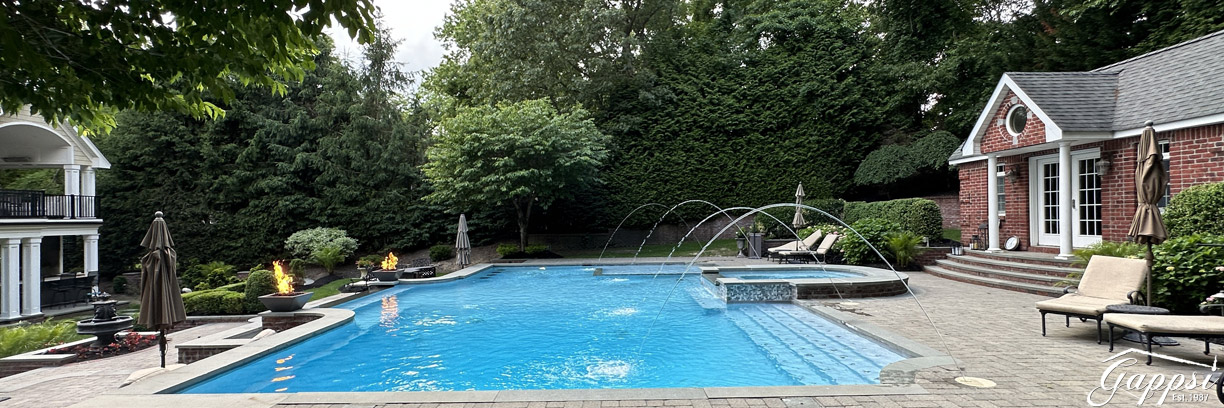
Paver Stain Before and After: A Homeowner’s Guide

Are you looking at your patio and feeling like its color is stuck in the past? Many Long Island homes have pavers in shades of pink, peach, or brown that no longer fit a modern aesthetic. Instead of tearing everything out, you can achieve a complete transformation by changing the color. Staining allows you to shift from warm, earthy tones to sophisticated cool grays and charcoals, instantly updating your entire backyard. This process gives you the power to customize your space without the expense of a full renovation. Seeing the paver stain before and after photos shows just how powerful a color change can be. Let’s explore how to choose the right products and techniques to give your pavers a fresh, new identity.

https://youtu.be/KD7E9iipEKo

View Gappsi’s YouTube Channel for Videos on Staining and Restoring Brick Pavers | Long Island, NY

Bring life back to your driveway or patio pavers by staining and restoring brick. Few things add so much to a landscape than a beautiful set of pavers, whether installed in your driveway, around the pool, or on your patio. One of the things that makes them so popular is the countless ideas of patterns and even colors you can choose from.

What To Do if Your Paver Color is Faded or Ugly?

Brick pavers must be maintained and sealed regularly to protect them from obvious staining. What might not be obvious to most is their gradual fade. If pavers are not sealed, they can fade to look like bare cement in as little as seven years!

Staining pavers can help protect them from water damage and erosion and increase their lifespan. Stains can also restore faded pavers to look almost new again. Some say that staining pavers is easy and affordable. It can transform a patio into a beautiful extension of a home.  Here are some reasons why you might want to stain your pavers:

  • Protect from water damage—Water can cause pavers to crack and stain over time. Sealing pavers with a water-repellent sealer can help keep water from penetrating the surface, reducing the likelihood of damage and prolonging the life of the pavers.
  • Restore faded pavers—If pavers aren’t sealed, they can fade to look like bare cement in as little as seven years. Staining can restore faded pavers to look almost new again.
  • Longer-lasting color—Stains penetrate into the concrete rather than just building up on the surface like paint, resulting in a longer-lasting color that won’t fade as quickly.
  • Better look – Stains can give pavers depth of color, making them look better than paint and less fake. The stain won’t be all one consistent color, so some darks or lighter colors will still be visible.
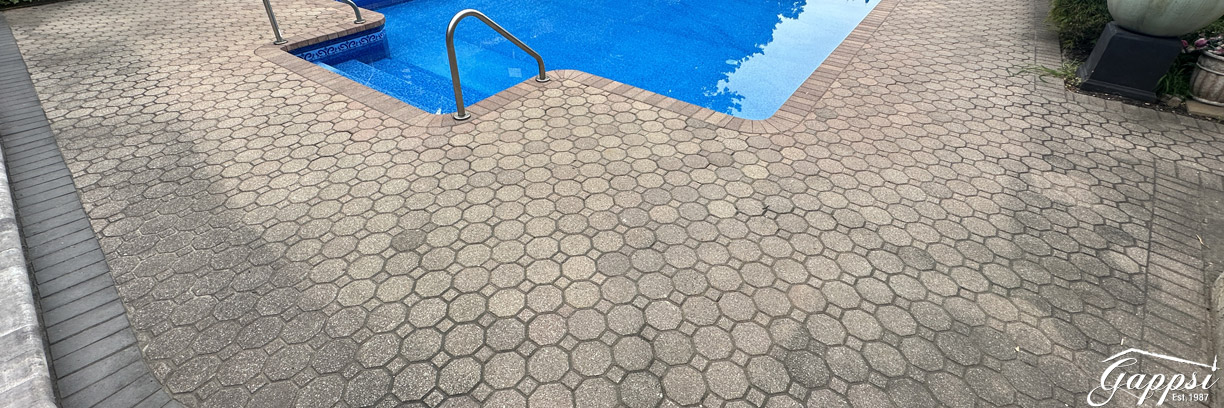
staining-and-restoring-brick-pavers-long-island-ny1Paver Staining – Power Washing & Polymetric Sand

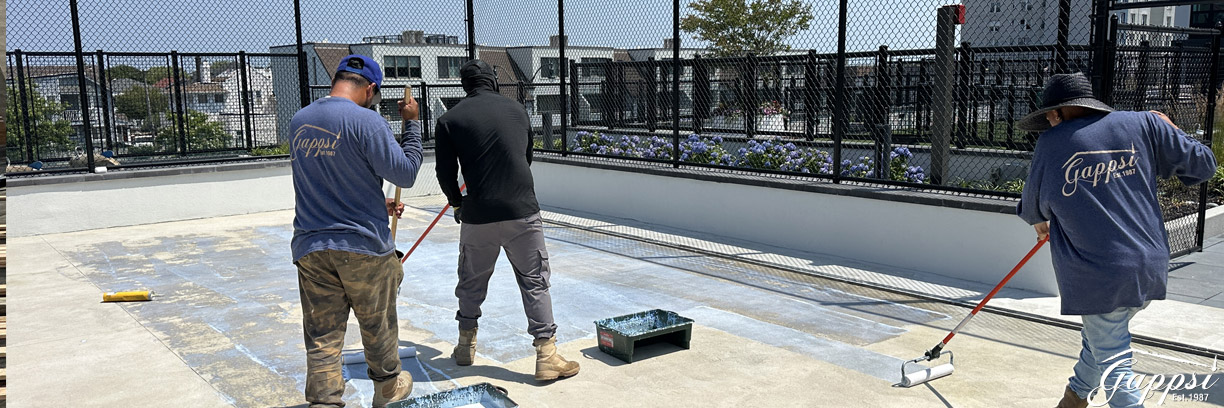
Recently, Gappsi completed a patio paver stain from Crab Orchard (pink/peach color) from Nicolock to gray. The client chose to stain the pavers in gray and the coping in black, changing the color of the backyard to a gray tone. 

The paver staining process starts first by pressure washing the stones.  Then, new gray polymeric sand is added and swept between the joints.  Polymeric sand is a mixture of sand and additives that can fill the joints between pavers and other hardscape materials. It can be a good choice for paver joints because it has many benefits, including:

  • Durability – Polymeric sand is more durable than regular sand and can help increase the lifespan of your hardscape. It’s also resistant to erosion from heavy rain and water runoff.
  • Weed and insect prevention – Polymeric sand can help prevent weeds like moss, grass, and dandelions from growing between pavers, and it can also deter ants from burrowing into cracks.
  • Easy application – Polymeric sand is quick and easy to apply, and it doesn’t require perfectly dry pavers.
  • Aesthetics – Polymeric sand comes in many colors, so choose a shade that matches your pavers or walkway.
  • Polymeric sand can cost more than regular sand, but it is worth the investment in the long term. With proper care, polymeric sand can last up to 15 years.
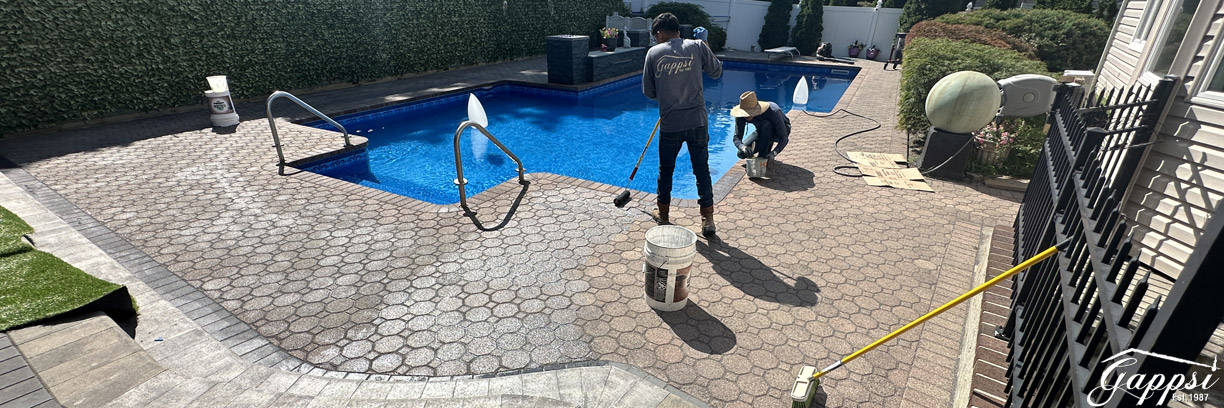
staining-and-restoring-brick-pavers-long-island-ny2Paver Staining – First Coat of Color Sealant

Once the polymetric sane has dried, we apply the first coat of colored sealer. It takes a few passes to achieve the gray color we want. It is going to be a huge transformation. Changing the color from a beige pink to a gray stone is a challenge. With each pass, we increase the color we apply as we add to the multiple coats. We are putting an extra coat of black on the coping.

Before You Begin: Planning Your Paver Project

Seeing a paver transformation take shape is exciting, but a successful project starts long before the first coat of stain is applied. Proper planning is the key to getting results you’ll love for years to come. Think of it as creating a roadmap for your project. You need to consider your budget, the timeline, the specific materials your pavers are made of, and the weather. While some small DIY paver staining jobs can be a great weekend project, restoring an entire patio or driveway is a significant undertaking. For larger spaces or intricate designs, working with professionals can ensure a flawless and lasting finish. Experts can help you manage the complexities of product selection and application, ensuring your investment not only looks beautiful but is also properly protected. A professional restoration and sealing service can save you time and prevent costly mistakes.

Understanding Project Timelines and Costs

One of the best things about staining pavers is that it can be a very budget-friendly way to refresh your outdoor space. A simple walkway refresh can be a small, affordable project. However, the cost will naturally scale with the size and complexity of the area. When planning your budget, remember to account for cleaning supplies, the stain itself, a quality sealer, and any application tools you might need. For a larger area like a driveway or an entire pool surround, the investment will be greater, but so will the impact on your home’s curb appeal. Think of it as an investment in the longevity and beauty of your masonry, protecting it from the elements while giving it a fresh, modern look.

Weather Considerations for Application

Here on Long Island, we know how unpredictable the weather can be. When it comes to staining pavers, timing is everything. You’ll need to plan your project for a stretch of clear, dry weather. The entire process, from cleaning and drying to staining and sealing, requires several consecutive dry days. Applying stain or sealer when it’s about to rain can lead to a washed-out, uneven finish, wasting both your time and money. The products need adequate time to penetrate the pavers and cure properly without moisture interference. Aim for a clear forecast with moderate temperatures for the best possible results.

Choosing the Right Products for Your Pavers

The products you choose will make or break your paver project. It’s not as simple as grabbing any can of stain off the shelf. The best choice for your project is a semi-transparent stain that is rich in color pigment. This type of stain adds a beautiful layer of color but is sheer enough to let the natural texture of the pavers show through. This avoids the flat, painted-on look that can make a surface look artificial. A quality stain enhances the material, giving it depth and dimension. Understanding the different types of porcelain and natural stone options available can also help you appreciate why specific products are recommended for different surfaces, ensuring a compatible and beautiful finish.

Is Staining Suitable for Your Paver Type?

Before you get your heart set on a specific color, it’s critical to identify what your pavers are made of. Staining is specifically designed for porous surfaces like concrete pavers, which can absorb the pigment. If you have clay brick or natural stone pavers, they will not absorb the stain correctly. Attempting to stain these materials will likely result in a blotchy, uneven mess that’s difficult to fix. For non-porous surfaces like clay or stone, a specialized tinted sealer is the appropriate product to use. This is a crucial distinction that ensures you’re using the right method for your specific material.

Paver Stain vs. Paver Sealer: What’s the Difference?

People often use the terms “stain” and “sealer” interchangeably, but they serve very different functions. A paver stain is all about color. It contains pigments that penetrate deep into the pores of the concrete. Because the color becomes part of the paver itself rather than just sitting on top, it results in a much more durable, long-lasting finish that won’t chip or peel like paint. A sealer, on the other hand, is a protective clear coat. Its primary job is to form a barrier on the surface to protect against moisture, UV rays, and wear and tear. You often apply a sealer after staining to lock in the new color and give it an extra layer of defense.

What to Look for in a Quality Sealer

Once your pavers are stained and you’re happy with the color, the final step is to protect your work with a high-quality sealer. Not all sealers are created equal. For the best protection, look for a sealer that has a high acrylic content, ideally 25% or more. This robust formula provides superior defense against fading from the sun and damage from foot traffic or vehicles. This is especially important for high-use areas like driveways and main walkways. Investing in a premium sealer is the best way to ensure your beautifully stained pavers stay vibrant and protected for as long as possible, making the entire restoration project a lasting success.

Preparing Your Pavers for Staining

Proper preparation is the most important step to ensure your paver stain looks great and lasts for years. Think of it like painting a room; you wouldn’t just slap a new color on a dirty wall. The same principle applies here. Taking the time to prep the surface correctly will prevent peeling, ensure even color absorption, and give you a professional-looking finish. Before you even think about opening a can of stain, you need to get your pavers ready for their makeover. This involves a few key checks and cleaning steps that you absolutely cannot skip. A little bit of effort now will save you a lot of headaches later and make the final result something you can be proud of.

Checking for Existing Sealer

Before you start, you need to figure out if your pavers already have a sealer on them. An existing sealer can prevent the new stain from penetrating the paver surface, leading to a blotchy and uneven finish. Luckily, there’s a simple way to check. Just pour a small amount of water onto a few different pavers. If the water beads up or sits on the surface for a while before soaking in, you likely have a sealer. If the water absorbs into the paver almost immediately, the surface is probably unsealed and ready for the next step. If you do find an old sealer, it will need to be stripped before you can apply a new stain, which can be a tough job. For projects like this, calling in a professional for restoration and sealing services can ensure the job is done right.

Treating Efflorescence Before You Stain

Have you ever noticed a white, chalky powder on the surface of your pavers? That’s called efflorescence. It’s a natural phenomenon caused by mineral salts migrating to the surface as water evaporates from the paver. While it’s harmless, it’s not very attractive and it will prevent your stain from adhering properly. You must remove it completely before staining. The most effective way to get rid of efflorescence is with a pressure washer. A strong stream of water will typically wash the salt deposits away. Make sure the pavers are completely clean and free of this white powder before you move on to applying any stain. This ensures the color penetrates deeply and evenly across the entire surface for a flawless look.

Specific Cleaning Requirements

A thoroughly cleaned surface is your best friend when it comes to paver staining. Start by removing any weeds or moss growing between the joints. A stiff-bristled brush can help with this. Next, sweep away all loose dirt, leaves, and debris. Once the area is clear, it’s time for a deep clean. For general grime, a pressure washer is often sufficient. However, if you have stubborn stains from things like oil, grease, or fallen leaves, you may need to use a specialized paver cleaner or degreaser. Applying stain over a dirty paver is a recipe for disappointment, as the color will look uneven and won’t last. A pristine surface is the foundation for a beautiful, long-lasting finish.

A Note on Newly Installed Pavers

If you have brand-new pavers, you might be eager to stain and seal them right away. However, it’s best to be patient. We recommend waiting at least 60 to 90 days after installation before applying any stain or sealer. This waiting period is crucial for a couple of reasons. First, it allows the pavers to fully cure and settle. Second, it gives time for any potential efflorescence to appear and be cleaned off. Staining too soon can trap moisture and salts within the pavers, leading to discoloration and sealer failure. When we complete a new masonry project, we always advise our clients on the proper timeline for care to ensure their investment looks beautiful for years to come.

Always Test Your Stain Color First

You would never paint an entire room without testing the color on a small patch of wall first, right? The same rule applies to paver stain. The final color can look different depending on the original shade and porosity of your pavers. To avoid any surprises, always test the stain on an inconspicuous area, like a corner of your patio or a spot that’s usually covered by furniture. Apply the stain just as you would for the full project and let it dry completely to see the true color. This simple step allows you to confirm you love the shade before committing to the entire surface. It’s a small bit of effort that guarantees you’ll be happy with the final transformation.

Application Process and Technique

Staining your pavers is a manageable project that can completely transform their look. The process starts with a deep clean to get rid of any dirt, grime, or old sealer. Once the surface is prepped and dry, you can begin applying the stain. The key is to apply a specialized masonry stain that penetrates the paver, followed by a protective sealer to lock in the new color and shield it from the elements. While many homeowners tackle this themselves, achieving a flawless, long-lasting finish requires precision. For larger patios or driveways, or if you simply want to guarantee a professional result, our team has the tools and expertise to restore and seal your pavers perfectly.

Keeping the Stain Mixed for a Consistent Finish

One of the most important tips for getting an even, consistent color is to keep your stain mixed throughout the entire application. The color pigments in the stain are heavier than the liquid and can settle at the bottom of your container. If you don’t mix it regularly, you might start with a rich color and end with a much lighter, diluted shade. As one expert source notes, “If using a sprayer, shake the stain often to make sure the color stays even.” This advice holds true whether you’re using a sprayer, a roller, or a brush. Give the container a good shake or stir every few minutes to keep those pigments suspended and ensure your patio has a uniform, beautiful finish from edge to edge.

How Many Coats of Stain Should You Apply?

The number of coats you’ll need depends on the color depth you’re aiming for. Generally, one coat will provide a subtle tint, while multiple coats will create a richer, more saturated look. If you want a deeper color, you can add more layers, but it’s best not to apply more than three. Applying too many coats can cause the stain to build up on the surface instead of soaking in, which might prevent it from sticking well over time. After your final coat of stain has completely dried, applying a high-quality sealer is the final step. This not only protects the pavers but also enhances the depth of the new color, giving it a vibrant, finished appearance that will last for years.

VISIT OUR KITCHEN & BATHROOM CLEANING & SEALING PAGE TO LEARN MORE

How to Stain Pavers?

To stain pavers, you can use either sprayers or brushes. A brush can provide better penetration of the coloring agents, but you must be careful not to leave brush marks. Remember to protect surrounding areas to prevent unintentional stains.

You can feel compelled to stain your pavers in a different color for several reasons. Let’s list below some of them:

  • You can create unique patterns using different colors.
  • Staining your pavers in different colors can add that new, fresh look you’re looking for in your landscape.
  • The result has a more natural look than painted pavers.
  • It is relatively easy compared to other options (replacing pavers).
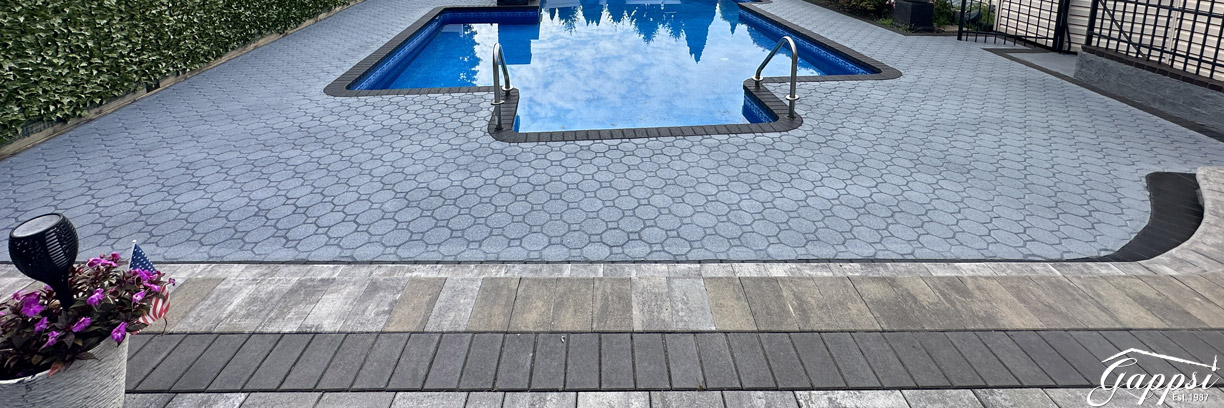
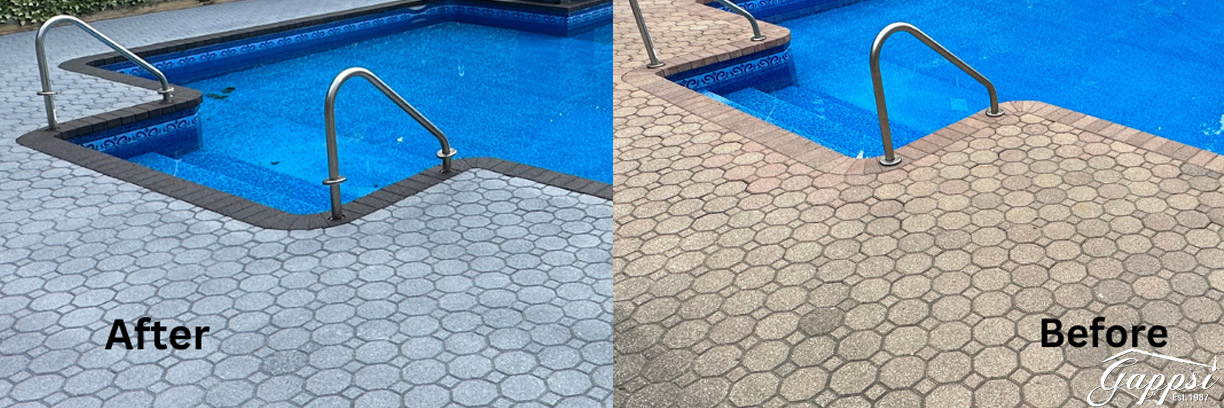
We will blend it in with the existing Cambridge patio. The color staining for this backyard in Smithtown NY has been completed.  We transformed the color of the patio and the coping from the crab orchard, a combination of beige brown and peach colors, to a light gray for the patio and charcoal for the borders.
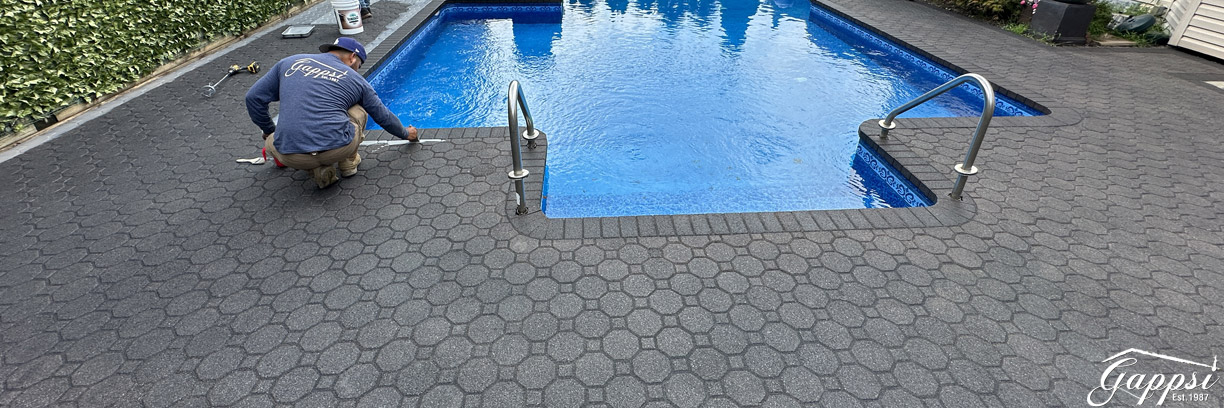
staining-and-restoring-brick-pavers-long-island-ny3The homeowners have changed the color of the backyard to be more gray-toned throughout the years. The existing old patio did not match the style, so they decided to color stain the pavers to blend in. This color that we used is also a sealer that stains the stones. This is the latest stone staining project done by Gappsi in Smithtown, NY.

Aftercare and Long-Term Maintenance

Durability and Lifespan of Paver Sealers

Think of paver sealant as a shield for your beautiful patio or driveway. It’s an essential step that protects the stone from stains, harsh UV rays that cause fading, and water damage from Long Island’s unpredictable weather. Without it, your pavers are exposed and can quickly show signs of wear. Regular sealing is the key to keeping your outdoor space looking pristine and ensuring your investment lasts for many years. A professional restoration and sealing service not only applies the product correctly but also ensures the surface is perfectly prepped, which is crucial for the sealer to bond effectively and provide maximum protection.

Your Paver Resealing Schedule

So, how often do you need to reapply this protective layer? A good rule of thumb is to reseal your pavers every two to three years. However, this can vary. The type of sealant used plays a big role; glossy, film-forming sealants might need attention sooner than penetrating sealers, which soak into the paver itself. Instead of just marking a date on the calendar, it’s smart to observe how your pavers are holding up. If you notice water is soaking in rather than beading on the surface, or if the color looks a bit dull, it’s probably time to think about resealing.

Factors That Affect Sealer Longevity

Several factors influence how long your paver sealant will last. The local climate is a major one; Long Island’s combination of strong summer sun, heavy rain, and freezing winters puts any outdoor surface to the test. The amount of traffic your pavers receive also matters. A driveway or a main walkway will see more wear than a secluded garden path. Even the type of sealant and how often you clean the area can affect its lifespan. Understanding these elements helps you create a realistic maintenance plan to keep your pavers in top condition.

The Final Step: Applying Joint Sand Correctly

After cleaning and sealing, there’s one final, crucial step: applying joint sand. Using polymeric sand between your pavers is a game-changer. This special sand mixture hardens to lock pavers firmly in place, which prevents shifting and wobbling over time. It also creates a durable barrier that stops weeds from sprouting and deters ants from making a home in the cracks. Proper application is everything. The sand must be swept carefully into the joints and activated with just the right amount of water. When done correctly, it provides a clean, finished look and can last for years, making it an essential part of any professional paver restoration project.

SCHEDULE A MEETING TODAY WITH GAPPSI
staining-and-restoring-brick-pavers-long-island-ny

Frequently Asked Questions

My pavers are a dated pink color. Can I really stain them gray? Yes, you absolutely can. Staining is a fantastic way to completely change the color of your concrete pavers from warm, earthy tones like pink or peach to modern cool shades like gray and charcoal. The stain penetrates the paver, creating a rich, durable color that looks natural, not painted on. It’s a transformative process that updates your entire outdoor space without the cost and hassle of a full replacement.

What’s the difference between staining and sealing my pavers? Think of it this way: stain is for color, and sealer is for protection. A stain contains pigments that soak into the pores of the concrete to change its color from the inside out. This is why it lasts so long and doesn’t chip. A sealer is a clear, protective topcoat applied after staining. Its job is to shield the pavers from water, UV rays, and stains, locking in the new color and making it last.

How do I know if staining is right for my type of pavers? Staining works best on porous materials like concrete pavers because they can absorb the pigment. If you have non-porous pavers, such as clay brick or certain types of natural stone, the stain won’t soak in correctly and will likely look blotchy. An easy way to check is to pour a little water on them; if it soaks in quickly, they are porous and good candidates for staining.

How long will the new stain color last on my patio? When done correctly with high-quality products, a paver stain can last for many years. The color itself becomes part of the paver, so it won’t peel or flake like paint. The key to longevity is finishing the job with a high-quality sealer and reapplying that sealer every two to three years. This protective layer is what defends the color against fading from sun exposure and general wear.

Can I do this project myself, or should I hire a professional? Staining pavers can be a DIY project, especially for a small area like a walkway. However, for larger spaces like a full patio or driveway, hiring a professional is often the best choice. Proper preparation, including deep cleaning and potentially stripping old sealer, is critical for a good result. Professionals have the right equipment and expertise to ensure the application is even and the finish is durable, saving you from costly mistakes and ensuring a beautiful, long-lasting transformation.

Key Takeaways

  • Staining offers a modern update without replacement: You can completely change the look of your patio or driveway by staining the pavers. This is a cost-effective way to shift from dated, warm colors to contemporary grays and charcoals, avoiding the expense of a full renovation.
  • Proper preparation is the most critical step: For the stain to look professional and last for years, you must start with a thoroughly prepped surface. This involves pressure washing, removing any old sealer, treating white mineral deposits (efflorescence), and always testing the stain color in a small, inconspicuous area first.
  • Product selection is key to success: Use a semi-transparent stain specifically designed for porous concrete pavers to ensure the color absorbs correctly. After staining, apply a high-quality sealer with at least 25% acrylic content to protect the new color from fading and wear, ensuring a durable, long-lasting finish.
Related Articles

Share this page:

Laykold Tennis Court at Breeze Oceanfront Rental Living in Long Beach, NY

laykold-tennis-court-at-breeze-oceanfront-rental-living-in-long-beach-3Gappsi installs and provides Laykold Tennis Court surfaces.  Laykold offers top-quality tennis court surfacing, to help create more advanced tennis courts that support athletes and their game. Laykold tennis court surfaces are found at professional venues, including the U.S. Open. This is due to the many benefits their industry-leading tennis court surfacing has to offer.
Laykold from Advanced Polymer Technology is a cutting-edge tennis court surfacing material that helps make court surfaces better than ever. Their goal in creating and providing this surfacing to athletes, their coaches, and casual tennis players is to provide a surface that supports them by helping to reduce fatigue and the risk of injury. In doing so, their tennis court surfacing can help enable you to compete and train better, and longer. It is also available in a multitude of color options, from traditional green to canary yellow and U.S. Open blue to New York Open black.

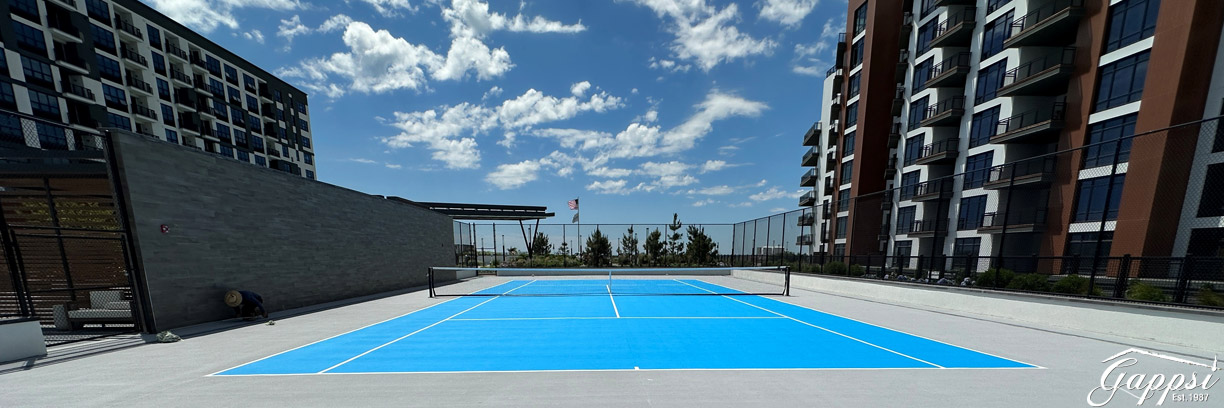
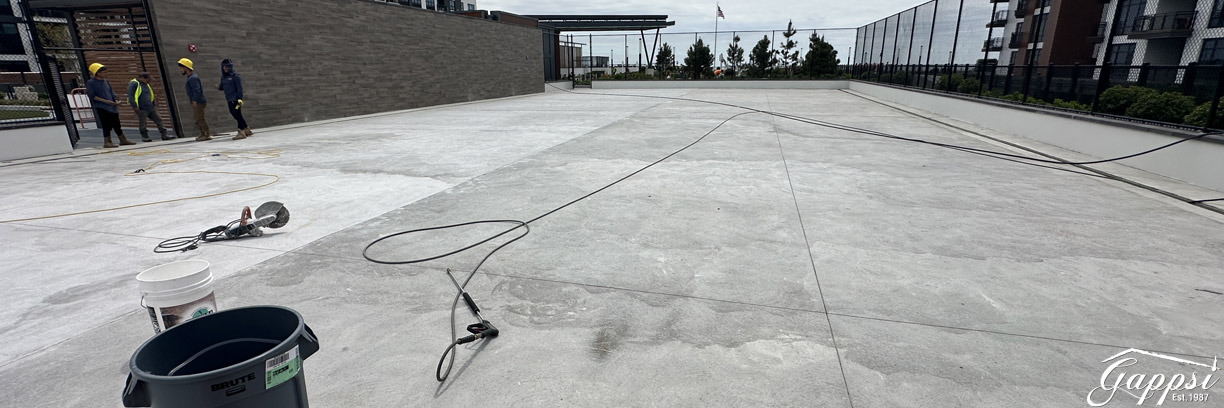
Constructing a tennis court offers a long-term value to your property. Gappsi recently completed a concrete tennis court in Long Beach NY on top of the roof of a parking garage of Breeze Oceanfront Rental Living.  The initial step in constructing a tennis court involves planning and design. This sets the foundation for the project.  Below are the steps taken in designing and installing a tennis court.

laykold-tennis-court-at-breeze-oceanfront-rental-living-in-long-beach-4Planning and Designing Tennis Sports Game Courts
  • Site Selection: Identify a suitable area for your tennis court.
  • Size and Dimensions: A standard tennis court requires a playing area of 78 feet by 36 feet for singles matches and 78 feet by 42 feet for doubles. Including the overrun areas, a total area of 120 feet by 60 feet is typically necessary.  The space must be planned on or adjusted to accommodate drainage, fencing, and landscaping.
  • Obtaining Permits: Research and adhere to local zoning laws and building codes.
  • Surface Selection: Choosing the right surface for your tennis court is crucial for player performance and safety. There are three main types of tennis court surfaces: hardcourts, clay courts, and grass courts. Each surface offers unique characteristics and requires specific maintenance. Consider factors such as climate, budget, and intended usage when selecting the surface type.  Laykold is a brand of tennis hardcourt constructed over an asphalt or concrete base that was chosen for this court construction.

Prepare the Ground for the Tennis Court

Ground preparation is crucial for creating a stable and level base for your tennis court.

  • Clearing and Excavation: Excavation involves leveling the ground and grading it for proper drainage.
  • Sub-Base Installation: The sub-base provides a stable foundation for your court and assists with drainage.

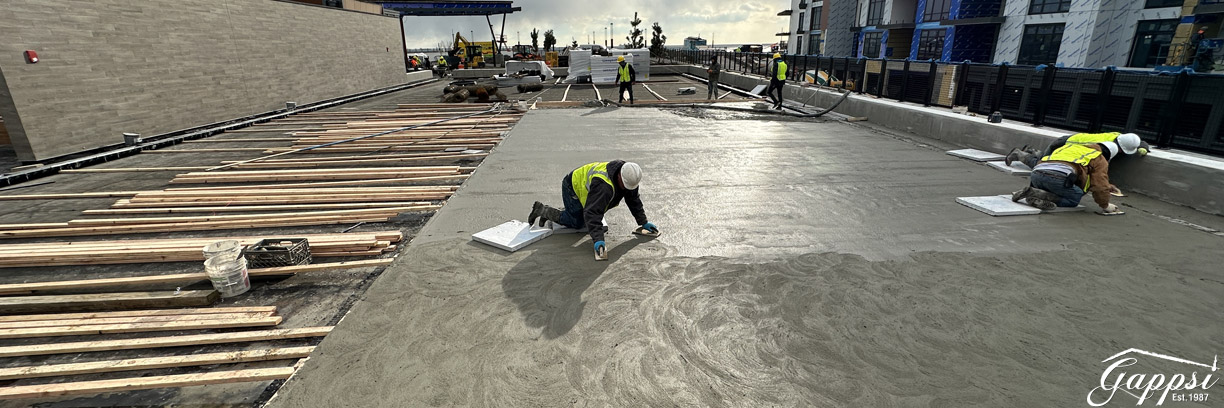
This court was built with 5 to 7 inches of 5000 psi poured concrete reinforced with fiber and wire mesh. The concrete was installed over 2 inches of structural foam and Marafi paper. Once the concrete cured we primed the concrete with the bond kote and applied two layers of resurfacer and two layers of paint.

laykold-tennis-court-at-breeze-oceanfront-rental-living-in-long-beach-5Fencing and Drainage

Fencing and drainage are essential for the functionality and longevity of your court.

  • Fencing: Surround your court with high-quality fencing to keep tennis balls within the playing area and ensure safety. Chain-link fences are common due to their durability and visibility.  The recommended height for a tennis court fence is 10–12 ft (3.05–3.66 m), with 10 ft being the most common. The fence should be 10 ft high at each end of the court, and extend along the sides for at least 20 ft, as most tennis balls bounce to the corners or ends
  • Drainage: Proper drainage prevents water accumulation that can damage the court surface and interfere with play.

VIEW OUR SPORTS GAME COURT GALLERYlaykold-tennis-court-at-breeze-oceanfront-rental-living-in-long-beach-6

Accessories and Tennis Court Markings

  • Net and Posts: The net divides the court into two halves.  We installed premier Douglas tennis netting with subs-mounted poles.  Douglas makes the most durable, long-lasting USA-made tennis products in the industry. Douglas® has been perfecting tennis court facility equipment for over 50 years and offers a wide variety of tennis nets, tennis net posts, and custom products to accommodate any facility. 
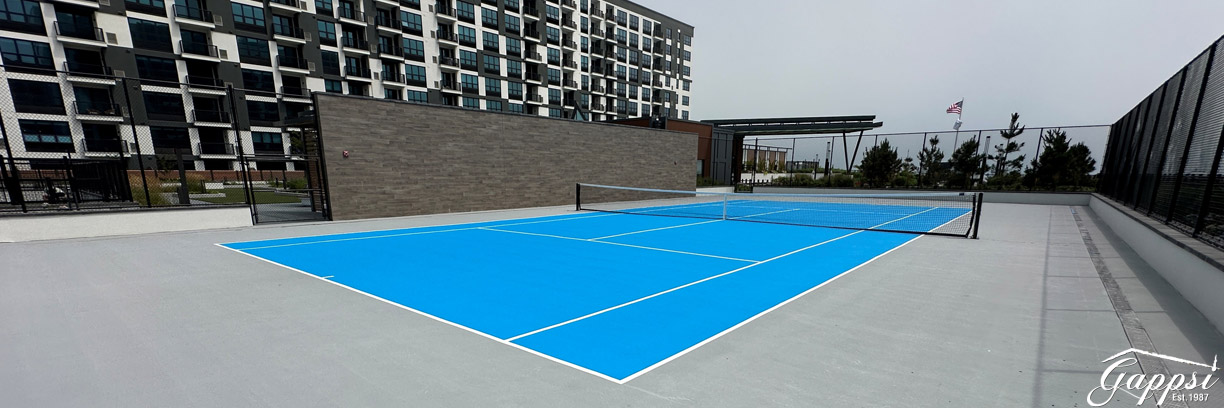
  • Line Marking: Apply durable, visible paint to outline the boundaries, service boxes, and center marks of your court.  The court was painted with Laykold products.  Markings play a vital role in defining the boundaries and lines on a tennis court. The standard markings include baseline, singles sidelines, doubles sidelines, service lines, and center service lines.  The tennis inlay was painted with a light blue color and the out-of-bounce perimeter was painted with a silver-gray color. The court was striped with white lines.
  • Accessories: Consider additional features such as benches, scorekeepers, and storage for equipment. These enhance the usability and enjoyment of your court.

laykold-tennis-court-at-breeze-oceanfront-rental-living-in-long-beach-ny2Constructing a tennis court is a significant project that, when done correctly, can provide endless hours of enjoyment and add substantial value to your property.  This court located at an apartment complex built by Engel Berman was constructed on the second floor over the parking garage leveled with the beach.  This is the latest Gappsi Tennis Court Sports Curt installation project in Long Beach NY.
SCHEDULE A MEETING TODAY WITH GAPPSI

View Gappsi’s YouTube Channel for Videos on Laykold Tennis Court at Breeze Oceanfront Rental Living in Long Beach, NY

Share this page:

How to Remove Sealer From Pavers: A Simple Guide

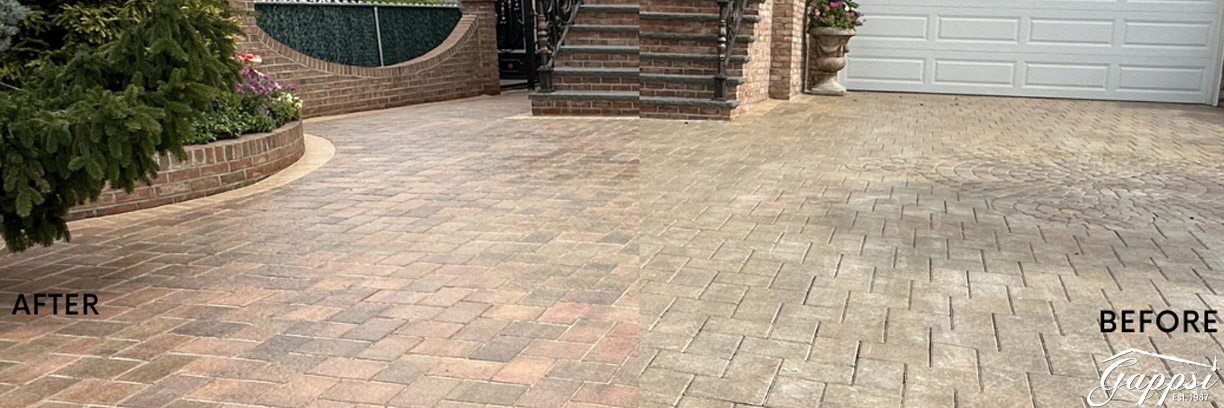
  How-to-Strip-and-Remove-Paver-Sealer-Long-Island-NY Before and AfterCan a poor application of driveway sealer be corrected?  Depending on the severity of the problem, it may require saturation, aggressive scrubbing, and repeated applications to re-emulsify the sealer.
That cloudy, white film ruining your beautiful pavers? It’s not a permanent stain. It’s usually just trapped moisture from a failed sealer, a frustrating issue we see on everything from a brick driveway to new concrete pavers. The good news is you can absolutely fix it. This guide gives you the exact steps on how to remove sealer from pavers and strip away that hazy layer for good. We’ll also touch on common safety questions, like “are paver sealers toxic?”, so you can feel confident tackling this project. Let’s get your pavers back to their original, vibrant color.

1-poor-sealing-job---how-to-strip-and-remove-paver-sealer-long-island-nyWhiting happens when your pavers have been sealed with a xylene or acrylic (solvent-based) sealer or sealed during imperfect weather conditions or application. The trapped moisture is caused by hydrostatic pressure, which brings the moisture up through the pores of the pavers and traps it under the sealer. Once your pavers have “turned white”, there is only one way to rectify the problem. The sealer must be completely stripped off and re-sealed with the correct type of sealer. When a failed coating needs professional correction, Gappsi’s paver cleaning and sealing services on Long Island can restore the surface and prepare it for the right finish.
2-applying-sealer-stripper_removers---how-to-strip-and-remove-paver-sealer-long-island-nyRemoving and Stripping Old Sealant Off Driveway Pavers
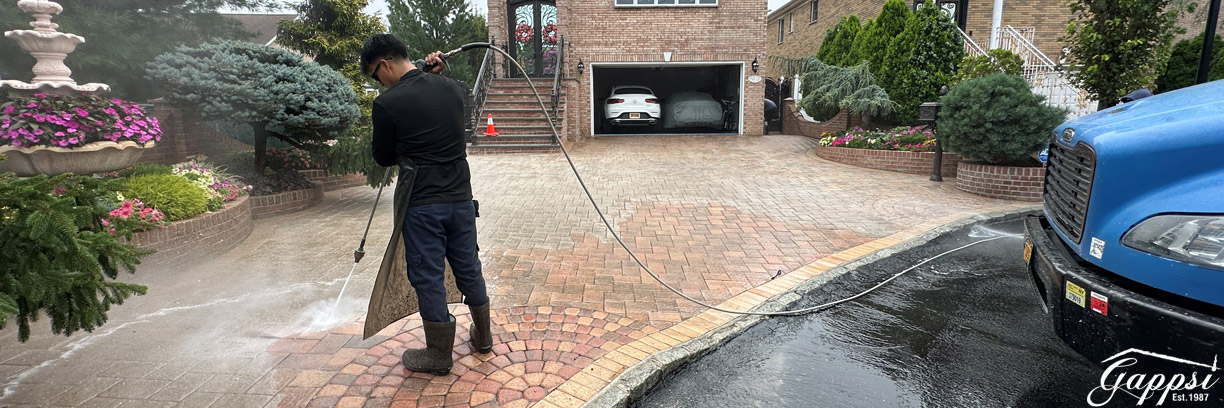
The first step in this job is to strip and remove all the old sealer from the paving stone driveway. Unfortunately, the previous contractor did not complete the job properly the first time. Through time many additional layers of sealer were applied and magnified the patchy poor paver color “whiting” issues.  There are a few different layers of sealer, the latest application seems to be an acrylic sealer.  It gives a shiny look to the stones, the issue over the years has made the problem worse and more noticeable.

We are applying the sealer remover. It is a stripper. We will finish applying the sealer and let it sit for a few minutes.  Then we start the process of pressure washing it off from the top of the pavers.

We have started removing the sealer. The stripper soaks in and makes it possible to remove the sealant layers. We are using the turbo nozzle with high pressure and hot water.  Then we pressure washed the surface of the pavers with hot water, low pressure.  As we strip the driveway each layer of the old sealer is removed.

3-pressure-washing-stripper-sealer-remover-with-hot-water-pressure-washing-system---how-to-strip-and-remove-paver-sealer-long-island-nyWhat type of sand material fills the joints between pavers?
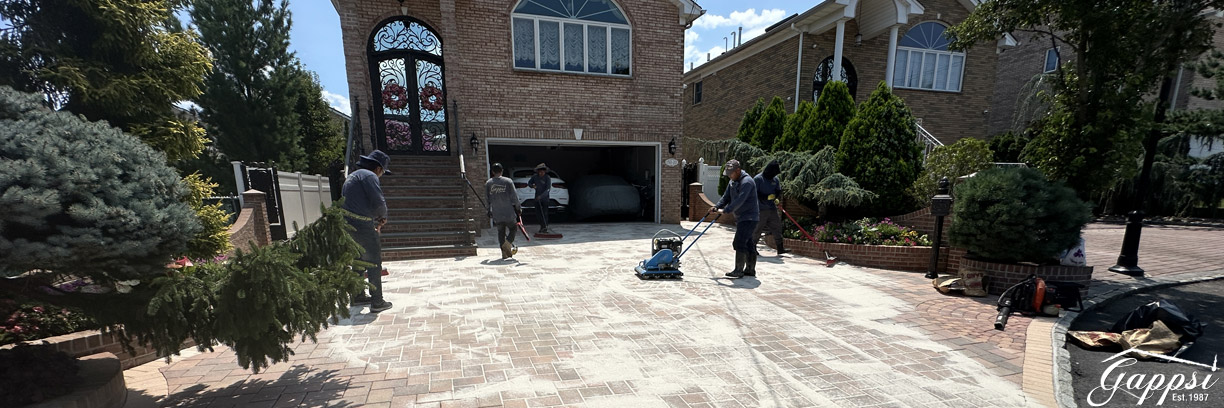
We add sand to the stone pavers. Then we are in the process of spreading the sand in the joints. We are using white silica sand, which works well with the urethane sealer, it absorbs the sealer and gets very hard. It also is very dry and falls into space very easily. We are compacting the sand with a vibratory roller. The compactor has rolls under it to prevent it from scratching the stones. Then we apply the sand once, vibrate it respread the sand, and vibrate it a second time. We are doing the final touches with the sand. We are blowing the extra sand from the top of the stones without removing it from the joints.

Polymeric sand is best to use to fill the joints in between pavers. High-quality polymeric sand will not leave any stains on the surface. Gappsi vibrates the pavers while sweeping which allows the sand to fill the joints tight and also helps the sand harden. Sweeping the excess sand off the pavers before wetting the sand is also very important. This prevents the glue that is in the sand from smearing the surface of the pavers. Most importantly, applying a good urethane sealer will further help the sand to harden and prevent ants from digging into the paver joints and weeds from growing on patios.

4-reaending-paver-joints-with-silica-sand---how-to-strip-and-remove-paver-sealer-long-island-nyWhat is the best sealer for concrete pavers?
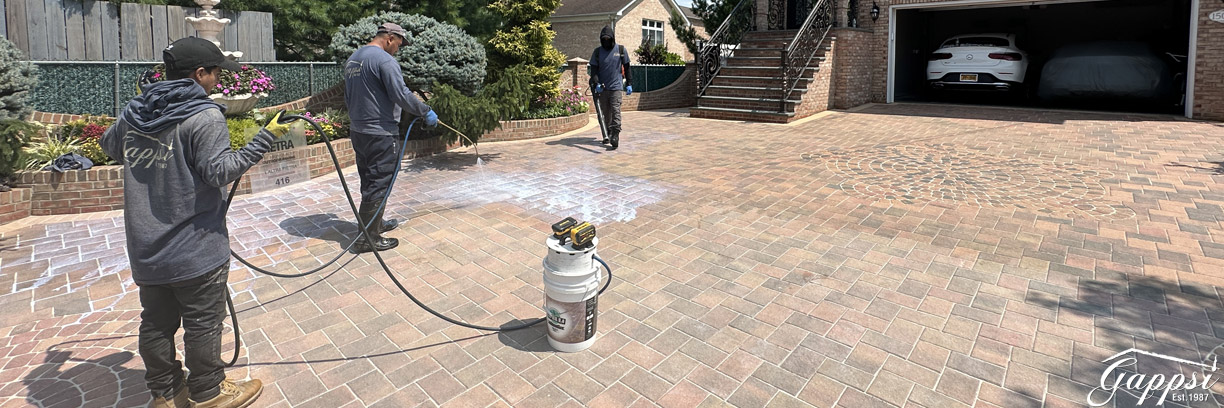
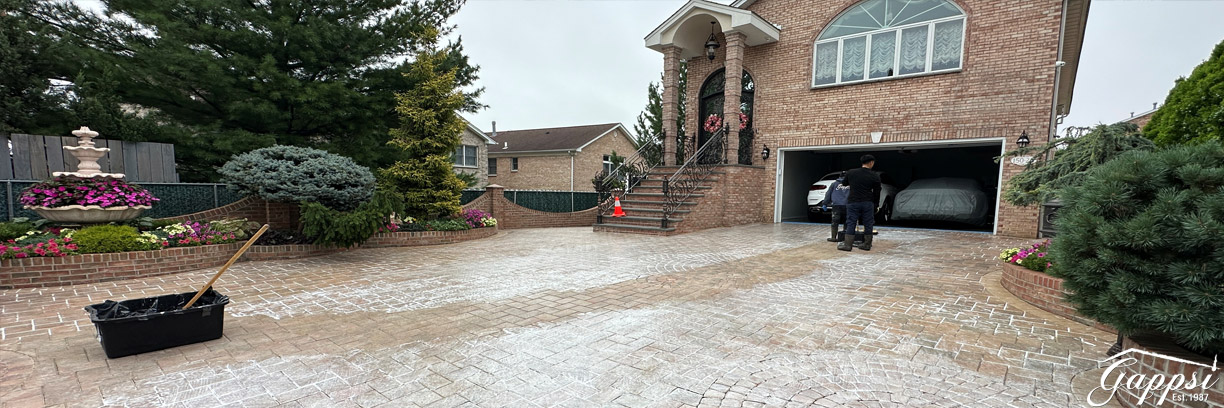
After the sand is vibrated into place in the driveway pavers we apply urethane sealer. It is going to be a HUGE transformation given how extreme this driveway was.

This is the process of the first application of driveway sealer to the pavers. We spray the sealer and allow it to sink into the joints. This will soak into the sand and get hard from the urethane. We use a blower to help the sealer spread uniformly. This coat is a flood coat.  A second layer of sealant is applied primarily to seal the stones. This first coat is absorbed into the sand in between the joints. We apply the second coat of sealer and final which gives the stones the color enhancement. We don’t float the surface of the stones with this coat because the pavers will not absorb as much as the first coat. However, we still have to move the sealer around because it can dry on top of the surface unevenly.

5-applying-first-coat-of-sealer-on-driveway-pavers---how-to-strip-and-remove-paver-sealer-long-island-nyThe sealer creates a very strong bond to the paving stone surface and over the sand particles in between the joints.
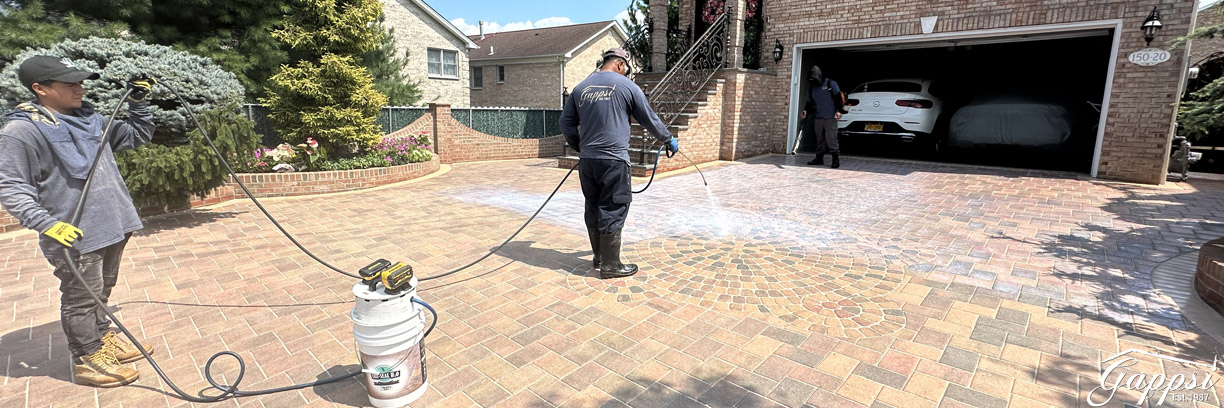
There are many manufacturers of sealers, from solvents to acrylic urethane. Epoxies, acrylic, and urethane sealers come in water-based versions and solvent-based versions, including combinations of both. The biggest difference between the two is the VOC content. The sheen and life of the product determine how often it lasts before needing to be reapplied. Solvent-based acrylics tend to yellow over time and don’t allow the concrete to breathe. Epoxies are the strongest sealers but are best used for smoother surfaces and more for indoor or warehouse floor applications.

6-applying-second-coat-of-sealer---how-to-strip-and-remove-paver-sealer-long-island-nyThe best sealers for paving stones are water-based urethanes
  • They are algae and mold inhibitors
  • Allow for superior joint stabilization,
  • Environmentally safe
  • Their UV Protection will not harm vegetation
  • VOC Compliant in all 50 States.

When you choose Gappsi you can guarantee a well-trained Gappsi personnel will apply correctly the paving stone sealer products achieving the best results.

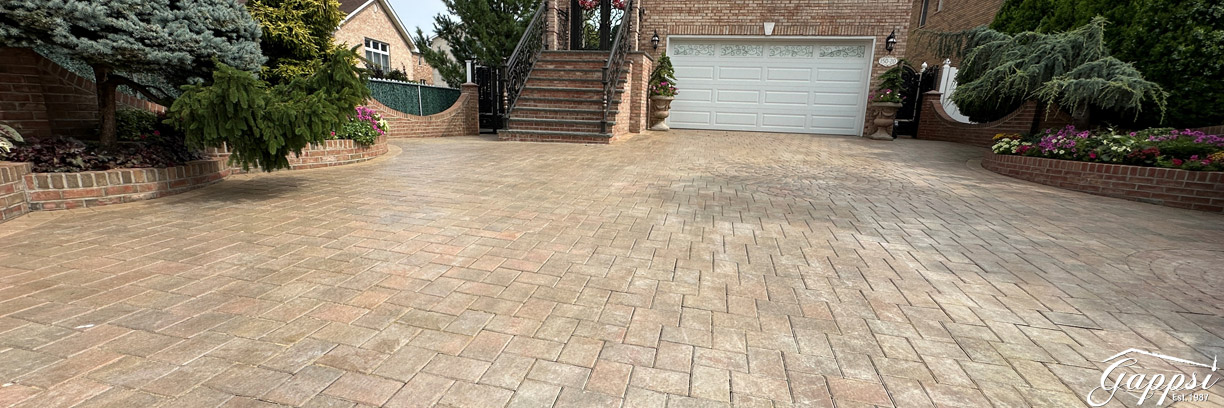
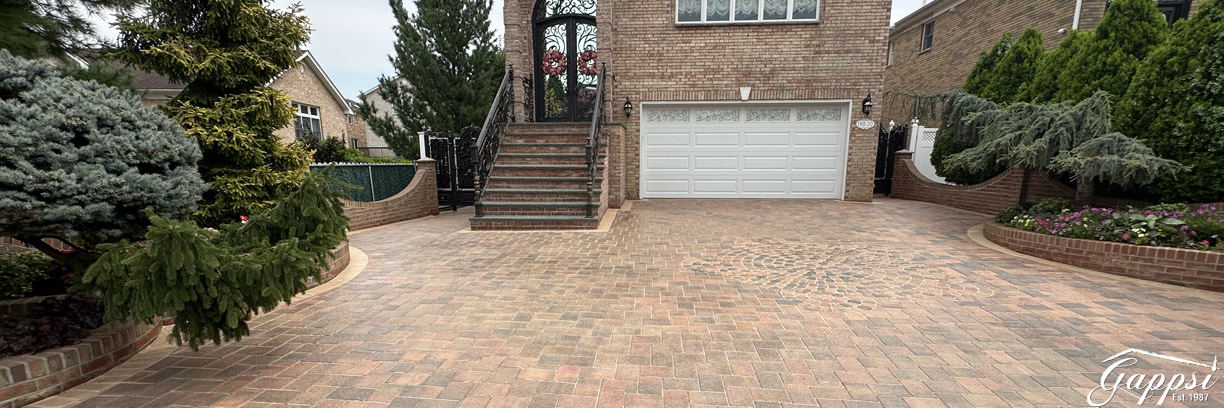
This driveway was installed over 20 years ago. The paving stones are by Nicolock in the color Bayberry Blend in a 6×9 Rustico and Sante Euro Circle.

7-complete-stripped-and-sealed-driveway--in-whitestone-long-island-nyGappsi brought back the color of the stones to look better than they did when they were originally installed. The colors are very vibrant and uniform now that the sealer is applied correctly. You can see the color variations of the Bayberry Blend, the shades of gray, beige, and peach color even after 20 years.
Surface color enhancement and polymeric sand replacement in between the joints for this paving stones driveway was completed over 24 hours. This is the latest paving stone driveway restoration cleaning and sealing done by Gappsi in Whitestone NY.

To view our Interior Cleaning and Sealing options and to learn more about the application of driveway sealer visit our page Sealing Stone Patios, Driveways, and Interiors Stone.

Why Paver Sealer Fails

You’ve invested in beautiful pavers for your patio or driveway, and you applied a sealer to protect them. So why do they now look cloudy, patchy, or covered in a strange white film? When paver sealer fails, it can be incredibly frustrating, but understanding the cause is the first step toward fixing it. Most failures aren’t random; they usually trace back to a handful of common issues related to moisture, surface preparation, or the product itself. The good news is that even a bad sealer job can be corrected. It just requires stripping the old sealer and starting fresh with a proper application.

The most common sign of a failed sealer is a milky or white haze known as “whiting.” This happens when moisture gets trapped beneath the sealer’s surface. Other issues include peeling, flaking, or a blotchy appearance where the sealer didn’t adhere correctly. These problems not only look bad but also mean your pavers aren’t getting the protection they need from stains, weather, and wear. Before you can restore your pavers to their original beauty, you need to identify what went wrong so you can avoid making the same mistake twice.

Trapped Moisture

If your sealed pavers have developed a cloudy, white haze, you’re likely dealing with trapped moisture. This issue, often called “whiting,” is one of the most frequent reasons for sealer failure. It occurs when water vapor rises from beneath the pavers and gets stuck under a non-breathable, solvent-based sealer. This can happen if the sealer was applied when the pavers weren’t completely dry, if it was applied in very humid conditions, or if there’s a source of moisture coming up from the ground. The result is a milky film that obscures the true color and texture of your beautiful natural stone pavers.

Applying Sealer Over Efflorescence

It’s easy to confuse whiting with efflorescence, but they are two different issues. Efflorescence is a natural phenomenon where soluble salts from within the concrete or stone are carried to the surface by water and left behind as a white, powdery deposit. If you apply a sealer directly over pavers with efflorescence, you are essentially trapping that white powder under a clear coat. This makes the salty residue impossible to simply wash away and permanently clouds the appearance of your pavers. A proper paver installation and cleaning process should always address any efflorescence before a sealer is even considered.

Using a Low-Quality Sealer or Too Many Coats

Not all sealers are created equal. Using a low-quality, cheap acrylic sealer can lead to premature failure, as these products often yellow, peel, or break down quickly under UV exposure and foot traffic. Another common mistake is applying too many coats over the years without properly stripping the old layers first. Each new coat adds to a thick, plastic-like film that can easily trap moisture and dirt. Over time, this buildup magnifies any existing issues, resulting in a patchy, discolored surface that completely hides the beauty of the pavers underneath. Eventually, the only solution is to strip it all off.

Improper Surface Cleaning

Applying sealer to a dirty surface is a recipe for disaster. The paver surface must be meticulously cleaned before sealing to ensure proper adhesion. Any dirt, grime, oil stains, or organic matter left on the pavers will prevent the sealer from bonding correctly. This can lead to the sealer peeling, flaking, or bubbling up shortly after application. A thorough cleaning with a pressure washer and appropriate paver cleaner is a non-negotiable first step. Skipping this crucial preparation phase almost guarantees that the sealer will fail, wasting both your time and money.

Preparation and Safety Before You Begin

Before you even think about opening a bottle of chemical stripper, it’s essential to focus on preparation and safety. Working with these products requires your full attention, as they are powerful chemicals that can be harmful if handled improperly. Taking the time to set up your workspace and wear the right gear will not only protect you but also ensure the project goes smoothly. The area can become extremely slippery once the stripper starts working, so being mindful of your footing is critical. A little prep work upfront prevents accidents and protects the areas of your yard you don’t want to be affected by the stripping process.

Your goal is to remove the sealer from the pavers, not from your skin or your prize-winning roses. Start by clearing the area of any furniture, planters, or decorations. Then, lay down plastic sheeting to protect nearby grass, garden beds, walls, and light fixtures from any accidental splashes or overspray. This is also the perfect time to do a final sweep of the paver surface to remove any loose leaves or debris. Remember, the stripper needs a clean, dry surface to work effectively, so this final cleanup is an important part of the process.

Essential Safety Precautions

When you’re working with a chemical paver sealer stripper, safety should always be your top priority. These products are designed to dissolve tough acrylic and solvent-based coatings, which means they are caustic and can cause skin and eye irritation. Always read the manufacturer’s instructions and safety warnings before you begin. Make sure you have good ventilation, especially if you are working in a covered or partially enclosed area. Keep pets and children away from the work zone until the entire process is complete and the area has been thoroughly rinsed and dried.

Wear Personal Protective Equipment (PPE)

This is not the time to skimp on safety gear. At a minimum, you should wear chemical-resistant gloves, safety glasses or goggles to protect your eyes from splashes, and closed-toe shoes with good traction. It’s also a smart idea to wear long sleeves and pants to protect your skin from accidental contact with the stripper. The chemicals can be harsh, so creating a barrier between you and the product is the best way to stay safe throughout the project.

Prevent Slips and Falls

Once the sealer stripper is applied and begins to break down the old sealer, the surface of your pavers will become incredibly slippery. The dissolved sealer creates a slick, gel-like residue that can be hazardous to walk on. Be extremely careful as you move around the work area. Wearing sturdy, slip-resistant shoes is essential. Walk slowly and deliberately, and try to avoid stepping directly on the wet, treated areas as much as possible while you work.

Preparing the Work Area

A well-prepared work area is the foundation of a successful sealer stripping project. Before you start, take a thorough look at the entire space and identify anything that could be damaged or get in your way. This includes not just the obvious things like patio furniture but also smaller items like sprinkler heads, outdoor lighting, and downspouts. A few minutes of preparation can save you hours of cleanup or costly repairs later on. Your primary goals are to isolate the paver surface and ensure it’s in the ideal condition for the stripper to work.

Protect Surrounding Plants and Structures

Chemical sealer strippers can harm or kill plants and can stain or damage other surfaces like siding, wood decks, or painted walls. Use plastic sheeting and painter’s tape to cover and protect anything adjacent to your pavers. For delicate plants and lawns, it’s a good idea to lightly water them before you start and rinse them off immediately if any stripper accidentally splashes onto them. This helps dilute the chemical and minimize potential damage.

Test the Stripper on a Small Area

Never apply a chemical stripper to your entire patio or driveway without testing it first. Choose a small, out-of-the-way spot, like a corner behind a planter, to test the product. Apply the stripper according to the directions and let it sit for the recommended time. This will confirm that the product effectively removes your specific type of sealer without discoloring or damaging the pavers themselves. It’s a simple step that can prevent a major catastrophe.

Ensure the Paver Surface is Clean and Dry

For a chemical stripper to work its magic, it needs to be applied to a completely dry surface. Any water on the pavers will dilute the stripper and reduce its effectiveness. If you’ve recently washed the area or if it has rained, wait at least 24 to 48 hours for the pavers to dry out completely. You should also do a final sweep to remove any leaves, dirt, or other debris that may have accumulated on the surface.

The Step-by-Step Guide to Stripping Paver Sealer

With your safety gear on and your workspace prepped, you’re ready to begin the process of stripping the old, failed sealer. The key to success is to be patient and methodical. Don’t rush the process; give the chemical stripper adequate time to do its job. It’s also much more effective to work in small, manageable sections rather than trying to tackle the entire area at once. This allows you to maintain a wet edge and ensures you can rinse away the dissolved sealer before it has a chance to dry and re-adhere to the surface. While it can be a labor-intensive job, seeing your pavers restored to their original, clean state is incredibly rewarding.

If the process seems too demanding, remember that you can always call in professionals. Companies that specialize in restoration and sealing services have the commercial-grade equipment and expertise to handle the job safely and efficiently. However, if you’re committed to the DIY route, following these steps carefully will guide you toward achieving the best possible results and preparing your pavers for a fresh, beautiful new coat of sealer.

Choosing the Right Product and Method

The first decision you’ll need to make is what product to use. Most home improvement stores carry a variety of paver sealer removers, often labeled as PSR or acrylic sealer strippers. It’s important to choose a product specifically designed for this purpose, as general-purpose cleaners or solvents are unlikely to be effective. Read the product labels carefully to ensure it is compatible with your type of paver and the type of sealer you believe is on them. If you’re unsure, a product that works on both water-based and solvent-based sealers is a safe bet.

Types of Chemical Strippers

Most paver sealer strippers are formulated to remove a wide range of coatings, including latex, acrylics, and epoxies. They are available in different strengths, so if you know you have multiple thick layers of old sealer, you may want to opt for a heavy-duty or professional-grade formula. These products work by chemically softening and lifting the sealer from the paver’s surface, turning it into a semi-liquid state that can then be washed away. Always follow the specific application instructions for the product you choose.

Alternative Removal Methods

While chemical strippers are the most common and effective method, some people look for alternatives. Unfortunately, for tough acrylic sealers, there are few effective non-chemical options. Sandblasting or grinding the surface can remove the sealer, but these methods are highly aggressive and will permanently damage the surface texture of your pavers. For the removal step after the chemical has worked, a pressure washer is best, but vigorous scrubbing with a stiff brush and a strong degreaser can also work if you don’t have access to one.

Cleaners That Won’t Work on Acrylic Sealers

It can be tempting to try and remove old sealer with common household products, but you’ll likely be wasting your time. Household cleaners like vinegar, baking soda, or even muriatic acid are generally ineffective at dissolving durable acrylic paver sealers. These products might clean the surface, but they won’t break down the chemical bond of the sealer itself. Stick to a product specifically formulated for sealer removal to get the job done right the first time.

Applying the Sealer Stripper

Once you’ve chosen your product and tested it, it’s time for the main event. The application process is straightforward but requires you to work efficiently. The goal is to apply a thick, even coat of the stripper over your chosen section and keep it wet until it has had enough time to work. Using the right tools will make this process much easier and help you get consistent coverage, which is key to ensuring all the old sealer lifts off evenly. Remember to keep your safety gear on throughout this entire stage.

Application Tools and Coverage Rates

The best tool for applying sealer stripper is a chemical-resistant, garden-style pump sprayer. This allows you to apply the product quickly and evenly over the surface. You can also use a roller with a solvent-resistant nap. Check the product’s label for the recommended coverage rate, which is typically around 75 to 100 square feet per gallon. This will help you calculate how much stripper you need to purchase for your entire project so you don’t run out midway through.

Work in Manageable Sections

Do not try to apply the stripper to your entire driveway or patio at once. The product will dry out before you have a chance to remove it. Instead, divide the area into small, manageable sections, such as a 10×10 foot square. Apply the stripper to one section, let it dwell, and then remove the sealer completely before moving on to the next section. This ensures you can control the process and get the best results.

Removing the Old Sealer

This is the most critical and satisfying part of the process. After letting the stripper dwell, you will physically remove the old, softened sealer from the paver surface. This step requires some elbow grease and the right equipment. The goal is to completely clear away the stripper and the dissolved sealer residue, leaving behind a clean, bare paver surface. Be thorough during this stage, as any residue left behind can interfere with the new sealer application. You’ll know you’re done when the rinse water runs clear.

Let the Stripper Dwell

Patience is key. After applying the stripper, you must let it sit on the surface and do its work. The recommended dwell time is usually between 20 and 30 minutes, but it can vary depending on the product and the thickness of the sealer. The sealer should start to bubble, wrinkle, or soften. It’s important to keep the surface wet during this time; if it starts to dry out, apply a light mist of additional stripper to reactivate it.

Using a Pressure Washer

A pressure washer is the most efficient tool for removing the softened sealer. A machine with at least 3,000 PSI is recommended for good results, and a hot water pressure washer is even better. Use a fan-tip nozzle and hold it at a consistent angle a few inches from the surface. Work from one end of the section to the other, systematically blasting away the gooey residue. Be careful not to dislodge the jointing sand between the pavers.

How to Remove Sealer Without a Pressure Washer

If you don’t have a pressure washer, you can still get the job done, but it will require more physical effort. After the stripper has dwelled, you’ll need to vigorously scrub the entire section with a stiff-bristled deck brush or broom. This will help loosen the dissolved sealer. Then, use a garden hose with a high-pressure nozzle to thoroughly rinse the area. You may need to alternate between scrubbing and rinsing a few times to remove all the residue.

When a Second Application is Needed

For pavers with many thick layers of old sealer or a particularly stubborn case of “whiting,” one application of stripper may not be enough. After rinsing the first section, let it dry and inspect it carefully. If you still see shiny, sealed patches or a persistent white haze, you will need to repeat the process. A second application on the tough spots should be enough to remove the last of the old sealer and get your pavers ready for their new finish.

SCHEDULE A MEETING TODAY WITH GAPPSI

View Gappsi’s YouTube Channel for Videos on How to Correct a Poor Application of Driveway Sealer on Paving Stones | Long-Island NY

https://youtu.be/zBkmJK4XOK0

Frequently Asked Questions

Why did my paver sealer turn white and cloudy? That frustrating white film is almost always caused by moisture getting trapped underneath the sealer. This can happen if a non-breathable, solvent-based product was used, if the pavers weren’t completely dry before sealing, or if the sealer was applied over natural salt deposits (efflorescence). It’s not a stain on the stone itself, but rather a sign that the protective layer has failed and needs to be removed.

Can I just apply a new coat of sealer over the old, failed one? Applying a new coat of sealer over a failing one is not a good idea. It essentially traps the problem, whether it’s cloudiness or peeling, underneath a new layer. This often makes the original issue look even worse and can lead to a thick, plastic-like buildup that is much more difficult to remove later. The best approach is to strip everything off for a clean slate.

How long does the stripping and resealing process typically take? The timeline really depends on the size of your project and how many layers of old sealer need to be removed. For an average driveway, you should plan for the project to take at least two days. This allows for the time needed to apply the stripper, pressure wash the surface, let the pavers dry completely, add new joint sand, and then apply the new coats of sealer with proper drying time in between.

Are the chemical strippers safe to use around my lawn and garden? These are powerful chemicals, so you need to be careful. You can protect your surrounding lawn, garden beds, and other surfaces by covering them with plastic sheeting. It’s also wise to lightly water your plants before you begin and rinse them immediately if any stripper splashes on them. Always keep pets and children away from the work area until the job is finished and the surface has been thoroughly rinsed.

Once the old sealer is gone, how do I make sure the new sealer doesn’t fail too? The key to a long-lasting finish is proper preparation and using the right product. Start with a surface that is perfectly clean and completely dry. Choose a high-quality, breathable sealer, like a water-based urethane, which allows any underlying moisture to escape. Finally, apply the sealer according to the manufacturer’s directions, paying close attention to the weather; avoid applying it in direct, intense sun or when rain is in the forecast.

Key Takeaways

  • Identify the cause of sealer failure: That milky haze on your pavers is usually moisture trapped under a non-breathable sealer. Figuring out what went wrong, whether it was a damp surface or a poor-quality product, is the key to making sure your next application looks great.
  • Commit to a thorough stripping process: To fix the problem, you must remove all the old sealer. This means applying a chemical stripper, giving it time to work, and using a pressure washer to remove the residue, tackling one small section at a time for the best results.
  • Reseal with the right materials: Once your pavers are clean and dry, fill the joints with quality sand and apply a breathable, water-based urethane sealer. This combination provides a durable, beautiful finish and helps prevent moisture from getting trapped again.

Related Articles

Share this page:

Gappsi Home Improvement Showroom | Smithtown NY

gappsi-showroom-and-products1Long Island’s premier home improvement company building your outdoor living and entertainment spaces. We have remodeled our main showroom over the past year to improve your experience!  The entire remodel was divided into 3 phases, the front, the rear, and indoor.  If you are considering a home remodel in your Long Island home, you need a place to go to gather ideas. You need to know what options are available, what products to consider, and what trends and designs are in style and worth considering. One of the best ways to gather this information is through a Gappsi showroom visit.
Gappsi Front Showroom Porcelain Pavers

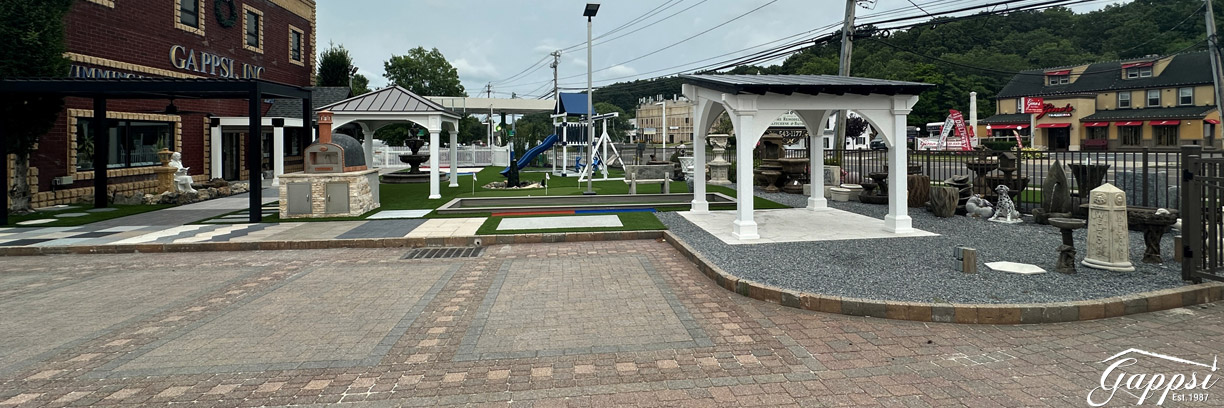
In the front area of the showroom, we have displayed all new porcelain pavers. Gappsi is a direct importer of porcelain pavers, porcelain coping, and natural stone coping from Italy. Our display of porcelain pavers for driveways comes in random sizes and also individual sizes in various colors.  Porcelain pavers are increasingly becoming the preferred choice for patios, walkways, and outdoor spaces due to their aesthetic appeal and robust performance. Unlike traditional concrete or cement pavers, porcelain offers enhanced durability, minimal maintenance, and an array of design options.  Outdoor porcelain pavers are frost-resistant, skid-resistant, durable, and easy to clean.

On display are over 100 different colors of porcelain pavers in various styles including wood look, hexagon shape, and wavy side edges to resemble natural stones.  In addition,  the showroom displays 48 x 48 large-size porcelain pavers as well as 4ft x 8ft individual-size tiles for viewing.

Paver Patios & Driveways Cleaning & Sealing

Professionally clean, seal and restore your stones, tiles, and grout today with Gappsi.  Our system is a chemical-free cleaning process, we use state-of-the-art high water volume machinery that can produce 200 Fahrenheit hot water to steam clean your floor removing all dirt, organics, and impurities before we apply the sealer. We use different sealers for natural stones or concrete products, based on their porosity and age, from color enhancers to natural penetrating and surface coating. We use the best sealer products on the market.  We have displayed all the different colors of stains that we use to restore old concrete or old patios to bring them back to life.  To learn more click this link and visit our cleaning and sealing page for details.

gravelfix for drivewaysGravelfix for Driveways and Walkways

We import and install the finest gravels, and aggregates for driveways including the Gravelfix System. Gravelfix is the recommended solution for stabilizing granulates and decorative pebbles and obtaining the best results for economical, stable, solid, and long-lasting flooring. Gravelfix is to solve the typical problems of gravel movements due to vehicular passage in car parks or transit areas.  Build your gravel driveway today with Gappsi.  View all the pebble and gravel options on display in our showroom.

gappsi-showroom-and-productsArtificial Living Walls & Vertical Gardens for Indoor or Outdoor Environments

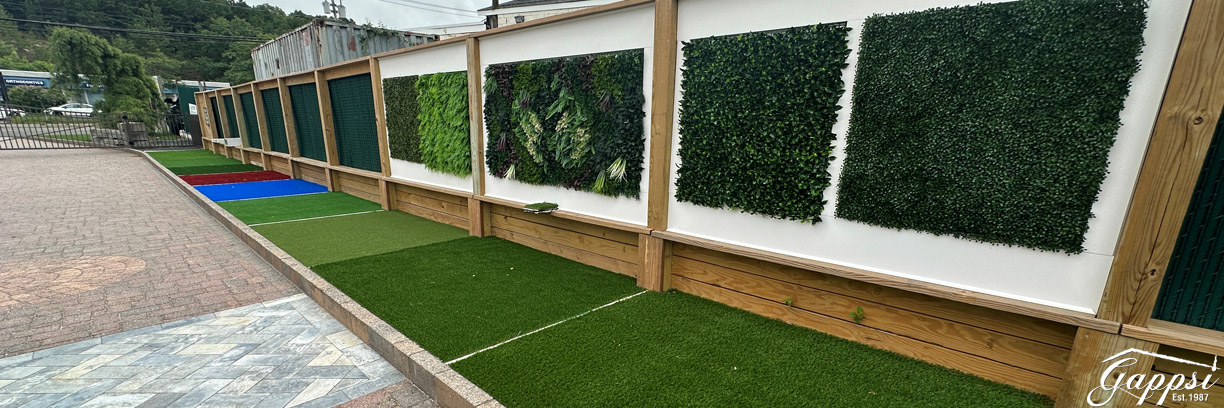
On the entrance side of the showroom, we installed green synthetic living walls and displayed our synthetic turf options. Artificial plant walls are the perfect addition to any design, regardless of project size or location.  Artificial plant walls transcend the need for light and water and are the ideal solution for greening spaces where plants cannot grow. Whether you’re planning to green up an empty wall in your backyard or you’re designing a large-scale commercial project, our hyper-realistic green wall panel system will enrich your design. Gappsi encourages your imagination to create remarkable living and working spaces with our vibrant faux plant walls.

Synthetic Turf and Artificial Greens

Our synthetic turf is perfect for sports game courts, including pickleball, soccer fields, tennis courts, putting greens, and pet grass.  Our pet grass selection is specifically designed for animals.  Your pets are part of the family but they’re also animals with destructive instincts. When you let your dogs play and go to the bathroom on real, carefully manicured grass, it doesn’t take long for them to fill your yard with holes, odors, clumps of grass, piles of dirt, and other telltale signs that animals own the place. Artificial pet turf is a low-maintenance alternative to natural grass. You and your pets will love it because it’s pet-friendly fake turf that your pets won’t be able to distinguish from real grass. The best part? It’s easy to clean.

gappsi-showroom-and-products3Sports Game Courts with Synthetic Turf

A turf court in your backyard or your school campus provides an enjoyable and safe surface for a wide range of sports.  From tennis to bocce ball, turf courts are becoming increasingly popular due to their low maintenance and high performance. When compared to natural grass surfaces, artificial turf is considerably safer and more reliable.

If you operate a sports complex or if you have kids who constantly want to practice sports at home, you know the challenges with maintenance for natural grass. Wearing out grass through frequent athletic practice can ruin your yard at home. For sports facilities that rely on full fields for weekend tournaments, having worn spots from weekday practices can disappoint the players and parents on the weekend.

That’s where artificial sports turf from Gappsi enters the picture. Our fields are durable, great value, and perfectly designed.  The artificial turf comes in various colors to offer the look and feel you want to achieve.  Never worry about overuse leading to bare spots and dead grass. Never cancel tournaments because of heavy overnight rains again. Whether you need an indoor or outdoor athletic field or turf, the quality of our synthetic turf options can make each team feel like it is playing professional sports. Let the constant practices and games commence!

Sports Game Courts

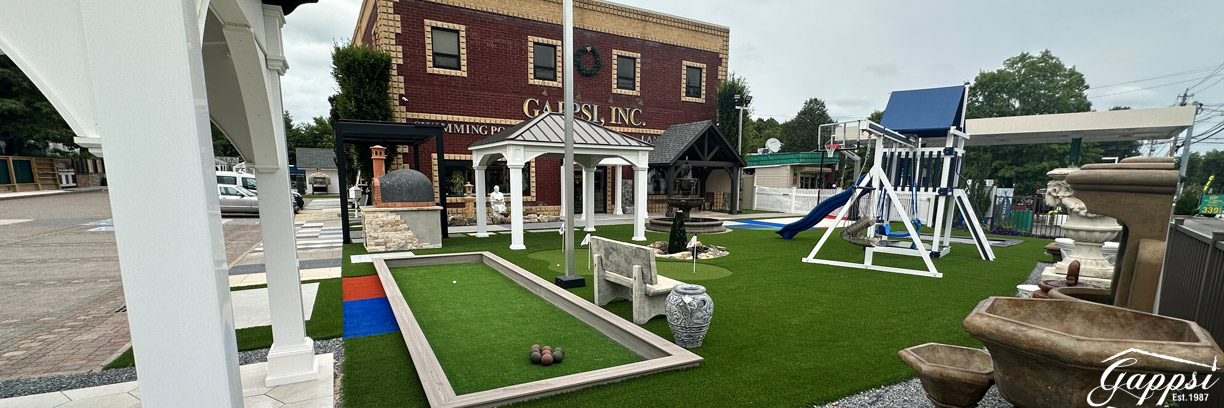
In front of the showroom, we displayed a miniature bocce ballcourt. Our bocce sports game courts are built with synthetic wood that will not warp.  Using synthetic wood sides, there are no exposed nails and no maintenance. In addition, the synthetic turf used is made specifically for bocce ball courts.

Come down to view our Dominator basketball sports game court with a double horn lights setup.  On display are the Metaflex tiles used for outdoor or indoor sports game court flooring.  Mateflex is a modular sports game court flooring company that makes tiles designed for durability and performance. Mateflex tiles are intended to combine the comfort of a soft court with the durability of a hard court.  Gappsi is an authorized dealer of Mateflex Sports Tiles.  They are the premier manufacturer of basketball court flooring, volleyball court surfaces, tennis court resurfacing options, and other courts for sports.

On one side we displayed adjustable netting used for multiple sports. The netting can be adjusted for pickleball, badminton, tennis, or volleyball.  We even have batting cages!  Check out our cages that use specific netting and fake grass.  

gappsi-showroom-and-products2Gappsi Playgrounds and Trampolines with Synthetic Turf

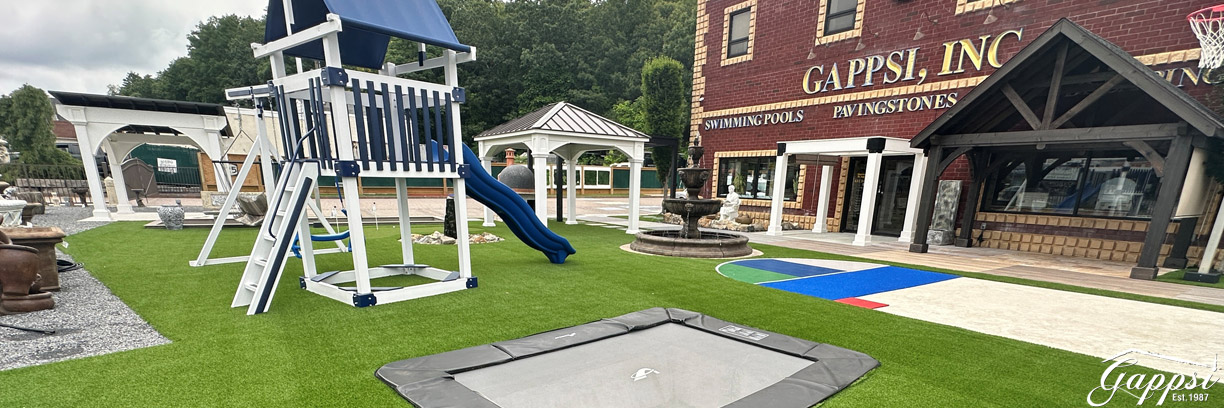
The front showroom displays the Boulder playground with a swing set by Patiovia. As an official dealer for Patiova, we are proud to showcase their products.

Crafting beautiful outdoor furniture, playsets, and arbors that you’ll love, and will last you a lifetime. All the playsets are built in Lancaster County, PA using elegant designs, superior materials, and time-tested construction methods.  Patiovia builds its products to endure the outdoor elements and look beautiful for years to come.

Next to our playground, we installed the latest and popular trend in inground trampolines.  America’s safest, highest quality, best-built, in-ground trampoline for fitness, and fun. High-quality engineered trampolines designed with safer jumping in mind.   Our trampolines come in a variety of sizes and shapes.

Garden-ornaments-showroom-on-Long-islandHenri Studio Concrete – Cement Garden Decor & Sculptures

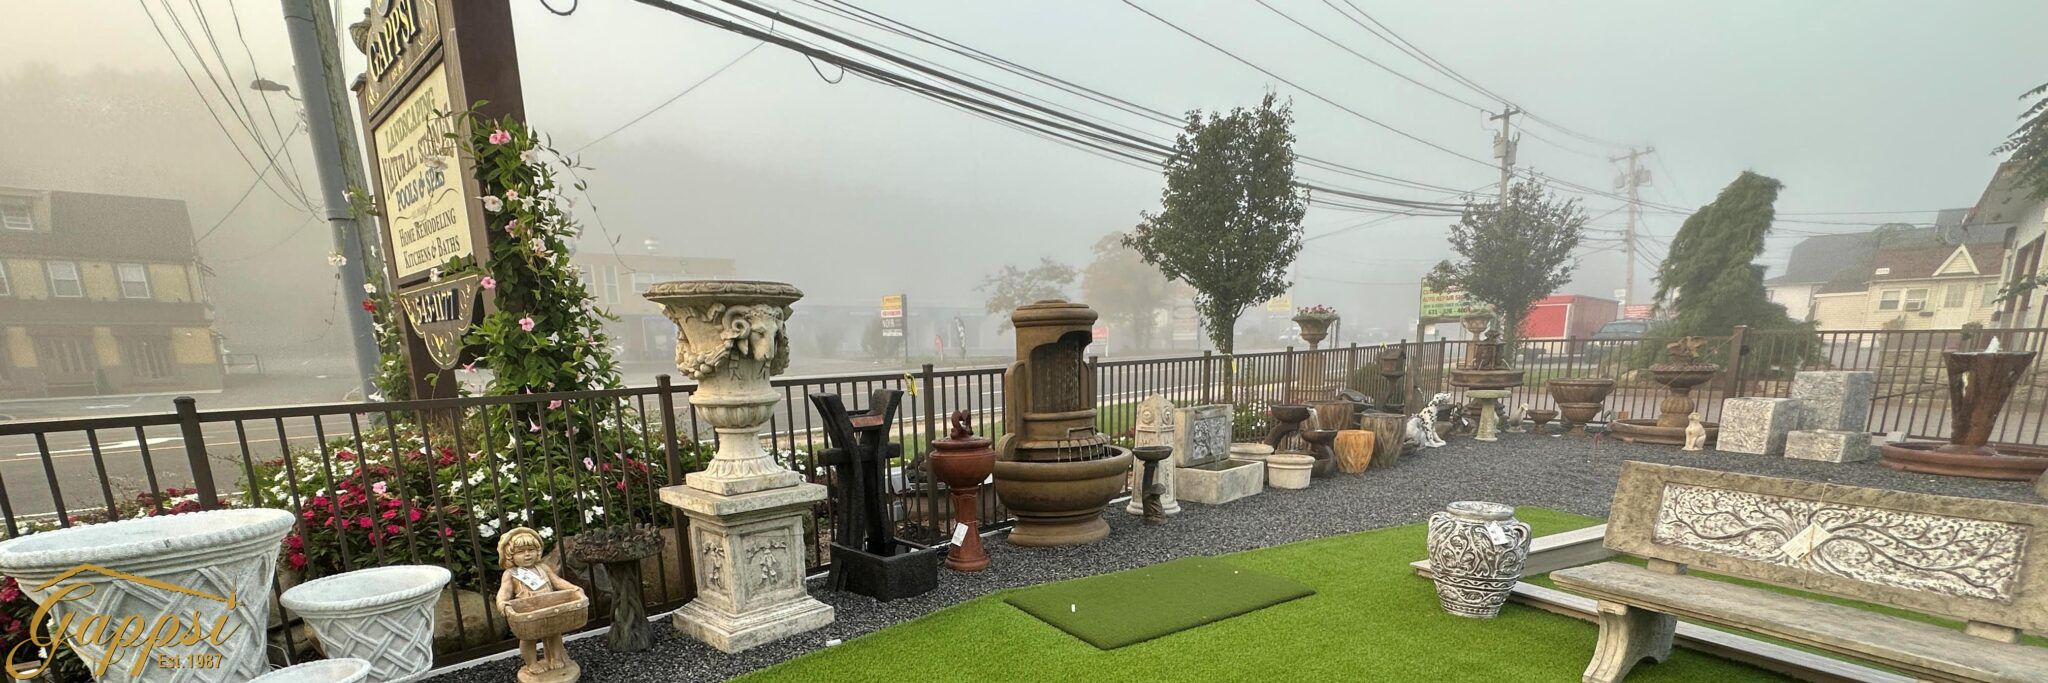
Our outdoor showroom showcases beautiful fountains, garden ornaments, concrete benches, and flower pots all by Henri Studio.  Our fountains and statuary are expertly engineered and skillfully made in the USA. The result is an evolving legacy of beauty. Henri studio fountains and garden decor continue to enhance distinctive homes and landscapes, adding elegance and enjoyment to outdoor living spaces throughout the world and we have them for your home!  For over the past 50 years, Henri Studio has revolutionized the world of cast stone fountains, outdoor fountains, statuary, and garden décor.  

Pavillions by Country Lane and Pergolas by Azek

A pergola can be a fun, unique addition to any outdoor space.  It can extend the inviting warmth of your home to patios and yards alike. Their versatile function and design provide creative minds with endless possibilities.  Pergolas also offers a fair amount of shade, making them ideal for covering certain flowers that may not fare as well in direct sunlight. You can either build a pergola around your garden or develop a garden around your pergola. Ultimately, the two complement one another so it’ll be a win-win.

We sell Amish-made outdoor structures that can transform the way you use your yard. Whether it’s a pavilion to sit under while watching the kids happily splash in the pool, or it’s a quiet gazebo seating area, this upgrade will change your yard forever.

Visit our outdoor showroom to view Azek pergolas with Sun Shade for the roof or sides.   Additional options for pavilions are metal roofs and automated aluminum roofs. This is a modern look and can be customized in many different sizes and heights.

Ovens-and-Appliance-ShowroomGappsi Pizza Ovens and Outdoor Kitchens

Home pizza ovens are the latest craze to add to your outdoor kitchen setup.  Gappsi offers its own line of pizza ovens and builds these ovens in-house.  A backyard pizza oven will elevate your outdoor gatherings. Wood-fired or gas, enjoy authentic homemade pizzas at home. Gappsi can add a stainless steel flue pipe to make it go through the roof when under a canopy or covered structure. These ovens can be built on-site and customized with your name engraved on the oven. 

Gappsi Inside Showroom – Under Construction

While our indoor showroom is not 100% complete you can view some of the products by Delta, Twin Eagles, Fire Magic, and Summit appliances we offer for outdoor kitchen setups.  Gappsi offers custom outdoor kitchen services including the initial plans, sourcing appliances, and cabinets, to backyard brick oven design and masonry.  View our Passion Hot Tub Spas inside our showroom on display too.

All-Inclusive Home Improvement Company

Gappsi is an all-inclusive home improvement company, that offers residential home services including home remodeling, swimming pool installations, masonry design and installations, landscape design and installation, sports game courts design and installation including basketball courts, tennis courts, pickleball, bocce, shuffleboard, and many others.  We use the latest products and applications.  Gappsi is an importer of the finest porcelain pavers from Italy.  We also import our synthetic turf that is used for lawns, dog runs, putting greens, and sports game courts.

SCHEDULE A MEETING TODAY WITH GAPPSI

View Gappsi’s YouTube Channel for Videos of Our Renovated Showroom | Smithtown NY

Share this page:

Gunite Pool Mastic Beach: A Homeowner’s Guide

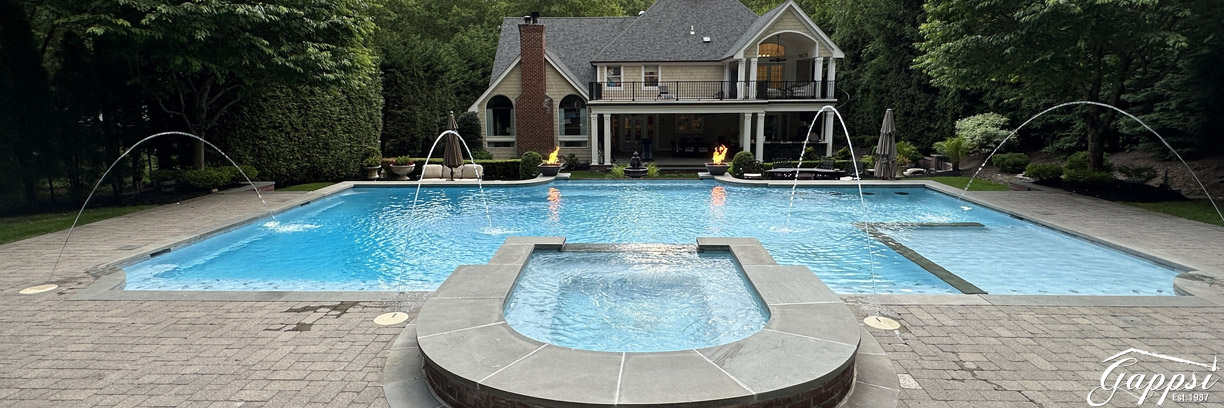
gunite-pool-renovation-smithtown-nyA traditional gunite pool renovation typically includes repairing or replacing the tile, coping, patio, skimmer, and pool surface.  In Smithtown NY we rebuilt most of the Gunite swimming pool due to the wall’s deterioration.  Often in New York, we face unique challenges due to the harsh regional climates, including severe freeze-thaw cycles and intense summer heat, which requires gunite pool resurfacing.
Your gunite pool is the heart of your backyard oasis. As a premier gunite pool builder in Smithtown, NY, we know you want it to stay perfect. But over time, you might notice issues like cracks, stains, or peeling plaster. This is a common concern for pool owners from Smithtown to Nesconset. Protecting your investment is key. The secret to a long-lasting pool isn’t just the initial build; it’s the details, like the flexible gunite pool mastic that protects your backyard beach entry and coping. Understanding the signs of deterioration is the first step to keeping your pool looking its best.

Factors that can cause deterioration include:

  • Water chemistry: Aggressive water chemistry, such as pH levels that are too high or too low, can break down cementitious products over time.
  • Poor water balance, such as low calcium hardness, can also cause pitting.
  • Repetitive impact: Abrasion or impact to the surface coating can also cause deterioration
  • Maintenance practices: The quality of the plaster and maintenance practices can also affect its lifespan.

Gappsi specializes in breathing new life into aging pools. Our commitment to sustainable practices ensures that every renovation extends your pool’s longevity and environmental footprint.  Check out our swimming pool gallery today!

Negative Edge Trough

Gappsi rebuilt the entire trough including new negative edge tiles and a marble top.  A negative edge is when only one side of the pool is lower than the deck level. The homeowners feel that the water is disappearing into nature from the house or deck. Of course, a visual effect.  It is undoubtedly best known because it has a significant aesthetic impact. It reveals all its beauty on the ground with a slope, but it can create a beautiful effect on almost flat land.gunite-pool-renovation-smithtown-ny1Porcelain Tiles for Waterline – Gunite Pool Renovation

Waterline tiles are a must-have for inground gunite pools, as they protect the perimeter and make it easier to remove buildup from hard water and other sources. They can also prevent a yellow ring from forming around the pool’s edge due to sunscreen, body oil, and other substances. Waterline tiles can also be used to customize the look of the pool with different designs.  On this Gunite pool renovation, we installed new porcelain tiles on the waterline.

Porcelain tiles are a great choice for gunite pool waterlines because they are durable, non-porous, and resistant to water, chemicals, and UV rays. They are also easy to clean and come in many colors, patterns, and finishes. Porcelain tiles can be used submerged in the pool as well as at the waterline.

Hydrazzo Gulfstream Blue Finish

Hydrazzo Interior Finish is a silky smooth texture, combined with the proven durability of exposed aggregates, which are two prime features of this state-of-the-art pool finish.  As part of the complete renovation for the gunite pool, we used Hydrazzo Gulfstream Blue finish.  Hydrazzo Gulfstream Blue is a polished pool finish made from natural ingredients like marble, white Portland cement, and other performance-enhancing ingredients. It’s known for its smooth, luxurious texture and durability, and is resistant to stains, algae, and scale adhesion. Hydrazzo Gulfstream Blue is also easy to apply and polish and can be re-polished to look new at any time.

gunite-pool-renovation-smithtown-ny2Here are some other benefits of Hydrazzo Gulfstream Blue:
  • Low maintenance
  • Non-slip surface
  • Friendly to swimsuits, toes, and fingers
  • Life expectancy of 15–20 years
  • Complements many pool designs

Pool Step Markers

We added step markers in the gunite pool renovation serving a dual roll in any pool. First and foremost is safety. Without step markers, the edges of steps, Baja shelves, and tanning ledges are difficult to identify beneath the water’s surface. This can ultimately create a fall or drowning hazard. The second role is more cosmetic. Step markers add a pop of personality to your pool. By choosing dolphins, turtles, starfish, or any other variety of markers you can add a bit of character while making your pool safer for all.

MagicStream Laminars – Arcs of Illuminated Water

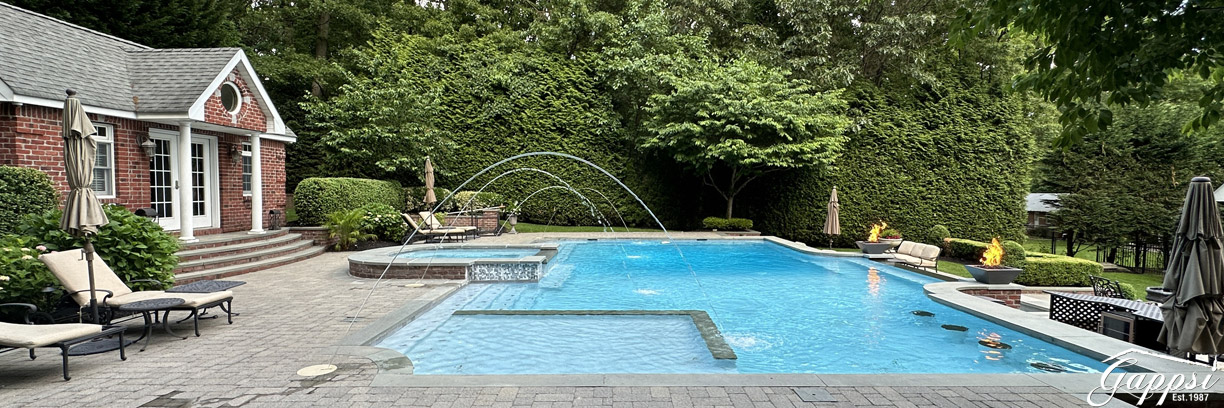
We added to the pool renovation 4 MagicStream Laminars.  They offer an elegant, dramatic arc of water into the pool.  MagicStream Laminars with 100% synchronization with IntelliBrite 5g LED color and white lights create clear, uniform arcs of moving water that originate from either a pool deck or the surrounding landscape. At night, these translucent streams are brilliantly colored, creating a water effect that adds elegant entertainment to your poolscape. It is fully compatible with the IntelliBrite 5g line of LED pool lights, the optional Color Sync™ Controller for Pentair Color LED Pool Lights, and the EasyTouch® or IntelliTouch® Automation Systems. Custom program and control light show using an indoor control panel, wireless remote, and the ScreenLogic® Interface using your smartphone, computer, or mobile digital device.

gunite-pool-renovation-smithtown-ny3Pool Spa with Bluestone Coping

In our latest renovation, we rebuilt the spa and replumbed it for better efficiency.  We added a bluestone coping also.  Bluestone makes perfect pool coping due to its non-slip properties. Elevate your pool spa design with our premium bluestone coping. Pool coping protects the pool shell and brings the swimming pool level with the pool deck. Coping also adds a decorative touch to your pool perimeter, and keeps your pool or spa cool to the touch and safe for individuals getting in or out. Whether you are designing your new pool or renovating the coping on an existing pool, our team is available to answer any questions you have about pool and spa coping.

Heat Up Your Pools Design with Fire

We installed two gas fire features.  Turn up the heat and make a splash by adding a fiery twist to your pool design with a fire bowl. Not only do pools with fire bowls pack a visual punch, but they also amp up the atmosphere and make your pool the place to be.  Elevate your poolside paradise with mesmerizing fire pits, adding a splash of luxury and turning your backyard into a lavish resort-like dream!

From rustic charm to contemporary chic, these enticing flame features radiate warmth and allure for your outdoor festivities while also boosting the value of your house!

This is the latest Gunite pool renovation done by Gappsi in Smithtown NY.

What is a Gunite Pool?

If you’re dreaming of a custom backyard pool, you’ve likely come across the term “gunite.” So, what exactly is it? A gunite pool is a type of concrete pool renowned for its durability and design flexibility. The name comes from the construction method, where a dry mix of cement and sand is shot through a high-pressure hose. Water is added at the nozzle, creating a concrete material called gunite. This mixture is then sprayed over a steel reinforcement grid, or rebar, that has been shaped into your desired pool design. This process creates a dense, strong, and monolithic pool shell that can be molded into virtually any shape or size you can imagine.

Unlike pre-molded fiberglass pools, gunite construction happens right in your backyard, allowing for a truly bespoke creation. Whether you envision a freeform lagoon, a classic rectangle, or a complex design with built-in waterfalls and spas, gunite makes it possible. After the gunite shell cures, it’s finished with a smooth layer of plaster, pebble aggregate, or tile, which waterproofs the structure and gives the pool its final, beautiful appearance. This combination of a reinforced steel core and a concrete shell results in an incredibly robust and long-lasting swimming pool that becomes a permanent, valuable addition to your home.

How Gunite Pools Are Made

Building a gunite pool is a meticulous process that transforms your backyard from a blank canvas into a stunning oasis. It all starts with a detailed design phase where every curve and feature is planned. Once the design is finalized, the area is excavated to the specified shape and depth. Next, a complex web of steel rebar is installed, forming the structural skeleton of the pool. This framework is crucial as it provides the tensile strength to support the concrete shell. Plumbers then strategically install all the necessary piping for filtration, jets, and any water features before the gunite application begins.

The magic happens when the gunite crew arrives. They expertly spray the concrete mixture over the rebar cage, building up the walls and floor to the required thickness. This application method creates a single, seamless structure with incredible strength. After the gunite is applied, it needs to cure for several weeks, a critical step for ensuring maximum durability. Finally, a waterproof finish like plaster or an aggregate is applied, along with coping and tile, completing the transformation. It’s a detailed construction project that requires true expertise, which is why partnering with an experienced builder is essential for a successful outcome.

The Gunite Shell and Waterproofing

A common misconception about gunite pools is that the shell itself is waterproof from the moment it’s sprayed. In reality, the raw gunite structure is porous. During the curing process, it’s normal to see some water seepage if it rains, but this is not a cause for alarm. The structural integrity comes from the dense concrete and rebar combination, but the waterproofing comes from the final interior finish. This finishing layer, typically plaster, pebble aggregate, or tile, is applied after the gunite shell has fully cured and hardened. It acts as a waterproof membrane, preventing water from penetrating the concrete shell and the ground beneath it.

This final surface does more than just hold water; it also defines the pool’s aesthetic and texture. A smooth plaster finish provides a classic look, while an aggregate finish offers a more textured, natural feel and can come in a variety of colors. The quality of this final layer is just as important as the gunite shell itself. A properly applied finish ensures your pool remains beautiful and leak-free for years, protecting the significant investment you’ve made in your backyard retreat. It’s the crucial last step in creating a durable and watertight swimming environment.

Pros and Cons of Gunite Pools

When deciding on the perfect pool for your home, it’s important to weigh the benefits and drawbacks of each type. Gunite pools are a top choice for many homeowners, especially those seeking a custom, high-end look. Their biggest selling point is unparalleled design freedom. You aren’t limited to standard shapes or sizes; if you can dream it, a skilled builder can likely create it with gunite. This makes them ideal for integrating unique features like tanning ledges, built-in seating, and intricate water features. Furthermore, gunite pools are exceptionally durable. The steel-reinforced concrete shell is built to last for decades, withstanding ground movement and the harsh Long Island climate better than many alternatives.

However, these benefits come with a few considerations. The initial cost of a gunite pool is typically higher than that of vinyl liner or fiberglass options due to the extensive labor and materials involved. The construction process is also longer, often taking several months from excavation to the first swim. Gunite pools also require more hands-on maintenance. The porous nature of the plaster finish can be a breeding ground for algae if water chemistry isn’t carefully managed. Over time, the pool will also need to be resurfaced, an expense to plan for down the road. Understanding these factors helps you make an informed decision that aligns with your budget, timeline, and lifestyle.

Advantages of Gunite Pools

The primary advantages of choosing a gunite pool are rooted in its strength and versatility. Homeowners who want a pool that is a true centerpiece of their backyard landscape often find that gunite is the only option that meets their creative vision. Because they are built on-site, gunite pools can be tailored to fit any space, accommodate complex designs, and seamlessly incorporate surrounding features like patios and landscaping. This level of customization ensures your pool is not just a place to swim but a unique reflection of your personal style. The robust construction also means you are investing in a permanent home improvement that adds significant value to your property.

Design Flexibility

The single greatest advantage of a gunite pool is the limitless design flexibility it offers. Unlike fiberglass pools that come in predetermined shapes, a gunite pool is a custom-built structure. This allows you to design a pool that perfectly fits the contours of your yard and your family’s needs. You can create sweeping curves, sharp angles, multiple levels, and varying depths. It’s also easy to integrate luxurious features directly into the pool’s structure, such as a vanishing edge, a relaxing spa, a shallow beach entry for kids, or even a swim-up bar. This creative freedom extends to the finish, where you can choose from a wide array of porcelain tiles, stones, and colored aggregates to achieve the exact look you desire.

Durability

When it comes to strength and longevity, gunite pools are in a class of their own. The combination of a steel rebar framework and a thick, sprayed concrete shell creates an incredibly strong and durable structure. This robust construction makes them highly resistant to damage from ground shifts and the extreme freeze-thaw cycles we experience here on Long Island. While other pool types might be susceptible to punctures or warping, a well-built gunite pool is engineered to last for generations. This inherent toughness means you are investing in a permanent feature of your home that, with proper care, will provide enjoyment for many decades to come.

Disadvantages and Risks of Gunite Pools

While gunite pools offer incredible benefits, it’s equally important to be aware of the potential downsides. The very nature of their custom, on-site construction leads to a higher price tag and a more extended installation timeline compared to other pool types. The maintenance requirements are also more intensive, as the plaster surface needs regular brushing and careful chemical balancing to prevent staining and algae growth. Finally, the quality of the final product is heavily dependent on the skill of the installer, making it crucial to choose a reputable and experienced pool builder to avoid potential long-term issues.

Higher Initial Cost

There’s no getting around it: gunite pools are a significant investment. The initial cost is generally higher than for vinyl liner or fiberglass pools. This price difference is due to the intensive labor, specialized equipment, and raw materials required for construction. From the detailed excavation and intricate steelwork to the professional application of the gunite and plaster, every step is a custom job. While the long-term durability can offset some of this cost over the pool’s lifetime, you need to be prepared for a larger upfront expense when planning your budget for a gunite pool project.

Longer Construction Time

Patience is a virtue when building a gunite pool. The construction process is not a quick one and can take anywhere from three to six months, or sometimes longer, depending on the project’s complexity and weather conditions. Each stage requires time, from excavation and plumbing to installing the rebar. The most significant waiting period is the curing phase, where the gunite shell must sit and harden for about 28 days before the final interior finish can be applied. This extended timeline is necessary to ensure a strong, durable final product, but it’s a factor you must consider when planning for your new pool.

Maintenance Needs

A gunite pool requires consistent and diligent maintenance to keep it looking its best. The plaster or aggregate surface, while durable, is porous. This means it can be susceptible to algae growth and staining if the water chemistry is not properly maintained. Regular brushing of the pool surface is necessary to remove any potential buildup. Additionally, because of the cement-based surface, you may need to use more chemicals to keep the pH levels balanced. Over a decade or more, the surface will eventually need to be acid washed or completely resurfaced, which is a significant maintenance expense to anticipate.

Installation Risks

The success of a gunite pool project rests almost entirely on the expertise of the builder. An inexperienced contractor can make critical errors during any phase of construction, from improperly shaping the rebar cage to applying the gunite unevenly. These mistakes can lead to serious structural problems down the line, including cracks, leaks, and “pop-ups,” where the pool shell can lift out of the ground. This is why it is absolutely essential to vet your pool builder carefully. Choosing a company like Gappsi, with a long-standing reputation for expert masonry and pool construction, minimizes these risks and ensures your investment is built to last.

How Long Do Gunite Pools Last?

One of the most compelling reasons to invest in a gunite pool is its incredible lifespan. A well-built and properly maintained gunite swimming pool can easily last for 50 years or more, with many lasting for a century. The structural shell itself, composed of steel and concrete, is built to be a permanent fixture. While the pool’s structure is incredibly long-lasting, the interior surface, such as the plaster or aggregate finish, has a shorter lifespan. Typically, a plaster finish will need to be redone every 10 to 15 years, depending on maintenance and water chemistry. This resurfacing process revitalizes the pool’s appearance and restores its waterproof seal, essentially giving it a new life.

The longevity of your gunite pool is directly tied to the quality of its construction and the consistency of its maintenance. Regular care, including balanced water chemistry, routine cleaning, and timely repairs to equipment and fixtures, will protect your investment. Addressing small issues before they become large problems is key. For example, maintaining the mastic joint around the pool’s edge can prevent costly water damage to the pool’s structure and surrounding deck. With diligent upkeep, your gunite pool will not only provide a lifetime of memories but will also remain a valuable and beautiful asset to your property for generations.

The Importance of Pool Mastic

When you look at a swimming pool, you probably notice the water, the tile, and the surrounding patio. But there’s a small, often overlooked component that plays a huge role in protecting your entire pool structure: the mastic. Pool mastic is the flexible, waterproof sealant that fills the expansion joint between your pool coping (the stone or concrete edge of the pool) and the pool deck. This joint is intentionally designed to allow the pool shell and the deck to expand and contract independently with temperature changes, preventing them from cracking or pushing against each other. The mastic acts as a flexible bridge in this gap, keeping everything sealed and protected.

Without functional mastic, this expansion joint becomes a channel for water. Rainwater, splashes from the pool, and water from cleaning the deck can seep into the gap and get underneath your coping and deck. Over time, this water can erode the soil supporting the pool’s structure, leading to shifting, cracking, and potentially catastrophic damage to the pool shell itself. In a climate like Long Island’s, this is especially critical. During the winter, any trapped water will freeze and expand, exerting immense pressure that can crack tiles, dislodge coping stones, and damage the pool’s bond beam. In short, that small strip of sealant is your first line of defense against very expensive structural repairs.

What is Pool Mastic and Why is it Important?

Pool mastic is a specialized, commercial-grade sealant, typically made of polyurethane, designed to be both flexible and durable. Its primary job is to create a watertight seal in the expansion joint around your pool’s perimeter. This seal is crucial because it prevents water from penetrating the ground beneath your pool deck and behind your pool wall. If water gets into this area, it can cause soil erosion, which can lead to the deck sinking or cracking and can even compromise the structural integrity of the pool itself. The mastic’s flexibility allows it to stretch and compress as the deck and pool shell expand and contract with changing temperatures, ensuring the seal remains intact year-round.

Pool Mastic Maintenance and Replacement

Pool mastic is not a lifetime product; it’s a maintenance item that needs to be inspected regularly and replaced periodically. Generally, mastic has a lifespan of about five to ten years. Exposure to UV rays, pool chemicals, and constant temperature fluctuations will eventually cause it to dry out, crack, and pull away from the sides of the joint. You should visually inspect your mastic at the beginning and end of each pool season. Look for any signs of cracking, peeling, or gaps. If you see any deterioration, it’s time to have it replaced. Delaying this simple repair can lead to much more complex and costly problems, making mastic replacement one of the most important preventative maintenance tasks for any pool owner.

Gunite Pool Renovation and Upgrades

Even the most well-built gunite pool will eventually show its age. After a decade or more, the plaster surface may become stained or rough, tiles can crack, and the overall look might feel dated. The great thing about gunite pools is that they are completely renewable. A full renovation can transform an old, tired pool into a modern masterpiece that looks and feels brand new. At Gappsi, we specialize in breathing new life into aging pools, handling everything from simple resurfacing to complete structural makeovers. A renovation is the perfect opportunity to not only restore your pool’s beauty but also to add features you’ve always wanted.

Upgrades can range from cosmetic enhancements to functional improvements. You might choose to replace your old waterline tile with modern porcelain, switch to a durable and beautiful aggregate finish, or replace worn coping with elegant natural stone. This is also the ideal time to add exciting new features. Imagine incorporating a relaxing spa, a dramatic waterfall, or energy-efficient LED lighting to create a stunning nighttime ambiance. You could also add a tanning ledge for lounging or deck jets for a playful touch. A professional renovation allows you to update your pool to match your current style and enhance your family’s enjoyment for years to come. You can explore our swimming pool gallery to see how we’ve transformed pools across Long Island.

SCHEDULE A MEETING TODAY WITH GAPPSI

View Gappsi’s YouTube Channel for Videos of Gunite Pool Renovation | Smithtown NY

https://youtu.be/7zC5f2igfgw

Frequently Asked Questions

How can I tell if my gunite pool needs a full renovation instead of just a simple repair? Look for signs that go beyond a single cracked tile. If the surface feels rough like sandpaper on your feet, has stains that chemicals won’t remove, or you see widespread cracking (often called crazing), it’s likely time to consider a renovation. These issues indicate the interior finish is nearing the end of its life. A renovation addresses the core surface, ensuring the pool is properly sealed and looks brand new again.

A gunite pool sounds expensive. Is the long-term value really worth the initial cost? It’s true that the upfront cost is higher, but it’s helpful to think of it as a permanent home investment. Because of their steel-reinforced concrete structure, gunite pools last for generations. Their durability in Long Island’s climate is unmatched. This longevity, combined with the complete freedom to create a custom design that adds significant value to your property, makes the initial investment pay off over the many decades you’ll enjoy it.

My pool’s surface is in decent shape, but the style feels outdated. Can I just upgrade the features? Absolutely. This is one of the best things about having a gunite pool. You don’t always need a complete overhaul to make a big impact. You can modernize your space by adding new features like dramatic fire bowls, elegant waterfalls, or energy-efficient LED lighting. Updating the waterline tile or replacing old coping with a beautiful natural stone are also fantastic ways to refresh your pool’s entire look without the time and expense of a full resurfacing.

What is the most important maintenance task I should focus on to protect my gunite pool? Besides keeping your water chemistry balanced to protect the interior finish, the most critical task is inspecting your pool mastic. That’s the flexible sealant between your pool edge and the patio. If you see it cracking or pulling away, get it replaced. This simple step prevents water from seeping underneath your deck and compromising the pool’s entire structure, saving you from incredibly expensive repairs down the road.

How long does a major gunite pool renovation typically take to complete? The timeline really depends on the scope of the project. A straightforward resurfacing with new tile might take a few weeks. However, if your renovation involves significant changes like rebuilding a spa, adding new plumbing for water features, and redoing the patio, it could take a couple of months. Weather also plays a role, but a professional team will give you a clear schedule based on your specific project.

Key Takeaways

  • Embrace Customization with a Plan: Gunite pools provide unmatched design flexibility and long-term durability, but they require a larger upfront investment and a longer build time. Acknowledge this trade-off by planning your budget and schedule carefully to create a truly custom backyard oasis.
  • Modernize Through Renovation: Your gunite pool is completely renewable. Use a renovation to not only replace dated surfaces with new tiles and finishes but also to incorporate modern upgrades like a spa, fire features, or energy-efficient lighting to transform your entire outdoor space.
  • Protect Your Investment with Key Maintenance: A gunite pool’s structure can last for generations, but its surfaces need care. Focus on two key tasks: periodically replacing the mastic sealant to prevent water damage and planning for resurfacing every 10 to 15 years to keep your pool beautiful and watertight.

Related Articles

Share this page: