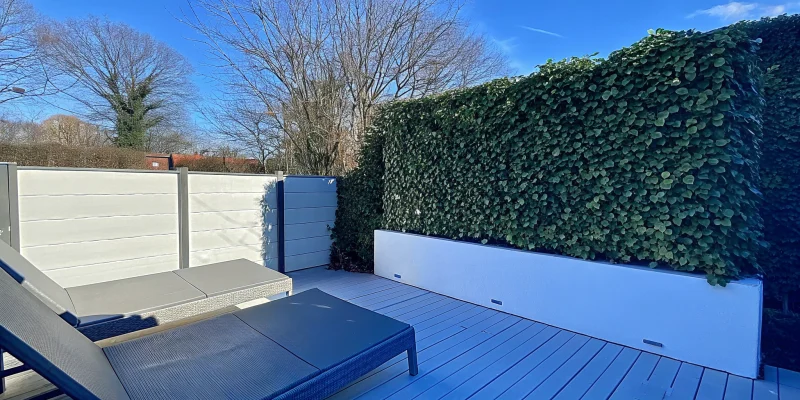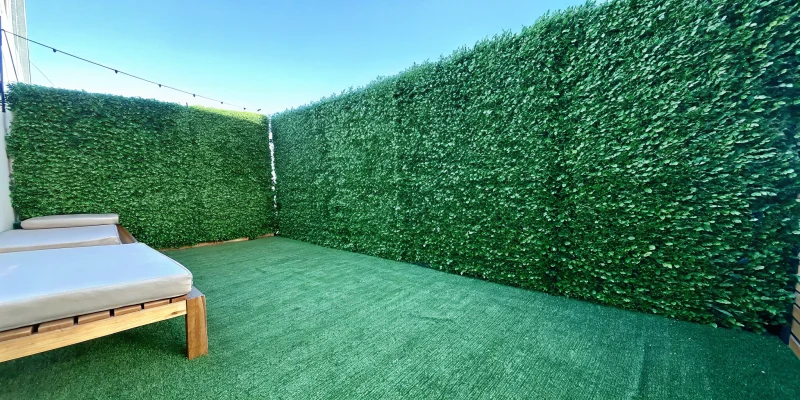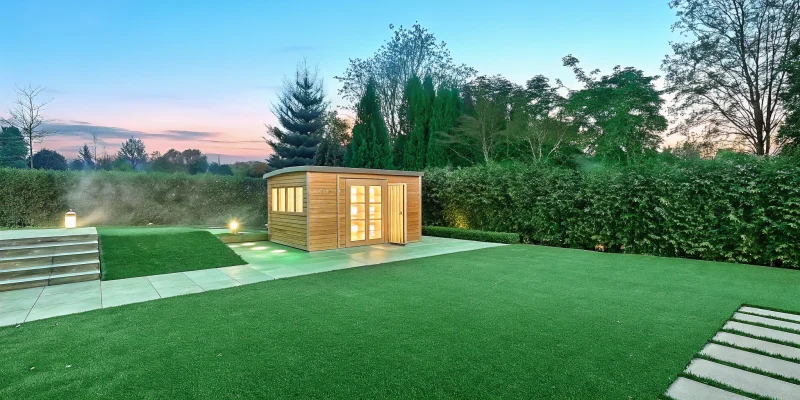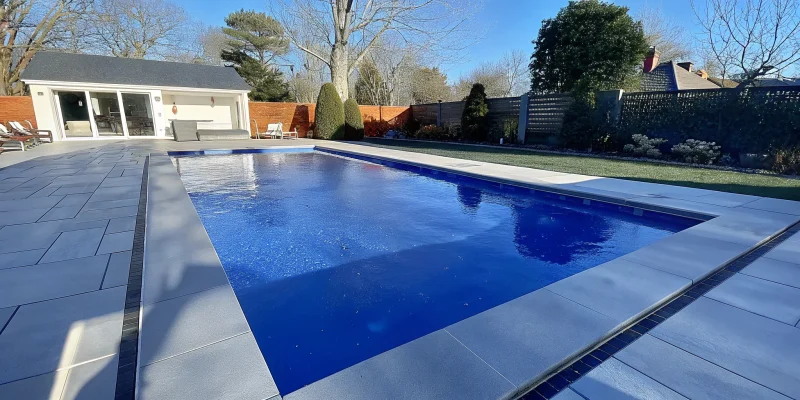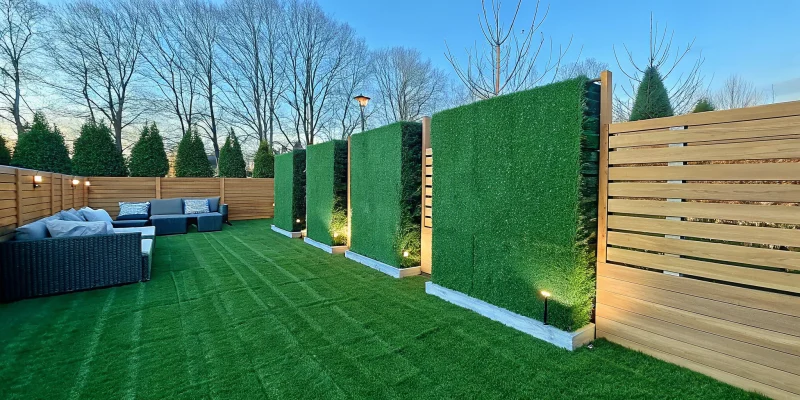
A privacy wall is one of the most transformative elements you can add to your landscape. Think of it not as a barrier, but as a beautiful backdrop that defines your entire outdoor living area. It’s a blank canvas waiting for your personal touch. You can use it to showcase climbing plants, mount a soothing water feature, or display outdoor art. A thoughtfully designed privacy wall outdoor adds a crucial vertical element, turning a flat, open yard into a sophisticated space with the intimate feel of an outdoor room. Ahead, we’ll explore creative ideas and material combinations that turn a functional necessity into a stunning focal point for your Long Island home.
Key Takeaways
- Define Your Goal First: Your main reason for the wall—whether it’s blocking noise, wind, or just a line of sight—should determine your material choice. A solid masonry wall is best for sound, while a decorative screen can provide simple visual separation.
- Handle the Homework Beforehand: Avoid costly mistakes by doing three things first: get a professional survey to confirm property lines, check your local Long Island town codes for permit and height rules, and ensure the site is properly prepped for drainage and stability.
- Think Beyond a Simple Barrier: A privacy wall is a major architectural element of your yard. Use it as an opportunity to add style and value by incorporating creative elements like a living wall, decorative panels, or mixed materials that complement your home’s aesthetic.
What’s an Outdoor Privacy Wall (And Why You’ll Want One)
Your backyard should be your personal retreat—a place to unwind after a long week, host a barbecue with friends, or just enjoy a quiet cup of coffee. But it’s hard to relax completely when you feel like you’re on display for the whole neighborhood. If you’ve ever wished for a bit more seclusion, an outdoor privacy wall might be exactly what you need.
So, what is it? An outdoor privacy wall is a freestanding structure designed to create a secluded, intimate space within your yard. Think of it as a more strategic and stylish version of a traditional fence. Instead of just marking a property line, its purpose is to shield a specific area, like a patio, pool, or outdoor kitchen, from prying eyes and unwanted noise. These walls can be crafted from a wide range of materials, from classic wood and modern metal to beautiful masonry work that adds architectural interest.
The real magic of a privacy wall is how it transforms your outdoor living experience. It’s not just about blocking your neighbor’s view; it’s about creating a sense of enclosure and comfort. A well-placed wall can turn an exposed patio into a cozy outdoor room, making it the perfect spot for family dinners or quiet evenings. It also adds a vertical element to your landscape design, serving as a stunning backdrop for plants, a water feature, or outdoor art. Essentially, it helps you get more use and enjoyment out of the space you already have.
A Guide to Privacy Wall Materials and Styles
Choosing the right material for your privacy wall is one of the most important decisions you’ll make. It sets the tone for your entire outdoor space, determining not just the look and feel but also how much time you’ll spend on upkeep. From the classic warmth of wood to the timeless strength of stone, each option has its own personality and practical benefits. Think about the style of your home, the Long Island climate, and the level of privacy you’re aiming for. Let’s walk through some of the most popular materials to help you find the perfect fit for your backyard retreat.
Wood Privacy Walls
Wood is a timeless choice for a reason. It offers a warm, natural look that can make any backyard feel more inviting and can be stained or painted to match your home’s aesthetic perfectly. Cedar is a fantastic option because its natural oils make it resistant to rot and insects, giving it a longer lifespan with proper care. While wood does require some maintenance—like sealing or staining every few years to protect it from the elements—its classic beauty is hard to beat. A well-built wood fence can create a truly private and organic-feeling sanctuary.
Metal and Aluminum Privacy Walls
If you’re leaning toward a more modern and sleek design, metal or aluminum could be the right choice. These materials offer a clean, contemporary look and are incredibly durable. Aluminum is especially great because it’s lightweight and won’t rust, making it a smart, low-maintenance option for our coastal climate. Metal panels can also be laser-cut into intricate, decorative patterns, turning your privacy wall into a stunning piece of art. They pair beautifully with modern pavilions and pergolas, creating a cohesive and sophisticated outdoor living area with minimal upkeep required.
Composite and Vinyl Privacy Walls
For homeowners who love the look of wood but not the maintenance, composite and vinyl are excellent alternatives. These engineered materials are designed to withstand the elements without warping, fading, or rotting. You’ll never have to worry about staining or painting, and cleaning is as simple as a quick spray with a hose. Composite and vinyl fencing comes in a wide variety of colors and textures that convincingly mimic real wood, giving you the best of both worlds: timeless style and modern convenience.
Natural Stone and Masonry Privacy Walls
For ultimate durability and a truly luxurious feel, nothing compares to natural stone or masonry. A stone wall provides superior privacy and sound reduction, creating a peaceful and secluded atmosphere. Materials like granite, fieldstone, or brick add a sense of permanence and elegance to your landscape that will last a lifetime. While the initial investment is higher, a beautifully constructed masonry wall is a lasting feature that adds significant value and character to your property. It’s a statement piece that is both functional and breathtakingly beautiful.
Fabric and Screen Privacy Walls
If you need a more flexible or budget-friendly solution, consider using outdoor fabric or decorative screens. These are perfect for sectioning off a patio, adding privacy to a pergola, or hiding an unsightly view without building a permanent structure. Modern outdoor fabrics are UV-resistant and designed to handle rain and wind. Screens come in materials like wood, composite, or metal and feature stylish patterns that can add a decorative touch. While they don’t offer the same security or soundproofing as a solid wall, they are a great way to define a space and add a pop of style.
More Than Just Privacy: The Benefits of an Outdoor Wall
When you hear “privacy wall,” your mind probably goes straight to blocking out nosy neighbors. And while that’s certainly a major perk, these structures offer so much more. Think of an outdoor wall as the foundation for creating a true extension of your home—a functional, beautiful, and peaceful retreat right in your own backyard. It’s about more than just seclusion; it’s about crafting an environment that feels safe, comfortable, and uniquely yours. From dampening street noise to serving as a stunning design feature, a well-planned privacy wall can completely transform how you experience your outdoor space.
Gain More Privacy and Security
Let’s start with the obvious: a privacy wall creates a secluded sanctuary. It gives you the freedom to enjoy your morning coffee, host a family barbecue, or lounge by the swimming pool without feeling like you’re on display. This sense of enclosure provides a powerful feeling of security, turning your yard into a safe haven for kids and pets to play freely. Whether you choose a solid stone wall or a classic wooden fence, you’re establishing a clear boundary that makes your property feel more personal and protected. It’s your space, and a privacy wall helps you claim it as a true personal oasis.
Block Out Noise and Wind
Life in Long Island can be bustling, and sometimes you need a quiet escape. A strategically placed privacy wall can act as an effective sound barrier, muffling the noise from nearby traffic, lawnmowers, or lively neighborhood gatherings. Solid structures built with masonry are particularly good at creating a more serene atmosphere. Beyond sound, a wall can also block persistent winds, making your patio or deck a much more pleasant place to relax, dine, or entertain. You’ll find yourself able to enjoy a calm conversation or a meal outdoors without everything blowing away.
Add Style and Value to Your Home
A privacy wall is far more than just a functional barrier; it’s a powerful design element that can define the entire look of your backyard. Imagine a beautiful wall made from natural stone serving as a dramatic backdrop for your garden, or a sleek, modern screen adding architectural interest to your patio. The right materials and design can complement your home’s style and turn a plain yard into a sophisticated outdoor living area. This kind of thoughtful improvement doesn’t just enhance your daily enjoyment—it also adds real, tangible value to your property when it comes time to sell.
Create a Comfortable, Sheltered Space
One of the best things a privacy wall does is help define an “outdoor room.” It creates a sense of enclosure that makes a large, open yard feel cozier and more intimate. This structure can provide welcome shade during the hottest parts of the day or offer shelter from a cool breeze, extending the hours you can comfortably spend outside. When combined with other elements like a pergola or pavilion, a privacy wall helps create a truly comfortable and sheltered retreat. It’s the key to transforming a simple patio into a destination for relaxation and connection.
How to Choose the Right Privacy Wall for Your Yard
Picking the perfect privacy wall feels like a big decision, but it doesn’t have to be overwhelming. With a little bit of planning, you can find an option that not only gives you the seclusion you want but also beautifully complements your home and yard. It’s all about balancing aesthetics with practicality. Think about what you truly need from the space, what your long-term maintenance tolerance is, and what your budget looks like. By breaking it down into a few key steps, you can confidently choose a privacy wall that you’ll love for years to come. Let’s walk through exactly what you need to consider.
Measure Your Space and Plan the Layout
Before you fall in love with a specific material or style, grab a tape measure and head outside. Figure out the exact length and desired height of your future privacy wall. Think about its purpose. Are you trying to block the view from a neighbor’s second-story window, or are you creating a cozy, enclosed patio space? The function will dictate the dimensions. Sketching out a simple layout of your yard can help you visualize how the wall will interact with your existing landscape, patio, or swimming pool. This is also the perfect time to consider your overall landscape design and ensure your new wall feels like an intentional part of the plan, not an afterthought.
Weigh Durability Against Maintenance
Every material comes with its own set of pros and cons, especially when it comes to upkeep. A classic wood fence is beautiful but will require regular staining or sealing to protect it from the Long Island weather. On the other hand, materials like vinyl, composite, and metal are incredibly durable and require little more than an occasional wash. For a truly permanent and low-maintenance solution, consider a masonry or natural stone wall. While the upfront investment may be higher, its longevity and resistance to the elements are unmatched. Be honest with yourself about how much time you’re willing to spend on maintenance each year—it will help you narrow down your options quickly.
Define Your Goal and Set a Budget
What is the number one reason you want a privacy wall? If your main goal is simply to create a visual barrier, a simple fence or screen might be enough. If you’re also looking to block noise or wind, a solid, taller structure made of stone or thick composite panels will be more effective. Your primary goal will heavily influence the best material and design for the job. At the same time, it’s important to establish a realistic budget. Remember to account for not just the materials but also the cost of professional installation, which ensures the structure is safe, secure, and built to last.
Know Your Local Rules and HOA Guidelines
This step is one you absolutely can’t skip. Before you break ground, you need to understand the local regulations in your town or village here on Long Island. Most municipalities have specific rules about fence and wall height, how far they must be set back from property lines, and whether you need a permit for the project. If you live in a community with a Homeowners Association (HOA), they’ll likely have their own set of guidelines on approved materials and styles. A quick check of your local building department’s website or a call to your HOA can save you from major headaches and costly mistakes down the road.
Get Inspired: Creative Ideas for Your Privacy Wall
A privacy wall is so much more than a barrier—it’s a blank canvas. Think of it as the backdrop for your entire outdoor living space, an opportunity to add personality, texture, and style. Instead of settling for a purely functional screen, you can create a stunning focal point that ties your whole yard together. Whether your style is modern and sleek, rustic and natural, or something in between, there’s a creative solution that will feel like a true extension of your home.
The right design can transform a simple patio into a secluded courtyard or turn an exposed yard into a private sanctuary. You can play with different materials, incorporate natural elements, and even add features that delight the senses, like the gentle sound of trickling water. It’s about creating a destination within your own property—a place where you can host dinner parties without feeling watched, or simply enjoy a quiet morning coffee in peace. We’ve put together a few ideas to get your imagination going. These concepts move beyond the basic fence and show how a privacy wall can become one of the most beautiful features of your landscape design. Let these examples inspire you to think creatively about how you can define your space.
Go Green with a Living Wall
Why build a wall when you can grow one? A living wall, or vertical garden, is a beautiful way to get privacy while surrounding yourself with lush greenery. You can achieve this look by installing a sturdy trellis and training climbing vines like clematis or ivy to cover it. Another option is to mount a system of planters directly onto a wall, filling them with a mix of ferns, grasses, and colorful flowers. This approach not only provides a natural screen but also helps absorb sound and improve air quality. For a lower-maintenance option, high-quality synthetic turf panels can create a similar green effect with zero upkeep.
Add Charm with a Trellis and Climbing Plants
A trellis is a classic and elegant solution for creating partial privacy without completely blocking light and air. These simple lattice structures provide the perfect support for climbing plants, adding a touch of romance and natural beauty to your yard. Imagine a wall of fragrant jasmine or vibrant bougainvillea defining your outdoor dining area. A trellis can be a standalone feature or integrated into a larger structure like one of Gappsi’s custom pavilions and pergolas. It’s a versatile choice that works well in both small and large spaces, offering a sense of enclosure while maintaining an open, airy feel.
Make a Statement with Decorative Screens
For a more modern and artistic touch, consider using decorative screens. These panels are often made from laser-cut metal, composite materials, or even carved wood, and they come in a huge variety of patterns. You can find everything from geometric designs to nature-inspired motifs like leaves and branches. These screens are fantastic for creating visual interest and casting beautiful, intricate shadows as the sun moves across your yard. They function as both a privacy solution and a piece of outdoor art, instantly adding a sophisticated, custom feel to your space. You can even use panels made from durable porcelain and natural stone for a truly unique look.
Mix and Match Materials for a Custom Look
Who says you have to stick to just one material? Combining different textures and finishes is a great way to create a privacy wall that is completely unique to your home. Picture a low wall built from rugged, natural stone with sleek wooden slats or frosted glass panels on top. Or, try pairing industrial-style corrugated metal panels with sections of warm cedar for a balanced, contemporary look. This approach allows you to get creative and design a wall that perfectly complements your home’s architecture and your personal style. Gappsi’s masonry experts can help you combine materials for a durable and beautiful result.
Incorporate a Soothing Water Feature
Turn your privacy wall into a multi-sensory experience by building a water feature directly into it. A wall-mounted fountain or a cascading waterfall not only looks stunning but also provides a gentle, soothing sound that helps mask unwanted neighborhood noise. The sound of moving water creates a tranquil, spa-like atmosphere, making your backyard feel like a true escape. This is an especially effective strategy for smaller yards, as it combines two features into one, saving valuable space. It’s the perfect finishing touch for creating a peaceful outdoor oasis where you can relax and unwind.
Avoid These Common Privacy Wall Mistakes
Building a privacy wall is an exciting project, but a few common missteps can turn your dream backyard feature into a real headache. Planning ahead is the key to making sure your investment is beautiful, functional, and built to last. Think of it as setting the foundation for success—literally. By sidestepping these frequent errors, you can avoid neighbor disputes, costly repairs, and the frustration of a project that doesn’t meet your expectations. A little bit of prep work and careful consideration will ensure your new privacy wall is a source of enjoyment for years to come, not a reminder of what could have gone wrong. Let’s walk through the four biggest mistakes homeowners make so you can get your project started on the right foot.
Mistake #1: Guessing Your Property Lines
Before you break ground, you need to be absolutely certain where your property ends and your neighbor’s begins. Guessing your property lines is one of the quickest ways to create a dispute. Even if you’re off by a few inches, building on a neighbor’s land can lead to serious legal issues and may even force you to tear down your brand-new wall. The best way to avoid this is to get a professional land survey. It provides a clear, legally recognized map of your property boundaries, giving you and your installation team the exact lines to work within. It’s a small upfront cost that can save you from major trouble later.
Mistake #2: Skipping Permits and Codes
It might be tempting to jump right into building, but ignoring local regulations is a risk you don’t want to take. Every town and village on Long Island has its own set of building codes that dictate things like how tall your wall can be, how far it needs to be from your property line (known as a setback), and what materials are allowed. Failing to secure the right permits can result in hefty fines or an order to remove the structure entirely. Before you finalize any plans, make a call or visit your local municipal building department’s website to understand the specific rules for your area. It’s a crucial step for a smooth, compliant project.
Mistake #3: Picking the Wrong Material for Your Climate
Long Island’s weather can be tough on outdoor structures. Between the humid summers, freezing winters, and salty air near the coast, materials that aren’t up to the task can quickly warp, rot, crack, or rust. Choosing a material simply for its looks without considering its durability can lead to constant maintenance and early replacement. Instead, opt for materials designed to withstand our four-season climate. High-quality vinyl, composite, aluminum, and professionally installed masonry are excellent choices that offer longevity and require minimal upkeep, keeping your wall looking great no matter what the weather throws at it.
Mistake #4: Neglecting Site Prep and Placement
A beautiful, sturdy wall needs to be built on solid, well-prepared ground. Simply clearing away the grass and starting to build is a recipe for future problems. Proper site preparation involves leveling the area, compacting the soil, and, most importantly, planning for proper water drainage. If water can’t flow away from the base of your wall, it can cause soil erosion, lead to frost heave in the winter, and ultimately compromise the structure’s stability. A leaning or sinking wall is often the result of a poorly prepared site. Taking the time to do this work correctly ensures your privacy wall will stand straight and strong for decades.
DIY vs. Pro: Who Should Install Your Privacy Wall?
So, you’ve picked out the perfect style and material for your new privacy wall. Now comes the big question: should you roll up your sleeves and build it yourself, or is it time to call in a professional? The answer really depends on the scale of your project, your comfort level with construction, and how much time you’re willing to invest.
A simple, freestanding screen might be a fun weekend project, but a permanent, structural wall made of stone or composite materials is a different story. It’s important to be honest about your skills and the tools you have on hand. While DIY can save you money on labor, a poorly executed installation can lead to costly repairs, safety issues, and a final product that doesn’t look quite right. On the other hand, hiring a professional ensures the job is done correctly, efficiently, and up to local code, giving you peace of mind and a beautiful, lasting result.
The Case for a DIY Installation
If you’re handy and love a good project, a DIY installation can be incredibly rewarding. Building your own outdoor privacy screen is a great way to customize your space while saving on labor costs. For smaller, simpler designs like a basic wooden lattice or a screen made from a kit, doing it yourself is often a practical choice. You get full control over the creative process and the satisfaction of seeing your vision come to life. There are countless tutorials and ideas online that can guide you through building everything from a simple panel to a more intricate design, making it an accessible option for those with the right tools and a bit of patience.
Why You Might Need a Professional
While DIY has its perks, some jobs are best left to the experts. A professional installation is about more than just convenience; it’s about expertise. Professionals understand the nuances of working with different materials, ensuring your wall is not only beautiful but also structurally sound and built to withstand Long Island weather. They can accurately survey your property lines to avoid any disputes with neighbors and handle complex site preparations, like leveling uneven ground. For projects involving heavy materials or intricate designs, a company that specializes in fences and netting will have the right equipment and experience to get the job done safely and efficiently, delivering a polished, high-quality finish.
A Quick Note on Permits and Requirements
Before you break ground, it’s crucial to understand your local regulations. Many towns in Nassau and Suffolk County have specific rules about the height, location, and materials you can use for fences and privacy walls. Ignoring these local codes or your HOA guidelines can result in fines or being forced to tear down your hard work. This is another area where a professional shines. An experienced contractor will be familiar with local requirements and can manage the entire permitting process for you. They can also help you create a realistic budget that accounts for all materials and labor, preventing unexpected costs from derailing your project.
How Much Do Outdoor Privacy Walls Cost?
Let’s talk about the numbers. The cost of an outdoor privacy wall can vary quite a bit, and it really comes down to three main things: the materials you choose, the size and complexity of the project, and the cost of professional labor. While it’s tempting to look for a single price tag, it’s more helpful to think of it as a flexible budget that you can shape based on your priorities. A simple, straight wall made from budget-friendly vinyl will cost significantly less than a custom-designed masonry wall with built-in planters, for example.
The key is to understand where your money is going so you can allocate your funds effectively. A larger portion of your budget will naturally go toward high-end materials like natural stone, while labor costs might be higher for intricate designs or difficult-to-access installation sites on your property. Thinking through these variables ahead of time helps you set realistic expectations. By breaking down the expenses, you can make informed decisions that align with both your vision and your wallet, ensuring you get a beautiful privacy wall without any financial surprises along the way. We’ll explore each of these cost factors so you can plan your project with confidence.
Breaking Down Material Costs
The material you select is the biggest factor in your project’s total cost. Each option comes with a different price point and aesthetic. For instance, natural wood offers a classic, warm look but can range from affordable pine to premium cedar. Sleek metal panels provide a modern, industrial feel, while versatile composite and vinyl fencing can mimic the look of wood or stone without the high maintenance. For a truly timeless and durable structure, natural stone and porcelain pavers create a substantial, high-end wall that becomes a permanent feature of your landscape. When choosing, consider materials that can stand up to Long Island’s weather, as durability is just as important as appearance.
Factoring in Labor and Installation
Beyond the cost of the panels or stones themselves, you need to account for professional installation. Labor costs cover everything from site preparation—like leveling the ground and digging post holes—to the actual construction of the wall. This is also where professional expertise becomes invaluable. A skilled team will know your local building codes and secure any necessary permits, avoiding costly mistakes down the road. They will also ensure your wall is built on your property—not your neighbor’s. The complexity of the design, the accessibility of your yard, and the overall size of the wall will all influence the final labor cost. Investing in a quality masonry and construction company ensures the job is done right the first time.
Thinking About Long-Term Value
When you’re setting a budget, it’s smart to think beyond the initial price tag. Some materials might be cheaper upfront but require more maintenance over time, leading to higher long-term costs. For example, untreated wood may need regular staining and sealing to prevent rot, while vinyl is waterproof and requires little more than an occasional wash. Materials like natural stone or high-quality composite are a bigger initial investment but often outlast other options with minimal upkeep. They resist weathering and retain their beauty for years, adding lasting value to your home. By choosing durable, low-maintenance materials, you’re not just buying a privacy wall; you’re making a smart investment in your property’s future.
Keeping Your Privacy Wall Looking Great: A Maintenance Guide
Your new privacy wall is more than just a structure; it’s a key part of your outdoor sanctuary. To keep it looking its best and standing strong for years, a little routine care goes a long way. The maintenance your wall needs will depend entirely on the material you chose, but don’t worry—it’s usually simpler than you think. A bit of seasonal attention can prevent small issues from becoming bigger problems, ensuring your investment continues to add beauty, privacy, and value to your home for years of enjoyment.
Think of it like any other part of your home’s exterior. Regular cleaning and inspections will preserve its integrity and appearance, protecting it from Long Island’s changing seasons. For many materials, this might just mean a quick rinse with a hose to wash away pollen and dirt. For others, a fresh coat of sealant every few years can make all the difference in shielding it from moisture and sun. If you ever spot something that needs a professional touch, like stubborn stains or cracked mortar, Gappsi offers expert restoration and sealing services to bring your surfaces back to life. Taking these small steps ensures your private retreat remains a beautiful and functional space for relaxing and entertaining.
Caring for Wood Walls
The natural warmth of a wood wall is hard to beat, and with the right care, it can last for decades. Woods like cedar are fantastic choices because they contain natural oils that make them resistant to rot and insects. To maintain that beautiful finish, plan on giving your wall a gentle cleaning once a year with mild soap and water to remove any dirt or mildew. Every few years, applying a fresh coat of stain or sealant will protect the wood from sun and moisture damage, preventing it from turning gray and splintering. A quick walk-around each season to check for loose boards or signs of wear will help you catch any issues early.
Maintaining Metal and Composite Screens
If you chose a metal or composite wall, you’re in luck—these materials are champions of low-maintenance living. Because materials like aluminum, vinyl, and PVC are designed to resist weather, rot, and pests, you can spend less time on upkeep and more time enjoying your yard. For the most part, a simple spray-down with a garden hose is all you need to wash away dust and pollen. If you notice any stubborn spots, a soft brush and some soapy water will do the trick. There’s no need for painting or sealing, making these fencing options a perfect “set it and forget it” solution for a busy homeowner.
Upkeeping Stone and Masonry
Stone and masonry walls are built to last a lifetime, offering a timeless look with incredible durability. Their maintenance is minimal and mainly involves keeping them clean. An occasional rinse with water can prevent moss or algae from growing, especially in damp or shady spots. Once a year, it’s a good idea to inspect the mortar joints between stones or bricks for any cracks. Addressing these small gaps promptly—a process called repointing—prevents water from getting in and causing damage over time. For added protection, consider having your wall professionally sealed to guard against stains and weathering, ensuring your masonry work remains a stunning feature of your landscape.
Ready to Build? Here’s How to Find the Right Partner
Choosing to add a privacy wall is exciting, but finding the right team to build it can feel like a huge task. The right partner won’t just build a wall; they’ll help you refine your vision, choose the best materials for our Long Island climate, and handle all the tricky details you might not have considered. A great contractor acts as your guide, ensuring the final result is exactly what you dreamed of—or even better.
Bringing a construction project to life involves more than just hammers and nails. It requires a deep understanding of local codes, a keen eye for design, and a commitment to quality craftsmanship. This is especially true for a structure that will become a permanent feature of your home and landscape. To make sure your project is a success from start to finish, it’s important to do a little homework upfront. By focusing on a contractor’s reputation, understanding what a professional installation truly involves, and asking smart questions before signing a contract, you can move forward with confidence. Let’s walk through how to find a reliable partner who will respect your home, your budget, and your timeline.
How to Find a Reputable Contractor
When you start looking for a contractor, begin with the people you trust. Ask friends, family, or neighbors for recommendations, especially if you admire their outdoor spaces. From there, head online to check reviews and look for a company with a strong portfolio of completed projects. A reputable contractor will be proud to showcase their masonry and construction work and should be happy to provide references from past clients. They should also be a source of expertise, offering guidance on which materials will best suit your needs and stand up to the local weather.
What a Professional Installation Should Include
A professional installation is seamless, safe, and built to last. One of the first things a true pro will do is confirm your property lines to ensure the wall is built exactly where it should be, avoiding any potential issues with your neighbors. They will also manage all the local regulations and permits for you. Every town in Nassau and Suffolk County has its own set of rules, and an experienced local contractor will know exactly what’s required. This expertise protects you from legal headaches and ensures your new privacy wall is fully compliant with all building codes.
Key Questions to Ask Before You Hire
Before you commit, it’s smart to have a conversation with any potential contractor to make sure they’re the right fit. Think of it as an interview. Start by discussing your budget and timeline to make sure you’re on the same page. Ask about their process for taking measurements and creating the design plan to prevent any surprises. It’s also a good idea to ask who will be the main point of contact on-site and what kind of warranty they offer on their work. A trustworthy home remodeling partner will be transparent and happy to answer all your questions.
Related Articles
Frequently Asked Questions
Is a privacy wall different from a regular fence? Yes, they serve slightly different purposes. Think of a traditional fence as a tool for marking your entire property line. A privacy wall, on the other hand, is more strategic. It’s designed to create a secluded, room-like feel for a specific area, like your patio, outdoor kitchen, or pool deck, shielding it from view and turning it into a more intimate space.
What material is best for the weather here on Long Island? While classic wood is beautiful, it does require regular upkeep to handle our coastal climate. For a more hands-off approach, materials like high-quality composite, vinyl, and aluminum are fantastic choices because they are built to resist moisture, salt air, and seasonal changes without warping or rotting. For ultimate durability and a timeless look, nothing beats a professionally installed natural stone or masonry wall.
How tall can I legally build my privacy wall? This is a great question, and the answer varies from town to town across Nassau and Suffolk counties. Most municipalities have specific height restrictions and rules about how far the structure must be from your property line. This is one of the most important reasons to work with an experienced local contractor who understands the specific codes in your area and can manage the permitting process for you.
Can a privacy wall be added to an existing patio or pool area? Absolutely. A privacy wall is one of the best ways to improve an existing outdoor space. A skilled design and construction team can create a wall that integrates perfectly with your current patio, deck, or pool surround. They can match materials and styles so the new wall looks like a natural, intentional part of your original landscape design.
How long does the installation process typically take? The timeline really depends on the size of the wall and the materials you choose. A straightforward installation of a few composite or vinyl panels might only take a couple of days. A more complex project, like a custom masonry wall, will take longer because it involves more extensive site preparation, foundation work, and detailed construction. During a consultation, a professional can give you a much more precise timeline based on your specific project.