Your backyard should be your personal retreat, a place to unwind and connect with family and friends. A swimming pool is often the centerpiece of that dream, and thanks to modern vinyl liner technology, creating a custom oasis is more accessible than ever. Forget the basic rectangles of the past; today’s vinyl pools can be designed in nearly any shape or size, complete with features like tanning ledges, waterfalls, and beautiful integrated steps. This guide will walk you through all the exciting possibilities, helping you design a pool that perfectly fits your space and lifestyle. We’ll also cover the practical side, including budgeting and maintenance, and explain how a professional vinyl swimming pool builder on Long Island NY can handle every detail to create a cohesive outdoor living space.
Key Takeaways
- Vinyl pools offer a smart combination of value and style: Their design flexibility allows for custom shapes that fit any Long Island backyard, making them a more affordable yet personalized inground pool option.
- Plan your budget beyond the initial installation cost: Remember to account for necessary extras like permits and fencing, plus long-term maintenance such as liner replacements, to understand the full financial commitment.
- Your builder choice is critical for a successful project: Select a licensed and insured professional with a strong portfolio who can manage your entire outdoor space, including patios and landscaping, to ensure a smooth process and a cohesive final design.
Why Are Vinyl Pools So Popular on Long Island?
If you’ve spent any time looking at backyard pools across Long Island, you’ve probably noticed a trend: vinyl liner pools are everywhere. It’s not just a coincidence. Homeowners from Suffolk to Nassau County often choose vinyl for its unique combination of style, comfort, and value. This type of pool offers a practical and beautiful solution that fits perfectly with the Long Island lifestyle, giving you a custom backyard oasis without the sticker shock of other pool types. Let’s get into what makes them such a popular choice.
What Are the Benefits of a Vinyl Pool?
Vinyl pools bring a lot to the table, starting with a surprisingly comfortable swimming experience. The liner material is smooth and non-abrasive, so you don’t have to worry about scraped feet or snagged swimsuits. This non-porous surface also makes it harder for algae to grow, which simplifies your cleaning routine. Modern vinyl liners are built for durability and can easily handle the temperature swings of a Long Island climate. They offer a fantastic balance of easy maintenance and flexible strength, making them a reliable centerpiece for your backyard fun for years to come.
Why Vinyl Pools Are a Long Island Favorite
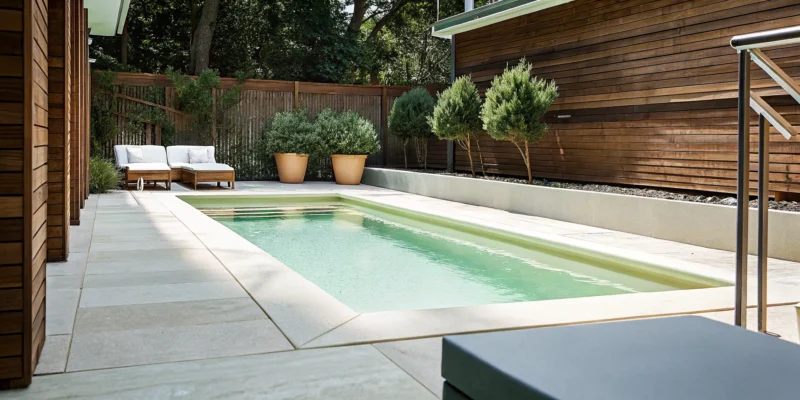
One of the biggest reasons vinyl pools are a local favorite is their incredible design flexibility. Unlike other pool types that come in predetermined shapes, a vinyl pool can be customized to fit your specific backyard and aesthetic vision. Whether you have a sprawling lawn or a more compact space, you can design a pool in almost any shape or size. This versatility is perfect for Long Island’s diverse properties. You can create a classic rectangle for swimming laps or a freeform lagoon that blends seamlessly with your landscape design. The design options are nearly endless.
Debunking Common Vinyl Pool Cost Myths
Let’s talk about budget, because this is where vinyl pools really shine. There’s a common misconception that because they are more affordable, they must be lower quality. That simply isn’t true. A well-built vinyl liner pool offers incredible value, often costing at least $10,000 less than a comparable fiberglass or concrete pool. The typical cost for a new installation can range from $35,000 to $65,000. This lower initial investment means you can create the swimming pool of your dreams and still have room in your budget for features like a beautiful stone patio or a cozy pergola.
How Much Does a Vinyl Pool Cost on Long Island?
Figuring out the budget for your dream pool is one of the first and most important steps. Vinyl liner pools are known for being a more affordable inground option, but the final price tag can vary quite a bit. Several factors come into play, from the size of the pool to the features you choose. To give you a clear picture, let’s break down the costs you can expect when building a vinyl pool on Long Island, covering everything from the initial installation to long-term care. This will help you plan your investment and ensure there are no surprises along the way.
Breaking Down the Average Installation Cost
When you start looking at prices, you’ll find a typical range for a professionally installed in-ground vinyl-lined swimming pool. On average, you can expect to invest between $35,000 and $65,000. A standard 12-by-24-foot pool with essential equipment like a heater, filter, steps, and a simple concrete deck often lands around the $45,000 mark. If you’re working with a tighter budget, a smaller, more basic installation can start as low as $20,000. On the other hand, if you envision a larger, freeform pool with custom features like a waterfall or a high-end deck, the cost can climb to $85,000 or more. This initial estimate gives you a solid baseline for what to expect.
What Factors Influence Your Final Price?
The size of your pool is the most significant factor affecting the cost. A larger pool requires more materials, more excavation, and more labor, which all contribute to a higher price. Beyond size, the materials you select play a big role. For instance, the coping, which is the material lining the pool’s edge, can vary in price. Standard aluminum coping is a cost-effective choice, but upgrading to natural stone or pavers will add to your budget. Don’t forget that installation labor itself makes up a large portion of the total cost, often between 25% and 50%. This is why choosing an experienced builder is so important; you’re paying for their expertise and quality craftsmanship.
Don’t Forget These Additional Expenses
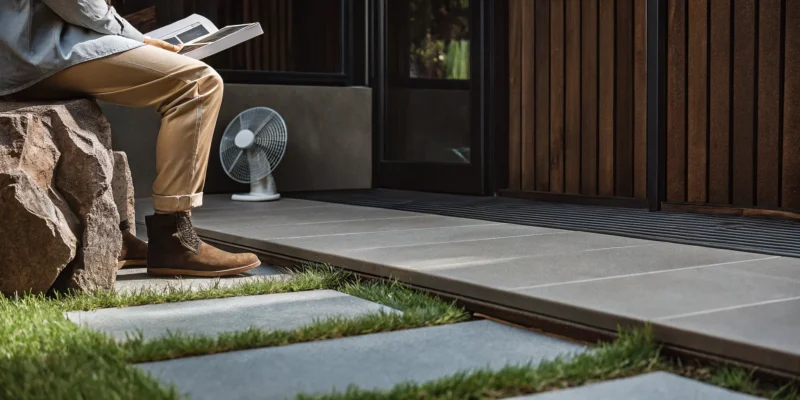
The price of the pool itself isn’t the final number. There are a few other costs you’ll need to factor into your overall budget. First, you’ll need to secure the proper building permits from your local town, which can range from a few hundred to over a thousand dollars. Safety is also key, and most areas on Long Island require a fence around the pool, which typically costs between $15 and $25 per linear foot. Finally, think about the finishing touches. You’ll want to plan for landscaping to integrate your new pool beautifully into your backyard. This might include new sod, garden beds, or a stone patio to complete your outdoor oasis.
Planning for Long-Term Maintenance Costs
Your financial planning shouldn’t stop once the pool is built. Owning a vinyl pool comes with ongoing maintenance costs that are important to anticipate. Yearly upkeep, including chemicals, cleaning supplies, and opening and closing services, usually runs between $350 and $800. The biggest long-term expense to plan for is the liner replacement. A vinyl liner typically lasts between 7 to 12 years, and replacing a vinyl pool liner generally costs between $4,000 and $7,000. Being aware of these future expenses from the start will help you enjoy your pool for years to come without any financial stress.
How Do You Choose the Right Vinyl Pool Builder?
Choosing a pool builder is one of the most important decisions you’ll make for your home. This is the team you’re trusting to transform your backyard, manage a significant investment, and deliver a space where you’ll create memories for years to come. The right partner will make the process feel exciting and seamless, while the wrong one can lead to delays, budget issues, and a lot of stress. To make a confident choice, you need to look beyond the initial quote and evaluate a builder’s qualifications, experience, and overall approach. Think of it as hiring a long-term partner for your home, not just a contractor for a single job.
Check for Licenses and Qualifications
Before you even look at a portfolio, make sure any potential builder is properly licensed and insured in New York. This is a non-negotiable first step. A valid license proves they meet state and local standards for construction, while proper insurance protects you from liability in case of accidents on your property. Any professional company will be upfront with this information and happy to provide documentation. Don’t be afraid to ask for their license number and verify it. This simple check ensures you’re working with a legitimate business that takes its work, and your safety, seriously. It’s the foundation of a trustworthy partnership and gives you essential peace of mind before breaking ground.
Review Their Experience and Portfolio
Once you’ve confirmed their credentials, it’s time to look at their work. A builder’s portfolio is more than just a collection of pretty pictures; it’s proof of their skill and versatility. Look for examples of vinyl swimming pools that are similar in style or complexity to what you envision for your own backyard. Ask them about specific projects. What challenges did they face, and how did they solve them? A seasoned builder will have a history of successful projects across Long Island and can speak confidently about their process. This gives you a clear idea of their craftsmanship and ability to bring your vision to life, ensuring the final result matches your expectations.
Look for Services Beyond the Build
A swimming pool is rarely a standalone project. It’s the centerpiece of your entire outdoor living space. The best builders offer comprehensive services that go beyond the pool itself. Do you also need a new patio, a walkway, or landscaping to complete the look? Working with a company that can manage the entire project, from masonry to fencing, simplifies the process immensely. It means you have one point of contact, a cohesive design, and a streamlined timeline. This integrated approach ensures every element of your backyard works together beautifully, creating a truly finished and functional oasis without the headache of coordinating multiple contractors.
Understand Their Warranty and Support
A great pool builder doesn’t disappear the moment the water is in the pool. Find out what kind of warranty they offer on their workmanship and the materials they use. A strong warranty is a sign that a company stands behind its work and is confident in the quality of its installation. Equally important is understanding their process for post-installation support. Who do you call if you have a question or an issue arises? Clear communication and reliable customer service are key. You want a partner who will be there to support you long after the construction is complete, ensuring you can enjoy your pool worry-free for years to come.
How to Spot Red Flags and Avoid Hiring Mistakes
Knowing what to avoid is just as important as knowing what to look for. Be cautious of any builder who pressures you into making a quick decision or offers a quote that seems too good to be true. Choosing the lowest bid without question can often lead to cut corners and surprise costs later. Other red flags include vague contracts, a lack of recent references, or an unwillingness to provide proof of license and insurance. Trust your gut. A professional and reliable builder will be transparent, patient, and thorough, making you feel comfortable and confident every step of the way.
What Features Should You Add to Your Vinyl Pool?
Once you’ve decided on a vinyl pool, the fun part begins: making it your own. The features you choose will transform a simple swimming hole into a personalized backyard retreat. Think about how you plan to use your pool. Will it be a hub for family gatherings, a quiet spot for relaxation, or a place for exercise? Your answers will guide you toward the right additions. From the fundamental shape and size to high-tech automation and beautiful aesthetic touches, every choice helps define your pool’s character and functionality.
Modern vinyl swimming pools are incredibly versatile. You can add features that were once only available for more expensive pool types, like tanning ledges, custom steps, and dramatic lighting. It’s a good idea to explore all your options before breaking ground. Consider what will bring you the most joy and convenience in the long run. Balancing your wishlist with your budget is key, and a good builder can help you understand the costs and benefits of each feature, ensuring your final design is both beautiful and practical for your Long Island home.
Choosing Your Pool’s Size and Shape
Forget the simple rectangles of the past. Vinyl pool liners offer nearly limitless design options, allowing you to create a shape that perfectly fits your yard and lifestyle. The first step is to assess your space. Consider the layout of your property, any existing landscaping or patios, and local zoning regulations that might dictate placement and size. Your pool’s purpose is also a major factor. If you’re a swimmer who loves doing laps, a long, straight design makes sense. If you envision a space for family fun and lounging, a freeform or L-shaped pool with distinct shallow and deep ends might be a better fit.
Exploring Design and Aesthetic Features
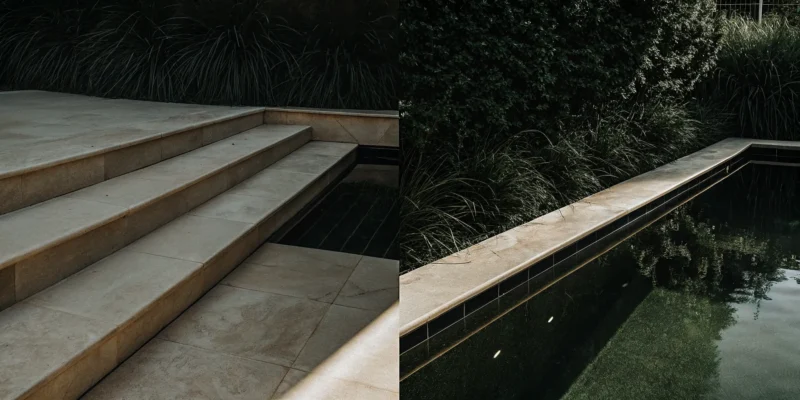
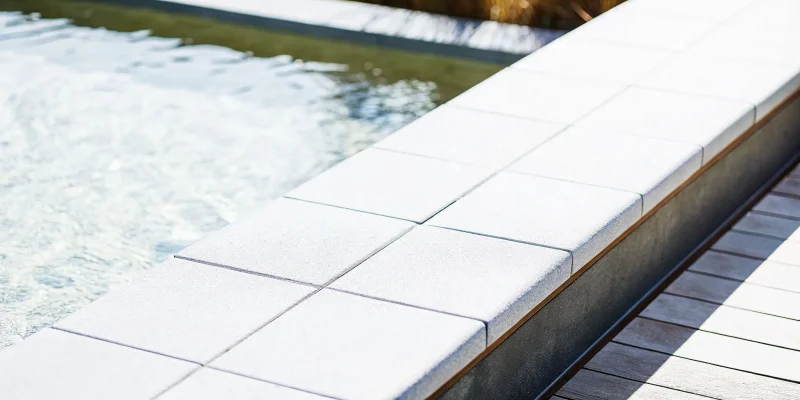
One of the biggest perks of a vinyl pool is its design flexibility. The liner itself is your first big aesthetic choice. You can select from a huge range of colors and patterns to set the mood. A dark liner can create a deep, natural lagoon look, while a light blue or patterned liner offers a classic, sparkling appearance. Beyond the liner, think about features that add comfort and style. Integrated vinyl-over steps provide a seamless entry, while built-in benches or a tanning ledge offer perfect spots for relaxing in the water. You can also add water features like waterfalls or deck jets for soothing sounds and visual appeal, framed by beautiful porcelain and natural stone decking.
Adding Smart Tech and Efficient Equipment
Modern pool technology makes ownership easier and more cost-effective than ever. Upgrading your equipment can make a huge difference in your pool’s daily operation. Consider an energy-efficient variable-speed pump, which can significantly reduce your electricity bills. A saltwater system is another popular choice, providing silky-soft water with less of the harshness of traditional chlorine. For ultimate convenience, smart technology allows you to control your pool’s features from your phone. Imagine turning on the heater, adjusting the lights, or running the robotic cleaner with just a few taps. These additions streamline maintenance and give you more time to simply enjoy your pool.
How Extra Features Affect Your Budget
While the base price of a vinyl pool is often attractive, it’s important to remember that additional features will impact the overall cost. Custom shapes, high-end liner patterns, waterfalls, and smart automation systems are all fantastic additions, but they contribute to the final price tag. Before you commit, create a list of “must-haves” and “nice-to-haves.” This will help you prioritize your spending. A great builder will provide an itemized quote, so you can see exactly where your money is going. This transparency allows you to make informed decisions, ensuring you get the features you truly want without any budget surprises during your home remodeling project.
How Do You Maintain Your Long Island Vinyl Pool?
Once your beautiful vinyl pool is installed, the next step is keeping it in pristine condition. Proper maintenance not only ensures your pool is always ready for a swim but also protects your investment for years to come. A consistent care routine will extend the life of your liner and equipment, saving you from unexpected repairs. Don’t worry, it’s more straightforward than you might think. Here’s a breakdown of what you need to know to care for your pool through every Long Island season.
Your Guide to Cleaning and Chemicals
Keeping your pool water clean and balanced is the foundation of vinyl pool care. I recommend skimming the surface daily and vacuuming at least once a week. Just be sure to use a vacuum head designed for vinyl pools to avoid any accidental tears or punctures. Beyond physical cleaning, maintaining proper water chemistry is critical. Unbalanced water can wrinkle or damage the liner over time. Regularly test your water for pH, alkalinity, and chlorine levels, and adjust them as needed. You can find all the necessary testing kits and chemicals at the Gappsi Store to make the process simple and effective.
When to Care for and Replace Your Liner
A quality vinyl liner can last for many years, but it won’t last forever. Keep an eye out for signs of aging, like significant fading from the sun, stubborn stains, or wrinkles that won’t smooth out. If you spot any cracks or tears, it’s definitely time to consider a replacement to prevent leaks that could damage the pool’s structure. The cost to replace a liner typically ranges from $4,000 to $7,000, depending on your pool’s size and the liner’s thickness and pattern. Think of it as a periodic refresh that keeps your pool looking new. When the time comes, our team can help you select and install a beautiful new liner for your swimming pool.
Seasonal Care for a Long Island Climate
Living on Long Island means we get to enjoy all four seasons, and your pool care routine needs to reflect that. Preparing your pool for the winter is one of the most important things you can do to protect your liner. Before closing it down for the season, make sure you balance the water chemistry one last time and remove all leaves, debris, and pool accessories. Then, lower the water level below the skimmer and install a secure, high-quality pool cover. This will protect your liner from harsh winter conditions like snow, ice, and damaging UV rays, ensuring a smooth opening next spring.
Should You Hire a Pro or DIY Your Maintenance?
Deciding between DIY maintenance and hiring a professional really comes down to your comfort level and available time. If you enjoy the process and can commit to a regular schedule, managing your own pool care is completely doable. However, many homeowners prefer the peace of mind that comes with professional service. A good pool contractor helps you save time and avoid costly mistakes with water chemistry or equipment. At Gappsi, we offer comprehensive maintenance services to handle everything for you. We believe clear communication is key, so you’ll always know exactly what’s being done to keep your pool in perfect shape.
Making the Right Choice: Selecting Your Pool Builder
Choosing the right company to build your pool is just as important as picking the liner pattern. This is the team that will turn your backyard vision into a reality, so you want to find a partner you can trust. It’s about more than just digging a hole and dropping in a pool; it’s about craftsmanship, communication, and creating a space your family will love for years. Let’s walk through how to find the perfect builder for your Long Island home.
What Sets a Top-Rated Builder Apart?
A top-rated builder sees the big picture. They aren’t just installing a pool; they’re designing a complete outdoor oasis. Look for a company that offers comprehensive services, from custom swimming pools to patios and landscaping. This shows they have the expertise to manage your entire project and ensure every element works together beautifully. A great builder has a strong reputation built on trust and proven experience. They should be able to show you a diverse portfolio of completed projects and speak confidently about their process. They are problem-solvers who bring both technical skill and creative vision to the table, ensuring your new pool is everything you dreamed it would be.
How to Compare Services, Pricing, and Value
When you start getting quotes, it’s tempting to just look at the final number, but value is about more than the lowest price. Ask each builder for a detailed, itemized quote so you can see exactly what you’re paying for. Are the pump and filter from a reputable brand? Is excavation and debris removal included? A cheaper quote might mean lower-quality materials or hidden costs down the line. Remember, a vinyl pool is already a cost-effective choice compared to other inground options. Investing in a quality installation from a skilled builder will save you money on repairs and ensure your pool lasts for decades.
Feeling Confident in Your Final Decision
Before you sign a contract, do your homework. Spend time looking through a builder’s portfolio of past work. A great way to see their craftsmanship is to watch videos of their completed projects. Don’t be shy about asking for references from recent clients in your area. It’s also helpful to have a clear idea of what you want in terms of size and shape before you start interviews. This allows you to have a more productive conversation and accurately compare proposals. Ultimately, choose a builder you feel comfortable with. Good communication and a positive relationship will make the entire construction process smoother and more enjoyable.
Related Articles
- Choosing a Vinyl Pool Contractor on Long Island
- Hiring a Vinyl Pool Builder on Long Island: A Guide
- Swimming Pools Archives – Gappsi Group
Frequently Asked Questions
How long will a vinyl pool liner last on Long Island? With our varied seasons, a quality vinyl liner typically lasts between 7 and 12 years. The key to getting the most life out of your liner is consistent care. This means keeping your water chemistry balanced and using a durable, properly fitted cover during the winter to protect it from the elements. Good maintenance habits go a long way in preserving the liner’s color and integrity.
Are there any limits to the shapes I can choose for a vinyl pool? This is one of the best parts about choosing vinyl: your design options are incredibly open. Unlike other pool types that come in pre-made shapes, a vinyl pool’s structure is built on-site, allowing for almost any custom shape you can imagine. Whether you want a classic rectangle for swimming laps or a freeform lagoon that curves around your patio, you can create a design that fits your yard and your style perfectly.
Besides the pool itself, what other costs should I plan for? It’s smart to think about the entire project from the start. Beyond the pool installation, you’ll need to budget for a few other essentials. This includes local building permits, a safety fence to meet town codes, and some electrical work to power the pump and filter. Most homeowners also plan for landscaping and a patio or deck to create a finished look around the pool area.
Is a vinyl pool harder to maintain than other types of pools? Not at all; in fact, many people find them easier. The liner’s smooth surface is non-porous, which makes it difficult for algae to take hold, simplifying your cleaning routine. The main tasks involve regular skimming, vacuuming with the right equipment, and testing the water chemistry. As long as you stay consistent, you’ll find the upkeep is quite manageable.
Why is it so important to choose a builder who does more than just install pools? A pool is rarely a standalone project; it’s the centerpiece of your entire backyard. Working with a builder who also specializes in masonry, landscaping, and patios means you get a cohesive design and a much smoother process. It ensures your new pool, stone decking, and garden beds all work together beautifully, and you have one trusted team managing the entire transformation instead of trying to coordinate several different contractors.