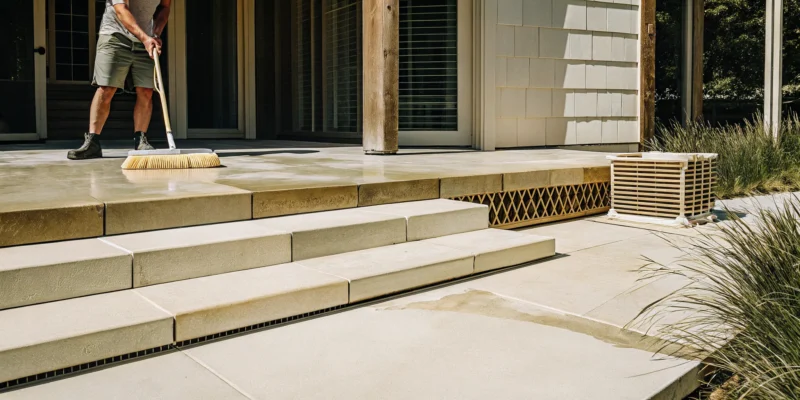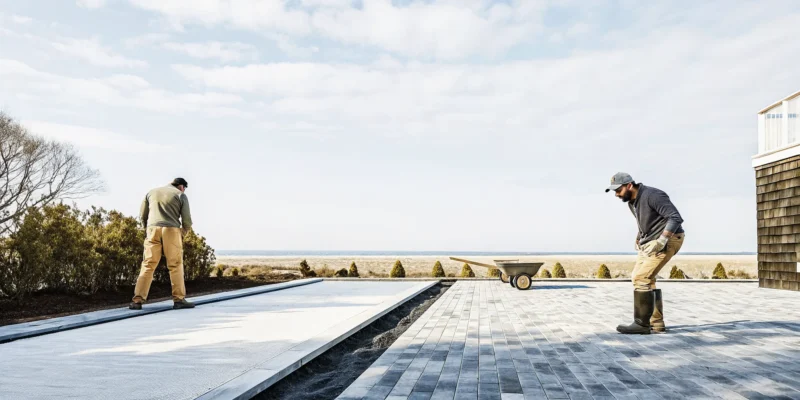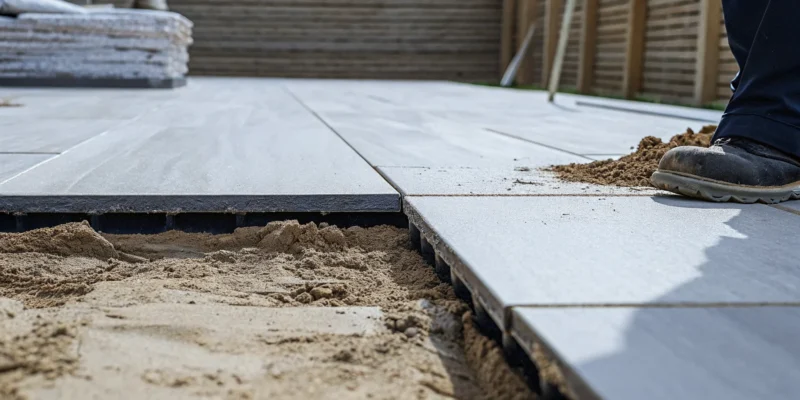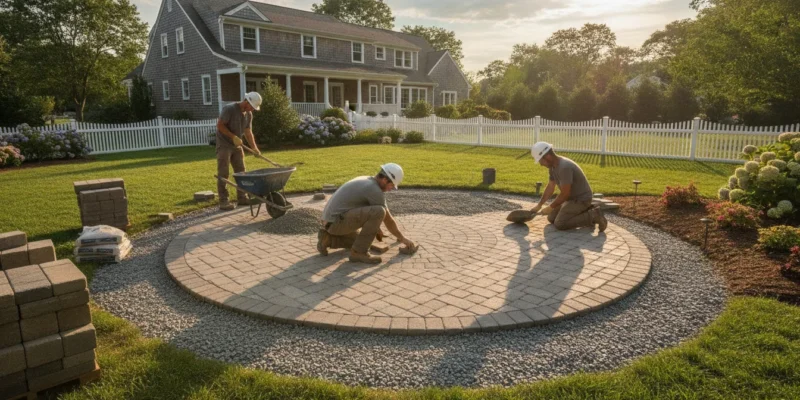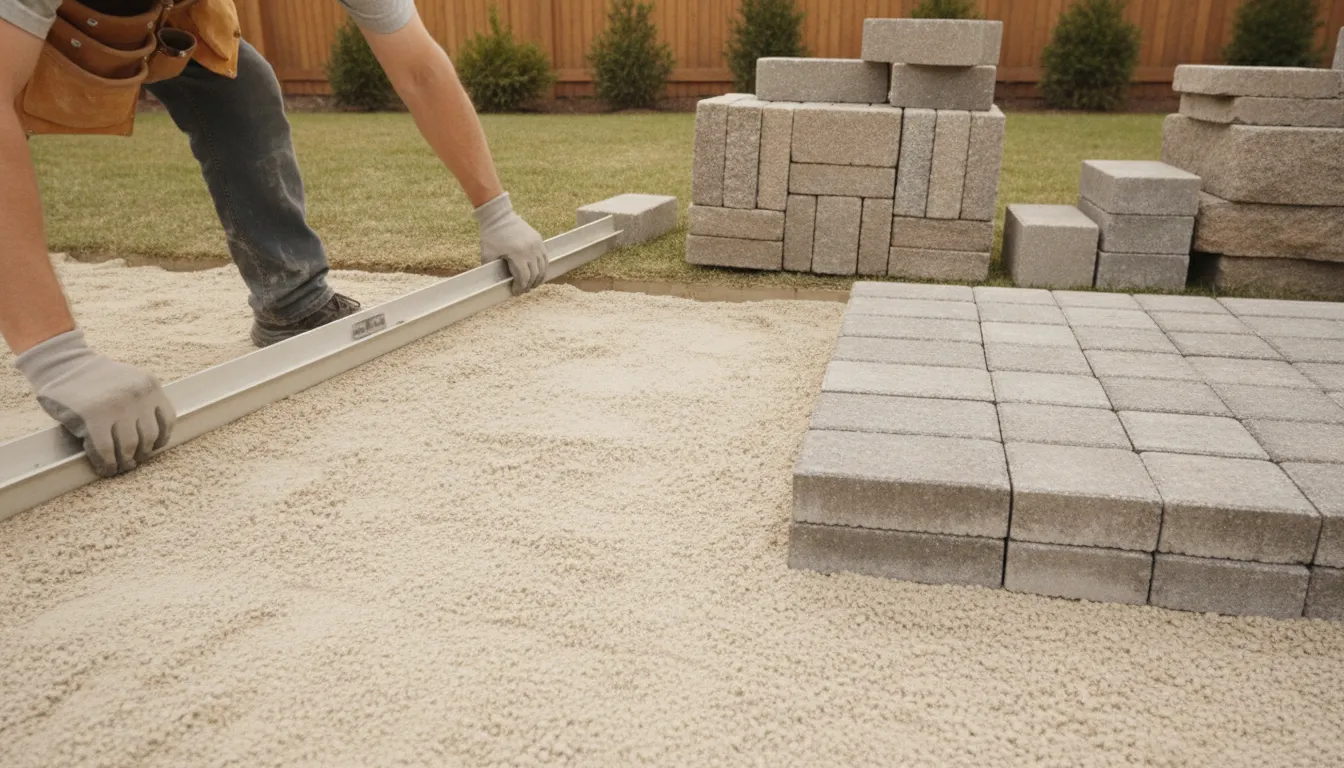
24x24x2 pavers installed around a modern Long Island pool

24x24x2 Pavers for Long Island Driveways and Patios

24x24x2 Pavers for Long Island Driveways and Patios

24x24x2 pavers give driveways, patios, and pool decks a clean large-format appearance while providing the thickness needed for demanding outdoor applications. The square format creates fewer visual interruptions than smaller units, which can make a compact backyard feel calmer and a wide driveway feel more intentional. The best result, however, depends on choosing the right material and building the base for the actual site conditions.

Contact Gappsi to compare materials and plan your Long Island project.

For homeowners in Nassau and Suffolk Counties, freeze-thaw cycles, drainage, vehicle loads, and pool exposure all influence the specification. Gappsi brings material selection, design, and installation planning together, helping homeowners move from a sample in the Smithtown showroom to a finished outdoor space with fewer handoffs.

What are 24x24x2 pavers?

In brief: A 24x24x2 paver is a large square paving unit measuring about two feet on each side and two inches thick. Its broad face creates a modern grid, while its substantial profile supports outdoor installations when paired with a properly engineered base.

The dimensions affect both appearance and construction. Each unit covers four square feet, so every paver becomes a noticeable part of the pattern. Straight joints emphasize architecture and symmetry. An offset layout softens the grid and can make long areas feel less rigid. Because the units are large, small changes in grade or base compaction are more visible than they might be with a smaller-format paver.

The term describes size, not one specific material. Options may include porcelain, natural stone, or concrete. Those materials differ in surface texture, edge character, stain response, color variation, and installation requirements. Homeowners should compare physical samples outdoors, where natural light reveals differences that showroom lighting may not show.

A useful design decision starts with the location, not the color. A driveway requires a different load strategy than a pedestrian patio. A pool surround adds wet-surface comfort and maintenance concerns. Gappsi’s porcelain and natural stone paver selection gives homeowners a practical place to compare those options.

Where do large-format pavers work best?

In brief: Large-format pavers work best where their scale can organize the view, including broad driveways, open patios, straight walkways, and pool decks. They can also suit smaller spaces when the layout is planned to limit awkward cuts.

On a driveway, a disciplined grid can visually connect the street, entry walk, and home. On a patio, the same format can create a restrained surface that allows furniture, planting, and an outdoor kitchen to stand out. Around a pool, broad units reduce the number of joints across the deck and help create a clean visual frame around the water.

Scale should be tested before installation. A two-foot module may land neatly between a house wall and pool edge on one property, but create narrow perimeter cuts on another. A layout drawing helps determine the starting line, border treatment, and joint alignment before the first paver is set. This planning step is especially valuable around steps, columns, curves, drains, and utility covers.

Large units can also bridge different outdoor zones. Repeating one format from a patio to a walkway creates continuity, while changing the laying direction can signal a transition without introducing another material. Homeowners considering a complete backyard plan can review Gappsi’s Long Island masonry design and construction services.

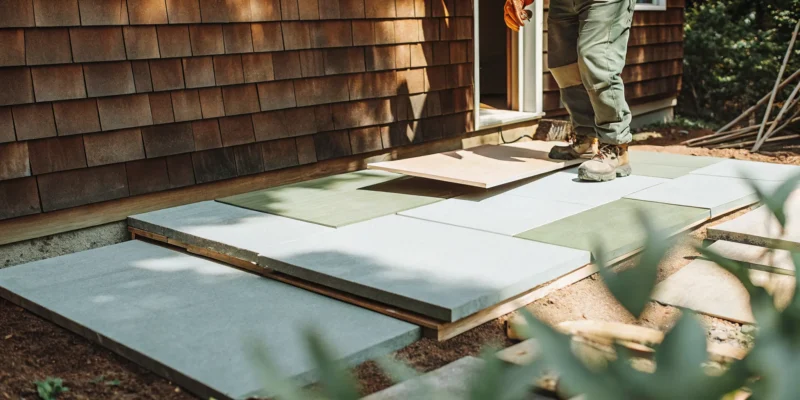
24x24x2 pavers forming a modern Long Island patio

How should homeowners choose the material?

In brief: Choose the material by balancing appearance with the site’s load, exposure, maintenance needs, and desired surface character. Size alone does not determine whether a paver is right for a driveway, patio, or pool deck.

Porcelain for a controlled, contemporary look

Porcelain can offer consistent sizing and a refined stone-look surface. It is often considered for contemporary outdoor designs where crisp edges and controlled color variation matter. Homeowners should confirm that the selected product, finish, and installation system are intended for the planned exterior application.

Natural stone for individual character

Natural stone brings variation in color, movement, and texture. Each piece contributes to the finished composition. So a sample should be evaluated as part of a broader range rather than as an exact promise of every installed unit. Stone selection should also account for the exposure and maintenance expectations of the property.

Concrete for additional design options

Concrete pavers are available in many colors and finishes. Product suitability still depends on the manufacturer specification and installation design. For any material, ask how edges will be restrained, joints handled, cuts placed, and transitions finished. These details often separate a deliberate result from a surface that merely uses attractive units.

The decision is easier when samples are compared next to siding, masonry, coping, and other permanent finishes. Gappsi’s porcelain pavers guide provides additional context for homeowners evaluating porcelain.

Material Visual character Planning focus
Porcelain Controlled sizing and refined stone-look options Confirm exterior application, finish, and installation system
Natural stone Individual color, movement, and texture Review expected variation, exposure, and maintenance
Concrete Broad range of colors and finishes Confirm product suitability and complete assembly design

Can 24x24x2 pavers be used for driveways?

In brief: They can be used for some driveway installations when the chosen product is approved for vehicular use and the complete assembly is designed for the expected loads. The paver, base, drainage, joints, and edge restraint must work as one system.

A driveway places repeated wheel loads on specific travel paths. Turning, braking, delivery vehicles, and edges can introduce concentrated stresses. That is why a two-inch thickness should never be treated as the only qualification. Product specifications and site conditions determine whether an option is appropriate.

The base is the hidden structure of the driveway. Excavation depth, subgrade condition, aggregate selection, lift thickness, and compaction all affect performance. Drainage must move water away from the paving assembly and nearby structures. Edge restraint helps keep the field from spreading under use. These are construction decisions, not finishing touches.

Large-format units make planning especially important because the joint grid is prominent. Designers can align the pattern with the garage doors, front walk, or facade. Borders may provide a visual frame and help resolve dimensions that do not fit the two-foot module evenly. Homeowners should ask for a plan that explains load suitability and layout, rather than selecting on appearance alone.

What matters most for patios and pool decks?

In brief: For patios and pool decks, prioritize drainage, comfortable circulation, surface texture, transitions, and a layout that works with furniture and pool geometry. The best-looking material must also support everyday outdoor use.

A patio is a working room. Dining chairs need stable placement. Door thresholds should transition cleanly. Water should move away from the home, and the finished elevation must account for steps, landscape beds, and adjacent lawn. A large-format layout can help define dining, cooking, and lounge zones without building visual clutter into the floor.

Pool decks add wet feet, splashing, coping interfaces, drains, and equipment access. Surface characteristics should be assessed for the intended setting, and the material should be reviewed in bright sun. Light-colored surfaces may create a different visual and comfort experience than darker selections. The pattern should also resolve cleanly around the pool shape.

Visit Gappsi’s swimming pool design and construction page to see how pool planning connects with the surrounding landscape. The U.S. Environmental Protection Agency also provides general information about permeable pavement and stormwater, which can help homeowners understand why drainage deserves early attention.

Light 24x24x2 pavers installed around a residential pool

How does a strong installation plan prevent problems?

In brief: A strong installation plan matches the assembly to the soil, load, drainage, and selected product before construction begins. It also resolves elevations, joints, borders, cuts, and transitions on paper instead of improvising them in the field.

Start with the site

The installer should understand existing grades, drainage paths, subgrade conditions, access constraints, and nearby structures. Long Island properties vary, so a method that works on one site should not automatically be copied to another. Water movement is particularly important because trapped water and seasonal temperature changes can affect outdoor paving systems.

Build and verify the base

Base preparation must follow the selected system and project conditions. Consistent compaction and grade help the broad paver faces remain aligned. If utilities, drains, or future structures need accommodation, those details should be coordinated before the finished surface is placed.

Protect the edges and joints

Perimeter restraint and joint treatment help the surface operate as intended. Their form depends on the product and installation method. The Concrete Masonry and Hardscapes Association is an additional industry resource for homeowners who want to learn more about segmental paving systems.

Request a Gappsi consultation before finalizing your paver installation plan.

What should you ask during a design consultation?

In brief: Ask about application suitability, base design, drainage, pattern layout, edge details, material variation, maintenance, and how the paving will connect with the rest of the property. Clear answers reveal whether the complete space has been considered.

  1. Is this exact product approved for the planned use? A driveway, patio, and pool deck may need different specifications.
  2. How will drainage be handled? Ask where water will go and how grades relate to the home, pool, and landscape.
  3. Where will cuts and borders appear? A drawing should show how the two-foot module fits the site.
  4. How will transitions be finished? Review thresholds, steps, coping, planting beds, and adjacent paving.
  5. What variation should we expect? Understand the natural or manufactured range before approving a material.
  6. How should the surface be maintained? Get guidance tailored to the selected material and exposure.

Bring photographs, approximate dimensions, and examples of styles you like. If the project includes a future pool, outdoor kitchen, pergola, or landscape renovation, mention it early. A coordinated plan can prevent a paving decision from limiting the next phase.

Why use a design-build approach on Long Island?

In brief: A design-build approach coordinates material selection, layout, grading, construction, and surrounding outdoor features through one planning process. That coordination is valuable when large-format paving must align with pools, masonry, landscaping, and architecture.

Gappsi has served Long Island since 1987 and works across specialized outdoor-living divisions. For a homeowner, the practical advantage is the ability to discuss the pavers as one part of a larger property plan. Material choice can be evaluated alongside a pool deck, retaining wall, steps, landscape, lighting, or outdoor kitchen rather than in isolation.

The Smithtown showroom also gives homeowners an opportunity to compare real materials. Photographs are useful for direction, but samples reveal scale, texture, edge character, and color more clearly. A consultation can then turn those preferences into a site-specific layout and construction plan for a Nassau or Suffolk County property.

Large-format pavers reward careful decisions. When the material, module, base, and surrounding features are coordinated, the result can feel simple without being generic. That is the core opportunity presented by 24x24x2 pavers: a strong visual framework supported by disciplined planning.

Frequently asked questions about 24x24x2 pavers

Are 24x24x2 pavers suitable for every driveway?

No. Suitability depends on the exact product specification, expected vehicle loads, base design, drainage, and installation system. Confirm that the selected unit is approved for vehicular use and have the complete assembly planned for the site.

Do large pavers make a small patio look bigger?

They can create a calmer surface with fewer visual breaks, which may make a compact space feel more open. The outcome depends on pattern direction, perimeter cuts, furniture placement, and how the paving connects to surrounding features.

What is the best material for a pool deck?

There is no single best material for every pool deck. Compare options based on intended exterior use, surface characteristics, exposure, maintenance, appearance, and compatibility with coping and drainage. Review physical samples before deciding.

Where can I see paver samples on Long Island?

Homeowners can contact Gappsi about visiting the Smithtown showroom to compare outdoor paving materials and discuss a site-specific design. Bring project photographs and approximate dimensions to make the consultation more productive.

Plan your 24x24x2 paver project with Gappsi

Whether you are planning a driveway, patio, or pool deck, the right result starts with a material and installation strategy tailored to the property. Gappsi can help Long Island homeowners compare options, resolve the large-format layout, and coordinate the paving with a broader outdoor-living plan.

Contact Gappsi to request a consultation or plan a visit to the Smithtown showroom.

Share this page:
Paver sealer wet look finish on a Long Island patio

Paver Sealer Wet Look: Pros and Cons

A paver sealer wet look finish deepens the color of concrete or brick pavers and leaves a noticeable sheen, similar to the appearance of the surface after a light rain. It can make a faded patio look richer and easier to maintain, but it is not automatically the best choice for every walkway, driveway, or pool surround.

Request a consultation with Gappsi

The right decision depends on the paver material, existing condition, drainage, desired gloss level, traction needs, and willingness to maintain the finish. Long Island weather adds another consideration because outdoor paving regularly faces moisture, freeze-thaw cycles, summer heat, and seasonal debris. This guide explains the practical advantages and drawbacks so you can choose a finish with realistic expectations.

What is a paver sealer wet look finish?

A wet look sealer is a film-forming product designed to enhance paver color while creating a satin, semi-gloss, or glossy surface. The appearance varies by product and application. Some finishes produce a subtle color boost, while others create a reflective sheen that becomes a prominent design feature.

Wet look does not mean the patio remains physically wet. The phrase describes the darker, more saturated appearance that water temporarily gives many masonry surfaces. A compatible sealer can preserve a similar visual effect after it cures.

How it differs from a natural-look sealer

A natural-look penetrating sealer generally absorbs below the surface and changes the visible finish very little. A wet look product usually forms more of a surface film. That film can deliver stronger color enhancement, but it also makes surface preparation and future maintenance especially important.

Consideration Wet look finish Natural look finish
Appearance Deepened color with visible sheen Minimal visual change
Design impact Becomes part of the patio’s style Keeps attention on the original material
Surface behavior Often creates a film on top Usually penetrates below the surface
Preparation Requires careful cleaning, drying, and compatibility checks Still requires preparation and compatibility checks
Traction Gloss can affect traction, depending on product and conditions Often preserves more of the original surface texture

Paver sealer wet look finish enhancing the color of a Long Island patio

Product chemistry matters as much as finish type. Paver composition, porosity, prior coatings, and site conditions all influence how a sealer bonds and looks. Testing a small, inconspicuous area is one of the most useful ways to evaluate the real result before committing to the full space.

The advantages of a wet look paver sealer

The strongest reason to choose a wet look is visual impact. It can revive muted reds, browns, grays, and blended colors, helping individual pavers and patterns look more defined. On an outdoor living area, that richer color can complement masonry design elements, pool finishes, landscape plantings, and other features.

Richer color and a refreshed appearance

A clean, properly prepared paved surface may still appear faded or dusty when dry. Color-enhancing sealer can give it a more finished appearance without replacing the pavers. This can be especially appealing when the original installation has attractive color variation that no longer stands out.

A surface that may be easier to clean

A compatible film-forming sealer can reduce how readily certain spills and debris contact the porous paver surface. Routine dirt, leaves, and minor spills may be easier to address when maintenance happens promptly. Gappsi’s stone and paver cleaning and sealing services address the surface as a complete care system. Sealing does not make paving stain-proof, however. Cooking grease, rust, organic matter, and other contaminants can still leave marks if ignored.

Help managing joint sand and surface wear

Some products are formulated to help stabilize joint sand. That feature can reduce migration from rain, cleaning, or ordinary use when the product and installation method are suitable. Not every wet look sealer provides joint stabilization, so the product specification and application plan need to match the goal.

A deliberate design finish

Gloss changes how light moves across the paving. Used thoughtfully, it can make a patio, driveway, or walkway feel polished and intentional. Homeowners who want a strong visual transformation may prefer it over an invisible penetrating finish.

These benefits depend on preparation and compatibility. Applying a premium coating over dirty, damp, or previously coated pavers can produce a disappointing result. The finish should be selected as part of a complete material-care plan rather than as a quick cosmetic layer.

Potential drawbacks to consider before sealing

A wet look finish creates a stronger visual change than a natural sealer, so imperfections can also become more noticeable. Uneven coverage, roller marks, trapped contamination, or inconsistent absorption may show clearly after curing. Correcting a failed coating can be far more involved than applying it correctly the first time.

Gloss can affect traction

Some glossy films may feel more slippery when wet, particularly on smooth pavers or around areas exposed to splashing. Pool surrounds, steps, sloped walkways, and frequently wet zones deserve a careful traction assessment. Homeowners planning a pool area can review Gappsi’s custom swimming pool services to consider the deck and water features together. A professional can help evaluate whether a lower sheen, suitable additive, or different sealer type better fits the space.

Moisture can create a cloudy or white appearance

Moisture trapped beneath a film-forming coating can contribute to hazing, whitening, or adhesion problems. Poor drainage, damp pavers, and application too soon after cleaning can increase risk. Long Island’s variable weather makes choosing an appropriate dry application window particularly important.

Old coatings can cause compatibility problems

A new product may not bond properly over an unknown or incompatible old sealer. The surface can peel, turn cloudy, or develop an uneven sheen. Before resealing, identify the existing coating when possible and determine whether it needs professional removal.

The finish requires ongoing care

No exterior coating remains unchanged forever. Sunlight, weather, traffic, deicing materials, cleaning practices, and standing water all affect performance. High-traffic areas may change appearance sooner than protected sections, resulting in inconsistent sheen. A realistic maintenance plan should be part of the decision from the beginning.

Wet look sealer also changes the character of the original material. If you value the subtle texture and natural variation of the pavers, a glossy film may feel too pronounced. Seeing a test section in both sun and shade can prevent a finish choice that looks different than expected.

How do you decide if a wet look is right?

Choosing a finish is easier when you evaluate the site in a logical order instead of selecting based only on a product photo.

  1. Identify the paving material. Determine the type, porosity, texture, and condition of the pavers. Natural stone and manufactured concrete products can respond differently to sealers.
  2. Clarify the visual goal. Decide whether you want subtle color enhancement, a satin finish, or a high-gloss appearance. Test samples because product labels cannot show exactly how your specific paving will look.
  3. Evaluate water and drainage. Look for low areas, standing water, irrigation overspray, and moisture that rises through the paving. Address drainage concerns before adding a film-forming finish.
  4. Consider traction. Give special attention to pool decks, steps, slopes, and shaded areas that remain wet. Appearance should not outweigh safe everyday use.
  5. Check for prior sealer. Existing coatings can change the preparation process and limit compatible product choices. Unknown coatings warrant professional evaluation.
  6. Set maintenance expectations. Consider how the area is used, cleaned, and exposed to weather. A showcase patio and a heavily used driveway do not face the same conditions.
  7. Use a test area. Confirm color, sheen, absorption, and texture on a small section before treating the whole installation.

A wet look often suits homeowners who want bold color enhancement and are comfortable caring for a visible coating. A natural finish may be better when retaining original texture and minimizing visual change are the priorities. The best choice balances design, material performance, and use of the space.

Why preparation determines the final result

Sealer can only perform as well as the surface beneath it. Preparation starts with an inspection for damaged pavers, failed joints, stains, drainage issues, efflorescence, and old coatings. These concerns should be addressed before sealing rather than hidden beneath a glossy layer.

Cleaning must match the condition

General dirt, algae, grease, rust, and old coating residue require different cleaning methods. Aggressive pressure alone can damage joints or leave an uneven surface. The cleaning approach should remove contaminants without harming the pavers.

The surface needs adequate drying time

A patio can look dry on top while retaining moisture within the pavers or joints. Applying film-forming sealer too soon can trap that moisture. Weather, shade, humidity, and paver porosity all affect drying, so a fixed waiting period is not appropriate for every property.

Application needs controlled conditions

Temperature, direct sun, wind, and the possibility of rain can influence curing. Overapplication may leave a thick, uneven, or tacky finish. Underapplication or inconsistent technique can create visible differences between sections. Following the selected product’s requirements and applying uniform coats are essential.

Gappsi has served Long Island homeowners since 1987 with design-build and material expertise across outdoor environments. That broader perspective helps connect surface care with drainage, landscape design, masonry condition, and how the space is actually used. Explore Gappsi’s outdoor living services and materials when planning a coordinated improvement.

How should a wet look sealed patio be maintained?

Routine care should be gentle and consistent. Remove leaves and organic debris before they sit for long periods. Address spills promptly, and use cleaning methods that are compatible with both the paver and sealer. Harsh chemicals or overly aggressive washing can dull or damage the finish.

Watch for early signs of change

Uneven sheen, whitening, peeling, persistent stains, or areas that remain wet deserve attention. These signs do not always mean the entire surface needs another coat. Adding sealer without identifying the cause can compound the problem.

Avoid automatic resealing schedules

The correct maintenance timing depends on the product, exposure, traffic, cleaning, and site conditions. A sheltered patio may age differently than a sunny driveway. Have the surface evaluated before resealing so the new application is compatible and necessary.

Seasonal observation is useful on Long Island. Check drainage after heavy rain, inspect the surface after winter, and look for joint changes before they grow. Thoughtful upkeep protects the appearance of the whole paved area, not only its shine. For material selection and care questions, homeowners can also explore the Gappsi Store and Smithtown showroom.

Frequently asked questions

Does wet look paver sealer make pavers slippery?

It can affect traction, particularly when a glossy film is applied to a smooth or frequently wet surface. Product choice, paver texture, application rate, and site conditions matter. Pool surrounds, steps, and slopes should receive a specific traction assessment before sealing.

Will wet look sealer make old pavers look new?

It can deepen color and refresh the appearance of sound pavers, but it will not repair cracks, remove stains, correct drainage, or fix failed joints. Cleaning and repairs should come first so the finish does not highlight existing defects.

Can wet look sealer turn white?

Cloudiness or whitening can occur when moisture becomes trapped, incompatible products are layered, or application conditions are unsuitable. A professional evaluation can help identify the cause and the appropriate corrective process.

How long does wet look paver sealer last?

There is no single lifespan that applies to every installation. Product type, preparation, sunlight, weather, traffic, drainage, and maintenance all influence performance. Evaluate the condition before deciding when to reseal.

Can I apply wet look sealer over an old sealer?

Only when the products are compatible and the existing coating remains suitable. Applying a new coating over an unknown or failing sealer can cause adhesion and appearance problems. Testing and possible removal may be necessary.

Choose a finish that fits your Long Island property

A paver sealer wet look finish can add rich color and a polished appearance, but the best outcome starts with the right material assessment, preparation, and maintenance plan. Gappsi can help you evaluate the paving and coordinate the finish with the surrounding outdoor design.

Request a consultation with Gappsi or visit the Smithtown showroom to discuss your patio, walkway, driveway, or pool area.

Bring photos of the existing surface and note where water collects after rain. This information can help guide a more useful first conversation about cleaning, repair, finish choices, and the next steps for your property.

Share this page:
Luxury Long Island outdoor kitchen with built-in appliances

Best Outdoor Kitchen Appliances for Long Island Homes

Outdoor kitchen appliances turn a patio cooking area into a practical place to prepare meals and host guests. Plan the built-in grill, outdoor-rated refrigerator, burners, sink, and specialty equipment before construction so every cutout, utility line, ventilation detail, and work zone fits the way you cook.

Schedule an outdoor kitchen design consultation with Gappsi.

Start with the outdoor kitchen appliances you will use most

Planning your outdoor cooking space begins with how you want to spend your time. Most people want a spot that makes it easy to grill, eat, and talk with friends. You should think about which outdoor kitchen appliances will serve your daily needs. It is best to focus on the items you will use every time you step outside.

A good plan helps you avoid buying things you do not need. Start by looking at your current habits. If you love to host large groups, you might need a large grill. If you just want quick meals for two, a smaller setup is better. Getting the right size for your planning your outdoor kitchen layout will make the space more useful.

The center of your cooking area

The grill is often the most used part of any setup. It acts as the heart of the kitchen where you will do most of your work. You can find many high-quality outdoor kitchen appliances that fit into custom stone islands. A built-in model offers a clean look and long-lasting strength.

Choose a grill that offers the heat and space you need for your top foods. Some models have side burners for sauces or searing. Others include rotisserie kits for slow cooking. Think about how many people you often feed. This helps you pick a unit that can handle the load without wasting fuel.

Cold storage for drinks and food

Keeping food at the right heat is key for safety and fun. You do not want to run back and forth to your indoor kitchen all day. Having reliable outdoor kitchen refrigerators keeps cold drinks and raw meat close to the grill. This makes the whole work much smoother.

Outdoor-rated units are built to handle the sun and rain. They use heavy insulation to keep things cold even on hot Long Island summer days. Many units also have locks to keep items safe when you are not there. These small details make a big change in how you use your deck or patio.

Fresh air and better health

Cooking outside does more than just give you more room. It can also help keep the air inside your home cleaner. Indoor stoves, mostly gas ones, can release chemicals like carbon monoxide into your rooms. These pollutants can get trapped without a strong vent. Moving your cooking outside allows these gases to blow away in the wind.

Studies show that outdoor cooking can reduce indoor pollutants by keeping smoke and heat away from your living areas. This choice makes your home a safer place for your family. It also helps you stay close to nature. Being near greenspaces is linked to a lower risk of health issues like heart disease and diabetes.

Think about your power and gas lines early in the work. You will need gas lines for your grill and power for your fridge. Running these lines before you finish your masonry saves time and money. Gappsi helps you plan these steps so your outdoor kitchen appliances work well from the first day.

Which cooking appliances earn their space?

The appliances that earn their space are the ones matched to your regular menu and hosting style. Most kitchens start with a built-in grill, then add a side burner, griddle, pizza oven, or smoker only when that appliance will be used often enough to justify its counter space and utility needs.

Good planning your outdoor kitchen layout starts with the right tools. You want to pick tools that fit your style and how you like to cook. Choosing high-quality outdoor kitchen appliances helps you make great food for your friends and family. They also help keep your home safe. Indoor gas stoves can fill your home with harmful gases like nitrogen dioxide. By moving your cooking out of the house, you keep these fumes from getting trapped in your living rooms. This makes your air much cleaner for everyone inside.

Think about how often you will use each unit before you buy it. Each choice takes up room on your counter and in your budget. You must balance the cost with how much joy and use the tool will bring. A well-set-up space makes it easy to host and cook at the same time. You will spend less time in the house and more time with your guests.

The core of your outdoor kitchen

The main tool in most yards is the built-in grill. This unit is the workhorse of your space. You can pick a gas grill if you want to start cooking fast. A charcoal grill takes more time but gives the food a deep smoke taste. Many top models have three or more zones. This lets you sear meat on one side and cook slow on the other. Look for a grill made of thick stainless steel. This metal will not rust when it rains or snows on Long Island.

Flat top griddles are also common now. They are great for making a full breakfast or thin burgers. You can cook eggs, bacon, and pancakes all at once. The flat surface gives you a lot of room to move food around. It is easy to clean and fun to use for a large crowd. Many chefs like to have both a grill and a griddle to cover all their needs. This setup lets you cook almost anything you can think of in your yard.

Add more ways to cook

Side burners are small but helpful. They let you boil a pot of corn or heat up a sauce right at your grill. You do not have to walk back and forth from the house. This saves you steps and keeps you in the mix. Some high-heat burners can even be used for a large wok or a deep fry pot. These units are easy to add to a small space. They give you a lot of power without taking up much room.

A pizza oven can change the way you host. These ovens get much hotter than the one in your house. They can bake a fresh pizza in just two or three minutes. The high heat makes the crust crisp and the cheese bubbled. You can also use them to roast meat or bake bread. They come in many sizes, from small table units to large built-in stone ovens. It is a great way to make mealtime a fun thing for kids and adults.

Keep things cool and close

Having reliable outdoor kitchen refrigerators is a must for any big plan. You need a place to keep raw meat and cold drinks near your grill. A good fridge is built to handle the heat of a Long Island summer. It will have a strong seal and a motor that can work in high temps. This keeps your food at a safe level so it does not spoil. It also keeps you from having to go in and out of the house all day long.

Storage is the other part of a good plan. You need drawers and doors to hold your tools and fuel. This keeps your space clean and ready to use. Keep your tongs, brushes, and trays in the island so they are always at hand. Use doors that seal tight to keep out bugs and dust. When everything has a place, you can cook with less stress. You will find that you use your yard much more when it is easy to set up and clean up.

Appliance Type Best Use Space Needed Fuel Source
Built-in Grill Main meals and searing Large Gas or Charcoal
Side Burner Sauces and boiling Small Gas
Pizza Oven High-heat baking Medium Wood or Gas
Flat Top Griddle Breakfast and burgers Medium Gas
Power Burner Large pots and frying Small Gas

Talk with Gappsi about the appliance mix and utility plan for your Long Island outdoor kitchen.

Plan refrigeration and beverage service early

A great outdoor space needs a way to keep food and drinks cold. When you plan your layout, think about where your guests will sit and where you will cook. Adding the right cooling tools saves you from many trips back and forth to the house. It also makes your backyard feel like a full living space where you can relax for hours.

Pick the right outdoor-rated units

You must choose outdoor kitchen appliances that can handle the local weather. Standard indoor fridges are not built to stay outside in the sun or rain. They may fail if the heat level drops too low or gets too high. Units made for the outdoors have better seals and stronger parts to resist rust and wear.

Most experts suggest looking for a UL rating for outdoor use. These units use high-grade steel that holds up well against salt and damp air. Using reliable outdoor kitchen refrigerators keeps your food cold and safe even on hot days. This setup also helps keep smoke and heat out of your house while you host. By moving your cooking and cooling outside, you help keep your house air clean. This vents gas and heat into the open air instead of trapping it inside (source).

Keep drinks cold and ready

Beverage centers are a top choice for those who love to host. They often have glass doors so you can see what is in stock at a glance. You can also add an ice maker to ensure you never run out of ice for drinks or sodas. These tools make it easy for guests to help themselves without getting in the way of the cook.

Consider how much storage you need for different items. Some units have zones with different heat levels for wine and beer. You might also want a small drawer for fresh fruit or snacks. Having these items close by helps you stay part of the party instead of spending your time in the house.

Layout for easy hosting

Where you put your fridge and ice maker matters just as much as what you buy. Put them near the prep area. Keep them far enough from the grill so they do not get too much heat. It is also wise to place the beverage center near the edge of the kitchen. This lets people grab a drink without walking through the main cooking zone.

Make sure you plan for power needs early in the build. Running electric lines is much easier before you lay down the patio or build the island. Talk to your builder about where the plugs should go so they stay dry and out of sight. A well-planned layout keeps your workspace clear and your guests happy.

Built-in outdoor kitchen appliances in a Long Island entertaining space
Plan appliance placement and utilities as part of the complete outdoor kitchen layout.

Build a practical prep and cleanup zone

A great outdoor cooking area needs more than just a grill. To keep the flow smooth, you must plan for prep and cleanup. Shifting your food tasks outside helps keep your home clean. It also stops you from running back and forth to your indoor kitchen. Research from the National Institutes of Health shows that cooking outside can lower indoor air risks by moving heat and smoke away from your living rooms.

Include a sink and prep space

A sink is the heart of a cleanup zone. It lets you wash your hands, rinse fresh produce, and clean up small spills without going inside. You will need a cold water line at the very least. If you plan to wash greasy pans, consider adding a hot water line too. Pair your sink with a wide counter. This gives you plenty of room to chop food or set down heavy plates near your high-quality outdoor kitchen appliances. At Gappsi, we often use natural stone or porcelain for these tops because they handle the Long Island weather well.

Manage trash and storage

Trash can be a big problem if you do not have a place for it. A pullout trash bin keeps waste out of sight and stops pests from getting in. You should also add sealed storage for your tools. This keeps your tongs, brushes, and wipes dry and ready to use. Using reliable outdoor kitchen refrigerators nearby also helps. You can keep raw meat and cold drinks right where you need them. This setup makes your prep work much faster and safer.

Plan your prep and cleanup steps

To get the best results, follow these steps to set up your zone:

  1. Pick a spot near your grill for the sink and prep counter.
  2. Install a deep sink that can handle large pots and pans.
  3. Set up a pullout trash drawer below the prep counter.
  4. Add task lighting above the sink for safe use at night.
  5. Check all utility lines like water and gas before you finish the masonry.

Good lighting is a must for any cleanup spot. You need to see clearly when you use sharp knives or clean the grill. We suggest LED lights that point down onto the counter. This keeps the glare out of your eyes while you work. When you plan your outdoor kitchen layout, think about the distance between each station. A tight work triangle will save you time and energy on every meal.

What makes an appliance suitable for a Long Island backyard?

A suitable Long Island outdoor appliance is explicitly rated for outdoor use, built from corrosion-resistant materials, and installed according to its ventilation and utility specifications. It also needs a seasonal care plan for humid summers, coastal salt exposure, freezing temperatures, and winter precipitation.

Long Island weather can be tough on your home gear. Between the salt air from the coast and the humid summers, you need parts that last. Picking the right high-quality outdoor kitchen appliances is the first step to a long-lasting space. You should look for units made to handle the local climate in Nassau and Suffolk County. Choosing the right gear ensures your yard stays fun and useful all year.

Tough metals for coastal weather

When you pick gear for your yard, look for high-grade stainless steel. Type 304 stainless steel is a top choice because it resists rust well. This is key if you live near the water. Salt and damp air can eat through cheap metal fast. Good steel keeps your grill and fridge looking new for many years. Gappsi helps you choose these parts from our store. We pick gear that works well with our custom stone walls and masonry.

You also want to find units with thick doors and tight seals. These help keep dust and rain out of the inner parts. For example, good outdoor rated fridges use extra foam to keep food cold even on a hot July day. These items are built to work in a wide range of outdoor temps. Our team knows how to fit a pizza oven or a large grill into a custom brick island for a clean look.

Outdoor safety and fuel needs

Safety is a big part of planning your outdoor kitchen layout. Indoor stoves can trap bad gases like nitrogen dioxide inside your home. Using a grill or stove in your backyard helps move these risks outside where the air flows freely. This makes your cooking space safer for everyone. We make sure your gas or electric lines are safe and meet all local codes in your town.

Proper airflow is still needed for your outdoor gear. If your grill is set into a stone wall, it must have a vent. This lets heat and gas escape safely. Always check the rules from the maker to keep the right space around each unit. This stops fires and helps your gear work the right way. Gappsi can also help with permits so you do not have to worry about the forms for your new project.

Winter care for your gear

Long Island winters can be very cold and snowy. Most outdoor gear needs a little help to stay safe during the winter. You should use a cover for your grill and pizza oven when you are not using them. This keeps ice from building up in small spots. It also stops rain from getting into the gas lines. Our team often suggests using covers that fit your gear to get the best fit and safety.

Before the first freeze, you must turn off the water to your outdoor sink. Drain the lines so they do not burst or crack. If you have a fridge, you may want to turn it off and clean it out for the season. Some people leave their fridges on, but you should check if yours is rated for freezing weather. Taking these steps helps your yard stay ready for the first warm day of spring. Having one team handle the design and the build makes this care easy to plan.

Why should appliances be selected before construction?

Select appliances before construction because each model has exact cutout, clearance, ventilation, fuel, electrical, water, and drainage requirements. Final specifications let the design-build team place utilities correctly and build masonry or cabinetry around the selected equipment, reducing the risk of expensive changes later.

Planning a cooking space in your yard needs a clear path from the start. You must choose your outdoor kitchen appliances before any masonry or gas work begins. This choice sets the size and spot for every utility line. If you wait until after the base is built, you may face costly changes. Selecting items early ensures that your stone or wood frames match the exact needs of your gear.

Accurate utility and gas lines

Every grill, burner, and fridge has unique needs for power and fuel. For example, a built-in grill like the high-quality outdoor kitchen appliances from Hestan needs specific gas line spots. Some units use natural gas while others need a tank. Water lines for sinks and drains also must be set in the base before the stone is laid. Shifting these lines after the build starts is hard and adds to your bill.

Proper airflow is also vital for safety and performance. Gas units can emit nitrogen dioxide and other pollutants that need to clear the area quickly. Research shows that cooking with gas can release hazardous chemicals if the space is not set up right (NCBI). By picking your gear first, your team can plan for vents and open paths that keep the air safe for your family and guests.

Seamless masonry and cabinetry fit

Outdoor cabinets and stone islands are built to fit the gear they hold. Most high-end units need a precise cutout to stay level and secure. When planning your outdoor kitchen layout, even a small error in size can ruin the look of your custom masonry. Pre-selecting your items lets your builder use the actual specs for the cutouts. This step ensures that your fridge and grill sit flush with the counter for a clean finish.

A unified design-build process helps you avoid these common pitfalls. You can visit a showroom to see and measure the gear in person. This lets you confirm the finish and style of your reliable outdoor kitchen refrigerators before the first stone is set. When your builder has the specs in hand, they can craft a kitchen that looks and works as you planned from day one.

How do you choose the right appliance mix?

Choose the right appliance mix by ranking what you cook, how many people you host, and which tasks should happen outside. Then compare available space, workflow, utility capacity, maintenance, and storage. Prioritize frequently used equipment first, and reserve specialty appliances for cooking methods you genuinely enjoy.

Choosing the best set of tools for your space is a big part of a great home project. You want to pick items that fit your life and how you like to cook. It is not just about the biggest grill. It is about how each part works with the others to make your yard a fun place to be.

Know your cooking habits

Think about what you make most often. If you love a good steak, you will need high-quality outdoor kitchen appliances like a large built-in grill. If you prefer home-made pizza, you might want to add a stone oven. Gappsi offers top brands like Giotto and Moderno to help you get the best crust every time.

Some people want a full outdoor bar while others just need a spot to keep drinks cold. Your choice should match your style. Do not buy a lot of gear you will not use. Focus on the tools that will make your time outside better and more fun.

Consider your guest count

Think about how many people you usually host. A small family needs less space than a large crowd. If you have big parties, you may need a second sink or a larger fridge. Having reliable outdoor kitchen refrigerators keeps food fresh and safe without you having to run inside all day.

Using these outdoor tools can also help your home stay clean and safe. When you cook outside, you keep heat and smoke away from your indoor rooms. Shifting these tasks to your yard helps lower the level of trapped air pollutants like carbon monoxide inside your house.

Plan for layout and utilities

The spot where you put your gear matters. You must think about gas lines, water pipes, and power outlets early in the process. When you are planning your outdoor kitchen layout, you should keep the most used items close together to save steps.

  • Place your grill where the wind will carry smoke away from guests.
  • Keep cold storage away from high-heat areas to save energy.
  • Make sure you have enough counter space near the stove for prep work.
  • Plan for light so you can see what you are doing after the sun goes down.

You should also think about how easy it is to clean your new space. Choose materials that can stand up to the local weather on Long Island. Stone and high-grade steel are good choices because they last a long time. They keep your kitchen looking new for many years with very little work.

See how appliance planning fits into a complete outdoor kitchen design, from the cooking island and counters to utilities and entertaining zones.

Visit the Gappsi showroom or request a consultation before finalizing your appliance list.

Frequently Asked Questions

Can outdoor kitchen appliances stay outside during winter?

Yes, most top-tier units can stay in your yard all year. You should look for tools made of high-grade steel. This metal stops rust and damage from salt air on Long Island. During the cold months, it is smart to use a tight cover to keep out snow. You must also drain all water lines for sinks or ice makers. This stops the pipes from freezing and breaking when it gets very cold.

Do I need a vent hood for my outdoor kitchen appliances?

You need a vent hood if your grill is under a roof. This fan pulls smoke and grease away from your house. It keeps your ceiling clean and safe from fire. Shifting your cooking tasks outside can also keep your indoor air fresh. As shown in a study in Environmental Health Perspectives, moving these tasks outside cuts indoor fumes like carbon monoxide. A hood makes sure these fumes do not drift back inside your home.

What is the best way to clean outdoor stainless steel appliances?

You should wipe your tools with a soft cloth and warm, soapy water. Always rub with the grain to avoid marks. For tough spots, use a cleaner made just for steel. Do not use steel wool as it can harm the surface. Wiping your items after each use stops grease and salt from building up. This keeps your yard space looking new and helps your tools last for a long time. It is a simple way to protect your buy.

How do I choose between gas and electric outdoor kitchen appliances?

Pick the one that fits the power lines in your yard. Gas tools like grills and burners heat up fast. They are great for high-heat cooking. Electric items like fridges and some ovens are easy to plug in and use. You should think about the cost of adding gas lines versus using more power. Both types work well if they are built for the weather. Talk to a pro to see which setup is best for your home and budget.

Start Planning Your New Outdoor Kitchen Today

Waiting to start your project might cause you to miss the best weather because top gear often has long wait times during the busy season. If you start your design now, we can help you get the right permits and choose high-quality gear so your kitchen is ready for summer. Choosing a single team for your design and build needs saves you time and ensures your high-end gear fits perfectly into your new stone island. By taking action today, you avoid the stress of last-minute changes and can look forward to hosting friends in a space built just for you.

Ready to get started? Schedule an outdoor kitchen design meeting with our experts to build your dream space now for your home.

Share this page:
Luxury Long Island outdoor kitchen with built-in appliances

Best Outdoor Kitchen Appliances for Long Island Homes

Outdoor kitchen appliances turn a patio cooking area into a practical place to prepare meals and host guests. Plan the built-in grill, outdoor-rated refrigerator, burners, sink, and specialty equipment before construction so every cutout, utility line, ventilation detail, and work zone fits the way you cook.

Schedule an outdoor kitchen design consultation with Gappsi.

Start with the outdoor kitchen appliances you will use most

Planning your outdoor cooking space begins with how you want to spend your time. Most people want a spot that makes it easy to grill, eat, and talk with friends. You should think about which outdoor kitchen appliances will serve your daily needs. It is best to focus on the items you will use every time you step outside.

A good plan helps you avoid buying things you do not need. Start by looking at your current habits. If you love to host large groups, you might need a large grill. If you just want quick meals for two, a smaller setup is better. Getting the right size for your planning your outdoor kitchen layout will make the space more useful.

The center of your cooking area

The grill is often the most used part of any setup. It acts as the heart of the kitchen where you will do most of your work. You can find many high-quality outdoor kitchen appliances that fit into custom stone islands. A built-in model offers a clean look and long-lasting strength.

Choose a grill that offers the heat and space you need for your top foods. Some models have side burners for sauces or searing. Others include rotisserie kits for slow cooking. Think about how many people you often feed. This helps you pick a unit that can handle the load without wasting fuel.

Cold storage for drinks and food

Keeping food at the right heat is key for safety and fun. You do not want to run back and forth to your indoor kitchen all day. Having reliable outdoor kitchen refrigerators keeps cold drinks and raw meat close to the grill. This makes the whole work much smoother.

Outdoor-rated units are built to handle the sun and rain. They use heavy insulation to keep things cold even on hot Long Island summer days. Many units also have locks to keep items safe when you are not there. These small details make a big change in how you use your deck or patio.

Fresh air and better health

Cooking outside does more than just give you more room. It can also help keep the air inside your home cleaner. Indoor stoves, mostly gas ones, can release chemicals like carbon monoxide into your rooms. These pollutants can get trapped without a strong vent. Moving your cooking outside allows these gases to blow away in the wind.

Studies show that outdoor cooking can reduce indoor pollutants by keeping smoke and heat away from your living areas. This choice makes your home a safer place for your family. It also helps you stay close to nature. Being near greenspaces is linked to a lower risk of health issues like heart disease and diabetes.

Think about your power and gas lines early in the work. You will need gas lines for your grill and power for your fridge. Running these lines before you finish your masonry saves time and money. Gappsi helps you plan these steps so your outdoor kitchen appliances work well from the first day.

Which cooking appliances earn their space?

The appliances that earn their space are the ones matched to your regular menu and hosting style. Most kitchens start with a built-in grill, then add a side burner, griddle, pizza oven, or smoker only when that appliance will be used often enough to justify its counter space and utility needs.

Good planning your outdoor kitchen layout starts with the right tools. You want to pick tools that fit your style and how you like to cook. Choosing high-quality outdoor kitchen appliances helps you make great food for your friends and family. They also help keep your home safe. Indoor gas stoves can fill your home with harmful gases like nitrogen dioxide. By moving your cooking out of the house, you keep these fumes from getting trapped in your living rooms. This makes your air much cleaner for everyone inside.

Think about how often you will use each unit before you buy it. Each choice takes up room on your counter and in your budget. You must balance the cost with how much joy and use the tool will bring. A well-set-up space makes it easy to host and cook at the same time. You will spend less time in the house and more time with your guests.

The core of your outdoor kitchen

The main tool in most yards is the built-in grill. This unit is the workhorse of your space. You can pick a gas grill if you want to start cooking fast. A charcoal grill takes more time but gives the food a deep smoke taste. Many top models have three or more zones. This lets you sear meat on one side and cook slow on the other. Look for a grill made of thick stainless steel. This metal will not rust when it rains or snows on Long Island.

Flat top griddles are also common now. They are great for making a full breakfast or thin burgers. You can cook eggs, bacon, and pancakes all at once. The flat surface gives you a lot of room to move food around. It is easy to clean and fun to use for a large crowd. Many chefs like to have both a grill and a griddle to cover all their needs. This setup lets you cook almost anything you can think of in your yard.

Add more ways to cook

Side burners are small but helpful. They let you boil a pot of corn or heat up a sauce right at your grill. You do not have to walk back and forth from the house. This saves you steps and keeps you in the mix. Some high-heat burners can even be used for a large wok or a deep fry pot. These units are easy to add to a small space. They give you a lot of power without taking up much room.

A pizza oven can change the way you host. These ovens get much hotter than the one in your house. They can bake a fresh pizza in just two or three minutes. The high heat makes the crust crisp and the cheese bubbled. You can also use them to roast meat or bake bread. They come in many sizes, from small table units to large built-in stone ovens. It is a great way to make mealtime a fun thing for kids and adults.

Keep things cool and close

Having reliable outdoor kitchen refrigerators is a must for any big plan. You need a place to keep raw meat and cold drinks near your grill. A good fridge is built to handle the heat of a Long Island summer. It will have a strong seal and a motor that can work in high temps. This keeps your food at a safe level so it does not spoil. It also keeps you from having to go in and out of the house all day long.

Storage is the other part of a good plan. You need drawers and doors to hold your tools and fuel. This keeps your space clean and ready to use. Keep your tongs, brushes, and trays in the island so they are always at hand. Use doors that seal tight to keep out bugs and dust. When everything has a place, you can cook with less stress. You will find that you use your yard much more when it is easy to set up and clean up.

Appliance Type Best Use Space Needed Fuel Source
Built-in Grill Main meals and searing Large Gas or Charcoal
Side Burner Sauces and boiling Small Gas
Pizza Oven High-heat baking Medium Wood or Gas
Flat Top Griddle Breakfast and burgers Medium Gas
Power Burner Large pots and frying Small Gas

Talk with Gappsi about the appliance mix and utility plan for your Long Island outdoor kitchen.

Plan refrigeration and beverage service early

A great outdoor space needs a way to keep food and drinks cold. When you plan your layout, think about where your guests will sit and where you will cook. Adding the right cooling tools saves you from many trips back and forth to the house. It also makes your backyard feel like a full living space where you can relax for hours.

Pick the right outdoor-rated units

You must choose outdoor kitchen appliances that can handle the local weather. Standard indoor fridges are not built to stay outside in the sun or rain. They may fail if the heat level drops too low or gets too high. Units made for the outdoors have better seals and stronger parts to resist rust and wear.

Most experts suggest looking for a UL rating for outdoor use. These units use high-grade steel that holds up well against salt and damp air. Using reliable outdoor kitchen refrigerators keeps your food cold and safe even on hot days. This setup also helps keep smoke and heat out of your house while you host. By moving your cooking and cooling outside, you help keep your house air clean. This vents gas and heat into the open air instead of trapping it inside (source).

Keep drinks cold and ready

Beverage centers are a top choice for those who love to host. They often have glass doors so you can see what is in stock at a glance. You can also add an ice maker to ensure you never run out of ice for drinks or sodas. These tools make it easy for guests to help themselves without getting in the way of the cook.

Consider how much storage you need for different items. Some units have zones with different heat levels for wine and beer. You might also want a small drawer for fresh fruit or snacks. Having these items close by helps you stay part of the party instead of spending your time in the house.

Layout for easy hosting

Where you put your fridge and ice maker matters just as much as what you buy. Put them near the prep area. Keep them far enough from the grill so they do not get too much heat. It is also wise to place the beverage center near the edge of the kitchen. This lets people grab a drink without walking through the main cooking zone.

Make sure you plan for power needs early in the build. Running electric lines is much easier before you lay down the patio or build the island. Talk to your builder about where the plugs should go so they stay dry and out of sight. A well-planned layout keeps your workspace clear and your guests happy.

Built-in outdoor kitchen appliances in a Long Island entertaining space
Plan appliance placement and utilities as part of the complete outdoor kitchen layout.

Build a practical prep and cleanup zone

A great outdoor cooking area needs more than just a grill. To keep the flow smooth, you must plan for prep and cleanup. Shifting your food tasks outside helps keep your home clean. It also stops you from running back and forth to your indoor kitchen. Research from the National Institutes of Health shows that cooking outside can lower indoor air risks by moving heat and smoke away from your living rooms.

Include a sink and prep space

A sink is the heart of a cleanup zone. It lets you wash your hands, rinse fresh produce, and clean up small spills without going inside. You will need a cold water line at the very least. If you plan to wash greasy pans, consider adding a hot water line too. Pair your sink with a wide counter. This gives you plenty of room to chop food or set down heavy plates near your high-quality outdoor kitchen appliances. At Gappsi, we often use natural stone or porcelain for these tops because they handle the Long Island weather well.

Manage trash and storage

Trash can be a big problem if you do not have a place for it. A pullout trash bin keeps waste out of sight and stops pests from getting in. You should also add sealed storage for your tools. This keeps your tongs, brushes, and wipes dry and ready to use. Using reliable outdoor kitchen refrigerators nearby also helps. You can keep raw meat and cold drinks right where you need them. This setup makes your prep work much faster and safer.

Plan your prep and cleanup steps

To get the best results, follow these steps to set up your zone:

  1. Pick a spot near your grill for the sink and prep counter.
  2. Install a deep sink that can handle large pots and pans.
  3. Set up a pullout trash drawer below the prep counter.
  4. Add task lighting above the sink for safe use at night.
  5. Check all utility lines like water and gas before you finish the masonry.

Good lighting is a must for any cleanup spot. You need to see clearly when you use sharp knives or clean the grill. We suggest LED lights that point down onto the counter. This keeps the glare out of your eyes while you work. When you plan your outdoor kitchen layout, think about the distance between each station. A tight work triangle will save you time and energy on every meal.

What makes an appliance suitable for a Long Island backyard?

A suitable Long Island outdoor appliance is explicitly rated for outdoor use, built from corrosion-resistant materials, and installed according to its ventilation and utility specifications. It also needs a seasonal care plan for humid summers, coastal salt exposure, freezing temperatures, and winter precipitation.

Long Island weather can be tough on your home gear. Between the salt air from the coast and the humid summers, you need parts that last. Picking the right high-quality outdoor kitchen appliances is the first step to a long-lasting space. You should look for units made to handle the local climate in Nassau and Suffolk County. Choosing the right gear ensures your yard stays fun and useful all year.

Tough metals for coastal weather

When you pick gear for your yard, look for high-grade stainless steel. Type 304 stainless steel is a top choice because it resists rust well. This is key if you live near the water. Salt and damp air can eat through cheap metal fast. Good steel keeps your grill and fridge looking new for many years. Gappsi helps you choose these parts from our store. We pick gear that works well with our custom stone walls and masonry.

You also want to find units with thick doors and tight seals. These help keep dust and rain out of the inner parts. For example, good outdoor rated fridges use extra foam to keep food cold even on a hot July day. These items are built to work in a wide range of outdoor temps. Our team knows how to fit a pizza oven or a large grill into a custom brick island for a clean look.

Outdoor safety and fuel needs

Safety is a big part of planning your outdoor kitchen layout. Indoor stoves can trap bad gases like nitrogen dioxide inside your home. Using a grill or stove in your backyard helps move these risks outside where the air flows freely. This makes your cooking space safer for everyone. We make sure your gas or electric lines are safe and meet all local codes in your town.

Proper airflow is still needed for your outdoor gear. If your grill is set into a stone wall, it must have a vent. This lets heat and gas escape safely. Always check the rules from the maker to keep the right space around each unit. This stops fires and helps your gear work the right way. Gappsi can also help with permits so you do not have to worry about the forms for your new project.

Winter care for your gear

Long Island winters can be very cold and snowy. Most outdoor gear needs a little help to stay safe during the winter. You should use a cover for your grill and pizza oven when you are not using them. This keeps ice from building up in small spots. It also stops rain from getting into the gas lines. Our team often suggests using covers that fit your gear to get the best fit and safety.

Before the first freeze, you must turn off the water to your outdoor sink. Drain the lines so they do not burst or crack. If you have a fridge, you may want to turn it off and clean it out for the season. Some people leave their fridges on, but you should check if yours is rated for freezing weather. Taking these steps helps your yard stay ready for the first warm day of spring. Having one team handle the design and the build makes this care easy to plan.

Why should appliances be selected before construction?

Select appliances before construction because each model has exact cutout, clearance, ventilation, fuel, electrical, water, and drainage requirements. Final specifications let the design-build team place utilities correctly and build masonry or cabinetry around the selected equipment, reducing the risk of expensive changes later.

Planning a cooking space in your yard needs a clear path from the start. You must choose your outdoor kitchen appliances before any masonry or gas work begins. This choice sets the size and spot for every utility line. If you wait until after the base is built, you may face costly changes. Selecting items early ensures that your stone or wood frames match the exact needs of your gear.

Accurate utility and gas lines

Every grill, burner, and fridge has unique needs for power and fuel. For example, a built-in grill like the high-quality outdoor kitchen appliances from Hestan needs specific gas line spots. Some units use natural gas while others need a tank. Water lines for sinks and drains also must be set in the base before the stone is laid. Shifting these lines after the build starts is hard and adds to your bill.

Proper airflow is also vital for safety and performance. Gas units can emit nitrogen dioxide and other pollutants that need to clear the area quickly. Research shows that cooking with gas can release hazardous chemicals if the space is not set up right (NCBI). By picking your gear first, your team can plan for vents and open paths that keep the air safe for your family and guests.

Seamless masonry and cabinetry fit

Outdoor cabinets and stone islands are built to fit the gear they hold. Most high-end units need a precise cutout to stay level and secure. When planning your outdoor kitchen layout, even a small error in size can ruin the look of your custom masonry. Pre-selecting your items lets your builder use the actual specs for the cutouts. This step ensures that your fridge and grill sit flush with the counter for a clean finish.

A unified design-build process helps you avoid these common pitfalls. You can visit a showroom to see and measure the gear in person. This lets you confirm the finish and style of your reliable outdoor kitchen refrigerators before the first stone is set. When your builder has the specs in hand, they can craft a kitchen that looks and works as you planned from day one.

How do you choose the right appliance mix?

Choose the right appliance mix by ranking what you cook, how many people you host, and which tasks should happen outside. Then compare available space, workflow, utility capacity, maintenance, and storage. Prioritize frequently used equipment first, and reserve specialty appliances for cooking methods you genuinely enjoy.

Choosing the best set of tools for your space is a big part of a great home project. You want to pick items that fit your life and how you like to cook. It is not just about the biggest grill. It is about how each part works with the others to make your yard a fun place to be.

Know your cooking habits

Think about what you make most often. If you love a good steak, you will need high-quality outdoor kitchen appliances like a large built-in grill. If you prefer home-made pizza, you might want to add a stone oven. Gappsi offers top brands like Giotto and Moderno to help you get the best crust every time.

Some people want a full outdoor bar while others just need a spot to keep drinks cold. Your choice should match your style. Do not buy a lot of gear you will not use. Focus on the tools that will make your time outside better and more fun.

Consider your guest count

Think about how many people you usually host. A small family needs less space than a large crowd. If you have big parties, you may need a second sink or a larger fridge. Having reliable outdoor kitchen refrigerators keeps food fresh and safe without you having to run inside all day.

Using these outdoor tools can also help your home stay clean and safe. When you cook outside, you keep heat and smoke away from your indoor rooms. Shifting these tasks to your yard helps lower the level of trapped air pollutants like carbon monoxide inside your house.

Plan for layout and utilities

The spot where you put your gear matters. You must think about gas lines, water pipes, and power outlets early in the process. When you are planning your outdoor kitchen layout, you should keep the most used items close together to save steps.

  • Place your grill where the wind will carry smoke away from guests.
  • Keep cold storage away from high-heat areas to save energy.
  • Make sure you have enough counter space near the stove for prep work.
  • Plan for light so you can see what you are doing after the sun goes down.

You should also think about how easy it is to clean your new space. Choose materials that can stand up to the local weather on Long Island. Stone and high-grade steel are good choices because they last a long time. They keep your kitchen looking new for many years with very little work.

See how appliance planning fits into a complete outdoor kitchen design, from the cooking island and counters to utilities and entertaining zones.

Visit the Gappsi showroom or request a consultation before finalizing your appliance list.

Frequently Asked Questions

Can outdoor kitchen appliances stay outside during winter?

Yes, most top-tier units can stay in your yard all year. You should look for tools made of high-grade steel. This metal stops rust and damage from salt air on Long Island. During the cold months, it is smart to use a tight cover to keep out snow. You must also drain all water lines for sinks or ice makers. This stops the pipes from freezing and breaking when it gets very cold.

Do I need a vent hood for my outdoor kitchen appliances?

You need a vent hood if your grill is under a roof. This fan pulls smoke and grease away from your house. It keeps your ceiling clean and safe from fire. Shifting your cooking tasks outside can also keep your indoor air fresh. As shown in a study in Environmental Health Perspectives, moving these tasks outside cuts indoor fumes like carbon monoxide. A hood makes sure these fumes do not drift back inside your home.

What is the best way to clean outdoor stainless steel appliances?

You should wipe your tools with a soft cloth and warm, soapy water. Always rub with the grain to avoid marks. For tough spots, use a cleaner made just for steel. Do not use steel wool as it can harm the surface. Wiping your items after each use stops grease and salt from building up. This keeps your yard space looking new and helps your tools last for a long time. It is a simple way to protect your buy.

How do I choose between gas and electric outdoor kitchen appliances?

Pick the one that fits the power lines in your yard. Gas tools like grills and burners heat up fast. They are great for high-heat cooking. Electric items like fridges and some ovens are easy to plug in and use. You should think about the cost of adding gas lines versus using more power. Both types work well if they are built for the weather. Talk to a pro to see which setup is best for your home and budget.

Start Planning Your New Outdoor Kitchen Today

Waiting to start your project might cause you to miss the best weather because top gear often has long wait times during the busy season. If you start your design now, we can help you get the right permits and choose high-quality gear so your kitchen is ready for summer. Choosing a single team for your design and build needs saves you time and ensures your high-end gear fits perfectly into your new stone island. By taking action today, you avoid the stress of last-minute changes and can look forward to hosting friends in a space built just for you.

Ready to get started? Schedule an outdoor kitchen design meeting with our experts to build your dream space now for your home.

Share this page:
Gunite swimming pool with a smooth marble dust finish

Marble Dust Pool Finish Guide for Gunite Pools

Many Long Island homeowners struggle with rough pool plaster that scrapes skin and traps green algae growth. A new marble dust pool finish solves this problem by providing a fresh and smooth surface. This blend is both cost effective and beautiful for any gunite pool project.

Ready to upgrade your Long Island pool? Visit our Smithtown showroom to compare finishes and plan your project.

A marble dust pool finish is a smooth interior coating made from white cement and crushed marble. Also called marcite or pool plaster, it protects a gunite shell and gives the water a bright, classic appearance. Careful installation and balanced water help preserve its feel and appearance.

What is a marble dust pool finish?

A marble dust pool finish is a smooth plaster coating made from white cement and crushed marble. Also called marcite, it seals and protects a gunite shell while giving the water a bright, clean look. It is a classic option for Long Island pool building work.

Parts of pool plaster

The main parts of this finish are white cement and crushed marble. When you mix these with water, they form a thick paste. Pro teams spread this paste over the concrete shell of the pool. The marble bits are small, which helps the surface stay smooth.

This smooth feel is nice for swimmers and makes it easy to keep the pool clean. You can see this mix at our Smithtown showroom to feel how it looks and feels.

While the standard color is bright white, you can change the tint of the mix. These tints can turn the water a light blue or a soft gray. This can help the pool match your deck or yard. Many people pick a light tint to give their water a deep glow, and a pool marble dusting pro can help you pick the best color for your home.

Visual style for gunite pools

The look of a marble dust pool finish is hard to beat. It reflects the sun to make the water look crisp and clear. This finish is a top choice for a gunite pool update because of its old-school style. It gives an even surface that looks great with any pool shape without feeling as rough as some pebble or stone finishes.

The bright white color also makes it easy to see the bottom of the pool. This is a good safety feature for families with young kids. It creates a high contrast with the pool lights at night, giving your yard a grand look. On Long Island, we use this finish for both luxury and simple pools.

Its bright appearance works with many pool designs and surrounding materials.

How it works with concrete

This type of finish is a great fit for gunite pools because it sticks well to the shell. The plaster acts as a final layer that keeps the water in the pool. It is thick enough to hide small bumps in the shell but thin enough to stay strong. This bond is vital for the health of your pool over time.

A strong bond between the plaster and the concrete prevents leaks. This saves you money on water bills and repairs in the long run.

Since the mix is porous, it does need some care. You must keep your pool water in a healthy range to protect the surface. If you let the water get out of balance, the finish could get rough or stained. Good care will keep the marble dust looking new and feeling smooth for a long time.

It is one of the most cost-effective ways to finish a gunite pool. Many owners find that the classic look and feel are worth the small amount of work needed to keep the water right.

Marble dust vs. other gunite pool finishes

A marble dust pool finish offers a smooth, classic surface, while quartz and exposed stone generally offer greater wear resistance and more texture. Marble dust can stay bright white or accept a tint. The right choice for a Long Island pool building project depends on preferred feel, appearance, care, and budget.

Smooth feel of marble dust

Classic plaster feels smooth, reflects light, and is often a cost-friendly choice. Balanced water helps prevent stains and rough spots. Research also shows that marble dust helps strength in cement mixes.

Strength of quartz and stone

Some owners want a finish that lasts longer and resists wear. Quartz finishes mix small bits of quartz with cement. This makes the surface harder than plain marble dust. It stands up better to pool chemicals and heavy use.

Many choose this for a gunite pool update when they want more color choices. The quartz bits can be dyed to give the water a deep blue or green hue. It is a smart way to get a custom look that stays strong for a long time.

Exposed stone is another tough choice. It uses small pebbles or glass beads to create a bumpy texture. This look hides dirt well and adds a natural feel to your yard. It is very strong and resists stains better than smooth plaster.

But it can be rougher on the skin. You should check a sample at a showroom to see if you like the feel. This type of finish is great for pools with a natural or rustic style and works well with rock features.

How to pick the best finish

Choosing the best finish depends on your style and budget. Think about how the pool will look with your house and deck. A smooth white finish looks great with modern homes. A stone finish might look better with a wood deck or a garden.

You also need to think about care. If you have a busy life, a harder surface might save you time on repairs. But if you want the softest feel, marble is still the king.

Cost is also a factor in your choice. Marble dust is usually the least costly to install. Quartz and stone cost more because they take more work and better mixes. But they may last longer, which can save money over time.

Talk to a pro to find the best match for your home and lifestyle. They can show you how each choice looks in the sun and under the water.

Material Strength Feel Look
Marble Dust Good Very Smooth Bright White
Quartz Better Mostly Smooth Deep Colors
Exposed Stone Best Textured Natural Stone
Professional applying a smooth marble dust pool finish to a gunite pool
Careful hand application helps create a smooth, even marble dust surface.

How is marble dust applied to a gunite pool?

A skilled crew applies marble dust after inspecting, repairing, and cleaning the gunite shell. The team adds a bond coat, mixes white cement with fine marble, and trowels the plaster into a smooth layer. Prompt filling and careful startup water care then help the new surface cure.

Surface prep and check

The work begins with a full check of the pool shell. First, the crew must drain the pool and let it dry. They look for any loose bits or old plaster that might fall off. If the gunite has cracks, they must fix them with a strong cement mix.

This creates a flat and firm base for the new marble dust pool finish. A clean surface is the only way to get a bond that lasts. If the shell is dirty, the new plaster might peel or flake away in just a few years.

After the shell is clean, the team apply a bond coat. This is a special type of glue made for pools. It acts as a bridge between the old gunite and the new plaster layer. Without this coat, the two layers might not stick well.

The team must be sure to cover every inch of the pool floor and walls. This step is what makes a pro job stand out from a quick fix. It makes sure that the final result stays smooth and looks great under the sun.

Mixing and applying the finish

The crew mixes the plaster right at your home. They use large bins to blend the white cement and crushed marble. They must get the ratio just right so the mix is easy to spread. If the mix is too dry, it will be hard to smooth out.

If it is too wet, it might run down the walls. This is why a pro crew is so vital. They know how to adjust the mix based on the heat and sun of the day. They can also add tints to the mix if you want a cool gray or deep black pool look.

Once the mix is ready, the team works fast. They use hand trowels to press the plaster onto the walls. It takes a lot of arm strength to get an even coat across the whole pool. The crew starts at the deep end and moves up the walls.

They must work in the shade or use a tent to keep the sun off the wet plaster. If it dries too fast, it might crack. This is a tough part of the job that needs many hands on deck at once.

  1. Draining and scrubbing: The team pumps out all the pool water and uses tools to scrub away old scale and dirt from the shell.
  2. Gunite repairs: Any holes or cracks in the concrete shell are filled with a patch mix to make sure the base is flat.
  3. The bond coat: A sticky layer is rolled onto the shell to help the new marble dust pool finish grip the old concrete.
  4. The first pass: The crew uses trowels to spread a thin layer of plaster over the walls and floor of the pool.
  5. Final smoothing: As the plaster starts to set, the team rubs it down many times to get a glass-smooth feel.
  6. Filling with water: Clean water must go back into the pool as soon as the floor is done to help the plaster cure.
  7. Startup care: You must brush the pool walls and check the water mix every day for at least two weeks.

Startup care and water balance

Filling the pool is not the last step. The first month is a vital time for a new gunite swimming pool renovation. You must keep the water mix in a safe range. High or low pH can etch the new surface and make it feel rough.

The CDC says that proper water balance is key for the health of both the pool and the people who use it. Brushing the walls twice a day helps remove any loose dust from the plaster.

At Gappsi, we take pride in our work. We offer a full range of outdoor services beyond just pools. Our team can also build Sports Game Courts and patios to match your new pool. If you want to see our work, visit our Smithtown showroom.

We can show you samples of the different colors and styles we offer. Our goal is to help you create a backyard space that you love to use every day.

Finished Long Island gunite pool with a white marble dust pool finish
A finished marble dust surface gives clear water a bright, classic appearance.

Comparing pool finish options for your property? Talk with Gappsi about marble dusting before choosing a color and finish.

How long does a marble dust pool finish last?

A marble dust pool finish can remain attractive for many years, but there is no single service-life guarantee. Longevity depends on shell preparation, installation quality, water chemistry, climate, and use. Careful startup and routine maintenance help preserve the smooth plaster surface.

You can learn more about how to build a pool with us. We help people on Long Island get the best results for their homes.

Factors that impact service life

Preparation, climate, and pool use all affect service life. The crew should repair cracks, clean the shell, and apply the mix evenly. Proper filling and startup care help a marble dust pool finish set correctly.

Signs your pool needs a new finish

You should look for signs that your pool needs a new finish. Stains are a common sign that the surface is wearing out. Some stains are just on the top, but others go deep into the plaster.

You might also see rough spots on the floor or walls. This can happen when the water balance is off. The water can eat away at the finish. This is called etching and it makes the walls feel like grit.

Scaling is another sign to watch for in your pool. This is when hard white spots form on the surface. It can make the finish feel like sand or even sharp in some areas.

If you see cracks or if the plaster starts to fall off in chunks, you should call a pro. You can see work we have done in our showrooms to see how a fresh finish should look. A smooth surface is safer for your feet and looks much better.

Why water balance matters

The best way to make your marble dust pool finish last is to watch the water. You must keep the pH and other levels in the right range. If the water is too harsh, it will be bad for the white cement.

This will lead to a rough surface that can trap dirt and algae. It is also hard on your skin and eyes when you swim. Good water balance keeps the surface smooth and clear.

You should test your pool water often to keep it safe. Keeping the water in check protects the finish and makes it feel better for those who swim. Many groups give tips on how to keep your pool safe and clean.

As one guide, the CDC has rules on pool health. Using these rules will help you get the most out of your pool finish and keep it bright for a long time.

How to care for a marble dust pool finish

Protect a new marble dust pool finish by following the installer’s startup plan, brushing away plaster dust, circulating and filtering the water, and monitoring chemistry. After startup, regular testing, cleaning, and prompt stain removal help keep the surface smooth and bright.

The first few weeks of startup

Wait for three weeks before you use an auto pool cleaner. The wheels can leave tracks on the soft finish. It is also best to wait a few weeks before you use a pool heater. High heat can change how the finish cures.

Good startup care helps the surface stay smooth and bright for many years. Gappsi Group has seen many pools in Nassau and Suffolk Counties stay in great shape with these steps. Our team in Smithtown knows that these early days set the stage for how long your pool will last.

Keep the water chemistry balanced

Keeping your water chemistry balanced is the best way to protect your marble dust pool finish. If the water is not balanced, it can damage the smooth inside. Check your pool water at least once a week. You want to look at the pH level first.

If the pH stays too high for a long time, calcium can build up. This creates a white crust on the walls. If the pH is too low, the water becomes acid. Acid can etch the marble dust and make the walls feel rough.

Total alkalinity and calcium hardness are also key. Alkalinity acts as a shield for the pH level. It keeps the pH from jumping up and down. Calcium hardness is a measure of how much lime is in the water.

If the level is too low, the water will try to pull calcium out of your pool walls. This leads to pits and small holes in the finish. If you see white flakes in the water, your calcium may be too high. Keeping these levels in a safe range will help your pool finish last for a long time.

Handling stains and yearly changes

Stains can form on a marble dust pool finish from leaves, dirt, or metal bits. If you see a dark spot, try to brush it right away. Many stains are just on the surface and will come off with a stiff brush. For tough marks, you can use a stain remover made for pool plaster.

Do not use harsh tools like wire brushes. They can tear the finish. If you have trees near your pool, skim the water often. Natural things like acorns can leave brown marks if they sit on the bottom for too long.

On Long Island, we must deal with cold winters and big shifts in the weather. When you close your pool for the year, make sure the water is clean. Add winter chemicals to keep the water clear while the pool is off. A tight cover is a good tool to keep out dirt and trash.

If you use a mesh cover, check the water level and chemistry in the late winter. Snow and rain can change the balance of the water. Taking care of your pool in the cold months prevents a big mess in the spring. If you need help with a new pool build or a fix, we are here for you.

Is marble dust right for your Long Island pool?

Marble dust may be right for a Long Island gunite pool when a smooth feel and bright, classic appearance are priorities. Also called marcite, the finish combines Portland cement and crushed marble sand. Compare its texture, maintenance needs, and color options with alternatives before deciding.

When you plan your pool construction, the finish is one of the last steps. It sets the color of the water and the feel of the floor, while marble dust feels soft to the touch during long days of swimming.

The classic look and feel

A marble dust finish gives your pool a crisp and white glow. When the sun hits the water, the white surface makes the pool look light blue and clear. This look fits well with many home styles on the island. Its smooth feel makes it a practical pick for steps and shallow areas where people sit or play.

The texture is tight and fine. This helps to keep the water clear and the surface easy to brush. Most people like how the pool stays bright even on cloudy days. The result is a classic style that does not quickly go out of fashion.

Strong and lasting results

Long Island weather can be tough on a pool. Our cold winters and hot summers mean you need a finish that lasts. Research shows that adding marble dust to cement mixes can make them stronger. One study found that marble dust helps durability and helps the mix resist damage from the weather.

A good install is also vital for your pool. Our experts at Gappsi Group make sure the mix is applied well. This stops thin spots or cracks that could lead to leaks later. When done right, a marcite finish can last for ten to fifteen years.

You just need to keep your water balance in check to keep it looking new. Proper care keeps the surface white and stops stains from forming over time.

Making your final choice

It is helpful to see these samples in person before you decide. You can visit the Gappsi showroom in Smithtown to see real samples of pool finishes. We can show you how marble dust looks next to other options like pebble or glass bead. Seeing the colors and feeling the textures helps you make a choice you will love for years.

We can also help you plan other parts of your yard, including the patio and landscape. We work with you from the first design to the final splash in your new pool.

Frequently Asked Questions

These answers cover the most common questions about marble dust terminology, colors, staining, and comparative cost. Because every pool and site differs, a professional inspection is the best way to evaluate the right finish and care plan for a specific property.

What is the difference between marcite and marble dust?

There is no real difference between these two terms. In the pool industry, marcite is just another name for a marble dust finish. Both refer to a mix of white Portland cement and crushed marble sand. This mix is the standard way to coat gunite pools on Long Island.

According to Gappsi, this classic choice remains common. It gives the pool a bright white look and a very smooth surface for swimmers.

Can you add color to a marble dust pool finish?

Yes, you can add liquid or powder tints to the mix to change the color. While white is the most common choice, many pool owners choose light blues or grays to give the water a deeper look. Keep in mind that dark colors may show streaks or fade over time due to the sun and pool salts. If you want a custom look, you can visit the Gappsi showroom to see different color options in person.

Does a marble dust pool finish stain easily?

Since it is a porous finish, marble dust can stain if you do not keep the water in check. Metals like iron or copper in the water can leave dark spots on the white walls. Debris like leaves can also leave marks if they sit on the floor for too long. According to Gappsi, frequent water testing and weekly brushing help prevent most stains.

Is marble dust the most affordable pool finish?

Yes, marble dust is often the most budget-friendly choice for finishing a gunite pool. It costs less than modern options like quartz or pebble because the parts are simpler. While it saves you money upfront, it has a shorter life than tougher finishes. Research shows that adding marble powder helps the cement resist water better, but the actual service life depends on installation and care.

Ready for your Long Island pool consultation?

A professional consultation can help you compare marble dust colors, assess the current gunite shell, and understand the application and startup process. Ask about a marble dust pool renovation and the appropriate next step for your Long Island property.

Ready to visit the Smithtown showroom or request a pool consultation? Visit our local Smithtown showroom to talk to a pool expert and start your pool project with our helpful crew today. We are here to help you get the best results for your home.

Share this page: