View Gappsi’s YouTube Channel to view Resin Bond Stone Joint Restoration for a Natural Pool Patio in Setauket, NY
When an older natural stone pool patio begins to show signs of wear, homeowners often assume the only solution is a complete replacement. Fortunately, that isn’t always the case. At Gappsi, we specialize in restoring and preserving beautiful outdoor living spaces while enhancing their durability and appearance. One of our latest projects in Setauket, NY, demonstrates how innovative materials and expert craftsmanship can breathe new life into an aging patio without sacrificing its original character.
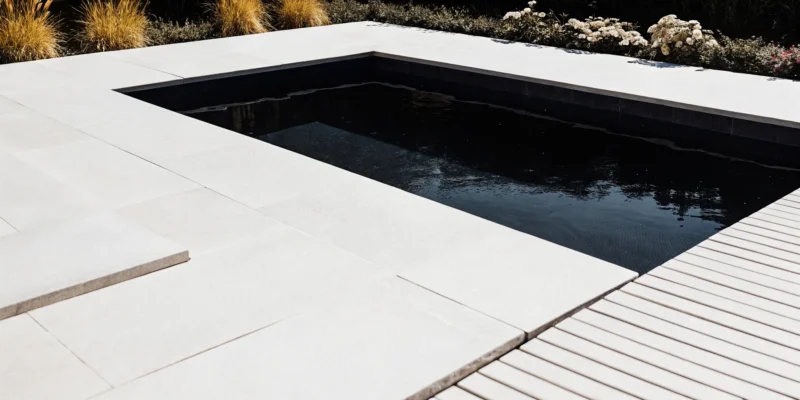
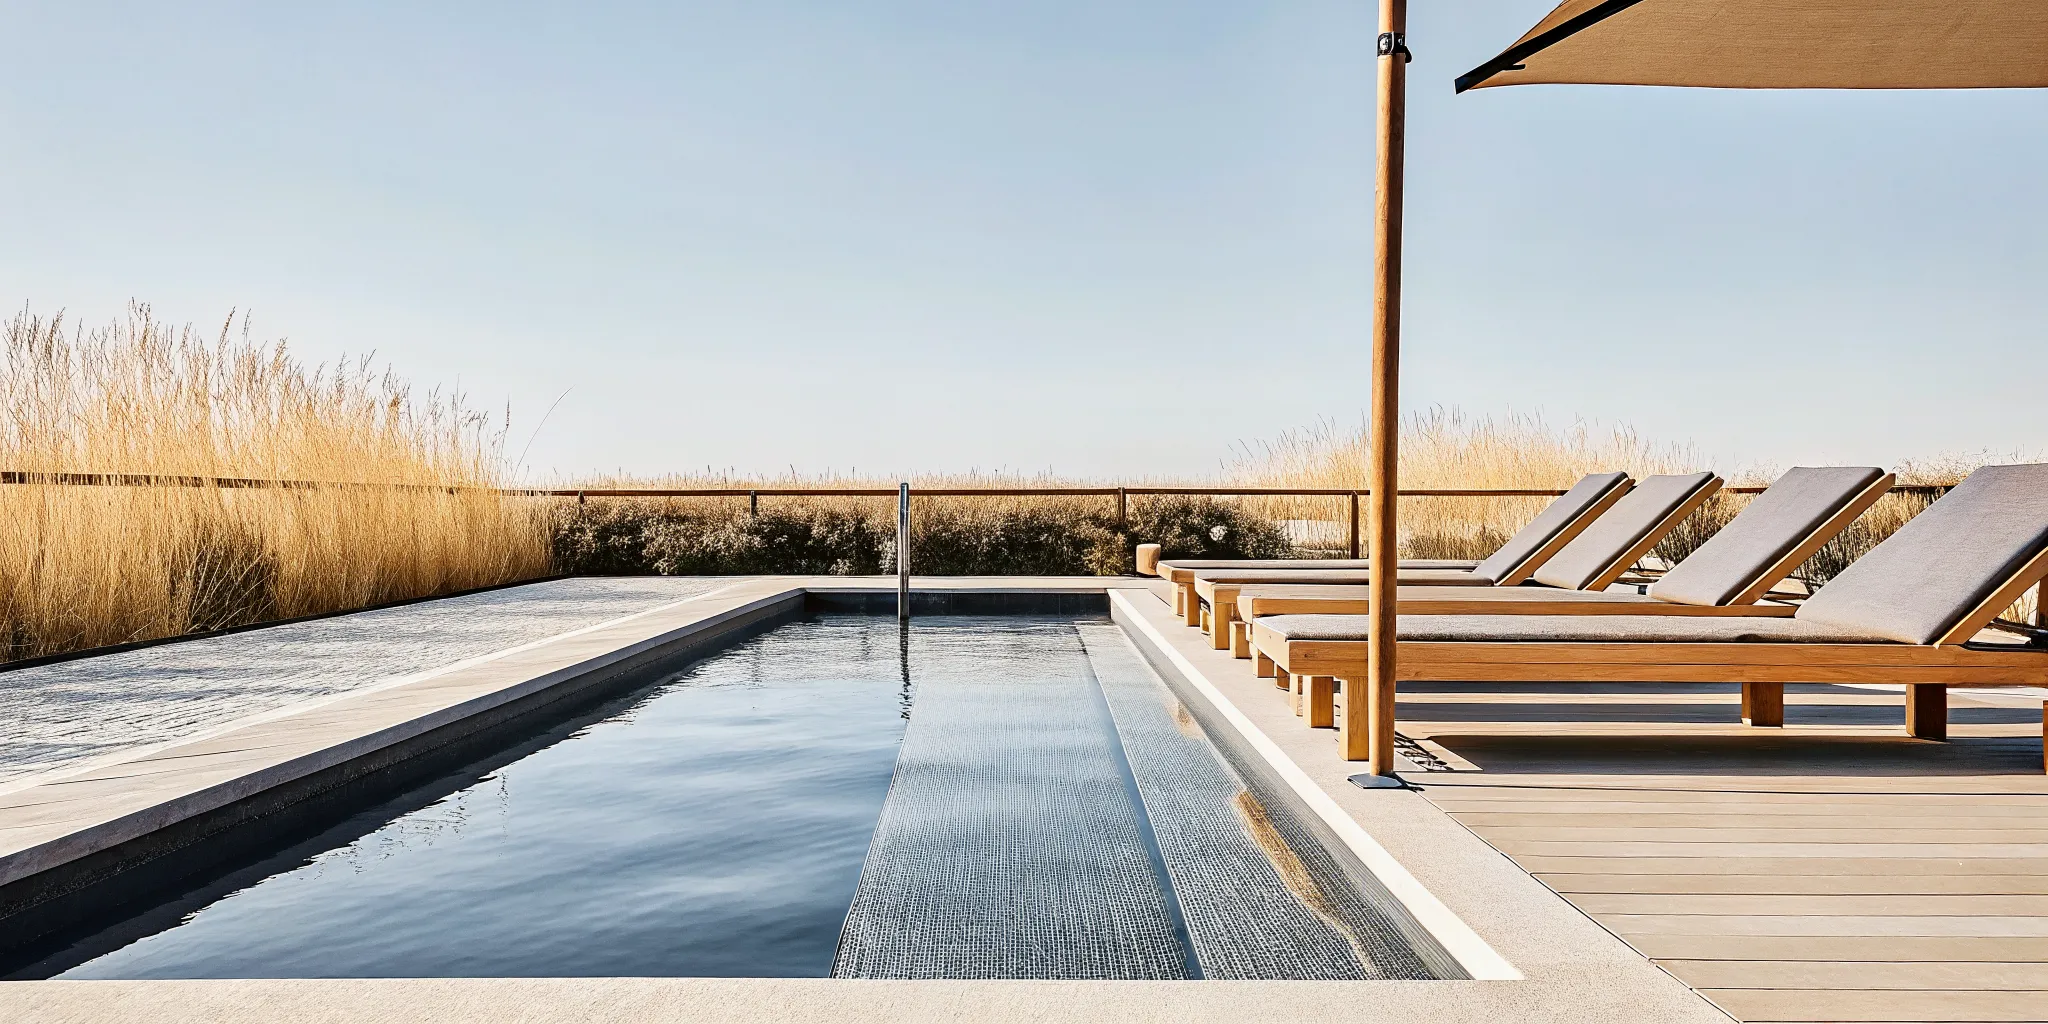
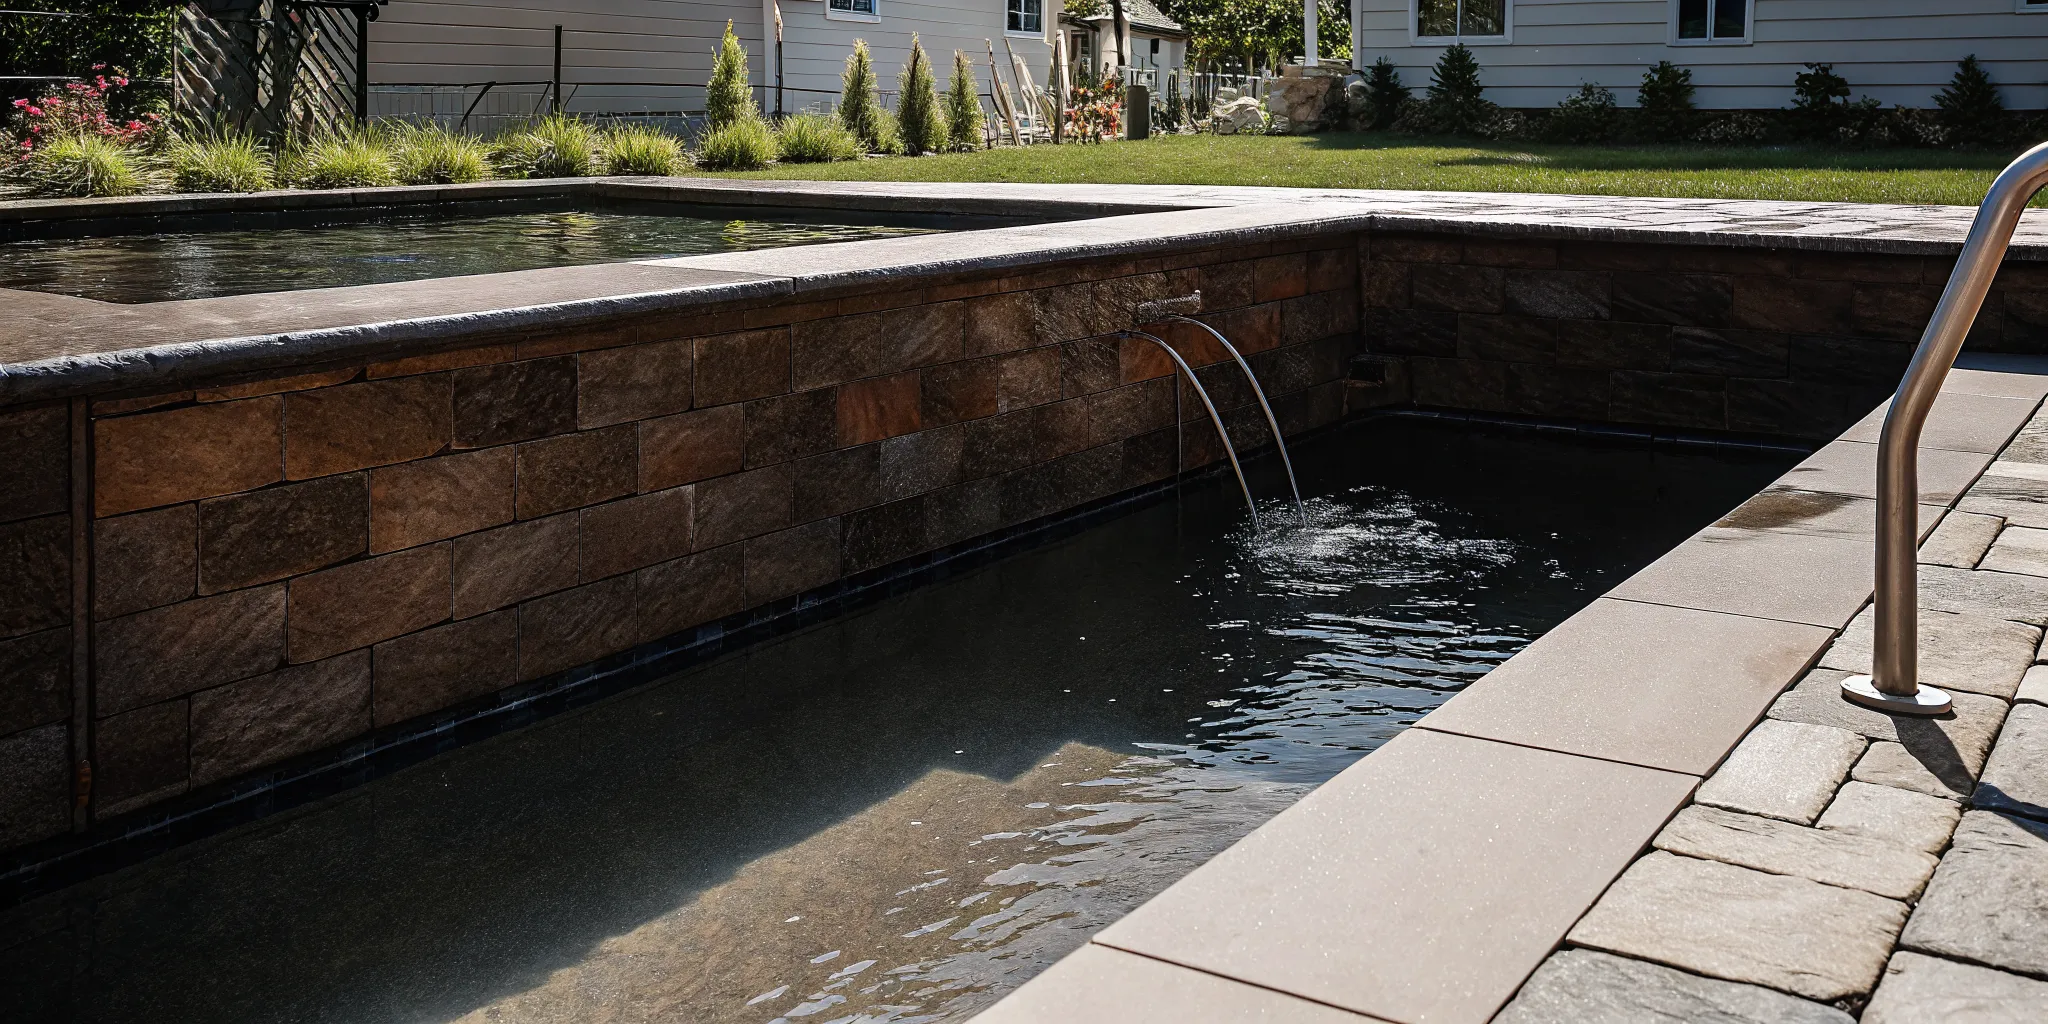
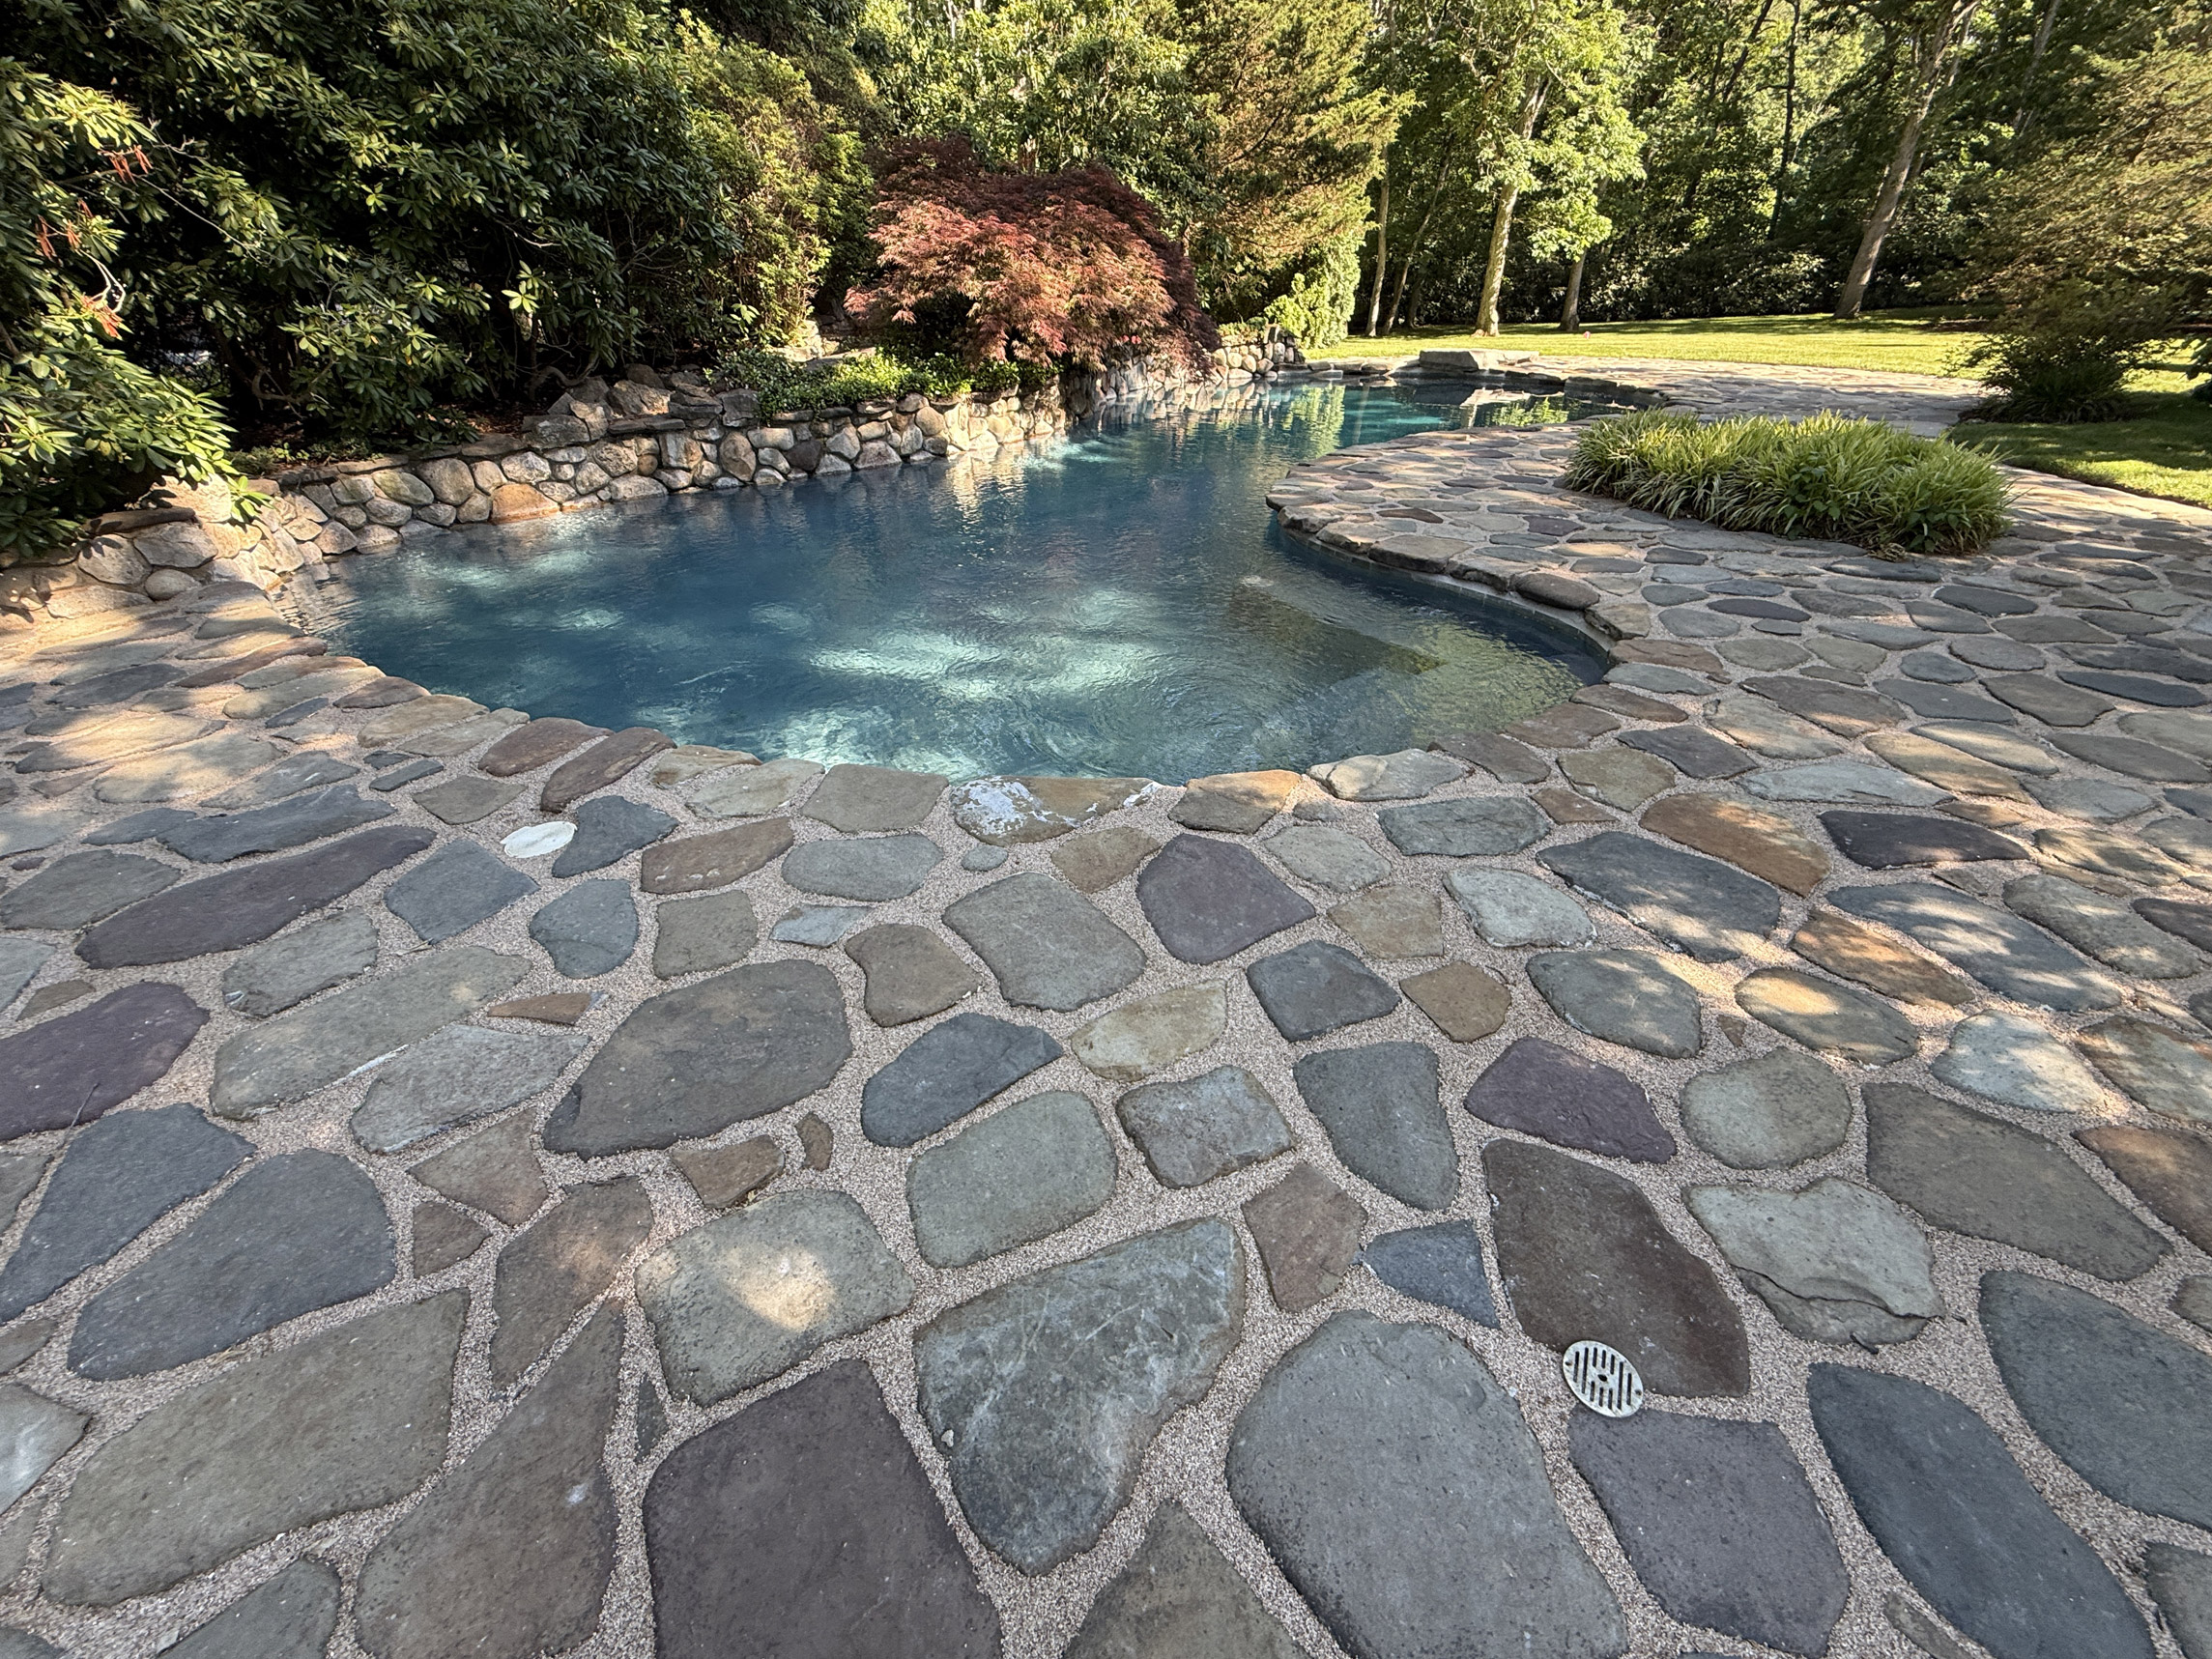
For this project, Gappsi restored the deteriorating joints of a natural stone pool patio using Italian-imported resin-bond stones. At the same time, we remodeled the swimming pool with a fresh gray marble dust finish that complements the landscape and maintains the property’s natural, pond-like aesthetic.
Restoring an Aging Natural Stone Pool Patio
Natural stone patios have a timeless beauty that blends seamlessly with outdoor landscapes. Unlike manufactured pavers, irregular stone patios create an organic appearance that is difficult to replicate. However, over time, the cement joints between the stones can deteriorate due to exposure to weather, water infiltration, freeze-thaw cycles, and years of foot traffic.
The homeowner’s patio had reached this point. The original cement joints had become loose and were beginning to crumble, creating several problems:
- Loose stones throughout the patio
- Unsightly cracks and missing joint material
- Increased weed and moss growth
- Water penetration beneath the patio surface
- Safety concerns from uneven stones
Although the stones themselves remained in excellent condition, the failing joints threatened the structural integrity of the entire patio.
Instead of replacing the beautiful natural stone, Gappsi recommended restoring the joints with a modern resin-bond stone system to preserve the patio while significantly improving its performance.
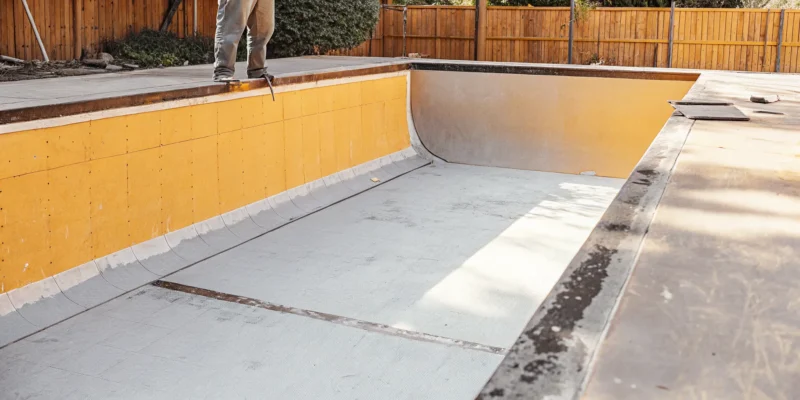
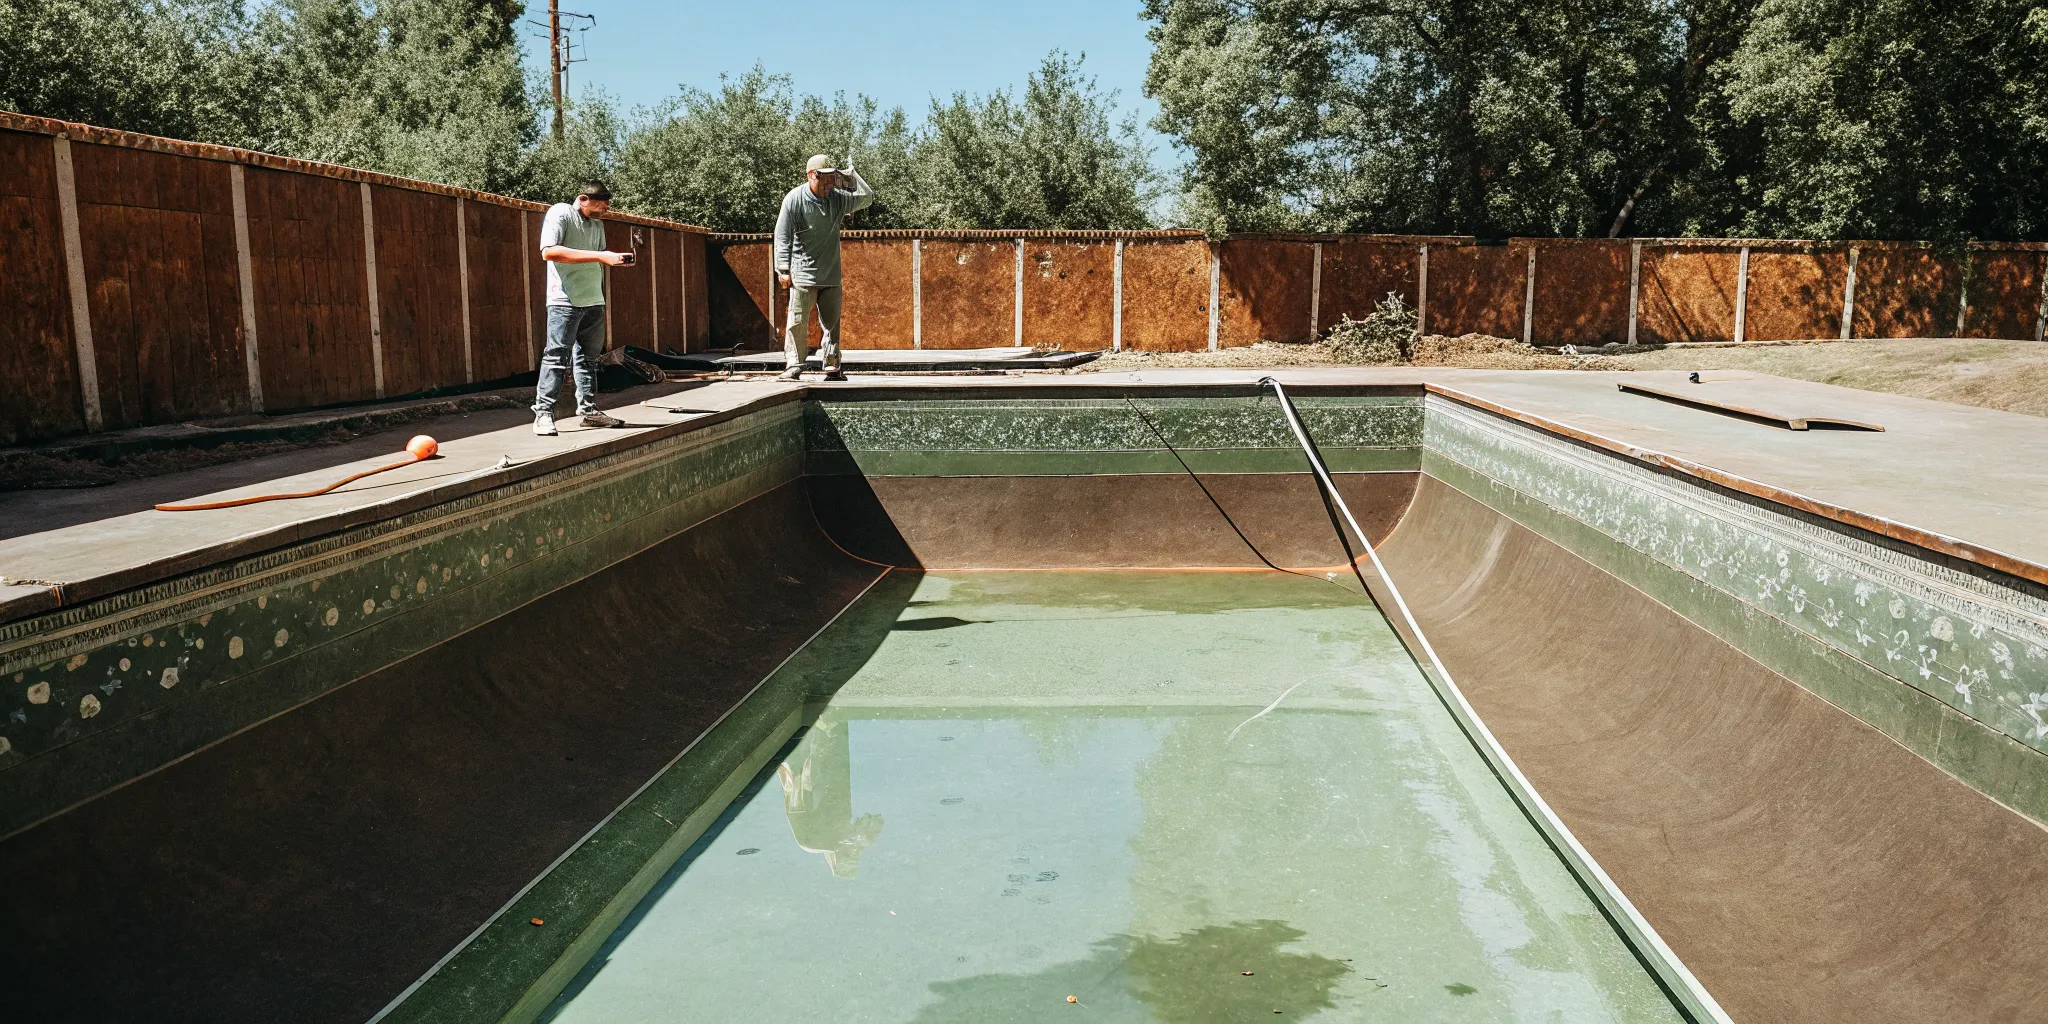
Removing the Failed Cement Joints
Every successful restoration begins with proper preparation.
Our first step was to carefully remove all the deteriorated cement between the stones. This process requires precision to avoid damaging the surrounding stone while completely eliminating loose material that could weaken the new installation.
By thoroughly cleaning every joint, we created a solid foundation for the new resin bond to adhere properly and perform for years to come.
This preparation stage is one of the most important parts of any patio restoration project because the longevity of the finished installation depends on the quality of the base beneath it.
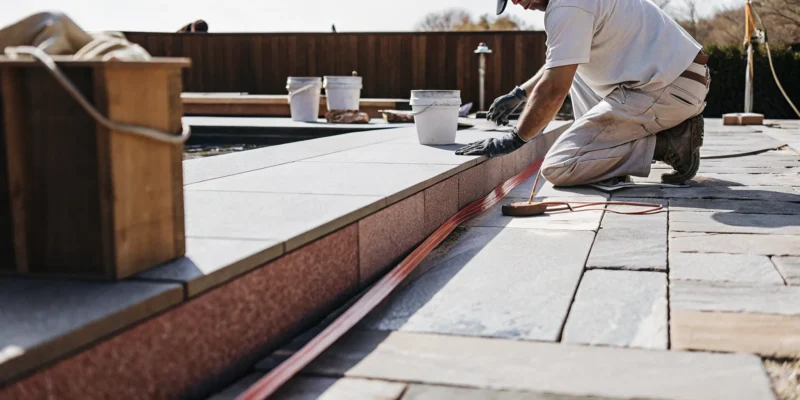
Why Resin Bond Stones Are a Superior Solution
Traditional cement joints have been used for decades, but today’s resin technologies offer significant advantages for outdoor stone patios.
For this project, Gappsi installed resin-bond stones imported from Italy, combining decorative stone aggregate with a premium one-component urethane binder.
Once mixed, the materials create an attractive, durable joint that locks the stones in place while remaining more flexible than conventional cement.
Some of the benefits include:
Increased Flexibility
Unlike rigid cement joints, resin-bond materials can better accommodate slight movement caused by seasonal temperature changes. This flexibility helps minimize cracking over time.
Excellent Drainage
The resin-bound stone system allows water to drain naturally while maintaining the patio’s stability. Proper drainage helps reduce standing water and minimizes freeze-thaw damage during Long Island winters.
Long-Lasting Performance
Premium urethane binders create strong adhesion between the decorative stone aggregate, producing joints that resist erosion, cracking, and weathering far better than traditional mortar.
Natural Appearance
Because the joints are made of decorative stone rather than gray cement, they blend seamlessly with natural stone patios. This was especially important for maintaining the landscape’s organic design.
Imported Italian Materials Deliver Premium Results
At Gappsi, we believe exceptional outdoor spaces deserve exceptional materials.
For this Setauket project, we selected a premium resin-bond stone product imported directly from Italy. Italian manufacturers have long been recognized for producing some of the highest-quality hardscape materials available, combining durability with elegant design.
The one-component urethane binder creates a strong bond while allowing the decorative stones to retain their natural texture and appearance.
The finished joints look as though they have always been part of the original patio while offering dramatically improved performance.
Preserving the Natural Landscape Design
One of the homeowner’s primary goals was to preserve the property’s unique character.
This swimming pool was originally designed to resemble a natural pond, with irregular stonework blending into the surrounding landscape. Rather than replacing the patio with modern pavers, Gappsi carefully maintained the existing stone layout that gives the backyard its distinctive appearance.
By restoring instead of replacing, we preserved:
- The original natural stone patio
- The organic shape of the landscape
- The rustic charm of the outdoor living space
- The established character of the property
The new resin-bond joints provide a fresh, clean appearance while remaining true to the original design vision.
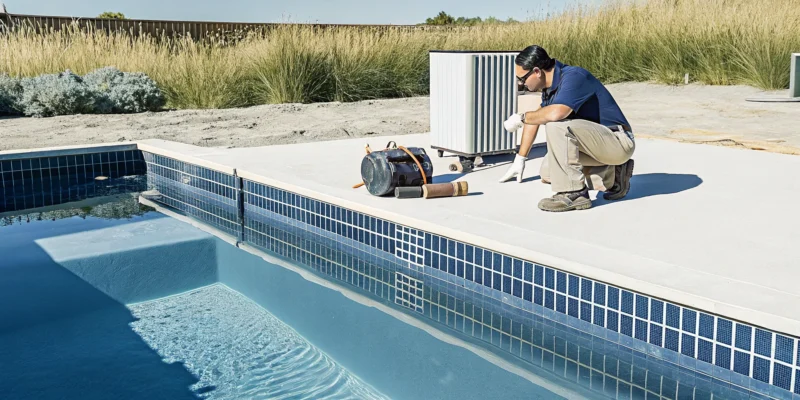
Pool Remodeling Completes the Transformation
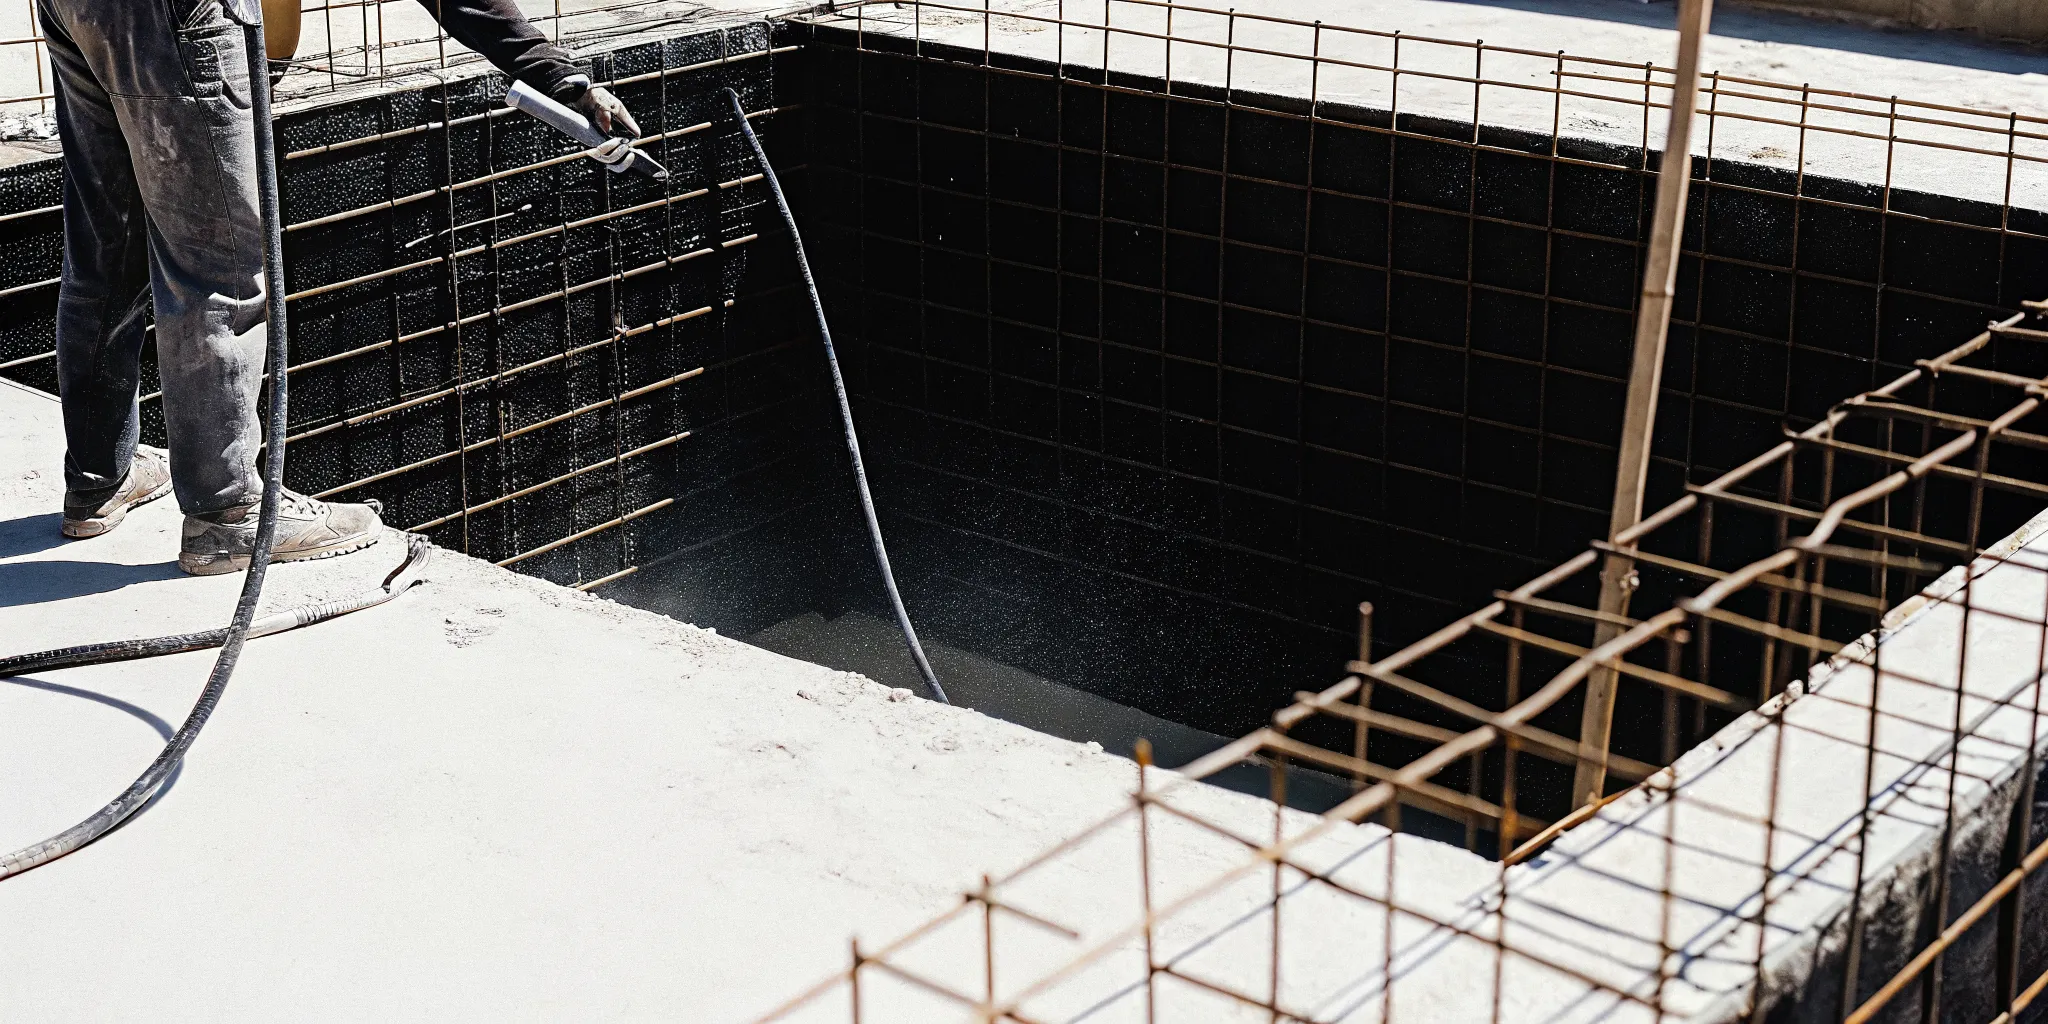
In addition to restoring the patio, Gappsi remodeled the swimming pool.
The pool received a brand-new gray marble dust finish, replacing the aging interior surface.
Gray marble dust has become increasingly popular because it creates a sophisticated appearance while enhancing the water’s natural color. Instead of the bright blue look associated with traditional plaster finishes, gray marble dust produces subtle tones that resemble a tranquil pond or natural lagoon.
The result perfectly complements the surrounding stone patio and creates a cohesive outdoor environment.
The refreshed pool finish also improves:
- Surface durability
- Water appearance
- Swimming comfort
- Overall property value
- Long-term performance
Why Restoration Can Be Better Than Replacement
Many homeowners believe that older patios must be demolished once the joints begin failing. In reality, restoration is often the smarter investment.
When the existing natural stones remain structurally sound, restoring the joints provides numerous advantages:
- Lower overall project cost
- Faster installation
- Less disruption to the property
- Preservation of mature landscaping
- Retention of original craftsmanship
- Improved durability using modern materials
For homeowners who appreciate the beauty of natural stone, restoration allows them to enjoy the same timeless appearance with significantly improved performance.
Expert Hardscape Restoration by Gappsi
Every restoration project requires careful planning, quality materials, and experienced craftsmanship.
At Gappsi, we specialize in restoring patios, walkways, pool decks, driveways, retaining walls, and outdoor living spaces throughout Long Island. Whether your project involves natural stone, travertine, porcelain pavers, concrete pavers, or custom masonry, our experienced team evaluates every detail to recommend the best long-term solution.
We combine traditional masonry expertise with innovative products, such as imported resin-bond systems, to deliver beautiful, durable results that stand the test of time.
A Beautiful Backyard Revitalized in Setauket, NY
This latest Gappsi project in Setauket, NY, showcases how thoughtful restoration can completely transform an aging outdoor space. By removing deteriorated cement joints, installing premium Italian resin-bond stones, and refinishing the pool with elegant gray marble dust, we preserved the backyard’s natural beauty while dramatically improving its durability and functionality.
The homeowner now enjoys a refreshed pool patio that maintains its original pond-inspired design while benefiting from today’s advanced restoration materials.
If your natural stone patio has loose joints, cracked mortar, or signs of aging, Gappsi can help restore its beauty without unnecessary replacement. Our experienced team provides custom hardscape restoration and pool remodeling solutions that enhance both the appearance and longevity of your outdoor living space throughout Long Island.
Contact Gappsi Today
📍 Serving all of Long Island, NY — Nassau & Suffolk Counties
🌐 https://www.gappsi.com/
📞 Call now for a free consultation and estimate