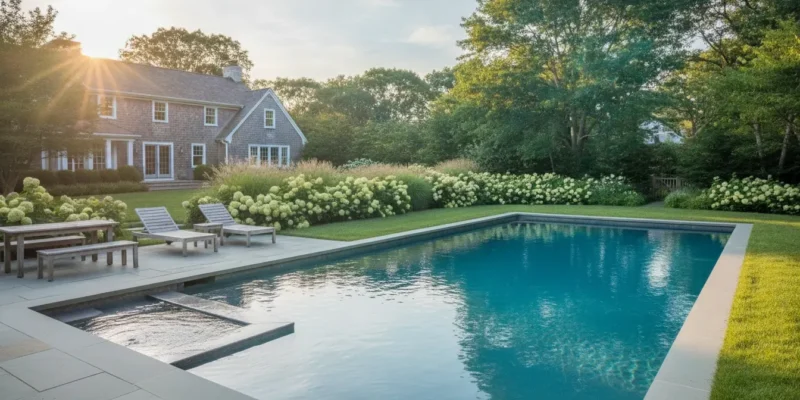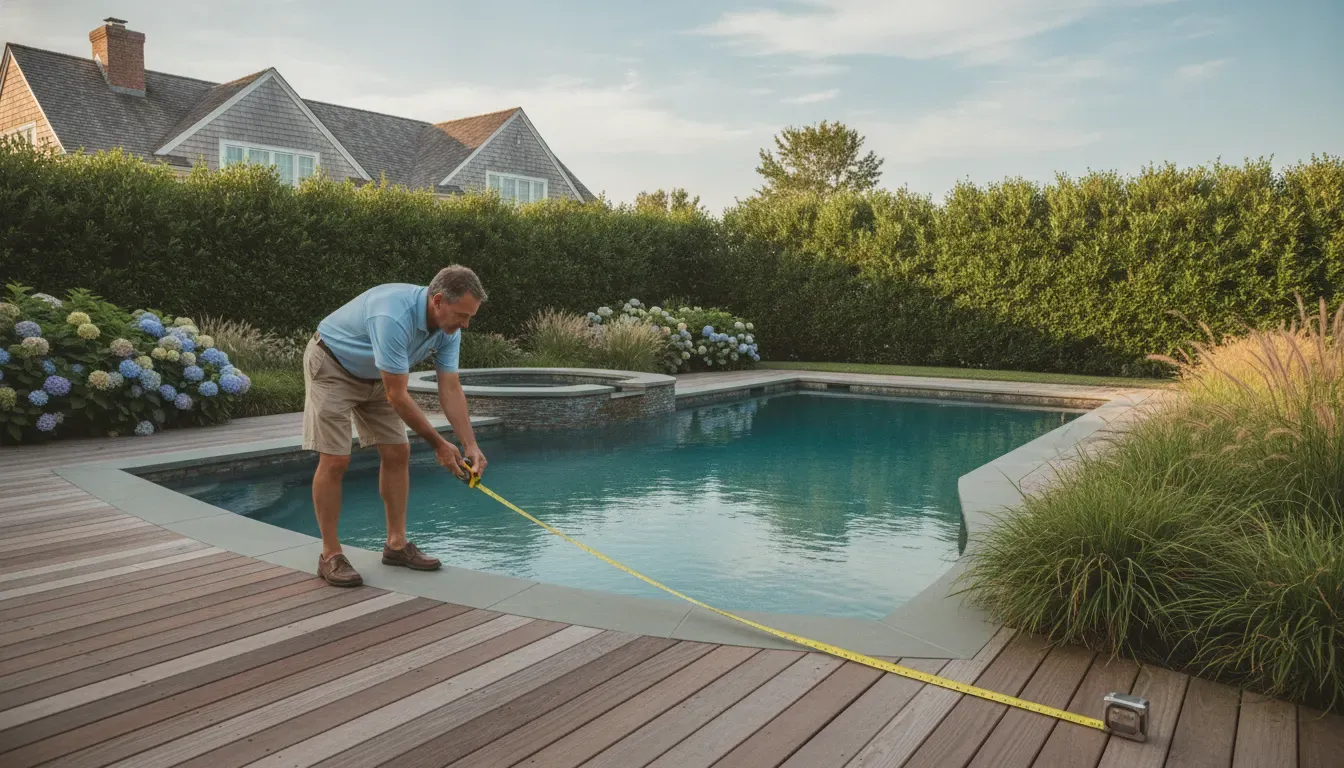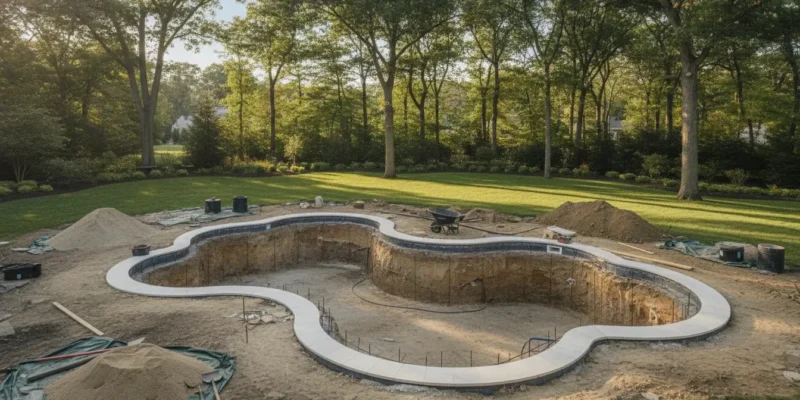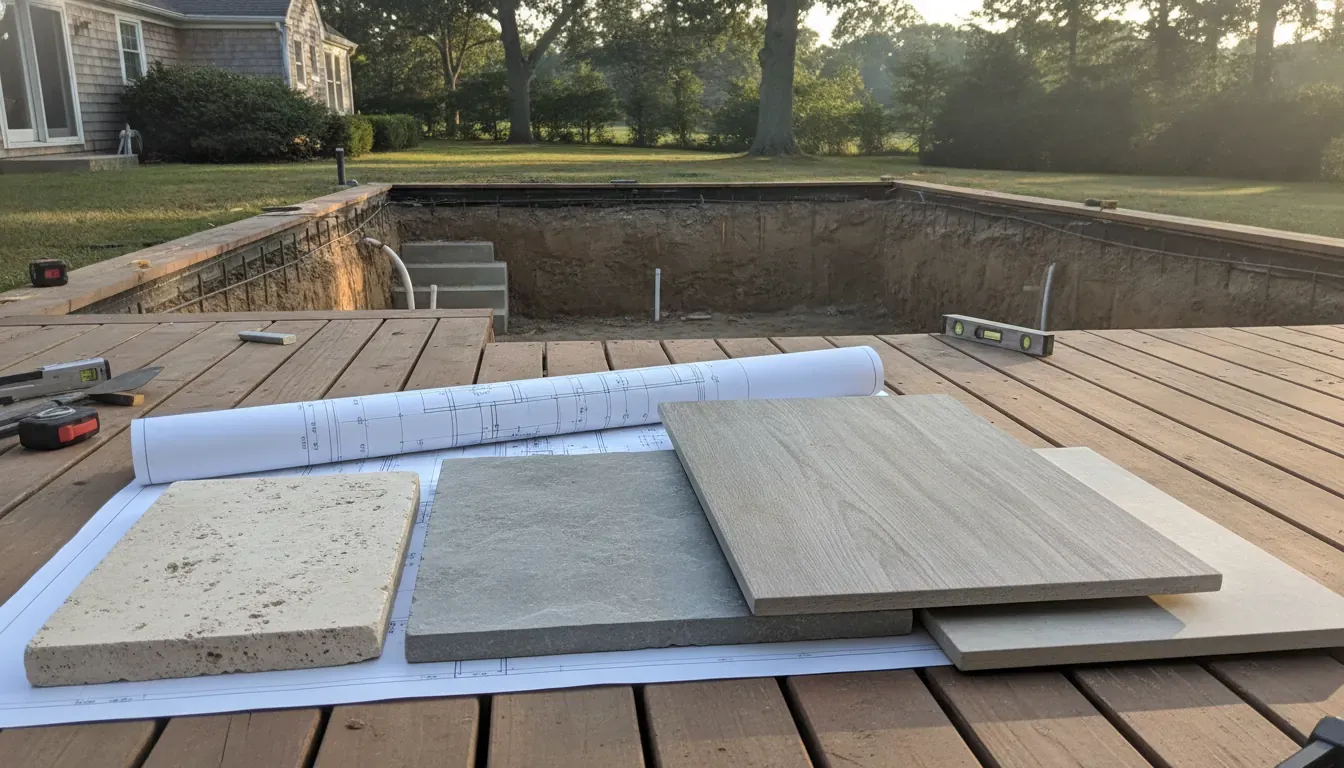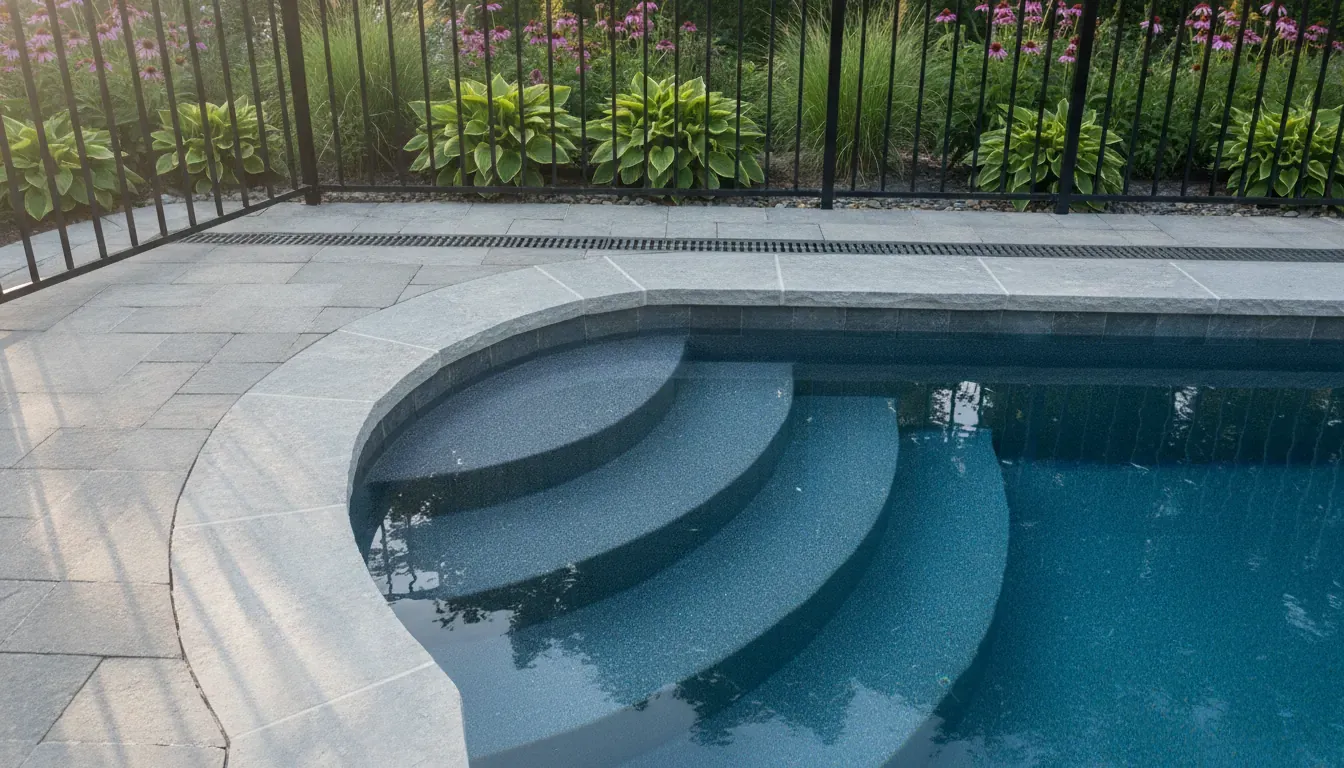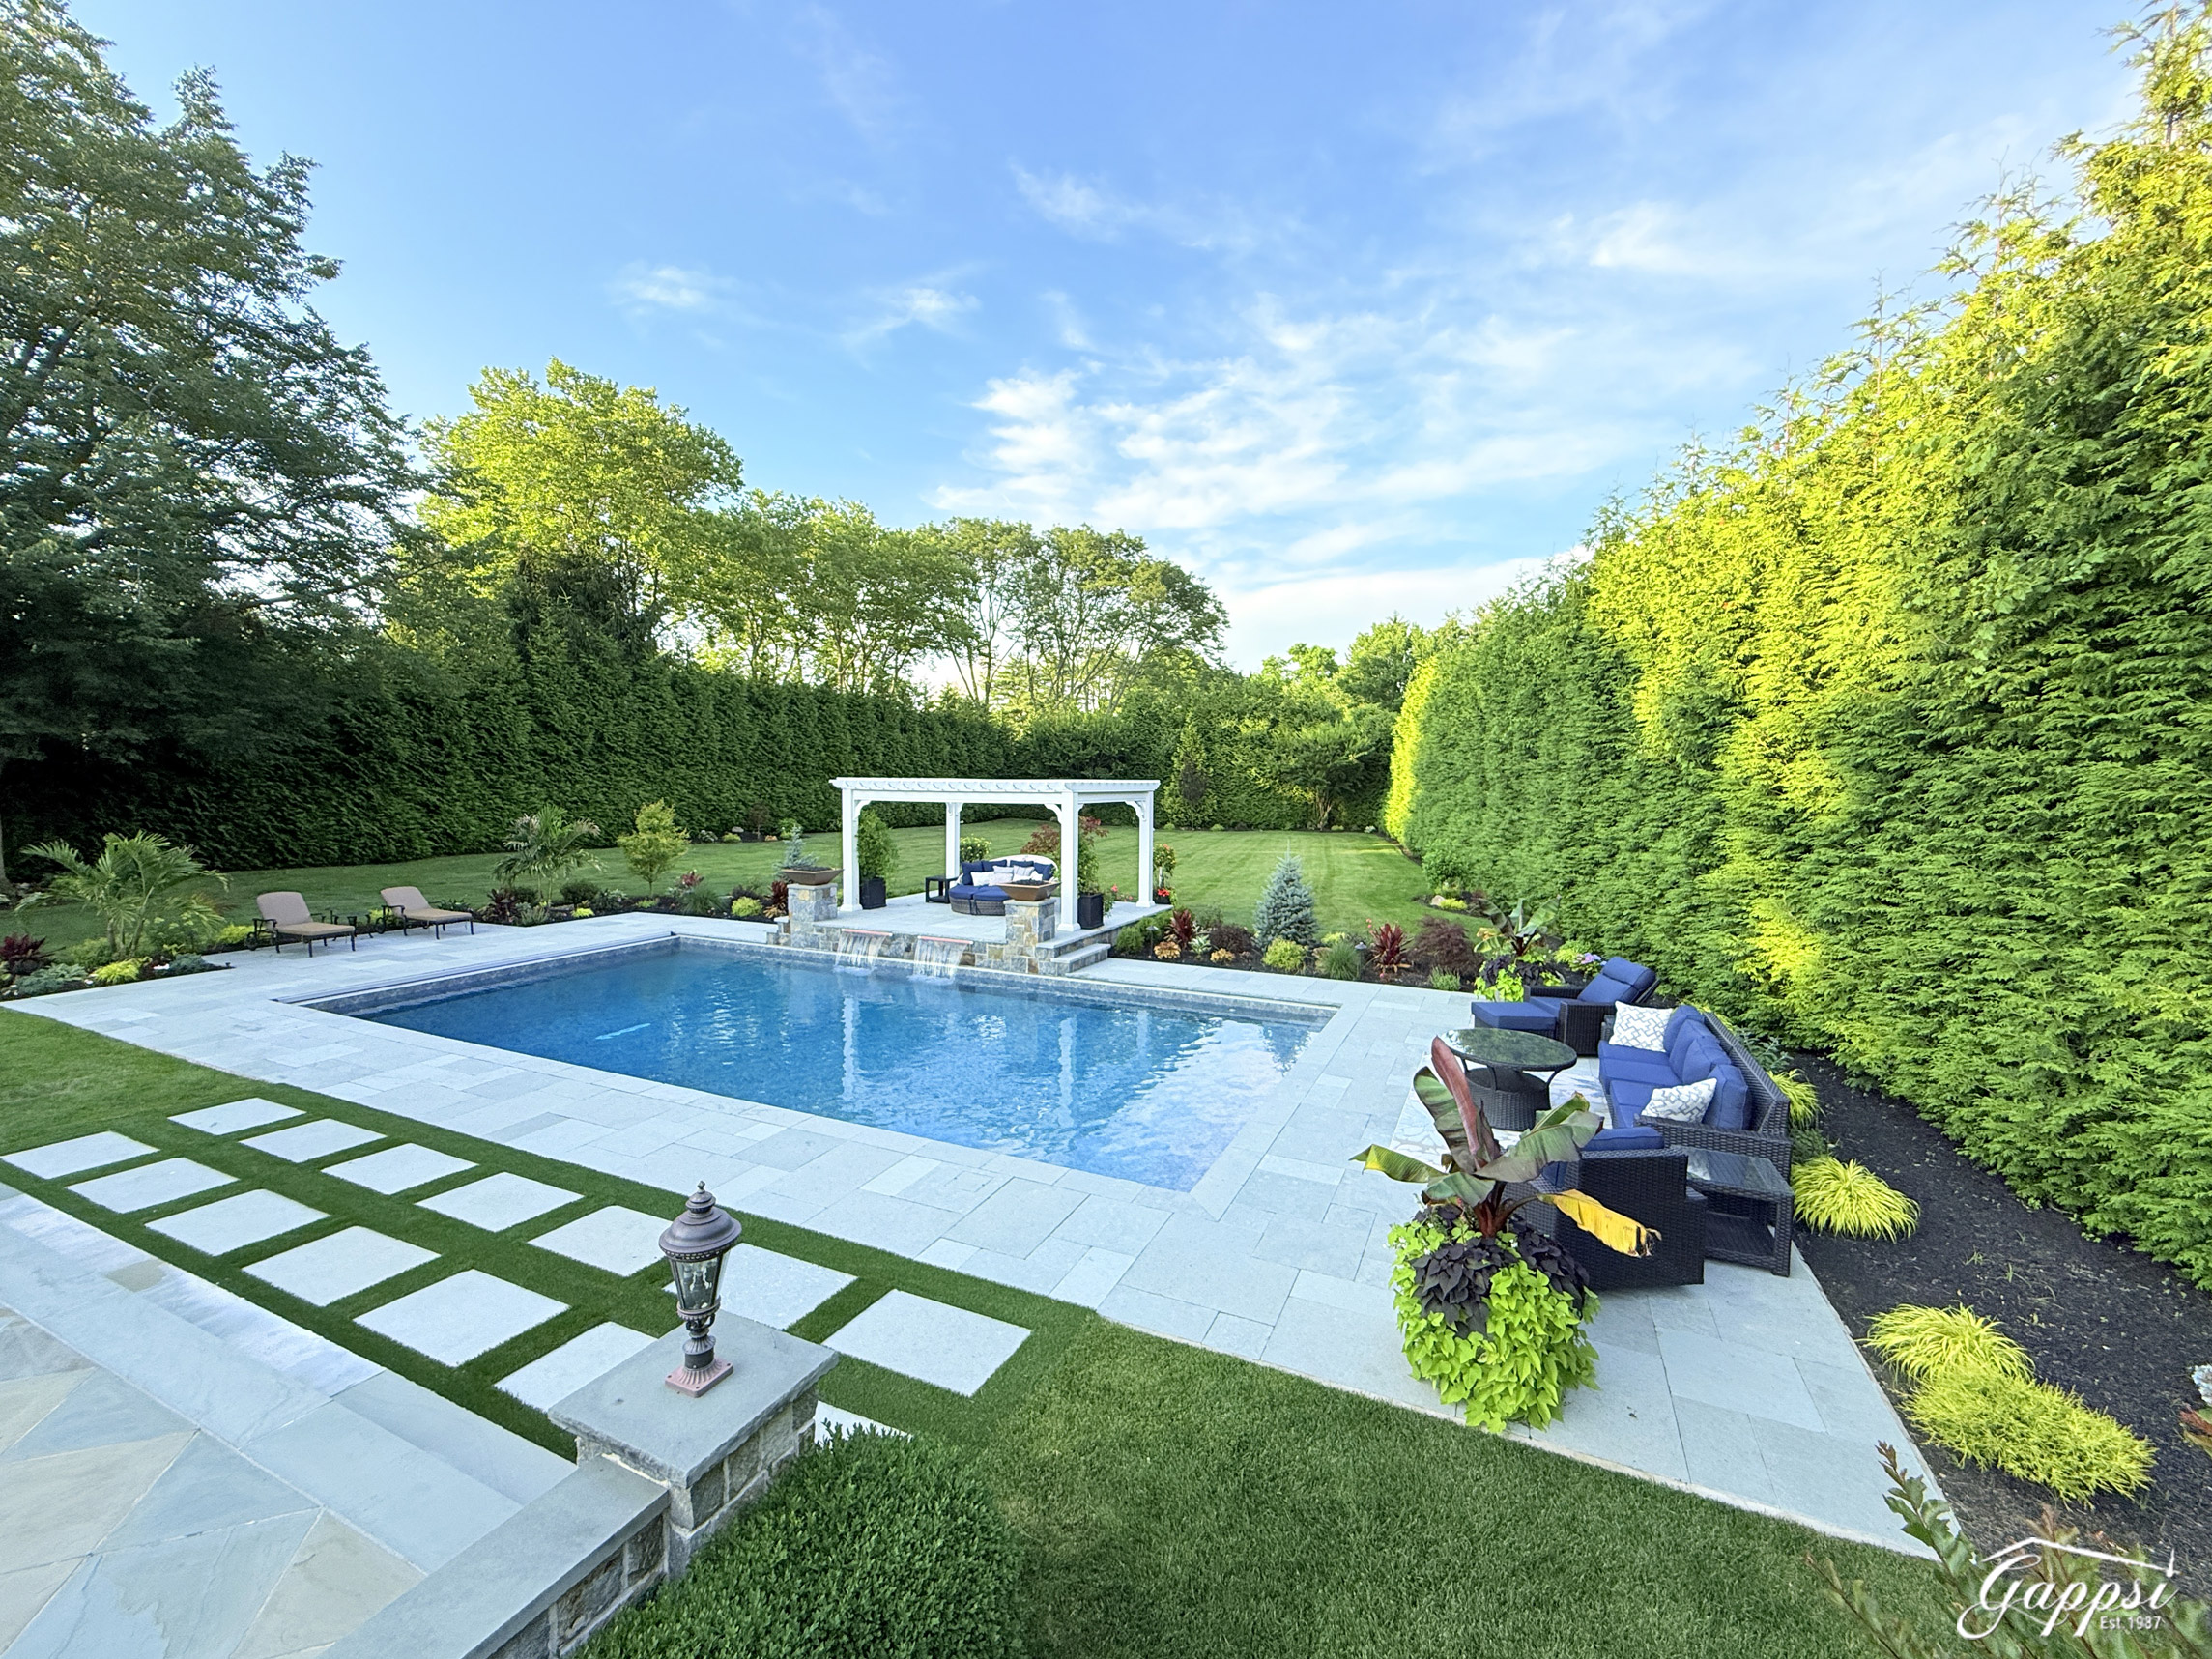
Spring pool opening on a Long Island property

Pool Opening Guide for Long Island Homeowners

After a Long Island winter, a pool can look ready from the deck while its cover, plumbing, filter, and water still need careful attention. Opening in the right order helps you find winter damage early, avoid restarting equipment under strain, and create a cleaner path to the first swim. Call Gappsi at (631) 831-3177 for pool opening and equipment help. A spring opening is more than removing a cover. It is a coordinated check of the pool shell, water level, circulation equipment, filter, controls, and safety features. Homeowners in Nassau and Suffolk counties can use the sequence below to decide what they can handle safely and when a professional inspection is the better choice.

What Is the Best Time for Pool Opening on Long Island?

For most Long Island homeowners, the best pool opening window comes when daytime weather is consistently mild and you have enough time to clean. Restart equipment, test chemistry, and correct problems before swimming. Gappsi recommends treating the calendar as a planning tool, not as a fixed date that overrides the condition of the pool. Late April through May is a common planning window in Nassau and Suffolk County, but the right date depends on the property. A shaded yard, heavy tree cover, a damaged winter cover, or a colder-than-usual spring can change the amount of work waiting under the cover. Look at the full forecast rather than one warm afternoon. Opening too early may expose the pool to more debris and leave you maintaining water before the season is established. Waiting too long can give algae and organic matter more time to accumulate. The practical goal is to open with enough time for circulation and water treatment to stabilize before the first planned swim.

Plan around the first swim, not the first warm day

Choose an opening date that leaves room for inspection and follow-up. If the pump will not hold its prime, the filter pressure is abnormal, or the water does not respond to treatment, you need time to diagnose the cause. A rushed opening can turn a manageable equipment issue into a delayed start to the season. Professional spring appointments can also fill after the first sustained warm spell. Gappsi’s pool opening services include the practical sequence of removing cover water and debris, cleaning the pool, reconnecting equipment, and checking operation. Scheduling before your target swim date makes it easier to address findings without compressing the rest of the preparation.

What Should You Do Before Removing the Pool Cover?

Before removing a winter cover, clear standing water and loose debris from its surface, protect the surrounding deck, and inspect the cover and anchors as you work. Gappsi’s opening approach starts with controlling debris transfer, because a careless cover removal can add leaves, sediment, and contaminated water to the pool.

  1. Inspect the area around the pool. Move furniture, toys, branches, and other obstacles away from the deck. Check that the working area is stable and that no damaged coping, loose pavers, or exposed electrical components create a hazard.
  2. Remove water from the cover where appropriate. Use equipment suited to your cover and follow the cover manufacturer’s instructions. Do not step onto a safety cover or use an unsafe method to reach the center of accumulated water.
  3. Clear leaves and branches. Use a cover brush or soft tool that will not puncture the material. Remove heavy debris in stages instead of dragging a loaded cover across the deck or pool edge.
  4. Check anchors, straps, springs, and seams. Look for tears, stretched areas, damaged hardware, and places where the cover no longer sits correctly. Photograph damage so you can plan a repair or replacement before the next closing.
  5. Remove and store the cover carefully. With help when needed, fold or roll the cover according to its care instructions. Clean and dry it before storage so trapped moisture and debris do not create additional deterioration.
  6. Clean the deck before debris reaches the water. Sweep or rinse the area using a method appropriate for the deck material. Keep loose dirt from being pushed toward open drains or back into the pool.

Once the cover is off, use a leaf net to remove large debris from the surface and floor. Do not stir a heavy layer of sediment unnecessarily. A slow, controlled cleaning pass gives you a clearer view of the waterline, tile, coping, steps, and visible pool surfaces. Gappsi also builds and renovates pools, so a spring inspection can reveal a separate construction or renovation question. If the pool needs more than seasonal preparation, review the company’s swimming pool design and construction services rather than treating a structural concern as routine maintenance.

How Do You Reconnect Pool Equipment Safely?

Reconnect pool equipment only after the water reaches the correct operating level and the equipment pad is clear. Gappsi’s pool opening process treats the pump, filter, heater, valves, plumbing, and controls as one circulation system. So each part should be checked before the system is placed under normal operating pressure. Start with a visual inspection. Check the pump lid and basket, filter tank, pressure gauge, valves, unions, plugs, visible plumbing, and drain points. Replace or reinstall winterizing plugs and fittings according to the equipment manufacturer’s instructions. Do not force a connection or bypass a safety device to make the system run. Confirm that valves are in their expected positions before starting the pump. If the water level is below the skimmer’s safe operating range, add water first. A pump that runs without adequate water flow can lose its prime and suffer damage. Keep children and untrained people away from the equipment pad during startup.

What should you check during the first startup?

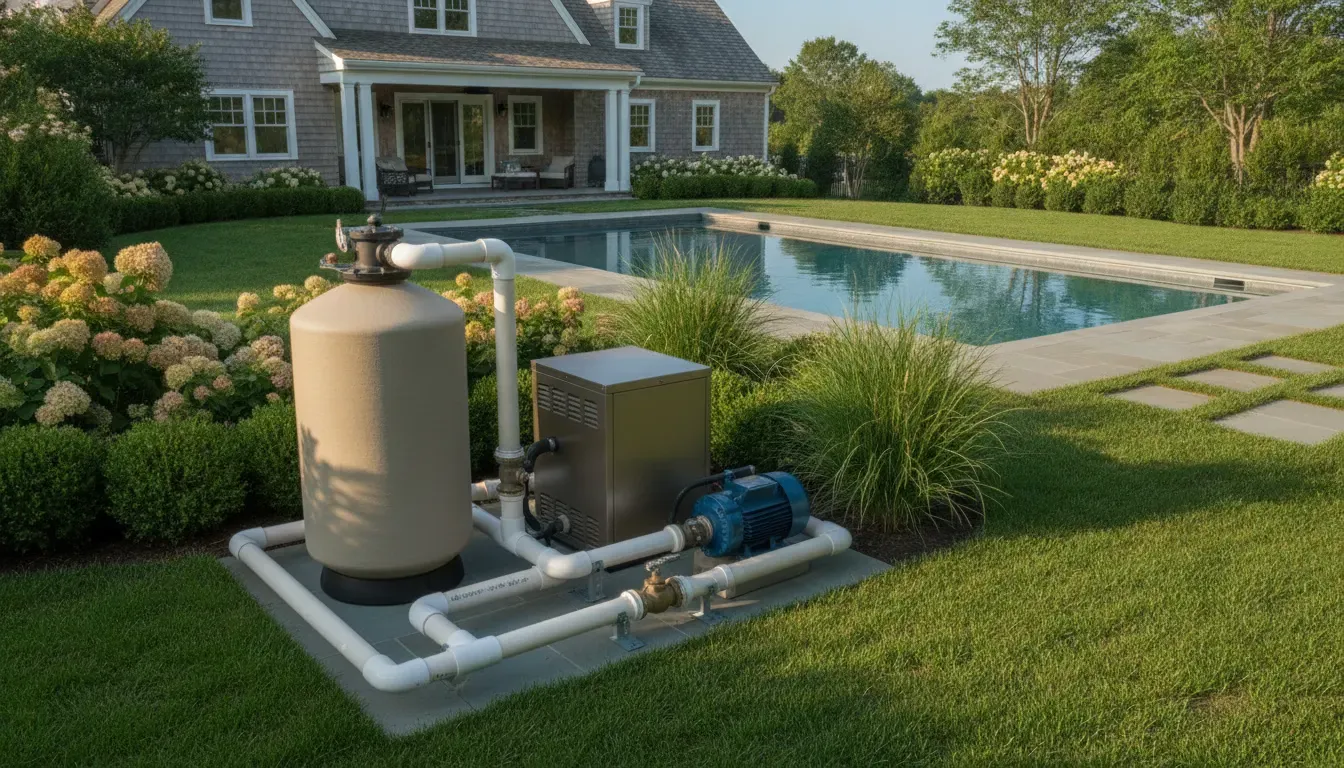
Prime the pump as directed for your equipment, then observe the clear lid, return flow, pressure gauge, and visible connections. Listen for unusual sounds and look for leaking water or air entering the system. If the pump will not hold its prime, shut it off and investigate instead of repeatedly restarting it. Check the filter’s starting pressure against the normal range recorded for your system. A sudden reading that is unusually high or low can point to a dirty filter, restricted flow, a valve position problem, or air in the system. Record the reading so future maintenance has a useful baseline. Reconnect heaters, salt chlorine generators, automation controls, lights, and other installed equipment according to the manufacturer’s instructions. Never remove electrical covers, change wiring, or bypass interlocks as part of a routine opening. Electrical work around water requires a qualified professional and the correct safety procedures. Call Gappsi at (631) 831-3177 if your pool equipment will not prime, circulate, or restart normally. Pool pump filter and heater equipment inspected in spring

How Should You Balance Pool Water at Opening?

Test pool water after the pool is clean and circulation is stable, then adjust chemistry in a controlled order. For a Long Island pool opening, Gappsi’s practical sequence is to establish flow. Collect a representative sample, measure pH and sanitizer, and continue testing as treatment changes the water. Use a test method appropriate to your pool and follow the product labels. The Centers for Disease Control and Prevention provides home pool water guidance that includes a pH range of 7.0 to 7.8 and at least 1 part per million of free chlorine for pools. Read the CDC guidance on home pool and hot tub water treatment for context and testing considerations. Do not estimate chemistry from water appearance alone. Clear water can still have an imbalance, while cloudy water can reflect several different conditions. Test the water, make one measured adjustment at a time, and allow the circulation system to distribute the treatment before testing again.

Opening check. What to observe. When to pause.
Water level. Safe operating level reached. Level is low or falling.
Circulation. Steady returns and a held pump prime. Noise, lost prime, or air problem.
Filter pressure. Gauge is in the normal range. Pressure changes sharply.
Water chemistry. pH and free chlorine move toward targets. Cloudy water or poor response.

Keep chemicals in their original labeled containers and follow handling, storage, and mixing directions. Never mix pool chemicals together or add products in a way that contradicts the label. If you are unsure which condition you are treating, pause and ask a pool professional to evaluate the water and equipment together.

How Do You Care for the Filter Before the First Swim?

Filter care at opening prepares the circulation system to remove debris after winter cleanup and chemical treatment. Gappsi’s pool equipment guidance emphasizes checking filter condition, priming, and operating pressure before swimmers enter the water, because filtration and chemistry work together throughout the opening. The correct procedure depends on whether the pool uses a cartridge, sand, or diatomaceous earth filter. Inspect the filter housing, lid, clamps, pressure gauge, valves, and visible seals. Clean or service the filter according to the manufacturer’s instructions and the condition of the media. Do not use a guessed procedure on unfamiliar equipment. For a cartridge filter, inspect the cartridge for tears, crushed pleats, or heavy buildup before cleaning it. For a sand filter, check the valve setting and follow the manufacturer’s backwash and rinse sequence. For a diatomaceous earth system, use the specified method for cleaning and recharging the filter media. After service, start circulation and watch for leaks around the tank, pump, unions, and drain points. A clean filter with a stable pressure reading is a better starting point than a filter that is simply switched on after months of winter shutdown. Keep a record of the opening pressure and any work completed. The first swim should wait until the water is clear, the circulation system is operating normally, and testing confirms that the water is within the applicable targets. Check ladders, handrails, gates, barriers, covers, and other safety features as well. Clean water is only one part of a safe return to swimming. Homeowner testing swimming pool water in spring If you are considering an equipment upgrade as part of opening, Gappsi can help connect equipment choices to a broader pool plan. You can also view Gappsi’s swimming pool services and recent Long Island pool projects for additional context.

When Should You Hire a Professional for Pool Opening?

Professional help is appropriate when winter damage, electrical risk, leaks, unfamiliar equipment, or persistent water problems make the opening uncertain. For Long Island homeowners, Gappsi can inspect the seasonal condition of the pool and equipment together. Rather than asking you to solve a circulation problem by trial and error.

Winter damage or unexpected water loss

Stop and arrange an inspection if you see cracked fittings, damaged plumbing, displaced coping, broken cover hardware, a wet equipment pad, or water that drops unexpectedly. These conditions can indicate a leak or winter damage that should be found before the system runs for an extended period.

Equipment will not start or operate normally

Turn off equipment that will not hold prime, makes a new grinding or screeching sound, leaks at a connection, trips a breaker, or shows an abnormal pressure reading. Do not remove electrical covers or defeat a safety switch. A qualified technician can isolate the issue before it becomes a larger equipment failure.

Cloudy water or chemistry that will not stabilize

Cloudiness, persistent discoloration, or chemistry that does not move toward the tested targets deserves a measured diagnosis. The cause could involve debris, filtration, circulation, testing, or treatment. Repeatedly adding chemicals without understanding the condition can waste product and make the next test harder to interpret. Gappsi’s opening service is also useful when the pool has automation, a heater, a salt system, underwater lighting, or other components that were winterized. The goal is not merely to get a pump running. It is to confirm that the pool is clean, circulating, tested, and ready for the season’s use. For a larger project, keep seasonal opening separate from design and installation decisions. Gappsi’s custom gunite pool design information is a better starting point for a new-build conversation than a repair-focused opening checklist. Call Gappsi at (631) 831-3177 to schedule a Long Island pool opening inspection.

Frequently Asked Questions

When should I schedule a spring pool opening on Long Island?

Most homeowners plan for late April through May, but the best date depends on weather, shade, debris, water condition, and the time needed for repairs. Schedule early enough to clean, restart equipment, test chemistry, and correct problems before the first planned swim.

Can I start the pump before adding water?

No. Bring the water to the equipment’s safe operating level before starting the pump. A low water level can prevent proper circulation, cause the pump to lose prime, and create avoidable equipment damage. If the level keeps falling, pause and arrange a leak inspection.

What water chemistry should I check first?

Begin with a representative water sample and test pH and free chlorine, then follow the product directions and applicable guidance for the rest of the system. The CDC identifies pH from 7.0 to 7.8 and at least 1 part per million of free chlorine as home pool reference points.

When should I call a professional for pool opening?

Call a professional when you find winter damage, leaks, unsafe electrical conditions, equipment that will not prime, abnormal filter pressure, persistent cloudiness, or chemistry that will not stabilize. Gappsi can evaluate the pool and equipment as a connected system before the season begins. Call Gappsi at (631) 831-3177 to get your pool ready for the Long Island swimming season.

Share this page:
Inground pool equipment system beside a Long Island swimming pool

Pool Equipment Guide for Long Island Inground Pools

Choosing equipment for an inground pool is not simply a matter of picking a pump from a catalog. Your circulation, filtration, sanitation, heating, cleaning, and control systems must work together with the pool’s size, plumbing layout, usage, and Long Island weather. A mismatch can create avoidable maintenance and operating problems.

Call Gappsi at (631) 831-3177 to plan your pool equipment.

The right pool equipment system typically includes a pump, filter, sanitation method, cleaner, and controls, with a heater, cover, lighting, or swim-jet features selected around how your household will use the pool. A design-build team can coordinate those choices before installation.

Understanding what each component does makes it easier to evaluate proposals and identify the systems your project actually needs. Start with the core equipment that keeps an inground pool circulating, clean, comfortable, and ready to use.

What Pool Equipment Does an Inground Pool Need?

An inground pool depends on several connected systems, not one piece of equipment. The pump moves water through the plumbing, the filter removes suspended debris, and the sanitation system helps keep the water suitable for swimming. Heating, cleaning, lighting, and covering systems then shape how comfortable and convenient the pool is to use. For a Long Island homeowner, those choices should be planned with the pool shell, plumbing layout, electrical service, gas availability, climate, and intended swimming season in mind.

Gappsi approaches this as one design and construction project rather than a product list. Its Long Island swimming pool design and construction service can coordinate the pool structure with the equipment pad, controls, finish details, and startup process.

The core circulation and water-care systems

Circulation begins with the pump, skimmer, drains, return lines, valves, and controls. Together, these components move water from the pool, through the treatment equipment, and back into the basin. Correct plumbing design matters because the equipment must work as a connected system, not as isolated devices.

Filtration catches particles that sanitation alone does not remove. Common filter categories include cartridge, sand, and diatomaceous earth, often called DE, filters. The right choice depends on the pool design, expected use, available service access, and the homeowner’s preferred maintenance routine.

Sanitation manages microorganisms and water chemistry. Gappsi’s equipment scope includes salt chlorine generators and ozone systems. A salt chlorine generator still supports chlorine-based sanitation, so it should not be presented as a chlorine-free system. Ozone can be selected as part of a broader water-care plan, with the final setup coordinated with the primary sanitation method and the pool’s controls.

Heating, cleaning, and everyday comfort

Heating extends the practical swimming season and improves comfort during cooler weather. Gas heaters and heat pumps are both options, but the best fit depends on how often the pool will be used, the desired season, the site’s gas and electrical planning, and the overall project design.

Cleaning equipment may include skimmers, brushes, vacuums, and robotic cleaners. These tools address leaves, dust, and settled debris that circulation and filtration may not remove by themselves. LED lighting supports evening visibility and changes the appearance of the pool area without relying on oversized fixtures. A pool cover can also help protect the water between uses, while reducing exposure to leaves and weather.

Some homeowners may also consider optional comfort equipment, such as swim jets for resistance swimming or upgraded automation for scheduling and monitoring. These additions should be evaluated alongside the pool’s purpose, available space, and long-term service needs.

  • Pump and circulation plumbing: moves water through the system.
  • Filter: captures suspended particles using cartridge, sand, or DE media.
  • Sanitation system: supports water care through chlorine generation, ozone, or a coordinated combination.
  • Heater or heat pump: adds water-temperature control for the intended swimming season.
  • Cleaning tools or robotic cleaner: handles debris that the main circulation system leaves behind.
  • LED pool lighting: improves visibility and supports the evening design.
  • Cover: protects the pool between uses and simplifies routine care.
  • Optional automation or swim jets: adds control or exercise features when appropriate.

The equipment pad should remain accessible for inspection and maintenance, with enough room for safe connections and future service. Planning these details before construction helps prevent a crowded layout, awkward plumbing, or equipment that does not match the way the household expects to use the pool.

How Do You Choose the Right Pool Pump and Filter?

The pump and filter are the working core of a swimming pool circulation system. Choosing them is not simply a matter of matching a product to the pool’s gallon capacity. The correct pool equipment must work with the pool’s dimensions, plumbing layout, water features, heater, sanitizer, expected use, and available service space.

Start with the idea of turnover. Turnover describes how long the circulation system takes to move the pool’s water through the filter. It is a design concept, not a universal pump setting. A professional evaluates the pool volume, intended circulation schedule, pipe diameter, fittings, elevation changes, and features such as waterfalls or spa jets. The goal is a system that provides appropriate circulation without forcing the pump to work against unnecessary resistance.

Flow resistance comes from the entire hydraulic path. Long pipe runs, narrow plumbing, elbows, valves, heaters, filters, and water features all affect how readily water moves. A pump selected without considering that resistance may circulate inadequately, operate noisily, or require more maintenance. Oversizing can also create problems, including excessive flow through equipment that was not designed for it. The equipment schedule should therefore be based on the complete plumbing design rather than a product label alone.

Filter selection depends on the water-quality goals and the homeowner’s preferred maintenance routine. The main media categories include:

  • Cartridge filters use removable elements that can be taken out and cleaned. They are often considered when straightforward maintenance and a practical equipment layout are priorities.
  • Sand filters use graded filter media and are cleaned through a backwashing process. The installation must account for the plumbing and drainage requirements of that process.
  • DE filters use diatomaceous earth to provide fine filtration. They require careful handling of the media and a maintenance plan suited to the property.

There is no single best filter for every Long Island pool. A cartridge design may suit one household’s cleaning preferences, while a DE or sand system may make more sense for another pool’s layout and operating plan. The same applies to pumps. Gappsi’s documented equipment brands include Pentair, Hayward, Raypak, Jandy, Sta-Rite, Autopilot, Dolphin, and Waterways. These names are examples of supported equipment categories, not a claim that one brand or model is universally right.

Service access deserves attention before construction begins. Filters need room for removal and cleaning, pumps need safe access, and valves and controls should remain reachable after the surrounding patio, planting, and enclosure work is complete. Ask for the equipment location, plumbing plan, electrical requirements, and startup responsibilities to be explained as part of the proposal.

Call Gappsi at (631) 831-3177 to plan the right pool pump and filter for your project.

For a closer look at the installation process, review Gappsi’s professional pool equipment installation guidance. Coordinating sizing, plumbing, controls, and access during the design stage helps the finished system operate as one connected part of the pool rather than as a collection of separate products.

Which Pool Heater Is Best for Your Long Island Backyard?

Heating decisions should begin with how your household will use the pool, not with a single product label. On Long Island, a pool may be used for a short period in spring and fall, throughout the warmer months, or on a more deliberate schedule for family gatherings and frequent swimming. The right pool equipment plan depends on the desired season, target water temperature, pool size, available utilities, and the physical layout of the equipment area.

Gas heaters are often considered when homeowners want responsive, on-demand heating for planned swims or occasional temperature changes. They can fit a use pattern where the pool is not heated continuously, but the installation must account for the appropriate gas supply, venting, clearances, and local requirements. Those details belong in the design phase, especially when the equipment pad is being placed near the home, a patio, or property boundaries.

Heat pumps draw heat from the surrounding air, so outdoor conditions matter. They can make sense for homeowners who plan to maintain a comfortable temperature over a longer period instead of heating the pool only before a specific event. Their suitability depends on the local weather, the intended swimming season, electrical planning, equipment location, and the homeowner’s expectations for heating response. A heat pump should be evaluated as part of the complete circulation and control system, not as an isolated appliance.

Pool heater considerations for a Long Island backyard
Consideration Gas heater Heat pump
Best fit Planned swims, occasional heating, or a preference for responsive temperature changes. Longer seasonal use with a plan to maintain a set temperature.
Weather relationship Less dependent on the immediate outdoor air temperature. Performance and heating response depend on outdoor air conditions.
Utility planning Requires evaluation of gas availability, sizing, venting, and clearances. Requires evaluation of electrical capacity, placement, airflow, and clearances.
Design questions How often will the pool be heated, and how quickly should it respond? How long will the season last, and what temperature should be maintained?

A solar-ready approach may also be worth discussing during planning, even when solar heating is not part of the immediate installation. Space, plumbing routes, controls, and future access can influence whether a later addition is practical. The same principle applies to a pool cover, which can support heat retention and should be considered alongside the heater rather than after the equipment pad is finalized.

There is no universal best heater for every backyard. Gappsi evaluates the pool’s dimensions, usage pattern, weather exposure, utility connections, equipment location, and broader design before recommending a system. That integrated process helps align the heater with the pumps, filters, automation, and startup plan instead of forcing one component to compensate for another.

What Do Salt, Ozone, and Automation Systems Do?

Sanitation equipment helps keep pool water clear and suitable for swimming, but it does not replace the basic work of circulation, filtration, and water testing. Each system addresses a different part of pool operation. A salt chlorine generator produces chlorine from dissolved salt as water passes through its cell. It is still a chlorine-based system, not a chlorine-free alternative. The generator can make chlorine production more consistent, while the pool owner or service professional still needs to monitor the water and maintain the equipment.

An ozone system adds another sanitation support process. It introduces ozone into the circulation line, where the gas can help oxidize certain contaminants before the water returns to the pool. Ozone is best understood as a supplement to the primary sanitizer, not a reason to stop maintaining appropriate chlorine levels. The generator, cell, and related plumbing also need inspection so the system continues operating as designed.

How do these systems work with filtration and circulation?

Circulation moves water through the pump, filter, heater, and treatment equipment. Filtration removes suspended particles, such as dirt and other debris that the filter can capture. Sanitation systems address microorganisms and organic contaminants that filtration alone does not remove. If the pump is not moving water effectively, a salt cell or ozone unit cannot treat the full pool properly. A dirty filter can also restrict flow and place additional strain on the circulation system.

This is why equipment selection should be planned as a connected system rather than as a list of individual products. Pump capacity, plumbing layout, filter type, sanitation method, heater, and control equipment all need to work together. Gappsi’s documented pool equipment scope includes pumps, filters, heaters, salt chlorine generators, ozone systems, and modern automation systems. The right combination depends on the pool design, expected use, available utilities, and the homeowner’s preferred maintenance routine.

What does pool automation control?

Automation controls can place routine equipment functions in one interface. Depending on the installed system, controls may coordinate pump schedules, filtration, heating, lighting, and sanitizer support equipment. This can make it easier to adjust settings and identify an operating issue than managing each component separately. Automation does not mean the pool runs without oversight. Sensors can drift, chemical feed components can require service, and a programmed schedule may not suit every change in weather or usage.

Regular testing remains essential. Check the water according to the equipment manufacturer’s guidance, keep the water balanced, clean or backwash the filter as required, and inspect the circulation and sanitation components. A salt system can simplify chlorine production, and ozone can provide additional treatment support, but neither system excuses skipped testing. During a new pool installation or equipment upgrade, Gappsi can evaluate the complete equipment plan so sanitation, filtration, circulation, and controls are matched to the project.

How Can Pool Equipment Reduce Maintenance and Energy Waste?

Efficient operation starts with matching each component to the pool’s design and the way your household uses it. An oversized pump can move more water than the plumbing and filter require, while an undersized system may need longer run times to maintain circulation. A properly planned setup supports clean water without making every operating decision a daily chore.

Programmed schedules help keep circulation consistent. Your installer can coordinate pump operation, filtration, heating, sanitation, and cleaning around typical use patterns. Seasonal adjustments may also make sense. A pool used frequently in July may need a different schedule than one used occasionally in early spring or fall. Automation can make those changes easier to manage, but it still needs sensible settings and periodic review.

Clean filters are another essential part of efficient pool equipment. As debris accumulates, water has a harder time passing through the filter. Watch the pressure indicator and follow the filter manufacturer’s cleaning guidance rather than waiting for cloudy water or weak circulation. The correct cleaning method depends on whether the system uses cartridge, sand, or DE filtration.

Technician checking inground pool equipment controls in a Long Island backyard

Several supporting choices can reduce routine work as well. A properly fitted pool cover can limit debris entering the water and reduce exposure when the pool is not in use. LED lighting provides clear evening illumination with a lower operating demand than older lighting designs. A robotic cleaner can handle regular debris collection, reducing the amount of manual brushing and vacuuming required between service visits.

Service access should be planned before construction is complete. Pumps, filters, heaters, automation controls, and valves need enough room for inspection, cleaning, and eventual replacement. Crowding equipment into an inaccessible corner may save space at first, but it can make ordinary maintenance slower and more disruptive. Good plumbing layouts and labeled controls also help technicians diagnose issues without unnecessary adjustments.

For an existing pool, start with an evaluation rather than replacing components at random. A technician can review the pump, filter, plumbing, controls, cleaner, and lighting as one system. If the equipment is aging or poorly matched, see this guide to upgrading older pool equipment before deciding what should change. The goal is a system that is easier to operate, service, and maintain over its useful life.

What Should You Budget for Pool Equipment Planning?

Pool equipment should be budgeted as part of the complete installation, not treated as a last-minute shopping list. The right allowance depends on the pool’s design, the way your household will use it, and the infrastructure required to operate each system safely. A small pool with limited features will have different requirements from a larger gunite pool with heating, automation, lighting, and an automatic cover.

Equipment is only one part of a complete pool project. Homeowners should request a written scope rather than compare isolated pump, heater, or filter figures that may not include installation or supporting work.

Which variables affect the equipment allowance?

A proposal should connect every equipment choice to the physical design and intended use of the pool. Ask the builder to explain how the following items affect the project:

  • Pool type, dimensions, and features: Water volume, depth changes, spas, tanning ledges, waterfalls, and swim jets influence circulation and equipment requirements.
  • Plumbing and circulation: The scope should identify the pump, filter, plumbing runs, valves, and equipment pad, including access for future service.
  • Electrical and fuel needs: Heating, pumps, automation, lighting, and other components may require electrical planning. Gas heaters also require appropriate gas-line coordination, while heat pumps have their own electrical requirements.
  • Sanitation and water control: Ask whether the design includes a salt chlorine generator, ozone system, conventional chlorine approach, automation, sensors, and any dosing equipment.
  • Comfort and protection: Heating, LED lighting, covers, and cleaning equipment should be listed separately so you can see which are essential, optional, or planned for a later phase.
  • Permits, startup, and service: Confirm that permits, inspections, commissioning, water balancing, owner instruction, and service access are included or clearly excluded.

What should a complete proposal show?

Request model or category details for the pump, filter, heater, sanitation equipment, automation controls, lights, cover, and cleaner. The proposal should also show labor, delivery, electrical and gas work, plumbing, permits, startup, warranty responsibilities, and any site preparation. Brand options may include manufacturers such as Pentair, Hayward, Raypak, Jandy, or Sta-Rite, but the most recognizable name is not automatically the correct fit. Sizing, compatibility, placement, and access matter just as much.

For a Nassau or Suffolk County project, an integrated design-build plan helps keep these dependencies visible from the beginning.

Call Gappsi at (631) 831-3177 to plan your pool equipment and request a project-specific proposal.

Frequently Asked Questions

What equipment is needed for an inground pool?

An inground pool needs a pump for circulation, a filter for removing suspended debris, and a sanitation system to manage water quality. Most projects also require plumbing controls, skimmers, returns, and a method for cleaning the pool. Depending on how you plan to use the pool, you may add a gas heater or heat pump, cover, LED lighting, automation, or a robotic cleaner.

What is the best pool equipment for a Long Island home?

The best setup depends on the pool’s size, plumbing design, usage schedule, desired swimming season, available gas or electrical service, and maintenance preferences. A properly matched system from a documented brand such as Pentair, Hayward, Raypak, Jandy, or Sta-Rite can be a sound starting point, but brand selection alone does not replace project-specific sizing.

What are the must-haves for a pool?

The essential components are circulation, filtration, sanitation, safe electrical and plumbing connections, and controls that let the system operate correctly. Heating, automatic cleaning, lighting, and a cover are practical additions rather than universal requirements. Planning service access at installation is also important because technicians need room to inspect, clean, and replace components.

What are the names of common pool equipment components?

Common components include the circulation pump, filter, skimmer, return jets, salt chlorine generator, ozone system, heater, heat pump, cleaner, automation controller, LED light, and pool cover. Filters are commonly categorized as cartridge, sand, or diatomaceous earth, often called DE. The right combination should be selected as one coordinated system, not as unrelated products.

Plan Your Pool Equipment With Gappsi

The right pool equipment should fit your backyard, pool design, comfort preferences, and plans for maintenance. Gappsi can help you review those needs as part of a coordinated Long Island pool project.

Call Gappsi at (631) 831-3177 to plan your pool equipment.

Share this page:
Contractors renovating an existing in-ground swimming pool with new gunite finish, coping and travertine deck

Pool Renovation on Long Island: Remodel vs Repair

An aging Long Island pool does not automatically need to be demolished. Cracked finishes, outdated equipment, leaking plumbing, and a dated deck can point to different levels of work. The first decision is whether the pool needs structural repair, a cosmetic remodel, or a broader renovation plan.

Call Gappsi at (631) 831-3177 to discuss your pool renovation options.

A pool renovation restores an existing swimming pool while upgrading selected features such as the finish, tile, coping, equipment, deck, lighting, or layout, without automatically replacing the entire shell. The right scope begins with evaluating the shell, bond beam, plumbing, and surrounding surfaces.

That distinction matters on Long Island, where repeated repairs may justify a coordinated project, while a sound shell may make targeted improvements the more practical choice. Start by defining what renovation includes, then match the scope to the pool’s condition and your long-term plans.

What Counts as a Pool Renovation?

A full pool renovation is more than applying a new finish. It is a coordinated update to the surfaces, systems, and surrounding features that determine how the pool looks, performs, and fits the backyard. The work may remain largely cosmetic, or it may include structural repairs and infrastructure upgrades after an inspection identifies underlying problems.

For a gunite pool in Nassau or Suffolk County, the scope should be defined before demolition begins. A contractor should evaluate the shell, waterline, equipment pad, plumbing, coping, and deck as connected parts of one system. If cracks or other structural problems are present, they need to be addressed before resurfacing. Covering a shell issue with a new finish can leave the cause unresolved and lead to another repair cycle.

The main components of a full renovation

  • Interior finish: The existing surface may be replaced with plaster, a pebble-based finish, or quartz. The material affects the pool’s appearance, texture, maintenance needs, and the time between major refinishing projects.
  • Waterline tile: New ceramic, porcelain, glass, or stone tile can refresh the waterline and create a more deliberate connection between the pool, coping, and deck. Tile selection also affects long-term cleaning and maintenance.
  • Coping: Replacing the edge material updates the pool’s profile and provides a clean transition to the surrounding hardscape. Coping can be coordinated with natural stone, travertine, or concrete pavers used elsewhere in the yard.
  • Equipment and plumbing: A renovation may include pumps, filters, heaters, automated controls, lighting, skimmers, main drains, or aging plumbing lines. Replacing inefficient equipment can reduce operating demands, while updating old underground lines may help prevent future leaks and disruptive excavation.
  • Deck and surrounding hardscape: Worn or cracked decking can be removed and replaced as part of the project. Addressing the deck at the same time as the pool helps manage elevations, drainage, access, and the visual relationship between the pool and outdoor living areas.

Not every project needs every component. Replacing tile and coping can modernize an older pool without changing its structural shell, while a broader renovation may combine resurfacing, equipment updates, and deck replacement. Gappsi can also coordinate design decisions so the renovated pool works with the larger backyard rather than appearing like an isolated upgrade.

For a closer look at finish work, review Gappsi’s guide to gunite pool resurfacing and refinishing. The right scope depends on the pool’s condition, the homeowner’s goals, and whether the existing shell and supporting systems can continue serving the property.

Remodel vs Repair: How to Tell the Difference

The most important distinction in an aging pool is whether the problem is structural or primarily cosmetic. A cosmetic remodel can change the appearance and usability of a sound pool. Structural repair addresses the parts that hold, contain, and circulate the water. At Gappsi, that decision should begin with an assessment of the existing gunite shell, not with a finish sample.

What belongs in a structural repair?

Structural work comes first when the pool is showing signs of movement, water loss, or deterioration behind the visible finish. Cracks in the gunite shell can allow seepage and worsen over time. The bond beam, which supports the waterline tile and coping, also needs to be sound before resurfacing or replacing those finishes. If it is compromised, installing new tile over it only conceals the problem temporarily.

Older underground plumbing is another key consideration. Aging lines can develop leaks that are difficult to locate and expensive to reach after a new surface or deck has been installed. Replacing vulnerable plumbing during a planned project may prevent future excavation. Visible seepage, unexplained water loss, shifting around the pool, recurring leaks, or repeated repairs all warrant a professional shell and systems assessment before cosmetic decisions are made.

Some warning signs are easier to see at the waterline. Loose coping, cracked tile, rough plaster, flaking finishes, and worn decking may indicate that the pool is ready for renovation, but they do not prove that the shell needs rebuilding. The same visible symptom can have different causes. For example, a damaged tile line may reflect ordinary age, movement in the bond beam, or water intrusion behind the finish. A site inspection helps separate a surface replacement from a repair that must happen below it.

  • Structural repair tasks: repairing gunite shell cracks, evaluating seepage or shifting, verifying bond beam integrity, and addressing aging underground plumbing.
  • Systems-related repairs: investigating circulation problems, plumbing leaks, and equipment issues that affect how the pool operates.

What can a cosmetic remodel change?

When the shell and supporting structure are stable, a cosmetic remodel can produce a substantial change without rebuilding the pool. Resurfacing can replace a worn interior finish with plaster, pebble-based material, or quartz. New waterline tile and coping can update the edge, improve the transition around the pool, and change the overall character of the backyard. Tile material choices, including ceramic, porcelain, or stone, also affect long-term maintenance at the waterline.

  • Cosmetic remodel tasks: resurfacing the interior, replacing waterline tile, updating coping, and refreshing the pool’s visible finishes.
  • Broader upgrades: replacing outdated equipment, improving lighting, or changing surrounding elements when they can be completed without correcting a shell defect.

A major remodel can cross both categories. Adding a tanning ledge, waterfall, or different pool shape may require significant structural modification, even when the original shell is mostly sound. That is why Gappsi evaluates the structure, plumbing, intended design, and surrounding site as one project. The right pool renovation does not simply cover old surfaces. It resolves underlying defects first, then applies cosmetic finishes.

What Are the Biggest Cost Drivers in a Pool Renovation?

How much does a pool renovation cost on Long Island? There is no responsible one-size-fits-all answer. A limited cosmetic remodel may begin in the lower thousands, while a larger renovation involving structural work, new decking, plumbing, and equipment can reach $30,000 or more. The pool’s size, age, shell condition, finish selections, and access to the property all affect the estimate. For perspective, Gappsi’s published baseline for a new gunite swimming pool on Long Island is $90,000 to $140,000. A renovation that preserves a sound shell is therefore evaluated differently from a full replacement.

The first major cost driver is the interior finish. Standard plaster, pebble-based finishes, and quartz each have different material, installation, and service-life considerations. Waterline tile and coping also affect the budget. Ceramic, porcelain, and stone tile vary in both appearance and maintenance needs. You can review a detailed guide to inground pool remodel cost before comparing finish packages.

Shell condition comes before appearance. Cracks, seepage, shifting, or a compromised bond beam must be assessed before resurfacing or replacing coping. Aging underground plumbing can add excavation and repair work, but replacing problematic lines during the project may help prevent future leaks. The scope may also expand when an older pool has outdated electrical components, filtration, or circulation equipment.

Equipment upgrades are another important variable. Replacing an inefficient pump with a variable-speed model can reduce electricity use, particularly in New York’s high-energy-cost environment. A heat pump, updated filter, automation, LED lighting, or saltwater conversion adds an upfront cost while changing how the pool operates and is maintained. Deck and coping work can become a substantial portion of the project when concrete, pavers, travertine, or other surrounding materials must be removed and rebuilt.

Typical pool project scopes and planning ranges
Scope Typical work General cost range Typical timeline
Cosmetic remodel Resurfacing, selected tile, coping, or equipment updates on a sound shell. Often lower thousands to tens of thousands, depending on materials. Several weeks
Full renovation Finish, tile, coping, plumbing or structural repairs, equipment, and portions of the deck. Often $30,000 or more when multiple systems are involved. Several weeks to a few months
Full replacement Demolition, excavation, new shell, new systems, finishes, and surrounding work. New gunite construction commonly falls near the $90,000-$140,000 Long Island baseline. Multiple months, subject to permits and weather

For additional context, see Gappsi’s guide to gunite swimming pool cost on Long Island. An on-site assessment is the only reliable way to separate a manageable remodel from a project that approaches replacement scope.

When Should You Renovate Your Pool Instead of Replacing It?

For many Long Island homeowners, the choice between remodeling a pool and building a new one is clear: renovating is more affordable when the existing shell remains structurally sound. Keeping that foundation avoids demolition, excavation, and the cost of constructing an entirely new pool. The right choice, however, depends on more than the age or appearance of the pool.

A gunite pool often gives homeowners a strong starting point for a redesign. Its concrete shell can support changes to the layout, finishes, and features, allowing a renovation to solve functional problems while updating the backyard’s appearance. Gappsi can help homeowners evaluate the existing pool alongside the surrounding patio, landscaping, and outdoor living areas through Long Island swimming pool design and construction.

Renovation is often the better economic decision when:

  • The shell is stable, with no unresolved cracking, shifting, or persistent seepage.
  • The pool’s shape and location still work for the backyard and how your household uses it.
  • Recurring repairs, aging finishes, or outdated equipment are creating a pattern of expense.
  • You want meaningful improvements without paying to remove and rebuild the entire structure.

Frequent repairs deserve special attention. Fixing one leak, finish failure, or equipment problem at a time may appear less expensive initially. Repeated service costs can add up without improving the pool as a whole. When repairs become frequent, a coordinated pool renovation may be more economical over the long term. A single project can address the finish, coping, tile, circulation system, and other related issues according to one plan.

Renovation does not necessarily mean preserving every dimension. A major rehabilitation can incorporate a tanning ledge, water feature, or revised pool shape, although these changes require substantial structural work. That flexibility can make an existing gunite shell worth renovating, especially when its placement fits the property’s grading, access, and outdoor circulation better than a new excavation would.

The deciding input should be a professional shell assessment. Gappsi should inspect for visible seepage or shifting, confirm the condition of the bond beam that supports the tile and coping, and check whether old plumbing could lead to underground leaks. Cosmetic work should not cover an unresolved structural problem. Conversely, replacing a sound shell simply because the tile, coping, surface, or equipment is dated can create unnecessary construction costs.

Call (631) 831-3177 to discuss your pool renovation with Gappsi

Replacement becomes more reasonable when the shell has extensive structural failure. The pool’s location no longer suits the property, or the desired redesign would require rebuilding nearly every component. An on-site evaluation can compare those costs with a renovation plan and give you a practical basis for deciding rather than relying on appearance alone.

Pool Renovation Upgrades That Add the Most Value

The most useful upgrades do more than change the appearance of an older pool. They can simplify routine care, improve how the space is used, and connect the pool to the rest of the backyard. During a renovation, Gappsi evaluates the existing shell, equipment, deck, and surrounding landscape together so each improvement supports the overall design.

  • Saltwater conversion: A saltwater system can make pool care more convenient and provide a softer water feel. It is not maintenance-free, but it can reduce the need to handle and add certain chemicals manually. Gappsi can assess whether the existing equipment and plumbing are suitable for the conversion.
  • LED pool lighting: Replacing older lights with LED fixtures improves evening visibility while using an efficient lighting format. Homeowners can also choose adjustable color settings to create a more flexible atmosphere for swimming, entertaining, or quiet evenings outdoors. Older underwater lights and wiring should be inspected as part of the renovation.
  • Automation and control systems: A centralized control system can bring filtration, heating, and lighting into one interface. Remote controls make it easier to adjust settings before using the pool, monitor routine operation, and avoid unnecessary equipment run time. This is especially useful when several systems were installed at different times.
  • Tanning ledges and in-pool seating: A shallow ledge creates a place to sit, cool off, or supervise children without using the deeper swimming area. Built-in seating can make the pool more comfortable for conversation. These additions may require substantial structural modification, so they belong in the design phase rather than as an afterthought.
  • Pool deck and landscape integration: A renovated pool can look disconnected if the surrounding paving, planting, drainage, and outdoor living areas remain unchanged. Coordinating the pool edge with travertine, natural stone, or concrete pavers creates a clearer transition from water to patio. Homeowners planning new or restored pavers can also review Gappsi’s guide to sealing pool deck pavers.

Contractor installing natural travertine pavers around a renovated in-ground swimming pool

Landscape integration can include planting beds, shade, walkways, an outdoor kitchen, or a seating area that follows the pool’s geometry. Gappsi’s design-build approach helps coordinate those decisions with the pool renovation instead of forcing separate contractors to work around completed surfaces. The result is a backyard that functions as one outdoor living space, with materials and elevations selected for practical use as well as visual continuity.

Prioritize upgrades according to the condition of the pool and the way your household uses it. A failing system or unsafe light circuit deserves attention before decorative features. Once the essential work is planned, design additions such as a ledge, lighting, and coordinated paving can make the renovated pool more useful for years to come.

How Long Does a Pool Renovation Take on Long Island?

There is no single schedule for every pool renovation. A simple finish replacement may move faster than a project that includes shell repairs, new plumbing, a redesigned deck, and updated landscaping. On Long Island, the most reliable timeline comes from evaluating the pool first, confirming the scope, and planning around permits and seasonal conditions. Gappsi maps those dependencies before construction begins so homeowners know what happens next.

  1. Site assessment and design: Gappsi inspects the existing pool, surrounding deck, equipment, drainage, and visible finishes. The design phase establishes whether the project is a focused update or a broader remodel, including decisions about tile, coping, surface materials, lighting, and usable backyard space.
  2. Permitting and planning: Permit requirements and review times can affect the start date. Long Island weather also matters, because cold temperatures, rain, and seasonal work limitations can change the construction sequence. The schedule should allow time for approvals, material selections, deliveries, and coordination with any masonry or landscape work.
  3. Demolition and structural repair: Existing finishes, damaged tile, coping, or sections of deck are removed as needed. Before cosmetic work proceeds, the pool shell and bond beam should be assessed. Cracks, shifting, seepage, or other structural concerns need attention first, rather than being covered by a new finish.
  4. Resurfacing, tile, and coping: Once the base is ready, the crew installs the selected interior finish and replaces waterline tile or coping where included. Material choices such as plaster, pebble, quartz, ceramic, porcelain, or stone affect both the appearance and the installation sequence.
  5. Equipment upgrades: Pumps, filters, heaters, plumbing, lighting, and controls are updated according to the approved plan. Replacing aging equipment or underground lines may add work to the schedule, but it can reduce the risk of future leaks and avoid reopening finished areas later.
  6. Deck and landscaping: Deck removal, new pavers or stone, drainage adjustments, planting, and other outdoor improvements follow the pool work when the design includes them. Coordinating these elements with Gappsi helps create a connected backyard instead of treating the pool as an isolated feature.
  7. Fill, finish, and startup: The pool is filled, systems are started, water chemistry is balanced, and the completed work is inspected. Proper balancing protects new surfaces and equipment. For Long Island homeowners, winterization and freeze-thaw protection should also be part of the care plan, especially if the project is completed near the end of the season.

Freshly resurfaced in-ground swimming pool with new quartz finish and ceramic tile waterline

In practical terms, a limited update may take less time than a complete renovation, while structural repairs and full backyard changes extend the schedule. The right answer to how long a pool renovation takes comes after an on-site assessment, not from a fixed promise. Gappsi can separate permitting, construction, and finishing milestones so the plan reflects the actual condition of your Long Island pool.

Call (631) 831-3177 to schedule your pool renovation with Gappsi

Frequently Asked Questions

Can you remodel an existing pool without rebuilding it?

In many cases, yes. A renovation can preserve the existing shell while updating the finish, tile, coping, decking, plumbing, lighting, and equipment. A professional shell assessment should come first if you see seepage, shifting, or recurring leaks.

How do I know whether my pool needs repair or a full renovation?

Cracks in the gunite shell, bond beam concerns, underground plumbing leaks, or movement call for structural evaluation before cosmetic work. If the shell is sound but the surface, coping, tile, deck, or equipment is worn, a focused remodel may address the problem without replacing the structure.

What typically affects the cost of a pool renovation?

The main variables are pool size, age, shell condition, finish materials, deck work, plumbing access, equipment selection, and design changes. Replacing a variable-speed pump, heater, or controls adds a different cost than resurfacing alone, so an on-site assessment is more useful than a broad online estimate.

Is renovating usually less expensive than building a new pool?

Often, renovation costs less because the project can retain the existing shell and avoid full demolition, excavation, and new construction. Replacement may deserve consideration when structural problems are extensive or the existing layout cannot support the way your family wants to use the backyard.

How long does a pool renovation take on Long Island?

There is no single timeline. Resurfacing or an equipment swap is generally simpler than a project involving structural repairs, new decking, or a changed pool shape. Permitting and seasonal weather can also affect scheduling, so your contractor should provide a phase-by-phase timeline after inspecting the pool.

Ready to Plan Your Pool Renovation?

A clear evaluation can help you separate structural repairs from cosmetic improvements and choose a renovation scope that fits your existing pool. Gappsi can help you review the pool’s condition, discuss design options, and map the next practical steps for your Long Island backyard.

Schedule a free pool renovation consultation by calling Gappsi at (631) 831-3177

Share this page:
Luxury Long Island backyard swimming pool with a natural stone rock waterfall cascading into the water

Pool Waterfall Design and Installation Guide

A water feature can change how a pool looks, sounds, and feels without taking over the entire backyard. The right design connects moving water with the pool, surrounding stonework, planting, and the way your family uses the space.

Call Gappsi at (631) 831-3177 to start planning a pool waterfall for your backyard.

A pool waterfall can serve as a visual focal point, add the sound of moving water, and create a more intentional transition between the pool and landscape. The best result depends on scale, water flow, materials, placement, and proper coordination of pumps and plumbing.

For Long Island homeowners, that planning matters. A natural-rock spillway may suit a garden-inspired setting, while a clean sheet fall can complement contemporary paving and architectural lines. Gappsi uses design-build experience and 3D visualization to evaluate those choices before installation, including how the feature will work with gunite or vinyl construction. The first decision is not which feature looks most impressive, but how it will support the way you want to use your backyard.

Why Add a Pool Waterfall to Your Backyard

A well-designed waterfall changes how a backyard feels before anyone enters the water. The movement, sound, and texture create a stronger connection between the pool, patio, planting beds, and surrounding hardscape. Instead of treating the pool as a separate rectangle, Gappsi can use a pool waterfall as a focal point that helps the entire outdoor space feel more intentional.

Moving water can make the pool area more relaxing. The steady sound of a cascade may soften the noise of nearby streets, neighbors, or outdoor equipment. It also gives the space a natural rhythm that can make quiet afternoons, evening swims, and time spent beside the pool feel more private. Adjustable flow can let homeowners choose a gentle spill or a stronger cascade when they want more sound and movement.

The feature can also support an active, restorative backyard routine. A waterfall does not replace exercise or medical care, but a pool provides a low-impact setting for movement. Mayo Clinic notes that aquatic exercise is gentle on bones, joints, and muscles, while research indexed by PubMed describes aquatic exercise in fitness and rehabilitation settings. A review in the National Library of Medicine also discusses hydrotherapy for musculoskeletal rehabilitation. The waterfall adds atmosphere to that experience, helping the pool feel more like a therapeutic retreat than a basic recreational feature.

Visual interest is another practical benefit. Natural boulders, river stone, a gunite ledge, or a clean sheet of water can become functional art in the landscape. The feature remains visible when the pool is not in use, especially when its shape is coordinated with planting, retaining walls, pavers, and evening lighting. A thoughtfully integrated water feature can strengthen curb appeal and contribute to the perceived value of an outdoor living area. Although resale outcomes depend on the property and the quality of the overall installation.

Gappsi approaches the waterfall as part of the complete pool design, not as an attachment added at the end. Its design-build team can coordinate the feature with the pool structure, circulation equipment, deck materials, and landscape layout. Homeowners comparing options can review these swimming pool water feature ideas before deciding whether a rock cascade, sheer descent, or another water effect fits their yard.

A pool waterfall is worth considering when you want sound, movement, and a defined visual anchor in one feature. The right scale and placement matter more than adding the largest possible cascade.

Call Gappsi at (631) 831-3177 to discuss your pool waterfall design.

Types of Pool Waterfalls and Water Features

The right feature depends on the pool’s architecture, the surrounding hardscape, and the kind of movement you want to see and hear. A modern pool waterfall may use a narrow stainless-steel opening for a clean sheet of water, while a natural design can layer boulders and river stone to resemble a mountain stream. Other features create upward movement, illuminated arcs, or a quiet visual accent without a large cascade.

Luxury residential pool with a natural rock waterfall cascading into the water

Gappsi’s design-build team can coordinate the structure, plumbing, pump, lighting, and finish as one system. That matters because a feature is not only a visual element. Its flow rate, landing point, operating controls, and relationship to the pool deck all affect how it performs.

Type Look Best For Key Note
Sheer descent A smooth, narrow sheet of falling water Contemporary pools, raised walls, and spas Creates a defined edge and can be paired with LED lighting.
Rain curtain A uniform veil of water from a linear opening Minimalist designs and broad visual effects Its clean, sheer appearance suits a sleek pool environment.
Grotto or rock waterfall Layered stone, boulders, and irregular cascades Naturalistic yards and resort-inspired landscapes Boulders and river stone can mimic a mountain stream.
Deck jets Several smooth streams arcing from the deck Family pools and animated perimeter accents Typical arcs reach about 4 to 5 feet, depending on design and flow.
Bubblers Gentle upward plumes of water Tanning ledges and shallow areas Add movement without the volume of a larger cascade.
Fountains Vertical or rounded sprays Standalone focal points and formal layouts Can be sized to complement, rather than dominate, the pool.
Water bowls Water spilling from a raised vessel Geometric walls and structured patios Provides a strong architectural accent with a compact footprint.
Laminars A clear, glass-like arc of water Modern pools and nighttime displays They can reach about 6 to 8 feet and maintain a precise arc when properly designed.

The distinction between natural and modern features is not absolute. A stone spillway can use concealed LED lighting, and a sleek sheer descent can pour from a wall faced with natural stone. LED illumination highlights moving water after sunset, while adjustable flow lets homeowners change the sound and intensity for swimming, entertaining, or quieter evenings. Gappsi can also evaluate whether a feature should pour into the main pool, an attached spa. Or a tanning ledge, then design the surrounding surfaces to support safe use and limit splashout.

For more design direction, review these swimming pool water feature ideas or explore Gappsi’s examples of a sheer descent water feature.

How Much Does a Pool Waterfall Cost?

The cost of a pool waterfall depends less on a single feature label and more on the design decisions behind it. A short, simple spillway added to an existing pool is a different investment from a large natural-rock structure with multiple cascades, integrated lighting, and dedicated equipment. For that reason, a responsible estimate should be presented as a general investment range after the feature has been designed, rather than as an exact price that may not fit the property.

On Long Island, Gappsi’s published baseline for a complete gunite swimming pool build is $90,000 to $140,000. A waterfall is only one component of that larger project, so its feature-only cost should not be confused with the cost of building the pool itself. When a waterfall is being added to an existing pool, the scope may also include modifications that would not apply during new construction.

  • Feature size and shape: A narrow sheet fall or compact spillway generally requires less structure and water volume than a wide cascade, raised wall, grotto, or multi-tiered rock formation.
  • Material selection: Natural stone, boulders, and river rock involve different preparation and installation requirements than cast concrete. Stainless steel components can create a clean, contemporary edge, but fabrication and finish details affect the budget.
  • Pump and plumbing: The pump must deliver the intended flow without excessive noise, splash, or strain. Larger features may require dedicated plumbing, additional drains, structural support, and engineering review.
  • Lighting and controls: LED lighting adds an evening dimension, while automation can schedule operation and adjust when the feature runs. These upgrades add to the initial scope but can make the system easier to manage.

Operating cost matters as well. Energy-efficient waterfall pumps can reduce the cost of running the feature, especially when paired with timers or automation that prevents unnecessary operation. Proper sizing is important because an oversized system may use more energy than the design requires, while an undersized pump may fail to produce the intended flow.

A well-designed waterfall can also contribute to the property’s outdoor appeal by creating a strong focal point and improving the character of the poolscape. That potential property-value return is not guaranteed and should not be treated as a dollar-for-dollar payback. The better approach is to choose a feature whose scale, materials, sound, and maintenance requirements make sense for the home. Gappsi can evaluate the pool, surrounding hardscape, and equipment needs before preparing a project-specific scope.

Where to Place a Pool Waterfall for Best Effect

Placement determines whether a waterfall feels like an intentional part of the pool or an accessory added afterward. Start by considering how people use the space, where the feature will be visible from the house, and how its sound will carry across the yard. A well-planned feature can also improve water movement. As water returns to the pool, it helps distribute sanitizers and reduce stagnant zones, provided the pump, plumbing, and circulation plan are properly sized.

For many Long Island backyards, the most direct option is a spillway that pours into the main swimming area. This creates a clear focal point and lets swimmers enjoy the sound and movement from inside the pool. The waterfall can also be positioned along a raised bond beam, retaining wall, or elevated natural-stone formation so it connects visually with the surrounding patio and landscape. Gappsi’s waterfall builders on Long Island case study shows how a moss rock design can be integrated into a broader outdoor setting.

Should the Waterfall Pour Into the Pool, Spa, or Tanning Ledge?

The receiving area changes both the experience and the scale of the installation. A cascade into the main pool creates a prominent visual anchor. A spillway from a raised spa adds movement while reinforcing the spa’s separation from the swimming area. A smaller flow into an attached tanning ledge can provide a gentler effect for shallow-water lounging without the volume or drop of a large rock waterfall. These options can be combined, but each requires coordinated elevations and plumbing so water reaches the intended basin without excessive turbulence.

Keep the landing point close enough to the receiving water to control splashout and water loss. A high drop, strong flow, or narrow landing zone can send water onto the deck, increase evaporation, and create a wet path around the pool. Flow controls and correctly selected pump capacity allow the effect to be adjusted for quiet evenings or more active entertaining. The design should also include non-slip decking around areas likely to receive spray. Textured stone, concrete, or another slip-resistant surface is safer than a smooth finish where bare feet and water meet.

Finally, evaluate sightlines from the kitchen, seating areas, and interior rooms. A waterfall should contribute to the full landscape composition, not only look attractive from one end of the pool. Review additional Long Island poolscapes for examples of how pool edges, patios, planting, and water features can work together as one backyard plan.

How Do Water Features Integrate with Gunite and Vinyl Pools?

The pool shell and liner material influence how a water feature is designed, supported, and connected to circulation. A gunite pool gives the builder more freedom to mold a raised wall, grotto, custom spillway, or integrated bench into the structure. A vinyl-lined pool can also support an attractive feature, but the installation usually relies on carefully selected surface-mounted or bolt-on components, such as spillways, bubblers, or a compact sheer descent. In either case, the feature should be planned with the pool, deck, drainage, and landscape rather than added as an afterthought.

Water movement begins with the equipment plan. Pump sizing and flow rates must match the width, height, and style of the feature. A narrow sheet fall needs a different flow pattern from a broad rock waterfall. Larger features may require dedicated plumbing, structural preparation, and engineering so the system delivers a consistent effect without creating excess splashout or placing stress on the pool wall. Adjustable valves can give homeowners practical control over the sound and appearance. From a quiet sheet during conversation to a stronger flow when the pool is being used as a focal point.

Material selection also affects how the feature fits the property. Natural stone, river rock, and hardscaping can make a gunite grotto or rock waterfall feel connected to surrounding patios and planting beds. A clean stainless steel or stone-faced sheer descent can create a more architectural transition from the coping into the water. Gappsi’s sheer descent water feature work illustrates how the edge detail and spillway shape contribute to the overall design.

  1. Design the complete setting. A professional 3D design integrates the feature with the pool shape, sightlines, hardscape, planting, lighting, and available equipment space. This is where the team can compare a molded gunite grotto with a vinyl-pool spillway or bubbler.
  2. Prepare the structure. Gunite features can be formed as part of the pool construction, with proper support, waterproofing, coping, and access for service. Vinyl installations need liner-safe details and a mounting approach that protects the liner and wall assembly.
  3. Plan the plumbing. The installer determines pipe routes, return locations, valves, drains, and service access. A larger pool waterfall may need separate plumbing instead of sharing an undersized return line.
  4. Size the pump and setup. Flow requirements are matched to the feature’s dimensions. Adjustable controls allow the homeowner to customize the water volume and reduce unnecessary pump demand when full flow is not needed.
  5. Install the finish materials. Stone, tile, metal, coping, and surrounding deck surfaces are fitted to manage water contact and complement the existing hardscape. Non-slip surfaces are especially important where splash may reach the deck.
  6. Test and fine-tune the system. Before completion, the team checks the flow pattern, splashout, level transitions, drainage, valves, lighting, and equipment operation. Adjustments at this stage help the feature run evenly and look intentional from the main viewing areas.

Pool Waterfall Maintenance and Winterization

Sheer descent pool waterfall feature with clean water sheet arcing into a gunite pool

A waterfall stays attractive and dependable when its care is treated as part of the pool’s routine, not as a separate decoration. Start by removing leaves, twigs, and other debris from the basin, spillway, rocks, and catch points. Periodic brushing and surface cleaning also help limit algae growth, which can discolor stone and make the moving water look cloudy. The exact cleaning schedule depends on surrounding trees, weather, and how often the feature runs.

Because the feature typically shares water with the pool, maintenance also depends on the central filtration and disinfection system. Test the water according to your pool-care schedule and keep the chemistry balanced for the entire circulation system. Gappsi’s guidance notes that regular testing and chemical balancing are essential for both the pool and the feature. This approach supports clear water and helps distribute sanitizer through areas that might otherwise become stagnant. The CDC also emphasizes proper circulation and disinfection when operating aquatic facilities: review its pool operation and maintenance guidance.

Automated controls make daily operation easier. A timer can run the waterfall during the hours you use the backyard, then shut it off when the pool area is empty. Scheduling reduces unnecessary pump runtime while preserving the sound and visual movement you want. If the pump has adjustable flow, you can also select a quieter, lower-volume setting for ordinary circulation and increase the effect when entertaining.

Cold weather requires a separate plan in Long Island and other freezing climates. Before sustained freezing temperatures arrive, the feature should be shut down, drained, and prepared according to the equipment design. Associated plumbing and pump systems must be winterized so trapped water does not freeze, expand, and damage pipes, fittings, or equipment. Large rock features may also hold water in concealed channels, so winterization should cover the full assembly rather than only the visible spillway. Have the installer or pool professional identify drain points and confirm the correct restart procedure in spring.

Thoughtful maintenance protects the stonework, pump, plumbing, and water quality at the same time. Gappsi can account for access, drainage, controls, and seasonal protection when designing or servicing a feature.

Call Gappsi at (631) 831-3177 to plan a pool waterfall that is easier to maintain year-round.

Call Gappsi at (631) 831-3177 to learn which pool waterfall fits your pool and landscape.

Frequently Asked Questions

Can I add a waterfall to an existing pool?

Often, yes. The design depends on the pool structure, available space, equipment pad, plumbing access, and the intended location. A smaller sheet fall or bubbler may require less infrastructure than a large rock feature. Gappsi can evaluate the pool and surrounding hardscape, then use 3D planning to coordinate the feature with the deck, landscape, and existing circulation system.

How much do pool waterfalls cost?

There is no single price because the investment changes with the feature’s size, stone or finish, pump, plumbing, lighting, and installation conditions. A simple sheet fall and a boulder-and-river-stone waterfall represent different scopes. The most useful estimate comes from a design review that defines the desired water effect and the work required to integrate it.

Are pool waterfalls worth it?

For homeowners who want more than a swimming area, a waterfall can add movement, sound, and a clear focal point to the backyard. It can also support water circulation when properly designed. The feature is most worthwhile when its scale, flow, maintenance needs, and style fit the pool and landscape rather than being added as an isolated decoration.

What maintenance does a pool waterfall require?

Plan to clear debris, clean surfaces, monitor water chemistry, and check the pump and plumbing as part of regular pool care. Automatic controls can schedule operating times, while colder Long Island weather requires draining and winterizing the feature’s plumbing and equipment. Proper circulation and disinfection should be maintained whenever the feature is operating, consistent with CDC pool-operation guidance.

Ready to Plan Your Pool Waterfall?

A well-planned water feature can bring movement, sound, and a clear design focal point to your pool area. Gappsi can help you discuss the right waterfall style, placement, plumbing, and materials for your pool build. Call Gappsi at (631) 831-3177 to talk through your pool waterfall or water feature project.

Share this page:
Crew resurfacing the interior of an in-ground swimming pool on a Long Island backyard

Pool Resurfacing Cost on Long Island: What to Expect

A pool finish does more than affect appearance. As plaster, quartz, pebble, or another interior surface ages, stains, roughness, cracks, and repeated maintenance can signal that the finish is ready for professional attention. On Long Island, the right budget depends on the pool’s size, current condition, selected finish, and the work required around the shell.

The typical pool resurfacing cost is about $6,000 to $15,000, with an average near $11,000, while larger or more complex concrete pool projects can reach approximately $10,000 to $20,000. Those figures generally cover the interior finish work, not a full renovation that changes lighting, tile, coping, plumbing, or the pool structure.

Knowing what is included in an estimate makes it easier to compare contractors and distinguish a straightforward refinishing project from repairs or upgrades. Start by examining the factors that shape the final scope and price.

Call Gappsi Group at (631) 831-3177

What Determines Pool Resurfacing Cost on Long Island

A resurfacing estimate is built around the condition of the pool, the work required to prepare it, and the finish selected for the new interior surface. Pool size, current condition, finish choice, and location are the primary variables that move the total cost up or down. A larger pool requires more surface material, more labor, and more time to drain, prepare, and refill. A smaller pool can still require significant work if the existing surface has widespread damage.

The existing pool surface is often the first cost variable to investigate. A contractor may need to remove failing material, clean and prepare the shell. And inspect for cracks or other areas that need repair before the new finish is applied. A surface with staining or roughness may need different preparation than one with delamination, exposed aggregate, or shell damage. The condition should be documented during an on-site inspection rather than assumed from the pool’s age alone.

The selected finish also affects the budget. Plaster, quartz, pebble, and other finish systems have different material costs, application requirements, appearance, and expected service life. A finish should be chosen for the pool’s design, maintenance plan, and use, not just its initial price. The cost of a pool resurfacing project can include labor, materials, waste disposal, and possible pool-shell repairs, so an estimate that lists only the finish material may not represent the complete scope. See the documented cost components and influencing factors.

Long Island location can affect drive and logistical costs. Access to the property, distance for crews and deliveries, staging space, disposal requirements, and the municipality where the work takes place may all influence project planning. Nassau and Suffolk properties can have different site conditions, access constraints, and local procedures.

Before work begins, homeowners should verify permit requirements with their specific Long Island municipality. Requirements can vary by town or village, and confirming them early helps prevent scheduling surprises. Ask for a written scope that separates preparation, shell repairs, finish application, cleanup, disposal, and any optional updates to coping, tile, or lighting.

Call Gappsi Group at (631) 831-3177

How Much Does Pool Resurfacing Cost on Long Island?

For many Long Island homeowners, the pool resurfacing cost falls between approximately $6,000 and $15,000, with an average near $11,000. That range is a budgeting guide, not a fixed quote. The final price depends on the pool’s size, the condition of the existing finish. The selected material, and whether the crew finds shell damage after draining and preparing the pool.

Concrete pool resurfacing often occupies the higher end of the range. A typical estimate for resurfacing a concrete pool is approximately $10,000 to $20,000. Concrete surfaces may require more preparation, repairs, or finish material than a smaller or less deteriorated pool. A contractor should inspect the surface and explain each preparation or repair charge before work begins.

Resurfacing is not the same as building a new pool. These figures generally apply to renewing the pool’s interior surface. They do not represent a new gunite pool installation, and they should not be compared as if the two projects deliver the same scope. Gappsi’s published baseline for a new gunite swimming pool on Long Island is $90,000 to $140,000. A new build can include excavation, structural construction, plumbing, equipment, finishes, and other features. Resurfacing addresses the interior finish of an existing pool, although a broader renovation may add separate upgrades.

When comparing estimates, ask whether the quoted amount includes draining, surface preparation, labor, materials, disposal, and repairs. Also confirm whether the proposed finish is plaster, quartz, pebble, or another material. Two estimates with different totals may be pricing different levels of preparation or different expected service life.

Call Gappsi Group at (631) 831-3177

A useful estimate should identify the work included, the finish being installed, and any conditions that could change the price. It should also distinguish resurfacing from tile, coping, lighting, plumbing, or structural updates. Those additions can turn a surface project into a larger renovation, so keeping the scopes separate makes the budget easier to evaluate.

Pool Resurfacing Finish Types and Their Costs

The finish is one of the clearest ways to shape both the appearance and the pool resurfacing cost of a project. Gappsi Group installs several finish families, including marble dust plaster, quartz Diamond Brite, glass, Hydrazzo, and pebble. The right choice depends on the condition of the pool shell. The look you want in the water, and how much service life you expect from the new surface.

Blue pool water showing a textured interior finish

Cost tiers below are directional rather than fixed prices. Pool size, preparation, shell repairs, access, and selected color or aggregate can change the estimate. A contractor should inspect the existing surface before comparing finish proposals.

Pool resurfacing finish comparison
Finish type Cost tier Typical service life Look and characteristics
Plaster or marble dust Most budget-friendly About 7-10 years Clean, traditional surface with a simple color field
Quartz Middle Longer-lasting than standard plaster when maintained correctly Fine aggregate adds texture, color variation, and durability
Hydrazzo or polished finish Higher Varies by product, installation, and water care Smooth, marbled appearance; polished surfaces resist chemical erosion
Glass aggregate Higher Varies by product, installation, and water care Reflective detail that can create brighter color and visual depth
Pebble Higher About 15-20 years with proper care Natural, textured appearance with pronounced aggregate character

Plaster is often the practical choice when the initial budget is the priority, but its shorter expected life can mean more frequent resurfacing. Quartz occupies the middle ground, offering a durability and cost compromise between plaster and pebble. Pebble finishes generally command a higher initial investment, yet their 15-20-year service life can make the long-term calculation different. The finish is not the only variable: disciplined water chemistry helps protect any surface from premature damage.

For a closer look at finish and refinishing choices, visit Gappsi’s gunite pool refinishing guide. A site-specific estimate should identify the existing finish, preparation work, chosen material, and any related tile, coping, or shell repairs as separate line items.

When Should You Resurface Your Pool?

A pool finish does not fail all at once. It usually shows smaller warning signs before the surface becomes difficult or expensive to restore. Stains, visible cracks, rough texture, and persistent discoloration are all reasons to schedule an inspection rather than waiting for the next major pool season.

Age is another useful planning signal. Many pool finishes begin to need attention when they are approximately 10 to 15 years old, although the actual service life depends on the material, water chemistry, installation, and routine maintenance. A finish that still looks uniform and feels smooth may have more useful life remaining. A newer finish with severe wear may need work sooner if the pool has experienced chemical imbalance or surface damage.

What does a failing pool finish look like?

  • Rough or sandpaper-like areas: texture can indicate erosion, exposed aggregate, or deterioration of the finish.
  • Cracks and chips: isolated damage should be evaluated to determine whether it is limited to the finish or points to a deeper shell concern.
  • Stains that return after cleaning: recurring rust-colored, gray, or dark marks may not be ordinary surface dirt.
  • Discoloration across broad areas: uneven fading or mottling can signal that the finish is aging or reacting to water conditions.

Staining does not always mean that resurfacing is immediately necessary. Prolonged unbalanced pool chemistry can contribute to staining and discoloration, so testing the water and correcting pH, alkalinity, and sanitizer levels should be part of the diagnosis. If the surface remains stained, rough, or damaged after chemistry is brought under control, resurfacing may be the more practical solution.

It is also worth looking beyond appearance. A deteriorating finish can make brushing and cleaning harder, hold debris in rough areas, and affect how comfortable the pool feels underfoot. During an evaluation, the contractor should inspect the entire interior, waterline tile, coping, and surrounding details rather than quoting a finish replacement based only on photographs.

For a closer look at the process and local considerations, review Gappsi’s Long Island pool resurfacing guide. Planning before the finish reaches an advanced stage can give you more control over scheduling, finish selection, and the overall pool resurfacing cost.

How Long Does Pool Resurfacing Take?

Most pool resurfacing projects take about one to two weeks from preparation through refill, although the exact schedule depends on the finish, curing requirements, and weather. A contractor should give you a project sequence rather than a single optimistic date, because each stage affects the next one.

What happens during the resurfacing process?

The work typically begins with draining the pool and inspecting the exposed shell. The crew removes loose or damaged material, cleans the surface, and addresses preparation needs before the new finish is applied. For a concrete pool, preparation can include an acid wash, bond coat, and plastering. These steps are not interchangeable shortcuts. The condition of the existing surface can add work to the schedule, particularly when repairs are needed before the finish can be installed. Acid-washing chemicals can also cause serious burns when handled incorrectly, so this stage belongs with trained professionals. Safety information on muriatic acid explains the risk of improper use.

After preparation, the selected material is applied across the pool interior. The surface then needs time to cure and stabilize. Curing is one reason a finish should not be judged only by how quickly it can be installed. Plaster and pebble surfaces have different requirements, and curing time varies by product and site conditions. In some installations, pebble surfaces can be filled sooner than traditional plaster, but the installer should provide the specific startup and filling instructions for your finish.

How does Long Island weather affect scheduling?

On Long Island, seasonal planning matters. Temperature, rain, humidity, and overnight conditions can affect application and curing, while freezing weather makes late-season work more difficult. Spring and summer calendars can also fill quickly, especially when homeowners are preparing for pool season. Scheduling an inspection early helps identify whether the project can be completed before a planned event or opening date.

Once curing requirements are met, the pool can be refilled and the water balanced according to the finish manufacturer’s instructions. Plan for a follow-up period while the chemistry is monitored and adjusted. A realistic pool resurfacing cost discussion should include this timeline, the finish-specific care instructions, and any shell preparation, not just the days when material is being applied. That planning helps protect the new surface and reduces surprises during the first weeks of operation.

Pool Resurfacing vs Full Pool Renovation: What’s the Difference?

The distinction comes down to what needs to change. Pool resurfacing addresses the interior finish of an existing pool. The work may include draining the pool, preparing the shell, applying a bond coat, and installing a new plaster, quartz, hydrazzo, marble dust, glass, or pebble finish. It can correct a worn, rough, stained, or discolored surface while leaving the pool’s basic shape and equipment layout intact.

A full pool renovation has a broader scope. Renovation may change the pool structure, reshape steps or benches, add features, or alter how the pool functions within the surrounding outdoor space. If you want to change the footprint, add a tanning ledge, rebuild damaged structural areas. Or coordinate major deck and patio work, resurfacing alone will not address the entire project.

When is resurfacing the better fit?

Resurfacing is usually the practical choice when the shell remains sound and the main concern is the finish. A new surface can update the color, texture, and feel of the pool without turning a maintenance project into a structural remodel. It is also an opportunity to coordinate related details, including waterline tile, coping, and pool lighting. Those updates can make the pool look and operate more current while keeping the underlying basin in place.

The right scope depends on the condition of the pool, the finish you want, and the improvements you expect to make over the next several years. Homeowners comparing options can review this gunite pool renovation guide for a broader look at renovation planning. It is useful to separate cosmetic finish work from structural changes before estimating pool resurfacing cost, because combining several upgrades may change labor, materials, scheduling, and permitting requirements.

When does a renovation make more sense?

Renovation is the stronger fit when the pool needs more than a new interior surface. Structural repairs, redesigned circulation areas, new water features, and coordinated changes to the pool deck may require several trades and a single project plan. A renovation can also combine resurfacing with tile, coping, lighting, and surrounding masonry so the finished pool does not look like an isolated repair.

Gappsi uses a vertically integrated design-build model with its own specialized crews rather than relying on outside subcontractors. That structure allows the team to evaluate the pool, finish, lighting, coping, and surrounding hardscape as connected parts of one project. For examples of broader work, see this gunite swimming pool renovation overview. On Long Island, seasonal conditions should also be considered when combining resurfacing with a larger renovation. Since the sequence and timing of each phase affect when the pool can return to service.

How to Budget for Pool Resurfacing and Avoid Hidden Costs

A reliable budget begins with the work beneath the visible finish. The quoted pool resurfacing cost may cover labor and materials, but the final project can also involve waste disposal, repairs to the pool shell, surface preparation, and related updates. Ask for these items to be identified separately so you can compare proposals accurately instead of choosing a bid that leaves necessary work out.

On Long Island, also ask whether your municipality requires a permit for the planned work. Permit requirements can vary by location, so homeowners should verify the rules for their specific Nassau or Suffolk County municipality before scheduling the project. Building that step into the timeline can help prevent avoidable delays, reinspection costs, or changes after work has started.

Acid washing is another area where cutting costs can create a larger problem. It is used to clean and prepare some concrete pool surfaces, but it must be performed by trained professionals. Incorrect handling can damage the pool structure and turn routine preparation into a repair expense. A proper concrete resurfacing process may include acid washing, applying a bond coat, and installing the new plaster or selected finish. Your written proposal should explain which preparation steps are included and how the existing surface will be evaluated.

Pool resurfacing project with a prepared concrete pool surface

Contractor selection also affects the real cost of the job. Look for relevant resurfacing experience, current references, and crews managed by the contractor. Ask who will perform each stage, who handles shell repairs, and who is responsible if the finish does not cure as expected. A design-build company with its own specialized teams can provide clearer coordination when resurfacing is combined with tile, coping, lighting, or surrounding patio work.

Finally, protect the finish after installation. Regularly monitor and balance the pool’s pH, since proper chemistry helps prevent premature finish degradation and surface damage. Visible staining or discoloration can indicate that chemistry has been unbalanced for an extended period. Include opening, closing, and ongoing water-care responsibilities in your maintenance plan. A complete budget accounts not only for the installation, but also for the care that helps the new surface reach its expected service life.

Call Gappsi Group at (631) 831-3177 to discuss the right finish for your pool and get a site-specific estimate before you commit to a resurfacing plan.

Frequently Asked Questions

How much does it cost to resurface a pool?

Many pool owners spend about $6,000 to $15,000, with an average near $11,000. Although the final price depends on pool size, surface condition, finish selection, access, and required repairs. These figures are a planning range, not a project quote. Source: Swimply cost research.

How much does resurfacing a concrete pool cost?

Concrete pool resurfacing commonly falls around $10,000 to $20,000 when preparation, the selected finish, labor, and possible shell repairs are included. A site inspection is important because cracks, hollow areas, waterline tile, coping, and difficult access can change the scope. Source: industry cost research.

When should you consider pool resurfacing?

Consider an evaluation when the finish is roughly 10 to 15 years old or you see persistent staining. Discoloration, cracks, roughness, exposed aggregate, or trouble keeping the surface clean. Staining can also point to prolonged water-chemistry imbalance, so testing the water helps identify the cause before work begins.

How long does pool resurfacing take?

Most projects take approximately one to two weeks, but weather, preparation, finish selection, curing requirements, and inspection timing can extend the schedule. Long Island homeowners should plan around seasonal demand and confirm when the selected finish can safely be filled and treated. Source: industry timeline research.

What is the difference between pool resurfacing and a full renovation?

Resurfacing replaces the pool’s interior finish. A full renovation can also change the structure or add features such as new lighting, tile, coping, steps, equipment, or a redesigned layout. If the shell and layout are sound, resurfacing may address the main problem. Broader structural or functional goals call for a renovation assessment.

Ready to Plan Your Pool Resurfacing?

A site-specific review can help you compare finish options, identify necessary shell or surface repairs, and build a clearer budget for your Long Island pool project.

Call Gappsi Group at (631) 831-3177 for a free pool resurfacing consultation and site-specific quote.

Share this page: