Proper outdoor sauna installation requires more than just picking a spot on the lawn. It is a long term cost for your home and health. This process works best when you plan for local weather and safety.
Outdoor sauna installation involves picking a strong model, making a level base, and getting any building permits needed by your local town office for your own home project. You must choose between old-style wood burning heaters or electric units, and you will need a thick concrete slab to keep the frame from warping in the soil. Check with your local office since permits for permanent structures often cost between 300 and 800 dollars depending on your specific town rules and your site needs. Working with an expert team helps you manage the site work and power needs to ensure your new wellness space stays safe and runs well for many years.
Installing a sauna is a big step for any homeowner who wants to improve their lifestyle and health. You need to know how to prepare your land and manage the project from start to finish. The fact that outdoor sauna installation starts with the right site is the focus of our next section. The path begins with.
Outdoor sauna installation starts with the right site
Choosing the best spot for your new sauna is the first step for any Long Island home. You need to find a place that is easy to reach but still offers privacy. Most owners in Nassau and Suffolk counties want a spot that fits well with their yard. It should be near your house so you can get to it fast in the winter. A short walk makes it much easier to use your sauna all year long.
You also need to think about how you will get power to the site. Picking a spot close to your main lines can save you money. A good spot will make your outdoor sauna installation more helpful for your life. It should be a place where you feel relaxed and safe.
Building a strong base
Your sauna needs a level and stable floor to stay in good shape. If the ground is not flat, the wood walls may warp or shift over time. This can cause the door to stick or gaps to form in the structure. A solid base keeps the unit dry and safe from the wet soil. You should check that the ground does not hold water after a rain. Good drainage is key to keeping the wood from rotting.
Expert teams suggest a few ways to build this base. A concrete slab 3 to 4 inches thick is a top choice for a strong base. You can also use a pad made of crushed stone or gravel. This pad should be at least 4 to 6 inches deep to allow water to flow away. These steps help keep your sauna level for many years.
Weather and wind safety
On Long Island, we get strong winds and heavy snow. You must think about wind and weather when you pick your spot. High winds can cool down your sauna too fast. This makes the heater work harder and uses more power. If you can, place the sauna near a fence to block the wind. This shield helps keep the heat inside where it belongs.
You should also think about the sun. A spot with some shade can keep the outside of the sauna from fading. Health studies from the National Institutes of Health show that high heat in a dry sauna can help your heart. To get these benefits, your unit must reach and keep the right heat level. Proper site choice ensures your sauna works well in any season.
Local rules and permits
Before you start, you must check the rules in your town. Many places in Nassau and Suffolk have laws about where you can put a new structure. You may need to keep the sauna a certain distance from your land line. This is called a setback rule. Following these rules from the start keeps you from getting a fine later. It is a vital part of a smooth project.
You will likely need a building permit for a fixed structure. These permits often cost between $300 and $800 based on where you live. Gappsi can help with the permit work to make it easy. We know the local codes and can help get your plans approved fast. Getting the right papers now means you can enjoy your sauna without any worry.
- Check local setback rules in your town.
- Look for a spot with good soil drainage.
- Find a place near power and water lines.
- Pick a site that offers good privacy.
Which foundation is best for an outdoor sauna?
Choosing the right base is the first step in a good outdoor sauna installation. A strong base keeps your unit flat and dry. Without it, the wood may warp or rot over time. A good base also makes sure your sauna stays safe for many years of use.
Why a flat base matters
A flat site is vital for any large unit. When the ground is not flat, the sauna walls can shift. This leads to gaps where heat leaks out. Keeping the unit flat also helps the door open and close well. It stops the wood from bending under its own weight.
Saunas offer great health perks that make them worth the work. Studies show that heat from a Finnish sauna can help your heart. Research from the National Institutes of Health links steady sauna use to a lower risk of heart disease. To get these perks, you need a unit that stays in top shape. A flat base is the best way to protect your purchase.
Popular base options for saunas
There are four main types of bases for a home sauna. You can use a concrete slab, stone pavers, a gravel bed, or a wood deck. Each one has pros and cons for your Long Island home. The best pick depends on your yard and the type of sauna you buy.
A concrete slab is the most stable choice. It should be 3 to 4 inches thick to handle the weight. This base is best for large cabin-style saunas that stay in one place. If you want a faster path, try a gravel pad. Use crushed stone at least 4 to 6 inches deep to help with water flow and keep the area dry.
| Base Type | Best For | Water Flow | Strength |
|---|---|---|---|
| Concrete Slab | Large cabin kits | Fair | Highest |
| Stone Pavers | Patio matching | Good | High |
| Gravel Pad | Barrel saunas | Great | Medium |
| Wood Deck | Raised units | Good | High |
Concrete slabs and pavers
A concrete slab is a fixed base for your yard. It works well for heavy units that need a lot of help. You must make sure it is flat before the mix dries. This base lasts a long time and needs very little work. It is a smart choice for any high-end sauna model.
Stone pavers are also a good pick for your home. They look great and can match your current patio or walk. They are easy to fix if one stone cracks or shifts. Pavers allow more water to pass through than solid concrete. This helps keep the ground under the sauna from getting too wet.
Gravel and wood decks
Gravel is a quick and cheap base that works well. It helps water flow fast away from the wood. This is good for areas that get a lot of rain or snow. You can set up a gravel bed in just one day. It is a smart pick for installing an outdoor sauna like a barrel unit.
A wood deck is another choice that many people like. It feels nice under your feet when you step out of the heat. But you must check if the deck is strong enough. A sauna with four people can be very heavy. Make sure the wood beams can hold the load before you start the build.
Long Island site factors
At Gappsi, we see many types of soil across Nassau and Suffolk County. Some yards have sand while others have thick clay. Sandy soil drains well but can shift over time. Clay soil holds water and might need a deeper gravel bed to stay dry. We know the local land and can help you pick the best spot.
Weather is also a factor on Long Island. Strong winds and heavy snow can test your sauna unit. A firm base keeps the unit from moving during a storm. We suggest looking at your yard after a big rain. See where the water goes before you pick your base. This simple step saves you from big trouble later on.
Plan permits, power, heat, and ventilation early
Before you start your outdoor sauna installation, you must look at local rules and power needs. Planning early helps you avoid high costs and keeps your project on track. This stage is about more than just where the sauna sits. It is about how the unit works with your home and stays safe for years.
Check local building rules
Most towns on Long Island have specific rules for new structures. You might need a permit for your sauna, which often costs between $300 and $800 Eden Hut. These rules often cover how far the unit must be from your property line. Checking these setbacks now prevents legal issues later. Working with a team like Gappsi can help since we handle the sauna and wellness design along with the paperwork.
Map out power and heat
Most outdoor sauna installation projects use electric heaters. These heaters usually need a 220V line run from your main panel. You should get quotes from two or three licensed pros to find the best path for these wires Almost Heaven. If you choose a wood-burning heater, you must plan for chimney height and fire safety. Both types reach high heat, often between 176°F and 212°F PubMed.
Manage air and water
Good air flow is vital for any sauna. You need vents to bring in fresh air and let out heat. This stops mold and keeps the wood in good shape. You also need to think about how water will drain from the area. Most units sit on a stone or concrete pad that stays level and dry. Taking time to plan these parts will make your new spa area much better for your home.
- Verify town codes. Call your local building office in Nassau or Suffolk to ask about sauna permits and property line rules.
- Select your heater. Choose between a wood stove or an electric heater based on your power access and style choice.
- Hire licensed trades. Find a pro to run the power lines or set up the gas for your heater to meet safety codes.
- Design air flow. Place intake and exhaust vents to keep the air fresh and protect the wood from moisture.
- Finalize setbacks. Mark the spot for your sauna to make sure it meets all town distance rules before the base is set.
Choose a sauna design made for the backyard
The right look for your outdoor sauna helps it fit your landscape and last for years. When you plan an outdoor sauna installation on Long Island, you must think about both form and function. Your design choice affects how the unit handles the local weather from the North Shore to the South Shore. You want a structure that stays warm in the winter but also looks like a natural part of your home.
Barrel and cabin shapes
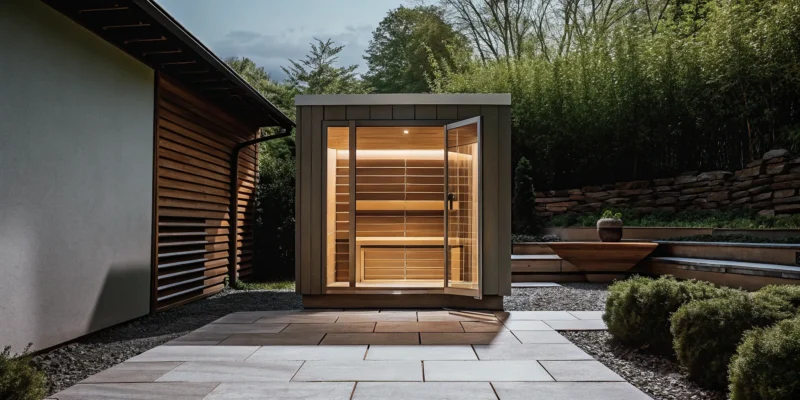
Barrel saunas are a popular pick for backyards because of their round shape and efficiency. The curved walls help heat move in a circle. This keeps the air warm without using too much power. This shape also lets snow and rain slide right off the sides. If you want a more classic look, luxury outdoor sauna installation often uses cabin-style designs. These units have flat walls and more head room. They feel like a small guest house or pool shed.
Both styles come in kits or pre-built models that work well for most yards. Cabin shapes allow for larger glass windows and tiered seating. Barrels take up less space and often do not need a deep base. Your choice depends on how many people will use the sauna. It should also match your current landscape design. Both forms provide a private space to relax and may help your heart health.
Wood and weather protection
Outdoor units face wind, rain, and sun every day. Picking the best wood is the first step to a long-life unit. Most high-end saunas use cedar or thermo-aspen. These woods resist rot and bugs. Cedar has natural oils that protect it from moisture. Thermo-aspen is wood that has been heat-treated to make it very stable and strong. These materials help the walls stay straight and tight even when the temperature changes fast.
You also need to think about wind and weather exposure when you pick a spot. A roof with a good overhang or high-quality shingles will keep the wood dry. For the best view, many owners add glass walls or large windows. These panes must be tempered glass to handle the high heat inside and the cold air outside. High-quality seals around the door and windows keep the steam in and the drafts out.
Cohesive backyard design
A sauna should not look like an afterthought in your yard. It works best when it is part of a full plan. Many homeowners on Long Island place their sauna near a pool or hot tub for a “hot and cold” routine. Research shows that Finnish sauna bathing at high heat can lower the risk of heart disease. Placing it near a cold plunge pool makes this routine easy to follow during the week.
Using the same stones or wood for the sauna base and your patio helps the space feel unified. You can also add lights or plants around the path to the sauna door. This makes the walk safe and inviting at night. When the design matches your home and yard, it adds value and beauty to your property. A well-placed unit creates a true spa feel right in your own backyard.
What happens during professional outdoor sauna installation?
Working with a full-service team makes the path to a backyard wellness space simple and clear. Professional outdoor sauna installation starts with a visit to our Smithtown showroom to view premium models from brands like SaunaLife and Auroom. Our design-build experts help you choose the right style for your Long Island home and plan the layout of your yard. We handle the complex tasks like permit expediting to ensure your project meets all local rules in Nassau or Suffolk County.
Initial site planning and design
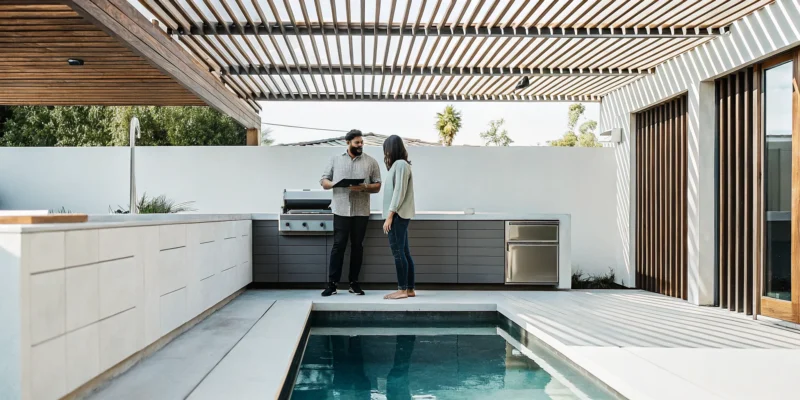
Before any work begins, we assess your yard to find the best spot for your new unit. A professional team looks for a site that is level and stable to prevent the structure from shifting or warping over time. We also consider wind and weather exposure to help your sauna run at its best for years. This phase often includes a look at how the sauna fits with your other features like swimming pools or masonry work to create a full outdoor retreat.
During the design stage, we also talk about the specific needs for your chosen model. Traditional Finnish saunas often use outdoor sauna installation options like electric or wood-burning heaters that produce dry heat. These units typically run at high temperatures from 176°F to 212°F to provide the best results for your heart and blood flow. Regular use of these saunas is linked to a lower risk of heart disease and high blood pressure, according to health studies.
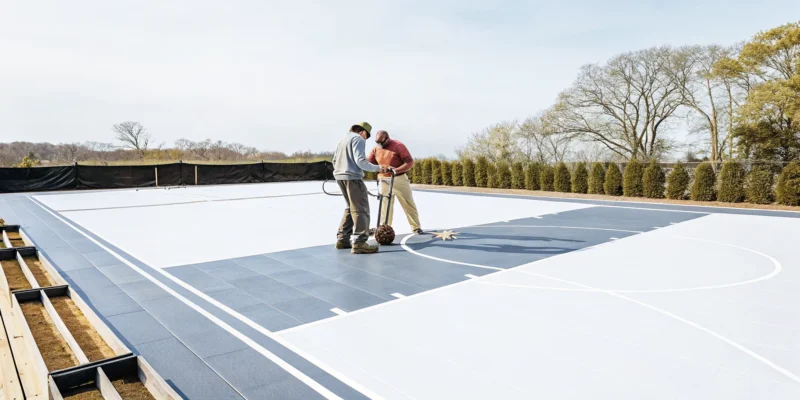
Site preparation and base construction
A solid foundation is the key to a long-lasting outdoor sauna installation. A pro crew will build a base that allows for proper drainage and leveling. Most sites need a 3-4 inch thick concrete slab or a crushed stone pad that is 4-6 inches deep to stay firm under the weight of the unit. We use our own masonry team to build these pads so they match the rest of your landscape and stand up to the local weather.
Getting the base right also helps with the electrical and utility work that follows. For electric models, we coordinate with licensed pros to run the proper power lines to your site. This setup must be done safely and meet all code rules before the sauna unit arrives. Having one team handle the site prep and the build means these steps happen in the right order without any delays.
Assembly delivery and final handoff
The final part of the process is the delivery and setup of your sauna. Some units arrive as outdoor sauna installation kits that our skilled crew builds on your new base. Others come pre-assembled and need to be placed with care using special tools. Once the unit is in place, we connect the heater and test all parts of the system to make sure they work well. We check that the air flows correctly and the benches are set for comfort.
After the build is done, we walk you through how to use and care for your sauna. We show you how to set the heat and humidity to get the most from each session. This is also when we do a final check of the work to ensure it meets our high standards for craftsmanship. Our goal is to hand off a ready-to-use space that adds value and health benefits to your Long Island property.
How do you protect an outdoor sauna through Long Island seasons?
Long Island weather brings salt air, damp air, and heavy snow, so you must plan for these shifts to keep your unit in top shape. Good outdoor sauna installation starts by picking a spot that can handle local wind and rain. A firm base keeps the wood from warping when the ground freezes and thaws. Check the roof and door seals twice a year to stop leaks.
Managing coastal salt and moisture
Living near the shore means your sauna faces salt air and wet weather, which can wear down wood and metal parts fast. Apply a good wood stain or sealer to the outside to block water and keep the cedar or spruce from turning gray. It also stops the wood from soaking up salt, which is vital because salt can cause rot over time. This keeps the wood strong and looking great for years. Keep the air dry inside the sauna after each use by leaving the door or vent open for a few minutes. This step prevents mold and mildew while often using the heat helps keep the wood dry and clean. Studies show that Finnish sauna use can also lower the risk of high blood pressure and heart disease. Using the heat is a great way to stay healthy and protect your cabin.
Planning for winter snow and drainage
Winter on Long Island can bring deep snow and ice, so your sauna needs a solid roof to hold the weight. Clear snow away from the base and the door to keep water from seeping inside the unit. Good drainage is key to stop ice build up, and a gravel pad allows water to flow away from the wood. Check the seals around the heater as the cold sets in because small cracks can let in cold air. This makes the heater work harder, which wastes power and puts stress on the unit. If you use a wood burning stove, make sure the pipe is clear of debris before the first frost to help it run well.
Routine cleaning and wood care
Cleaning your sauna is easy if you scrub the benches with a soft brush and warm water often. Do not use harsh soaps or bleach since these can damage the wood and leave bad smells. A light sanding can make the wood look new if you see stains and helps keep the surface smooth for your skin. Most people only need to do this once or twice a year. Check parts like hinges and handles for rust and wipe them with a damp cloth to remove salt near the coast. If a part looks worn, swap it quickly to keep the unit safe and secure. Caring for your sauna takes very little time but adds years to its life if you stay on top of these tasks. Small steps now will save you from big repairs later on.
Questions to answer before your sauna consultation
Planning for an outdoor sauna installation takes more than just picking a spot in the yard. A bit of work before your design talk can help you save time and get a better result. You should think about how you plan to use the space and what style fits your home best. Gappsi helps Long Island homeowners through every step of this path. Here are the key things to think about before you meet with a pro.
Define your goals and users
First, ask yourself who will use the sauna most often. Is it for solo rest or for the whole family? A small cabin might be enough for two people, but you may need a larger model for guests. Thinking about the number of users helps you pick the right size. It also helps you find the best way to set up the seats inside the unit.
You should also think about your health goals. Many people use saunas to help with heart health and blood pressure. Research shows that Finnish sauna bathing may lower the risk of high blood pressure and heart disease. If you want these benefits, you may want a classic unit that can hit high heat levels. Knowing your goals helps your designer find the best product for your needs.
Select a location and heat source
Where you put your sauna matters for both look and use. A flat and firm spot will keep the structure from shifting. You also need to think about wind and snow. Picking the right spot ensures your sauna stays in good shape for years. You must also check that there is easy yard access for the setup crews.
You must also pick a heat source. Wood-burning units give a classic feel but take more work to start. Electric heaters are simple to use but need a power line from your home. Some people prefer outdoor sauna installation options that use infrared heat instead. Each type has different needs for wiring or venting that you should talk about during your meeting.
Consider style and budget
Next, think about the look of your new sauna. Do you like the round shape of a barrel sauna or the clean lines of a cabin? The style should match your home and other outdoor features like pools or patios. Gappsi can help you design a full space that looks great and works well for your life. Picking a style early helps the team give you a better price estimate.
Finally, think about what you need most for your budget. You do not need a fixed price yet, but you should know what matters to you. Are you looking for a luxury cabin or a simple kit? Do not forget to plan for things like base prep and permits. Some towns may charge for a permit to set up a new structure on your land. Having these answers ready will help you get the most out of your consultation.
Frequently Asked Questions
How much does it cost to install an outdoor sauna?
Installation costs for an outdoor sauna can vary based on the model and site needs. To get a clear price, it is best to get quotes from two or three licensed pros before you start. Factors like running power lines and building a concrete base will change the final cost. Expert teams can help you plan your budget while making sure the setup meets all local safety codes for your home.
Do I need a permit for an outdoor sauna on Long Island?
Yes, most towns in Nassau and Suffolk County need a building permit for a permanent outdoor structure. These permits often cost between $300 and $800 based on your local rules. Since laws can change from one town to the next, it is wise to work with a team that offers permit help. This makes sure your new wellness space is legal and safe according to all regional building standards.
What is the difference between electric and wood-burning sauna heaters?
Traditional Finnish saunas often use either electric or wood-burning heaters to create dry heat. Most units reach temperatures between 160 degrees and 195 degrees during a session. Electric heaters offer ease and quick starts with the turn of a dial. Wood-burning stoves provide a classic feel and a soft heat but need more work to light and clean. Both types provide a high-heat space that is perfect for a deep sweat and relaxation.
How does regular sauna use help with heart health?
Using a Finnish sauna often can help lower your risk of high blood pressure and heart disease. These saunas use very hot, dry air with low humidity to improve your blood flow. Research shows that regular sauna bathing is a safe way to boost your heart health. For the best results, saunas should run between 176 degrees and 212 degrees. This heat puts a healthy stress on the heart that helps it stay strong over time.
Ready to book your Long Island outdoor sauna installation today?
Putting off your sauna project often leads to higher supply costs and fewer open dates as more local people look for outdoor upgrades now. If you wait too long, you will miss the chance to use your sauna during the cold months when you need the heat the most. Starting your plan now saves your place on our list and ensures you get a high-quality retreat that adds real value to your own home.
Ready to book? Please contact the expert team at Gappsi today to request an outdoor sauna design consultation. Our team is ready to help you with your new home sauna project right here on Long Island.