.
A private swimming pool should feel like a quiet retreat instead of a public stage. Many homeowners find that neighbors can see right into their yard. You need a plan to block these views.
Contact Gappsi today to schedule a consultation with our Long Island privacy landscaping experts.
Privacy landscaping around pool areas mixes solid walls with plants to make a quiet space. Good plans use tall trees, thick hedges, and long grasses to block views from neighbors. According to research on hedgerows for home gardens, these living walls work well to screen your yard. You can also add stone walls or wood fences. For shade, builds like pavilions and pergolas give shelter from the sun. The best way is to pick plants that grow well in your area. This stops wind and noise so you can rest without feeling like people are watching. A well-placed screen turns your pool into a private retreat for your family. This ensures that you can swim and play in total peace.
Making a quiet backyard needs more than just a few shrubs because you must think about how every part works to block noise. The Importance of Planning Privacy Landscaping Around Pool Areas on Long Island is the first step toward a perfect home.
The Importance of Planning Privacy Landscaping Around Pool Areas on Long Island
A pool is a place for rest and fun with friends and family. On Long Island, many homes in Nassau and Suffolk County sit close to each other. This makes privacy a key part of your backyard plan. Before you start, think about how you will use the space each day. You should plan your outdoor tasks first to make sure the design fits your needs. Good plans help you feel safe and calm in your own yard. Gappsi uses 3D tools to help you see the final design and layout of your pool and yard before any work begins.
Creating a natural boundary
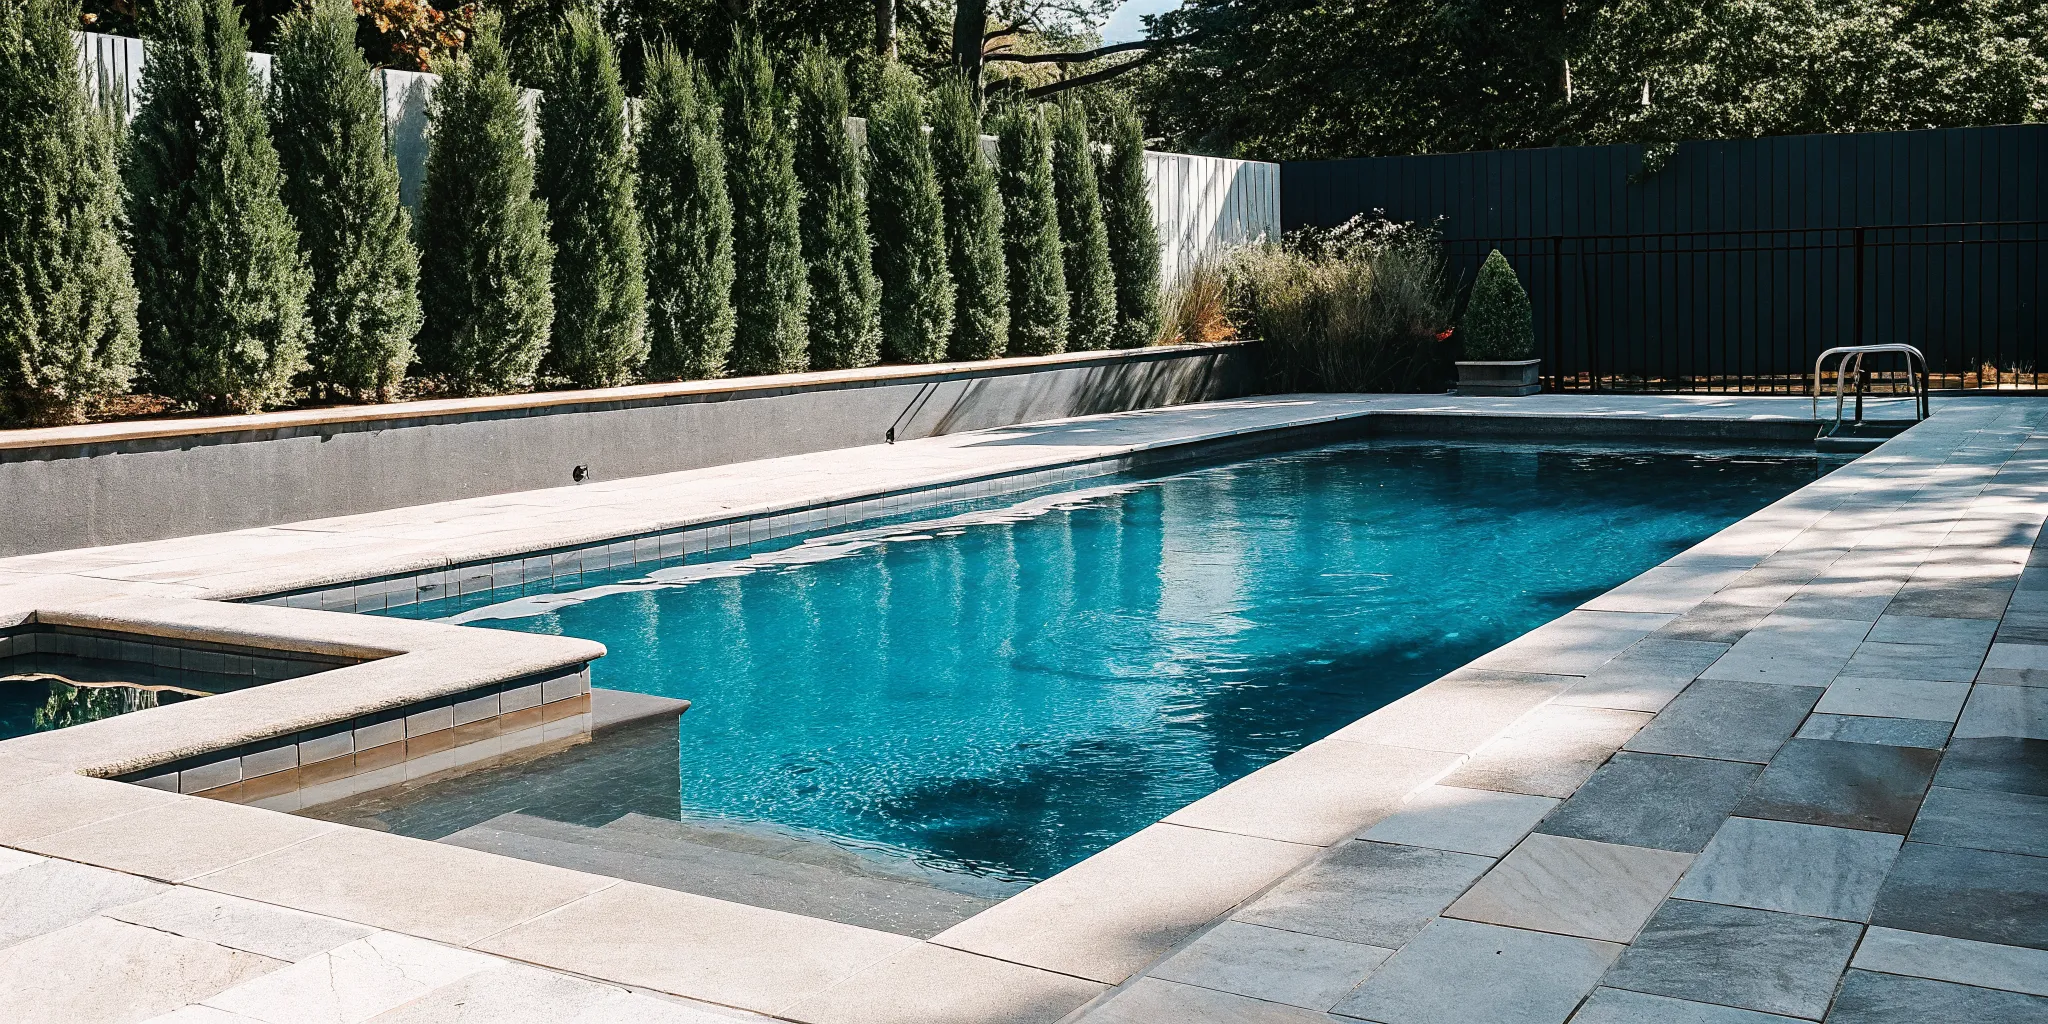
Living plants can form a soft wall around your pool space. A thick hedgerow helps birds find a home and can hide your yard from a neighbor’s view. When you pick your plants, try to use native types that grow well in New York. These plants help local bugs and birds live well while giving you a screen. Green trees that stay green all year long are a great choice. Our landscape design building experts can help you choose the best trees and shrubs for your pool edge. They know which plants will grow fast and stay healthy in our local soil.
Blending hardscape and greenery
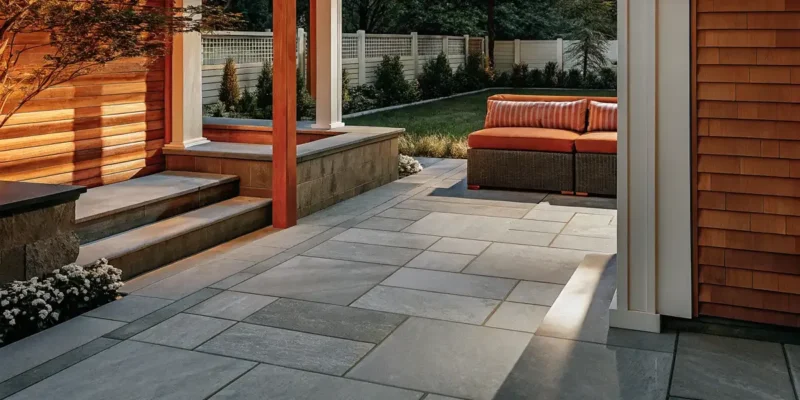
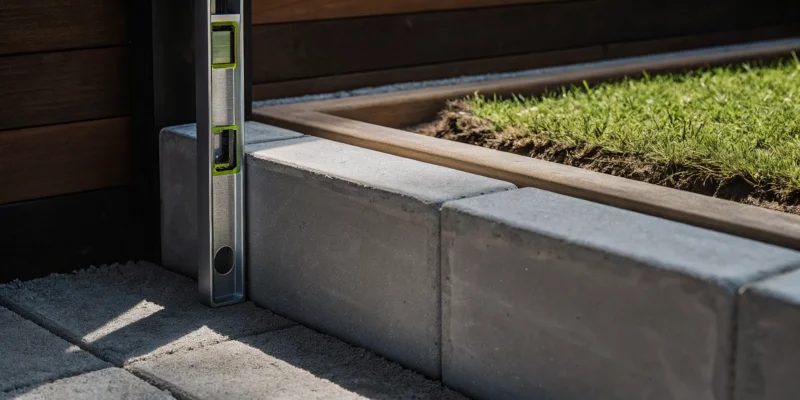
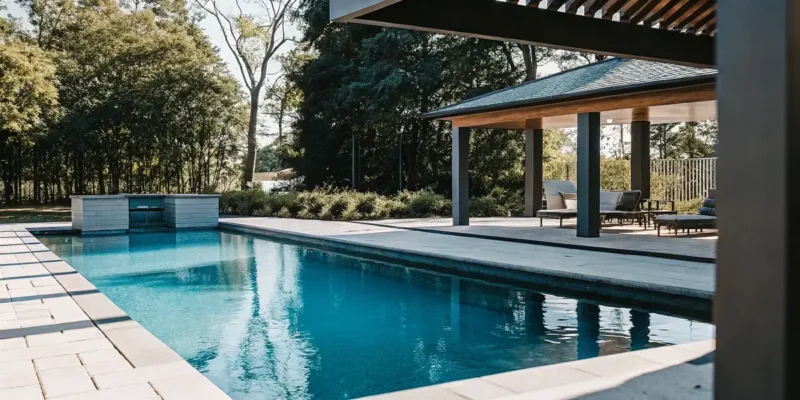
Privacy does not just come from trees and shrubs. You can mix walls, fences, and shade spots to get the best result for your home. A good plan might use a mix of fencing for home privacy and tall green plants. You can also add shade structures like slotted roofs or covered decks. These add shade and block the view from high windows nearby. Using real stone or hard pavers around the pool creates a smooth path between the water and your private zones. These items are strong and look great with any plant choice. This mix of hard and soft items makes your yard look like one big room.
Planning your view and space
Think about what you see when you sit by the pool. You may want to look away from your house or toward it to make the space feel special. Tall trees with wide tops can act like a ceiling for your yard. This makes the space feel more like a real room and less like an open field. You should also look at existing walls or hedges that can help separate the parts of your yard. A well-placed wall or fence can keep your pool space quiet and private. When you start with a clear plan, you make sure your yard serves its main goal. A private pool space lets you relax and enjoy the sun without any worries.
What Are the Best Evergreen Plants and Shrubs for Poolside Privacy?
The best evergreen plants for poolside privacy include Arborvitae (Thuja) for narrow spaces, Skip Laurels for dense leaf coverage, and Leyland Cypress for fast-growing screens. These living walls stay green year-round and block noise and wind.
Evergreen plants are a top choice for landscape design construction experts because they stay green all year. A dense hedge acts as a natural living boundary that hides your pool from the road. Unlike wood fences, these plants add life and soft color to your yard. They are a great form of privacy landscaping around pool areas that also block wind and noise.
Selecting the Best Privacy Plants
You have many good choices for privacy wall outdoor ideas. The Arborvitae, or Thuja, is a classic pick for tight spots. It grows tall and thin, so it fits in small side yards. For a wider screen, Skip Laurels have thick leaves that block views well. Leyland Cypress is a fast grower if you need a screen in a short time. When you pick your plants, try to use native types. These plants grow better in the local dirt and need less water. They also support local birds and bees, which keeps your garden in good shape. Think about the final height of each plant so you do not block too much sun from the pool.
Planning Your Privacy Screen
Before you start digging, check your yard for things you already have. Look for large canopy trees that can act like a green roof for your space. You can also use old walls or fences to help split up different parts of your yard. A good plan looks at the view from both the pool and the house. You want to feel private while you swim, but you still want a nice view from your porch. You should also think about how the plants will look next to your custom pool landscaping, including stone or brick pavers.
- Check your soil and sun levels to make sure your plants will grow well near the pool area.
- Measure the length of the fence line and count how many plants you need to buy to fill the space.
- Dig holes that are twice as wide as the root ball but only just as deep to help roots spread.
- Place the plants in the holes and fill them with dirt, keeping the top level with the ground.
- Add a thick layer of wood chips around the base of the plants to hold in water and stop weeds.
- Water the new plants deeply and often during their first year to help them grow strong roots.
Care for Your Privacy Hedges
Once your plants are in the ground, they need a bit of work to stay thick. Trimming is key to keeping the hedge full. If you let it grow too wild, the bottom might lose its leaves. Most evergreens only need a light trim once or twice a year. Feeding your plants with the right plant food helps them grow fast and keep their dark green hue. Keep an eye out for bugs or brown spots on the leaves. Catching these small issues early can save your whole screen. A healthy hedge can last for many years and add value to your home.
Comparing Natural Greenery vs. Hardscape Privacy Solutions
Choosing the right way to hide your yard from view depends on your needs. You may want a soft, green look for your privacy landscaping around pool zones. Or you might need a strong wall to block noise and wind. Both ways have good points that help you enjoy your outdoor space more.
Why choose natural greenery?
Plants offer a soft and living wall for your yard. A thick hedgerow for the home garden can act as a screen that looks great all year. Evergreens and tall grasses are common picks because they stay full and green. These living walls also help local birds find a safe place to rest. You should use native plants to make sure your screen grows well in your local soil.
Living screens can also help keep your pool area cool and calm. Large trees create shade that feels like a ceiling for your yard. This makes the space feel like a private room away from the world. You can also use tall grasses to add a soft look and more movement to the air. These plants provide good cover while making the space feel more open.
One downside to plants is the time they take to grow. You may have to wait a few years for a hedge to reach its full height. They also need care like water, food, and trimming to stay thick. If you want a natural feel and do not mind the work, plants are a great choice.
The case for hardscape solutions
Hardscape options give you privacy as soon as the work is done. You do not have to wait for plants to grow tall or thick. A solid fence or a stone wall blocks the view from your neighbors right away. You can choose from many types of fencing for home privacy like wood, vinyl, or stone.
These structures are very strong and last for many years. They do not need water or pruning to stay in good shape. Stone walls can also block more noise than a row of plants can. If you live on a busy street, a hard wall might be the best way to keep your yard quiet. You can also mix in natural stone and tile to create a clean look near your pool.
Hardscape walls also work well in small yards. They take up less room than a wide row of shrubs. This gives you more space for your pool deck or patio. You can build them with built-in seats or lights to make your yard more useful at night. This makes it a very steady way to keep your yard private for a long time.
Compare privacy ways
| Feature | Natural Greenery | Hardscape (Fencing/Walls) |
|---|---|---|
| Setup Speed | Slow. (Needs time to grow) | Fast. (Built in days) |
| Upkeep | High. (Trimming, watering) | Low. (Occasional cleaning) |
| Look | Soft, natural, and lush. | Solid, clean, and structured. |
| Life Span | Varies by plant health. | Very long. (20+ years) |
| Cost | Lower start, ongoing care. | Higher start, low care. |
.
Finding the right balance
Many people find that a mix of both works best. You can build a fence for quick privacy and then add plants in front of it. This softens the look of the wall and adds more color to your yard. You can also use fake grass to keep the ground near your pool soft and green without the mess of real grass.
Think about how you will use your pool before you pick a plan. If you want a space that feels like a park, go with more plants. If you want a neat area that is easy to clean, hardscape may be the better pick. A good design will use both stone and plants to create the best yard for your home.
How Can I Create Privacy for My Pool From Neighbors?
To create pool privacy from neighbors, combine a physical barrier like a wood or vinyl fence with layered evergreen plants. Add custom shade structures like pergolas or pavilions to block views from taller, second-story neighboring windows.
Creating a private space around your swimming pool helps you relax without feeling watched. Many people use privacy landscaping around pool areas to block lines of sight from nearby windows or yards. By choosing the right mix of plants and walls, you can build a natural screen that looks great and adds value to your home. You should start by looking at where your neighbors can see into your yard from high or low spots.
Natural Screening with Plants
Living walls are a great choice for pool owners who want a soft, green look. Dense hedgerows provide a natural boundary that works well as a screen. You can use tall shrubs like arborvitae or privet to create a thick barrier. These plants grow high and stay green all year. This keeps your pool area private even in the cold months. For a fresh look, landscape design construction experts say to use tall ornamental grasses.
Ornamental grasses add movement and style to your backyard. They grow fast and can reach heights of six to eight feet in just one season. When you plant them in rows, they sway in the wind and create a blurred view for neighbors. These grasses also make a gentle sound that can help mask noise from the street or other houses. They are a low-care way to get the privacy you need without a lot of work or high costs.
Layered Multi-Tiered Designs
A single row of plants may not block every view from a tall house. A layered design uses many heights to fill in all the gaps. You can start with tall canopy trees to create an implied roof for your outdoor room. Below those, you can plant mid-sized shrubs and then smaller flowers or ground cover. This multi-tiered way of planting creates a deep visual wall that is much harder to see through than a flat fence.
Using native plants in these layers is a smart move for any Long Island home. Native species support local birds and bugs while being tough enough to handle local weather. This type of design also lets you mix colors and leaf shapes for a rich look. It feels like a natural part of your land rather than a forced screen. It turns your pool into a hidden spot that feels far away from the rest of the world.
Privacy Structures and Walls
Sometimes plants alone are not enough to stop every view. You can combine greenery with hard structures for total peace. Using a mix of fencing for residential privacy and tall plants is helpful. A solid wood or vinyl fence gives you instant screening that lasts for years. You can then add vines or shrubs in front of the fence to soften the look of the hard material.
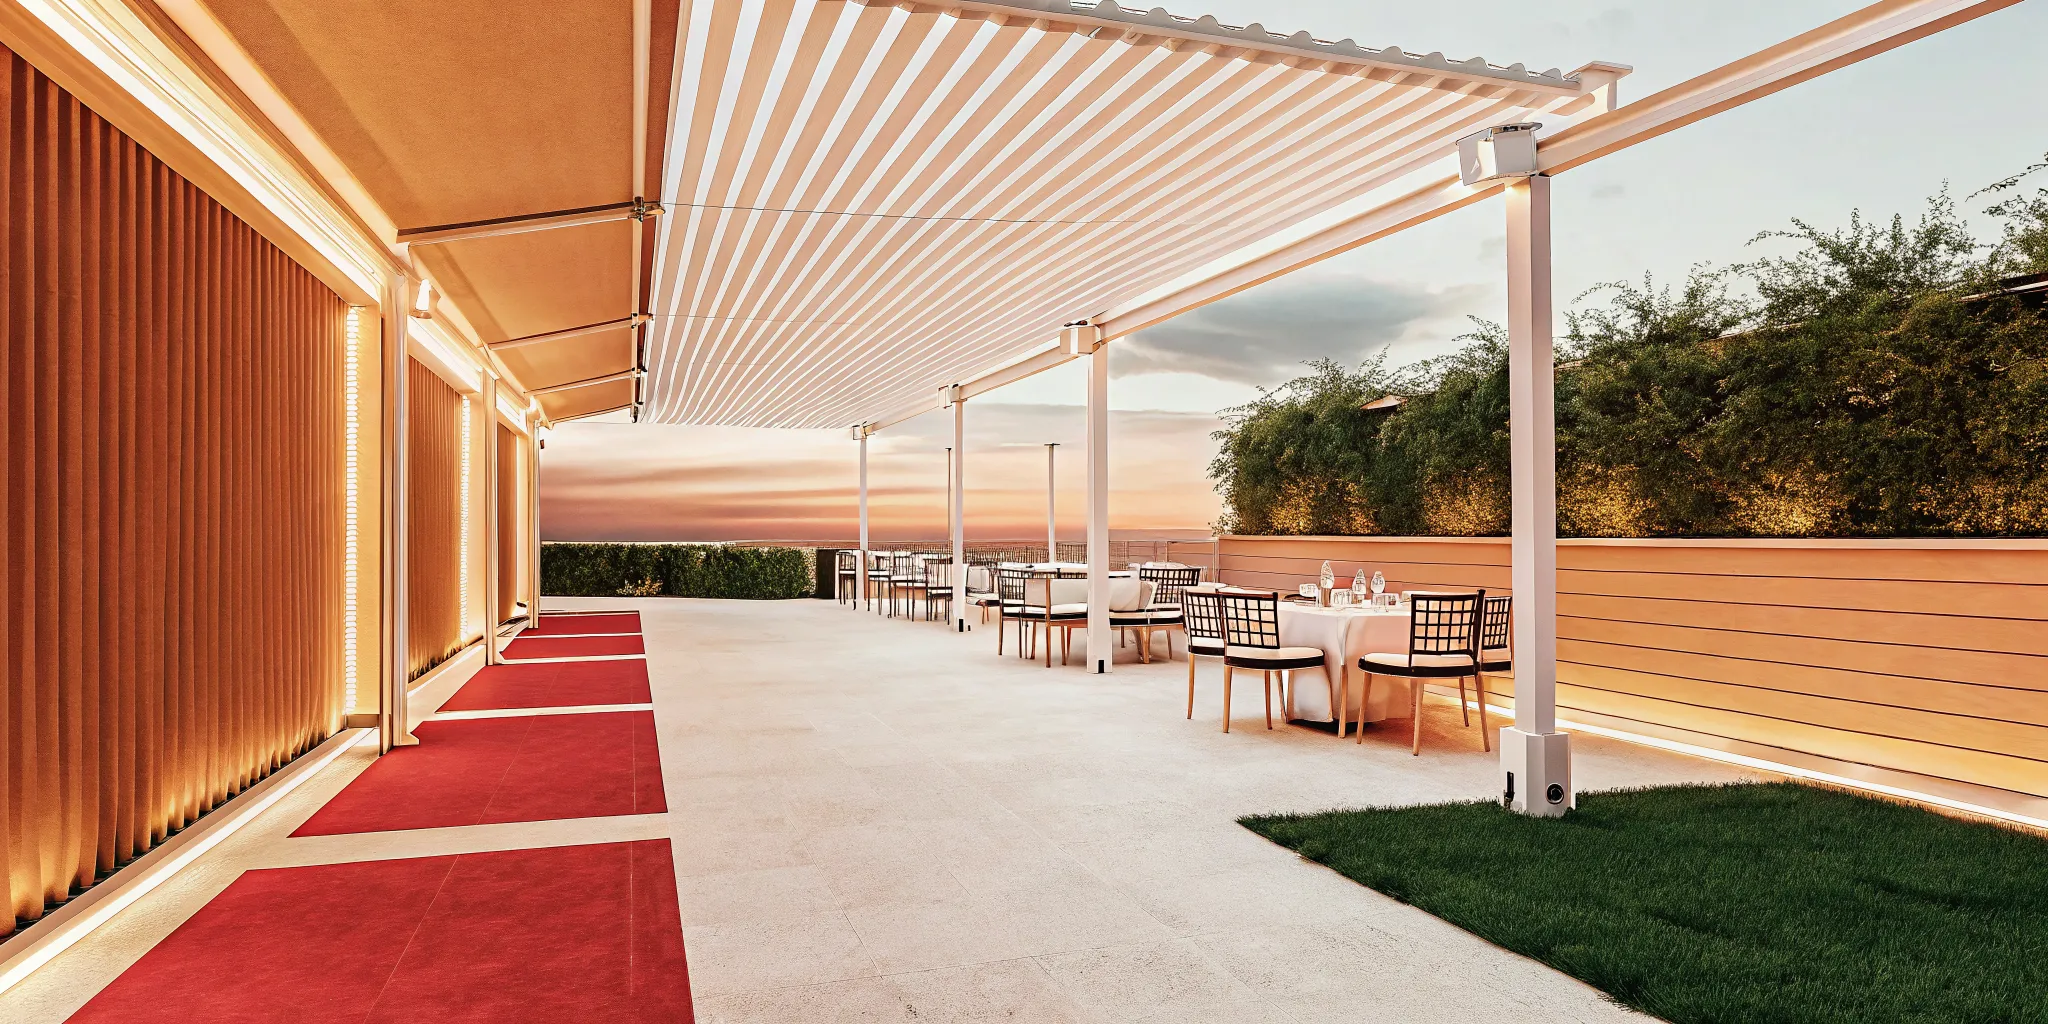
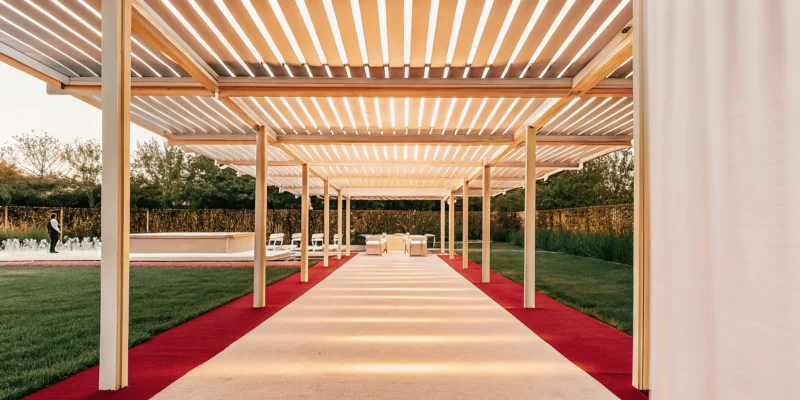
Other options include stone walls or shade structures like pergolas and pavilions. These can block views from upper-floor windows in nearby homes. When you place a pergola near the edge of your pool deck, it creates a cover over your seating area. This keeps you hidden from above while you rest in the shade. It also adds a touch of style to your outdoor space. These structures work well with stone or porcelain pavers to create a clean and polished look for your backyard.
How Can I Incorporate Shade and Shelter with Pavilions and Pergolas?
Incorporate shade and shelter by placing custom pavilions or pergolas over poolside seating areas. Louvered pergolas let you control sunlight, while solid roof pavilions block overhead views and provide a comfortable outdoor room.
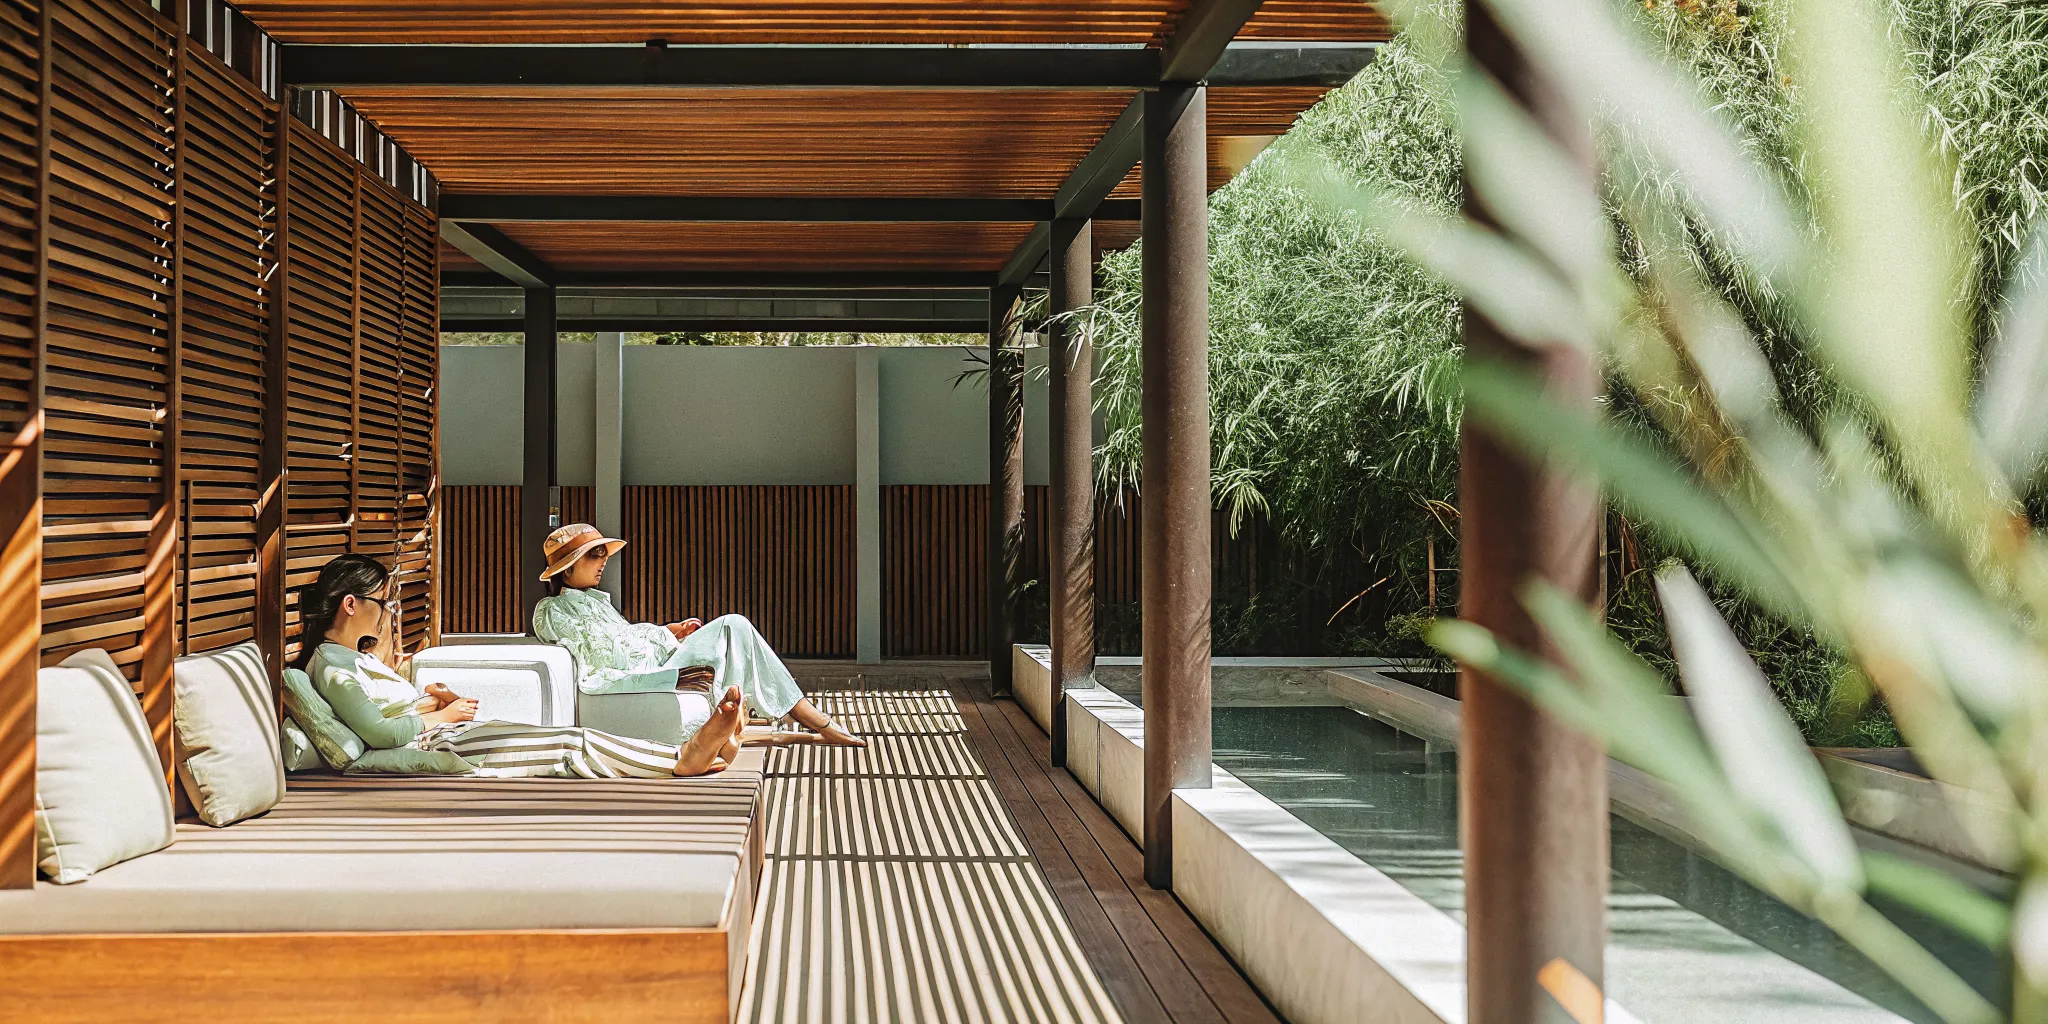
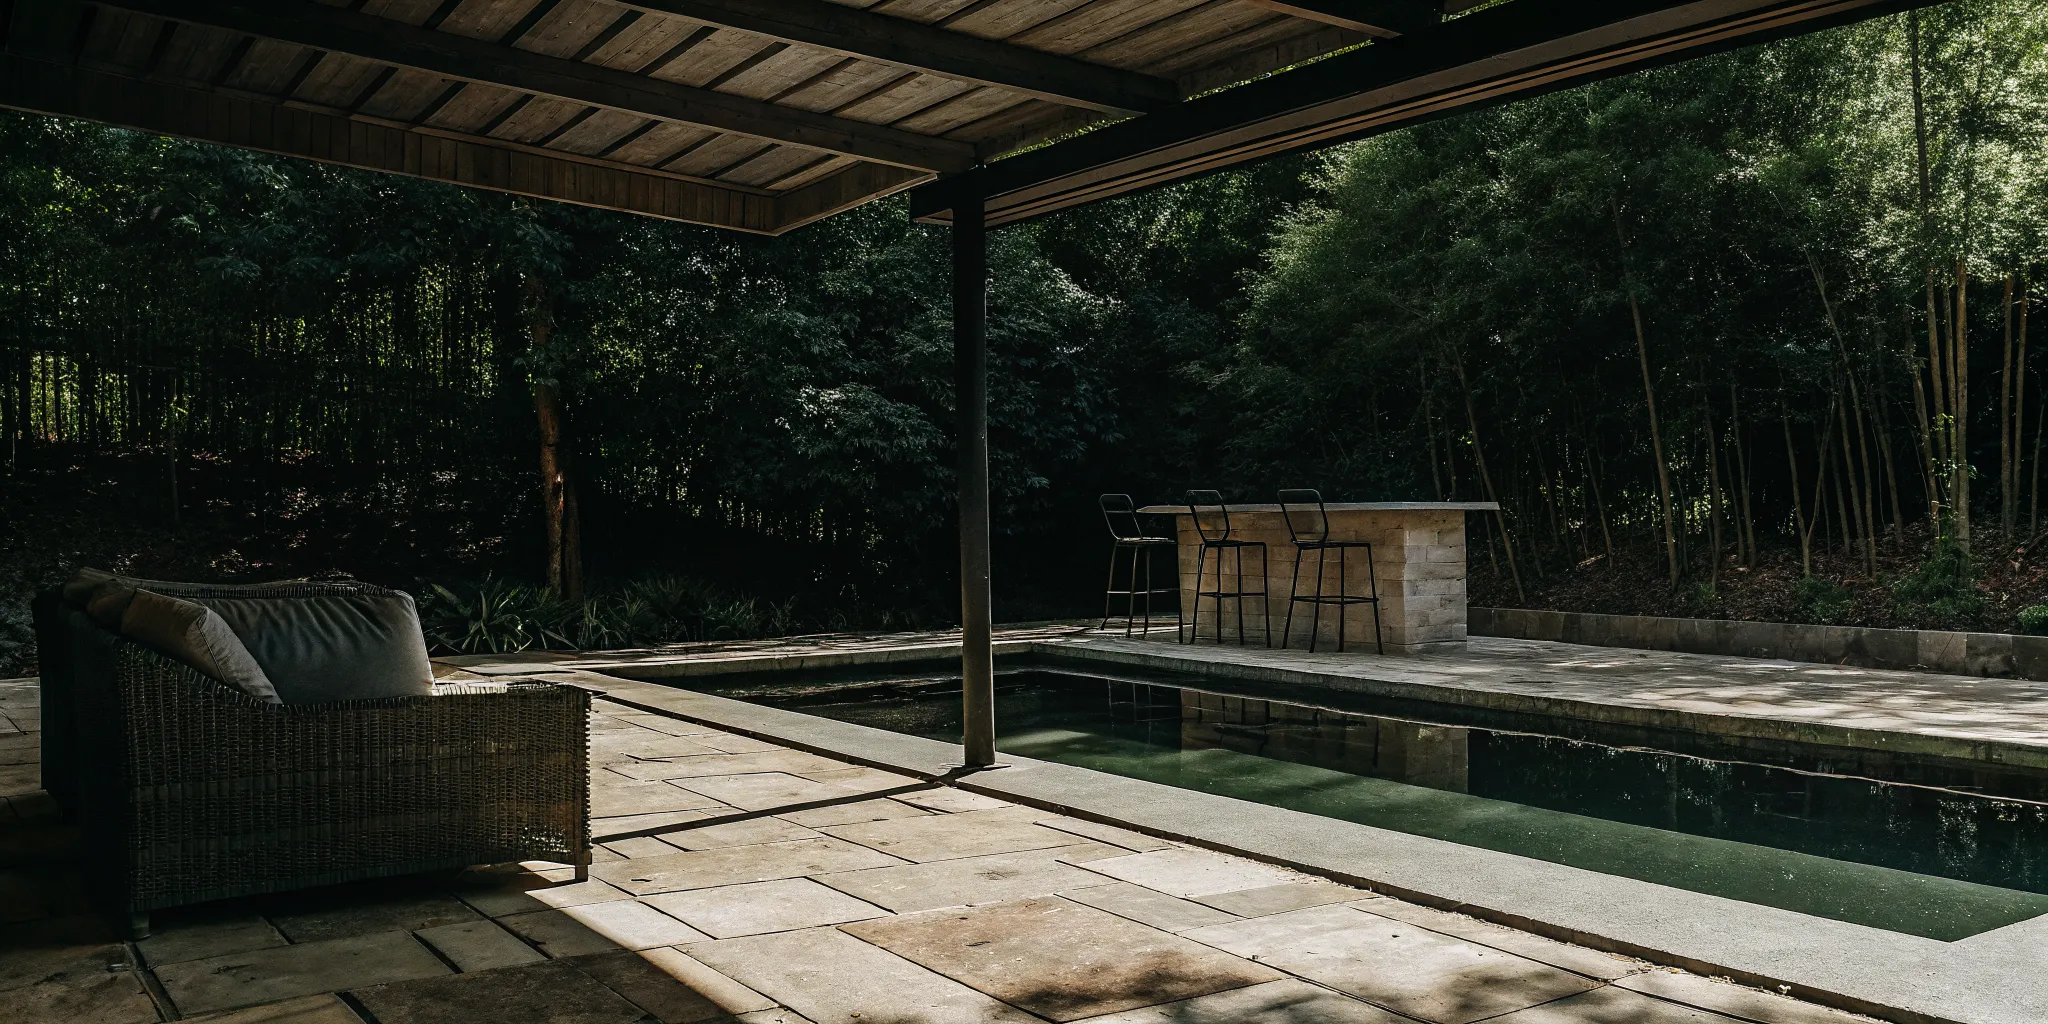
Creating a true outdoor room on Long Island takes more than just plants. While trees and shrubs offer a soft border, custom structures like pavilions and pergolas add a needed hard ceiling to your space. These features help define separate zones for dining or lounging while they reduce your sun heat. Using a pavilion or gazebo can turn a simple patio into a useful living area that you can use all day.
Designing outdoor rooms for privacy
To build a private retreat, you must first think about how you will use the space. A well-placed structure can block the view from nearby houses and create a sense of place. You can use existing walls or hedges to set apart different areas in your yard for a well-designed landscape. Adding a roof or a louvered top provides a hard ceiling that makes the area feel more enclosed and secure.
When you plan your layout, think about the views from inside your home. Think about whether you want to look toward the house or away from it to set up a private feel. Mixing these structures into your luxury backyard pool landscaping ensures a smooth flow between the water and your seating areas. This mix of hard structures and soft plants helps shield your pool from the wind and wandering eyes.
Custom shade for pool areas
Shade structures are vital for comfort around a pool where the sun reflects off the water and stone. Louvered pergolas are a popular choice because they let you control the light with the touch of a button. These privacy landscaping around pool ways work with fencing and greenery to give you full coverage. A solid roof pavilion offers the most cover and can even house an outdoor kitchen or a fireplace.
A custom structure also provides a spot to hang fans or lights for use after dark. Choosing items like natural stone for the base can match your pool edge for a clean look. These shelters not only keep you cool but also add long-term value to your home. By mixing shade and shelter, you create a space that feels both open to the air and tucked away from the world.
Schedule a free backyard privacy landscaping consultation with Gappsi today.
.
Frequently Asked Questions
How can I create privacy for my pool from a neighbor?
You can block the view of your pool by using a mix of fences and plants. A solid wall or fence works fast to stop prying eyes. You can also add trees or tall shrubs along the edge of your yard. Experts at Gappsi say using a mix of green plants and wood frames like pergolas provides a great shield. This helps keep your yard private and cool.
What are some effective poolside privacy ideas using plants?
Tall hedges and thick shrubs are great for making a living wall. These green fences help block noise and views while looking beautiful. It is best to use local plants to help birds and bugs. A hedgerow can also act as a safe home for local wildlife. Pick plants that do not drop too many leaves so your pool stays clean and clear.
How do ornamental grasses add to pool privacy?
Tall grasses are a smart choice for screening because they grow fast and move in the wind. They create a soft look that fits well near water. These plants can reach many feet in height to hide your pool deck. Most types stay green for a long time and need very little care. They provide a thick screen that lets light through while keeping your yard safe and hidden.
Are there privacy screens suitable for pool areas?
Yes, you can use built items to get privacy right away. Fences are a common choice, but you can also use wood panels or outdoor curtains. Large structures like louvered pergolas or pavilions add shade and block views from above. These work well when you do not have space for wide trees. They turn your pool area into a cozy room that feels very safe and calm.
Ready to build your private pool oasis on Long Island?
If you do not act now, you will lose another full season of use as build dates fill up fast during the peak season. Starting your plan today ensures that your pool area will be cool and private before the hottest days of next summer arrive to stay. Work with our landscape design construction experts to build a custom yard. This gives your family a hidden place to relax and have fun without any neighbors watching or hot sun ruining your time at home. This simple first step ensures you get the exact outdoor look and feel you want for your property.
Ready to schedule a free design-build consultation? Call (631) 543-1177 to talk to a landscape design expert.