Are you tired of looking at a cracked concrete patio or a plain, uninspired walkway? Your outdoor surfaces are the foundation of your landscape, and they should be both beautiful and built to last. Replacing worn-out materials with something truly special can completely revitalize your entire property. Natural stone offers a perfect blend of incredible durability and one-of-a-kind beauty that manufactured products simply can’t match. This guide will walk you through the best choices for natural stone pavers in Nassau County, helping you find a permanent, elegant solution that adds lasting value and character to your home.
Key Takeaways
- Choose stone based on function, not just looks: While aesthetics are important, the best choice depends on how you’ll use the area. Select heat-resistant stones like travertine for pool decks where you’ll be barefoot, and opt for ultra-durable granite for high-traffic driveways.
- Find a supplier with hands-on expertise: A great partner does more than just sell stone; they guide you. Prioritize a company with a physical showroom for comparing materials, a wide selection of quality products, and proven experience in both design and installation.
- Commit to simple, consistent maintenance: Keeping your pavers beautiful is straightforward. Protect your investment with routine cleaning using pH-neutral products, periodic professional sealing, and prompt repairs of any small chips or cracks.
What Types of Natural Stone Pavers Are Best for Nassau County?
Choosing the right natural stone for your patio, walkway, or pool deck can feel like a big decision, but it’s also one of the most exciting parts of a project. The perfect stone sets the entire mood for your outdoor space, defining its character for years to come. Your final choice will depend on your personal style, how you plan to use the area, and your budget. Let’s walk through some of the most popular and reliable porcelain and natural stone options that are perfect for homes here in Nassau County. Each one has a unique personality and set of benefits, and understanding them will help you make a choice you’ll love.
Travertine
If you’re dreaming of a classic, elegant look, travertine is a fantastic choice. It often comes in beautiful creamy, tan, and soft gray tones that bring a touch of Mediterranean warmth to any backyard. One of its best features is that it stays relatively cool under the sun, making it a top pick for pool decks and patios where you’ll be walking barefoot. Its natural durability means it holds up well to our Long Island weather, giving you a beautiful and long-lasting surface for relaxing and entertaining.
Marble
Many people think marble is too delicate for outdoor use, but that’s a common myth. When properly installed and sealed, marble is a stunningly luxurious and durable option for patios and walkways. It offers an unmatched level of sophistication with its unique veining and luminous quality. Imagine a bright, elegant patio that becomes the centerpiece of your landscape. To keep it looking its best, professional restoration and sealing is key, ensuring your investment remains protected and beautiful for years to come.
Limestone
For a strong and timeless aesthetic, consider limestone. This stone is known for its durability, making it a great candidate for everything from garden paths to driveways. Limestone typically comes in soft, earthy colors that create a very natural and inviting feel. Its subtle texture provides a rustic charm that blends seamlessly into landscape designs, whether you’re aiming for a formal English garden or a more relaxed, organic look. It’s a versatile workhorse that delivers both strength and understated beauty to your outdoor living areas.
Granite
When durability is your top priority, granite is the answer. As one of the hardest natural stones available, it’s an excellent choice for high-traffic areas like driveways and busy family patios. Granite is incredibly resistant to scratches and stains, so you can be confident it will withstand daily life and continue to look great. It comes in a wide variety of colors and patterns, from deep blacks to speckled grays and warm pinks, adding a touch of elegance that truly lasts. Think of it as a long-term investment in your home’s beauty and function.
Bluestone (New York & Pennsylvania)
As a local favorite, bluestone has a special place in many Long Island landscapes. Sourced from New York and Pennsylvania, it has a signature blue-gray hue that can also feature beautiful swirls of green, rust, and lilac. Its naturally textured surface provides excellent slip resistance, which makes it an ideal and safe choice for walkways, patios, and especially pool surrounds. Choosing bluestone gives your yard an authentic, regional character that feels both timeless and perfectly suited to our environment.
Sandstone and Slate
Sandstone and slate are two more wonderful options that offer distinct looks. Sandstone provides a warm, earthy feel with its rich red, gold, and brown tones, making it perfect for creating a cozy and rustic atmosphere. On the other hand, slate offers a more sleek, contemporary vibe. Its unique layered texture and deep colors, like charcoal, green, and purple, can make a bold design statement. Both materials are very durable and capable of withstanding the elements, giving you two more great paths to a beautiful outdoor space.
Why Invest in Natural Stone Pavers?
Choosing the right material for your patio, walkway, or pool deck is a big decision. While there are many options, natural stone pavers offer a unique combination of benefits that make them a worthwhile investment for any Long Island home. They provide more than just a surface to walk on; they create a foundation for your outdoor living space that is beautiful, durable, and adds lasting value to your property. If you’re weighing your options, here are a few key reasons why natural stone stands out from the rest.
Enjoy Long-Lasting Durability
When you invest in your home, you want it to last. Natural stone is incredibly durable and can stand up to just about anything, including Long Island’s demanding weather. From hot summers to freezing winters, these pavers resist cracking and fading far better than many manufactured alternatives. With proper care, a natural stone patio or driveway can last for decades, making it a cost-effective choice in the long run. This means less time and money spent on future repairs and replacements and more time simply enjoying your beautiful outdoor space. A little routine maintenance, like professional cleaning and sealing, is all it takes to keep your stone looking its best for years to come.
Achieve a Timeless Aesthetic
There’s an elegance to natural stone that manufactured products can’t quite replicate. Each paver has a unique story, with its own distinct colors, veining, and textures shaped by the earth over millions of years. This inherent variation creates a rich, authentic look that adds character and sophistication to any landscape design. Whether you prefer the rustic charm of bluestone or the refined look of marble, natural stone pavers provide a timeless beauty that never goes out of style. Your outdoor space will feel both classic and completely personal, creating a stunning backdrop for everything from quiet morning coffees to lively family gatherings.
Choose Eco-Friendly Options
Making sustainable choices is important for many homeowners, and natural stone is an inherently eco-friendly building material. Since it’s a product of the earth, it doesn’t require a complex manufacturing process that consumes energy and creates waste. Furthermore, certain installation techniques can help manage stormwater runoff, a significant environmental concern on Long Island. By creating permeable surfaces that allow rainwater to seep into the ground naturally, you can help replenish the local aquifer and reduce pollution in our bays and harbors. Systems like GravelFIX are a great example of how to pair natural stone with environmentally conscious design for a truly green landscape.
Increase Your Home’s Value
A beautiful outdoor living area is a major selling point, and high-quality materials make a big impression. Investing in natural stone pavers can significantly increase your property’s curb appeal and overall market value. Potential buyers recognize natural stone as a premium, long-lasting feature, which sets your home apart from others. Unlike trendy materials that may look dated in a few years, the classic appeal of stone is always in demand. Think of it not as an expense, but as a smart addition to your home’s equity. It’s one of those home improvement projects that offers a fantastic return, both in personal enjoyment and financial value.
Where to Use Natural Stone Pavers in Your Yard
Natural stone pavers are one of the most versatile materials you can use to transform your yard. Their inherent beauty and strength allow them to fit seamlessly into almost any outdoor project you can imagine. You can use them to create a cohesive design that flows from your front curb to your back fence, tying your entire landscape together. Think of them as the foundation for your outdoor living dreams. Whether you’re creating a space for quiet morning coffees, lively family barbecues, or elegant evening gatherings, natural stone provides a durable and beautiful surface that stands the test of time.
The real magic happens when you start combining these applications. A beautiful travertine walkway can lead guests from a granite-paved driveway to a matching travertine patio. Or, you can use the same bluestone for your pool deck and the capstones on your retaining walls. This creates a harmonious look that makes your property feel thoughtfully designed and professionally executed. By understanding the different ways you can use natural stone pavers, you can start to envision a landscape that is both functional and breathtakingly beautiful, adding significant value and enjoyment to your home.
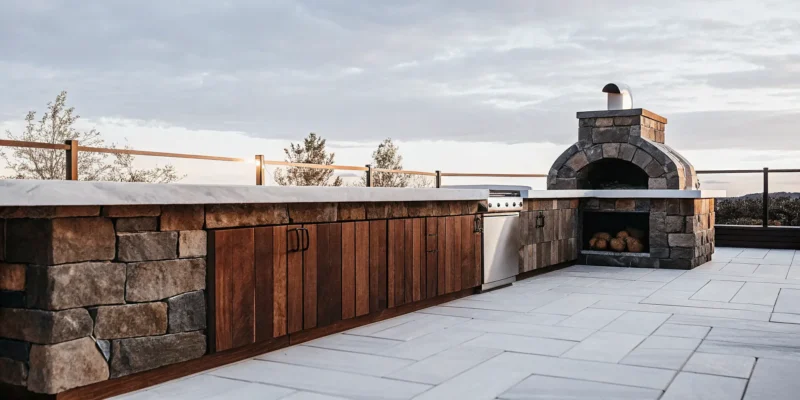
Patios and Outdoor Living Spaces
Your patio is the heart of your outdoor living space, and natural stone pavers are the perfect choice to make it both beautiful and durable. They create a solid, elegant foundation for entertaining, dining, or simply relaxing with a good book. Imagine a warm, inviting travertine patio for summer barbecues or a classic bluestone surface for your outdoor kitchen area. Because stone is so resilient, it can easily handle heavy foot traffic and patio furniture. It provides a timeless backdrop that complements any style, from rustic to modern, turning your backyard into a true extension of your home.
Driveways and Walkways
Make a stunning first impression with a driveway and walkway crafted from natural stone. Using strong stones like granite or limestone for your driveway not only adds incredible curb appeal but also provides a surface that can withstand the weight of vehicles for decades. Forget boring asphalt; a stone driveway signals quality and luxury from the moment you arrive. You can then extend that look to your walkways, creating an inviting path that guides guests to your front door or through your garden. This creates a cohesive and polished look that instantly elevates your home’s exterior.
Pool Decks and Surrounds
A natural stone pool deck can transform your pool area into a private resort. Many types of stone, like travertine, are naturally slip-resistant and stay cooler to the touch than concrete or brick, making them a safe and comfortable choice for bare feet. Stone is also resistant to chlorine and salt, so it won’t fade or degrade from pool water splashes. A beautiful stone surround gives your swimming pool a high-end, elegant finish that feels both luxurious and organic. It’s the perfect way to create a beautiful and functional space for sunbathing, entertaining, and making memories by the water.
Retaining Walls
Retaining walls are often a necessity for managing sloped yards, but they can also be a beautiful design feature. Building retaining walls with natural stone serves a dual purpose: it provides the necessary strength to hold back soil and prevent erosion while adding incredible texture and character to your landscape. You can use stacked stone to create terraced gardens, define a raised patio, or simply add visual interest to a flat yard. The natural variations in color and shape make each wall a unique work of art that enhances your overall landscape design.
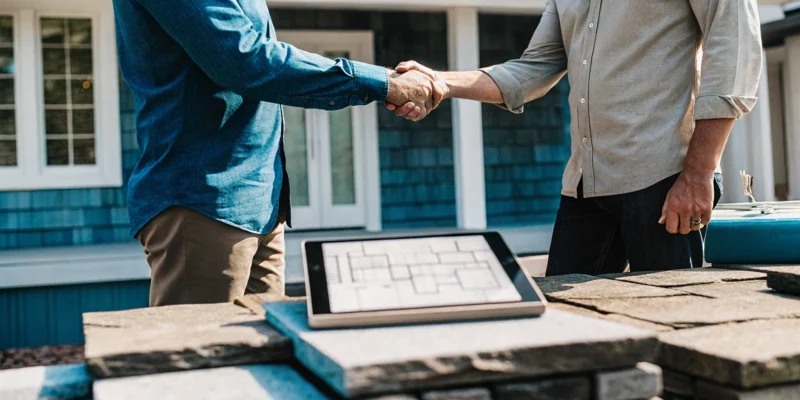
How to Choose a Natural Stone Paver Supplier in Nassau County
Finding the right supplier is just as important as picking the perfect stone for your patio or walkway. The right partner will not only provide beautiful, high-quality materials but also offer the guidance you need to bring your vision to life. A great supplier acts as a resource, helping you understand your options and ensuring your project’s success from the ground up. When you start your search in Nassau County, keep these key factors in mind to find a company you can trust with your home.
Look for High-Quality Product Variety
When you begin your search, look for a supplier that offers a diverse range of high-quality products. A wide selection means you won’t have to compromise on your vision. You’ll have the freedom to find the exact color, texture, and style that complements your home’s architecture and your personal taste. Whether you’re drawn to the warm, earthy tones of Travertine, the classic elegance of Marble, or the rustic charm of New York Bluestone, having options is key. A supplier with a varied inventory shows they have a deep understanding of different materials and can help you find the perfect fit for both your aesthetic goals and your project’s practical requirements.
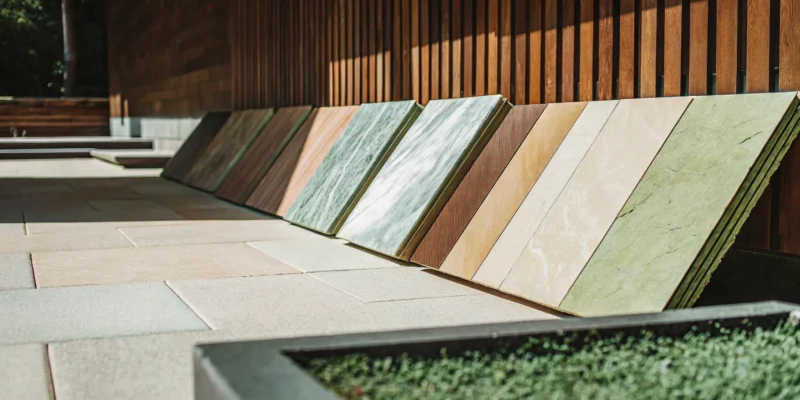
Visit a Local Showroom
While online galleries are great for initial inspiration, nothing compares to seeing and touching the materials in person. Visiting a local showroom is a critical step in making your final decision. Photos can’t accurately capture the subtle color variations, unique textures, and overall feel of natural stone. At a showroom, like the Gappsi display in Smithtown, you can lay out different samples, compare them side-by-side, and see how they look in natural light. This hands-on experience removes the guesswork from the process, giving you confidence that the stone you choose is the one you’ll love for years to come.
Verify Design and Installation Expertise
Your supplier should be more than just a retailer; they should be an expert. Look for a company with proven design and installation expertise, as this indicates they understand how the materials perform in a real-world setting. A team that also handles landscape design, swimming pools, and even home remodeling can provide invaluable insight into how your paver project fits into the bigger picture. They can advise on the best stone for your specific application, anticipate potential challenges, and ensure the final installation is both beautiful and structurally sound. This comprehensive knowledge is the difference between simply buying stone and making a smart, long-term investment in your property.
Gappsi: Your Local Partner for Natural Stone Pavers
Choosing a company that manages the entire process from sourcing to installation provides peace of mind. As a direct importer, supplier, and installer, Gappsi maintains strict quality control every step of the way. This integrated approach often translates to a wider selection and more competitive pricing because there are no intermediaries. By working with a single, accountable partner, you streamline communication and ensure a cohesive project. You can trust that the team helping you select your pavers is the same one with the expertise to design and build your dream outdoor space, ensuring quality and customer satisfaction from start to finish.
How to Maintain Your Natural Stone Pavers
Investing in beautiful natural stone pavers is the first step. The next is making sure they stay as stunning as the day they were installed. Proper maintenance is your secret to preserving their color, integrity, and timeless appeal for decades. A little care goes a long way, and it’s simpler than you might think. By following a few key practices, you can protect your investment from the elements and everyday wear and tear, ensuring your outdoor space remains a beautiful retreat. If you ever need a hand, Gappsi’s team is always ready to help with professional care.
Follow Routine Cleaning Best Practices
Think of this as simple housekeeping for your patio or walkway. Regular sweeping with a stiff-bristled broom prevents dirt and debris from settling into the stone’s surface. For a deeper clean, you can rinse the area with a garden hose. If you notice tougher spots from spills or leaves, use a pH-neutral cleaner designed specifically for natural stone and a soft brush. This gentle approach is key, as it cleans effectively without stripping sealants or damaging the stone itself. Routine cleaning keeps your pavers looking fresh and prevents buildup that can become harder to remove later.
Control Weeds and Moss
Weeds and moss can be persistent, popping up in the joints between your pavers and creating an untidy look. The best defense is a good offense. Make it a habit to walk over your patio or walkway and pull any small weeds as soon as you see them. This prevents them from establishing deep roots. For more stubborn growth, a specialized paver tool or a stiff wire brush can work wonders. Using polymeric sand in the joints during installation also creates a firm barrier that helps block weeds from sprouting in the first place.
Know When to Seal Your Pavers
Sealing is like applying sunscreen to your natural stone. It provides a protective barrier against stains, moisture, and UV rays that can cause colors to fade. Not every stone requires sealing, but for many types, it’s a crucial step for longevity. A simple way to check your sealer is to sprinkle some water on the surface. If it beads up, your sealer is still working. If the water soaks in and darkens the stone, it’s time to reseal. For Long Island homeowners, we typically recommend having a professional restoration and sealing service every three to five years, depending on the stone and traffic.
Repair Cracks and Chips Promptly
The freeze-thaw cycles we experience in Nassau County can be tough on outdoor surfaces. That’s why it’s important to inspect your pavers for any cracks, chips, or loose stones, especially after winter. Addressing a small issue right away prevents it from becoming a bigger, more expensive problem. A single loose paver can create a tripping hazard and allow water to seep underneath, compromising the base. If you spot any damage, it’s best to have it fixed quickly. Our masonry experts can seamlessly repair or replace damaged stones to restore the safety and beauty of your surface.
Avoid Common Maintenance Mistakes
When caring for your natural stone, what you don’t do is just as important as what you do. Never use harsh chemicals like acid washes, bleach, or vinegar, as they can etch the stone and cause permanent discoloration. Similarly, be careful with pressure washers. Using a setting that’s too high or holding the nozzle too close can damage the stone’s surface and blast away the essential joint sand. Also, avoid using rock salt for de-icing in the winter, as it can be corrosive. Instead, opt for a calcium-based de-icer that is safer for natural stone.
Frequently Asked Questions
Which type of natural stone is truly the best for a pool deck? For pool decks, my top two recommendations are almost always travertine and bluestone. Travertine is a fantastic choice because it naturally stays cooler on hot, sunny days, which is a huge plus for bare feet. Bluestone is another excellent option because its naturally textured surface provides great slip resistance, adding a layer of safety around the water. Both are durable and hold up well to splashes from salt or chlorine pools, giving you a beautiful and functional resort-like feel.
How do natural stone pavers hold up to harsh Long Island winters? This is a great question, and the answer comes down to two things: choosing the right stone and ensuring proper installation. Dense stones like granite and bluestone are incredibly tough and can handle our freeze-thaw cycles without a problem. However, the most critical factor is the base preparation. A deep, properly compacted base is essential to prevent the ground from shifting and causing your pavers to heave or crack. This is where professional installation makes all the difference in ensuring a beautiful surface that lasts for decades.
Is natural stone slippery when it gets wet? It really depends on the stone and its finish. Some stones are naturally more slip-resistant than others. For example, stones with a natural cleft or a tumbled finish, like bluestone and most travertine, have a texture that provides good grip even when wet. Highly polished stones, like some marbles, can be more slippery and are often better suited for areas that don’t see as much rain or foot traffic. When we help you choose a stone, we always consider where it’s going to be used to make sure it’s a safe and practical fit for your family.
I’m trying to decide between natural stone and porcelain pavers. What’s the difference? Both are excellent, high-quality options, but they offer different benefits. Natural stone provides a unique, one-of-a-kind beauty since no two pieces are exactly alike, giving your space a very organic and timeless character. Porcelain pavers are manufactured, which means they offer incredible consistency in color and pattern, perfect for achieving a sleek, modern look. Porcelain is also non-porous, making it extremely resistant to staining and water absorption. The best choice depends on the aesthetic you want and the specific needs of your project.
How often do I really need to seal my stone pavers? The general rule of thumb is to have your pavers professionally cleaned and sealed every three to five years. However, this can vary based on the type of stone you have and how much direct sun and foot traffic it gets. A simple test is to sprinkle some water on the surface; if it beads up, your sealer is still working. If the water soaks in and darkens the stone, it’s time to reseal. Regular sealing is the best way to protect your investment from stains and fading, keeping it looking vibrant for years.