


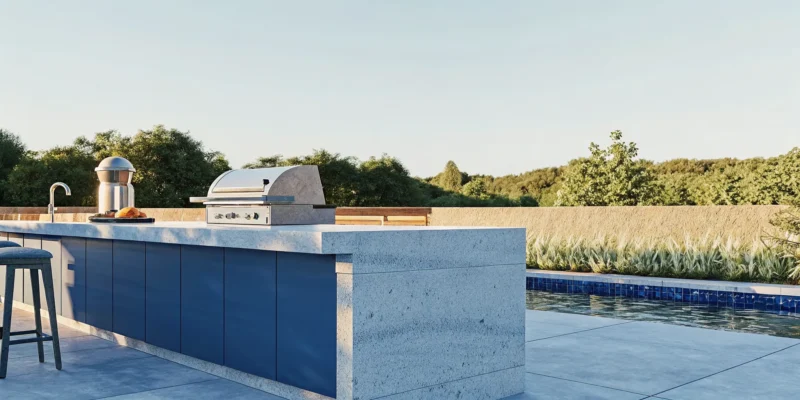
Long Island homeowners often find that a custom outdoor kitchen becomes the most used room in their home. This functional space extends your living area while providing a dedicated zone for social flow.
Our outdoor kitchen planning guide helps you build a useful and strong backyard cooking space. Success starts with a 3D plan that shows your layout and seating areas so you can move around easily. You should pick materials like natural granite, bluestone, or travertine that can handle the cold winter weather on Long Island. According to This Old House, these kitchens can return up to 80% of their cost in home value. Gappsi brings 38 years of Italian craftsmanship to every project. We fit appliances like gas grills and brick pizza ovens into a stone veneer base. Working with one team helps you avoid the stress of hiring many workers and ensures your permits are filed correctly.
Planning a great project requires you to look at how you will use the space each day. Think about your cooking style before you pick your stones. We will walk you through Step 1: Define Your Outdoor Kitchen Goals and Lifestyle Needs to make sure your new space fits your family. This journey starts with a clear vision of how you want to cook and entertain in your Long Island backyard.
Outdoor Kitchen Planning Guide: Step 1: Define Your Outdoor Kitchen Goals and Lifestyle Needs
Planning an outdoor kitchen starts with a clear vision. You must think about how you will use the space before you buy any parts. A solid Long Island outdoor kitchen layout guide helps you focus on your daily life and needs. Think about your current cooking habits. Do you want a small spot for family meals or a big space to host guests? Knowing your goals now will save you time and money later.
Check your cooking style
First, look at how you like to cook. Think about the meals you make most often. Do you want to do the same things outside, or do you want to try new styles? Some people want a simple grill for burgers. Others want a full space with a pizza oven, a smoker, and side burners. You should also think about prep space. You will need room to cut food and set down trays. A good plan includes enough counter space near your grill to make cooking easy.
Think about how many people you will host. Do you have small family dinners or large backyard parties? This will change the size of your grill and the amount of seating you need. If you often have more than ten people over, you might want a bar area. This gives guests a place to sit and talk while you cook. It keeps the social flow moving and keeps people out of the cooking zone for safety.
- Assess your cooking needs. List the meals you want to make and the tools you will need for them.
- Measure your yard space. Note the room you have for counters, seats, and walk ways.
- Watch the sun and wind. See how the light and air move through your yard during the day.
- Set your budget range. Decide what you can spend on parts, stone veneer, and labor.
- Think about the seasons. Plan for Long Island weather to make sure your space lasts for many years.
Plan your yard and space
Measure your open yard space well. You need to know how much room you have for a kitchen island. It is also wise to think about the path from your house to the yard. Most pros say to keep a space of 15 to 20 feet from your indoor kitchen. This is a short walk for moving food and tools. It is far enough to keep smoke away from your doors. It also helps keep the cost of gas and water lines low.
Watch the sun and wind ways in your yard. You do not want to cook in direct hot sun all day. You also do not want the wind to blow smoke from the grill into your dining area or home. Notice where the shade falls at many times. This can help you decide if you need a pavilion or a pergola for shade. Long Island weather can change fast. Having a plan for both sun and rain is a smart move.
Budget and home value
Your budget will guide your choices for parts and stone. A basic built-in grill setup on Long Island may start at about $5,000. Full custom kitchens with granite counters and stone veneer can cost $40,000 or more. While this is a big cost, it is also a great way to add value to your home. Most homeowners find that an outdoor kitchen can return 50 to 80 percent of the cost in home value.
When you plan your budget, think about the long term. Using strong stone like natural bluestone or travertine will save you money on fixes. These parts can handle the cold winters and salt air in Nassau and Suffolk counties. A well-built kitchen is a smart gain for your home and your life. It gives you a place to relax and have fun with your friends and family for a long time.
Step 2: Choose the Right Layout for Cooking and Social Flow
The layout you pick for your outdoor kitchen defines how you use the space. A good design keeps the person cooking close to the guests but out of the way of foot traffic. You should aim to keep the main cooking area about 15 to 20 feet from your indoor back door. This gap makes it easy to grab supplies without spending too much on utility lines. If you plan to add a cover, check local rules for outdoor grill exhaust needs to keep the space safe and clear of smoke.
Match Your Layout to Your Yard Size
Large yards on Long Island can support a full U-shape or a large island. These layouts offer the most counter space for prep work and serving. For smaller patios, a straight-line setup works best because it fits against an existing wall. If you want to maximize a corner, an L-shape design provides a natural workflow. Gappsi uses 3D design tools to help you see these Long Island outdoor kitchen layouts before any work starts in your yard.
Separate Your Work and Social Zones
Safety is the top goal when planning where to put your grill and sink. You want to keep hot surfaces away from where children play or where guests sit to talk. An island layout is great for this because it creates a clear line between the chef and the guests. This setup lets you stay part of the party while you work. Using a 3D plan helps ensure your outdoor kitchen pavilion or patio has enough room for everyone to move safely.
| Layout Type | Best Use Case | Main Benefit |
|---|---|---|
| Straight-Line | Small patios or tight decks. | Saves space and keeps costs low. |
| L-Shape | Corner spots with medium space. | Offers separate prep and cook zones. |
| U-Shape | Large yards for frequent hosts. | Provides the most counter space. |
| Island | Social cooking and open yards. | Allows guests to sit near the chef. |
When you choose a layout, think about the wind and sun. You do not want smoke blowing back into your house or the sun hitting you while you grill. Gappsi can help you find the best spot on your property to avoid these issues. Our team looks at your yard’s shape and your home’s style to build a kitchen that fits perfectly.
Step 3: Select Materials That Withstand Long Island Weather
Long Island weather changes a lot through the year. We have hot summers and very cold winters. The air near the water often has salt in it. These things can hurt your outdoor kitchen if you pick the wrong items. You need stones and tools that can take the heat and the ice.
Picking the right stones and pavers keeps your space looking new for a long time. It also helps your home stay in good shape. Choosing tough items now saves you money on fixes later.
Strong Bases With Stone Veneer
The base of your kitchen must be solid to hold heavy grills. Most people use a frame made of steel or stone blocks. Then, they cover it with stone veneer. This looks like a real stone wall but is faster to build. It stays strong in wet air and deep snow.
Gappsi uses many types of veneer to match your house. You can learn more in our stone veneer guide for outdoor rooms. These thin stone pieces stay on the base even when the ground moves in the cold months. Using veneer also lets you pick from many colors and textures.
Tough Stone Counters
Your counters are where you prep food and eat with friends. They must be easy to wash and hard to chip or break. Natural stone is a smart pick for our area because it lasts. Granite is a top choice because it does not stain from grease. It also does not fade when the sun is bright.
Colors like Blue Pearl, Uba Tuba, and Absolute Black look great in the yard. Some stones can break when they get wet and then freeze. Facts on freeze-thaw cycles in granite show that dense stones last long in cold spots. Other good picks are bluestone and travertine. These stones stay cool to the touch even on very hot days.
Safe Flooring and Pavers
The floor of your outdoor kitchen must be safe and very hard. Concrete pavers work well on Long Island. They are made to handle the ice that grows in the dirt during winter. This stops the floor from breaking or shifting out of place. Gappsi works with the best names in the field.
We use pavers from Cambridge, Nicolock, and Techo-bloc. We also have many options from Belgard and Unilock. These pavers come in many looks and tones to match your grill. They give you a flat spot for your stove and chairs. They also stand up to salt if you live by the sea.
See the Gappsi Showroom in Smithtown
Choosing the right stone is easy when you can feel it in your hands. We invite you to see the Gappsi showroom in Smithtown. It is at 1015 West Jericho Tpke and is easy to find. You can see all the stones, pavers, and counters in person.
We have a large space with over 10,000 square feet for you to walk through. Our team can help you pick the best match for your style and cost needs. Seeing the colors in the sun helps you find a look you will like. We can show you how stones look when they are side by side.
Step 4: Plan Your Must-Have Appliances and Cooking Features
The core of your outdoor kitchen planning guide is the list of tools you choose to install. These items decide how often you will use your new space for cooking and hosting. A built-in gas grill usually serves as the main piece for most Long Island homes. These grills offer a quick start and steady heat for burgers or steaks. Brands like Delta Heat and Twin Eagles are top picks for their strength. You should place the grill in a spot where the wind can carry smoke away from your guests.
Choosing Your Primary Grill and Cooking Surfaces
When you choose a grill, look for thick stainless steel parts that can resist rust. The salt air and wet weather on Long Island can wear down cheap metals fast. Adding a side burner is a smart move for your kitchen layout. It lets you simmer sauces or boil water without walking back to the indoor house. You can also add a flat-top griddle for cooking eggs or stir-fry dishes. These features help you do all your cooking in one spot.
For those who enjoy slow-cooked meals, a smoker is a great add to the yard. Gappsi carries brands like Fire Gear to give you good results for every meal. You must also plan for enough counter space next to your cooking tools. Leave at least 24 inches of workspace on one side of the grill to handle plates and trays. This keeps the cooking flow smooth and safe for the cook.
Adding Specialty Pizza Ovens and Power Burners
A brick pizza oven is a favorite for people who host many outdoor parties. These ovens reach very high heat and can cook a pizza in just a few minutes. Fontana Forni makes gas and wood-fired ovens that sit well on a stone base. These ovens are not just for pizza. You can use them to roast meats or bake bread with a rich wood-fired taste. They add a unique look and feel to your outdoor living space.
You may also want to look at outdoor kitchen appliances such as power burners. These big burners can hold heavy pots for boiling corn or lobsters for a summer feast. They are a must-have for large groups who spend a lot of time outdoors. Planning for these features early helps you set up the right gas and power lines during the build.
Selecting Durable Fridges and Sinks
An outdoor fridge is a key part of any well-planned kitchen. You need a unit that is outdoor-rated to handle the heat of a New York summer. Brands like SUMMIT build units with strong seals and tough motors to keep food safe. These units stay cold even on the hottest days of the year. You should also think about adding an ice maker to your plan. It saves you from making trips to the store for heavy bags of ice.
A sink is the final piece of a full outdoor setup. Having a sink with hot and cold water makes cleaning up after a meal very fast. It also lets you wash your hands or rinse fresh food right where you are working. Sinks should be made of thick stainless steel to avoid damage from the weather. You can see many of these outdoor rated appliances at the Gappsi showroom in Smithtown. Adding these features ensures your outdoor kitchen is both useful and fun for years to come. Building an outdoor kitchen can also add value to your home. Some experts say it can return up to 80 percent of its cost when you sell.
Step 5: Coordinate Utilities, Permits, and Professional Installation
A good outdoor kitchen planning guide covers more than just picking a grill or granite counters. You must plan gas, water, and power lines to create a safe and useful cooking space. Gappsi brings 38 years of local skill to this phase. We manage every utility link and permit rule to keep your project on track. Our design-build model is a big plus. You work with one team that handles everything from 3D design to the final stone build.
Safe and Expert Utility Links
Running gas lines is a job for a licensed plumber who knows local safety codes. This step ensures your built-in grill and brick pizza oven have a steady fuel source. Proper set up prevents leaks and ensures your gear works at its best. Power work is just as vital. You will need power for lights, fridges, and outlets. We use GFCI outlets to protect against shocks on wet days. Our team places pipes under your masonry design and construction made of natural bluestone or travertine to hide wires and protect them from weather.
Plumbing needs careful planning too. A useful sink needs hot and cold water lines and a solid drain system. We focus on proper slopes to ensure water moves away from your home and patio. This prevents puddles and keeps your outdoor kitchen clean and dry. We also plan for winter prep. Long Island freeze-thaw cycles can damage pipes if they are not drained before winter. Our team builds in easy access points. This lets you shut off and drain lines when the cold hits.
Navigating Permits in Nassau and Suffolk
Most towns in Nassau and Suffolk Counties require building permits for outdoor kitchens. This process often includes site plans and checks on how far the kitchen is from the yard edge. The Nassau County government and local Suffolk towns use these rules to keep people safe. We handle the permit work for our clients. This saves you from spending hours at town hall. It also keeps your build moving without delays.
Airflow is another key factor for covered kitchens. If you build an outdoor kitchen pavilion, you must have enough fresh air. Trapped smoke and heat can be dangerous. They can also damage your frame. We design custom vent systems and choose hoods that match the power of your grill. This ensures your cooking area stays safe for you and your guests. Using a design-build firm means these hard details are part of the main plan.
- Map out all utility lines during the 3D design phase to prevent costly changes later.
- Hire a licensed plumber to install gas lines and test for leaks before you finish the stone work.
- Set up a dedicated power panel with GFCI protection for all your cooking and cooling gear.
- Set up hot and cold water lines with frost-proof valves to make winter prep fast and simple.
- Submit clear site plans to your local building office to get the needed permits and signs.
- Plan for proper airflow if your kitchen will be under a roof or inside a pavilion frame.
Bringing It All Together: Why Gappsi Is Your Single-Source Partner
Planning an outdoor kitchen is a big job. You have to think about the layout, the parts you need, and the cooking tools. It can be hard to work with many other workers at the same time. This is why many people on Long Island look for a partner who can do it all. Gappsi is here to help you turn your yard into a great place for food and fun.
The Benefits of Design-Build Services
Our team uses a design-build model for every project. This means you only have to work with one firm from the start to the end. We handle the 3D design and the masonry work ourselves. We also set up your gas lines and power outlets.
Using one team helps keep your project on a clear timeline. You will have one contract and one point of contact for the whole build. This makes the outdoor kitchen planning guide process simple and stress free.
We also take care of the hard parts like getting permits. Most towns in Nassau and Suffolk Counties need a permit for gas, water, and power lines. Our team knows how to talk to local building offices to get your project done fast.
You can check the permit rules for your area on sites like the Smithtown Building Department page. Having an expert handle these steps saves you a lot of time and worry.
A History of Italian Skill
Gappsi has been serving Long Island homes since 1987. Our founder, Giuseppe Abbrancati, has more than 50 years of work in the trade. He started learning about building in Italy when he was only seven years old. He brings that old world care and skill to every project we do today.
This past helps us build spaces that look great and last for many years. We use the best ways to make sure your stone and pavers stay in place. We are proud of the work we have done over the last 38 years.
Our team has earned over 50 ICPI awards for our stone work and masonry. We also hold a patent for the Gappsi Edge Restraint System. This tool helps keep your patio and kitchen floors from moving over time.
We have 12 expert groups that work under one roof. This allows us to handle every part of your build without calling other firms. Our team works together to make sure every stone and pipe is set correctly.
Experience Our Smithtown Showroom
It is helpful to see and feel the items for your new space. We have a 10,000 square foot showroom in Smithtown where you can look at many choices. You can pick out natural stone veneer for your island or granite for your counters.
Seeing these items in person helps you make the best choice for your home. We can show you how different stones look next to each other in real light. This hands-on way is the best way to start your project.
Our work can be seen in many homes across the island. We have finished projects like this Dix Hills outdoor kitchen project for our happy customers.
You can also view our Merrick outdoor kitchen project to see a custom Wolf appliance setup. These projects show how we combine beauty and use in every build. We treat every yard like it is our own to give you the best results possible.
Frequently Asked Questions
How much does an outdoor kitchen cost on Long Island?
The price of an outdoor kitchen depends on the size and the materials you choose. A simple build with a grill and counter space often costs between $5,000 and $8,000. For a custom space with stone veneer, granite counters, and many appliances, costs can range from $15,000 to over $40,000. Your choice of natural bluestone or travertine and the cost of new gas lines will set the final price.
Do I need a permit for an outdoor kitchen in Nassau or Suffolk?
Most towns in Nassau and Suffolk Counties need building permits for outdoor kitchen projects. You will likely need a permit if you plan to install new gas lines, wires, or pipes. Each town has its own rules for where you can build on your land. Gappsi handles the permit process for our clients to make sure every project meets local laws. This saves you time and stops legal problems with your home building.
How long does it take to design and build an outdoor kitchen?
The time to build an outdoor kitchen depends on the design and permit wait times. A typical project starts with a 3D design and picking materials at our Smithtown showroom. Once the town approves the permits, the building work often takes two to four weeks. This time covers the stone work for the kitchen island, counter setup, and appliance tests. Bad weather and the size of the yard work can also change the final schedule.
Can I install standard indoor appliances in an outdoor kitchen?
You should not use indoor appliances in an outdoor kitchen. Indoor units cannot handle the rain, sun, or the deep cold of Long Island. Proper outdoor kitchen appliances use tough stone or stainless steel to stop rust. They also have strong cooling parts and tight seals to keep food and drinks safe in hot weather. Using indoor models outside is a safety risk and will end your repair coverage.
Ready to plan your custom outdoor kitchen on Long Island?
Waiting to start means more time in a yard that does not fit your needs and missing out on the layout you want. Each month you wait is more time you lose with friends and family. By starting now, you can beat the rush and make sure your new space is ready for the first warm days of spring. Our team handles the permits and utility plans for Nassau or Suffolk to make the stone veneer and appliance install easy. We use strong stones like natural bluestone and granite to build a space that lasts through the Long Island winters.
Ready to build? Schedule a free design consultation to walk through our Smithtown showroom and start your plan.