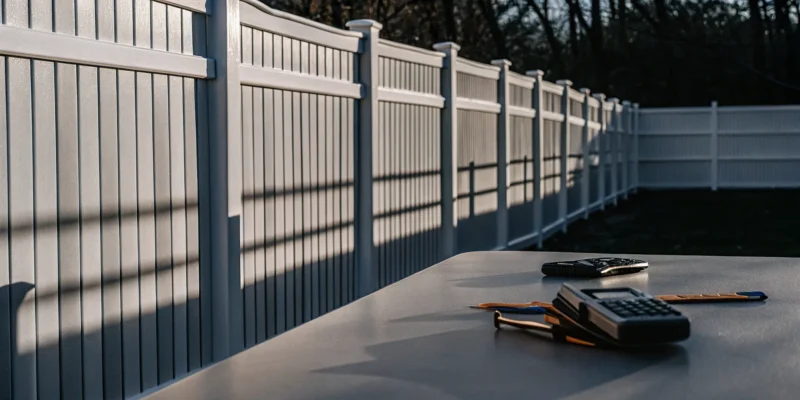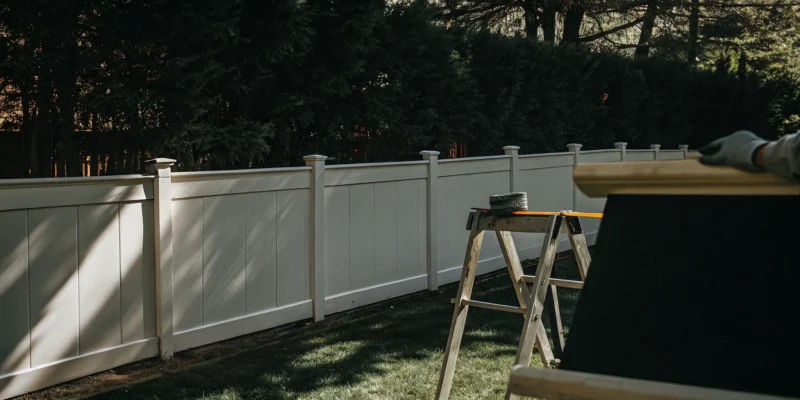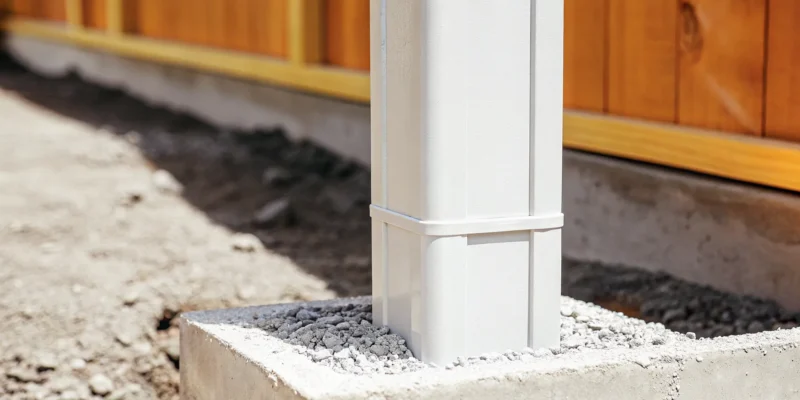
How to install a vinyl fence post set in concrete over a gravel base.

How to Install Vinyl Fence Posts That Actually Last

Installing a fence on Long Island comes with its own set of rules. Our local climate, with its freezing winters, means you have to account for the frost line. If you follow a generic guide that doesn’t consider this, you risk “frost heave” pushing your posts right out of the ground over time, leaving you with a wavy, unstable fence. This guide is tailored for Long Island homeowners. We’ll show you how to install vinyl fence post sections correctly for our specific soil conditions and weather, ensuring your foundation is deep enough and secure enough to last through every season.

Key Takeaways

  • Plan before you dig: Your most important work happens before you pick up a shovel. Always call 811 to mark utility lines and confirm local fence regulations, then dig your post holes below Long Island’s frost line (at least 36 inches deep) to prevent shifting.
  • Reinforce for lasting strength: Give your vinyl fence a solid backbone by inserting pressure-treated wood posts inside the hollow sleeves. This step is non-negotiable for gate and corner posts, as it provides the structural support to resist sagging and wind.
  • Patience with your posts pays off: Resist the urge to hang fence panels right away. You must let the concrete footings cure for at least 24 to 48 hours, or until the posts feel completely solid when you push on them. This patience ensures your fence line stays straight and secure.

Your Project Toolkit and Shopping List

Before you break ground, let’s talk about what you’ll need to get the job done right. Gathering all your tools and materials ahead of time is one of the best things you can do to make your installation day go smoothly. Think of it as setting up your command center. With everything on hand, you can focus on each step without having to make extra trips to the store. Let’s build your shopping and tool list.

Digging Tools: Manual vs. Power

The star of the show here is your digging tool. For just a few posts, a manual post-hole digger will work just fine. If you’re fencing a larger area, consider renting a powered auger. It will save you a significant amount of time and back-breaking work. Besides the digger, you’ll need a few other essentials to keep your project on track. Grab a tape measure, a string line for mapping your fence, a level to ensure your posts are perfectly upright, a rubber mallet for gentle adjustments, and a saw for any custom cuts.

Choosing the Right Concrete Mix

The right concrete is what gives your fence its strength and longevity, so this isn’t the place to cut corners. A good rule of thumb is to plan for at least one 50-pound bag of fast-setting concrete mix for each post hole. For corner posts or the posts that will support a gate, you’ll want to double down. Use two bags, or about 80 pounds of concrete, for these critical points. Gate posts handle a lot more stress from the weight and movement of the gate, so giving them a stronger foundation is key to preventing future sagging.

Your Complete Materials Checklist

Beyond tools and concrete, let’s list out the core components. You’ll have your vinyl posts, post caps, and the fence panels themselves. Don’t forget the gravel for the bottom of your holes, which is essential for proper drainage. For a big project, renting a portable concrete mixer can be a game-changer, ensuring you get a consistent mix without wearing out your arms. Once you have all your supplies, including your vinyl fencing, lay them out near your workspace. This simple step makes the entire installation process feel much more organized and manageable.

First Things First: Prepping Your Fence Line

Before you grab a shovel, a little prep work will save you a lot of headaches. A successful fence installation is all about what you do before the first post goes into the ground. Taking the time to plan your project, understand local rules, and mark your layout ensures your new fence will be straight, secure, and exactly where it’s supposed to be. Think of it as creating a roadmap for your project. A clear plan helps you avoid costly mistakes, like accidentally digging into a utility line or building on your neighbor’s property. This initial phase isn’t the most glamorous part of the job, but it’s arguably the most important for a professional-looking result.

Proper preparation is the foundation of a fence that lasts. We’ll walk through three essential steps to get your project started on the right foot. First, you’ll need to check local regulations to make sure your plans are compliant. Next, you’ll make a quick but critical call to have underground utilities marked. Finally, you’ll stake out your fence line to create a perfect guide for installation. These steps are straightforward, and getting them right is the key to a smooth and successful DIY fence project. Gappsi offers a wide selection of fences and netting to suit any style, from classic vinyl to modern aluminum composite.

Know Before You Dig: Local Rules and Permits

Before you start, it’s important to understand the rules for your specific area in Long Island. Many towns and villages have zoning laws that dictate how tall your fence can be and how far it must be set back from property lines. If you live in a community with a homeowner’s association (HOA), they likely have their own set of guidelines you’ll need to follow. Checking these regulations first prevents you from having to tear down a fence that doesn’t meet local requirements. You can usually find this information on your town’s website or by calling the local building department.

Call 811 to Mark Utility Lines

This step is simple, free, and absolutely essential for your safety. Before you dig any holes, you must call 811 to have underground utility lines marked. When you call, they will send someone from each local utility company to your property to mark the approximate location of buried lines for gas, water, electricity, and communications. This service helps you avoid causing a dangerous and expensive outage. The markings are usually done with colored flags or spray paint, giving you a clear visual guide of where it is safe to dig. Plan to make this call a few days before you intend to start your project.

Map It Out: Staking Your Fence Line

With the legal and safety checks done, it’s time to create a physical outline of your fence. Using wooden stakes and string, mark the entire perimeter of your planned fence. Start by placing stakes at each corner and at any points where the fence will change direction. Then, run a taut string line between the stakes to create a straight guide. This visual map helps you confirm the layout looks right and ensures your posts will be perfectly aligned. You can see examples of our precise work on the Gappsi YouTube channel. This simple step is the secret to avoiding a wavy or crooked fence line.

How Deep Should Your Fence Post Holes Be?

Getting the depth of your fence post holes right is probably the most important step in this entire project. If your holes are too shallow, your fence will lean, shift, and look sloppy over time. The general rule is to bury at least one-third of the post’s length. For a standard 6-foot fence panel, you’ll likely use an 8-foot post, meaning you should aim for a hole that’s at least 2.5 to 3 feet deep.

However, this is just a starting point. Several factors, like our local climate and soil conditions here on Long Island, play a huge role in determining the perfect depth. A fence that stands strong for decades is one where the posts are set deep enough to withstand anything nature throws at them. Getting this right from the start saves you from frustrating and costly repairs down the road. Let’s break down exactly what you need to consider.

Factoring in Long Island’s Frost Line

Here on Long Island, we have to deal with the frost line. This is the depth to which the ground freezes during the winter. When water in the soil freezes, it expands and can push your fence posts upward in a process called “heaving.” Come spring, the ground thaws and settles, but the post might not settle back into its original position. This cycle causes an uneven, wobbly fence. To prevent this, you must dig your post holes so the bottom of the concrete footing is below the frost line. For Nassau and Suffolk counties, the frost line is typically between 36 and 48 inches deep. Always dig below this depth to give your fence installation a stable foundation that won’t budge.

How Soil Type Impacts Post Depth

The type of soil in your yard also affects how deep and wide your post holes should be. Long Island has a mix of soil types, from sandy loam to denser clay. Sandy or loose soil doesn’t offer as much stability, so you may need to dig a deeper or wider hole to create a more substantial concrete footing. For denser, more stable soil, a standard hole width of about 10 to 12 inches is usually sufficient. A good practice is to leave a few inches of space at the top of the hole when you pour the concrete. You can fill this with the dirt you removed, which helps hold the post steady while the concrete cures and creates a cleaner look.

Getting Your Post Spacing Right

While the distance between your posts is important, the preparation of each individual hole is just as critical for stability. Before you place your post and pour the concrete, add about 4 to 6 inches of gravel to the bottom of the hole. This gravel base serves two key purposes. First, it allows for proper drainage, preventing water from pooling around the bottom of your post and causing issues from freeze-thaw cycles. Second, it creates a solid, level foundation to set your post on. You can easily adjust the post’s height and make sure it’s perfectly plumb before the concrete goes in. This simple step makes a huge difference in the final quality and longevity of your fence.

Should You Use Wood Supports Inside Vinyl Posts?

You’ve got your hollow vinyl posts, and you might be wondering if they need something extra inside. It’s a common question, and taking the time to ask it puts you on the right track for a fence that lasts. While some installation kits might not mention it, adding reinforcement is a professional step that makes a world of difference in the strength and longevity of your fence.

Think of it this way: vinyl provides a beautiful, low-maintenance exterior, but what’s inside gives it the core strength to stand up to Long Island’s weather. Using wood supports is a straightforward way to ensure your investment remains straight, strong, and secure for years. It’s especially important for key areas of your fence line that handle more stress, like gates and corners. Let’s get into why this extra step is so valuable and when it becomes absolutely essential.

The Case for Wood Reinforcement

I highly recommend using treated 4×4 wood posts inside your hollow vinyl sleeves, even if the instructions don’t explicitly say so. This simple addition acts as a sturdy backbone for your fence, dramatically increasing its overall strength and stability. A reinforced vinyl post is far better equipped to handle strong winds, accidental bumps from a lawnmower, or kids playing in the yard. It’s a pro-level technique that prevents sagging and leaning over time.

This reinforcement ensures your fence can withstand various environmental conditions, keeping it looking great season after season. By creating a solid structure, you’re not just installing a fence; you’re building a lasting feature for your property. Gappsi offers a variety of durable fences and netting options, and we always build with structural integrity as a top priority.

When Is Reinforcement a Must?

Reinforcement becomes absolutely crucial when you consider the ground movement here on Long Island. Our winters bring freezing and thawing cycles that can cause the ground to shift and expand, a process known as “heaving.” If a post isn’t deeply and solidly anchored, this movement can push it upward, resulting in an uneven and unstable fence line. A wood-reinforced post, set properly in concrete, provides the rigidity needed to resist this pressure.

At a minimum, you must reinforce all terminal posts. This includes corner posts, end posts, and especially gate posts. Gate posts support the constant weight and motion of the gate itself, and without a solid wood core, they will inevitably sag and pull the entire section out of alignment. Combining wood supports with a solid concrete footing from our expert masonry team is the best way to guarantee your posts stay put.

Setting Your Vinyl Fence Posts: A Step-by-Step Guide

With your fence line marked and your materials ready, it’s time for the most critical part of the project: setting the posts. A perfectly set post is the foundation of a fence that will stand straight and strong for years. This process requires precision and patience, but getting it right ensures your fence panels will align beautifully and withstand Long Island’s weather. We’ll walk through each step, from digging the first hole to letting the concrete cure, so you can tackle this with confidence.

Step 1: Dig Your Post Holes

This is the most physically demanding part of the job, so be prepared to break a sweat. For just a few holes, a manual post-hole digger will do the trick. If you’re installing a long fence line, renting a power auger is a smart move that will save you a lot of time and effort. Each hole should be about 30 inches deep to get below the frost line and have a diameter between 9 and 12 inches. This size gives you enough room for the post and the concrete that will hold it securely in place. Proper depth is key to preventing your posts from shifting during freeze-thaw cycles.

Step 2: Add a Gravel Base for Drainage

Before you even think about concrete, pour about six inches of gravel into the bottom of each hole. This simple step is one that many DIYers skip, but it’s essential for the longevity of your fence. The gravel base creates a space for water to drain away from the bottom of your post. This prevents water from pooling, which can cause issues from soil erosion or frost heave in the winter. It also gives you a firm, stable surface to set your post on, making it easier to get the height just right before you pour the concrete.

Step 3: Place Wood Reinforcements (If Using)

While vinyl posts are hollow, you can give your fence a major strength upgrade by inserting pressure-treated 4×4 wood posts inside them. This isn’t always in the manufacturer’s instructions, but it’s a professional technique we highly recommend, especially for gate posts and corner posts that handle more stress. The wood reinforcement provides internal structure, making the post far more rigid and resistant to impact or strong winds. It’s an extra step that adds incredible stability and ensures your vinyl fence remains durable for the long haul.

Step 4: Position and Level Each Post

Place your first post into the hole, resting it on the gravel base. Use the string line you set up earlier to ensure the post is perfectly aligned with the rest of the fence line. Check that the height is correct, leaving enough post above ground for your panels. Now, grab a level. Hold it against two adjacent sides of the post to make sure it is perfectly plumb, or vertically straight. An unlevel post will throw off the entire fence section, so take your time with this step. It’s much easier to make small adjustments now than to fix a crooked post set in concrete.

Step 5: Mix and Pour the Concrete

Now it’s time to lock those posts in place. You can use a standard bag of concrete mix; just be sure to follow the mixing instructions on the package carefully. The ideal consistency is similar to thick oatmeal, not too soupy and not too dry. Shovel the wet concrete into the hole, filling it all the way around the post. As you pour, use a stick or scrap piece of wood to poke the concrete, removing any air pockets. Fill the hole until the concrete is a few inches below ground level. This allows you to cover it with soil and grass later for a cleaner look.

Step 6: Brace the Posts as They Cure

Concrete doesn’t set instantly, so you’ll need to brace each post to keep it perfectly level while it cures. Use scrap wood or stakes to create simple braces on two sides of the post, holding it in its final, plumb position. Once you have the braces set, do one last check with your level to make sure nothing has shifted. This is your last chance to make adjustments before the concrete hardens permanently. Leave the braces in place for at least 24 hours, or as directed by the concrete manufacturer, to ensure the post is completely solid and secure.

Step 7: Account for Expansion and Contraction

One of vinyl’s properties is that it expands in the heat and contracts in the cold. While this won’t affect your posts once they are set in concrete, it’s something to keep in mind for the next step: installing the panels. Fence manufacturers design their systems to account for this movement. Typically, the fence rails are designed to fit into the post with a small amount of extra space. This allows the panels to shift slightly with temperature changes without buckling or becoming damaged. Always follow the manufacturer’s spacing guide when you’re ready to install your fence panels to ensure a flawless and durable result.

How Long Should You Wait Before Installing Fence Panels?

You’ve dug the holes, set the posts, and poured the concrete. At this point, you’re probably eager to hang the fence panels and see your project come to life. I get it, this is the exciting part where it all starts to look like a real fence. However, this is the most critical waiting period of the entire installation. Rushing to install the panels before the concrete has properly cured is one of the biggest mistakes you can make. It can compromise the stability of your posts, leading to a fence that leans, sags, or fails prematurely.

Think of the concrete footing as the foundation of your entire fence. A weak foundation will undermine all the hard work you’ve put in. Once you hang the panels, they act like sails, catching the wind and putting significant lateral pressure on the posts. If the concrete isn’t fully hardened, that force can easily push the posts out of alignment, creating a wavy, unstable fence line. Giving the concrete enough time to harden ensures your posts are solidly anchored in the ground, ready to support the weight of the panels and withstand Long Island’s wind and weather for years to come. A little patience now prevents major headaches and repairs later. Taking the time to do it right is what separates a DIY project from the durable, professional fences and netting that stand the test of time.

Understanding Concrete Curing Times

It’s a common misconception that concrete just needs to “dry.” In reality, it goes through a chemical process called curing, where it hardens and gains strength. While concrete can feel hard to the touch within a few hours, it hasn’t reached its full structural strength. For fence posts, you should wait at least 24 to 48 hours before installing panels. This gives the concrete enough time to become sufficiently hard to prevent the posts from shifting under the new weight.

The exact time can vary based on the concrete mix you used and the weather conditions, as humidity and temperature play a role. The key is to wait until the concrete is completely hard. As experts in masonry construction, we know that a proper cure is non-negotiable for a stable structure.

How to Know Your Posts Are Ready

So how can you tell if your posts are ready for the next step? The best method is a simple physical test. Go to each post and give it a firm push and pull near the top. If you feel any movement or wiggling at the base, it needs more time. A properly set post will feel completely solid and unmovable. Don’t be tempted to proceed if there’s even a little give, as the weight of the panels will only make it worse.

Once you’ve confirmed a post is solid, use your level one last time to make sure it’s still perfectly plumb. Sometimes, minor settling can occur as the concrete sets. It’s much easier to make a small adjustment now than to fix a leaning fence section later.

Common Mistakes to Avoid During Installation

Even the best materials can’t save a project from a few common installation errors. Taking the time to get these details right is what separates a wobbly, short-lived fence from one that stands strong for decades. A successful installation comes down to patience and precision. Here are the five most frequent missteps we see and how you can easily avoid them to ensure your fence looks professional and lasts for years to come.

Forgetting the Frost Line

One of the most critical errors in fence installation is not digging deep enough to get below the frost line. Here on Long Island, the ground freezes and thaws, causing the soil to expand and contract. If your post isn’t deep enough, this movement, known as “frost heave,” will slowly push it right out of the ground. This leads to a wavy, unstable fence that loses its straight alignment over time. For our area, you need to dig below this line, which is typically around 36 inches deep. Always dig a few inches deeper for good measure to give your fence a truly stable footing.

Skipping the Gravel Base

It might seem like a small step, but skipping the gravel base at the bottom of your post hole is a mistake that can compromise your entire fence. Pouring about four to six inches of gravel and tamping it down before you place the post does two important things. First, it creates a solid, level foundation for the post and concrete to rest on. Second, it allows water to drain away from the base of the post. This prevents water from pooling and destabilizing the soil around the concrete footing, ensuring your posts remain secure through wet seasons and heavy rain.

Choosing the Wrong Concrete

Not all concrete is created equal, and using the wrong type or amount can leave your fence posts vulnerable to wobbling. For a standard vinyl fence post, you should plan on using at least one 50-pound bag of a standard concrete mix. For corner posts and especially gate posts, which handle more weight and movement, using more concrete is essential for long-term stability. While fast-setting mixes are convenient, make sure you can work quickly enough to position and level the post before it hardens. Getting the concrete right is a key part of a professional fence installation.

Ignoring Level and Alignment

Once concrete is poured, you have a very short window to make adjustments. A common mistake is failing to check that each post is perfectly plumb, or vertical, before the concrete begins to set. A post that is even slightly off-kilter will be noticeable, and it can create problems when you try to install the fence panels. Use a post level on at least two adjacent sides to ensure it’s straight. After pouring the concrete, brace the post securely so it doesn’t shift while it cures. This careful attention to detail is what creates a flawless, professional-looking fence line.

Inconsistent Post Spacing

Vinyl fence panels are manufactured to precise lengths, usually six or eight feet. If your post spacing is inconsistent, you’ll run into major headaches during installation. Posts that are too far apart will leave a gap, while posts that are too close together will require you to cut down a panel, which can be difficult and time-consuming. Before you dig a single hole, map out your entire fence line and measure the distance between the center of each planned post. Using a template or marking your measurements carefully ensures every panel will fit perfectly, giving you a clean and uniform result.

Essential Safety Tips for Your Project

A successful DIY project is a safe one. Installing a fence involves heavy lifting, digging, and working with materials like concrete, so taking the right precautions is non-negotiable. Protecting yourself is just as important as getting the post holes right. Before you start, make sure you’re prepared to handle each step safely. Think of it as part of the project plan, not an afterthought. A little preparation goes a long way in preventing accidents and ensuring your project goes smoothly from start to finish.

Wear the Right Protective Gear

First things first, let’s talk about personal protective equipment, or PPE. At a minimum, you’ll need thick work gloves to protect your hands from splinters and blisters, and safety glasses to shield your eyes from flying dirt or concrete splash-back. Sturdy, closed-toe boots are also a must to protect your feet. Having the right tools is one thing, but using them safely is what truly matters. Proper safety gear is your first line of defense against potential injuries, so don’t be tempted to skip it, even if it’s a hot day. It’s a simple step that makes a huge difference.

Handle Concrete with Care

Working with concrete requires some specific precautions. Wet concrete is caustic and can cause skin irritation or even chemical burns, so always wear waterproof gloves and long sleeves when mixing and pouring it. You want to avoid direct skin contact as much as possible. When you pour the concrete, do it carefully to prevent splashing. The goal is to create a stable footing for your post, so focus on filling the hole evenly around the post. Properly handling materials like concrete not only ensures a stronger fence but also keeps you safe throughout the process.

Be Mindful of the Weather

The weather on Long Island can be unpredictable, and it plays a big role in your installation timeline and safety. Avoid working in extreme heat, which can lead to exhaustion, or during heavy rain, which can wash out your post holes and ruin your concrete mix. High winds are also a hazard, as they can make it incredibly difficult to set your posts perfectly level and plumb. When you’re faced with a challenge like bad weather, the smartest move is often to wait for better conditions. Pushing through a storm isn’t worth the risk of a failed installation or an accident.

Is DIY Vinyl Fence Installation Right for You?

Taking on a DIY vinyl fence installation is a big decision. It requires a serious commitment of time, effort, and physical strength. Before you start, it’s worth asking yourself if you’re truly ready for the work involved. A successful project demands careful planning, the right tools, and a willingness to see a tough job through to the end. While the satisfaction of building something yourself is a great feeling, it’s important to be realistic about the scope of the project.

Installing a fence isn’t just about putting up panels. It involves digging precise holes, working with heavy materials like concrete, and ensuring every post is perfectly level and aligned. Any misstep can affect the entire fence line, potentially leading to a structure that sags or fails over time. Think about your own skills, the tools you have available, and whether you have the time to dedicate to the project without cutting corners. Facing the challenges of a large home project head-on can be rewarding, but it’s also wise to know your limits.

Knowing When to Call a Pro

While a DIY project can save money on labor, there are many situations where hiring a professional is the smarter choice. The physical demands alone can be a major factor. Digging post holes, mixing and pouring concrete, and lifting heavy fence sections is strenuous work, especially if you’re tackling it by yourself. If you have a large property, uneven terrain, or simply don’t have the time for a multi-day labor-intensive project, calling a pro is a practical decision.

Professionals also bring expertise and specialized equipment that most homeowners don’t have. They understand how to handle Long Island’s specific soil conditions and ensure your fence posts are set below the frost line to prevent heaving. An expert installer has the right tools for the job and knows the best techniques to ensure your fence is sturdy and straight. Plus, a good company will handle the entire process, from securing permits to cleaning up the site, leaving your yard looking better than they found it.

The Gappsi Advantage for Your Long Island Home

When you choose a professional installer like Gappsi, you’re not just paying for labor, you’re investing in peace of mind and lasting quality. We understand the science behind a solid installation. For example, some companies might mix concrete improperly, resulting in a weak foundation that can’t support your fence. We know that the goal isn’t for the concrete to bind to the vinyl post, but to create a stable footing that holds the post securely in the ground. This expertise ensures your fence will stand strong for years.

Our team at Gappsi provides comprehensive fencing and netting services across Long Island. We handle every detail, from initial design to final installation, ensuring your new vinyl fence perfectly complements your home and landscape. Because we offer a full range of home improvement services, from masonry to landscaping, we can create a cohesive and beautiful outdoor space for your family to enjoy. Let us handle the hard work so you can simply enjoy the results.

Related Articles

Frequently Asked Questions

How deep do my fence post holes really need to be on Long Island? The most important rule is to dig below the local frost line. For us here in Nassau and Suffolk counties, that means your holes should be at least 36 to 48 inches deep. This prevents a process called “frost heave,” where frozen ground can push your posts upward and make your fence line uneven. Digging this deep ensures your posts have a stable foundation that won’t shift during our winter freeze and thaw cycles.

Do I have to put wood supports inside my vinyl posts? While you might get away without them for some sections, I strongly recommend using pressure-treated 4x4s inside your posts, especially for corners and gates. Think of the vinyl sleeve as the pretty, low-maintenance exterior and the wood post as the strong backbone. This reinforcement provides the internal structure needed to prevent sagging and resist strong winds, making your fence significantly more durable over the long term.

How long do I actually have to wait before hanging the fence panels? You should wait at least 24 to 48 hours after pouring the concrete before you install the fence panels. The concrete needs this time to cure, which is a chemical hardening process, not just drying. Hanging heavy panels too soon puts pressure on the posts and can easily pull them out of alignment. A good way to check is to give the top of a post a firm push; if you feel any wiggle at the base, it needs more time.

What’s the most common mistake that ruins a DIY fence project? The most critical and frequent mistake is not digging the post holes deep enough. If your post footings are not set below the frost line, all your hard work can be undone in a single winter. Frost heave will slowly push the posts out of the ground, resulting in a wavy, unstable fence. Taking the time to dig deep is the single best thing you can do to ensure your fence stays straight and secure for years.

Can I really do this project by myself? Honestly, this is a very tough job for one person. While it’s possible, the physical demands of digging dozens of deep holes, mixing concrete, and setting heavy posts perfectly level are significant. At a minimum, I would recommend having a helper. If you have a large yard or uneven terrain, or if you simply want to ensure a perfect, professional result without the back-breaking labor, considering a professional installer is a very smart choice.
Share this page:
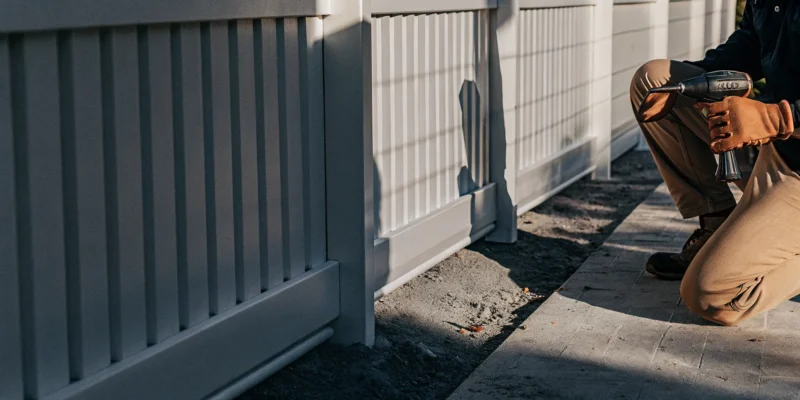
Long Island fence installer building a new vinyl backyard fence.

Find the Best Backyard Fence Installer Long Island

Before a single post is set, there are a few crucial details to sort out, especially here on Long Island. Every town, from Suffolk to Nassau County, has its own set of rules regarding fence height, materials, and permits. Then there’s the matter of confirming your exact property lines to avoid any future disputes with neighbors. A top-tier contractor knows these local regulations inside and out. They understand the permit process and the importance of a proper survey. This guide will help you understand these essential first steps and show you why the best backyard fence installer Long Island has to offer is one who manages these details for you, ensuring your project starts on a solid, legally sound foundation.

Key Takeaways

  • Handle logistics before you build: Before choosing a style, confirm your exact property lines with a survey and research your local town’s rules on fence height and permits. This essential prep work prevents costly mistakes and future headaches.
  • Hire for value, not just the lowest price: An unusually low bid can be a red flag for poor quality or lack of insurance. Instead, choose a professional who provides a detailed written contract, proof of licensing, and has a strong portfolio of past work.
  • Match the material to your lifestyle: Consider the long-term commitment of each option, not just the initial cost. Weigh the classic look and regular upkeep of wood against the lasting durability and low maintenance of vinyl or aluminum to find the best fit for your home.

Exploring Fence Materials and Styles

Choosing the right fence is about more than just marking your property line. It’s a design decision that impacts your home’s curb appeal, privacy, and security. The material you select sets the tone for your entire outdoor space, so it’s worth exploring your options to find the perfect fit for your home and lifestyle. From the classic warmth of wood to the sleek look of aluminum, each material offers a unique combination of style, durability, and maintenance. Let’s walk through the most popular choices for Long Island homes.

Wood Fencing

There’s a reason wood remains a timeless favorite. It offers a natural, classic look that can be customized to feel either traditional or modern. Homeowners are leaning into natural cedar tones and rich stains that create a warm, inviting connection to their gardens and landscaping. A wood fence can provide excellent privacy and can be built in various styles, like the popular stockade or a modern horizontal plank design. While it requires regular maintenance like staining or sealing to protect it from the elements, the beauty and versatility of a wood fence are hard to match.

Vinyl Fencing

If you love the look of a classic fence but not the upkeep, vinyl is an excellent choice. Known for its durability and low maintenance, a vinyl fence won’t rot, warp, or need repainting. A simple cleaning with soap and water is usually all it takes to keep it looking fresh. While the crisp white picket fence is an iconic style that creates a neat, welcoming look, modern vinyl fencing is available in a wide range of colors and textures, including options that mimic the appearance of wood. It’s a practical and long-lasting solution for any backyard.

Aluminum Fencing

For a look that is both elegant and strong, consider aluminum fencing. With its clean lines and simple geometric patterns, aluminum offers a modern, sophisticated appearance that provides security without blocking your view. This makes it a perfect choice for enclosing swimming pools or defining a property line while maintaining an open feel. Aluminum is also lightweight, rustproof, and requires virtually no maintenance, so you can count on it to look great for years to come. Its strength and durability make it a secure and stylish addition to any home.

Chain Link Fencing

When practicality and affordability are top priorities, chain link fencing is a reliable solution. It’s one of the most cost-effective options for securing a large area, making it a great choice for keeping pets and children safe. While it has a reputation for being purely functional, modern chain link fences can be coated in black or green vinyl to help them blend more seamlessly into your landscape. It’s an ideal enclosure for everything from a backyard garden to a personal sports games court, providing security you can depend on without breaking the budget.

Modern and Mixed-Material Fences

You don’t have to stick to just one material. A growing trend is to combine different elements to create a unique, custom fence that is both beautiful and durable. Imagine wood panels set between sturdy metal posts or a fence with a stone or brick base. This approach allows you to get creative with your design while also adding to the fence’s longevity. For example, using a composite or masonry base can protect wood panels from ground-level moisture. Mixing materials lets you create a one-of-a-kind look that perfectly complements your home’s architecture.

What Will Your New Fence Cost?

Let’s talk about one of the biggest questions on every homeowner’s mind: what will this project actually cost? Budgeting for a new fence is a crucial first step, and the final price tag can vary quite a bit. The total investment depends on two main things: the materials you choose and the specific details of your property and project. A simple, straight fence on flat land will naturally have a different price point than a complex installation on a hilly yard with lots of corners and custom gates. It’s not just about the length of the fence, but also the labor and preparation involved.

At Gappsi, we believe in transparency, so we want to walk you through the numbers. We offer a wide selection of fencing options, from classic wood to modern composite and sleek aluminum, each with its own price point. Understanding these costs upfront helps you make a choice that fits your budget and your vision for your outdoor space. Below, we’ll break down the average costs by material and explore the other factors that can influence the final price of your installation. This will give you a solid foundation for planning your project and ensure there are no surprises along the way. Knowing what to expect empowers you to move forward with confidence.

Average Cost by Material

The material you select is the biggest driver of your fence’s cost. Here’s a general breakdown of what you can expect to pay per linear foot for some popular options. A classic wood fence often runs from $15 to $30, while low-maintenance vinyl typically costs between $20 and $40. For a more durable and elegant look, aluminum fencing is usually priced from $25 to $50 per linear foot. If you’re looking for a purely functional and budget-friendly solution, chain link is the most economical choice at around $10 to $20. These ranges are a great starting point for your initial budget planning.

Factors That Affect the Final Price

Beyond the material, several other factors will shape your final quote. The complexity of the installation plays a huge role; things like sloped terrain, clearing old vegetation, or working around existing structures will add to the labor costs. This is why getting a detailed written estimate is so important. A simple verbal quote can easily miss these details, leading to unexpected charges later. You should also confirm that any contractor you consider is fully licensed and insured. Hiring an uninsured team is a risk that can lead to major expenses if something goes wrong. Finally, think about long-term value. A slightly more expensive, durable material might save you money on maintenance and repairs down the road.

Understanding Permits, Property Lines, and Local Rules

Before the first post goes into the ground, there are a few logistical hurdles to clear. Taking the time to understand local rules and property boundaries is a non-negotiable step. It ensures your project goes smoothly, stays on budget, and avoids any stressful disputes with neighbors or town officials down the line. Think of it as the essential prep work for a beautiful and long-lasting fence. Getting these details right from the start is just as important as choosing the right material or style for your home. It’s the foundation for a successful project that adds value and security without any unexpected complications.

Local Zoning Laws and Height Restrictions

Every town and village on Long Island has its own set of rules for fences. Before you get too attached to a six-foot privacy fence, it’s important to check your local zoning laws. Many areas require a permit for installation, especially if the fence is over a certain height or close to a property line. Understanding these regulations from the start helps you avoid potential fines and the headache of having to modify or remove a non-compliant fence. A professional installer will know how to manage the permit process and ensure your new fence meets all local requirements.

Property Line and Survey Requirements

One of the most common mistakes homeowners make is assuming they know exactly where their property line is. Guessing can lead to serious trouble, including disputes with neighbors that can sour a relationship for years. To avoid this, you should get a professional survey to confirm your property’s exact boundaries before any work begins. This isn’t just about being a good neighbor; it’s about protecting your investment. A survey provides the legal proof you need to ensure your fence is built entirely on your land, giving you complete peace of mind.

Best Time of Year to Install a Fence

Timing your fence installation can make a big difference in the process. Spring and early summer are generally the best seasons for this kind of project. The weather is more predictable, and the ground is soft enough to dig easily, which makes for a quicker and more efficient installation. Trying to install a fence in the dead of winter can be difficult due to frozen ground, while the peak of summer can bring unexpected thunderstorms. By scheduling your installation during the milder months, you can better plan your entire backyard transformation without weather-related delays.

What to Look for in a Fence Installer

Choosing the right fence material is only half the battle; finding a skilled and reliable installer is just as important for a successful project. The right installation partner will not only build a beautiful, sturdy fence but also make the entire process feel seamless. A great contractor handles the complexities, from securing permits to ensuring your new fence is built to last. They bring the expertise needed to work with different materials and navigate the unique challenges of your property. When you find a team you can trust, you’re not just hiring labor, you’re investing in a smooth experience and a high-quality result that will protect and beautify your home for years. A professional fencing company ensures every detail is managed correctly from start to finish.

Licensing and Insurance

One of the biggest mistakes homeowners can make is not checking for proper licensing and insurance. It might feel like an awkward conversation, but it’s a crucial step that protects you. A licensed contractor is accountable to local regulations, ensuring your fence is built to code. More importantly, proper insurance, including general liability and worker’s compensation, shields you from financial responsibility if an accident happens on your property. A reputable installer will have this documentation ready and will be happy to provide it. Think of it as the first sign that you’re working with a true professional who takes their business, and your safety, seriously.

Experience and Portfolio

To ensure a satisfactory outcome, it’s essential to select a professional and reputable fence company with a proven track record. An experienced installer has seen it all: sloped yards, tricky soil conditions, and complex property lines. This expertise is invaluable for avoiding common pitfalls and ensuring a durable installation. Ask to see a portfolio of their previous work. This allows you to visually inspect the quality of their craftsmanship and see if they have experience with the style and material you want. Gappsi’s YouTube channel is a great place to see our team’s work and get inspiration for your own project.

Warranties and Guarantees

Making an informed decision can safeguard your financial investment and provide peace of mind. A quality fence is a significant addition to your home, and you want assurance that it will last. Always ask potential installers about the warranties they offer on both materials and their workmanship. A strong warranty shows that a company stands behind its products and services. Be sure to get the details in writing so you understand what is covered, for how long, and what the process is for addressing any issues. This guarantee protects your investment long after the installation crew has packed up.

Customer Reviews and References

While it can be tempting to go with the cheapest bid, feedback from past customers provides a much clearer picture of what you can expect. Check online reviews on several platforms to get a sense of a company’s reputation for communication, timeliness, and overall quality. Don’t stop there; ask the installer for a list of recent references you can speak with directly. Talking to a former client allows you to ask specific questions about their experience, from the initial consultation to the final cleanup. This step helps you confirm you’re choosing a reliable and customer-focused team.

Clear Written Estimates

Agreeing to fence work without a detailed written estimate is a common mistake that can lead to confusion and unexpected costs. A professional installer should provide a clear, itemized proposal that breaks down all the expenses. This document should outline the cost of materials, labor, permit fees, and any other charges. It should also specify the project timeline and payment schedule. This level of transparency ensures everyone is on the same page before any work begins and helps you stick to your budget. A detailed estimate is a hallmark of a trustworthy contractor who values clear communication.

Common Mistakes to Avoid When Hiring

You’ve picked your materials and have a vision for your new fence. Now comes the most important step: choosing the right team to build it. Hiring a fence installer can feel overwhelming, but knowing what to watch out for makes the process much smoother. A great contractor does more than just build a fence; they act as your partner, guiding you through the project and ensuring every detail is handled correctly. Avoiding a few common pitfalls can be the difference between a stressful experience and a seamless installation that you’ll be happy with for years to come. From falling for a price that’s too good to be true to skipping essential paperwork, these missteps can lead to delays, extra costs, and a final product that doesn’t meet your expectations. By understanding these key areas, you can confidently select a professional who will respect your home, your budget, and your vision. Let’s walk through the mistakes homeowners often make so you can hire with total confidence.

Choosing Based on Price Alone

It’s always tempting to go with the lowest bid, but when it comes to a long-term investment like a fence, price shouldn’t be the only factor. An unusually low quote can be a red flag for subpar materials, inexperienced labor, or a contractor who isn’t properly insured. Instead of focusing on the cheapest option, look for the best value. A quality installer provides a fair price for excellent work, durable materials, and a professional process from start to finish. A vague verbal quote can easily lead to surprise costs later on. A reputable company will always provide a detailed written estimate that clearly outlines all expenses, ensuring you know exactly what you’re paying for.

Skipping the Permit Process

Dealing with permits can seem like a hassle, but it’s a non-negotiable step for most fencing projects on Long Island. Local zoning laws in towns across Nassau and Suffolk counties have specific rules about fence height, materials, and placement, especially concerning property lines. Skipping this step could lead to fines or even an order to tear your new fence down. A professional fence installer should be well-versed in these local regulations and can often handle the entire permit process for you. Before you hire anyone, ask them about their experience with your town’s building department. This will save you major headaches and ensure your project is completed legally.

Not Verifying Credentials

Hiring a contractor without the right credentials is a significant risk. Before you sign anything, always verify that the company has both general liability insurance and workers’ compensation. Liability insurance protects your property from any accidental damage during the installation, while workers’ compensation covers the crew if someone gets injured on the job. Without this coverage, you could be held financially responsible. A trustworthy company will gladly provide proof of their licensing and insurance. This simple verification is one of the easiest ways to protect yourself and ensure you’re working with a legitimate, professional fencing and netting installer.

Failing to Get a Contract in Writing

A verbal agreement or a handshake is not enough to protect you on a home improvement project. A comprehensive, written contract is essential. This document is your roadmap for the entire project and protects both you and the contractor. Make sure the contract includes a detailed description of the work, the specific materials to be used, a clear payment schedule, and an estimated start and completion date. Vague timelines or costs are a sign of potential problems. A detailed contract ensures everyone is on the same page, prevents misunderstandings, and provides a clear plan for bringing your beautiful new backyard design to life without any unwelcome surprises.

Start Your Fencing Project with Confidence

Starting a new fencing project is an exciting step toward creating the backyard you’ve always wanted. A little preparation goes a long way in ensuring the process goes smoothly, so you can move forward with total peace of mind. The first step is to always get a detailed written estimate from your contractor. Moving forward with only a verbal quote is a common mistake that can lead to confusion and surprise costs down the road. A clear, written contract protects both you and your installer.

Next, get familiar with your local zoning laws. Many towns on Long Island have specific rules about fence height and placement, and you may need a permit before installation can begin. Taking the time to check these regulations first can prevent any potential issues. You will also want to confirm your exact property lines. Having a survey done or locating your property markers ensures your new fence is built in the right spot and helps you avoid any disputes with neighbors.

Finally, consider your materials. Choosing the right ones for our Long Island climate is key to a long-lasting fence. Gappsi offers a wide selection of durable and beautiful fencing options, from classic wood to low-maintenance vinyl and aluminum. Proper material selection and expert installation will save you time and money for years to come. With these details handled, you can feel confident and ready for a successful project.

Related Articles

Frequently Asked Questions

What’s the best fence material if I want something low-maintenance? If you want to spend your weekends enjoying your yard instead of working on it, vinyl and aluminum are your best friends. Vinyl gives you that classic painted-wood look without any of the scraping, staining, or rotting. A quick wash is all it needs. Aluminum is just as easy to care for and offers a more modern, elegant style that provides security without closing off your view. Both are fantastic, long-lasting choices that free you from regular upkeep.

Do I really need a property survey? My neighbor and I agree on the line. I completely understand the temptation to skip this step, especially when you have a good relationship with your neighbor. However, a professional survey is about protecting your investment for the long term. A friendly handshake agreement isn’t legally binding, and situations can change if a new neighbor moves in. Getting a survey is the only way to be certain your fence is built on your land, which prevents potential disputes, legal fees, and the costly headache of having to move a fence later.

How can I make sure my fence is safe for my pool? When it comes to pool safety, there are specific codes you need to follow, and aluminum fencing is often the go-to choice. It’s designed to be difficult to climb, is available in the required heights, and features self-closing gates to keep your pool area secure. Its open design also allows you to keep an eye on the pool from other areas of your yard. A professional installer will know the exact local requirements to ensure your pool fence is not only beautiful but also fully compliant and safe.

How long does the whole process take, from consultation to finished fence? The timeline can vary quite a bit depending on the project’s size and complexity. After your initial consultation, the next steps involve finalizing the design, ordering materials, and securing any necessary permits from your town, which can sometimes take a few weeks. Once everything is approved and the materials arrive, the actual on-site installation for an average-sized yard often takes just a few days. A good contractor will give you a clear, estimated timeline in your written contract.

What’s the biggest mistake people make when choosing a fence? One of the most common mistakes is focusing only on the initial price tag instead of the overall value. A cheaper fence might save you money upfront, but it could cost you more in the long run with repairs and maintenance. Another major misstep is not getting a detailed, written contract. This single document is your best protection, as it outlines everything from the specific materials being used to the project timeline and total cost, ensuring there are no surprises along the way.

Share this page:
A white vinyl privacy fence, an example for a vinyl fencing cost calculator.

Vinyl Fencing Cost Calculator: A Quick Guide

Figuring out the budget for a new fence can feel like putting together a puzzle with missing pieces. You know you want the privacy and curb appeal, but the path to a final price isn’t always clear. A vinyl fencing cost calculator can be a helpful first step, giving you a ballpark estimate for materials. However, to get a number you can truly rely on, you need to understand what goes into a professional quote. This article will guide you through the process, explaining how factors like fence height, property terrain, and gate selection influence the final cost. We’ll help you gather the right information so you’re prepared to get an accurate estimate from an experienced contractor.

Key Takeaways

  • Budget for the Complete Project, Not Just Materials: A realistic budget for vinyl fencing includes more than the panels themselves; remember to account for professional installation, site preparation, permit fees, and features like gates to understand the true total cost.
  • Consider Vinyl’s Long-Term Value: While vinyl can have a higher upfront price than wood, its value comes from its durability and low maintenance. You save money and time over the years by avoiding the recurring costs of painting, staining, and repairs.
  • Provide Key Details for a Reliable Quote: To get an accurate estimate, give your contractor specific information. Measure the fence line, decide on a preferred style and height, and point out any site challenges like slopes or trees on your property.

What is a Vinyl Fencing Cost Calculator?

If you’re starting to plan a new vinyl fence for your Long Island home, you’ve probably wondered about the cost. A vinyl fencing cost calculator is a handy online tool designed to give you a preliminary estimate for your project. Think of it as a digital shopping list that helps you understand the potential material costs before you commit. While these calculators are great for initial budgeting, remember that a professional quote will always be more accurate, as it accounts for labor, site conditions, and other project-specific details.

How Does It Work?

Most online fence calculators are surprisingly user-friendly. Many allow you to sketch your fence layout directly onto a satellite map of your property or a simple grid. From there, you can select the specific style, height, and color of the vinyl fence you want. As you make your selections, the tool automatically calculates all the necessary components for your project, like the fence panels, posts, and caps. It then generates a list of these materials and provides an estimated cost. This gives you a clear, itemized breakdown of what you’ll need, making it much easier to visualize the material expenses for your new fence.

What Information Do You Need for an Accurate Estimate?

To get the most out of a cost calculator, it helps to do a little prep work first. Before you start clicking, grab a tape measure and walk your property line to determine the total length of your planned fence in feet. It’s also a great idea to sketch a simple diagram of the layout. On your drawing, be sure to mark the locations for gates and identify the different types of posts you’ll need: corner posts where the fence changes direction, end posts where a line of fencing stops, and gate posts on either side of a gate. Having these specific numbers ready will give you a much more precise material estimate from the calculator.

What’s Included in the Estimate (and What’s Not)

It’s important to understand what an online calculator’s estimate actually covers. These tools are designed to primarily calculate the cost of the materials themselves. The final price you see usually does not include several key factors. Things like professional installation labor, the removal and disposal of an old fence, local permit fees, and sales tax are typically excluded. The estimate also won’t account for site-specific challenges, such as working on sloped ground or clearing vegetation. For a complete and accurate project cost, you’ll need a comprehensive quote from an experienced contractor who can assess your property and provide expert fencing services.

What Factors Affect Vinyl Fencing Costs?

When you start budgeting for a new vinyl fence, it’s helpful to know that the final price tag is more than just the cost of the panels. Several key factors influence the total investment, from the style you choose to the unique layout of your property. Understanding these elements ahead of time helps you set a realistic budget and ensures there are no surprises along the way. Think of it less as a single price and more as a combination of choices that come together to create your perfect fence.

Each of these components plays a role in the material and labor costs. For example, a simple fence on a flat, clear lawn will have a different price point than an ornate fence on a sloped yard with trees. By breaking down what goes into the estimate, you can make informed decisions that align with both your vision and your wallet. Let’s walk through the main factors that will shape the cost of your vinyl fencing project.

Material Quality and Fence Style

Not all vinyl is created equal, and the quality of the material is a major factor in the overall cost. High-quality vinyl offers better durability, UV protection, and color retention, ensuring your fence looks great for years to come. Basic privacy panels are on the lower end of the price spectrum, while decorative styles with features like lattice tops or custom colors will be at the higher end. Your choice of fences and netting ultimately comes down to balancing your aesthetic goals with your budget. A premium fence might have a higher initial cost, but its longevity can make it a more valuable investment over time.

Fence Height and Length

This one is pretty straightforward: the more fence you need, the higher the cost. The total linear footage of your project is one of the biggest drivers of the final price because it determines the amount of material and labor required. Fence height also plays a significant role. A standard six-foot privacy fence uses more material than a four-foot decorative picket fence, which is reflected in the cost. When you request an estimate, providing accurate measurements of the perimeter you want to enclose will give you a much clearer picture of the potential expense.

Installation Site and Terrain

The condition of your property is another crucial element. A flat, open yard is the ideal canvas for a simple installation. However, many Long Island properties have unique features that require extra work. Slopes, rocky soil, tree roots, and existing structures can all add to the labor costs. An uneven terrain requires careful planning to ensure the posts are secure and the panels are perfectly aligned, preventing unsightly gaps. Our teams are experts in landscape design and construction, so we know how to prepare any site for a flawless and durable fence installation.

Local Permits and Regulations

Before any work begins, it’s important to consider local building codes and permit requirements. Many towns and villages in Nassau and Suffolk counties have specific rules about fence height, style, and placement relative to property lines. Applying for a permit usually involves a fee, which should be factored into your overall budget. Working with an experienced local contractor is a huge advantage here. We are familiar with the regulations across Long Island and can manage the permit process for you, ensuring your project is fully compliant and saving you from potential fines or delays.

What is the Real Cost of Vinyl Fencing?

When you start looking at vinyl fencing, it’s easy to focus on the price per panel. But the true cost of a new fence is a bigger picture. It includes the materials, the skilled labor to install it correctly, and any prep work your yard might need. Understanding these different pieces helps you create a realistic budget and see the full value of your investment. Think of it less as a simple purchase and more as a permanent upgrade to your home and property. Let’s break down what really goes into the final price.

Average Cost Per Foot

On average, you can expect the materials for vinyl fencing to cost between $15 and $40 per linear foot. The final number depends heavily on the style you choose. A simple, white privacy panel will naturally fall on the lower end of that range. If you’re looking for something more decorative, like a fence with lattice work, custom colors, or ornate post caps, the price will be closer to the higher end. This cost covers the panels and posts themselves, but it’s just the starting point for your total project budget.

Breaking Down Labor vs. Material Costs

The materials are only one part of the equation. Professional installation is a significant portion of the total cost, typically making up 40% to 60% of your final bill. This isn’t just about paying for someone’s time; it’s about paying for expertise. Proper installation includes preparing the site, digging precise post holes, setting the posts in concrete for stability, and ensuring every panel is perfectly level and secure. Investing in professional fencing installation means your fence will stand strong against Long Island weather for years to come, saving you from future headaches and repair costs.

Hidden Costs to Plan For

A few additional costs can pop up during a fencing project, but a good contractor will help you plan for them. For example, your town might require a permit for the installation, which comes with a fee. If your property is on a steep slope or has rocky soil, extra labor may be needed for site preparation. Do you have an old fence that needs to be torn down and hauled away? That’s another potential cost. Finally, remember that gates are more complex than standard panels and will add to the total. Discussing these items upfront ensures your final quote is comprehensive and accurate.

Is Vinyl Fencing a Good Investment?

Absolutely. While the initial price for vinyl can be higher than for a wood fence, it often proves to be the more economical choice over time. Wood fences require regular staining, sealing, and repairs to prevent rot and warping, and those maintenance costs add up. Vinyl, however, is incredibly low maintenance. It resists pests, won’t rot, and never needs painting. A simple cleaning with soap and water is usually all it takes to keep it looking new. This durability and ease of care make vinyl a smart, long-term investment that adds lasting value and curb appeal to your home.

Common Myths About Vinyl Fencing Costs

When you start researching fencing options, you’ll likely run into a lot of opinions about cost, especially when it comes to vinyl. It’s easy to get tangled in conflicting information, so let’s clear up a few common myths. Understanding the true value of vinyl fencing will help you make a confident decision for your Long Island home, ensuring you get a beautiful, durable fence that fits your budget in the long run.

Myth: “Vinyl is always more expensive than other materials.”

It’s true that the initial price tag for vinyl fencing can be higher than for some wood options. However, looking only at the upfront cost doesn’t tell the whole story. Think of it as a long-term investment. While a wood fence might seem cheaper at first, it requires regular maintenance like staining, painting, and sealing to prevent rot and weather damage. These costs add up over the years. Vinyl, on the other hand, demands very little upkeep. When you compare materials, you’ll find that vinyl’s durability and low maintenance often make it the more economical choice over its lifespan.

Myth: “The initial quote is the final price.”

An initial quote is a great starting point, but it’s best viewed as an estimate. The final cost of your fence installation can be influenced by several factors that aren’t always obvious from the start. Labor is a significant part of the budget, and the specific conditions of your property, like slopes or rocky soil, can require more work. Plus, any changes you decide to make during the project will also adjust the price. Working with an experienced team ensures your quote is as comprehensive as possible, minimizing surprises and helping you plan for the total cost of your project.

Myth: “Vinyl requires costly maintenance.”

This is one of the biggest misconceptions about vinyl fencing. In reality, its low maintenance is a key benefit. Unlike wood, vinyl doesn’t need to be painted or sealed to protect it from the elements. It won’t rot, warp, or attract pests. To keep your vinyl fence looking new, all you typically need is a simple wash with a garden hose and maybe some mild soap to remove any dirt. This saves you from the recurring costs and labor associated with the cleaning and sealing that other materials demand, giving you more time to simply enjoy your beautiful yard.

How to Get an Accurate Vinyl Fence Estimate in Long Island

Getting a clear and accurate estimate for your vinyl fence project is the first step toward a smooth installation. While it’s tempting to just ask for a price per foot, a reliable quote involves much more detail. A thorough estimate prevents surprise costs and ensures both you and your contractor are on the same page from day one. To get a quote you can trust, you need to do a little prep work and know what to ask. It’s about understanding the key factors that influence the final price, from material choices and fence height to the specifics of your property, like slopes or existing landscaping.

An accurate estimate is a sign of a professional contractor who values transparency. It shows they have taken the time to understand your project’s unique requirements instead of just giving a generic number. By providing your contractor with detailed information and asking the right questions about what’s included, you can feel confident that the number you receive truly reflects the scope of the work. This collaborative approach helps build a strong foundation for a successful project and a beautiful, long-lasting fence for your Long Island home. It turns a simple transaction into a partnership focused on bringing your vision to life.

Tips for a More Reliable Quote

To get the most accurate quote, start by gathering some key information. First, measure the total length of the area where you want the fence installed. This measurement, in linear feet, is the primary basis for material costs. Next, think about the style and height you prefer. A simple four-foot privacy fence will have a different price point than a six-foot decorative one with custom post caps. Knowing what you want helps the contractor provide a precise material estimate, which can range from $15 to over $40 per linear foot. Also, make a note of any gates you need, their width, and any specific site challenges like slopes, trees, or existing structures that need to be removed. A clear picture of your project helps create a quote that covers all the bases.

Why Working With an Experienced Local Contractor Matters

While the lowest bid might seem attractive, it rarely tells the whole story. An experienced local contractor provides value that goes far beyond the initial price. They understand Long Island’s specific building codes, soil conditions, and weather patterns, ensuring your fence is installed correctly and built to last. A seasoned professional can also guide you through common misconceptions about fencing projects, helping you make informed decisions. For example, while vinyl’s upfront cost can be higher than wood, its minimal maintenance often makes it a more economical choice over time. Choosing a reputable company like Gappsi for your fencing installation means you’re investing in quality craftsmanship and long-term satisfaction, not just a product.

Related Articles

Frequently Asked Questions

Why can’t I just use an online calculator for my final budget? An online calculator is a fantastic starting point for understanding material costs, but it can’t see the unique layout of your property. These tools provide a preliminary estimate for panels and posts, but they don’t account for essential factors like professional labor, permit fees, or the cost of removing an old fence. A professional quote is the only way to get a complete and accurate number that includes site-specific work, like managing a sloped yard or rocky soil.

Is professional installation really worth the cost? Yes, absolutely. The cost of professional installation covers expertise, not just labor. A skilled team ensures every post is set securely in concrete, every panel is perfectly level, and the entire structure is built to withstand Long Island’s weather for decades. This investment saves you from the future costs and frustrations of a poorly installed fence that might sag, lean, or fail prematurely.

Besides the fence itself, what’s the most common extra cost I should plan for? Site preparation is one of the most common additional costs. If your property is on a steep grade, has dense tree roots, or requires the removal of an old fence, this will add to the labor involved. Another factor to budget for is the permit fee required by your local town or village, which is a standard part of ensuring your new fence meets all local regulations.

How does vinyl fencing’s cost compare to wood over time? While a wood fence might have a lower upfront price, its lifetime cost is often much higher. Wood requires regular, costly maintenance like staining, sealing, and painting to prevent rot and weather damage. Vinyl, in contrast, is a one-time investment. Its durability and resistance to the elements mean you’ll only ever need to wash it with soap and water, making it the more economical and hassle-free choice in the long run.

What information should I have ready before I call for a professional estimate? To help us give you the most accurate quote possible, it’s great to have a few details prepared. First, try to measure the total length of the fence line in feet. Second, have an idea of the fence style and height you’re interested in. Finally, make a note of how many gates you’ll need and any specific challenges on your property, such as steep hills or large trees near the fence line.

Share this page:
Estimating how much a 100 foot vinyl fence costs with a calculator and tools on a table.

How Much Does a 100 Foot Vinyl Fence Cost?

A new vinyl fence is more than just a property line; it’s an investment in your home’s curb appeal, privacy, and security. When homeowners start budgeting, one of the first questions they ask is, “how much does a 100 foot vinyl fence cost?” While the initial price is important, the true value lies in its long-term performance. Vinyl offers decades of durability with almost no maintenance, saving you time and money year after year. Before you look at the price tag, let’s explore why this choice is such a smart investment and what factors determine the final cost for a beautiful, lasting fence.

Key Takeaways

  • Budget Beyond the Basics: Your final fence cost depends on more than just length; factors like style (privacy vs. picket), height, material quality, and necessary additions like gates or permit fees all play a significant role in the total price.
  • Choose Vinyl for Lasting Value: While vinyl’s upfront cost can be higher than wood, it is a smart long-term investment because its durability and resistance to weather save you money and time on future repairs and maintenance.
  • Prepare for an Accurate Quote: To get a reliable estimate from a contractor, first measure your property line, have a general fence style in mind, and understand your local town’s rules on permits and fence height.

What Does a 100-Foot Vinyl Fence Really Cost?

Figuring out the cost of a new fence can feel a bit like asking, “How much does a car cost?” The answer is always, “Well, it depends.” While that can be frustrating, the final price for a 100-foot vinyl fence truly hinges on the style, height, and features you choose. For a standard 100-foot project, you can generally expect the cost to fall somewhere between $3,000 and $7,000. This range covers everything from simple, classic designs to more elaborate, high-end options.

The biggest factors driving the price are the amount of material needed and the complexity of the design. A tall privacy fence, for example, uses more vinyl than a short picket fence, which is reflected in the cost. To give you a clearer picture of what to expect, let’s break down the typical costs for the three most popular styles. Remember, these are starting points, and a professional quote for fences and netting will give you the most accurate number for your specific property.

Basic Picket Fences

If you love that classic, welcoming look, a vinyl picket fence is a fantastic choice. Typically standing about four feet tall, this style is perfect for defining your property line and adding a touch of charm without completely blocking the view. For a 100-foot stretch, a basic vinyl picket fence usually costs between $1,500 and $3,000. This breaks down to about $15 to $30 per linear foot. It’s an affordable way to get that timeless aesthetic, keep small pets safely in the yard, and add to your home’s curb appeal.

Privacy Fences

For homeowners who want to create a secluded backyard retreat, a privacy fence is the way to go. These fences are usually six feet tall and feature solid panels that block sightlines, giving you a true sense of peace and quiet. The cost for a 100-foot vinyl privacy fence typically ranges from $3,000 to $6,000, or about $30 to $60 per linear foot. The higher price reflects the increased material needed for the taller, solid design. This style is ideal for enclosing a backyard with a swimming pool or creating a private space for family gatherings.

Premium Decorative Fences

When you want a fence that makes a real statement, a premium decorative style is your best bet. These fences can be six to eight feet tall and often include special features like textured finishes that mimic wood, custom colors, or lattice and spindle accents at the top. For a 100-foot installation, a premium fence generally costs between $6,000 and $7,800, which is about $60 to $78 per linear foot. This is the top-tier option for homeowners who see their fence as a key architectural element of their home’s exterior design.

What Determines Your Vinyl Fence’s Final Price?

When you get a quote for a new vinyl fence, the final number reflects more than just the cost of the panels. Several key factors come together to determine the total investment for your project. Understanding these elements helps you see exactly where your money is going and allows you to make informed decisions that align with your budget and vision for your property. From the height and design of the fence to the unique characteristics of your yard, each detail plays a role in the final price. A simple project on flat, clear land will naturally cost less than a complex installation on a sloped, rocky property with custom gates.

Thinking about these variables ahead of time prepares you for a more productive conversation with your contractor. It allows you to prioritize what matters most to you, whether that’s maximum privacy, a specific aesthetic, or long-term durability. We believe in transparency, so breaking down the costs helps you appreciate the value of professional craftsmanship and high-quality materials. Let’s walk through the main components that will shape the cost of your new vinyl fence.

Fence Height and Style

The physical dimensions and design of your fence are two of the biggest factors in its cost. A taller fence naturally requires more material, which increases the price. For example, a six-foot privacy fence will cost more than a four-foot picket fence. Beyond height, the style you choose makes a difference. Simple, solid panels are the most straightforward option, while decorative touches like lattice tops, custom post caps, or intricate patterns add to the overall cost. These details can create a beautiful, personalized look, so it’s a matter of balancing your aesthetic goals with your budget. Our team can show you various fencing options to find the perfect fit.

Material Quality

Not all vinyl is the same, and the quality of the material you select will impact both the upfront cost and the fence’s lifespan. Standard white vinyl is typically the most affordable choice. If you prefer a different color or a textured finish that mimics the look of wood, you can expect the price to be higher. Beyond aesthetics, the thickness and chemical makeup of the vinyl matter. Higher-quality vinyl often includes more UV inhibitors to prevent fading and is engineered to be stronger and more resistant to impact. Investing in a premium material can mean a longer-lasting, more durable fence that holds up beautifully to Long Island’s weather.

Labor and Installation

The cost of professional installation is a crucial part of your total investment, often accounting for a significant portion of the final price. This fee covers the expertise, time, and equipment needed to ensure your fence is installed correctly. A professional crew handles everything from precisely measuring your property lines to securely setting each post in concrete. While a DIY approach might seem cheaper, improper installation can lead to a sagging, unstable fence that needs costly repairs down the road. Hiring an experienced construction company guarantees your fence is level, secure, and built to last for years.

Your Property’s Terrain

The landscape of your yard plays a surprisingly large role in installation costs. A flat, clear, and level area is the ideal canvas for a fencing project, making the job quicker and more straightforward. However, many Long Island properties have unique challenges. If your yard is on a slope, has rocky soil, or is filled with large tree roots, the installation process becomes more complex. Our team may need specialized equipment or extra time to navigate these obstacles and ensure every post is perfectly set. A professional site assessment from a landscape designer can identify these issues early on, giving you a clear picture of the labor involved.

Gates and Hardware

Gates are an essential component of most fences, but they are priced separately from the linear footage of the fence panels. The cost of a gate depends on its size, style, and the hardware you choose. A simple walk-through gate will be less expensive than a wide double gate designed for a driveway. You’ll also want to consider the quality of the hinges, latches, and handles, as durable hardware is key to a gate that functions smoothly for years. If you’re interested in an automatic gate opener, this will be an additional investment. We can help you select the right gates and hardware to match your fence and meet your needs.

Local Permits and Regulations

Before any work begins, it’s important to consider local building codes. Many towns and villages across Suffolk and Nassau County have specific regulations regarding fence height, style, and placement relative to property lines. In most cases, you will need to obtain a permit before installation can start, and these permits come with a fee. The process can sometimes feel a bit complicated, but working with an experienced local contractor makes it much easier. We are familiar with the requirements in different Long Island communities and can help you manage the permitting process to ensure your project is fully compliant with all local rules.

Vinyl Fence Styles: Which One is Right for You?

Choosing a vinyl fence isn’t just about setting a boundary, it’s about defining your home’s personality and how you want to experience your outdoor space. The style you select plays a huge role in everything from your backyard’s privacy level to its overall curb appeal and, of course, the final cost. Whether you’re dreaming of a secluded sanctuary for your family or a charming frame for your garden, there’s a vinyl fence style that fits your vision and budget. Let’s walk through the most popular options to help you find the perfect match for your Long Island home.

Privacy Fences

If creating a personal retreat is your top priority, a privacy fence is the way to go. These fences feature solid panels that block sightlines, giving you a quiet, secluded space away from neighbors and street traffic. They are perfect for backyards with swimming pools or patios where you want to relax without an audience. Because they use more material to create that solid barrier, they are more expensive than open-style fences. A professionally installed 100-foot vinyl privacy fence typically costs between $2,500 and $6,000, but the peace and quiet it provides is often priceless.

Picket Fences

The picket fence is a timeless American classic for a reason. It offers a friendly, welcoming look while still clearly marking your property lines. This style is more open than a privacy fence, making it a great choice for front yards or for sectioning off a garden without blocking sunlight. Picket fences are also one of the more budget-friendly options. A standard 100-foot vinyl picket fence usually runs between $1,500 and $3,000. It’s an iconic style that adds charm and character, perfectly complementing a beautiful landscape design.

Ranch Rail Fences

Often seen on larger properties, ranch rail fences provide a rustic, open feel. With two to four horizontal rails, this style is excellent for defining boundaries without obstructing scenic views. It’s a practical and attractive choice for corner lots or homes with a more country-style aesthetic. While traditionally used for agricultural purposes, vinyl ranch rail fences have become a popular and stylish option for residential homes. They are generally less expensive than privacy fences, making them a cost-effective solution for fencing in large areas while maintaining an open and airy atmosphere.

Decorative and Ornamental Styles

For homeowners who want their fence to be a standout feature, decorative and ornamental styles are the ultimate choice. These fences often incorporate details like latticework, custom post caps, or mixed materials to create a truly unique look that enhances your home’s architecture. They are perfect for making a statement and can significantly improve your property’s curb appeal. This premium look comes at a higher price, with a 100-foot decorative fence costing between $6,000 and $7,800. These designs pair beautifully with high-end masonry and custom patio work.

Don’t Forget These Additional Fencing Costs

When you’re budgeting for a new vinyl fence, it’s easy to focus on the price per foot. But the final invoice often includes more than just the cost of the panels and posts. To get a true picture of your total investment, you need to account for a few extra services and potential variables that can pop up during the project. Thinking about these ahead of time helps you avoid any last-minute budget surprises and ensures a smooth process from start to finish.

From clearing the way for your new fence to navigating local paperwork, these additional costs are a normal part of a professional installation. Things like removing an old, weathered fence, securing the proper permits for your Long Island town, adding functional gates, and preparing uneven ground are all important steps. A comprehensive quote from a trusted contractor should outline these items clearly. At Gappsi, we believe in transparency, so we make sure you understand every aspect of the fencing project before we even break ground. This way, you can plan confidently and get excited for your beautiful new fence without any financial stress.

Old Fence Removal

If you have an old fence that needs to be replaced, you’ll need to factor in the cost of removal and disposal. Most professional installers offer this as part of their service, typically charging between $3 and $5 per linear foot. While it might be tempting to save money by doing it yourself, removing an old fence can be a tough job. It often involves digging out concrete footings and hauling away heavy, awkward materials. Letting your installation team handle it saves you a weekend of hard labor and ensures the site is properly cleared for a clean, sturdy installation of your new vinyl fence. Plus, they’ll take care of disposing of the old materials correctly.

Long Island Permit Fees

Depending on where you live in Nassau or Suffolk County, you may need a permit to install a new fence. This is especially true for fences over a certain height or those installed in specific areas, like a front yard. Permit fees on Long Island can range from $50 to $500, and the process involves submitting plans to your local town or village for approval. An experienced local contractor will be familiar with these regulations and can manage the entire permit process for you. This is a huge benefit, as it ensures your project complies with all local building codes and saves you the headache of navigating the paperwork yourself.

Gate and Hardware Upgrades

A fence is more than just a boundary; it needs entry and exit points. The cost of a gate isn’t usually included in the base price per foot, so you’ll want to budget for it separately. A standard vinyl swing gate can add $300 to $1,500 to your total, depending on its width, style, and the hardware you choose. Think about how many gates you’ll need for easy access to your yard, driveway, or pool. You can also select from various hardware options, like decorative hinges or self-latching locks for added security and convenience. These small details can make a big difference in how you use and enjoy your new fence every day.

Ground and Site Preparation

The condition of your property plays a big role in the installation cost. A flat, clear yard is the ideal canvas, but many Long Island properties have slopes, rocky soil, or mature tree roots to contend with. Preparing uneven or difficult terrain requires more labor and specialized techniques to ensure your fence is perfectly straight and secure. This might involve some minor grading or extra care when setting posts. A professional installer will assess your site during the quoting process and account for any necessary landscape preparation. This ensures there are no surprises and that your fence will stand strong and look great, no matter the terrain.

How Vinyl Fencing Compares to Other Materials

Choosing the right fencing material is a big decision, and it often comes down to balancing your budget, desired look, and how much maintenance you’re willing to do. Vinyl is a fantastic all-around option, but seeing how it stacks up against other popular materials like wood, aluminum, and chain-link can help you feel confident in your choice. Each material has its own set of benefits, so let’s break down the key differences to find the perfect fit for your Long Island home.

Vinyl vs. Wood

Many homeowners love the classic look of a wood fence, but it comes with a commitment to upkeep. Wood requires regular staining, sealing, or painting to protect it from rot and weather damage. Vinyl, on the other hand, offers a set-it-and-forget-it advantage. It’s built to withstand the elements without warping, cracking, or fading, and it only needs an occasional wash to look its best. While wood might have a lower initial price tag, a vinyl fence’s durability and minimal maintenance make it a more cost-effective investment over its 20 to 30-year lifespan. It’s a practical choice for anyone who wants lasting beauty without the weekend work.

Vinyl vs. Aluminum

Both vinyl and aluminum are excellent low-maintenance fencing options, but they serve different aesthetic and functional purposes. Aluminum fencing provides a sleek, modern look that’s perfect for securing a property line or pool area without obstructing the view. However, if privacy is your main goal, vinyl is the more affordable solution. An aluminum fence with added privacy panels can be significantly more expensive than a standard vinyl privacy fence. Gappsi offers a wide selection of both fences and netting, so you can compare styles and find the right material that fits your vision and budget.

Vinyl vs. Chain-Link

When budget is the primary concern, chain-link is usually the most affordable fencing material available. It’s a functional choice for defining boundaries and keeping pets contained. However, it offers very little in terms of privacy or curb appeal. For homeowners looking to create a secluded backyard retreat or enhance their property’s appearance, vinyl is a far better option. A beautiful vinyl fence can transform your outdoor space, providing a clean backdrop for your landscaping and adding significant value to your home. The initial investment in vinyl pays off with a more attractive and private yard.

A Quick Cost Comparison

To put it all into perspective, let’s look at some general cost estimates for a 100-foot fence. A wood fence might cost between $2,500 and $5,000, while a vinyl fence typically ranges from $3,000 to $7,800. Aluminum is often the priciest of the three, with costs falling between $7,500 and $13,000. These numbers can fluctuate based on style, height, and installation complexity. While wood seems like the cheapest option upfront, remember to factor in the long-term costs of maintenance and eventual replacement. Vinyl strikes a great balance between initial affordability and lasting value, making it a smart choice for many homeowners.

Why a Vinyl Fence is a Smart Long-Term Investment

When you’re looking at the initial price tag of a fence, it’s easy to focus on the immediate cost. But a fence is more than just a one-time purchase; it’s a long-term addition to your property. This is where vinyl fencing truly stands out as a savvy investment for your home. While the upfront cost might be higher than some other materials, the value it delivers over its lifespan in durability, low maintenance, and curb appeal is unmatched.

Choosing a vinyl fence means you’re investing in peace of mind for decades to come. You’re not just buying a boundary for your yard; you’re selecting a feature that will protect your property, look great with minimal effort, and hold its value through years of Long Island seasons. Think of it as a permanent upgrade that pays you back with time and money saved, all while making your home look its best. Gappsi offers a variety of fences and netting to suit any home, with vinyl being a top choice for homeowners looking for lasting quality.

Lasting Durability

One of the most compelling reasons to choose vinyl is its incredible lifespan. A professionally installed vinyl fence can easily last 20 to 30 years or even longer without losing its structural integrity. Unlike wood, vinyl is not susceptible to rot, termites, or other pests that can cause damage over time. It doesn’t warp or splinter from moisture exposure. What this means for you is a strong, reliable fence that you won’t have to worry about replacing in just a few years. It’s a one-and-done solution that provides security and privacy for your family for a generation.

Minimal Maintenance

If you’d rather spend your weekends enjoying your yard than working on it, a vinyl fence is your best friend. The maintenance required is next to nothing. Forget about the annual scraping, staining, or painting that wood fences demand. Vinyl keeps its clean, fresh look for years with very little help. Most of the time, a simple spray with a garden hose is enough to wash away dirt and grass clippings. For any tougher spots, a little soap and water will do the trick. This saves you countless hours and hundreds of dollars on supplies over the life of the fence, making it a truly low-effort, high-reward home improvement.

All-Weather Performance on Long Island

Long Island weather can be tough on outdoor structures. Between the humid, salty air in the summer and the freezing temperatures and snow in the winter, materials can take a beating. Vinyl is uniquely suited to handle these challenges. Since it’s a non-porous material, it doesn’t absorb moisture, which prevents the rotting, blistering, and peeling that can plague wood fences. It also stands up to the sun’s UV rays without fading or turning yellow, thanks to protective coatings added during manufacturing. This resilience makes it a practical and dependable choice for any Long Island home, ensuring your investment looks great no matter the season. Gappsi’s expertise in masonry construction gives us a deep understanding of how to build outdoor features that last.

Added Property Value and Curb Appeal

A beautiful fence does more than just mark your property line; it frames your home and significantly enhances its curb appeal. A crisp white picket fence or a stately privacy fence can completely transform the look of your property, giving it a polished and well-maintained appearance. This visual upgrade is something potential buyers notice, which can directly translate to a higher property value. By choosing a durable and attractive material like vinyl, you’re making an investment that not only improves your daily life but also provides a tangible return should you ever decide to sell. It’s a key part of a larger home remodeling strategy that adds lasting worth.

Your Pre-Installation Checklist for a Vinyl Fence

Getting a new fence is exciting, but a little planning beforehand makes the whole process smoother. Before the first post goes into the ground, running through this simple checklist will save you time, prevent headaches, and ensure your project goes off without a hitch. Think of it as your roadmap to a beautiful new vinyl fence that you’ll love for years to come. Taking these steps will help you feel confident and prepared as you move forward with your home improvement project.

Check Local Zoning Laws and HOA Rules

Before you fall in love with a specific fence style, it’s smart to handle the administrative details first. Your town in Suffolk or Nassau County will have specific zoning laws about fence height, placement, and even appearance. Many installations require a permit, so you’ll want to factor that into your timeline and budget. If you live in a community with a Homeowners Association (HOA), be sure to review their guidelines, as they can be even more specific than local laws. A professional team can help you manage the paperwork and ensure your new fence installation is fully compliant from day one.

Understand the Installation Process

Deciding between a DIY project and hiring a professional is a key step. While installing a fence yourself can seem like a good way to save money, it requires specialized tools, significant time, and a lot of precision. An improperly installed fence can sag or lean over time. Professional installation ensures the job is done correctly and efficiently. Our teams have the experience to handle any challenges your property might present, from uneven ground to complex layouts. This expertise in construction and masonry guarantees your fence posts are set perfectly for a stable, long-lasting result.

Know the Project Timeline

Having a clear idea of the project timeline helps you plan accordingly. The total time isn’t just the days of active installation. It also includes ordering and receiving materials, preparing the site, and accounting for potential weather delays, especially on Long Island. When you work with an experienced contractor, you’ll get a realistic schedule that outlines each phase of the project. We believe in clear communication, so you’ll always know what to expect and when. You can even watch our teams in action on past projects to get a better sense of the workflow and the quality of our craftsmanship from start to finish.

Review Your Warranty Coverage

A new vinyl fence is an investment in your home, and a good warranty protects that investment. Before signing off, make sure you understand what the warranty covers. Typically, a strong warranty from the manufacturer will cover issues like cracking, peeling, or abnormal discoloration. It’s a sign that the company stands behind the quality of its materials. At Gappsi, we only source high-quality products from the Gappsi Store and provide a workmanship guarantee, giving you complete peace of mind. This final check ensures your beautiful new fence is protected for the long haul.

Keep Your Vinyl Fence Looking New

One of the best things about choosing a vinyl fence is how little upkeep it needs. Unlike wood, you will not spend your weekends staining or repainting it. Still, a little attention goes a long way in keeping your fence looking pristine for years. These simple habits will protect your investment and maintain your home’s curb appeal.

Simple Cleaning Tips

Vinyl fences are famously low maintenance. For most of the year, a simple spray with a garden hose is enough to wash away dirt and grass clippings. If you notice tougher spots from pollen or grime, a soft cloth with a mild soap and water solution usually does the trick. While some suggest a pressure washer, it’s best to be cautious as high pressure can cause damage. For stubborn stains or widespread discoloration, our professional restoration and sealing team has the expertise to safely clean exterior surfaces without harming them.

Inspect for Damage After Storms

Long Island weather can be unpredictable, so it’s a good habit to walk the perimeter of your fence after a major storm. Check for any signs of stress, like loose posts, cracked panels, or a gate that no longer latches properly. Catching these small issues early prevents them from becoming larger, more costly problems down the road. A quick inspection ensures your fence remains secure and stable. If you do find damage, a professional can make sure the repair is done right, maintaining the fence’s structural integrity. Our team is experienced with all types of fences and netting.

Prevent Fading and Discoloration

The best way to prevent fading is to start with a high-quality product. Thicker, stronger vinyl is designed to resist sun damage and will hold its color much longer than thinner, less durable options. This is why we prioritize premium materials in our installations. You can also help by being mindful of your landscaping. Avoid spraying lawn fertilizers or chemicals directly on the fence, as they can cause stains. It’s also wise to trim back any branches or shrubs that might rub against the panels, which can cause scuffs and scratches over time.

How to Get an Accurate Vinyl Fence Quote

Getting a clear and accurate quote for your new vinyl fence is the best way to avoid unexpected costs and feel confident about your project. While it’s tempting to look for a simple online calculator, the final price depends on your specific property and choices. A little preparation on your end will help any contractor provide a number you can actually rely on. By gathering some basic information, you can ensure the quotes you receive are a true reflection of your project’s scope.

This process empowers you to compare offers effectively and choose a partner who understands your vision and budget. Let’s walk through the three key steps to getting a detailed and trustworthy vinyl fence quote for your Long Island home. Taking the time to do this now will save you headaches later and ensure your fencing project goes smoothly from start to finish.

Measure Your Property

Before you even pick up the phone, grab a measuring tape and walk your property line. The most critical piece of information for any quote is the total length of the fence you need, measured in linear feet. If you have a property survey, it can be a great resource for this step. While you’re measuring, also make a note of the terrain. Are there steep slopes, trees, or other obstacles along the fence line? This information will be helpful for your contractor. Finally, think about the purpose of your fence. Do you need a six-foot privacy fence for the backyard or a four-foot picket fence for the front? Having a basic idea of the length and height will give you a solid foundation for your conversation with a fencing professional.

Choose a Style That Fits Your Budget

Vinyl fencing comes in a wide range of styles, and your choice will significantly impact the cost. A standard six-foot privacy fence is a popular and often cost-effective option. However, if you’re interested in more decorative elements, the price will increase. Features like lattice tops, custom post caps, alternating panel colors, or a semi-privacy design add to the material and labor costs. For example, a professionally installed 100-foot privacy fence can range from $2,500 to $6,000, depending on the material quality and site conditions. Knowing your budget ahead of time helps you narrow down the different styles and find one that gives you the look you want without breaking the bank.

Work With a Professional Long Island Contractor

Once you have your measurements and a style in mind, it’s time to connect with a reputable contractor. It’s always a good idea to get at least two or three quotes to compare. When you receive a quote, make sure it’s itemized. A professional contractor should be able to provide a detailed breakdown of the costs for materials, labor, permits, and any other services like old fence removal. This transparency helps you understand exactly what you are paying for and allows you to compare different offers fairly. A professional Long Island contractor will also visit your property to confirm measurements and assess the terrain, ensuring their quote is as accurate as possible.

Related Articles

Frequently Asked Questions

Why is there such a wide price range for a vinyl fence? The price for a vinyl fence can vary quite a bit because it’s a custom project tailored to your home. The final cost depends on several key factors, including the fence’s height, its style (like a simple picket versus a solid privacy fence), and the quality of the vinyl you choose. Things like adding decorative post caps, a lattice top, or gates will also affect the price. A professional quote will account for all these details to give you an accurate number.

Can I install a vinyl fence myself to save money? While a DIY installation might seem like a way to cut costs, it’s a job that requires a lot of precision. Setting posts perfectly level and in concrete to withstand Long Island’s weather is a real skill. An improperly installed fence can sag or lean, leading to more expensive repairs later. Hiring a professional ensures the job is done right the first time, giving you a secure, long-lasting fence and saving you a lot of time and physical labor.

How long does the entire fencing project usually take? The timeline for a new fence involves more than just the installation days. You should plan for a few weeks from start to finish. This includes the time it takes to get a quote, finalize your design, order and receive the materials, and secure any necessary permits from your town. The actual installation on your property might only take a few days, depending on the size and complexity of the job.

Will a vinyl fence really hold up to Long Island’s weather for decades? Yes, a high-quality vinyl fence is an excellent choice for our local climate. Unlike wood, vinyl doesn’t absorb moisture, so it won’t rot, warp, or splinter from the humid summers and wet winters. Premium vinyl also contains UV inhibitors that protect it from fading or becoming brittle in the sun. It’s designed to handle everything from salty air to snow, which is why it’s such a durable, long-term investment for homes here.

Do I really need to worry about getting a permit for my fence? Absolutely. Most towns and villages across Nassau and Suffolk County have specific rules about fence height, style, and how close they can be to your property line. Getting a permit ensures your project is legal and up to code, which protects you from potential fines or having to take the fence down. An experienced local contractor will be familiar with your town’s requirements and can manage the permit process for you, making it a stress-free part of the project.

Share this page:
A new white vinyl fence installation in progress in a backyard.

Vinyl Fence Installation Price Per Foot: A Cost Guide

Figuring out the cost of a new vinyl fence for your Long Island home can feel like trying to solve a puzzle with missing pieces. You often hear contractors talk about pricing “per linear foot,” but that number is only a single part of the larger picture. The final cost of your project is shaped by many variables, including the fence style you choose, the height you need, the specific layout of your yard, and even the quality of the materials. This guide is designed to put all the pieces together for you. We will break down what influences the vinyl fence installation price per foot so you can understand a professional quote and create a realistic budget for a fence you’ll love for years.

Key Takeaways

  • Budget for the Whole Project, Not Just the Fence: The price per linear foot is only part of the equation. Your final cost will also depend on fence style, height, material quality, site preparation, gates, and any necessary permits.
  • Choose Your Installer as Carefully as Your Fence: The quality of the installation determines the fence’s longevity and appearance. Always get detailed quotes, check for proper licensing and insurance, and review a contractor’s portfolio of past work.
  • Invest in Low Maintenance for Long-Term Savings: Although vinyl may have a higher initial cost than wood, it saves you significant time and money in the long run. You avoid the recurring costs and effort of painting, staining, and rot repair.

What’s the Price Per Foot for a Vinyl Fence?

Figuring out the cost of a new vinyl fence can feel a bit like a puzzle. You’ll often hear contractors and suppliers talk about price “per linear foot,” but what does that really mean for your total budget? Think of the per-foot price as a starting point. The final cost of your project will depend on several things, like the fence style you choose, the layout of your yard, and the specific materials used. Let’s break down the numbers so you can get a clearer picture of what to expect for your Long Island home.

Average Cost Range

As a general guideline, installing a standard 100-foot vinyl fence can range from about $3,000 to $7,800. That’s a pretty wide range, I know. This variation comes from the huge number of options available. A simple, shorter fence will be on the lower end, while a tall privacy fence with decorative posts and gates will be on the higher end. This estimate helps you set a basic budget, but the details are what will really shape the final price tag for your specific project.

Linear Foot vs. Total Project Cost

When you get a quote, it will likely be broken down by the linear foot. This cost typically falls between $15 and $78 per foot, a price that usually includes both the fencing materials and the professional installation. While this number is helpful for comparing different material qualities or styles, remember to focus on the total project cost. This final number gives you the complete picture, covering everything from the first post to the last gate latch. Gappsi offers a variety of fences and netting to suit your style and budget.

Why Smaller Jobs Can Cost More Per Foot

It might seem counterintuitive, but you could see a higher price per linear foot for a very short fence. Think of it this way: contractors have fixed costs for every job they take on. These include things like travel time, insurance, and ensuring their crew is paid for their time on-site. For a small project, these base costs are spread over fewer feet of fencing, which can bump up the per-foot rate. It’s a way for the installation company to make sure the project is worthwhile while still delivering high-quality work.

What Factors Influence Your Vinyl Fence Cost?

When you start getting quotes for a new vinyl fence, you’ll quickly see that the price per linear foot is just a starting point. The final cost of your project depends on several key variables that go beyond a simple length measurement. Think of it like a recipe: the final dish is a sum of all its ingredients and the effort it takes to prepare it. Understanding these factors will help you read a quote with confidence and see exactly where your money is going. From the height of the fence to the texture of the vinyl, every choice plays a part.

A professional quote from a company like Gappsi will break down these elements, giving you a clear picture of the total investment. The goal is to find a balance between your budget and your vision for the perfect backyard. Whether you’re looking for simple privacy or a decorative statement, knowing what drives the cost will empower you to make the best decisions for your home. Our team specializes in installing a variety of fences and netting to suit any property.

Fence Height and Style

One of the most direct factors affecting your fence’s cost is its size. A six-foot privacy fence will naturally cost more than a four-foot picket fence simply because it requires more material. But style plays an equally important role. A simple, solid panel is the most straightforward option. If you want to add more visual interest with features like a lattice top, decorative post caps, or a scalloped design, you can expect the price to increase. These stylistic touches require more intricate manufacturing and add a bit of extra time to the installation process, but they also give your fence a custom, polished look that can significantly enhance your home’s curb appeal.

Material Quality and Thickness

Not all vinyl is created equal. The quality and type of vinyl you choose will have a major impact on both the upfront cost and the long-term durability of your fence. Standard white vinyl is typically the most budget-friendly option. However, if you prefer a different look, you can explore colored vinyl or even textured styles that mimic the appearance of wood grain. These premium options cost more but can create a unique aesthetic. Beyond color and texture, the thickness of the vinyl matters. Higher-quality, thicker vinyl offers superior strength and better resistance to fading and weathering, making it a worthwhile investment for a fence that will look great for years to come.

Labor Costs on Long Island, NY

The cost of labor is a significant part of any professional fence installation, and it’s influenced by the complexity of the job. On Long Island, labor rates reflect the skill and experience required to build a fence that can withstand coastal weather and last for decades. A professional crew does more than just dig holes and place posts. They ensure every post is perfectly level, properly set in concrete, and aligned for a flawless finish. Hiring an experienced team like Gappsi means you’re paying for expertise, efficiency, and the peace of mind that comes with knowing your fence is installed correctly and securely. This level of craftsmanship is a core part of our home remodeling philosophy.

Your Yard’s Condition and Terrain

An ideal installation site is a flat, clear, and easily accessible stretch of land. However, most yards have their own unique challenges. The specific conditions of your property can influence labor costs. If your yard is on a slope, the installation team will need to use special techniques to ensure the fence follows the contour of the land gracefully. Rocky soil or large tree roots can make digging post holes much more difficult and time-consuming. Similarly, if the fence line is hard to access with equipment, it may require more manual labor. A thorough site assessment is key to getting an accurate quote that accounts for the unique terrain of your landscape.

Local Permits and Regulations

Before any work begins, it’s important to consider local building codes. Most towns and villages on Long Island have specific regulations regarding fence height, style, and placement, especially for properties on corner lots or near pools. Securing the right permits is a critical step, and the fees can vary from one municipality to another. This is a task you don’t have to handle on your own. A reputable contractor will be familiar with the local requirements in areas like Suffolk and Nassau County and will manage the entire permit application process for you. This service ensures your project is fully compliant and saves you from the hassle of dealing with paperwork.

How Do Vinyl Fence Styles Compare in Price?

The style you choose for your vinyl fence does more than just define its look; it’s one of the biggest factors determining your total project cost. Different styles use varying amounts of material and require different levels of labor to install, which is reflected in the price per linear foot. Think about what you want your fence to do. Are you creating a private backyard for quiet weekends and family gatherings? Or are you looking to add a touch of classic charm to your front yard that welcomes the neighborhood? The right fence becomes an extension of your home’s personality.

From the complete seclusion of a privacy fence to the open, rustic feel of a ranch rail fence, each option serves a unique purpose for your property. Understanding these differences is the first step in aligning your vision with your budget. At Gappsi, we offer a wide selection of fences and netting to match your home’s aesthetic and functional needs, ensuring you find the perfect fit for your Long Island home. Let’s break down the most popular styles so you can see how their costs compare and decide which one is right for you.

Privacy Fences

If creating a secluded backyard retreat is your top priority, a privacy fence is the way to go. These fences feature solid, interlocking panels that block sightlines and reduce noise, giving you maximum security and solitude. Because they use the most material, they are one of the more premium options. You can typically expect the cost for a standard 6-foot tall vinyl privacy fence to range from $30 to $60 per linear foot. For a 100-foot project, this translates to an installation cost between $3,000 and $6,000. While it’s a significant investment, a privacy fence transforms your yard into a truly personal oasis.

Semi-Privacy Fences

A semi-privacy fence offers a beautiful compromise between seclusion and openness. Styles like shadowbox or those with lattice tops provide a sense of enclosure while still allowing for airflow and light to pass through. This makes them a popular choice for homeowners who want to define their space without feeling completely boxed in. The cost for a semi-privacy fence generally falls between $25 and $50 per linear foot. They are a more affordable alternative to full privacy fences and work wonderfully for creating friendly boundaries with neighbors or enclosing a swimming pool area without obstructing the view.

Picket Fences

Nothing says classic American charm quite like a picket fence. This style is perfect for enhancing your home’s curb appeal and defining your front yard or garden without blocking the view. Because they use less material than other styles, picket fences are one of the most budget-friendly vinyl options available. A typical 4-foot tall picket fence costs between $15 and $30 per linear foot, which means a 100-foot installation could run from $1,500 to $3,000. It’s an excellent choice if your main goal is aesthetic appeal and clear property demarcation rather than total privacy.

Decorative and Ranch Rail Fences

For those looking to make a statement, decorative and ranch rail fences are designed to be architectural features. Ranch rail fences, with their long, open rails, are ideal for defining the borders of larger properties without interrupting the landscape. Decorative fences can include custom designs, colors, and post caps to create a truly unique look. These styles represent the higher end of the price spectrum, often ranging from $60 to $78 per linear foot. The cost reflects their custom nature and role as a key element in your home’s overall landscape design, making them a true investment in style.

A Look at Top Vinyl Fence Brands

When you start shopping for a vinyl fence, you’ll quickly see there are several brands to choose from. While having options is great, it can be tough to know which one offers the best quality and value for your home. A brand’s reputation is built over years, but the quality of the final product also depends on the specific product line and, most importantly, the skill of the installer. Let’s look at a couple of popular brands and discuss what really matters when making your final choice for your fences and netting project.

Bufftech

Bufftech has long been a recognized name in the vinyl fencing world, often associated with durable and quality products. They offer a wide range of styles, which gives homeowners plenty of design flexibility. However, it’s always smart to do your homework. While the brand has a strong historical reputation, some users have noted that product consistency can be a concern in recent years. This is why looking at recent reviews and talking to your installer about their direct experience with the material is so important. A trusted contractor will guide you toward the most reliable product lines based on their hands-on knowledge.

Illusions Vinyl Fence

For those who like to support local businesses, Illusions Vinyl Fence is a fantastic option. Their products are proudly manufactured in the USA by a company right here in Medford, New York. With almost five decades of experience, their parent company has built a solid reputation for quality and reliability in the fencing industry. Choosing a local manufacturer can sometimes mean better availability and a team that understands the specific needs of Long Island properties. Their commitment to quality control and extensive product range makes them a strong contender for any vinyl fence project in our area.

What to Look for Beyond the Brand

Ultimately, the brand name on the box is only one piece of the puzzle. A top-tier vinyl fence can perform poorly if it’s not installed correctly. That’s why it’s critical to look beyond just the brand name and focus on the reputation of your installation company. A contractor with a history of positive reviews and a portfolio of beautiful work shows a commitment to quality service. The installer is the one who ensures your fence posts are set correctly, the panels are level, and the gates function smoothly for years to come. The best brand means little without expert craftsmanship to bring it all together.

Are There Hidden Costs in a Vinyl Fence Installation?

When you get a quote for a new vinyl fence, it’s easy to focus on the price per linear foot. But that number is just one part of the story. A complete fence project involves more than just posts and panels, and several factors can influence your final invoice. Thinking about these potential costs ahead of time helps you create a realistic budget and prevents surprises down the road. From preparing your yard to adding the finishing touches, each step has a potential price tag. A transparent contractor will walk you through all of these, but it’s always smart to know what to ask about. Let’s break down the common costs that might not be included in an initial estimate.

Old Fence Removal

If you’re replacing an old fence, the first step is getting rid of it. This isn’t just a matter of pulling up a few posts. Removing an old fence involves dismantling the structure, hauling away the materials, and disposing of them properly. This process requires labor and time, which adds to the overall project cost. Some homeowners might consider tackling this as a DIY project to save money, but it can be more work than you expect, especially with stubborn posts set in concrete. When you get a quote, ask if old fence removal is included so you have a clear picture of the total investment from start to finish.

Site Prep and Grading

The condition of your yard plays a big role in the installation process and its cost. A perfectly flat, clear lawn is the ideal scenario, but most yards have their own unique challenges. If your property has steep slopes, rocky soil, or large tree roots, your installation team will need extra time and possibly specialized equipment to dig post holes and ensure the fence is level. This additional labor naturally affects the price. Proper site preparation is essential for a stable and long-lasting fence, so it’s a cost that directly invests in the quality of the final product. A thorough site assessment is key to getting an accurate quote.

Gates, Hardware, and Decorative Extras

Your fence’s main job might be to create privacy or define a boundary, but its style and features are what make it your own. The base price for a vinyl fence typically covers the standard panels and posts. However, features like gates, decorative post caps, lattice tops, and premium hardware are considered upgrades and will increase the total cost. A simple walk-through gate will cost less than a wider, double-door gate for a driveway, for example. While these extras add to the budget, they also add significant functional and aesthetic value to your property. Be sure to discuss all the custom touches you want with your contractor.

Contractor Fees and Permits

Working with a professional contractor ensures your fence is installed correctly and safely, but it’s important to understand what their fees cover. A reputable company’s quote should be comprehensive, but always clarify if it includes project management, labor, and cleanup. Another crucial cost is building permits. Many towns on Long Island require a permit for fence installation to ensure it meets local zoning laws and safety codes. The cost of a permit can vary, but it’s a necessary expense to keep your project compliant. Skipping this step can lead to fines and headaches, so it’s a cost you definitely don’t want to avoid.

Is Vinyl Fencing a Good Investment?

When you’re planning a new fence, it’s easy to focus on the initial price tag. But a truly smart home improvement decision considers the long-term value, not just the upfront cost. Vinyl fencing is a perfect example of this. It’s an investment in your property’s curb appeal, your security, and just as importantly, your free time. Looking at how vinyl stacks up against other materials and what it means for your maintenance checklist shows why it’s such a popular choice for Long Island homeowners.

Vinyl vs. Wood

Choosing between vinyl and wood often comes down to a simple question: do you want to pay more now or pay more later? Wood fencing typically has a lower initial cost, which can be tempting. However, that lower price comes with a lifetime of maintenance. Wood is susceptible to rot, warping, and insect damage, requiring regular staining, painting, and sealing to keep it looking good and standing strong.

Vinyl, on the other hand, is a long-term solution. While the upfront cost is higher, a quality vinyl fence can last for decades with very little upkeep. It’s a durable material that won’t rot or splinter. This means you can spend your weekends enjoying your backyard instead of working on it, saving you significant time and money on maintenance supplies over the life of your fence.

Vinyl vs. Aluminum

Aluminum is another popular fencing material, known for its strength. Yet, when it comes to appearance and everyday durability, vinyl often has the edge. Aluminum fences can be prone to denting from things like lawnmowers or stray baseballs, and over time, their finish can corrode or fade, especially in the salty air we get on Long Island.

High-quality vinyl fencing offers a clean, attractive appearance that holds up beautifully for years. It’s engineered to be resilient and flexible, resisting impacts that might dent a metal fence. Plus, the color is solid all the way through the material, so scratches are much less noticeable. When you want a fence that combines strength with lasting curb appeal, vinyl is an excellent choice.

The Value of Low Maintenance and Warranties

Perhaps the most compelling reason to choose vinyl is the minimal maintenance it requires. Unlike wood, you will never have to paint or stain a vinyl fence. It doesn’t absorb moisture, so you don’t have to worry about rot or decay. A simple cleaning with soap and water is usually all it takes to keep it looking fresh and new. This freedom from constant upkeep is a value you can’t put a price on.

Top manufacturers stand behind their products with impressive warranties, often for a lifetime. Many of these warranties are even transferable to the next homeowner, which can be a great selling point if you ever decide to move. This guarantee gives you peace of mind, knowing your fencing investment is protected for the long haul.

How to Budget for Your Vinyl Fence Project

Creating a budget for your new vinyl fence is one of the most important steps in the planning process. It’s about more than just finding the lowest price; it’s about understanding what you’re paying for and ensuring you make a smart investment that adds value to your home for years to come. A well-planned budget helps you avoid surprises and allows you to choose the right materials and features without compromising on quality. By thinking through the costs ahead of time, you can move forward with confidence, knowing your project will stay on track financially.

To get started, you’ll want to break the process down into a few manageable steps. First, get a clear picture of your project’s scope by measuring your property. Next, use that information to establish a realistic total budget based on typical costs. Finally, learn where you can make savvy choices to save money without sacrificing the durability or beauty of your fence. This approach will help you balance your vision with your finances, leading to a result you’ll love. At Gappsi, we believe an informed homeowner is a happy homeowner, and we’re here to provide the clarity you need for your Long Island fence installation.

Measure Your Property Accurately

Before you can get a reliable cost estimate, you need to know exactly how much fencing you need. Grab a tape measure and walk your property line to determine the total length in feet. This is the single most significant factor in your project’s cost. While you’re at it, think about your desired fence height. A six-foot privacy fence will require more material than a four-foot picket fence, which will be reflected in the price. Also, make a note of any slopes, tricky corners, or obstacles like trees and sheds. A clear and accurate measurement is the foundation of a solid budget and will help your contractor provide a precise quote right from the start.

Set a Realistic Total Budget

Once you have your measurements, you can start to form a realistic budget. As a general guideline, homeowners can expect the cost to install a vinyl fence to range from around $30 to $80 per linear foot. For a standard 100-foot project, this could place the total cost anywhere between $3,000 and $8,000. Remember, these are just averages. The final price depends on the fence style, material quality, and your property’s specific needs. Use these numbers as a starting point, but the best way to understand the true cost for your home is to get a detailed quote from a professional who can assess your Long Island property in person.

How to Save Money Without Sacrificing Quality

Everyone wants the best value, and there are ways to be cost-effective without cutting corners. While it’s smart to get a few different quotes, focus on the overall value, not just the lowest number. A contractor with a strong portfolio and great reviews, like the projects you can see on our YouTube channel, often indicates higher quality work that lasts longer. You can also manage costs by being mindful of add-ons. Gates, for example, can add several hundred to over a thousand dollars each, and decorative post caps or hardware will also increase the price. By choosing a standard style and minimizing extras, you can keep your budget in check while still getting a beautiful, high-quality vinyl fence.

What to Look for in a Vinyl Fence Contractor

Choosing the right contractor is just as important as picking the perfect fence style and material. The quality of the installation determines how your fence will look and perform for years to come. A great installer ensures every post is secure, every panel is level, and every gate functions smoothly. A subpar job, on the other hand, can lead to sagging sections, uneven lines, and problems down the road, even with the best materials. This is why your choice of installer is a critical part of your investment.

Finding a reliable partner for your project means looking for a team with proven expertise, transparent practices, and a solid reputation. You want a company that communicates clearly and stands behind its work. Think of it as hiring a long-term partner for your home’s security and curb appeal. Taking the time to vet your options thoroughly will give you peace of mind and a beautiful, durable fence that you can enjoy without worry. At Gappsi, we manage every aspect of your fence installation, from design to completion, ensuring a seamless process from start to finish.

Comparing Detailed Quotes

Your first step is to gather at least three detailed quotes from different companies. This isn’t about finding the absolute cheapest option; it’s about understanding what you get for your money. A trustworthy contractor will provide an itemized quote that breaks down all the costs, including materials, labor, permit fees, and old fence removal. Be wary of any quote that’s just a single number with no details.

When you have clear, itemized quotes, you can compare them accurately. Does one contractor use thicker, higher-quality vinyl? Is gate hardware included in the price? A detailed quote shows transparency and professionalism, giving you a clear picture of where your investment is going. It helps you avoid surprise charges and ensures you’re comparing equivalent services.

Questions to Ask Before You Hire

Before you sign a contract, it’s time to ask some direct questions. Start by asking for their license and insurance information, a non-negotiable for any work done on your property. Look for a contractor with a history of positive customer reviews and ask to see a portfolio of their recent vinyl fence projects. You can often see examples of a company’s work on their YouTube channel or website.

Don’t be shy about asking for references from past clients in your area. Also, inquire about their warranty. What does it cover and for how long? A reputable installer will offer a warranty on their workmanship in addition to the manufacturer’s warranty on the materials. Finally, ask about their timeline. A clear start and end date helps set expectations for everyone involved.

Red Flags to Watch For

Knowing what to avoid is just as important as knowing what to look for. A major red flag is a contractor who pressures you to make a quick decision or asks for a large cash deposit upfront. Professional companies have established payment schedules. Another warning sign is a lack of a professional presence, like a proper website, physical address, or branded vehicles.

Pay attention to communication. If a company is slow to return your calls or emails during the quoting process, imagine the service you’ll receive after they have your deposit. Vague answers about warranties, timelines, or materials are also cause for concern. A contractor who can’t provide clear, confident answers may not be the right fit for your home improvement project.

Your Long Island Vinyl Fence Installation with Gappsi

When you’re ready to move forward with a vinyl fence on Long Island, it helps to have a clear picture of the investment. The price for a professional vinyl fence installation can vary, but industry data provides a helpful baseline. Costs typically range from $15 to $78 per linear foot, depending on factors like fence height, style, and the specific quality of the vinyl you choose. For a standard 100-foot project, a recent cost installation guide shows that homeowners might see a total between $3,000 and $7,800.

While the upfront cost can be higher than for a wood fence, vinyl offers incredible long-term value. A well-installed vinyl fence can last 20 to 30 years with very little maintenance, saving you time and money on future repairs and upkeep. This durability is what makes it such a popular and cost-effective choice for so many homeowners over the long run. It stands up to Long Island weather without warping, rotting, or needing to be repainted.

At Gappsi, we specialize in providing high-quality fencing solutions that are built to last. We understand that a fence is more than just a boundary; it’s a key part of your home’s security, privacy, and overall aesthetic. Our team works with you to select the perfect style and ensures the installation is handled with expert care. Choosing Gappsi means you’re making a solid investment in your property, one that will enhance its beauty and function for decades. We are committed to using superior products and delivering exceptional service, giving you peace of mind and a result you’ll love.

Related Articles

Frequently Asked Questions

Why should I choose vinyl fencing when wood is cheaper upfront? That’s a great question that gets to the heart of long-term value. While a wood fence often has a lower initial price, it requires a lifetime of work, including regular staining, sealing, and repairs to prevent rot and warping. A vinyl fence is an investment in your time. It resists moisture and pests, so you will never have to paint or stain it. Over the years, the money and weekends you save on maintenance make vinyl a very smart financial choice.

How long can I expect a vinyl fence to last on Long Island? A professionally installed, high-quality vinyl fence is built to handle Long Island weather, from humid summers to coastal storms. You can realistically expect it to last for 20 to 30 years, or even longer. The key is using thick, durable vinyl that resists fading and impact, combined with expert installation that ensures posts are set securely to withstand strong winds. It’s a truly resilient material perfect for our local climate.

What’s more important: the fence brand or the installer? The installer, without a doubt. While a good brand provides quality materials, those materials are only as good as the hands that put them together. An expert contractor ensures your fence is perfectly straight, the posts are set deep in concrete, and the structure is secure. A poor installation can make even the most expensive fence fail, so investing in a reputable, experienced installation team is the most important decision you’ll make.

Are gates and decorative caps included in the per-foot price? Typically, the price per linear foot covers the standard fence panels and posts for a specific style. Gates, decorative post caps, premium hardware, and lattice tops are usually considered upgrades and are priced separately. This is because their costs can vary widely based on size and style. A good quote will break these items out for you, so you can see exactly what you are paying for and make choices that fit your budget.

My yard isn’t perfectly flat. How does that affect the installation and cost? Most yards have some slopes or uneven ground, and a professional installer knows exactly how to handle it. For sloped terrain, we use a technique called “racking” or “stepping” to ensure the fence follows the contour of your land beautifully. This requires more skill and time than installing on flat ground, so it can add to the labor cost. A site assessment is crucial for an accurate quote that accounts for your property’s unique landscape.

Share this page: