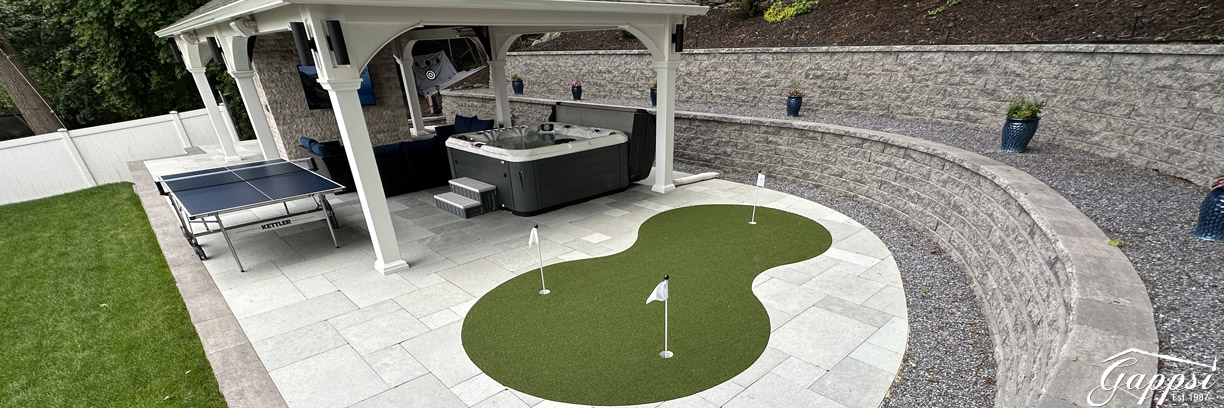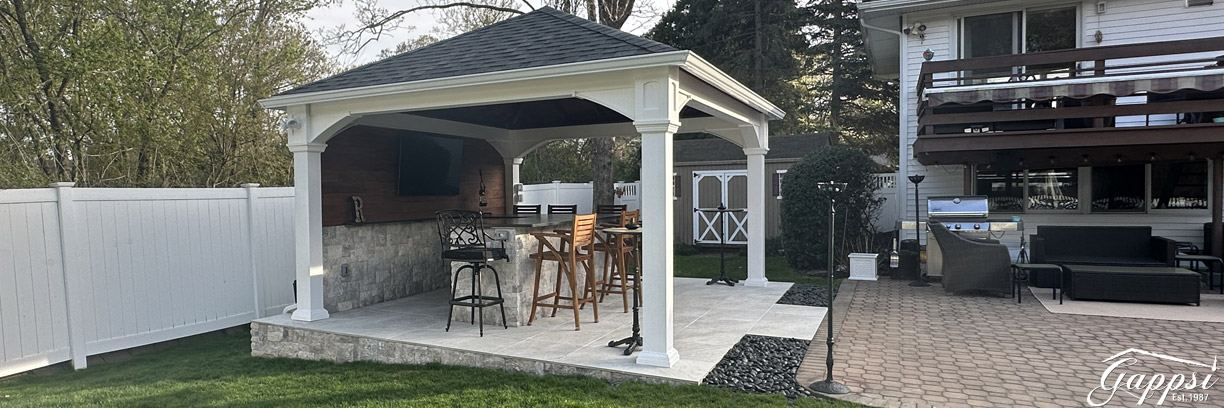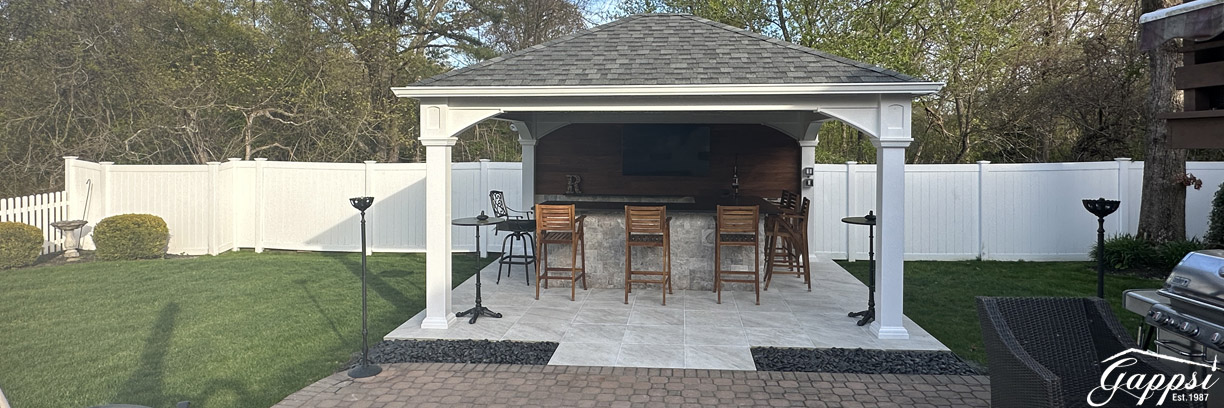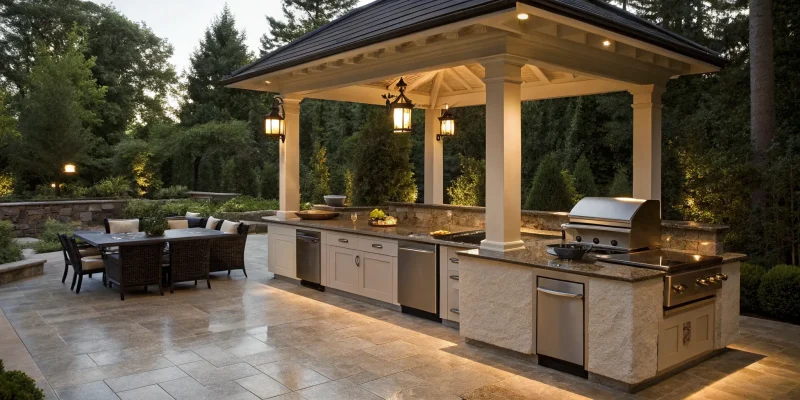
Luxury outdoor kitchen under a custom pavilion with granite countertops and stainless steel appliances.

Your Guide to the Perfect Outdoor Kitchen Pavilion

Hosting a backyard barbecue often means running back and forth to your indoor kitchen, juggling platters and supplies. Then there’s the weather—a sudden rain shower or intense sun can quickly send everyone inside. An outdoor kitchen pavilion solves these problems for good. It creates a self-sufficient, comfortable, and sheltered space where everything you need is within arm’s reach. Think of it as your dedicated cooking pavilion, a permanent setup that makes entertaining feel truly effortless. This is how you create a pavilion outdoor kitchen that lets you be a relaxed host who actually enjoys the party.

Key Takeaways

  • Plan for Flow, Not Just Footprint: A truly functional outdoor kitchen depends on an intuitive layout. Consider how you’ll move between cooking, prepping, and socializing zones to create an effortless space that makes hosting a joy.
  • Choose Materials for Longevity, Not Just Looks: Your outdoor kitchen must withstand Long Island’s weather. Investing in durable, weather-proof materials like natural stone, porcelain, and stainless steel from the start means less maintenance and a beautiful space that lasts for years.
  • Hire an Outdoor Living Specialist: This is a complex project requiring expertise in masonry, utilities, and outdoor construction. Partnering with a licensed and insured contractor who specializes in outdoor kitchens is the best way to protect your investment and ensure a high-quality result.

What Defines a Luxury Outdoor Kitchen Pavilion?

An outdoor kitchen is more than just a grill on a patio. It’s a complete extension of your home, a place where you can cook, dine, and entertain without sacrificing comfort or style. When you pair a high-end kitchen with a beautifully designed pavilion, you create a true luxury outdoor living experience. This combination transforms your backyard into a destination, blending sophisticated design with practical function. It’s about crafting a space that feels both elegant and effortlessly usable, allowing you to host a dinner party or enjoy a quiet family meal outdoors with all the conveniences of your indoor kitchen. The difference is in the details: premium materials, thoughtful layout, and seamless integration with your home and landscape.

More Than a Grill: The Modern Outdoor Kitchen

A modern luxury outdoor kitchen is a fully equipped culinary workspace designed to withstand the elements while looking incredible. Forget rolling a charcoal grill out from the garage. We’re talking about a permanent, custom-built setup featuring high-performance appliances, from built-in gas grills and smokers to pizza ovens and outdoor refrigerators. The foundation of this luxury lies in the materials. Think durable, gorgeous countertops made from porcelain or natural stone that can handle Long Island weather, paired with custom cabinetry that offers ample storage. A well-designed layout also includes a functional sink, plenty of prep space, and task lighting, ensuring you can cook a gourmet meal as easily outside as you can inside. It’s this level of detail and quality that makes it a worthwhile investment in your home and lifestyle.

Why a Pavilion Creates an All-Weather Oasis

The pavilion is what truly elevates an outdoor kitchen into an all-season entertainment hub. This isn’t just any roof; it’s a permanent architectural feature that provides essential protection from the sun and rain, instantly extending the usefulness of your outdoor space. Modern pavilions and pergolas can be customized with features like adjustable louvered roofs that let you control the amount of sun or shade with the touch of a button. You can also integrate amenities like ceiling fans for hot summer days, infrared heaters for cool autumn nights, and built-in lighting and sound systems to set the perfect mood. By creating a sheltered, comfortable environment, the pavilion ensures your gatherings are never cut short by unpredictable weather, making it the ultimate centerpiece for outdoor living.

A Brief History: From Ancient Gardens to Modern Backyards

The idea of creating a dedicated, sheltered spot to enjoy the outdoors is anything but new. This desire for a beautiful structure in a garden setting actually goes back thousands of years. Structures similar to gazebos appeared in Egyptian gardens about 5,000 years ago and were also mentioned in ancient Chinese and Persian writings. Throughout history, their purpose has remained consistent: to offer a comfortable place for shade, shelter, and rest while enhancing the beauty of the landscape. This long tradition of blending architecture with nature is the foundation for the sophisticated outdoor living spaces we design today, transforming a simple backyard into a personal retreat.

Understanding Pavilions, Gazebos, and Other Structures

While rooted in history, today’s outdoor structures have evolved far beyond simple garden accents. A gazebo is typically a freestanding, often octagonal, structure with a solid roof, perfect for creating an intimate focal point in a garden. A pavilion, however, is usually larger, rectangular, and open on all sides, specifically designed to cover a patio or outdoor kitchen. At Gappsi, we specialize in creating custom pavilions and pergolas that serve as permanent, architectural extensions of your home. Built with durable materials meant to last, these structures provide reliable shelter and a defined space for dining and entertaining, making them the ideal partner for a luxury outdoor kitchen.

Don’t Build Without These Outdoor Kitchen Features

A luxury outdoor kitchen pavilion is more than just a grill under a roof—it’s a fully functional and inviting space designed for cooking, dining, and entertaining. To create a truly exceptional experience, you’ll want to incorporate features that blend high-end performance with comfort and style. Think about how you plan to use the space. Will it be for intimate family dinners, large parties, or quiet morning coffees? Your answer will guide which features are essential for your backyard oasis. From state-of-the-art cooking equipment to materials that can handle Long Island weather, every detail contributes to the final result.

The Best Appliances for Your Cooking Pavilion

The heart of any kitchen is its appliances, and an outdoor kitchen is no different. Go beyond a standard grill and consider a complete cooking setup that rivals your indoor kitchen. This means incorporating high-performance, built-in appliances for convenience and versatility. Think about a professional-grade grill, a dedicated smoker, or a wood-fired pizza oven. Don’t forget essentials like an outdoor-rated refrigerator, a sink for easy cleanup, and stainless steel storage. The beauty of a custom pavilion is that you can design the layout to perfectly house these features.

Materials and Finishes That Withstand the Elements

Your outdoor kitchen needs to look great and stand up to the elements, from summer sun to winter snow. Choosing premium, weather-proof materials is non-negotiable for a lasting investment. For countertops, select durable surfaces like granite, quartzite, or high-quality porcelain pavers that resist stains, heat, and fading. The pavilion structure should be built from robust materials like powder-coated aluminum, cedar, or stone to handle heavy snow and high winds. For cabinetry, marine-grade stainless steel is a popular choice because it won’t rust or warp.

Adding Comfort: Seating, Lighting, and Sound

What truly makes an outdoor kitchen a destination is comfort. You need a space where guests want to linger long after the meal is over. Start with ample, comfortable seating, like bar stools at the counter and a separate lounge area with cushioned chairs. To extend your enjoyment into the evening, incorporate layered lighting, including task lighting over the grill, ambient string lights, and thoughtful landscape lighting. For the final touch, consider entertainment options like a built-in sound system or an outdoor-rated television to create a complete entertainment hub.

Designing for Entertainment: Bars, Islands, and Ice Makers

A great outdoor kitchen is designed for socializing, not just cooking. A large island or a dedicated bar area becomes the natural gathering spot where guests can relax with a drink while you finish grilling. This setup encourages interaction and keeps you from being isolated from the party. Incorporating features like a built-in ice maker, a beverage refrigerator, or even a kegerator means everything you need is right there. No more running inside for ice or cold drinks. A custom-built masonry island provides the perfect foundation for these amenities, creating a functional and beautiful centerpiece for your outdoor entertainment space.

Why Invest in an Outdoor Kitchen Pavilion?

An outdoor kitchen pavilion is more than just a structure; it’s a complete transformation of your backyard. It turns a simple patio or deck into a destination—a place where family dinners feel like a vacation and weekend get-togethers become unforgettable. If you’re thinking about adding this feature to your home, you’re not just considering a beautiful addition. You’re investing in a lifestyle upgrade that offers practical benefits for years to come.

Year-Round Entertaining, Rain or Shine

Imagine hosting a barbecue without worrying about a sudden summer shower or the intense afternoon sun. That’s the freedom a pavilion offers. Modern pavilions and pergolas can be designed with adjustable louvered roofs, giving you complete control over your environment. With the touch of a button, you can let the sunshine in or create a fully sheltered space to protect you and your guests from the elements. This means your outdoor kitchen isn’t just for perfect weather days. It becomes a reliable, comfortable entertainment hub you can enjoy through spring, summer, and fall, making every moment outdoors a pleasure.

Weatherproofing Your Pavilion for All Seasons

A pavilion is the key to turning your outdoor kitchen into a space you can use almost year-round. It’s a permanent architectural feature designed to provide reliable protection from the elements, whether it’s the hot summer sun or an unexpected rain shower. This structure instantly extends the usefulness of your outdoor area, ensuring your plans are never ruined by the weather. Modern pavilions can even be customized with features like adjustable louvered roofs, which allow you to control the amount of sun or shade with the simple touch of a button. This level of control means you can create the perfect atmosphere for any gathering, making your outdoor kitchen a true all-season entertainment hub.

Using Enclosures like Vinyl Curtains for Full Protection

To get the most out of your pavilion, especially during cooler Long Island months, consider adding enclosures. This step transforms your open-air structure into a cozy, protected room you can use even when it’s cold. Clear vinyl curtain enclosures are an excellent choice because they block wind, rain, and snow without obstructing your view of the backyard. These durable curtains are designed to stay flexible even in freezing temperatures, offering reliable protection against harsh weather. By adding a simple enclosure system, you create a flexible and cost-effective way to make your outdoor kitchen pavilion a comfortable retreat all year long, turning it into a true four-season space.

Add Lasting Value to Your Home

An outdoor kitchen pavilion is one of the smartest investments you can make in your property. It’s a high-impact feature that significantly boosts curb appeal and functionality, which is exactly what today’s homebuyers are looking for. In fact, adding a well-designed outdoor kitchen can increase your home’s value by up to 30%. It sets your home apart in a competitive market, showcasing a commitment to quality and a luxury lifestyle. Think of it not as an expense, but as a direct investment in your home’s equity and a feature that will pay dividends if you ever decide to sell.

Extend Your Living Space Outdoors

This addition fundamentally changes how you use your backyard. It creates a central, functional zone that seamlessly blends cooking, dining, and relaxing. No more running back and forth to the indoor kitchen. Everything you need is right where you need it, making outdoor living effortless and more enjoyable. An outdoor kitchen pavilion extends your living space, effectively adding another room to your home. It’s a way to improve your daily life by creating a beautiful, comfortable, and stylish area where you can make lasting memories, whether you’re enjoying a quiet morning coffee or hosting a lively party.

Potential Downsides and How to Address Them

An outdoor kitchen pavilion is a fantastic addition to any home, but like any major project, it’s wise to go in with a clear understanding of the practical side. Being prepared for the investment, ongoing care, and weather considerations ensures you can plan effectively and enjoy your new space without any surprises. The good news is that with thoughtful design and the right materials, these potential challenges are easy to manage.

Understanding the Costs and Maintenance Involved

Let’s be upfront: building a luxury outdoor kitchen is a significant investment, especially when you factor in utilities like plumbing, electricity, and gas lines. The final cost depends heavily on your choice of appliances, materials, and the complexity of the design. However, viewing this as a long-term investment in your home’s value and your lifestyle helps put the expense into perspective. Working with an experienced team can also help you create a detailed budget and avoid unexpected costs. The key is to partner with a company that can handle everything from masonry to utilities, ensuring a smooth process.

Beyond the initial build, you’ll need to plan for some upkeep to keep your outdoor kitchen looking its best. This involves routine cleaning of countertops, grills, and the pavilion structure. The best way to minimize this work is by choosing the right materials from the start. Opting for durable, low-maintenance surfaces like porcelain and natural stone for countertops and flooring will save you time and effort. For long-term protection, professional cleaning and sealing services can also preserve the beauty of your investment, making sure it remains a stunning feature for years to come.

Considering Weather Limitations

While a pavilion provides excellent protection from sun and rain, it’s true that extreme weather might still affect your plans. A heavy downpour with strong winds or a chilly evening could make the space less comfortable. However, this is where modern design comes in. A well-built pavilion is the foundation of an all-season entertainment hub, but you can enhance it further to counter almost any weather. By planning ahead, you can turn your outdoor kitchen into a true three-season oasis that remains comfortable and usable even when the weather isn’t perfect.

To address these limitations, consider integrating climate control features directly into your pavilion design. Adding built-in infrared heaters can make cool autumn nights cozy, while ceiling fans can create a refreshing breeze on hot summer days. For even more protection, you can incorporate retractable screens or vinyl curtains to block wind and rain without obstructing your view. These additions cost more, but they dramatically extend the usability of your outdoor kitchen, ensuring you get the most out of your investment regardless of the forecast. It’s all about creating a space that adapts to your needs and the weather.

Popular Design Styles for Your Pavilion Outdoor Kitchen

Choosing a style for your outdoor kitchen pavilion is one of the most exciting parts of the design process. This is where you get to infuse your personality into the space, creating an atmosphere that’s perfect for how you want to relax and entertain. Whether you’re drawn to clean, contemporary lines or the warmth of traditional materials, there’s a design that will feel like a natural extension of your home. The right style will not only look beautiful but will also complement your home’s architecture and surrounding landscape, creating a truly cohesive outdoor retreat.

The Modern Look: Clean Lines and Simplicity

If you love clean lines, minimalist aesthetics, and smart functionality, a modern design is a perfect choice. These pavilions often feature materials like metal, smooth-finished wood, and polished stone for a sophisticated look. One of the most popular features in modern pavilions and pergolas is an adjustable louvered roof. With the touch of a button, you can open the slats to let the sun in or close them for protection from rain, giving you total control over your environment. This blend of high-tech convenience and sharp design makes a modern pavilion a stunning centerpiece for any contemporary backyard.

The Appeal of Classic, Traditional Charm

For a timeless and inviting feel, you can’t go wrong with a classic design. Traditional pavilions draw inspiration from rustic structures, using natural materials to create a warm atmosphere. Think sturdy timber frames with beautiful joinery that showcase expert craftsmanship. These structures are not only incredibly strong and built to last, but their natural beauty also blends seamlessly into a garden setting. Paired with classic masonry like a stone fireplace or brick accents, a traditional pavilion creates a cozy and elegant space that feels both grand and intimate.

The Craftsmanship of Mortise and Tenon Joints

At the core of this traditional craftsmanship is the mortise and tenon joint, a time-honored woodworking technique that creates incredibly strong and beautiful structures. This method involves fitting a precisely cut projection (the tenon) on one piece of wood into a matching hole (the mortise) in another, forming a tight, interlocking connection without nails or screws. When you admire historic barns or antique furniture, you are often seeing the enduring power of these joints. For a pavilion, this technique not only ensures structural integrity against the elements but also showcases a level of detail that defines high-end construction. It’s a method that connects us to centuries of building traditions where patience and precision were paramount, a true hallmark of quality you can explore further.

Rustic Meets Refined: Mediterranean and Transitional

If your taste falls between modern and traditional, a transitional style offers the best of both worlds. The key is creating harmony between your new pavilion and your existing home and yard. This style often uses natural materials like stone and wood to bridge the gap between the built environment and the natural landscape. A transitional design might pair the clean structure of a modern pavilion with the warmth of wood beams or stone columns. This flexibility allows you to create a personalized look that feels both current and timeless, ensuring your entire landscape design feels connected and thoughtfully planned.

Low-Maintenance Looks: Modern Vinyl Pavilions

For homeowners who love a clean, polished look but don’t want the constant upkeep, a modern vinyl pavilion is an excellent choice. This material is incredibly durable and designed to handle Long Island’s diverse weather without fading, cracking, or peeling. Unlike wood, which requires regular staining or painting to protect it from the elements, vinyl simply needs an occasional wash to look brand new. This low-maintenance quality means you can spend more time enjoying your outdoor kitchen and less time on maintenance. Modern pavilions and pergolas made from high-quality vinyl offer a crisp, clean aesthetic that complements a wide range of home styles, from contemporary to traditional, making it a smart and stylish investment.

How to Plan the Perfect Layout

A beautiful outdoor kitchen is wonderful, but a beautiful and functional outdoor kitchen is a game-changer. The layout is the foundation of your entire project, determining how easily you can move, cook, and entertain. A thoughtful plan ensures your new space isn’t just a showpiece but the true heart of your backyard. It’s about creating an intuitive flow that makes hosting a summer barbecue feel effortless and relaxing.

Before you fall in love with specific appliances or finishes, take a step back and focus on the blueprint. Think about how you’ll carry dishes from your indoor kitchen, where guests will sit and mingle, and how you’ll move between the grill, sink, and prep areas. Getting this right from the start will save you headaches later and make every moment you spend in your new kitchen a joy.

Start by Measuring Your Space

One of the most common missteps in outdoor kitchen design is underestimating the amount of space you actually need. It’s easy to focus on the footprint of the grill and cabinets, but you also have to account for walking paths, open appliance doors, and elbow room for the chef. Start by measuring your intended area and marking it out with stakes and string or even spray paint. This helps you visualize the scale in your actual backyard.

Think through your workstations. You’ll want dedicated zones for hot tasks (grilling), cold tasks (refrigeration), wet tasks (sink), and dry tasks (prep). A frequent mistake is not giving these functional areas enough counter space. Ensure there’s plenty of room on either side of the grill for platters and tools. Proper space planning is a core part of our masonry design and construction, ensuring your kitchen is as practical as it is beautiful.

Freestanding vs. Attached Pavilions

One of the first decisions you’ll make is whether your pavilion should be attached to your home or stand freely in your yard. An attached pavilion creates a seamless extension of your indoor living space, making it feel like a true outdoor room. Because it uses your home for partial support, it can sometimes be a more cost-effective option. However, it requires careful planning to ensure it integrates perfectly with your home’s architecture. A freestanding pavilion offers complete design freedom. You can place it anywhere you like—by the pool, in a garden, or positioned to capture the best sunset view—creating a distinct destination in your backyard. This flexibility allows for more creative layouts and designs, but it does require a full foundation. The best choice depends on your property’s layout and how you envision using your new outdoor kitchen. Exploring different pavilion and pergola styles can help you decide which approach best fits your home.

Plan for Traffic Flow and Functionality

Your outdoor kitchen should feel like a natural extension of your home, not a distant outpost. A poor layout can make cooking and entertaining feel disjointed. One of the biggest mistakes is placing the kitchen too far from the house. Think about all the trips you’ll make back and forth for ingredients, dishes, and forgotten utensils. Keeping it close to a back door makes everything much simpler.

We often apply the classic “work triangle” principle, creating an efficient path between the grill, sink, and refrigerator. This minimizes your steps and keeps everything within easy reach. The layout should also consider guest traffic, creating clear paths so people can move around without getting in the cook’s way. A well-designed space allows the host to socialize while cooking, making the experience more inclusive and fun for everyone.

Make It Look Like It’s Always Been There

Your new outdoor kitchen and pavilion shouldn’t look like an afterthought. The best designs feel completely integrated with the surrounding environment. We achieve this by using materials and architectural styles that complement your home and existing landscape. Using porcelain and natural stone that echoes the materials on your patio or home exterior creates a cohesive and high-end look.

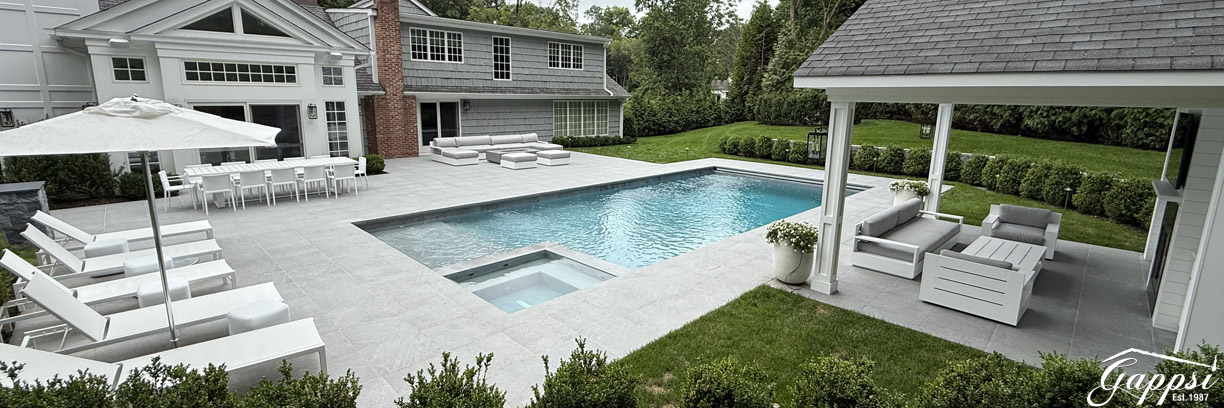
Think of the kitchen and pavilion as the anchor of a larger outdoor living area. How can it connect with other features? Perhaps it overlooks the swimming pool or opens onto a lush garden. Thoughtful landscape design can frame the space with beautiful plantings, while ambient lighting adds atmosphere and extends its usability into the evening. The goal is to create a complete, harmonious environment for relaxing and entertaining.

How to Choose the Right Materials

Selecting the right materials is one of the most critical steps in designing an outdoor kitchen and pavilion that lasts. Your outdoor space will be exposed to everything Long Island weather can throw at it—from hot, sunny days to freezing, snowy winters. The materials you choose need to stand up to the elements without fading, cracking, or warping, ensuring your investment looks beautiful for years to come.

Think of it this way: high-quality materials are the foundation of a low-maintenance lifestyle. Choosing durable, weather-resistant options from the start means you’ll spend more time enjoying your space and less time on upkeep. It’s about finding the perfect balance between stunning aesthetics and practical, long-term performance. From the countertops where you’ll prep meals to the flooring underfoot and the roof overhead, every choice contributes to the overall quality and longevity of your outdoor oasis. This isn’t just about picking what looks good on day one; it’s about choosing materials that will maintain their integrity and beauty through countless family barbecues, holiday gatherings, and quiet morning coffees.

What Are the Best Outdoor Countertop Materials?

Your countertops are the primary work surface in your outdoor kitchen, so they need to be tough. They’ll face everything from food spills and hot pans to direct sun and rain. For a combination of elegance and resilience, natural stone is a fantastic choice. Granite and quartzite are incredibly durable and can handle temperature fluctuations with ease. Another excellent option is porcelain, which offers a sleek, modern look and is non-porous, making it highly resistant to staining and easy to clean. Gappsi offers a wide selection of beautiful porcelain and natural stone options perfect for creating a functional and stylish outdoor cooking space.

The Best Materials for Your Pavilion’s Structure and Floor

The flooring in your outdoor kitchen pavilion needs to be safe, durable, and forgiving. Spills are bound to happen, so you’ll want a surface that doesn’t stain easily and is simple to wipe clean. Porcelain pavers and natural stone are top contenders because they are incredibly dense, resistant to moisture, and hold their color even with constant sun exposure. For the structure of the pavilion itself, materials like powder-coated aluminum, vinyl, or resilient woods like cedar provide the strength needed to support the roof while resisting rot and pests. Our expert masonry team can help you integrate these structural elements seamlessly with stone features for a cohesive, high-end look.

Topping It Off: Roofing and Finishes

The roof of your pavilion is your first line of defense against the elements, providing essential shade and protection from rain. You can opt for a solid roof for complete coverage or choose a more flexible design. Modern louvered roofs are a popular luxury feature, allowing you to adjust the slats with the push of a button to let sunlight in or create a water-tight seal when it rains. This versatility extends the usability of your outdoor kitchen through different seasons and weather conditions. At Gappsi, we design custom pavilions with various roofing systems to match your home’s style and your entertainment needs, ensuring your outdoor space is always ready for guests.

How Much Does a Luxury Outdoor Kitchen Pavilion Cost?

One of the first questions on everyone’s mind is, “What’s the budget for a project like this?” The truth is, there’s no one-size-fits-all answer. Because every outdoor kitchen pavilion is a custom creation, the cost can vary significantly. Think of it like designing an indoor kitchen—your choices in size, materials, and appliances will shape the final price. Generally, you can expect a project to range from $6,000 to over $30,000, with high-end, fully custom builds reaching well beyond that.

The final cost is a reflection of your vision. A simple, elegant pavilion with a high-quality grill and prep space will be on the lower end of the spectrum. A sprawling structure with a full suite of gourmet appliances, premium stone countertops, a fireplace, and integrated lighting and sound systems will naturally require a larger investment. The key is to remember that you’re not just buying appliances and materials; you’re investing in a lifestyle upgrade and a significant asset for your home. A well-planned outdoor kitchen pavilion becomes the heart of your backyard, a place for making memories for years to come. It’s about creating a space that perfectly fits how you want to live and entertain outdoors.

What Drives the Final Cost?

The final price tag for your outdoor kitchen pavilion is influenced by several key elements. The size and complexity of the design are the biggest drivers—a larger footprint with more intricate details will require more materials and labor. The materials you select also play a huge role. For instance, choosing luxurious natural stone countertops and custom masonry will be a different investment than more standard options. Finally, your choice of appliances is a major factor. You can opt for a fantastic built-in grill or create a complete chef’s setup with a smoker, side burners, an outdoor refrigerator, and a pizza oven. Each choice contributes to the overall cost and functionality of your space.

Factoring in Utilities and Permit Costs

Beyond the structure and appliances, you’ll need to account for the practical necessities. Your outdoor kitchen will need utilities like electricity for lighting and appliances, plumbing for a sink, and potentially a natural gas line for the grill. The cost to run these lines from your house to the pavilion depends on the distance and complexity of the job. Additionally, depending on the scale of your project and local Long Island regulations, you may need building permits. A permanent structure often requires official approval. Working with an experienced contractor is the best way to ensure all the necessary permits and plans are handled correctly, so you can avoid any headaches down the road.

Why Skipping Permits Can Be a Costly Mistake

I know it can be tempting to bypass the permit process to get your project started faster, but this step is there for a crucial reason: your safety. Permits ensure your new pavilion and kitchen comply with local building codes, from electrical wiring to structural stability. Building without one can lead to serious headaches, including hefty fines, stop-work orders that halt your project indefinitely, or even being forced to tear down the finished work. Beyond that, unpermitted work can create major problems with your homeowner’s insurance or when you decide to sell your home. This is why partnering with an experienced team that handles the entire process, from design to construction, is so important. They’ll make sure everything is done right, protecting your investment and giving you peace of mind.

Smart Ways to Get the Best Value

An outdoor kitchen pavilion is more than just a beautiful addition to your home; it’s a smart investment. Studies have shown that a well-designed outdoor kitchen can significantly increase your home’s value, with some homeowners seeing a return of up to 30%. In a competitive market, a stunning and functional outdoor living area makes your property stand out to potential buyers. But the value isn’t just financial. You’re investing in your family’s quality of life by creating a dedicated space for gathering, celebrating, and relaxing. This enhancement to your home provides a return in enjoyment and memories that you can’t put a price on.

Cost Examples: Custom Builds vs. Pavilion Kits

When you start looking at costs, you’ll see two main paths: pre-designed pavilion kits and fully custom builds. Some pavilion packages, for example, might have a starting price of around $16,000 to $18,000. While that number seems specific, it often only covers the structure itself, not the foundation, installation, or any of the kitchen components. In contrast, a fully custom project offers a much wider budget range because it’s tailored to your exact vision. A custom build can range from $6,000 for a more modest setup to well over $30,000 for a high-end design with premium materials and appliances. The key difference is that a custom approach integrates every element from the start, ensuring the final space is a seamless and functional extension of your home.

Avoid These Common Pavilion Planning Mistakes

Creating your dream outdoor kitchen and pavilion is an exciting process, but it’s easy to get tripped up by a few common missteps. A successful project isn’t just about picking out a great grill; it’s about thoughtful planning that considers how you’ll use the space for years to come. Taking the time to think through the details now will save you from headaches and costly changes down the road.

From the initial layout to the final finishes, every decision impacts the final result. The biggest mistakes often happen when homeowners rush the design, choose materials that aren’t suited for the outdoors, or forget to plan for weather and upkeep. By being aware of these potential pitfalls, you can ensure your new outdoor living area is as functional and durable as it is beautiful. Let’s walk through the key things to watch out for so you can get it right the first time.

Don’t Rush the Planning Phase

One of the most frequent mistakes is underestimating the amount of space you actually need. It’s crucial to think beyond just the footprint of your appliances. Consider the flow of traffic: how will you and your guests move around the grill, prep counters, and seating areas? A cramped layout can make cooking and entertaining feel chaotic. Before you finalize anything, map out distinct zones for cooking, preparation, and socializing. A well-thought-out masonry design ensures every part of your kitchen is functional and easy to use, preventing logistical issues before they ever start.

Avoid Choosing the Wrong Materials or Contractor

Your outdoor kitchen is an investment, and skimping on materials is a mistake that will cost you more in the long run. Materials that work well indoors often can’t withstand the temperature fluctuations, moisture, and sun exposure of Long Island’s climate. Opt for durable, weather-resistant options like stainless steel for appliances and high-quality porcelain or natural stone for countertops and flooring. Just as important is your choice of builder. An experienced contractor who specializes in outdoor construction will understand the unique challenges, from proper ventilation for grills to ensuring your structure is safe and built to last.

Don’t Forget About Future Upkeep

While a pavilion provides excellent shelter, your outdoor kitchen is still exposed to the elements. It’s essential to plan for weather from the very beginning. This means ensuring proper drainage, selecting materials that won’t fade or warp in the sun, and considering how wind might affect your cooking area. Think about future upkeep, too. Spills are inevitable, so choose non-porous surfaces that are easy to clean and resist staining. Planning for long-term care, like periodic cleaning and sealing for your stonework, will keep your outdoor kitchen looking pristine season after season with minimal effort.

Overlooking Critical Safety Measures

While it’s exciting to choose countertops and appliances, safety is the one area where there’s no room for compromise. A well-designed outdoor kitchen pavilion is not only beautiful and functional but also fundamentally safe for you, your family, and your guests. Overlooking critical safety measures can lead to serious risks, turning your backyard oasis into a potential hazard. From proper ventilation for your grill to secure electrical work for lighting and appliances, every detail must be planned with safety as the top priority, ensuring your space is a source of enjoyment, not worry.

A Warning on Heaters in Enclosed Spaces

As the weather cools, it’s tempting to bring a portable propane heater into your pavilion to keep the party going. However, this is a significant safety risk that should be avoided. Using propane or other open-flame heaters in an enclosed or even partially covered space can lead to a dangerous buildup of carbon monoxide, a colorless, odorless gas that can be fatal. According to the National Fire Protection Association, heating equipment is a leading cause of home fires, and improper use of portable heaters is a major contributor. The risk of fire is also much higher with these types of heaters, especially in a structure that may have wooden elements or nearby flammable materials.

A much safer way to add warmth to your outdoor living area is with electric infrared heaters. These can be professionally mounted on the ceiling or walls of your pavilion, keeping them out of the way and reducing trip hazards. Unlike fuel-burning heaters, infrared models don’t produce any emissions, so there’s no risk of carbon monoxide. They work by heating objects and people directly, providing a comfortable, sun-like warmth that isn’t affected by wind. This makes them an efficient and safe choice for creating a cozy atmosphere on cool evenings, allowing you to enjoy your outdoor space for more of the year without compromising on safety.

This specific issue with heaters highlights a broader point: building an outdoor kitchen pavilion involves complex safety considerations. This is why adhering to local building codes and securing the necessary permits is not just a formality; it’s a crucial step in ensuring your structure is safe. A professional team understands the requirements for proper ventilation, safe electrical and gas line installation, and structural integrity. When you partner with an experienced builder for your home construction projects, you’re ensuring that every aspect of your outdoor kitchen is designed and built to the highest safety standards, giving you complete peace of mind.

How to Choose the Right Contractor for Your Project

Bringing a luxury outdoor kitchen and pavilion to life is a significant investment, and the single most important decision you’ll make is choosing the right team to build it. This isn’t just about hiring someone to lay pavers; it’s about finding a partner who understands your vision, has the technical expertise for complex outdoor projects, and communicates clearly from start to finish. A great contractor will guide you through every step, from initial design to final inspection, ensuring the result is not only beautiful but also functional and built to last.

Your goal is to find a company with a proven track record of creating stunning, high-end outdoor living spaces. Look for a team that handles everything in-house, from masonry and landscaping to installing utilities and structures. This integrated approach prevents miscommunication and delays, leading to a smoother process and a more cohesive final product. Taking the time to vet your options thoroughly will save you from headaches down the road and ensure your new outdoor oasis is everything you dreamed it would be.

Check for Key Qualifications and Experience

When you start your search, focus on contractors who specialize in outdoor kitchens and pavilions. This isn’t a job for a general handyman. Outdoor construction comes with unique challenges, like dealing with Long Island’s weather, selecting durable materials, and properly running utility lines for gas, water, and electricity. A seasoned expert will know which materials stand up to salt air and freezing winters and how to design a space that functions flawlessly.

Always confirm that any potential contractor is fully licensed and insured. This is a non-negotiable that protects you and your home from liability during the project. Don’t be shy about asking for proof. A reputable company will have this information readily available. You’re looking for a team whose portfolio showcases a history of building beautiful and durable pavilions and pergolas, demonstrating they have the specific skills your project requires.

The Benefit of a Full-Service Design-Build Firm

Instead of juggling separate designers, masons, and electricians, consider partnering with a full-service design-build firm. This approach streamlines your entire project by keeping every aspect, from the initial sketches to the final installation, under one roof. When one team manages both the design and construction, the process is significantly smoother. There’s no risk of miscommunication between different contractors, which means fewer delays and a more cohesive final product. This integrated model is especially valuable for outdoor kitchens, which require a blend of skills from expert masonry to landscaping and utility installation. With a single point of contact, you get clear communication and one team that is fully accountable for bringing your vision to life.

Key Questions to Ask Potential Contractors

Once you have a shortlist, it’s time to start asking questions. The way a contractor responds will tell you a lot about their process, expertise, and professionalism. Come to the conversation prepared with a list to ensure you cover all your bases. This is your chance to gauge their experience and see if they’re a good fit for your project and personality.

Here are a few essential questions to ask:

  • Can you show me a portfolio of outdoor kitchens you’ve built in my area?
  • How do you handle the permitting process with local towns in Nassau or Suffolk County?
  • What is your process for communicating updates or potential issues during construction?
  • Who will be the main point of contact for my project?
  • Can you provide references from a few recent clients?

A confident and experienced contractor will welcome these questions. You can also get a great sense of a company’s work by checking out their project videos, which often show the construction process and finished results in detail. Seeing their work on YouTube can give you a better feel for their quality and style.

Understand the Timeline from Start to Finish

A reliable contractor will provide a clear and detailed project plan before any work begins. This document should be more than just a start and end date; it should outline the entire construction sequence, from excavation and foundation work to appliance installation and final touches. Understanding the timeline helps you manage your expectations and plan accordingly.

Ask for a breakdown of project milestones and the corresponding payment schedule. This transparency ensures you know exactly what to expect and when. It’s also important to discuss how potential delays, such as bad weather or material backorders, are handled. A professional team will have contingency plans in place and will communicate proactively. A well-defined plan is the foundation of a successful project and a stress-free experience for you as the homeowner.

Related Articles

Frequently Asked Questions

How long does it typically take to build an outdoor kitchen pavilion? The timeline for a project like this can vary quite a bit depending on the complexity of your design, the permitting process in your town, and of course, the weather. A more straightforward setup might take a few weeks, while a highly custom project with extensive masonry and utility work could take a couple of months from start to finish. A detailed project plan from your contractor will give you the clearest picture of the schedule.

What’s the real difference between a pavilion and a pergola? That’s a great question, as the terms are often used together. The simplest way to think about it is the roof. A pavilion has a solid, fixed roof that offers complete protection from sun and rain. A traditional pergola has a slatted or open-beam roof designed to provide partial shade and support climbing plants. Modern designs, like louvered roofs, can blur the lines by giving you the option to switch between open slats and a solid covering.

Can I really use my outdoor kitchen in the colder months on Long Island? While you probably won’t be grilling in a snowstorm, a well-designed pavilion can absolutely extend your outdoor season. The solid roof provides a crucial barrier against the elements. When you add features like built-in infrared heaters and a stone fireplace, you can create a cozy and comfortable space that’s perfect for crisp autumn evenings and even mild winter days.

How much maintenance does an outdoor kitchen require? The goal is to build a space you can enjoy, not one you have to constantly work on. By choosing high-quality, weather-resistant materials from the start, you minimize future upkeep. Your main tasks will be simple things like covering your grill and appliances when not in use and wiping down countertops. For natural stone, a periodic professional cleaning and sealing will keep it protected and looking its best for years.

Can you build a pavilion and kitchen on my existing patio? In many cases, yes. However, it depends on the condition and construction of your current patio. We would need to assess the foundation to ensure it can safely support the weight of the new pavilion structure and kitchen components. It also needs to be suitable for running any necessary utility lines for water, gas, and electricity. A professional evaluation is the first step to see if your existing space is ready for the upgrade.
Share this page:
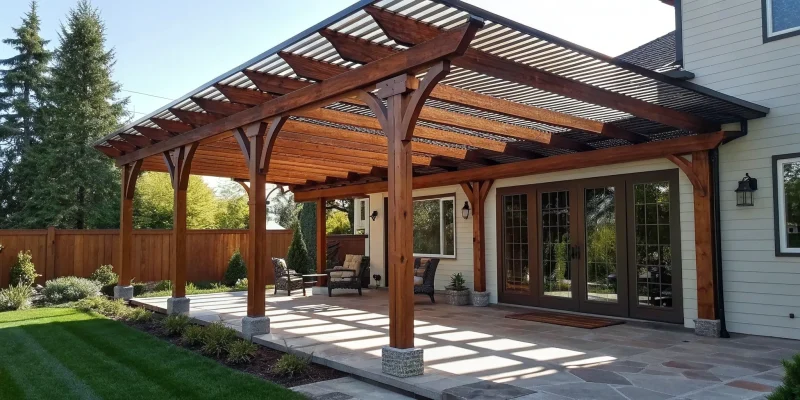
Custom wood pergola with a roof attached to a house over a furnished patio.

Your Guide to a Custom Pergola Attached to House with Roof

There’s a certain magic to a home that flows effortlessly from the inside out. Creating that seamless connection between your living room and your garden is a key goal for many homeowners, but it can be hard to achieve with just a sliding door and a simple patio. You need an architectural element that bridges the two worlds. An attached pergola acts as that perfect transition, creating a sheltered space that is both part of the house and part of the yard. A custom pergola attached to house with roof blurs the lines, offering a comfortable, defined area that encourages you to step outside. It makes your backyard feel like a true extension of your home, turning an undefined space into your new favorite room.

Key Takeaways

  • Create a True Outdoor Room: An attached pergola with a roof does more than add shade; it creates a functional, weather-protected extension of your home. This makes your patio usable for dining or relaxing, rain or shine, effectively increasing your home’s living space and value.
  • Choose Materials That Fit Your Life: The right material is about balancing aesthetics with maintenance. While wood offers classic charm, it requires regular upkeep. Modern options like aluminum and vinyl provide a sleek look with minimal effort, ensuring you spend more time enjoying your pergola than working on it.
  • Prioritize a Professional Installation: Attaching a structure to your home is a complex job that requires expertise in building codes, foundations, and structural integrity. Hiring a professional ensures your pergola is built safely and correctly, protecting your home from damage and guaranteeing a beautiful, long-lasting result.

What is an Attached Pergola with a Roof?

Think of an attached pergola as a beautiful and functional extension of your home that blends your indoor and outdoor spaces. This structure connects directly to an exterior wall, creating a covered area over your patio or deck. Unlike a traditional open-rafter pergola, adding a roof transforms the space into a true outdoor room. It provides reliable shade from the summer sun and shelter from unexpected Long Island showers, making your backyard far more usable throughout the year.

An attached pergola with a roof does more than just provide cover; it defines a space. It can frame your outdoor dining area, create a cozy lounge next to the pool, or serve as a graceful transition from your back door to the garden. These structures are custom-designed to complement your home’s architecture, adding both functional living square footage and significant visual appeal. Gappsi designs and builds custom pavilions and pergolas that are tailored to your home’s specific style and your family’s needs, turning an underused patio into your new favorite spot.

Exploring Attached Pergola Styles

One of the best parts of adding a pergola is that you can tailor it perfectly to your home’s character. Whether your house is a classic colonial, a modern masterpiece, or a rustic cottage, there’s a pergola style to match. You can choose from clean, minimalist lines for a contemporary look or opt for more traditional designs with decorative posts and ends. The material you select plays a huge role in the final aesthetic. Natural wood offers timeless warmth, while sleek aluminum provides a modern, low-maintenance alternative. Vinyl is another durable option that comes in various colors to seamlessly match your home’s trim and siding.

Roofed vs. Open-Top: Which is Right for You?

Deciding between a roofed and an open-top pergola comes down to how you want to use the space. An open-top design with rafters is classic and beautiful, allowing for plenty of sunlight and air circulation—ideal if you want to grow climbing plants. However, for most homeowners, a roofed pergola offers far more practical benefits. A solid or louvered roof provides consistent shade and protects you and your outdoor furniture from the elements. This means you can enjoy your masonry patio for a morning coffee or an evening dinner without worrying about the weather forecast. A roof makes your outdoor space a reliable extension of your home, not just a fair-weather feature.

Why Add a Custom Attached Pergola to Your Home?

If you’re looking for a way to get more out of your backyard, an attached pergola is a brilliant solution. It’s more than just a structure; it’s a seamless transition from your indoor comfort to your outdoor oasis. By connecting directly to your house, it creates a functional and stylish space that feels like a true extension of your home. A custom-designed pergola doesn’t just add shade—it adds character, purpose, and value. Let’s look at some of the key reasons why adding one is one of the best upgrades you can make for your Long Island home.

Extend Your Living Space Outdoors

An attached pergola instantly creates a defined outdoor room, effectively expanding your home’s square footage. This new area becomes the perfect spot for dining al fresco, hosting summer barbecues, or simply relaxing with a book. It provides a comfortable, sheltered zone that encourages you to spend more time outside. Instead of a simple, undefined patio, you get a purposeful space that bridges the gap between your house and your yard. With the right design, you can craft a beautiful and functional outdoor living area that your family will enjoy for years. Gappsi offers a range of custom pavilions and pergolas to perfectly match your home and lifestyle.

Enjoy Your Patio, Rain or Shine

One of the biggest advantages of a roofed pergola is its ability to make your patio usable in almost any weather. A solid or louvered roof offers reliable protection from the intense summer sun and unexpected rain showers, so you never have to cancel plans. This means more family dinners outside and more quiet mornings with coffee on the patio. Modern materials like powder-coated aluminum are incredibly durable and require very little maintenance, standing up to Long Island’s coastal climate without warping or rusting. When you pair your pergola with beautiful, weather-resistant porcelain and natural stone pavers, you create a complete outdoor space that’s ready whenever you are.

Add Value and Curb Appeal

A well-designed attached pergola is a smart investment that adds significant value to your home. It’s a highly desirable feature for potential buyers, who see it as additional, usable living space. Beyond the financial return, a pergola dramatically enhances your home’s curb appeal. It adds architectural interest and dimension to your home’s exterior, breaking up flat walls and creating an elegant, welcoming focal point. A custom design ensures the pergola complements your home’s style, looking like it was always meant to be there. This kind of thoughtful home remodeling not only improves your daily life but also strengthens your property’s long-term value.

Improve Your Home’s Energy Efficiency

An often-overlooked benefit of an attached pergola is its positive impact on your home’s energy consumption. By shading the windows and exterior walls of your house, a pergola can block a significant amount of direct sunlight from entering your home during the hottest parts of the day. This natural cooling effect reduces the workload on your air conditioning system, which can lead to lower energy bills during the summer. According to the U.S. Department of Energy, strategic landscaping and shading can make a real difference in home energy use. It’s a practical advantage that makes your home more comfortable on the inside while you enjoy your beautiful new space on the outside.

Choosing the Best Material for Your Pergola

The material you choose for your attached pergola does more than just define its look—it determines how much time you’ll spend maintaining it and how well it will stand up to Long Island’s four-season climate. Think of it as the foundation of your new outdoor oasis. Each option has its own personality and practical benefits, so it’s all about finding the right fit for your home’s style, your budget, and your lifestyle. Whether you’re drawn to the classic warmth of wood or the sleek, modern appeal of metal, we’ll walk through the most popular choices to help you make a decision you’ll love for years to come.

Wood: Natural Beauty and Charm

There’s something undeniably classic and inviting about a wooden pergola. Materials like cedar and redwood bring a natural warmth and texture to your backyard that blends beautifully with landscaping. These woods are popular for a reason; they have a natural resistance to rot and insects, making them sturdy choices for outdoor structures. A pressure-treated pine is another excellent, budget-friendly option. While wood offers timeless charm, it does require a bit more TLC than other materials. You’ll need to plan on regular staining or sealing to protect it from the elements and keep it looking its best, but for many homeowners, that upkeep is a small price to pay for the authentic beauty that only real wood can provide.

Aluminum: Modern, Durable, and Low-Maintenance

If your style leans more modern and you’d rather spend your weekends relaxing than doing maintenance, an aluminum pergola is a fantastic choice. Aluminum is incredibly strong yet lightweight, and it won’t rust, warp, or rot, which is a huge plus in our coastal climate. It’s the ultimate “set it and forget it” material. You can get a sleek, clean look that complements contemporary home designs, and it comes in a variety of powder-coated finishes that last for decades without needing a touch-up. For homeowners who want a durable structure that looks sharp and requires virtually no upkeep, aluminum is one of the best long-term investments for custom-built pavilions and pergolas.

Vinyl: Weather-Resistant and Versatile

Vinyl offers a wonderful middle ground, giving you a traditional look without the maintenance of wood. It’s a highly durable and weather-resistant material that stands up to sun, salt, and moisture without fading, cracking, or peeling. You’ll never have to worry about termites or rot, and cleaning is as simple as a quick rinse with a hose. Vinyl pergolas come in a range of colors—with crisp white being a classic favorite—and can be designed to mimic the look of painted wood. This versatility makes it easy to match your home’s trim and other exterior features, creating a cohesive and polished look for your outdoor space.

Composite: The Ultimate in Performance

For those who want the rich look of wood without any of the maintenance, composite materials are the perfect solution. Made from a blend of wood fibers and recycled plastics, composite decking and structural pieces offer the best of both worlds. This material is engineered to resist staining, scratching, and fading, and it’s completely immune to rot, decay, and insect damage. It’s an incredibly tough material that delivers high-end performance and longevity. While it can be a larger initial investment, a composite pergola pays for itself over time with its durability and minimal upkeep, making it a smart choice for creating truly premium outdoor living spaces.

How to Customize Your Pergola’s Design

A custom pergola isn’t just a structure; it’s a reflection of your personal style and how you want to live outdoors. This is where the fun begins, as you get to make decisions that transform a standard design into something that feels like it was always meant to be part of your home. From the overall architecture to the smallest finishing touches, every choice helps create an outdoor space that is uniquely yours. By focusing on a few key areas of customization, you can design a pergola that perfectly suits your home’s aesthetic and your family’s needs.

Match Your Home’s Architectural Style

The most successful attached pergolas look like they were built right along with the house. The goal is to create a seamless transition from your indoor to your outdoor space. Take cues from your home’s existing design—whether it’s a classic Colonial, a modern farmhouse, or a coastal cottage. You can match the column style to your front porch posts or align the pergola’s trim with your home’s eaves. This ensures your new addition complements your home’s character instead of competing with it. A well-designed structure helps define your outdoor area, creating a distinct “room” for dining, lounging, or entertaining.

Select Your Ideal Roof: Solid, Louvered, or Retractable

Your pergola’s roof does more than just provide cover; it dictates how you can use the space. A solid roof offers complete protection from sun and rain, essentially creating a year-round outdoor room. For more flexibility, a louvered roof is a fantastic option. Its adjustable slats can be angled to let in the perfect amount of sunlight or closed completely during a surprise shower. If you love the idea of an open-air feel, a retractable canopy gives you the best of both worlds—sun when you want it and shade when you need it. Your choice depends on how much you want to control the elements.

Personalize the Color, Finish, and Size

The details are what make your pergola truly custom. When selecting a color, look to your home’s exterior trim, window frames, and siding for inspiration to create a cohesive look. The finish—from smooth powder-coated aluminum to rustic stained wood—also plays a huge role in the final feel. Size is another critical element. Think about how you’ll use the space. Will it be an intimate seating area for two or a large dining space for family gatherings? Planning for furniture and comfortable traffic flow will help you determine the ideal dimensions for your custom pavilions and pergolas.

Incorporate Privacy Screens and Custom Features

Beyond the basic structure, you can add features that enhance both comfort and functionality. Privacy screens, whether they are fixed panels, lattices, or retractable shades, can create a more intimate and secluded atmosphere while shielding you from neighbors or a setting sun. You can also integrate elements like ceiling fans for a cooling breeze on hot days, built-in heaters for chilly evenings, and integrated lighting to set the perfect mood after dark. These thoughtful additions are what will make your pergola the go-to spot for relaxing and entertaining.

Upgrading Your Pergola with Must-Have Features

A custom pergola is a fantastic starting point, but the real magic happens when you personalize it with features that fit your lifestyle. Think of the structure as the foundation and these upgrades as the finishing touches that transform it into a true outdoor room. Modern pavilions and pergolas are designed to be fully customized, allowing you to create a space that’s as comfortable and functional as any room inside your house. From extending your evenings with beautiful lighting to staying comfortable no matter the season, the right additions make all the difference, turning a simple structure into the heart of your outdoor living area.

These features aren’t just about aesthetics; they’re about maximizing the time you can spend enjoying your backyard. By incorporating elements like climate control, smart technology, and weather protection, you can host dinner parties on cool autumn nights, read a book without worrying about bugs, or simply relax in the shade on a hot summer day. It’s about creating a flexible space that adapts to your needs, whether you’re seeking solitude or entertaining a crowd. We’ll walk through some of the most popular and impactful upgrades that can turn your pergola into your favorite spot at home, ensuring you get the most out of your investment.

Set the Mood with Integrated Lighting

The right lighting can completely change the atmosphere of your pergola, turning it from a daytime shade structure into a captivating evening retreat. Integrated lighting, which is built directly into the beams and posts, offers a clean, seamless look that you can’t get from stringing up lights after the fact. You can layer different types of lighting to create the perfect ambiance for any occasion. Consider soft, recessed LEDs for general illumination, task lighting over a grilling or dining area, and subtle uplighting on the columns to add a touch of drama. With a well-designed lighting plan, your pergola will be a warm and inviting space long after the sun goes down.

Stay Comfortable with Heaters and Fans

One of the best ways to get more use out of your pergola is by adding climate control features. An integrated ceiling fan is a must-have for making those warm, humid Long Island summer days more enjoyable, creating a gentle breeze that keeps the space comfortable. When the weather turns cooler, you don’t have to head back inside. Built-in heaters, such as discreet infrared models, can provide gentle warmth that takes the chill out of the air. This allows you to extend your outdoor season, enjoying crisp spring mornings and cozy fall evenings in your favorite spot. These additions ensure your investment is one you can enjoy for most of the year.

Add Convenience with Smart Controls

Imagine adjusting your pergola’s roof, screens, and lighting with a simple tap on your phone. That’s the convenience of smart controls. Modern pergolas can be equipped with technology that lets you manage every feature effortlessly. If the sun gets too intense, you can close the louvered roof without leaving your chair. If a surprise shower rolls in, you can deploy the retractable screens in seconds. This level of control makes your outdoor space incredibly responsive to your needs and the changing weather. Integrating these smart features is a key part of any modern home remodeling project, blending your indoor and outdoor living spaces seamlessly.

Get All-Weather Use with Curtains and Screens

To make your pergola a truly versatile outdoor room, consider adding curtains or retractable screens. Motorized screens are a game-changer, allowing you to keep pesky insects out while still enjoying the breeze and the view. They can also offer a degree of shade and protection from light wind and rain. For a softer touch and added privacy, outdoor curtains are a beautiful option. They can be drawn to create a more intimate, enclosed setting or tied back to open up the space. Both of these features help you manage sun exposure and create a comfortable, protected environment, making your pergola usable in a wider range of weather conditions.

What to Expect During the Installation Process

Once you’ve designed the perfect attached pergola, you’re probably eager to see it come to life. The installation process is where your vision becomes a reality, and knowing what to expect can make the entire experience smooth and stress-free. A successful installation is all about careful planning and expert execution, ensuring your new outdoor structure is not only beautiful but also safe and built to last.

The journey from design to completion involves several key stages. It starts with a thorough assessment of your home and property to ensure a seamless integration. Next comes the necessary paperwork, like securing building permits, which protects your investment and ensures everything is up to code. Then, the site is prepared by creating a solid foundation for the structure. Finally, the pergola is expertly constructed and attached to your home. While it might sound like a lot, working with an experienced team means you can relax while the professionals handle every detail. At Gappsi, we manage the entire process for our clients, turning a complex project into an exciting home transformation. Our pavilions and pergolas are built with precision and care from start to finish, so you can simply look forward to enjoying your new space.

Assessing Your Space and Structure

Before any work begins, a professional will conduct a detailed site assessment. This isn’t just about measuring the patio; it’s about understanding how the pergola will connect with your home’s existing structure. We’ll examine the attachment wall to confirm it can support the load and determine the best way to work around features like windows, doors, and existing gutters. A common question homeowners ask is, “Can I attach a pergola if I have gutters?” The answer is yes, but it requires a professional approach to ensure proper drainage and a secure fit. This initial evaluation is critical for planning a safe and structurally sound installation that looks like a natural extension of your home.

Understanding Permits and Building Codes

Navigating local regulations is a crucial step in any construction project. Before installation, it’s essential to check with your local Long Island municipality about building permits, zoning rules, and other building codes. This process ensures your new pergola meets all safety and structural requirements, preventing potential issues or fines down the road. While it can seem like a hassle, it’s a non-negotiable part of a professional build. A seasoned contractor will handle the entire permitting process for you, from submitting the plans to scheduling inspections. This way, you can have peace of mind knowing your project is fully compliant from day one.

Preparing the Foundation and Attachment Points

A pergola is only as strong as its foundation. Proper preparation involves two key areas: the ground supports and the house attachment. For the posts that stand on your patio, we create solid concrete footings below the frost line to prevent shifting and ensure stability for years to come. For the side attached to your house, a ledger board is securely bolted to your home’s framing. Attaching a pergola needs careful planning, and this step is best left to professionals. It guarantees the structure is installed safely and correctly, ready to withstand the elements and provide a secure framework for your new outdoor living space.

Professional vs. DIY Installation: What to Consider

While a DIY project can be tempting, installing an attached pergola is a complex job with little room for error. A professional installation is about more than just convenience; it’s about safety and quality. While installing a pergola yourself may seem cost-effective, this often comes with risks like improper installation, which can lead to serious structural issues or damage to your home. Professionals have the right tools, experience, and understanding of structural engineering to ensure your pergola is secure and built to code. Investing in a professional installation gives you a flawless finish, a valid warranty, and the confidence that your beautiful new space is safe for your family to enjoy.

How to Budget for Your Custom Pergola

Planning your budget is one of the most important steps in bringing your dream pergola to life. While it’s easy to get swept up in design ideas, having a clear financial picture from the start ensures a smooth process without any surprises. The final cost of a custom pergola can vary quite a bit, as it depends entirely on your vision, your home’s specific needs, and the materials you choose.

Think of your budget as a roadmap. It helps you and your contractor make key decisions about size, features, and finishes. A well-planned budget allows you to prioritize what matters most to you, whether that’s a high-end wood finish, a state-of-the-art louvered roof, or integrated lighting for evening get-togethers. By understanding the key cost factors, you can create a realistic budget that aligns with your goals and sets you up for a successful project that you’ll love for years to come.

Key Factors That Influence Cost

The single biggest factor influencing your pergola’s cost is the material you choose. Different materials come with different price points, maintenance needs, and aesthetics. For example, custom wood pergolas offer a classic, natural look but are often the most expensive option, ranging from $35 to $60 per square foot. Other popular choices like low-maintenance aluminum or vinyl offer a more modern feel and can fit into different budget tiers. The pavilions and pergolas you select will set the foundation for your project’s overall expense, so it’s a great place to start your planning.

How Size, Complexity, and Features Affect Price

It makes sense that a larger, more complex pergola will cost more than a simple, smaller one. Size directly impacts material and labor costs—the bigger the footprint, the more of each you’ll need. Labor for a standard installation can range from $500 to $3,000, making up a significant portion of the total budget. Adding custom features like intricate post designs, built-in privacy screens, or the need for complex masonry work for the foundation will also increase the price. When you’re budgeting, think about how you plan to use the space to decide which features are must-haves.

Understanding Your Return on Investment

It’s helpful to view your new pergola not just as a cost, but as an investment in your home and lifestyle. An attached pergola literally extends your home’s living space, giving you a comfortable, sheltered area to relax and entertain. This addition can significantly increase your property’s curb appeal and overall value. Potential buyers often see a well-built outdoor structure as a major plus. More importantly, it’s an investment in your own enjoyment, creating a beautiful outdoor retreat you can use for years. It’s a valuable part of any home remodeling project.

Exploring Financing Options

While a DIY pergola project might seem like a way to save money, it comes with serious risks. Improper installation can lead to structural problems, safety hazards, and costly mistakes that you’ll have to pay to fix later. Hiring a professional ensures your pergola is built correctly, meets all local building codes, and is securely attached to your home. This protects your investment and gives you peace of mind. Many contractors can discuss payment schedules or point you toward financing resources to help make your project more manageable, allowing you to get the quality build you want without compromising on safety.

How to Choose the Right Pergola Contractor

Choosing the right design and materials for your pergola is exciting, but finding the right contractor to build it is just as important. This is the team that will turn your vision into a beautiful, functional part of your home. A great contractor ensures the process is smooth and the final result is structurally sound and built to last. Taking the time to vet your options carefully will save you from potential headaches and costly mistakes down the road.

Verify Licenses, Insurance, and Experience

Before you even start talking about design, make sure any contractor you consider has their credentials in order. This is your first line of defense. A valid license proves they meet state and local requirements, while proper insurance protects you from liability in case of accidents on your property. While a DIY approach might seem like a way to save money, it often leads to “improper installation, structural issues, and costly mistakes.” A professional team has the experience to get it right the first time. Look for a company with a strong portfolio of completed pavilions and pergolas, especially projects similar to what you have in mind.

Assess Their Design Skills and Local Knowledge

A great pergola contractor is more than just a builder; they’re a design partner. They should be able to look at your home’s architecture and your backyard layout to help you create a pergola that looks like it was always meant to be there. Beyond aesthetics, they need deep knowledge of Long Island’s local building codes and permit processes. This expertise is critical for handling the technical details. For example, a common challenge “involves existing gutters,” and an experienced contractor will know exactly how to work around them without compromising your home’s integrity. This combination of design sense and local know-how is what separates a good project from a great one.

Essential Questions to Ask Before You Hire

Once you’ve narrowed down your list to a few qualified candidates, it’s time to ask some specific questions to find the perfect fit. This is your chance to understand their process and confirm their expertise. To avoid “common pergola installation mistakes like poor site prep, weak foundations, [and] wrong materials,” you need to know they have a solid plan.

Come to the conversation prepared with questions like:

  • Can you show me a portfolio of attached pergolas you’ve built in my area?
  • How will you prepare the site and foundation to ensure stability?
  • What is your process for obtaining the necessary permits?
  • What is the estimated timeline for my project, from start to finish?
  • Who will be my main point of contact throughout the construction?

Keeping Your Attached Pergola in Top Shape

Your attached pergola is more than just a structure; it’s the backdrop for family barbecues, quiet morning coffees, and relaxing evenings. To keep it looking its best and functioning perfectly for years to come, a little routine care goes a long way. Proper maintenance not only preserves its beauty but also protects your investment and ensures it remains a safe, sturdy extension of your home. When you invest in a beautiful outdoor feature that enhances your daily life, you want it to last. Consistent upkeep is the best way to guarantee that your pergola continues to add value and enjoyment to your property.

The good news is that maintaining your pergola doesn’t have to be a huge chore. The level of upkeep depends largely on the material you choose and the features you’ve included. Whether you have a classic wooden design or a modern aluminum one, a simple maintenance schedule can prevent minor issues from turning into costly repairs. By staying on top of a few key tasks, you can ensure your outdoor oasis remains a favorite spot for relaxation and entertainment season after season. Gappsi offers expert restoration and sealing services that can help keep your entire patio area, including your pergola’s foundation, in pristine condition.

Simple Care Tips Based on Material

The material of your pergola is the biggest factor in its maintenance routine. For classic wood pergolas made from materials like cedar, which is naturally resistant to rot and insects, you’ll still want to inspect them annually. Look for any signs of wear or damage. Applying a fresh coat of stain or sealant every few years will protect the wood from moisture and sun damage, keeping its natural color vibrant and preventing warping or cracking over time.

On the other hand, materials like aluminum, vinyl, and fiberglass are celebrated for being low-maintenance. These modern options are resistant to rust, rot, and pests, so you won’t have to worry about seasonal staining or sealing. For these, a simple cleaning with mild soap and water once or twice a year is usually all that’s needed to wash away dirt, pollen, and other buildup, keeping your structure looking brand new.

Your Seasonal Maintenance Checklist

A great way to stay on top of pergola care is to create a simple seasonal checklist. In the spring, give your pergola a thorough cleaning to wash away winter grime. This is also the perfect time to inspect the structure for any loose bolts or screws, ensuring everything is secure after any harsh weather. Check the attachment points where the pergola meets your house, as well as the foundation, to make sure everything is stable.

In the fall, focus on clearing away leaves and debris from the roof and any integrated gutters. Proper drainage is crucial, especially for an attached structure, to prevent water from pooling against your home’s siding or foundation. A quick check-up before and after the harshest seasons will help you catch any potential issues early.

Long-Term Strategies for Preservation

Thinking long-term starts with the initial design and installation. Choosing durable, high-quality materials like powder-coated aluminum for your pavilions and pergolas can significantly reduce future maintenance. These materials are built to withstand the elements without requiring the regular sealing or staining that wood does, giving you more time to simply enjoy your space.

Ensuring your pergola is installed correctly on a solid foundation is another key strategy for its longevity. A professional installation avoids common mistakes that can lead to instability and premature wear. Regular inspections, even quick visual ones, will help you ensure your pergola remains a strong, beautiful, and lasting feature of your home for many years to come.

Related Articles

Frequently Asked Questions

How long does the entire process take, from design to installation? The timeline can vary quite a bit depending on the complexity of your design and the permitting process in your town. Generally, you can expect the design and material selection phase to take a couple of weeks. After that, securing permits can take anywhere from a few weeks to a couple of months. Once everything is approved, the actual on-site construction is surprisingly quick, often taking just one to two weeks for a professional team to complete.

Do I really need a permit for an attached pergola on Long Island? Yes, almost certainly. Because an attached pergola connects directly to your home’s structure, it’s considered a permanent addition and requires a building permit in most Long Island municipalities. This isn’t just red tape; it’s a process that ensures the structure is built safely and to code, protecting both your home and your family. A reputable contractor will handle the entire permitting process for you, so you won’t have to worry about the paperwork.

Can an attached pergola be built on an existing patio or deck? This is a great question and the answer depends on the condition of your existing surface. If you have a concrete patio that is in good shape, we can often anchor the pergola posts directly to it. For a wood or composite deck, we’ll need to assess its structural integrity to ensure it can support the added weight. In many cases, we will add extra reinforcement or new footings beneath the deck to provide a solid foundation for the pergola.

What’s the most popular pergola material for Long Island’s climate? For homeowners here on Long Island, low-maintenance materials like aluminum and vinyl are incredibly popular, and for good reason. Our coastal climate with its salty air and four distinct seasons can be tough on exterior structures. Aluminum and vinyl won’t rust, rot, or warp, and they require little more than an occasional cleaning. While classic wood is always beautiful, these modern materials offer fantastic durability and let you spend more time enjoying your pergola rather than maintaining it.

How much maintenance should I realistically expect? The amount of upkeep really comes down to the material you choose. If you opt for a wood pergola, you should plan on inspecting it annually and re-staining or sealing it every two to three years to protect it from the elements. If you go with aluminum, vinyl, or composite, your maintenance is minimal. A simple wash with soap and water once a year is typically all that’s needed to keep it looking fresh and clean.

Share this page:

Pool Company in Sands Point: A Project Tour & Guide

What does it take to turn an ordinary backyard into an extraordinary private resort? It starts with a clear vision and a team capable of executing it down to the smallest detail. We invite you to explore one of our favorite recent projects, a complete outdoor renovation in Sands Point, NY. This transformation features a breathtaking 20×40 gunite pool with a built-in spa, surrounded by a chic porcelain patio. We also added a modern pavilion, a gas fire pit, and a full cooking island. This isn’t just a case study; it’s a showcase of what happens when innovative design meets expert construction from a leading pool company in Sands Point.

https://youtu.be/SZNfVpv1cEs

View Gappsi’s YouTube Channel for Videos of Gunite Pool and Porcelain Patio in Sands Point, NY – A Modern Masterpiece by Gappsi

A modern masterpiece, gunite pool and porcelain patio in Sands Point, NY.  At Gappsi, we specialize in creating luxury outdoor spaces that blend function, comfort, and aesthetics. Our recent project in Sands Point, NY, is a prime example of a complete backyard transformation.  It elevates outdoor living to a new level. This job involved a full redesign and installation of the entire backyard area.  Resulting in a breathtaking blend of modern design and expert craftsmanship. From the installation of a luxurious gunite pool to premium porcelain pavers.  The high-end features like a pavilion, fire pit, and outdoor kitchen, this backyard was turned into a five-star retreat right at home.

gunite-pool-and-porcelain-patio-in-sands-point5A Stunning Gunite Pool and Porcelain Patio – The Centerpiece of the Backyard
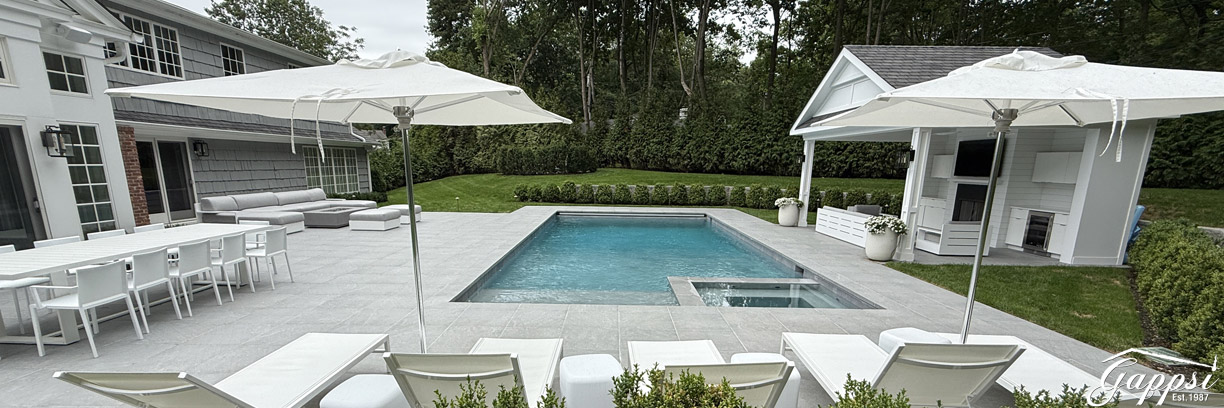
The focal point of the redesign is a 20×40 gunite pool that immediately captures attention with its clean lines and functional elegance. Gunite, renowned for its durability and versatility, enables complete customization in pool design. For this project, the pool features a built-in spa and an inviting sundeck in the shallow end.  It’s perfect for relaxing and cooling off on hot summer days. Whether you’re lounging on the sundeck or soaking in the spa, this pool was designed with luxury and leisure in mind.

To ensure ease of maintenance and added safety, we also installed an automatic pool cover. This system helps maintain water cleanliness, conserves heat, and provides a child-safe barrier when the pool is not in use.

Porcelain Paver Patio – Sleek, Durable, and Stylish

Surrounding the pool is a beautifully installed patio made from gray porcelain pavers. The gunite pool and porcelain patio pavers are three-quarters of an inch thick and were carefully chosen by the homeowners to match the color and style of the house. Porcelain is an ideal material for outdoor spaces.  It’s non-porous, slip-resistant, UV-resistant, and incredibly easy to maintain.

One of the standout features of the patio is its porcelain coping. It frames the pool’s edge, creating a smooth, finished look. We used 24×24-inch, two-inch-thick porcelain coping for the pool’s automatic cover area and 12×24-inch, two-inch-thick coping for the remainder of the pool edge. This combination of sizes ensures both a functional and aesthetic flow around the entire perimeter of the pool. Additionally, the skimmer boxes were custom-cut to integrate perfectly with the porcelain coping—demonstrating our attention to detail and craftsmanship.

custom-built pavilion and gas fireplaceThe Pavilion – A Modern Outdoor Living Room
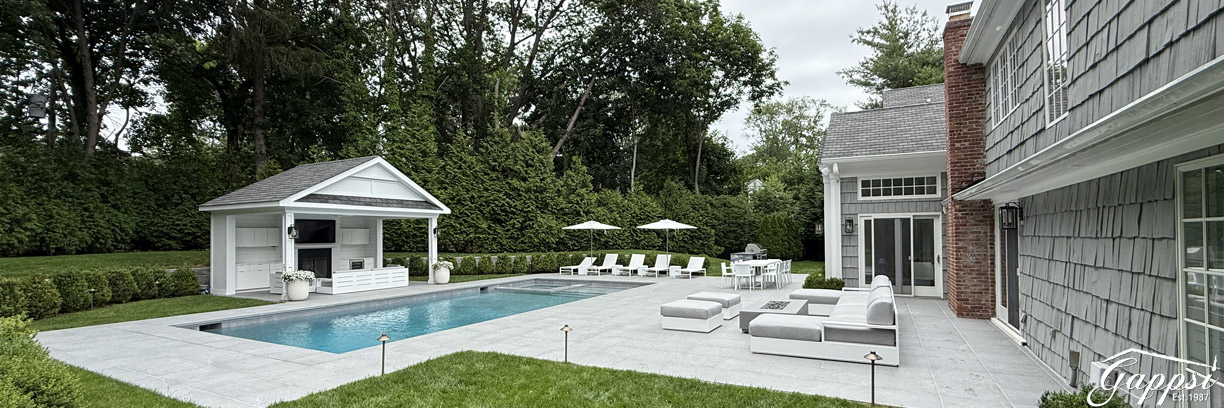
To complement the pool and patio, a custom-built pavilion was installed at the far end of the backyard. Designed to match the house in both style and finish, the pavilion serves as an outdoor living room.  The pavilion has all the comforts of an indoor space. It features a gas fireplace, a mounted TV, and cabinets for storage—perfect for hosting gatherings, watching the game, or simply relaxing outdoors.

The pavilion creates a shaded, inviting retreat just a step away from the pool. It was built using materials that harmonize with the overall color palette of the backyard.  This ensures a seamless aesthetic from one area to the next.

Fire Pit and Outdoor Cooking Island – Enhancing the Entertainment Experience

To further elevate the outdoor experience, we installed a modern gas fire pit, ideal for evening relaxation or entertaining guests. The fire pit adds warmth and ambiance, making the outdoor space enjoyable even on cooler nights.

gunite-pool-and-porcelain-patio-in-sands-point3Adjacent to the pavilion is a fully functional cooking island, custom-built for this project. The island’s structure is faced with marble split-face veneer, offering a rich texture and upscale appearance. Topping it off is a black leathered granite countertop, which provides a bold contrast and durable work surface for outdoor cooking. This area is perfect for grilling, prepping meals, and serving guests—all without needing to go inside.
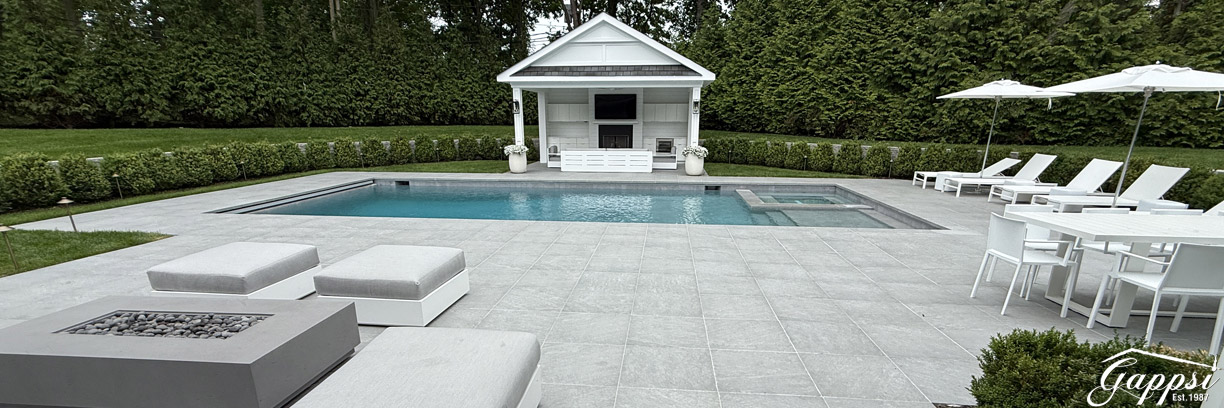
Modern Outdoor Furnishings – A Cohesive Design

The entire pool and patio area is furnished with contemporary outdoor furniture, handpicked to maintain the modern and minimalist design theme. Gray and white tones dominate the space, maintaining a clean, cohesive, and stylish look. The furniture was selected not only for its looks but also for comfort and weather resistance, ensuring years of enjoyment.

The careful choice of materials, from porcelain and granite to marble and weather-resistant fabrics, reflects Gappsi’s commitment to quality and long-term durability. Every element in this project complements the next, offering a luxurious yet practical outdoor environment.

Understanding Your Investment in a New Pool

A new swimming pool is more than just an addition to your home; it’s an investment in your lifestyle. When you start planning for a project like the one in Sands Point, it’s important to have a clear picture of the costs involved. The price tag isn’t just for the pool itself but for the entire transformed space, including the patio, features, and landscaping that create a cohesive outdoor oasis. Understanding the budget from the beginning helps you make informed decisions and ensures the final result is exactly what you dreamed of, without any surprises along the way. Let’s break down what you can expect when investing in a new inground pool.

Average Cost of a New Inground Pool

When budgeting for a new inground pool, it’s helpful to look at industry averages. Most homeowners find that the total cost for a new installation, including essential features like stone and concrete work, falls somewhere between $80,000 and $120,000. This range can shift based on the size of the pool, the materials you choose, and any custom features you add, such as a built-in spa or sundeck like the one in our Sands Point project. A comprehensive project often includes more than just the pool, incorporating masonry for patios and retaining walls, which contributes to the overall investment but also creates a complete and functional outdoor living area.

What is the Cheapest Type of Pool to Install?

If budget is a primary concern, vinyl-lined pools are typically the most affordable option, with installation costs often ranging from $35,000 to $65,000. While they offer a lower upfront cost, it’s important to consider the long-term picture. For projects that demand complete design freedom and durability, a gunite pool is an excellent choice. Gunite allows for endless customization in shape, size, and integrated features, which is why we selected it for the modern masterpiece in Sands Point. This flexibility ensures your swimming pool perfectly matches your home’s aesthetic and your family’s needs, providing lasting value and a truly unique design.

When is the Best Time of Year to Buy a Pool?

While you can plan a pool project any time of year, scheduling the installation during the off-season—from late fall to early spring—can be a smart move. During these months, contractors often have more availability, which can lead to a smoother and sometimes faster construction process. Planning ahead allows you to get on the schedule before the busy summer rush begins. This ensures your backyard transformation is complete and ready for you to enjoy as soon as the warm weather arrives. It gives you plenty of time to finalize designs, select materials, and prepare for an exciting new addition to your home.

What to Expect for Pool Refinishing Costs

If you already have a pool that’s showing its age, refinishing can bring it back to life. The cost for this varies depending on the pool type and the extent of the work. For a gunite pool, for example, resurfacing can range from $5,000 to $15,000. This process involves repairing any cracks and applying a new finish to make the surface look brand new. It’s a great way to update your pool’s appearance without the cost of a full replacement. At Gappsi, we also offer services to restore and seal surrounding patios and stonework, ensuring your entire pool area looks pristine and well-maintained for years to come.

How to Choose the Best Pool Company in Sands Point

Choosing the right company to build your dream backyard is one of the most critical decisions you’ll make. The quality of the craftsmanship, the smoothness of the process, and the final outcome all depend on the team you hire. In an area like Sands Point, where quality and aesthetics are paramount, you need a partner who understands your vision and has the expertise to execute it flawlessly. It’s not just about finding a builder; it’s about finding a designer, a project manager, and a team of artisans who will treat your home with the care it deserves. Look for a company with a proven track record, a deep understanding of local requirements, and a commitment to client satisfaction.

Full-Service Design vs. Specialized Contractors

When undertaking a large-scale backyard project, you can either hire specialized contractors for each part—one for the pool, another for the patio, and a third for landscaping—or you can work with a full-service design and build company. A full-service firm like Gappsi manages every aspect of the project, from the initial concept to the final installation. This integrated approach ensures a seamless experience, with one point of contact and a cohesive design vision. It eliminates the stress of coordinating multiple teams and timelines, ensuring that elements like the pavilion and outdoor kitchen are perfectly integrated with the pool and patio design.

The Importance of In-House Teams and Experience

A company’s experience and the structure of its team can significantly impact your project’s success. Companies with decades of experience, like Gappsi’s 35+ years serving Long Island, bring a wealth of knowledge to every job. When a company uses in-house teams for design, masonry, and installation, it leads to better communication, consistent quality control, and greater accountability. This structure ensures that everyone working on your project is aligned with the same high standards and vision. An experienced team can anticipate challenges, offer creative solutions, and deliver a finished product that not only looks beautiful but is built to last.

Comparing Pool Materials and Construction

The materials and construction methods used will define your pool’s look, feel, and longevity. As seen in the Sands Point project, gunite is a top-tier choice known for its incredible durability and design flexibility. It allows for custom shapes, depths, and features like built-in spas and benches that simply aren’t possible with other pool types. Surrounding the pool, high-quality porcelain and natural stone pavers offer a slip-resistant, low-maintenance, and elegant surface. Discussing these options with your pool company will help you understand the benefits of each and select the best materials to achieve your desired aesthetic and performance.

custom-built pavilionThe Final Result – A Private Resort in Sands Point, NY
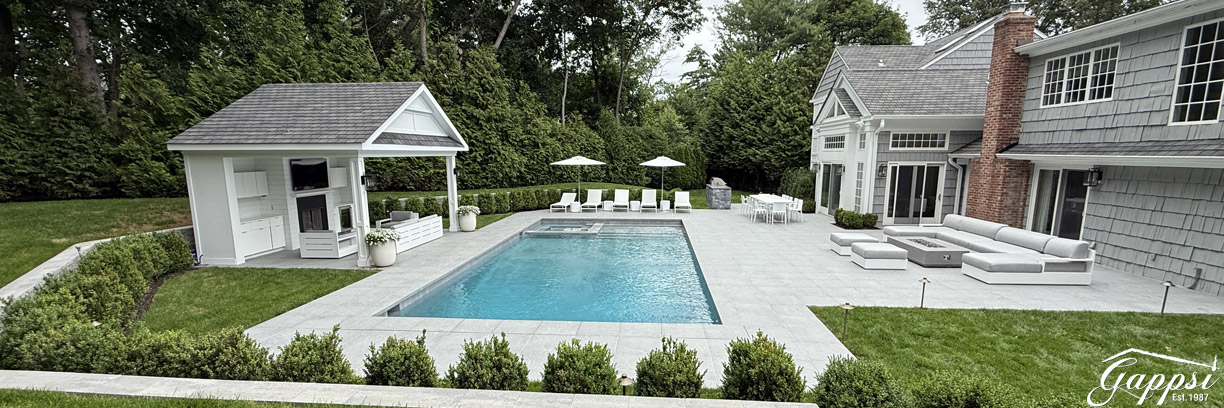
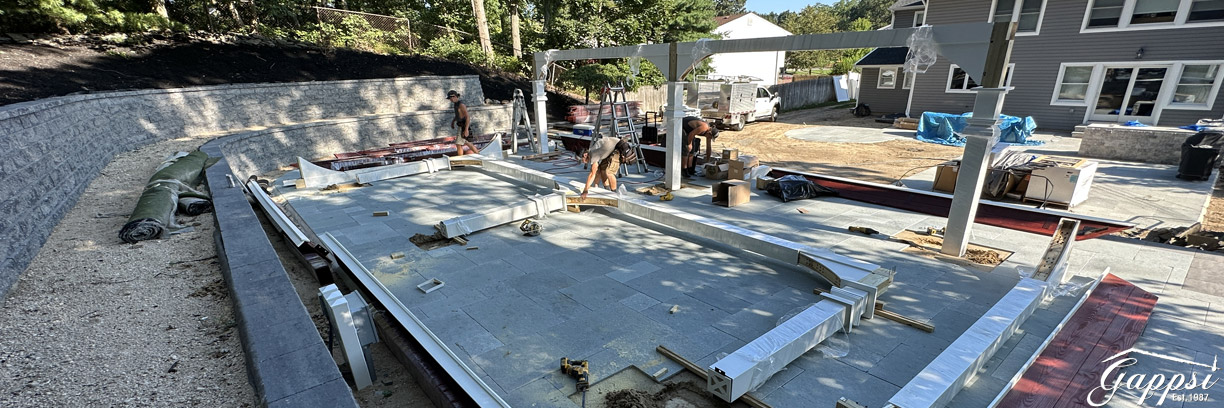
What was once a standard backyard has now become a complete outdoor sanctuary that resembles a high-end resort. This transformation is not just about adding a pool or patio—it’s about creating an entire lifestyle experience. The project’s modern design, premium materials, and innovative layout combine to provide homeowners with a space that is both beautiful and functional.</p>

At Gappsi, we take pride in bringing our client’s visions to life. This project in Sands Point, NY, is a perfect example of how thoughtful design and expert execution can turn any backyard into a luxurious retreat. Whether you’re lounging by the pool, enjoying a cozy night by the fire pit, or entertaining friends under the pavilion, this space was designed to enhance every moment spent outdoors.</p>

Why Choose Gappsi for Your Backyard Redesign?

With over three decades of experience in outdoor living design and installation, Gappsi has established itself as a trusted name across Long Island for high-quality craftsmanship and personalized service. We specialize in custom pool construction, paver installation, landscape design, masonry, and a range of other services.

Each project we undertake is unique, and we work closely with our clients from the initial concept through to completion. Our team handles every aspect—from design to permitting to construction—with precision and care, ensuring that the final product exceeds expectations.</p>

Are you considering a backyard transformation of your own? In that case, whether it’s a pool installation, patio upgrade, or a complete outdoor living space like this one in Sands Point, Gappsi is here to bring your vision to life.</p>

gunite-pool-and-porcelain-patio-in-sands-point

SCHEDULE A MEETING TODAY WITH GAPPSI

Frequently Asked Questions

Why did this project use porcelain pavers instead of a more traditional material like natural stone? That’s a great question. While natural stone is a classic choice, porcelain offers some fantastic benefits for a high-traffic area like a pool patio. It’s incredibly durable and doesn’t stain easily, so you don’t have to worry about spills during a barbecue. It’s also slip-resistant, which is a huge plus around water, and it stays cooler under the sun than many other materials. For this project, it provided the clean, modern look the homeowners wanted with minimal upkeep.

A project of this scale seems huge. How long does a complete backyard transformation typically take? A multi-faceted project involving a new pool, extensive masonry, and a structure like a pavilion can take a few months from the first day of construction to the final touches. The timeline can vary based on factors like the complexity of the design, local permitting, and even the weather. The most important part is the planning phase, which happens well before any digging begins, to ensure every detail is considered and the project runs smoothly.

The post mentions a lot of custom features. How much of a project like this can actually be personalized? Nearly every element you see can be tailored to your specific taste and property. With a gunite pool, the shape, size, depth, and features like a sundeck or spa are designed from scratch. The same goes for the outdoor kitchen, the layout of the patio, and the finishes on the pavilion. Our goal is to create a space that feels like a true extension of your home, so we work with you on everything from the color of the pavers to the placement of the fire pit.

What does it really mean to work with a “full-service” company for a project like this? Think of it as having one dedicated team and a single point of contact for your entire project. Instead of you having to hire and coordinate a pool installer, a mason, a landscaper, and an electrician, we manage all of it. This ensures the design is cohesive—so the patio stone perfectly matches the pool coping—and that the entire process is streamlined. It saves you the headache of juggling different contractors and timelines.

I’m inspired by this project, but my backyard is completely different. What’s the first step to see what’s possible for my own space? Every great backyard starts with a conversation. The best first step is to gather some inspiration—photos of styles you love and a list of how you want to use the space. Do you host big parties or prefer quiet family evenings? From there, scheduling a consultation is key. We can walk your property with you, listen to your ideas, and help you understand what’s possible within your specific landscape and budget.

Key Takeaways

  • Think Beyond Just the Pool: A successful backyard transformation comes from a unified design where the pool, patio, and amenities work together. Planning your project as a complete outdoor living space ensures every element is functional and flows together beautifully.
  • Select Materials for Both Style and Performance: Your choice of materials is a long-term investment in your home’s value and your own enjoyment. High-quality options like customizable gunite and durable porcelain pavers create a sophisticated look that is also built to last with minimal upkeep.
  • Partner with a Full-Service Firm for a Seamless Process: Hiring one company to manage your entire project from design to installation simplifies everything. An integrated team provides a single point of contact, ensures consistent quality, and brings a cohesive vision to life without the stress of coordinating multiple contractors.

Related Articles

Share this page:

Traditional Pavilion with Passion Spa Built in Commack NY

View Gappsi’s YouTube Channel for Videos of the Traditional Pavilion with Passion Spa Built in Commack, NY

View our latest traditional pavilion with Passion Spa, built on the unused sloped backyard of this home in Commack, New York.

Unused sloped backyard areas can be transformed into usable spaces by incorporating terraced gardens, retaining walls, rock gardens, or even dedicated planting zones that utilize the slope for varied plant life. This will manage potential erosion issues and create distinct levels within the yard, turning a challenging slope into a visually appealing and functional outdoor space.

This recent project, designed and built by Gappsi in Commack, N.Y., involved using the unused sloped backyard area and making it very useful.

traditional-pavilion-with-passion-spa-built-in-commack-ny4Considerations when designing for a sloped backyard:
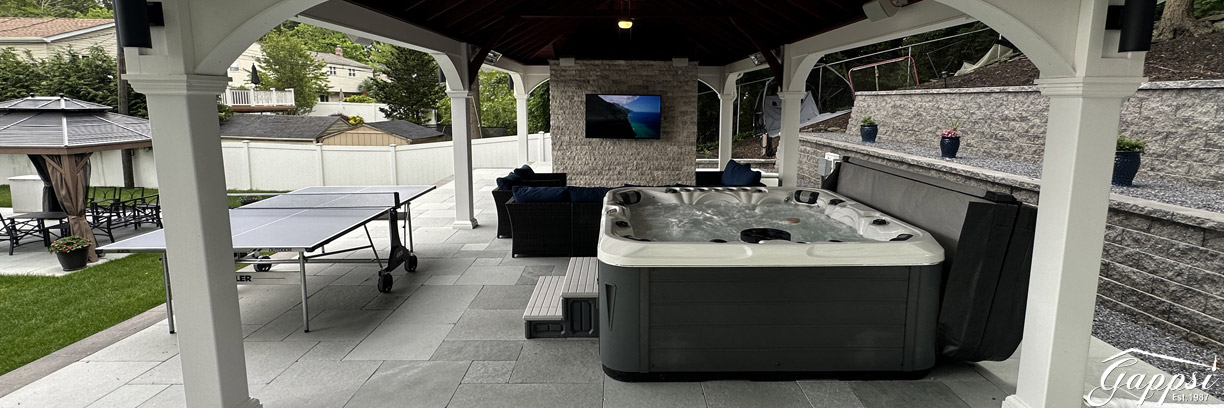
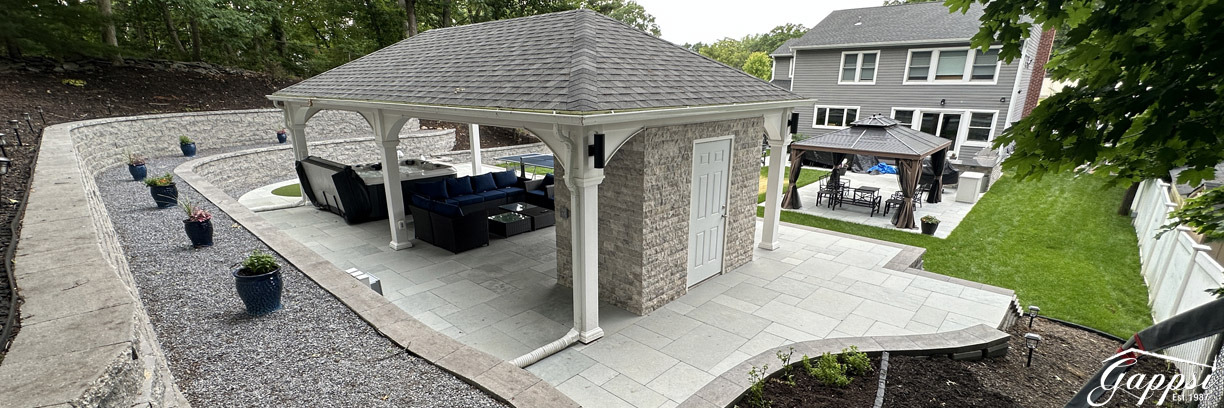
  • Slope Severity:  The degree of slope will determine the type of structures needed, with steeper slopes requiring more substantial retaining walls.
  • Drainage: Ensure proper drainage to prevent water accumulation and erosion, especially in areas with heavy rainfall.
  • Sunlight Exposure: Consider how the slope affects sunlight exposure when choosing plants for different areas.

We built a multi-level retaining wall using the Nicolock Granite City Firma wall. The first level creates a flat area for the 18×36 traditional pavilion with the Roman pattern G045 natural blue-gray limestone patio floor from the Gappsi Natural Stone Collection.

Gappsi built the traditional pavilion with Passion Spa. Adding a conventional pavilion to your backyard provides a dedicated, covered outdoor space that protects you from the elements while enhancing the aesthetic appeal of your yard. It allows for comfortable outdoor living, entertaining guests, and potentially increasing your home’s value. It creates a functional and stylish area to relax and enjoy the outdoors, rain or shine.

traditional-pavilion-with-passion-spa-built-in-commack-ny

Key benefits of a backyard traditional pavilion:

  1. Shelter from weather: Protects from sun, rain, and wind, allowing you to use your outdoor space even during inclement weather.
  2. Elevated aesthetic: Adds a touch of elegance and sophistication to your backyard design.
  3. Multipurpose space: This can be used for dining, lounging, gathering with guests, or even a casual outdoor living room.
  4. Increased outdoor living: Encourages more time spent outdoors by offering a comfortable, protected area.
  5. Potential home value increase: A well-designed pavilion can add to the perceived value of your property.
  6. Customization options: Can be designed and built to match your style and needs, including size, materials, and features.

Second and Third Level Retaining Walls

A second retaining wall was built to retain the slope and the ground behind it.  Tiered retaining walls comprise two or more walls, each higher wall set back horizontally from the underlying wall. When appropriately designed, they retain soil and support loads, deliver an attractive appearance, and provide room for plantings.

traditional-pavilion-with-passion-spa-built-in-commack-ny13 Hole Putting Green

Our team installed and built a three-hole putting green on the patio.  A 3-hole putting green in your backyard offers several benefits, including improved golf skills through dedicated practice space, low maintenance with artificial turf, increased property value, fun for family and friends, mental stimulation through strategic putting, and the ability to customize the difficulty level of each hole; allowing you to focus on specific aspects of your putting game depending on the design of each hole.

With a 3-hole design, you can create diverse putting challenges by varying the length, slope, and green contours on each hole to target specific putting weaknesses.

Important considerations:

  1. Space Requirements: Ensure you have enough yard space to accommodate a 3-hole putting green with appropriate distances and design elements.
  2. Installation Costs: Factor in the cost of materials, installation, and potential landscaping needed for your putting green.
  3. Maintenance Routine: While low maintenance, artificial turf requires occasional brushing and cleaning to maintain optimal putting conditions.

traditional-pavilion-with-passion-spa-built-in-commack-ny2Passion Spa – Gappsi is an Authorized Dealer for Passion Spas
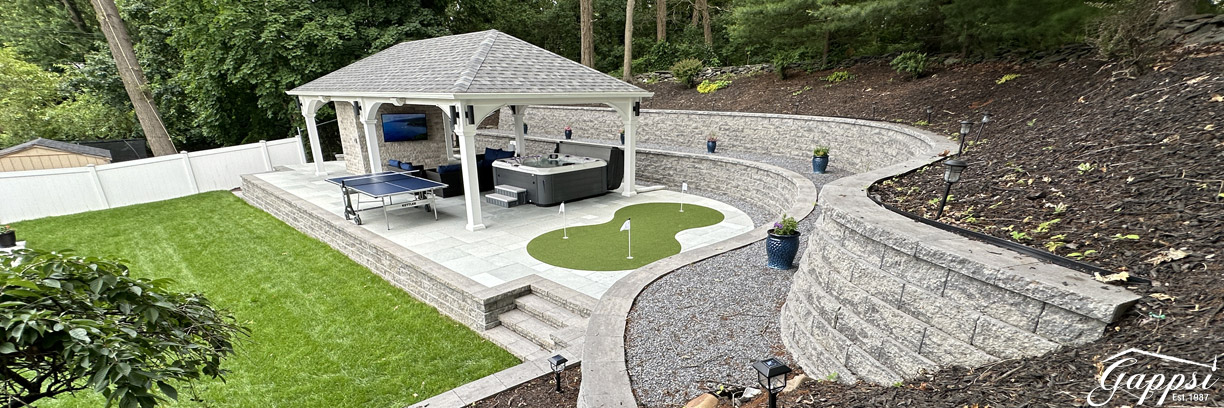
Under the traditional Pavillion, we installed a Passion spa.  A Passion Spa in your backyard offers numerous benefits, including stress relief, pain management, improved sleep, enhanced muscle relaxation, increased blood circulation, social interaction, boosted mood, potential for light exercise through swim features, and a luxurious outdoor retreat thanks to its designed massage jets and water purification system, all while providing a comfortable and aesthetically pleasing addition to your outdoor space; essentially creating a personal oasis for relaxation and wellness at home.

Custom Traditional Pavilion with Passion Spa Designed and Built By Gappsi

The 18 x 36 pavilion was built with a bare wood ceiling stained mahogany.  An audio system and electrical heating system were also installed so that people could enjoy year-round entertainment.  Behind the TV wall, we created an area with a door in the back for additional storage.  The wall was veneered with silver travertine tumbled, and the TV was hung on the wall.

Steps on both sides of the patio access the pavilion area, also used as a ping-pong area. This is the latest masonry-designed sports court and pavilion incorporated into an entire abandoned area. It became the most helpful part of the backyard. It is the newest project built by Gappsi in Commack, NY.

traditional-pavilion-with-passion-spa-built-in-commack-ny3SCHEDULE A MEETING TODAY WITH GAPPSI

Share this page:

Your Guide to Building a Pavilion in Islip, NY

Creating the perfect outdoor entertainment area often starts with a single, powerful focal point. For one of our recent clients, that focal point was a stunning 14×16 modern Amish pavilion complete with a custom bar, porcelain tile floors, and high-end finishes. This project showcases how the right structure can define an entire outdoor living space. If you’ve been considering adding a pavilion in Islip, NY, this project serves as a perfect example of what’s possible. Follow along as we detail the materials, design choices, and construction process that brought this incredible backyard vision to life for a local homeowner.

https://youtu.be/_m07lf12eJM

View Gappsi’s YouTube Channel for Videos on Modern Amish Backyard Pavilion with Porcelain Floor Tile | Islip, NY

From small to big, pavilions provide the perfect setting to enjoy your space. Our pavilions are built with high-quality materials and designed to last.  Pavilions offer ample space for hosting various gatherings, parties, and barbecues. You can even set up a bar and outdoor kitchen in your pavilion, making it the ultimate party spot.

With numerous backyard pavilions available, the first choice is to invest in a distinct-looking pavilion to provide unbeatable shade. You can check out various pavilions available at our showroom in Smithtown, N.Y., and choose one that fits your style, budget, usage, and structural needs.

Planning Your Backyard Pavilion Project

Bringing a pavilion into your backyard is an exciting project, but a little planning goes a long way. Before you get swept up in design ideas, it’s smart to lay some groundwork. Thinking through your budget, material preferences, and ideal style will make the entire process smoother and ensure the final result is exactly what you envisioned. A well-planned pavilion not only provides a beautiful outdoor living space but also adds lasting value to your home. Taking the time to consider these key elements upfront helps you communicate your vision clearly to your builder and sets the stage for a successful build that you’ll enjoy for years to come.

Setting a Budget for Your Pavilion

Establishing a clear budget is the first practical step in your pavilion journey. The total cost can vary significantly based on several key factors. The size of the structure is a primary driver; a larger pavilion will naturally require more materials and labor. The materials you choose also play a huge role, with options ranging from pressure-treated pine to high-end cedar or low-maintenance vinyl. Don’t forget to account for site preparation, which might include leveling the ground or pouring a concrete slab. Finally, any custom features like built-in lighting, electrical outlets, or an attached outdoor kitchen will add to the final price tag. Having a realistic budget helps you prioritize what’s most important for your outdoor space.

Choosing the Right Materials

The material you select for your pavilion defines its look, feel, and long-term maintenance needs. Wood pavilions, especially those made from cedar or pine, offer a classic, natural aesthetic that blends beautifully with landscaping. They are highly customizable but do require periodic staining or sealing to protect them from the elements. For a lower-maintenance option, vinyl pavilions are an excellent choice. They resist rot, insects, and fading, and only need occasional cleaning. Metal pavilions, typically made from aluminum, provide a sleek, modern look and are incredibly durable, standing up well to harsh weather. At Gappsi, we offer a wide range of pavilions and pergolas in various materials to suit your style and lifestyle.

Exploring Pavilion Styles

Your pavilion should be an extension of your home’s architecture and your personal style. The options are nearly endless, from traditional to contemporary. Traditional Amish-built pavilions are celebrated for their exceptional craftsmanship and timeless appeal, often featuring beautiful woodwork and classic design elements. If your home has a more modern aesthetic, you might prefer a pavilion with clean lines, a minimalist structure, and materials like metal or a combination of wood and steel. The best part about a custom project is that you don’t have to fit into a box. You can work with a design team to create a unique structure that perfectly complements your home and meets your specific needs for outdoor entertaining and relaxation.

Navigating Local Requirements for a Pavilion in Islip, NY

Before breaking ground, it’s essential to understand the local rules and regulations in the Town of Islip. While it might seem like a hassle, these requirements are in place to ensure every structure is safe, sound, and properly placed. Dealing with permits and zoning can feel overwhelming, but it’s a standard part of any construction project. An experienced local contractor will be well-versed in these processes and can handle the paperwork for you, making the experience much less stressful. This ensures your project is compliant from the start, avoiding any potential issues or delays down the road and giving you peace of mind that your new pavilion is built to last.

Building Permits for Accessory Structures

In the Town of Islip, the construction of any new building, including accessory structures like a pavilion, is governed by the New York State Uniform Code. This means you will almost certainly need to obtain a building permit before construction begins. The permit process involves submitting your plans to the town’s building department for review. They check to make sure the design meets all safety standards and building codes. This step is crucial for ensuring your pavilion is structurally sound and safe for you and your family to enjoy. It also protects your investment by making sure it’s officially documented and approved by the town.

Zoning Laws and Setback Rules

Beyond the building permit, you also need to comply with Islip’s zoning laws, particularly setback rules. Setbacks are regulations that dictate how far an accessory structure, like your pavilion, must be from your property lines, your house, and other structures. These rules ensure there’s adequate space between properties for safety, privacy, and access. Before finalizing your pavilion’s location, you or your contractor must check the specific requirements for your property. A professional team familiar with Islip’s regulations can help you position your pavilion perfectly to meet all local ordinances while maximizing the beauty and function of your yard.

Private vs. Public Pavilions in Islip

While Islip offers beautiful public parks with pavilions available for public use, there’s a distinct difference between that experience and having a private pavilion in your own backyard. A public pavilion is a great option for a one-off event, but it comes with limitations like booking schedules, rules, and a lack of privacy. A personal pavilion, on the other hand, becomes a seamless part of your daily life—a permanent retreat designed just for you. It’s about creating a dedicated space for relaxation and entertainment that is always available, perfectly customized, and exclusively yours to enjoy whenever you wish.

The Convenience of a Personal Backyard Pavilion

Imagine stepping out your back door into a shaded, comfortable oasis built just for you. That’s the beauty of a personal backyard pavilion. It’s your private spot for morning coffee, a sheltered play area for the kids, or the perfect setting for an impromptu dinner with friends. You have complete control over the design, from installing an outdoor kitchen and bar to adding cozy lighting and a sound system. This level of customization transforms it from a simple structure into a true outdoor living room. A personal pavilion not only enhances your lifestyle but also adds significant appeal and value to your home improvement investment.

Using Public Pavilions in Islip Parks

The Town of Islip maintains several lovely parks with pavilions that residents can reserve for gatherings. These are fantastic resources for large parties or community events. However, using a public space means working around a reservation system, which can be competitive, especially during peak season. You’ll also be sharing the park with others, which means less privacy and more background noise. There are often rules regarding decorations, music, and hours of use. While public pavilions serve a wonderful purpose, they can’t offer the spontaneous, intimate, and personalized experience that comes with having a beautiful, custom-built pavilion just a few steps from your own home.

Modern Amish Backyard Pavilion – Wooden

Perfect for all kinds of locations, modern Amish backyard pavilions have a wide appeal because of the classic wood look. Large or small, ornate or rustic, traditional or trendy, these backyard pavilions will surely deliver beyond your expectations and are made to last for generations. Nothing beats the charm and elegance of natural wood for a truly traditional look. Our wood pavilions are constructed using hand-selected, #1 grade, treated Southern yellow pine for the best possible appearance.

Modern Amish Backyard Pavilion – Vinyl

Vinyl backyard pavilions are modern-looking, long-lasting, and easy to clean and maintain. They are available in all sizes, from a small poolside getaway to an enormous outdoor retreat. Veneer stonework, a fireplace and chimney, exotic wood ceilings, and copper and other roofing options may complement a vinyl backyard pavilion. Get the traditional pavilion look without the maintenance of wood. Made from #1 grade-treated southern yellow pine and covered in high-quality vinyl, our vinyl pavilions offer a worry-free addition to your backyard.

modern-amish-backyard-pavilion-with-porcelain-floor-tile-islip-ny1Recently, we installed a 14×16 modern Amish backyard pavilion with porcelain floor tile in Islip, NY. This traditional pavilion has 8″ columns and a shingled roof. The ceiling is bare wood stained in a mahogany color.  A pavilion bar was added as a great way to have an iconic outdoor structure that is still eye-catching. A leather black granite countertop was also added. Leather-finish stone has a pebbly, leather-like surface feel, a design trend gaining popularity among homeowners. It has a grainy texture and a gentle gloss less intense than polished granite.

Summit Appliances

We added a Summit refrigerator and Summit cabinets to the island bar. Summit’s outdoor refrigeration line includes built-in weatherproof stainless steel appliances. Summit is made in NYC and entirely manufactures several product lines, including electric cooktops and blanket warmers, in its Bronx facilities. It is a great choice for those of you looking for top-quality products that are built to last. They offer a wide range of appliances that will meet various needs, and with an extensive collection, you will find the perfect fit!

Silver Travertine Veneered Island Bar and Backdrop Wall

Travertine is a durable stone, making it a good choice for indoor and outdoor projects. Its dense, compact structure, formed from the slow deposition of minerals, can withstand heavy foot traffic, extreme weather conditions, and the test of time. Random variation travertine tiles have a charm and character that is hard to describe, but you will certainly appreciate it when you see it.  This beautiful tile is suitable for installation on walls in commercial and residential spaces such as bathrooms, kitchens, and outdoor spaces.  We applied the Silver Travertine in random sizes to the facade of the bar and the wall behind the bar.

Brazilian Teak Wood TV Wall and Focal Point

The back wall of the outdoor bar was split between Brazilian teak wood and Silver Travertine random tiles to match the bar island.  Teak wood is incredibly durable and resistant to rot, insects, and moisture. It contains natural oils that make it weather-resistant.  Brazilian teak wood, also known as Cumaru wood, has many benefits, including:

  • Durability: Brazilian teak is a tough, durable tropical hardwood that lasts decades. It’s a popular choice for outdoor structures and high-traffic interior flooring.
  • Weatherproof: Brazilian teak is water-resistant and can withstand harsh weather conditions, including heavy monsoons. It’s less likely to crack or expand in extreme climates.
  • Low maintenance: Brazilian teak doesn’t require unique treatments or sealants, and it doesn’t need to be sanded or painted. It’s also easy to maintain, as it doesn’t need to be resealed often or scrubbed for mold and mildew.
  • Sustainable: Brazilian teak is a fast-growing hardwood that’s a more eco-friendly alternative to materials like plastic, which can take centuries to decompose.
  • Elegant: Brazilian teak has a smooth color and deep grain.
  • Pest resistant: Brazilian teak’s natural oils make it resistant to pests, rot, and decay. Termite resistant: Brazilian teak is resistant to termites.

Italian Porcelain Floor Tile

Gappsi installed Italian porcelain tiles from our Porcelain and Natural Stone collection on the floor. Italian porcelain tiles are renowned worldwide for their superior quality, enduring durability, and timeless aesthetic appeal. Porcelain tile is highly resistant to wear and lasts longer than standard ceramic tile.  A highly regarded benefit of porcelain tiles is they are excellent tiles that withstand a lot of spills without obtaining any lasting stains.  One of the main reasons we chose these tiles is their ease of daily use. Italian porcelain tiles are less porous and do not permit as much liquid penetration as ceramic tiles. This is a huge benefit, especially if you have young children or dogs at home. Despite the inevitable daily accidents, your tiles will remain brand new for a long time.

modern-amish-backyard-pavilion-with-porcelain-floor-tile-islip-ny2

Black Mexican Pebbles

Black Mexican pebbles are famous for landscaping and interior decoration because of their unique color, smooth texture, and versatility. We added the pebbles at the pavilion’s entrance, connecting the existing patio to the new porcelain tile area.

There are several advantages of using Mexican beach pebbles:

  • Appearance – Black Mexican beach pebbles have a deep, lustrous black color that creates a striking contrast when placed in or around water. Their smooth, polished surfaces reflect light, creating captivating glimmers and reflections.
  • Durability – Black Mexican beach pebbles are weather resistant and can last a lifetime, remaining unaffected by sun, rain, ice, or snow.
  • Versatility – Black Mexican beach pebbles can be used for landscaping and interior decoration projects, including pathways, borders, water features, and terrariums.
  • High-end look—Black Mexican beach pebbles are considered high-end stones that add a sophisticated and elegant feel to a home.

This is the latest porcelain patio and pavilion installation supplied and installed by Gappsi.  Whether you visit our porcelain paver showroom in person or tour our virtual showroom, you’ll immediately see what separates us from other porcelain paver suppliers and pavilion dealers.  We’re here to make a difference.

SCHEDULE A MEETING TODAY WITH GAPPSI

Frequently Asked Questions

What are the biggest factors that influence the cost of a new pavilion? The final cost of a pavilion depends on a few key choices. The overall size is the most significant factor, as it dictates the amount of material and labor needed. The type of material you select, whether it’s classic wood or low-maintenance vinyl, also plays a major role. Finally, any custom additions like a built-in bar, electrical wiring for lights and outlets, or a stone fireplace will shape the total investment.

Do I have to handle the building permits myself? Navigating local town requirements can feel like a full-time job, but you don’t have to do it alone. While a building permit from the Town of Islip is necessary for a structure like a pavilion, our team manages that entire process for you. We prepare and submit all the required plans and paperwork to ensure your project is fully compliant with local codes, so you can focus on the exciting parts of the design.

How do I decide between a wood and a vinyl pavilion? The choice between wood and vinyl really comes down to aesthetics and maintenance. Wood pavilions offer a timeless, natural beauty and can be stained or painted to match your home perfectly, but they do require periodic sealing to protect them from the weather. Vinyl pavilions give you a classic look without the upkeep; they are incredibly durable, resist the elements, and only need simple cleaning to stay looking new.

Can a pavilion be customized with features like an outdoor kitchen or a TV? Absolutely. Think of a pavilion as the foundation for your ideal outdoor living room. The project we featured is a perfect example, with its custom bar, integrated appliances, and a feature wall for a TV. We can design your pavilion to include anything from a complete outdoor kitchen and dining area to a cozy lounge with a fireplace, creating a space that is perfectly suited to how you want to relax and entertain.

I’m interested in a pavilion, but I’m not sure where to begin. What’s the first step? The best way to start is by scheduling a consultation with our design team. This first meeting allows us to understand your vision, see your space, and discuss your lifestyle and budget. From there, we can help you explore different styles, materials, and features to create a clear plan for a pavilion that you’ll love for years to come.

Key Takeaways

  • Start with a solid plan: Before you build, define your budget, choose materials that suit your lifestyle (like classic wood or low-maintenance vinyl), and select a style that complements your home to ensure the final result is exactly what you envisioned.
  • Address local requirements early: Building a pavilion in Islip requires following local rules, so work with your contractor to secure the necessary building permits and confirm your design meets all zoning and setback laws to prevent any project delays.
  • Mix materials for a custom design: Create a truly unique outdoor space by combining different textures and finishes. Pairing durable elements like porcelain tile floors and stone veneer with the warmth of wood accents gives your pavilion a sophisticated, high-end feel.

Related Articles

Share this page: