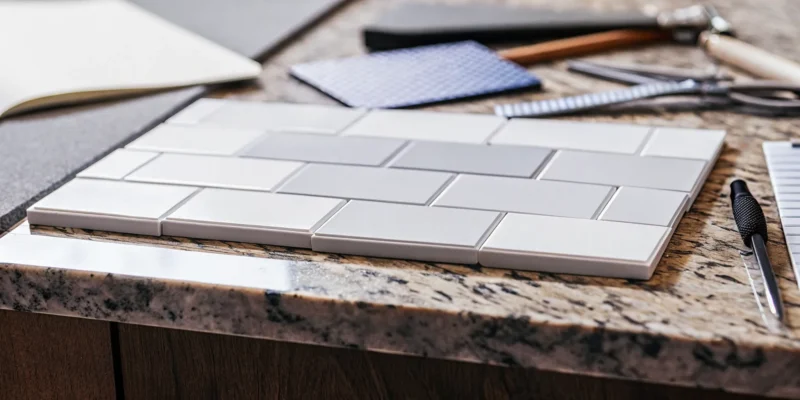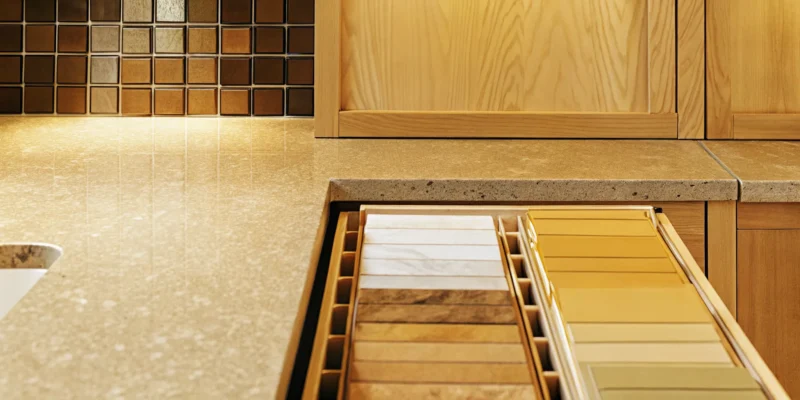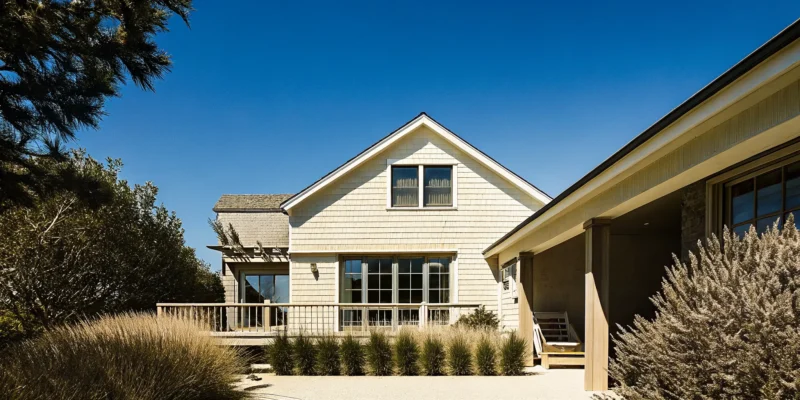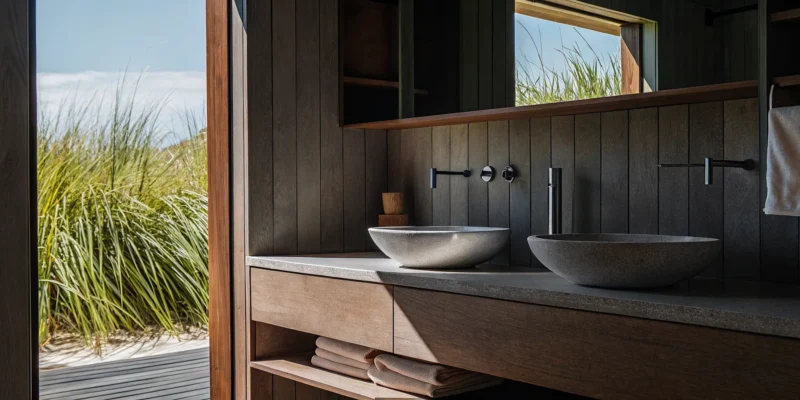
Contractors building a new garage addition for a home.

The Smart Guide to Garage Addition Contractors

A garage addition is one of the smartest investments you can make in your Long Island home. It adds significant property value, enhances curb appeal, and provides practical space that makes daily life easier. But the success of this investment depends entirely on the quality of the build. You need a structure that is not only beautiful but also durable and compliant with local codes. This is where professional garage addition contractors come in. They are the experts who ensure your project is a sound financial decision, not a costly mistake. In this article, we’ll explore how a new garage pays off in the long run and why partnering with an experienced local builder is the key to maximizing your return.

Key Takeaways

  • Your Contractor Is Your Most Important Partner: A professional contractor does more than just build; they guide your design, manage all local permits and zoning laws, and oversee the entire project. It is essential to verify their credentials, check references, and confirm their local experience to ensure a smooth process.
  • Design for Your Life, Not Just Your Car: A garage addition is a smart investment that adds value and convenience. Think beyond parking and consider how the space can truly serve your needs, for instance, as a workshop, home gym, or organized storage hub, to get the most out of your new space.
  • A Detailed Budget Prevents Surprises: Protect your investment by getting detailed, written quotes that clearly define the project scope and costs. Always include a contingency fund of 10% to 20% in your budget to cover unexpected issues and insist on a clear contract before any work begins.

What Does a Garage Addition Contractor Do?

Thinking about adding a garage? It’s a big project, and a garage addition contractor is the professional who brings it all together. Their job goes far beyond just building four walls and a roof. A great contractor acts as your partner, guiding you through every step, from the first sketch to the final coat of paint. They help you define what you need, design a space that fits your life, and manage the entire construction process so you don’t have to. They are the experts who ensure your new garage is not only beautiful and functional but also safe, compliant with local codes, and built to last.

Attached vs. Detached: Which Garage Is Right for You?

One of the first decisions you’ll make is whether to build an attached or detached garage. An attached garage connects directly to your home, offering the convenience of walking straight from your car into the house without facing the elements. This option is often preferred for its easy access and simpler connection to your home’s existing utilities.

A detached garage, on the other hand, is a separate structure on your property. This gives you more flexibility with placement and design. It’s an excellent choice if you plan to use the space as a workshop for noisy projects or want to keep fumes from cars and equipment away from your living areas. A contractor can help you weigh these options based on your property’s layout and your specific needs for a home remodeling project.

More Than a Garage: Designing Workshops, Gyms, or Guest Suites

Your new garage doesn’t have to be just a place to park your car. With the right design, it can become a valuable extension of your living space. Many homeowners are now creating custom garages that serve multiple purposes. Imagine a dedicated workshop for your hobbies, a private home gym, or even a playroom for the kids.

You could also design a garage with a finished room above it, creating a perfect guest suite, home office, or rental opportunity. A skilled contractor will help you plan for the specific features these spaces require, like reinforced floors for gym equipment, extra electrical outlets for a workshop, or plumbing for a guest bathroom. This is your chance to add a truly functional space that complements your lifestyle, perhaps even alongside new sports games courts.

Visualizing the Final Look with Design Plans and 3D Renderings

It can be hard to picture how a new structure will look once it’s built. That’s why the design phase is so important. A professional contractor will work closely with you to create detailed plans that capture your vision. They don’t just listen; they help you refine your ideas into a workable blueprint.

Modern contractors use tools like 3D renderings to give you a realistic preview of your garage addition. This allows you to see how it will connect to your home, experiment with different exterior finishes, and make sure every detail is right before construction begins. Visualizing the project with different porcelain and natural stone options ensures the new addition perfectly matches your home’s existing style and enhances its curb appeal.

Handling Permits, Zoning, and Building Codes

Navigating local regulations is often one of the most challenging parts of any construction project. Every town in Nassau and Suffolk County has its own specific zoning laws, building codes, and permit requirements for new structures. A garage addition must comply with rules regarding its size, height, and distance from property lines.

An experienced local contractor handles all of this for you. They know the regulations inside and out and will manage the entire permitting process. This saves you from the stress of paperwork and potential delays. Hiring a professional ensures your project is fully compliant from the start, giving you peace of mind that your new garage is built safely and legally. This expertise is a key reason to work with an established Long Island company.

Managing the Project from Concept to Completion

From the moment you approve the design, your contractor takes on the role of project manager. They are your single point of contact, responsible for coordinating every aspect of the build. This includes ordering high-quality materials, scheduling and overseeing all the different tradespeople, like electricians and plumbers, and ensuring the work stays on schedule and within budget.

This comprehensive management means you don’t have to juggle multiple contacts or worry about the day-to-day logistics. Your contractor will provide regular updates and handle any challenges that arise, ensuring a smooth process from the first day of site prep to the final walkthrough. You can see examples of Gappsi’s beautifully finished projects on our YouTube channel.

Is a Garage Addition a Good Investment for Your Long Island Home?

Thinking about adding a garage to your Long Island home? It’s a fantastic question, and the short answer is a resounding yes. A garage addition is one of the most practical and valuable improvements you can make. It’s not just about having a place to park your car to protect it from coastal weather. It’s about adding square footage, creating functional space, and seriously improving your home’s curb appeal. A well-built garage provides a solid return on investment by making your property more attractive to future buyers and your daily life much more convenient.

How a New Garage Increases Property Value

A new garage gives you more space and can also make your property more valuable. For many Long Island homebuyers, a garage is a non-negotiable feature. Adding one can instantly make your home more competitive on the market. It provides secure parking, which is a huge plus, but it also adds significant storage and functional living area. This kind of versatile space is exactly what buyers are looking for. A thoughtfully designed garage addition is a smart home remodeling project that not only enhances your lifestyle now but also pays you back when it’s time to sell. It’s a feature that adds tangible value you can see on a property appraisal.

Beyond Parking: The Benefits of Extra Storage and Protection

Garages help homeowners add more useful space to their homes, not just for parking cars. Think of a new garage as a blank canvas. It’s the perfect spot for a workshop where you can finally tackle those DIY projects. It can become a home gym, a studio for your hobbies, or simply a well-organized storage hub for everything from holiday decorations to beach chairs and bikes. For those looking to create a personal wellness retreat, a garage can even house a brand new sauna. By moving these activities out of your main living area, you free up space inside your home and keep everything neatly contained and protected from the elements.

Creating a Cohesive Look That Enhances Curb Appeal

A great garage addition should look like it was always part of your home’s original design. The goal is to make the new garage fit perfectly with your home’s look, not appear like a tacked-on box. This is where expert design and material selection come into play. By matching the siding, roofing, and architectural style of your house, the new structure blends in seamlessly. You can also use the project as an opportunity to improve your landscape and hardscaping. Imagine a beautiful new driveway made from elegant porcelain and natural stone leading up to your new garage. This cohesive approach creates a polished, high-end look that dramatically improves your home’s curb appeal.

Why Smart Design Choices Pay Off in the Long Run

Investing in a garage is about more than just the structure itself; it’s about making smart choices that ensure its longevity and functionality. This is why it’s so important to focus on good quality work, clear communication, and local expertise. A contractor who understands Long Island’s specific building codes and weather patterns will build a garage that lasts. Smart design also involves planning for your future needs. Will you need extra outlets for a workshop? Reinforced flooring for heavy equipment? Proper ventilation for a gym? Thinking through these details from the start ensures your new garage serves you well for years, making your initial investment even more valuable. Expert masonry and construction techniques are key to a successful project.

How Much Does a Garage Addition Cost in Long Island?

Talking about budget is one of the first, and most important, steps in any home renovation. A garage addition is a significant project, and understanding the potential costs is key to planning a successful build. The final price tag can vary quite a bit, depending on the size, style, and features you choose. It’s also important to remember that building on Long Island often comes with higher costs for labor and materials compared to national averages.

This section will walk you through the numbers, from typical project costs to the hidden fees you might not expect. My goal is to give you a clear picture of what to budget for, so you can move forward with your home remodeling project feeling confident and prepared. We’ll break down the costs by square foot, explore the factors that can cause prices to fluctuate, and give you a framework for creating a realistic budget that covers all your bases.

Typical Costs by Garage Type and Size

Nationally, the average cost to build a new garage is between $19,500 and $42,500, but this is just a starting point. The final price depends heavily on whether you choose an attached or detached structure and how many cars you plan to park. A simple, one-car attached garage will naturally fall on the lower end of the spectrum. A more complex two or three-car detached garage, which requires its own foundation and separate utility lines, will cost significantly more. These figures also represent a standard build, so any custom features or high-end finishes will add to the total.

What to Expect for Cost Per Square Foot

A helpful way to create an initial estimate is to look at the cost per square foot. For a basic, good-quality garage addition, you can expect to pay somewhere between $300 and $400 per square foot. This price generally covers the core structure, including the foundation, framing, roofing, and standard siding. However, this is a baseline. If you plan to finish the interior for a workshop, add plumbing for a half-bath, or install premium flooring, that per-square-foot cost will rise. Using high-end materials like custom natural stone for an adjoining walkway or installing an electric vehicle charging station are other examples of upgrades that will increase the final price.

Factors That Influence the Final Price

Several key elements will shape the total cost of your garage addition, especially here on Long Island. Labor and permitting costs in our area can increase project totals by 15% to 30% over the national average. Beyond location, the materials you select for roofing, siding, and garage doors play a huge role. Custom features are another major factor. Do you want a simple space for parking, or are you dreaming of a heated workshop, a home gym with a dedicated sauna, or a guest suite with a full bathroom? Each of these additions requires specialized labor and materials, which will be reflected in your quote.

Common Hidden Fees to Watch Out For

A good plan accounts for the unexpected. While a detailed quote from your contractor is your best guide, some costs can pop up that aren’t always included in the initial estimate. Site preparation, for instance, might require more extensive excavation or tree removal than first anticipated. You should also plan for the cost of restoring your yard after construction is complete, which could involve new sod or plantings from a landscape designer. Other potential costs include upgrading your home’s electrical panel to handle the new space or dealing with unforeseen soil or foundation issues. These are some of the hidden costs that can surprise homeowners.

How to Create a Realistic Budget

Creating a solid budget is all about planning and transparency. Start by getting detailed quotes from potential contractors that break down the costs for labor, materials, and permits. A vague, one-line estimate is a red flag. Next, and this is crucial, set aside a contingency fund. Most professionals recommend adding an extra 10% to 20% to your total budget to cover any of those hidden fees or unexpected issues that might arise. Finally, think about the finishing touches. The cost of paint, light fixtures, shelving, and other organizational systems can add up, so be sure to factor those into your overall plan to avoid any financial surprises.

How to Choose the Right Garage Addition Contractor

Choosing the right contractor is the single most important decision you’ll make for your garage addition. This is the partner who will turn your vision into a physical structure, so you want someone with the right skills, experience, and professionalism. The right choice means a smoother process, fewer surprises, and a final result you’ll love for years to come. A great contractor doesn’t just build; they guide you through every step, from initial design to the final walkthrough. Taking the time to vet your options thoroughly will save you headaches and ensure your investment is in good hands. When you’re ready to start the conversation, our team is here to help with your home remodeling needs.

Verify Licenses, Insurance, and Credentials

Before you get too far into discussions, your first step should always be to confirm the contractor’s credentials. It’s a common oversight, but hiring someone without the proper licensing and insurance can expose you to significant financial and legal risks. A valid license proves they meet state and local requirements, while insurance protects you if an accident happens on your property. Ask for proof of both general liability insurance and workers’ compensation. Don’t just take their word for it; get copies of the certificates and verify they are current. You can check a contractor’s status with the Suffolk County Department of Labor, Licensing & Consumer Affairs to be certain.

Review Their Portfolio and Check References

A contractor’s past work is the best predictor of your future results. Ask to see a portfolio of their completed garage additions and other similar projects. Look for quality craftsmanship and a style that aligns with what you have in mind. But don’t stop at the photos. Ask for a list of recent client references, and make a point to call them. Speaking with previous customers gives you unfiltered insight into what it’s like to work with the contractor. You can ask if the project stayed on schedule, if the final cost matched the quote, and how the team handled any challenges that came up. You can also see our work to get a feel for the quality and variety of projects we handle.

How to Compare Quotes and Project Scope

Getting several quotes is smart, but the lowest price isn’t always the best deal. To make a true comparison, you need detailed, written proposals from each contractor. A vague quote is a major red flag. A professional proposal will break down all the costs, including labor, materials, permits, and any other fees. It should also include a clear scope of work, a projected timeline, a payment schedule, and information on warranties. This document becomes the foundation of your contract, protecting both you and the contractor by setting clear expectations from the start. A detailed quote for a masonry project, for example, ensures everyone is on the same page about materials and design.

Why Local Experience in Nassau and Suffolk County Matters

A contractor who is familiar with Long Island has a distinct advantage. Local builders understand the specific zoning laws, permit requirements, and building codes for towns across Nassau and Suffolk counties, which can be complex. This expertise helps avoid costly delays and ensures your project is compliant from day one. Local contractors also have established relationships with area suppliers and municipal inspectors, which helps the entire process run more smoothly. They know which materials stand up best to our coastal climate and have experience with the unique construction considerations of our region. This local knowledge is especially critical for complex projects like swimming pools, which involve extensive regulations.

Red Flags to Spot When Hiring a Contractor

Trust your intuition during the hiring process. If something feels off, it’s worth a closer look. Reputable contractors are professional, transparent, and patient.

Here are a few red flags to watch out for:

  • Vague contracts: The proposal lacks detail on the scope, timeline, or costs.
  • High-pressure sales tactics: You feel rushed to sign a contract or make a decision.
  • Large upfront payments: A request for a significant cash deposit before any work begins is a warning sign.
  • An unusually low bid: A price that is drastically lower than other quotes may indicate cheap materials, unskilled labor, or hidden costs to come.
  • Poor communication: They are difficult to reach or unclear in their answers.
  • No physical address: A professional business should have a verifiable office or showroom, like the Gappsi Store.

What Is the Garage Addition Process Like?

Understanding the garage addition process from start to finish helps you feel confident and prepared. A professional contractor will guide you through each step, but knowing what to expect makes the entire experience smoother. The journey involves several key phases, from the initial creative brainstorming and design to the final construction and walkthrough. Each stage is a chance to collaborate with your contractor and ensure your vision is coming to life exactly as you planned. This partnership is the foundation of a successful project. We’ll explore what happens during your initial consultation and how your ideas are translated into concrete designs. Then, we’ll break down the construction timeline so you know what’s happening on-site, from preparing the ground to applying the final coat of paint. Before any work starts, it’s important to ask the right questions, and we’ll give you a list of essential ones. We will also provide actionable advice on how to keep your project on time and on budget, avoiding common pitfalls. Finally, we’ll guide you through the final walkthrough, so you know exactly what to inspect to ensure the finished space is perfect. Let’s walk through what this process typically looks like.

Your Initial Consultation and Design Phase

This first meeting is where your ideas begin to take shape. Come prepared to discuss your vision for the garage addition, including its intended size, style, and how you plan to use the space. Will it be a simple one-car garage, a multi-car space with a workshop, or a two-story structure with a guest suite above? A great contractor will listen to your needs and ask about their design process to ensure it aligns with your expectations. This is the time to explore possibilities and see how a professional can translate your dreams into a functional plan. The goal is to establish a clear direction before any home remodeling begins, ensuring everyone is on the same page.

The Construction Timeline: Site Prep, Building, and Finishing

Once the design is finalized, the construction work begins. This process generally unfolds in three main stages. First is site preparation, which involves clearing the land, grading, and pouring the foundation. Next comes the building phase, where the structure is framed, and the roof, siding, windows, and doors are installed. The final stage involves all the finishing work, such as electrical, plumbing, insulation, drywall, and painting. It’s important to understand if your contractor will handle all phases of the project, including securing the necessary permits. A full-service team like Gappsi manages the entire masonry and construction timeline, providing a seamless experience from the ground up.

Important Questions to Ask Before Construction Starts

Before you sign a contract, it’s crucial to ask the right questions to verify your contractor’s credibility. Think of it as a final interview to confirm you’re making the right choice. Start with the basics: “Are you licensed and insured in Long Island?” This protects you from liability. Then, ask for a portfolio of similar projects and a list of references you can contact. It’s also wise to ask, “Do you have the workforce available to complete my project on schedule?” These questions help confirm that the contractor is not only qualified but also has the resources to deliver on their promises.

How to Keep Your Project on Time and on Budget

One of the biggest concerns for any homeowner is having the project go over budget or past its deadline. A key strategy to prevent this is securing a fixed-price bid from your contractor. Failing to get a fixed-price bid is a common mistake that can lead to unexpected costs and delays down the road. This type of agreement outlines the total cost for the entire project as specified in the contract. Clear communication is also vital. Schedule regular check-ins with your project manager to discuss progress, address any concerns, and make decisions promptly to keep everything moving forward smoothly.

The Final Walkthrough: What to Look For

The final walkthrough is your last opportunity to inspect the work and ensure everything meets your expectations. Before this meeting, review your contract one last time. A detailed written contract should clearly outline the scope of work, timeline, payment schedule, materials, and warranty terms. During the walkthrough, carefully check that all work has been completed to the agreed-upon standards. Test light switches, open and close doors and windows, and look closely at the finishes. Don’t be afraid to point out anything that doesn’t seem right. A reputable contractor will create a “punch list” of items to fix before considering the job officially complete.

Related Articles

Frequently Asked Questions

How long does a typical garage addition take to build? The timeline for a garage addition can vary quite a bit, as it depends on the project’s complexity, size, and style. Generally, you can break the process into two main parts: pre-construction and construction. The pre-construction phase, which includes design, material selection, and securing permits in your specific Long Island town, can take several weeks to a couple of months. Once the permits are approved and the site is ready, the actual construction phase usually lasts for a few months. An experienced contractor will give you a detailed schedule and manage the entire process to keep things moving efficiently.

Besides parking, what are some creative ways to use a new garage space? A new garage is a fantastic opportunity to add functional living space to your home. Many homeowners are designing multi-purpose garages that go far beyond parking. You could create a dedicated home gym, a quiet art studio, or a fully equipped workshop for your hobbies. Another popular option is designing a garage with a finished loft above, which makes a perfect home office, guest suite, or even a private lounge area. It’s a chance to create a space that truly fits your lifestyle, keeping clutter and noise separate from your main living areas.

What’s the most common mistake to avoid with a garage addition? The most significant mistake you can make is hiring a contractor based only on the lowest price without doing your homework. A bid that seems too good to be true often is, and it can lead to cheap materials, poor workmanship, and unexpected costs later. Always choose a licensed and insured professional with a strong portfolio and solid references. Another common pitfall is not having a detailed, written contract that outlines the full scope of work, timeline, and a fixed price before the project begins.

Do I really need to worry about permits and zoning laws myself? No, you shouldn’t have to. A key responsibility of a professional garage addition contractor is to handle all the necessary permits and ensure the project complies with local zoning laws. Every town in Nassau and Suffolk County has its own set of specific regulations, and an experienced local contractor will know exactly what’s required. They manage the paperwork and inspections for you, which prevents stressful delays and ensures your new garage is built safely and legally.

How can I ensure my new garage doesn’t look like an afterthought? Creating a seamless look starts in the design phase. A skilled contractor will work with you to make sure the new garage complements your home’s existing architectural style, matching everything from the roofline and siding to the window trim. Using tools like 3D renderings can help you visualize how the addition will connect to your house. Thoughtful material choices, like using similar natural stone for a new walkway or patio, also help to create a cohesive and polished appearance that improves your home’s overall curb appeal.

Share this page:
Bathroom remodel ideas showing a modern design with a wood vanity, vessel sink, and beige tile.

15+ Bathroom Remodel Ideas for Every Style & Budget

Does your current bathroom feel more chaotic than calm? A well-designed bathroom should be a sanctuary, a place to unwind and recharge. If yours is falling short, it might be time for a change. The journey to a new bathroom is filled with choices, from the perfect freestanding tub to the right vanity that offers both style and storage. To help you find your direction, we’ve compiled our favorite bathroom remodel ideas that focus on creating a serene and highly functional space. We’ll cover everything from spa-inspired features and smart layouts to the power of natural materials, helping you design a personal retreat that feels both timeless and perfectly tailored to you.

Key Takeaways

  • Create Your Roadmap First: A successful remodel begins with a clear plan. Before you do anything else, define your budget (including a 15-20% cushion), decide on a design style, and finalize the layout to ensure the project runs smoothly.
  • Prioritize Everyday Function: While aesthetics are important, your bathroom must work for your daily routine. Focus on practical solutions like smart storage, layered lighting, and proper ventilation to create a space that is both beautiful and easy to live in.
  • Define Your Style with Finishes: The materials and fixtures you choose bring your bathroom’s personality to life. From tile and countertops to faucets and hardware, these selections are your opportunity to create a space that feels uniquely yours, no matter the size of your budget.

Find Your Perfect Bathroom Style

Choosing a style for your bathroom remodel is the first big, exciting step. It sets the tone for the entire project, guiding your choices for everything from tile and countertops to fixtures and lighting. Whether you dream of a sleek, modern oasis or a cozy, traditional retreat, defining your style helps create a space that feels uniquely yours. At Gappsi, we love helping Long Island homeowners find the perfect look that matches their personality and lifestyle. Let’s explore three popular design styles to help you find your inspiration: modern, traditional, and transitional.

Modern Bathroom Design

Modern bathroom design is all about clean lines, simplicity, and a clutter-free feel. Think geometric shapes, minimal ornamentation, and a neutral color palette that might feature a bold accent color. Key elements often include a striking freestanding tub, a frameless glass shower, and a floating vanity that makes the room feel more spacious. High-quality materials like glass, metal, and concrete are common. For a sleek and durable finish, you can use large-format porcelain tiles on the floors and walls to create a seamless, sophisticated look. This style is perfect if you appreciate understated elegance and functional design.

Traditional Bathroom Design

If you love timeless elegance and comfort, a traditional bathroom design might be for you. This style creates a warm and inviting atmosphere with classic details and rich materials. Picture a beautiful clawfoot tub as the centerpiece, paired with a pedestal sink or ornate wooden vanity. Fixtures in finishes like polished nickel or oil-rubbed bronze add to the classic charm. Natural materials, especially wood and stone, are essential for achieving this look. Our home remodeling services can help you incorporate these classic elements to create a bathroom that feels both luxurious and welcoming, like your own personal spa.

Transitional Bathroom Design

Can’t decide between modern and traditional? You don’t have to. Transitional design blends the best of both worlds, creating a look that is both fresh and timeless. This style balances the clean, simple lines of modern design with the warmth and comfort of traditional aesthetics. For example, you might pair a sleek, modern vanity with classic subway tile or elegant stone countertops. The result is a sophisticated space that feels balanced and harmonious. Because it’s so versatile, transitional design offers a lot of flexibility, allowing our masonry experts to craft a truly personalized bathroom that won’t feel dated in a few years.

What Are the Latest Trends in Bathroom Design?

Your bathroom should be more than just a functional space; it can be a personal retreat. As you plan your project, looking at current design trends can be a great source of inspiration. While classic designs are always in style, incorporating a few modern touches can make your bathroom feel fresh, personal, and perfectly suited to your lifestyle. A successful home remodeling project blends timeless elements with features that bring you comfort and joy every day. From rich color palettes and spa-like amenities to smart technology and natural textures, the latest trends focus on creating a space that is both beautiful and highly personalized. Let’s look at some of the most popular ideas shaping bathroom design right now.

Earthy Tones and Bold Colors

The all-white bathroom has given way to more expressive and inviting color schemes. Homeowners are embracing earthy tones like terracotta, sage green, and warm beige to create a calming, natural atmosphere. These colors connect the space to the outdoors and provide a soothing backdrop for your daily routines. On the other end of the spectrum, bold colors are making a major comeback. Deep navy blues, rich forest greens, and even matte black can add a touch of drama and sophistication. You can introduce these colors through painted walls, a statement vanity, or vibrant tile work to give your bathroom a unique personality that feels anything but sterile.

Freestanding Tubs and Spa Features

Creating a spa-like experience at home is one of the biggest drivers in modern bathroom design. A freestanding tub often serves as the stunning centerpiece, offering a luxurious spot to unwind. Beyond the tub, showers are getting a major upgrade. Many homeowners are opting for larger, curbless showers that feel open and accessible. Features like rainfall showerheads, dual shower controls, and built-in benches are becoming standard for those wanting to replicate a high-end spa. These elements transform the simple act of showering into a moment of daily indulgence and relaxation.

Natural Materials and Statement Lighting

Bringing organic textures into the bathroom adds warmth and a sense of tranquility. The use of porcelain and natural stone for floors, walls, and countertops introduces a timeless, earthy element. Wood vanities or accents also soften the space and contrast beautifully with sleek tile and fixtures. To complete the look, statement lighting is essential. Think of it as the jewelry of the room. A sculptural chandelier above the bathtub or artistic sconces flanking the vanity can serve as a focal point, adding a layer of sophistication and ambiance that standard lighting just can’t match.

Smart Technology and Automated Features

Technology is seamlessly integrating into the bathroom to add convenience and a touch of luxury. Smart features are designed to make your daily routine smoother and more enjoyable. Imagine a shower that sets your preferred water temperature before you even step in, or a mirror with built-in LED lighting and anti-fog capabilities. Digital faucets can help conserve water, while heated floors provide incredible comfort on chilly mornings. These automated features are no longer futuristic concepts; they are becoming popular additions that add functional, modern value to your home.

Sustainable and Eco-Friendly Designs

Sustainability is a growing priority for many homeowners, and it extends to bathroom remodels. This trend focuses on making thoughtful choices that are better for the environment without sacrificing style. This can include installing water-saving fixtures like low-flow toilets and faucets, choosing durable materials with a long lifespan, and incorporating reclaimed wood or recycled glass tiles. Good design also plays a role. For example, maximizing natural light reduces the need for artificial lighting, while well-designed cabinetry provides ample storage, keeping the space organized and clutter-free. An eco-friendly approach ensures your new bathroom is beautiful, functional, and mindful.

Choose the Right Materials and Fixtures

Selecting the right materials and fixtures is where your bathroom’s personality truly comes to life. These are the elements you’ll see and touch every day, so they need to be both beautiful and practical. From the tile under your feet to the faucet on your sink, every choice contributes to the final look and feel of your space. Think of this step as assembling the core components of your bathroom retreat. It’s about finding the perfect balance between your aesthetic vision, your daily needs, and your budget.

The options can feel endless, but don’t worry. We can break it down into a few key categories. Focusing on one area at a time, like tile or countertops, makes the process much more manageable. At Gappsi, we guide homeowners through our extensive selection of high-quality materials, helping you find options that fit your style and will stand the test of time. Our home remodeling experts can help you source everything you need to create a cohesive and functional design that you’ll love for years to come.

Tile: Porcelain, Stone, and Pebble

Tile is one of the most impactful choices you’ll make, setting the tone for the entire bathroom. For showers, natural stone like granite is a fantastic option because it’s durable and easy to clean. Porcelain tiles are another popular choice, offering incredible versatility in color, pattern, and size, all while being resistant to moisture and wear. If you’re dreaming of a spa-like escape, consider using pebble tiles on the shower floor to create a unique, textural experience that feels amazing underfoot. The right tile combination can make your bathroom feel custom and thoughtfully designed.

Countertops: Quartz, Granite, and Marble

Your bathroom countertop is a major focal point and a hardworking surface. The three most popular materials are quartz, granite, and marble, each with distinct advantages. Engineered quartz is a top contender for its durability and low maintenance, since it’s non-porous and resists stains without needing to be sealed. Granite offers the unique, one-of-a-kind beauty of natural stone and is very durable. Marble provides a classic, luxurious look, though it is softer and requires more care to prevent etching and stains. Your choice will depend on your style preferences and how much maintenance you’re comfortable with.

Vanities, Sinks, and Fixtures

The vanity, sink, and fixtures are like the jewelry of your bathroom. These details are where you can inject a lot of personality. A floating vanity can make a small bathroom feel more open, while a freestanding furniture-style piece can add a touch of elegance. Don’t forget that small hardware choices, like cabinet pulls, faucets, and showerheads, make a big difference. Selecting interesting finishes like matte black, brushed brass, or polished nickel can tie your entire design together. You can find a wide range of high-quality options at the Gappsi Store to complete your vision.

Flooring and Hardware

Bathroom flooring needs to be safe, durable, and stylish. Tile is the go-to material for good reason. You can create visual interest with patterned or geometric tiles or go for a classic look with subway or octagon tiles. For a slip-resistant and beautiful surface, consider textured porcelain and natural stone options. Once you’ve chosen your floor, ensure your hardware is cohesive. Matching your towel bars, robe hooks, and cabinet pulls to your faucet finish creates a polished and intentional look that pulls the whole room together.

How to Maximize Space in a Small Bathroom

A small bathroom doesn’t have to feel cramped. With a thoughtful approach to your remodel, you can create a space that feels open, airy, and perfectly functional. The key is to make every design choice with intention, from the fixtures you select to the way you use light and storage. A successful home remodeling project can transform even the most compact bathroom into a personal oasis. Let’s look at a few proven strategies to make the most of your square footage.

Use Compact Fixtures and Smart Layouts

When you’re working with a small footprint, scale is everything. Opting for compact fixtures prevents any single element from overwhelming the room. Consider a pedestal sink or a slim, floating vanity instead of a bulky cabinet. A corner sink can also be a brilliant solution for an awkward layout. Even a round-front toilet instead of an elongated one can save you precious inches. Planning the layout carefully ensures there’s a clear, easy path to walk through the room without bumping into anything. This focus on proportion is essential for creating a bathroom that is not only beautiful but also comfortable to use every day.

Compare Walk-In Showers vs. Tub Combos

Deciding between a walk-in shower and a tub-shower combination is a major choice in a small bathroom. A walk-in shower, especially one with a seamless glass door or a curbless entry, can make the entire room feel larger by creating an unbroken line of sight. Many homeowners are choosing to expand their showers for a more spa-like experience. However, if you have young children or simply love a good soak, a tub is a must. In that case, a streamlined tub-shower combo with beautiful porcelain or stone tile can still feel elegant and integrated into the design.

Add Wall-Mounted and Floating Storage

One of the best ways to create a sense of spaciousness is to get things off the floor. Wall-mounted solutions draw the eye upward and make the room feel less cluttered. A floating vanity is a perfect example, as it frees up floor space underneath for storage baskets or simply to make the room look bigger. You can also add vertical storage with recessed medicine cabinets, open shelving above the toilet, or a tall, narrow linen cabinet. These additions provide essential storage for towels and toiletries without taking up valuable floor real estate, keeping your countertops clear and your space feeling organized.

Use Mirrors and Light to Create Space

Never underestimate the power of a large mirror. It can instantly make a small bathroom feel twice its size by reflecting light and the room itself. Instead of a small, standard mirror, consider a larger one that extends across the vanity or even a full mirrored wall for a dramatic effect. Good lighting is just as important. A well-lit room always feels more open. You can see some great examples of lighting in our project videos. Layer your lighting with an overhead fixture for general brightness, and add sconces beside the mirror for clear, flattering task lighting.

Bathroom Layouts for Every Size

The layout of your bathroom is the foundation of its design. It dictates how you move through the space and how functional it is for your daily routines. A poor layout can mean a door that constantly bumps into the vanity, not enough elbow room at the sink, or a cramped feeling no matter how beautiful the finishes are. Conversely, a great layout makes a bathroom feel intuitive, comfortable, and perfectly tailored to your needs. Whether you’re working with a tiny powder room or a sprawling master suite, the right plan can make all the difference.

Thinking about the flow before you start picking out tile and fixtures is key. Consider who will use the bathroom and what their primary needs are. A small guest bath has different requirements than a high-traffic family bathroom or a luxurious master retreat. By focusing on the layout first, you ensure your home remodeling project starts on the right foot. This initial planning helps you avoid costly changes down the line and results in a bathroom that is both beautiful and practical for years to come.

Small Bathroom Layouts

When space is tight, a smart layout is everything. The goal is to make the room feel open and uncluttered while still providing all the necessary functions. Start by choosing compact fixtures, like a smaller vanity or a pedestal sink, to free up floor space. Consider a pocket door or sliding barn door instead of a traditional swinging door, which requires clearance. To add storage without cramping the room, think vertically. Wall-mounted shelves, tall linen cabinets, and over-the-toilet storage units are great ways to keep essentials organized and off the countertops. A thoughtful layout can transform a cramped bathroom into a surprisingly spacious and efficient oasis.

Master Bathroom Layouts

Your master bathroom should feel like a personal retreat. If you have the space, this is where you can add a touch of luxury. Many homeowners are opting for larger, spa-like showers, sometimes even removing the tub completely to make room. A double vanity is another popular feature that adds convenience for couples. You can also create distinct zones for different activities, like a separate water closet for the toilet or a dedicated makeup vanity. Incorporating features like a freestanding tub, a steam shower, or even a sauna can turn your master bath into the ultimate relaxation spot.

Guest Bathroom Layouts

A guest bathroom needs to be welcoming, functional, and easy for visitors to use. Since it’s not used daily by your family, you have some flexibility. If you don’t need another bathtub, consider a stylish walk-in shower, which can make the room feel larger. A simple, clean layout is often best. Ensure there’s enough counter space for toiletries and accessible storage for extra towels and essentials. Pay attention to the details, like matching fixtures, good lighting, and a well-placed mirror. Using durable and beautiful materials like porcelain and natural stone will ensure the space is both impressive and low-maintenance for years to come.

Bathroom Remodel Ideas by Budget

A bathroom remodel is one of the best investments you can make in your home, but it doesn’t have to drain your savings. Whether you’re looking for a quick refresh or a complete overhaul, you can create a beautiful and functional space that fits your financial plan. The key is to focus your resources on changes that will make the biggest difference for your specific goals. By understanding what’s possible at every price point, you can plan a project that feels both manageable and exciting.

This breakdown covers what you can typically achieve with a low, mid-range, or high-end budget, helping you match your vision with your wallet.

Low-Budget: Paint and Fixture Swaps

You can give your bathroom a whole new personality without tearing down walls. A fresh coat of paint is one of the most cost-effective ways to transform a space, whether you choose a calming neutral or a vibrant, energizing color. To complete the look, swap out old, dated hardware. New drawer pulls, faucets, a modern showerhead, and an updated light fixture can make the entire room feel more current.

Even simpler changes, like new towels, a stylish shower curtain, and a plush bath mat, can instantly refresh the space. These small updates are perfect for a weekend project and can make your bathroom feel brand new while you save for a larger home remodeling project down the road.

Mid-Range: New Vanities and Tile

With a more moderate budget, you can start to replace some of the larger, more impactful elements in your bathroom. Upgrading your vanity can dramatically improve both style and storage, serving as a beautiful new focal point for the room. This is also a great time to introduce new tile. You can make a statement with a patterned floor, a classic subway tile shower surround, or a stunning backsplash behind the sink.

Materials like porcelain and natural stone are durable, easy to clean, and add a touch of luxury that improves the entire space. At this stage, you might also consider minor layout adjustments, like installing a new toilet or upgrading your tub, to improve the bathroom’s overall flow and function.

High-End: Full Renovations and Luxury Finishes

For those ready to create a true sanctuary, a high-end budget allows for a complete transformation. This is where you can move walls, reconfigure plumbing, and build the custom bathroom you’ve always wanted. Imagine a spa-like retreat with a spacious walk-in shower featuring a rainfall showerhead, body sprayers, and a built-in bench. A freestanding soaking tub can serve as a stunning centerpiece, inviting you to relax and unwind.

Luxury finishes and smart technology are hallmarks of a high-end remodel. Consider heated floors, a smart shower that sets the perfect temperature, and mirrors with integrated, touchless lighting. A project of this scale requires expert design and craftsmanship to bring all the elements together seamlessly, resulting in a truly personalized and luxurious space you can see in our project showcases.

How to Plan a Successful Bathroom Remodel

A beautiful, functional bathroom doesn’t just happen, it’s the result of careful planning. Before you start tearing out tile or picking paint colors, taking the time to create a solid plan is the single most important thing you can do. A good plan acts as your roadmap, keeping your project on track and on budget from start to finish. It helps you define what you want, what you can afford, and how all the pieces will come together. Thinking through the details now saves you from making costly decisions under pressure later. From setting a realistic budget to choosing between a DIY approach and hiring a professional, these steps will guide you toward a renovation that you’ll love for years to come.

Set a Realistic Budget and Timeline

First things first, let’s talk numbers. When you begin planning, consider your available space, the materials you love, and what you’re comfortable spending. Be honest with yourself about your budget and then add a cushion of 10% to 20% for those just-in-case moments. Unexpected plumbing issues or a last-minute material upgrade can happen, and a contingency fund keeps these surprises from derailing your project. Your timeline will depend on the scope of your remodel. A simple fixture swap might take a weekend, but a full gut renovation will take much longer. An experienced home remodeling team can help you create a detailed budget and a practical schedule.

Choose Your Style and Materials

This is where the fun really begins. What’s your bathroom’s personality? Exploring different design styles like modern, traditional, or transitional will help you create a cohesive look. Your chosen style will guide every decision, from the vanity and tile to the faucets and lighting. Don’t be afraid to inject some personality with bold colors or unique patterns to make the space feel more welcoming. The materials you select, like Gappsi’s beautiful porcelain and natural stone, are what will truly define the look and feel of your new bathroom, so choose options that you love and that fit your lifestyle.

Layer Your Lighting

Great lighting can completely change a bathroom. It’s not just about seeing clearly, it’s about creating an atmosphere. The best approach is to layer your lighting with multiple sources. Start with ambient lighting, like recessed lights or a central ceiling fixture, for overall illumination. Next, add task lighting around the vanity with sconces or a lighted mirror, which is essential for grooming. Finally, consider adding accent lighting, like a small spotlight on a piece of art or a dimmer on your main lights, to set a relaxing mood. Picking mirrors, lights, and fixtures that match your style will tie the whole room together beautifully.

Account for Permits and Ventilation

Let’s cover some of the less glamorous, but absolutely critical, parts of a remodel: permits and ventilation. Depending on the scale of your project and where you live in Long Island, you may need permits for plumbing or electrical work. This ensures everything is done safely and up to code. Equally important is proper ventilation. A high-quality exhaust fan is your best defense against mold and mildew, protecting both your investment and your family’s health. While it can feel like a hassle, getting these details right is what makes a renovation successful in the long run.

Decide Between DIY and Hiring a Pro

The question of whether to do it yourself or hire a professional is a big one. If you’re skilled, have the right tools, and are just doing cosmetic updates like painting or swapping a faucet, a DIY approach can be very rewarding. However, for more complex projects that involve moving walls, reconfiguring plumbing, or extensive tile work, hiring a pro is usually the best choice. A professional team brings expertise, efficiency, and peace of mind, ensuring the job is done right. When you decide to work with experts, Gappsi’s home remodeling construction team can manage every detail of your Long Island bathroom renovation.

Common Bathroom Remodel Mistakes to Avoid

A beautiful bathroom remodel is exciting, but the process can be full of hidden challenges. Knowing what to watch out for is just as important as picking the perfect tile. Avoiding a few common mistakes can save you from budget overruns, frustrating delays, and a finished space that doesn’t quite meet your needs. By thinking ahead and prioritizing both style and function, you can ensure your project goes smoothly and results in a bathroom you’ll love for years to come. Let’s walk through the most frequent missteps homeowners make and how you can steer clear of them.

Skipping the Planning Phase

Jumping into demolition without a detailed plan is one of the quickest ways to derail a bathroom remodel. A successful project starts long before the first hammer swings. You need to think carefully about your layout, the materials you want, and how every detail works together. Rushing this stage often leads to making expensive decisions on the fly or realizing too late that your dream vanity won’t fit. A comprehensive plan acts as your roadmap, helping you set a realistic budget and timeline. It also ensures you and your contractor are on the same page, which is essential for bringing your vision to life. Proper home remodeling requires this foundational step to prevent costly changes down the line.

Underestimating Costs

It’s easy to focus on the price of a new tub or vanity, but those are only part of the equation. Many homeowners underestimate the total cost of a remodel by forgetting to account for labor, permits, and unexpected issues. It’s wise to add a contingency fund of 15% to 20% to your budget to cover surprises, like discovering old plumbing that needs replacing. With many homeowners choosing to enlarge their bathrooms and add premium features like rainfall showerheads, costs can add up quickly. When selecting materials, be sure to explore all your options. High-quality porcelain and natural stone can provide a luxurious look, but it’s important to factor their cost into your overall budget from the start.

Choosing Style Over Function

While a bathroom should be beautiful, it must also be practical for your daily routine. It’s easy to fall in love with a trendy vessel sink or a sleek, minimalist faucet, but consider the real-world implications. Will that sink be easy to clean around? Is that faucet comfortable to use every day? Think about who will be using the space. If you rarely take baths, a large, luxurious walk-in shower might be a better use of space than a freestanding tub. Your final design should support your lifestyle, providing adequate storage, easy-to-clean surfaces, and a layout that makes sense for you and your family. The goal is to create a space that is both inspiring and effortlessly functional.

Ignoring Ventilation and Lighting

Ventilation and lighting are two of the most critical, yet often overlooked, aspects of bathroom design. Inadequate ventilation traps moisture, leading to mold, mildew, and peeling paint, which can damage your new investment and impact air quality. A properly sized, quiet exhaust fan is not a luxury; it’s a necessity for protecting your home. Similarly, poor lighting can make a bathroom feel small and gloomy. A single fixture above the mirror is rarely enough. Instead, layer your lighting with ambient overhead lights, bright task lighting at the vanity, and even accent lighting to highlight architectural details. Good lighting and ventilation are key to creating a bathroom that is both functional and pleasant to be in.

Your Long Island Bathroom Remodel with Gappsi

Thinking about a bathroom remodel can feel overwhelming, but it’s also an exciting opportunity to create a space that truly feels like your own. Here on Long Island, our team at Gappsi has helped countless homeowners transform their bathrooms into personal retreats. Whether you’re dreaming of a sleek, modern oasis or a cozy, traditional bathroom, we have the design expertise and construction know-how to make it happen. We handle everything from simple updates to complete gut renovations, ensuring your project is smooth from start to finish.

A successful remodel starts with great design and the right materials. We can help you explore different styles and find the perfect finishes to match your vision. Imagine a shower lined with beautiful natural stone or a floor with durable, elegant porcelain tiles. We’ll guide you through selecting everything from vanities and countertops to fixtures, making sure every element works together beautifully. Our goal is to create a design that not only looks stunning but also reflects your personal style, whether that means using earthy, natural tones or adding a pop of bold color.

Beyond aesthetics, we focus on creating a bathroom that is functional for your daily life. If you’re working with a small space, our designers are experts at maximizing every square inch with smart layouts and clever storage solutions. We can also incorporate modern features that add a touch of luxury and convenience, like a freestanding tub for spa-like soaks or smart fixtures that make your routine a little easier. With our comprehensive home remodeling services, we’ll work with you to plan a layout that perfectly balances beauty and practicality for your family’s needs.

Related Articles

Frequently Asked Questions

How long should I expect my bathroom remodel to take? The timeline really depends on the scope of your project. A simple cosmetic refresh, like painting and swapping out fixtures, might only take a weekend. A mid-range project involving a new vanity and tile could take one to three weeks. For a full renovation where we’re moving walls and plumbing, you should plan for several weeks to a few months. This accounts for design, ordering materials, construction, and any necessary permits. Working with a professional team helps establish a clear and realistic schedule from the start.

I want to update my bathroom but don’t know where to start. What’s the very first step? Before you even look at tile samples or paint swatches, I suggest you start by making a simple list. Write down everything you dislike about your current bathroom and everything you wish it had. Is the storage a mess? Is the lighting terrible? Do you wish you had a better shower? This list of pain points and wishes will become your guide. It helps you define your goals and priorities, making it much easier to make design decisions that will actually improve your daily life.

What’s one thing I should splurge on, and where can I save money? If you’re going to splurge, I recommend investing in the elements you interact with every day or that are difficult to change later. This includes high-quality faucets, a great shower system, and durable tile for the floor and shower walls. These items impact your daily experience and provide long-term value. You can save money on things that are easier to update down the road, like paint, decorative lighting, mirrors, and cabinet hardware.

My bathroom is tiny. Is it better to have a walk-in shower or a tub? This decision comes down to your lifestyle. If you rarely take baths and value a spacious, open feeling, a walk-in shower with a glass door is a fantastic choice. It can make the entire room feel larger and more modern. However, if you have small children or a bathtub is a non-negotiable for your relaxation routine, then a tub is essential. A streamlined tub-shower combination with beautiful tile can still feel very elegant and integrated.

How can I make sure my new bathroom won’t look dated in a few years? The best way to create a timeless design is to build a classic foundation. Stick with a functional layout and choose high-quality, neutral materials for the most permanent surfaces, like your floor tile and shower surround. You can then introduce current trends through elements that are easier and less expensive to change. Think about using a trendy color on the walls, adding stylish cabinet pulls, or choosing a unique light fixture. This approach gives you a bathroom that lasts, with the flexibility to feel fresh for years to come.

Share this page:
Two skylight installation contractors working with blueprints in an attic.

Your Guide to Skylight Installation Contractors

Light is a powerful design element. It can make a small room feel spacious, highlight architectural details, and create a warm, inviting atmosphere. While windows connect us to the world outside, a skylight offers a direct connection to the sky, bringing a dynamic quality of light that changes throughout the day. This simple addition can serve as a stunning focal point in any room, from a living area with vaulted ceilings to a primary bathroom. Achieving this seamless integration of light and architecture requires a high level of skill. Expert skylight installation contractors do more than just install a window; they ensure it becomes a flawless part of your home’s design.

Key Takeaways

  • Your Contractor Is Key: A successful, leak-free skylight installation requires a true professional. Always choose a contractor with proven experience and be sure to verify their license, insurance, and references before signing a contract.
  • Choose the Right Type for Your Space: Consider your room’s function to select the best skylight. Fixed models are great for pure light, ventilated ones add fresh air to kitchens or bathrooms, and tubular skylights are a clever solution for small, dark areas like hallways.
  • Understand the Full Value and Cost: Skylights do more than just brighten a room; they can improve energy efficiency and increase your home’s value. To ensure a smooth project, always request a detailed, itemized estimate that breaks down all material and labor costs.

What Does a Skylight Contractor Do?

A skylight contractor is a specialist who handles the entire process of installing, repairing, or replacing skylights. Think of them as a roofer, carpenter, and waterproofing expert all in one. Their job starts long before they get on your roof. A great contractor will first help you decide on the best placement and type of skylight for your space, considering factors like the sun’s path, your room’s layout, and your home’s architecture.

The installation itself is a precise task. It involves carefully cutting an opening in your roof, building a supportive curb, and fitting the skylight securely. The most critical part of their job is ensuring everything is perfectly sealed and flashed. This detailed waterproofing prevents leaks and protects your home from water damage, drafts, and other issues down the road. After the skylight is in, they also handle the interior finishing, like drywall and painting, to make it look like it was always part of your home. Because it’s such a specialized project, hiring a dedicated skylight contractor is a key part of any home remodeling plan that includes adding natural light from above.

Common Types of Skylights

Once you decide to add a skylight, you’ll discover there are several different types to choose from. A good contractor will walk you through the options to find the perfect fit for your home’s needs and your budget. The main differences come down to whether they open for ventilation or are purely for light. Some models even have smart features, like solar power and rain sensors.

The right choice depends on the room and your goals. Do you want to brighten a dark hallway, or do you need to air out a steamy bathroom? Are you looking for a simple solution or a high-tech, energy-efficient upgrade? Understanding the common types, from fixed and ventilated to tubular and custom, will help you make an informed decision. Just as you might choose between pavilions and pergolas to manage sunlight outdoors, selecting the right skylight helps you control it indoors.

Fixed Skylights

Fixed skylights are the most straightforward and popular option. As the name suggests, they don’t open or close. Their sole purpose is to let natural light pour into a room, making them a fantastic choice for areas where extra ventilation isn’t a priority. Think of living rooms with vaulted ceilings, stairwells, or any space that feels a bit dark and closed off.

Because they have no moving parts, fixed skylights are often the most affordable and have a very low risk of leaks when installed correctly. They are essentially a window for your roof, designed to brighten your home and create a more open, airy atmosphere. The natural light they provide can completely transform a room, highlighting your decor and even making the space feel larger. This effect is especially beautiful when light shines on quality materials like porcelain and natural stone.

Ventilated Skylights

Ventilated skylights, also known as venting skylights, offer the best of both worlds: natural light and fresh air. These units can be opened to allow air to circulate, which makes them ideal for rooms that collect moisture, heat, or odors, like kitchens, bathrooms, and laundry rooms. By opening them, you can let hot air escape in the summer or clear out steam after a shower, improving your home’s air quality.

These skylights can be operated in a few different ways. Manual models open with a hand crank, which works well for skylights within reach. For higher ceilings, electric or solar-powered models that open with a remote control or wall switch are much more convenient. Adding a ventilated skylight is a functional upgrade that adds comfort and value, making it a smart addition to any home remodeling project.

Solar-Powered Skylights

Solar-powered skylights are a smart, energy-efficient version of ventilated skylights. They use a small, built-in solar panel to capture the sun’s energy, which then powers a battery used to open and close the unit. This means they operate without needing any wiring, making installation simpler and cleaner. Plus, because they run on renewable energy, they won’t add a cent to your electricity bill.

One of the best features of many solar-powered models is the integrated rain sensor. This sensor automatically closes the skylight at the first sign of rain, so you never have to worry about forgetting to close it. They offer total convenience and peace of mind. Just like a beautiful swimming pool makes the most of sunny days, a solar-powered skylight harnesses that same sunlight to improve your home’s comfort and efficiency.

Tubular Skylights

If you have a small, windowless space that could use a splash of sunlight, a tubular skylight is an amazing solution. These are perfect for areas where a traditional skylight won’t fit, such as hallways, closets, pantries, and small bathrooms. Instead of a large glass pane, a tubular skylight uses a small dome on the roof to capture light.

That light is then channeled down a highly reflective tube that runs through your attic space to a diffuser lens mounted on your ceiling. The diffuser spreads the light evenly, looking much like a standard ceiling light fixture but powered entirely by the sun. They are less invasive to install than full-sized skylights and are a cost-effective way to brighten up the darkest corners of your home. You can find all sorts of innovative products like these at the Gappsi Store to brighten your home.

Custom Skylights and Roof Windows

For homes with unique architectural features or specific needs, custom skylights and roof windows offer tailored solutions. If you have a vision for a one-of-a-kind design, a contractor can create custom skylights in special shapes and sizes, like pyramids, domes, or extended polygons. This allows you to make a dramatic architectural statement while bringing in light. It’s a similar principle to creating custom masonry work, where design is tailored to the home’s character.

Roof windows are another specialized option. They are essentially skylights designed for in-reach applications, like a finished attic or a room with a vaulted ceiling. Because they are installed lower on the roof, they are easy to open and close, functioning much like a regular window. They provide both light and an excellent source of ventilation, and some can even serve as an emergency exit.

Why Add a Skylight to Your Home?

Thinking about a skylight is about more than just adding a window to your ceiling; it’s about completely transforming a room. If you have a space in your home that feels a bit dark, closed-off, or uninspired, a skylight can be the perfect solution. It’s a design feature that works hard, bringing in beautiful, natural light while also offering practical perks that can make your home more comfortable and efficient. Unlike a standard window, a skylight provides a direct connection to the sky, letting you watch the clouds drift by or see the stars at night from the comfort of your living room.

This simple addition can make a cramped hallway feel open, turn a dim kitchen into a bright and cheerful workspace, or add a touch of luxury to a primary bathroom. It’s a popular feature in many home remodeling projects because the impact is immediate and impressive. Beyond the visual appeal, skylights can help you save on energy costs, improve your home’s ventilation, and even add to its overall market value. It’s an investment that pays you back in daily enjoyment and long-term benefits. Let’s look at exactly why adding a skylight might be one of the best decisions you make for your home.

Brighten Your Home with Natural Light

There’s just no substitute for natural light. It makes colors appear more vibrant, makes spaces feel larger, and can even have a positive effect on your mood. Skylights are masters at flooding a room with sunlight, reaching areas that traditional windows can’t. Think about interior bathrooms, hallways, or walk-in closets that often rely entirely on artificial light. A skylight can turn these functional but often gloomy spaces into bright, welcoming parts of your home. The light from above creates a soft, diffused glow that reduces harsh shadows and makes every corner feel more inviting. This is especially true when sunlight reflects off beautiful surfaces, like our high-quality porcelain and natural stone options for floors or walls.

Improve Energy Efficiency

A brighter home can also be a more energy-efficient one. When your rooms are filled with natural light during the day, you’ll find yourself reaching for the light switch far less often. This simple change can lead to noticeable savings on your electricity bills over time. Modern skylights are designed with energy performance in mind. Many feature double-paned glass and special low-emissivity (Low-E) coatings that act as insulators. These technologies help keep your home warm in the winter by preventing heat from escaping and cool in the summer by blocking solar heat from entering. For maximum efficiency, you can look for products that meet ENERGY STAR guidelines, ensuring you get a skylight that helps maintain a comfortable temperature year-round.

Get Better Airflow and Ventilation

Some rooms, like kitchens and bathrooms, can trap heat, humidity, and odors. A ventilating skylight is an excellent way to let fresh air in and stale air out. Since hot air naturally rises, an open skylight creates a chimney effect, pulling warm air up and out of your home while drawing cooler, fresh air in through your windows. This natural circulation improves your home’s air quality and can reduce your reliance on air conditioning during warmer months. It’s a bit like having a gentle breeze on demand. This ability to open up a space to the elements is similar to the open, airy feeling you get with our custom pavilions and pergolas, bringing that sense of outdoor freedom inside.

Increase Your Home’s Value

A skylight is a feature that adds a “wow” factor to your home, and that can translate directly into higher property value. It’s considered a premium upgrade that signals a well-maintained and thoughtfully designed home. Potential buyers often see skylights as a luxurious touch that makes a property stand out from the rest. The abundance of natural light and the feeling of spaciousness they create are highly desirable qualities in any home. By choosing a high-quality skylight and ensuring it’s installed by experienced professionals, you’re not just making your home more enjoyable for yourself; you’re making a smart financial investment that can pay off when it’s time to sell. It’s one of the many ways Gappsi helps you build lasting value into your property.

How to Choose the Right Skylight Contractor

Finding the right contractor is just as important as choosing the perfect skylight. You’re trusting someone to cut a hole in your roof, so you want to be sure they know exactly what they’re doing. A great contractor not only ensures a leak-free installation but also helps you get the most out of your investment. Taking the time to vet your options will give you peace of mind and a beautiful, functional result that lasts for years. Here are the key things to look for when making your decision.

Look for Experience and Credentials

A skylight installation is more than just placing a window on the roof; it requires solid carpentry and roofing skills. You want a contractor who understands how your roof is constructed and how to properly integrate the skylight without compromising its integrity. Look for a company with a proven track record in comprehensive home remodeling and construction. A team with broad expertise, from masonry to framing, will have the well-rounded knowledge needed to handle any structural challenges that may arise during the installation, ensuring a seamless and secure fit for your new skylight.

Verify Their License and Insurance

This step is non-negotiable. Before you hire anyone, ask to see their state and local licenses and proof of insurance. A professional contractor’s license shows they meet industry standards, while their insurance protects you from any liability if an accident happens on your property. If a contractor hesitates to provide these documents or lacks comprehensive coverage, consider it a major red flag. A reputable company will always have this information ready and will be happy to share it with you. This simple check is one of the most important things you can do to protect yourself and your home.

Read Reviews and Check References

What past clients say about a contractor can tell you a lot. Start by reading online reviews, but don’t stop there. Ask the contractor for a list of references you can contact directly. Speaking with a few past customers gives you a chance to ask specific questions about their experience, the quality of the work, and the professionalism of the crew. You can also check out a company’s project portfolio. Viewing a contractor’s past work on the Gappsi YouTube channel, for example, can give you a real feel for their craftsmanship and the scope of projects they handle.

Discuss Materials and Warranties

A quality installation depends on quality materials. Talk to your contractor about the specific skylight brands they use and why. A knowledgeable professional will be able to explain the differences in glass, framing, and flashing. It’s also crucial to understand the warranties. You should receive a warranty for the skylight itself from the manufacturer and a separate workmanship warranty from the installer that covers any potential leaks or issues. A trustworthy contractor will be transparent about these details and provide all the necessary paperwork without you having to press them for it.

Ensure They Know Local Building Codes

Building codes can vary between towns, even within Long Island. A qualified contractor will be familiar with the specific requirements in your area for everything from structural support to energy efficiency. This local knowledge is essential for ensuring your project is completed correctly and passes any required inspections without delays or extra costs. Hiring a contractor who understands local regulations prevents future headaches and guarantees your skylight is installed safely and to code. It’s one of the key benefits of working with an established, local company that has been serving your community for years.

Understanding Skylight Installation Costs

Figuring out the budget for a new skylight involves more than just the price of the unit itself. Several key factors influence the final cost, from the type of skylight you choose to the unique characteristics of your roof. Understanding these elements ahead of time will help you plan your project, ask the right questions, and get a clear, accurate estimate from your contractor. Let’s walk through the main components that will shape your skylight installation costs.

Skylight Type and Size

The skylight model you select is one of the biggest factors in the overall price. A simple, fixed skylight will cost less than a ventilated one that opens to let in fresh air. Solar-powered models with automated blinds or rain sensors are at the higher end of the price spectrum. Tubular skylights, which are great for smaller spaces like hallways or closets, are often the most budget-friendly option. As you might expect, size also matters. A larger skylight requires more materials and labor, increasing the cost. When planning your home remodeling project, consider how much light you want to bring in and what features are most important to you.

Your Roof’s Condition and Pitch

Your roof plays a huge role in the complexity of the installation. A professional contractor needs to cut an opening, install the skylight, and add flashing, which is a special material that makes the area completely waterproof. If your roof has a very steep pitch or is made of a material like tile or slate, the installation process becomes more challenging and time-consuming, which can increase labor costs. Additionally, if your roofer discovers any existing damage, like soft spots or old shingles that need replacing, those repairs will need to be addressed first. A thorough inspection is a crucial first step before any work begins, ensuring your home is properly protected.

Labor and Local Rates

Professional installation is not something to cut corners on, as improper work can lead to leaks and costly water damage. The cost of labor covers the specialized skills needed to cut into your roof, frame the opening, build an interior light shaft if needed, and perfectly seal the skylight against the elements. Labor rates can vary based on your location and the complexity of the job. While it might be tempting to go with the lowest bidder, remember that you are paying for expertise and peace of mind. An experienced team with a history of quality design and construction ensures the job is done right the first time, protecting your investment for years to come.

How to Get a Clear Estimate

To avoid surprises, always ask for a detailed, itemized estimate in writing. A trustworthy contractor will be transparent about all the costs involved in your project. The quote should clearly break down the price of the skylight unit, all necessary materials like flashing and sealants, and the total for labor. This document helps you understand exactly what you are paying for and provides a clear scope of work. Don’t hesitate to ask questions if something is unclear. A reputable company will gladly walk you through the estimate to ensure you feel confident moving forward with your home improvement project.

Contractor Red Flags to Avoid

Choosing the right contractor is the most important step in your skylight project. While most professionals are honest and skilled, a few bad apples can cause major headaches. Knowing the warning signs will help you steer clear of trouble and find a partner you can trust. When you’re investing in a significant home upgrade, you deserve a smooth process and a beautiful result. Pay close attention during your initial conversations and consultations. If something feels off, it probably is. Trust your gut and look for these specific red flags before you sign any contracts.

No Proof of License or Insurance

A reputable contractor will always be ready to show you their credentials. If you ask for proof of licensing and insurance and the contractor hesitates, gets defensive, or can’t provide the documents, consider it a major warning sign. In New York, specific licenses are often required to perform home improvement work, and these credentials show a contractor has met professional standards. More importantly, comprehensive insurance protects you from liability if an accident happens on your property. Without it, you could be financially responsible for injuries or damages. A professional company understands this and will have its paperwork in order, no questions asked.

Demands for Large Upfront Payments

Be cautious of any contractor who asks for a large sum of money before the work even begins. While a reasonable deposit is standard practice to cover initial material costs, it shouldn’t be an excessive amount. A contractor demanding 50% or more upfront, or even the full project cost, might be financially unstable or, in the worst-case scenario, planning to disappear with your money. A trustworthy contractor will have a clear, fair payment schedule that ties payments to specific project milestones. This ensures they get paid for their progress and you only pay for work as it’s completed, creating a transparent and secure arrangement for everyone involved.

High-Pressure Tactics or Vague Estimates

Your contractor should be a partner, not a pushy salesperson. If a contractor uses high-pressure tactics, like claiming a special price is “only good for today” or rushing you to sign a contract on the spot, it’s a red flag. This behavior is unprofessional and often used to prevent you from getting other quotes or thinking through the decision. Similarly, a vague estimate that lacks detail is a cause for concern. A proper quote should be itemized, clearly outlining the costs for labor, materials, and other expenses. A fuzzy estimate leaves the door open for unexpected charges and price increases down the road.

No Portfolio or Verifiable Reviews

A contractor’s past work is the best predictor of their future performance. An experienced and proud professional will be excited to show you a portfolio of their completed projects. If a contractor can’t provide photos of their work or direct you to verifiable reviews from past clients, they may not have the experience needed for your skylight installation. You can often find examples of a company’s craftsmanship on their website or social media channels, like Gappsi’s YouTube channel, which showcases a wide range of completed projects. A lack of a portfolio, combined with poor communication like unreturned calls, often signals that you’ll face issues throughout the project.

Dodging Key Questions

Clear communication is the foundation of a successful home improvement project. During your initial meetings, you should feel comfortable asking any questions you have about the process, materials, timeline, or team. If a contractor seems evasive, brushes off your questions, or gives you vague answers, it’s a significant red flag. A professional will be happy to explain the details of your project and provide clear, confident answers. Dodging questions suggests they either don’t know the answer or are hiding something you wouldn’t like. You need a partner who is transparent and knowledgeable about every aspect of the job, including the specific porcelain and natural stone options they might use around your new skylight.

Related Articles

Frequently Asked Questions

Will my new skylight leak? This is the most common concern, and it’s a valid one. The truth is, a modern, high-quality skylight is engineered to be completely watertight. Leaks are almost always the result of improper installation, not a faulty product. This is why choosing an experienced contractor is so critical. A professional will use proper flashing techniques and high-grade sealants to create a durable, weatherproof barrier around the skylight, ensuring it integrates seamlessly with your roof and protects your home for years to come.

How long does a typical skylight installation take? The timeline for installing a skylight can vary, but a straightforward installation often takes between one and three days. The process involves cutting the opening, framing the structure, installing the unit, and completing the detailed flashing and sealing on the roof. The interior work, such as drywall and painting the light shaft, adds to the timeline. Factors like your roof’s pitch, the roofing material, and the complexity of the interior finish will influence the final schedule.

Will a skylight make my room too hot in the summer or cold in the winter? Not at all. Modern skylights are designed with impressive energy efficiency. Most feature double-paned glass with an inert gas filling and special Low-E (low-emissivity) coatings. These technologies work year-round to reflect heat away from your home in the summer and prevent warmth from escaping during the winter. By choosing an ENERGY STAR rated model, you can ensure your skylight helps maintain a comfortable indoor temperature without driving up your energy bills.

Can a skylight be installed on any roof? In most cases, yes, a skylight can be installed on nearly any type of roof, whether it’s sloped or flat. However, the complexity and cost of the installation can be affected by your roof’s pitch and material. For example, installing a skylight on a very steep roof or one made of slate or tile requires more specialized labor and techniques than on a standard asphalt shingle roof. A thorough assessment by a qualified contractor will determine the best approach for your specific home.

What kind of maintenance does a skylight require? A properly installed skylight is a very low-maintenance feature. The main task is simply keeping the glass clean, just as you would with any other window in your home, to ensure you’re getting the maximum amount of beautiful natural light. It’s also a good practice to have the seals and flashing inspected periodically as part of your regular roof maintenance routine to catch any potential issues before they become problems.

Share this page:
Wall panel options showing ways to cover an internal brick wall.

7 Chic Ways to Cover an Internal Brick Wall

Your home’s style evolves, and a feature that once felt perfect can start to feel out of place. An exposed brick wall, with its distinct color and texture, often dictates the entire design of a room. If you’re ready for a brighter, more modern, or completely different aesthetic, that brick might feel like a roadblock. The good news is, you have options. Covering it up is a powerful design move that can completely refresh your space, giving you a blank canvas to work with. Let’s explore the most popular ways to cover an internal brick wall, from simple cosmetic updates to full transformations that will redefine your room.

Key Takeaways

  • Decide if covering is right for you: Covering a brick wall can brighten a room and improve insulation, but keeping it exposed offers unique texture and character. Weigh the pros and cons based on your brick’s condition and your personal style.
  • Proper prep prevents future problems: Before starting, always clean the surface, repair cracks with the correct mortar, and use a breathable primer. These steps are crucial for preventing moisture damage and ensuring your new finish lasts.
  • Know when to DIY versus hiring a pro: Simple cosmetic updates like painting are great DIY projects. For more complex jobs like plastering, stone application, or structural repairs, hiring a professional ensures a flawless finish and protects your home’s integrity.

Should You Cover Your Interior Brick Wall?

That exposed brick wall you’ve been staring at can feel like both a blessing and a curse. On one hand, it’s a feature packed with character, texture, and a sense of history. On the other, it might not fit your design vision, or it could be showing its age with cracks and drafts. Deciding whether to cover it is a big step, but it’s a common dilemma for homeowners looking to refresh their space. The right choice depends entirely on your home’s condition, your personal style, and your long-term goals.

Exposed brick can be a stunning focal point, lending a rustic or industrial vibe that’s hard to replicate. It tells a story and adds a layer of authenticity to a room. However, it’s not always practical. Brick can be porous, making it prone to moisture, and it isn’t the best insulator, which can affect your home’s energy efficiency. If the brick is damaged or simply doesn’t align with the bright, clean aesthetic you’re dreaming of, covering it can be a transformative part of your home remodeling project. Let’s walk through the pros and cons to help you make a confident decision.

Reasons to Cover Your Brick Wall

While exposed brick has its charm, there are plenty of valid reasons to cover it up. You might simply be ready for a new look. Covering a dark or dated brick wall can instantly brighten a room and give you a clean canvas for a different style. It’s also a practical choice if the brick is in poor condition. The interior brick in many homes was never intended to be seen, so it may be lower quality, mismatched, or damaged. Covering it is often easier and more cost-effective than extensive repairs. Finally, covering brick can improve your home’s energy efficiency by adding a layer of insulation and sealing drafts, making your space more comfortable year-round.

Reasons to Keep Your Brick Exposed

If your brick is in good shape, keeping it exposed can be a fantastic design choice. It offers a unique texture and warmth that you just can’t get from drywall. An exposed brick wall can serve as a stunning accent, adding a sense of history and timeless character to any room, from the living room to the kitchen. It works beautifully with various styles, including industrial, rustic, modern, and eclectic. The rich colors and natural variations in the brick can become the centerpiece of your decor, creating an inviting and stylish atmosphere that feels both authentic and chic. It’s a feature that makes a statement all on its own.

Busting Common Myths About Covering Brick

There are a few misconceptions about covering interior brick that might be holding you back. One common myth is that covering brick will always cause moisture problems. The truth is, problems only arise when the wall is covered improperly with the wrong materials. A professional masonry expert will know how to prepare the surface and use breathable materials to prevent trapped moisture. Another myth is that you’ll lose that authentic brick look forever. If you love the texture but not the color or condition of your current wall, you can always install a new surface like thin brick tiles or stone cladding for a fresh, flawless finish.

How to Prepare Your Brick Wall for Covering

Before you jump into the fun part of transforming your brick wall, a little prep work is essential. Think of it as setting the stage for a flawless performance. Properly preparing the surface ensures your new covering will look beautiful and last for years. Skipping these steps can lead to issues down the road, so taking the time to do it right is a smart investment in your home. These four steps will get your wall ready for its makeover.

Step 1: Clean the Brick Surface

First things first, you need a clean slate. Over time, brick collects dust, dirt, and even a bit of grime. You’ll want to get all of that off so your new finish can adhere properly. For most walls, a stiff-bristled brush and a simple cleaning solution will do the trick. Be gentle, especially if your brick is older or showing signs of wear. If you’re dealing with stubborn stains or are worried about damaging the brick, calling in a pro is a great idea. Expert restoration and sealing services can ensure the job is done safely and effectively.

Step 2: Repair Any Cracks or Damage

Next, give your wall a thorough inspection. Look for any cracks, crumbling mortar, or loose bricks. It’s important to fix these spots before you cover them up. Using the wrong type of mortar for repairs can cause more harm than good, leading to more cracking later on. You need a mix that’s compatible with your existing brick and mortar. This is where professional masonry expertise can be a lifesaver, ensuring the structural integrity of your wall is sound before you proceed with any cosmetic changes. A solid, stable surface is key to a lasting finish.

Step 3: Add a Vapor Barrier to Control Moisture

Moisture is the enemy of any successful home project. Brick is a porous material that needs to breathe, meaning it allows moisture to pass through it and evaporate. When you cover it with a non-breathable material, you can trap that moisture inside the wall. This can lead to serious problems like mold, mildew, and deterioration of the brick itself. Installing a vapor barrier is a crucial step to manage moisture and protect your home. This is especially important for exterior-facing interior walls or basement walls where moisture levels can be higher.

Step 4: Apply Primer or a Sealant

The final prep step is to apply a quality primer or sealant. This creates a uniform surface for your chosen covering and helps it adhere better. Most importantly, you need to choose a breathable, or vapor-permeable, product specifically designed for masonry. A non-breathable sealant will trap water vapor just like an improper covering would, which can cause paint to peel and the brick face to flake off. A good primer will also prevent the porous brick from soaking up too much paint or plaster, saving you time and material in the long run.

7 Creative Ways to Cover an Interior Brick Wall

Once you’ve prepped your wall, the fun part begins. Covering an interior brick wall isn’t just about hiding something you don’t like; it’s an opportunity to introduce a new style, texture, and personality into your space. From simple cosmetic updates to more structural changes, there’s a solution for every design goal and budget. Let’s walk through seven creative ways you can transform your brick wall from a feature you’re unsure about into a stunning focal point you’ll love.

1. Paint or Limewash

Painting is one of the most straightforward ways to update an interior brick wall. A few coats of paint can instantly brighten a room and give it a clean, modern look. For a more nuanced and classic finish, consider limewash. This special paint, made from lime and water, soaks into the brick instead of sitting on top of it. The result is a soft, matte texture that gives the brick a beautiful, slightly weathered appearance. You can apply multiple coats to achieve a whiter, more opaque finish while still maintaining the brick’s natural character. This is a fantastic weekend project for a quick room refresh.

2. Whitewashing

If you like the idea of lightening up your brick but find solid paint a bit too flat, whitewashing is an excellent middle ground. More opaque than limewash, this technique involves applying a watered-down paint solution to the brick. It tones down the original color, usually red or brown, while allowing the natural texture and some color variation to peek through. This method is perfect for achieving a rustic, shabby-chic, or coastal aesthetic. Whitewashing can dramatically change the mood of a room, making it feel brighter and more open without completely erasing the charm of the exposed brick.

3. Plaster, Render, or Stucco

For a complete transformation that adds texture and depth, consider covering your brick wall with plaster, render, or stucco. This method involves applying a plaster-like material directly over the brick to create a new, seamless surface. The finish can be anything from a smooth, polished look to a more rustic, textured effect. This is a durable, long-lasting solution that completely hides the brick and provides a fresh canvas for your interior design. Because it requires skill to get a professional finish, this is often a job for an experienced masonry designer, but the results are truly transformative and can suit any style from Mediterranean to minimalist.

4. Drywall (Stud Wall or Direct Bond)

If you want a perfectly smooth, traditional wall, installing drywall is the best solution. This method completely conceals the brick, giving you a standard wall surface that you can paint or wallpaper. You have two main options: building a new stud wall in front of the brick or attaching furring strips directly to the brick to anchor the drywall sheets. While it’s a more involved project, it’s the most effective way to deal with uneven brick or moisture issues, since you can add insulation and a vapor barrier behind the drywall. This is a core part of many home remodeling projects and offers a truly blank slate.

5. Wood Paneling

Adding wood paneling is a fantastic way to introduce warmth, texture, and character to a room. You can cover the brick with anything from classic beadboard for a traditional look to sleek wood slats for a modern feel or rustic shiplap for a farmhouse vibe. The paneling can be installed over furring strips attached to the brick wall, which also creates a small air gap that helps with insulation and moisture control. Wood paneling not only covers the brick but also becomes a stunning architectural feature in its own right, adding a cozy and inviting atmosphere to your space.

6. Tile or Stone Cladding

To make a bold statement, consider covering your brick wall with tile or a thin stone veneer. This method adds incredible texture, color, and a high-end feel to any room. You can choose from a wide variety of materials, including sleek porcelain tiles for a contemporary look or rugged, earthy natural stone pavers for a rustic, organic feel. This is an especially popular choice for fireplace surrounds or feature walls in living rooms and kitchens. While it requires careful preparation and installation, the result is a durable, artful surface that adds significant visual interest and value to your home.

7. Wallpaper or Fabric Wall Coverings

For a decorative touch that offers endless possibilities in pattern and color, wallpaper or fabric is a great choice. Before you can apply them, the brick wall needs to be smoothed over, typically by installing drywall or applying a skim coat of plaster. Once you have a smooth surface, you can choose from thousands of designs to match your decor. Wallpaper can create a dramatic accent wall, while upholstered fabric panels can add softness and improve acoustics. This method allows you to easily change the look of your room down the line without a major renovation.

Your Shopping List: Materials and Tools for Each Method

A successful project starts long before you pick up a tool. It begins with a clear plan and a well-stocked toolkit. To make things easier, I’ve put together a shopping list for each of the most popular methods for covering brick. Think of these as your pre-project checklists. Gathering everything you need ahead of time means you can focus on the creative part without making extra trips to the hardware store. Before you begin any of these projects, remember that proper wall preparation, including cleaning and repairs, is the key to a lasting finish. If you find any significant damage, our experts in restoration and sealing can ensure your wall is in perfect condition before you start.

Paint, Limewash, and Whitewash

This is one of the most approachable DIY methods, and your shopping list is pretty straightforward. For a classic painted look, you’ll want a good quality masonry primer and paint. For limewash or whitewash, you can buy a pre-mixed product or create your own.

Your list will include:

  • Materials: Masonry primer, latex or masonry paint, limewash, or a 1:1 mixture of white latex paint and water for a whitewash effect. Don’t forget painter’s tape and drop cloths.
  • Tools: A wire brush for cleaning, natural bristle brushes for limewash, rollers for paint, a paint tray, rags, and a spray bottle with water to dampen the brick before applying limewash.

Plaster, Render, and Stucco

Applying a plaster or stucco finish is a skill that takes practice, but it creates a beautiful, seamless surface. This method completely hides the brick for a modern and clean aesthetic. The key is mixing the material to the right consistency and applying it in thin, even layers.

Here’s what you’ll need:

  • Materials: A bonding agent to help the plaster stick, your chosen plaster or stucco mix, and clean water for mixing.
  • Tools: A powerful drill with a paddle mixer attachment will save your arms. You’ll also need buckets, a hawk to hold the plaster, and a trowel to apply it. Safety glasses and gloves are a must. For a project this involved, many homeowners trust our masonry design team to get a flawless result.

Drywall and Furring Strips

Putting up drywall is the best way to get a perfectly smooth, traditional wall. The process involves building a thin frame over the brick using furring strips, which gives you a flat surface to attach the drywall.

Your shopping list should contain:

  • Materials: Wood or metal furring strips, concrete screws to attach them to the brick, drywall sheets, drywall screws, joint compound (mud), and drywall tape.
  • Tools: A drill with a masonry bit is essential. You’ll also need a level to get the frame straight, a tape measure, a utility knife for scoring the drywall, and taping knives for the joint compound. This is a foundational step in many home remodeling projects.

Wood Paneling

Wood paneling adds warmth, texture, and character to a room. From rustic shiplap to classic beadboard, the options are nearly endless. Like drywall, this method typically requires attaching wood battens (similar to furring strips) to the brick first.

Here’s what to grab at the store:

  • Materials: Your choice of wood paneling, wood battens for the frame, construction adhesive, and finishing nails. You may also need wood filler and your preferred paint or stain.
  • Tools: A saw (miter or circular) for cutting panels to size, a nail gun or hammer, a level, a tape measure, and a drill. Seeing how wood can transform a space is part of what makes our custom pavilions and pergolas so special.

Tile and Stone Cladding

For a truly high-end and durable finish, consider cladding your brick wall with tile or a thin stone veneer. This method adds incredible texture and a sense of permanence, turning your wall into a stunning focal point. It’s perfect for fireplace surrounds or creating a dramatic accent wall.

Here is your list of supplies:

  • Materials: Your selected tile or stone veneer, a high-quality mortar or thin-set adhesive, and grout if your material requires it.
  • Tools: A notched trowel for applying adhesive, a wet saw or tile cutter for precise cuts, a level, a rubber mallet to set the pieces, a grout float, and sponges. You can explore a wide variety of beautiful options at the Gappsi Store, which features an extensive collection of porcelain and natural stone.

Should You DIY or Hire a Pro?

Deciding whether to cover your brick wall yourself or bring in a professional comes down to the complexity of the project, your budget, and your comfort level with home improvement tasks. While some methods are straightforward enough for a weekend warrior, others require a skilled hand to get right. Weighing the pros and cons can help you make a choice that protects your home’s value and gives you a result you’ll love for years to come.

Projects You Can Tackle Yourself

If you’re comfortable with basic carpentry, you can likely handle covering a brick wall with drywall. The most common method involves attaching wood furring strips directly to the brick, creating a frame for the drywall panels. This approach is a great way to get a smooth, modern finish without needing specialized masonry skills. Another manageable project is installing timber battens on the wall, which gives you a solid base to anchor your new wall covering. These projects are great if you’re looking for a significant change and aren’t afraid to get your hands dirty.

When It’s Time to Call in the Experts

If your project involves plastering, rendering, or any structural changes, it’s best to call for professional help. A professional masonry expert can test and match existing mortar, ensuring any repairs support the wall’s integrity instead of accidentally damaging it. Achieving a flawless, high-end finish with materials like plaster or limewash also requires specific knowledge. For example, a pro will know to use mineral-based masonry paint designed for brick, not standard house paint, for a clean look that lasts. For a truly seamless transformation, our home remodeling team can handle the project from start to finish.

Mistakes to Avoid No Matter What

Whether you DIY or hire a pro, there are a few critical mistakes to avoid. Never cover your brick wall with impermeable materials like dense stucco, vinyl siding, or certain faux stone panels. These materials can trap moisture inside the brick, preventing it from breathing and leading to serious long-term damage. Using the wrong mortar mix for repairs is another common error that can cause the surrounding bricks to crack or crumble over time. If you suspect a previous owner made these mistakes, our restoration and sealing services can help assess and correct the damage.

Design Ideas for Your New Wall

Once your brick wall is covered, you have a beautiful blank canvas to work with. This is your chance to turn a once-problematic wall into a stunning focal point that complements your home’s style. Instead of just letting it blend into the background, think about how you can use design elements to make your new wall a feature you truly love. With the right approach to color, lighting, and decor, you can completely transform the feel of the room and create a space that feels intentional and thoughtfully designed.

Experiment with Texture and Color

Just as exposed brick can lend a feeling of rustic charm or city style to a room, your new wall covering offers a fresh opportunity to define your space. The material you choose sets the stage. A smooth, plastered wall painted in a soft, neutral hue creates a calm and modern backdrop, while wood paneling can introduce warmth and organic texture. If you opted for stone or porcelain cladding, you can play with a rich variety of tones and patterns to create a chic and inviting interior. Don’t be afraid to go bold with color or choose a material with a unique finish. This wall is your chance to add character and depth to your home.

Highlight Your Wall with Smart Lighting

The right lighting can make all the difference. Instead of relying solely on overhead fixtures, consider how you can use light to accentuate your new wall. Installing track lighting or wall sconces can cast a warm glow, creating shadows and highlighting any texture in the material, whether it’s the subtle lines of shiplap or the unique surface of stone veneer. This technique draws the eye and adds a layer of sophistication to the room. Smart lighting, as part of a larger home remodeling project, can help you create different moods, turning your wall into a dynamic feature that adapts to any occasion.

Add Shelves, Art, and Other Decor

Your new wall is the perfect backdrop for showcasing your personality. Adding shelves or art can enhance its visual appeal, creating a focal point that anchors the room. Consider installing a set of minimalist floating shelves to display curated objects, books, or small plants. Alternatively, a single, large-scale piece of art can make a dramatic statement and tie the room’s color palette together. The clean surface of your new wall, whether it’s drywall or plaster, ensures that your chosen decor will stand out. This is your opportunity to tell a story and make the space uniquely yours.

Related Articles

Frequently Asked Questions

Can I ever go back to exposed brick if I cover it? This really depends on the method you choose. If you install drywall or wood paneling over the brick, the process is generally reversible, although it will require some work to dismantle the frame and patch any screw holes. However, methods like painting, plastering, or applying a stucco finish are much more permanent. Removing these coatings is an intensive process that can damage the brick surface, so it’s best to consider those options a long-term commitment.

My brick wall feels damp. Is it still okay to cover it? You should never cover a damp brick wall. Doing so will trap the moisture, which can lead to serious problems like mold, mildew, and the eventual breakdown of the brick and mortar. Your first step should be to identify and fix the source of the dampness. This might involve exterior repairs or improving ventilation. It’s wise to consult a professional to diagnose the issue correctly before you proceed with any cosmetic project.

What’s the easiest and most affordable way to update my brick wall? Painting, whitewashing, or applying a limewash finish are by far the most approachable and budget-friendly options. These projects require relatively few materials and can completely change the look and feel of a room in just a weekend. They offer a significant visual impact by brightening the space, all without the cost and complexity of more structural solutions like installing drywall or plaster.

Why can’t I just use regular house paint on my brick wall? Brick is a porous material that needs to breathe, which means it allows small amounts of water vapor to pass through it. Standard interior latex or acrylic paints create a non-breathable film that traps this moisture inside the brick. Over time, this trapped moisture can cause the paint to bubble and peel, and it can even damage the face of the brick itself. Using a breathable masonry paint or limewash ensures the wall stays healthy and your finish lasts.

How do I decide between keeping the brick and covering it? The decision comes down to the brick’s condition and your personal style. If the brick is in good shape and you enjoy its texture and character, keeping it exposed is a great choice. You can always clean it or apply a clear sealant to protect it. However, if the brick is damaged, of poor quality, or simply doesn’t fit the bright, clean aesthetic you want for your home, then covering it is a fantastic way to transform your space and achieve your design goals.

Share this page:
Kitchen remodel by a top Smithtown home remodeling company.

How to Find the Best Smithtown Home Remodeling Company

Your home is more than just the space within its four walls; it’s your entire property. A truly transformative renovation considers how you live both inside and out. Perhaps your dream project includes a new patio for summer dinners or a beautiful swimming pool for the family to enjoy. Finding a contractor who can create a seamless flow between your interior and exterior living areas is key to achieving a cohesive design. A versatile Smithtown home remodeling company with expertise in both indoor renovations and outdoor construction can manage your entire project, simplifying the process and delivering a unified, stunning result. Let’s explore how to find that all-in-one expert.

Key Takeaways

  • Vet Your Contractor Thoroughly: Go beyond the price by confirming every potential contractor has a valid license and full insurance. Dig into online reviews and ask for local recommendations to get a true sense of their professionalism and quality of work.
  • Establish a Clear Plan from the Start: A successful renovation begins with you. Define your project goals, must-haves, and budget before getting quotes, as this helps you compare offers accurately and ensures your contractor understands your vision.
  • Choose a Partner, Not Just a Builder: Look for a contractor who prioritizes clear communication and provides transparent, itemized pricing. The right team will act as your partner, keeping you informed and making the entire remodeling process feel collaborative and low-stress.

What Can a Smithtown Remodeler Do for You?

Thinking about a change for your home? A professional remodeler can help you reimagine your space, whether you’re looking for a simple update or a complete transformation. The right contractor acts as your partner, guiding you from the initial design concept to the final build. They handle the complexities of construction, so you can focus on the excitement of seeing your vision come to life. From updating the most-used rooms inside your house to creating a brand new outdoor retreat, a skilled remodeler can improve your home’s functionality and make it a place you truly love to live in.

A full-service company can manage every detail. Gappsi, for example, offers comprehensive home remodeling services that cover everything from interior renovations to expansive outdoor projects. This integrated approach means you have one team overseeing your entire project, ensuring a smooth process and a cohesive final look. Whether your project is big or small, a local Smithtown remodeler has the expertise to turn your ideas into a beautiful and practical reality.

Kitchen and Bathroom Renovations

Your kitchen and bathroom are two of the most important rooms in your home, and renovating them can dramatically improve your daily life. A remodeler can help you design a kitchen that’s not just beautiful but also a joy to cook in, with smart storage, durable countertops, and a layout that flows. The same goes for your bathroom; it can become a personal spa with updated fixtures, beautiful tile work, and better lighting. A contractor manages all the details, from plumbing and electrical to installing new flooring, ensuring every element works together perfectly.

Home Additions and Basement Finishing

If your family is growing or your needs have changed, you might feel like you’re running out of room. A home addition can give you the space you need without the hassle of moving. Whether you want to add a new bedroom, a home office, or a sunroom, a remodeler can design and build an extension that seamlessly integrates with your existing home. Similarly, finishing your basement is a fantastic way to gain a whole new level of living space. You can create a cozy family room, a home gym, or a guest suite, adding significant value and function to your property.

Outdoor Living and Entertainment Spaces

Why limit your living space to the indoors? A Smithtown remodeler can help you create an outdoor oasis right in your backyard. Imagine hosting summer barbecues on a new patio, relaxing under a custom pergola, or cooling off in a beautiful new swimming pool. Gappsi specializes in designing these kinds of dream backyards, offering everything from stunning masonry for patios and walkways to installing custom sports games courts for endless family fun. These additions extend your home’s usable space and create the perfect setting for making memories.

Why Hire a Local Smithtown Remodeler?

When you decide to remodel your home, you have a lot of choices. While big, national chains might have flashy ads, there’s a distinct advantage to working with a contractor right here in your community. Choosing a local Smithtown remodeler isn’t just about convenience; it’s a strategic move that can lead to a smoother process and a better final result. Local experts bring an unmatched level of area-specific knowledge, a reputation built on trust with your neighbors, and a personal commitment to your project’s success.

A local company understands the unique character of Smithtown homes and what it takes to execute a beautiful and compliant renovation. From handling town permits for a new patio to sourcing the perfect materials for a kitchen update, a local team is invested in the outcome because their reputation is on the line in the very community where they live and work. This connection fosters a higher level of accountability and a more personalized approach to your home remodeling project, ensuring your vision is brought to life with care and expertise.

Local Building Code Knowledge

Dealing with building codes and permits can be one of the most stressful parts of any renovation. Every town has its own set of rules, and Smithtown is no exception. A local contractor who is familiar with these specific regulations is an invaluable asset. They understand the permitting process, know what inspectors look for, and can design your project to be compliant from the very beginning. This expertise helps you avoid costly delays and frustrating setbacks. Working with a contractor who knows Smithtown’s building codes ensures your project moves forward smoothly, saving you time, money, and a whole lot of headaches.

Community Reputation

Local remodelers thrive on their reputation. Unlike a faceless national corporation, a Smithtown-based contractor builds their business on word-of-mouth referrals and positive reviews from your friends and neighbors. Their success is directly tied to their performance on past projects in the area. You can often see the quality of their work firsthand by driving through local neighborhoods or asking for addresses of completed projects. A company with deep roots in the community has a proven track record and is committed to maintaining the trust they’ve earned from repeat customers in Smithtown, St. James, and beyond. You can explore their past projects to see their local reputation in action.

Personalized Service

When you work with a local remodeler, you are more than just a project number. You get a hands-on, personalized experience that larger companies often can’t match. Communication is typically more direct, and you’ll likely have a consistent point of contact, or even the owner, overseeing your project. This close relationship allows for greater flexibility and a better understanding of your specific needs and vision. Local companies aim to make the remodeling experience smooth and easy for their customers because they are personally invested in your satisfaction. This dedicated attention ensures your project, whether it’s a new pavilion or a finished basement, gets the focus it deserves.

Support for the Local Economy

Hiring a local Smithtown remodeler is an investment in your own community. The money you spend on your renovation stays local, supporting jobs and contributing to the area’s economic vitality. Local contractors hire local crews and often source their materials from other Long Island businesses. This creates a positive ripple effect that benefits everyone. By choosing a premier home improvement company on Long Island, you are not only enhancing your own property but also strengthening the local economy. You are helping ensure that Smithtown remains a vibrant and prosperous place to live for years to come, all while getting the home of your dreams.

Top Home Remodeling Companies in Smithtown

Finding the right team for your renovation is a big decision, and Smithtown has some excellent contractors to choose from. Your goal is to find a company with a solid reputation, a portfolio that matches your style, and a team you feel comfortable welcoming into your home. To help you get started, we’ve highlighted a few of the top-rated companies in the area that are known for their quality work and commitment to their clients.

Gappsi

Gappsi is a standout choice in Smithtown because they offer such a complete range of services for your entire property. They are well-known for their stunning interior home remodeling, transforming kitchens, bathrooms, and basements with expert craftsmanship. What makes them unique is that their expertise extends to your home’s exterior. They also design and build incredible outdoor living spaces, from custom masonry and landscaping to swimming pools. This ability to handle both indoor and outdoor projects makes them a convenient one-stop solution, streamlining your renovation process and ensuring a cohesive design across your whole home.

Other Local Contractors to Consider

While Gappsi is a leading option, it’s always a good idea to explore a few different contractors to find the best match for your specific project and budget. Websites like Houzz are a fantastic resource, offering an extensive list of home remodelers in the Smithtown area, complete with project photos and client reviews. You’ll come across other respected companies like Preferred Remodeling, which handles everything from additions to whole-home renovations, and Seaview Contracting LLC, known for its careful and precise construction work. Reviewing a few different portfolios will help you compare styles and find a team that truly gets your vision.

How to Find a Reputable Smithtown Remodeler

Finding the right remodeler in Smithtown can feel like a huge task, but with a clear strategy, you can confidently find a professional you trust. It’s all about doing your homework before you sign any contracts. By combining online research with personal recommendations and a thorough check of their qualifications, you can narrow down the field to find a contractor who will bring your vision to life. These steps will help you vet potential partners and ensure you’re working with a true professional who respects your home and your investment.

Check Online Reviews and Directories

A great place to start your search is online. Websites dedicated to home improvement are treasure troves of information, offering reviews from homeowners in your area. You can check online reviews on platforms like Houzz, which list local professionals alongside feedback from their past clients. Seeing what others have experienced gives you a candid look at a company’s communication, timeliness, and quality of work. Pay attention to how contractors respond to reviews, both positive and negative, as it shows their commitment to customer satisfaction. This initial digital search helps you create a shortlist of contenders before you even pick up the phone.

Ask for Recommendations

While online reviews are helpful, nothing beats a recommendation from someone you know. Talk to friends, family, and neighbors in the Smithtown area who have recently completed a renovation. They can give you an honest, firsthand account of their experience, from the initial consultation to the final walkthrough. A personal referral often comes with valuable insights you won’t find online, like how the crew managed the workspace or handled unexpected issues. A company with a strong local reputation is often built on word-of-mouth, which is a powerful indicator of consistent quality and reliable service.

Verify Credentials and Portfolios

Once you have a few names, it’s time to dig a little deeper. The most important step is to confirm that any contractor you consider is fully licensed and insured in New York. This protects you from liability in case of accidents or property damage. Don’t just take their word for it; ask for proof. Next, ask to see their portfolio. A contractor’s past work is the best evidence of their skill and style. Gappsi, for example, has an extensive portfolio that showcases decades of craftsmanship in both interior and outdoor projects, giving you a clear idea of what they can achieve.

What to Look for in a Remodeling Contractor

Once you have a shortlist of potential contractors, it’s time to look closer at what sets them apart. Choosing the right partner for your renovation is about more than just a good price. You’re looking for a team you can trust to bring your vision to life inside your home. The best contractors share a few key qualities that ensure a smooth, successful project from start to finish. Pay attention to their experience, credentials, transparency, and communication style to find a team that’s the right fit for you.

Experience and Services Offered

A contractor’s experience is one of the strongest indicators of their reliability. Look for a company that has been in business for a long time and has a portfolio of projects similar to yours. It’s also a huge advantage to find a contractor who offers a wide range of services. A team that can handle everything from initial design to the final touches provides a more seamless experience. For example, a company with expertise in both home remodeling and outdoor construction can create a cohesive flow between your indoor and outdoor living spaces. This versatility means you won’t have to juggle multiple companies, which simplifies communication and ensures a unified final result.

Licensing and Insurance

This is a critical, non-negotiable checkpoint. A reputable contractor must be fully licensed and insured, and they should be ready to provide proof. A license confirms that the contractor meets local and state requirements for their trade. Insurance is your financial safety net. It typically includes general liability, which covers property damage, and worker’s compensation, which protects you from being held liable if a worker is injured on your property. Never hire a contractor without verifying these credentials. It’s a simple step that protects you, your home, and your investment from unforeseen accidents and legal issues.

Clear Pricing and Timelines

Transparency is essential for keeping your project on track and within budget. A professional contractor will provide a detailed, written quote that clearly breaks down the costs for labor, materials, and any other expenses. Be cautious of quotes that seem vague or unusually low, as they can often lead to surprise costs later. A reliable contractor will also give you a realistic project timeline and keep you informed of their progress. While unexpected delays can sometimes happen in any renovation, a good team will communicate proactively and work with you to find solutions, ensuring you’re never left in the dark about the status of your project.

Communication and Professionalism

You’ll be working closely with your remodeling team for weeks or even months, so good communication is key. Your contractor should be easy to reach, responsive to your questions, and willing to listen to your ideas and concerns. Professionalism extends beyond just communication. It’s also about how they treat you and your home. A professional crew will show up on time, maintain a clean and organized worksite, and respect your family’s daily routine. The right team makes the renovation process feel collaborative and exciting, not stressful. Look for a company whose goal is to make your experience as positive as the final outcome.

Why Do Customer Reviews and Testimonials Matter?

When you’re planning a major home project, choosing the right contractor can feel like the biggest decision of all. This is where customer reviews and testimonials become your most valuable resource. They offer a genuine look into what it’s like to work with a company, moving beyond polished advertisements to show you the real experiences of homeowners just like you. Think of reviews as firsthand stories that reveal a company’s true character. Do they communicate clearly? Is their craftsmanship as good as their photos suggest? How do they handle unexpected challenges that inevitably pop up during a renovation?

Reading about past projects gives you insight into a company’s reliability and commitment to customer satisfaction. It helps you build a picture of the entire process, from the initial design consultation to the final reveal. A consistent pattern of positive feedback is a strong indicator that a company values its clients and delivers high-quality results. You can often see this dedication in action on a company’s YouTube channel, where completed projects and client stories are shared. By taking the time to read reviews, you’re not just picking a contractor; you’re choosing a partner for your home’s transformation, someone you can trust to bring your vision to life without adding unnecessary stress to your life.

What to Look for in Genuine Reviews

When you start reading reviews, it’s important to look past the simple star rating and dig into the details. The most helpful reviews are specific. Instead of a generic “they did a great job,” look for comments that describe how the company excelled. Did they praise the project manager’s communication skills, the crew’s professionalism and tidiness, or the stunning quality of the finished masonry work? These specifics give you a much clearer picture of the client experience.

Pay attention to patterns across multiple reviews. While a single negative comment might be an outlier, a recurring theme, whether positive or negative, is telling. If several homeowners mention how a company went above and beyond to stick to the timeline, that’s a great sign. Similarly, look for mentions of repeat customers or referrals. A company that earns business from past clients is clearly doing something right and has built a strong reputation for quality and trust within the community.

Red Flags to Watch Out For

Just as you look for positive signs, it’s equally important to spot potential red flags. Consistent negative feedback is the most obvious warning, but the specifics are what truly matter. Be cautious if you see multiple complaints about poor communication, missed deadlines, or costs that ballooned without explanation. A home renovation should be an exciting process, not a stressful one. If reviews frequently describe a frustrating or chaotic experience, it’s wise to steer clear.

Another major red flag is a lack of transparency. A reputable home remodeling company will be upfront about its licensing and insurance. If you can’t easily find this information or if reviews mention issues related to it, consider it a serious warning. Also, be wary of a contractor with very few reviews or a limited online presence. An established, professional company should have a portfolio of work and a history of client feedback you can easily access. A lack of available information can sometimes be as telling as a bad review.

How to Set Your Smithtown Renovation Up for Success

A successful home renovation is all about clear communication and thoughtful planning. Before the first wall comes down or the first tile is laid, taking a few key steps can make the entire process smoother, more predictable, and ultimately more rewarding. When you know what to expect and have a solid plan, you can work with your contractor as a team to bring your vision to life without the stress of surprise costs or delays. Let’s walk through how to prepare for a successful Smithtown renovation, from defining your vision to choosing the right partner for the job. These steps will help you feel confident and in control as you begin transforming your home.

Define Your Goals and Budget

The first step in any renovation is figuring out exactly what you want to achieve and what you’re prepared to spend. Start by making two lists: one for your absolute must-haves and another for your nice-to-haves. This simple exercise helps you prioritize what’s most important. Maybe a double vanity is non-negotiable for your bathroom remodel, but a heated floor is a feature you could live without if the budget gets tight. Having a clear budget and a prioritized list of goals for your home remodeling project will guide every decision you make and ensure you and your contractor are always on the same page.

Get Multiple Quotes

Once you have a clear idea of your project, it’s time to talk to professionals. Don’t settle on the first contractor you speak with. Getting multiple quotes allows you to compare not just prices but also the scope of work, proposed timelines, and the overall approach of different companies. A reputable contractor will provide a detailed, itemized estimate that breaks down all the costs, which helps prevent unexpected expenses later on. This is your chance to find a team that understands your vision and offers the transparency you need for a successful partnership. Comparing offers will give you a better feel for the market and help you find the best fit for your specific project.

Visit Showrooms to Select Materials

Nothing compares to seeing and touching materials in person. While online galleries are great for inspiration, visiting a showroom is essential for making final decisions. At the Gappsi Store in Smithtown, you can explore an extensive selection of materials for every part of your home. Whether you’re looking for the perfect porcelain tiles for a bathroom floor, natural stone for a kitchen backsplash, or pavers for an outdoor patio, seeing the options firsthand helps you appreciate their true color, texture, and quality. This hands-on experience is invaluable for ensuring the materials you choose will create the exact look and feel you want in your renovated space.

Ask the Right Questions Before Signing

Before you sign a contract, make sure you’ve done your homework. This is the time to ask detailed questions and confirm that your chosen contractor is the right partner for you. Inquire about their licensing and insurance, their typical project timeline, and how they manage communication throughout the renovation. Ask how they keep the worksite clean and minimize disruption to your daily life. A professional contractor will be happy to answer these questions and provide references. You can also see their work and get a feel for their expertise on platforms like their YouTube channel. Asking the right questions upfront ensures you’re aligned on expectations and ready to move forward with confidence.

Ready to Transform Your Smithtown Home?

Finding the right home remodeling company in Smithtown is the key to a successful project. With a variety of local professionals available, you can connect with experts who specialize in exactly what you need. Using a directory to find home remodelers in Smithtown is a great first step, as you can read reviews from other homeowners and see who has a strong reputation in the community. This research helps you make an informed decision and choose a reputable contractor for your project.

As you explore your options, you’ll find companies that offer a full range of services, from kitchen and bathroom updates to major home additions. The most important thing is finding a partner who understands your vision. For a truly personalized touch, nothing beats seeing and selecting your materials in person before the work begins. This hands-on approach removes any guesswork and ensures you’ll love the final result. At Gappsi, we believe this is a crucial part of the home remodeling process, making your experience smoother and more enjoyable from start to finish.

Many professionals offer online consultations and free estimates, giving you an easy way to start the conversation. Don’t hesitate to reach out to a few different contractors to discuss your project. Whether you want to modernize your kitchen, finish your basement, or create an entirely new outdoor living space, the right team for your Smithtown home transformation is just a few clicks away.

Related Articles

Frequently Asked Questions

What’s the difference between a general remodeler and a full-service company? A general remodeler might specialize in specific areas, like just kitchens or just bathrooms. A full-service company, however, can manage your entire project from the inside out. This means one team can handle your interior home remodeling and also design and build your outdoor living space, like a new patio or swimming pool. This integrated approach ensures a cohesive look for your whole property and simplifies the process for you, since you only have one point of contact.

I’m interested in remodeling, but where do I even begin? The best first step is to simply define your goals and your budget. Before you even talk to a contractor, sit down and make a list of your absolute must-haves for the project and a separate list of nice-to-have features. This helps you prioritize what’s most important. Once you have that clarity and a realistic budget in mind, you’ll be in a much better position to have productive conversations with potential contractors.

How can I be sure a contractor is trustworthy? Trust is built by doing a little homework. Before hiring anyone, you should always verify that they have a valid license and are fully insured; this protects you from liability. After that, read detailed online reviews to see what past clients have said about their communication and quality of work. A reputable contractor will also have an extensive portfolio of completed projects that they are proud to show you.

Can one company really handle both my kitchen renovation and a new backyard sports games court? Yes, and it’s a huge advantage when they can. A company with expertise in both indoor and outdoor construction can manage diverse projects like a kitchen remodel and a sports games court installation. This streamlines the entire process, as you have a single, dedicated team overseeing everything. It ensures all the elements of your home work together beautifully, creating a seamless flow from your interior to your exterior spaces.

Why is it so important to visit a showroom to pick out materials? While looking at photos online is great for gathering inspiration, they don’t always show the true color or texture of materials. Visiting a showroom allows you to see and touch the tiles, stones, and other finishes in person. This hands-on experience is critical for confirming that the quality is what you expect and that the materials will create the exact look and feel you want for your home. It removes the guesswork and helps you make final decisions with confidence.

Share this page: