


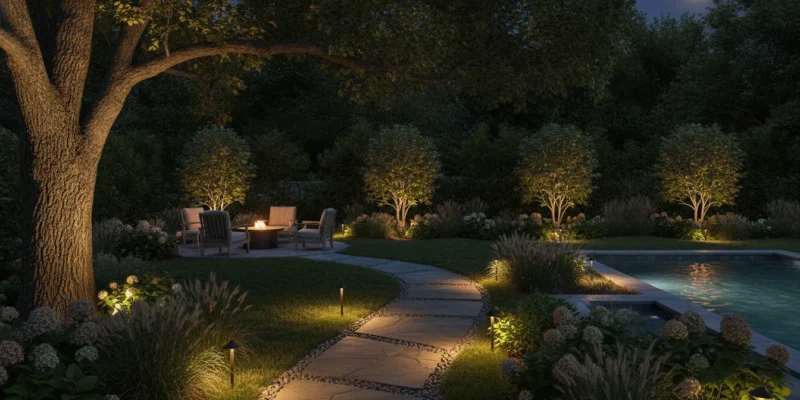
After sunset, a Long Island yard needs light that guides movement and preserves atmosphere.
Contact Gappsi through our contact page
The most useful landscape lighting ideas layer visibility, architectural accents, and softer focal points by zone. Path and step fixtures guide movement, shielded lights reveal trees and stonework, and adjustable scenes let the same outdoor area support dinner, conversation, or quiet evening use.
The right balance depends on sightlines, mature planting, existing hardscape, and where wiring can be coordinated with the broader design. Start at the places people move through first, then build outward from the entry paths and steps.
What Landscape Lighting Ideas Work Best for Entry Paths and Steps?
The most effective entry lighting helps people read the route without making the fixtures the main attraction. Start at the driveway or sidewalk and identify the sequence a visitor actually follows: the turn toward the front door, changes in grade, the first riser. The landing, and the final approach, then layer light so each transition is visible while planting, masonry, and the front door remain the visual focus.
Use path lights to shape the route
Path lights work well along walkways because they create a repeated rhythm at the edge of the route. Avoid lining them up directly opposite one another unless the path needs a very formal treatment. Alternating fixtures from side to side can produce a more natural appearance. And the cited landscape-lighting guidance places typical pathway fixtures about 8 to 10 feet apart as a starting point: pathway spacing guidance. That distance is not a rule for every Long Island property. A narrow walk, a broad bluestone approach, dense shrubs, and mature trees can all change the sightline.
Space fixtures by what the eye needs to see, not by a tape measure alone. A bend may need light before and after the turn. A darker section beside a hedge may need closer coverage, while an open stretch may look calmer with fewer fixtures. Keep the beam on the walking surface and nearby planting rather than aiming it toward the house, the street, or a neighbor’s windows.
Make steps readable without creating glare
Step lights should reveal the edge of each tread and the depth of the stair without shining directly into approaching eyes. Recessed fixtures in risers, low-profile lights beneath a wall cap, or carefully positioned side lighting can all work, depending on the material and construction. On a masonry stair, the fixture location should be coordinated before stone, pavers, or coping are installed. A light that is technically bright enough can still perform poorly if its lens is exposed at the wrong viewing angle.
Downlights can add a softer layer from a nearby wall, tree, or architectural element. Use them to support the route, not to flood the entire entry. Responsible outdoor-lighting guidance recommends a clear purpose, the lowest light level required, and shielding or careful aiming to limit spill: responsible outdoor-lighting principles. This approach also helps preserve the contrast that makes a front entry feel dimensional after dark.
Before finalizing the layout, review the route twice: once from the driveway and once from the front door. Look for exposed lenses, bright spots, dark gaps, reflected glare on pale paving, and light spilling beyond the property. Walk the path after the planting and hardscape are in place, then make small aiming or shielding adjustments. The goal is a comfortable visual handoff from driveway to door, with each step and change in direction clear enough to follow.
How Can Trees and Planting Beds Become Nighttime Focal Points?
Mature trees and layered planting can give a Long Island property its strongest evening character, but the goal is not to make every leaf equally bright. Start by choosing the view that matters most, such as the approach from the driveway, the view from a patio, or the sightline from inside the house. Then shape the lighting around the trunk, canopy, bed edge, and background so the planting reads as part of the landscape rather than a collection of visible fixtures.
Uplights placed near a trunk can reveal bark texture and branch structure. The exact distance and angle depend on the tree, surrounding surfaces, and the viewing position. One cited landscape-lighting guide describes placing tree uplights a few feet from the trunk and angling them upward. The placement should be tested on site rather than treated as a fixed formula. A narrow beam can emphasize a single trunk or branching form, while a wider beam can spread softly through a fuller canopy.
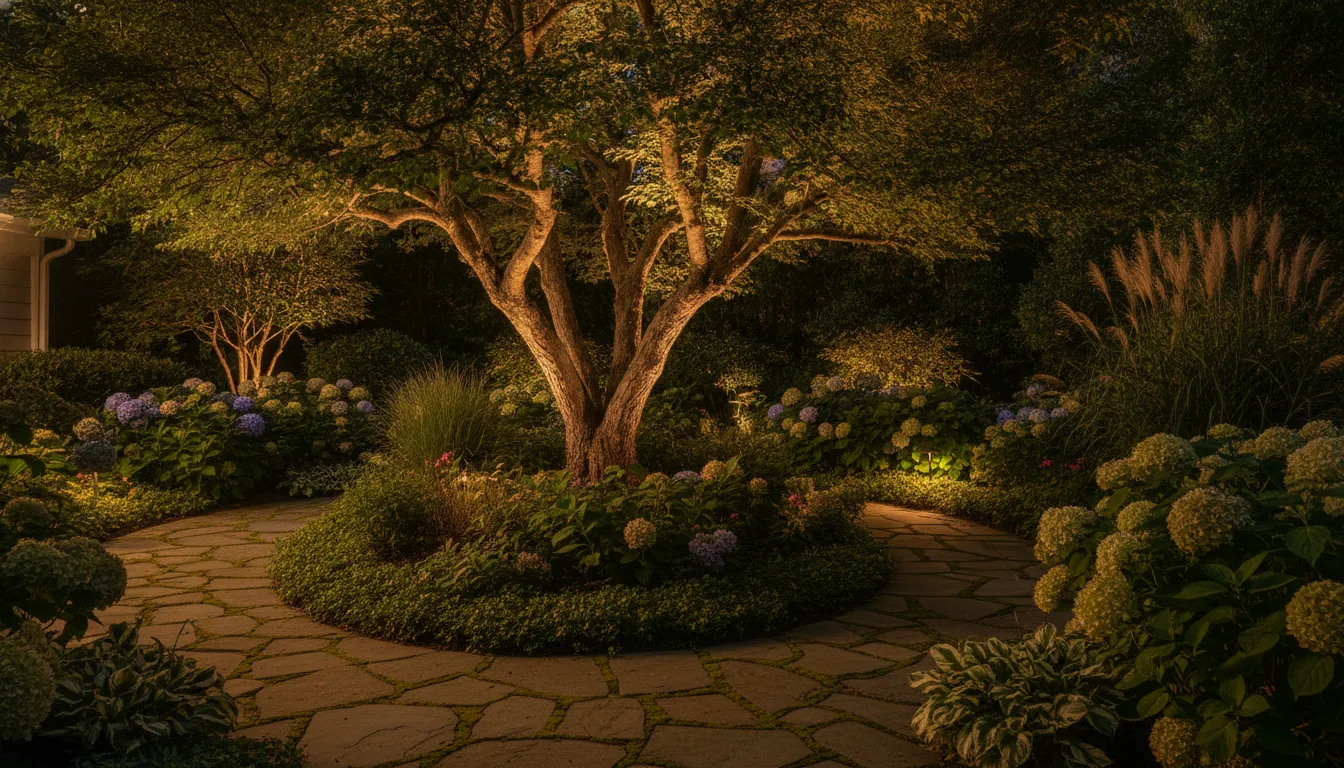
Downlights can create a quieter moonlit effect when concealed above eye level in suitable branches. Aim them toward the ground or planting below, not toward windows, seating, or neighboring properties. This preserves the canopy as the source of interest while giving lower layers enough definition to connect the tree to the rest of the bed. Shielding and careful aiming are important because responsible outdoor lighting guidance recommends directing light only where needed and limiting spill (DarkSky lighting principles).
Build depth instead of a bright wall of foliage
In a planting bed, combine a few accent lights with discreet well lights or adjustable fixtures. Highlight a specimen form, ornamental grass mass, stone edge, or change in height, then allow darker areas to separate those moments. Guidance for garden lighting recommends selective highlighting instead of lighting every plant, and it also advises accounting for seasonal changes in plant size and density (landscape lighting techniques). Adjustable stakes can help maintain the composition as plants mature or are divided.
Test the scene from the locations where people actually stand. A fixture that looks balanced beside the bed may create a harsh hot spot from a kitchen window or patio chair. Move the fixture farther away for softer coverage, lower the intensity, change the beam spread, or use a shield to hide the light source. Look for reflected glare on pale walls, wet leaves, and paving, especially around pools and entertaining areas. The best landscape lighting ideas leave room for shadow, future growth. And the natural shape of the planting, so the focal point remains comfortable to view throughout the season.
Wall-Wash and Hardscape Lighting Ideas Add Texture
Masonry changes character after sunset when light is used to reveal its surface rather than flatten it. A textured stone retaining wall, brick edge, stucco garden wall, or seat wall can become a quiet architectural backdrop with the right fixture position. Start by deciding whether the goal is a broad wash, a grazing effect, or a narrow accent. The surface, viewing distance, and nearby planting all affect the result.
Wall washing spreads light across a larger plane. The cited guidance places fixtures about 12 to 18 inches from an exterior wall and angles them toward the surface to reveal texture in stone, brick, or stucco. Fixtures spaced about 3 to 4 feet apart can help create more even coverage. Although actual spacing should be tested against the wall height, joints, surface color, and fixture output. See the source guidance on wall-washing placement for the technical basis of these ranges.
Grazing is more directional. Moving a fixture closer to rough masonry and aiming the beam across the face can emphasize stone faces, cap edges, mortar joints, and irregular relief. On a smooth wall, that same approach may expose every imperfection, so a wider, softer wash can be more forgiving. A longer distance between the fixture and surface generally softens contrast and broadens the illuminated area, while a closer fixture and sharper angle produce stronger texture and shadow. Test both positions from the main seating and walking viewpoints before finalizing the layout.
| Location | Lighting effect | Planning note |
|---|---|---|
| Retaining wall | Low, even wash that defines grade changes | Coordinate fixture placement with drainage, planting, and the wall cap. |
| Seat wall | Soft grazing that outlines masonry texture | Keep fixtures concealed and prevent direct glare for people seated nearby. |
| Wall cap | Subtle line of light along the top edge | Use compact, shielded fixtures where they will not be visible from the patio. |
| Outdoor steps | Layered illumination on risers and landings | Light walking surfaces without aiming beams into approaching eyes. |
Step and cap lighting should support orientation without making every edge bright. Recessed or concealed fixtures beneath a cap can cast light onto the face of a riser. While small fixtures set beside a landing can define a change in elevation. On a seat wall, place the light source where cushions, backs, and nearby plants will not block the intended spread. For retaining walls, account for mature planting and maintenance access so the fixtures remain serviceable.
Shielding matters wherever a wall borders a patio, pool, or neighboring property. DarkSky guidance recommends shielding and careful aiming so light points where it is needed, using the lowest required level and limiting spill. The same principles reduce glare from pale masonry and help preserve darker areas around the composition. Plan the hardscape and lighting together through masonry design and construction, especially when new walls, caps, steps, or outdoor living areas are part of the project.
What Lighting Ideas Make Patios, Pools, and Outdoor Kitchens Inviting?
Outdoor rooms should feel connected after sunset. A patio may need a soft perimeter glow for conversation. While the route to a pool or outdoor kitchen needs more deliberate illumination around changes in grade, steps, and working surfaces. The strongest landscape lighting ideas support how people move through the space without making every surface equally bright.
Begin with the evening view from inside the house and from the main seating area. A concealed source beneath a counter edge can outline an outdoor kitchen without competing with the person preparing food. Low fixtures tucked into planting beds can define the patio edge. While a pergola can carry subtle downlighting that reaches the dining table without putting a bright fixture in the line of sight.
Use the patio as a layered entertaining zone
For a dining area, combine focused task light with lower-level ambient light. A fixture aimed at a grill or prep counter should illuminate the work surface, not shine across the yard or into a guest’s eyes. Around lounge seating, light can come from nearby masonry, planting, or a pergola structure. This layering gives the eye places to rest and keeps the patio from looking like a brightly lit room.
Hardscape details can carry the design. Concealed fixtures beneath a seat wall cap, along a step riser. Or under a counter lip can reveal the shape of the construction while preserving a clean daytime appearance. Coordinate those locations with the masonry plan before installation. Gappsi’s Long Island paver patio ideas can help homeowners think through patterns, edges, and entertaining layouts that lighting will later reinforce.
Make the pool approach visible without fighting the water
Pool areas need a different balance because water reflects light. A bright fixture aimed toward the pool can create distracting glare. It can obscure the surrounding view and make the water surface visually dominant. Instead, place light on the approach, nearby planting, steps, and seating areas, then aim beams away from direct sightlines. The U.S. Department of Energy notes that outdoor lighting can support navigation and enjoyment. Responsible planning also considers how much light is actually needed: outdoor lighting should serve a clear purpose.
Near water features, use fixtures specifically rated for wet locations. The cited landscape-lighting guidance identifies IP65 and IP68 as appropriate ratings for its wet-location recommendation. But the correct equipment and placement still depend on the feature, wiring route, and installation conditions. Gappsi’s Long Island swimming pool design services provide useful context when pool edges, decks, planting, and lighting are being considered together.
Plan for the full evening, not one photograph
Test the composition from the grill, dining chairs, pool approach, and house windows. A Long Island backyard may include masonry, mature planting, coastal exposure, and several entertaining zones. So fixture positions that look balanced from one angle may create glare from another. Keep the most important views open, use shielding where needed, and leave room to adjust fixtures as planting grows or furniture changes.
How Do You Choose Color Temperature and Control Glare?
Color temperature is a design decision, not a universal rule. A warmer appearance can make planting, stone, wood, and entertaining areas feel connected to the warmth of a Long Island home. A cooler appearance can create a crisper, more contemporary effect around clean architectural lines, pale masonry, or a modern pool setting. The right choice depends on the materials, paint colors, planting, existing exterior lighting, and the mood you want after dark. Review samples at night, because the same fixture can look very different against dark mulch, bluestone, white walls, or evergreen foliage.
One commonly cited landscape-lighting guide associates warm, inviting ambiance with LEDs between 2700K and 3000K. While it describes 3500K to 4000K as cooler tones for a crisp, modern aesthetic. Treat those ranges as reference points rather than an automatic specification. Using one color family throughout a connected view usually feels more intentional than mixing noticeably different whites between the front entry, patio, pool deck, and planting beds. There can still be exceptions, such as a brighter task area at an outdoor kitchen, if the transition is controlled and visually comfortable.
For a coordinated plan, call Contact Gappsi through our contact page.
Shield the source, then aim the beam
Glare usually comes from seeing the light source directly, not from a landscape being thoughtfully illuminated. Use hoods, shields, louvers, recessed fixtures, and careful fixture placement to keep the lamp out of normal sightlines. Aim light toward the path, tread, planting form, or wall surface that needs attention. The DarkSky lighting principles recommend shielding and careful aiming so light points downward and does not spill beyond where it is needed: responsible lighting guidance.
Walk the property from the viewpoints that matter. Check the approach from the street, the view from the front door, seating positions on the patio, and sightlines from inside nearby windows. On a Nassau or Suffolk property, also consider neighboring homes, raised decks, pool enclosures, and upper-story rooms. A fixture that looks hidden while standing beside a planting bed may be visible from across the yard or from a neighbor’s window. Adjust the height, beam angle, shield, or location before adding more output.
Use light only where the property needs it
Start with purpose: navigation, a cooking surface, a step, a favorite tree, a wall texture, or a seating zone. The U.S. Department of Energy notes that outdoor lighting can support navigation, hazard detection, reassurance, and enjoyment, while also recognizing that nighttime light can affect ecological conditions. DarkSky principles likewise recommend using the lowest light level required and being mindful of reflective surfaces. Light-colored pavers, water, glass, and pale walls can bounce more light than expected, so dimming may improve comfort without changing the fixture layout.
Controls make the design adaptable. Put paths and arrival areas on a schedule, keep entertaining zones available later when needed, and use separate zones for architectural accents, planting, and task lighting. Dimming allows the scene to shift from arrival mode to dinner or quiet evening use. Timers or motion controls can make light available when needed and turn it off when it is not. For more technical guidance on low-voltage planning, controls, and installation details, review Gappsi’s technical landscape lighting guide.
How Should You Coordinate Landscape Lighting With a Long Island Design?
Landscape lighting works best when it is planned alongside the spaces it will illuminate, not added after grading, planting, and masonry are complete. On Long Island, existing stonework, mature trees, coastal exposure, pool layouts, and changing soil conditions can all affect fixture locations and wire routes. A coordinated plan lets the lighting support the way your property is used while preserving the intended character of the landscape.
- Walk the property at dusk. Start when there is enough natural light to see the layout, then observe what disappears as the sky darkens. Note the front walk, steps, driveway, planting beds, trees, patio edges, pool approaches, and views from the kitchen, living room, and primary entertaining areas. These viewpoints reveal where visibility is needed and where a fixture could create glare.
- Map the routes and focal points. Mark circulation paths first, including transitions between the house, patio, pool, outdoor kitchen, and lawn. Then identify features that deserve emphasis, such as a specimen tree, retaining wall, water feature, or architectural planting. Selective lighting creates a clearer composition than treating every plant and surface equally.
- Choose the lighting effect before choosing fixture locations. Decide whether each area needs soft path illumination, a concealed downlight, an uplight for bark and branching, a wall wash, or a controlled accent. The effect should match the feature and the viewing angle. Shielded fixtures can keep the source out of sight, while adjustable fixtures allow the design to respond as planting grows and changes through the seasons.
- Coordinate grading, planting, irrigation, masonry, and wiring. Establish wire routes and transformer locations before soil is prepared, plants are installed, or hardscape is set. Keep cables clear of planned footings, drainage paths, irrigation lines, tree root zones, and pool construction. Gappsi’s landscape work includes Long Island landscape design, grading, planting, irrigation, and 3D planning. Its masonry team can coordinate patios, walkways, pool decks, and retaining walls through the masonry design and construction process.
- Review the design from real use points. Before final installation, test the proposed scenes from the front door, path, patio seating, pool approach, and nearby rooms. Check whether steps are legible, tree light reaches the intended branches, and reflective pool surfaces or pale masonry send light toward eye level. Adjust aiming, shielding, spacing, and intensity instead of simply adding more fixtures.
- Plan for maintenance and future growth. Record fixture locations, wire routes, controls, and planting assumptions so the system can be serviced without disturbing the landscape. Schedule checks after major pruning, planting changes, or masonry work. A design that anticipates mature trees, seasonal plant density, and future outdoor use will remain easier to refine over time. Gappsi serves homeowners across Nassau and Suffolk Counties with integrated design, construction, material supply, and maintenance services.
Contact Gappsi through our contact page
Frequently Asked Questions
What is the rule of thumb for outdoor lighting?
Use light for a clear purpose, then place and aim each fixture so it supports navigation, a task, or a focal point without creating glare. The U.S. Department of Energy recommends considering both the intended use and the effect on surrounding areas. While DarkSky guidance supports shielding and careful aiming to keep light where it is needed. Learn more about responsible outdoor lighting.
What are common outdoor lighting mistakes?
Common problems include lighting every plant equally, pointing fixtures toward windows, exposing the light source, and overlooking how mature plants will change the composition. Too much light can flatten the yard and increase glare. Selective highlighting, concealed fixtures, and adjustable placement usually create a more dimensional result.
What are the best landscape lighting ideas for a front yard?
Begin with the approach to the front door, then layer path lighting with a restrained accent on a tree, masonry detail, or planting bed. Alternate path fixtures rather than creating a rigid runway, and use lower-output light near the entry if nearby windows or reflective surfaces could cause discomfort. The final layout should follow the home’s sightlines and existing hardscape.
Are low-voltage systems suitable for residential landscape lighting?
Yes. Low-voltage kits operate at 12 volts, and a transformer converts household current to that lower system voltage. The right layout still depends on wire length, fixture load, connections, and local conditions. So a professional should plan circuits rather than treating a kit as a complete design. Review the cited low-voltage system guidance.
Ready to Plan Landscape Lighting Ideas for Your Long Island Home?
A site-specific conversation can help you balance pathways, planting, walls, patios, pools, and entertaining areas while accounting for sightlines and existing landscape features. Share how you use your outdoor spaces, and Gappsi can help shape a lighting direction that fits the property. Contact Gappsi through our contact page