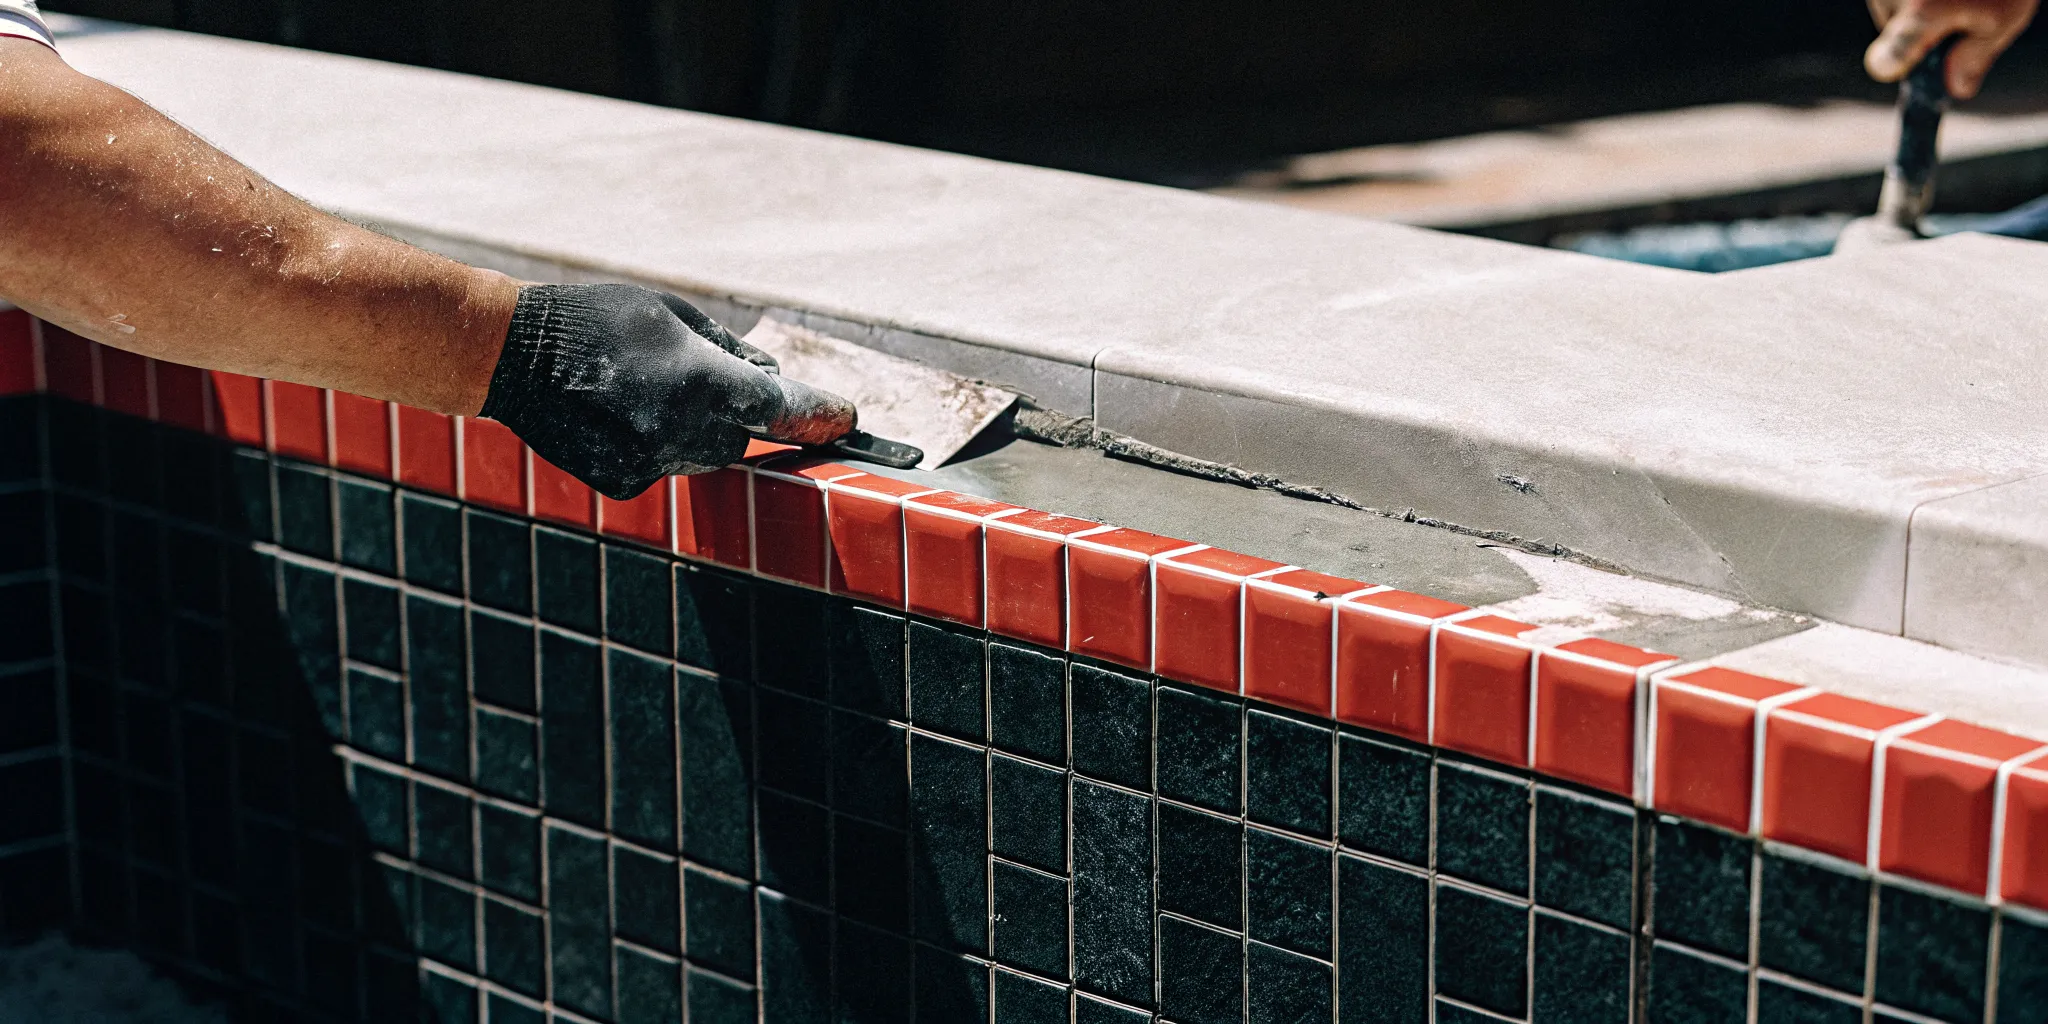
A professional builder to hire for your new room addition project.

How to Hire a Builder for a Room Addition (7 Steps)

We’ve all heard stories of home renovation projects that went off the rails—budgets that doubled, timelines that stretched for months, and results that were less than stellar. These problems almost always start with choosing the wrong contractor. When you decide to hire a builder for a room addition, you’re not just buying a service; you’re entering into a long-term partnership. You need a professional you can rely on for clear communication, honest pricing, and high-quality work. This guide is your defense against common pitfalls. We’ll show you the red flags to watch out for, the key questions you must ask, and how to spot a true professional, ensuring your home addition story is a success from start to finish.

Key Takeaways

  • Vet potential builders thoroughly: Your due diligence is crucial. Always verify licenses and insurance, review a portfolio of similar projects, and call past client references to get an unfiltered look at their professionalism and quality of work.
  • Analyze the quote for transparency, not just price: A professional quote is your project’s roadmap. It should be itemized with clear costs for labor and materials, include a realistic timeline, and detail the payment schedule to protect you from hidden fees.
  • Choose a partner, not just a builder: A room addition is a collaborative process. Select a contractor who communicates clearly, has a transparent system for handling changes, and makes you feel confident and respected throughout the decision-making process.

What Kind of Room Addition Are You Dreaming Of?

Before you start searching for builders, it’s helpful to have a clear vision for your project. A room addition is one of the best ways to improve your living space and increase your property value, but the right choice depends entirely on your family’s needs. Are you feeling cramped in your current layout? Is your family growing, or are you planning for multi-generational living? Maybe you’re just ready to create that dream space you’ve always wanted, like a sun-drenched reading nook or a spacious master suite.

Thinking about what you want to achieve will help you communicate your goals to potential contractors. From a simple bump-out to a full second-story build, a well-planned home remodeling project can completely transform how you experience your home. Let’s explore some of the most popular types of room additions to help you figure out what makes the most sense for you.

Bedrooms and Bathrooms

Is the morning rush for the bathroom a daily struggle? Or maybe you’re tired of shuffling guests to a pull-out sofa. Adding a new bedroom or bathroom is one of the most common and practical home additions. From extra bathrooms to home offices and expanded master suites, these additions add tremendous value and function to a home.

You could create a dedicated guest suite, give your kids their own rooms, or build the master retreat you deserve with a walk-in closet and spa-like bathroom. This type of project not only solves everyday frustrations but also makes your home more appealing down the road. It’s a smart investment in your comfort and your property’s future.

Kitchens and Dining Areas

The kitchen is often the heart of the home, but it can easily feel crowded and outdated. If you’re constantly bumping elbows while cooking or wishing you had more space to entertain, a kitchen or dining area expansion might be the perfect solution. Imagine having enough counter space for meal prep, a large island where friends can gather, or a formal dining room for holiday dinners.

A kitchen addition can be a simple bump-out to create a breakfast nook or a larger project that reconfigures the entire space. By expanding your kitchen, you’re not just adding square footage; you’re creating a more functional and inviting hub for your family’s daily life. Plus, a modern, spacious kitchen is a major selling point for any home.

Sunrooms and Enclosed Porches

If you love the idea of enjoying Long Island’s natural beauty without dealing with bugs or bad weather, a sunroom is an ideal addition. This versatile space acts as a bridge between your indoor and outdoor living areas, flooding your home with natural light. It can become a peaceful reading room, a vibrant playroom for the kids, or a beautiful spot to enjoy your morning coffee year-round.

An enclosed porch or sunroom allows you to feel connected to your yard while staying comfortable inside. It’s a fantastic way to add functional living space that feels open and airy. This kind of addition pairs beautifully with outdoor features like a patio or a swimming pool, creating a seamless flow for entertaining.

In-Law Suites and ADUs

As more families embrace multi-generational living, in-law suites and accessory dwelling units (ADUs) have become incredibly popular. An in-law suite addition or an ADU offers flexibility that adds both function and value. It can provide a private, accessible space for aging parents, give adult children a place of their own, or even serve as a potential source of rental income.

These additions are more than just an extra bedroom; they are often self-contained living spaces with a small kitchen, bathroom, and separate entrance. This allows for both independence and togetherness, making it a thoughtful solution for evolving family dynamics. A project of this scope requires a builder with comprehensive expertise to handle the unique zoning and construction requirements.

Second-Story Additions

When you love your neighborhood but have completely outgrown your home’s footprint, building up is often a better solution than moving out. Second-story additions can significantly enhance the living space and value of a home by doubling your square footage without sacrificing any yard space. This is the ultimate way to get the home you need right where you already are.

This major undertaking can add multiple bedrooms, bathrooms, and even a bonus room, completely transforming a modest ranch into a spacious colonial. Because it involves complex structural work, it’s critical to hire a highly experienced home remodeling company that can manage the project from design to completion, ensuring your home is both beautiful and structurally sound.

How to Find and Vet the Best Local Builders

Finding the right builder is the most important decision you’ll make for your room addition. This partnership sets the tone for the entire project, from the initial design to the final walkthrough. A great builder makes the process smooth and exciting, while the wrong one can lead to headaches and budget overruns. Taking the time to properly vet your options will pay off in the long run, ensuring you partner with a professional who can bring your vision to life. Here’s a step-by-step guide to finding the best builders on Long Island.

Start Your Local Search

Your search for the perfect contractor should begin with people you trust. Ask friends, family, and neighbors for recommendations, especially if they’ve recently completed a similar project. A personal referral is a fantastic starting point, but you’ll also want to expand your search online to gather a few options. Look for local builders who specialize in home remodeling and have a strong presence in your community. Your goal here is to create a shortlist of three to five promising companies that you can research more deeply.

Verify Licenses and Insurance

This step is absolutely non-negotiable. Any professional builder operating in Nassau or Suffolk County must have the proper licenses to perform the work. Before you go any further, ask for proof of their license and confirm they carry both general liability insurance and worker’s compensation. This is crucial because it protects you from being held financially responsible for any accidents or property damage that might occur during construction. A reputable contractor will have no problem providing this documentation. If they hesitate, that’s a clear sign to walk away.

Check Their Reputation and Reviews

With your shortlist in hand, it’s time to do some digging into each company’s reputation. Check online reviews on sites like Google, Houzz, and the Better Business Bureau to see what past clients are saying. Don’t just glance at the star rating—read the actual comments. You’re looking for consistent feedback about their communication, professionalism, timeliness, and the quality of their finished work. One or two negative reviews aren’t necessarily a deal-breaker, but pay close attention to how the builder responded. A professional and constructive response shows they value customer satisfaction.

Look Through Their Portfolio

A picture is worth a thousand words, especially when it comes to construction. A builder’s portfolio is the best way to get a feel for their craftsmanship and design style. As you review their past projects, ask yourself: Have they completed room additions similar to what I want? Does their work look high-quality and built to last? A strong portfolio should showcase a range of projects, demonstrating their expertise in everything from foundational masonry to the final finishing touches. This visual evidence helps you determine if their aesthetic aligns with your own.

Ask for Client References

Online reviews are helpful, but speaking directly with a past client can provide unfiltered insight. Ask each builder on your shortlist for a list of two or three recent references, preferably from homeowners who had a similar project completed. When you call, be prepared with specific questions. Ask if the project was completed on time and on budget, how the team handled unexpected challenges, and if communication was clear and consistent. Hearing about their firsthand experience will tell you a lot about what it’s really like to work with the builder day-to-day.

What to Look For in a Builder’s Credentials

Once you’ve narrowed your list down to a few promising builders, it’s time to take a closer look at their qualifications. Think of this as the final interview round. You’re not just looking for someone who can build a room; you’re looking for a professional partner who has the specific expertise, local knowledge, and commitment to quality that your project deserves. A builder’s credentials are the best indicator of the experience you’ll have and the quality of the final result.

Proven Experience with Room Additions

General construction experience is great, but building a room addition is a specialized skill. You want a team that has a solid track record of seamlessly blending new structures with existing homes. Ask to see a portfolio focused specifically on additions. Look for projects similar in scope and style to what you envision. An experienced builder will be able to show you before-and-after photos and discuss the unique challenges they overcame. This isn’t the time for a contractor to learn on the job; you need someone who has successfully completed many home remodeling projects and can prove it.

Knowledge of Local Building Codes

Every town on Long Island has its own set of zoning laws and building codes. A builder who isn’t familiar with the specific regulations in your area can cause major headaches, from failed inspections to costly delays. An experienced local builder understands the permitting process inside and out and has relationships with local inspectors. They’ll know the requirements for setbacks, height restrictions, and structural standards, ensuring your project is built correctly and legally from the start. This local expertise is non-negotiable for a smooth, stress-free construction process.

Commitment to Quality Materials and Craftsmanship

A beautiful room addition is built with more than just a good design; it’s built with high-quality materials and expert craftsmanship. When you review a quote, look past the final number and ask about the specific materials being used. A reputable builder will be transparent about their choices, whether it’s the framing lumber, the insulation, or the porcelain and natural stone for the flooring. Their commitment to quality should be evident in their work. This is what ensures your new space will not only look great on day one but will also stand the test of time.

Relevant Certifications and Training

Finally, always verify a builder’s licensing and insurance. This is the most basic but critical step in vetting a professional. A valid license proves they meet the state and local requirements to perform the work. More importantly, make sure they carry both liability insurance and workers’ compensation. Liability insurance protects your property from damage, while workers’ compensation covers any injuries that might happen on-site. Don’t just take their word for it—ask to see the certificates. A professional builder will have this information ready and will be happy to provide it for your peace of mind.

How to Compare Quotes from Different Builders

Once you have a few quotes in hand, it’s time to sit down and compare them. This step is about more than just finding the lowest price; it’s about understanding the value each builder offers. A quote is a window into how a contractor operates. Is it detailed and transparent, or vague and confusing? The goal is to find a builder who provides a comprehensive plan that aligns with your budget and expectations, ensuring there are no surprises down the road.

A lower bid might seem tempting, but it could signal lower-quality materials, less experienced labor, or an incomplete scope of work that will lead to costly change orders later. Conversely, the highest bid doesn’t automatically guarantee the best quality. You’re looking for a fair price from a reputable builder who clearly outlines every aspect of the project. A thorough quote should break down costs, specify materials, provide a realistic timeline, and detail the payment schedule. This level of detail shows professionalism and gives you the confidence that you’re making a well-informed decision for your home remodeling project.

Understand the Cost Breakdown

A trustworthy quote should be itemized, not just a single number at the bottom of the page. Look for a detailed breakdown that separates the costs of labor, materials, permits, and any subcontractor fees. Pay close attention to what’s included and, just as importantly, what’s excluded. For example, does the quote cover site prep and post-project cleanup? Are project management and administration costs listed? A transparent builder will clearly define the scope of work, so you know exactly what you’re paying for. If a quote is vague, don’t hesitate to ask for a more detailed breakdown. This clarity is crucial for avoiding unexpected costs later on.

Review Material Specifications

The quality of materials will have a huge impact on the look, feel, and durability of your room addition. Your quote should specify the types, brands, and quality levels of the materials being used—from the framing lumber to the windows and fixtures. Be wary of generic terms like “builder-grade” or “standard tile.” A cheaper quote often hides lower-quality materials that may need replacing sooner. We believe in using high-quality porcelain and natural stone and other durable materials, and your builder should be just as committed to quality. If the material specs aren’t clear, ask for them in writing.

Clarify the Project Timeline

Time is a critical component of any construction project. A professional quote will include a proposed timeline with a start date, key construction milestones, and an estimated completion date. This demonstrates that the builder has thought through the logistics and scheduling required to get the job done. When comparing quotes, look at how realistic each timeline is. If one builder promises a significantly faster completion time than others, ask how they plan to achieve it. An overly optimistic schedule can be a red flag for a rushed job or potential delays. A realistic timeline is always better than a fast one that isn’t met.

Examine the Payment Schedule

The payment schedule protects both you and the contractor. It should be clearly outlined in the quote and tied to the completion of specific project milestones. A common red flag is a builder who demands a large percentage of the total cost upfront. A reasonable deposit to secure materials and schedule the work is standard, but subsequent payments should be made as work progresses. For example, you might pay in installments after the foundation is poured, the framing is complete, and the drywall is up. The final payment should always be withheld until after you’ve done a final walkthrough and are completely satisfied with the work.

Watch Out for Hidden Costs

The number on the quote should be as close to the final cost as possible. To avoid surprises, look for “allowances,” which are placeholder amounts for items you’ll select, like lighting fixtures or flooring. If these allowances are unrealistically low, you’ll end up paying the difference out of pocket. Also, ask about the process for change orders. Changes are common in remodeling projects, so you need to understand how they will be handled and priced. A reputable masonry and construction company will be upfront about these possibilities and explain everything clearly.

Key Questions to Ask Every Potential Contractor

Once you have a few quotes in hand, it’s time to start the interview process. Think of this as a conversation, not an interrogation. You’re looking for a partner in this project, someone whose expertise you can trust and whose communication style works for you. The goal is to understand their process from start to finish. A great builder will have clear, confident answers to your questions because they’ve managed countless projects like yours.

Asking the right questions now can save you from major headaches later. A contractor’s responses will tell you a lot about their professionalism, transparency, and how they handle challenges. A successful home addition depends on good planning and skilled labor, but it also relies on clear communication and effective project management. Use these five questions as your guide to finding a builder who will bring your vision to life with skill and integrity.

How will you manage the project timeline?

Every project has a schedule, but you need to know how a contractor creates and sticks to it. Ask for an estimated start and completion date, but also dig a little deeper. Inquire about key milestones and how they track progress. What’s their plan for handling potential delays, like bad weather or supply chain issues? A professional builder will have a system for managing the timeline and will be upfront about how they communicate changes. They should be able to provide a clear sequence of events, so you know what to expect and when.

Who handles permits and inspections?

This is a critical question. The permitting and inspection process can be complex, and you want a contractor who is an expert in local regulations. A builder with extensive experience in Long Island will be familiar with the specific codes and requirements in your town. Ask directly if they will be responsible for securing all necessary permits and scheduling inspections. A “yes” indicates they are a full-service professional who understands the legal and safety requirements of the job. This isn’t an area where you want to cut corners, so make sure your builder has it covered.

What’s your communication process?

Clear communication is the foundation of a smooth renovation. You need to know how, when, and with whom you’ll be communicating throughout the project. Ask who your primary point of contact will be—is it a project manager or the owner of the company? Find out how often you can expect updates and what method they prefer, whether it’s daily texts, weekly emails, or scheduled on-site meetings. Establishing these expectations from the beginning helps ensure everyone is on the same page and that your questions and concerns will be addressed promptly.

How do you handle change orders?

Even with the best planning, changes can happen. You might decide on different materials, or an unexpected issue might arise once walls are opened up. This is where a change order comes in. Ask the contractor to walk you through their process. How are changes documented? How is the additional cost or credit calculated and presented for approval? A reputable builder will require any changes to be detailed in writing and signed by you before any new work begins. This protects both of you and keeps the budget transparent.

What does your warranty cover?

A contractor’s warranty is a statement of confidence in their work. It’s your assurance that they stand behind the quality of their craftsmanship and materials. Ask for specific details about what their warranty covers and for how long. Does it include both labor and materials? Are there any exclusions you should be aware of? A strong warranty is a sign that the builder is committed to your long-term satisfaction. Always ask for the warranty information in writing and make sure it’s included in your final contract.

Contractor Red Flags to Watch Out For

Choosing a builder is a huge decision, and while you’re focused on finding the right fit, it’s just as important to know how to spot the wrong one. Think of this as your protective checklist. A home addition is a significant investment of your time and money, and the last thing you want is a partnership that causes more stress than it solves. Most contractors are dedicated professionals, but knowing the warning signs of a bad one can save you from headaches, hidden costs, and heartache down the road.

Trust your intuition. If something feels off during your initial conversations, it probably is. A great builder will make you feel confident and informed, not rushed or confused. By learning to recognize these common red flags, you can confidently move forward with a partner who will respect your vision, your budget, and your home. Let’s walk through the specific things you should be on the lookout for.

High-Pressure Sales Tactics

A reputable contractor will give you the space and information you need to make a thoughtful decision. If a builder is pushing you to sign a contract on the spot with a “limited-time offer” or making you feel like you’ll lose out if you don’t commit immediately, take a step back. High-pressure tactics are often used to prevent you from doing your due diligence or getting competing quotes. One of the biggest mistakes homeowners make is underestimating the true cost of a project, and a rushed decision is a recipe for overlooking crucial details. Your home addition is a major project, not an impulse buy.

Demands for Full Upfront Payment

This is one of the brightest red flags you can encounter. While a deposit is standard (typically 10% to 30% to cover initial material costs), a contractor who demands the full payment before work begins is a serious risk. Be cautious of anyone who asks for a large sum upfront, as this can be a sign of financial instability or, in the worst-case scenario, a plan to take your money and disappear. A professional builder will provide a clear payment schedule tied to specific project milestones. This ensures they get paid for their work as it’s completed and you only pay for progress you can see.

Missing Licenses or Insurance

This is non-negotiable. Any contractor you consider must be fully licensed to work in your area and carry both liability insurance and workers’ compensation. Don’t just take their word for it—ask to see the documents and verify them. Licensing proves they meet state and local requirements, while insurance protects you from liability if a worker is injured on your property or if your home is damaged during construction. A legitimate home remodeling company will have this information readily available and will be happy to provide it for your peace of mind. If they hesitate or can’t produce proof, walk away.

Unrealistic Bids or Timelines

We all love a good deal, but a bid that is drastically lower than all the others should be examined closely, not celebrated. An unusually low price can indicate that the contractor is cutting corners, using subpar materials, or plans to hit you with unexpected charges later on. The same goes for timelines that seem overly optimistic. An experienced builder understands the complexities of a room addition and will provide a realistic schedule that accounts for potential delays like inspections or weather. A bid that seems too good to be true often is.

Poor Communication

Pay close attention to how a contractor communicates with you from the very first interaction. Do they return your calls promptly? Do they answer your questions clearly and thoroughly? If they are difficult to get a hold of or vague with their answers before you’ve even hired them, imagine what it will be like once the project is underway. Lack of updates is one of the top frustrations homeowners face. You are hiring a partner for a major project, and you need someone who offers clear, consistent communication every step of the way.

How to Make Your Final Choice

You’ve done the research, checked the references, and compared the quotes. Now it’s time to make the final call. This decision is about more than just the numbers on a page; it’s about choosing a partner you can trust to bring your vision to life inside your home. The right builder will not only deliver a beautiful room addition but will also make the construction process feel manageable and collaborative. Think about which contractor made you feel most confident and comfortable throughout the vetting process. Trust your gut, but back it up with the solid facts you’ve gathered.

Choosing a builder is a significant commitment, and it’s perfectly normal to take your time with this last step. A team that respects your process and answers your final questions with patience is often a sign of a great working relationship to come. At Gappsi, we believe a successful home remodeling project is built on a foundation of clear communication and mutual respect from day one. This final decision sets the tone for the entire project, so choose the team that feels like the best fit for you, your family, and your home.

Weigh Experience Against Cost

It’s tempting to jump at the lowest bid, but when it comes to a room addition, the cheapest option is rarely the best one. A surprisingly low quote can be a red flag for subpar materials, inexperienced labor, or a builder who cuts corners. Instead, view the cost as an investment in quality and peace of mind. A more experienced builder might have a higher price tag, but that often includes a dedicated project manager, skilled craftspeople, and a deep understanding of Long Island’s specific building codes, which prevents costly delays and errors. A solid track record is your best insurance against future problems.

Get Everything in Writing

Before you sign anything, make sure every single detail is documented in a comprehensive contract. A verbal agreement isn’t enough. Your contract is the official playbook for the entire project, and it protects both you and your builder. It should clearly outline the full scope of work, a detailed breakdown of costs for labor and materials, a projected timeline with key milestones, and a clear payment schedule. It should also specify how changes or unexpected issues will be handled. This document ensures everyone is on the same page and helps you avoid unexpected costs down the road.

Prepare for the Construction Process

Your decision isn’t just about the finished product—it’s also about the journey to get there. A successful home addition depends on clear communication and effective project management from start to finish. Before making your final choice, have a frank conversation with the builder about what the construction phase will look like. Ask who your main point of contact will be, how they’ll keep you updated on progress, and what their plan is for keeping the work site clean and safe. Choosing a team that values a smooth and respectful construction process will make all the difference in your day-to-day life while your dream space is being built.

Related Articles

Frequently Asked Questions

How long should I expect my room addition to take? The timeline for a room addition can vary quite a bit depending on the project’s complexity. A simple bump-out might take a few months, while a full second-story addition could take much longer. Factors like the local permitting process, weather, and the availability of materials all play a role. A professional builder will provide you with a detailed and realistic schedule that outlines each phase of construction, so you know what to expect from start to finish.

Can I live in my house during the construction? In most cases, yes, you can stay in your home during the renovation. However, it requires some planning and flexibility. You should have a detailed conversation with your builder about how they plan to manage dust, noise, and safety. They can set up dust barriers and define clear work zones to minimize disruption to your family’s daily routine. It’s important to establish a plan that keeps your living space as comfortable and functional as possible throughout the project.

Which type of room addition adds the most value to my home? While additions like new bathrooms and expanded kitchens typically provide a strong return on investment, the true value comes from what best suits your home and your needs. An in-law suite might be invaluable for a multi-generational family, while a sunroom could be the perfect feature for someone who loves to entertain. The most valuable addition is one that is well-built, seamlessly integrated into your home’s existing design, and enhances the way you live.

What’s the difference between a quote and an estimate? An estimate is a rough approximation of the cost, often given early in the process to give you a general idea of the budget. A quote, on the other hand, is a detailed and specific offer that breaks down the exact costs for labor, materials, and permits based on a finalized design. You should always get a comprehensive written quote before signing a contract, as this is the document that outlines exactly what you are paying for.

What should I do if I’m unhappy with the work mid-project? If an issue comes up during construction, it’s important to address it right away. Your first step should be to speak directly with your primary contact, whether that’s the project manager or the builder. Clearly explain your concerns and refer back to your contract, which should detail the agreed-upon scope of work and materials. Good communication is key, and a professional contractor will want to resolve any problems to ensure you are satisfied with the final result.

The cost of a modern finished basement by a professional finishing company.

Basement Finishing Company: Cost & Hiring Guide

If you’re a homeowner on Long Island, you know that national averages for home renovation costs don’t always apply here. The price of skilled labor, local permit requirements, and material sourcing in Nassau and Suffolk counties create a unique financial picture. This guide is specifically for you. We break down the real costs of finishing a basement in our area, so you can set a realistic budget from the start. We’ll cover everything from waterproofing a coastal home to understanding local building codes, helping you make informed decisions and choose a local basement finishing company that understands the market and can deliver lasting value.

That unfinished basement downstairs is more than just a storage area; it’s a blank canvas waiting to become your home’s next favorite room. Whether you’re dreaming of a cozy family media room, a quiet home office, or a personal gym, you’re essentially adding a whole new floor of living space. But turning that vision into reality requires a solid plan and a clear budget. Understanding the basement finishing company cost is the crucial first step. In this guide, we’ll explore all the variables, from framing and electrical work to flooring and waterproofing, so you can confidently plan your project and transform that underused space into a valuable asset.

Key Takeaways

  • Understand Your Core Cost Drivers: The final price of your basement remodel depends on more than just its size. Your chosen layout, the quality of materials, and essential prep work like waterproofing are the key factors that will shape your total investment.
  • Budget for the Unexpected: A smart budget includes a safety net. Plan to set aside a contingency fund of 10-15% of your project’s total cost to cover any surprises, like hidden structural issues or necessary electrical upgrades, without causing stress.
  • Hire a Pro to Avoid Costly Mistakes: Investing in a qualified contractor saves you money in the long run. They handle complex permits, ensure the project meets all safety codes, and prevent critical errors like improper moisture control that can lead to expensive damage later.

What’s the Real Cost to Finish a Basement?

Finishing your basement is an exciting prospect—it’s like discovering a whole new floor in your home. But before you start planning, the big question is always about the budget. The final price for a basement remodel varies widely, depending on your vision, the current state of your space, and the materials you choose. To give you a clear picture, let’s break down the numbers, from national averages to the specific details that will shape your project’s cost. This will help you set a realistic budget for a transformation that adds both value and enjoyment to your home.

Understanding the National Average

On average, homeowners spend around $32,000 to finish a basement, but that number comes with a very wide range—from as low as $2,800 to over $100,000. Why the huge difference? It all comes down to scope. A simple, open-concept family room will cost significantly less than a multi-room layout with a full bathroom and wet bar. Think of the average cost as a helpful starting point, but remember that your specific plans for a home remodeling project will determine where you land in that range.

Calculating Your Cost Per Square Foot

A more practical way to estimate your budget is to look at the cost per square foot, which typically falls between $7 and $23. This helps you tailor the estimate to your home’s dimensions. For example, finishing a 1,000-square-foot space could cost anywhere from $7,000 to $23,000 for the basics like framing, drywall, and simple electrical work. The final cost per square foot will depend on the complexity of the layout and the quality of the materials you select. An open-plan design is more cost-effective, while adding walls for separate rooms will increase the price.

Basic vs. Luxury: How Finishes Affect Price

The finishes you choose have one of the biggest impacts on your budget. A basic finish might include durable vinyl flooring and standard lighting—perfect for a playroom or home gym. A luxury finish, on the other hand, could feature a home theater, a custom wet bar with natural stone countertops, and a full bathroom with high-end tile. The most significant expenses in a luxury remodel often come from specialized labor for plumbing and electrical work. While a finished basement is a fantastic investment, you can create a beautiful, functional space without needing top-of-the-line everything.

Understanding Tiered Pricing Models

Essential, Premium, and Luxury Packages

To make planning your basement remodel easier, it helps to think about the project in terms of pricing tiers. Most contractors group finishes into Essential, Premium, and Luxury packages, which helps you match your vision to your budget right from the start. An Essential package focuses on creating a functional, finished space at a friendly price point. The Premium tier offers a great balance of upgraded materials and design, while the Luxury tier is where you can build a truly custom space with high-end features. Knowing which category your dream basement falls into will give you a much clearer idea of the potential investment.

If your main goal is to create a simple, usable space, the Essential tier is a fantastic starting point. This package covers all the necessities, like framing, drywall, basic electrical wiring, and simple flooring. It’s perfect for a kids’ playroom, a home gym, or a clean, open-concept family room where function is the priority. According to a NerdWallet analysis, a basic basement project can start for as little as $2,800, making it an accessible way to add valuable living space to your home without a massive financial commitment.

The Premium tier is the sweet spot for many homeowners, offering a balance between quality and cost. This is where you can start adding more personality and comfort to the space with better materials and more thoughtful design elements. You can expect to invest between $7 and $23 per square foot for a more refined finish. This could include upgrades like recessed lighting, more durable and stylish flooring options, or a more complex layout with separate rooms. This tier allows you to create a polished, inviting area that feels like a natural extension of your upstairs living space.

For those who envision a high-end retreat, the Luxury tier is where your ideas can truly come to life. This level includes custom features tailored to your lifestyle, such as a home theater with surround sound, a wet bar with gorgeous natural stone countertops, or a full bathroom with spa-like fixtures. The sky’s the limit, but these custom additions come with a higher price tag, often pushing the total cost over $100,000. The main drivers are the high-end materials and the specialized labor required for complex plumbing, electrical, and custom cabinetry work.

What Factors Determine Your Final Cost?

When you start budgeting for a basement remodel, you’ll quickly find there’s no single price tag. The final cost is a blend of several key factors, each playing a significant role in the total investment. Think of it less like buying a product off the shelf and more like commissioning a custom piece of art—the price depends on the canvas, the complexity, and the materials you choose. From the sheer size of your space to the condition it’s in now, every detail matters. Understanding these variables is the first step to creating a realistic budget and a clear plan for your project. It helps you know where you can save and where it’s worth splurging to get the basement you’ve always wanted.

How Size and Layout Impact the Budget

The most straightforward factor influencing your cost is the size of your basement. A larger square footage naturally requires more materials—more framing, drywall, flooring, and paint—and more labor hours to put it all together. But it’s not just about the total area. The layout you envision also plays a huge part. An open-concept media room or playroom will generally cost less than a layout with multiple rooms, like a guest suite with a bedroom, bathroom, and closet. Creating separate rooms requires more walls, doors, electrical wiring, and HVAC ducting, all of which add to the final bill. A professional home remodeling team can help you design a layout that makes the most of your space while keeping your budget in mind.

The Condition of Your Existing Space

Is your basement a completely blank slate with concrete floors and exposed pipes, or is it partially finished? The starting point of your project heavily influences the cost. A raw, unfinished basement will require more extensive prep work before the finishing touches can even begin. This includes framing all the walls, running new electrical and plumbing lines, installing insulation, and potentially leveling the concrete floor. If your space already has some of these basics in place, you’ll save on those initial steps. A thorough inspection is crucial to assess the current condition and identify any necessary prep work, ensuring a solid foundation for your new living area.

How Your Material Choices Add Up

This is where you have the most control over your budget. The materials you select for your basement finish can cause the total cost to swing dramatically. Standard options like vinyl plank flooring, basic drywall, and simple lighting fixtures can keep costs down. However, if you’re dreaming of a more luxurious space, high-end materials will increase the investment. Think about features like custom-built cabinetry for a wet bar, elegant porcelain tile for a bathroom, or recessed smart lighting throughout the space. Every choice, from the type of insulation behind the walls to the hardware on your doors, contributes to the final price. We can walk you through the options at the Gappsi Store to find materials that match your style and budget.

Factoring in Local Labor and Permit Fees

Beyond materials, labor makes up a significant portion of your basement finishing cost. The price of skilled labor varies, and a complex project requiring specialized tradespeople—like electricians and plumbers—will naturally cost more. It’s also essential to factor in the cost of building permits. Most towns on Long Island require permits for a basement remodel to ensure all work meets safety and building codes. While it might seem like an extra expense, a permit is your assurance that the job is done right. A reputable contractor will handle the entire permitting process for you, making sure your project is compliant from start to finish and avoiding any legal headaches down the road.

Why Your Location Matters (Especially on Long Island)

Just like in real estate, location plays a huge role in renovation costs. If you live on Long Island, you can expect to invest more in your basement project compared to the national average. Here, finishing a basement typically ranges from $50 to $150 per square foot. This means a basic renovation might start around $35,000, while a more high-end transformation can easily exceed $60,000. Why the higher price tag? It comes down to a combination of factors unique to our area, including higher costs for skilled labor, specific town permit requirements, and the overall strong demand for quality home improvements. Understanding these local market dynamics from the start helps you set a realistic budget for a project in Nassau or Suffolk County.

Dealing with Moisture or Structural Issues

A dry basement is a healthy basement, and addressing any water issues is non-negotiable before finishing the space. The most common mistake homeowners make is covering up moisture problems instead of solving them. Before any drywall goes up, a thorough inspection for leaks, cracks in the foundation, or high humidity is critical. Proper waterproofing, which might include sealing walls or installing a sump pump, is a vital upfront investment. Ignoring water intrusion will only lead to bigger, more expensive problems later, like mold, mildew, and ruined finishes. Taking care of these issues first ensures your beautiful new basement will last for years to come. Our restoration and sealing services can ensure your foundation is perfectly prepped.

A Step-by-Step Look at Project Costs

Thinking about the total cost of a basement remodel can feel overwhelming. It helps to break the project down into smaller, more digestible pieces. Each stage, from building the walls to laying the floor, comes with its own price tag. Understanding these individual costs gives you a clearer picture of where your money is going and helps you create a realistic budget. It also makes it easier to talk with contractors about your priorities. Below is a look at the typical costs for each major task involved in transforming your basement, giving you the information you need to plan effectively.

The Cost of Framing and Structural Support

Before any walls go up, you need a solid skeleton. Framing creates the essential structure for your new rooms, defining the layout of your finished basement. This is a foundational step that everything else is built upon, so it’s crucial to get it right. The cost to finish a basement for this stage typically falls between $7 and $16 per square foot. This investment covers both the materials and the labor needed to build the framework for your new living space, setting the stage for drywall, electrical work, and all the finishes that follow. A professional job here ensures your walls are straight, secure, and ready for the next phase of construction.

Breaking Down Framing Costs by Linear Foot

For a more granular look at your budget, it helps to think about framing costs by the linear foot. On average, you can expect to pay between $18 and $24 per linear foot for basement framing. This means that for a typical 1,000-square-foot basement, the framing alone could cost anywhere from $2,300 to $6,000. It’s important to remember that labor is a significant part of this expense, often making up 40% to 50% of the total, according to industry data. The final price will shift based on the complexity of your layout—more walls, doors, and windows will increase the cost. Investing in professional framing ensures your walls are perfectly straight and secure, creating a solid foundation for the drywall, electrical, and finishing stages of your home remodeling project.

Budgeting for Electrical and Plumbing

To make your basement a truly livable space, you’ll need power and, potentially, plumbing. Electrical work is essential for lighting, outlets, and any special features like a home entertainment system. The average cost to finish a basement for electrical installation is around $5,300, though this can climb with more complex needs. If you’re adding a bathroom or a wet bar, plumbing is another major consideration. Costs can range anywhere from $2,500 to $15,000, depending on how much new pipe needs to be run. These systems are complex and require licensed professionals to ensure everything is safe and up to code.

Typical Plumbing Rates

If your basement plans include a bathroom, a laundry room, or even a simple wet bar, you’ll need to budget for plumbing. This is one of the areas where costs can really vary. On average, homeowners can expect to spend between $2,500 and $15,000 on plumbing for a basement remodel. The final price tag depends heavily on the project’s complexity. For instance, installing a simple sink for a wet bar will be on the lower end, while adding a full bathroom with a shower and toilet requires extensive new piping and will push you toward the higher end of that range. It’s absolutely essential to hire licensed professionals for this work. Not only does it ensure the installation is safe and meets local building codes here on Long Island, but it also protects your investment by preventing costly leaks and water damage down the road. When you work with a full-service team like Gappsi for your home remodeling project, we coordinate all the licensed tradespeople needed to get the job done right.

Pricing Out Drywall, Insulation, and Ceilings

Once the framing and rough-ins are done, it’s time to make the space feel like a real room. This is where drywall, insulation, and ceilings come in. Insulation is key for temperature control and energy efficiency, with an average project cost of about $1,650. Hanging and finishing drywall typically costs around $1,750, though it can range from $800 to $3,000. Finally, finishing the ceiling can cost between $1,600 and $3,600, depending on whether you opt for a simple drywall ceiling or a more complex drop ceiling. These elements work together to create a comfortable, polished, and quiet environment for your new space.

What to Expect for Flooring Costs

The flooring you choose has a huge impact on both the look and feel of your basement. From cozy carpet in a family room to durable luxury vinyl plank in a home gym, your options are wide-ranging. This is one area where your budget can be very flexible. Depending on the material you select, flooring installation can cost anywhere from $3 to $30 per square foot. Carpet tends to be on the lower end of that scale, while high-end tile or engineered hardwood will be at the top. When making your choice, consider not just the style but also the durability and moisture resistance needed for a below-grade space.

The Price of a Dry Basement: Waterproofing

Before you spend a dollar on finishes, you have to ensure your basement is dry. This is the single most important step in protecting your investment. Proper waterproofing prevents moisture from seeping in, which can lead to mold, mildew, and costly structural damage down the road. The average cost for a comprehensive waterproofing solution is about $4,400, or $5 to $10 per square foot. Most homeowners should plan to budget between $1,900 and $6,500 for effective moisture control. Skipping this step is a gamble that rarely pays off, so it’s wise to address any water issues with a professional before construction begins.

How Long Will My Basement Project Take?

Once you have a handle on the budget, the next big question is always, “How long will this take?” You’re excited to start using your new space, and it’s completely normal to want a clear timeline. Just like the cost, the duration of a basement remodel isn’t set in stone. It depends on the scope of your project, from the initial prep work to the final coat of paint. A straightforward family room will be ready much faster than a custom guest suite with a full bathroom. Understanding the different phases of the project and the factors that can influence the schedule will help you set realistic expectations and plan for a smooth, efficient transformation.

Typical Project Timelines

For a standard, professionally managed basement finishing project, you can generally expect a timeline of about four to eight weeks. This timeframe typically covers a project of average size and complexity, like creating an open-concept living area or home gym. This schedule accounts for all the major steps: framing, running electrical and plumbing, installing drywall, painting, and laying the flooring. However, this is an estimate. The actual duration can be affected by factors outside of the construction itself, such as waiting for municipal permits to be approved or delays in material shipments. A well-organized contractor will manage this schedule closely to keep things moving forward as efficiently as possible.

From Basic to Luxury Finishes

The complexity of your design is the biggest factor in your project’s timeline. A simple, open-plan finish with standard materials will land on the shorter end of the scale, closer to that four-to-six-week mark. But if your vision includes more intricate features, the schedule will naturally extend. A luxury remodel with multiple rooms, a full bathroom, a wet bar with custom cabinetry, and high-end finishes could take anywhere from eight to sixteen weeks or more. These projects involve more detailed plumbing and electrical work, specialized labor, and custom orders that require longer lead times. This is where hiring a professional home remodeling team makes a huge difference; they can coordinate all the moving parts to prevent unnecessary delays and ensure your project stays on track.

How Does a Contractor Calculate Your Quote?

Understanding how a contractor calculates the cost of your project is the first step to managing your budget effectively. It’s not as simple as adding up the cost of materials and calling it a day. A professional quote accounts for everything from labor and materials to permits and overhead. When you partner with an experienced home remodeling company, you’re paying for their expertise, project management, and the peace of mind that comes with knowing the job will be done right.

Most contractors use one of two main pricing models: a fixed-price contract or a time and materials contract. Each has its own benefits, and the right one often depends on the scope and predictability of your project. A detailed, professional quote is non-negotiable; it should clearly outline every aspect of the job, ensuring there are no surprises down the line. This transparency helps you see exactly where your money is going, from the specific type of flooring being installed to the hourly rate for skilled labor. Knowing this breakdown helps you make informed decisions and feel confident in your investment.

Fixed-Price vs. Time & Materials: Which is Better?

When you receive a quote, it will likely be structured as either a fixed-price or a time and materials contract. A fixed-price contract is exactly what it sounds like: one set price for the entire project. This is great for budgeting because you know the total cost upfront. It’s best for projects with a clearly defined scope and predictable steps.

A time and materials (T&M) contract, on the other hand, bills you for the actual hours worked and the cost of materials purchased. This model offers more flexibility if you anticipate making changes along the way or if the project has unknown variables. While the final cost isn’t set in stone, it ensures you only pay for the work that’s actually done.

What to Look For in a Professional Quote

A professional quote is much more than a single number at the bottom of a page. It’s a detailed document that protects both you and the contractor. A thorough estimate should always include a complete scope of work, specifying exactly what will be done. It should also list the specific materials to be used, so you know the quality you’re paying for.

Look for a clear breakdown of labor costs, any additional fees for permits or inspections, and a projected timeline for completion. This level of detail ensures everyone is on the same page before any masonry work or construction begins. A vague quote is a red flag, so don’t hesitate to ask for more specifics.

Understanding the Materials vs. Labor Split

It’s helpful to understand how your total project cost is divided. Typically, materials make up the largest portion of the budget—often 70% or more. This means your choices, from framing lumber to flooring, have a significant impact on the final price. Opting for high-end porcelain and natural stone will cost more than standard options, so this is where you have the most control over the budget.

Labor usually accounts for 20% or more of the total cost. While it’s a smaller piece of the pie, this is where the quality of the final product comes from. Investing in skilled, experienced craftsmanship ensures your finished basement is not only beautiful but also safe, durable, and built to code.

Are There Hidden Costs to Watch For?

Sticking to a budget is a top priority for any home project, but basement finishing can sometimes feel like it has a mind of its own. Just when you think you have every expense accounted for, a surprise cost can pop up. The key isn’t to fear these potential expenses, but to anticipate them. Knowing what to look for ahead of time helps you create a more realistic budget and a solid contingency plan, ensuring your project moves forward without a hitch.

Most hidden costs fall into a few common categories: administrative fees like permits, structural issues that only reveal themselves after work begins, and necessary system upgrades to support your new living space. An experienced team can often spot many of these potential issues during the initial consultation, but it’s always smart to be prepared. Think of it as building a financial safety net. A good rule of thumb is to set aside an extra 10% of your total estimated budget for these “just in case” moments. This way, you’re ready for anything and can make decisions from a place of confidence, not stress.

The Truth About Permit and Inspection Fees

Before a single wall goes up, you’ll need to handle the paperwork. Most basement remodels, especially those involving changes to plumbing, electrical, or HVAC systems, require building permits from your local town or village here on Long Island. These permits ensure the work is done safely and to code. The fees for these can range from $1,200 to $2,000, depending on the scope of your project. While your contractor will typically manage the entire application and inspection process, the cost of the permits themselves is a direct project expense you’ll need to factor into your budget.

Preparing for Unexpected Structural Repairs

Sometimes, the biggest surprises are hiding right behind the walls. Once demolition begins, you might uncover issues you had no idea existed, like a crack in the foundation, signs of past water damage, or the need for additional support beams. It’s impossible to predict these with 100% certainty, which is why having a contingency fund is so important. Setting aside at least 10% more than your estimated budget gives you a cushion to address these structural repairs properly without derailing your project. A thorough initial inspection from a home remodeling professional can help identify many potential red flags early on.

Will You Need Utility and HVAC Upgrades?

Your new basement will place new demands on your home’s existing utility systems. For instance, your current electrical panel might not have enough capacity to handle the new lights, outlets, and appliances you plan to add. Similarly, your HVAC system needs to be able to efficiently heat and cool the additional square footage. This could mean extending ductwork or, in some cases, adding a separate zone or unit. These upgrades are crucial for comfort and safety, and a general contractor will often include the management of these tasks in their overall fee, which can add 10% to 20% to the labor cost.

The Cost of Meeting Building Codes

Beyond securing permits, all the work done in your basement must comply with local building codes. These rules are in place for your safety and cover everything from minimum ceiling height and proper insulation to the size and type of windows required for bedrooms (known as egress windows). If you have an older home, bringing your basement up to current standards can sometimes add unexpected costs. For example, you might need to enlarge a window or add a new one to meet safety requirements. Following these local building rules is non-negotiable, and a qualified contractor will ensure every aspect of your project is fully compliant.

What’s the ROI on a Finished Basement?

Thinking about finishing your basement is exciting, but it’s also a big investment. It’s natural to wonder if you’ll see that money again. The great news is that a basement remodel is one of the smartest home improvement projects you can take on, offering returns that go beyond just dollars and cents. It’s not just about a line item on a future sales listing; it’s about creating a space your family can use and love right now.

Whether you’re dreaming of a cozy family room, a quiet home office, a personal gym, or an extra bedroom for guests, a finished basement expands your home’s functional footprint. This project transforms a space that’s often underused into one of the most versatile areas in your house. When it comes to return on investment, a professionally finished basement consistently ranks high, adding both financial value and quality of life. It’s a project that pays you back in enjoyment today and in resale value tomorrow.

How a Finished Basement Adds to Your Home’s Value

The most direct financial benefit of a finished basement is the boost it gives to your home’s value. As This Old House points out, “Finishing a basement adds valuable living space to your home and can significantly increase its resale value. It can also help your home sell faster.” By converting your basement into a finished area, you’re increasing the official livable square footage of your property. This is a huge draw for potential buyers who are often comparing homes based on size and functionality. A well-executed home remodeling project in the basement can be the feature that makes your home stand out and command a higher price.

How Much of the Cost Will You Get Back?

When you invest in your home, you want to know what kind of financial return you can expect. For a basement remodel, the numbers are encouraging. According to NerdWallet, “You can expect to get back about 70% of what you spent if you sell your home.” This is a strong return compared to many other home improvement projects. While 70% is a national average, the final figure depends on the quality of the work and the features you include. Investing in durable materials, smart design, and professional craftsmanship is the best way to maximize your return and ensure the space is both beautiful and built to last.

Beyond Resale Value: Other Lifestyle Benefits

While a strong return on investment is a huge plus, the true value of a finished basement is how it enhances your day-to-day life. It’s about creating a space that serves your family’s unique needs, whether that’s a quiet corner for work, a place for the kids to play, or a hub for entertaining friends. This new level of your home can solve so many common household challenges, from finding a spot for noisy hobbies to generating extra income. The financial return is the cherry on top, but the immediate lifestyle improvements are what you’ll appreciate every single day. Let’s look at some of the practical, life-enhancing benefits that come with this smart home addition.

Potential for Rental Income

One of the most strategic ways to use your new space is to create a source of passive income. Transforming your basement into a rental unit can provide a steady monthly cash flow that helps pay your mortgage or even covers the cost of the remodel over time. According to Realty Times, finishing a basement for rental purposes is a savvy way to increase both cash flow and property value. With a separate entrance, a small kitchen, and a bathroom, you can create an attractive apartment for a long-term tenant. This turns an underused part of your property into a hardworking asset that contributes to your financial goals.

A Dedicated Space for Noise

Let’s be honest—some activities are just loud. Whether it’s a teenager learning the drums, a high-intensity workout, or a movie night with surround sound, that noise can disrupt the whole house. A finished basement is the perfect solution. Because it’s underground, it acts as a natural sound buffer, absorbing sound and reducing noise transmission between floors. This makes it the ideal spot for a home theater, a music studio, a playroom, or a personal gym. You can create a dedicated zone for fun and fitness without worrying about disturbing anyone trying to work or relax upstairs, making for a more peaceful home for everyone.

A Safe Shelter from Storms

On Long Island, we’re no strangers to intense weather. A properly finished basement can offer invaluable peace of mind by serving as a secure shelter during severe storms. The key is ensuring the space is completely protected from the elements before any finishing work begins. As we’ve mentioned, proper waterproofing is a vital upfront investment that protects your family and your property. By sealing foundation walls and installing a reliable sump pump, you create a dry, safe haven that is far less vulnerable to flooding or high winds. This transforms your basement from a simple storage area into a fortified space where your family can safely wait out any storm.

Why Your Local Market Matters

The value a finished basement adds is heavily influenced by your local housing market, and that’s fantastic news for Long Island homeowners. In areas where homes are expensive and space is at a premium, extra finished square footage is highly valued. Here in Suffolk and Nassau counties, a finished basement isn’t just a bonus—it’s a major selling point that buyers actively look for. It provides the extra room families need without the expense and hassle of a full-scale addition. A professionally finished basement by a trusted local company is a smart, strategic investment that truly pays off in our competitive market.

Pro vs. DIY: Why Hiring an Expert Can Save You Money

The temptation to tackle a basement remodel yourself is understandable. Weekend warrior projects can be rewarding, but finishing a basement is a different league. It’s a complex construction project masquerading as a home improvement task. While you might save on upfront labor costs, the potential for expensive mistakes, code violations, and endless delays is high. Thinking of a professional as an investment rather than an expense is the first step. An expert team not only delivers a beautiful, functional space but also protects your home’s value and your peace of mind.

Save Your Time and Avoid Project Headaches

Finishing a basement is a massive undertaking that requires specialized skills, tools, and a deep understanding of the construction process. It’s far more than just putting up some drywall and laying down carpet. A professional contractor manages every detail, from creating a viable floor plan to scheduling electricians, plumbers, and inspectors. What could take you months of sacrificed evenings and weekends, a dedicated crew can complete efficiently and correctly. By hiring a company like Gappsi for your home remodeling, you’re not just paying for labor; you’re buying back your time and avoiding the stress of managing a complex project.

Gain Access to Pro-Grade Materials and Tools

Professionals have access to a wider range of high-quality materials and the commercial-grade equipment needed to install them properly. While materials are often the biggest part of the budget, contractors can source them from trusted suppliers, sometimes at trade prices that aren’t available to the public. This ensures you get durable, long-lasting finishes that stand the test of time. More importantly, an experienced designer can guide you toward the best material choices for a below-grade space, like durable porcelain flooring that resists moisture, helping you make smart decisions that add real value to your home.

Guaranteeing Safety and Code Compliance

This is one area where you absolutely can’t afford to cut corners. Basement finishing involves strict building codes that govern everything from ceiling height and egress window requirements to electrical wiring and insulation. Failing to follow these rules can result in fines, being forced to tear out completed work, and major safety hazards. Professionals are experts in local Long Island building codes and will handle the entire permitting process, which can cost between $1,200 and $2,000 on its own. This ensures your new living space is not only beautiful but also safe, legal, and won’t cause problems when you eventually sell your home.

How to Avoid Expensive Long-Term Mistakes

A small DIY mistake in a basement can lead to a catastrophic long-term problem. The most common and damaging error is failing to properly manage moisture. As one expert on Quora notes, “If water/moisture comes into the basement, it will soak into wood and drywall,” leading to mold, rot, and structural damage. A professional will assess your foundation and install a robust waterproofing system before a single wall goes up. This proactive approach, backed by Gappsi’s extensive masonry and construction experience, prevents issues that could cost tens of thousands to fix down the road, making the initial investment in professional work a very wise decision.

How to Choose the Right Basement Finishing Company

Choosing the right company for your basement remodel is one of the most important decisions you’ll make. This isn’t just about finding someone to hang drywall and lay flooring; it’s about finding a partner you can trust to transform a part of your home. The right team will not only deliver high-quality results but also make the entire process smooth and transparent. A great contractor communicates clearly, respects your budget, and has the expertise to handle any surprises that pop up along the way.

Your goal is to find a company with a proven track record of successful home remodeling projects. This means doing a bit of homework before you sign any contracts. By focusing on a few key areas—credentials, experience, insurance, and references—you can feel confident that you’re placing your home in capable hands. Taking the time to vet your options thoroughly will pay off in the long run, ensuring your finished basement is a space your family will love for years to come.

Verify Their Credentials and Qualifications

Before you even start talking about design ideas, make sure any contractor you consider is properly licensed and insured. This is a non-negotiable first step. A valid license proves they meet state and local requirements to perform the work legally. One of the biggest mistakes homeowners make is failing to ask for this proof. A professional company will have no problem providing you with their license number, which you can often verify online through your local consumer affairs department. This simple check protects you from unqualified or fraudulent operators and ensures your project will be up to code.

Look for a Portfolio of Proven Experience

You wouldn’t hire a chef who has never cooked the type of food you want, and the same logic applies to contractors. Look for a company with a strong portfolio of finished basements. Ask to see photos of their past work, paying close attention to projects that are similar in style and scope to what you envision. Don’t just rely on pictures, though. Ask for references from previous clients and follow up with them. A great question to ask is, “Would you hire them again?” The answer can be one of the most telling indicators of their quality and professionalism.

Always Confirm Insurance and Warranties

Proper insurance is crucial for protecting you and your home. The contractor should carry both general liability insurance and workers’ compensation. General liability covers any accidental damage to your property, while workers’ compensation protects you from being held liable if a worker gets injured on the job. Ask for a certificate of insurance directly from their provider to ensure their policies are current. Additionally, a reputable company will offer a warranty on their workmanship. This shows they stand behind their work and gives you peace of mind that they’ll address any issues that may arise after the project is complete.

Don’t Skip Checking Their References

A confident contractor will gladly provide a list of recent clients you can speak with. Talking to references gives you a real-world look at what it’s like to work with the company. Ask about their experience with communication, timeliness, and budgeting. Did the project finish on schedule? How did the team handle unexpected challenges? Were they happy with the final result? It’s also smart to get estimates from several different contractors. This isn’t just about finding the lowest price; it’s about comparing the detailed scope of work, material quality, and project timeline to find the best overall value for your investment.

Common (and Costly) Basement Finishing Mistakes

A finished basement is a fantastic investment, but the path to getting there is filled with potential pitfalls that can turn your dream project into a costly headache. Being aware of the most common mistakes homeowners make is the first step toward a smooth, successful renovation. From budgeting blunders to hiring the wrong team, a little foresight can save you thousands of dollars and ensure your new living space is safe, comfortable, and built to last. Let’s walk through the key missteps to sidestep.

Underestimating the Real Budget

One of the biggest financial traps is assuming a DIY project will cost the same as hiring a professional. While you save on labor, you often miss out on a contractor’s trade discounts for materials and the efficiency that comes with experience. A professional quote accounts for everything, including the small details you might overlook. It’s crucial to create a detailed budget that includes a 10-15% contingency fund for unexpected issues, like discovering old wiring that needs updating. Working with a firm that handles comprehensive home remodeling projects ensures you get a realistic, all-inclusive estimate from the start, preventing sticker shock later on.

Skipping Essential Waterproofing

Basements are naturally prone to moisture, and failing to address this is perhaps the most critical error you can make. As one expert notes, “If water/moisture comes into the basement, it will soak into wood and drywall,” leading to mold, mildew, and rot. Before a single frame is built, your basement must be thoroughly inspected for any signs of water intrusion. Proper waterproofing might involve sealing foundation cracks, installing a sump pump, or improving exterior drainage. Investing in these preventative measures protects your new floors, walls, and furniture from expensive water damage. Professional restoration and sealing services can identify and fix underlying issues, giving you a dry foundation for your renovation.

### Forgetting Pre-Project Safety Checks

Before you get lost in the fun of picking out paint colors and flooring, there are a few critical safety checks that need to happen first. These aren’t the most glamorous parts of a remodel, but they are absolutely essential for protecting your family and your home. Think of this as building the foundation for a healthy living space. One of the most important pre-project steps is testing for invisible hazards that could be present in your basement. Taking care of these safety measures upfront ensures that your beautiful new space is not only stylish and functional but also completely safe for everyone who enjoys it.

Why You Should Test for Radon

It’s a good idea to test your basement for radon gas before starting any work. Radon is a naturally occurring radioactive gas that is colorless, odorless, and tasteless, but it can pose serious health risks with long-term exposure. Since basements are below ground, they are more susceptible to radon seeping in through cracks in the foundation. The good news is that testing is simple and inexpensive. If high levels are found, a radon mitigation system can be installed to vent the gas safely outside. Addressing this before you finish the space is far easier and more cost-effective than trying to fix it after the walls and floors are in place. You can learn more about protecting your family from this hazard from the Environmental Protection Agency.

Overlooking Common Basement Problems

Every basement comes with its own set of quirks and challenges, from low-hanging ductwork to a lack of natural light. It’s easy to see these as obstacles, but an experienced design and build team sees them as opportunities for creative solutions. Overlooking these common issues can lead to a finished space that feels awkward or uncomfortable. The key is to identify and plan for these problems from the very beginning. A thoughtful design can turn a low ceiling into a cozy nook or strategically place lighting to make the entire space feel bright and welcoming. Addressing these inherent basement characteristics head-on is what separates a basic renovation from a truly transformative one.

Dealing with Low Ceilings and Poor Lighting

Low ceilings and minimal natural light are classic basement challenges. If you have an older home, bringing your basement up to current standards might mean enlarging a window to meet safety requirements, which has the added benefit of letting in more light. Smart lighting design is your best friend here. Recessed can lights can make a ceiling feel higher, while wall sconces and track lighting can highlight specific areas and eliminate dark corners. A professional home remodeling team can help you create a layered lighting plan that makes the space feel open, airy, and inviting, no matter how many windows you have.

Planning for Utility Access

Your new basement will place new demands on your home’s existing utility systems. Your current electrical panel might not have enough capacity to handle the new lights, outlets, and appliances you plan to add. The same goes for your HVAC system, which will now need to heat and cool an entirely new floor of living space. It’s crucial to have a licensed electrician and HVAC technician assess your current systems to see if upgrades are needed. Planning for this from the start prevents issues like tripped breakers or a chilly family room, ensuring your new space is as comfortable and functional as the rest of your house.

Ignoring Critical Construction Details

The long-term success of your basement remodel depends on getting the construction details right. These aren’t just minor points; they are fundamental to creating a durable, safe, and moisture-free environment. Using the wrong materials or construction techniques in a below-grade space can lead to major problems like mold, rot, and structural damage. This is where professional expertise becomes invaluable. An experienced contractor understands the unique science of basement construction and knows which materials and methods will stand the test of time. Paying attention to these critical details ensures your investment is protected and your new space remains healthy and beautiful for years to come.

Vapor Barriers and Pressure-Treated Wood

Here’s a pro tip that might surprise you: do not put a plastic vapor barrier on the inside walls of a finished basement. While it seems logical, it can actually trap moisture between the barrier and the foundation wall, creating a perfect environment for mold. The correct approach is to waterproof the foundation from the outside when possible and use moisture-impermeable insulation on the interior walls. Additionally, any wood that comes into direct contact with the concrete floor, like the bottom plate of your wall frames, should be pressure-treated to resist rot and moisture damage. These small but crucial details make a huge difference in preventing future problems.

Choosing Mold-Resistant Drywall

Not all drywall is created equal, and in a basement, the type you choose matters immensely. Because basements can have higher humidity levels, it’s essential to use mold-resistant or moisture-resistant drywall. This type of drywall is made with a special paperless backing and core that are designed to prevent the growth of mold and mildew, even in damp conditions. While it may cost slightly more than standard drywall, it’s a small upfront investment that provides powerful protection against a potentially expensive and unhealthy problem. It’s a non-negotiable material for any below-grade living space.

Installing Egress Windows for Bedrooms

If your basement plan includes a bedroom, you are required by law to install an egress window. This isn’t just a suggestion; it’s a critical safety requirement in local building codes. An egress window is large enough to provide a safe exit in case of a fire or other emergency. It ensures that anyone sleeping in the basement has a direct way out. A professional contractor will know the exact size and placement requirements for your area and will handle the installation as part of the project. This guarantees your new bedroom is not only comfortable but, most importantly, fully compliant and safe for your family or guests.

Hiring an Unqualified Contractor

The temptation to hire the cheapest contractor can lead to disastrous results. An unqualified individual might cut corners, use subpar materials, or lack the necessary insurance, leaving you liable for accidents on your property. One of the most common mistakes homeowners make is “not asking for proof that they are licensed and insured.” Always verify a contractor’s credentials, look at their portfolio of completed basement projects, and ask for references from local clients. A reputable, licensed and insured team will gladly provide this information and will stand behind their work with a warranty, giving you peace of mind that the job is done right.

Rushing Through the Planning Phase

Excitement can make you want to jump straight to demolition, but a rushed plan almost always leads to regret. A solid plan goes beyond a simple floor layout; it details everything from the type of lighting and placement of electrical outlets to the specific flooring materials and paint colors. “It’s important to plan and set a budget early. This helps keep costs and time down.” Making these decisions on the fly often results in costly change orders and project delays. Taking the time to work with a professional on expert design and construction ensures every detail is considered, creating a clear roadmap that keeps your project on schedule and within budget.

How to Get and Compare Accurate Quotes

Finding the right contractor is about more than just finding the lowest price; it’s about finding a partner you can trust to bring your vision to life. The quoting process is your first real look into how a company operates. A clear, detailed quote is a sign of a professional who respects your investment and is transparent about their process. Getting several quotes helps you understand the market rate for your project and gives you the confidence that you’re making a well-informed decision for your home. This step is crucial for setting a realistic budget and avoiding surprises down the road.

When you start collecting estimates, your goal is to create an apples-to-apples comparison. This means ensuring every contractor is bidding on the exact same scope of work with comparable materials. A vague request will get you vague quotes that are impossible to compare fairly. Be specific about your plans, your material preferences, and your desired timeline. A reputable home remodeling company will appreciate your clarity and provide a more accurate and detailed proposal in return. Remember, this isn’t just a transaction; it’s the start of a professional relationship. You want to feel comfortable with their communication style and confident in their expertise before any work begins.

What to Ask Every Contractor You Meet

Think of this stage as an interview. You’re hiring a team for a significant project, and you deserve to have all your questions answered. Before you sign anything, make sure you ask every potential contractor the same set of questions so you can compare their responses fairly. Start with the basics: Are you licensed and insured in Long Island? Can you provide a detailed project timeline? Also, ask about their process for handling permits and what kind of warranty they offer on their work. A professional contractor will have clear, confident answers and be happy to provide references from past clients in your area.

Spotting Red Flags in an Estimate

A professional estimate should be a detailed, written document—not a number scribbled on a piece of paper. Be wary of any quote that seems significantly lower than the others. While it might seem tempting, an unusually low bid often points to subpar materials, inexperienced labor, or hidden costs that will appear later. Other red flags include vague descriptions of the work to be done, high-pressure sales tactics urging you to sign immediately, or a demand for a large cash deposit upfront. A trustworthy contractor will provide a comprehensive breakdown of all costs involved, ensuring you know exactly what you’re paying for.

How to Compare Contractor Quotes Fairly

When you have a few quotes in hand, it’s time to compare them line by line. Don’t just look at the final number. Are the contractors quoting for the same quality of materials? Is the scope of work identical? One quote might seem higher because it includes demolition and debris removal, while another omits it. It’s also smart to set aside a contingency fund of about 10-15% of your total budget. This buffer protects you from unexpected issues, like discovering a foundation problem once work begins, ensuring your project stays on track without financial stress.

Smart Tips for Managing Your Project Budget

If you’re looking for ways to make your budget work harder, a few strategic choices can make a big difference. Discuss material options with your contractor. For example, there are beautiful and durable porcelain and natural stone options available at various price points, allowing you to achieve a high-end look that fits your finances. For those who are handy, taking on smaller finishing tasks yourself, like painting, can also reduce labor costs. The key is to have an open conversation with your contractor about your budget from the start so they can help you find the best value without compromising on quality.

Agreeing on a Payment Schedule

It’s essential to have a clear conversation with your contractor about payment terms before any work begins. A professional payment schedule protects both you and the company, ensuring that payments align with progress. Typically, this involves an initial deposit to cover materials and get the project started, followed by several installment payments tied to specific project milestones. For example, you might make a payment after the framing is complete, another after the electrical and plumbing rough-ins are done, and so on. The final payment should only be made after a final walkthrough is complete and you are fully satisfied with the work. This structure, clearly outlined in your contract, is a hallmark of a trustworthy home remodeling partner and keeps the project on track financially.

Related Articles

Frequently Asked Questions

What’s a realistic starting budget for a simple basement remodel? For a straightforward, open-concept space with standard finishes, a good starting point is to budget around $25,000 to $35,000. This typically covers the essentials like framing, drywall, basic electrical work, and durable flooring. The final number will depend on the size of your space and its current condition, but this range gives you a solid foundation for planning a functional and inviting new room.

Does adding a bathroom or wet bar dramatically increase the cost? Yes, adding any feature that requires plumbing will significantly raise your project’s cost. The need to cut into the concrete slab, run new water and drain lines, and install fixtures requires specialized labor and materials. While a full bathroom or a wet bar adds incredible function and value, you should plan for this to be one of the largest single expenses in your budget.

Why is dealing with moisture so critical before any work begins? Ignoring even minor dampness is the most expensive mistake you can make. Sealing a basement with new walls and flooring without first addressing the root cause of moisture is like putting a bandage on a broken bone. It traps the water, leading to mold, mildew, and rot that will ruin your investment and can create an unhealthy environment. A professional assessment and proper waterproofing is a non-negotiable first step to protect your home and your project.

Can I really save money by doing some of the work myself? While you might save on labor costs by tackling tasks like painting or installing trim, it’s wise to leave the structural, electrical, and plumbing work to licensed professionals. Mistakes in these areas can be incredibly costly to fix and can create serious safety hazards. A professional contractor also ensures the entire project is up to code, which protects you from legal issues and problems when you eventually sell your home.

Besides the construction itself, what other costs should I plan for? It’s smart to set aside an extra 10-15% of your total project cost for a contingency fund. This covers any surprises that might pop up, like needing to update an old electrical panel or discovering a crack in the foundation once the walls are open. You should also budget for local building permits, which are required for most basement remodels on Long Island and ensure the work is done safely and correctly.

Modern inground pool remodel with a waterfall and patio, a project that impacts the total estimate.

Pool Remodel vs. Install: A Price Comparison

You see the potential for a true outdoor oasis in your backyard, but that outdated pool is standing in the way. Turning your vision into reality starts with one thing: understanding the budget. Whether you’re considering a simple resurfacing or a complete overhaul, every decision impacts the final price. To move forward with confidence, you need a clear estimate. We’ll break down the numbers for every option and help you compare the prices of custom pool installation and backyard transformation, giving you the clarity to build a plan you can feel good about.

Key Takeaways

  • Understand What Drives the Cost: Your final estimate depends on more than just pool size. Key factors include your choice of surface finish, decking materials like porcelain or stone, and whether you’re adding major features like a spa or changing the pool’s shape.
  • Set a Realistic Budget with Detailed Quotes: Don’t settle for a single number. Request itemized estimates from at least three contractors to compare costs for labor, materials, and permits. This transparency is the best way to avoid surprise expenses and choose the right partner.
  • A Remodel Pays for Itself Over Time: The benefits go beyond a beautiful new look. Upgrading your pool can increase your home’s value, improve safety with modern features, and significantly lower your monthly energy and maintenance costs with efficient equipment.

What Goes Into a Pool Remodel Estimate?

Thinking about remodeling your pool is exciting, but the big question is always about cost. A pool remodel isn’t a one-size-fits-all project, and the final price tag depends on several key factors. While a typical inground pool remodel can range from $6,000 to over $50,000, your specific choices will determine where your project falls on that spectrum. Understanding these variables will help you set a realistic budget and have a more productive conversation with your contractor. Let’s break down the main components that shape your estimate.

Factoring in Pool Size and Project Scope

It makes sense that the bigger your pool, the more your remodel will cost. A larger surface area requires more materials for resurfacing and more labor to get the job done. The scope of your project is just as important. Are you looking for a simple refresh, like replastering the surface and replacing the waterline tile? Or are you planning a complete overhaul with new decking and features? A basic resurfacing job is on the lower end of the cost scale, while a comprehensive renovation that touches every part of your swimming pool will naturally command a higher budget.

The Impact of Your Material Choices

The materials you select have a huge impact on both the look and the cost of your remodel. For resurfacing, standard plaster is one of the most affordable and popular options. However, if you want to create a more luxurious feel, you might consider an aggregate finish, tile, or premium fiberglass, which all come at a higher price point. The same goes for your pool deck and coping. You can choose from a wide variety of beautiful and durable materials, from classic concrete pavers to high-end porcelain and natural stone. Each choice affects your total investment.

Vinyl Liner Pools: Pros, Cons, and Lifespan

If you’re looking for the most budget-friendly way to get a pool, a vinyl liner is often the answer. These pools typically cost between $35,000 and $80,000, making them an accessible entry point for many homeowners. The lower upfront cost is their biggest advantage. However, the trade-off is in their longevity. The vinyl liner itself isn’t a permanent fixture and will need to be replaced roughly every 10 years to keep the pool in good condition. While the initial investment is smaller, it’s important to factor in this recurring replacement cost when you plan your pool project for the long term.

Fiberglass Pools: Pros, Cons, and Lifespan

Fiberglass pools represent a fantastic middle ground, balancing cost, durability, and maintenance. With a price range of $45,000 to $100,000, they are a step up from vinyl but offer significant long-term benefits. The non-porous surface is smooth to the touch, resists algae growth, and makes cleaning much easier. These pools are incredibly durable and can last for over 25 years with minimal upkeep. The main consideration is that they are built from pre-designed molds, which means your shape and size options are more limited than with a custom-built pool. Still, for many, the ease of installation and low maintenance make them an ideal choice.

Concrete and Gunite Pools: Pros, Cons, and Lifespan

For ultimate design flexibility, nothing beats a concrete or gunite pool. These are the most premium option, with costs ranging from $50,000 to over $120,000, but they allow for complete customization. You can design any shape, size, or depth you can imagine, seamlessly integrating features like built-in spas, tanning ledges, or unique water features. This level of custom masonry results in a pool that is incredibly strong and can last for 50 years or more. The downside is a longer construction timeline, typically three to six months, and they require more intensive maintenance over their lifespan, including periodic acid washes and eventual resurfacing to keep them looking their best.

When Structural Changes Are on the Table

If your vision includes more than just cosmetic updates, be prepared for a significant budget increase. Altering the fundamental shape, depth, or size of your pool is a major construction project that involves excavation, new plumbing, and extensive masonry work. These types of structural changes can easily push a project’s cost from $50,000 to over $100,000. While transforming a simple rectangular pool into a custom freeform oasis is absolutely possible, it’s one of the most expensive updates you can make. This is where having an experienced masonry design team is essential.

Budgeting for New Features and Upgrades

This is the fun part where you can truly customize your pool. Adding new features can make your outdoor space more enjoyable and functional, but each addition will affect your final estimate. Popular upgrades include building a tanning ledge, installing a spillover spa, or adding a slide for the kids. You might also consider modern LED lighting, automated cleaning systems, or elegant water features like waterfalls and fountains. These additions can range from a few hundred dollars for simple lights to over $25,000 for an attached hot tub or spa, so it’s important to prioritize what matters most to you.

Understanding Labor and Contractor Fees

Don’t underestimate the cost of labor—it can account for nearly half of your total project budget. The price reflects the skill, experience, and time required to execute your remodel flawlessly. While it might be tempting to go with the lowest bidder, a pool remodel is not the place to cut corners. Hiring a reputable and experienced contractor ensures that the job is done correctly, meets all local codes, and will last for years to come. An established home remodeling company with a proven track record provides peace of mind that is well worth the investment.

Breaking Down Labor vs. Material Costs

When you look at a pool remodel estimate, the numbers essentially boil down to two key areas: labor and materials. Labor often makes up nearly half of your total project budget, and for good reason. This cost covers the expertise, time, and precision required to execute your remodel flawlessly, from demolition and plumbing to the final finishing touches. While it can be tempting to choose the lowest bidder to save money upfront, a pool remodel is not the place to cut corners. Investing in an experienced home remodeling company ensures the job is done right, meets all safety codes, and is built to last, giving you valuable peace of mind for years to come.

On the other side of the equation are your material choices, which is where you have the most flexibility to influence the final cost. This is your chance to define the style of your new oasis. For resurfacing, a classic plaster finish is a popular and budget-friendly option, while premium aggregate or all-tile surfaces create a more luxurious look at a higher price point. The same principle applies to your pool deck and coping. You can select from a wide range of beautiful and durable materials, from classic concrete pavers to high-end porcelain and natural stone. Understanding this balance between expert labor and your material selections is the key to setting a realistic budget and making informed decisions.

What’s the Real Cost of an Inground Pool Remodel?

Let’s talk numbers. The final cost of your inground pool remodel depends entirely on your vision. Are you looking for a simple cosmetic update or a complete backyard transformation? While every project is unique, understanding the typical cost ranges can help you set a realistic budget. We’ve broken down the estimates into three common tiers to give you a clearer picture of what to expect for your Long Island home.

The Basic Refresh: What to Expect for $6k–$15k

Think of this tier as the perfect way to give your pool a new lease on life without a complete overhaul. A basic refresh, typically falling between $6,000 and $15,000, focuses on cosmetic updates and minor repairs. This could include replacing a few cracked tiles, patching the plaster, or upgrading an older piece of equipment like the pump. It’s an excellent option if your pool’s structure is sound but it’s starting to show its age. These smaller updates can make a significant visual impact and improve your pool’s functionality, ensuring it’s ready for another season of fun.

The Mid-Range Makeover: Your $15k–$30k Options

If your pool needs more than just a touch-up, you’re likely looking at a mid-range makeover. With a budget of $15,000 to $30,000, you can tackle more substantial projects. This is the typical range for completely resurfacing your pool with a new finish, replacing the waterline tile, or renovating the surrounding deck and coping. Because inground pools require specialized labor and high-quality materials, costs are higher than for above-ground pools. This is where you can make a big impact by upgrading to beautiful and durable porcelain or natural stone pavers for your pool deck.

The High-End Transformation: Budgeting for $30k and Up

For a truly dramatic change, you’ll be entering the high-end transformation tier, which starts at $30,000 and can easily exceed $100,000. This budget allows for major structural changes and luxury additions. You could change the shape or depth of your pool, add an integrated spa, or install custom water features like waterfalls or fountains. These large-scale projects require extensive design and construction work, but the result is a completely customized backyard oasis. A full swimming pool renovation of this scale turns your backyard into the ultimate destination for relaxation and entertainment.

Cost Breakdown for Common Remodeling Projects

To give you a better handle on your budget, let’s look at the numbers for some of the most common pool remodeling projects. These figures can help you see where your investment will go and what kind of results you can expect at different price points. Remember, these are typical ranges, and a detailed quote from a trusted contractor is the best way to get an exact price for your specific project.

Pool Resurfacing Costs

Resurfacing is one of the most impactful updates you can make, and the cost typically falls between $6,000 and $50,000. The biggest factor driving this price is the material you choose. A classic white plaster finish is the most budget-friendly option and gives your pool a clean, timeless look. If you want to add more texture and color, an aggregate finish is a popular mid-range choice. For a truly luxurious and durable surface, a full tile finish sits at the high end of the spectrum but offers a stunning, long-lasting result for your swimming pool.

Tile and Coping Replacement Costs

Replacing the waterline tile and the coping around your pool’s edge is a fantastic way to refresh its entire look. This project generally costs between $2,500 and $25,000 or more. The final price tag depends heavily on your material selections. Standard ceramic or porcelain tiles are cost-effective and come in a huge variety of styles. However, if you opt for custom mosaic designs or high-end materials like glass or natural stone coping, you can expect the cost to be on the higher end of that range, reflecting the premium quality and expert installation required.

Deck and Patio Renovation Costs

Your pool deck is the foundation of your outdoor living space, and renovating it can cost anywhere from $5,000 to over $20,000. The scope of the project is the main variable here. Simply resurfacing your existing concrete deck will be more affordable than a complete tear-out and replacement. Installing new pavers offers the biggest transformation, and your choice of material matters. While concrete pavers are a solid option, upgrading to elegant and durable porcelain or natural stone pavers will create a truly high-end finish that transforms your entire backyard.

Don’t Get Surprised: Planning for Hidden Costs

No matter the size of your project, it’s smart to plan for the unexpected. One of the most common remodeling mistakes is underestimating the total cost and not accounting for potential surprises. During demolition, your contractor might uncover issues that need to be addressed, like old plumbing or electrical problems. That’s why it’s so important to properly vet your contractors to ensure they are transparent and thorough. We always recommend setting aside a contingency fund of 10% to 20% of your total budget. This buffer ensures that unforeseen expenses won’t derail your project or force you to make compromises on your vision.

Site Preparation and Excavation Fees

If your remodel involves more than just a surface-level update, you’ll need to account for site preparation. The most expensive parts of a major pool renovation often happen before the beautiful new features are even installed. Changing your pool’s shape, making it deeper, or adding an integrated spa requires excavation—and that means heavy machinery, labor, and hauling away debris. These costs can add up quickly and are a significant part of the budget for any project that alters the pool’s structure. This is why getting a detailed, transparent quote is so important, so you can see exactly where your money is going and avoid surprises down the line.

Permits and Fencing Requirements

Before any work begins, there’s a bit of administrative groundwork to cover. Most towns and villages on Long Island require permits for significant pool renovations, especially those involving structural or electrical changes. These permits come with fees and ensure your project meets local safety and building codes. Speaking of safety, fencing is another crucial consideration. Most areas have strict regulations about pool barriers to prevent accidents. If your current fence doesn’t meet code, you’ll need to budget for an upgrade. Working with an experienced local contractor can make this process much smoother, as they’ll be familiar with the specific requirements in your area and can manage the fencing and permit process for you.

Ongoing Costs: Maintenance, Water, and Insurance

The final price of your remodel isn’t the last expense you’ll have. It’s important to remember the ongoing costs of pool ownership. Regular maintenance, including chemicals and professional servicing, can run between $80 and $150 per month. If you’ve increased your pool’s size, expect your water and utility bills to rise as well. Finally, give your insurance agent a call. A newly renovated pool, especially one with new features like a slide or diving board, can impact your homeowner’s policy. This might increase your premium by around $50 to $75 per month, but it’s a necessary step to ensure you’re properly covered. Factoring these long-term costs into your budget from the start helps you enjoy your new oasis without financial stress.

What’s Included in a Standard Pool Remodel?

A pool remodel is a collection of projects that can reinvent your backyard. Depending on your goals, your project can range from a simple cosmetic refresh to a full overhaul. Here are the most common components of a pool renovation.

Giving Your Pool a New Surface

Over time, your pool’s surface can stain, develop cracks, or simply feel rough to the touch. Resurfacing is the process of applying a brand-new finish to the interior, which not only makes it look pristine but also helps prevent leaks. While plaster is a common and affordable option, many homeowners are choosing more durable and visually striking finishes like polished aggregate or elegant tile. A fresh surface is one of the most impactful changes you can make, instantly brightening your pool and making the water look more inviting. It’s a foundational step in most major remodels that restores both beauty and integrity to your pool.

Modernizing Your Pool Equipment

Your remodel is the perfect time to improve how you use and enjoy your pool. This is your chance to add features you’ve always wanted, like a tanning ledge for lounging, a soothing waterfall, or an attached spa for year-round relaxation. Beyond the fun additions, it’s also a great opportunity to upgrade core systems for better performance. This could mean switching to a saltwater generator for softer water or installing energy-efficient pumps and heaters. These modern swimming pool upgrades can significantly lower long-term maintenance costs and make your pool much easier to manage, giving you more time to simply enjoy it.

Updating the Plumbing and Electrical

What’s happening behind the scenes is just as important as what you see on the surface. Older pools often have outdated plumbing and wiring that can be inefficient or even unsafe. During a remodel, your contractor can inspect these critical systems, replace old pipes, and ensure all electrical components are up to current safety codes. This is definitely not a DIY job—it requires a licensed professional to ensure everything is installed correctly for safety and longevity. Taking care of these essential updates during your renovation protects your investment, prevents future problems, and gives you complete peace of mind.

Revamping Your Deck and Coping

The area around your pool sets the stage for your entire outdoor space. Cracked concrete or faded pavers can make even a beautifully resurfaced pool look dated. Renovating the deck and the coping—the stone or concrete edge around the pool—provides a major visual impact and ties the whole area together. You can choose from a wide variety of materials, including beautiful and durable natural stone pavers, classic concrete, or sleek, modern porcelain. A new deck doesn’t just look great; it expands your usable living space, creating a safer, more attractive area for lounging, dining, and entertaining.

Dream Upgrades: What Popular Features Really Cost

A pool remodel is the perfect opportunity to add features that make your backyard more beautiful, functional, and fun. While you’re already investing in the project, incorporating a few upgrades can completely transform your experience. From creating a resort-like feel with a new spa to simplifying your routine with smart automation, these additions can make your pool the true centerpiece of your home.

The cost of these popular upgrades can vary quite a bit depending on the size of your pool, the materials you choose, and the complexity of the installation. Think of these price ranges as a starting point to help you budget. For a precise figure, you’ll need a detailed quote that reflects your specific design goals. A professional consultation can help you understand which upgrades will provide the most value for your swimming pool and your lifestyle.

Adding a Tanning Ledge or Spa

A tanning ledge, also known as a Baja shelf, is a shallow, flat area in your pool perfect for placing lounge chairs or for kids to splash around in safely. It adds a touch of luxury and creates a designated space for relaxation. Similarly, integrating a spa or hot tub directly into your pool design provides a seamless way to enjoy hydrotherapy. Because these features require significant structural work and custom masonry, they are a considerable investment. Expect the cost to add a tanning ledge or spa to start around $5,000 and go up from there based on size and finishes.

Installing Modern Lighting and Automation

Upgrading your pool’s lighting can dramatically change its ambiance after sunset. Modern LED lights are energy-efficient and can be programmed to change colors, setting the perfect mood for a quiet evening or a lively party. Paired with an automation system, you can control your lights, heater, pump, and water features right from your smartphone. This convenience simplifies pool ownership and ensures your equipment runs efficiently. Installing new LED lighting can cost between $700 and $1,700, while full automation systems typically range from $1,200 to $3,500.

Creating Ambiance with Water Features

The sound and sight of moving water can turn your pool area into a tranquil oasis. Water features range from simple deck jets that create elegant arcs of water to elaborate rock waterfalls that provide a naturalistic feel. These additions enhance the sensory experience of your backyard, masking neighborhood noise and creating a peaceful atmosphere. The cost varies widely with the design’s complexity. A simple fountain might cost under $1,000, while a custom waterfall built with natural stone can easily exceed $10,000.

Switching to Energy-Efficient Heaters and Filters

While they aren’t the most glamorous upgrades, investing in your pool’s core equipment is one of the smartest moves you can make during a remodel. A new, high-efficiency heater can extend your swimming season into the cooler months without causing a huge spike in your utility bills. Likewise, upgrading to a variable-speed pump can significantly reduce energy consumption compared to older single-speed models. These practical upgrades pay for themselves over time through lower operating costs. A new pool heater typically costs between $1,800 and $4,100 installed.

Investing in Safety and Motorized Covers

For many homeowners, especially those with children or pets, safety is the top priority. An automatic or motorized pool cover is one of the most effective safety barriers you can install. With the push of a button, a sturdy cover slides over your pool, preventing accidental access. These covers also offer other benefits: they keep debris out, reduce water evaporation, and retain heat, which lowers your cleaning and heating costs. While they are a significant investment, often ranging from $5,000 to $15,000, the peace of mind and convenience are invaluable.

How Long Will Your Pool Remodel Take?

One of the most common questions we get from homeowners is about the project timeline. Knowing how long your backyard will be a construction zone helps you plan your summer and manage expectations. The truth is, the timeline for a pool remodel can vary significantly, from a couple of weeks for minor touch-ups to a few months for a complete transformation. The duration depends entirely on the scope of your project.

To give you a clearer picture, we’ve broken down typical timelines based on the scale of the work involved. Think of these as general guidelines—your specific project could be shorter or longer depending on the details. A simple resurfacing job is much quicker than changing the shape of your pool and adding a brand-new patio. We’ll walk you through what to expect for minor, standard, and major renovations so you can head into your project with confidence.

Timeline for Minor Updates: 1–3 Weeks

If your pool is in good shape but needs a little refresh, you’re likely looking at a minor update. These projects typically take about one to three weeks to complete. This category includes cosmetic fixes and simple equipment swaps that don’t require major demolition or construction. Think of it as a facelift for your pool. Examples include replacing the waterline tile, patching a small crack in the plaster, or upgrading to a more efficient pump or filter. These quick projects can make a big impact on your pool’s look and feel without a long-term commitment.

Timeline for Standard Projects: 4–8 Weeks

Most pool remodels fall into this category, with a timeline of about four to eight weeks. A standard project involves more significant work, like completely resurfacing the interior with new plaster or aggregate, or replacing the entire deck and coping. This is the timeframe you can expect if you’re looking to give your pool a substantial makeover without altering its fundamental structure. These are the kinds of swimming pool projects that can dramatically update your backyard’s aesthetic, turning a dated space into a modern retreat. Planning for this timeline allows for proper demolition, installation, and curing time for new materials.

Timeline for Major Renovations: 8–12+ Weeks

For a full-blown transformation, you should plan for a timeline of eight to twelve weeks, and sometimes longer. A major renovation involves structural changes to the pool itself. This could mean altering the depth or shape, adding a tanning ledge or integrated spa, or installing dramatic water features. Often, these projects are part of a larger backyard overhaul that includes new landscaping and masonry work. Because these renovations are complex and require extensive planning, permitting, and construction, the timeline is naturally longer. The result, however, is a completely customized outdoor space built just for you.

How Pool Type Affects the Project Timeline

The material your pool is made from—whether it’s concrete, vinyl liner, or fiberglass—plays a big role in how long your remodel will take. Concrete and gunite pools offer the most design flexibility, but they also have the longest renovation timelines. Major structural changes or a complete resurfacing involves significant masonry work and requires time for materials to properly cure. According to industry experts, a standard inground pool project can take 8 to 12 weeks, but highly customized work on a concrete pool can stretch that timeline even further.

Renovations for vinyl liner and fiberglass pools are often quicker. Replacing a vinyl liner can sometimes be done in just a few days, though the project will take longer if the underlying wall structure needs repairs. Fiberglass pool remodels are typically the fastest because the work is usually cosmetic, like refinishing the gelcoat, rather than structural. Since you can’t easily change the shape of a pre-molded fiberglass shell, the scope of the project is naturally more contained. Ultimately, the complexity of the job is the biggest factor, regardless of the pool type.

What Can Delay Your Pool Remodel?

Several factors can stretch your project timeline, and it’s smart to be aware of them from the start. Unpredictable weather, especially on Long Island, can cause delays. The municipal permitting process can also take longer than expected, so it’s important to get that started early. Beyond that, making changes to the plan mid-project is one of the biggest reasons for delays. Having a clear vision and a detailed plan before any work begins is the best way to keep your project on track and ensure your pool remodel finishes on time and within budget.

Should You Remodel or Replace Your Pool?

Deciding whether to give your existing pool a facelift or start over from scratch is a major decision. An outdated pool can feel like a missed opportunity, but the path forward isn’t always clear. The right choice depends on your pool’s current condition, your long-term vision for your backyard, and your budget. Think of it this way: Is your pool’s foundation solid but just in need of a style update, or are there deeper issues that a simple makeover can’t fix? Breaking down the signs for each option will help you figure out the best investment for your home.

Is It Time for a Remodel? Watch for These Signs

If your pool’s main structure—the shell—is still in great shape, a remodel is often the perfect solution. This is your best bet if your goals are primarily cosmetic or functional. Maybe the tile looks dated, the plaster is stained, or you’re simply dreaming of a more modern aesthetic. A remodel allows you to update the look and feel without the cost and time of a full replacement. It’s also the ideal route for adding new features that make your pool more enjoyable and efficient. You can introduce a tanning ledge for lounging, upgrade to energy-saving equipment, or install a beautiful new waterfall. Essentially, if you want to improve your current swimming pool without changing its fundamental size and shape, a remodel is the way to go.

When to Consider a Full Pool Replacement

Sometimes, a pool has issues that go more than skin-deep. If you’re dealing with major structural problems like large cracks in the shell, persistent leaks that are difficult to locate, or completely outdated plumbing and electrical systems, a replacement might be the smarter long-term choice. Patching up serious damage can become a costly, recurring headache. It’s also time to consider a new build if your renovation plans are so extensive that the cost starts to creep close to the price of a new pool. A full replacement gives you a clean slate to design the exact pool you want, from shape and depth to materials and features, ensuring everything is built to modern standards.

The Cost of Converting Your Pool Type

If a full replacement is on the table, you might also be thinking about changing your pool type altogether. This is a major step, but it can be a fantastic long-term investment if your current pool doesn’t fit your lifestyle. For instance, converting a vinyl liner pool to a low-maintenance fiberglass model typically costs between $50,000 and $70,000. If you’re dreaming of a fully custom shape and high-end finish, upgrading to a concrete or gunite pool is the ultimate choice, though it’s a bigger investment, usually ranging from $50,000 to $100,000. While the upfront remodeling costs are significant, the decision often comes down to long-term benefits like durability and reduced maintenance, which can make the switch worthwhile.

Remodel vs. Replace: Comparing the Prices and Process

Financially, there’s a significant difference between remodeling and replacing. A pool remodel is typically the more budget-friendly option upfront. Costs can range from around $6,000 for basic resurfacing to $50,000 or more for a comprehensive overhaul that includes new tile, coping, and equipment. This approach leverages the existing structure, which saves on demolition and excavation costs. A full replacement is a much larger investment, generally starting around $50,000 and going well into six figures depending on the size, materials, and complexity. While the initial cost is higher, it guarantees a brand-new, structurally sound pool with a full warranty, which can provide peace of mind and prevent future repair bills.

For Context: How Much Does a New Pool Installation Cost?

To make a smart decision between remodeling and replacing, it helps to know what a brand-new pool costs. The price of a new inground pool can vary widely based on your location, the materials you choose, and the complexity of the design. Nationally, the average cost for a new inground pool installation typically falls between $45,000 and $85,000. Understanding these baseline costs gives you a crucial point of comparison. If your remodel estimate is approaching this range, it might be worth exploring what a completely new build could offer you in terms of modern design, efficiency, and a full warranty. This context is key to ensuring you’re making the best long-term investment for your home.

New Pool Costs by Material

The material you choose for your pool’s shell is one of the biggest factors in the final price. Vinyl liner pools are generally the most budget-friendly option, often costing between $40,000 and $75,000. Fiberglass pools, which are pre-molded shells dropped into an excavated hole, sit in the middle, typically ranging from $55,000 to $100,000. At the higher end are concrete or gunite pools, which offer the most design flexibility and durability, with costs usually starting at $65,000 and going well over $120,000. Each material has its own benefits, and the right choice depends on your budget and vision for your swimming pool.

How Pool Size Impacts Price

It’s a simple rule: the larger the pool, the higher the cost. A bigger surface area requires more materials, more labor for excavation and installation, and more water to fill it. A small “cocktail” pool (around 10’x20′) might cost between $65,000 and $75,000. A medium-sized pool (about 15’x30′), perfect for most families, typically runs from $75,000 to $100,000. For a large pool (20’x40′ or bigger) designed for laps or entertaining big crowds, you can expect the price to start at $100,000 and climb from there. The size directly influences every aspect of the build, from the initial masonry work to the final decking.

Pool Remodel Budgeting: 4 Mistakes to Avoid

A pool remodel is an exciting investment, but a few common budgeting missteps can add unnecessary stress to the process. Thinking through your finances and planning for the unexpected will help you stay on track and ensure your project is a success from start to finish. Let’s walk through some of the most frequent mistakes homeowners make so you can sidestep them completely.

Mistake #1: Underestimating the Total Cost

It’s easy to focus on the exciting cosmetic upgrades, but one of the biggest mistakes is overlooking the long-term costs of pool ownership. Your initial remodel estimate is just the beginning. You also need to account for future maintenance, including chemicals, cleaning, and potential repairs to keep your new oasis in pristine condition. Factoring these ongoing expenses into your overall budget from day one prevents financial surprises later. Planning for services like professional restoration and sealing can also extend the life of your investment.

Mistake #2: Choosing Materials Based on Looks Alone

While aesthetics are important, selecting materials based only on their appearance can be a costly error. That beautiful but porous stone might look great initially, but it could stain easily or become slippery when wet. It’s crucial to balance style with durability and maintenance requirements. Consider how materials will stand up to Long Island’s weather, chlorine, and constant use. Our team can guide you through a wide selection of durable porcelain and natural stone options that are both stunning and built to last, saving you money on future repairs and upkeep.

Considering Long-Term Value Over Upfront Cost

Focusing only on the initial price tag is a common mistake, but a successful remodel is an investment that pays for itself over time. Choosing the cheapest option now can lead to higher costs down the road. Instead, think about the long-term benefits. Upgrading to modern, energy-efficient equipment is one of the smartest moves you can make. A new variable-speed pump or a high-efficiency heater might cost more upfront, but they can dramatically lower your monthly utility bills. These upgrades not only save you money but also enhance your enjoyment, allowing you to extend your swimming season without worrying about a huge energy spike. A quality pool renovation is about creating lasting value for both your home and your lifestyle.

Mistake #3: Skipping Essential Planning and Permits

In the rush to get started, some homeowners are tempted to bypass proper planning and permitting. This is a mistake that can lead to significant delays, failed inspections, and even fines. A detailed plan and a clear timeline are your best tools for keeping the project on schedule and within budget. Working with an experienced contractor is key, as they will manage the entire permitting process for you. This ensures your remodel meets all local building codes and safety regulations, giving you peace of mind and a smooth, hassle-free renovation.

Mistake #4: Forgetting to Set Aside a Contingency Fund

Even with the most meticulous planning, unexpected issues can arise during a remodel. You never know what you might find once demolition begins—hidden plumbing problems or structural issues can pop up. That’s why a contingency fund is essential. Most experts recommend setting aside an extra 10% to 20% of your total project cost for these unforeseen expenses. This financial cushion ensures that a surprise won’t derail your budget or force you to compromise on your vision. It’s the best way to prepare for the unknown and keep your project moving forward.

Smart Ways to Save on Your Pool Remodel

A pool remodel is a significant investment, but that doesn’t mean it has to break the bank. With some smart planning, you can achieve a stunning transformation while keeping your budget in check. Saving money isn’t about cutting corners or sacrificing quality; it’s about making strategic decisions that maximize the impact of every dollar you spend. From timing your projects to finalizing your design choices, a few key strategies can make a world of difference in the final cost. Let’s explore some practical ways to get the beautiful, updated pool you’ve been dreaming of without any financial surprises along the way.

Bundle Your Services

One of the most effective ways to save is to tackle multiple projects at once. If you’re already planning to resurface your pool, consider if you also want to replace the tile or upgrade the lighting. Since the pool will already be drained and a construction crew will be on-site, bundling these tasks is far more efficient than doing them separately over time. This approach saves on labor costs and mobilization fees. At Gappsi, we often see clients combine a pool remodel with a new patio or updated landscaping, creating a cohesive backyard transformation in a single, streamlined project.

Opt for a Simpler Design

The complexity of your design directly impacts the cost. While it can be tempting to completely change the shape or depth of your pool, these structural alterations are among the most expensive parts of a renovation. You can achieve a dramatic new look without major excavation by focusing on high-impact cosmetic updates. Sticking with your pool’s existing footprint and choosing a classic geometric shape saves a significant amount on labor and materials. Instead, you can allocate that budget toward premium finishes, a stunning new waterfall, or an energy-efficient heater to extend your swim season.

Finalize Your Plan Before Work Begins

Indecision can be expensive. One of the fastest ways to drive up costs is by making changes after the project has already started. Each modification, no matter how small it seems, can lead to change order fees, wasted materials, and project delays. To avoid this, invest ample time in the planning phase. Finalize every detail—from the exact tile you want to the specific model of your new pump—before you sign a contract. A detailed, locked-in plan ensures your initial quote is accurate and helps the entire remodeling process run smoothly, on time, and on budget.

How to Get an Accurate Remodel Estimate

Getting a clear and reliable estimate is the first step toward a successful pool remodel. A detailed quote sets expectations, prevents surprise costs, and ensures you and your contractor are on the same page from day one. Starting a project without a realistic budget can lead to frustration and delays, so it’s worth the effort to get this part right. Let’s walk through how to get a number you can trust for your Long Island pool renovation.

How to Prepare for Your Contractor Consultation

Before you pick up the phone, do a little homework. The more clarity you have, the more accurate your estimate will be. Start by gathering inspiration. What do you want your new pool area to look like? Think about materials for the decking, like beautiful porcelain pavers, new tile for the waterline, or modern lighting features. Create a list of “must-haves” and “nice-to-haves.” Finally, establish a realistic budget range. Knowing what you’re comfortable spending helps a contractor suggest solutions that fit your financial and aesthetic goals, making the initial conversation much more productive.

Smart Questions to Ask Every Pool Contractor

Your consultation is a two-way street. It’s your chance to interview potential contractors and see if they’re the right fit. Finding the right team ensures your project is completed on time and to your satisfaction. Come prepared with a list of questions to understand their process and expertise. Ask about their license and insurance, and don’t be shy about requesting to see a portfolio of similar pool projects. Inquire about their projected timeline, who will be on-site managing the work, and what their payment schedule looks like. A professional contractor will also provide a written contract and warranty before any work begins, giving you peace of mind.

Decoding and Comparing Your Remodel Quotes

Not all estimates are created equal. A trustworthy quote should be more than just a single number at the bottom of a page; it should be a detailed, itemized document. Look for a clear breakdown of costs for materials, labor, permits, and any special equipment. Understanding what drives the cost helps you make informed decisions. If one quote seems vague, ask for more detail. This transparency is a sign of a professional company and allows you to compare apples to apples when looking at different bids for your home remodeling project.

The Power of Getting Multiple Estimates

It’s always a good idea to speak with a few different companies. Getting at least three estimates gives you a solid understanding of the market rate for your project in the Long Island area. This process isn’t just about finding the lowest price. In fact, be careful of bids that seem too cheap, as they might signal lower-quality work or materials. Comparing quotes helps you see how different contractors approach the project, what materials they recommend, and what their timelines are. This information empowers you to choose a partner who offers the best value, not just the lowest cost.

Is a Pool Remodel Worth It? The Real Payoff

Thinking about a pool remodel is exciting, but it’s also a big decision. Beyond just fixing cracks or updating tile, a renovation is an investment in your home and your lifestyle. It’s about transforming an underused or outdated part of your yard into a stunning centerpiece that adds value, improves safety, and cuts down on your weekend chores. Many homeowners put off a remodel because they’re focused on the initial cost, but it’s crucial to look at the bigger picture. A modern, efficient, and beautiful pool doesn’t just look better—it functions better and can save you money and headaches down the line. When you weigh the costs, it’s just as important to consider the significant returns. From higher property values to lower energy bills and enhanced safety for your family, a well-planned

Add Real Value to Your Property

A sparkling, modern swimming pool is a huge draw for potential buyers, especially here on Long Island. It’s not just a feature; it’s a lifestyle upgrade. A professional remodel can significantly increase your home’s market value—by as much as 8%, according to some estimates. Think of it this way: an old, cracked, or inefficient pool can be a liability that turns buyers away. But a beautifully renovated pool, complete with modern finishes and energy-efficient equipment, becomes a major asset. It signals that your home is well-maintained and ready for enjoyment, making it a smart investment for your future.

Improve Your Pool’s Safety and Function

An older pool might not meet today’s safety standards. A remodel is the perfect opportunity to address potential hazards and give you peace of mind. This could mean replacing a slippery deck with beautiful, non-slip porcelain pavers, adding a safety fence, or installing a reliable automated cover. Beyond safety, you can also rethink how you use your pool. Want a shallow area for the kids to splash around? A tanning ledge is a perfect addition. Dream of relaxing after a long day? We can integrate a heated spa. A remodel lets you customize your swimming pool to fit your family’s current lifestyle.

Save Money on Energy and Maintenance

Let’s be honest: pool ownership comes with recurring costs. But a remodel can drastically reduce your monthly bills and the time you spend on upkeep. Swapping out an old, single-speed pump for a modern variable-speed model can save you a surprising amount on electricity. The same goes for upgrading to energy-efficient LED lights. According to HomeGuide, these updates, along with a good pool cover to reduce water evaporation, are key for long-term savings. This means you can spend less time worrying about utility bills and more time actually enjoying your pool.

Design Your Dream Backyard Oasis

Your backyard should be your personal retreat. A pool remodel is your chance to create a true outdoor oasis that reflects your style. You can replace dated tile with sleek glass, add the soothing sound of a waterfall, or build a gorgeous new patio for lounging and entertaining. It’s about more than just updating the pool itself; it’s about creating a cohesive, beautiful environment where you, your family, and your friends can make lasting memories. Remodeling an existing pool is often more affordable than building a new one from scratch, giving you the backyard of your dreams for a fraction of the cost.

Related Articles

Frequently Asked Questions

Is it cheaper to remodel my pool during the off-season? While the cost of materials generally stays consistent year-round, scheduling your remodel for the fall or winter can have its advantages. Contractors are often less booked during these cooler months, which can lead to more flexibility in scheduling and a potentially faster project timeline. Planning ahead ensures your pool will be completely ready to go the moment the warm weather arrives, without you having to sacrifice any precious swim time.

How do I decide between a simple repair and a full remodel? Think about the scale of the issues you’re facing. If you have a single cracked tile or a minor leak, a targeted repair is likely all you need. However, if you’re dealing with widespread problems like a rough, stained surface, outdated equipment that constantly breaks down, or a deck that’s cracking all over, it’s time to consider a remodel. A remodel addresses the root causes and allows you to update the entire space at once, which is often more cost-effective in the long run than a series of small fixes.

Will I need a permit for my pool remodel? This really depends on the scope of your project. Simple cosmetic updates, like replacing tile or resurfacing the interior, typically don’t require a permit. However, if your renovation involves structural changes, such as altering the pool’s depth, or includes significant electrical or plumbing work, you will almost certainly need one. A reputable contractor will be familiar with local Long Island regulations and will handle the entire permitting process for you.

What upgrade offers the most impact for a limited budget? If you want the biggest visual transformation without a complete overhaul, focus on resurfacing the pool’s interior and replacing the waterline tile. A fresh, new surface can make the water look brighter and more inviting, instantly making the entire pool feel brand new. This combination provides a dramatic aesthetic refresh and addresses common wear-and-tear issues, giving you a lot of bang for your buck.

Can I use my pool at all while it’s being remodeled? For safety reasons and to ensure the quality of the work, your pool will be completely out of commission during the remodel. The process requires the pool to be drained, and the area will be an active construction zone with equipment and materials. It’s best to plan your project for a time when you know you won’t need to use it, which is another great reason to consider an off-season renovation.

A Guide to Outdoor Kitchen Installation in East Setauket

We’ve all been there. You’re hosting a backyard barbecue, the weather is perfect, and everyone is having a great time outside. But you, the host, are constantly running back into the house for plates, drinks, or utensils, missing out on the conversation. An outdoor kitchen solves this problem by creating a single, cohesive space for cooking and entertaining. It brings the full functionality of your indoor kitchen to the center of the party. This common frustration is why so many homeowners are opting for a complete outdoor kitchen installation; our recent project in East Setauket shows how it creates a true hub for backyard life.

https://youtu.be/iuxTeeLETOs

View Gappsi’s YouTube Channel to view Backyard Design with Porcelain Patio and Pool in East Setauket, NY | Gappsi

Transforming a backyard into a luxury retreat takes vision, creativity, and expert craftsmanship.  This latest Gappsi project in East Setauket, NY, is a perfect example. The homeowners wanted a space that was beautiful, functional, and comfortable year-round. Gappsi designed and installed an entire backyard environment that blends modern features, elegant materials, and thoughtful outdoor living spaces. The result is a seamless combination of leisure, entertainment, and architectural sophistication.

A Custom Vinyl Pool as the Centerpiece

The project began with the installation of a custom vinyl pool featuring concrete walls for exceptional durability and longevity. Measuring 16 feet by 36 feet, the pool offers ample space for swimming, relaxing, and entertaining. Its shape complements the backyard layout, providing space for the surrounding patio, sundeck, and additional landscape features.

A full-width sundeck at the shallow end provides a resort-style element. Gappsi installed two bubblers on the sundeck, creating a soothing, spa-like water feature that enhances the pool’s visual appeal and comfort.

Custom Vinyl Pool as the CenterpieceTo create a clean, elevated look around the perimeter, Gappsi used sandstone coping with rounded edges on the top and bottom. The coping was then sealed to match the porcelain patio, ensuring a cohesive, elegant finish throughout the space. This color-matching technique allowed the natural stone to blend beautifully with the rest of the design.

Porcelain Patio Pavers Throughout the Yard

The entire patio surrounding the pool was installed using high-quality porcelain pavers selected from the Gappsi showroom. The homeowners chose a beige porcelain with white veins, adding a modern yet timeless aesthetic to the outdoor environment. Porcelain is one of the most durable and low-maintenance materials available for outdoor patios.  The porcelain paver is resistant to fading, staining, weathering, and heat.

Porcelain Patio Pavers Throughout the YardThe pavers were installed with precision to create a smooth, flawless surface ideal for lounging, walkways, and outdoor entertaining. Their neutral tones allow all surrounding structures and landscaping features to blend harmoniously.

Synthetic Turf Accents for Clean, Modern Lines

To further elevate the visual design, Gappsi installed a 12- to 14-inch synthetic turf border around the patio. This strip of turf creates a clean line in front of the retaining walls and alongside the home, enhancing contrast while keeping the overall layout neat and contemporary. Synthetic turf is not only visually appealing but also eliminates the need for trimming, watering, or maintenance along those tight boundary lines.

Retaining Wall and Pool Auto Cover Housing

Synthetic Turf Accents for Clean, Modern LinesA custom-designed retaining wall was built behind the pool’s deep end. This wall also serves as the housing area for the pool’s automatic cover system, keeping it concealed and protected. The retaining wall blends seamlessly with the overall design, offering both structural support and visual appeal.

A Custom Pavilion Designed to Match the Home

One of the standout features of this backyard is the custom-built pavilion, thoughtfully designed to mirror the home’s architectural style. Trimmed entirely in Azek moldings, the pavilion features a detailed front peak that ties into the residence’s aesthetic.

The pavilion floor is uniquely delineated with synthetic turf, creating a soft, visually distinct boundary between the shaded structure and the porcelain patio. Under the pavilion, Gappsi created a cozy outdoor living room complete with a gas fireplace, a mounted TV, and comfortable lounge space. The cathedral ceiling enhances openness while providing excellent airflow, and a built-in heater allows the homeowners to enjoy the area even during cooler seasons.

backyard-design-with-porcelain-patio-and-pool-in-east-setauket-ny-gappsiA Premium Outdoor Kitchen Built for Entertaining

No luxury backyard is complete without a well-designed outdoor kitchen. Gappsi installed an L-shaped outdoor kitchen featuring top-tier Twin Eagle appliances, including:

  • A 36-inch grill
  • A 30-inch griddle
  • Summit refrigerator
  • Summit ice maker
  • Stainless steel cabinetry
  • A built-in sink

The kitchen is topped with a leather-finished granite countertop, explicitly chosen to complement the color of the stone walls and porcelain patio. This outdoor kitchen allows for complete meal preparation, making the backyard an ideal space for gatherings, celebrations, and summer cookouts.

Custom Pavilion Designed to Match the HomeA Cohesive and Luxurious Backyard Design

This project reflects Gappsi’s commitment to quality design, precision installation, and personalized outdoor living solutions. Every part of this East Setauket backyard, from the pool and patio to the pavilion and kitchen, was thoughtfully planned and executed to deliver a cohesive, luxurious, and functional environment.

The combination of porcelain pavers, synthetic turf, custom masonry, architectural woodwork, and premium outdoor appliances creates a space that is both modern and timeless. Whether relaxing on the sundeck, enjoying the pavilion in the evening, or hosting a backyard barbecue, the homeowners now have a private retreat that enhances their lifestyle year-round.

This backyard transformation stands as one of Gappsi’s latest and most impressive designs, showcasing their craftsmanship and dedication to delivering beautiful outdoor spaces across Long Island.

Planning Your Dream Outdoor Kitchen

An outdoor kitchen is more than just a place to grill; it’s the heart of your backyard, a space where you can cook, dine, and entertain without missing a moment of the fun. It keeps everything you need for preparing and serving meals right where you are, so you no longer have to run back and forth to your indoor kitchen. This means more time spent with family and friends, enjoying the beautiful Long Island weather. Planning is the first step to creating a space that is both beautiful and perfectly suited to your needs. From the layout and appliances to the materials and finishes, every detail contributes to a kitchen that you will love for years to come.

Defining Your Entertainment Style

Before you start picking out grills, think about how you plan to use your outdoor kitchen. Are you picturing large, lively parties with friends, or quiet, intimate dinners with your family? Your personal entertainment style will guide the entire design. For big gatherings, you might want a long countertop with bar seating, a large grill, and maybe even a pizza oven. If you prefer smaller get-togethers, a more compact, efficient layout with essential appliances might be all you need. Thinking about your lifestyle first ensures your new outdoor kitchen will be a functional and natural extension of how you already love to live and entertain.

The Gappsi Design and Build Process

Creating a fully functional outdoor kitchen involves more than just placing a grill on a patio. It requires careful planning, design expertise, and skilled construction. A comprehensive design and build process ensures that every element works together harmoniously. The Gappsi team handles everything from the initial design concepts to installing appliances and connecting all the necessary utilities like gas, water, and electricity. Working with a single, experienced team simplifies the entire project, eliminating the stress of coordinating multiple contractors and ensuring a seamless, high-quality result that perfectly matches your vision for the perfect outdoor living space.

Initial Consultation and Site Assessment

The journey to your dream outdoor kitchen begins with an initial consultation. This is where we get to know you and your vision. During this first meeting, our design team will walk through your property to assess the available space and discuss your specific needs, wants, and budget. We’ll talk about how you envision using the kitchen, what features are most important to you, and the overall aesthetic you want to achieve. This collaborative conversation is essential for gathering the information needed to create a design that is tailored specifically to your home and lifestyle, laying a strong foundation for the entire project.

Custom Design Phase

After the initial consultation, the creative work begins. Our team takes all the ideas and information gathered and translates them into a custom design plan. This phase is all about ensuring your new outdoor kitchen fits perfectly into your existing landscape and meets all your functional requirements. We create detailed layouts that optimize workflow and space, help you select materials that match your home’s style, and present you with a visual representation of the final project. This custom design ensures your outdoor kitchen is not just an addition, but an integrated part of your home’s overall character.

Construction and Installation

Once the design is finalized, our skilled construction team takes over to bring it to life. This phase is where your vision becomes a physical reality. We use durable, high-quality materials that are specifically chosen to withstand the elements, ensuring your outdoor kitchen will have longevity with minimal maintenance. Our expert masons and builders handle every aspect of the installation with precision, from building the foundation and structure to installing countertops, cabinets, and appliances. We manage the entire construction process to ensure it runs smoothly and efficiently.

Final Walkthrough

The project isn’t finished until you are completely satisfied. After the construction and installation are complete, we conduct a final walkthrough with you. This is our opportunity to ensure that every detail meets your expectations and that every component functions exactly as intended. We’ll inspect the quality of the workmanship, test all the appliances, and answer any questions you may have about using and caring for your new outdoor kitchen. This final step guarantees that the finished space is everything you dreamed it would be, ready for you to start making memories.

Choosing Materials Built for Long Island Weather

Building an outdoor kitchen on Long Island means selecting materials that can handle everything our coastal climate throws at them, from humid summer air and salty breezes to freezing winter temperatures. The right materials will not only look great but also stand the test of time, resisting wear and requiring less maintenance. Durability is key to protecting your investment and ensuring your outdoor kitchen remains a beautiful and functional space for entertaining season after season. From countertops to cabinetry, every choice should be made with weather resistance and longevity in mind, creating a structure that is as tough as it is beautiful.

Durable Countertop Options

Your countertops are one of the most used surfaces in your outdoor kitchen, so they need to be incredibly durable. Unlike indoor kitchens, outdoor countertops are exposed to sun, rain, and temperature fluctuations. For this reason, materials like natural stone or engineered surfaces are excellent choices because they are strong and can resist stains and weather damage. These materials provide a sturdy and reliable surface for food prep, serving, and dining, all while maintaining their beauty despite the demanding outdoor conditions. Choosing the right countertop is a critical decision for both the functionality and the long-term appearance of your kitchen.

Natural Stone and Quartz

When it comes to combining beauty and strength, natural stone and quartz are top contenders for outdoor countertops. Materials like granite and bluestone offer a timeless, organic look that blends seamlessly with outdoor surroundings. They are incredibly durable and can handle the rigors of an outdoor environment. Similarly, engineered quartz provides a non-porous, highly resilient surface that is resistant to stains and easy to clean. As seen in our East Setauket project, a leather-finished granite countertop can perfectly complement the surrounding stone and porcelain, creating a cohesive and elegant look that is built to last.

Weather-Resistant Cabinetry and Structure

The foundation and cabinetry of your outdoor kitchen form its structural core, and they must be built to endure Long Island’s challenging coastal conditions. Salt air, high humidity, and the annual freeze-thaw cycle can quickly degrade inferior materials. That’s why it’s essential to use strong, weather-resistant products for the kitchen’s structure. At Gappsi, we often use high-quality masonry products from trusted brands like Cambridge, Techo-Bloc, and Unilock. These materials are specifically engineered to withstand the elements, providing a solid and durable base that ensures your outdoor kitchen remains stable and beautiful for decades.

Cambridge, Techo-Bloc, and Unilock Pavers

Building a resilient outdoor kitchen starts from the ground up. We rely on pavers and wall systems from industry leaders like Cambridge, Techo-Bloc, and Unilock because they are designed to handle the specific weather challenges of Long Island. These products are manufactured to resist fading from UV rays, damage from salt, and cracking from freeze-thaw cycles. Using these high-performance materials for the base and veneer of your outdoor kitchen ensures it will not only look stunning upon completion but will also maintain its structural integrity and appearance for many years, making them a wise investment for any outdoor project.

High-Performance Stainless Steel Appliances

The appliances are what turn your outdoor kitchen from a simple prep area into a fully functional cooking space. To withstand the outdoors, it’s crucial to select appliances made from high-performance, corrosion-resistant stainless steel. As showcased in our East Setauket project, we installed an L-shaped outdoor kitchen with top-tier Twin Eagle appliances, including a 36-inch grill, a 30-inch griddle, and stainless steel cabinetry. These premium appliances are designed for outdoor use, ensuring they can handle moisture and temperature changes without rusting or failing, allowing you to cook with confidence and precision in your backyard oasis.

Understanding the Cost and Return on Investment

Thinking about a new outdoor kitchen is exciting, but it’s natural to wonder about the budget. It’s helpful to view this project not just as a cost, but as a true investment in your home’s value and your family’s lifestyle. An outdoor kitchen extends your living area, creating a central hub for making memories, entertaining friends, and enjoying beautiful Long Island days. The final cost will depend on your vision, but the return comes in both financial value and priceless moments spent enjoying your new space. With a clear plan, you can create a stunning kitchen that aligns with your budget and enhances your home for years to come.

What to Expect for an Outdoor Kitchen Installation

The cost of an outdoor kitchen in the East Setauket area can range from around $15,000 for a more basic setup to $50,000 or more for a luxurious design with high-end appliances. The primary factors influencing the price are the size of the kitchen, the complexity of the design, and the materials you choose. Appliances are a significant part of the budget; a quality grill might cost between $2,000 and $4,000, while a premium model could be over $8,000. At Gappsi, our design process focuses on helping you select the right combination of features, from durable masonry to premium appliances, to bring your vision to life within your desired budget.

How an Outdoor Kitchen Increases Property Value

Adding an outdoor kitchen is widely considered one of the best home improvements for a strong return on investment. For potential buyers, especially on Long Island, a functional and beautiful outdoor entertaining space is a major draw. It effectively increases the usable square footage of your home and signals a property that is well-cared-for and designed for enjoyment. Beyond the financial upside, think of the return on lifestyle. It creates a perfect setting for everything from casual weeknight dinners to large family celebrations, making your backyard the go-to destination for fun and relaxation.

The Installation Process: What to Expect

The idea of a construction project can feel a bit daunting, but understanding the process can make it feel much more manageable. A professional installation is a well-orchestrated series of steps, from initial design to the final finishing touches. When you work with an experienced team, you can expect clear communication, a respect for your property, and a streamlined workflow. The goal is to handle all the complexities behind the scenes, including permits and coordinating different trades, so you can simply look forward to the exciting final reveal of your brand new outdoor kitchen.

Permits and Local Regulations in East Setauket

If your outdoor kitchen design includes features like gas lines for a grill, plumbing for a sink, or new electrical wiring for lighting and refrigerators, you will almost certainly need permits. Navigating local building codes and the permitting process can be complicated, but it’s a critical step to ensure your project is safe, compliant, and built to last. A full-service contractor like Gappsi takes care of this for you. We manage all the necessary paperwork and inspections, ensuring every part of your installation meets East Setauket’s local regulations, giving you complete peace of mind.

A Typical Project Timeline

A well-planned outdoor kitchen installation is surprisingly efficient. Most projects take between one to three weeks from start to finish. A simpler, more straightforward build might be completed in just five to seven days, while a more complex design with extensive masonry and utility hookups could take two to three weeks. It’s also important to remember that outdoor work is subject to weather, which can sometimes cause minor delays. During our planning phase, we provide a clear and realistic project timeline so you know exactly what to expect and when you can start firing up the grill.

Why a Licensed Local Contractor Matters

Hiring a licensed and local contractor is the single most important decision you’ll make for your project. A licensed professional is essential for coordinating the specialized work required for gas, water, and electrical connections, ensuring everything is done safely and to code. Furthermore, a local contractor possesses invaluable knowledge of Long Island’s specific building requirements and environmental conditions. This expertise is what allows Gappsi to manage projects seamlessly, avoiding common pitfalls and ensuring the finished kitchen is not only beautiful but also durable and structurally sound.

Maintaining Your Outdoor Kitchen Year-Round

Your new outdoor kitchen is built with durable materials designed to withstand the elements, but a little routine care will keep it looking and functioning its best for decades. Proper maintenance ensures your investment remains a beautiful and reliable centerpiece of your backyard. From preparing it for the winter to simple cleaning tasks throughout the year, these small efforts protect your appliances, countertops, and cabinetry. This allows you to spend less time on upkeep and more time enjoying your outdoor living space with family and friends, season after season.

Seasonal Use on Long Island

Don’t limit your outdoor kitchen to just the summer months. With thoughtful design, you can enjoy the space for much of the year. Integrating features like LED lighting creates a warm ambiance for evening dinners, while a nearby fire pit or a pavilion with built-in heaters can make cool spring and autumn nights comfortable. When planning your kitchen, consider how it connects with other outdoor elements like seating walls and patios. Creating a cohesive outdoor living area makes the kitchen more functional and invites you to use it more often, extending your enjoyment well beyond the peak of summer.

Winterization and Long-Term Care Tips

Preparing your outdoor kitchen for a Long Island winter is key to its longevity. Before the first freeze, it’s important to winterize any water lines and appliances according to the manufacturer’s instructions to prevent damage. Throughout the year, regularly clean stainless steel surfaces to maintain their shine and prevent corrosion. For countertops, it’s a good idea to seal natural stone surfaces periodically to protect them from stains and weathering. These simple maintenance steps will ensure your outdoor kitchen remains in pristine condition and is always ready for your next cookout.

Contact Gappsi Today

📍 Serving all of Long Island, NY — Nassau & Suffolk Counties 🌐 www.gappsi.com 📞 Call now for a free consultation and estimate!

SCHEDULE A MEETING TODAY WITH GAPPSI

Synthetic Turf Accents for Clean, Modern Lines

Frequently Asked Questions

Why are porcelain pavers so popular for patios? Porcelain pavers are a fantastic choice because they combine good looks with incredible toughness. Unlike some other materials, they are highly resistant to stains from things like spilled wine or food, and they won’t fade from sun exposure. They are also very dense, which means they don’t absorb much heat, making them more comfortable for bare feet on a hot summer day. It’s a low-maintenance option that keeps your backyard looking polished for years.

How long does a complete backyard renovation like the one featured take? A multi-part project that includes a pool, a large patio, and custom structures is a significant undertaking, so the timeline can range from several weeks to a few months. The exact duration depends on the complexity of the design, permitting, and weather. A professional design and build team manages the entire schedule, coordinating all the moving parts so the process feels streamlined and efficient for you as the homeowner.

Can I really use an outdoor kitchen all year on Long Island? You absolutely can, especially with a thoughtful design. While summer is peak season, adding a pavilion or covered structure provides protection from the elements. Integrating features like built-in heaters or a nearby fireplace, as seen in the East Setauket project, creates a warm and inviting space that you can comfortably enjoy on cool spring evenings and crisp autumn afternoons, extending your outdoor living well beyond just a few months.

Do I need a huge backyard to have a functional outdoor kitchen? Not at all. While large backyards offer more layout possibilities, a beautiful and highly functional outdoor kitchen can be designed for almost any size space. The key is a smart, custom design that makes the most of your available area. A compact L-shaped kitchen or a simple linear island can provide all the essentials, like a grill, prep space, and storage, without overwhelming a smaller patio.

I love these ideas, but I’m not sure where to begin. What’s the first step? The first step is simply starting a conversation. It begins with an initial consultation where you can share your ideas, talk about how you want to use the space, and discuss your budget. This meeting is all about exploring the possibilities for your home and getting a clear understanding of the design and build process. It’s the best way to turn your inspiration into a workable plan.

Key Takeaways

  • Design Beyond the Grill: Think of your outdoor kitchen as the central hub of your entire backyard. Plan its layout to connect seamlessly with your patio, pool, and lounge areas, creating one cohesive space for cooking, dining, and relaxing.
  • Build for Long Island Weather: Your material choices are key to a long-lasting outdoor kitchen. Select durable options like natural stone, porcelain, and premium stainless steel to resist local climate challenges, ensuring your space stays beautiful with less maintenance.
  • Rely on a Single, Expert Team: An outdoor kitchen involves permits, plumbing, and electrical work. Working with a professional design-build contractor simplifies the entire process, as they handle all coordination to ensure your project is completed safely, correctly, and without the stress of managing multiple vendors.

Related Articles

Custom wood pergola with a roof attached to a house over a furnished patio.

Your Guide to a Custom Pergola Attached to House with Roof

There’s a certain magic to a home that flows effortlessly from the inside out. Creating that seamless connection between your living room and your garden is a key goal for many homeowners, but it can be hard to achieve with just a sliding door and a simple patio. You need an architectural element that bridges the two worlds. An attached pergola acts as that perfect transition, creating a sheltered space that is both part of the house and part of the yard. A custom pergola attached to house with roof blurs the lines, offering a comfortable, defined area that encourages you to step outside. It makes your backyard feel like a true extension of your home, turning an undefined space into your new favorite room.

Key Takeaways

  • Create a True Outdoor Room: An attached pergola with a roof does more than add shade; it creates a functional, weather-protected extension of your home. This makes your patio usable for dining or relaxing, rain or shine, effectively increasing your home’s living space and value.
  • Choose Materials That Fit Your Life: The right material is about balancing aesthetics with maintenance. While wood offers classic charm, it requires regular upkeep. Modern options like aluminum and vinyl provide a sleek look with minimal effort, ensuring you spend more time enjoying your pergola than working on it.
  • Prioritize a Professional Installation: Attaching a structure to your home is a complex job that requires expertise in building codes, foundations, and structural integrity. Hiring a professional ensures your pergola is built safely and correctly, protecting your home from damage and guaranteeing a beautiful, long-lasting result.

What is an Attached Pergola with a Roof?

Think of an attached pergola as a beautiful and functional extension of your home that blends your indoor and outdoor spaces. This structure connects directly to an exterior wall, creating a covered area over your patio or deck. Unlike a traditional open-rafter pergola, adding a roof transforms the space into a true outdoor room. It provides reliable shade from the summer sun and shelter from unexpected Long Island showers, making your backyard far more usable throughout the year.

An attached pergola with a roof does more than just provide cover; it defines a space. It can frame your outdoor dining area, create a cozy lounge next to the pool, or serve as a graceful transition from your back door to the garden. These structures are custom-designed to complement your home’s architecture, adding both functional living square footage and significant visual appeal. Gappsi designs and builds custom pavilions and pergolas that are tailored to your home’s specific style and your family’s needs, turning an underused patio into your new favorite spot.

Exploring Attached Pergola Styles

One of the best parts of adding a pergola is that you can tailor it perfectly to your home’s character. Whether your house is a classic colonial, a modern masterpiece, or a rustic cottage, there’s a pergola style to match. You can choose from clean, minimalist lines for a contemporary look or opt for more traditional designs with decorative posts and ends. The material you select plays a huge role in the final aesthetic. Natural wood offers timeless warmth, while sleek aluminum provides a modern, low-maintenance alternative. Vinyl is another durable option that comes in various colors to seamlessly match your home’s trim and siding.

Roofed vs. Open-Top: Which is Right for You?

Deciding between a roofed and an open-top pergola comes down to how you want to use the space. An open-top design with rafters is classic and beautiful, allowing for plenty of sunlight and air circulation—ideal if you want to grow climbing plants. However, for most homeowners, a roofed pergola offers far more practical benefits. A solid or louvered roof provides consistent shade and protects you and your outdoor furniture from the elements. This means you can enjoy your masonry patio for a morning coffee or an evening dinner without worrying about the weather forecast. A roof makes your outdoor space a reliable extension of your home, not just a fair-weather feature.

Why Add a Custom Attached Pergola to Your Home?

If you’re looking for a way to get more out of your backyard, an attached pergola is a brilliant solution. It’s more than just a structure; it’s a seamless transition from your indoor comfort to your outdoor oasis. By connecting directly to your house, it creates a functional and stylish space that feels like a true extension of your home. A custom-designed pergola doesn’t just add shade—it adds character, purpose, and value. Let’s look at some of the key reasons why adding one is one of the best upgrades you can make for your Long Island home.

Extend Your Living Space Outdoors

An attached pergola instantly creates a defined outdoor room, effectively expanding your home’s square footage. This new area becomes the perfect spot for dining al fresco, hosting summer barbecues, or simply relaxing with a book. It provides a comfortable, sheltered zone that encourages you to spend more time outside. Instead of a simple, undefined patio, you get a purposeful space that bridges the gap between your house and your yard. With the right design, you can craft a beautiful and functional outdoor living area that your family will enjoy for years. Gappsi offers a range of custom pavilions and pergolas to perfectly match your home and lifestyle.

Enjoy Your Patio, Rain or Shine

One of the biggest advantages of a roofed pergola is its ability to make your patio usable in almost any weather. A solid or louvered roof offers reliable protection from the intense summer sun and unexpected rain showers, so you never have to cancel plans. This means more family dinners outside and more quiet mornings with coffee on the patio. Modern materials like powder-coated aluminum are incredibly durable and require very little maintenance, standing up to Long Island’s coastal climate without warping or rusting. When you pair your pergola with beautiful, weather-resistant porcelain and natural stone pavers, you create a complete outdoor space that’s ready whenever you are.

Add Value and Curb Appeal

A well-designed attached pergola is a smart investment that adds significant value to your home. It’s a highly desirable feature for potential buyers, who see it as additional, usable living space. Beyond the financial return, a pergola dramatically enhances your home’s curb appeal. It adds architectural interest and dimension to your home’s exterior, breaking up flat walls and creating an elegant, welcoming focal point. A custom design ensures the pergola complements your home’s style, looking like it was always meant to be there. This kind of thoughtful home remodeling not only improves your daily life but also strengthens your property’s long-term value.

Improve Your Home’s Energy Efficiency

An often-overlooked benefit of an attached pergola is its positive impact on your home’s energy consumption. By shading the windows and exterior walls of your house, a pergola can block a significant amount of direct sunlight from entering your home during the hottest parts of the day. This natural cooling effect reduces the workload on your air conditioning system, which can lead to lower energy bills during the summer. According to the U.S. Department of Energy, strategic landscaping and shading can make a real difference in home energy use. It’s a practical advantage that makes your home more comfortable on the inside while you enjoy your beautiful new space on the outside.

Choosing the Best Material for Your Pergola

The material you choose for your attached pergola does more than just define its look—it determines how much time you’ll spend maintaining it and how well it will stand up to Long Island’s four-season climate. Think of it as the foundation of your new outdoor oasis. Each option has its own personality and practical benefits, so it’s all about finding the right fit for your home’s style, your budget, and your lifestyle. Whether you’re drawn to the classic warmth of wood or the sleek, modern appeal of metal, we’ll walk through the most popular choices to help you make a decision you’ll love for years to come.

Wood: Natural Beauty and Charm

There’s something undeniably classic and inviting about a wooden pergola. Materials like cedar and redwood bring a natural warmth and texture to your backyard that blends beautifully with landscaping. These woods are popular for a reason; they have a natural resistance to rot and insects, making them sturdy choices for outdoor structures. A pressure-treated pine is another excellent, budget-friendly option. While wood offers timeless charm, it does require a bit more TLC than other materials. You’ll need to plan on regular staining or sealing to protect it from the elements and keep it looking its best, but for many homeowners, that upkeep is a small price to pay for the authentic beauty that only real wood can provide.

Aluminum: Modern, Durable, and Low-Maintenance

If your style leans more modern and you’d rather spend your weekends relaxing than doing maintenance, an aluminum pergola is a fantastic choice. Aluminum is incredibly strong yet lightweight, and it won’t rust, warp, or rot, which is a huge plus in our coastal climate. It’s the ultimate “set it and forget it” material. You can get a sleek, clean look that complements contemporary home designs, and it comes in a variety of powder-coated finishes that last for decades without needing a touch-up. For homeowners who want a durable structure that looks sharp and requires virtually no upkeep, aluminum is one of the best long-term investments for custom-built pavilions and pergolas.

Vinyl: Weather-Resistant and Versatile

Vinyl offers a wonderful middle ground, giving you a traditional look without the maintenance of wood. It’s a highly durable and weather-resistant material that stands up to sun, salt, and moisture without fading, cracking, or peeling. You’ll never have to worry about termites or rot, and cleaning is as simple as a quick rinse with a hose. Vinyl pergolas come in a range of colors—with crisp white being a classic favorite—and can be designed to mimic the look of painted wood. This versatility makes it easy to match your home’s trim and other exterior features, creating a cohesive and polished look for your outdoor space.

Composite: The Ultimate in Performance

For those who want the rich look of wood without any of the maintenance, composite materials are the perfect solution. Made from a blend of wood fibers and recycled plastics, composite decking and structural pieces offer the best of both worlds. This material is engineered to resist staining, scratching, and fading, and it’s completely immune to rot, decay, and insect damage. It’s an incredibly tough material that delivers high-end performance and longevity. While it can be a larger initial investment, a composite pergola pays for itself over time with its durability and minimal upkeep, making it a smart choice for creating truly premium outdoor living spaces.

How to Customize Your Pergola’s Design

A custom pergola isn’t just a structure; it’s a reflection of your personal style and how you want to live outdoors. This is where the fun begins, as you get to make decisions that transform a standard design into something that feels like it was always meant to be part of your home. From the overall architecture to the smallest finishing touches, every choice helps create an outdoor space that is uniquely yours. By focusing on a few key areas of customization, you can design a pergola that perfectly suits your home’s aesthetic and your family’s needs.

Match Your Home’s Architectural Style

The most successful attached pergolas look like they were built right along with the house. The goal is to create a seamless transition from your indoor to your outdoor space. Take cues from your home’s existing design—whether it’s a classic Colonial, a modern farmhouse, or a coastal cottage. You can match the column style to your front porch posts or align the pergola’s trim with your home’s eaves. This ensures your new addition complements your home’s character instead of competing with it. A well-designed structure helps define your outdoor area, creating a distinct “room” for dining, lounging, or entertaining.

Select Your Ideal Roof: Solid, Louvered, or Retractable

Your pergola’s roof does more than just provide cover; it dictates how you can use the space. A solid roof offers complete protection from sun and rain, essentially creating a year-round outdoor room. For more flexibility, a louvered roof is a fantastic option. Its adjustable slats can be angled to let in the perfect amount of sunlight or closed completely during a surprise shower. If you love the idea of an open-air feel, a retractable canopy gives you the best of both worlds—sun when you want it and shade when you need it. Your choice depends on how much you want to control the elements.

Personalize the Color, Finish, and Size

The details are what make your pergola truly custom. When selecting a color, look to your home’s exterior trim, window frames, and siding for inspiration to create a cohesive look. The finish—from smooth powder-coated aluminum to rustic stained wood—also plays a huge role in the final feel. Size is another critical element. Think about how you’ll use the space. Will it be an intimate seating area for two or a large dining space for family gatherings? Planning for furniture and comfortable traffic flow will help you determine the ideal dimensions for your custom pavilions and pergolas.

Incorporate Privacy Screens and Custom Features

Beyond the basic structure, you can add features that enhance both comfort and functionality. Privacy screens, whether they are fixed panels, lattices, or retractable shades, can create a more intimate and secluded atmosphere while shielding you from neighbors or a setting sun. You can also integrate elements like ceiling fans for a cooling breeze on hot days, built-in heaters for chilly evenings, and integrated lighting to set the perfect mood after dark. These thoughtful additions are what will make your pergola the go-to spot for relaxing and entertaining.

Upgrading Your Pergola with Must-Have Features

A custom pergola is a fantastic starting point, but the real magic happens when you personalize it with features that fit your lifestyle. Think of the structure as the foundation and these upgrades as the finishing touches that transform it into a true outdoor room. Modern pavilions and pergolas are designed to be fully customized, allowing you to create a space that’s as comfortable and functional as any room inside your house. From extending your evenings with beautiful lighting to staying comfortable no matter the season, the right additions make all the difference, turning a simple structure into the heart of your outdoor living area.

These features aren’t just about aesthetics; they’re about maximizing the time you can spend enjoying your backyard. By incorporating elements like climate control, smart technology, and weather protection, you can host dinner parties on cool autumn nights, read a book without worrying about bugs, or simply relax in the shade on a hot summer day. It’s about creating a flexible space that adapts to your needs, whether you’re seeking solitude or entertaining a crowd. We’ll walk through some of the most popular and impactful upgrades that can turn your pergola into your favorite spot at home, ensuring you get the most out of your investment.

Set the Mood with Integrated Lighting

The right lighting can completely change the atmosphere of your pergola, turning it from a daytime shade structure into a captivating evening retreat. Integrated lighting, which is built directly into the beams and posts, offers a clean, seamless look that you can’t get from stringing up lights after the fact. You can layer different types of lighting to create the perfect ambiance for any occasion. Consider soft, recessed LEDs for general illumination, task lighting over a grilling or dining area, and subtle uplighting on the columns to add a touch of drama. With a well-designed lighting plan, your pergola will be a warm and inviting space long after the sun goes down.

Stay Comfortable with Heaters and Fans

One of the best ways to get more use out of your pergola is by adding climate control features. An integrated ceiling fan is a must-have for making those warm, humid Long Island summer days more enjoyable, creating a gentle breeze that keeps the space comfortable. When the weather turns cooler, you don’t have to head back inside. Built-in heaters, such as discreet infrared models, can provide gentle warmth that takes the chill out of the air. This allows you to extend your outdoor season, enjoying crisp spring mornings and cozy fall evenings in your favorite spot. These additions ensure your investment is one you can enjoy for most of the year.

Add Convenience with Smart Controls

Imagine adjusting your pergola’s roof, screens, and lighting with a simple tap on your phone. That’s the convenience of smart controls. Modern pergolas can be equipped with technology that lets you manage every feature effortlessly. If the sun gets too intense, you can close the louvered roof without leaving your chair. If a surprise shower rolls in, you can deploy the retractable screens in seconds. This level of control makes your outdoor space incredibly responsive to your needs and the changing weather. Integrating these smart features is a key part of any modern home remodeling project, blending your indoor and outdoor living spaces seamlessly.

Get All-Weather Use with Curtains and Screens

To make your pergola a truly versatile outdoor room, consider adding curtains or retractable screens. Motorized screens are a game-changer, allowing you to keep pesky insects out while still enjoying the breeze and the view. They can also offer a degree of shade and protection from light wind and rain. For a softer touch and added privacy, outdoor curtains are a beautiful option. They can be drawn to create a more intimate, enclosed setting or tied back to open up the space. Both of these features help you manage sun exposure and create a comfortable, protected environment, making your pergola usable in a wider range of weather conditions.

What to Expect During the Installation Process

Once you’ve designed the perfect attached pergola, you’re probably eager to see it come to life. The installation process is where your vision becomes a reality, and knowing what to expect can make the entire experience smooth and stress-free. A successful installation is all about careful planning and expert execution, ensuring your new outdoor structure is not only beautiful but also safe and built to last.

The journey from design to completion involves several key stages. It starts with a thorough assessment of your home and property to ensure a seamless integration. Next comes the necessary paperwork, like securing building permits, which protects your investment and ensures everything is up to code. Then, the site is prepared by creating a solid foundation for the structure. Finally, the pergola is expertly constructed and attached to your home. While it might sound like a lot, working with an experienced team means you can relax while the professionals handle every detail. At Gappsi, we manage the entire process for our clients, turning a complex project into an exciting home transformation. Our pavilions and pergolas are built with precision and care from start to finish, so you can simply look forward to enjoying your new space.

Assessing Your Space and Structure

Before any work begins, a professional will conduct a detailed site assessment. This isn’t just about measuring the patio; it’s about understanding how the pergola will connect with your home’s existing structure. We’ll examine the attachment wall to confirm it can support the load and determine the best way to work around features like windows, doors, and existing gutters. A common question homeowners ask is, “Can I attach a pergola if I have gutters?” The answer is yes, but it requires a professional approach to ensure proper drainage and a secure fit. This initial evaluation is critical for planning a safe and structurally sound installation that looks like a natural extension of your home.

Understanding Permits and Building Codes

Navigating local regulations is a crucial step in any construction project. Before installation, it’s essential to check with your local Long Island municipality about building permits, zoning rules, and other building codes. This process ensures your new pergola meets all safety and structural requirements, preventing potential issues or fines down the road. While it can seem like a hassle, it’s a non-negotiable part of a professional build. A seasoned contractor will handle the entire permitting process for you, from submitting the plans to scheduling inspections. This way, you can have peace of mind knowing your project is fully compliant from day one.

Preparing the Foundation and Attachment Points

A pergola is only as strong as its foundation. Proper preparation involves two key areas: the ground supports and the house attachment. For the posts that stand on your patio, we create solid concrete footings below the frost line to prevent shifting and ensure stability for years to come. For the side attached to your house, a ledger board is securely bolted to your home’s framing. Attaching a pergola needs careful planning, and this step is best left to professionals. It guarantees the structure is installed safely and correctly, ready to withstand the elements and provide a secure framework for your new outdoor living space.

Professional vs. DIY Installation: What to Consider

While a DIY project can be tempting, installing an attached pergola is a complex job with little room for error. A professional installation is about more than just convenience; it’s about safety and quality. While installing a pergola yourself may seem cost-effective, this often comes with risks like improper installation, which can lead to serious structural issues or damage to your home. Professionals have the right tools, experience, and understanding of structural engineering to ensure your pergola is secure and built to code. Investing in a professional installation gives you a flawless finish, a valid warranty, and the confidence that your beautiful new space is safe for your family to enjoy.

How to Budget for Your Custom Pergola

Planning your budget is one of the most important steps in bringing your dream pergola to life. While it’s easy to get swept up in design ideas, having a clear financial picture from the start ensures a smooth process without any surprises. The final cost of a custom pergola can vary quite a bit, as it depends entirely on your vision, your home’s specific needs, and the materials you choose.

Think of your budget as a roadmap. It helps you and your contractor make key decisions about size, features, and finishes. A well-planned budget allows you to prioritize what matters most to you, whether that’s a high-end wood finish, a state-of-the-art louvered roof, or integrated lighting for evening get-togethers. By understanding the key cost factors, you can create a realistic budget that aligns with your goals and sets you up for a successful project that you’ll love for years to come.

Key Factors That Influence Cost

The single biggest factor influencing your pergola’s cost is the material you choose. Different materials come with different price points, maintenance needs, and aesthetics. For example, custom wood pergolas offer a classic, natural look but are often the most expensive option, ranging from $35 to $60 per square foot. Other popular choices like low-maintenance aluminum or vinyl offer a more modern feel and can fit into different budget tiers. The pavilions and pergolas you select will set the foundation for your project’s overall expense, so it’s a great place to start your planning.

How Size, Complexity, and Features Affect Price

It makes sense that a larger, more complex pergola will cost more than a simple, smaller one. Size directly impacts material and labor costs—the bigger the footprint, the more of each you’ll need. Labor for a standard installation can range from $500 to $3,000, making up a significant portion of the total budget. Adding custom features like intricate post designs, built-in privacy screens, or the need for complex masonry work for the foundation will also increase the price. When you’re budgeting, think about how you plan to use the space to decide which features are must-haves.

Understanding Your Return on Investment

It’s helpful to view your new pergola not just as a cost, but as an investment in your home and lifestyle. An attached pergola literally extends your home’s living space, giving you a comfortable, sheltered area to relax and entertain. This addition can significantly increase your property’s curb appeal and overall value. Potential buyers often see a well-built outdoor structure as a major plus. More importantly, it’s an investment in your own enjoyment, creating a beautiful outdoor retreat you can use for years. It’s a valuable part of any home remodeling project.

Exploring Financing Options

While a DIY pergola project might seem like a way to save money, it comes with serious risks. Improper installation can lead to structural problems, safety hazards, and costly mistakes that you’ll have to pay to fix later. Hiring a professional ensures your pergola is built correctly, meets all local building codes, and is securely attached to your home. This protects your investment and gives you peace of mind. Many contractors can discuss payment schedules or point you toward financing resources to help make your project more manageable, allowing you to get the quality build you want without compromising on safety.

How to Choose the Right Pergola Contractor

Choosing the right design and materials for your pergola is exciting, but finding the right contractor to build it is just as important. This is the team that will turn your vision into a beautiful, functional part of your home. A great contractor ensures the process is smooth and the final result is structurally sound and built to last. Taking the time to vet your options carefully will save you from potential headaches and costly mistakes down the road.

Verify Licenses, Insurance, and Experience

Before you even start talking about design, make sure any contractor you consider has their credentials in order. This is your first line of defense. A valid license proves they meet state and local requirements, while proper insurance protects you from liability in case of accidents on your property. While a DIY approach might seem like a way to save money, it often leads to “improper installation, structural issues, and costly mistakes.” A professional team has the experience to get it right the first time. Look for a company with a strong portfolio of completed pavilions and pergolas, especially projects similar to what you have in mind.

Assess Their Design Skills and Local Knowledge

A great pergola contractor is more than just a builder; they’re a design partner. They should be able to look at your home’s architecture and your backyard layout to help you create a pergola that looks like it was always meant to be there. Beyond aesthetics, they need deep knowledge of Long Island’s local building codes and permit processes. This expertise is critical for handling the technical details. For example, a common challenge “involves existing gutters,” and an experienced contractor will know exactly how to work around them without compromising your home’s integrity. This combination of design sense and local know-how is what separates a good project from a great one.

Essential Questions to Ask Before You Hire

Once you’ve narrowed down your list to a few qualified candidates, it’s time to ask some specific questions to find the perfect fit. This is your chance to understand their process and confirm their expertise. To avoid “common pergola installation mistakes like poor site prep, weak foundations, [and] wrong materials,” you need to know they have a solid plan.

Come to the conversation prepared with questions like:

  • Can you show me a portfolio of attached pergolas you’ve built in my area?
  • How will you prepare the site and foundation to ensure stability?
  • What is your process for obtaining the necessary permits?
  • What is the estimated timeline for my project, from start to finish?
  • Who will be my main point of contact throughout the construction?

Keeping Your Attached Pergola in Top Shape

Your attached pergola is more than just a structure; it’s the backdrop for family barbecues, quiet morning coffees, and relaxing evenings. To keep it looking its best and functioning perfectly for years to come, a little routine care goes a long way. Proper maintenance not only preserves its beauty but also protects your investment and ensures it remains a safe, sturdy extension of your home. When you invest in a beautiful outdoor feature that enhances your daily life, you want it to last. Consistent upkeep is the best way to guarantee that your pergola continues to add value and enjoyment to your property.

The good news is that maintaining your pergola doesn’t have to be a huge chore. The level of upkeep depends largely on the material you choose and the features you’ve included. Whether you have a classic wooden design or a modern aluminum one, a simple maintenance schedule can prevent minor issues from turning into costly repairs. By staying on top of a few key tasks, you can ensure your outdoor oasis remains a favorite spot for relaxation and entertainment season after season. Gappsi offers expert restoration and sealing services that can help keep your entire patio area, including your pergola’s foundation, in pristine condition.

Simple Care Tips Based on Material

The material of your pergola is the biggest factor in its maintenance routine. For classic wood pergolas made from materials like cedar, which is naturally resistant to rot and insects, you’ll still want to inspect them annually. Look for any signs of wear or damage. Applying a fresh coat of stain or sealant every few years will protect the wood from moisture and sun damage, keeping its natural color vibrant and preventing warping or cracking over time.

On the other hand, materials like aluminum, vinyl, and fiberglass are celebrated for being low-maintenance. These modern options are resistant to rust, rot, and pests, so you won’t have to worry about seasonal staining or sealing. For these, a simple cleaning with mild soap and water once or twice a year is usually all that’s needed to wash away dirt, pollen, and other buildup, keeping your structure looking brand new.

Your Seasonal Maintenance Checklist

A great way to stay on top of pergola care is to create a simple seasonal checklist. In the spring, give your pergola a thorough cleaning to wash away winter grime. This is also the perfect time to inspect the structure for any loose bolts or screws, ensuring everything is secure after any harsh weather. Check the attachment points where the pergola meets your house, as well as the foundation, to make sure everything is stable.

In the fall, focus on clearing away leaves and debris from the roof and any integrated gutters. Proper drainage is crucial, especially for an attached structure, to prevent water from pooling against your home’s siding or foundation. A quick check-up before and after the harshest seasons will help you catch any potential issues early.

Long-Term Strategies for Preservation

Thinking long-term starts with the initial design and installation. Choosing durable, high-quality materials like powder-coated aluminum for your pavilions and pergolas can significantly reduce future maintenance. These materials are built to withstand the elements without requiring the regular sealing or staining that wood does, giving you more time to simply enjoy your space.

Ensuring your pergola is installed correctly on a solid foundation is another key strategy for its longevity. A professional installation avoids common mistakes that can lead to instability and premature wear. Regular inspections, even quick visual ones, will help you ensure your pergola remains a strong, beautiful, and lasting feature of your home for many years to come.

Related Articles

Frequently Asked Questions

How long does the entire process take, from design to installation? The timeline can vary quite a bit depending on the complexity of your design and the permitting process in your town. Generally, you can expect the design and material selection phase to take a couple of weeks. After that, securing permits can take anywhere from a few weeks to a couple of months. Once everything is approved, the actual on-site construction is surprisingly quick, often taking just one to two weeks for a professional team to complete.

Do I really need a permit for an attached pergola on Long Island? Yes, almost certainly. Because an attached pergola connects directly to your home’s structure, it’s considered a permanent addition and requires a building permit in most Long Island municipalities. This isn’t just red tape; it’s a process that ensures the structure is built safely and to code, protecting both your home and your family. A reputable contractor will handle the entire permitting process for you, so you won’t have to worry about the paperwork.

Can an attached pergola be built on an existing patio or deck? This is a great question and the answer depends on the condition of your existing surface. If you have a concrete patio that is in good shape, we can often anchor the pergola posts directly to it. For a wood or composite deck, we’ll need to assess its structural integrity to ensure it can support the added weight. In many cases, we will add extra reinforcement or new footings beneath the deck to provide a solid foundation for the pergola.

What’s the most popular pergola material for Long Island’s climate? For homeowners here on Long Island, low-maintenance materials like aluminum and vinyl are incredibly popular, and for good reason. Our coastal climate with its salty air and four distinct seasons can be tough on exterior structures. Aluminum and vinyl won’t rust, rot, or warp, and they require little more than an occasional cleaning. While classic wood is always beautiful, these modern materials offer fantastic durability and let you spend more time enjoying your pergola rather than maintaining it.

How much maintenance should I realistically expect? The amount of upkeep really comes down to the material you choose. If you opt for a wood pergola, you should plan on inspecting it annually and re-staining or sealing it every two to three years to protect it from the elements. If you go with aluminum, vinyl, or composite, your maintenance is minimal. A simple wash with soap and water once a year is typically all that’s needed to keep it looking fresh and clean.