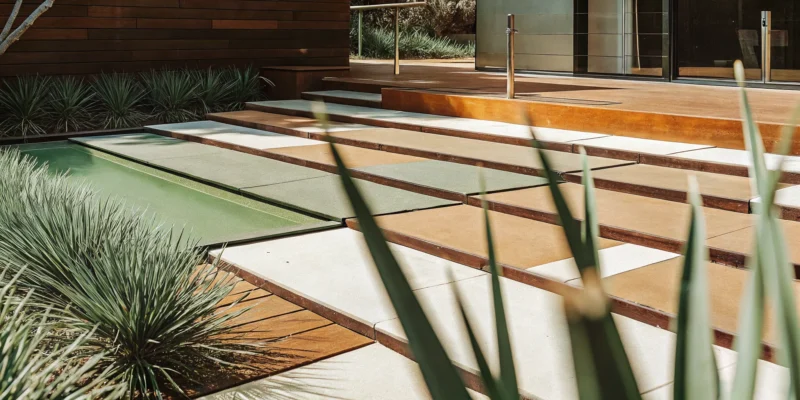
Layers of a paver base with sand and grid creating a solid foundation for patio stones.

Paver Base 101: Your Guide to a Solid Foundation

Have you ever walked across a paver patio and noticed a few wobbly stones or a low spot that collects water? These common problems aren’t usually caused by the pavers themselves. The real culprit is almost always a weak or improperly installed paver base. This foundational layer of compacted aggregate is responsible for supporting the entire structure and preventing shifting, sinking, and water damage. Without a solid base, your beautiful hardscape is destined for future headaches and costly repairs. Understanding what goes into a great base is the first step toward building a patio or walkway that stays beautiful and functional for years.

Key Takeaways

  • Foundation First: The paver base is the most important part of your project. A properly installed foundation of crushed stone and sand provides the essential stability and drainage needed to prevent your beautiful pavers from sinking, shifting, or becoming uneven.
  • Plan for Weight and Water: Your base depth is not one-size-fits-all. You must calculate the correct depth based on the project’s use (a driveway needs a much deeper base than a walkway) and your specific soil conditions. Always include a slight slope to ensure water drains away properly.
  • Compact in Layers for Maximum Strength: For a truly solid foundation, add your base material in three-inch layers. You must compact each layer thoroughly with a plate compactor before adding the next one. This step is non-negotiable for preventing future settling and paver failure.

What Is Paver Base (And Why Is It So Important)?

Think of a paver base as the hidden foundation for your beautiful patio, walkway, or driveway. It’s a carefully prepared layer of materials, like crushed stone and gravel, that sits directly underneath the pavers. While you’ll never see it once the project is finished, the quality of this base is the single most important factor in how your hardscape looks and performs over time. Its job is to create a stable, level surface that won’t shift, sink, or buckle under pressure from foot traffic, patio furniture, or Long Island’s freeze-thaw cycles.

A strong base provides the necessary support for the stunning porcelain and natural stone pavers you’ve chosen. It also plays a critical role in drainage, allowing water to filter through instead of pooling on the surface or washing away the materials underneath. Skipping this step or cutting corners on the base is a recipe for future headaches and costly repairs. Simply put, a great paver project starts from the ground up, and the base is where it all begins.

Your Hardscape’s Foundation

Just like your home needs a solid foundation to stand strong, your paver patio or walkway relies entirely on its base. This foundational layer is typically built from compacted aggregate, which is a mix of crushed stone and gravel. For most patios and walkways, a depth of four to six inches (after compaction) is the standard. This depth provides a solid footing that distributes weight evenly and prevents the pavers from shifting or developing low spots over the years. It creates a stable interlocking system that can withstand weather changes and everyday use without falling apart.

Common Problems Caused by a Poor Base

A poorly prepared base is often called the number one patio killer, and for good reason. When the base material isn’t deep enough or hasn’t been properly compacted, it creates a weak foundation that is prone to failure. The most common issues are sinking and shifting pavers, which lead to an uneven, hazardous surface. These problems are often made worse by natural soil erosion and settling. Another major issue is poor drainage. Without the right slope and materials, water can get trapped beneath the pavers, leading to heaving during winter freezes and creating a mushy, unstable surface. These are the kinds of issues that require professional masonry work to fix correctly.

Choosing the Best Materials for Your Paver Base

The success of your patio, walkway, or driveway hinges on the materials you put underneath it. Think of it like building a house; you wouldn’t skimp on the foundation, and the same principle applies here. Using the right combination of aggregates and sand creates a stable, interlocking system that can withstand weather, time, and heavy use. The goal is to build a base that provides excellent drainage and won’t shift, sink, or settle over time, which is what causes those dreaded uneven pavers and tripping hazards.

Your paver base isn’t just one layer of one material. It’s a carefully engineered multi-layered system, and each layer has a specific job. The main sub-base, typically made of crushed stone, provides the primary structural support and drainage. On top of that, a thin layer of bedding sand creates a smooth, level surface to set the pavers perfectly. Finally, after the pavers are in place, joint sand is swept between them to lock everything together and prevent movement. Choosing high-quality materials for each of these layers is the first step toward a beautiful, long-lasting hardscape. At Gappsi, we work with a wide variety of porcelain and natural stone pavers, and we know that their performance and appearance depend entirely on the strength of the base below.

Crushed Stone and Gravel

When you think of a paver base, crushed stone is likely the first material that comes to mind, and for good reason. It’s the industry standard for creating a strong, stable foundation. You’ll often see it referred to as “3/4-inch minus,” which means it’s a mix of stones up to three-quarters of an inch in size, along with smaller particles and dust. This variety is key because as the stone is compacted, the smaller pieces fill the gaps between the larger ones, creating a dense, interlocked layer. This process provides incredible stability and excellent drainage, which is essential for preventing frost heave during Long Island winters. Our masonry construction experts rely on this material for its proven durability.

Limestone vs. Granite Screenings

While crushed stone is a popular choice, limestone and granite screenings are also fantastic options for your paver base. Both materials compact extremely well, forming a solid and unyielding foundation for your hardscape project. Limestone is a sedimentary rock that is widely available and cost-effective, making it a common choice. Granite screenings, the small particles left over from crushing granite, are known for their hardness and durability. The best option for your project often depends on local availability and specific soil conditions. Both materials provide the excellent compaction needed to ensure your patio or walkway remains level and stable for years to come.

The Role of Sand and Polymeric Sand

Sand plays two distinct and vital roles in a paver installation. First is the bedding sand. This is a one-inch layer of coarse sand that goes directly on top of your compacted base. Its job is to provide a perfectly level surface to set each paver into. It’s not for structural support; instead, it’s the final leveling medium that helps accommodate for tiny height differences in the pavers themselves.

After the pavers are laid, polymeric sand comes into play. This is a special blend of sand and polymers that you sweep into the joints. When activated with water, the polymers harden, locking the pavers together and creating a firm, durable surface. This is a game-changer for preventing weeds, deterring ants, and stopping erosion from washing the sand out of the joints. Proper joint maintenance is key to longevity, which is why our restoration and sealing services always check the integrity of the joint sand.

How Deep Should Your Paver Base Be?

Getting the depth of your paver base right is one of the most critical steps in your project. Think of it like the foundation of a house; if it’s not deep or stable enough, everything on top of it will have problems down the road. There isn’t a single magic number for base depth, because the ideal measurement depends on two key factors: what you’re building and the type of soil you have in your yard.

A shallow base might seem like a good way to save time and money, but it often leads to pavers shifting, sinking, or becoming uneven. Taking the time to calculate the correct depth ensures your new patio or walkway will stay beautiful and functional for years. Let’s break down how to figure out the perfect depth for your specific project.

Depth Requirements by Project Type

The primary rule for base depth is simple: the more weight the surface needs to support, the deeper the base must be. A walkway that only sees foot traffic has very different needs than a driveway that will support thousands of pounds of vehicle weight every day. For most standard projects like patios and walkways, a compacted base of 4 to 6 inches is the minimum requirement. This provides enough support to prevent sinking and shifting from regular use and changing weather.

For a project that needs to handle more stress, like a durable driveway, you’ll need to dig deeper. We recommend a base of at least 8 to 12 inches for driveways to properly distribute the weight of vehicles and prevent ruts from forming. Building a strong foundation is the key to a long-lasting masonry project that adds value to your home.

How Soil Conditions Affect Depth

The native soil on your property is another major piece of the puzzle. Different soil types drain and compact differently, which directly impacts how much base material you’ll need. Long Island homeowners often work with sandy or loamy soil, which drains well and provides a relatively stable foundation. In these cases, the standard depth recommendations usually work just fine.

However, if your yard has heavy clay soil, you’ll need to make some adjustments. Clay holds a lot of moisture and can expand and contract dramatically with temperature changes, which can easily wreck a paver installation. To counteract this, you should plan for a deeper base, adding several extra inches of material. This creates a thicker, more stable buffer between the clay and your pavers. A professional landscape design team can assess your soil and ensure the base is built to last.

How to Install Paver Base Correctly

Building a solid paver base is a methodical process, but it’s the most important part of ensuring your new patio or driveway looks great for years to come. Each step builds on the last, creating a stable, interlocked foundation that can withstand weather, time, and foot traffic. Rushing through this stage or cutting corners can lead to uneven surfaces, sinking pavers, and drainage problems down the road.

Following the correct installation process is key to a professional-looking and durable result. From digging the right depth to ensuring proper drainage, every detail matters. While it’s a rewarding DIY project for some, many homeowners prefer the peace of mind that comes with professional installation. Our masonry experts have been building beautiful, lasting hardscapes on Long Island for decades, handling every step with precision. If you’re ready to tackle it yourself, here’s how to do it right.

Step 1: Excavate and Prepare the Area

Your first job is to dig. You need to excavate the area to make room for all the layers of your base. For a walkway or patio, the total base, including gravel and sand, should be between 6 and 10 inches thick. If you’re building a driveway that needs to support vehicles, you’ll need a much more substantial base of 8 to 14 inches. When digging, make sure to extend the excavation about 6 to 12 inches beyond the planned perimeter of your pavers. This provides extra stability for the edges and prevents them from shifting over time.

Step 2: Install and Level in Layers

Once your area is excavated, it’s time to start building the base. Don’t just dump all the gravel in at once. For the best results, you should spread the gravel base in layers about 3 inches thick at a time. After spreading each layer, use a rake to level it out as evenly as possible. This layered approach is critical because it allows for thorough compaction at every level, creating a much stronger foundation. After you’ve built up and compacted your gravel base, you’ll add the final 1-inch layer of bedding sand, which the pavers will sit directly on top of.

Step 3: Compact for Maximum Stability

Compacting the base material is absolutely crucial for stability. This step removes air pockets and locks the aggregate particles together, creating a solid, unmoving foundation. If the base for your pavers isn’t properly compacted, you’ll likely see the effects of erosion and natural settling much sooner, leading to dips and uneven spots. For each 3-inch layer of gravel, you’ll need to go over it several times with a vibratory plate compactor. A hand tamper can work for very small areas, but a plate compactor ensures the most even and firm result for a lasting hardscape.

Step 4: Create the Right Slope for Drainage

Water is the biggest enemy of a paver installation. If it pools on the surface or soaks into the base, it can cause major issues. To prevent this, you need to build a slight slope into your base, directing water away from your home’s foundation and other structures. A good rule of thumb is a quarter-inch drop for every foot of length. This slope is subtle enough that you won’t notice it when you’re walking on it, but it’s effective enough to ensure proper water runoff. This simple step is key to preventing water accumulation beneath the paver surface and protecting your investment.

Gathering Your Tools and Equipment

Having the right tools on hand before you start is one of the best ways to make your paver project go smoothly. You don’t want to be halfway through a step only to realize you’re missing a key piece of equipment. Think of this as your project prep phase. Getting everything organized first means you can focus on doing each step correctly, from digging the initial trench to laying the final paver. While many of these items can be rented, investing in quality tools is always a good idea if you plan on tackling more home improvement projects. A well-equipped toolkit is the foundation for any successful installation, ensuring your new patio or walkway is built to last.

Essential Hand Tools

Let’s start with the basics. You’ll need a few essential hand tools to handle the manual work of preparing your base. A sturdy shovel is non-negotiable for digging out the project area, and a garden rake will be your best friend for spreading and roughly leveling the base material. For compaction in smaller areas or along edges, a hand tamper is incredibly useful. You’ll also want a rubber mallet to gently tap pavers into their final position without causing chips or cracks. Finally, don’t forget a tape measure and a level to keep your dimensions and surfaces accurate. These simple tools are the backbone of quality masonry work and are essential for a professional finish.

Compaction Equipment

Compaction is a step you absolutely cannot skip, and the right equipment makes all the difference. While a hand tamper works for tight spots, a plate compactor is the real hero for creating a solid, stable foundation. This machine uses vibration and weight to tightly pack the layers of gravel and sand, removing air pockets and preventing future settling. You can rent a plate compactor from most tool supply stores for a day or a weekend. Using one ensures your base is firm and ready to support your beautiful new porcelain or natural stone pavers for years to come, giving you a durable surface that can handle foot traffic and weather with ease.

Measuring and Leveling Tools

Precision is key to a paver installation that looks clean and professional. Your measuring and leveling tools are what get you there. Use a measuring tape and a string line to create a clear, accurate outline of your patio or walkway. This simple guide will help you keep your lines straight and your curves consistent. When it comes to leveling the sand layer, a set of screeds (long, straight pipes or boards) is invaluable. By pulling a flat board across the screeds, you can create a perfectly smooth and level surface for your pavers to sit on. This careful preparation is what separates an okay project from a stunning outdoor feature.

Maintaining Your Paver Base for Long-Term Stability

Once your paver project is complete, the work isn’t entirely over. Think of your paver base like the foundation of a house; it needs occasional check-ups to ensure everything stays strong and stable for years to come. Proper maintenance is what separates a hardscape that looks good for a season from one that looks beautiful for a lifetime. Fortunately, keeping your paver base in top condition doesn’t require a huge amount of effort. It’s all about being proactive and knowing what to look for. By performing simple, regular checks and addressing minor issues as they appear, you can prevent small problems from turning into costly repairs down the road. This ongoing care protects your investment and keeps your patio, walkway, or driveway safe, functional, and looking its best.

Perform Regular Inspections

A few times a year, take a walk around your paver installation with a critical eye. Regular inspection is the easiest way to maintain the integrity of your paver base. Look for weeds or moss growing between the pavers, as these can be early signs of underlying drainage issues or problems with base stability. Check for any pavers that seem lower than their neighbors or rock when you step on them. Catching these things early allows for a quick fix. If you notice widespread issues or aren’t sure what you’re looking at, our professional restoration and sealing services can help diagnose and solve the problem, preserving the beauty and safety of your hardscape.

Address Settling and Shifting

It’s natural for some minor settling to occur over time, especially with the changing seasons here on Long Island. If you find a paver or a small section that has sunk or shifted, it’s best to address it right away. This usually involves carefully lifting the affected pavers, adding and re-compacting the base material to bring it back to the correct height, and then resetting the pavers. This proactive approach restores the level surface, prevents trip hazards, and stops the problem from spreading. For more complex or larger areas of settling, our expert masonry team can provide a professional repair that seamlessly blends with your existing installation.

Maintain the Joint Sand

The sand between your pavers, especially polymeric sand, is the glue that locks everything together. Over time, weather and cleaning can wash some of it away. Maintaining the joint sand is essential, as it prevents pavers from shifting and keeps weeds from taking root, which can compromise the stability of the entire surface. After cleaning your patio or driveway, check the joints to see if they need a top-up. Simply sweep new polymeric sand into the gaps, lightly mist it with water to activate the binding agent, and let it cure. This simple step is one of the most effective ways to keep your natural stone pavers secure and looking pristine.

Common Paver Base Mistakes to Avoid

Even the most beautiful pavers will fail if the base isn’t right. A solid foundation is truly the secret to a patio, walkway, or driveway that lasts for decades. Unfortunately, this is where many DIY projects go wrong. Rushing through the prep work or cutting corners on materials can lead to sinking, shifting, and cracking down the road. By understanding the most common mistakes, you can make sure your hard work pays off and your outdoor space remains a source of pride, not problems. Let’s walk through the key pitfalls to sidestep for a flawless finish.

Using the Wrong Materials

It’s easy to think all gravel and sand are the same, but that’s a critical misstep. The materials you choose for your base directly impact the strength and longevity of your entire project. For instance, a garden path doesn’t face the same stress as a driveway that needs to support vehicles. Driveways require thicker, more durable pavers and a more robust base to handle the weight. Using the wrong type of aggregate or sand can lead to poor compaction and drainage issues. Always match your materials to the job at hand, ensuring you’re building a foundation that’s up to the task. Selecting high-quality porcelain and natural stone is just the first step; what’s underneath matters just as much.

Not Digging Deep Enough

One of the most frequent errors is not excavating deep enough for the base. Skimping on depth might save you a bit of time and effort upfront, but it will cost you later. A shallow base simply can’t provide the necessary support, leaving your pavers vulnerable to sinking and shifting. Most paver patios need at least six to eight inches of compacted base material, while driveways require even more to distribute the load of cars. The exact depth also depends on your soil type, especially with the clay-heavy soils we often see on Long Island. A proper excavation ensures your hardscape has a stable foundation that can withstand seasonal changes and daily use without failing.

Forgetting to Compact Each Layer

If there’s one step you absolutely cannot skip, it’s compaction. Failing to properly compact the base is the number one cause of paver problems. Simply dumping all your gravel in at once and running a compactor over the top won’t work. The base material must be added in layers, with each layer being thoroughly compacted before the next is added. This process locks the aggregate particles together, creating a dense, stable foundation that won’t settle over time. This meticulous approach is a hallmark of professional masonry services and is essential for a durable, long-lasting surface.

Ignoring Proper Drainage

Water is the biggest enemy of a paver installation. If it can’t drain away properly, it will pool beneath the surface, leading to heaving during freeze-thaw cycles and a soft, unstable base. Proper drainage starts with planning. Your paver surface should have a slight, consistent slope (about a quarter-inch drop per foot) to direct water away from your home’s foundation. In some cases, installing channel drains or using permeable pavers is the best strategy to manage water runoff effectively. Thinking about drainage from the very beginning prevents major headaches and protects your investment, ensuring your beautiful patio or walkway stays level and stable for years to come.

Related Articles

Frequently Asked Questions

Can I just use sand for the entire base to save money? While it might seem like an easy shortcut, using only sand for your base is one of the biggest mistakes you can make. Sand doesn’t compact and interlock the way crushed stone does, so it will shift and wash away over time. This creates an unstable foundation that will quickly lead to sinking pavers and an uneven surface. The crushed stone aggregate is what provides the structural support and drainage your hardscape needs to last.

How can I tell what kind of soil I have in my yard? A simple way to test your soil is the “squeeze test.” Grab a handful of moist soil (not soaking wet) and squeeze it in your fist. If it feels gritty and falls apart easily when you open your hand, you likely have sandy soil, which drains well. If it feels smooth and holds its shape like a ribbon, you have clay soil, which holds moisture and requires a deeper base. Knowing this helps you plan the right foundation depth from the start.

Is renting a plate compactor really necessary for a small project? Yes, it absolutely is. Proper compaction is the key to preventing your pavers from settling and shifting later on. A hand tamper can work for very tight corners, but it doesn’t provide the consistent, powerful force needed to lock the aggregate base together. Renting a plate compactor for a day is a small investment that ensures your base is solid and your hardscape remains stable for years.

What’s the real difference between regular sand and polymeric sand for the joints? Regular sand in the joints will wash out with rain and needs to be replaced often. It also does little to prevent weeds or ant hills. Polymeric sand, on the other hand, contains polymers that harden when activated with water. This locks the pavers together, creates a durable barrier against weeds and insects, and prevents the sand from eroding. It’s a finishing step that makes a huge difference in the longevity and maintenance of your project.

If my paver base is installed correctly, how long can I expect it to last? A professionally installed paver base, built with the right materials, proper depth, and thorough compaction, is designed to last for decades. It creates a stable foundation that can withstand Long Island’s weather cycles and everyday use without failing. While minor maintenance like topping off joint sand might be needed over the years, the structural integrity of the base itself should remain solid for the lifetime of your patio or walkway.

Outdoor Kitchen Built on a TimberTech Deck in Dix Hills

View Gappsi’s YouTube Channel to view Outdoor Kitchen Built on a TimberTech Deck in Dix Hills

Creating an outdoor living space that combines durability, functionality, and visual appeal requires thoughtful planning and expert craftsmanship. This recently completed backyard project by Gappsi showcases a custom-built outdoor kitchen installed on a TimberTech composite deck in Dix Hills, New York. The project demonstrates how high-quality materials and professional design can transform a backyard into a fully functional outdoor entertainment area.

This outdoor kitchen was designed to provide homeowners with a complete cooking and dining environment while complementing the surrounding deck and landscape. By integrating premium appliances, durable stone finishes, and advanced decking materials, the final installation delivers both performance and long-term value.

Outdoor Kitchen Built on a TimberTech Deck in Dix Hills Project

The project involved the construction of a fully equipped outdoor kitchen built directly on a TimberTech deck surface. The homeowners wanted a space that would allow them to cook and entertain outdoors while maintaining a clean, cohesive appearance throughout the backyard.

The outdoor kitchen includes:

  • Custom-built masonry structure
  • Natural stone veneer finish
  • Granite countertops
  • Wood-burning pizza oven
  • Built-in grill and burner
  • Outdoor refrigerator
  • Storage cabinets and drawers
  • Trash storage system
  • New TimberTech composite deck surface
  • Reinforced deck framing
  • New composite railings

The goal was to create a practical cooking space that blends seamlessly with the deck and surrounding environment while offering the durability needed for year-round outdoor use.

Structural Base Construction

The foundation of the outdoor kitchen was constructed using standard prefabricated fiber-reinforced cement boxes. These modular units provide a strong and stable base for outdoor kitchens and are ideal for supporting heavy materials such as stone veneers and granite countertops.

Fiber-reinforced cement construction offers several advantages:

  • High structural strength
  • Resistance to moisture
  • Fire resistance
  • Long lifespan
  • Minimal maintenance requirements

Using prefabricated components allowed for precise installation while ensuring structural reliability. Once installed, the cement boxes created a solid framework capable of supporting the stone veneer and heavy cooking equipment.

Travertine Stone Veneer Finish

The exterior surfaces of the outdoor kitchen were veneered with Fiorito travertine. Travertine is a popular choice for outdoor construction because of its natural beauty and durability.

The stone veneer consisted of pieces measuring both 2 inches and 4 inches in height. These were installed in a mixed-random pattern to create a natural, visually appealing texture.

The Fiorito travertine finish offers several benefits:

  • Warm natural coloration
  • Unique texture variations
  • Weather resistance
  • Timeless appearance
  • Compatibility with outdoor environments

outdoor-kitchen-built-on-a-timbertech-deck-in-dix-hills

The random pattern installation gives the kitchen a handcrafted look while avoiding a repetitive or artificial appearance. This method enhances the stone’s natural character and allows the kitchen to blend with the outdoor setting.

The neutral tones of the travertine complement the deck and railings, creating a unified design throughout the backyard.

Granite Countertops for the Outdoor Kitchen Display

The countertops were fabricated from polished Tan Brown granite, a dense and durable natural stone that performs exceptionally well in outdoor environments.

Granite is commonly used for outdoor kitchens because it offers:

  • High resistance to heat
  • Scratch resistance
  • Weather durability
  • Low maintenance
  • Long-term performance

The Tan Brown granite features a rich blend of earth tones that coordinate well with the travertine veneer and TimberTech decking.  Square-edge detailing was selected for the countertop finish. This clean-edge profile provides a modern appearance while maintaining a solid, substantial feel.  The polished surface makes the countertops easy to clean while enhancing the stone’s natural color and pattern

Outdoor Kitchen Premium Outdoor Appliances

The outdoor kitchen was equipped with a full range of premium outdoor appliances designed for performance and durability.  Most of the cooking equipment and storage components were manufactured by Twin Eagles, a brand known for high-quality outdoor kitchen products.

The installation includes:

  • Built-in grill
  • Gas burner
  • Storage cabinets
  • Drawers
  • Trash drawers
  • Access doors

Twin Eagles components are constructed from high-grade stainless steel, designed to withstand outdoor conditions while maintaining their appearance.  These appliances allow homeowners to prepare a wide variety of meals without needing to go indoors.

Wood-Burning Pizza Oven

One of the standout features of the outdoor kitchen is the wood-burning pizza oven. This addition transforms the cooking area into a versatile culinary space capable of producing restaurant-quality pizza and other wood-fired dishes.

Wood-fired ovens provide:

  • Authentic cooking flavor
  • High cooking temperatures
  • Efficient heat retention
  • Versatility for different foods

The pizza oven was integrated into the stone structure to match the kitchen’s overall design. The natural stone veneer surrounding the oven creates a cohesive and professional appearance.  This feature makes the outdoor kitchen ideal for entertaining guests and hosting gatherings.

Twin Eagles Outdoor Refrigerator Installation

The kitchen also features a built-in refrigerator from Summit Appliance.

Outdoor refrigeration is an essential feature for any complete outdoor kitchen. The refrigerator provides convenient access to beverages and ingredients without requiring trips inside the house.

Benefits of the Summit refrigerator include:

  • Compact design
  • Energy efficiency
  • Reliable cooling
  • Outdoor-rated construction

The refrigerator was carefully integrated into the kitchen layout to maintain a clean, organized design.

TimberTech Deck Installation

The outdoor kitchen was built on a newly resurfaced TimberTech deck.  The original deck framing was retained but reinforced to support the additional weight of the kitchen and stone materials. Reinforcing the structure ensures long-term stability and safety.  The deck surface was replaced using TimberTech composite decking in 6-inch planks.  TimberTech decking offers several advantages over traditional wood:

  • Resistance to moisture
  • No splintering
  • Minimal maintenance
  • Fade resistance
  • Long lifespan

Composite decking eliminates the need for frequent staining or sealing, making it ideal for busy homeowners who want a low-maintenance outdoor space.  The wide 6-inch planks create a clean and contemporary appearance while providing a comfortable walking surface.

Reinforced Deck Structure

Because the outdoor kitchen features heavy masonry and stone, the deck structure required reinforcement.  The existing framing was strengthened to ensure that the deck could safely support:

  • Cement construction modules
  • Stone veneer
  • Granite countertops
  • Appliances
  • Pizza oven

Proper reinforcement is critical for outdoor kitchens built on elevated deck surfaces. This step ensures that the installation remains safe and stable for many years.

Composite Railings

New TimberTech railings were installed to complement the deck surface.  The railing system features a brown-and-black color combination that matches the tones of the decking and stone veneer.  Composite railings provide several benefits:

  • Weather resistance
  • Minimal maintenance
  • Long-term durability
  • Consistent appearance

The coordinated color scheme helps unify the deck and kitchen into a single cohesive outdoor living space.

Design Integration

One of the most important aspects of this project was achieving a cohesive design.  The following elements were carefully coordinated:

  • Travertine stone veneer
  • Granite countertops
  • Composite decking
  • Railing colors
  • Stainless steel appliances

The warm tones of the travertine and granite pair naturally with the brown and black decking components.  This coordination creates a professional appearance that enhances the property’s value.

Functional Outdoor Living Space

This outdoor kitchen was designed to function as a complete cooking and entertainment center.  The layout allows multiple people to use the space comfortably.  The homeowners can:

  • Grill meals
  • Cook on the gas burner
  • Bake in the pizza oven
  • Store food and beverages
  • Prepare meals on the granite countertops
  • Entertain guests outdoors

The result is a backyard environment that encourages outdoor living throughout the warmer months.

Craftsmanship and Installation

The project reflects careful craftsmanship and professional installation.  Key construction steps included:

  • Structural reinforcement
  • Precision stone installation
  • Appliance integration
  • Countertop fabrication
  • Deck resurfacing
  • Railing installation

Attention to detail ensures that each component fits together properly and functions as intended.

A Modern Backyard Upgrade

This outdoor kitchen project represents a modern approach to backyard design.  By combining masonry construction with composite decking, the installation provides both durability and style.  The finished space offers:

  • Long-lasting materials
  • Professional construction
  • Functional cooking space
  • Attractive design
  • Low maintenance requirements

This outdoor kitchen, built on a TimberTech deck in Dix Hills, NY, demonstrates how thoughtful design and quality materials can transform a backyard into a highly functional outdoor living space.  Using fiber-reinforced cement construction, Fiorito travertine stone veneer, polished Tan Brown granite countertops, and premium appliances, the project delivers both beauty and durability.

The reinforced TimberTech deck and coordinated railings complete the installation, creating a cohesive and long-lasting outdoor environment.

Designed and built by Gappsi, this project represents the latest in outdoor kitchen construction and composite deck integration, providing homeowners with a comfortable, practical space for cooking, dining, and entertaining.

Contact Gappsi Today

📍 Serving all of Long Island, NY — Nassau & Suffolk Counties
🌐 www.gappsi.com
📞 Call now for a free consultation and estimate!

SCHEDULE A MEETING TODAY WITH GAPPSI

A person choosing new tile samples for a bathroom renovation with a contractor.

How to Pick a Bathroom Renovation Contractor

Your bathroom should be more than just a functional space; it can be a personal retreat where you start and end your day. But turning that vision of a spa-like oasis or a highly efficient family bathroom into reality requires more than just good taste. It requires expert planning and execution. A skilled bathroom renovation contractor is the partner who bridges the gap between your dream design and a beautifully finished room. They guide you through the endless choices of fixtures, layouts, and materials, ensuring every decision contributes to a cohesive and functional space. In this article, we’ll break down the entire process, showing you how a professional can make your renovation seamless and successful.

Key Takeaways

  • A contractor is your project manager: A professional contractor handles every detail beyond construction, including design, permits, and coordinating specialized trades like plumbers and electricians to ensure the project runs smoothly.
  • Vet your contractor carefully: Protect your investment by verifying a contractor’s license and insurance, reviewing their portfolio, comparing itemized quotes, and speaking directly with recent client references before you hire them.
  • Plan for success with a solid budget and timeline: Establish a clear budget that includes a 10-20% contingency fund for unexpected issues, and understand the step-by-step renovation timeline to manage your expectations for a stress-free process.

What Does a Bathroom Renovation Contractor Actually Do?

When you decide to remodel your bathroom, you’re not just hiring someone to swing a hammer. A great renovation contractor is your project manager, designer, and lead problem-solver all rolled into one. They are the person responsible for turning your vision into a reality, managing every single detail from the initial demolition to the final coat of paint. Think of them as the conductor of an orchestra; they coordinate all the different players, like plumbers, electricians, and tilers, to ensure they work together seamlessly and efficiently.

A contractor handles the less glamorous but essential parts of the job, like securing the right permits, ordering materials, and making sure everything complies with local building codes. This comprehensive oversight is what separates a smooth, stress-free renovation from a chaotic one. By hiring a professional home remodeling team, you get a single point of contact who is accountable for the project’s timeline, budget, and quality. They take on the logistical burdens so you can focus on the exciting part: watching your new bathroom take shape.

Designing Your Layout

One of the first things a contractor does is help you perfect the layout. They have the experience to see possibilities you might miss, ensuring you make the best use of your bathroom space. A skilled contractor can help you map out a floor plan that improves flow and functionality, whether that means adding a spacious walk-in shower, finding the perfect spot for a freestanding tub, or incorporating smart storage solutions. They’ll take your ideas and inspiration photos and translate them into a practical, buildable design that fits your home’s structure and your family’s needs, making sure every inch is put to good use.

Handling Plumbing and Electrical

So much of a bathroom’s function happens behind the walls, and this is where a contractor’s technical expertise is crucial. They manage the licensed plumbers and electricians needed to move water lines and run new wiring safely. This includes installing new, water-saving toilets, elegant showerheads, and stylish faucets. If you’re dreaming of a double vanity, heated floors, or better lighting, your contractor will ensure all the electrical work is done correctly and up to code. They handle the complex, technical tasks that are essential for your bathroom to not only look beautiful but also function perfectly and safely for years to come.

Installing Tile and Flooring

Tile and flooring set the entire tone for a bathroom, and proper installation is an art form. A contractor oversees the meticulous work of installing all kinds of materials, from classic subway tile to large-format porcelain and natural stone. They ensure the surfaces are properly prepared and, most importantly, completely waterproofed, especially in wet areas like the shower. This prevents leaks, water damage, and mold growth down the line. From perfectly level floors to flawless grout lines, a professional ensures your tile work is not only stunning to look at but also durable enough to withstand daily use.

Upgrading Your Fixtures

From the tub to the toilet, your contractor is responsible for installing all the major fixtures that make a bathroom a bathroom. They expertly upgrade showers and tubs, whether you’re looking for a luxurious walk-in shower with a seamless glass enclosure, a deep soaking tub for ultimate relaxation, or an accessible design for easier use. They also handle the installation of sinks, toilets, and ventilation fans, ensuring everything is securely fitted and functions correctly. This part of the process is where you really see the room come to life, as the big pieces you’ve chosen are finally put into place.

Creating Custom Storage

Clutter can quickly ruin the serene vibe of a new bathroom, which is why smart storage is so important. A renovation contractor can help you design and install custom storage solutions that keep your space organized and beautiful. This could mean fitting a modern floating vanity, building recessed medicine cabinets, or creating clever shelving niches inside the shower wall for your toiletries. Whether you need a vanity with double sinks for a busy household or sleek, minimalist cabinets, your contractor brings the carpentry and design skills to create storage that perfectly fits your space and style.

How to Choose the Right Bathroom Contractor

Finding the right contractor is the most important decision you’ll make for your bathroom remodel. This is the person you’re trusting to manage the budget, timeline, and quality of your project, so it’s worth taking the time to find a true professional. A great contractor brings your vision to life, while a poor one can turn your dream project into a headache. To make sure you find a great partner, focus on these five key areas.

Check Their Credentials and Insurance

Before you even start talking about tile and tubs, do a quick background check. A reputable contractor will be fully licensed and insured in New York, and they should be happy to provide you with their license number. This isn’t just a formality; it’s your protection. Proper insurance, including liability and workers’ compensation, shields you from financial responsibility if an accident happens on your property. Think of it as the essential foundation for a successful project. Any hesitation from a contractor to share this information is a major red flag. A true professional understands that these credentials build the trust needed for a great working relationship and a beautiful home remodeling project.

Review Their Portfolio

Once you’ve confirmed a contractor is licensed and insured, it’s time for the fun part: looking at their work. Ask to see a portfolio of their completed bathroom remodels. You’re not just looking for pretty pictures; you’re looking for proof of their expertise. Do they have experience with the style you want? Pay close attention to the details, like the tile work, fixture installation, and custom cabinetry. A strong portfolio showcases a contractor’s craftsmanship and their ability to handle projects similar to yours. You can often find project photos and videos on a contractor’s website or social media channels, which can give you a great feel for their work before you even pick up the phone.

Compare Detailed Quotes

Don’t just go with the first quote you get, and never choose based on price alone. Request detailed, itemized quotes from at least three different contractors. A professional quote should break everything down clearly, including the costs for labor, materials, permits, and any other expenses. This transparency allows you to compare apples to apples and understand exactly what you’re paying for. Be wary of a bid that’s significantly lower than the others, as it could signal subpar materials or hidden costs down the line. A thorough quote reflects a contractor’s professionalism and helps prevent misunderstandings about the project scope and budget.

Gauge Their Communication Style

A bathroom remodel involves a lot of moving parts, so clear and consistent communication is crucial. During your initial conversations, pay attention to how the contractor interacts with you. Are they responsive to your calls and emails? Do they listen to your ideas and answer your questions thoroughly? A good contractor will explain their process, set clear expectations for communication, and let you know who your main point of contact will be. This partnership will last for weeks or even months, so you want to work with someone you can easily talk to. A strong communicator will keep you informed and confident throughout the entire remodeling process.

Read Reviews and Ask for References

Online reviews and client references provide a real-world look at what it’s like to work with a contractor. Go beyond the star ratings and read through the comments to find patterns. Do clients consistently praise their punctuality, cleanliness, and problem-solving skills? Don’t hesitate to ask a contractor for a list of recent references you can speak with directly. When you call, ask specific questions about their experience. Were they happy with the final result? Did the project stay on budget and on schedule? Hearing directly from past clients is one of the best ways to verify a contractor’s reputation and ensure you’re making the right choice.

Budgeting for Your Bathroom Remodel

Talking about money can feel tricky, but setting a clear budget is one of the most important steps in any renovation. It helps you and your contractor get on the same page and ensures your project stays on track without any stressful financial surprises. Think of your budget as the roadmap for your remodel; it guides every decision, from the tile you choose to the type of faucet you install. A well-planned budget is your best tool for turning your vision into a reality you can comfortably afford. Let’s break down what goes into the cost of a bathroom remodel so you can plan with confidence.

What Affects the Final Cost?

The final price tag on a bathroom remodel depends on a few key factors. First is the size of the space. A small powder room will naturally cost less than a sprawling primary bathroom. The scope of the project also plays a huge role. Are you simply swapping out the vanity and toilet, or are you moving walls and reconfiguring the entire plumbing layout? The more complex the job, the higher the cost. Finally, your choice of materials is a major driver. As experts will tell you, the quality of materials used in your bathroom remodel can significantly impact the longevity and appearance of the finished project. High-end porcelain and natural stone tiles, custom cabinetry, and luxury fixtures will cost more upfront but can add lasting value and enjoyment to your home.

Breaking Down the Average Costs

While every project is unique, it helps to have a general idea of what to expect financially. Based on industry averages, a small full bathroom remodel can start around $22,000. For a larger primary bathroom, which might include features like a separate soaking tub, a walk-in shower, and a double vanity, the starting point is often closer to $50,000. These figures typically cover everything from demolition and labor to materials and new fixtures. Remember, these are just starting points. The final cost will depend on the specific details of your home remodeling project and the finishes you select. Having a baseline helps you understand the investment and prepare for productive conversations with your contractor.

How to Read a Quote

Once you start meeting with contractors, you’ll receive quotes or estimates. It’s important to know how to read them so you can make an informed decision. A professional contractor will provide a detailed written estimate that includes a breakdown of labor, materials, and other costs. You should avoid vague, one-line quotes that don’t specify where your money is going. A good quote should be itemized, listing the costs for things like the vanity, toilet, tile, plumbing work, and electrical updates. It should also outline a clear payment schedule. This transparency not only protects you but also shows that the contractor has a solid, well-thought-out plan for your project. Don’t be afraid to ask questions if anything is unclear.

Plan for the Unexpected

Even with the most careful planning, renovations can sometimes uncover surprises, like old plumbing issues or hidden water damage behind the walls. That’s why it’s smart to build a contingency fund into your budget. Most experts recommend setting aside an extra 10% to 20% of your total project cost for these unforeseen expenses. It’s also wise to plan for the project timeline. The typical wait time to start a new bathroom remodel is 60-90 days, so it’s best to begin the process well before you want the work to start. Having a financial cushion and a realistic timeline will make the entire process smoother and much less stressful, allowing you to focus on the exciting transformation ahead.

Your Renovation Timeline: A Step-by-Step Guide

Understanding the renovation process from start to finish helps you know what to expect. While every project is unique, a bathroom remodel generally follows a clear sequence of events. A professional contractor will manage this timeline, keeping you informed every step of the way so you can feel confident and prepared. This roadmap breaks down the journey into four main phases, from the first conversation about your dream bathroom to the final sign-off. Knowing these steps helps you see how your vision will come to life.

Step 1: Consultation and Design

This is where the fun begins. The first step is the initial consultation, where you’ll meet with our design team to discuss your vision, goals, and budget. After you select a contractor, you’ll work together to lay the groundwork for your home remodeling project. We’ll take measurements of your space and create detailed plans and 3D renderings so you can visualize the final result. During this phase, you’ll also make key decisions on materials, from tile and countertops to fixtures and lighting. We’ll refine the design until it perfectly matches your style and functional needs, ensuring every detail is planned before any construction starts.

Step 2: Getting Permits and Materials

Before the first hammer swings, there’s important work happening behind the scenes. If your renovation involves moving walls or changing the plumbing or electrical layout, we’ll need to secure the proper permits from your local municipality. Gappsi handles this entire process for you, making sure your project is fully compliant with Long Island building codes. This is also when we order all the materials for your bathroom, including beautiful porcelain and natural stone, vanities, and fixtures. We coordinate the delivery of these items to align with the construction schedule, preventing delays and ensuring everything is on-site when needed.

Step 3: The Construction Phase

Now it’s time to bring the design to life. The construction phase kicks off with demolition, where we carefully remove old fixtures and materials. Next, our skilled tradespeople complete the “rough-in” work for new plumbing and electrical systems. After inspections, we move on to installing drywall, flooring, and tile. Our expert masonry team ensures every tile is perfectly placed. Finally, we’ll paint, install the vanity, connect the fixtures, and add the finishing touches. While this phase can take several weeks, we work efficiently to minimize disruption to your daily life and keep the project on track.

Step 4: The Final Walkthrough

Once the construction is complete, we’ll conduct a final walkthrough with you. This is your opportunity to inspect every detail of your new bathroom and ensure the craftsmanship meets your expectations. Together, we’ll create a “punch list” of any minor adjustments or touch-ups that may be needed. Our goal is your complete satisfaction, so we’ll address every item on the list before officially calling the project finished. After the final sign-off, your beautiful new bathroom is all yours to enjoy. You can find accessories and other home goods at the Gappsi Store to complete your new space.

Related Articles

Frequently Asked Questions

How long will my bathroom remodel actually take? The timeline for a bathroom remodel depends entirely on the scope of the work. A straightforward project that involves replacing fixtures and tile might take two to three weeks. However, a complete renovation that includes moving walls, reconfiguring plumbing, and custom work can take six to eight weeks or longer. A professional contractor will give you a detailed project schedule before any work starts, so you’ll have a clear understanding of the timeline from day one.

Do I need to find and hire my own plumber and electrician? No, you don’t have to worry about coordinating different tradespeople. A full-service renovation contractor manages the entire team for you. They bring in their trusted, licensed, and insured plumbers, electricians, and other specialists at the right moments. This ensures all the technical work is done correctly and up to code, and it gives you one reliable point of contact for the entire project.

Can I live in my house while the renovation is happening? Yes, in most cases, you can absolutely stay in your home during the remodel. Professional crews are skilled at containing the work area to minimize dust and disruption to the rest of your house. They will protect your floors and clean up the site daily. If the bathroom being renovated is the only one in your home, your contractor can discuss options to make the process as manageable as possible.

What happens if I want to make a change after the project has started? It is possible to make changes mid-project, but it’s important to address them as soon as you think of them. Changes to the plan can impact both the budget and the schedule. Your contractor will handle this by creating a “change order,” which is a document that details the new work and the associated costs. You will review and approve it before any adjustments are made, ensuring everything remains clear and transparent.

Why can’t I get a simple price quote over the phone? A responsible contractor won’t give you a quote without seeing the space first. An accurate price depends on many factors, including the current condition of your bathroom, the complexity of the design, and the specific materials you choose. An in-person consultation allows a contractor to take precise measurements and understand your goals, which leads to a detailed, itemized quote that you can actually rely on, preventing unexpected costs down the road.

A professionally built Hamptons tennis court with a pergola and seating area.

How to Choose a Hamptons Sports Courts Builder

Life in the Hamptons is all about embracing the outdoors, and a private sports court is the perfect extension of that lifestyle. However, building here comes with its own unique set of rules and challenges. From navigating strict local zoning laws to selecting materials that can withstand the coastal salt air and weather, local expertise is non-negotiable. You need more than just a contractor; you need a specialist who understands the nuances of the area. This is why choosing the right Hamptons Long Island new york sports courts builder company is so critical to your project’s success and longevity.

Key Takeaways

  • Choose a builder with local expertise: Select a team that manages the entire project, from design and permits to construction, and has a proven portfolio of work in the Hamptons.
  • Prioritize quality from the ground up: A long-lasting court depends on a solid foundation, effective drainage, and high-performance materials specifically chosen to withstand a coastal environment.
  • Design a court that fits your lifestyle: Think about how your family will use the space by considering versatile multi-sport layouts, popular games like pickleball, and features like lighting for nighttime play.

What Makes a Great Sports Court Builder in the Hamptons?

Building a sports court is a fantastic addition to your Hamptons home, but it’s also a significant project. The difference between a court you’ll love for years and one that causes headaches comes down to the builder you choose. A great builder isn’t just a contractor; they are a partner who brings expertise, quality, and a deep understanding of what it takes to build in this unique area. They should guide you through every step, from initial design to the final net installation, ensuring the result is exactly what you envisioned. So, what key qualities should you look for? It boils down to a few critical factors that separate the best from the rest.

Look for Proven Experience

When you’re vetting builders, look for a team with a strong portfolio of projects specifically in the Hamptons and across Long Island. Local experience is invaluable. A builder who knows the area understands the specific soil conditions, weather patterns, and zoning regulations that can impact a build. Ask to see their previous work and look for a company that offers personalized, one-on-one service. The best builders are hands-on, with a dedicated project manager or even the owner present on-site to oversee the work. This level of attention ensures high standards and a smooth process from start to finish. A company with a long history of building sports courts will have the expertise to deliver a court that lasts.

Insist on High-Quality Materials

The longevity, safety, and performance of your court depend entirely on the materials used. A top-tier builder will offer a range of high-quality surfacing options and help you choose the right one for your needs. Whether you’re interested in classic asphalt, cushioned synthetic turf, or modern interlocking tiles like Mateflex, your builder should explain the benefits of each. They should source their materials from reputable suppliers and be transparent about what goes into your court. Don’t hesitate to ask about the specific products they use, from the base layer to the final surfacing. A commitment to quality materials, like premium natural stone for surrounding patios, is a clear sign of a builder who takes pride in their work.

Find a Partner for Design and Construction

Your builder should be a partner in both design and construction. They should listen to your vision and then use their expertise to bring it to life while avoiding common pitfalls. For example, proper drainage is absolutely essential for any court to prevent water from pooling and creating a slippery, unsafe surface. A skilled builder will incorporate a thoughtful drainage plan into the initial design. They will also guide you in selecting the right surfacing material to match your desired activities and aesthetic. Look for a company that offers comprehensive design and construction services, ensuring a cohesive and well-executed project from the ground up.

Confirm They Manage Local Permits

Navigating the building codes and permit requirements in the Hamptons can be a complex and time-consuming process. A professional and experienced sports court builder will handle this for you. They should have a thorough understanding of local regulations and manage all the necessary paperwork and inspections. This service is a huge relief for homeowners and a hallmark of a truly full-service company. When a builder confidently takes on the logistics of permitting, it shows they are well-established and knowledgeable about the local requirements. This is a key part of any major home improvement project and ensures your new court is fully compliant from day one.

What Are the Most Popular Sports Courts in the Hamptons?

Choosing the right type of sports court for your home is about more than just picking a game. It’s about creating a space for fun, fitness, and making memories with family and friends. In the Hamptons, homeowners are embracing a variety of sports, each with its own unique appeal. From timeless classics to the latest trends, the right court can become the centerpiece of your backyard. Understanding what’s popular can help you decide which option best fits your lifestyle, property, and how you plan to enjoy your outdoor space for years to come.

Tennis Courts

A private tennis court is a classic Hamptons feature for a reason. It offers a fantastic workout and a perfect setting for social gatherings. Having a court in your backyard provides a private, convenient place to practice your swing or host friendly matches without booking public court time. To get the authentic feel of the game, it’s essential that the court is built with professional-grade materials and precise dimensions. A well-constructed court not only plays better but also stands up to the coastal weather, ensuring it remains a beautiful and functional part of your property.

Basketball Courts

Basketball courts are another top choice, especially for families. They offer endless entertainment and are a great way to keep everyone active. Whether you’re planning for full-court games or just a space for your kids to practice their free throws, a custom design is key. You can tailor the size, surface, and markings to fit your specific needs and the layout of your yard. Gappsi specializes in designing and building custom sports game courts that are both high-performance and visually appealing, creating the perfect home court for players of all skill levels.

Pickleball Courts

Pickleball has quickly become one of the most requested sports courts, and it’s easy to see why. The game is fun, social, and accessible to all ages and athletic abilities. Because a pickleball court is smaller than a tennis court, it’s a practical option for a wider range of properties. Many homeowners are now opting for dedicated pickleball courts to join in on the fun. Proper installation is crucial for a consistent bounce and long-term durability, ensuring your court is always ready for a game when friends drop by.

Multi-Sport Courts

If you can’t decide on just one sport, a multi-sport court offers the ultimate versatility. This is an incredibly popular option for families with varied interests, allowing you to play basketball, pickleball, volleyball, and more, all in one designated area. A thoughtful design can incorporate adjustable nets and different line markings without feeling cluttered. Working with an experienced builder allows you to create a flexible recreational space that adapts to your family’s favorite activities, maximizing both the fun and the value of your investment.

What Materials and Technologies Do the Best Builders Use?

A beautiful sports court is more than just perfectly painted lines and a net. The real quality lies in the materials and construction techniques that you can’t always see. A premier builder combines time-tested methods with modern innovations to create a court that not only looks fantastic but also performs exceptionally and stands up to the Hamptons weather for years. From the ground up, every layer matters. An expert team will know exactly which materials and technologies are right for your property and the sports you love to play, ensuring your court is a lasting investment. This is where a builder’s deep knowledge truly makes a difference, turning a simple project into a professional-grade recreational space.

Choose the Right Court Surface

The surface of your court is one of the most important decisions you’ll make. It directly impacts playability, safety, and maintenance. For tennis, you might prefer the classic feel of a cushioned acrylic hard court, known for its consistent ball bounce. For basketball, a high-traction surface is key. If you’re looking for a low-impact option that’s easy on the joints, you might consider high-performance synthetic turf and game courts. A great builder won’t just present you with options; they’ll explain the pros and cons of each material based on your needs, helping you find the perfect match for your family’s activities.

Plan for a Solid Foundation and Drainage

What’s underneath your court is just as crucial as the surface itself. A solid, stable foundation is the key to a long-lasting court that won’t crack or shift over time. Without it, you’re setting yourself up for expensive repairs down the road. Equally important is proper drainage. In a place like the Hamptons, you need a court that can handle rain without turning into a pond. An experienced builder will meticulously plan for water runoff as part of a complete landscape design, ensuring your court dries quickly and remains safe and playable after a storm. This foundational work is a hallmark of true craftsmanship.

Add Lighting and Tech Features

Why limit your games to daylight hours? Modern lighting and technology can transform your court into a 24/7 entertainment hub. Energy-efficient LED lighting provides bright, even illumination for nighttime play without disturbing your neighbors. Beyond lighting, you can incorporate features like shock-absorbing surfaces to reduce stress on joints, multi-sport accessories for easy conversion between games, and even integrated sound systems. Discussing these features with your builder during the design phase ensures they are seamlessly integrated into the final build, adding functionality and fun to your investment.

Prioritize Weather-Resistant Construction

The coastal environment of the Hamptons, with its sun, salt air, and seasonal changes, can be tough on outdoor structures. The best builders understand this and use materials specifically designed to withstand the elements. This includes UV-resistant surface coatings that prevent fading and cracking, rust-proof fixtures, and durable fences and netting that can handle strong winds. By prioritizing weather-resistant construction, a builder ensures your court will maintain its pristine look and structural integrity for many seasons, minimizing the need for constant upkeep and allowing you more time to simply enjoy the game.

How to Choose the Right Builder

Selecting the right builder is the most critical decision you’ll make for your sports court project. The right team will not only deliver a high-quality court but also make the entire process smooth and enjoyable. You’re looking for a partner who understands your vision, respects your property, and has the expertise to bring your dream court to life. Think of this as hiring a long-term collaborator for your home. A great builder communicates clearly, provides transparent pricing, and has a proven track record of success right here in the Hamptons. Taking the time to vet your options thoroughly will pay off for years to come, ensuring your court is a source of fun, not frustration.

Verify Their Credentials and Insurance

Before you get into the exciting details of design, start with the fundamentals. Any professional builder you consider must be fully licensed and insured. This is non-negotiable. Licensing confirms they meet state and local requirements, while insurance protects you from any liability for accidents that might happen on your property during construction. A reputable company will gladly provide you with their documentation. This simple step ensures you’re working with a legitimate business that adheres to industry standards and is committed to protecting both their team and their clients. It’s the first and most important sign that you’re dealing with a true professional.

Schedule a Personal Consultation

A website or phone call can only tell you so much. The best way to get a feel for a builder is to schedule an in-person consultation at your home. This meeting is your chance to discuss your project, ask questions, and see how they respond. Do they listen carefully to your ideas? Do they offer thoughtful suggestions? A quality builder will take the time to walk your property, assess the space, and provide initial feedback. This personal interaction is invaluable for gauging their expertise and professionalism. It also helps you determine if your personalities and communication styles are a good fit for a major construction project.

Review Their Full Scope of Services

To keep your project streamlined and stress-free, look for a builder who offers comprehensive services. The ideal partner can manage everything from the initial design to the final installation. Companies that handle sports court design, material supply, and construction in-house can prevent the delays and miscommunications that often happen when you’re juggling multiple contractors. Ask potential builders to walk you through their entire process. A full-service company ensures a cohesive project where every element, from the foundation to the fencing, is handled by a single, accountable team. This integrated approach almost always leads to a better final product and a much smoother experience for you.

Ask About Warranties and Maintenance Plans

A sports court is a significant investment, and you want it to last. A confident builder will stand behind their work with a strong warranty. Don’t hesitate to ask for specifics. What does the warranty cover, and for how long? Some top-tier builders offer warranties that span decades, which speaks volumes about the quality of their materials and craftsmanship. Beyond the initial build, ask about ongoing maintenance. A company that offers restoration and sealing services shows a long-term commitment to their clients. This ensures you have a trusted partner to help keep your court in pristine condition for years of play.

Check Their Reputation and Reviews

Finally, do your homework on the builder’s reputation. Look for online reviews, client testimonials, and portfolio examples. While a company’s website is a great starting point, independent reviews will give you a more balanced perspective on the customer experience. See what past clients have to say about the builder’s communication, timeliness, and the quality of the finished product. You can also check out their social media channels, like YouTube, to see their work in action. Positive feedback and a portfolio of impressive projects are strong indicators that you’ve found a reliable and skilled builder who will deliver the court you’ve envisioned.

What to Expect During the Build

Once you’ve selected your builder, the journey to your new home sports court truly begins. This phase is all about turning plans into reality, and a professional team will make the process feel seamless and exciting. A great builder acts as your partner, keeping you informed every step of the way. From the first shovel in the ground to the final net installation, you should feel confident and clear about what’s happening on your property.

The construction of a custom sports court is a major project that involves careful coordination and expert execution. It’s more than just leveling a patch of land; it involves site preparation, foundation work, surface installation, and finishing touches like fencing and lighting. Your builder should provide a clear roadmap of the entire process, outlining key milestones and what to expect at each stage. Communication is key, so make sure you have a dedicated point of contact who can answer your questions and provide regular updates. This collaborative approach ensures the final result not only meets but exceeds your expectations, giving you a beautiful and functional court for years of enjoyment.

The Initial Site Evaluation and Design

The first step in the build process is a thorough site evaluation. Your builder will visit your property to assess the proposed location, taking careful measurements and analyzing the landscape. This isn’t just about aesthetics; it’s a critical technical step. One of the most important factors they’ll examine is drainage. Proper water management is essential for preventing puddles and ensuring your court has a safe, dry playing surface that lasts. During this phase, you’ll also finalize the design, working with your builder to integrate the court beautifully into your existing landscape.

Finalizing the Price and Timeline

With a design in hand and a site plan confirmed, your builder will provide a detailed proposal. This document should clearly outline the full scope of work, a transparent breakdown of costs, and a realistic project timeline. A large-scale construction project like a sports court requires a high level of coordination, so a well-defined schedule is crucial for keeping everything on track. Review this document carefully and ask questions about anything that seems unclear. A trustworthy builder will be happy to walk you through every line item, ensuring you feel completely comfortable with the investment and the projected completion date before work begins.

Getting the Right Permits

Building a sports court in the Hamptons almost always requires permits from your local town or village. This can be a complicated and time-consuming process involving paperwork, zoning laws, and inspections. A full-service builder will manage this entire process for you. They have the experience to prepare and submit all the necessary applications correctly, handle communications with local officials, and schedule required inspections. Having a team that can manage the permits is a huge advantage, saving you from headaches and potential delays while ensuring your project is fully compliant with local regulations.

Preparing for Potential Challenges

Even with the best planning, any construction project can face unexpected challenges, from weather delays to supply chain issues. An experienced builder knows how to anticipate these potential hurdles and has contingency plans in place to address them effectively. They also guide you in making crucial decisions upfront, like choosing the right surfacing material for your court’s performance and durability. By selecting a builder with deep knowledge of high-quality materials and construction techniques, you can feel confident that your project is in capable hands, ready to overcome any obstacles that may arise.

Related Articles

Frequently Asked Questions

How long does it typically take to build a sports court? The timeline for building a sports court can vary quite a bit. Factors like the complexity of the design, the amount of site preparation needed, local permit processing times, and even the weather can play a role. A straightforward project might take several weeks from start to finish, while a more intricate build with extensive landscaping could take longer. A professional builder will give you a detailed and realistic timeline before any work begins.

What are the main factors that influence the cost of a new sports court? The final cost depends on a few key decisions. The overall size of the court is a major factor, as is the type of playing surface you select; for example, synthetic turf and cushioned acrylic surfaces have different price points. The condition of your property also matters, as extensive excavation or drainage work can add to the cost. Finally, any custom features like professional lighting, high-end fencing, or multi-sport accessories will influence the total investment.

How much maintenance does a home sports court actually require? The level of upkeep really depends on the surface material you choose. Most modern courts are designed to be low-maintenance, generally just requiring you to keep them clear of leaves and debris. Some surfaces may benefit from a periodic power wash to stay looking fresh. Over the long term, a hard court surface might need to be resealed or repainted every five to seven years to maintain its performance and appearance, but your builder can provide a specific care plan for your court.

I’m not sure if I have enough space. What’s the minimum area needed for a court? You might be surprised by what’s possible, even in a yard that doesn’t seem huge. While a regulation tennis court requires a large footprint, a pickleball court is much smaller and can fit into more compact spaces. Half-court basketball is another fantastic option for maximizing fun in a limited area. The best way to know for sure is to have a professional designer evaluate your property; they are experts at creating functional and fun layouts that work with the space you have.

Can I customize the look of my court with specific colors or logos? Absolutely! Customizing the appearance of your court is one of the most exciting parts of the design process. Modern court surfaces are available in a wide variety of colors, so you can choose a scheme that complements your home and landscape design. Many homeowners also add custom logos, family initials, or unique line markings to make the space truly their own. This is a great detail to discuss with your builder during the initial design consultation.

One of the best house extension ideas for a ranch home, featuring a modern sunroom with large windows.

6 Best House Extension Ideas for Ranch Homes

One of the best features of a ranch home is its architectural simplicity, which makes it an incredible canvas for creative updates. Unlike more complex home styles, the clean lines and sprawling layout of a ranch provide amazing flexibility when it comes to adding on. You can seamlessly blend a new addition or create a stylish, modern contrast. This design freedom opens up a world of possibilities for transforming your home. To help you get inspired, we’ve gathered the best house extension ideas for ranch homes, covering everything from sunrooms that blur the line between indoors and out to second-story additions that completely reshape your living space. Let’s look at how you can build upon your home’s classic charm.

Key Takeaways

  • A solid plan is your best tool: Before you begin, understand local zoning laws, secure the necessary permits, and create a detailed budget that includes a 10-20% contingency fund. This preparation is essential for a smooth and predictable project.
  • Ranch homes offer diverse expansion options: The single-level layout of a ranch is perfect for various additions, including horizontal expansions for a master suite, cost-effective garage conversions, or even adding a second story to double your living area.
  • Your contractor and materials determine the final quality: The long-term success of your extension relies on two things: partnering with a licensed, experienced contractor and selecting durable, high-quality materials. This combination ensures your new space is both beautiful and built to last.

What Makes a Ranch Home Extension Unique?

Ranch homes have a classic, sprawling charm that makes them a fantastic canvas for expansion. Unlike multi-story homes where additions can feel complicated, the single-level layout of a ranch offers unique and straightforward opportunities to add space without sacrificing character. The key is to lean into what makes this style so special in the first place.

One of the biggest advantages is the seamless connection to the outdoors. Ranch homes were designed to blend with their landscape, and a well-planned extension can strengthen that bond. This is your chance to add a sunroom that floods your home with light or expand a living area with large glass doors that open onto a new patio. By focusing on this indoor-outdoor flow, you can create a space that feels both larger and more connected to your yard, perfect for adding features like pavilions and pergolas to complete the experience.

The architectural simplicity of a ranch also provides incredible design flexibility. You aren’t locked into one specific look. The exterior can be finished with a variety of materials, from classic horizontal siding to modern board and batten, allowing the new addition to either match the original structure perfectly or provide a stylish contrast. This adaptability makes it easier to create the open-concept living areas many homeowners want, transforming the layout to better suit a modern lifestyle. A thoughtful home remodeling project can make an addition feel like it was always part of the original plan.

Popular Ideas for Extending Your Ranch Home

One of the best things about a ranch home is its straightforward, accessible layout. But as your family grows or your needs change, you might find yourself wishing for a little more elbow room. The good news is that the simple structure of a ranch makes it a fantastic candidate for an extension. Whether you want to build up, push out, or repurpose an existing area, there are plenty of ways to add functional and beautiful space to your home.

Deciding on the right type of addition depends on your budget, how much space you need, and your property’s layout. You could double your square footage by adding a second story, or you could create a seamless indoor-outdoor flow with a new sunroom. From small bump-outs that make a single room feel more spacious to full-scale garage conversions, we’ll walk through the most popular options. Each approach has its own set of benefits, helping you create a home that perfectly fits your lifestyle without having to move.

Add a Second Story

If you need a significant amount of new space but don’t want to sacrifice your yard, building up is the way to go. Adding a second story can literally double your living area, providing ample room for new bedrooms, bathrooms, or a dedicated home office. This is a major project that transforms your single-story ranch into a two-story colonial, so it requires careful planning and a solid foundation. While it’s one of the more expensive options, a second-story addition is an incredible investment that allows you to completely reshape your home. A project of this scale is a significant home remodeling undertaking, but the results can be truly spectacular.

Expand Horizontally

Expanding outward is a natural fit for the classic ranch layout. A horizontal addition lets you extend your home’s footprint into your side or backyard, maintaining the convenience of single-level living. This is a great way to create a luxurious primary suite, a larger, more open-concept kitchen, or a spacious family room for everyone to gather. Because you’re building on the ground level, these additions can feel like a natural extension of your existing home. The process typically involves pouring a new foundation and blending the roofline, which requires expert masonry and construction work to ensure a seamless look.

Create a Bump-Out Addition

Don’t need a massive new wing? A bump-out might be the perfect solution. This is a smaller-scale addition that extends an existing room by just a few feet. It’s a clever way to gain a little extra space right where you need it most, without the cost and disruption of a full-blown addition. A bump-out can create a cozy breakfast nook in your kitchen, a sunny reading corner in your living room, or enough space to finally get that walk-in closet you’ve been dreaming of. Since they often don’t require a full new foundation, bump-outs are a more budget-friendly way to enhance a room’s function and feel.

Add a Sunroom or Porch

Ranch homes are known for their connection to the outdoors, and adding a sunroom or porch can strengthen that link. A sunroom gives you a light-filled, versatile space you can enjoy year-round, whether you use it as a lounge, a playroom, or a home office with a view. A covered porch or patio, on the other hand, extends your living area into the backyard, creating the perfect spot for outdoor dining and entertaining. You can even add features like an outdoor kitchen or fireplace under beautiful pavilions and pergolas to create a true outdoor oasis that complements your home’s style.

Convert Your Garage

If your attached garage is mostly used for storage, converting it into living space is one of the most cost-effective ways to expand. Since the structure is already in place, the project focuses on transforming the interior into a comfortable, finished room. This involves insulating the walls, leveling the floor, adding heating and cooling, and replacing the garage door with a wall and windows. A converted garage can become anything from a home gym or guest suite to a family den or playroom. Just remember that you’ll be giving up your indoor parking, so it’s a trade-off you’ll want to consider carefully.

Convert Your Attic

Have you ever looked up and wondered about all that empty space above your head? If your ranch has a pitched roof with enough headroom, you might be able to convert your attic into a functional room. This is another great way to add square footage without altering your home’s footprint. An attic conversion is perfect for creating a quiet home office, a cozy guest bedroom, or a fun bonus room for the kids. The project mainly involves interior work like adding flooring, insulation, drywall, and running electrical lines. A professional should always assess the structure first to make sure it can support the added weight of a finished living space.

How Much Will Your Ranch Extension Cost?

One of the first questions on every homeowner’s mind is, “What’s the budget for this?” The cost of extending your ranch home can vary quite a bit, depending on what you want to achieve. A small bump-out to expand your kitchen will have a very different price tag than adding an entire second floor. The final cost depends on the project’s size, the materials you choose, and the complexity of the work.

To give you a clearer picture, we’ve broken down the typical cost ranges for the most popular ranch home additions. Think of these as a starting point for your planning. The best way to get a precise number for your specific project is to work with a professional who can provide a detailed estimate. A full-service home remodeling team can help you understand every cost involved, from permits to the final coat of paint, ensuring there are no surprises along the way.

Second Story Addition ($100k – $300k)

Adding a second story is the most ambitious and expensive way to expand your ranch home, with costs often ranging from $100,000 to $300,000. This is a major renovation that essentially involves building a new level on top of your existing home. The process requires significant structural reinforcement to the foundation and first-floor walls to support the added weight. While it’s a big investment, a second-story addition can double your square footage without sacrificing any of your precious yard space, making it a fantastic option for growing families on smaller lots.

Horizontal Expansion ($20k – $50k)

If you have the land to spare, building outward is a more budget-friendly option than building up. A horizontal expansion, like adding a new master suite or a family room, typically costs between $20,000 and $50,000. This type of project requires pouring a new foundation and seamlessly connecting the new structure to your existing home. The final price will depend on the size of the addition and the finishes you select. It’s a great way to get the extra space you need while maintaining the single-story convenience of a ranch home.

Bump-Out Addition ($4k – $10k)

A bump-out is a perfect solution when you just need a little more breathing room in a specific area. These small-scale additions can cost as little as $4,000 to $10,000 because they often don’t require a full new foundation. Instead, they can be cantilevered from the existing structure. A bump-out can extend a room by just a few feet, but that small change can make a huge difference. It’s an ideal way to create a cozy breakfast nook in your kitchen, a reading corner in your living room, or extra space for a soaking tub in your bathroom.

Garage Conversion ($10k – $20k)

If your attached garage is mostly used for storage, converting it into living space is one of the most cost-effective ways to expand your home. With a typical price range of $10,000 to $20,000, a garage conversion uses the existing structure, which saves a lot on construction costs. The project involves insulating the walls, leveling the floor, adding heating and cooling, and replacing the garage door with a solid wall and windows. This can be a great way to add a new bedroom, home office, or playroom, but remember you’ll be giving up your indoor parking space.

Attic Conversion ($20k – $50k)

Don’t forget to look up! If your ranch home has an attic with enough headroom, you might have usable space right above you. Converting an attic into a livable room generally costs between $20,000 and $50,000. The work is mostly contained within your home’s existing footprint and involves adding insulation, flooring, drywall, and proper ventilation. You may also need to add dormer windows to bring in natural light. An attic conversion is a wonderful way to create a private guest suite, a quiet home office, or a fun playroom for the kids.

What Factors Influence the Final Price?

The price ranges we’ve discussed are great for initial planning, but your final cost will depend on several key factors. The overall size of the addition is the biggest driver of cost, as a larger space requires more materials and labor. The quality of the materials you choose also plays a huge role; high-end finishes like custom cabinetry or natural stone pavers will cost more than standard options. Any custom features, complex structural changes, and local permit fees will also affect the bottom line. Working with an experienced contractor will help you create a detailed budget that reflects your vision and priorities.

Choosing the Best Materials for Your Extension

Selecting the right materials is one of the most important steps in planning your home extension. Your choices will define the look, feel, and long-term durability of your new space. It’s about more than just aesthetics; it’s about choosing materials that can handle Long Island’s weather, blend with your existing home, and provide lasting value. From the foundation that supports it all to the siding that protects it from the elements, every component plays a crucial role in the success of your project. Let’s walk through the key materials you’ll need to consider.

Siding and Exterior Finishes

The siding is what ties your new extension to the rest of your home, creating a cohesive look. For ranch homes, you have a lot of great options. Materials like wood, stone, brick, and stucco are popular choices, and you don’t have to stick to just one. In fact, using a mix of materials can add texture and visual interest to your home’s exterior. Imagine pairing classic wood siding with a beautiful stone veneer accent wall. This approach allows you to create a custom look that feels both timeless and unique, ensuring your addition is a perfect complement to your home’s original character.

Roofing for Your Addition

Your roof does more than just keep the rain out; it’s a key part of your home’s energy efficiency. Modern roofing materials and techniques can make a huge difference in keeping your extension comfortable year-round. Innovations like closed-cell spray foam insulation and advanced sheathing systems prevent air leaks and heat loss, which can help lower your energy bills. A properly vented roof assembly is also essential, as it helps manage moisture and temperature, protecting the structure of your addition. Investing in a high-quality roofing system ensures your new space is not only durable but also efficient.

Foundation and Structural Support

A strong foundation is the literal base of your entire project. Without solid structural support, even the most beautifully designed extension will run into problems. The best materials for home construction and foundations are typically wood, engineered wood products, concrete, and stone. The right choice depends on your specific project, soil conditions, and local building codes. Working with an experienced contractor is key here, as they can ensure the foundation is properly designed and built to support your new addition safely for decades to come. This is one area where you never want to cut corners.

Flooring for a Seamless Look

The right flooring helps create a smooth and natural transition from your existing home into your new extension. The goal is to make the entire space feel like one unified area, not a separate, tacked-on room. You can achieve this by continuing your current flooring material into the new space or by choosing a complementary option. For example, if you have hardwood in your living room, you could extend it into the addition. Alternatively, you could use beautiful porcelain tiles that match the color palette of your home. Options like bamboo also offer a modern and durable finish.

Why Quality Brands Matter for Durability

When you’re selecting materials, it’s tempting to focus on the initial cost, but durability is just as important. Investing in high-quality, trusted brands from the start can save you a lot of money and headaches down the road. These materials are designed to withstand wear and tear, resist damage from different climates, and maintain their appearance over time. At the Gappsi Store, we carry products that are built to last, so you can feel confident in your investment. Choosing quality ensures your home extension will not only look great when it’s finished but will continue to perform well for years to come.

How an Extension Improves Your Home’s Value and Function

A home extension is about more than just adding square footage. It’s an opportunity to reshape your home to fit your life, not the other way around. Whether your family is growing, you need a dedicated workspace, or you simply want to create a better flow between your indoor and outdoor areas, a well-designed addition can completely transform your living experience. Beyond the immediate lifestyle benefits, a thoughtful extension is also a smart financial move that can significantly increase your property’s market value.

Enjoy More Living Space

As your life changes, your home should be able to change with it. An extension gives you the freedom to create the space you truly need. Ranch homes are particularly well-suited for horizontal additions, making it easier to expand your footprint with a new master bedroom, a larger kitchen, or a family room. This type of home remodeling project allows you to stay in the neighborhood you love while tailoring your home to your current needs. Imagine having a dedicated home office that isn’t the dining room table or a spacious kitchen where everyone can gather without feeling cramped. That extra room can make all the difference in your day-to-day comfort.

Increase Your Property Value

Building an addition is often a more affordable and emotionally satisfying way to get more living space than buying a new home. When you add functional rooms like bedrooms or bathrooms, you get the best return on your investment. A professionally constructed extension not only adds value through increased square footage but also enhances your home’s overall appeal to future buyers. High-quality materials and craftsmanship, from the foundation to the finishing touches, signal a well-maintained and desirable property. It’s an investment in your home’s future that you also get to enjoy right now.

Create Better Outdoor Living Opportunities

Ranch homes are known for their strong connection to the outdoors, and an extension can make that connection even stronger. Additions that include patios, decks, or sunrooms honor the original spirit of the design while creating new ways to enjoy your property. You could add a sunroom that opens onto a beautiful new patio made with porcelain and natural stone, creating a seamless transition from inside to out. Or, you could extend your kitchen and install large glass doors that lead to a covered outdoor dining area, perfect for summer evenings with family and friends.

Common Challenges to Plan For

A home extension is an exciting project, but it comes with its share of complexities. Thinking through potential hurdles before you start is the best way to keep your project on track, on time, and on budget. From the unseen structure of your home to local regulations and design choices, every detail matters. A successful addition isn’t just about the final look; it’s about a smooth process built on careful preparation. This means looking beyond the blueprints and considering the practical realities of construction.

Anticipating these challenges helps you and your contractor create a solid plan. When you know what to look for, you can ask the right questions and make informed decisions. This proactive approach turns potential problems into manageable tasks. Whether you’re adding a new master suite or expanding your kitchen, a well-thought-out strategy is your greatest asset. Working with an experienced team that understands the nuances of home remodeling in Long Island ensures every challenge is met with a professional solution. It’s about having a partner who can foresee issues with drainage, material availability, or permitting, giving you peace of mind from the first sketch to the final walkthrough.

Ensuring Proper Structural Support

Before you dream about paint colors and furniture, you have to think about what’s holding everything up. Your home’s existing foundation and frame must be able to handle the weight and stress of an addition. A professional assessment is the first step. We always start by checking the existing foundation, roof, and materials to confirm they are sound. This isn’t a corner you can cut. A weak foundation can lead to major structural problems down the road, like cracking walls or uneven floors. A thorough inspection will determine if your current structure needs reinforcement, ensuring your new space is safe and built to last for decades.

Understanding Zoning Rules and Permits

Every town in Nassau and Suffolk County has its own set of rules for home construction, and they are strictly enforced. You’ll need to check local zoning laws for regulations on setbacks (how close you can build to property lines), lot coverage (how much of your property can be covered by buildings), and height restrictions. Trying to figure this out on your own can be overwhelming. An experienced local contractor will handle the permits and ensure your extension plans are fully compliant, saving you from potential fines, legal issues, and the nightmare of having to tear down non-compliant work.

Matching the New Design to Your Home

Creating a seamless transition between your existing home and the new addition is key to a beautiful result. While you might think an exact match is the goal, it can be difficult to find identical siding or brick from decades ago. Instead, consider using a different but complementary material for the addition. For example, a brick ranch home can look stunning with a wood or stone siding addition. This approach creates intentional contrast and character. Exploring different porcelain and natural stone options can also help you tie the old and new spaces together beautifully, both inside and out.

Planning Your Budget to Avoid Overruns

Sticking to a budget is one of the biggest concerns for any homeowner. The best way to manage costs is to plan for the unexpected. We always advise clients to budget carefully and include a contingency fund of 10% to 20% for unforeseen expenses. During demolition, you might discover outdated wiring, hidden plumbing issues, or pest damage that needs to be addressed. Having that extra money set aside means these surprises won’t derail your project or force you to compromise on other features. It’s a financial safety net that provides flexibility and reduces stress during the construction process.

How to Choose the Right Contractor for Your Project

Finding the right partner to bring your vision to life is one of the most critical steps in any home extension project. The right contractor does more than just build; they act as your guide, managing the complexities of construction, adhering to timelines, and ensuring the final result meets your expectations. A great partnership with your contractor can make the entire process feel smooth and exciting, while the wrong one can lead to stress and disappointment. Taking the time to carefully vet potential contractors will pay off in the long run, giving you peace of mind and a beautiful, well-built addition to your home.

What Qualifications to Look For

When you start meeting with contractors, there are a few non-negotiables to look for. First and foremost, confirm that any potential partner is fully licensed and insured. This is your safety net, protecting you from liability and ensuring all work complies with Long Island’s local building codes. Next, ask for references from past clients. Speaking to people who have been through the process can give you honest insight into a contractor’s reliability, communication, and the quality of their work. Finally, look for a team with specific, proven experience in projects similar to yours. A contractor who specializes in home remodeling and extensions will understand the unique challenges of seamlessly blending new construction with an existing ranch home.

Questions to Ask Potential Contractors

To find the best fit, it helps to go into your initial meetings with a prepared list of questions. This isn’t an interrogation; it’s a conversation to see if your styles and expectations align. Start with the basics: “Are you licensed and insured?” and “Can you provide a few references from recent house extension projects?” Then, get more specific about their process. Ask for a detailed written estimate and a clear project timeline. Inquiring about how they handle unexpected issues or changes can also reveal a lot about their problem-solving skills and communication style. The answers to these questions will help you gauge not only their qualifications but also how well you’ll work together throughout the project.

Getting an Accurate Project Estimate and Timeline

A project estimate should be more than just a single number. A professional contractor will provide a detailed breakdown that outlines the costs for labor, materials, permits, and other expenses. This transparency helps you understand exactly where your money is going and prevents surprise costs down the road. It’s a good practice to get estimates from a few different contractors to get a sense of the market rate for your project. Be cautious of any bid that is significantly lower than the others, as it could be a red flag for subpar materials or hidden fees. A realistic timeline is just as crucial, so make sure you get a clear schedule of the project phases from start to finish.

How to Plan Your Ranch Home Extension

A successful home extension starts long before the first wall comes down. A thoughtful plan is your roadmap to getting the space you want without the headaches you don’t. It helps you set a realistic budget, create a cohesive design, and prepare your home and family for the construction process. Taking the time to map out your project ensures every decision, from the layout to the light fixtures, aligns with your vision and your home’s existing character. With a clear plan, you can move forward confidently, knowing you’ve covered all your bases for a smooth and rewarding renovation.

Key Design Considerations for a Seamless Look

The goal of an extension is to make it feel like it was always part of your home, not an afterthought. To achieve a seamless look, think about how the new structure will connect to the old one. For instance, if your ranch is brick, you could use a complementary material like board-and-batten siding on the addition to create an intentional, layered design. It’s also important to consider what your family needs now and what you might need in the future. Planning for a flexible space, like a sunroom that could one day become a playroom or home office, adds long-term value and function to your home remodeling project.

Understanding the Project Timeline and Phases

Every construction project follows a general timeline, and knowing the phases can help you manage expectations. It all begins with an initial consultation and design phase, where you’ll work with professionals to draw up blueprints. Next comes the permitting process, which can take time depending on your local municipality. Once approved, the real work begins with site preparation, foundation work, framing, and exterior finishing. The final phases involve interior work like plumbing and electrical, followed by finishing touches and a final walkthrough. A professional team will always start by inspecting the existing foundation and local building codes to build a realistic project timeline.

How to Prepare Your Home for Construction

Getting your home ready for construction is about more than just clearing out furniture. First, it’s critical to address the structural and legal groundwork. You’ll need to verify that your home’s foundation can support the new weight, especially if you’re adding a second story. It’s also essential to check local zoning laws for rules on property line setbacks and how much of your lot can be covered by buildings. On a practical level, you should designate a clear path for workers to access the construction zone and seal off other areas of your home to minimize dust. Planning for temporary lifestyle changes, like setting up a makeshift kitchen, can also make the process much more manageable.

Related Articles

Frequently Asked Questions

How long does a typical ranch home extension take? The timeline for an extension can vary quite a bit depending on the project’s scale. A smaller bump-out or garage conversion might take a few months, while a large horizontal addition could take four to six months. A full second-story addition is a much bigger undertaking and can often take six months to a year from the initial design to the final walkthrough. Factors like the local permitting process, weather, and the complexity of your design will all play a role in the final schedule.

Can we stay in our home while the extension is being built? For many types of additions, especially those that expand outward like a new family room or sunroom, you can absolutely stay in your home. Your contractor will work to seal off the construction zone to minimize dust and disruption. However, for more invasive projects like a second-story addition or a major kitchen overhaul that’s part of the extension, it might be more comfortable and practical to arrange temporary housing for at least part of the construction phase.

Which type of addition adds the most value to my home? Generally, any addition that increases your home’s functional square footage will add value. Projects that add bedrooms and bathrooms tend to provide a strong return on investment because they are key features for homebuyers. That said, a well-designed addition that improves your home’s overall flow, curb appeal, and connection to the outdoors can also add significant value by making the entire property more desirable.

How can I ensure the new addition blends well with my existing ranch home? The key to a seamless look is thoughtful design, not necessarily an exact match. Instead of trying to find identical decades-old brick, consider using a complementary material like stone or wood siding to create a beautiful, intentional contrast. Paying close attention to architectural details is also important. Aligning the new roofline with the old one and using similar window styles and trim will help tie the entire structure together into one cohesive home.

What is the very first step I should take if I’m considering an extension? Before you do anything else, take some time to think clearly about your goals and your budget. Ask yourself what you need the new space for, how you want it to function, and what you are comfortable investing in the project. Once you have a good sense of your needs and a realistic budget in mind, the next step is to schedule a consultation with a professional design-build firm. They can help you explore your options, discuss what’s feasible for your property, and provide an initial estimate.