


Before you start planning a costly and messy tile renovation, take a closer look at what’s really making your room feel dated. Often, it’s not the tiles themselves but the discolored, stained grout between them. There’s a powerful secret for achieving a dramatic refresh without the headache of a remodel. This guide is your complete resource for grout care, from simple DIY cleaning solutions to the transformative process of grout color restoration. This technique doesn’t just clean; it applies a new, durable layer of color that seals and protects, giving your entire room a brand-new look and feel.
What is Grout and Why Does It Get Dirty?
If you have tile in your home, you have grout. It’s that stuff in between the tiles that seems to have a magnetic attraction to dirt. But what exactly is it? Grout is a dense mixture, typically made of cement, water, and sand, that fills the gaps between tiles. Its main jobs are to hold your tiles securely in place and prevent moisture from seeping underneath them. While it’s a crucial part of any tile installation, its porous nature is what makes it a challenge to keep clean. Think of it like a tiny sponge that’s ready to soak up any dirt, spills, or grime it comes into contact with. This is why a pristine tile floor can still look dingy if the grout lines are stained. Keeping your grout clean not only makes your space look brighter but also helps protect the longevity of your tile work.
Understanding the type of grout you’re dealing with can also make a difference in your cleaning approach. Different types are used depending on the tile and location. For homeowners with beautiful porcelain or natural stone, knowing your grout is the first step to proper care. While you can tackle surface-level cleaning yourself, sometimes deep-set stains or widespread discoloration require a professional touch. For a truly transformative result, especially on outdoor patios or high-traffic indoor areas, our restoration and sealing services can bring your grout and tile back to life, ensuring it stays beautiful for years to come.
Understanding Grout Composition and Types
At its core, grout is a simple but effective material. It’s a thick paste that acts as the glue and sealant between your tiles. Because it’s made with cement and sand, it has a naturally porous texture. This means it’s filled with tiny, microscopic holes that are perfect for trapping dirt, soap scum, and mildew. According to experts at Lioli Ceramica, this porosity is the primary reason grout gets dirty so easily. Regularly cleaning your grout isn’t just about looks; it helps maintain the integrity of your tile installation by preventing grime from breaking down the material over time. A little bit of maintenance goes a long way in keeping your tiled surfaces looking fresh and new.
Why Grout Collects Dirt
The porous nature of grout is its biggest weakness when it comes to cleanliness. Those tiny holes and rough texture act like a net, catching everything from spilled coffee to muddy footprints. In bathrooms, this porosity allows soap scum and moisture to settle in, creating a perfect environment for mold and mildew to grow. In kitchens, it’s food splatters and grease. Over time, this buildup doesn’t just sit on the surface; it works its way deep into the grout, leading to stubborn discoloration that can’t be wiped away. That’s why a quick mop doesn’t always do the trick for grout lines, and a more targeted cleaning approach is often necessary to lift that embedded grime.
Common Grout Types
Not all grout is created equal. The most common type you’ll find is sanded grout, which contains fine sand to provide extra strength. It’s used for wider grout lines (more than 1/8 inch) and is a go-to for flooring because of its durability. For more delicate tile or smaller gaps, unsanded grout is used. It has a smoother texture and adheres better to vertical surfaces, like a shower wall. Then there’s epoxy grout, a powerhouse option that is non-porous and resistant to stains and water. It’s more difficult to install but offers superior durability, making it a great choice for high-traffic or wet environments. Knowing which type you have can help you choose the right cleaning method.
A Homeowner’s Guide to Cleaning Grout
Ready to roll up your sleeves and get that grout sparkling again? With a few common household items and a little bit of elbow grease, you can make a huge difference in the appearance of your tile. The key is to use the right tools and techniques to lift stains without damaging the grout itself. Before you start, gather everything you need so you’re not running around mid-project. You’ll want a good grout brush or an old toothbrush, a spray bottle, microfiber cloths, and gloves to protect your hands. Most of the cleaning agents you’ll need are probably already in your pantry, like baking soda and vinegar. This DIY approach is perfect for routine maintenance and tackling minor stains before they become a major headache.
Essential Tools and Supplies for a DIY Project
Let’s get your grout cleaning kit together. You don’t need a lot of fancy equipment to get the job done right. Here’s a simple checklist of items to gather: a stiff-bristled grout brush (an old toothbrush works in a pinch), a spray bottle for your cleaning solution, and some microfiber cloths or rags for wiping. For the cleaning solution itself, you’ll want baking soda, white vinegar, and hydrogen peroxide. A pair of rubber gloves is also a must to protect your skin from irritation. Having these simple tools on hand will make the process smooth and effective, turning a dreaded chore into a satisfying project with brilliant results.
DIY Grout Cleaning Solutions
You don’t need harsh, expensive chemicals to get your grout clean. Some of the most effective cleaners can be made from simple ingredients you likely already have at home. These DIY solutions are not only budget-friendly but also gentler on your grout and home environment. We’ll walk through two of the most popular and effective methods: a paste made from baking soda and hydrogen peroxide, and a foaming combination of baking soda and vinegar. Both are fantastic for lifting everyday grime and mild stains, helping you restore that clean, fresh look to your tile floors, backsplashes, and showers without the overwhelming fumes of commercial cleaners.
Baking Soda and Hydrogen Peroxide Paste
This combination is a powerhouse for whitening stained grout. Simply mix baking soda and hydrogen peroxide together until you have a thick, spreadable paste. Apply the paste directly onto the grout lines, making sure to cover all the discolored areas. Let it sit for about 10 minutes; this gives the mixture time to work its magic, bubbling away and lifting stains from the porous surface. After waiting, grab your grout brush and scrub the lines thoroughly. You’ll be amazed at how much grime comes up. Once you’re done scrubbing, rinse the area with plain water and wipe it dry with a clean cloth.
Baking Soda and Vinegar Method
This method creates a satisfying fizzing action that helps dislodge dirt. First, make a paste using baking soda and a little water, and apply it to your grout lines. Next, fill a spray bottle with a 50/50 solution of white vinegar and warm water. Spray the vinegar solution directly onto the baking soda paste. It will immediately start to foam and bubble. This chemical reaction is what helps to break down grime and stains. Once the foaming stops, scrub the grout with your brush and then rinse the entire area with water to wash away all the residue, revealing cleaner, brighter grout lines.
Important Safety Precautions
Even when you’re using common household ingredients, it’s smart to take a few safety precautions. Always wear rubber gloves to protect your hands, as ingredients like hydrogen peroxide and even vinegar can cause skin irritation with prolonged contact. It’s also a good idea to ensure the area is well-ventilated, so open a window or turn on a fan, especially when working in a small space like a bathroom. Never mix cleaning agents unless a method specifically calls for it; for example, mixing bleach and ammonia creates toxic gas. Stick to the proven recipes and you’ll have a safe and successful cleaning session.
Chemicals and Cleaners to Avoid
When you’re faced with really tough grout stains, it can be tempting to reach for the strongest cleaner you can find, like bleach. However, many experts advise against it. Using bleach on grout can be a big mistake. While it might seem to whiten the grout initially, it can actually weaken the cement-based material over time, causing it to become brittle and crack. It can also lead to permanent discoloration, leaving you with blotchy, uneven grout lines. It’s best to stick with safer alternatives like baking soda, vinegar, or pH-neutral cleaners specifically designed for grout. Your grout will thank you in the long run.
DIY Grout Coloring and Sealing
Sometimes, no matter how much you scrub, the grout just won’t come clean. Years of foot traffic, spills, and moisture can lead to permanent staining that cleaning alone can’t fix. But don’t despair and start thinking about a total retile just yet. There’s another option: grout colorant. A grout colorant, like the popular Polyblend Grout Renew, is essentially a special paint for your grout. It not only covers up old, stubborn stains but also comes in a variety of colors, allowing you to completely refresh or change the look of your tile. Even better, it acts as a sealant, creating a protective barrier that makes the grout resistant to future stains and moisture. It’s a fantastic way to get a like-new finish without a major renovation.
Step-by-Step Grout Coloring Process
Using a grout colorant is a game-changer for stained grout. As detailed by Southern Home and Hospitality, this product is a combination of color and sealant that can completely transform your tile’s appearance. Instead of just cleaning, you’re applying a fresh, new surface that’s durable and stain-resistant. The process is straightforward but requires a bit of patience and a steady hand. You’ll need to thoroughly clean the grout first, then carefully apply the colorant to the grout lines. The result is a uniform, clean look that not only hides old stains but also protects against new ones, making future cleanup much easier.
Preparation
Proper preparation is the key to a professional-looking finish. Before you even think about opening the grout colorant, you need to give your grout a deep clean. Use your preferred cleaning method to scrub away any surface dirt, grease, or soap scum. This ensures the colorant will adhere properly to the grout and not to the grime on top of it. After cleaning, rinse the area well with water to remove any cleaning residue. Then, the most important step: let the grout dry completely. Applying colorant to damp grout can lead to a patchy, uneven finish, so give it at least 24 hours to air dry.
Application and Drying
Once your grout is clean and completely dry, it’s time to apply the colorant. Most grout colorant kits come with an applicator brush, but a small, stiff artist’s paintbrush also works well. Work in small, manageable sections. Carefully paint the colorant onto the grout line, trying your best to stay within the lines. Don’t worry if you get some on the tile; the trick is to wipe it off quickly. Keep a damp cloth or paper towel handy and wipe any excess colorant off the tile surface immediately after you paint each section. This prevents the colorant from drying on your tile. Continue this process section by section until you’re done.
Maintaining Your Grout for Lasting Results
You’ve put in the work, and your grout looks fantastic. Now, how do you keep it that way? The secret to long-lasting, clean grout is all about sealing and regular maintenance. Cleaning is only half the battle; protecting the grout from future stains is what will save you from having to do a deep scrub every few months. A simple sealing step after you clean can make a world of difference, creating an invisible shield that repels dirt and moisture. This is especially crucial for high-traffic areas or outdoor spaces exposed to the elements. A little proactive care will ensure your hard work pays off and your tile continues to look its best.
For homeowners on Long Island who want to ensure their outdoor living spaces remain in pristine condition, professional maintenance is a great option. After investing in a beautiful masonry patio or poolside area, you want it to last. At Gappsi, our restoration and sealing services are designed to do just that. We use high-quality sealants and expert techniques to protect your investment from the harsh New York weather, preventing staining and deterioration. This professional sealing service ensures your grout and stone stay clean and stable, allowing you to spend more time enjoying your backyard and less time worrying about its upkeep.
Long-Term Grout Care
After you’ve cleaned your grout, letting it dry completely and then applying a sealant is the most important step for long-term protection. As many DIYers on Reddit will tell you, skipping the sealant is a recipe for having to repeat the deep cleaning process all over again in a few months. A good quality, water-based grout sealant soaks into the porous grout and creates a protective barrier. This barrier prevents dirt, water, and other grime from penetrating the grout, making routine cleanups as easy as a quick wipe. You’ll need to reapply the sealant every year or so, but it’s a small task that pays huge dividends in keeping your grout looking new.
Setting Realistic Expectations
It’s important to have realistic expectations, especially when dealing with old grout. While the cleaning and coloring methods we’ve discussed can create dramatic improvements, some grout may have permanent discoloration that’s impossible to remove completely. This is often the case in areas with constant moisture, like around a toilet base or in the corners of a shower. Even with the best cleaning efforts, you might notice some slight shadowing remains. In these situations, grout colorant is your best friend for achieving a uniform look. Understanding that “like new” might not mean 100% perfect helps you appreciate the massive improvement your efforts have made.
View Gappsi’s YouTube Channel for Videos of Grout and Tiles Cleaning, Coloring, and Sealing Bathrooms and Kitchen Walls and Floors
https://youtu.be/Z1Fti0HmG_c
Tile & Grout – Restoration Cleaning Coloring Sealing only at Gappsi. Tile cleaning is tough work. Grout cleaning is even harder. Over time, tile floors and surfaces lose their shine and luster. Scrubbing and mopping do not generally yield the results needed for a deep clean. Because grout is porous and absorbs all the dirt and debris on it, mopping only removes surface soil and not the embedded dirt that causes the grout to become dull.
Our residential tile and grout cleaning and grout-sealing product helps maintain the cleaned grout for months and makes your regular home maintenance more effective. Also, if your grout is discolored or you want to update the look, we offer grout re-coloring services in a variety of colors to suit your style.
Gappsi Tile and Grout Deep Cleaning
Gappsi has trained technicians who use specialized equipment. It extracts deeply embedded dirt and grime, thoroughly cleaning and sanitizing your tile, grout, and baseboards. We use nonabrasive yet effective methods with adjustable heat and pressure for deep-down cleaning.
 We service all sorts of tile: stone, ceramic, porcelain, clay, and more on floors, shower walls, backsplashes, vanities, tub surrounds, hot tub surrounds, pool decks, table tops, and more throughout Long Island.
Our steam cleaning yields stunning results! If you have soiled grout it can respond to steam cleaning as suddenly as what happens when you spill bleach on black cloths. The grout is often restored to a uniform color and sanitized the very second the steam wand runs across the tile and grout surface.
 Tile and Grout Restoration Repair
- Shower Restoration, Cleaning & Caulking – We offer a variety of shower restoration services. We use alkaline cleaners or acid cleaners to remove soap scum, calcium deposits, and dead skin cells. We also provide caulking services and grout repairs for damaged areas of the tile floor. We can apply sealants to protect your grout from future damage.
- Tile & Grout Repairs – When grout is cracked, crumbling, or stained over time there are several repair options. If only certain areas of the grout are damaged, we may be able to add more grout material or re-grout those areas. If the entire floor needs repair, we can either re-grout the entire floor or color your existing grout to match the original color.
 Grout Recoloring | Grout Color Sealing
After thoroughly cleaning your grout, we can apply a pigmented sealer that seals your grout and covers up the stains.
With recoloring, we can change the color of your grout to a lighter or darker color or match the original color. We will work with you to choose the right color for your grout. Changing the color of the grout in a bathroom, kitchen, or any tiled area can give the room a new look and feel!
If your sanded grout has cracked due to loose tiles, broken thresholds, or other causes, we can repair it before color sealing.
Color-sealed grout is easy to clean because you simply wipe down the tiles with a clean cloth or mop. There is no scrubbing needed. The color seal protects your grout from the dirt, grime, and liquids that caused the stains in the first place.
Tile & Grout – Restoration Cleaning Coloring Sealing
 What You Can Expect from Gappsi
When you choose Gappsi for professional grout cleaning and color sealing you will receive 100% Satisfaction
Step One – Prep Existing Floor – our professionals have perfected tile and grout restoration. We can make dirty, discolored grout lines look like new regardless of the choice of color. If you prefer the original appearance, we can restore, clean, repair, and seal your existing grout. If you prefer to add something special to your existing tile floor, Gappsi can help you mix and match the tile and grout line colors.
Step Two – Select Color for Grout – Gappsi can turn dingy, dark grout lines into clean, white grout lines. We can apply a color sealer that will also provide lasting protection. Our color matching system allows our customers to choose a new grout color for a customized appearance.
Step Three – Apply New Grout – Grout is a concrete and sand mixture. When you have your renovated grout color sealed it protects it from accidents. All those unexpected spills, foot traffic, and day-to-day life. Having unprotected grout lines can absorb the stains leaving discoloration and/or create a breeding ground for odor-causing bacteria as in pet-related accidents. Protective sealant allows for a quick mop and your tile floor is as good as new.
Step Four – Tile & Grout Sealed for Protection – Our proven process for grout restoration and color sealing means you no longer have to face the dilemma of ugly, unsanitary grout lines in your bathrooms, kitchen, or family room. Don’t waste your time scrubbing discolored grout lines with harsh chemicals.
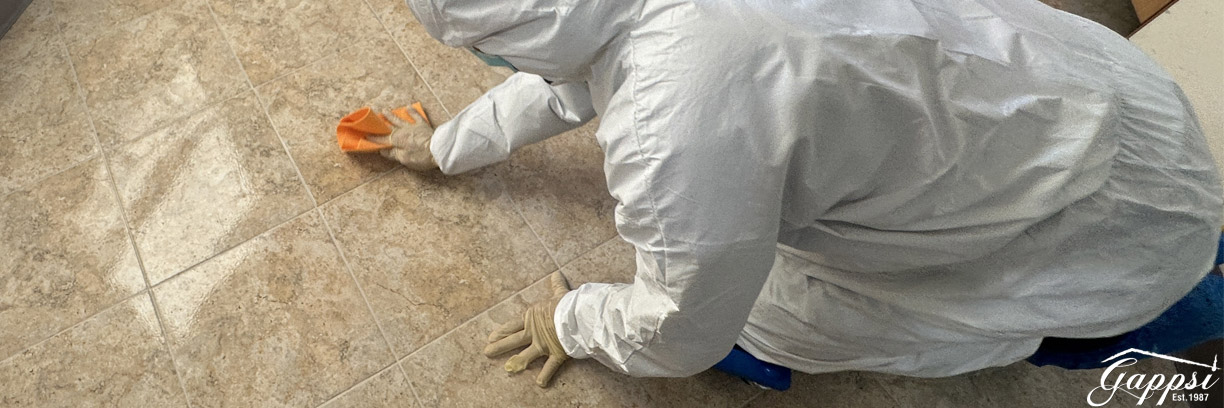 Grout color sealing can break down over time and will need to be resealed to keep your grout in great condition. We recommend grout sealing once a year in areas without moisture, and as needed in high-moisture areas such as kitchens and bathrooms.
SCHEDULE A MEETING TODAY WITH GAPPSI
https://youtu.be/Z1Fti0HmG_c
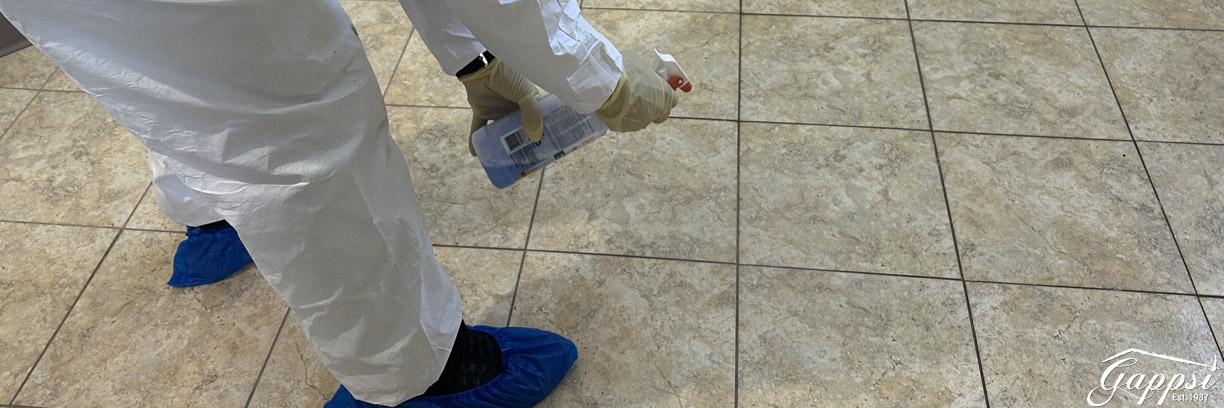
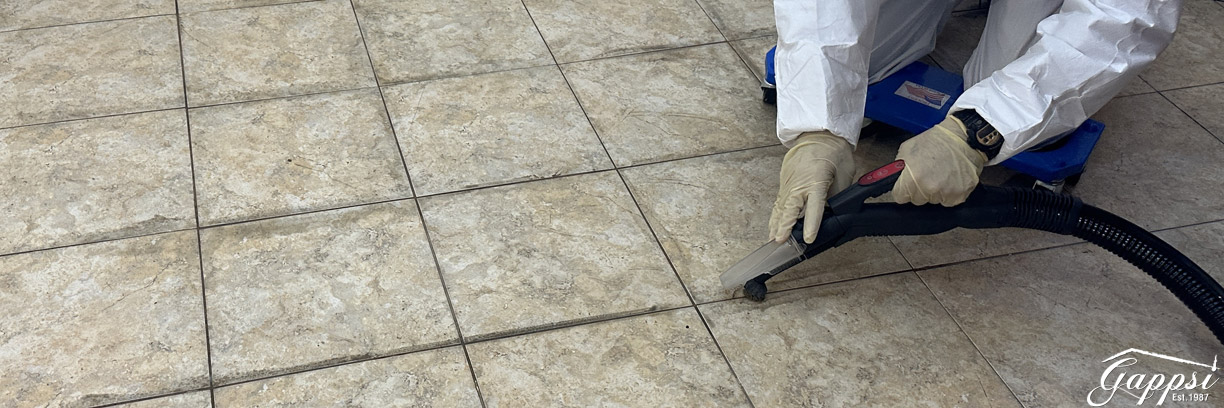
In this video, you can view the process of cleaning and coloring the grout from this demonstration floor. You can see the difference in the before and after. We start by applying the grout and tile cleaner over the tiles and the grout joints. We allow it to sit for a few minutes. Next, we steam-wash the entire floor. Then, we start the cleaning process of the joints with hot steam and a brass brush. We use a vacuum to remove leftover dirt from the grout joints for the final general cleaning of the tiles and grout.
Gappsi Coloring Process for Grout
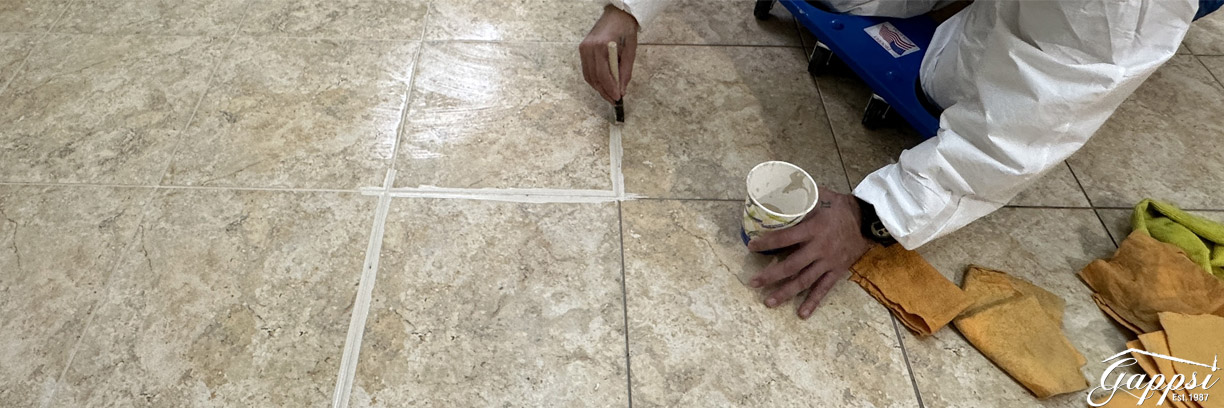
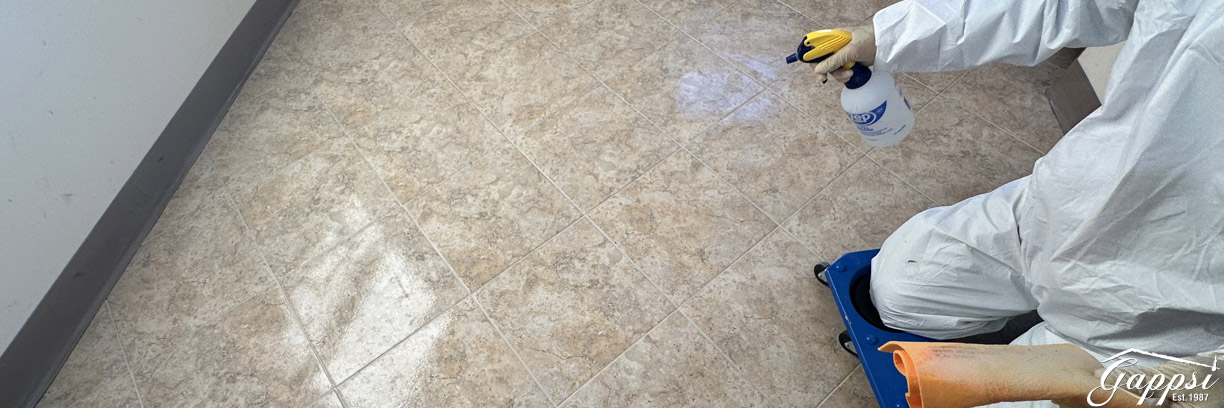
Next is the process of coloring the grout after they have been cleaned. There is a huge transformation from before, as you can see in the part of the floor that has not been cleaned yet. The joints have not been colored before. After the next step, we will apply a protective sealer on the grout and tiles. Now, when applying the final coat of clear sealer, this sealer will not enhance the color of the grout or the tiles but will prevent it from getting dirty. We wipe off the excess sealer and get the sealer into the grout and joints and off the tile surface for a clean finish.
Frequently Asked Questions
My grout is permanently stained. Do I have to replace my tile? Not at all. Before you consider a full renovation, look into grout colorant. This product is like a durable paint for your grout lines that covers up old, stubborn stains and seals the grout from future dirt and moisture. It allows you to completely refresh the look of your tile by choosing a new, uniform color for the grout, giving the entire room a facelift without the cost and mess of a remodel.
Are DIY grout cleaners like baking soda and vinegar really effective? Yes, for routine cleaning and mild to moderate stains, DIY solutions can be very effective. A paste of baking soda and hydrogen peroxide is great for whitening, while the foaming action of baking soda and vinegar helps lift dirt from the porous grout. These methods are budget-friendly and safer than harsh chemicals, but they do require some scrubbing. For deep-set, long-term stains, a professional cleaning or a grout colorant might be necessary.
How often should I seal my grout? Sealing is the key to keeping your grout looking clean long-term. As a general rule, you should reseal your grout about once a year for most areas. However, for high-traffic zones like entryways or high-moisture areas like showers and kitchen backsplashes, you might need to reseal more frequently, perhaps every six months. A simple test is to sprinkle a few drops of water on the grout line; if it soaks in and darkens, it’s time to reseal.
Can I use bleach to get my grout white again? It’s best to avoid using bleach on your grout. While it might seem like a quick fix for whitening, bleach is a harsh chemical that can weaken the cement-based structure of the grout over time, causing it to become brittle and crack. It can also lead to uneven, blotchy discoloration. Sticking to gentler, pH-neutral cleaners or DIY solutions is a much safer and more effective long-term strategy.
What’s the difference between cleaning grout and coloring it? Cleaning removes the surface-level dirt, grime, and mildew from your grout lines, which can significantly brighten up your tile. Grout coloring, or color sealing, is a restorative process for when cleaning isn’t enough. It involves applying a pigmented sealant that creates a new, colored surface over the old grout. This not only covers permanent stains but also provides a powerful seal against future dirt and moisture, making it a more transformative and long-lasting solution.
Key Takeaways
- Clean Before You Replace: You can often refresh your tile’s appearance without a full renovation by deep cleaning the grout. Simple, effective DIY solutions like a baking soda and hydrogen peroxide paste can remove years of built-up grime and brighten your grout lines.
- Use Grout Colorant for Stubborn Stains: When cleaning isn’t enough to fix deep-set discoloration, grout colorant is a transformative alternative. It applies a new, durable layer of color that covers old stains and simultaneously seals the grout, offering a fresh look and added protection.
- Seal Your Grout for Lasting Results: The most important step for long-term maintenance is applying a grout sealant after cleaning. This creates a protective barrier against dirt and moisture, which makes future cleanups much easier and prevents stains from setting in.


 After we let the color sealer absorb into the grout joints we wipe the excess that’s sitting on the tiles. It dries for a minute or so and the process continues throughout the entire bathroom. Once all the joints are sealed, we let the grout dry. We polish with a buffing machine and remove any dry residue that was left on the tiles during the grout cleaning process.