


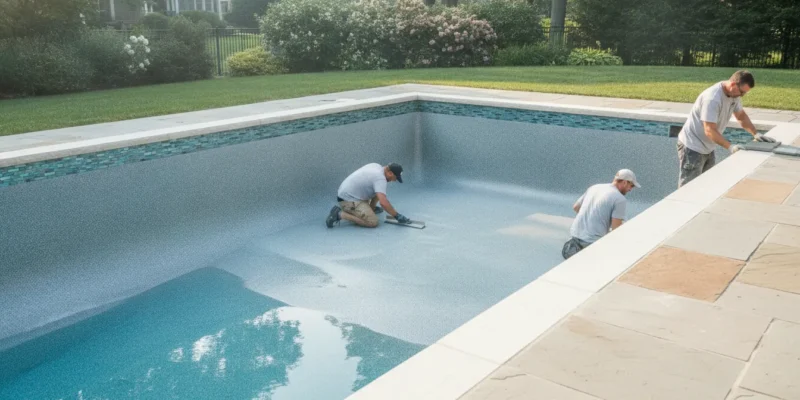
A gunite pool can remain the center of a Long Island backyard for decades. But its interior finish, coping, tile, and equipment do not age at the same rate. Rough plaster, stained surfaces, cracked tile, loose coping, or outdated circulation details can affect comfort, appearance, and maintenance long before the concrete shell needs replacement. Contact Gappsi through our contact page
Renovating in stages is not always the most practical approach. Draining the pool creates an opportunity to inspect concealed damage, coordinate finish and masonry work, update selected components, and shape a more cohesive design. Look first at the warning signs that indicate routine maintenance is no longer enough.
When Is It Time to Renovate a Gunite Pool?
A gunite pool does not always need a complete rebuild when its interior begins to show age. In many cases, the existing shell can remain in service while targeted renovation addresses surface wear, cracking, waterline details, and hidden structural concerns. The important step is recognizing when a cosmetic problem may signal a deeper one.
Are map cracks and rough surfaces getting worse?
Map or alligator cracking is one of the clearest reasons to schedule an inspection. These interconnected cracks can appear across the pool interior and may be associated with alkali-silica reaction, or ASR, in the gunite. An academic case study of gunite pools linked this type of cracking with rough, uneven surfaces, rather than treating it as ordinary finish discoloration. You can review the findings from Boise State University. Surface texture matters beyond appearance. Rough areas are harder to brush and clean, can feel uncomfortable underfoot, and may continue to deteriorate as water moves through damaged finish material. If the floor or walls feel abrasive, uneven, or noticeably different from the rest of the pool, resurfacing may be part of a broader gunite pool renovation plan.
Could small cracks hide a structural concern?
A narrow crack is not automatically harmless. Reinforcing steel that is not properly surrounded by gunite can contribute to structural cracking and may require professional repair. The underlying defect cannot be diagnosed reliably by looking at the crack alone. A review of structural cracking in gunite construction notes that even a small visible crack may need to be opened, repaired, and finished by an experienced professional. See the supporting case record from the Stanford-hosted California Supreme Court archive. Call for an evaluation when cracks are spreading, returning after patching, following a pattern across several surfaces, or appearing alongside hollow-sounding areas, displaced tile, or water loss. An inspection can help separate a finish repair from a problem involving the shell or rebar. Addressing that distinction early is more useful than covering a recurring crack with another layer of plaster.
Is water chemistry accelerating surface wear?
Water chemistry is also a maintenance signal. The CDC recommends maintaining pool water pH between 7.0 and 7.8 and testing pH and disinfectant levels regularly. Persistent imbalance can contribute to swimmer discomfort, sanitation problems, and premature wear of the pool finish. The CDC’s guidance on operating public pools provides the underlying maintenance standard at cdc.gov. If your pool repeatedly develops roughness, staining, surface scale, or discoloration despite consistent cleaning and balanced chemistry, have the finish assessed before choosing a replacement material. A renovation decision should account for both what is visible and what may be happening behind the surface.
What a Gunite Pool Renovation Includes, Step by Step
A well-planned gunite pool renovation is more than applying a new color to the interior. The work should address the pool shell, finish, waterline details, safety components, and any upgrades that are easier to complete while the pool is empty. The goal is an interior that is smooth, waterproof, and durable enough to withstand routine brushing, scrubbing, and cleaning. These requirements are reflected in resurfacing guidance from Sacramento County Environmental Management: the finished pool shell must have a smooth waterproof interior finish. The exact sequence varies with the pool’s condition and the selected materials. But the following steps provide a practical overview of what homeowners in Nassau and Suffolk Counties can expect.
- Drain and inspect the pool. The project begins by removing the water and examining the exposed interior. This allows the renovation team to identify hollow or damaged areas, cracks, worn plaster, deteriorated tile, and problems around fittings. Inspection at this stage is important because a small visible crack does not always reveal whether a deeper structural issue is present. Any necessary repairs should be completed before the new finish is installed.
- Prepare the shell. The existing interior surface is removed or prepared according to its condition and the selected resurfacing system. The shell must be cleaned and properly bonded so the new material can adhere consistently. Areas requiring patching or structural attention are addressed before the finish work begins. This preparation supports a surface that is even underfoot and resistant to premature deterioration.
- Select the interior finish. Homeowners can choose from several concrete finish systems, including marble dust plaster, quartz Diamond Brite, glass, Hydrazzo, and stone pebbles. Each option affects the pool’s appearance, texture, maintenance requirements, and expected service life. Standard plaster typically lasts about 7 to 10 years, while pebble finishes commonly last about 15 to 20 years, according to this pool surface materials comparison. The right choice depends on the condition of the shell, water chemistry practices, design goals, and renovation budget.
- Install the new interior finish. The selected plaster, aggregate, or other finish is applied across the prepared shell to create a continuous waterproof interior. The surface should be smooth enough for comfortable use and durable enough for repeated cleaning. For a closer look at one material approach, see Gappsi’s guide to resurfacing a gunite pool with marble dust plaster.
- Upgrade lighting and drain covers. With the pool drained and access available, the team can inspect existing lights and replace outdated or damaged components. This is also the appropriate time to install code-compliant drain covers. Resurfacing guidance recommends checking or replacing pool lighting and installing approved drain covers during this phase. Completing these upgrades before refilling avoids a second disruptive drain-down.
- Finish the tile and surrounding details. If the waterline tile is cracked, loose, or visually dated, it can be replaced as part of the renovation. New glass tile, porcelain, or natural stone details can coordinate the pool with the surrounding deck and outdoor living space. The completed work is then cleaned, inspected, and prepared for careful refilling and water chemistry balancing.
After the pool is refilled, maintaining balanced water chemistry and following the finish manufacturer’s care instructions helps protect the investment. A renovation plan should therefore cover both the visible materials and the underlying safety and maintenance details that determine how the pool performs over time. Contact Gappsi through our contact page
Plaster vs Pebble Finish: What Should You Choose?
The interior finish affects how a renovated gunite pool looks, feels, ages, and responds to daily water chemistry. The two most common directions are white plaster and a pebble aggregate finish. Neither is automatically right for every pool. The better choice depends on your budget, preferred texture, maintenance habits, and how long you want the finish to serve before the next resurfacing project. Both materials must be installed as a smooth, waterproof interior surface that can withstand regular brushing and cleaning. That standard is reflected in public pool resurfacing requirements, which call for a durable finish suited to repeated cleaning. During a gunite pool renovation, the contractor should also evaluate the existing shell before recommending either finish.
| Consideration | White plaster | Pebble aggregate finish |
|---|---|---|
| Expected durability | Typically lasts about 7 to 10 years with appropriate installation and water care. | Often lasts about 15 to 20 years, giving it a longer resurfacing interval. |
| Stain and chemical resistance | Provides a clean, bright surface, but requires consistent water balance and cleaning to help limit staining and erosion. | Offers greater resistance to staining and chemical erosion than traditional white plaster. |
| Texture | Generally has a smooth feel underfoot and a simple white appearance that reflects light throughout the pool. | Has a more textured feel, with visible aggregate that can create a natural stone appearance and varied water color. |
| Cost position | Usually occupies the more accessible finish position, making it useful when controlling the initial renovation scope matters. | Usually costs more initially because of the aggregate material and installation, but the longer service life may improve its long-term value. |
When does white plaster make sense?
White plaster can be a practical choice when you want a smooth, familiar finish and a straightforward appearance. Its light surface can make the water look bright and clear. While its lower initial cost may leave room in the project for other repairs, such as coping, tile, lighting, or drain-cover updates. It is especially worth considering when the pool is used seasonally and the owner is prepared to monitor water chemistry and schedule routine maintenance.
When is pebble aggregate the better fit?
Pebble aggregate is better suited to owners who prioritize a longer service interval, stronger resistance to staining and chemical erosion, and a natural material appearance. The texture is not identical to plaster, so it should be reviewed in person before installation. Ask how the selected aggregate will feel on steps, benches, and tanning areas, where swimmers have the most contact with the finish. A pool finish comparison at River Pools and Spas reports the commonly cited lifespan difference of 7 to 12 years for plaster compared with 15 to 20 years for pebble finishes. Your contractor should translate those general ranges into a recommendation based on the shell condition, water care plan, design goals, and complete renovation scope.
Replacing Coping and Tile: Details That Matter
Coping and waterline tile frame the pool and influence how safely people move around the water. During a gunite pool renovation, replacing these elements can refresh an aging design. Correct cracked or uneven edges, and create a cleaner transition between the pool finish and surrounding deck. The work should be planned with the pool shell, deck elevations, drainage, and interior finish in mind rather than treated as a cosmetic change. Coping is the cap installed along the top edge of the pool wall. Its projection and thickness affect both appearance and safety. A resurfacing standard from Sacramento County specifies that replacement coping should extend over the pool wall by 1 to 2 inches and should not be thicker than 2.5 inches. Those dimensions provide a useful reference when reviewing a proposed profile, although the final installation must also account for the existing structure and applicable local requirements. See the resurfacing requirements for the cited coping guidance. Material selection changes the character of the pool deck. Available options can include porcelain ceramics, glass tile, granite, marble, travertine, bluestone, limestone, and sandstone. Porcelain ceramics can provide a consistent manufactured surface, while natural stone introduces variation in color and texture. Granite, bluestone, and travertine each require the right detailing for the site, including careful layout, stable installation, and appropriate consideration of wet conditions. The best choice should coordinate with the home, patio, steps, and any existing masonry instead of being selected from a small sample alone. 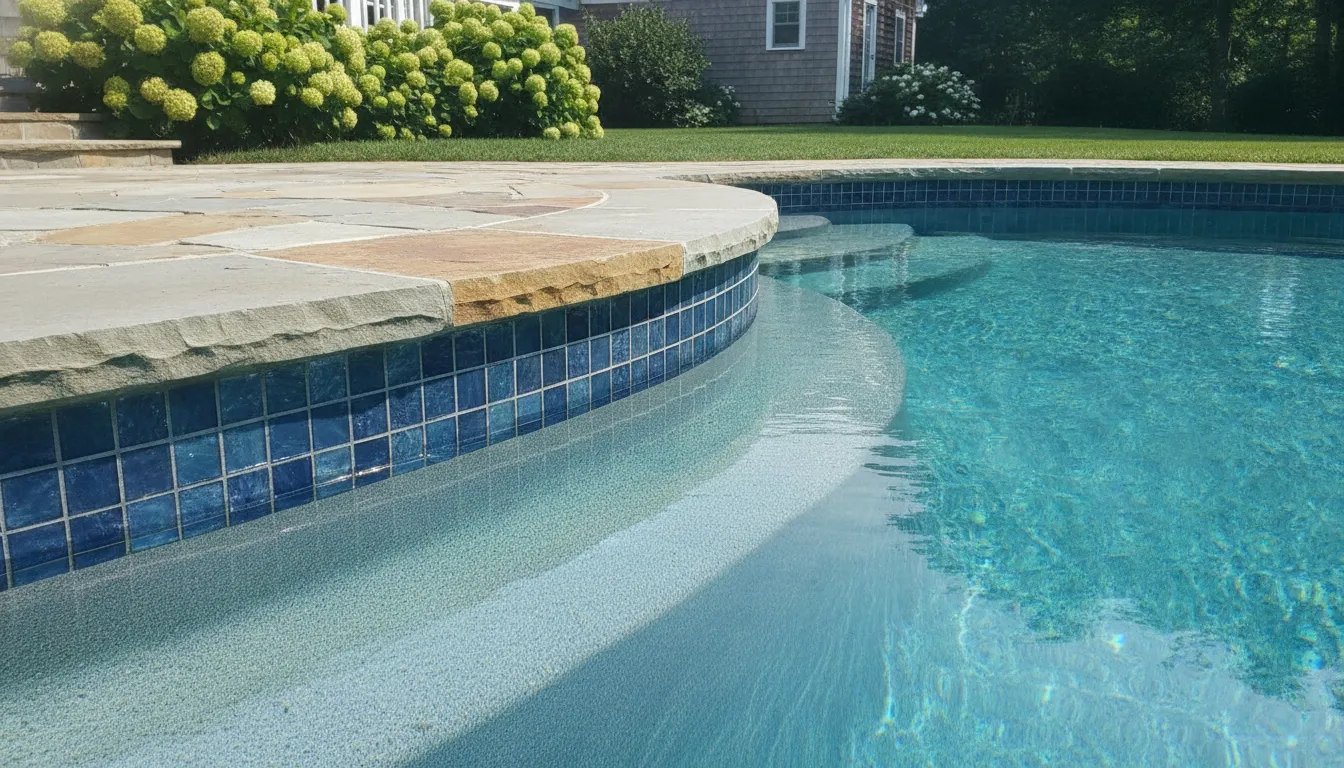
Why waterline tile deserves careful planning
Waterline tile sits where water, chemicals, sunlight, and regular cleaning meet. A replacement should align cleanly with the finished water level and follow the pool’s curves without abrupt changes in pattern. The tile scale also matters. Smaller pieces can follow rounded shapes with less visual interruption, while larger pieces may create a simpler, more architectural look on straight runs. Color and surface texture affect how the water reads, but maintenance access and cleanable joints remain practical priorities. Replacing coping and tile at the same time can prevent mismatched elevations between the deck, pool edge, and new interior finish. It also gives the renovation team an opportunity to inspect transitions before the final materials are installed. If coping is cracked, loose, or misaligned, address the underlying condition rather than covering it with a new surface. A coordinated material schedule helps ensure that the finished edge looks intentional and performs safely for years after the gunite pool renovation is complete.
Water Features Worth Adding During Your Gunite Pool Renovation
A renovation is an opportunity to improve how the pool works, not only how its finish looks. Once the design team reviews the existing shell, circulation lines, deck, and surrounding grade, you can decide whether a new water feature belongs in the project scope. The right addition should support the way your household uses the pool and fit the available space without creating difficult maintenance demands. Waterfalls, fountains, and tanning ledges are common feature choices for an aging gunite pool. They can update the pool’s appearance and add a distinct use to the water, but each one affects plumbing, electrical work, construction time, and the total project cost. A feature should be selected during design, before resurfacing and surrounding hardscape work are finalized.
What can a waterfall add?
A raised stone or tiled waterfall can create movement and sound at one end of the pool. It may also connect the pool to a retaining wall, spa, or raised bond beam. Helping the renovation feel integrated with the backyard rather than added as a separate object. Natural bluestone, travertine, glass tile, and porcelain ceramics can produce very different visual and maintenance requirements, so the material should be coordinated with the coping and waterline tile. Waterfalls require an appropriate pump and return plumbing. The design should account for access to equipment, splash control, and the path water takes across adjacent coping or deck surfaces. These details matter because an attractive feature can become a nuisance if it sends water onto walking areas or makes nearby surfaces continually wet.
When does a fountain make sense?
Deck jets and bubblers can add motion without requiring a large raised structure. Bubblers work particularly well in a shallow ledge, while deck jets can arc into the pool from the surrounding deck. Their placement needs careful planning around seating, circulation, lighting, and the pool’s existing plumbing. A restrained layout is often easier to operate and balance than several unrelated water effects.
Could a tanning ledge improve the pool?
A tanning ledge creates a shallow platform for sitting, cooling off, or supervising young swimmers from a comfortable depth. It can be incorporated into a redesigned pool shape or added as part of a broader shell modification, depending on the existing structure. The ledge should have a practical width, a nonslip finish, and steps that provide clear entry and exit. It also requires the contractor to evaluate circulation so shallow water remains clean and properly mixed. 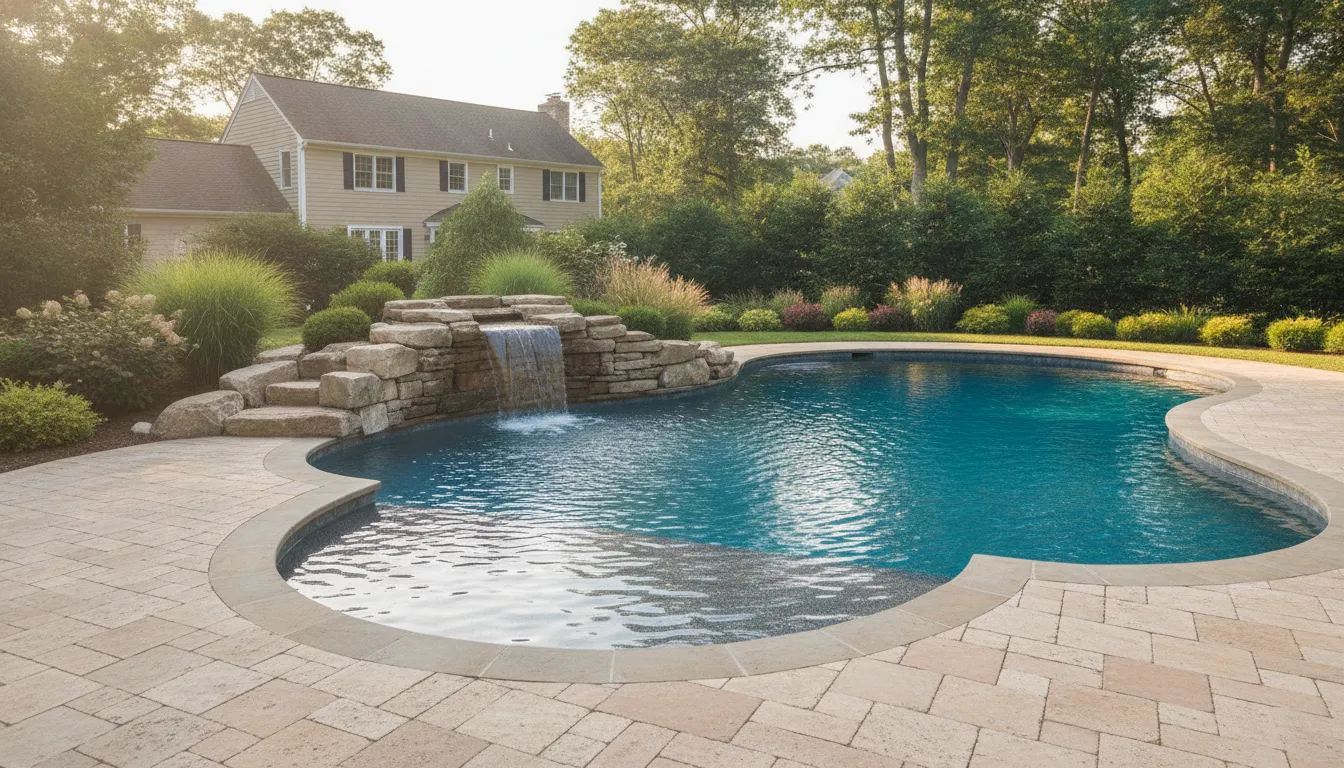 Water feature additions can significantly modernize an older gunite pool while increasing the renovation budget. So plan for them before the finish, tile, and surrounding hardscape work are finalized. Review the feature as part of the complete plan, including plumbing, electrical, drainage, and equipment. For a practical example of how these elements can work together, see this full backyard and pool renovation case study.
How Much Does a Gunite Pool Renovation Cost on Long Island?
The cost of a gunite pool renovation depends on the condition of the existing shell and the parts you choose to replace. Resurfacing an intact pool with new plaster or pebble is a different project from correcting structural cracking, rebuilding steps, replacing plumbing, upgrading equipment, or redesigning the surrounding deck. A useful estimate starts with a detailed inspection, not a generic per-square-foot price. For context, Gappsi’s published baseline for a new gunite pool on Long Island is $90,000 to $140,000. Renovating an existing shell is generally a smaller investment than removing and rebuilding the pool because the excavation. Shell construction, and much of the original infrastructure may remain in place. The final scope still needs to account for hidden conditions uncovered after draining and removing the old finish.
Which renovation components affect the estimate?
The interior finish is often the largest visible decision. Standard plaster typically lasts 7 to 10 years, while pebble finishes are commonly expected to last 15 to 20 years. That longer service life can influence the value of the initial choice, but material selection should also reflect the desired texture, color, maintenance routine, and appearance. The finished surface should be smooth, waterproof, and durable enough to withstand routine cleaning, as described in resurfacing requirements from Sacramento County’s Environmental Management Department: pool resurfacing requirements. Other cost drivers include coping and waterline tile, structural repairs, pool steps, lights, drain covers, pumps, filters, and plumbing. Replacing coping with natural bluestone, travertine, limestone, porcelain, or another selected material changes both the appearance and the installation work. If the pool is already drained, it may be practical to inspect the lighting and install approved drain covers at the same time.
Why should the scope be priced as a complete project?
A finish-only quote may not reflect repairs needed beneath the surface. Small cracks can disguise structural problems, so a professional should evaluate them before the pool is replastered. Likewise, adding a tanning ledge, fountain, or waterfall during renovation increases the scope and may require new plumbing, controls, or electrical work. These are deliberate upgrades, not costs that should be blended into a basic resurfacing allowance. For a clearer project plan, review Gappsi’s gunite pool construction and renovation services and request a site-specific evaluation. The right comparison is not renovation versus an invented flat price. It is the cost of restoring the existing shell and selected components versus the much larger scope of a complete new pool. With the finish lifespan and long-term maintenance needs included in the decision. Contact Gappsi through our contact page
Frequently Asked Questions
Can a gunite pool be resurfaced?
Yes. A contractor can remove the worn interior finish, inspect the shell, repair appropriate cracks, and install a new smooth, waterproof finish. Options may include marble dust plaster, quartz, glass, hydrazzo, or stone pebble, depending on the pool’s condition and the desired appearance.
How often should a gunite pool be resurfaced?
Standard plaster commonly lasts about 7 to 12 years, while pebble finishes are often expected to last 15 to 20 years. Water chemistry, cleaning practices, exposure, and installation quality affect the actual service life. Regular inspection helps identify roughness, staining, cracking, or surface loss before the project becomes more extensive. Source
What is involved in a gunite pool renovation?
The scope can include draining the pool, evaluating the shell, repairing structural or surface damage. Resurfacing the interior, replacing coping and waterline tile, and updating lighting or drain covers. Homeowners may also add a tanning ledge, fountain, or waterfall while the pool is open.
How much does it cost to redo a gunite pool on Long Island?
There is no reliable single price because the scope may range from a finish replacement to a broader redesign with structural repairs, coping, tile, equipment, or water features. For context, a new Long Island gunite pool is published at a baseline of $90,000 to $140,000. While renovation pricing should be based on the existing shell and selected improvements rather than that new-construction figure.
Ready to Plan Your Gunite Pool Renovation?
A renovation plan can help you prioritize the work your pool needs, from a new plaster or pebble finish to updated coping, tile, lighting, or water features. A consultation gives you a chance to discuss the existing shell, the look you want, and the improvements that fit your Long Island property before decisions are made. Gappsi Group can review your goals and outline a practical path for the project. Contact Gappsi through our contact page When you are ready to move forward, bring your questions and renovation priorities to the conversation. The right scope can make the next step clearer and help you plan the finished pool with greater confidence.