


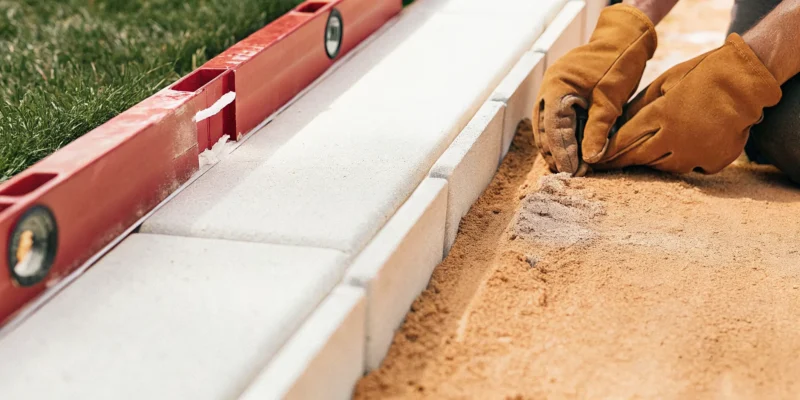
A sloped yard can feel like a wasted opportunity, a tricky incline that’s difficult to mow and even harder to enjoy. A retaining wall is the perfect solution, transforming that challenging grade into beautiful, usable space for a garden, patio, or play area. This guide will walk you through how to build a retaining wall with blocks, covering everything from planning and site prep to the final capstone. We’ll focus on the critical steps, like creating a solid foundation and managing drainage, that ensure your wall is built to last. Understanding these fundamentals is key, whether you plan to tackle the project yourself or want to know what to expect when working with our expert masonry team.
Key Takeaways
- Focus on a flawless first row: Your entire wall’s stability depends on the base course. Make sure to bury the first row of blocks partially and use a level on each one, both front to back and side to side, to create a perfect foundation.
- Create a path for water to escape: Heavy, waterlogged soil is a wall’s worst enemy. Protect your investment by installing a perforated drainage pipe and backfilling with at least a foot of clean gravel to relieve pressure and prevent collapse.
- Know when to call a professional: Always check local building codes before starting your project. If your wall is over three feet tall, built on a steep slope, or involves a complex design, hiring an expert is the best way to guarantee a safe and durable structure.
Plan Your Retaining Wall Project
A successful retaining wall starts long before you lay the first block. Proper planning is the most important step to ensure your wall is strong, beautiful, and built to last. Taking the time to choose the right materials, understand your site, and check local rules will save you from headaches down the road. Think of this phase as creating the blueprint for your project. It’s where you make the key decisions that will define the look and function of your new landscape feature.
Choose the Right Blocks
The blocks you choose are about more than just strength, they define the style of your wall. Block retaining walls come in a huge variety of colors, textures, and patterns, making it easy to find a look that complements your garden and home. Do you want a rustic, natural feel or something more modern and sleek? Consider the existing materials in your landscape. Matching your wall to your patio pavers or home’s stone veneer can create a cohesive, professionally designed look. Our Gappsi team can show you a wide range of porcelain and natural stone options to help you find the perfect match for your vision.
Concrete vs. Interlocking vs. Natural Stone
Your wall’s height and purpose will help you decide on the best material. Interlocking concrete blocks are a popular choice for DIY projects because they are engineered to fit together securely. For shorter walls, typically under three feet, these are a great option. If your design calls for a taller structure, you’ll need to consider structural blocks or even poured concrete, which often requires a professional. While you might be able to install a short concrete block wall yourself, taller and more complex projects should be handled by an expert masonry construction company to ensure they are engineered for safety and longevity.
Gather Your Materials and Tools
Before you start digging, make sure you have everything you need. A typical project requires the retaining wall blocks, capstones for a finished top, and construction adhesive to secure them. You will also need materials for the foundation and drainage, including gravel and a perforated drainage pipe. For tools, you’ll want a sturdy shovel, a wheelbarrow, a tape measure, a string line, a level, and a hand tamper or plate compactor to create a solid base. Having all your materials and tools ready on-site makes the entire building process go much more smoothly and helps you avoid interruptions.
Check Local Building Codes and Permits
This is a step you absolutely cannot skip. Many towns on Long Island require a permit for retaining walls, especially for any wall over three or four feet high. These building codes exist to ensure your wall is safe and won’t fail under pressure. A collapsing wall is a serious safety hazard and can cause major property damage. For any wall taller than four feet, you will likely need a licensed engineer to approve the design. We always recommend checking with your local building department in Suffolk or Nassau County before you begin. If it seems complicated, our team can help manage the entire process for you.
Prepare the Site for Your Wall
You’ve planned your project, and now it’s time to get your hands dirty. Site preparation is arguably the most important part of building a retaining wall that lasts. A little extra effort here prevents a lot of headaches later. Think of it as building the perfect foundation for your project. A strong start ensures your wall will stand straight and true for years, handling everything Long Island weather throws at it. This process involves marking your layout, digging a precise trench, and creating a solid base. It’s physical work, but seeing that clean, prepped space ready for your first row of blocks is incredibly satisfying.
Before you break ground, take a final look at your plan. Double-check your measurements and make sure you have all your tools ready to go. Proper preparation is about more than just digging; it’s about working smart to create a stable structure that enhances your property’s beauty and function. If you start digging and find the scope is bigger than you expected, or you run into unexpected pipes or roots, don’t panic. Remember that our team of masonry experts are always here to help guide you or take over if needed. Let’s walk through each step together.
Mark and Measure the Wall’s Location
First things first, let’s create a clear guide for your wall. Grab some wooden stakes and a string line. Hammer the stakes into the ground at both ends of where your wall will be, then run the string tightly between them. This simple line will be your best friend, keeping your trench and your wall perfectly straight. For curved walls, you can use a garden hose or marking paint to outline the shape on the ground. Take a step back and look at your outline from different angles. Does it look right? Making adjustments now is much easier than after you’ve started digging. This visual guide is essential for accuracy.
Dig the Trench to the Proper Depth
With your path marked, it’s time to start digging. Your goal is to create a trench for the base course of blocks. A good rule of thumb is to make the trench about twice as wide as your retaining wall blocks. For depth, you’ll want to dig deep enough to bury about half of your first block, plus space for a 4 to 6-inch gravel base. For most standard blocks, this means digging a trench about 8 to 12 inches deep. This ensures the base of your wall is locked firmly into the ground, giving it the stability it needs. The exact dimensions will depend on the natural stone or concrete blocks you’ve chosen, so always check their specifications.
Compact the Soil and Add a Gravel Base
Once your trench is dug, don’t just start laying blocks. You need to create a solid, level footing. First, use a hand tamper to compact the soil at the bottom of the trench until it’s firm. Next, add a layer of crushed stone or gravel, about 4 to 6 inches deep. This gravel base is critical for drainage and preventing the ground from shifting. Spread the gravel evenly and then compact it with the tamper until it’s tightly packed and, most importantly, perfectly level. Use a carpenter’s level to check it from side to side and front to back. Your entire wall depends on this first layer being flawless.
Understand How Soil Type Affects Stability
Here on Long Island, we have a mix of soil types, from sandy loam to denser clay. The type of soil in your yard plays a big role in your wall’s stability. Sandy soils drain well but can be less stable, while clay soils hold water and can create immense pressure when they freeze and thaw. If you dig your trench and find very soft, mucky, or loose soil, it’s best to remove it. Dig a little deeper and replace that unstable dirt with more compacted gravel. This creates a stronger footing for your wall to rest on. Understanding your specific ground conditions is a key part of a successful landscape design and construction project.
Lay the Foundation Row
This is it, the moment of truth. Laying the first row of blocks, also known as the foundation or base course, is the single most important step in building a retaining wall. Everything you do from here on out depends on getting this part right. A perfectly straight and level foundation row sets you up for a stable, strong wall that looks professionally built. Rushing this stage is a recipe for a crooked, unstable wall, so grab your level, take a deep breath, and let’s focus on creating a flawless base for your project.
Bury the First Row to the Correct Depth
To give your wall the stability it needs to stand strong for years, you must bury the first row of blocks partially below ground. This anchors the entire structure and prevents it from sliding forward under pressure. A good rule of thumb is to bury at least half of the first block. For example, if you’re using a standard 6-inch-tall block, your trench should be deep enough to bury at least 3 inches of it. This means your initial trench, including the gravel base, should be about 9 inches deep from the final grade. Getting this depth right is a non-negotiable part of building a lasting wall, and it’s a detail our masonry experts never overlook.
Level the Foundation for a Stable Base
Once your trench is ready, it’s time to place the first blocks. Your goal here is perfection. Each block must be perfectly level, both from side to side and from front to back. Use a torpedo level to check each block as you place it, and a longer 4-foot level across several blocks to ensure they are all aligned. If a block isn’t level, use a rubber mallet to gently tap it into the gravel base until it is. Any imperfection here will be magnified as you add more rows, resulting in a visibly crooked wall. Take your time, because as many installation guides will tell you, a flawless first course is the key to a beautiful finish.
Avoid Common First-Row Mistakes
The most common mistake DIYers make is underestimating how much time and patience the foundation row requires. It’s easy to get frustrated and want to move on, but rushing will derail your project. Don’t be surprised if getting the first few blocks perfectly level takes a while. Another pitfall is not following the manufacturer’s instructions for the specific blocks you’re using. Different systems, whether they are interlocking concrete or natural stone blocks, can have unique requirements for setup and alignment. Always read the guide that comes with your materials. Taking the time to get this first row right will save you from major headaches and a wobbly wall later on.
Manage Drainage Behind the Wall
Water is a retaining wall’s greatest enemy. When soil becomes saturated, it gets incredibly heavy and exerts immense force, known as hydrostatic pressure, against the back of your wall. Without a proper escape route, this pressure can cause a wall to bulge, crack, or even collapse. Creating a solid drainage plan is not just a good idea; it is the most critical step for ensuring your wall remains strong and stable for years to come. Think of it as building a hidden system that gives water an easy path to follow, guiding it away from your wall so it never has a chance to cause damage.
The following steps will show you how to create a complete drainage system using a perforated pipe, the right backfill material, and structural reinforcement. Taking the time to manage water correctly from the start will protect your investment and prevent future problems. Ignoring drainage can lead to significant damage, which is why our restoration and sealing services are often called to fix issues caused by poor water management. A little extra effort now will save you from major headaches down the road.
Install a Perforated Drainage Pipe
A perforated drainage pipe is your wall’s primary tool for collecting and redirecting water. This is a flexible or rigid pipe with small holes or slits designed to let water in. Place the pipe on the gravel base directly behind your first row of blocks. To keep it from getting clogged with silt and debris, it’s a great idea to cover the pipe with a fabric filter sock. This simple addition ensures water can flow freely for the life of the wall. The pipe should be laid with a slight downward slope, about an eighth of an inch per foot, to let gravity carry the water away. Make sure the end of the pipe, or the “daylight,” opens to a location where water can drain safely, like a downslope area or a dry well.
Backfill with Gravel for Proper Water Flow
The material you place directly behind your wall is crucial for effective drainage. Do not use the soil you excavated. Instead, you need to backfill with a layer of 3/4-inch clean, crushed gravel. This angular stone locks together to form a stable, porous mass that allows water to flow freely down to the drainage pipe at the base. This gravel zone should be at least 12 inches wide, creating a clear channel for water to travel without building up pressure against the wall blocks. At Gappsi, we rely on high-quality aggregates for everything from durable gravel driveways to solid foundations because we know proper materials are the key to lasting results.
Use Geogrid Reinforcement for Taller Walls
If your retaining wall will be taller than three to four feet, you must include geogrid reinforcement. Geogrid is a strong, synthetic mesh that stabilizes the soil behind the wall, effectively tying the wall structure into the earth it is holding back. This reinforcement is laid horizontally across the top of the blocks and extends several feet back into the gravel fill. As you add more courses to your wall, you will add more layers of geogrid according to the block manufacturer’s specifications. This step is essential for preventing taller walls from leaning or failing under pressure. For any wall of significant height, geogrid is a critical safety feature that our professional masonry team incorporates into every project.
Know Your Wall’s Height Limitations
Not all retaining wall blocks are created equal, and it’s important to know their limits before you start building. Smaller, solid concrete blocks sold at big-box stores are typically designed for simple garden walls under three feet tall. For anything higher, you will need to use larger, engineered interlocking blocks designed to handle greater structural loads. These systems are specifically designed for taller walls and often have their own requirements for setbacks and reinforcement. Pushing a block system beyond its engineered height limit is a recipe for failure. If your project involves a tall or complex wall, it is always best to consult with a professional to ensure it is designed and built safely.
Build and Finish Your Wall
With your foundation set and drainage in place, you’re ready for the most rewarding part: building the wall itself. As you stack the blocks, you’ll see your project come to life. This stage is all about precision and patience. Taking your time with each row ensures your wall will be strong, stable, and straight for years to come. Pay close attention to staggering the joints, keeping everything level, and finishing the top with care.
Stagger Joints in a Running Bond Pattern
As you begin your second row, avoid placing the blocks directly on top of the ones below so the seams line up. Instead, you’ll want to create a running bond pattern. This means staggering the joints on each new row, similar to a brick wall. The vertical seam of a block on an upper row should sit over the center of the block below it. This simple technique is crucial because it distributes pressure across the entire wall, making it significantly stronger and more stable. Many block systems are designed for this, and you may need to cut a block in half to start a new row correctly.
Check for Level and Setback as You Build
After you place each block, check that it’s level from front to back and side to side. A small mistake on a lower row will become a very noticeable problem by the time you reach the top. It’s also important to follow the manufacturer’s instructions for setback. Many retaining wall blocks are designed with a lip or pin system that creates a slight, consistent step back with each new course. This backward lean helps the wall resist pressure from the soil behind it. Our expert masonry team knows that consistent checks are the key to a professional-looking and structurally sound wall.
Apply Adhesive to Secure the Capstones
The capstones, or coping, are the flat blocks that create the finished top surface of your wall. They provide a polished look and protect the wall structure from water. Before you place them, make sure the top row of your wall is clean and completely dry. Apply a generous bead of concrete or masonry adhesive to the top of the wall blocks, then firmly press the capstones into place. This final step secures the entire structure, preventing the top blocks from shifting over time and giving your wall a beautiful, completed appearance.
Add Finishing Touches for a Polished Look
A retaining wall doesn’t have to be just a functional structure. Think of it as a new feature in your yard. You can integrate lighting into the wall for a beautiful evening glow or build in planters to create a tiered garden space. Consider planting cascading flowers or lush greenery behind the wall to soften its edges and blend it into the surrounding environment. A well-designed wall can completely transform a sloped yard into a multi-level outdoor living area. If you need ideas, our landscape design services can help you visualize how to best integrate your new wall into your property.
Know When to Call a Professional
While tackling a retaining wall yourself can be incredibly rewarding, some projects are best left to the pros. Knowing when to step back and call for help isn’t admitting defeat; it’s making a smart, informed decision to protect your investment and ensure your family’s safety. Complexities like wall height, challenging terrain, and local regulations can quickly turn a weekend project into a major headache with long-term consequences if not handled correctly. Think about the sheer weight of the soil your wall will hold back. A small miscalculation in the base or drainage can lead to bulging, cracking, or even a complete collapse down the road.
A professionally built wall is an asset that adds lasting value to your home. When you bring in an expert, you’re not just paying for labor. You’re investing in years of experience, technical knowledge, and the peace of mind that comes from knowing the job was done right. Our team has the expertise to design and build retaining walls that are both beautiful and structurally sound, handling every detail from start to finish. We ensure the final structure is built to last, giving you a functional and gorgeous addition to your landscape.
Signs Your Project Needs an Expert
It can be tough to gauge a project’s difficulty from the outset. Here are a few clear signs that your retaining wall requires a professional touch. If your planned wall is taller than three or four feet, it will need special reinforcement and possibly an engineer’s approval to handle the immense pressure behind it. Building on a steep slope or dealing with poor drainage also adds significant complexity. These situations require expert planning to prevent erosion and structural failure. Finally, if you have an intricate, multi-tiered, or curved design in mind, a professional can ensure the final result matches your vision without compromising stability.
The Benefits of Hiring a Masonry Pro
Hiring a professional mason offers benefits that go far beyond simply getting the wall built. An experienced team brings a level of craftsmanship that ensures your wall is not only strong but also visually stunning. We provide expert masonry construction that stands the test of time. Professionals also take the stress of logistics off your plate. We understand local building codes and will secure all the necessary permits for your project, saving you from potential fines or safety issues. Ultimately, hiring a pro guarantees a high-quality, durable, and compliant structure that enhances your landscape for years to come.
Related Articles
- Learn About Quality Retaining Walls for Your Long Island Backyard – Gappsi Group
- Estimate for reinforced poured concrete footer for retaining walls long island – Gappsi Group
- Three level retaining wall long island – Gappsi Group
- Remove retaining walls|rebuild retaining wall|long island – Gappsi Group
- The Complete Guide to a Privacy Wall Outdoor
Frequently Asked Questions
How high can I build a retaining wall myself? Generally, most DIY-friendly block systems are designed for walls under three or four feet tall. Once you go higher than that, the project becomes much more complex. Taller walls must support an incredible amount of soil pressure, so they require professional engineering, specific reinforcement like geogrid, and almost always a building permit to ensure they are constructed safely.
Why is proper drainage so essential for a retaining wall? Water is the biggest threat to a retaining wall’s stability. When soil behind the wall gets saturated with rain, it becomes extremely heavy and pushes against the blocks with immense force. A proper drainage system, which includes a gravel backfill and a perforated pipe, gives that water an escape route. Without it, the pressure can build up and cause your wall to bulge, crack, or even collapse over time.
What makes the first row of blocks so important? The first row, or foundation course, sets the standard for the entire wall. It must be partially buried to anchor the structure and prevent it from sliding forward. More importantly, it has to be perfectly level. Any small error or tilt in this first row will become much more obvious as you build higher, resulting in a crooked, unstable wall. Taking your time here is the best thing you can do for your project.
How do I know when to call a professional for my wall project? You should consider hiring a professional if your wall will be taller than four feet, if you are building on a very steep slope, or if you notice the soil is extremely soft or mucky. Complex designs with deep curves or multiple tiers are also best handled by an expert. Calling a pro isn’t giving up; it’s a smart move to ensure the safety, longevity, and beauty of your investment.
How do I choose the right material for my wall? Your choice of material depends on your wall’s height and your home’s style. Interlocking concrete blocks are a fantastic, user-friendly option for shorter walls and come in many colors and textures. For a more unique or high-end look, natural stone offers timeless beauty. The best approach is to consider your existing landscape and home exterior, and choose a material that complements them to create a cohesive, polished look.