


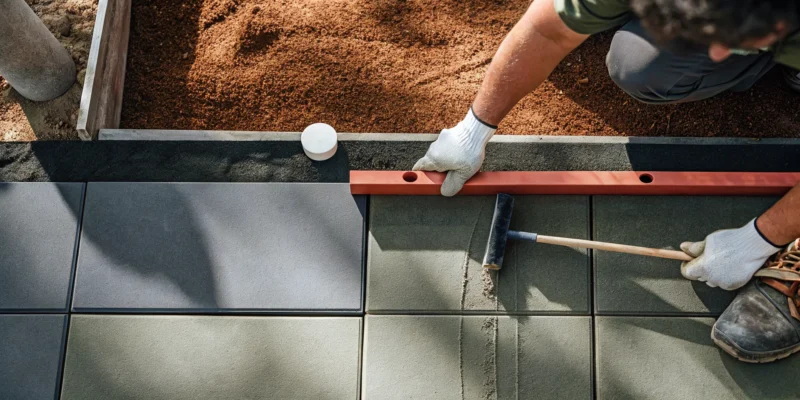
You want a beautiful paver patio, but the thought of demolishing your existing concrete slab is overwhelming. What if you didn’t have to? Laying pavers directly over concrete is a practical solution that can give your outdoor space a dramatic facelift. This method works wonderfully, provided the concrete base is in good shape and you follow the right steps. This article is your complete roadmap, detailing how to lay a patio for beginners on concrete from start to finish. We’ll cover choosing the right materials, preparing the surface correctly, and avoiding common mistakes so your new patio looks professionally installed.
Key Takeaways
- A Solid Base is Non-Negotiable: Paving over concrete is a great time-saver, but only if the existing slab is in excellent condition. If your concrete has large cracks, is crumbling, or is uneven, you must remove it and build a proper foundation to ensure your new patio lasts.
- Proper Technique Prevents Costly Repairs: Always use a full, continuous mortar bed under each paver for solid support, and never skip the bonding agent. These two steps work together to create a powerful adhesion that stops pavers from cracking or becoming loose over time.
- Plan for Water and Protect Your Investment: Water is a patio’s biggest enemy, so ensure your surface has a slight slope for drainage away from your house. After installation, apply a quality sealant to protect your pavers from stains, water damage, and fading.
What You Need Before You Start
Before you get your hands dirty, let’s talk about preparation. Like any good recipe, having all your ingredients and tools laid out first is the secret to success. It saves you from making frantic trips to the hardware store mid-project and helps everything run smoothly. Getting organized now means you can focus on the fun part: bringing your beautiful new patio to life. While a DIY project can be rewarding, remember that a project of this scale requires precision. If you find the list daunting, our expert masonry team has perfected this process over decades and is always here to help.
Your Tool Checklist
Think of this as your project’s command center. Having the right tools on hand will make every step, from measuring to finishing, much easier. You don’t want to be stuck trying to level a slab with the wrong equipment. Here’s what you should gather:
- Measuring tape, rope, and a carpenter’s square
- Shovel and wheelbarrow
- 2×4 lumber and steel stakes for the frame
- Drill and 3-inch screws
- Hand tamper or a plate compactor
- Level and a straightedge
- Saw (for cutting pavers)
- Stiff broom
A plate compactor is a real game-changer for creating a solid, level base that won’t shift over time. You can often rent one from a local hardware store if you don’t own one.
Your Materials Checklist
With your tools ready, it’s time to gather your materials. The quality of these components will directly impact how durable and beautiful your finished patio will be. Don’t be tempted to cut corners here; a strong foundation is everything. You will need:
- Gravel for the base layer
- Concrete mix and rebar for reinforcement
- Mortar mix
- A bonding agent or primer
- Jointing compound or sand
- Concrete sealer
And of course, the star of the show: your pavers. Whether you’re dreaming of sleek porcelain or classic natural stone, choosing the right material is key to achieving your desired look. Make sure you have a solid 4-inch-thick layer of compacted gravel to ensure proper drainage and a stable base.
Is Paving Over Concrete a Good Idea?
So, you have an old concrete patio or walkway and you’re dreaming of a beautiful paver surface. The big question is, can you just lay new pavers on top of the existing concrete? The short answer is yes, you often can, and it can be a fantastic shortcut. Using your existing concrete slab as a base can save you a ton of time, money, and demolition work. However, this method only works if the concrete you’re covering is in good shape. If the foundation is flawed, you’re just putting a pretty bandage on a problem that will eventually ruin your hard work. Let’s walk through when this is a smart move and when you need to pause and reconsider.
The Pros of Laying Pavers on Concrete
When your existing concrete is stable and in good condition, using it as a base is a practical and efficient way to go. The biggest advantage is speed. Since you’re not excavating and building a new base from scratch, the project timeline gets much shorter. Once the concrete is prepped, you can get right to the fun part: laying the pavers. This approach reduces labor costs and the mess that comes with a full demolition. It’s an effective method to revitalize your outdoor spaces with beautiful new materials without the headache of a complete overhaul. Think of it as giving your patio a major facelift on a solid foundation.
When to Reconsider: Dealing with Damaged Concrete
This shortcut has one major rule: never build on a bad foundation. If your concrete slab has significant issues, paving over it will only lead to disappointment. Look for large, deep cracks, crumbling edges, or sections that are heaving or sinking. If parts of the concrete are at different levels, it’s a sign that the ground underneath is unstable. This movement won’t stop just because you’ve covered it. Your new pavers will shift, crack, and become uneven, wasting all your effort. Proper site preparation is everything. If your concrete is not a solid, stable base, you’ll need to remove it and start fresh to ensure your new patio lasts for years.
A Quick Note on Height and Damp-Proofing
Here’s a crucial detail that’s easy to overlook: the final height of your new patio. Laying a mortar bed and pavers will add about 1.5 to 2 inches of height to the surface. You need to check where this new height will sit in relation to your house. Look for your home’s damp-proof course (DPC), which is typically a thin horizontal line in the brickwork about six inches above the ground. If your new patio surface is higher than the DPC, it can create a bridge for moisture to bypass this protective layer, potentially causing serious damp issues inside your home. Always measure first to make sure your beautiful new patio doesn’t create a costly problem down the road.
How to Prepare Your Concrete Surface
Think of your existing concrete slab as the foundation for your new patio. If that foundation isn’t solid, clean, and stable, the beautiful patio you lay on top won’t last. Taking the time to properly prepare the surface is the single most important thing you can do to ensure your project is a success for years to come. It prevents future headaches like shifting pavers, water damage, and cracks. Let’s walk through exactly what you need to do.
Clean and Pressure Wash the Area
Start with a completely clean slate. Over the years, your concrete has collected dirt, moss, algae, and maybe even some oil stains. All of this has to go. A thorough cleaning ensures that the mortar and bonding agents you apply later will adhere properly. The most effective way to do this is with a pressure washer, which blasts away grime from the pores of the concrete. If you don’t own one, you can easily rent one for a day. For stubborn stains, you may need a concrete-specific cleaner. This step is so important that it’s a standard part of any professional restoration and sealing service.
Repair Cracks and Level the Surface
Next, play detective and inspect every inch of the clean concrete. Small, hairline cracks aren’t a dealbreaker, but they need to be addressed. You can fill them with a flexible concrete crack sealant. For larger cracks or low spots, use a self-leveling compound to create a smooth, even surface. Be honest with your assessment here. If your slab has major, wide cracks, is crumbling, or is severely heaved, it’s not a stable base. Paving over it will only hide the problem temporarily. In these cases, you may need to have the old slab removed and a new one poured by a masonry professional.
Plan for Proper Slope and Drainage
Water is the biggest threat to any patio. If it pools on the surface or drains toward your home’s foundation, you’re setting yourself up for major problems. Your concrete base must have a gentle slope that directs water away from your house and into your yard or a drain. The ideal slope is about a quarter-inch drop for every foot of distance. You can check this with a long level and a measuring tape. If your slab is perfectly flat or slopes the wrong way, you can correct it by applying a layer of leveling compound, making it thicker on one side to create the necessary grade for proper drainage.
Apply a Bonding Agent
This is a step many DIYers skip, but it’s your secret weapon for a long-lasting patio. A bonding agent, or primer, acts like a super-strong glue between the old concrete and the new mortar bed you’re about to lay. It ensures the two layers fuse together into a single, solid unit, preventing the pavers from shifting or coming loose over time. You’ll want to use a liquid polymer bonding agent, often called an SBR bonding agent. Following the product’s instructions, you’ll simply brush a thin, even coat onto the clean, repaired concrete surface right before you start applying your mortar. It’s a quick step that provides powerful adhesion and peace of mind.
How to Choose the Right Paving Slabs
Choosing the right paving slabs is one of the most exciting parts of planning your new patio. The material you select sets the tone for your entire outdoor space, influencing everything from the overall style to your long-term maintenance routine. Think of it as choosing the personality for your backyard. Do you want something sleek and modern, or rustic and timeless? We’ll walk through the three most popular options: porcelain, natural stone, and concrete. Each has its own unique benefits, and understanding them will help you find the perfect match for your home and lifestyle.
Porcelain Pavers
If you’re looking for a durable, low-maintenance option with a clean, contemporary feel, porcelain pavers are an excellent choice. They are incredibly tough and built to handle heavy foot traffic and harsh Long Island weather without fading or cracking. Because they are non-porous, they resist stains, mold, and mildew, making cleanup a breeze. You won’t have to worry about spilled wine during a summer barbecue. Gappsi’s collection of porcelain pavers comes in a huge variety of colors and finishes, including realistic wood and stone effects, giving you endless design possibilities without the upkeep of the real thing.
Natural Stone Pavers
For a touch of timeless elegance, nothing compares to natural stone. Materials like limestone, slate, travertine, and granite bring an organic, high-end beauty to any patio, with unique colors and textures that only nature can create. Each stone is one-of-a-kind, so your patio will have a character that is entirely its own. Natural stone is extremely durable and can last a lifetime with proper care. While it can be a bigger initial investment, the classic charm and lasting value it adds to your home are undeniable. Our expert masonry team can help you design a layout that truly highlights the stone’s natural beauty.
Concrete Pavers
Don’t underestimate the power of concrete pavers. They are the chameleons of the paving world, offering incredible versatility and durability at a budget-friendly price point. Available in a vast array of shapes, sizes, and colors, concrete pavers give you the creative freedom to design intricate patterns and unique layouts. Whether you want the look of classic cobblestone or a simple, modern grid, you can achieve it with concrete. They are engineered to be strong and resilient, making them a practical choice for any patio. You can find a wide selection of options at the Gappsi Store to get your project started.
What to Consider: Size, Thickness, Climate, and Use
Beyond the material itself, a few other factors will guide your decision. The size and shape of the pavers should complement your home’s architectural style. Larger slabs can make a small space feel bigger, while smaller pavers can create charming, intricate patterns. Thickness is also key; a simple walkway won’t need the same thick, heavy-duty pavers as a surface that might hold heavy patio furniture or a hot tub. Finally, think about long-term performance. A properly installed base is crucial to prevent shifting and sinking, which can lead to costly repairs. Investing in quality installation and periodic cleaning and sealing will ensure your patio looks great for years to come.
Your Step-by-Step Guide to Laying Pavers on Concrete
Alright, you’ve done the prep work, and your concrete slab is ready for its makeover. This is where the transformation really begins. Following these steps carefully will help you create a beautiful, durable patio that you can be proud of. Remember to work at a steady pace and not to rush the process, especially when you’re setting the first few pavers, as they will guide the rest of your layout. Let’s get those pavers down.
Step 1: Mark and Dry Lay Your Slabs
Before you mix any mortar, it’s smart to do a test run. Start by marking your layout with chalk lines directly on the concrete. Then, begin your dry lay, placing the pavers in your desired pattern without any adhesive. This lets you see exactly how the pattern will look and where you’ll need to make cuts. It’s much easier to adjust a paver now than after it’s set in mortar. This step is your best defense against ending up with an awkward sliver of a paver in a highly visible spot. A thoughtful masonry design always starts with a solid plan.
Step 2: Mix and Apply the Mortar Bed
Now it’s time to mix your mortar. You’ll be creating a full mortar bed, which provides a solid, even base for every paver. Combine your sand and cement according to the package directions, adding water slowly until you have a consistency similar to thick oatmeal. It should be stiff enough to hold its shape but wet enough to bond to the concrete and the paver. Working in small, manageable sections, spread an even layer of mortar about one inch thick. Use your trowel to create slight ridges in the mortar, which will help the paver settle in and create a stronger bond.
Step 3: Lay the First Slab and Set Your Pattern
With your mortar bed ready, it’s time to lay the first paver. Start in a corner and press the paver firmly into the mortar with a slight twisting motion. This ensures good contact and squeezes out any air pockets. Gently tap it with a rubber mallet to set it to the correct height. This first paver is your guide for the entire patio, so make sure it’s perfectly positioned. Continue laying pavers according to your pattern, using tile spacers to maintain consistent joint widths. You can see how our Gappsi pros handle different patterns on our YouTube channel for inspiration.
Step 4: Check Levels and Adjust for Drainage
As you lay each paver, constantly check your levels. Place a level across several pavers at a time to ensure the surface is flat and even. Just as importantly, you need to maintain the gentle slope you planned for drainage. A good rule of thumb is a slope of about a quarter-inch for every foot, angled away from your home’s foundation. This prevents water from pooling on the patio or running toward your house. Proper drainage is key to avoiding future issues that might require professional restoration services. Adjust the mortar underneath each paver as needed to achieve the right height and slope.
Step 5: Cut Slabs to Fit Edges
Unless your patio is a perfect grid of full-sized pavers, you will need to make cuts for the edges and to fit around obstacles like posts or vents. A wet saw with a diamond blade is the best tool for this job, as it gives you clean, precise cuts. An angle grinder also works but can create more dust. Always measure twice and cut once. Mark your cut line clearly on the paver before you begin. And please, always wear safety glasses and gloves when cutting pavers. Achieving a professional finish, whether for a patio or a full home remodeling project, is all about these finishing details.
Step 6: Fill the Joints
After all your pavers are laid and the mortar has had at least 24 hours to cure, you can fill the joints. This step locks the pavers together and prevents weeds from sprouting. Polymeric sand is an excellent choice because it contains polymers that harden when activated with water, creating a firm, durable joint. Sweep the sand across the dry patio surface, working it into the joints until they are completely full. Use a soft-bristle broom to avoid scratching the paver surface. You can find high-quality jointing sands and other materials at the Gappsi Store.
Step 7: Compact and Finish the Surface
Once the joints are filled, sweep any excess sand off the paver surfaces. If you used polymeric sand, follow the manufacturer’s instructions for activation, which usually involves lightly misting the patio with a garden hose. Be careful not to use too much water, as it can wash the sand out of the joints. For larger patios, using a plate compactor with a protective pad can help settle the pavers and sand for a truly professional finish. This final step ensures your new patio, much like the area around one of our custom swimming pools, is solid, stable, and ready for years of enjoyment.
Common Mistakes to Avoid
Laying a beautiful new patio is an exciting project, but a few common missteps can turn your dream outdoor space into a future headache. Taking the time to do things right from the start ensures your patio will be a source of enjoyment for years, not a constant repair job. By avoiding these frequent errors, you can build a stable, durable, and professional-looking surface that stands up to the elements and everyday life.
Using “Spot-Bedding” Instead of a Full Mortar Bed
It might seem faster to apply just a few dabs of mortar to the corners and center of each paver, a method known as “spot-bedding.” However, this is one of the most critical mistakes you can make. This technique leaves large, unsupported voids under the slab. Any pressure on these weak spots, like from foot traffic or patio furniture, can easily cause the paver to crack or rock back and forth. For a patio that lasts, you must use a full mortar bed. This provides solid, continuous support across the entire base of each paver, distributing weight evenly and locking it firmly in place.
Skipping the Bonding Agent
Think of a bonding agent as the essential primer for your project. It’s a liquid polymer that you paint onto the existing concrete and the back of your pavers before laying them in the mortar. Its job is to create a powerful chemical bond between the old concrete surface, the new mortar, and the paving slab. If you skip this step, the mortar will not properly adhere to the smooth concrete, and your pavers will eventually become loose and wobbly. It’s a simple, quick step that makes a huge difference in the long-term stability and success of your patio installation.
Forgetting About Drainage
Water is the biggest enemy of any paved surface. If you don’t plan for proper drainage, water can pool on your patio or, worse, get trapped underneath it. This can lead to a host of problems, from unsightly stains and moss growth to serious structural issues. In a climate like Long Island’s, trapped water that freezes and thaws can cause the pavers to heave and crack. A proper landscape design always includes a slight, consistent slope (about a quarter-inch drop per foot) to direct water away from your home’s foundation and off the patio surface, preventing damage before it starts.
Paving Over Unstable Concrete
Your new patio is only as strong as the foundation it’s built on. If your existing concrete slab is badly cracked, crumbling, or has significant heaving and unevenness, laying pavers directly over it is a recipe for failure. These issues are often signs of an unstable base underneath the concrete, and that movement will transfer directly to your new pavers, causing them to shift, crack, and become uneven. Before you begin, carefully inspect the slab. Minor cracks can be repaired, but if the damage is widespread, you must address the underlying problem first for a lasting result.
Missing Expansion Joints
Paving materials, like all building materials, expand in the heat and contract in the cold. Expansion joints are flexible gaps, typically filled with a silicone sealant, that are placed around the perimeter of the patio and at regular intervals in larger areas. They give the pavers room to move without pressing against each other and causing cracks or buckling. Similarly, sturdy edge restraints are essential for keeping the outer pavers from shifting outward over time. Proper masonry construction accounts for this movement, ensuring the entire system remains stable and intact through every season.
Working in Extreme Weather
The weather on installation day can have a big impact on the quality of your finished patio. Try to avoid working in extreme temperatures. If it’s too hot and sunny, the mortar can dry out too quickly before it has a chance to cure properly, resulting in a weak bond. If it’s too cold (below 40°F), the curing process will slow dramatically and can be halted entirely, compromising the strength of the mortar. Rain is also a problem, as it can wash away fresh mortar and ruin the surface finish. Always check the forecast and plan to work on a mild, dry day for the best results.
How to Seal and Maintain Your New Patio
You’ve put in the work, and now you have a beautiful new patio to show for it. To keep it looking its best for years of backyard barbecues and quiet mornings, a little maintenance goes a long way. Taking care of your patio is simple, and it protects the investment you’ve made in your home. Think of it as the final step in creating a lasting outdoor space.
Why Sealing Is a Must
Sealing your new patio is one of the most important things you can do to protect it. Think of sealant as a protective shield for your pavers. It creates an invisible barrier that guards against water damage, pesky stains from spilled drinks or grill grease, and general wear from the weather. This protective layer not only keeps your patio looking vibrant and new but also helps prevent cracks and makes cleaning much easier. By sealing your patio, you’re ensuring it remains a beautiful and durable centerpiece of your yard for many seasons to come.
How and When to Apply Sealant
Timing is everything when it comes to sealing. As a general rule, you should plan to reseal your patio every two to three years, depending on how much foot traffic it gets and its exposure to the elements. For the best results, apply the sealant on a clean, completely dry surface. It’s a good idea to check the weather forecast and pick a few dry days to ensure the sealant can cure properly without being washed away by rain. If you’d rather leave it to the experts, Gappsi offers professional restoration and sealing services to get the job done right.
Keep It Clean: Routine Washing
Regular cleaning is your first line of defense against dirt and grime buildup. A quick sweep every week or so will clear away leaves, dirt, and other debris that can accumulate on the surface. For a deeper clean, you can use a pressure washer on a low setting. Be careful not to use too much pressure, as a powerful blast can damage the paver surface or the jointing material between them. This simple routine is often all you need to keep your patio looking fresh and inviting, especially if you have durable porcelain and natural stone pavers.
Tackle Stains Immediately
Accidents happen, but they don’t have to leave a permanent mark on your patio. The key is to act fast. For most common spills and spots, a simple solution of mild detergent and water applied with a soft brush will do the trick. For tougher stains like oil or rust, you may need a specialized cleaner designed for pavers. Addressing stains as soon as you notice them prevents them from setting deep into the stone, making cleanup much easier and keeping your patio looking pristine. A properly sealed patio will also give you more time to clean up before a stain can set.
Know When to Reseal
So, how do you know when it’s time to reapply sealant? Your patio will give you a few clear signs. The easiest test is to splash a little water on the surface. If it beads up like water on a freshly waxed car, your sealant is still working. If the water soaks in and darkens the paver, it’s time to reseal. You might also notice the color of your patio looking a bit faded or dull. These are cues that the protective layer has worn down. Paying attention to these signs will help you keep your patio protected, and our professional restoration team is always here to help.
When to Call a Professional
Taking on a DIY project can be incredibly rewarding, but it’s also important to know when a job might be bigger than you can handle alone. For patio installations, calling a professional isn’t giving up; it’s making a smart investment in your home’s value and your own peace of mind. If you’re facing a large or complex project, bringing in an expert ensures the job is done right the first time, saving you from costly mistakes and future headaches.
Consider the scale and design of your project. A small, square patio on a perfectly level surface is a manageable weekend task. However, if you’re planning a large patio or a custom design with intricate patterns, curves, or multiple levels, the complexity grows quickly. Professionals have the experience to execute these detailed masonry designs flawlessly. They also understand the structural requirements for larger areas, like adding control joints to prevent the concrete from cracking over time.
The condition of your existing concrete slab is another major factor. If you notice significant cracks or areas where the concrete is uneven, it could signal that the ground underneath is unstable. Simply paving over this can lead to your new patio shifting and breaking apart. A professional can assess the root cause of the problem and properly restore and seal the foundation before any new pavers are laid. This ensures your beautiful new patio has a stable base that will last for years.
Finally, think about the logistics. Projects requiring more than a cubic yard of concrete involve a lot of heavy lifting and precise mixing. Professionals handle all the logistics, from ordering ready-mix concrete deliveries to operating heavy machinery like power mixers safely and efficiently. If the thought of coordinating material deliveries and wrestling with unfamiliar equipment sounds overwhelming, it’s a clear sign to call in a team that does it every day.
Related Articles
- What’s the Best Base for Pavers? An Expert’s Guide
- Can you install Nickolock pavers over concrete – Gappsi Group
- FAQ about Swimming pools, Landscape, masonry, carpentry, natural stone. – Gappsi Group
- Build a Stone Patio on Grass: A Step-by-Step GuideCopy linkFind any service
Frequently Asked Questions
My concrete has a few small cracks. Do I really need to tear it all out? Not necessarily. Small, hairline cracks are usually not a dealbreaker and can be repaired as part of your surface preparation. You can fill them with a flexible concrete sealant before you begin. The real red flag is significant damage, such as wide, deep cracks, crumbling edges, or sections of the slab that are heaving and uneven. If the concrete is no longer a stable, level surface, paving over it will only hide the problem temporarily, and your new pavers will eventually fail.
What is the single most common mistake DIYers make with this project? The most tempting and damaging shortcut is “spot-bedding,” which is using dabs of mortar on the corners and center of a paver instead of a full bed. This leaves hollow voids under the paver, making it incredibly weak and prone to cracking under the weight of foot traffic or furniture. Always take the time to apply a solid, full mortar bed under each paver for a durable patio that will last.
How much height will this add, and why is that important? You can expect the mortar and pavers to add about 1.5 to 2 inches of height to your existing surface. This detail is critical because you must ensure the new patio level does not end up higher than your home’s damp-proof course (DPC). The DPC is a thin, horizontal barrier in your brickwork, usually about six inches above the ground, that prevents moisture from rising into your home’s walls. If your patio bridges this barrier, it can lead to serious damp problems inside your house.
Is it really necessary to seal the pavers? What happens if I don’t? Yes, sealing is a step you shouldn’t skip. Think of unsealed pavers as being very porous, like a sponge. Without a sealant, they will absorb moisture, which can lead to cracking in freezing weather. They will also soak up any spills, from wine to oil, resulting in permanent stains. Sealing creates a protective shield that repels water, resists stains, and makes cleaning much easier, keeping your patio looking great for years.
This seems like a lot of work. When should I just call a professional? A small, simple patio can be a great DIY project. However, you should consider calling a professional if your existing concrete foundation is in poor shape, if your project is large and requires complex cuts or patterns, or if the design involves multiple levels and retaining walls. Professionals have the equipment and experience to assess and repair foundational issues and execute intricate designs flawlessly, ensuring a beautiful and long-lasting result.