


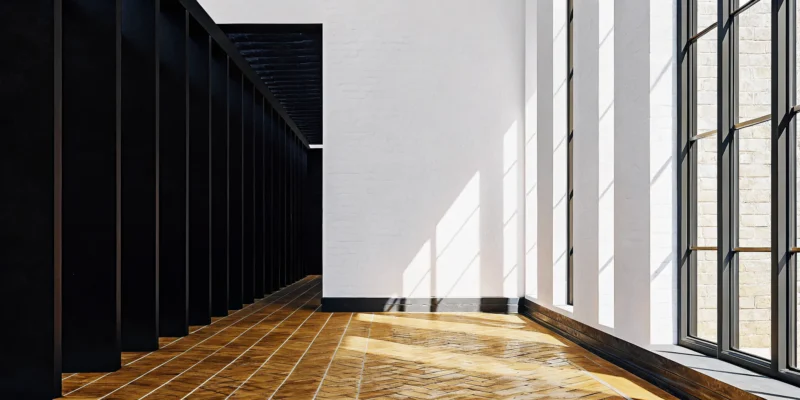
Some design trends fade as quickly as they appear, but others have a staying power that makes them true classics. The red brick herringbone floor falls firmly into the second category. With its rich, earthy tones and dynamic zig-zag pattern, it brings a sense of movement and history to any room, from a cozy farmhouse kitchen to a chic, industrial-style living area. It’s a choice that feels both grounded and full of character. If you’re considering this beautiful and durable option, you’re in the right place. We’ll cover what defines the pattern, the best materials to use, and how to care for your investment, ensuring it remains a beloved feature in your home for decades.
Key Takeaways
- It’s a Stylish Choice That Lasts: A red brick herringbone floor provides both timeless character and serious durability. The classic pattern adds warmth and texture, making it a practical and beautiful foundation for busy areas of your home like kitchens and entryways.
- Professional Installation Is Worth It: The intricate herringbone pattern requires precision to look right, making it a difficult installation. Hiring an experienced masonry professional is the best way to avoid a skewed layout and ensure a flawless, long-lasting result.
- Sealing Is Key for Easy Maintenance: Because brick is naturally porous, applying a quality sealant is a critical step. This protects your floor from stains and moisture, which simplifies daily cleaning and preserves the brick’s beauty for years.
What Is a Red Brick Herringbone Floor?
A red brick herringbone floor is a classic design choice that brings warmth, texture, and a touch of history into any home. It involves laying rectangular red bricks or brick-like pavers in a distinctive zig-zag pattern. This flooring style has been around for centuries, yet it feels just as fresh and relevant in modern homes as it does in rustic farmhouses. Whether you’re aiming for a cozy kitchen, a durable mudroom, or a statement entryway, this flooring makes a lasting impression.
The beauty of a red brick herringbone floor lies in its ability to be both a neutral backdrop and a standout feature. Its rich, earthy tones complement a wide range of color palettes and design styles, from industrial to traditional. Before you decide if this look is right for your space, let’s explore what defines the pattern, the materials you can use, and where it works best in a home.
Understanding the Herringbone Pattern
The herringbone pattern gets its name from its resemblance to the bone structure of a herring fish. It’s created by arranging rectangular bricks in a staggered, zig-zag layout. Each brick is laid at a 90-degree angle to the one next to it, forming a broken V-shape that repeats across the floor. This arrangement creates a sense of movement and visual interest that can make a room feel more spacious and dynamic.
Don’t confuse it with the chevron pattern, where the ends of the pieces are cut at an angle to meet in a perfect point. The herringbone pattern uses simple rectangular bricks, which gives it a more intricate and textured look. This timeless design requires precision, making expert masonry work essential for a flawless finish that adds character and sophistication to your home.
Real Brick vs. Brick-Look Alternatives
When planning your floor, you have two main material choices: real brick or a brick-look alternative. Real thin brick pavers offer unmatched authenticity. Often made from reclaimed clay, each brick has its own unique character, with subtle variations in color and texture that tell a story. This option provides a genuinely rustic and warm feel underfoot. However, real brick is porous, heavier, and typically requires sealing to protect it from stains and moisture.
For a more practical approach, you can opt for porcelain or natural stone tiles designed to look like brick. These alternatives are incredibly durable, water-resistant, and easier to clean, making them a great choice for busy households. While they may not have the exact texture of real brick, modern manufacturing techniques have made them look remarkably similar. The choice between real brick and a look-alike often comes down to balancing your desire for authenticity with your lifestyle needs.
Best Rooms for a Red Brick Herringbone Floor
The durability and classic style of a red brick herringbone floor make it a versatile choice for many areas of your home. It’s especially popular in high-traffic zones where you need a floor that can handle daily wear and tear. Think of entryways, mudrooms, and hallways, where the pattern can hide dirt while making a great first impression. Kitchens are another perfect spot, as the brick adds a cozy, European-inspired feel that pairs beautifully with both modern and traditional cabinetry.
Beyond floors, you can use the herringbone pattern to create stunning accent walls, fireplace surrounds, or even a backsplash. It’s also an excellent option for laundry rooms, sunrooms, and covered patios. As part of a larger home remodeling project, a brick herringbone floor can connect different spaces and add a cohesive, custom-designed element throughout your property.
Weighing the Pros and Cons of Red Brick Herringbone
A red brick herringbone floor makes a stunning statement, but it’s important to look at the full picture before you commit. Like any design choice, it comes with a unique set of benefits and challenges. Understanding these factors will help you decide if this beautiful, classic flooring is the right fit for your home, your lifestyle, and your budget. Let’s walk through the key pros and cons to consider.
The Pros: Durability, Character, and Timeless Appeal
The biggest draw of a red brick herringbone floor is its undeniable character. It brings a sense of history and warmth into a room that’s hard to replicate. Made from real clay, these bricks have a rustic, authentic look with classic red tones arranged in a dynamic zig-zag pattern. This flooring is also incredibly durable and can handle high-traffic areas with ease, making it a practical choice for entryways, kitchens, and mudrooms.
Best of all, the herringbone pattern is a timeless design element. It turns the simple brick into something more sophisticated, ensuring your floor won’t look dated in a few years. You get the charm of old, reclaimed bricks, which adds a unique story to your home’s design. This classic appeal pairs well with many different styles, from modern farmhouse to industrial chic, making it a versatile foundation for your decor.
The Cons: Weight, Cost, and Installation Challenges
On the other hand, there are a few practical challenges to keep in mind. First, real brick is heavy. Your home’s subfloor must be strong enough to support the additional weight, which might require reinforcement and should always be assessed by a professional. Brick is also a porous material, meaning it can absorb spills and stain if not properly sealed. Without a good sealant, it can also give off a bit of clay dust.
The installation itself is another major consideration. Herringbone is one of the most difficult patterns to lay correctly. It requires precision, careful planning, and a lot of cuts, which makes the installation more labor-intensive and costly than a standard layout. This is not a simple DIY project; you’ll want to rely on an experienced masonry designer to ensure the lines are perfect and the pattern remains consistent across the entire floor.
Brick Herringbone vs. Other Flooring Types
So, how does brick herringbone stack up against other options? Compared to a standard running bond brick pattern, the herringbone layout instantly adds more visual interest. It breaks up the monotony and creates a high-end look using a relatively humble material. It feels more intentional and decorative, turning your floor into a true focal point.
When compared to wood herringbone, brick offers a more rustic and industrial feel. It’s also a more durable option for areas prone to moisture, like a mudroom or covered patio. Of course, you can also find brick-look alternatives made from porcelain or other materials. While these can be easier to clean and install, they don’t offer the same authentic texture and natural color variation as real clay brick. Ultimately, the choice comes down to balancing authentic character with your project’s practical needs, something a home remodeling expert can help you sort out.
What’s the Cost of a Red Brick Herringbone Floor?
Understanding the cost of a red brick herringbone floor involves looking beyond the price tag on the tile. The total investment depends on the materials you choose, the size of your space, and whether you hire a professional or tackle the installation yourself. While it can be more of an upfront investment than some other flooring types, its durability and classic style make it a worthwhile addition that adds lasting value to your home.
Think of the final price in three parts: the cost of the brick itself, the price of additional materials like grout and sealer, and the cost of labor. Each of these elements can vary, but breaking them down will give you a much clearer picture of your total budget. We can help you explore material options and provide a detailed estimate that covers every aspect of the project, ensuring there are no surprises along the way.
Breaking Down the Cost Per Square Foot
When you start shopping for materials, you’ll often see an advertised price of around $9.99 per square foot for popular red brick herringbone mosaics. This is a great starting point for budgeting, but remember that this number typically only covers the cost of the tile itself. The final material cost can change depending on whether you choose genuine thin brick pavers or a porcelain lookalike, with natural materials often costing a bit more.
Exploring different porcelain and natural stone options can help you find the perfect balance between your budget and your design vision. While the per-square-foot price is a key piece of the puzzle, it’s just one part of the overall financial picture.
Factors That Affect the Final Price
Several other factors influence the final cost of your herringbone floor. First, it’s wise to get 10% more tile than you think you need. This extra material provides a buffer for any cuts, mistakes, or accidental breaks that can happen during installation. You’ll also need to budget for supplies like thin-set mortar, grout, and a high-quality sealer to protect the brick from stains and moisture.
The condition of your subfloor matters, too. If it needs leveling or repairs before the tile can be laid, that will add to the project’s cost and timeline. The complexity of a herringbone pattern often requires more skilled labor, which is why working with an experienced masonry designer can ensure the job is done right.
Comparing Professional vs. DIY Costs
Deciding between a DIY installation and hiring a professional is a major cost consideration. Some modern brick mosaics come with a mesh backing that simplifies installation, making a DIY approach more manageable for a handy homeowner. Going the DIY route saves you money on labor, but you’ll still need to account for your time and the cost of renting or buying specialized tools like a wet saw.
Hiring a professional, on the other hand, provides peace of mind. An expert installer can handle any subfloor issues and execute the intricate herringbone pattern flawlessly. While professional labor adds to the upfront cost, it protects your investment by ensuring a beautiful, long-lasting floor. For a project of this scale, professional home remodeling services guarantee a polished result.
How Difficult Is a Red Brick Herringbone Installation?
A red brick herringbone floor is a showstopper, but its beauty comes from a complex installation. Unlike a simple grid, the interlocking zigzag pattern demands precision and patience. Even a small mistake at the start can throw off the entire layout, creating a wavy effect that’s hard to ignore. So, is this a weekend DIY project or a job best left to the pros?
The answer depends on your skill level, your tools, and your tolerance for imperfection. While some find the rustic nature of brick forgiving, others argue that the herringbone pattern itself is one of the most difficult to execute correctly. Before you start pulling up your old floors, it’s important to understand exactly what the process entails. From establishing perfect lines to making countless angled cuts, installing a herringbone floor is a significant undertaking. Let’s look at what makes this installation so challenging and help you decide the best path forward for your home.
A Look at the Installation Process
The herringbone installation process is methodical and requires careful planning from the very first step. It begins with finding the exact center of the room and snapping a chalk line to serve as your guide. From there, you lay out the V-shaped pattern, ensuring each brick is perfectly placed against the next. This isn’t as simple as just laying tiles side by side; there are specific rules to starting this layout to keep the pattern straight.
You’ll need to apply thin-set mortar, place each brick, and use spacers to maintain consistent grout lines. The real challenge comes with the cuts you’ll need to make along the walls, which will all be at an angle. This requires a good quality wet saw and a steady hand. For many homeowners, the complexity and precision involved make hiring an expert in masonry a worthwhile investment.
Why Precision Is Key for the Herringbone Pattern
With a herringbone pattern, precision is everything. Because the bricks interlock at a 45-degree angle, every piece affects the position of the next. If your starting line is even slightly off, or if a few bricks are misaligned, the error will multiply as you move across the floor. This can result in grout lines that “wander” and a pattern that looks skewed rather than sharp and uniform. A perfectly straight layout is what gives herringbone its sophisticated and timeless appeal.
While it’s true that a perfect installation is possible, it takes a very skillful hand to achieve it. An experienced installer knows how to constantly check their lines and make micro-adjustments to keep the pattern true from one end of the room to the other. This level of expertise ensures your floor becomes a stunning feature, not a distracting eyesore.
Planning for Extra Material
When you’re budgeting for your project, remember to account for extra material. For a herringbone pattern, it’s wise to order at least 10% to 15% more flooring than your room’s square footage requires. This isn’t just a buffer for accidental breaks; it’s a necessity due to the nature of the pattern. The angled cuts you’ll make where the floor meets the walls create more waste than the straight cuts used in a standard grid layout.
Having extra bricks on hand prevents the stress of running out of material mid-project, especially if you’re using reclaimed brick where finding a perfect match later can be difficult. This overage ensures you have enough to complete the job and keep a few extra bricks for any future repairs. When sourcing materials, exploring a supplier with a wide variety of porcelain and natural stone can help you find the perfect brick look.
Deciding Between a Professional and DIY
So, should you do it yourself? Some DIYers feel that because brick is naturally rustic, the end result is meant to be imperfect, making it a great project for first-time tilers. If you’re aiming for a very casual, farmhouse look and aren’t bothered by a few imperfections, a DIY installation could be a rewarding challenge. You’ll save on labor costs and gain a huge sense of accomplishment.
However, if you want a crisp, clean, and perfectly aligned herringbone pattern, hiring a professional is the safest bet. A flooring installation is a major part of any home remodeling project, and mistakes can be costly and difficult to fix. An experienced team has the right tools, techniques, and foresight to handle the complexities of the pattern, ensuring a beautiful, durable floor that adds lasting value to your home.
How to Care for Your Red Brick Herringbone Floor
One of the best things about a red brick herringbone floor is its incredible durability. This isn’t a delicate surface you have to tiptoe around. It’s meant to be lived on and can handle the daily hustle of a busy home, including kids and pets. With the right care routine, your brick floor will not only last for decades but will also develop a beautiful patina over time. Keeping it in top shape is straightforward and doesn’t require a lot of complicated steps.
The key is to start with a properly sealed surface and then follow a simple maintenance schedule. This involves routine cleaning to prevent grit from scratching the finish, knowing how to tackle spills quickly, and understanding when it’s time to reapply a protective coat. Let’s walk through the simple steps to protect your investment and keep your gorgeous herringbone floor looking its best for years to come.
Sealing Your Floor for Moisture Protection
Think of sealant as your floor’s first line of defense. Brick is naturally porous, which means it can absorb liquids and dirt, leading to stains and discoloration. A high-quality sealer penetrates the brick and grout, creating a protective barrier that repels moisture and grime, making cleanup much easier. For older homes that may not have a modern damp-proof membrane, it’s wise to use a breathable sealer. This allows any naturally occurring moisture from below to escape instead of getting trapped, which could cause issues down the road. A professional sealing ensures complete and even coverage, giving you peace of mind from day one.
Simple Tips for Daily Cleaning
Maintaining your brick floor is surprisingly simple and doesn’t require much more than your usual cleaning routine. The main goal is to keep abrasive dirt and sand off the surface. Regular sweeping with a soft-bristle broom or vacuuming with a hard floor attachment will do the trick perfectly. For a deeper clean, you can mop the floor weekly. Just use a gentle, pH-neutral cleaner mixed with warm water. Harsh chemicals or acidic cleaners like vinegar can strip the sealant and damage the brick over time, so it’s best to stick with products designed for natural stone or brick surfaces. This simple habit prevents buildup and keeps your floor looking fresh.
How to Handle Spills and Stains
The golden rule with a porous surface like brick is to act fast. When a spill happens, whether it’s wine, juice, or a pet accident, clean it up immediately. Use a clean cloth or paper towel to blot the liquid, working from the outside of the spill inward to prevent it from spreading. Avoid rubbing, as this can push the liquid deeper into the brick and grout lines. For most everyday spills, a quick blot is all you need, especially on a well-sealed floor. If you do encounter a tougher, set-in stain, a specialized brick cleaning product or a paste made from baking soda and water can often lift it out.
When to Reseal Your Brick Floor
No sealant lasts forever. Over time, foot traffic will gradually wear down the protective layer. How often you need to reseal depends on how much use the area gets, but a good rule of thumb is every three to five years. A simple way to check is to sprinkle a few drops of water on the floor. If the water beads up, your sealer is still doing its job. If it soaks into the brick and darkens it, it’s time for a new coat. When the time comes, resealing your floors is a project that restores that essential layer of protection, ensuring your brick continues to resist stains and moisture for years to come.
Is a Red Brick Herringbone Floor Right for You?
Deciding on a new floor is a big commitment, and a red brick herringbone floor is a particularly bold and beautiful choice. It’s more than just a surface to walk on; it’s a statement piece that brings incredible character and texture into your home. But before you start picturing that perfect rustic entryway or cozy kitchen, it’s important to consider if this unique flooring truly fits your lifestyle, budget, and home. Let’s walk through the key considerations, from styling and installation to safety, to help you make a confident decision. With the right approach, you can create a stunning feature that you’ll love for years to come.
Styling Your Red Brick Herringbone Floor
One of the best things about a red brick herringbone floor is its versatility. The classic zig-zag pattern, where bricks are laid at an angle, instantly adds a sense of history and movement to a room. While it’s a natural fit for rustic, farmhouse, or industrial designs, it can also create a surprising and warm contrast in more modern spaces. You can choose from different layouts, like single or double herringbone, to change the scale and feel of the pattern. This timeless look adds so much charm and warmth, making it a durable and stylish choice for high-traffic areas like mudrooms, kitchens, and entryways. The rich color and texture of the brick serve as a beautiful foundation for almost any decor.
Common Design Mistakes to Avoid
While the final look is stunning, getting there requires precision. The herringbone pattern is known for being one of the most difficult to lay correctly. A common mistake is underestimating the complexity of the installation. There are specific rules for starting the pattern and keeping the lines straight, and even a small error can throw off the entire floor. A bad herringbone layout is immediately noticeable and can undermine the sophisticated look you’re aiming for. This is one of those projects where professional expertise makes all the difference. An experienced installer will ensure the pattern is centered, the lines are crisp, and the final result is flawless.
A Note on Safety and Slip Resistance
When considering brick flooring, it’s wise to think about the practical details, including safety. Because brick is naturally porous, it can be prone to absorbing moisture and stains if not properly treated. An unsealed or uneven floor can also present a tripping hazard and create nooks where dirt can hide. The solution is to have your floor professionally installed and sealed. A quality sealant protects the brick from spills and wear while also creating a more uniform, slip-resistant surface. With proper restoration and sealing services, your brick floor will not only be safer but also much easier to clean and maintain over the years.
Bring Your Vision to Life with Gappsi
A red brick herringbone floor is a project that requires both vision and skill. It’s a choice that promises timeless appeal, adding a touch of charm and warmth that is durable enough to withstand years of wear. While the installation demands expertise, the result is a truly special feature in your home. At Gappsi, our team has the masonry and design experience to bring your vision to life perfectly. We handle every detail, from preparing the subfloor to laying each brick with precision and applying the final seal. If you’re ready to add this beautiful and enduring element to your home, we’re here to help you get it right.
Related Articles
- herringbone Archives – Gappsi Group
- How to Refinish an Interior Brick Wall: A DIY Guide
- Masonry Solutions & Inspiration for Homes in NY | Gappsi Inc
- Masonry Archives – Gappsi Group
- Driveway Paver Installation & Design Guide | Gappsi Inc
Frequently Asked Questions
Is a brick floor hard or uncomfortable to stand on for long periods? Brick is a hard surface, similar to natural stone or porcelain tile, so it doesn’t have the softness of carpet or cork. In areas where you stand a lot, like in the kitchen, many people place a stylish area rug or a cushioned mat for extra comfort. That said, the unique texture can feel pleasant underfoot, and it’s a surface that holds warmth well, especially in a sunny room.
Can I install radiant heating underneath a brick herringbone floor? Yes, you absolutely can. Brick is an excellent material for radiant floor heating because it conducts and retains heat very well. An underfloor heating system can make your brick floor feel wonderfully warm and cozy, which is a fantastic feature in kitchens, bathrooms, or entryways during colder months. Just be sure the installation is handled by a professional who is experienced with both radiant heat systems and brick flooring.
How do I keep the grout lines from getting dirty? This is a great question and a common concern with any tiled floor. The most important step is to have the floor properly sealed right after it’s installed. A good quality sealer will protect both the brick and the grout, creating a barrier that stops dirt and spills from soaking in. For routine cleaning, simply avoiding harsh chemicals and using a pH-neutral cleaner will keep your grout looking fresh without damaging the sealant.
Is this a good flooring choice for a home with kids and pets? It’s one of the best. A red brick floor is incredibly tough and can easily handle the daily chaos of family life, from dropped toys and running pets to heavy foot traffic. Its natural color variations and textured pattern are also great at hiding minor scuffs, crumbs, and pet hair between cleanings. When properly sealed, the floor is also resistant to spills and stains, making cleanup much less stressful.
What’s the main difference between using real brick pavers and porcelain tiles that look like brick? The choice really comes down to a balance of authenticity and practicality. Real thin brick pavers offer an unmatched rustic character, with genuine texture and subtle color variations that give your floor a truly historic feel. Porcelain alternatives, on the other hand, are manufactured to be extremely dense and non-porous. This makes them incredibly resistant to stains and water, and they often require less long-term maintenance.