


That sloped part of your yard can feel like a puzzle you just can’t solve. It might be limiting your plans for a beautiful garden, a level patio, or a safe place for the kids to play. Instead of just living with it, you can transform that tricky terrain into one of your property’s best features. This is where interlocking retaining wall blocks come in. They are a modern, effective solution designed to create strong, stable, and attractive walls. This guide will walk you through everything you need to know, from choosing the right style to understanding the building process.
Key Takeaways
- Focus on a Strong Base and Proper Drainage: Your wall’s longevity hinges on two things: a compacted gravel foundation and an effective drainage system. These steps are not optional; they are the best way to prevent your wall from leaning, bulging, or failing from water pressure.
- Choose Blocks for Function First, Then Style: Look beyond just color and texture when selecting your blocks. The right choice depends on your wall’s height, so pay close attention to the block’s weight, locking mechanism, and design to ensure it provides the necessary structural support.
- Know When to Call a Professional: While building a short, decorative garden wall can be a rewarding DIY project, it is crucial to know your limits. Any tall or structural wall that supports a significant load requires professional design and installation to ensure it is safe, compliant with local codes, and built to last.
What Are Interlocking Retaining Wall Blocks?
Think of interlocking retaining wall blocks as sophisticated, puzzle-like pieces for your landscape. They are specially engineered concrete blocks designed to fit together securely. Instead of relying on messy mortar to hold them in place, these blocks use a combination of their own weight, friction, and clever interlocking mechanisms (like pins or a lip on the back edge) to create a strong, stable structure. This innovative design makes building retaining walls faster and often simpler than traditional methods, while still delivering a professional and long-lasting result for your sloped yard or garden bed.
How They Differ From Traditional Walls
The biggest difference between interlocking blocks and traditional walls lies in the construction process and materials. While a classic masonry wall requires a skilled hand to apply mortar between each stone or brick, interlocking systems are designed for a dry-stacking method. This means no mortar is needed, which simplifies installation and creates a more forgiving building process. These blocks are engineered to be incredibly durable, often exceeding industry standards to handle tough weather and the pressures of the soil behind them. This modern approach results in a wall that is not only strong but also has the flexibility to handle minor ground shifts without cracking.
Common Materials and Designs
Most interlocking blocks are made from high-density concrete, some boasting a strength of 5000 PSI, making them exceptionally robust. The real magic, however, is in their design. Many feature a hollow-core system, which makes the individual blocks lighter and easier to handle. Once stacked, these cores can be filled with gravel to add mass and create an even more stable structure. You are not limited to a single look, either. Manufacturers offer a huge variety of faces, textures, and colors to match any home’s style. You can find everything from sleek, modern lines to blocks that mimic the rustic appearance of natural stone, giving you complete creative control over your project.
The Pros and Cons of Interlocking Blocks
Interlocking blocks are a fantastic solution for many retaining wall projects, but it’s smart to look at the full picture before you start building. Like any material, they come with a unique set of benefits and potential challenges. Understanding these points will help you decide if they are the right fit for your backyard and whether you should tackle the project yourself or bring in a professional.
The Upsides
The biggest advantage of interlocking blocks is their clever design. They fit together like puzzle pieces, using their weight and shape to create a strong, stable wall without any messy mortar. This makes installation much faster and cleaner than traditional methods. Because they don’t use rigid cement joints, these walls have a bit of flexibility. They can shift slightly with the ground during freeze and thaw cycles, which helps prevent cracking. This durability makes them a great long-term investment. Their straightforward assembly also makes them a popular choice for DIY projects, though a professional masonry team can guarantee a flawless and long-lasting result.
The Downsides
While interlocking blocks are versatile, they have limitations, especially concerning height. For any retaining wall taller than about four feet, you should consult a professional engineer and check your local building codes for permit requirements. This is a critical safety step to prevent wall failure. A common problem with improperly built retaining walls is that they can lean or bulge over time. This isn’t a flaw in the blocks themselves but is almost always due to an incorrect foundation or poor drainage. If you’re dealing with a failing wall, professional restoration services can often correct the issue and prevent further damage.
Choosing the Right Blocks: What to Look For
Picking the right interlocking blocks for your retaining wall is a bit like choosing the right ingredients for a recipe. The final result depends entirely on the quality of what you start with. While it might seem like all blocks are the same, there are key differences that impact your wall’s strength, longevity, and appearance. Getting this part right ensures your wall will not only look fantastic but also stand strong against the elements for years to come. It’s about finding the perfect balance between function and form.
A well-built retaining wall starts with a block that is engineered for your specific project, whether it’s a small garden bed or a large, terraced slope. The right choice will make the installation process smoother and prevent future headaches like bulging or cracking. Think of it as setting the foundation for a successful project that adds both value and beauty to your property. Let’s walk through the five main things you should look for when selecting your blocks, so you can feel confident in your choice. For a look at the beautiful materials available, you can explore a wide range of porcelain and natural stone options.
Size and Weight
The size and weight of the blocks you choose are directly related to the height and purpose of your wall. For a small, decorative garden wall that’s only a foot or two high, smaller and lighter blocks are perfectly fine and much easier to handle. However, if you’re building a taller wall that needs to hold back a significant amount of soil, you’ll need larger, heavier blocks. These substantial blocks provide the necessary mass and stability to resist the immense pressure from the earth behind them, ensuring your wall remains secure and upright. Think of it this way: the bigger the job, the bigger the block.
Locking Mechanisms
The “interlocking” part of the name is the most important feature. Each block is designed with a specific locking mechanism, usually a lip on the back edge or a pin system, that secures it to the blocks above and below. This creates a unified, incredibly strong structure. This system also helps create what’s known as “batter,” which is a slight, intentional lean back into the hillside. This backward tilt uses gravity to its advantage, allowing the wall to effectively brace itself against soil pressure. A solid locking mechanism is the key to a retaining wall that functions as a single, durable unit rather than just a stack of heavy stones.
Drainage Features
Water is the number one enemy of a retaining wall. Without a proper way for water to escape, pressure can build up behind the wall and cause it to fail. That’s why effective drainage is non-negotiable. Many high-quality interlocking blocks are designed with voids or cores that help channel water away. These features work as part of a larger drainage system, which typically includes a gravel backfill and a perforated pipe at the base. Choosing blocks that accommodate these elements will protect your investment from the powerful forces of water and prevent costly damage. Proper drainage is essential to the long-term health of any masonry project.
Design and Style Options
Now for the fun part: making it look great. Interlocking blocks are available in a huge variety of colors, textures, and styles, so you don’t have to sacrifice aesthetics for function. You can find blocks that mimic the look of rustic, weathered stone or choose a clean, modern design with sharp lines. This versatility allows you to select a style that perfectly complements your home’s architecture and your overall landscape design. Whether you want your wall to be a subtle backdrop for your garden or a stunning focal point, there’s a block out there that will help you achieve your vision.
Stability and Flexibility
A great retaining wall needs to be both strong and slightly flexible. Here on Long Island, the ground is constantly shifting due to freeze-thaw cycles in the winter and spring. High-quality interlocking blocks are engineered to handle these slight ground movements without cracking. The interlocking system allows the wall to move as a cohesive unit, adjusting to changes in the soil without compromising its structural integrity. This built-in flexibility is what makes interlocking walls so durable in climates with changing seasons. It ensures your wall can withstand the test of time and remain a stable, beautiful feature of your property for years.
Finding High-Quality Interlocking Blocks
Once you know what features and style you’re looking for, the next step is to find the best materials for the job. The quality of your interlocking blocks will directly impact the strength, appearance, and lifespan of your retaining wall. A wall is a significant investment, so choosing durable, well-made blocks is essential to protect it. High-quality blocks are engineered for performance and designed to withstand the elements, ensuring your wall remains stable and beautiful for years. Let’s look at what separates a premium block from a standard one and what questions you should ask to make sure you’re getting the best.
What Defines a Premium Block?
A premium interlocking block is all about smart design and proven durability. Top-tier brands often feature hollow-core designs that are engineered for superior stability. When these cores are filled with gravel and properly reinforced, they create an incredibly strong, interconnected structure that can handle immense pressure. This isn’t just a simple block; it’s part of a system designed for long-term performance. These blocks are built to last, resisting the freeze-thaw cycles we see in Long Island and preventing shifting over time. While they demand a precise and skilled installation, the result is a retaining wall you can count on for decades.
Exploring Gappsi’s Natural Stone and Porcelain Options
While engineered concrete blocks are a fantastic and reliable choice, they aren’t your only option. If you want to create a truly distinctive look, you can build a retaining wall with other high-end materials. At Gappsi, we specialize in creating custom outdoor spaces, and that includes using materials that match your home’s aesthetic. Our extensive selection of porcelain and natural stone offers a world of design possibilities. Imagine a retaining wall clad in the same beautiful porcelain as your patio, or a rustic wall built from natural fieldstone. These materials combine the structural integrity you need with the sophisticated look you want, turning a functional wall into a stunning landscape feature.
Questions to Ask Your Supplier
To make sure you’re getting a product that will last, it’s important to ask the right questions. Whether you’re talking to us or another supplier, doing your homework ensures you’re making a wise investment. Start by asking about the materials used in the blocks and the warranty offered on them. You should also inquire about the engineering support available and ask to see examples of completed projects. A reputable masonry construction company will be happy to walk you through their portfolio and explain the long-term performance you can expect. Finally, ask about the expected lifespan of the materials, especially considering our local climate.
Understanding the Costs of an Interlocking Wall
Budgeting for a new retaining wall can feel like a puzzle, but it gets a lot clearer when you know what pieces you’re working with. The total cost depends on a few key things: the materials you choose, the size of your wall, and whether you hire a professional or tackle it yourself. A well-planned budget helps you get the look you want without any surprises along the way. Let’s break down what you can expect to spend.
Factors That Influence Cost
The biggest factor in your budget will be the materials. Generally, you can expect interlocking blocks to cost between $15 and $35 per square foot. The final price depends on the style, color, and brand you select. A simple, standard block will be on the lower end of that range, while a premium block with a more detailed texture or unique color blend will cost more. The complexity of your project, like adding curves or steps, will also influence the final price, especially if you’re hiring a professional masonry designer for the installation.
Breaking Down the Price Per Block
To get more specific, it helps to look at how blocks are sold. Many are priced by the pallet, and popular systems can range from $700 to $1,250 per pallet depending on the block’s size and style. Understanding these price points can help you compare different options more easily while you shop. When you’re ready to explore materials, we can walk you through our extensive collection of porcelain and natural stone to find an option that fits both your aesthetic and your budget. Our team can explain the costs per block or pallet to make sure everything is transparent.
How to Plan Your Budget
When you’re mapping out your budget, the first question to ask is whether this is a DIY project or one for the pros. Retaining walls under four feet tall are often manageable for a skilled DIYer. However, for any wall taller than that, it’s best to get help from a professional. Taller walls require more structural planning to be safe and durable. You should always check your local Long Island building codes and permit requirements before you start. These rules can affect your design and overall cost, so it’s a step you don’t want to skip. For larger projects, working with an experienced home improvement company ensures everything is built correctly and to last.
How to Build Your Interlocking Retaining Wall
Building your own interlocking retaining wall can be a rewarding project, but it requires careful planning and execution to ensure it lasts. A well-built wall not only looks great but also functions correctly for years to come. This step-by-step guide will walk you through the process, from gathering your supplies to placing the final capstone. We’ll cover the essential techniques for creating a stable, beautiful wall and highlight when it’s best to call in a professional for your Long Island home project. Let’s get started on transforming your landscape.
Gather Your Tools and Materials
Before you break ground, having all your tools and materials ready will make the process much smoother. You’ll need a shovel and rake for digging and leveling, a wheelbarrow for moving materials, and a plate compactor for creating a solid base. For the blocks themselves, a rubber mallet helps set them in place, and a masonry saw is necessary for any cuts. Don’t forget safety gear like gloves and safety glasses. For larger projects, a laser level ensures everything is perfectly straight. You can find high-quality gravel, sand, and of course, beautiful porcelain and natural stone blocks right here at the Gappsi store to complete your material list.
Step 1: Plan Your Layout and Check for Permits
First things first: map out where your wall will go. Use stakes and string or marking paint to create a clear outline. This is also the time to check with your local municipality about building permits. Generally, any retaining wall taller than two feet, or any wall that will be holding back a significant amount of weight (what’s known as a structural wall), requires a permit and a design from a qualified engineer. Taking this step seriously from the start prevents major headaches later and ensures your wall is both safe and compliant with local regulations. Proper masonry design and construction is key to a long-lasting structure.
Step 2: Prepare the Foundation
A retaining wall is only as strong as its foundation. Start by digging a trench along your planned layout. A good rule of thumb is to make the trench deep enough to bury about half of your first block, plus an additional six inches for a gravel base. For example, if your blocks are six inches tall, you’ll need a 12-inch-deep trench. The trench should be at least twice as wide as your block to give you room to work. Once dug, add six inches of gravel and use a plate compactor to create a firm, level base. This solid footing is essential for preventing your wall from shifting or settling over time.
Step 3: Install Proper Drainage
Water is the number one enemy of a retaining wall. Without a way for it to escape, hydrostatic pressure can build up behind the wall, causing it to bulge or even fail. To prevent this, you need to install proper drainage. After laying your first course of blocks, place a 4-inch perforated drainage pipe behind it, with the holes facing down. Cover the pipe with more gravel, extending the gravel up the back of the wall as you build. It’s also a smart idea to place landscape fabric between the gravel and the soil to prevent dirt from clogging your drainage system. This step is absolutely critical for the long-term stability of your wall.
Step 4: Lay and Level the First Course
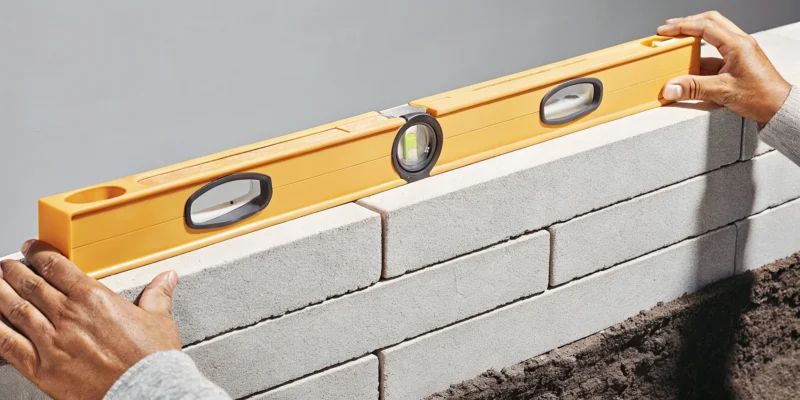
The first row of blocks, or the first course, is the most important one for the entire wall. It needs to be perfectly level, both side-to-side and front-to-back. Place your first block on the compacted gravel base, using a rubber mallet to tap it into place. Use a level to check it, and then lay the next block right beside it. Continue this process for the entire length of the wall, using a string line to keep the row straight. Take your time here, because any imperfections in this first course will be magnified as you build higher. Getting this row right sets you up for success.
Step 5: Stack and Stagger the Next Courses
Once your first course is perfectly level, building the rest of the wall is relatively straightforward. As you add the next row, stagger the blocks so the joints don’t line up, much like a brick pattern. This is called a running bond, and it creates a stronger, more stable structure. Most interlocking blocks have a lip or pin system that helps lock them together and creates a slight setback with each row. Simply place the next block, ensure it connects with the one below it, and continue building. Remember to backfill with gravel behind each course as you go to maintain proper drainage.
Step 6: Finish With Capstones
The final touch for your retaining wall is adding the capstones. These are the flat, finished blocks that sit on the top row, giving your wall a professional and polished look. Capstones often have a slight overhang for a clean edge. Lay them out on top of the wall to ensure they fit perfectly before you secure them. Once you’re happy with the alignment, remove them, apply a bead of concrete adhesive to the top of the wall blocks, and carefully set the capstones back in place. This will keep them from shifting and complete your project.
Common Mistakes to Avoid
Even with the best intentions, it’s easy to make a few common mistakes when building a retaining wall. The most frequent issue is a wall that starts to lean or bulge over time. This is almost always caused by a poor foundation or inadequate drainage. Don’t be tempted to skip the plate compactor or skimp on the gravel base. Likewise, ensuring you have a functional drainage system with a perforated pipe and plenty of gravel backfill is not optional. Following the proper building techniques from the start is the best way to ensure your wall stays straight and strong for years to come.
Know When to Call a Pro
While building a small, decorative garden wall can be a great DIY project, it’s important to know your limits. If your wall needs to be taller than two feet or will be supporting a heavy load like a driveway or patio, it’s time to call a professional. Structural walls require an engineer’s design and expert installation to ensure they are safe and built to code. At Gappsi, our team has decades of experience in masonry design and construction, and we can handle everything from design and permits to the final installation. Don’t risk the safety and value of your property; let an expert build it right.
Related Articles
- Three level retaining wall long island – Gappsi Group
- Learn About Quality Retaining Walls for Your Long Island Backyard – Gappsi Group
- Estimate for reinforced poured concrete footer for retaining walls long island – Gappsi Group
- Paving Stones: Services, Types, Colors, Patterns Long Island – Gappsi Group
Frequently Asked Questions
How long can I expect an interlocking retaining wall to last? A well-built interlocking retaining wall can easily last for decades. The key to its longevity isn’t just the quality of the blocks, but the quality of the installation. When a wall has a solid, compacted gravel foundation and a proper drainage system to manage water, it is protected from the primary forces that cause failure. Investing in a proper build from the start ensures your wall will remain a stable and beautiful part of your landscape for many years.
Do I really need to dig a deep trench and use all that gravel for drainage? Yes, absolutely. This is the one area where you should never cut corners. The gravel base creates a solid, level foundation that prevents the wall from settling or shifting over time. The gravel backfill and drainage pipe work together to relieve hydrostatic pressure, which is the force of water-saturated soil pushing against the wall. Skipping these steps is the number one reason retaining walls fail, so think of it as essential insurance for your project.
Can I build a curved wall with these blocks, or just straight ones? You can definitely create beautiful, sweeping curves with most interlocking block systems. Many blocks are designed with a slightly trapezoidal shape, which allows them to fit together tightly when building on a radius. This versatility is a major advantage, giving you the creative freedom to design a wall that flows naturally with the contours of your landscape instead of being limited to straight lines and sharp angles.
My old retaining wall is leaning. Can I just replace it with these blocks? While interlocking blocks are a great replacement, it is critical to first figure out why your old wall is failing. A leaning wall is almost always a symptom of a bigger problem, like a poor foundation or inadequate drainage. Simply rebuilding in the same spot without addressing the root cause will likely lead to the new wall failing, too. It is best to have a professional assess the site to ensure the underlying issues are corrected before you build again.
What is the real difference between a DIY wall and a professionally installed one? A skilled DIYer can certainly build a great-looking short, decorative wall. The difference with a professional installation comes down to expertise, especially for taller or more complex walls. A professional team understands how to read a landscape, plan for site-specific drainage challenges, and ensure the structure is engineered to handle the pressures of your specific property. They have the heavy equipment to create a perfectly compacted base and the experience to guarantee the wall is safe, compliant with local codes, and built to last.