


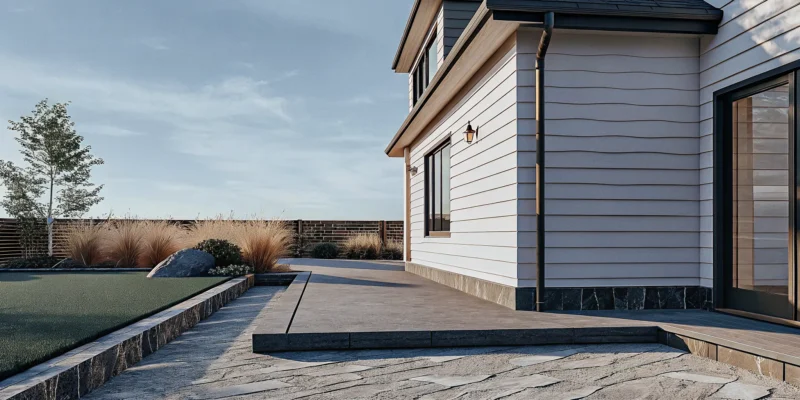
For the hands-on homeowner, the idea of a DIY putting green can be very appealing. It’s a challenging project that promises a rewarding result: a custom practice area you built yourself. But it’s also a project where small mistakes, especially in the foundation and drainage, can lead to big problems down the road. Before you start digging, it’s crucial to understand the common pitfalls and the right techniques. This guide provides a realistic look at what a DIY installation involves, while also explaining the benefits of professional expertise. We’ll help you decide which path is right for your backyard putting green Long Island dream.
Key Takeaways
- Decide between authenticity and convenience: A natural grass green provides a classic feel but requires dedicated maintenance, while artificial turf gives you a flawless, playable surface year-round with very little work.
- Focus on the foundation: The success of your putting green depends on a properly excavated and drained base. This non-negotiable step ensures a smooth, durable surface that prevents water damage and provides a true ball roll.
- Customize your design for better practice: Think beyond a simple patch of turf. By planning the size, shape, contours, and adding features like a fringe or chipping areas, you create a more challenging and useful practice space that fits your yard perfectly.
Natural Grass or Artificial Turf: Which Is Best for Your Backyard?
Deciding on the perfect putting green for your backyard is a big first step. The main choice you’ll face is between classic natural grass and modern artificial turf. Both can give you a fantastic space to practice your short game, but they come with very different requirements for installation and upkeep. Thinking about your lifestyle, your budget, and how much time you want to spend on maintenance will help you figure out which surface is the right fit for your Long Island home. Let’s break down the pros and cons of each to make the decision a little easier.
The Pros and Cons of a Natural Grass Green
There’s something undeniably classic about a natural grass putting green. It offers an authentic experience, letting you practice on the same type of surface you’ll find at the golf course. The look and feel are traditional, and for some purists, nothing else compares. While the initial installation cost can be lower than turf, the real investment is in the upkeep. Natural grass demands constant attention: regular mowing, watering, fertilizing, and pest control are all necessary to keep it healthy. This ongoing landscape maintenance can be a significant commitment of both time and money, especially with Long Island’s changing seasons.
The Pros and Cons of an Artificial Turf Green
If you love the idea of a perfect green without the constant work, artificial turf is an amazing option. The biggest advantage is how easy it is to maintain. Forget about mowing, weeding, or fertilizing. High-quality synthetic turf stays green and pristine all year long, giving you a consistent surface for practice whenever you want. This means you get a reliable ball roll every time you step outside. While the upfront cost for professional installation is typically higher than for natural grass, you’ll save a great deal on water bills and maintenance expenses over the years. It’s a durable, long-term investment in your home and your golf game.
The Verdict: Which Option Is Right for You?
Ultimately, the best choice comes down to your personal priorities. If you’re a traditionalist who enjoys yard work and wants the authentic feel of a golf course green, natural grass might be for you, as long as you’re prepared for the dedicated maintenance. However, if you want a beautiful, playable putting green that’s always ready for a game with minimal effort, artificial turf is likely the better fit. Consider how much time you want to spend maintaining your green versus playing on it. Your decision should support your lifestyle and help you get the most enjoyment from your new backyard feature.
How to Design Your Dream Putting Green
Once you’ve decided on the right material for your putting green, the fun part begins: the design. This is your chance to create a custom practice area that fits your space, skill level, and aesthetic goals. A well-designed green is more than just a patch of turf; it’s a feature that enhances your backyard and your golf game. Thinking through the details beforehand ensures the final result is exactly what you envisioned. Here’s how to approach the design process step by step.
Plan Your Size, Shape, and Layout
First, decide on the scale of your project. How much of your yard do you want to dedicate to your green? Consider both the available space and how you plan to use it. A smaller, simpler green is great for casual putting, while a larger, more complex layout is better for serious practice. The shape is completely up to you. You can go with a classic kidney bean or a freeform design that follows the natural curves of your yard. A professional can help you create a layout for your synthetic turf that maximizes your space and playability.
Map Out Contours, Elevation, and Holes
A flat green is a good start, but adding contours and elevation changes makes the experience much more realistic and challenging. Think about creating gentle slopes and undulations that mimic what you’d find on a real golf course. You should also plan the number and placement of your holes. This will dictate how you can practice different types of putts. Using multicolor turf can also add a professional touch, creating visual depth and realism. You can see how these elements come together in a finished project to get a better idea of the possibilities.
Add Bunkers, Fringe, and Chipping Areas
If you want to practice more than just your putting, consider adding features for your short game. A fringe, which is a collar of slightly taller turf around the green, allows you to practice chipping from different lies. For an even greater challenge, you can incorporate sand bunkers. These additions transform your putting green into a complete short-game practice facility. While they require more space and planning, they offer a fantastic way to sharpen all aspects of your game right in your own backyard. The retaining walls for these features can be built through expert masonry services.
Blend Your Green with Your Existing Landscape
Your putting green should feel like a natural part of your property, not an afterthought. The best designs seamlessly integrate the green with the surrounding environment. You can achieve this by using stone borders, planting beds, or pathways to connect the turf area to your patio or garden. Thoughtful landscape design ensures your new putting green enhances your home’s curb appeal and creates a cohesive, beautiful outdoor living space. This approach makes the green a stunning focal point for your yard.
Key Factors for a Long Island Installation
Installing a putting green on Long Island involves more than just rolling out some turf. To create a green that lasts for years and plays like a dream, you need to consider a few key local factors. Thinking through these details ahead of time will ensure your project goes smoothly and results in a backyard feature you’ll love. By planning for our unique environment, you can build a durable, high-performance green that adds value and enjoyment to your home.
Tackle Local Climate and Drainage
Long Island’s weather can be a mixed bag, from humid, rainy summers to freezing winters. Without the right preparation, all that moisture can be a big problem for your putting green. Poor drainage can lead to water pooling on the surface, creating an uneven, soggy mess and damaging the base layers underneath. A professional installation always starts with a solid drainage plan tailored to our local climate. This ensures water moves away from the green efficiently, protecting your investment and keeping your turf playable, no matter what the forecast says. Proper site work is the foundation of all great landscape designs.
Work with Your Yard’s Size and Soil
You don’t need a huge, perfectly level yard to have an amazing putting green. In fact, some of the most interesting greens work with the natural character of the space. Whether your backyard is small, sloped, or has a unique shape, a putting green can be designed to fit perfectly. That’s the great thing about a custom installation. You get to choose the size, shape, and undulations to create a personalized experience that’s both fun and challenging. An expert designer can help you see the potential in your yard, turning tricky slopes into exciting contours that will help you improve your short game.
Check HOA Rules and Local Permits
Before you break ground, it’s smart to do a little homework on local rules. Some Homeowners Associations (HOAs) have specific guidelines about landscaping projects or the use of artificial turf. Your town may also have regulations you need to follow. Taking a moment to check these requirements can save you from potential fines or the headache of having to redo your project. An experienced installer will begin with a detailed consultation to assess your space and discuss your vision. Part of this process includes understanding any local rules to ensure your new putting green is fully compliant from day one, letting you focus on enjoying your new backyard oasis.
How Much Does a Backyard Putting Green Cost on Long Island?
Figuring out the budget for your dream putting green is a huge first step. On Long Island, the cost for a professionally installed backyard putting green generally falls between $18 and $25 per square foot. Think of it as an investment in your home and your hobby. The final price tag really depends on what you envision for your space, since every project is unique.
The total cost is shaped by your design choices, the materials you select, and the specifics of your yard. A simple, flat green will naturally cost less than a sprawling, multi-hole course with custom breaks and bunkers. The best way to get a clear number is to have a professional come out, look at your space, and talk through your ideas. This initial consultation helps turn your vision into a concrete plan with an accurate price estimate, ensuring there are no surprises down the road.
What Factors Influence the Final Price?
Several key elements will determine your final cost. The most obvious is size; a larger green requires more materials and labor. The shape and complexity also play a big role. A simple oval is more straightforward to install than a custom, free-form design that winds around existing landscape features.
Other factors include site preparation, like how much excavation and grading your yard needs to create the perfect surface. Adding custom features such as undulations, multiple holes, fringe grass, or even sand traps will also add to the price. The quality of the synthetic turf and sports games courts you choose is another important consideration, as premium materials offer better performance and durability.
Compare DIY vs. Professional Installation Costs
It can be tempting to try a DIY putting green to save some money, and for a very small, simple setup, it might be an option. However, for a high-quality green that plays true and lasts for years, professional installation is almost always the better investment. Experts have the right equipment and experience to handle the crucial steps, especially the base preparation, which is essential for proper drainage and a smooth, consistent surface.
A professional team can typically install a green in about a week, depending on the complexity. While the upfront cost is higher than a DIY project, you’re paying for expertise, longevity, and a polished final product that you’ll be proud of. You also avoid common mistakes that can lead to costly repairs later.
Ask About Your Financing Options
A backyard putting green is a significant home improvement project, and you don’t always have to pay for it all at once. Many installation companies understand this and offer financing options to help make your dream green more attainable. These plans can break down the total cost into more manageable monthly payments, allowing you to get the high-quality installation you want without straining your budget.
When you’re getting quotes, don’t hesitate to ask about available payment plans or financing partnerships. It’s a standard part of the process for large projects. You can also explore options at the Gappsi Store to see how you can best manage the investment for your new favorite backyard feature.
Thinking of a DIY Putting Green? Here’s How
Taking on a DIY putting green is an ambitious and rewarding project. If you have the time, patience, and a bit of construction know-how, you can create a great practice space right in your backyard. This isn’t just a weekend project, though. It involves significant planning, physical labor, and attention to detail to get it right. Think of it as a small-scale landscaping and construction job.
Before you pick up a shovel, it’s important to understand each stage of the process. From preparing the ground to laying the turf, every step builds on the last. Rushing through the initial phases will only cause problems later on, like poor drainage or an uneven surface that makes your ball roll untrue. We’ll walk through the essential steps to guide you. While the process is straightforward, the execution requires precision. If you’re aiming for a professional-grade green that blends perfectly with your landscape, remember that our team has spent years perfecting the installation of synthetic turf and can bring that expertise to your project.
Step 1: Plan Your Layout and Pick Your Materials
First, decide where your putting green will go and what shape it will take. Walk around your yard and find a spot that works with your landscape. Think about size, contours, and where you want to place the holes. Will it be a simple kidney bean shape or a more complex design with multiple chipping locations? Sketch it out on paper. Designing a putting green is all about creating a space that fits your practice goals and your backyard. Once you have a layout, you can select your materials, including the type of artificial turf, cup assemblies, and the crushed stone for your base.
Step 2: Excavate and Prepare the Base
This is where the heavy lifting begins. You’ll need to excavate about four to six inches of soil and grass from your designated area. The goal is to create a solid, compacted foundation for your green. After clearing the area, you’ll add and compact layers of crushed stone to create a stable base. It’s critical that this base is perfectly smooth and graded for drainage. Any imperfections here will show up on the final surface. This stage often requires renting equipment like a sod cutter and a plate compactor to ensure your masonry base is professionally prepared.
Step 3: Install Drainage and Infill
Proper drainage is crucial, especially with Long Island’s weather. If water collects on the surface, it can damage the base and create an uneven green. Your compacted stone base provides the primary drainage, but you may need to incorporate a perforated drain pipe if your yard has existing water issues. Once the base is set, you’ll add a thin layer of fine, crushed stone or sand and smooth it out to create the final surface for the turf. This is also when you’ll shape any subtle contours you planned for your green.
Step 4: Lay and Secure the Turf
Now it’s time to roll out your artificial turf. Carefully lay the turf over the prepared base, making sure it’s smooth and free of wrinkles. If you’re using multiple pieces, seaming them together so the line is invisible is a true art form. Once the turf is in place, you’ll need to stretch and secure it around the perimeter with landscape spikes. After it’s secured, you can cut the holes for your cups. High-quality artificial grass is designed for durability, but it needs to be installed correctly to perform its best.
Step 5: Add the Finishing Touches
With the green installed, you can focus on the details that make it look complete. This includes adding the infill, which is typically a specialized sand that you brush into the turf fibers. The infill helps the blades stand up, weighs the turf down, and ensures a consistent ball roll. You can also install a fringe of longer turf around the green for a professional look and to practice chipping. Integrating these elements thoughtfully will help your new putting green feel like a natural part of your overall landscape design.
Avoid These Common DIY Putting Green Mistakes
Taking on a DIY putting green is an ambitious and rewarding project, but it’s easy to make a few missteps that can turn your dream green into a backyard headache. While it’s tempting to cut corners to save time or money, certain mistakes can compromise the look, feel, and longevity of your green. Getting it right the first time saves you from costly fixes down the road. Before you start digging, let’s walk through the most common pitfalls homeowners face and how you can steer clear of them to ensure your project is a success from the ground up.
Forgetting Proper Drainage
One of the most critical, yet often overlooked, aspects of any landscape project on Long Island is drainage. When you’re building a putting green, this becomes even more important. Without a proper drainage system, rainwater will pool on the surface, creating a soggy, unplayable mess and potentially leading to mold or turf damage. A simple slope isn’t enough. A professional installation includes a carefully layered base that allows water to move through and away from the surface. This ensures your green stays firm and ready for play, even after a heavy downpour. A well-drained base, like those built with Gravel-Fix systems, is essential for a long-lasting, high-performance green.
Choosing the Wrong Type of Turf
The quality of your artificial turf will make or break your putting experience. It’s easy to get drawn in by lower-priced options, but this is one area where you truly get what you pay for. Low-quality turf often looks unnaturally shiny, feels stiff, and won’t stand up to foot traffic or the elements, quickly becoming matted and worn. More importantly, it won’t provide a realistic ball roll, which defeats the purpose of practicing your short game. Investing in high-quality synthetic turf designed specifically for putting greens ensures you get a true, consistent roll and a surface that looks and feels like a professionally maintained course for years to come.
Rushing Your Base Preparation
Your putting green is only as good as the foundation it’s built on. Rushing the base preparation is a recipe for an uneven, lumpy surface that will only get worse over time. A solid base requires excavating the area to the proper depth, laying and compacting multiple layers of aggregate, and meticulously grading the surface to create the exact contours you want. Skimping on any of these steps can lead to dips and bumps that make putting frustrating and unpredictable. Taking the time to build a stable, smooth foundation is the most important step in achieving a professional-quality green that performs perfectly. Proper landscape construction techniques are essential for this foundational work.
How to Choose the Right Putting Green Installer
Selecting the right installer is the most critical decision you’ll make for your backyard putting green. The right team does more than just lay down turf; they act as your partner, guiding you from the initial design to the final walkthrough. A professional installation ensures your green not only looks beautiful but also plays true for years to come. Look for a company with deep roots in Long Island and a comprehensive understanding of how to build lasting outdoor living spaces. An experienced installer will evaluate your property, listen to your goals, and create a plan that fits your vision and budget.
With a project of this scale, you want a team that has seen it all. A company with decades of experience in everything from landscaping to masonry brings a holistic perspective to your project. They can anticipate potential issues with drainage or grading and integrate the green seamlessly into your existing backyard design. This expertise is what separates a good result from a great one, ensuring your new putting green becomes a favorite feature of your home.
Review Their Experience and Past Projects
When you start vetting installers, their portfolio is your best friend. A reputable company will be eager to show you their work. Ask to see a gallery of their past projects, paying close attention to the details. Do the edges look clean and professional? Do the contours appear natural? Look for a variety of projects that showcase their ability to handle different yard sizes and design complexities. Don’t just rely on photos; ask for references from previous clients in your area. A quick chat with a past customer can give you invaluable insight into the company’s process, professionalism, and final product.
Ask About Material Quality and Custom Designs
The quality of the turf directly impacts your green’s performance and longevity. Not all artificial turf is created equal, so ask potential installers about the materials they use. A top-tier company will offer premium turf options that mimic the look and feel of a real bentgrass green, providing a consistent ball roll and realistic speed. They should also provide you with samples to see and touch. Beyond materials, inquire about their custom design options. A one-size-fits-all approach rarely works. The best installers can tailor the size, shape, undulations, and even the hole placements to match your skill level and aesthetic preferences.
Understand Warranties and Maintenance Plans
A backyard putting green is a significant addition to your home, and you want to protect it. Before signing any contracts, make sure you have a clear understanding of the warranties offered. A professional installer should provide a comprehensive warranty that covers both the turf material against defects and the workmanship of the installation. This is a sign that the company stands behind its work. Also, ask about ongoing maintenance. While artificial turf is low-maintenance, it’s not zero-maintenance. Find out what you need to do to keep your green in top shape and ask if the company provides guidance or offers plans to help you care for your investment.
Your Year-Round Putting Green Maintenance Plan
Once your putting green is installed, a little upkeep will keep it in top shape for years of enjoyment. Your maintenance plan will look very different depending on whether you chose natural grass or artificial turf. One requires the dedication of a part-time greenskeeper, while the other asks for little more than occasional tidying.
Understanding what each type needs throughout the seasons on Long Island will help you protect your investment and keep your green ready for practice. Let’s walk through what you can expect for year-round care.
How to Care for Artificial Turf
If you chose an artificial green, you can put away the lawnmower and fertilizer for good. The beauty of synthetic turf is its incredibly low maintenance. It stays green and pristine all year without any watering, mowing, or weeding. Your main tasks are simple: use a leaf blower or a soft-bristled broom to clear away leaves, twigs, and other debris that might fall onto the surface.
For a deeper clean, you can occasionally rinse the turf with a hose to wash away dust and pollen. If you notice any areas looking a bit flat from heavy use, a quick brushing against the grain will fluff the fibers right back up. That’s really all it takes to keep your artificial green looking and playing its best.
How to Maintain a Natural Grass Green
A natural grass putting green offers an authentic experience, but it requires consistent and careful work to maintain that golf course feel. Think of it as a specialized garden that needs regular attention. You will need to mow it frequently with a special reel mower to keep the grass at the perfect height for putting.
Watering is also crucial, especially during dry spells, to prevent the grass from getting thirsty and turning brown. You’ll also need a schedule for fertilizing to keep it lush and green, along with managing any weeds or pests that appear. This constant care is a significant commitment, but for golf purists, the reward is a playing surface that perfectly mimics the conditions of a professional course.
Seasonal Tips for Long Island Weather
Long Island’s weather brings unique challenges, from summer humidity to winter freezes. Proper drainage is your number one defense against the elements. Without it, heavy rain can lead to pooling water that damages the base of your green. Gappsi’s turf systems are designed to drain efficiently, preventing water-related issues year-round.
In the fall, make sure to keep your green clear of falling leaves to prevent mold or staining. For artificial turf, you don’t need to do much to prepare for winter, as it’s built to withstand snow and ice. With natural grass, you’ll want to follow a specific winterizing process to protect it. Come spring, a quick inspection and cleaning will have your green ready for the new season.
Related Articles
- Putting Green Installation On Long Island – Gappsi Group
- Artificial Putting Greens Long Island – Backyard Design | Gappsi Inc
- Polypropylene Turf Putting Greens on Long Island | Gappsi Inc
- backyard putting green Long Island Archives – Gappsi Group
- Synthetic Putting Greens Designer Long Island NY – Gappsi Group
Frequently Asked Questions
How long will an artificial turf putting green actually last? A professionally installed putting green is a fantastic long-term addition to your home. You can expect the high-quality synthetic turf itself to last for 15 years or even longer with proper care. The expertly prepared base underneath is built to be a permanent fixture. This means that down the road, you could potentially just replace the turf surface without having to redo the entire foundation, making it a very durable and sensible investment.
Can I still get a putting green if my backyard is small or on a slope? Absolutely. One of the best things about a custom putting green is that it can be designed to fit almost any space. A skilled designer can turn a sloped yard into an asset, creating interesting breaks and contours that make practice more challenging and fun. For smaller yards, a compact green can be designed to maximize playability without overwhelming the landscape, giving you a dedicated practice area no matter the size of your property.
Will the ball roll on artificial turf feel like a real golf course? Yes, and that’s the goal of a quality installation. The realism of the ball roll comes from a combination of factors: the premium turf designed with dense fibers, the specialized sand infill that provides weight and consistency, and most importantly, the perfectly smooth and compacted base underneath. When all these elements are done right, the result is a true, consistent roll that closely mimics the feel of a well-maintained course green.
How long does the installation process typically take from start to finish? For an average-sized backyard putting green, the entire professional installation process usually takes about a week. This can vary slightly depending on the project’s complexity, the site conditions, and of course, the weather. The process involves several key stages, including excavating the area, building and compacting the multi-layered base, installing the turf, and adding the final infill and finishing touches.
Is synthetic turf a safe option for my kids and pets? Yes, modern, high-quality synthetic turf is designed with safety in mind. The materials used are non-toxic and lead-free, making the surface a safe place for children and pets to play. An added benefit is that artificial turf eliminates the need for the chemical fertilizers, pesticides, and weed killers that are required to maintain a natural grass lawn, creating an even healthier environment for your whole family to enjoy.