


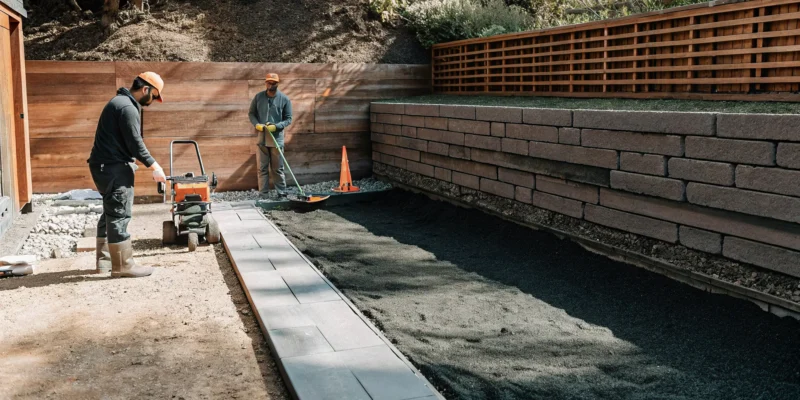
Building on Long Island comes with its own set of rules and environmental factors. Our sandy soil, high water tables near the coast, and varied terrain all play a significant role in construction. These local conditions are precisely why a straightforward answer to “how long does retaining walls take to install in Long Island” can be misleading. A project in a coastal area of Suffolk County might require different foundation and drainage techniques than one in a more inland part of Nassau, directly affecting the schedule. We’ll explain how your property’s specific location, soil type, and slope influence the construction timeline, and why working with a local expert who understands these challenges is key to a successful project.
Key Takeaways
- Multiple Factors Shape Your Schedule: The time it takes to build your wall depends on several things, including its size, your material choice, your property’s specific conditions like soil and slope, and the local permit process.
- Finalize Decisions Early to Stay on Track: Making firm choices about your design and materials before construction begins is the best way to prevent delays. This allows your contractor to order supplies and create a solid schedule without waiting on last-minute changes.
- A Local Pro Makes All the Difference: Partnering with an experienced Long Island contractor is crucial for an efficient build. They anticipate site-specific issues, handle the local permit process, and ensure critical steps like drainage are done correctly the first time.
What Determines Your Retaining Wall Timeline?
So, you’re wondering how long it will take to build your retaining wall. It’s a great question, and the honest answer is: it depends. The final timeline for your project isn’t a simple number; it’s a combination of your wall’s design, the materials you select, the unique conditions of your property, and even local paperwork. Think of it less like a fixed appointment and more like a recipe where each ingredient affects the total cooking time. Understanding these factors from the start helps you plan better and sets clear expectations for the entire process.
Our masonry design and construction team considers all these variables to give you a realistic schedule. From the initial design to the final cleanup, each step is influenced by the specific needs of your project. A simple, straightforward wall on a flat, accessible lot will naturally be completed faster than a complex, engineered wall on a steep, sandy slope. Let’s walk through the main things that will shape your project’s timeline so you know exactly what to expect.
Wall Height and Length
It might seem obvious, but the bigger the wall, the longer it takes to build. The size of your retaining wall is one of the most significant factors influencing the construction schedule. A small, decorative garden wall that’s under four feet high and around 50 feet long might only take our crew a few days of active work. However, if your project involves a taller, longer wall designed to support a major slope, the timeline extends. Walls over four feet often require an engineer’s stamp of approval and more extensive excavation and reinforcement, which can stretch the project from a few days into a couple of weeks or more.
Your Choice of Materials
The materials you choose for your wall do more than just define its look; they also impact how long it takes to install. Some materials, like interlocking concrete blocks, are manufactured for a uniform fit, which can make the installation process quicker. On the other hand, building a wall with natural stone requires a bit more artistry and time. Each stone is unique, so our masons carefully select and fit them together like a puzzle. While the result is stunning, this craftsmanship naturally takes longer than stacking uniform blocks. We can help you weigh the pros and cons of each material, balancing your aesthetic goals with your desired timeline.
Site and Soil Conditions on Your Property
Here on Long Island, we have our own unique environmental quirks that can affect construction. The specific conditions of your property, from soil type to water drainage, play a huge role in the installation timeline. Many areas in Nassau and Suffolk counties have sandy soil or high water tables, especially near the coast. These conditions require special attention to ensure your wall has a stable, long-lasting foundation. Our team might need to spend extra time on site preparation, like excavating deeper or adding robust drainage systems, to properly manage the local soil and water. Proper landscape design accounts for these factors from the very beginning.
Local Permit Requirements
Before a single shovel hits the ground, there’s often a bit of paperwork to handle. In most Long Island towns, you’ll need a permit to build a retaining wall, especially if it’s over four feet tall. The permit process itself adds to your overall project timeline, and the duration can vary depending on your municipality. Some towns, like Hempstead or Babylon, might process a straightforward application in three to five weeks. This waiting period happens before any construction can begin, so it’s an important part of the schedule to plan for. Working with an experienced local contractor who knows the permitting process can help make sure everything is submitted correctly the first time.
How Long Does It Take to Build a Retaining Wall in Long Island?
One of the first questions homeowners ask when planning a retaining wall project is, “How long will my yard be a construction zone?” It’s a fair question, and the answer depends on several factors. The timeline for building a retaining wall isn’t one-size-fits-all. The height, length, materials, and complexity of your design all play a significant role. Site conditions, like soil type and property access, also influence the schedule.
Understanding the general timeframe for different types of walls can help you set realistic expectations. Whether you’re adding a small garden border or terracing a steep slope, knowing what’s ahead makes the process much smoother. Here’s a breakdown of what to expect for small, standard, and large retaining wall projects in Long Island.
Small Walls (Under 3 Feet)
For a simple garden wall or a short decorative border under three feet tall, you can typically expect the active construction to take just one to two days. These smaller walls are perfect for creating raised flower beds or adding a clean edge to a patio. The process is relatively quick because it involves less excavation and fewer materials.
However, don’t let the short timeline fool you, proper installation is still crucial for a wall that lasts. Even for small projects, our team ensures a solid foundation to prevent shifting or leaning. It’s also important to know local rules. For example, some towns like Islip require a permit for any wall over 18 inches high, which can add some time to the planning phase before any work begins. Our experts in masonry can guide you through any local requirements.
Standard Walls (3 to 6 Feet)
If you’re looking to build a standard residential retaining wall, perhaps between three and six feet high, the project timeline extends a bit. For a wall of this size, you should plan for about three to five days of active work. These walls are common for managing moderate slopes, creating level areas for patios, or preventing soil erosion on your property.
The extra time is needed for more substantial excavation, placing more layers of materials, and installing proper drainage systems, which are critical for walls of this height. These projects almost always require permits, so the initial planning and approval phase will be longer than for a small garden wall. Integrating these structures into your overall property plan is key, which is where professional landscape design becomes invaluable.
Large or Complex Walls (Over 6 Feet)
When your project involves a retaining wall over six feet tall or includes complex features like curves, stairs, or multiple tiers, the timeline can stretch from two to four weeks or even longer. These large-scale structures are serious engineering projects designed to hold back immense amounts of soil pressure, so there’s no room for cutting corners.
The extended schedule accounts for several critical steps. First, a licensed engineer must design the wall to ensure it’s safe and structurally sound. The permitting process is also much more rigorous, often requiring detailed architectural plans and multiple inspections. The construction itself involves heavy machinery, deep excavation, and meticulous installation of drainage and reinforcement. For projects of this scale, working with an experienced masonry construction company is essential to ensure the job is done right.
How Do Materials Affect Installation Time?
Choosing the right material for your retaining wall is one of the most important decisions you’ll make. It influences the wall’s final look, its durability against Long Island’s weather, and your total budget. It also plays a huge role in the project’s timeline. Some materials, like uniform concrete blocks, allow for a faster, more predictable build. Others, like the unique and irregular pieces of natural stone, require more time and artistry to fit together perfectly. The difference comes down to the labor involved. A project that allows for repetitive, straightforward steps will move faster than one that requires custom fitting for every single piece.
The weight and size of the materials also matter. Heavier options may require heavy machinery for transport and placement, which can add time for delivery and careful maneuvering around your property. Lighter materials might be moved by hand, but they may not offer the same longevity. Understanding these trade-offs is key to setting a realistic schedule. Our team can walk you through the pros and cons of each option, helping you balance your aesthetic goals with your timeline. We have extensive experience with a wide range of masonry materials, ensuring we can find the perfect fit for your home and schedule.
Concrete Block and Poured Concrete
Concrete, in block or poured form, is a popular choice for a reason: it’s strong, durable, and relatively quick to install. Concrete Masonry Units (CMUs) are manufactured to be uniform in size and shape. This consistency allows our masons to work efficiently, stacking and securing the blocks in a predictable pattern, which speeds up the construction process considerably.
Poured concrete walls involve building forms, installing steel rebar for reinforcement, and then pouring the concrete. While setting up the forms takes precision, the pour itself can be completed quickly. The main time consideration here is the curing process. The concrete needs several days to a week or more to gain enough strength before the forms can be removed and backfilling can begin.
Natural Stone
If you’re dreaming of a wall with timeless character and one-of-a-kind beauty, natural stone is an unmatched choice. However, this beauty comes with a more intensive installation process. Unlike uniform blocks, each piece of natural stone is unique in shape, size, and thickness. Building with it is a true craft. Our skilled masons must carefully select, shape, and fit each stone to create a strong, interlocking structure. It’s like putting together a complex, heavy puzzle on a grand scale. This meticulous work takes more time than stacking uniform blocks, but the stunning, organic result is well worth the wait for many homeowners.
Timber
Timber retaining walls can be an attractive option, especially for a more rustic look or for smaller, decorative walls. Installation can be faster than masonry because it involves setting posts and attaching wooden planks. The materials are lighter and easier to handle than stone or concrete, which can reduce labor time. However, it’s important to think about the long-term timeline. While timber may have a lower upfront cost and faster build time, it has a shorter lifespan than stone or concrete. Wood is susceptible to rot and insect damage, meaning it may need replacement sooner, adding another project to your future to-do list.
Steel
Steel is a modern and powerful option for retaining walls, often used for its incredible strength and durability. It’s an excellent choice for taller walls or for properties with challenging conditions, like the sandy soils or high water tables we sometimes see on Long Island. Installation can be surprisingly fast depending on the design. The process often involves driving vertical steel beams deep into the ground and then sliding panels, made of steel or other materials, between them. This method can be more efficient than building a wall from the ground up, piece by piece. Steel is a specialized solution that provides robust structural support where it’s needed most.
Planning Steps That Impact Your Timeline
Before the first block is ever laid, a significant amount of work goes into planning your retaining wall. These upfront steps are essential for a successful project and have a major impact on your overall timeline. From creating a solid design to navigating local regulations and preparing the land, here’s what you need to account for before construction begins.
Design and Engineering
The design and engineering phase is your project’s blueprint. It’s about much more than just choosing a material you like; it’s about ensuring your wall is strong, safe, and built to last. A professional design will create a structure that properly supports soil, prevents erosion, and can even turn a sloped, unusable area into a functional part of your yard.
More complex projects, like tiered walls or walls with built-in stairs and lighting, require detailed engineering to get right. This stage involves creating precise plans and structural calculations, which can take time to finalize. Working with an experienced masonry designer ensures your vision is both beautiful and structurally sound, preventing costly issues down the road.
Securing Long Island Permits
In most Long Island towns, you will need a permit to build a retaining wall, especially if it’s over four feet tall. This is a critical step that happens before any construction can start. The time it takes to secure a permit varies by municipality. For example, the Town of Hempstead and the Town of Babylon can often process a straightforward application in three to five weeks.
This waiting period is a fixed part of your project timeline that you can’t skip. An experienced local contractor will be familiar with the specific requirements of your town, helping you prepare a clean application package to avoid unnecessary delays. Handling these home remodeling logistics correctly from the start is key to keeping your project on track.
Site Preparation and Excavation
Once your design is approved and permits are in hand, the physical work begins with site preparation. This involves clearing the area of any plants or obstacles, followed by excavating a trench for the wall’s footing. The soil must be properly graded to ensure stability and proper drainage. This step is especially important on Long Island, where sandy soil and coastal conditions present unique challenges.
The accessibility of your property also plays a role. If the construction area is hard to reach with machinery, excavation may take longer. Proper site preparation is a foundational part of any landscape construction project and sets the stage for a smooth and efficient build.
How Long Island’s Unique Site Conditions Affect Your Timeline
Your property isn’t a blank slate, especially here on Long Island. The unique geography of Nassau and Suffolk counties plays a big role in how a retaining wall project unfolds. From the sandy ground beneath our feet to our proximity to the coast, these local characteristics require a thoughtful approach. An experienced contractor will assess these factors from the very beginning, as they can add necessary steps to the installation process. Understanding how your specific lot fits into the bigger picture will help you set realistic expectations for your project’s schedule.
Sandy Soil and Drainage Needs
Much of Long Island is known for its sandy soil. While great for a day at the beach, it presents a specific challenge for construction. Sandy soil is less stable than denser, clay-based soils, meaning your retaining wall’s foundation needs to be stronger and deeper to prevent shifting. This often requires more extensive excavation and a thicker base of crushed stone. Proper drainage is also critical. We design our masonry projects to manage water flow effectively, preventing erosion that could undermine the wall. Addressing these soil conditions properly might add a day or more to the schedule, but it’s essential for a wall that lasts.
Coastal Properties and High Water Tables
If you live near the coast, your property faces a different set of considerations. A high water table, where groundwater is close to the surface, can complicate the excavation process. In some cases, water may need to be pumped from the site before the foundation can be properly laid, which can add time. Furthermore, coastal properties need walls built to withstand salt spray and harsh weather. While this primarily influences your choice of materials, the careful construction techniques required for these environments ensure your investment is protected from the elements. A well-built wall is your first line of defense against erosion on a coastal lot.
Your Property’s Slope and Accessibility
The natural slope, or grade, of your yard is one of the biggest factors influencing your timeline. A steeply sloped area may require a taller, more complex wall or a series of terraced walls, which naturally takes longer to build than a short, decorative wall on flat ground. Accessibility is another key point. If our team can’t get heavy equipment to the installation site easily, tasks like excavation and moving materials have to be done with smaller machinery or by hand. This manual labor can significantly extend the project timeline, so it’s a critical part of our initial landscape design assessment.
Why Proper Drainage Can Extend Your Project Timeline
A retaining wall’s biggest enemy is water pressure building up behind it. This force, called hydrostatic pressure, can push against the wall with incredible strength, especially after heavy rain or snowmelt. Without a way for that water to escape, your wall can bow, crack, or even fail completely over time. That’s why proper drainage isn’t just a good idea, it’s an essential part of building a wall that lasts for decades. While these steps are non-negotiable for a quality installation, they do require careful planning and execution, which adds time to the overall project. A professional team will never cut corners on drainage, because they know it’s the key to protecting your investment.
This focus on longevity is why our masonry construction process is so thorough. We build things to last, and that starts from below the ground up. Taking the time to install a robust drainage system means you won’t have to worry about costly repairs down the road. It’s about doing the job right the first time, even if it takes a little longer. It’s the unseen work that makes all the difference in the final product’s durability and appearance for years to come.
Weep Holes and Gravel Backfill
One of the most common drainage methods involves creating weep holes and using a gravel backfill. Weep holes are small openings at the base of the retaining wall that allow trapped water to seep out. To make sure water can get to these holes, the area directly behind the wall is filled with clean, crushed stone, not dirt. This gravel acts as a filter, letting water flow freely to the bottom of the wall while preventing soil from clogging the system. This step is meticulous, as it requires careful placement of at least a foot of gravel to ensure a clear path for water drainage.
French Drains and Perforated Pipes
For larger walls or properties with significant water runoff, a French drain system is often the best solution. This involves placing a perforated pipe in a trench filled with gravel behind the base of the wall. The pipe collects water and channels it safely away from the structure, preventing hydrostatic pressure from building up. Installing a French drain requires additional excavation and precise placement to ensure it functions correctly. This is one of the most important steps to prevent a wall from failing and is a standard part of any professional installation where water management is a concern.
What Can Delay Your Retaining Wall Project?
Even with a perfect plan, some factors can shift your project’s timeline. Building a retaining wall involves working with the land and navigating local processes, which means surprises can pop up. Being aware of these potential hurdles is the best way to manage them and keep your project moving forward as smoothly as possible. From unpredictable weather to hidden issues underground, several common culprits can cause delays. Understanding what they are ahead of time helps you set realistic expectations and work with your contractor to create effective contingency plans.
Weather and Seasonal Changes
Here on Long Island, we know the weather can be unpredictable. A week of heavy rain can saturate the ground, making it impossible to properly compact the base of your wall, a critical step for long term stability. Work might need to pause until the ground dries out. Similarly, a sudden cold snap can freeze the earth, bringing excavation to a halt. We always build the local weather patterns into our project schedules, but extended periods of bad weather can sometimes add days or even weeks to the timeline for your masonry project.
Unexpected Ground Conditions
You never truly know what’s hiding beneath the surface until you start digging. Your property could be sitting on large boulders, dense clay, or even old construction debris that needs to be removed. Discovering these obstacles requires extra labor and sometimes specialized equipment to address, which can extend the excavation phase of your project. An experienced team can often anticipate some of these issues based on the local geology, but surprises are always a possibility. This is a key reason why thorough site preparation is so important for a successful build.
Permit Revisions and Processing Times
Before any construction begins, your project needs the green light from your local town. While many Long Island municipalities are efficient, the permit process itself takes time. If the town requests revisions to your plans, it can create a significant delay as your engineer or architect makes updates and resubmits the application. The best way to minimize this risk is to work with a professional who understands local building codes and submits a complete, accurate application from the start. This helps ensure your home improvement project gets approved without unnecessary back and forth.
Material Lead Times and Contractor Schedules
Your project’s timeline is also tied to the availability of both materials and labor. If you have your heart set on a specific type of imported natural stone, its lead time could be several weeks or even months. This is why finalizing your material choices early in the planning process is so important. At the same time, reputable contractors are often booked well in advance, especially during the busy spring and summer seasons. Securing your spot on their schedule early is essential to keeping your project on track and avoiding a long wait.
When Should You Start Planning Your Project?
Timing is everything, especially when it comes to home improvement projects. Planning your retaining wall installation ahead of time is the secret to a stress-free experience. It gives you plenty of time to finalize your design, choose materials, and book the right team for the job without feeling rushed. Getting a head start is crucial for any major outdoor project, whether you’re dreaming of a new patio or a complete landscape design. By thinking about your project timeline early, you can ensure everything lines up perfectly, from the first consultation to the final finishing touches. This proactive approach helps you avoid potential delays and secures a spot with a trusted contractor.
The Best Seasons for Installation
For most outdoor construction on Long Island, spring and fall are the sweet spots for installation. The milder weather during these seasons is ideal for this kind of work. The ground isn’t frozen solid like in the winter, and your crew won’t be battling the intense heat and humidity of mid-summer. These more stable conditions allow materials like concrete and mortar to cure properly, which is essential for a strong, long-lasting wall. Planning your project for these windows helps ensure the installation process is efficient and the final result is top-quality. This same logic applies to other projects, like installing a new swimming pool or patio.
How Far in Advance to Book a Contractor
Once you have a season in mind, it’s smart to book your contractor well in advance. Even a smaller retaining wall can take several days to complete, while larger, more complex projects can take a few weeks. To be safe, I recommend reaching out to a contractor at least a few months before you want to start. This gives you a comfortable buffer for the entire pre-construction process, which includes the initial design consultation, material selection, and any necessary permits. Experienced masonry teams are often scheduled far out, especially during the peak spring and fall seasons, so booking early is the best way to get on their calendar.
How to Keep Your Retaining Wall Project on Schedule
Even with a clear timeline, construction projects can face unexpected hurdles. The best way to prevent delays is with careful, proactive planning. A few key decisions made before any dirt is moved can make all the difference in keeping your retaining wall installation on track and on budget. By thinking through the entire process from start to finish, you can avoid common pitfalls that stall progress. Here’s how you can keep things moving smoothly.
Work With an Experienced Local Pro
Partnering with a contractor who has deep experience in Long Island is the single most effective way to keep your project on schedule. A local professional understands the area’s unique soil conditions, weather patterns, and municipal permitting processes. They can anticipate potential challenges before they become costly delays. An experienced masonry designer will ensure your retaining wall is not only beautiful but also structurally sound, preventing erosion and improving your yard’s layout. They manage the project logistics, from scheduling inspections to coordinating material deliveries, so you don’t have to.
Finalize Your Design and Materials Early
Indecision can be a major source of delays. Before construction begins, it’s important to finalize your design and select all your materials. Whether you choose natural stone, concrete blocks, or another option, locking in your choices allows your contractor to order everything well in advance. This step helps you avoid waiting for backordered items to arrive. Gappsi offers a wide selection of high-quality porcelain and natural stone pavers to suit any aesthetic. Once your design is set, your team can create a precise schedule for excavation, construction, and finishing, ensuring a seamless workflow from one phase to the next.
Plan for Landscaping and Finishing Touches
A retaining wall is rarely a standalone feature. It’s usually part of a larger vision for your outdoor space. Thinking about the surrounding landscape from the very beginning is crucial for staying on schedule. Do you want to add built-in lighting, a garden bed on top, or a patio at its base? These elements often require work to be done during the wall’s construction, such as running electrical conduits or installing drainage. By incorporating these features into the initial plan with a landscape designer, you avoid having to do costly and time-consuming rework later.
Related Articles
- Three level retaining wall long island
- Learn About Quality Retaining Walls for Your Long Island Backyard
- Estimate for reinforced poured concrete footer for retaining walls long island
- Remove retaining walls|rebuild retaining wall|long island
- Top Concrete Block Retaining Wall Contractors Long Island
Frequently Asked Questions
Why does a wall over four feet tall take so much longer to build? Once a retaining wall crosses the four-foot height threshold, it transforms from a simple landscape feature into a structural engineering project. The amount of soil pressure it must hold back increases dramatically, so the design requires a licensed engineer’s approval to ensure it is safe and stable. This adds an engineering phase to the plan. Construction also becomes more complex, demanding a deeper foundation, more reinforcement, and a more robust drainage system to handle the immense force, all of which adds to the on-site construction time.
Can I do anything to speed up the permit process? While you can’t control how quickly your local town office processes applications, you can prevent unnecessary delays. The best way to keep the permit phase as short as possible is to submit a perfect application package on the first try. This means having complete, accurate plans that meet all local codes. Working with an experienced local contractor is your best bet here, as they know exactly what each Long Island municipality requires and can prepare the paperwork correctly to avoid the back-and-forth of revisions.
What happens if I change my mind about the materials after construction starts? Changing your material choice mid-project can unfortunately cause significant delays and increase costs. Construction would likely need to pause while the new materials are ordered, and you would have to wait for them to be delivered, which could take weeks. Depending on the change, it might even require revisions to the engineering plans and permits. This is why we spend so much time with you during the planning phase, to make sure you are completely confident in your design and material selections before we break ground.
Is it faster to build a small retaining wall myself? While a DIY project might seem faster for a very small garden border, it often takes much longer than you’d expect. The real work isn’t just stacking the blocks; it’s in the preparation. A professional crew can excavate, build a perfectly level gravel foundation, and install proper drainage with speed and efficiency. For a homeowner, this prep work can take several weekends. A professional team can typically complete a small, properly built wall in a day or two, ensuring it won’t lean or fail after the first big rainstorm.
Can a retaining wall be built in the winter on Long Island? Generally, we advise against building retaining walls during the winter. Frozen ground is extremely difficult to excavate and makes it impossible to properly compact the foundation, which is critical for the wall’s stability. Additionally, the mortar and concrete used in construction need to cure at temperatures above freezing to reach their full strength. It’s much better to use the winter months for planning your design and securing permits so you’re ready to go as soon as the ground thaws in the spring.