


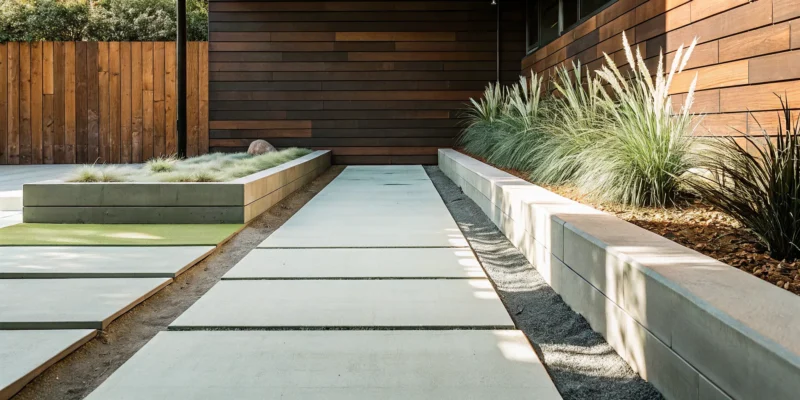
When you hear “cinder block,” you might picture a plain, industrial gray wall. It’s time to rethink that image. While cinder blocks provide an affordable and incredibly strong foundation for a retaining wall, they are also one of the most versatile materials for custom designs. Think of a cinder block wall not as the final product, but as the structural starting point for something beautiful. Whether you cover it with a sleek stucco finish, apply a natural stone veneer, or paint it a bold color, the possibilities are endless. This article is filled with creative cinder block retaining wall ideas to help you see beyond the block and design a feature that perfectly matches your home’s style and enhances your entire outdoor living space.
Key Takeaways
- Look Beyond the Basic Block: Cinder blocks are a cost-effective and strong foundation, but their real strength is versatility. Customize them with finishes like stucco, stone veneer, or paint to create a wall that perfectly complements your home and landscape.
- Prioritize Foundation and Drainage: A wall’s longevity depends on two critical steps: creating a solid, compacted gravel footing and installing a proper drainage system. These non-negotiable steps prevent shifting and failure by managing ground stability and water pressure.
- Integrate Smart Design Features: Make your wall a functional part of your yard by incorporating built-in elements. Consider adding integrated seating, creating terraced garden planters, or using decorative capstones for a polished look that improves your outdoor living space.
What Is a Cinder Block Retaining Wall (and What Does It Do)?
If you have a sloped yard, you know the challenges it can present, from soil erosion to unusable space. A cinder block retaining wall is a straightforward and effective solution. Think of it as a structural wall designed to hold back soil and create a stable, level area where there once was a hill. Its main job is to manage the landscape by preventing dirt and rocks from sliding downhill, especially during heavy rain.
Beyond its practical function of erosion control, a retaining wall can completely transform your property. It allows you to carve out functional, flat spaces from a sloped yard. This could mean creating a level foundation for a new patio, designing terraced garden beds, or simply making a section of your lawn more usable for family activities. Essentially, it helps you reclaim your yard and shape it to fit your vision.
While the concept is simple, building a durable retaining wall requires proper engineering. These structures need a solid concrete footing to anchor them and must include a drainage system to manage water pressure that builds up behind the wall. Without these critical elements, a wall can fail. This is why expert masonry knowledge is so important for ensuring your wall is not only beautiful but also built to last for decades.
Why Choose Cinder Blocks for Your Retaining Wall?
When you start planning a retaining wall, you’ll find plenty of material options, but cinder blocks consistently stand out for a few key reasons. They offer a fantastic combination of affordability, strength, and design potential that’s hard to beat. While some people might think of them as purely utilitarian, a cinder block wall is actually a blank canvas for your backyard. Whether you’re managing a sloped yard, creating garden tiers, or defining an outdoor space, cinder blocks provide a reliable and customizable foundation for your project. Let’s look at why they are such a popular choice for homeowners.
Compare Costs: Cinder Blocks vs. Stone, Brick, and Timber
One of the biggest advantages of using cinder blocks is their cost-effectiveness. When you compare material costs, cinder blocks are almost always the most budget-friendly option, especially when measured against materials like natural stone or brick. This affordability means you can allocate more of your budget to other parts of your project, like professional installation or beautiful landscaping to complement the wall. While timber can also be a lower-cost choice, it doesn’t offer the same longevity as a block wall. For homeowners looking for a practical solution that delivers maximum value without sacrificing structural integrity, cinder blocks are an excellent starting point.
Strength, Durability, and Longevity
A retaining wall is a long-term investment, so you need it to be strong and durable. Cinder blocks, also known as Concrete Masonry Units (CMUs), are heavy, dense, and built to last. When installed correctly with mortar and steel rebar reinforcement, they create an incredibly strong structure capable of holding back tons of soil. This makes them ideal for the changing seasons we experience on Long Island. A wall built with expert masonry construction is designed to handle tough weather for many years, giving you peace of mind that your landscape is secure and your investment is protected from shifting or failure.
Design Flexibility for Curves, Steps, and Custom Shapes
Don’t let their simple shape fool you; cinder blocks offer amazing design flexibility. Because they are uniform blocks, they can be used to create clean lines, gentle curves, or integrated steps that flow with the contours of your property. This adaptability allows you to build a wall that fits perfectly into your custom landscape design instead of forcing a rigid structure onto your yard. Think of a cinder block wall as the structural base. From there, you can apply a finish like stucco, stone veneer, or paint to achieve any aesthetic you want, from modern and sleek to rustic and natural.
Cinder Block Retaining Wall Ideas to Inspire Your Project
A cinder block wall is more than just a functional structure; it’s a blank canvas for your backyard. While the grey blocks might seem plain at first, they are the perfect starting point for a wall that truly reflects your personal style. Whether you want a sleek, modern boundary or a rustic, natural-looking feature, you can customize cinder blocks to achieve the perfect look. The key is to think beyond the block and focus on the finish.
From applying elegant veneers to incorporating clever design features, there are countless ways to transform a basic wall into a stunning landscape element. You can integrate seating, create garden planters, or even turn the wall into a piece of art. With the right design and professional execution from our masonry services, your cinder block retaining wall can become a highlight of your outdoor space. Let’s explore some creative ideas to get you started.
Get a Clean, Modern Look with a Stucco Finish
If you love a minimalist and contemporary aesthetic, a stucco finish is an excellent choice. Applying a smooth coat of stucco over the cinder blocks completely hides the joints and rough texture, creating a seamless, uniform surface. This clean look pairs beautifully with modern home architecture and simple landscaping.
You can leave the stucco in its natural grey or white, or you can have it tinted to any color you like, perfectly matching your home’s exterior paint or trim. To complete the look, add flat capstones to the top of the wall for a polished, intentional finish. Our expert masonry team can create a flawless stucco finish that is both durable and beautiful.
Create a Natural, High-End Look with Stone Veneer
Want the timeless beauty of a stacked stone wall without the high cost and intensive labor? Stone veneer is the answer. By applying a thin layer of real or manufactured stone to the face of your cinder block wall, you can achieve a high-end, natural look that blends perfectly with the landscape.
This technique gives you incredible design flexibility. You can choose from a wide variety of stone types, colors, and shapes, from rustic fieldstone to sleek, uniform ledgestone. A natural stone veneer provides an authentic, durable finish that makes your retaining wall look like it was built entirely from solid stone, adding significant value and character to your property.
Make a Bold Statement with Painted Cinder Blocks
For a simple, budget-friendly, and highly creative option, consider painting your cinder block wall. A fresh coat of paint can instantly transform the look and feel of the structure. You could choose a solid color that complements your home’s exterior, a dark, dramatic shade that makes your landscaping pop, or a neutral tone that helps the wall recede into the background.
If you’re feeling artistic, you can even turn the wall into a canvas for a custom mural. An abstract design or a nature-inspired scene can become a unique focal point in your yard. Just be sure to use high-quality outdoor masonry paint to ensure the color stays vibrant and resists weathering over time.
Build Terraced Retaining Walls for Sloped Yards
If your Long Island property has a significant slope, a single, tall retaining wall might feel overwhelming and imposing. A better solution is to create terraced walls. This approach involves building a series of shorter, staggered walls that step down the hill.
Terracing breaks up the slope into more manageable, level sections. These new flat areas are perfect for creating garden beds, small lawn areas, or even a cozy patio. This not only solves your erosion problem but also adds dimension and usability to your yard. A thoughtful landscape design can turn a challenging slope into one of your property’s best features.
Design Multi-Tiered Walls for Separate Garden Areas
Even in a relatively flat yard, multi-tiered walls can add structure and definition. You can use low retaining walls to create distinct “rooms” within your landscape. For example, a short wall can separate a patio from a garden bed or define the edge of a pathway.
This technique is perfect for creating visual interest and organizing your outdoor space. You can design different levels for different purposes: a raised bed for vegetables, a sunken area for a fire pit, or a slightly elevated platform for a seating area. These subtle changes in elevation make the landscape feel more dynamic and thoughtfully planned.
Use Raised Garden Bed Walls as Planters
Why not make your retaining wall do double duty? A cinder block wall is the perfect structure for building integrated raised garden beds. By designing the wall as a planter, you can add lush greenery and colorful flowers right into the hardscaping. This is an especially great solution for yards with poor soil, as you can fill the beds with high-quality topsoil and compost.
The hollow cores of the cinder blocks themselves can even be used as mini-planters for succulents or herbs. This functional design softens the look of the wall and makes gardening more accessible by bringing the plants up to a comfortable height.
Add Visual Interest with Curved and Angled Walls
A retaining wall doesn’t have to be a straight line. Introducing curves and angles into your design can completely change the feel of your yard. A gently curving or serpentine wall can create a soft, organic flow that feels more natural and inviting. It can guide the eye through the landscape and make a space feel larger.
Alternatively, using sharp, geometric angles can create a bold, modern statement. This works well in contemporary landscape designs and can be used to define specific zones or create interesting patterns. Breaking away from straight lines adds a custom, high-end feel to your project.
Get a Polished Finish with Paver Caps
The small details often make the biggest difference, and that’s certainly true for retaining walls. Adding a cap to the top of your wall is a crucial finishing touch. Capstones, which are flat stones or pavers, provide a clean, smooth surface that makes the entire structure look complete and professional.
Beyond aesthetics, caps also protect the wall by preventing water from getting into the cinder block cores. You can choose from a variety of materials, including natural stone or concrete paver caps, to match or contrast with your wall finish and surrounding patio. This simple addition gives your wall a polished, durable top edge.
Integrate Seating for a Functional Outdoor Space
One of the most clever ways to use a retaining wall is to build seating directly into it. A “seat wall” is typically built at a comfortable height (around 18 to 20 inches) and topped with a smooth, flat capstone. This is an incredibly efficient way to add permanent, weatherproof seating to your patio, fire pit area, or garden.
Integrated seating saves space, as you don’t need to make room for bulky outdoor furniture. It also creates a cohesive, built-in look that feels intentional and high-end. It’s a perfect solution for maximizing the functionality of your outdoor living areas.
Build a Vertical Garden into Your Wall
Turn your retaining wall into a living work of art by creating a vertical garden. You can easily soften the hard surface of a cinder block wall with climbing plants like ivy, clematis, or climbing roses grown on a trellis. This adds a layer of lush greenery and seasonal color.
For a more structured look, you can use the wall to support a system of planters or pockets designed for vertical gardening. This is a great way to grow herbs, strawberries, or a variety of ornamental plants, especially if you have limited ground space. A vertical garden transforms a purely functional wall into a vibrant, green feature in your landscaping.
How to Make a Cinder Block Retaining Wall Look Good
A cinder block wall is a practical and strong solution for your landscape, but let’s be honest, the standard gray block isn’t always the most inspiring look. The good news is you don’t have to settle for a purely utilitarian wall. With a bit of creativity and smart design, you can transform a basic cinder block structure into a beautiful focal point in your yard. It’s all about moving beyond the block itself and thinking about the finish, the surrounding elements, and the overall harmony of your outdoor space. You can easily make it a feature you’re proud of, rather than something you try to hide.
Thinking like a designer can make all the difference. By combining different materials, incorporating natural textures like wood and plants, and thoughtfully blending the wall with your home’s existing style, you can achieve a high-end look that feels intentional and polished. These strategies help soften the hard lines of the concrete and integrate the wall seamlessly into your landscape, proving that functional can also be beautiful. A great masonry design considers both form and function from the very beginning, ensuring the final result enhances your entire property.
Combine Materials for a Custom Finish
One of the best ways to dress up a cinder block wall is to cover it with a more decorative material. This approach gives you a premium look without the cost of building the entire wall from expensive materials. Applying a stone or brick veneer is a popular choice that completely changes the wall’s appearance, giving it the timeless character of natural stone or classic brick. You can also top the wall with elegant caps made from bluestone, travertine, or other porcelain and natural stone pavers. This mix-and-match technique allows you to create a truly custom finish that reflects your personal style and complements your home’s architecture.
Add Wood Accents and Landscaping Details
Integrating natural elements is key to making a cinder block wall feel like part of your garden. Adding wood accents, such as a wooden cap or a built-in bench, introduces warmth and texture that contrasts beautifully with the concrete. You can also attach horizontal or vertical wood slats to the face of the wall for a modern, stylish look. Of course, the most effective way to soften a wall is with plants. Thoughtful landscape design can use trailing vines, colorful flowers, and lush shrubs to cascade over the edges or grow at the base, turning your retaining wall into a living part of the landscape.
Blend Your Wall with Your Existing Landscape
A successful retaining wall doesn’t just stand out; it fits in. To create a cohesive look, choose finishing materials and colors that match your home and the surrounding environment. For example, if your home has a stone foundation, using a similar stone veneer on the wall will create a seamless visual connection. You can also paint the wall a color that complements your home’s siding or trim. Think about how the wall functions within your yard. Use it to define different “rooms,” like separating a patio dining area from a lawn or creating a dedicated space for a fire pit or garden.
How to Build a Cinder Block Retaining Wall: A Step-by-Step Guide
Building a cinder block retaining wall is a rewarding project that can transform your yard, but it requires careful planning and a bit of muscle. A well-built wall can solve slope issues, prevent erosion, and create beautiful, usable garden tiers. While it’s a substantial undertaking, following the correct steps is the key to creating a structure that is both strong and attractive. From digging the foundation to applying the finishing touches, each stage is critical for the wall’s long-term stability.
This guide will walk you through the fundamental steps of building a cinder block retaining wall. Keep in mind that local building codes on Long Island may have specific requirements, especially for walls over a few feet tall. For larger or more complex projects, working with an experienced team ensures your wall is built to last and meets all safety standards. Gappsi’s masonry experts have been designing and constructing retaining walls for decades, handling everything from structural engineering to final finishes.
Step 1: Plan Your Wall’s Height, Length, and Layout
Before you pick up a shovel, you need a solid plan. Start by deciding on the exact location, length, and height of your retaining wall. Use stakes and string to outline the wall’s footprint in your yard so you can visualize the final result. This is also the time to check with your local municipality about building codes and whether you’ll need a permit.
For walls taller than three or four feet, you’ll likely need to incorporate structural reinforcement, like vertical rebar and concrete grout. A wall of this size is holding back a tremendous amount of soil pressure, so it’s often best to consult a professional for the design. An expert can ensure your plan accounts for soil type, drainage, and the necessary structural support for a safe and durable wall.
Step 2: Dig and Prepare the Site
With your plan finalized, it’s time to prepare the site. The first step is to dig a trench for the wall’s foundation, also known as a footing. The trench should be about twice as wide as your cinder blocks and deep enough to accommodate a 6-inch gravel base plus half the height of your first block.
As you dig, make sure the bottom of the trench is firm and perfectly level. Use a long level or a builder’s line level to check your work. A level base is absolutely essential for a stable wall, as any imperfections in the foundation will be magnified as you build upward. This initial groundwork is one of the most important parts of the entire construction process, so take your time to get it right.
Step 3: Lay a Compacted Gravel Footing for a Solid Base
Every strong retaining wall starts with a solid footing. Once your trench is dug and level, you’ll fill it with a base of compacted gravel. Use a crushed stone aggregate, as sand or fine dirt will hold water and can compromise the wall’s stability over time.
Add the gravel in 2- to 3-inch layers, using a hand tamper to compact each layer thoroughly before adding the next. Continue this process until you have a solid, level gravel base that is at least 6 inches deep. This compacted footing creates a stable foundation that distributes the wall’s weight evenly and allows for proper drainage, preventing shifting and settling down the road. This base is just as important as the natural stone you might choose for your patio.
Step 4: Stack, Level, and Align Your Cinder Blocks
Now you can start laying the blocks. Set the first course of cinder blocks directly onto the compacted gravel footing. Gently tap each block into place with a rubber mallet, making sure it’s perfectly level from front to back and side to side. The first course sets the standard for the entire wall, so precision is key.
For the second course and beyond, stack the blocks in a running bond pattern, similar to how bricks are laid. This means the vertical joints are staggered, which adds significant strength to the wall. As you build, continuously check that the blocks are level and plumb (perfectly vertical). You can also run a string line from one end of the wall to the other to ensure each course is straight.
Step 5: Reinforce with Rebar and Concrete Grout
For any wall holding back a significant amount of soil, reinforcement is not optional. For walls over a few feet high, you’ll need to add vertical steel rebar for strength. Place the rebar into the hollow cores of the cinder blocks at regular intervals, typically every few feet, as specified by your design plan.
Once the rebar is in place, you’ll fill the cores containing the rebar with concrete grout. This process effectively transforms the hollow blocks into solid, reinforced concrete pillars within the wall, creating a powerful structure capable of withstanding immense pressure. This is a critical step where professional masonry services can provide peace of mind, ensuring the reinforcement is done correctly for maximum stability.
Step 6: Waterproof the Back of the Wall
Water is the number one enemy of a retaining wall, so protecting your wall from moisture is essential. Before you backfill behind the wall with soil, you need to waterproof the entire back surface. Apply a thick coat of foundation sealant or a waterproofing membrane designed for masonry.
This barrier prevents water in the soil from seeping into the porous cinder blocks. Over time, water penetration can weaken the wall, cause cracks during freeze-thaw cycles, and lead to efflorescence, that chalky white residue you sometimes see on concrete. Taking the time to properly seal your masonry is a small step that adds years to your wall’s life.
Step 7: Install Drainage Solutions Behind the Wall
In addition to waterproofing, you need a system to manage the water that will inevitably collect behind your wall. This is done by installing a French drain. Lay a perforated drain pipe at the base of the wall on the soil side, ensuring it has a slight downward slope to direct water away.
Next, backfill the space directly behind the wall with at least 12 inches of clean, crushed gravel. This gravel allows water to flow freely down to the perforated pipe instead of building up and creating hydrostatic pressure against the wall. This pressure is incredibly powerful and is a leading cause of retaining wall failure. Proper drainage is just as important as a strong foundation for a long-lasting wall.
Step 8: Apply Your Finish and Add Landscaping
With the structural work complete, you can focus on the aesthetics. A plain cinder block wall is functional, but you can easily make it a beautiful feature of your yard. Consider applying a stucco finish for a clean, modern look, or install a stone veneer for a more natural, high-end appearance. Adding capstones to the top of the wall provides a polished, finished edge.
Finally, integrate the wall into your yard with thoughtful landscaping. You can find inspiration for finishes by looking at different porcelain and natural stone options. Planting shrubs, flowers, or groundcover in front of and behind the wall will soften its edges and help it blend seamlessly with your outdoor space. A well-designed landscape can turn your functional retaining wall into a stunning focal point.
Does a Cinder Block Retaining Wall Need Drainage?
Thinking about drainage might not be the most exciting part of planning your retaining wall, but it’s one of the most important. The short answer is yes, every cinder block retaining wall needs a solid drainage plan. Without it, water from rain and soil can get trapped behind the wall. This creates immense pressure that can cause the wall to bulge, crack, or even fail completely over time. Proper drainage isn’t just a suggestion; it’s the key to ensuring your wall stays strong and beautiful for years to come. Think of it as essential insurance for your investment. A professional masonry design always includes a robust drainage system tailored to your property’s specific needs.
How to Install a French Drain Behind Your Wall
A French drain is one of the best ways to manage water behind your retaining wall. The setup involves placing a perforated pipe in a trench at the base of the wall, on the soil side. This pipe is then covered with clean gravel. The gravel creates space for water to move freely, relieving the heavy, waterlogged pressure against the wall. As water filters through the gravel, it enters the perforations in the pipe and is channeled away to a safe location, like a storm drain or a lower point on your property. This system actively prevents water from building up, which is the main cause of retaining wall failure.
Weep Holes: What They Are and Why They Matter
Weep holes are another simple yet critical component of retaining wall drainage. These are small openings or gaps left in the face of the wall near its base. Their job is to provide an escape route for any water that manages to accumulate behind the wall, despite the French drain. Think of them as tiny pressure-relief valves. By allowing water to literally “weep” out, they prevent hydrostatic pressure from building to a dangerous level. While they may seem minor, incorporating weep holes into your wall’s design is a fundamental step in ensuring its long-term stability and preventing the kind of water damage that can lead to costly repairs.
Why Hydrostatic Pressure Is Your Wall’s Biggest Enemy
So, what exactly is this hydrostatic pressure we keep mentioning? In simple terms, it’s the force exerted by standing water. When soil behind your retaining wall becomes saturated, the weight of the water pushes against the structure with incredible force. This is your wall’s biggest enemy. Over time, this constant pressure can lead to serious structural damage, from visible cracks and bowing to a complete collapse. This is why a combination of a French drain and weep holes is so effective. Together, they create a comprehensive system to manage water and neutralize the threat of hydrostatic pressure, protecting both your wall and your property. If you notice cracks or damage on an existing wall, professional restoration and sealing may be needed to address the issue.
Reinforce Your Wall for Long-Term Strength
A retaining wall does more than just look good; it holds back tons of soil. Without proper reinforcement, that immense pressure can cause your wall to bow, crack, or even fail completely. Reinforcing your cinder block wall isn’t an optional step, it’s the key to ensuring it remains strong, stable, and safe for years to come. Think of it as building a strong skeleton inside your wall. The right reinforcement strategy depends on your wall’s height and the load it needs to support. Professional masonry projects always prioritize this step to guarantee long-term structural integrity, because what’s inside the wall is just as important as the finish on the outside. Taking these extra steps during construction prevents major headaches and costly repairs later on, protecting your investment and your property.
When and How to Use Rebar and Concrete Grout
For any cinder block retaining wall over three feet tall, using rebar and concrete grout is essential. Rebar, which is short for reinforcing bar, is a steel rod that provides tensile strength, helping the wall resist forces that could pull it apart. The process involves placing vertical rebar rods into the hollow cores of the cinder blocks as you build. Once the blocks are stacked, you fill those cores containing the rebar with concrete grout. This effectively creates solid, steel-reinforced concrete pillars within the wall, giving it incredible strength to withstand the lateral pressure from the soil behind it.
Use Geogrid for Taller, Heavier Walls
When you’re building taller retaining walls or dealing with significant soil loads, geogrid is an excellent reinforcement tool. Geogrid is a synthetic mesh material that stabilizes the soil itself. You install it by laying it in horizontal layers that extend from the back of the wall into the soil as you backfill. Each layer of geogrid helps lock the soil in place, creating a reinforced soil mass that works with the wall to resist pressure. This method distributes the load over a much larger area, dramatically increasing the wall’s stability and preventing failure on more ambitious landscape design projects.
Know Your Reinforcement Needs Based on Wall Height
The height of your wall is the primary factor that determines your reinforcement needs. For shorter walls under three feet, a compacted gravel footing might be enough. However, once you exceed that height, the rules change. Walls taller than three feet require a solid concrete footing and vertical rebar set within the blocks. As the wall gets taller, the reinforcement requirements become more complex, often involving geogrid, more rebar, and specific engineering plans. Don’t guess on this part. Underestimating the forces at play can lead to a costly and dangerous failure down the road.
Common Cinder Block Retaining Wall Mistakes to Avoid
Building a cinder block retaining wall can be a rewarding project, but a few common missteps can turn your hard work into a structural headache. A wall that’s built to last requires more than just stacking blocks. It needs a solid plan that accounts for foundational support, water management, and the right materials. By understanding these potential pitfalls before you start, you can ensure your wall remains strong and stable for years to come. Let’s walk through the most frequent mistakes so you can get your project right the first time.
Skipping the Footing or Foundation Prep
Think of a footing as the foundation for your wall; it’s the solid base that everything else depends on. One of the biggest mistakes you can make is building directly on top of unprepared soil. Without a proper footing, your wall is likely to shift, settle unevenly, or even collapse over time. As construction pros often say, every wall needs a strong base to distribute its weight and anchor it to the ground. This usually involves digging a trench below the frost line and filling it with compacted gravel to create a stable, level surface. This step is non-negotiable for a durable and long-lasting retaining wall.
Ignoring Drainage Until It’s Too Late
Water is the number one enemy of a retaining wall. The soil behind your wall will absorb rainwater, and without an escape route, that water creates immense hydrostatic pressure. This force can cause the wall to bow, crack, or fail completely. To prevent this, you must plan for drainage from the very beginning. Smart drainage solutions include installing perforated pipes or a French drain at the base of the wall to channel water away. You should also add weep holes, which are small gaps in the wall that let water escape before pressure builds up. Proper drainage is a critical part of any professional masonry project.
Building Too Tall Without Proper Reinforcement
While cinder blocks are strong, there’s a limit to how high you can build a simple wall without adding extra support. Generally, any wall over three or four feet tall needs reinforcement to handle the pressure from the soil behind it. For taller structures, you’ll need to use vertical rebar threaded through the block cavities and filled with concrete grout. This creates a solid, interconnected structure that can withstand significant force. For very tall or complex walls, it’s always best to consult with a professional to ensure the design is safe and meets local building codes.
Using the Wrong Mortar or Adhesive
A common misconception is that cinder blocks in a retaining wall are held together with mortar, just like a brick wall. However, for most dry-stacked retaining wall systems, the blocks are designed to interlock, and their weight provides the necessary stability. Mortar can actually create weak points and trap water within the wall. The main exception is the capstone, the final layer that gives your wall a finished look. For this top course, you’ll often use a strong construction epoxy to secure the caps in place and prevent them from shifting.
Forgetting to Waterproof Before Backfilling
Before you backfill the area behind your wall with soil, there’s one final protective step you can’t afford to skip: waterproofing. Cinder blocks are porous, meaning water can seep through them over time. This moisture can lead to staining, efflorescence (those chalky white deposits), and can weaken the blocks during freeze-thaw cycles. To prevent this, it’s important to paint a special water sealant on the back of the wall. This creates a waterproof barrier that protects your wall from the inside out. This is a key step in any professional restoration and sealing project.
When Should You Call a Professional for Your Retaining Wall?
While it’s tempting to tackle a cinder block wall yourself, some projects are best left to the professionals. It’s not about admitting defeat; it’s about making a smart, safe choice for your home and property. A poorly constructed retaining wall can fail, leading to costly damage, soil erosion, and serious safety hazards. So, how do you know when a project has moved from a weekend DIY into professional territory?
Generally, it’s time to call for help if your planned wall is over three or four feet tall. Taller walls must withstand immense pressure from the soil behind them, requiring specific engineering, reinforcement, and deep footings that go beyond a simple DIY guide. Other red flags include steep slopes, poor soil conditions, or building the wall near a property line, driveway, or your home’s foundation. In these situations, a professional assessment is critical to ensure the wall is designed and built to last without causing unintended problems. A professional can also manage the entire project, from initial design and material selection to final construction, giving you peace of mind.
Permits and Codes: What to Know on Long Island
Before you even break ground, it’s essential to understand the local rules. On Long Island, building codes can vary between towns in Nassau and Suffolk County, and retaining walls are often subject to specific regulations. You should always check your local building rules to see what kind of footing and wall size you need, especially for walls that hold back soil. These codes aren’t just red tape; they exist to ensure your wall is safe and structurally sound. For more complex projects, like hillside stabilization, it’s best to consult with professionals who are familiar with local requirements. A masonry expert can ensure your project meets all necessary standards from the start.
How Gappsi Can Help with Your Retaining Wall Project
Professional help is strongly recommended for walls over three to four feet high. These structures often require vertical rebar filled with concrete grout and professional structural planning to handle the pressure safely. Our team at Gappsi has the expertise to design and build retaining walls that are both beautiful and structurally sound. We also know it’s very important to check the specific details for each type of block to see how high it can safely go. We handle every aspect of your retaining wall project, from securing permits and creating a solid engineering plan to selecting the right materials and ensuring proper drainage, so you get a finished wall that enhances your property for years to come.
Related Articles
- Estimate for reinforced poured concrete footer for retaining walls long island – Gappsi Group
- Learn About Quality Retaining Walls for Your Long Island Backyard – Gappsi Group
- Three level retaining wall long island – Gappsi Group
- Top Concrete Block Retaining Wall Contractors Long Island
- masonry and landscape estimate long island – Gappsi Group
Frequently Asked Questions
How long can I expect a professionally built cinder block retaining wall to last? A well-built cinder block retaining wall is a long-term investment that should last for many decades. Its lifespan depends entirely on proper construction. When a wall includes a solid footing, effective drainage to manage water pressure, and the right reinforcement for its height, it is built to withstand the elements and the constant pressure of the soil. Professional installation ensures all these critical factors are handled correctly, giving you a structure that will remain stable and secure for years.
Do I really need a permit for a short retaining wall on Long Island? It’s always best to assume you might. Rules for permits can vary significantly between different towns across Nassau and Suffolk County. While a very short, decorative wall might not require one, any wall that is holding back soil (what’s known as a “surcharged” wall) or is over a certain height, often around three feet, will almost certainly need a permit. Checking with your local building department is the only way to know for sure, and it’s a step a professional contractor will handle for you.
My yard has a very steep slope. Is a cinder block wall strong enough? Yes, a cinder block wall can absolutely be strong enough for a steep slope, but only if it is properly engineered. This is not a scenario for a simple stacked wall. A wall on a steep grade requires significant reinforcement, such as vertical steel rebar and concrete-filled cores, and may even need geogrid mesh extending into the hillside to stabilize the soil. A professional design is essential to calculate the forces at play and ensure the wall is built to handle the immense pressure safely.
Can I just paint a cinder block wall, or do I need a special finish like stucco or veneer? Painting is a fantastic and budget-friendly way to customize your cinder block wall. You don’t necessarily need a more complex finish if you like the look of a painted surface. The key is to use a high-quality paint specifically designed for outdoor masonry, which will adhere properly and resist weathering. This allows you to choose any color to match your home or landscape, while finishes like stone veneer or stucco are great options for creating a completely different texture and style.
What’s the most important step to get right if I’m building a small wall myself? If you’re tackling a small, simple wall, the most critical step is creating the foundation. You cannot build a stable wall directly on top of dirt. You must dig a trench and lay a level, compacted gravel footing. This base distributes the wall’s weight and provides drainage, preventing the structure from shifting, sinking, or heaving during freeze-thaw cycles. An unstable foundation is the number one reason DIY walls fail, so take your time to get this step perfect.