


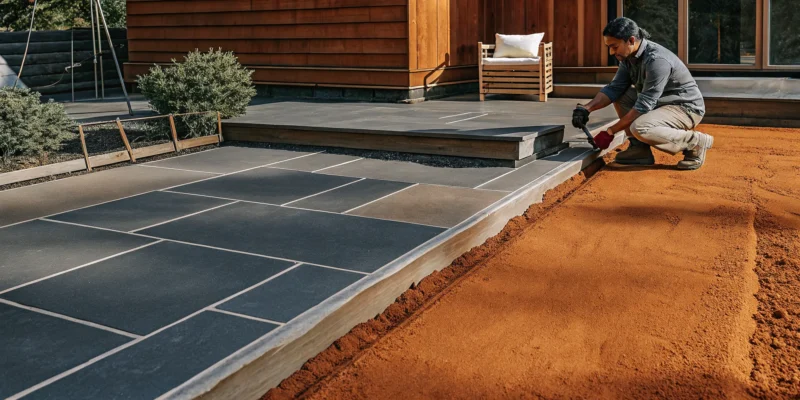
Thinking about a new stone patio is one of the most exciting upgrades you can make to your home. You can already picture summer evenings spent with family and friends. But before you get to the fun part, it’s important to understand the construction process. Knowing the timeline helps you plan your life around the work and sets clear expectations. Many homeowners ask us how long does natural stone patios take to install in Long Island, and the answer depends on several key factors. This article breaks down everything from site preparation and material choice to weather delays, giving you a realistic look at the journey from a patch of grass to a stunning, durable outdoor living area.
Key Takeaways
- Plan for Weeks, Build in Days: The entire process, from initial design to final approval, typically takes two to six weeks, but the actual hands-on construction of your patio is often finished in just a few days.
- A Solid Foundation Prevents Future Problems: The most critical part of your patio is the unseen base; proper excavation, grading, and compaction are essential for preventing sinking stones, drainage issues, and costly repairs.
- Timing and Materials Dictate the Schedule: Your project’s timeline depends on the patio’s size, design complexity, and the stone you select, while scheduling for spring or fall offers the best weather for a smooth and durable installation.
How Long Does a Natural Stone Patio Take to Install in Long Island?
One of the first questions homeowners ask is, “How long will this actually take?” It’s a great question. From our first conversation to the final walkthrough, installing a natural stone patio in Long Island typically takes about two to six weeks. This timeline gives us enough room for all the important steps: finalizing your design, ordering materials, preparing the site, and, of course, the installation itself. While the whole project is a multi-week process, the good news is that your yard won’t be a construction zone for that entire time.
The actual hands-on installation is surprisingly fast. For a standard-sized patio, our crew can often complete the physical work in just one or two days. We’re usually on-site from morning to late afternoon, working efficiently to bring your vision to life. Of course, things like weather can cause a slight delay, but we always keep you in the loop and give you a heads-up about your exact start date. The goal is to make the process as smooth and predictable as possible for you.
Several things can influence this timeline, like the size of your patio, the condition of your yard, and any special features you want to include. Choosing the right materials is also a key part of the planning phase. We can help you explore a wide selection of beautiful porcelain and natural stone pavers to find the perfect fit for your home and style. Our expert masonry designer team works with you to create a plan that matches your timeline and budget, ensuring every detail is accounted for before we break ground.
Your Natural Stone Patio Installation: A Step-by-Step Guide
Thinking about a new stone patio is exciting, but understanding the installation process can make it feel much more manageable. While every project is unique, most professional installations follow a clear, structured path from design to completion. Knowing what to expect at each stage helps you plan accordingly and feel confident as your new outdoor space comes to life. Here’s a look at the typical steps we follow to build a beautiful and durable natural stone patio right here on Long Island.
Initial Consultation and Design
Everything starts with a conversation. The first step is an on-site consultation where one of our design experts visits your home. We’ll measure the proposed patio area, discuss your vision, and talk through different material and design options. This meeting usually takes about 45 to 60 minutes and gives us the information we need to create a plan tailored to your home and lifestyle. After our visit, you can expect a detailed estimate that outlines the project scope and costs, so you have a clear picture of the investment before any work begins.
Selecting Your Materials
Choosing the stone for your patio is one of the most enjoyable parts of the process. Natural stone is a premium material that adds unique character and lasting value to your property. Unlike manufactured pavers, each stone has its own distinct color, texture, and pattern, ensuring your patio is truly one-of-a-kind. Whether you’re drawn to the classic look of bluestone or the warm tones of travertine, our team can help you explore our wide selection of porcelain and natural stone to find the perfect match for your home’s aesthetic and your family’s needs.
Securing Permits and Approvals
Before we can break ground, it’s important to handle any necessary paperwork. Many towns and villages on Long Island require permits for new patio installations, regardless of the material. Navigating local building codes can be complicated, but it’s a standard part of our process. As your contractor, we manage the permit application for you, making sure all plans are compliant with local regulations. This step ensures your project is built to code and saves you the headache of dealing with municipal requirements on your own.
Preparing and Excavating the Site
A great patio starts with a solid foundation, and that begins with proper site preparation. Our crew will carefully excavate the designated area, creating clean, precise boundaries for your new patio. This step is about more than just digging a hole; it’s about creating a stable base that will support the patio for decades to come. Proper excavation removes unstable topsoil and allows us to build up a strong sub-base, which is essential for preventing shifting, sinking, or cracking down the road. This meticulous groundwork is key to the longevity of your investment.
Installing the Base Layer
The base layer is the unseen hero of your patio. A weak or improperly installed base is one of the most common reasons patios fail, which is why we take this step so seriously. We install a thick layer of crushed stone, typically between six and eight inches deep, to create a stable foundation. This material is laid down in layers and compacted tightly to form a dense, interlocking base that provides excellent drainage and support. This solid footing ensures your beautiful stone patio remains level and secure through Long Island’s changing seasons.
Setting the Stones and Jointing
With the foundation set, it’s time for the main event: laying the stone. Our skilled masons will carefully place each stone according to the design, ensuring tight fits and an even surface. For a standard-sized project, this phase usually takes one to two days. Once the stones are set, we fill the gaps between them with a specialized jointing compound or sand. This not only locks the stones securely in place but also prevents weed growth and helps with drainage, adding the finishing touch to the patio’s structure and appearance.
Final Cleanup and Inspection
Our job isn’t finished until your property is spotless and your new patio is ready for you to enjoy. Once the installation is complete, our team conducts a thorough cleanup of the entire work area, removing all debris and leftover materials. We’ll then walk you through the finished project for a final inspection, making sure every detail meets your expectations. We take pride in our masonry craftsmanship and want to ensure you are completely satisfied with your beautiful new outdoor living space from day one.
What Factors Affect Your Patio Installation Timeline?
Thinking about your new stone patio is exciting, but it’s also helpful to have a realistic idea of the installation timeline. While our team at Gappsi works efficiently to bring your vision to life, several factors can influence how long the project takes from start to finish. Understanding these variables will help you plan accordingly and know what to expect as we transform your outdoor space. From the size of your patio to the time of year, here’s a look at what shapes your project’s schedule.
Patio Size and Complexity
The most straightforward factor influencing your timeline is the sheer size and intricacy of your patio design. A simple, small rectangular patio can often be installed in just a day or two. However, if you’re dreaming of a large, expansive patio for entertaining, the project will naturally take longer. More complex designs with multiple levels, intricate patterns, or custom inlays require precise cuts and careful placement, adding to the installation time. Our masonry experts take the time needed to ensure every stone is perfectly set, so a more ambitious design might take three days or more to complete.
Your Yard and Soil Conditions
The current state of your backyard plays a big role in the preparation phase. A flat, clear, and easily accessible area is the ideal canvas. However, many Long Island properties have unique characteristics that require extra attention. If your yard has a significant slope, we’ll need to grade the area properly to ensure a level surface and good drainage. The presence of large tree roots, existing concrete slabs that need removal, or challenging soil conditions can also add time to the site preparation stage. Our landscape design team is skilled at handling these challenges to create a stable foundation for your new patio.
Weather and Seasonal Delays
Outdoor construction is always dependent on the weather, and patio installation is no exception. Heavy or persistent rain can saturate the ground, making it too soft and unstable to properly lay the base material and stones. For the integrity of your patio, we have to wait for the ground to dry out, which can sometimes cause a delay of a day or two. While we monitor the forecast closely to schedule work during clear weather, unexpected storms are a reality on Long Island. We appreciate your patience when Mother Nature has other plans, as waiting for the right conditions is key to a lasting installation.
Scheduling During Peak Season
Spring and summer are the most popular times for homeowners to invest in outdoor projects, which means it’s our busiest season. While we manage our schedule carefully, the high demand can affect how quickly we can start your project. We typically provide a one to two day notice before the installation begins, as project schedules can shift due to weather or the completion of other jobs. To get on the calendar during these peak months, we always recommend you schedule a consultation with us as early as possible. Planning ahead helps ensure we can fit your project into your desired timeframe.
Custom Features and Design Choices
A patio is often more than just a flat surface; it’s the centerpiece of your outdoor living area. If your design includes custom features, the installation will require more time. Elements like built-in seating walls, a cozy fire pit, elegant steps, or connecting walkways all add layers of complexity to the project. Unlike a simple square patio, these features involve detailed masonry work and careful construction to integrate them seamlessly into the overall design. Adding these beautiful and functional elements is worth the extra time, as they make your patio a truly unique extension of your home.
Site Access and Limitations
Logistics are a crucial part of any construction project. To install your patio efficiently, we need to bring in equipment, including a small digging machine and a trailer for materials, which are often staged in the driveway. If access to your backyard is limited by narrow gates, delicate landscaping, or other obstructions, it can slow down the process. In some cases, we may need to temporarily remove a section of fencing to create a clear path. Limited access might also mean more work needs to be done by hand, which can extend the overall timeline.
How Your Stone Choice Affects Installation Time
The type of stone you choose for your patio does more than just define its look; it also plays a significant role in the installation timeline. Think of it like this: some stones are dense and heavy, requiring more muscle and precision to cut and place, while others are lighter and more forgiving to work with. This difference in material properties directly impacts how long our crew will be on-site. The stone’s natural characteristics, such as its porosity, can also add extra steps like sealing to the process, which is crucial for protecting your investment from the elements.
Understanding these nuances from the start helps you set realistic expectations for your project schedule. It’s not just about the time it takes to lay the stones, but also the preparation, cutting, and finishing work that each specific material demands. A complex, custom pattern with a hard stone like granite will naturally take longer than a simple layout with a softer stone. We’ll walk you through how some of the most popular porcelain and natural stone pavers for Long Island patios compare in terms of installation, so you can make an informed choice that balances your aesthetic goals with your timeline.
Bluestone
Bluestone is a classic choice, known for its beautiful blue-gray tones that fit both modern and traditional designs. Its naturally textured, slip-resistant surface makes it a safe and practical option for pool surrounds and patios. However, bluestone is quite dense and heavy. This means it requires more effort to transport, handle, and set each paver into place. Cutting it to fit intricate patterns or curves also takes more time compared to softer stones. While the result is a timeless and durable patio, the installation process is often more methodical and can take a bit longer to ensure every piece is perfectly laid.
Travertine
If you’re dreaming of a patio with a warm, Mediterranean feel, travertine is an excellent option. This stone comes in a variety of earthy shades and is famous for staying cool to the touch, even in direct summer sun. Because travertine is lighter than stones like granite or bluestone, it can often be installed more quickly. The trade-off is its porous nature. To protect it from Long Island’s weather and prevent stains, it’s essential to restore and seal the stone properly. This final step is crucial for longevity and adds a bit of time after the pavers are set.
Granite
For a patio that offers unmatched durability, granite is a top contender. It’s an incredibly hard stone that stands up to harsh weather and heavy foot traffic without showing wear. This toughness, however, is what can extend the installation timeline. Granite’s density makes it difficult to cut and shape, requiring specialized tools and more time to achieve precise fits, especially for custom designs. While the labor involved is more intensive, the payoff is a patio that will last for decades with minimal maintenance, making it a fantastic long-term investment for your home.
Limestone
Limestone offers a soft, natural look that works well with many different architectural styles. It’s a versatile stone that comes in various colors, from creamy whites to cool grays. Compared to granite, limestone has a lower density, which makes it easier for our masonry team to handle, cut, and install. This can help shorten the overall project time. Similar to travertine, many types of limestone benefit from being sealed to protect against stains and moisture. This finishing step is an important part of the process that ensures your beautiful new patio stays looking its best for years to come.
Slate
Slate is a unique stone prized for its rich colors and distinctive layered texture. It’s naturally less porous than many other stones, giving it excellent resistance to staining and making it a very practical choice for outdoor dining areas. The main factor that affects slate’s installation time is its natural variation. No two pieces are exactly alike, so our team spends extra time carefully planning the layout. Arranging the different shapes, colors, and textures to create a beautiful, cohesive surface is an art form that can add to the installation schedule, but it’s what gives a slate patio its one-of-a-kind character.
When Is the Best Time to Install a Patio in Long Island?
Timing your patio project correctly is just as important as choosing the right materials. In Long Island, our four distinct seasons each present unique conditions that can affect the installation process, from the stability of the ground to the curing time of the mortar. While you might be dreaming of summer barbecues on your new patio, the best time to build isn’t always during the hottest months. Planning your installation for the right season ensures a smoother process, fewer delays, and a durable, long-lasting result.
Understanding the seasonal nuances helps you set realistic expectations for your project timeline. The ideal installation window combines stable weather with optimal ground conditions, allowing our team to work efficiently and meticulously. While we can often work around the weather, scheduling your project during a favorable season can make a significant difference in the final outcome. A well-timed project ensures your beautiful natural stone pavers have the perfect foundation to settle on, giving you a stunning outdoor space that will stand the test of time. Let’s look at how each season on Long Island stacks up for patio installation.
Spring and Fall: The Ideal Seasons
Most professionals agree that spring and fall are the prime seasons for patio installation. During these months, Long Island’s weather is typically mild and stable, with moderate temperatures and less rainfall than in other seasons. This creates the perfect environment for our crews to work. The ground is neither frozen nor baked solid by the sun, making excavation and base preparation much more straightforward.
These Goldilocks conditions also allow materials like mortar and jointing sand to cure properly without the risk of freezing or drying out too quickly. Planning a spring installation means your patio will be ready for you to enjoy all summer long, right alongside your swimming pool. A fall project gets your yard ready for the following year, so you can step out and enjoy your new space as soon as the warm weather returns.
Summer Installations: What to Expect
Installing a patio in the summer is definitely possible, and it even has a few perks. The long, sunny days and warm temperatures can help the base materials and adhesives dry and cure more quickly, which can sometimes speed up the installation process. However, summer is also the peak season for outdoor construction. This means contractors’ schedules are often packed, which can make booking your project more challenging.
You also have to account for Long Island’s summer weather, which can include intense heatwaves and sudden, heavy thunderstorms. Extreme heat can be tough on the crew, and unexpected downpours can cause delays. If you’re planning a summer installation, consider adding a pavilion or pergola to provide immediate shade and protection for your new outdoor living area.
Why to Avoid a Winter Installation
We generally advise against installing a natural stone patio during the winter on Long Island. The primary reason is the frozen ground. When the soil is frozen, it’s nearly impossible to properly excavate and compact the base layer, which is the most critical step for ensuring your patio’s stability. A poorly prepared base on frozen ground will shift and settle once the spring thaw arrives, leading to an uneven surface, cracked stones, and drainage problems.
Additionally, freezing temperatures can prevent mortar and joint fillers from curing correctly, compromising the structural integrity of the patio. Snow and ice also create unsafe working conditions and can bring the project to a complete halt for days or weeks. It’s better to wait for the ground to thaw to ensure your investment is built to last and avoid the need for premature restoration services.
How to Prepare Your Property for Installation
A smooth patio installation starts before our crew even arrives. Taking a few simple steps to prepare your yard can make a significant difference, helping the project run on schedule and without any surprises. Think of it as rolling out the welcome mat for your new outdoor space. Proper preparation ensures our team can work efficiently, which gets you that much closer to enjoying your beautiful new stone patio. Here’s how you can help set the stage for a successful installation.
Clear the Space and Ensure Access
Before the installation day, take some time to clear the entire project area. Move all your patio furniture, grills, potted plants, and any yard decorations to a safe spot away from the construction zone. This gives the team a clean slate to work with. It’s also important to think about the path from the street to your backyard. Our crew will need to move materials and equipment, so ensuring there’s a clear and wide-enough path will prevent delays and protect the rest of your landscaping. A little tidying beforehand helps our masonry team get straight to work on building your dream patio.
Mark Your Sprinklers and Utility Lines
Hidden obstacles underground can cause major headaches. If you have an irrigation system, it’s essential to mark all your sprinkler heads and let your project manager know their locations. While our team can often work around or move a few lines, a complex system might require a visit from your sprinkler company before we begin excavation. The same goes for any other underground utility lines for gas, electricity, or water. A quick call to 811 will have a professional come out to mark public utility lines for free, which is a crucial safety step for any digging project. This simple action protects your property and keeps everyone safe.
Plan to Remove Existing Structures
If you have an old, cracked concrete slab or a worn-out wooden deck where your new patio will go, it usually needs to be removed. While it might seem easier to build on top of an existing surface, this can lead to problems down the line. Removing the old structure allows us to build a proper, compacted base, which is the key to a long-lasting and level patio. We can assess the condition of your existing patio during our initial consultation and include the removal process in the project plan. Starting with a fresh foundation is almost always the best way to guarantee beautiful, durable results for your new natural stone patio.
What Can Delay Your Natural Stone Patio Project?
Even with the best plans, unexpected issues can arise during a patio installation. Knowing what these potential hurdles are ahead of time can help you and your contractor prepare for a smoother process. From the ground beneath your feet to the weather overhead, several factors can extend your project timeline. Being aware of these common delays helps set realistic expectations and ensures you can address any challenges quickly. The most frequent culprits involve poor site preparation, overlooked drainage, an unsuitable stone choice for the climate, and underestimating the project’s true scope. Let’s look at each of these so you can feel confident and prepared.
Poor Site Preparation
A beautiful, long-lasting patio starts with a solid foundation. Rushing or skipping steps during site preparation is one of the biggest reasons for project delays and future problems. Proper ground preparation is not just about clearing the space; it involves excavating the soil to the correct depth, ensuring the ground is perfectly graded, and compacting the sub-base to create a stable surface. If this stage is done incorrectly, you can face issues like uneven stones, poor drainage, or cracked materials down the line. A professional masonry team understands that this foundational work is critical and will not cut corners, preventing costly delays and ensuring your patio stands the test of time.
Forgetting About Drainage
Water is a patio’s number one enemy. Without a proper drainage plan, rainwater and melting snow can pool on the surface or seep into the base layer, causing major issues. On Long Island, this is especially important due to our freeze-thaw cycles, which can cause water trapped beneath the stones to expand and shift your entire patio. A well-designed patio incorporates a subtle slope to direct water away from your home’s foundation. Good excavation also creates space for the right layers of base material that support drainage. Overlooking this crucial step can halt a project while a solution is engineered, adding unexpected time and costs to your installation.
Picking the Wrong Stone for the Climate
Not all natural stones are suited for Long Island’s weather. Some materials are more porous than others, meaning they absorb more water. This can lead to staining, cracking, or flaking when temperatures drop below freezing. For example, certain types of sandstone might not hold up as well as a dense granite or bluestone. Choosing the wrong material can lead to a mid-project pivot if it’s discovered to be unsuitable, or worse, it can lead to premature failure of your patio. We can help you select the perfect natural stone that is not only beautiful but also durable enough to withstand our region’s specific climate challenges, preventing future headaches.
Underestimating the Project Scope
A natural stone patio installation is often more complex than it appears. Many homeowners who attempt a DIY approach quickly find themselves in over their heads. They may underestimate the physical labor involved, the specialized tools required, or the time it takes to correctly set each stone. This can lead to a project that stalls for weeks or even months, leaving your yard in disarray. Homeowners who tackle the job without the right expertise often end up with sinking stones, shifting borders, and drainage problems. Understanding the full scope from the start is why working with an experienced landscape design team is so valuable; we map out every detail to ensure a seamless and timely installation.
Caring for Your New Natural Stone Patio
Once your beautiful new patio is complete, a little upkeep will keep it looking stunning for years to come. Think of it as protecting your investment. Proper care prevents stains, stops weeds, and preserves the rich color of the stone you carefully selected. By focusing on a few key tasks every year, you can ensure your outdoor space remains the centerpiece of your Long Island home. It all comes down to a simple routine of cleaning, maintaining the joints, and sealing the surface.
Regular Cleaning and Rinsing
Keeping your natural stone patio clean is simpler than you might think. The best first step is to sweep it regularly with a stiff-bristled broom to clear away leaves, dirt, and other debris. This small habit prevents organic matter from staining the stone and keeps the surface from getting slippery. Once or twice a year, give your patio a good rinse with a garden hose to wash away any accumulated grime. While a pressure washer can be effective, use it on a low setting and with a wide-angle nozzle. Applying too much pressure can etch the stone or blast away the important sand in the joints. For a deeper clean, our professional restoration and sealing services can safely refresh your patio’s appearance.
Maintain the Joint Sand
The sand between your stone pavers, especially polymeric sand, acts like a flexible glue. It locks the stones together, provides stability, and prevents weeds and ants from making a home in the cracks. Over time, weather and foot traffic can cause this sand to erode. It’s a good idea to inspect the joints each spring. If you notice the sand level has dropped or you see weeds starting to sprout, it’s time for a touch-up. Topping off the joints is a straightforward process that restores the patio’s integrity and clean look. Our masonry experts can handle this for you, ensuring the correct sand is used and properly applied for a long-lasting finish.
Seal Your Patio Every Few Years
Sealing your natural stone patio is like applying a protective coat to your car’s paint. While not always required, it’s highly recommended, especially for areas near a grill or under a dining table where spills are likely. A quality sealant soaks into the stone to create a barrier against stains from oil, wine, and dirt, making cleanup much easier. It also helps protect the stone from weathering and can enhance its natural colors, making them appear richer and more vibrant. Depending on the type of stone and its exposure to the elements, you should plan to restore and seal your patio every three to five years. Professional application ensures an even, durable finish that provides maximum protection.
Why Hire a Professional for Your Long Island Patio Installation
A new stone patio is an exciting addition to your home, and the idea of a weekend DIY project can be tempting. While laying a few stones might seem straightforward, creating a beautiful and durable patio involves much more than meets the eye. For a project that adds lasting value to your home, hiring a professional is the best path forward. They have the experience to sidestep common pitfalls that can turn a dream patio into a costly headache.
One of the first hurdles is choosing the right materials. A professional understands how Long Island’s freeze-thaw cycles affect different types of stone. They can guide you to the perfect porcelain and natural stone options that won’t crack or shift, ensuring your investment looks great for years. Even more critical is the site preparation. Many DIY projects fail because of an improperly prepared base, leading to sinking pavers, uneven surfaces, and drainage problems that can damage your home’s foundation.
Expert masonry is the foundation of a space designed to impress and built to last. Professionals have the right tools and techniques to ensure every stone is perfectly set and the entire structure is sound. They handle everything from securing permits to managing the complexities of excavation and grading. By entrusting your project to a team of experts, you get peace of mind knowing the job will be done efficiently and correctly, giving you a stunning outdoor space to enjoy without the stress.
Related Articles
- Best Pool Deck Stone by a Long Island Patio Contractor
- Natural Stone Pavers Long Island Outdoor Living
- Limestone pavers in Long Island Archives – Gappsi Group
- Granite Patio & Pool Coping in Long Island, NY | Gappsi Inc
- Limestone Patios & Automated Pergolas in Long Island | Gappsi Inc
Frequently Asked Questions
How much should I expect to invest in a natural stone patio? The final cost of a natural stone patio depends on a few key factors, including the size of the space, the specific stone you choose, and the current condition of your yard. A simple, small patio will naturally be a smaller investment than a large, multi-level design with custom features. The best way to get a clear number is through our initial consultation. We provide a detailed estimate that breaks down all the costs, so you have a complete financial picture before any work begins.
How long will my new natural stone patio actually last? When installed correctly, a natural stone patio can last for decades, becoming a permanent feature of your home. The stone itself is incredibly durable, but the real secret to its longevity is the foundation built beneath it. A professionally installed base with proper compaction and drainage is what prevents the shifting, sinking, and cracking that can happen over time. This expert preparation is what ensures your patio will withstand Long Island’s seasons for a lifetime.
Can I save money by installing the patio myself? While a DIY project can seem like a good way to save money upfront, it often comes with hidden costs and risks. You would need to rent heavy equipment, handle the intense physical labor, and have the expertise to grade the site for proper drainage. Mistakes made during the base preparation can lead to expensive repairs down the road. Hiring a professional team ensures the job is done efficiently and correctly the first time, saving you from future headaches and giving you a beautiful result without the stress.
What’s the most popular or practical stone choice for a Long Island patio? Bluestone is a timeless and very popular choice for Long Island homes. Its classic look fits almost any style, and its durability is perfect for our climate. Travertine is another favorite, especially around pools, because it stays cooler in the summer sun. Ultimately, the best stone is the one that fits your home’s aesthetic and your family’s lifestyle. We can walk you through all the options to find the perfect material for your specific project.
Do I really need a permit for a patio, and is it a difficult process? Yes, most towns and villages on Long Island require a permit for a new patio installation. While navigating municipal codes can seem intimidating, it’s a standard part of our process and not something you need to worry about. As your contractor, we manage the entire permit application for you. We prepare and submit all the necessary plans to ensure your project is fully compliant, making the process completely seamless for you.