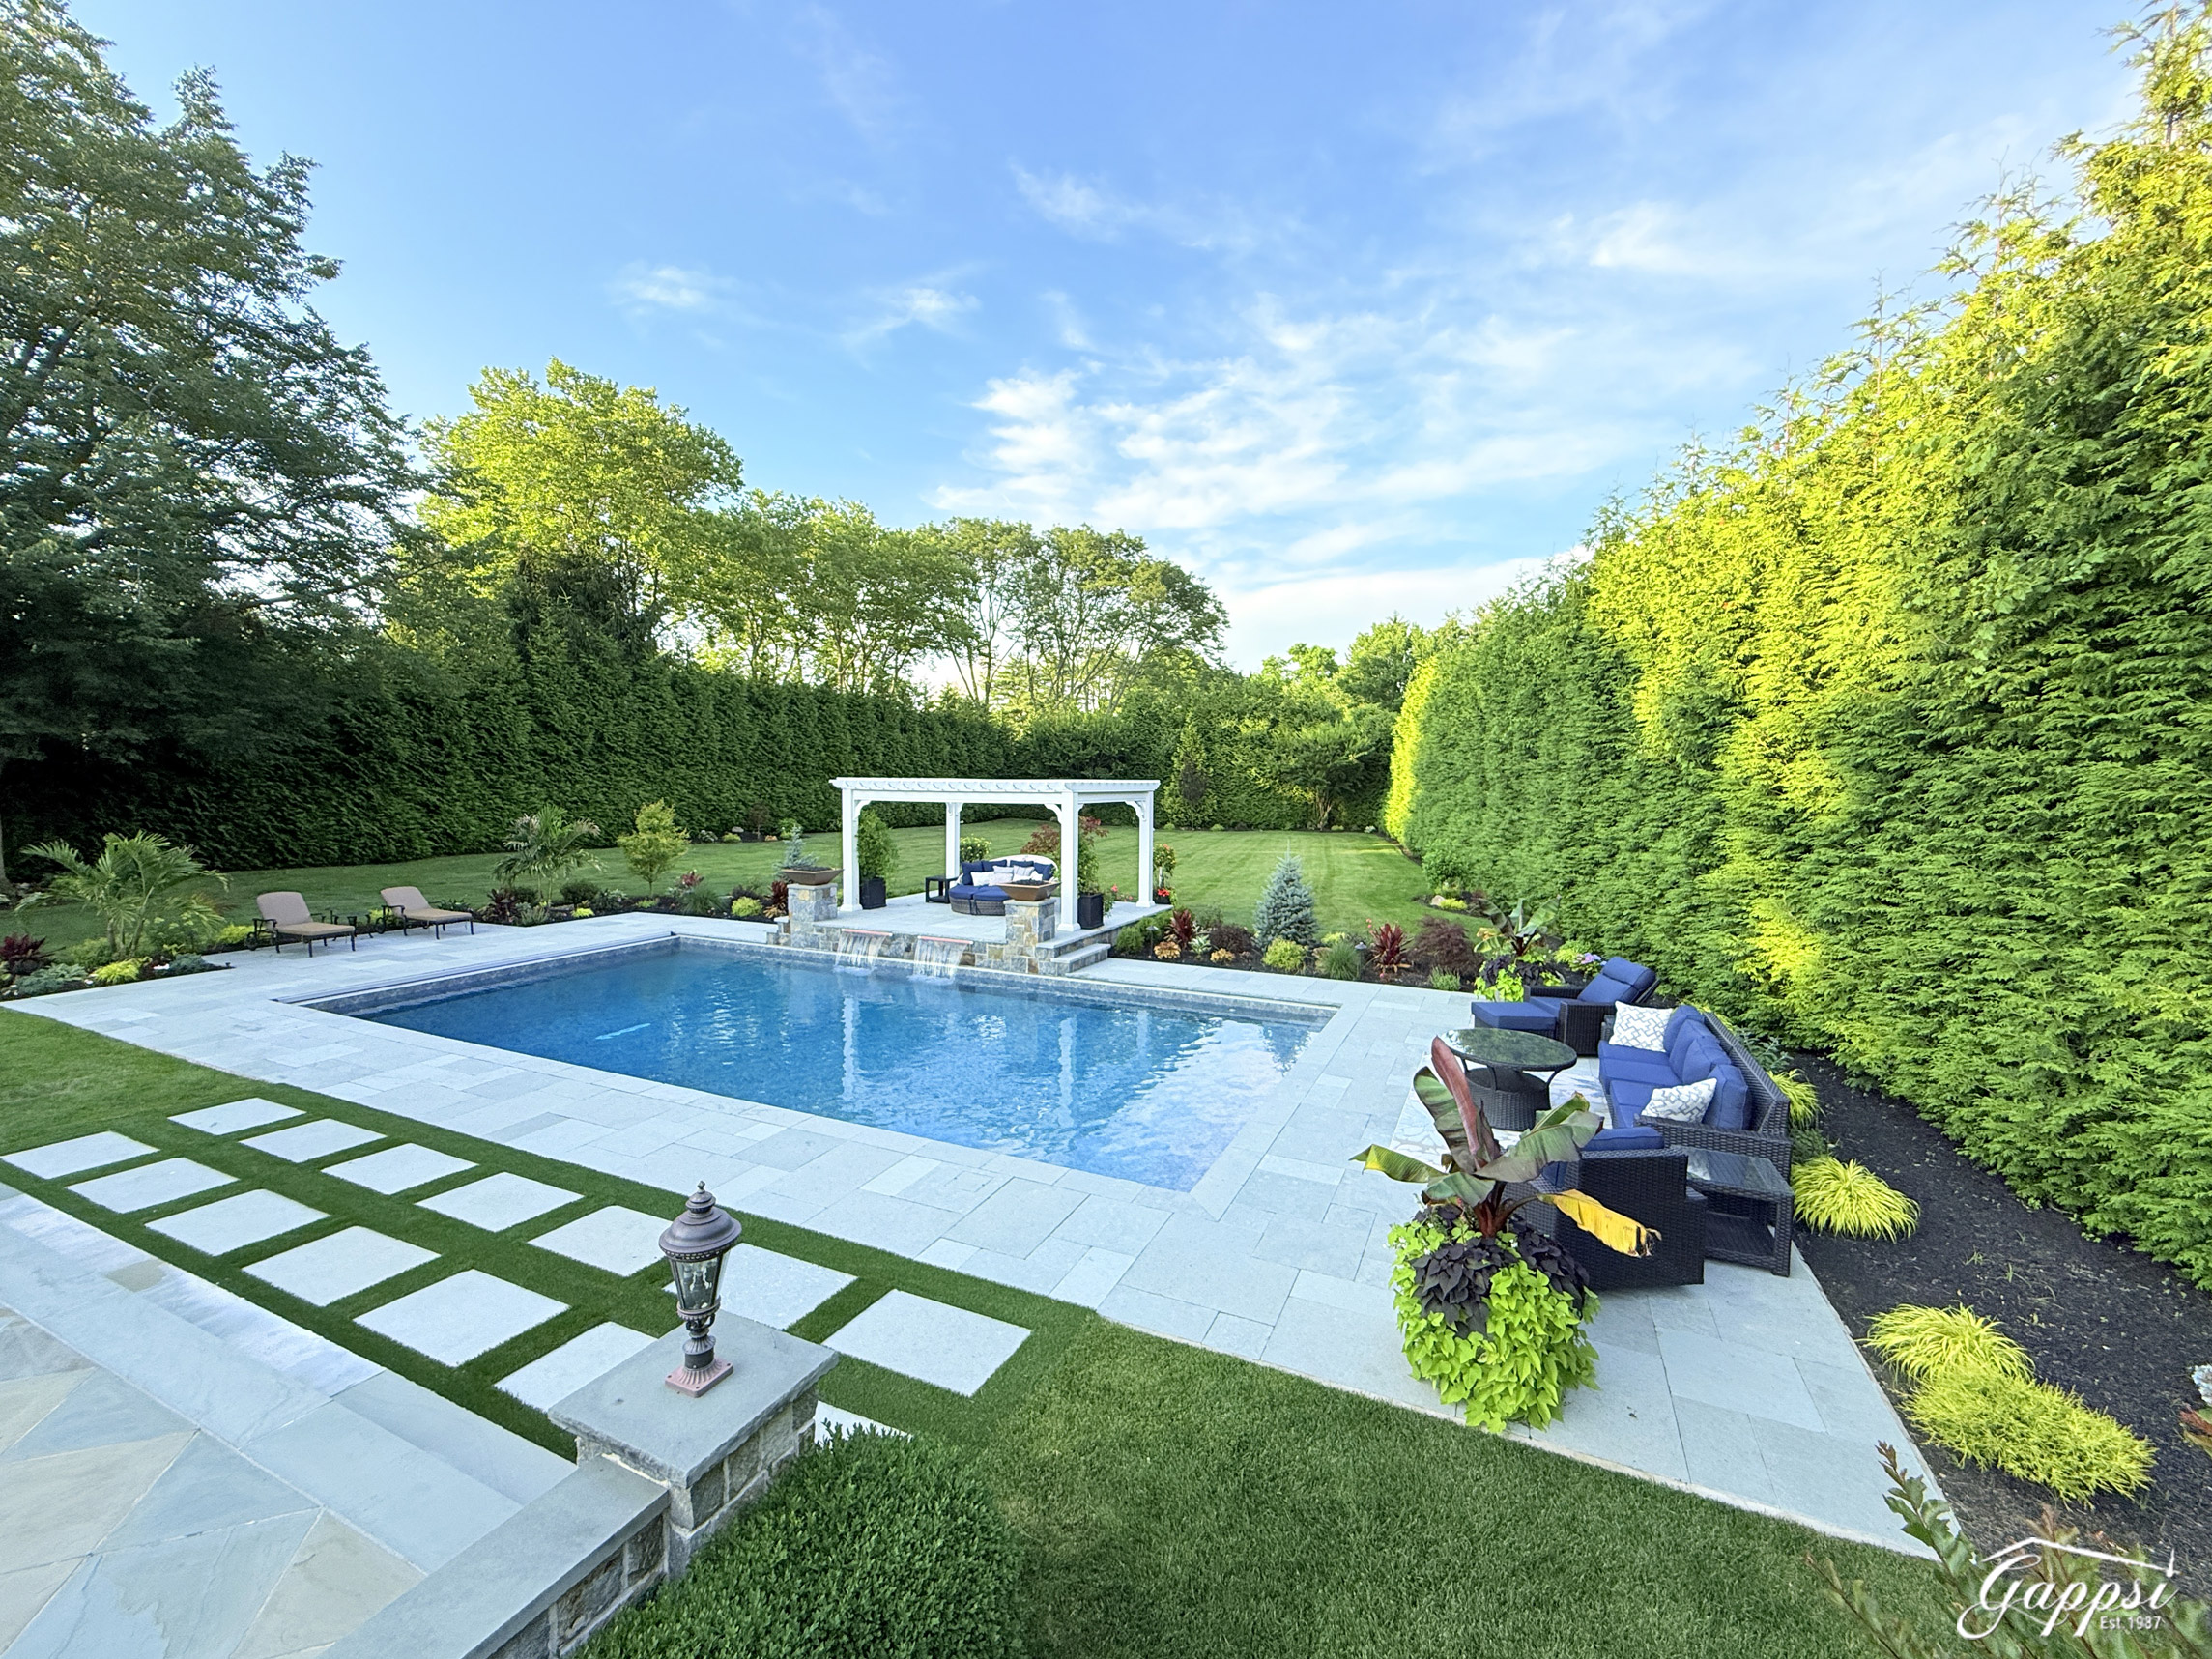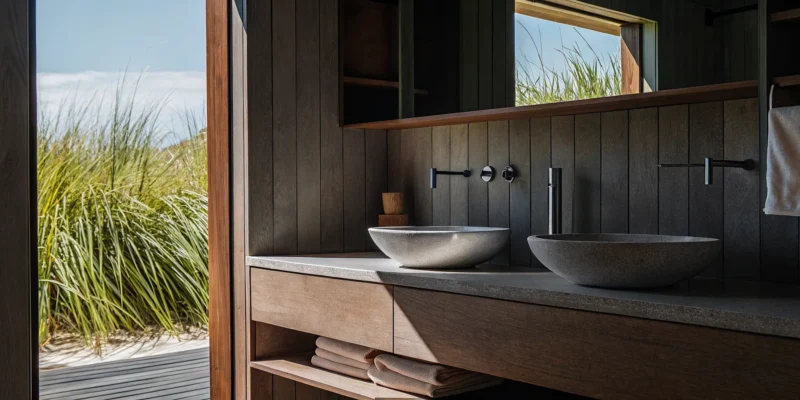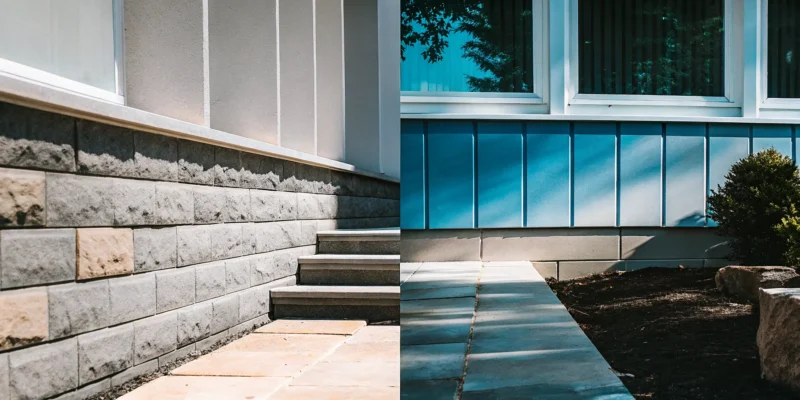
Modern sunken swim spa deck with clean lines and natural wood accents.

Your Guide to the Best Swim Spa Deck Ideas

Without a thoughtful plan, a swim spa can look like a large box dropped in the middle of your yard. The key to making it look like a luxurious, fully integrated feature is the deck design. The right deck elevates your spa from a simple piece of equipment to the centerpiece of a sophisticated outdoor living area. Whether you prefer the sleek, modern look of a sunken spa or the functionality of a multi-level entertainment space, the design possibilities are endless. We’ve gathered our favorite swim spa deck ideas to inspire you, focusing on how different layouts, materials, and finishing touches can create a cohesive and beautiful extension of your home.

Key Takeaways

  • Plan Your Deck as an Outdoor Room: Create a truly functional space by designing a layout with distinct zones for lounging and easy access. A great design considers traffic flow and materials to feel like a natural extension of your home.
  • Get the Technical Details Right: Your spa’s safety and longevity depend on the essentials. Ensure your project includes a reinforced, level foundation to support the weight, proper electrical work, and at least three feet of clearance for maintenance access.
  • Layer in Comfort and Privacy: Complete your backyard retreat by adding elements that enhance the experience. Use landscaping, fences, or a pergola to create a secluded feel, and install lighting to improve ambiance and safety for evening use.

What Makes a Swim Spa Deck Great?

A great swim spa deck does more than just hold your spa; it creates a destination in your backyard. It’s about designing a space that feels like a natural extension of your home and personal style. The best designs seamlessly integrate the spa into your overall landscape design, making it look like it was always meant to be there. This means thinking about how the deck flows with your garden, patio, and the architecture of your house to create one cohesive and beautiful outdoor living area.

Functionality is just as important as appearance. Consider the path from your back door to the spa. You’ll want it to be short and convenient, especially on cooler evenings. Privacy is another key factor. A well-placed deck can shield you from the view of neighbors, creating a private retreat for you and your family to relax. Thoughtful placement ensures you can enjoy your swim spa comfortably any time of day.

The materials you choose will define the look and durability of your deck. Composite decking is a fantastic, low-maintenance option that resists moisture, while natural woods like cedar offer timeless beauty. You can also incorporate porcelain and natural stone pavers to create stunning multi-level designs with separate zones for lounging, dining, or sunbathing. A sunken design, where the deck is built around a partially recessed spa, can provide a sleek, modern look and make getting in and out easier.

Finally, the details complete the experience. Proper lighting is essential for safety after dark and sets a relaxing mood. And here’s a pro tip that’s often overlooked: always plan for maintenance access. Your swim spa will need service at some point, so designing a removable panel or hatch will save you a major headache down the road. Combining these elements of design, function, and foresight is what truly makes a swim spa deck great.

How to Choose the Best Deck Materials

Selecting the right material for your swim spa deck is one of the most important decisions you’ll make. The material you choose sets the tone for your entire backyard oasis, influencing everything from the look and feel to the amount of maintenance required. You want something that not only looks beautiful but can also handle poolside splashes and Long Island’s distinct seasons. Let’s walk through some of the best options so you can find the perfect fit for your lifestyle and aesthetic.

Composite Decking

If you love the look of wood but not the upkeep, composite decking is a fantastic choice. Made from a blend of wood fibers and recycled plastic, it gives you that classic deck appearance without the risk of rot, warping, or splintering. This material is especially great for wet areas around a swim spa because it resists moisture damage and provides excellent durability. You can spend more time enjoying your spa and less time on maintenance. Plus, it comes in a variety of colors and finishes, making it easy to match your home’s style.

Natural Wood (Cedar and Redwood)

There’s nothing quite like the timeless, natural beauty of a real wood deck. Woods like cedar and redwood are popular for a reason: they offer a warm, classic look and are naturally resistant to rot and insects. A wooden deck creates an inviting, organic feel that blends seamlessly with your landscape. Keep in mind that natural wood does require some love to keep it looking its best. You’ll need to plan for regular sealing and staining to protect it from the elements and maintain its rich color, but for many homeowners, the stunning result is well worth the effort.

Stone and Porcelain Pavers

For a truly luxurious and permanent feel, consider building your deck with stone or porcelain pavers. This option creates a sophisticated hardscape that feels like a natural extension of your home. Porcelain and natural stone pavers are incredibly durable, slip-resistant, and can withstand harsh weather without fading or cracking. They offer endless design possibilities, allowing you to create a custom look that complements your pool and landscaping perfectly. A paver deck provides a solid, elegant foundation for your swim spa that will last for decades with minimal maintenance.

Consider Long Island’s Climate

Living on Long Island means we get to experience a unique coastal climate, from humid summers to freezing winters. This is a critical factor when choosing your deck materials. Salt in the air can be tough on certain woods, and the freeze-thaw cycle can challenge less durable surfaces. It’s important to select a material that is proven to perform well in our specific environment. As local experts, we help homeowners choose materials that are not only beautiful but are also engineered to handle Long Island’s weather, ensuring your investment remains safe and stunning for years to come.

How to Design Your Deck Layout

Once you have your materials picked out, it’s time for the fun part: designing the layout. The right design does more than just hold your swim spa; it creates an experience. Think about how you want to use the space. Will it be a quiet retreat for morning workouts, a hub for family fun, or a sophisticated spot for entertaining guests? A thoughtful layout defines different zones for various activities, ensuring smooth traffic flow and making the most of your backyard. This planning stage is crucial for creating a space that is both beautiful and highly functional for your specific needs.

Your deck should feel like a natural extension of your home and landscape. Consider the views you want to highlight and the areas where you might want more privacy. A well-designed layout can transform a simple backyard into a functional and beautiful outdoor living area. With a bit of planning, you can create a swim spa deck that not only looks incredible but also perfectly suits your lifestyle. The key is to balance aesthetics with practicality, creating a space you’ll love for years. Our team can help you visualize the possibilities with a professional landscape design that brings all these elements together seamlessly.

Multi-Level Decks

A multi-level deck is a fantastic way to add dimension and visual interest to your backyard. By creating different platform heights, you can naturally separate your space into distinct zones. Imagine a lower level for your swim spa, providing easy entry, with an upper level dedicated to a dining table or a comfortable lounge area. This approach is especially effective for sloped or uneven yards, as it works with the natural contours of your land instead of against them.

These separate levels create a more dynamic and organized outdoor living space. You can connect the tiers with wide, inviting steps, and use different materials or lighting to define each area. This design isn’t just practical; it makes your backyard feel larger and more luxurious.

Sunken Deck Designs

For a sleek, integrated look, consider a sunken deck design. This style places the swim spa partially or fully in the ground, with the decking built flush around it. The result is a seamless, high-end appearance that makes your swim spa look like it was always meant to be there. This design is perfect for creating a private, intimate atmosphere, almost like your own personal grotto.

A sunken design is also a great solution for yards that aren’t perfectly level, as it can help create a flat, usable area. It minimizes the visual height of the swim spa, allowing it to blend beautifully with your landscaping. This approach gives you a clean, modern aesthetic while making it easy to get in and out of the water.

Wraparound Decks

A wraparound deck provides 360-degree access to your swim spa and creates a generous amount of usable surface area. This design can surround your spa on two, three, or all four sides, offering plenty of room for lounge chairs, planters, and side tables. It’s an excellent choice if you plan on entertaining, as it gives guests space to relax by the water without having to get in.

If you have an existing deck, you don’t necessarily have to start from scratch. We can often modify your current structure to accommodate a new swim spa, cutting out a section and reinforcing the frame to support the weight. This type of home remodeling project seamlessly integrates your new spa into your existing outdoor living space.

Built-In Seating and Lounge Areas

To maximize space and create a polished, custom look, incorporate built-in features directly into your deck design. Benches that flow from the deck’s edge, for example, provide ample seating without the clutter of extra furniture. This is a smart way to ensure there’s always a spot for family and friends to gather and socialize.

You can also add other built-in elements like planters, storage boxes for towels and spa accessories, or even a bar top along one side of the spa for drinks and snacks. These thoughtful details make the space more functional and feel completely integrated. For ultimate comfort, consider adding a pavilion or pergola overhead to provide shade and define your new lounge area.

What Does Installation Involve?

Bringing a swim spa into your backyard is an exciting project, but it’s more than just picking a spot and filling it with water. A successful installation requires careful planning and execution to ensure safety, longevity, and easy maintenance for years to come. From building a solid base to handling the electrical work, each step is crucial. Working with a professional team ensures that all the technical details are managed correctly, so you can focus on the fun part: enjoying your new backyard oasis. A proper setup for your swim spa is the first step toward creating a seamless and beautiful outdoor living space.

Start with a Strong, Level Foundation

A swim spa is incredibly heavy, especially when filled with water and people. Because of this, it needs a perfectly solid and level surface that can support the immense weight without shifting or cracking over time. The standard recommendation is a reinforced concrete pad that is at least four inches thick. This isn’t a step where you want to cut corners. An unstable foundation can damage the spa’s shell and components. Our expert masonry team can prepare the perfect base, giving you peace of mind that your investment is secure.

Plan for Clearance and Access

When designing your deck and layout, think beyond the footprint of the swim spa itself. You need to leave at least three feet of clear, accessible space on all sides. This clearance is essential for several reasons. It provides a safe path for getting in and out of the spa, gives you room to handle the cover, and, most importantly, allows service technicians to access the internal components for any maintenance or repairs. Factoring this space into your initial landscape design will prevent major headaches down the road.

Electrical Requirements

Swim spas require a significant amount of power to run the jets, heaters, and filtration systems. Most models need a dedicated 240V/50-amp electrical connection, which is not a DIY project. For your safety and to ensure your spa operates correctly, this work must be completed by a licensed electrician. They will run the proper wiring from your home’s electrical panel to the spa’s location and install a GFCI (Ground Fault Circuit Interrupter) for protection. We coordinate with trusted electricians to make sure all electrical work is done safely and meets all local codes.

Permits and Local Building Codes

Before any work begins, it’s important to understand your local regulations. Many towns on Long Island require permits for swim spa installations. These rules often cover aspects like placement, safety barriers, and electrical connections. For example, you may be required to have specific fencing or a locking cover to meet safety standards. Navigating the building codes in different parts of Suffolk and Nassau County can be complex, but it’s a critical part of any home improvement project. An experienced installer will handle the permitting process for you, ensuring your project is fully compliant from day one.

Common Planning Mistakes to Avoid

A swim spa is a fantastic investment, but a few planning missteps can create major headaches. Thinking through the entire process, from delivery to your first dip, will save you time, money, and stress. Let’s walk through some common mistakes I’ve seen homeowners make so you can sidestep them completely.

Underestimating the Weight Load

It’s easy to think of a swim spa deck as just another deck, but it’s supporting a massive amount of weight. When filled with water and people, a swim spa can weigh up to 24,000 pounds. That’s more than three elephants. This incredible weight requires a foundation that is far more robust than a typical patio or deck structure. Without proper support, your deck could sag, crack, or even collapse, leading to costly damage and serious safety risks. This is why working with professionals who understand the structural engineering needed for heavy water features is not just a good idea, it’s essential.

Forgetting Maintenance Access

A sleek, built-in swim spa looks amazing, but if you can’t access the internal components, you’ll have a big problem when it’s time for service. A common rule of thumb is to leave at least three feet of clear space around all sides of the spa. This gives a technician room to work on the plumbing and electrical systems. This space is also useful for you, providing a clear path for getting in and out and a place to store the cover when the spa is in use. If you’re planning a sunken design, be sure to incorporate removable access panels into your deck plan.

Not Planning for Delivery

Your swim spa will arrive as one large, bulky unit. A frequent oversight is failing to plan for its journey from the delivery truck to its final spot in your yard. Before you even place an order, you should measure the entire delivery path. Check the width of gates, pathways, and any tight corners. Also, look up for any overhead obstacles like low-hanging tree branches or utility lines. A professional installation team will perform a site visit to confirm the logistics, but doing your own initial check can help you identify potential challenges early on. You can see examples of how these large projects come together on the Gappsi YouTube channel.

Overlooking Safety and Non-Slip Surfaces

Water and smooth surfaces are a recipe for slips and falls. When choosing materials for the area immediately surrounding your swim spa, safety should be your top priority. Opt for materials with a textured, non-slip finish. Many beautiful porcelain and natural stone pavers are designed specifically for wet areas like pool surrounds, offering both safety and style. Also, consider how you’ll use the spa at night. Integrating multi-colored LED lighting into the deck, steps, and surrounding landscape not only creates a beautiful ambiance but also improves visibility and safety after dark. Just be sure any electrical work is handled by a licensed professional.

Landscaping Ideas for Your Swim Spa Oasis

Your swim spa deck is the foundation, but the landscaping is what truly transforms the space into a personal paradise. The right plants, lighting, and privacy features work together to create a cohesive and inviting atmosphere that feels like a natural extension of your home. Think of it as the finishing touch that pulls your entire backyard vision together. A thoughtful landscape design not only adds beauty and value but also enhances the experience of using your swim spa, making every dip feel like a getaway.

By carefully selecting greenery and structural elements, you can craft an environment that is both stunning and functional. The goal is to create a space that feels secluded, peaceful, and completely your own. From lush plantings that add color and fragrance to strategic lighting that sets the mood for an evening soak, every detail contributes to your backyard oasis. Let’s look at a few key landscaping ideas that will make your swim spa area the highlight of your home.

Add Plants, Flowers, and Greenery

Surrounding your swim spa with plants and flowers is one of the easiest ways to soften the hardscape of a deck and integrate it into your yard. Greenery adds color, texture, and a sense of life, making the area feel lush and relaxing. For a low-maintenance approach, choose hardy perennials and evergreen shrubs that thrive in Long Island’s climate. Consider adding fragrant plants like lavender or gardenias in pots near the spa to create a soothing aroma while you unwind. A mix of tall grasses for movement, flowering shrubs for color, and potted plants for flexibility allows you to create a layered, dynamic garden design.

Create Privacy with Hedges, Trellises, and Fencing

To make your swim spa feel like a true retreat, privacy is essential. You want to be able to relax without feeling like you’re on display. Tall, dense hedges like Arborvitae or Holly create a beautiful living wall that offers year-round seclusion and helps block wind. Another great option is installing a trellis with climbing vines, such as clematis or wisteria, for a softer, more romantic look. For a more immediate and structural solution, a stylish privacy fence or screen can define the space while complementing your home’s architecture. These elements ensure your spa area is a peaceful and intimate sanctuary.

Use Lighting for Ambiance and Safety

The right lighting plan serves two important purposes: it creates a magical ambiance for evening soaks and ensures the area is safe to use after dark. Soft, warm landscape lighting can completely change the mood of your backyard. Consider installing uplights to highlight beautiful trees, path lights to guide the way, and string lights over a seating area for a festive glow. For safety, it’s critical to illuminate steps, deck edges, and the path to and from your house. Modern LED systems offer incredible flexibility, allowing you to adjust color and brightness to suit any occasion, turning your swim spa into a stunning nighttime feature.

Add-Ons for the Ultimate Swim Spa Experience

Your swim spa is the star of the show, but the right supporting features can turn your backyard into a personal resort. These add-ons bring comfort, convenience, and a major wow-factor, making your space the go-to spot for relaxation and entertainment. From creating shady lounge areas to building cozy spots for cool evenings, the right additions complete your swim spa oasis and extend its use throughout the year. By thoughtfully integrating these elements, you create a cohesive and luxurious outdoor living area that you and your family will enjoy for years to come.

Install Shade with Pergolas and Pavilions

A swim spa is all about relaxation, but the Long Island sun can be intense. Adding a shade structure is a game-changer for comfort and usability. A beautifully crafted pergola or pavilion not only provides a welcome escape from direct sunlight but also defines the space, creating a resort-like feel. These structures are perfect for setting up a seating area or an outdoor dining spot right next to your spa. Gappsi’s custom pavilions and pergolas can be designed to match your home’s architecture and your personal style, seamlessly blending function with sophisticated design to enhance your entire backyard aesthetic.

Include an Outdoor Kitchen or Bar

Why limit your swim spa to just swimming and relaxing? Turn it into the ultimate social hub by adding an outdoor kitchen or bar area. Imagine preparing drinks and snacks for your guests without ever having to leave the party. A custom bar top with built-in seating encourages conversation and creates a fun, casual atmosphere right by the water. This is a fantastic way to entertain friends and family. With expert masonry, you can build a durable and stylish outdoor kitchen that includes everything from a grill and refrigerator to a sink and counter space, making outdoor gatherings effortless and enjoyable.

Add Built-In Storage Solutions

A cluttered deck can really take away from the relaxing vibe you’re trying to create. That’s where smart storage comes in. Instead of having towels, spa covers, and cleaning supplies out in the open, consider incorporating built-in storage into your deck design. Benches with hinged tops, hidden cabinets, or custom-built cubbies can keep everything organized and out of sight. This not only keeps your space tidy but also maximizes functionality. Thoughtful home remodeling expertise can help you integrate these solutions seamlessly into your deck’s structure, ensuring they are both practical and visually appealing.

Ensure Year-Round Comfort with Heaters and Fire Pits

Don’t let cooler weather cut your swim spa season short. You can extend your enjoyment throughout the year by adding a source of warmth to your deck area. A custom-built fire pit or an outdoor fireplace creates a cozy and inviting atmosphere, perfect for gathering around after an evening swim. The warmth and flickering light make the space comfortable even on chilly nights. These features serve as a natural focal point for your outdoor living space, and our masonry designers can help you create a fire feature that perfectly complements your swim spa and overall backyard design.

Create Your Dream Swim Spa Deck on Long Island

Creating the perfect deck for your swim spa is about blending beauty with function. When you’re planning your Long Island backyard oasis, a few key decisions will make all the difference. Start by thinking about location. Placing your

Next, consider your materials. While composite decking is a popular choice for its resistance to water damage, don’t forget about the timeless look of natural wood. For a truly elegant and durable surface, porcelain and natural stone pavers create a stunning foundation that stands up to the elements. The right design can also transform your space. A multi-level deck creates distinct zones for lounging and dining, while a sunken design can make your swim spa feel seamlessly integrated into your yard.

Finally, don’t overlook the finishing touches. The right landscaping adds color and serenity, with tall hedges or trellises offering an extra layer of privacy. It’s also critical to ensure the foundation is strong enough to support the spa’s weight, which can be substantial when filled, and that delivery access is planned for. Thinking through these elements from the start helps ensure your new swim spa deck is a dream come true.

Related Articles

Frequently Asked Questions

What’s the most important factor when choosing a deck material for Long Island? For our coastal climate, durability is everything. You need a material that can handle humid summers, salty air, and winter’s freeze-thaw cycles without failing. Composite decking is a great low-maintenance option that resists moisture and won’t splinter. For ultimate longevity and a high-end look, porcelain or stone pavers are practically weatherproof. While natural wood is beautiful, be prepared for the regular sealing it will need to withstand our specific weather conditions.

How do I make sure my deck is strong enough for a swim spa? A swim spa deck is not a typical deck; it’s a specialized structure. A filled swim spa is incredibly heavy, so it requires a foundation built to handle that specific load, which is usually a reinforced concrete pad. The deck itself must also be engineered with extra support. This is not a DIY-friendly project. The safest approach is to work with an experienced builder who understands the structural requirements to prevent sagging or collapse and ensure your family’s safety.

Can I build a deck around my swim spa if my yard isn’t level? Absolutely. An uneven yard is actually a great opportunity to get creative with your design. A multi-level deck is a perfect solution, as it allows you to build different platforms that follow the natural slope of your land. This can create separate, functional zones for the spa, dining, and lounging. Another option is a sunken design, where we excavate a portion of the yard to create a level spot for the spa, making it look beautifully integrated with the landscape.

What’s the biggest mistake people make when planning their swim spa deck? The most common and costly mistake is forgetting to plan for maintenance access. Your swim spa has pumps, heaters, and electrical components that will eventually need service. If you build the deck flush against all sides without including a removable panel or hatch, a technician won’t be able to reach anything. Always plan for at least three feet of clearance on the side with the equipment panel to save yourself a major headache in the future.

Do I need a permit to install a swim spa on Long Island? Yes, in most cases you will need a permit. The specific requirements vary between towns across Suffolk and Nassau County, but they generally cover safety regulations for things like electrical wiring and fencing or locking covers. Navigating these local codes can be complicated, so it’s a huge benefit to work with a professional installer who is familiar with the process and can handle all the paperwork for you, ensuring your project is compliant from the start.

Share this page:
Modern bluestone patio design with clean geometric pavers and contrasting stone borders.

15 Stunning Bluestone Patio Design Ideas

There’s a certain character to Long Island homes that feels both classic and connected to the coast. Your outdoor space should reflect that same spirit. Bluestone is a material that seems made for our local landscape. Its cool blues, grays, and earthy tones perfectly complement the lush greenery of a Suffolk County backyard or the breezy feel of a Nassau County coastal home. It just feels right. To help you create an outdoor area that is truly harmonious with your surroundings, we’ve gathered our favorite bluestone patio design ideas. This guide will show you how to use this beautiful natural stone to build a timeless retreat right here on Long Island.

Key Takeaways

  • Match Bluestone to Your Home’s Style: With its wide range of colors, finishes, and patterns, bluestone can be tailored to fit any aesthetic. Select the right combination to create a patio that feels like a natural extension of your modern, rustic, or coastal home.
  • Build a Functional Outdoor Space: Go beyond a simple slab by adding features like seating walls, fire pits, and dedicated dining zones. This thoughtful design turns your patio into a multi-purpose area for relaxing and entertaining.
  • Protect Your Investment for Lasting Beauty: A bluestone patio’s longevity depends on two key factors: professional installation with proper drainage from the start, and simple routine maintenance like seasonal cleaning and sealing.

What Is Bluestone and Why Is It So Popular?

If you’ve ever admired a stunning stone patio that felt both timeless and perfectly natural, there’s a good chance you were looking at bluestone. This beautiful, durable material is a top choice for homeowners across Long Island for a reason. It’s a type of sandstone defined by its rich, earthy color palette and incredible versatility. Whether your home is a modern masterpiece or a classic colonial, a bluestone patio provides a solid foundation for your outdoor living space. It’s more than just a surface; it’s an investment in your home’s character and value, offering a unique blend of natural elegance and rugged strength that few other materials can match.

Explore Its Rich Colors: Blues, Grays, and Browns

The name “bluestone” is a bit modest, as its color range goes far beyond a single shade. While it’s famous for its signature deep blues and cool grays, you’ll also find beautiful variations that include earthy browns, subtle greens, and even hints of lilac. This natural diversity means no two bluestone patios are exactly alike. The unique blend of tones in each stone adds depth and character to your design, creating a surface that feels organic and dynamic. These colors beautifully complement Long Island’s lush landscapes and coastal light, making your patio feel like a natural extension of your home’s surroundings. Our masonry experts can help you select a color blend that perfectly matches your vision.

Choose Your Finish: Natural, Honed, or Thermal Textures

Beyond color, the finish of your bluestone plays a huge role in the final look and feel of your patio. A “natural cleft” finish has a slightly uneven, rustic texture that comes from splitting the stone along its natural layers, offering excellent slip resistance. For a more uniform and consistent non-slip surface, a “thermal” finish is created by heat-treating the stone, resulting in a subtly pebbled texture. If you’re aiming for a sleek, contemporary look, a “honed” finish provides a smooth, matte surface that’s perfect for covered porches or accent walls. Each finish offers a different personality, allowing you to customize your patio to suit your style and functional needs.

Built to Last: Why Bluestone Endures Every Season

One of bluestone’s most celebrated qualities is its exceptional durability. As a dense, hard-wearing natural stone, it’s built to withstand heavy foot traffic, patio furniture, and the demanding weather cycles of Long Island. From hot, sunny summers to cold, icy winters, bluestone holds up beautifully year after year. Proper installation and drainage are key to its longevity, preventing cracking from freeze-thaw cycles. Applying a quality sealant can also protect it from stains and weathering. When you invest in a professionally installed bluestone patio, you’re choosing a material that will provide decades of enjoyment. We also offer services to restore and seal your surfaces to keep them looking their best.

Discover Popular Bluestone Patio Styles

One of the best things about bluestone is its incredible versatility. It’s not a one-size-fits-all material. Depending on how it’s cut, finished, and laid, bluestone can complement nearly any home style, from sleek modern architecture to a classic Long Island coastal home. The key is to choose a design that reflects your personal taste and fits the character of your house. Whether you’re drawn to uniform patterns or a more organic, free-flowing layout, there’s a bluestone style that will feel just right for your outdoor space. Let’s look at some of the most popular design approaches to get you inspired.

Sleek and Modern: Clean Lines and Geometric Shapes

If your home has a contemporary feel, a modern bluestone patio can create a seamless transition from your indoor to outdoor living areas. This style is all about precision and simplicity. Think large, uniformly cut pavers laid in a crisp, geometric pattern like a grid or running bond. The clean lines and smooth surfaces create an uncluttered, sophisticated look. Using a thermal finish on the bluestone enhances this aesthetic by providing a consistent texture and color. Our expert masonry team can cut and lay bluestone with the precision needed to achieve this polished, high-end finish that makes your patio feel like a true extension of your home.

Cozy and Rustic: Embrace Farmhouse Charm

For a warmer, more inviting atmosphere, bluestone can be used to create a beautiful rustic or farmhouse-style patio. This look often uses irregular or random-shaped flagstones, creating a more organic and natural feel. The rich, earthy tones of bluestone pair wonderfully with classic rustic elements like wooden pergolas, stone fire pits, and lush greenery. Imagine a space that feels comfortable and lived-in, perfect for casual family gatherings. A rustic bluestone patio can serve as the perfect foundation for a complete landscape design that feels both timeless and welcoming, giving you a charming escape right in your own backyard.

Classic and Coastal: Timeless, Breezy Layouts

Living on Long Island, many of us are drawn to a classic coastal style that feels both elegant and relaxed. Bluestone is a perfect fit for this aesthetic. Its cool blue and gray tones echo the colors of the sea and sky, creating a serene and breezy atmosphere. For a timeless look, consider a simple pattern with rectangular pavers. This style is incredibly flexible and works well for everything from poolside lounging areas to spacious outdoor dining rooms. As a durable and beautiful natural stone, bluestone provides a classic foundation that will look great for decades, effortlessly matching the enduring charm of a coastal home.

Create a Pattern: Herringbone, Random Flagstone, and More

This is where you can get really creative. The pattern you choose for your bluestone patio has a huge impact on the final look and feel of the space. A herringbone or basketweave pattern adds a touch of formal elegance and visual interest, making the patio a true focal point. For a more naturalistic style, a random flagstone layout uses irregular shapes fitted together like a puzzle, offering a unique, one-of-a-kind surface. You can see a wide range of these patterns in action by exploring our project showcases. Patterns can also help define different zones in your outdoor living area, creating distinct spaces for dining, lounging, or cooking.

Creative Bluestone Patio Ideas to Inspire You

Your bluestone patio is more than just a surface; it’s the foundation for your entire outdoor living experience. With a little creativity, you can transform a simple stone slab into a dynamic, multi-functional space that reflects your style and enhances your home. From cozy fire pits to elegant dining areas, bluestone’s versatility allows for endless design possibilities. Here are some of our favorite ideas to get you inspired for your own Long Island backyard retreat.

Add Dimension with Multi-Level Patios and Seating Walls

If your yard has a natural slope or you simply want to create more visual interest, a multi-level patio is a fantastic solution. Using bluestone for the steps and risers creates a seamless, elegant transition between different elevations, turning a challenge into a stunning feature. You can designate one level for lounging and another for dining. To further define these spaces and add practical function, consider incorporating built-in seating walls. Our expert masonry team can construct beautiful bluestone seating walls that provide permanent, stylish seating for guests while beautifully framing your patio. This approach adds depth and sophistication to your outdoor design.

Gather Around an Integrated Fire Pit

There’s nothing quite like gathering with friends and family around a crackling fire. Integrating a fire pit into your bluestone patio creates a natural focal point and a cozy ambiance for cool evenings. The deep, earthy tones of bluestone pair beautifully with the warm glow of a fire, creating an inviting atmosphere that encourages conversation and relaxation. Whether you prefer a rustic wood-burning pit or a modern gas-powered fire table, we can design it to blend perfectly with your patio layout. A custom-built fire feature makes your patio the go-to spot for making memories all year round.

Design Functional Zones for Dining and Outdoor Kitchens

Think of your patio as an extension of your home by creating dedicated functional zones. A bluestone patio provides the perfect durable and stylish floor for an outdoor dining room or a complete outdoor kitchen. Its hardwearing surface can easily handle heavy foot traffic, dropped utensils, and spills, making it ideal for cooking and entertaining. You can define the kitchen area with a change in the stone pattern or by framing it with a low seating wall. By planning for specific activities, you create a more organized and usable space for everything from casual family barbecues to sophisticated outdoor entertaining.

Connect Your Spaces with Elegant Bluestone Walkways

Create a cohesive and flowing landscape by connecting your outdoor spaces with elegant bluestone walkways. A beautifully laid path from your patio to the garden, pool, or front driveway doesn’t just guide foot traffic; it ties your entire property together. Using the same bluestone for your patio and walkways ensures a harmonious design that feels intentional and polished. This is a key element of thoughtful landscape design, making your yard feel larger and more interconnected. Whether you choose uniform pavers for a formal look or irregular flagstones for a more rustic feel, these pathways add both beauty and function.

Mix Materials: Pair Bluestone with Wood, Gravel, or Other Stones

Don’t be afraid to get creative by mixing materials. Pairing bluestone with other textures can add incredible depth and personality to your outdoor space. Imagine a warm wood deck stepping down onto a cool bluestone patio, creating a beautiful contrast of natural elements. You could also frame your patio with a border of smooth river stones or use decorative gravel for connecting paths. These combinations break up the visual expanse of stone and introduce new colors and textures. Using materials like stabilized gravel for surrounding areas can also be a practical and stylish way to manage drainage and define different zones.

Extend Your Design to Pool Decks and Pergolas

Extend the beauty and durability of bluestone to other areas of your backyard for a truly luxurious, resort-like feel. Bluestone is an excellent material for pool decks, as its thermal finish tends to stay cooler under the sun than other materials, and it provides a non-slip surface for wet feet. Imagine a seamless transition from your patio to your swimming pool, all paved with gorgeous bluestone. To create a comfortable, shaded retreat, consider building your patio beneath a custom structure. Placing your bluestone patio under one of our elegant pavilions or pergolas provides a perfect spot for an outdoor living room, protecting you from the sun while defining a sophisticated lounge area.

How to Integrate a Bluestone Patio with Your Landscape

A beautiful bluestone patio is a fantastic start, but the real magic happens when it feels like a natural part of your backyard. Instead of looking like a separate addition, your patio should blend seamlessly with your home and the surrounding yard. Achieving this cohesive look involves thinking about the big picture, from your house’s siding to the garden beds at the edge of the lawn. By carefully considering how your patio connects to these other elements, you create a truly unified and inviting outdoor living area. Here are a few key strategies to make it happen.

Match Your Patio to Your Home’s Exterior

Your patio should feel like a true extension of your home, not an afterthought. One of the best qualities of bluestone is its incredible versatility. With its range of cool blues, deep grays, and earthy browns, it complements almost any home exterior, whether you have classic brick, modern siding, or rustic stone. The goal is to select a shade and finish of natural stone that picks up on the colors of your home’s facade, trim, or roof. This simple step creates a visual connection that makes your entire property look more intentional and thoughtfully designed, tying your indoor and outdoor spaces together.

Define the Space with Contrasting Borders

A border does more than just frame your patio; it provides essential structure and a touch of custom style. Using a contrasting material for the border is a great way to make your bluestone stand out and clearly define the patio’s edge. You could use a different type of paver, a darker colored stone, or even a classic brick for a traditional look. This design choice adds visual interest and prevents the patio from looking like a flat, uniform slab. Professionally installed masonry borders also help lock the pavers in place, preventing shifting and ensuring your patio remains stable and beautiful for years.

Weave in Greenery and Landscaping

Hardscapes like patios feel most at home when they are softened with plenty of greenery. Integrating plants around and onto your bluestone patio is key to creating a lush, welcoming atmosphere. You can build raised garden beds along the perimeter, fill them with flowers and shrubs, or allow low-growing groundcover like creeping thyme to grow between irregular flagstones. Placing large, decorative planters at the corners or along the edges can also add height and color. Thoughtful landscape design helps merge the structured patio with the natural elements of your yard, creating a harmonious retreat that feels both elegant and alive.

What Does a Bluestone Patio Actually Cost?

Thinking about a bluestone patio is exciting, but it’s natural to wonder about the budget. The final cost of a bluestone patio depends on several factors, including the size of your space, the type of stone you choose, and the complexity of the design. While it’s an investment, it’s one that adds significant beauty and functional living space to your home. Let’s break down what you can expect when planning your project.

Breaking Down Material and Installation Costs

On average, you can expect a bluestone patio to cost between $17 and $25 per square foot for both materials and professional installation. To give you a clearer picture, a standard 10-foot by 10-foot patio would typically run from $1,700 to $2,500. This range accounts for the quality of the bluestone and the specifics of the installation process. At Gappsi, we source a wide variety of high-quality porcelain and natural stones to ensure you get a durable and beautiful finish that fits your budget and style.

What Factors Influence the Final Price?

Several key elements can affect the total cost of your bluestone patio. The type of stone is a major factor; for instance, precisely cut thermal bluestone pavers often cost more than irregular flagstone pieces. Custom-cut stone can bring the total to as much as $70 per square foot. The complexity of your design, such as adding curves, multiple levels, or intricate patterns, will also influence the price. Finally, site preparation is crucial. If your yard requires extensive grading or drainage solutions to create a stable foundation, this will be factored into the overall cost of our expert masonry services.

Understanding the Long-Term Value of Your Investment

A bluestone patio is more than just an expense; it’s a lasting improvement that adds to your home’s resale value. Because bluestone is incredibly durable and stands up to harsh weather, you won’t have to worry about frequent replacements. It’s a timeless material that extends your living area outdoors, giving you a beautiful space for dining, relaxing, and entertaining for years to come. Proper care, including professional cleaning and sealing, will protect your investment and keep it looking stunning, making it a smart and enjoyable addition to your property.

How to Keep Your Bluestone Patio Looking Its Best

A bluestone patio is a stunning investment that adds timeless character to your home. Its natural beauty is a huge part of its appeal, and with a little care, you can keep it looking as gorgeous as the day it was installed. While bluestone is incredibly durable, it’s not completely immune to the elements or everyday life. Spills, dirt, and changing seasons can all take a toll. The good news is that maintaining your patio doesn’t require a huge amount of effort, just a consistent and gentle approach.

The key to long-term beauty lies in a few simple habits: routine cleaning, smart protection, and seasonal prep. It also helps to understand that the best maintenance starts with a professional installation. A solid foundation prevents many future headaches. By following a few straightforward steps for cleaning, sealing, and winterizing, you can protect your patio from stains and damage, ensuring it remains a favorite spot for relaxing and entertaining for many years to come.

Simple Steps for Routine Cleaning

Keeping your bluestone patio clean is easier than you might think. The best strategy is simple, regular maintenance. Start by sweeping away leaves, dirt, and other debris every few days to prevent them from staining the stone. For a deeper clean, you can wash the surface with a simple solution of mild dish soap and water. Gently scrub with a soft-bristle brush, rinse thoroughly with a hose, and let it air dry. Doing this weekly or bi-weekly, especially in high-traffic areas, helps prevent grime from building up and keeps your patio looking fresh and inviting.

Know When and Why to Seal Your Bluestone

Sealing your bluestone patio is like giving it a protective raincoat. While not always necessary, a high-quality sealer provides an invisible barrier that repels water, oil, and other liquids that could cause stains. This is especially helpful for patios used for dining or grilling, where spills are more likely. Sealing can also make routine cleaning easier and may even enhance the stone’s rich, natural colors. We often recommend sealing your patio before winter to protect it from moisture and freeze-thaw cycles. If you’re unsure whether your patio needs sealing, our team can assess its condition and recommend the best approach for stone restoration and sealing.

Avoid Common Mistakes with Prep and Drainage

The secret to a long-lasting patio has less to do with what you do after it’s built and more to do with how it was built in the first place. Proper site preparation and drainage are critical. Many DIY projects fail because the base isn’t prepared correctly, leading to shifting stones, an uneven surface, and cracks over time. A professional masonry installation ensures a compacted, stable base that allows water to drain away from the patio. This foundational work prevents water from pooling on the surface or seeping underneath, which is the primary cause of weather-related damage.

Prepare for Winter and Ensure Long-Term Beauty

Getting your bluestone patio ready for a Long Island winter is a crucial step in preserving its beauty. Before the first frost, give your patio a thorough cleaning to remove any dirt or stains from the summer. Once it’s completely dry, applying a natural stone sealer provides an essential layer of protection against harsh winter weather. This helps prevent moisture from penetrating the stone, which can freeze, expand, and cause cracking. Also, avoid using rock salt or chemical de-icers on your bluestone, as they can cause pitting and discoloration. Instead, use sand for traction if the surface becomes icy.

Related Articles

Frequently Asked Questions

Is bluestone slippery when it gets wet? This is a great question, as safety is always a top priority. The slip resistance of bluestone really depends on its finish. A natural cleft or thermal finish provides a textured, slightly uneven surface that offers excellent traction, even when wet. This makes it a fantastic choice for pool surrounds and open-air patios. A honed finish, which is sanded smooth, can be more slippery and is generally better suited for covered porches or areas that won’t see much rain.

How does bluestone compare to concrete pavers? Think of it as the difference between solid hardwood and laminate flooring. Bluestone is a natural stone quarried from the earth, so every piece has unique color variations and character. It offers a timeless, high-end look that can last for generations. Concrete pavers are a manufactured product, so they are very uniform in color and shape. While often less expensive upfront, they don’t offer the same one-of-a-kind beauty or the long-term durability and value that natural bluestone provides.

Will the color of my bluestone patio fade over time? As a natural product, bluestone doesn’t “fade” in the way a dyed or manufactured material would. Instead, it will weather gracefully over the years, which many people feel adds to its character. Its rich, earthy colors are part of the stone itself, not just a surface treatment. You can help preserve its original vibrancy and protect it from stains by having it professionally sealed every few years, which helps maintain its deep tones.

Why is professional installation so important for a bluestone patio? A beautiful patio is only as good as its foundation. Professional installation is critical because it ensures the ground beneath the stone is properly excavated, graded, and compacted. This creates a stable base that allows for proper drainage, which is essential for preventing the stone from shifting, cracking, or heaving during Long Island’s freeze-thaw cycles. Getting the foundation right from the start is the single most important factor in your patio’s long-term beauty and stability.

Can I use rock salt on my bluestone patio during the winter? Please don’t. While it’s tempting to use salt or chemical de-icers, they can be very damaging to natural stone. These products can cause the surface to pit, flake, and become discolored over time. For icy conditions, the safest option is to use sand for traction. It won’t melt the ice, but it will provide a gritty, non-slip surface to help you walk safely without harming your beautiful stone.

Share this page:
Two skylight installation contractors working with blueprints in an attic.

Your Guide to Skylight Installation Contractors

Light is a powerful design element. It can make a small room feel spacious, highlight architectural details, and create a warm, inviting atmosphere. While windows connect us to the world outside, a skylight offers a direct connection to the sky, bringing a dynamic quality of light that changes throughout the day. This simple addition can serve as a stunning focal point in any room, from a living area with vaulted ceilings to a primary bathroom. Achieving this seamless integration of light and architecture requires a high level of skill. Expert skylight installation contractors do more than just install a window; they ensure it becomes a flawless part of your home’s design.

Key Takeaways

  • Your Contractor Is Key: A successful, leak-free skylight installation requires a true professional. Always choose a contractor with proven experience and be sure to verify their license, insurance, and references before signing a contract.
  • Choose the Right Type for Your Space: Consider your room’s function to select the best skylight. Fixed models are great for pure light, ventilated ones add fresh air to kitchens or bathrooms, and tubular skylights are a clever solution for small, dark areas like hallways.
  • Understand the Full Value and Cost: Skylights do more than just brighten a room; they can improve energy efficiency and increase your home’s value. To ensure a smooth project, always request a detailed, itemized estimate that breaks down all material and labor costs.

What Does a Skylight Contractor Do?

A skylight contractor is a specialist who handles the entire process of installing, repairing, or replacing skylights. Think of them as a roofer, carpenter, and waterproofing expert all in one. Their job starts long before they get on your roof. A great contractor will first help you decide on the best placement and type of skylight for your space, considering factors like the sun’s path, your room’s layout, and your home’s architecture.

The installation itself is a precise task. It involves carefully cutting an opening in your roof, building a supportive curb, and fitting the skylight securely. The most critical part of their job is ensuring everything is perfectly sealed and flashed. This detailed waterproofing prevents leaks and protects your home from water damage, drafts, and other issues down the road. After the skylight is in, they also handle the interior finishing, like drywall and painting, to make it look like it was always part of your home. Because it’s such a specialized project, hiring a dedicated skylight contractor is a key part of any home remodeling plan that includes adding natural light from above.

Common Types of Skylights

Once you decide to add a skylight, you’ll discover there are several different types to choose from. A good contractor will walk you through the options to find the perfect fit for your home’s needs and your budget. The main differences come down to whether they open for ventilation or are purely for light. Some models even have smart features, like solar power and rain sensors.

The right choice depends on the room and your goals. Do you want to brighten a dark hallway, or do you need to air out a steamy bathroom? Are you looking for a simple solution or a high-tech, energy-efficient upgrade? Understanding the common types, from fixed and ventilated to tubular and custom, will help you make an informed decision. Just as you might choose between pavilions and pergolas to manage sunlight outdoors, selecting the right skylight helps you control it indoors.

Fixed Skylights

Fixed skylights are the most straightforward and popular option. As the name suggests, they don’t open or close. Their sole purpose is to let natural light pour into a room, making them a fantastic choice for areas where extra ventilation isn’t a priority. Think of living rooms with vaulted ceilings, stairwells, or any space that feels a bit dark and closed off.

Because they have no moving parts, fixed skylights are often the most affordable and have a very low risk of leaks when installed correctly. They are essentially a window for your roof, designed to brighten your home and create a more open, airy atmosphere. The natural light they provide can completely transform a room, highlighting your decor and even making the space feel larger. This effect is especially beautiful when light shines on quality materials like porcelain and natural stone.

Ventilated Skylights

Ventilated skylights, also known as venting skylights, offer the best of both worlds: natural light and fresh air. These units can be opened to allow air to circulate, which makes them ideal for rooms that collect moisture, heat, or odors, like kitchens, bathrooms, and laundry rooms. By opening them, you can let hot air escape in the summer or clear out steam after a shower, improving your home’s air quality.

These skylights can be operated in a few different ways. Manual models open with a hand crank, which works well for skylights within reach. For higher ceilings, electric or solar-powered models that open with a remote control or wall switch are much more convenient. Adding a ventilated skylight is a functional upgrade that adds comfort and value, making it a smart addition to any home remodeling project.

Solar-Powered Skylights

Solar-powered skylights are a smart, energy-efficient version of ventilated skylights. They use a small, built-in solar panel to capture the sun’s energy, which then powers a battery used to open and close the unit. This means they operate without needing any wiring, making installation simpler and cleaner. Plus, because they run on renewable energy, they won’t add a cent to your electricity bill.

One of the best features of many solar-powered models is the integrated rain sensor. This sensor automatically closes the skylight at the first sign of rain, so you never have to worry about forgetting to close it. They offer total convenience and peace of mind. Just like a beautiful swimming pool makes the most of sunny days, a solar-powered skylight harnesses that same sunlight to improve your home’s comfort and efficiency.

Tubular Skylights

If you have a small, windowless space that could use a splash of sunlight, a tubular skylight is an amazing solution. These are perfect for areas where a traditional skylight won’t fit, such as hallways, closets, pantries, and small bathrooms. Instead of a large glass pane, a tubular skylight uses a small dome on the roof to capture light.

That light is then channeled down a highly reflective tube that runs through your attic space to a diffuser lens mounted on your ceiling. The diffuser spreads the light evenly, looking much like a standard ceiling light fixture but powered entirely by the sun. They are less invasive to install than full-sized skylights and are a cost-effective way to brighten up the darkest corners of your home. You can find all sorts of innovative products like these at the Gappsi Store to brighten your home.

Custom Skylights and Roof Windows

For homes with unique architectural features or specific needs, custom skylights and roof windows offer tailored solutions. If you have a vision for a one-of-a-kind design, a contractor can create custom skylights in special shapes and sizes, like pyramids, domes, or extended polygons. This allows you to make a dramatic architectural statement while bringing in light. It’s a similar principle to creating custom masonry work, where design is tailored to the home’s character.

Roof windows are another specialized option. They are essentially skylights designed for in-reach applications, like a finished attic or a room with a vaulted ceiling. Because they are installed lower on the roof, they are easy to open and close, functioning much like a regular window. They provide both light and an excellent source of ventilation, and some can even serve as an emergency exit.

Why Add a Skylight to Your Home?

Thinking about a skylight is about more than just adding a window to your ceiling; it’s about completely transforming a room. If you have a space in your home that feels a bit dark, closed-off, or uninspired, a skylight can be the perfect solution. It’s a design feature that works hard, bringing in beautiful, natural light while also offering practical perks that can make your home more comfortable and efficient. Unlike a standard window, a skylight provides a direct connection to the sky, letting you watch the clouds drift by or see the stars at night from the comfort of your living room.

This simple addition can make a cramped hallway feel open, turn a dim kitchen into a bright and cheerful workspace, or add a touch of luxury to a primary bathroom. It’s a popular feature in many home remodeling projects because the impact is immediate and impressive. Beyond the visual appeal, skylights can help you save on energy costs, improve your home’s ventilation, and even add to its overall market value. It’s an investment that pays you back in daily enjoyment and long-term benefits. Let’s look at exactly why adding a skylight might be one of the best decisions you make for your home.

Brighten Your Home with Natural Light

There’s just no substitute for natural light. It makes colors appear more vibrant, makes spaces feel larger, and can even have a positive effect on your mood. Skylights are masters at flooding a room with sunlight, reaching areas that traditional windows can’t. Think about interior bathrooms, hallways, or walk-in closets that often rely entirely on artificial light. A skylight can turn these functional but often gloomy spaces into bright, welcoming parts of your home. The light from above creates a soft, diffused glow that reduces harsh shadows and makes every corner feel more inviting. This is especially true when sunlight reflects off beautiful surfaces, like our high-quality porcelain and natural stone options for floors or walls.

Improve Energy Efficiency

A brighter home can also be a more energy-efficient one. When your rooms are filled with natural light during the day, you’ll find yourself reaching for the light switch far less often. This simple change can lead to noticeable savings on your electricity bills over time. Modern skylights are designed with energy performance in mind. Many feature double-paned glass and special low-emissivity (Low-E) coatings that act as insulators. These technologies help keep your home warm in the winter by preventing heat from escaping and cool in the summer by blocking solar heat from entering. For maximum efficiency, you can look for products that meet ENERGY STAR guidelines, ensuring you get a skylight that helps maintain a comfortable temperature year-round.

Get Better Airflow and Ventilation

Some rooms, like kitchens and bathrooms, can trap heat, humidity, and odors. A ventilating skylight is an excellent way to let fresh air in and stale air out. Since hot air naturally rises, an open skylight creates a chimney effect, pulling warm air up and out of your home while drawing cooler, fresh air in through your windows. This natural circulation improves your home’s air quality and can reduce your reliance on air conditioning during warmer months. It’s a bit like having a gentle breeze on demand. This ability to open up a space to the elements is similar to the open, airy feeling you get with our custom pavilions and pergolas, bringing that sense of outdoor freedom inside.

Increase Your Home’s Value

A skylight is a feature that adds a “wow” factor to your home, and that can translate directly into higher property value. It’s considered a premium upgrade that signals a well-maintained and thoughtfully designed home. Potential buyers often see skylights as a luxurious touch that makes a property stand out from the rest. The abundance of natural light and the feeling of spaciousness they create are highly desirable qualities in any home. By choosing a high-quality skylight and ensuring it’s installed by experienced professionals, you’re not just making your home more enjoyable for yourself; you’re making a smart financial investment that can pay off when it’s time to sell. It’s one of the many ways Gappsi helps you build lasting value into your property.

How to Choose the Right Skylight Contractor

Finding the right contractor is just as important as choosing the perfect skylight. You’re trusting someone to cut a hole in your roof, so you want to be sure they know exactly what they’re doing. A great contractor not only ensures a leak-free installation but also helps you get the most out of your investment. Taking the time to vet your options will give you peace of mind and a beautiful, functional result that lasts for years. Here are the key things to look for when making your decision.

Look for Experience and Credentials

A skylight installation is more than just placing a window on the roof; it requires solid carpentry and roofing skills. You want a contractor who understands how your roof is constructed and how to properly integrate the skylight without compromising its integrity. Look for a company with a proven track record in comprehensive home remodeling and construction. A team with broad expertise, from masonry to framing, will have the well-rounded knowledge needed to handle any structural challenges that may arise during the installation, ensuring a seamless and secure fit for your new skylight.

Verify Their License and Insurance

This step is non-negotiable. Before you hire anyone, ask to see their state and local licenses and proof of insurance. A professional contractor’s license shows they meet industry standards, while their insurance protects you from any liability if an accident happens on your property. If a contractor hesitates to provide these documents or lacks comprehensive coverage, consider it a major red flag. A reputable company will always have this information ready and will be happy to share it with you. This simple check is one of the most important things you can do to protect yourself and your home.

Read Reviews and Check References

What past clients say about a contractor can tell you a lot. Start by reading online reviews, but don’t stop there. Ask the contractor for a list of references you can contact directly. Speaking with a few past customers gives you a chance to ask specific questions about their experience, the quality of the work, and the professionalism of the crew. You can also check out a company’s project portfolio. Viewing a contractor’s past work on the Gappsi YouTube channel, for example, can give you a real feel for their craftsmanship and the scope of projects they handle.

Discuss Materials and Warranties

A quality installation depends on quality materials. Talk to your contractor about the specific skylight brands they use and why. A knowledgeable professional will be able to explain the differences in glass, framing, and flashing. It’s also crucial to understand the warranties. You should receive a warranty for the skylight itself from the manufacturer and a separate workmanship warranty from the installer that covers any potential leaks or issues. A trustworthy contractor will be transparent about these details and provide all the necessary paperwork without you having to press them for it.

Ensure They Know Local Building Codes

Building codes can vary between towns, even within Long Island. A qualified contractor will be familiar with the specific requirements in your area for everything from structural support to energy efficiency. This local knowledge is essential for ensuring your project is completed correctly and passes any required inspections without delays or extra costs. Hiring a contractor who understands local regulations prevents future headaches and guarantees your skylight is installed safely and to code. It’s one of the key benefits of working with an established, local company that has been serving your community for years.

Understanding Skylight Installation Costs

Figuring out the budget for a new skylight involves more than just the price of the unit itself. Several key factors influence the final cost, from the type of skylight you choose to the unique characteristics of your roof. Understanding these elements ahead of time will help you plan your project, ask the right questions, and get a clear, accurate estimate from your contractor. Let’s walk through the main components that will shape your skylight installation costs.

Skylight Type and Size

The skylight model you select is one of the biggest factors in the overall price. A simple, fixed skylight will cost less than a ventilated one that opens to let in fresh air. Solar-powered models with automated blinds or rain sensors are at the higher end of the price spectrum. Tubular skylights, which are great for smaller spaces like hallways or closets, are often the most budget-friendly option. As you might expect, size also matters. A larger skylight requires more materials and labor, increasing the cost. When planning your home remodeling project, consider how much light you want to bring in and what features are most important to you.

Your Roof’s Condition and Pitch

Your roof plays a huge role in the complexity of the installation. A professional contractor needs to cut an opening, install the skylight, and add flashing, which is a special material that makes the area completely waterproof. If your roof has a very steep pitch or is made of a material like tile or slate, the installation process becomes more challenging and time-consuming, which can increase labor costs. Additionally, if your roofer discovers any existing damage, like soft spots or old shingles that need replacing, those repairs will need to be addressed first. A thorough inspection is a crucial first step before any work begins, ensuring your home is properly protected.

Labor and Local Rates

Professional installation is not something to cut corners on, as improper work can lead to leaks and costly water damage. The cost of labor covers the specialized skills needed to cut into your roof, frame the opening, build an interior light shaft if needed, and perfectly seal the skylight against the elements. Labor rates can vary based on your location and the complexity of the job. While it might be tempting to go with the lowest bidder, remember that you are paying for expertise and peace of mind. An experienced team with a history of quality design and construction ensures the job is done right the first time, protecting your investment for years to come.

How to Get a Clear Estimate

To avoid surprises, always ask for a detailed, itemized estimate in writing. A trustworthy contractor will be transparent about all the costs involved in your project. The quote should clearly break down the price of the skylight unit, all necessary materials like flashing and sealants, and the total for labor. This document helps you understand exactly what you are paying for and provides a clear scope of work. Don’t hesitate to ask questions if something is unclear. A reputable company will gladly walk you through the estimate to ensure you feel confident moving forward with your home improvement project.

Contractor Red Flags to Avoid

Choosing the right contractor is the most important step in your skylight project. While most professionals are honest and skilled, a few bad apples can cause major headaches. Knowing the warning signs will help you steer clear of trouble and find a partner you can trust. When you’re investing in a significant home upgrade, you deserve a smooth process and a beautiful result. Pay close attention during your initial conversations and consultations. If something feels off, it probably is. Trust your gut and look for these specific red flags before you sign any contracts.

No Proof of License or Insurance

A reputable contractor will always be ready to show you their credentials. If you ask for proof of licensing and insurance and the contractor hesitates, gets defensive, or can’t provide the documents, consider it a major warning sign. In New York, specific licenses are often required to perform home improvement work, and these credentials show a contractor has met professional standards. More importantly, comprehensive insurance protects you from liability if an accident happens on your property. Without it, you could be financially responsible for injuries or damages. A professional company understands this and will have its paperwork in order, no questions asked.

Demands for Large Upfront Payments

Be cautious of any contractor who asks for a large sum of money before the work even begins. While a reasonable deposit is standard practice to cover initial material costs, it shouldn’t be an excessive amount. A contractor demanding 50% or more upfront, or even the full project cost, might be financially unstable or, in the worst-case scenario, planning to disappear with your money. A trustworthy contractor will have a clear, fair payment schedule that ties payments to specific project milestones. This ensures they get paid for their progress and you only pay for work as it’s completed, creating a transparent and secure arrangement for everyone involved.

High-Pressure Tactics or Vague Estimates

Your contractor should be a partner, not a pushy salesperson. If a contractor uses high-pressure tactics, like claiming a special price is “only good for today” or rushing you to sign a contract on the spot, it’s a red flag. This behavior is unprofessional and often used to prevent you from getting other quotes or thinking through the decision. Similarly, a vague estimate that lacks detail is a cause for concern. A proper quote should be itemized, clearly outlining the costs for labor, materials, and other expenses. A fuzzy estimate leaves the door open for unexpected charges and price increases down the road.

No Portfolio or Verifiable Reviews

A contractor’s past work is the best predictor of their future performance. An experienced and proud professional will be excited to show you a portfolio of their completed projects. If a contractor can’t provide photos of their work or direct you to verifiable reviews from past clients, they may not have the experience needed for your skylight installation. You can often find examples of a company’s craftsmanship on their website or social media channels, like Gappsi’s YouTube channel, which showcases a wide range of completed projects. A lack of a portfolio, combined with poor communication like unreturned calls, often signals that you’ll face issues throughout the project.

Dodging Key Questions

Clear communication is the foundation of a successful home improvement project. During your initial meetings, you should feel comfortable asking any questions you have about the process, materials, timeline, or team. If a contractor seems evasive, brushes off your questions, or gives you vague answers, it’s a significant red flag. A professional will be happy to explain the details of your project and provide clear, confident answers. Dodging questions suggests they either don’t know the answer or are hiding something you wouldn’t like. You need a partner who is transparent and knowledgeable about every aspect of the job, including the specific porcelain and natural stone options they might use around your new skylight.

Related Articles

Frequently Asked Questions

Will my new skylight leak? This is the most common concern, and it’s a valid one. The truth is, a modern, high-quality skylight is engineered to be completely watertight. Leaks are almost always the result of improper installation, not a faulty product. This is why choosing an experienced contractor is so critical. A professional will use proper flashing techniques and high-grade sealants to create a durable, weatherproof barrier around the skylight, ensuring it integrates seamlessly with your roof and protects your home for years to come.

How long does a typical skylight installation take? The timeline for installing a skylight can vary, but a straightforward installation often takes between one and three days. The process involves cutting the opening, framing the structure, installing the unit, and completing the detailed flashing and sealing on the roof. The interior work, such as drywall and painting the light shaft, adds to the timeline. Factors like your roof’s pitch, the roofing material, and the complexity of the interior finish will influence the final schedule.

Will a skylight make my room too hot in the summer or cold in the winter? Not at all. Modern skylights are designed with impressive energy efficiency. Most feature double-paned glass with an inert gas filling and special Low-E (low-emissivity) coatings. These technologies work year-round to reflect heat away from your home in the summer and prevent warmth from escaping during the winter. By choosing an ENERGY STAR rated model, you can ensure your skylight helps maintain a comfortable indoor temperature without driving up your energy bills.

Can a skylight be installed on any roof? In most cases, yes, a skylight can be installed on nearly any type of roof, whether it’s sloped or flat. However, the complexity and cost of the installation can be affected by your roof’s pitch and material. For example, installing a skylight on a very steep roof or one made of slate or tile requires more specialized labor and techniques than on a standard asphalt shingle roof. A thorough assessment by a qualified contractor will determine the best approach for your specific home.

What kind of maintenance does a skylight require? A properly installed skylight is a very low-maintenance feature. The main task is simply keeping the glass clean, just as you would with any other window in your home, to ensure you’re getting the maximum amount of beautiful natural light. It’s also a good practice to have the seals and flashing inspected periodically as part of your regular roof maintenance routine to catch any potential issues before they become problems.

Share this page:
A beautiful natural stone patio by a pool, a major factor in overall project cost.

What’s the Real Cost of a Natural Stone Patio?

Planning a major home project like a new patio can feel overwhelming, especially when it comes to the budget. It’s easy to get a quote for materials, but what about all the other expenses? Hidden fees and unexpected charges are every homeowner’s fear. We believe you should feel confident and informed from start to finish. That’s why we’re breaking down the true cost of a natural stone patio, leaving no stone unturned. From local permit fees and essential site preparation to the price of professional installation and long-term maintenance, this guide gives you a complete financial picture. You’ll learn exactly what to expect so you can set a realistic budget without any last-minute surprises, ensuring a smooth and stress-free process.

Key Takeaways

  • Plan Your Budget with Key Factors in Mind: A professionally installed natural stone patio typically costs between $16 and $35 per square foot, but your final price depends on the stone type, design complexity, and necessary site preparation.
  • Invest in Professional Installation for Lasting Results: A professional build is crucial for a durable patio that adds value to your home. Proper installation prevents future issues like shifting stones and poor drainage, protecting your investment for years to come.
  • Account for the Finishing Touches: A complete budget includes more than just stone and labor, so remember to factor in costs for permits, drainage solutions, protective sealing, and surrounding landscaping for a polished result.

How Much Does a Natural Stone Patio Really Cost?

A natural stone patio brings a timeless elegance to any backyard, creating a perfect spot for relaxing and entertaining. But before you start dreaming of summer barbecues, you’re probably wondering about the budget. The cost of a natural stone patio is an investment, and the final price depends on several key factors, from the type of stone you choose to the complexity of the installation. Working with an expert masonry team ensures the job is done right, giving you a beautiful and durable patio that lasts for decades.

Understanding the costs upfront helps you make informed decisions without feeling overwhelmed. A well-built patio not only enhances your lifestyle but also adds significant value to your home. The beauty of natural stone is that each piece is unique, so your outdoor space will be truly one of a kind. Let’s break down the numbers so you can plan your project with confidence and get one step closer to the backyard of your dreams.

What to Expect Per Square Foot

When budgeting for your patio, it’s helpful to think in terms of square footage. On average, you can expect a professionally installed natural stone patio to cost between $16 and $35 per square foot. This range typically covers the cost of the stone itself, all base materials for a proper foundation, and the labor to get it all installed perfectly. Keep in mind that this is a general estimate. The final price can shift based on your specific site conditions, the intricacy of the design, and the type of high-quality natural stone you select for your Long Island home.

How Different Stones Impact the Price

The type of stone you choose is one of the biggest variables in your patio’s final cost. Each stone has a unique look, level of durability, and price point based on how abundant it is and where it’s sourced from. Here’s a quick look at some of the most popular options and what you can expect them to cost.

Bluestone

Known for its beautiful deep blue and gray tones and naturally rough texture, bluestone is a classic choice for patios. It’s incredibly durable and provides a non-slip surface, making it both safe and stylish. An installed bluestone patio typically costs between $15 and $31 per square foot.

Flagstone

Flagstone is a popular and versatile option, often seen in irregular, natural shapes that create a rustic feel. Because it’s widely available, it’s a relatively affordable choice, with installed costs generally running from $15 to $32 per square foot. Larger, more uniform pieces of flagstone will usually be at the higher end of that range.

Sandstone

If you’re looking for warm, earthy colors, sandstone is an excellent choice. It offers a soft, natural look that blends beautifully with garden landscapes. The price for an installed sandstone patio usually falls between $18 and $30 per square foot, depending on the specific color and finish you select.

Granite

For ultimate durability and a sophisticated look, granite is hard to beat. It’s one of the strongest natural stones available and resists scratches and stains, making it a fantastic long-term investment. An installed granite patio typically costs between $19 and $32 per square foot, offering a premium finish for your outdoor space.

What Factors Influence Your Patio’s Final Cost?

When you start budgeting for a new patio, it’s easy to focus only on the price of the stone itself. But several key elements come together to determine the final number on your invoice. Understanding these factors from the start helps you set a realistic budget and make informed decisions for your project. From the specific stone you fall in love with to the complexity of the design, each choice has an impact. Let’s walk through the main components that shape your patio’s total cost, so you know exactly what to expect.

Your Choice of Stone

The material you select is one of the biggest drivers of your patio’s cost. Natural stones like granite, slate, and limestone are premium materials, and their price reflects their beauty and durability. Material costs alone can range from $7 to $16 per square foot. When you factor in professional installation, a complete stone patio often lands between $16 and $35 per square foot. Exploring different types of porcelain and natural stone will give you a better sense of the aesthetic and budget that works for you. While some options are more of an initial investment, their longevity can offer greater value over time.

The Cost of Professional Installation

Hiring a skilled team to install your patio is an investment in getting the job done right. Professional installation for a natural stone patio can range from $3,900 to $15,000 for a typical 300-square-foot space. This price covers not just the labor but also the expertise required to ensure your patio is level, stable, and built to last for decades. Expert masonry services prevent common issues like uneven stones and poor drainage. While a DIY approach might seem tempting to save money, a professional build protects your investment and gives you a beautiful, worry-free outdoor space.

Prepping the Groundwork

What lies beneath your patio is just as important as the stones you see on top. Proper groundwork is the key to a long-lasting patio that won’t shift, sink, or crack over time. This process involves excavating the area and laying a compacted gravel base to create a stable foundation. In areas with clay soil, this step is especially critical. Skipping proper site preparation is one of the most common reasons patios fail, leading to expensive repairs down the road. A solid base ensures your beautiful new patio remains a durable and level surface for years of enjoyment.

How Intricate Designs Affect the Price

The shape and pattern of your patio also play a role in the final cost. Simple square or rectangular designs are generally the most budget-friendly because they require fewer cuts and less labor. As you introduce more complex elements like curves, custom inlays, or intricate patterns, the labor costs will increase. These designs demand more time and precision from the installation team to cut and fit each stone perfectly. While a custom design can create a stunning, one-of-a-kind look, it’s important to factor the additional labor into your overall budget.

Don’t Forget These Additional Costs

When you’re budgeting for a new natural stone patio, it’s easy to focus on the price of the stone and the installation labor. But a few other key expenses can influence your final total, and thinking about them ahead of time ensures there are no surprises. These aren’t just minor add-ons; they are crucial components that contribute to the longevity, safety, and overall beauty of your outdoor space. For example, without proper site preparation and drainage, your beautiful patio could shift or hold water after a heavy Long Island rainstorm. Similarly, skipping the permitting process can lead to headaches and fines down the road.

These additional costs are what separate a standard job from a truly professional one. They include the administrative work of securing permits, the foundational work of creating proper drainage, the protective step of sealing the stone, and the aesthetic details of post-installation landscaping. Each element plays a vital role in transforming a simple stone slab into a durable and inviting outdoor living area. By planning for these aspects from the beginning, you can create a comprehensive budget that covers every detail, guaranteeing a smooth process and a result you’ll love for years to come.

Handling Local Permits

Before any work begins, it’s important to figure out if your project requires a permit. Many towns and villages on Long Island have specific rules for construction, and your patio project might need approval. These requirements can involve paperwork and inspection fees that are not typically included in an initial installation estimate. As one industry resource notes, you might have extra costs for permits or inspection fees from your local government. Working with an experienced contractor like Gappsi can make this process much smoother, as we are accustomed to managing the necessary permits for our projects.

Planning for Proper Drainage

Proper drainage is one of the most critical, yet often overlooked, aspects of patio construction. Without a plan to manage rainwater and runoff, you could face issues like pooling water, shifting stones, and potential damage to your home’s foundation. A simple patio on level ground may not need much, but more complex sites often require drainage systems, which can add to the project cost. Investing in a well-designed drainage solution from the start is a smart move that protects your patio for years to come. It’s a key part of the expert site preparation that ensures a long-lasting installation.

The Final Touches: Sealing and Finishing

Once your beautiful natural stone patio is installed, the final step is to protect it. Sealing the stone is an important part of long-term care. A quality sealant helps shield the stone from stains, moisture, and weathering while enhancing its natural color and texture. While this adds an upfront cost, it significantly reduces future maintenance and keeps your patio looking new. Think of it as insurance for your investment. Professional restoration and sealing services can ensure the right product is applied correctly for maximum protection and beauty.

Post-Installation Landscaping Needs

A stunning patio rarely stands alone. To create a truly inviting outdoor oasis, you’ll want to consider the surrounding landscape. This might include planting new garden beds, installing irrigation for your lawn, or adding outdoor lighting to set the mood for evening get-togethers. These finishing touches are what tie the whole space together. A cohesive landscape design integrates your new patio with the rest of your yard, creating a seamless flow and making the entire area more functional and beautiful. Budgeting for these elements ensures your project feels complete.

Natural Stone vs. Pavers vs. Concrete: A Cost Comparison

When you’re planning your new patio, one of the biggest decisions you’ll make is choosing the right material. The three most popular choices are natural stone, concrete pavers, and poured concrete. Each one comes with a different look, feel, and, of course, price tag. Understanding the cost differences is key to creating a budget that works for you without sacrificing your vision for the perfect outdoor space. It’s easy to get caught up in beautiful inspiration photos, but knowing the real-world costs helps you set realistic expectations from the start.

Your choice will ultimately come down to balancing your aesthetic goals with your financial plan. Natural stone offers unmatched, high-end beauty but comes at a premium. Concrete pavers provide a fantastic middle ground, offering versatility and durability at a more accessible price. Poured concrete is the most budget-friendly option, giving you a solid foundation for your outdoor living area. At Gappsi, we work with all of these materials and can help you explore the options in person, ensuring your final decision fits both your home’s style and your budget. Let’s break down what you can expect to invest in each of these popular choices.

Natural Stone

Natural stone is the most luxurious and, therefore, the most expensive patio material. Think of it as a long-term investment in your home’s value and your own enjoyment. The material itself can range from $40 to $70 per square foot, and that’s before professional installation. When you factor in labor, the total cost often lands in a premium price range, reflecting its status as a top-tier material. While the upfront cost is significant, the result is a one-of-a-kind surface with timeless appeal. The unique colors and textures of natural stone create a patio that is truly unique and built to last for decades with proper care.

Concrete Pavers

If you love the look of stone but need a more budget-conscious option, concrete pavers are an excellent choice. They offer incredible design flexibility, coming in a huge variety of shapes, colors, and textures that can even mimic the appearance of natural stone. The cost for a professionally installed paver patio typically runs from $10 to $35 per square foot. For most homeowners, a complete project will fall somewhere between $4,000 and $12,000. This makes pavers a popular middle-ground solution that delivers durability and style without the premium price tag of natural stone. Our masonry experts can design a pattern that perfectly complements your home.

Poured Concrete

Poured concrete is the most affordable route for a new patio. With material costs around $6 to $10 per square foot, it’s a straightforward way to create a functional outdoor surface. A standard installation might cost between $9,000 and $15,000, depending on the size and complexity of the job. While a basic concrete slab is not as visually dynamic as stone or pavers, you can add some personality with stamping or staining techniques. However, it’s important to remember that concrete is more prone to cracking over time and doesn’t offer the same sophisticated texture or individual character you get from pavers or natural stone.

Design Trends and Their Price Tags

Today’s patios are so much more than a simple place to put a grill. They have become true extensions of our homes, reflecting our personal style and adding significant value. As outdoor living has grown in popularity, so have the design possibilities. From mixing materials to adding custom lighting, these modern trends can transform your backyard into a stunning retreat. Of course, these beautiful design choices also play a role in your project’s final cost, as they often require more specialized materials and expert craftsmanship. Let’s look at a few popular trends and what they mean for your budget.

Mixing Materials

Gone are the days of a single, uniform surface. A major trend in patio design is mixing materials to create texture, contrast, and visual interest. Think of a smooth bluestone patio bordered by rustic river stones, or natural stone slabs interspersed with strips of lush green turf. This approach turns your patio into a unique feature of your landscape. The cost of this trend varies widely depending on the materials you choose. Combining a premium stone with more affordable gravel or groundcover can be a creative way to get a high-end look without the high-end price tag for the entire area. A skilled masonry team can help you select a combination that fits both your aesthetic and your budget.

Geometric Patterns and Custom Layouts

If you love a clean, modern look, you might be drawn to geometric patterns. Designs like herringbone, basketweave, or large-scale repeating shapes can make a powerful statement. While stunning, these intricate layouts are more labor-intensive than a simple running bond pattern. Each stone often needs to be precisely cut and placed to create the desired effect. A natural stone patio is already a significant investment that includes both material and professional installation fees. The more complex your chosen pattern, the more time and skill it will require from your installers, which will be reflected in the labor portion of your final bill.

Natural Edges and Organic Shapes

Many homeowners are moving away from sharp, rectangular patios and embracing softer, more organic shapes. These free-form designs often feature curved edges that blend seamlessly into the surrounding garden beds and lawn. This style frequently uses irregular flagstone, fitted together like a custom puzzle to create a surface that feels like it was shaped by nature. While the result is beautiful, this trend requires a high level of artistry and handwork. Fitting and placing each unique stone takes considerable time and expertise, which can increase labor costs compared to working with uniform, pre-cut stones. This is where a team with deep landscape design experience truly shines.

Adding Built-In Lighting and Greenery

Integrating functional elements directly into your patio is a popular way to add both beauty and utility. Low-voltage lighting can be installed along edges or recessed into the stone itself, creating a warm ambiance and improving safety after dark. Built-in planters are another great option, allowing you to soften the hardscape with pockets of greenery. These features do add to the initial project cost, as they require extra steps like running electrical wiring or constructing proper drainage for planters. It’s crucial that this work is done correctly during the initial build to prevent future issues, like water seeping under the stones and causing instability. Investing in professional installation upfront helps protect your investment for years to come.

Is a Natural Stone Patio a Good Investment?

When you look at the initial price tag, it’s easy to wonder if a natural stone patio is truly worth it. It’s a significant project, and you want to be sure you’re making a smart choice for your home and your finances. The short answer is yes, a natural stone patio is an excellent investment. It’s more than just a beautiful addition to your backyard; it’s an asset that offers lasting value, enhances your home’s appeal, and improves your quality of life.

Unlike other home improvement projects that can quickly look dated, a natural stone patio has a timeless quality that endures for decades. It creates a durable, functional outdoor living space for you to enjoy with family and friends. When you consider the long-term benefits, from its incredible durability to its impact on your property value, the initial cost starts to look a lot more reasonable. Let’s break down exactly what makes it such a worthwhile investment.

Long-Term Durability and Value

One of the biggest advantages of natural stone is its strength. Materials like granite, bluestone, and travertine are incredibly resilient and can withstand harsh weather, heavy foot traffic, and the test of time. Natural stone is a popular choice for outdoor patios because it looks good, is strong, and doesn’t need much care. While the upfront cost might be higher than for other materials, you’re paying for longevity. A properly installed natural stone patio can last a lifetime, meaning you won’t have to worry about costly replacements down the road. This durability makes it a cost-effective choice over the long run.

Improving Curb Appeal and Home Value

A stunning stone patio does more than just give you a nice place to relax. A well-designed patio is one of the best outdoor improvements for increasing home value. It makes your property stand out to buyers. The unique colors and textures of natural stone create an elegant, high-end look that instantly enhances your home’s curb appeal. This isn’t just an expense; it’s an upgrade that adds tangible value to your property. Should you ever decide to sell, a beautiful and functional outdoor living space built with expert masonry techniques can be a major selling point that helps you secure a better price.

The Hidden Costs of Cutting Corners

While a natural stone patio is a great investment, its value depends heavily on proper installation and care. Natural stone patios require a significant upfront investment, covering both premium material costs and professional installation fees. Trying to cut costs with a DIY job or by hiring an inexperienced contractor can lead to disaster. Neglecting regular upkeep can also result in water seeping beneath the stones, causing unevenness and instability over time. To protect your investment, it’s crucial to have it installed correctly from the start and to perform routine maintenance. This prevents small issues from turning into expensive restoration projects.

What’s the Real Cost of Patio Maintenance?

Your beautiful natural stone patio is an investment in your home and your lifestyle, and like any good investment, it requires a little care to keep it in prime condition. The cost of your patio doesn’t stop once the last stone is laid. Thinking about maintenance from the start helps you protect its beauty and durability for decades. Luckily, maintaining a stone patio is straightforward and won’t break the bank, but it does require a consistent approach. By planning for routine upkeep and potential repairs, you ensure your outdoor space remains a stunning and safe place for relaxing and entertaining.

Budgeting for Routine Upkeep

Keeping your natural stone patio looking its best is mostly about simple, regular tasks. You’ll want to sweep it often to get rid of leaves, dirt, and other debris that can cause stains or become ground into the surface. An occasional rinse with a hose helps wash away dust and pollen. When it’s time for a deeper clean, it’s vital to use a pH-neutral cleaning solution made specifically for stone, as acidic or harsh chemicals can cause permanent damage. To give your patio the best defense against stains and weather, consider having it professionally sealed every few years. Our restoration and sealing services can protect your investment and make daily cleaning even easier.

Planning for Future Repairs

Over time, even the most well-installed patio can show signs of wear. The key is to catch small issues before they become big, expensive problems. If you neglect regular upkeep, water can get underneath the stones, leading to shifting and an uneven surface. A great habit is to walk your patio every spring and fall to inspect it. Pay close attention to the joints between the stones. If the sand or filler is washing away, it may need to be replenished to keep the stones secure. You should also check your joints and look for any pavers that have become stained, chipped, or broken so you can plan for their replacement. Addressing these minor repairs promptly will save you from a major overhaul down the road.

When to Call a Professional

While you can handle most routine maintenance yourself, some jobs are best left to the experts. If you notice widespread or significant issues, it’s time to make a call. Problems like multiple loose or uneven stones, drainage issues where water pools on the surface, or deep-set stains that don’t lift with simple cleaning are signs you need professional help. Trying to fix major structural problems without the right tools or experience can often make things worse. A professional can diagnose the root cause of the issue, whether it’s from settling or improper installation. For any significant patio repairs on Long Island, our expert masonry team can restore your patio’s safety and beauty.

Start Your Natural Stone Patio Project on Long Island

Taking the first step on a new patio project is exciting, and knowing what to expect can make the process feel much smoother. For a natural stone patio on Long Island, a good budget estimate is between $16 and $35 per square foot for the complete installation. This means a typical patio project often lands somewhere between $4,000 and $12,000, though this can change based on your site’s specific needs and the complexity of your design. The stone itself is a big part of that equation, with beautiful and durable options like granite, slate, and limestone usually costing between $7 and $16 per square foot.

Choosing the right material is about finding a look you love that fits your budget. At Gappsi, we can walk you through our extensive collection of porcelain and natural stone to help you find the perfect match for your home’s style. Our design team has been transforming Long Island backyards for decades, and we handle every detail, from preparing the ground to executing the final pattern. We believe a great patio is built on a solid foundation, which is why our masonry work is second to none.

We also help you think about the future of your investment. To keep your patio looking its best for years to come, regular care is key. Simple upkeep, like sealing the stone to protect it from the elements, makes a huge difference. We offer professional restoration and sealing services to ensure your outdoor space remains a source of pride and enjoyment. When you’re ready to turn your vision into a reality, our team is here to help you create a beautiful, lasting addition to your home.

Related Articles

Frequently Asked Questions

Why is natural stone so much more expensive than concrete pavers or poured concrete? The higher price of natural stone comes down to its uniqueness and durability. Each piece is quarried from the earth, meaning no two stones are exactly alike, giving your patio a one-of-a-kind character. This process is more labor-intensive than manufacturing concrete pavers. While pavers and concrete are excellent materials, natural stone offers a level of timeless elegance and natural variation that simply can’t be replicated, making it a premium, long-lasting investment in your home.

What’s a realistic starting budget for a typical natural stone patio? For a professionally installed natural stone patio, a good starting point for your budget is between $16 and $35 per square foot. So, for a common 300-square-foot patio, you could expect the total project cost to fall somewhere between $4,800 and $10,500. This range generally includes the stone, all the necessary base materials for a solid foundation, and the expert labor required to ensure a beautiful, long-lasting installation.

Besides the stone, what is the most important cost factor I shouldn’t overlook? The most critical factor beyond the stone itself is the groundwork and professional installation. A beautiful patio on a weak foundation will fail, leading to sinking stones, poor drainage, and expensive repairs. Investing in proper site excavation and a compacted gravel base is non-negotiable for a patio that will last. Hiring an expert masonry team ensures this foundational work is done right, protecting your entire investment for decades to come.

How can I get a high-end look if a full natural stone patio is outside my budget? You can absolutely achieve a luxurious feel without using natural stone for the entire surface. A popular and beautiful trend is to mix materials. Consider using more budget-friendly concrete pavers for the main area and adding a sophisticated border of natural stone. You could also create visual interest by interspersing strips of synthetic turf between larger stone slabs. This approach gives you a custom, high-end look while keeping the overall project cost more manageable.

How long will a professionally installed natural stone patio actually last? When a natural stone patio is installed correctly by a skilled team and properly maintained, it can easily last a lifetime. We’re talking 50 years or even longer. The key is the combination of a solid, well-drained base and periodic care, like cleaning and sealing the stone every few years to protect it from stains and weather. This incredible longevity is what makes natural stone such a fantastic long-term investment for your home.

Share this page:
Concrete driveway installation services with a team smoothing the freshly poured concrete.

Concrete Driveway Installation Services: The 101 Guide

Are you tired of pulling weeds from between pavers or dealing with the ruts and dust of a gravel driveway? A driveway should be a source of pride, not a constant chore. Concrete offers a simple, elegant solution. It provides a solid, seamless surface that’s easy to clean, shovel, and maintain, freeing up your weekends for better things. Forget the old idea of plain gray slabs; modern concrete can be customized with colors and patterns to match any home’s style. Our concrete driveway installation services are designed to give you a beautiful, low-maintenance entrance that solves your driveway frustrations for good.

Key Takeaways

  • A Solid Foundation is Non-Negotiable: The long-term durability of your driveway relies on proper site preparation. A compacted base, correct grading for drainage, and planned expansion joints are essential to prevent cracks and structural failure.
  • Design Your Driveway to Match Your Home: Concrete is a versatile canvas for your home’s exterior. You can use stamped patterns, colored finishes, and unique textures to create a custom look that complements your property’s style and improves its curb appeal.
  • Choose a Partner, Not Just a Price: Selecting the right contractor is crucial. Look for a team with proven local experience, transparent pricing, and a focus on technical details like reinforcement, as this ensures a high-quality result that provides lasting value.

Why Choose a Concrete Driveway?

Choosing a new driveway is a major decision. It’s the welcome mat to your home, the first impression for guests, and a feature you’ll use every single day. While you have several material options, concrete remains a top choice for Long Island homeowners for good reason. It’s a classic that has evolved far beyond simple gray slabs, offering a powerful combination of strength, style, and practicality that’s hard to beat. A well-installed concrete driveway is more than just a place to park your car; it’s a long-term investment in your property’s value and curb appeal.

When you partner with an expert team, you get a driveway that not only looks fantastic but is also engineered to withstand Long Island’s changing seasons, from hot summers to freezing winters. The right masonry design and construction can transform your home’s entrance and tie your entire landscape together. If you’re looking for a solution that delivers on all fronts, concrete offers a compelling case. It provides a solid foundation for your home’s exterior aesthetic while giving you peace of mind for years to come. Let’s look at the three biggest benefits you can expect.

Enjoy Decades of Durability

One of the most significant advantages of a concrete driveway is its incredible longevity. When properly installed and maintained, a concrete driveway can easily last 30 years or more. Think about that, three decades of reliable performance with very little fuss. This isn’t a temporary fix; it’s a permanent improvement to your property. This durability makes it an excellent investment, saving you from the cost and hassle of premature replacements. To ensure your driveway reaches its maximum lifespan, periodic cleaning and applying a high-quality sealant every few years can protect it from moisture, stains, and wear. Our restoration and sealing services can keep your concrete looking its best for the long haul.

Enhance Your Curb Appeal with Versatile Designs

Forget the idea that concrete is boring. Modern concrete driveways are incredibly versatile and can be customized to perfectly match your home’s style. Concrete is a blank canvas that can greatly enhance your home’s exterior. You can choose from a wide range of decorative options, including stamped patterns that mimic the look of natural stone, brick, or slate. We can also integrate colors and stains to create a unique finish that complements your home’s siding, trim, or landscaping. This design flexibility allows you to create a truly custom look that improves your curb appeal. With our expertise in working with porcelain and natural stone, we understand how to create cohesive and beautiful hardscapes.

Save Time and Money with Low Maintenance

If you have a busy lifestyle, a low-maintenance driveway is a must. Concrete driveways don’t need a lot of upkeep, which is a huge plus for many homeowners. Unlike asphalt that requires regular sealing or pavers that can grow weeds in the joints, concrete is simple to care for. A seasonal cleaning with a pressure washer is usually all it takes to keep it looking fresh. This minimal maintenance not only saves you valuable time on the weekends but also reduces long-term costs. By avoiding the need for frequent repairs and resealing, you’ll find that a concrete driveway is one of the most cost-effective options over its entire lifespan, making it a smart part of any home remodeling plan.

How Concrete Compares to Other Driveway Materials

Choosing a driveway material can feel overwhelming, but it really comes down to balancing looks, longevity, and upkeep. While options like asphalt, pavers, and gravel each have their place, concrete consistently stands out for its unique combination of strength and style. Let’s break down how it stacks up against the other common choices for your Long Island home.

Concrete vs. Asphalt

Asphalt is a popular choice, but when you look at the long game, concrete often comes out ahead. A well-installed concrete driveway can last for more than 30 years with very little maintenance. It stands up beautifully to Long Island’s harsh weather, especially the freezing and thawing cycles that can wreak havoc on other materials. Plus, concrete is less prone to staining from oil leaks. While asphalt might have a lower initial price tag, it typically requires resealing every few years and is more susceptible to damage, making concrete a more durable and cost-effective investment over the life of your home.

Concrete vs. Pavers

Pavers offer a classic, elegant look, and we love designing with them. However, the main difference comes down to a solid surface versus individual units. Over time, pavers can sometimes shift or settle, and you’ll likely have to pull weeds from the joints. A poured concrete driveway gives you a seamless, solid surface that’s easy to clear and maintain. If you love the look of stone or brick, stamped concrete can replicate those intricate patterns without the individual seams, giving you the best of both worlds: high-end design on a stable, unified surface. We can help you explore all your porcelain and natural stone options to find the perfect fit.

Concrete vs. Gravel

Gravel is certainly the most budget-friendly option upfront, but it comes with a lifetime of maintenance. Gravel driveways develop ruts, need regular raking, and require periodic top-offs as stones get displaced. They can also be dusty in the summer and difficult to plow in the winter. One of the biggest myths about concrete is its cost; when you factor in its incredible lifespan and minimal upkeep, it proves to be a far more cost-effective solution over time. Think of it as a one-time investment for decades of performance, rather than a recurring project. While we can create beautiful gravel driveways, concrete offers a cleaner, more permanent solution for a polished home exterior.

Explore Your Concrete Driveway Design Options

A concrete driveway is much more than just a functional surface; it’s a design opportunity. Forget the idea of a plain gray slab. Modern concrete work offers a surprising amount of versatility, allowing you to create a custom look that enhances your home’s curb appeal. Whether you want the elegance of natural stone or a color that perfectly complements your home’s exterior, there’s a design solution for you. By exploring different finishes, you can transform your driveway from a simple necessity into a standout feature of your property. Here are a few popular design approaches to consider.

Stamped and Decorative Concrete

If you love the look of high-end materials like flagstone, slate, or brick but not the price tag, stamped concrete is an excellent solution. This technique involves pressing molds into freshly poured concrete to create realistic patterns and textures. The result is a decorative surface that provides the sophisticated look of natural stone with the durability and affordability of concrete. It’s a fantastic way to add character and visual interest, ensuring your driveway complements your home’s architecture and landscaping. Our expert masonry team can create intricate designs that truly refine your home’s entrance.

Colored and Stained Finishes

Why stick with gray when you can choose a color that perfectly matches your home? Concrete can be colored or stained to achieve a wide range of hues, from warm earth tones to cool, contemporary shades. Color can be mixed directly into the concrete before it’s poured for a consistent, uniform look. Alternatively, acid stains can be applied to cured concrete to create rich, marbled effects with unique variations. This versatility allows you to create a cohesive aesthetic, tying your driveway into your home’s color scheme for a polished and intentional design. It’s a key part of a thoughtful home remodeling project.

Patterns and Textures

Beyond stamping, you can add subtle patterns and textures to your driveway for both visual appeal and improved function. A classic broom finish, for example, creates fine lines across the surface that not only look clean but also provide excellent traction in wet or icy conditions. Another option is an exposed aggregate finish, which reveals the natural stones within the concrete mix for a pebbled, textured appearance. These finishes add a layer of sophistication and can be combined with colored concrete or decorative borders to create a truly unique look. Proper restoration and sealing will keep these beautiful textures looking their best for years.

Understanding Concrete Driveway Costs

When planning for a new concrete driveway, it’s helpful to know what goes into the final price tag. The total cost is more than just the size of the space; it’s a combination of site conditions, material quality, labor, and any custom features you choose. Understanding these elements will help you set a realistic budget and appreciate the value of a well-executed project. Let’s break down the key factors that influence the cost of your new driveway.

How Size and Site Conditions Affect Price

It’s true that a larger driveway will require more materials and labor, which increases the cost. However, what’s underneath the surface is just as important. Proper site preparation is the foundation of a long-lasting driveway. This involves excavating the area, ensuring the soil is correctly compacted, and laying a sufficient gravel base to support the concrete. If a contractor rushes this step or uses a thin base, your driveway could crack or settle over time. A professional assessment of your property’s grading and soil is essential for a durable installation, and this expert masonry work is a critical part of the investment.

Factoring in Material Quality and Labor

The quality of the concrete mix and the skill of the installation team play a huge role in both the price and the lifespan of your driveway. Using a high-strength concrete mix and proper reinforcement, like steel rebar, prevents cracking and ensures your driveway can handle vehicle loads for years. While it might be tempting to save money with lower-quality materials, this often leads to expensive repairs later. Skilled labor is just as vital. Experienced professionals know how to pour, finish, and cure concrete correctly, even in challenging weather. This expertise ensures a beautiful, resilient surface and is a hallmark of a company that values high-quality materials and craftsmanship.

The Impact of Decorative Features

A standard concrete driveway is functional, but decorative options can transform it into a stunning feature that enhances your home’s curb appeal. Features like stamped concrete, which can mimic the look of stone or brick, add texture and visual interest. You can also choose from a variety of colors and stains to complement your home’s exterior. These customizations require additional materials and specialized labor, which will increase the overall cost. Think of it as an investment in your home’s aesthetic. You can see many examples of how these features create unique outdoor spaces on the Gappsi YouTube channel, offering plenty of inspiration for your own project.

Why the Cheapest Bid Isn’t the Best Value

It’s natural to want the best deal, but when it comes to concrete work, the lowest bid can be a major red flag. An unusually low price often indicates that a contractor is cutting corners somewhere. This could mean they are using subpar materials, skipping crucial site preparation steps, or hiring unskilled labor. A poorly installed driveway might look fine at first, but it’s likely to fail prematurely, leading to costly repairs or a full replacement. A reputable contractor provides a detailed estimate that reflects the true cost of a quality installation. Investing in a job done right the first time will always provide better long-term value and peace of mind, saving you from future restoration and sealing headaches.

Your Concrete Driveway Installation: A Step-by-Step Guide

A beautiful, long-lasting concrete driveway is the result of a careful, multi-step process where every detail matters. Understanding these steps can help you appreciate the craftsmanship involved and know what to expect when our team arrives. Here’s a look at how we bring your new driveway to life, from the ground up.

Site Preparation and Excavation

The most important part of your driveway installation happens before any concrete is poured. Proper site preparation is the foundation for a surface that will last for decades. This critical phase involves clearing the area of any vegetation or old materials, then excavating the soil to the correct depth. We then build and compact a sub-base of crushed stone. This solid, stable base is essential for preventing the driveway from sinking, shifting, or cracking over time. Rushing this step is a common mistake, but our expert masonry team ensures it’s done right, creating a durable foundation for your investment.

Setting Forms and Reinforcement

Once the base is prepared, we set up wooden or metal forms around the perimeter. These forms act as a mold, defining the exact shape and dimensions of your new driveway. Inside these forms, we place a grid of steel reinforcement, known as rebar or wire mesh. This reinforcement is crucial because it adds tensile strength, helping the concrete withstand heavy loads and resist cracking from ground movement or temperature changes. We also strategically place control joints. These are planned grooves in the concrete that encourage any future cracking to happen in a straight, clean line, preserving the driveway’s structural integrity and appearance. You can see our team’s meticulous process on the Gappsi YouTube channel.

Pouring, Finishing, and Sealing

With the groundwork laid, it’s time to pour the concrete. Our team works efficiently to spread the concrete evenly within the forms, ensuring a consistent thickness throughout. Next comes finishing, a process that requires skill and timing to create the desired surface texture, whether it’s a standard broom finish for traction or a smoother troweled look. After the concrete has set but before it fully cures, we apply a high-quality sealant. This final layer is vital for protection. It acts as a barrier against moisture, road salts, oil, and UV rays, which helps prevent staining and surface damage. This step is a key part of our restoration and sealing services.

Curing Time and Aftercare

Your driveway isn’t finished the moment the truck leaves. The concrete now needs to cure, which is a chemical process where it hardens and gains its full strength. This can take up to a month, but the first week is the most critical. During this time, the concrete should be kept moist and protected from heavy traffic. We recommend waiting at least seven days before parking cars on it. Long-term aftercare is simple but effective. Keeping the surface clean and periodically reapplying a sealant every few years will protect your investment from the elements. With proper care, your driveway can easily outlast its typical 25-year lifespan, giving you decades of reliable performance and curb appeal.

How to Choose the Right Concrete Driveway Contractor

Selecting the right contractor is the most important step in ensuring your new concrete driveway is a success. A great partner will not only deliver a beautiful final product but will also make the entire process smooth and stress-free. It’s about finding a team with the right skills, a solid reputation, and a commitment to quality that matches your own. Taking the time to vet your options carefully will pay off for decades by preventing headaches and costly repairs down the road.

Experience and Local Reputation

Not all concrete crews have the specific skills needed for a high-quality driveway installation. Look for a contractor with a deep portfolio of completed driveway projects in the Long Island area. Ask to see examples of their work and read online reviews from local homeowners. A contractor with a strong local reputation has a track record to protect and is familiar with Nassau and Suffolk County’s specific building codes and climate considerations. A company that offers comprehensive masonry services often has the well-rounded expertise needed to handle complex driveway projects from start to finish, ensuring a professional result that lasts.

Transparent Pricing and Written Estimates

A trustworthy contractor will always provide a detailed, written estimate before any work begins. This document should clearly break down the costs for labor, materials, site preparation, and any special finishes. Be wary of vague quotes or bids that seem unusually low, as they often hide future costs or signal subpar work. You should look for a verifiably experienced concrete contractor who is transparent about their pricing and what’s included. A comprehensive estimate is a sign of professionalism and helps ensure there are no surprises when the final bill arrives. It protects both you and the contractor by setting clear expectations from the outset.

Proper Drainage and Reinforcement Plans

A beautiful driveway can quickly fail without a solid foundation and a plan for water management. Before you hire anyone, ask how they plan to handle drainage. Proper grading is essential to direct water away from your home’s foundation and prevent pooling that can erode the base of your driveway. The contractor should also explain their plan for reinforcement, such as using steel rebar or wire mesh, which helps control cracking and adds structural integrity. A contractor who proactively discusses these technical details is one who is focused on building a driveway that is engineered to last for years.

Warranties and Guarantees

A contractor who stands behind their work will offer a warranty or guarantee. This is your assurance that they have confidence in their materials and craftsmanship. Before signing a contract, ask for the warranty details in writing. Understand what is covered (for example, materials and labor), for how long, and what the process is for making a claim. A solid warranty protects your investment and gives you peace of mind, knowing that the contractor is committed to quality and won’t disappear if an issue arises. Investing your time to find a contractor who offers this protection can prevent costly repairs in the future.

Contractor Red Flags to Avoid

Knowing what to look for in a good contractor is just as important as knowing the warning signs of a bad one. Be cautious of anyone who pressures you to make a quick decision, asks for a large cash deposit upfront, or cannot provide proof of licensing and insurance. Always verify a contractor’s credentials and licenses to ensure they are qualified and that you are protected. Other red flags include a lack of a physical business address, poor communication, or an unwillingness to provide references. Trust your instincts; if something feels off, it’s best to walk away and find a more professional and reliable partner for your project.

Common Concrete Driveway Mistakes to Avoid

A new concrete driveway is a significant upgrade to your home, but a few common missteps can turn a great investment into a future headache. Knowing what to watch out for is the best way to ensure your project goes smoothly and your driveway looks fantastic for decades. A properly installed driveway is more than just a place to park your car; it’s a durable, functional part of your home’s landscape. Unfortunately, cutting corners at any stage of the process can lead to premature cracking, spalling, and discoloration, forcing you to spend more on repairs down the road.

From the unseen work that happens below the surface to the final finishing touches, every step matters. An experienced team understands that the long-term performance of your driveway depends on getting these details right. By familiarizing yourself with the most frequent errors, you can ask the right questions and feel confident that your contractor is committed to quality. Think of it as your checklist for success, ensuring your investment is protected from day one. Gappsi’s approach to masonry focuses on this foundational quality, creating surfaces built to withstand time and the elements. Let’s walk through the key mistakes to avoid when planning your new concrete driveway so you can feel empowered and prepared for your project.

Skipping Proper Site Preparation

Think of your driveway’s base as the foundation of a house. If the ground underneath isn’t solid, stable, and properly prepared, the structure on top is bound to have problems. One of the most critical errors in driveway installation is rushing or skipping site preparation. This involves excavating the area to the correct depth and creating a compacted base of gravel. A poorly prepared base will settle unevenly over time, causing the concrete slab above to sink, shift, and crack. A professional crew will take the time to ensure the subgrade is firm and uniform before any concrete is poured. This initial step is your best defense against future structural issues and costly repairs.

Ignoring Drainage and Expansion Joints

Water is one of concrete’s biggest enemies. Without a proper drainage plan, rainwater can pool on the surface or seep underneath the slab, eroding the base material. Here in Long Island, that trapped moisture can freeze and expand in the winter, causing the concrete to heave and crack. Equally important are expansion joints. These are the lines you see cut into large concrete surfaces. They aren’t just for decoration; they are planned separations that allow the concrete to safely expand and contract with temperature changes. Without them, the concrete would create its own jagged, uncontrolled cracks. Proper planning for both drainage and joints is a hallmark of professional porcelain and natural stone installation and is just as crucial for concrete.

Choosing a Contractor Based on Price Alone

It’s always tempting to go with the lowest bid, but when it comes to concrete work, a suspiciously low price can be a major red flag. The cost of a driveway reflects the quality of the materials, the skill of the crew, and the time taken to do the job right. A contractor who underbids the competition may be using a subpar concrete mix, skimping on base preparation, or hiring an inexperienced team. While you might save money upfront, you will likely pay for it later in the form of cracks and a much shorter lifespan. Instead, look for a contractor with a strong local reputation and a portfolio of quality work, like our team at Gappsi specializing in home remodeling and outdoor construction.

Neglecting Sealing and Maintenance

Many people assume that once concrete is cured, the work is done. However, neglecting simple maintenance is a mistake that can shorten your driveway’s life. Applying a high-quality sealer is one of the most important final steps. A sealer acts as a protective barrier, shielding the concrete from moisture penetration, oil stains, de-icing salts, and UV damage. It makes the surface easier to clean and helps preserve its color and finish. Without this protection, the porous concrete is vulnerable to staining and deterioration. Gappsi offers professional restoration and sealing services to keep your surfaces protected. Periodic cleaning and resealing every few years is a small task that provides huge returns by keeping your driveway looking new.

Partner with Gappsi for Your Long Island Driveway Project

Choosing the right team for your new driveway is a big step, and you want a partner who understands your vision and the unique demands of Long Island properties. At Gappsi, we’ve spent over 30 years transforming homes across Suffolk and Nassau counties, and we bring that local expertise to every project. Our foundation is built on exceptional masonry, and we specialize in creating driveways that are as durable as they are beautiful. We know that a driveway is more than just a place to park your car; it’s the first impression your home makes.

We believe you should feel completely confident in your investment before any work begins. That’s why we use advanced 3D design software to create a realistic rendering of your new driveway. This allows you to see exactly how different colors, patterns, and finishes will look with your home’s exterior, so you can make decisions with total peace of mind. Our goal is to collaborate with you to design a driveway that perfectly matches your style and functional needs.

Our commitment to you doesn’t end once the concrete is poured. Gappsi is your one-stop solution for the entire lifecycle of your driveway. From initial design and expert installation to long-term maintenance, we’ve got you covered. We even offer professional restoration and sealing services to protect your investment and keep it looking pristine for years to come. When you’re ready to create a stunning and long-lasting entrance to your home, let’s start the conversation.

Related Articles

Frequently Asked Questions

How long will my new concrete driveway last, especially with Long Island’s weather? A professionally installed concrete driveway is built to last for 30 years or even longer. The key is proper installation, which includes a solid base and reinforcement to handle our freeze-thaw cycles. When combined with a quality sealant, your driveway will be well-equipped to resist damage from road salts and moisture, making it a durable, long-term investment for your home.

I love the look of natural stone, but I’m interested in concrete. Can I get both? Yes, you absolutely can. This is where stamped concrete comes in. We can use special molds to press realistic patterns of slate, flagstone, or brick into the fresh concrete. You get the high-end, textured appearance of natural stone pavers with the strength, durability, and seamless surface of a solid concrete slab. It’s a fantastic way to achieve a custom look without the upkeep of individual stones.

How long does the installation process take, and when can I use my new driveway? The entire project, from excavation to final finishing, typically takes a few days, though the exact timeline depends on the size of your driveway and the weather. After the concrete is poured, the curing process begins. You can usually walk on the new surface after 24 to 48 hours, but we strongly recommend waiting at least a full week before parking any vehicles on it. This patience allows the concrete to gain the strength it needs for long-term performance.

What kind of maintenance does a concrete driveway actually need to look good for years? Concrete is wonderfully low maintenance. For the most part, keeping it clean with a simple wash from a hose or a light pressure washing is all you need to do. The most important maintenance task is sealing. We recommend having your driveway professionally cleaned and resealed every few years. This protective layer prevents stains, repels moisture, and keeps the surface looking fresh, which is the best way to protect your investment.

Is a concrete driveway really worth the investment compared to a cheaper option like asphalt? While asphalt may have a lower upfront cost, concrete provides far better long-term value. A concrete driveway lasts significantly longer and requires much less maintenance over its lifespan. You won’t have to deal with the recurring cost and hassle of resealing it every few years like you do with asphalt. When you consider its durability and curb appeal, concrete is a smarter financial decision that pays for itself over time.

Share this page: