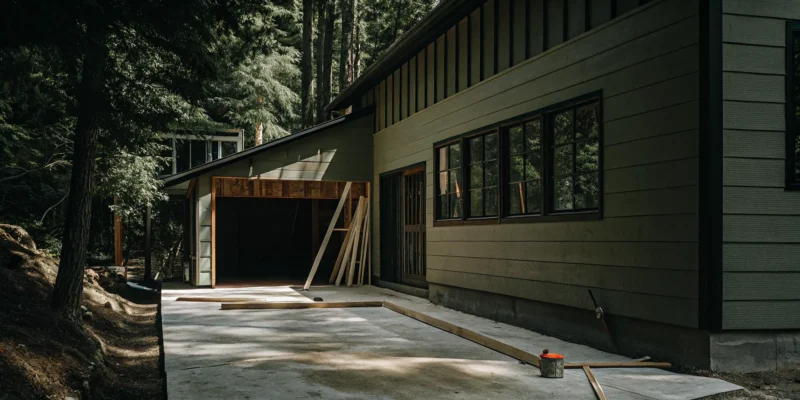
Contractors building a new garage addition for a home.

The Smart Guide to Garage Addition Contractors

A garage addition is one of the smartest investments you can make in your Long Island home. It adds significant property value, enhances curb appeal, and provides practical space that makes daily life easier. But the success of this investment depends entirely on the quality of the build. You need a structure that is not only beautiful but also durable and compliant with local codes. This is where professional garage addition contractors come in. They are the experts who ensure your project is a sound financial decision, not a costly mistake. In this article, we’ll explore how a new garage pays off in the long run and why partnering with an experienced local builder is the key to maximizing your return.

Key Takeaways

  • Your Contractor Is Your Most Important Partner: A professional contractor does more than just build; they guide your design, manage all local permits and zoning laws, and oversee the entire project. It is essential to verify their credentials, check references, and confirm their local experience to ensure a smooth process.
  • Design for Your Life, Not Just Your Car: A garage addition is a smart investment that adds value and convenience. Think beyond parking and consider how the space can truly serve your needs, for instance, as a workshop, home gym, or organized storage hub, to get the most out of your new space.
  • A Detailed Budget Prevents Surprises: Protect your investment by getting detailed, written quotes that clearly define the project scope and costs. Always include a contingency fund of 10% to 20% in your budget to cover unexpected issues and insist on a clear contract before any work begins.

What Does a Garage Addition Contractor Do?

Thinking about adding a garage? It’s a big project, and a garage addition contractor is the professional who brings it all together. Their job goes far beyond just building four walls and a roof. A great contractor acts as your partner, guiding you through every step, from the first sketch to the final coat of paint. They help you define what you need, design a space that fits your life, and manage the entire construction process so you don’t have to. They are the experts who ensure your new garage is not only beautiful and functional but also safe, compliant with local codes, and built to last.

Attached vs. Detached: Which Garage Is Right for You?

One of the first decisions you’ll make is whether to build an attached or detached garage. An attached garage connects directly to your home, offering the convenience of walking straight from your car into the house without facing the elements. This option is often preferred for its easy access and simpler connection to your home’s existing utilities.

A detached garage, on the other hand, is a separate structure on your property. This gives you more flexibility with placement and design. It’s an excellent choice if you plan to use the space as a workshop for noisy projects or want to keep fumes from cars and equipment away from your living areas. A contractor can help you weigh these options based on your property’s layout and your specific needs for a home remodeling project.

More Than a Garage: Designing Workshops, Gyms, or Guest Suites

Your new garage doesn’t have to be just a place to park your car. With the right design, it can become a valuable extension of your living space. Many homeowners are now creating custom garages that serve multiple purposes. Imagine a dedicated workshop for your hobbies, a private home gym, or even a playroom for the kids.

You could also design a garage with a finished room above it, creating a perfect guest suite, home office, or rental opportunity. A skilled contractor will help you plan for the specific features these spaces require, like reinforced floors for gym equipment, extra electrical outlets for a workshop, or plumbing for a guest bathroom. This is your chance to add a truly functional space that complements your lifestyle, perhaps even alongside new sports games courts.

Visualizing the Final Look with Design Plans and 3D Renderings

It can be hard to picture how a new structure will look once it’s built. That’s why the design phase is so important. A professional contractor will work closely with you to create detailed plans that capture your vision. They don’t just listen; they help you refine your ideas into a workable blueprint.

Modern contractors use tools like 3D renderings to give you a realistic preview of your garage addition. This allows you to see how it will connect to your home, experiment with different exterior finishes, and make sure every detail is right before construction begins. Visualizing the project with different porcelain and natural stone options ensures the new addition perfectly matches your home’s existing style and enhances its curb appeal.

Handling Permits, Zoning, and Building Codes

Navigating local regulations is often one of the most challenging parts of any construction project. Every town in Nassau and Suffolk County has its own specific zoning laws, building codes, and permit requirements for new structures. A garage addition must comply with rules regarding its size, height, and distance from property lines.

An experienced local contractor handles all of this for you. They know the regulations inside and out and will manage the entire permitting process. This saves you from the stress of paperwork and potential delays. Hiring a professional ensures your project is fully compliant from the start, giving you peace of mind that your new garage is built safely and legally. This expertise is a key reason to work with an established Long Island company.

Managing the Project from Concept to Completion

From the moment you approve the design, your contractor takes on the role of project manager. They are your single point of contact, responsible for coordinating every aspect of the build. This includes ordering high-quality materials, scheduling and overseeing all the different tradespeople, like electricians and plumbers, and ensuring the work stays on schedule and within budget.

This comprehensive management means you don’t have to juggle multiple contacts or worry about the day-to-day logistics. Your contractor will provide regular updates and handle any challenges that arise, ensuring a smooth process from the first day of site prep to the final walkthrough. You can see examples of Gappsi’s beautifully finished projects on our YouTube channel.

Is a Garage Addition a Good Investment for Your Long Island Home?

Thinking about adding a garage to your Long Island home? It’s a fantastic question, and the short answer is a resounding yes. A garage addition is one of the most practical and valuable improvements you can make. It’s not just about having a place to park your car to protect it from coastal weather. It’s about adding square footage, creating functional space, and seriously improving your home’s curb appeal. A well-built garage provides a solid return on investment by making your property more attractive to future buyers and your daily life much more convenient.

How a New Garage Increases Property Value

A new garage gives you more space and can also make your property more valuable. For many Long Island homebuyers, a garage is a non-negotiable feature. Adding one can instantly make your home more competitive on the market. It provides secure parking, which is a huge plus, but it also adds significant storage and functional living area. This kind of versatile space is exactly what buyers are looking for. A thoughtfully designed garage addition is a smart home remodeling project that not only enhances your lifestyle now but also pays you back when it’s time to sell. It’s a feature that adds tangible value you can see on a property appraisal.

Beyond Parking: The Benefits of Extra Storage and Protection

Garages help homeowners add more useful space to their homes, not just for parking cars. Think of a new garage as a blank canvas. It’s the perfect spot for a workshop where you can finally tackle those DIY projects. It can become a home gym, a studio for your hobbies, or simply a well-organized storage hub for everything from holiday decorations to beach chairs and bikes. For those looking to create a personal wellness retreat, a garage can even house a brand new sauna. By moving these activities out of your main living area, you free up space inside your home and keep everything neatly contained and protected from the elements.

Creating a Cohesive Look That Enhances Curb Appeal

A great garage addition should look like it was always part of your home’s original design. The goal is to make the new garage fit perfectly with your home’s look, not appear like a tacked-on box. This is where expert design and material selection come into play. By matching the siding, roofing, and architectural style of your house, the new structure blends in seamlessly. You can also use the project as an opportunity to improve your landscape and hardscaping. Imagine a beautiful new driveway made from elegant porcelain and natural stone leading up to your new garage. This cohesive approach creates a polished, high-end look that dramatically improves your home’s curb appeal.

Why Smart Design Choices Pay Off in the Long Run

Investing in a garage is about more than just the structure itself; it’s about making smart choices that ensure its longevity and functionality. This is why it’s so important to focus on good quality work, clear communication, and local expertise. A contractor who understands Long Island’s specific building codes and weather patterns will build a garage that lasts. Smart design also involves planning for your future needs. Will you need extra outlets for a workshop? Reinforced flooring for heavy equipment? Proper ventilation for a gym? Thinking through these details from the start ensures your new garage serves you well for years, making your initial investment even more valuable. Expert masonry and construction techniques are key to a successful project.

How Much Does a Garage Addition Cost in Long Island?

Talking about budget is one of the first, and most important, steps in any home renovation. A garage addition is a significant project, and understanding the potential costs is key to planning a successful build. The final price tag can vary quite a bit, depending on the size, style, and features you choose. It’s also important to remember that building on Long Island often comes with higher costs for labor and materials compared to national averages.

This section will walk you through the numbers, from typical project costs to the hidden fees you might not expect. My goal is to give you a clear picture of what to budget for, so you can move forward with your home remodeling project feeling confident and prepared. We’ll break down the costs by square foot, explore the factors that can cause prices to fluctuate, and give you a framework for creating a realistic budget that covers all your bases.

Typical Costs by Garage Type and Size

Nationally, the average cost to build a new garage is between $19,500 and $42,500, but this is just a starting point. The final price depends heavily on whether you choose an attached or detached structure and how many cars you plan to park. A simple, one-car attached garage will naturally fall on the lower end of the spectrum. A more complex two or three-car detached garage, which requires its own foundation and separate utility lines, will cost significantly more. These figures also represent a standard build, so any custom features or high-end finishes will add to the total.

What to Expect for Cost Per Square Foot

A helpful way to create an initial estimate is to look at the cost per square foot. For a basic, good-quality garage addition, you can expect to pay somewhere between $300 and $400 per square foot. This price generally covers the core structure, including the foundation, framing, roofing, and standard siding. However, this is a baseline. If you plan to finish the interior for a workshop, add plumbing for a half-bath, or install premium flooring, that per-square-foot cost will rise. Using high-end materials like custom natural stone for an adjoining walkway or installing an electric vehicle charging station are other examples of upgrades that will increase the final price.

Factors That Influence the Final Price

Several key elements will shape the total cost of your garage addition, especially here on Long Island. Labor and permitting costs in our area can increase project totals by 15% to 30% over the national average. Beyond location, the materials you select for roofing, siding, and garage doors play a huge role. Custom features are another major factor. Do you want a simple space for parking, or are you dreaming of a heated workshop, a home gym with a dedicated sauna, or a guest suite with a full bathroom? Each of these additions requires specialized labor and materials, which will be reflected in your quote.

Common Hidden Fees to Watch Out For

A good plan accounts for the unexpected. While a detailed quote from your contractor is your best guide, some costs can pop up that aren’t always included in the initial estimate. Site preparation, for instance, might require more extensive excavation or tree removal than first anticipated. You should also plan for the cost of restoring your yard after construction is complete, which could involve new sod or plantings from a landscape designer. Other potential costs include upgrading your home’s electrical panel to handle the new space or dealing with unforeseen soil or foundation issues. These are some of the hidden costs that can surprise homeowners.

How to Create a Realistic Budget

Creating a solid budget is all about planning and transparency. Start by getting detailed quotes from potential contractors that break down the costs for labor, materials, and permits. A vague, one-line estimate is a red flag. Next, and this is crucial, set aside a contingency fund. Most professionals recommend adding an extra 10% to 20% to your total budget to cover any of those hidden fees or unexpected issues that might arise. Finally, think about the finishing touches. The cost of paint, light fixtures, shelving, and other organizational systems can add up, so be sure to factor those into your overall plan to avoid any financial surprises.

How to Choose the Right Garage Addition Contractor

Choosing the right contractor is the single most important decision you’ll make for your garage addition. This is the partner who will turn your vision into a physical structure, so you want someone with the right skills, experience, and professionalism. The right choice means a smoother process, fewer surprises, and a final result you’ll love for years to come. A great contractor doesn’t just build; they guide you through every step, from initial design to the final walkthrough. Taking the time to vet your options thoroughly will save you headaches and ensure your investment is in good hands. When you’re ready to start the conversation, our team is here to help with your home remodeling needs.

Verify Licenses, Insurance, and Credentials

Before you get too far into discussions, your first step should always be to confirm the contractor’s credentials. It’s a common oversight, but hiring someone without the proper licensing and insurance can expose you to significant financial and legal risks. A valid license proves they meet state and local requirements, while insurance protects you if an accident happens on your property. Ask for proof of both general liability insurance and workers’ compensation. Don’t just take their word for it; get copies of the certificates and verify they are current. You can check a contractor’s status with the Suffolk County Department of Labor, Licensing & Consumer Affairs to be certain.

Review Their Portfolio and Check References

A contractor’s past work is the best predictor of your future results. Ask to see a portfolio of their completed garage additions and other similar projects. Look for quality craftsmanship and a style that aligns with what you have in mind. But don’t stop at the photos. Ask for a list of recent client references, and make a point to call them. Speaking with previous customers gives you unfiltered insight into what it’s like to work with the contractor. You can ask if the project stayed on schedule, if the final cost matched the quote, and how the team handled any challenges that came up. You can also see our work to get a feel for the quality and variety of projects we handle.

How to Compare Quotes and Project Scope

Getting several quotes is smart, but the lowest price isn’t always the best deal. To make a true comparison, you need detailed, written proposals from each contractor. A vague quote is a major red flag. A professional proposal will break down all the costs, including labor, materials, permits, and any other fees. It should also include a clear scope of work, a projected timeline, a payment schedule, and information on warranties. This document becomes the foundation of your contract, protecting both you and the contractor by setting clear expectations from the start. A detailed quote for a masonry project, for example, ensures everyone is on the same page about materials and design.

Why Local Experience in Nassau and Suffolk County Matters

A contractor who is familiar with Long Island has a distinct advantage. Local builders understand the specific zoning laws, permit requirements, and building codes for towns across Nassau and Suffolk counties, which can be complex. This expertise helps avoid costly delays and ensures your project is compliant from day one. Local contractors also have established relationships with area suppliers and municipal inspectors, which helps the entire process run more smoothly. They know which materials stand up best to our coastal climate and have experience with the unique construction considerations of our region. This local knowledge is especially critical for complex projects like swimming pools, which involve extensive regulations.

Red Flags to Spot When Hiring a Contractor

Trust your intuition during the hiring process. If something feels off, it’s worth a closer look. Reputable contractors are professional, transparent, and patient.

Here are a few red flags to watch out for:

  • Vague contracts: The proposal lacks detail on the scope, timeline, or costs.
  • High-pressure sales tactics: You feel rushed to sign a contract or make a decision.
  • Large upfront payments: A request for a significant cash deposit before any work begins is a warning sign.
  • An unusually low bid: A price that is drastically lower than other quotes may indicate cheap materials, unskilled labor, or hidden costs to come.
  • Poor communication: They are difficult to reach or unclear in their answers.
  • No physical address: A professional business should have a verifiable office or showroom, like the Gappsi Store.

What Is the Garage Addition Process Like?

Understanding the garage addition process from start to finish helps you feel confident and prepared. A professional contractor will guide you through each step, but knowing what to expect makes the entire experience smoother. The journey involves several key phases, from the initial creative brainstorming and design to the final construction and walkthrough. Each stage is a chance to collaborate with your contractor and ensure your vision is coming to life exactly as you planned. This partnership is the foundation of a successful project. We’ll explore what happens during your initial consultation and how your ideas are translated into concrete designs. Then, we’ll break down the construction timeline so you know what’s happening on-site, from preparing the ground to applying the final coat of paint. Before any work starts, it’s important to ask the right questions, and we’ll give you a list of essential ones. We will also provide actionable advice on how to keep your project on time and on budget, avoiding common pitfalls. Finally, we’ll guide you through the final walkthrough, so you know exactly what to inspect to ensure the finished space is perfect. Let’s walk through what this process typically looks like.

Your Initial Consultation and Design Phase

This first meeting is where your ideas begin to take shape. Come prepared to discuss your vision for the garage addition, including its intended size, style, and how you plan to use the space. Will it be a simple one-car garage, a multi-car space with a workshop, or a two-story structure with a guest suite above? A great contractor will listen to your needs and ask about their design process to ensure it aligns with your expectations. This is the time to explore possibilities and see how a professional can translate your dreams into a functional plan. The goal is to establish a clear direction before any home remodeling begins, ensuring everyone is on the same page.

The Construction Timeline: Site Prep, Building, and Finishing

Once the design is finalized, the construction work begins. This process generally unfolds in three main stages. First is site preparation, which involves clearing the land, grading, and pouring the foundation. Next comes the building phase, where the structure is framed, and the roof, siding, windows, and doors are installed. The final stage involves all the finishing work, such as electrical, plumbing, insulation, drywall, and painting. It’s important to understand if your contractor will handle all phases of the project, including securing the necessary permits. A full-service team like Gappsi manages the entire masonry and construction timeline, providing a seamless experience from the ground up.

Important Questions to Ask Before Construction Starts

Before you sign a contract, it’s crucial to ask the right questions to verify your contractor’s credibility. Think of it as a final interview to confirm you’re making the right choice. Start with the basics: “Are you licensed and insured in Long Island?” This protects you from liability. Then, ask for a portfolio of similar projects and a list of references you can contact. It’s also wise to ask, “Do you have the workforce available to complete my project on schedule?” These questions help confirm that the contractor is not only qualified but also has the resources to deliver on their promises.

How to Keep Your Project on Time and on Budget

One of the biggest concerns for any homeowner is having the project go over budget or past its deadline. A key strategy to prevent this is securing a fixed-price bid from your contractor. Failing to get a fixed-price bid is a common mistake that can lead to unexpected costs and delays down the road. This type of agreement outlines the total cost for the entire project as specified in the contract. Clear communication is also vital. Schedule regular check-ins with your project manager to discuss progress, address any concerns, and make decisions promptly to keep everything moving forward smoothly.

The Final Walkthrough: What to Look For

The final walkthrough is your last opportunity to inspect the work and ensure everything meets your expectations. Before this meeting, review your contract one last time. A detailed written contract should clearly outline the scope of work, timeline, payment schedule, materials, and warranty terms. During the walkthrough, carefully check that all work has been completed to the agreed-upon standards. Test light switches, open and close doors and windows, and look closely at the finishes. Don’t be afraid to point out anything that doesn’t seem right. A reputable contractor will create a “punch list” of items to fix before considering the job officially complete.

Related Articles

Frequently Asked Questions

How long does a typical garage addition take to build? The timeline for a garage addition can vary quite a bit, as it depends on the project’s complexity, size, and style. Generally, you can break the process into two main parts: pre-construction and construction. The pre-construction phase, which includes design, material selection, and securing permits in your specific Long Island town, can take several weeks to a couple of months. Once the permits are approved and the site is ready, the actual construction phase usually lasts for a few months. An experienced contractor will give you a detailed schedule and manage the entire process to keep things moving efficiently.

Besides parking, what are some creative ways to use a new garage space? A new garage is a fantastic opportunity to add functional living space to your home. Many homeowners are designing multi-purpose garages that go far beyond parking. You could create a dedicated home gym, a quiet art studio, or a fully equipped workshop for your hobbies. Another popular option is designing a garage with a finished loft above, which makes a perfect home office, guest suite, or even a private lounge area. It’s a chance to create a space that truly fits your lifestyle, keeping clutter and noise separate from your main living areas.

What’s the most common mistake to avoid with a garage addition? The most significant mistake you can make is hiring a contractor based only on the lowest price without doing your homework. A bid that seems too good to be true often is, and it can lead to cheap materials, poor workmanship, and unexpected costs later. Always choose a licensed and insured professional with a strong portfolio and solid references. Another common pitfall is not having a detailed, written contract that outlines the full scope of work, timeline, and a fixed price before the project begins.

Do I really need to worry about permits and zoning laws myself? No, you shouldn’t have to. A key responsibility of a professional garage addition contractor is to handle all the necessary permits and ensure the project complies with local zoning laws. Every town in Nassau and Suffolk County has its own set of specific regulations, and an experienced local contractor will know exactly what’s required. They manage the paperwork and inspections for you, which prevents stressful delays and ensures your new garage is built safely and legally.

How can I ensure my new garage doesn’t look like an afterthought? Creating a seamless look starts in the design phase. A skilled contractor will work with you to make sure the new garage complements your home’s existing architectural style, matching everything from the roofline and siding to the window trim. Using tools like 3D renderings can help you visualize how the addition will connect to your house. Thoughtful material choices, like using similar natural stone for a new walkway or patio, also help to create a cohesive and polished appearance that improves your home’s overall curb appeal.
Share this page:
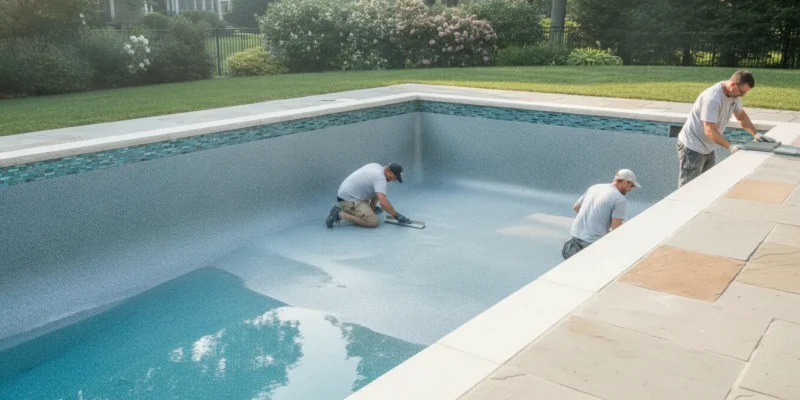
Masons finishing a resurfaced residential gunite swimming pool on Long Island

Gunite Pool Renovation: Resurfacing, Coping, Upgrades

A gunite pool can remain the center of a Long Island backyard for decades. But its interior finish, coping, tile, and equipment do not age at the same rate. Rough plaster, stained surfaces, cracked tile, loose coping, or outdated circulation details can affect comfort, appearance, and maintenance long before the concrete shell needs replacement. Contact Gappsi through our contact page

A gunite pool renovation can restore an existing pool by repairing the shell, applying a new plaster or pebble finish. Replacing coping and tile, and adding features such as waterfalls or tanning ledges. The right scope depends on the condition of the pool, the finish you want, and how the space should function for your family.

Renovating in stages is not always the most practical approach. Draining the pool creates an opportunity to inspect concealed damage, coordinate finish and masonry work, update selected components, and shape a more cohesive design. Look first at the warning signs that indicate routine maintenance is no longer enough.

When Is It Time to Renovate a Gunite Pool?

A gunite pool does not always need a complete rebuild when its interior begins to show age. In many cases, the existing shell can remain in service while targeted renovation addresses surface wear, cracking, waterline details, and hidden structural concerns. The important step is recognizing when a cosmetic problem may signal a deeper one.

Are map cracks and rough surfaces getting worse?

Map or alligator cracking is one of the clearest reasons to schedule an inspection. These interconnected cracks can appear across the pool interior and may be associated with alkali-silica reaction, or ASR, in the gunite. An academic case study of gunite pools linked this type of cracking with rough, uneven surfaces, rather than treating it as ordinary finish discoloration. You can review the findings from Boise State University. Surface texture matters beyond appearance. Rough areas are harder to brush and clean, can feel uncomfortable underfoot, and may continue to deteriorate as water moves through damaged finish material. If the floor or walls feel abrasive, uneven, or noticeably different from the rest of the pool, resurfacing may be part of a broader gunite pool renovation plan.

Could small cracks hide a structural concern?

A narrow crack is not automatically harmless. Reinforcing steel that is not properly surrounded by gunite can contribute to structural cracking and may require professional repair. The underlying defect cannot be diagnosed reliably by looking at the crack alone. A review of structural cracking in gunite construction notes that even a small visible crack may need to be opened, repaired, and finished by an experienced professional. See the supporting case record from the Stanford-hosted California Supreme Court archive. Call for an evaluation when cracks are spreading, returning after patching, following a pattern across several surfaces, or appearing alongside hollow-sounding areas, displaced tile, or water loss. An inspection can help separate a finish repair from a problem involving the shell or rebar. Addressing that distinction early is more useful than covering a recurring crack with another layer of plaster.

Is water chemistry accelerating surface wear?

Water chemistry is also a maintenance signal. The CDC recommends maintaining pool water pH between 7.0 and 7.8 and testing pH and disinfectant levels regularly. Persistent imbalance can contribute to swimmer discomfort, sanitation problems, and premature wear of the pool finish. The CDC’s guidance on operating public pools provides the underlying maintenance standard at cdc.gov. If your pool repeatedly develops roughness, staining, surface scale, or discoloration despite consistent cleaning and balanced chemistry, have the finish assessed before choosing a replacement material. A renovation decision should account for both what is visible and what may be happening behind the surface.

What a Gunite Pool Renovation Includes, Step by Step

A well-planned gunite pool renovation is more than applying a new color to the interior. The work should address the pool shell, finish, waterline details, safety components, and any upgrades that are easier to complete while the pool is empty. The goal is an interior that is smooth, waterproof, and durable enough to withstand routine brushing, scrubbing, and cleaning. These requirements are reflected in resurfacing guidance from Sacramento County Environmental Management: the finished pool shell must have a smooth waterproof interior finish. The exact sequence varies with the pool’s condition and the selected materials. But the following steps provide a practical overview of what homeowners in Nassau and Suffolk Counties can expect.

  1. Drain and inspect the pool. The project begins by removing the water and examining the exposed interior. This allows the renovation team to identify hollow or damaged areas, cracks, worn plaster, deteriorated tile, and problems around fittings. Inspection at this stage is important because a small visible crack does not always reveal whether a deeper structural issue is present. Any necessary repairs should be completed before the new finish is installed.
  2. Prepare the shell. The existing interior surface is removed or prepared according to its condition and the selected resurfacing system. The shell must be cleaned and properly bonded so the new material can adhere consistently. Areas requiring patching or structural attention are addressed before the finish work begins. This preparation supports a surface that is even underfoot and resistant to premature deterioration.
  3. Select the interior finish. Homeowners can choose from several concrete finish systems, including marble dust plaster, quartz Diamond Brite, glass, Hydrazzo, and stone pebbles. Each option affects the pool’s appearance, texture, maintenance requirements, and expected service life. Standard plaster typically lasts about 7 to 10 years, while pebble finishes commonly last about 15 to 20 years, according to this pool surface materials comparison. The right choice depends on the condition of the shell, water chemistry practices, design goals, and renovation budget.
  4. Install the new interior finish. The selected plaster, aggregate, or other finish is applied across the prepared shell to create a continuous waterproof interior. The surface should be smooth enough for comfortable use and durable enough for repeated cleaning. For a closer look at one material approach, see Gappsi’s guide to resurfacing a gunite pool with marble dust plaster.
  5. Upgrade lighting and drain covers. With the pool drained and access available, the team can inspect existing lights and replace outdated or damaged components. This is also the appropriate time to install code-compliant drain covers. Resurfacing guidance recommends checking or replacing pool lighting and installing approved drain covers during this phase. Completing these upgrades before refilling avoids a second disruptive drain-down.
  6. Finish the tile and surrounding details. If the waterline tile is cracked, loose, or visually dated, it can be replaced as part of the renovation. New glass tile, porcelain, or natural stone details can coordinate the pool with the surrounding deck and outdoor living space. The completed work is then cleaned, inspected, and prepared for careful refilling and water chemistry balancing.

After the pool is refilled, maintaining balanced water chemistry and following the finish manufacturer’s care instructions helps protect the investment. A renovation plan should therefore cover both the visible materials and the underlying safety and maintenance details that determine how the pool performs over time. Contact Gappsi through our contact page

Plaster vs Pebble Finish: What Should You Choose?

The interior finish affects how a renovated gunite pool looks, feels, ages, and responds to daily water chemistry. The two most common directions are white plaster and a pebble aggregate finish. Neither is automatically right for every pool. The better choice depends on your budget, preferred texture, maintenance habits, and how long you want the finish to serve before the next resurfacing project. Both materials must be installed as a smooth, waterproof interior surface that can withstand regular brushing and cleaning. That standard is reflected in public pool resurfacing requirements, which call for a durable finish suited to repeated cleaning. During a gunite pool renovation, the contractor should also evaluate the existing shell before recommending either finish.

White plaster and pebble aggregate finish comparison
Consideration White plaster Pebble aggregate finish
Expected durability Typically lasts about 7 to 10 years with appropriate installation and water care. Often lasts about 15 to 20 years, giving it a longer resurfacing interval.
Stain and chemical resistance Provides a clean, bright surface, but requires consistent water balance and cleaning to help limit staining and erosion. Offers greater resistance to staining and chemical erosion than traditional white plaster.
Texture Generally has a smooth feel underfoot and a simple white appearance that reflects light throughout the pool. Has a more textured feel, with visible aggregate that can create a natural stone appearance and varied water color.
Cost position Usually occupies the more accessible finish position, making it useful when controlling the initial renovation scope matters. Usually costs more initially because of the aggregate material and installation, but the longer service life may improve its long-term value.

When does white plaster make sense?

White plaster can be a practical choice when you want a smooth, familiar finish and a straightforward appearance. Its light surface can make the water look bright and clear. While its lower initial cost may leave room in the project for other repairs, such as coping, tile, lighting, or drain-cover updates. It is especially worth considering when the pool is used seasonally and the owner is prepared to monitor water chemistry and schedule routine maintenance.

When is pebble aggregate the better fit?

Pebble aggregate is better suited to owners who prioritize a longer service interval, stronger resistance to staining and chemical erosion, and a natural material appearance. The texture is not identical to plaster, so it should be reviewed in person before installation. Ask how the selected aggregate will feel on steps, benches, and tanning areas, where swimmers have the most contact with the finish. A pool finish comparison at River Pools and Spas reports the commonly cited lifespan difference of 7 to 12 years for plaster compared with 15 to 20 years for pebble finishes. Your contractor should translate those general ranges into a recommendation based on the shell condition, water care plan, design goals, and complete renovation scope.

Replacing Coping and Tile: Details That Matter

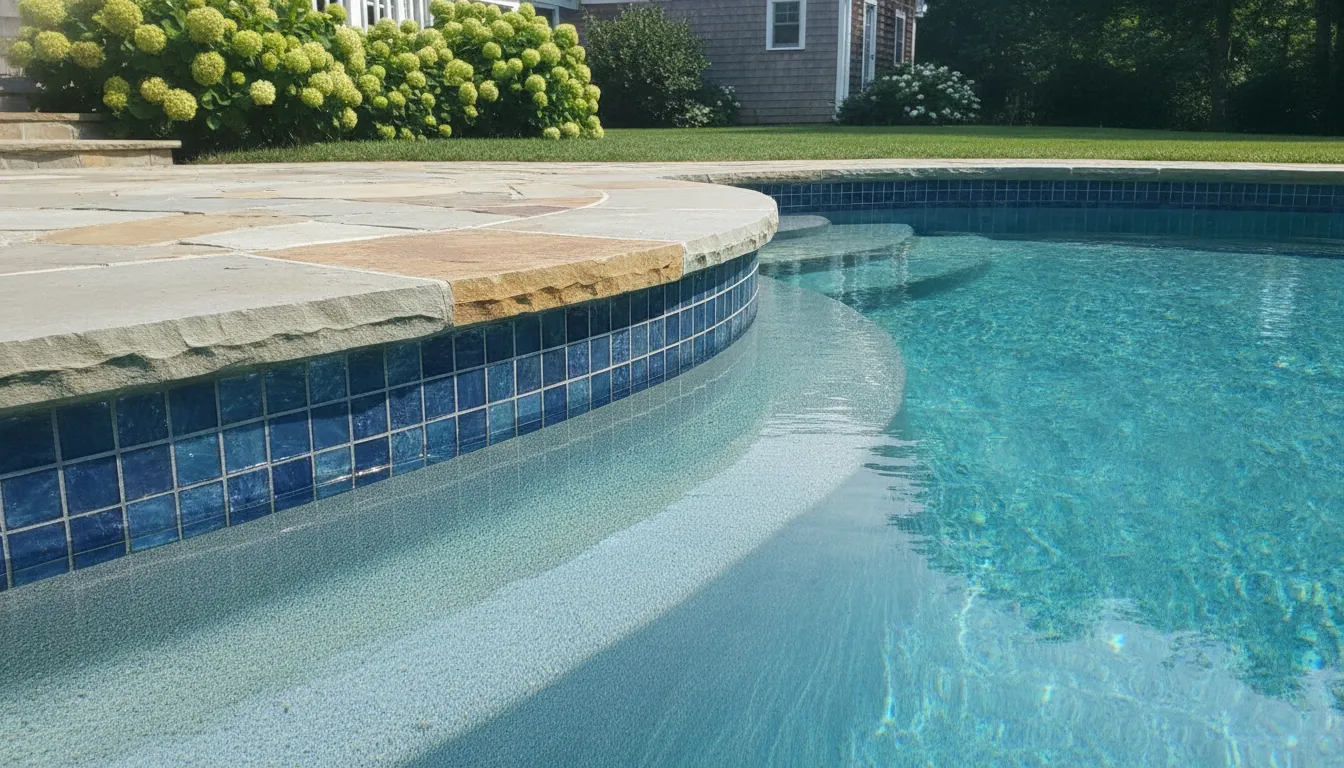
Coping and waterline tile frame the pool and influence how safely people move around the water. During a gunite pool renovation, replacing these elements can refresh an aging design. Correct cracked or uneven edges, and create a cleaner transition between the pool finish and surrounding deck. The work should be planned with the pool shell, deck elevations, drainage, and interior finish in mind rather than treated as a cosmetic change. Coping is the cap installed along the top edge of the pool wall. Its projection and thickness affect both appearance and safety. A resurfacing standard from Sacramento County specifies that replacement coping should extend over the pool wall by 1 to 2 inches and should not be thicker than 2.5 inches. Those dimensions provide a useful reference when reviewing a proposed profile, although the final installation must also account for the existing structure and applicable local requirements. See the resurfacing requirements for the cited coping guidance. Material selection changes the character of the pool deck. Available options can include porcelain ceramics, glass tile, granite, marble, travertine, bluestone, limestone, and sandstone. Porcelain ceramics can provide a consistent manufactured surface, while natural stone introduces variation in color and texture. Granite, bluestone, and travertine each require the right detailing for the site, including careful layout, stable installation, and appropriate consideration of wet conditions. The best choice should coordinate with the home, patio, steps, and any existing masonry instead of being selected from a small sample alone. New natural stone coping and blue glass waterline tile around a renovated gunite pool

Why waterline tile deserves careful planning

Waterline tile sits where water, chemicals, sunlight, and regular cleaning meet. A replacement should align cleanly with the finished water level and follow the pool’s curves without abrupt changes in pattern. The tile scale also matters. Smaller pieces can follow rounded shapes with less visual interruption, while larger pieces may create a simpler, more architectural look on straight runs. Color and surface texture affect how the water reads, but maintenance access and cleanable joints remain practical priorities. Replacing coping and tile at the same time can prevent mismatched elevations between the deck, pool edge, and new interior finish. It also gives the renovation team an opportunity to inspect transitions before the final materials are installed. If coping is cracked, loose, or misaligned, address the underlying condition rather than covering it with a new surface. A coordinated material schedule helps ensure that the finished edge looks intentional and performs safely for years after the gunite pool renovation is complete.

Water Features Worth Adding During Your Gunite Pool Renovation

A renovation is an opportunity to improve how the pool works, not only how its finish looks. Once the design team reviews the existing shell, circulation lines, deck, and surrounding grade, you can decide whether a new water feature belongs in the project scope. The right addition should support the way your household uses the pool and fit the available space without creating difficult maintenance demands. Waterfalls, fountains, and tanning ledges are common feature choices for an aging gunite pool. They can update the pool’s appearance and add a distinct use to the water, but each one affects plumbing, electrical work, construction time, and the total project cost. A feature should be selected during design, before resurfacing and surrounding hardscape work are finalized.

What can a waterfall add?

A raised stone or tiled waterfall can create movement and sound at one end of the pool. It may also connect the pool to a retaining wall, spa, or raised bond beam. Helping the renovation feel integrated with the backyard rather than added as a separate object. Natural bluestone, travertine, glass tile, and porcelain ceramics can produce very different visual and maintenance requirements, so the material should be coordinated with the coping and waterline tile. Waterfalls require an appropriate pump and return plumbing. The design should account for access to equipment, splash control, and the path water takes across adjacent coping or deck surfaces. These details matter because an attractive feature can become a nuisance if it sends water onto walking areas or makes nearby surfaces continually wet.

When does a fountain make sense?

Deck jets and bubblers can add motion without requiring a large raised structure. Bubblers work particularly well in a shallow ledge, while deck jets can arc into the pool from the surrounding deck. Their placement needs careful planning around seating, circulation, lighting, and the pool’s existing plumbing. A restrained layout is often easier to operate and balance than several unrelated water effects.

Could a tanning ledge improve the pool?

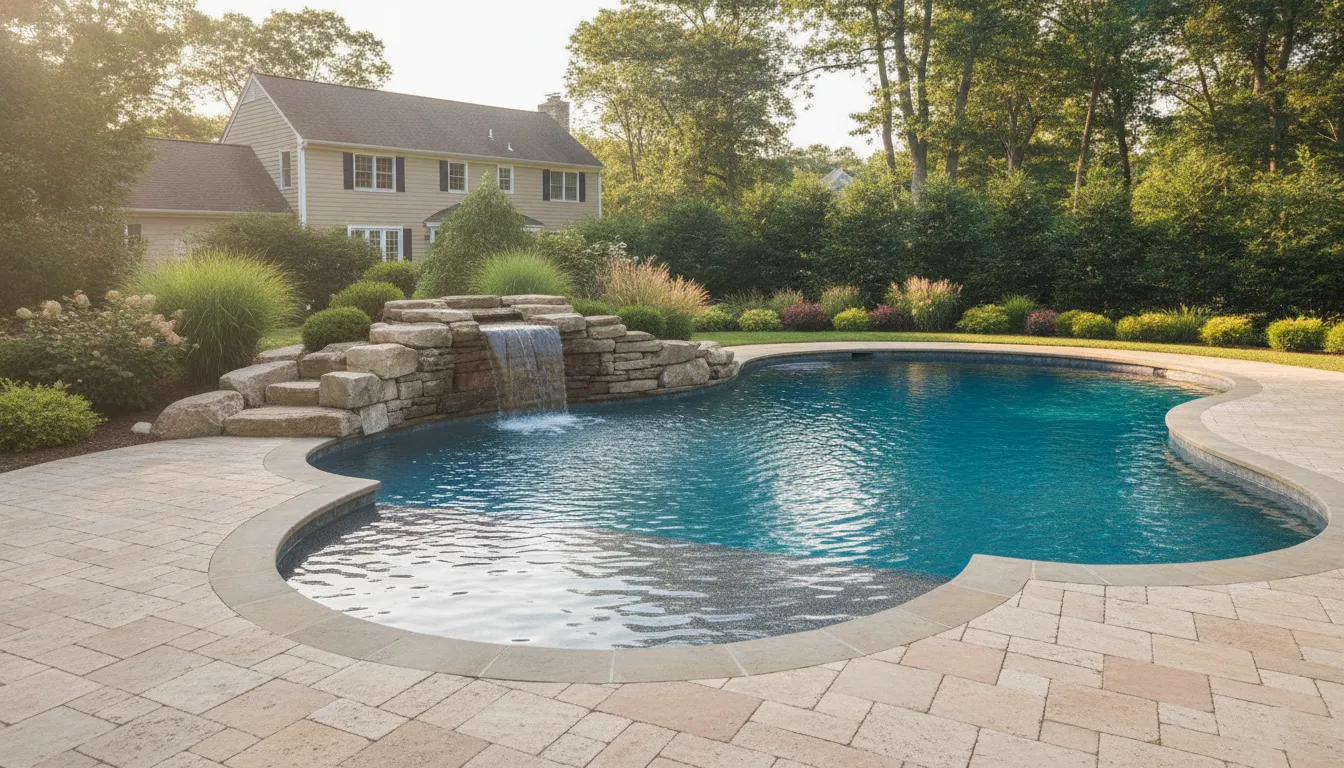
A tanning ledge creates a shallow platform for sitting, cooling off, or supervising young swimmers from a comfortable depth. It can be incorporated into a redesigned pool shape or added as part of a broader shell modification, depending on the existing structure. The ledge should have a practical width, a nonslip finish, and steps that provide clear entry and exit. It also requires the contractor to evaluate circulation so shallow water remains clean and properly mixed. Backyard gunite pool with a natural stone waterfall and shallow tanning ledge Water feature additions can significantly modernize an older gunite pool while increasing the renovation budget. So plan for them before the finish, tile, and surrounding hardscape work are finalized. Review the feature as part of the complete plan, including plumbing, electrical, drainage, and equipment. For a practical example of how these elements can work together, see this full backyard and pool renovation case study.
How Much Does a Gunite Pool Renovation Cost on Long Island?

The cost of a gunite pool renovation depends on the condition of the existing shell and the parts you choose to replace. Resurfacing an intact pool with new plaster or pebble is a different project from correcting structural cracking, rebuilding steps, replacing plumbing, upgrading equipment, or redesigning the surrounding deck. A useful estimate starts with a detailed inspection, not a generic per-square-foot price. For context, Gappsi’s published baseline for a new gunite pool on Long Island is $90,000 to $140,000. Renovating an existing shell is generally a smaller investment than removing and rebuilding the pool because the excavation. Shell construction, and much of the original infrastructure may remain in place. The final scope still needs to account for hidden conditions uncovered after draining and removing the old finish.

Which renovation components affect the estimate?

The interior finish is often the largest visible decision. Standard plaster typically lasts 7 to 10 years, while pebble finishes are commonly expected to last 15 to 20 years. That longer service life can influence the value of the initial choice, but material selection should also reflect the desired texture, color, maintenance routine, and appearance. The finished surface should be smooth, waterproof, and durable enough to withstand routine cleaning, as described in resurfacing requirements from Sacramento County’s Environmental Management Department: pool resurfacing requirements. Other cost drivers include coping and waterline tile, structural repairs, pool steps, lights, drain covers, pumps, filters, and plumbing. Replacing coping with natural bluestone, travertine, limestone, porcelain, or another selected material changes both the appearance and the installation work. If the pool is already drained, it may be practical to inspect the lighting and install approved drain covers at the same time.

Why should the scope be priced as a complete project?

A finish-only quote may not reflect repairs needed beneath the surface. Small cracks can disguise structural problems, so a professional should evaluate them before the pool is replastered. Likewise, adding a tanning ledge, fountain, or waterfall during renovation increases the scope and may require new plumbing, controls, or electrical work. These are deliberate upgrades, not costs that should be blended into a basic resurfacing allowance. For a clearer project plan, review Gappsi’s gunite pool construction and renovation services and request a site-specific evaluation. The right comparison is not renovation versus an invented flat price. It is the cost of restoring the existing shell and selected components versus the much larger scope of a complete new pool. With the finish lifespan and long-term maintenance needs included in the decision. Contact Gappsi through our contact page

Frequently Asked Questions

Can a gunite pool be resurfaced?

Yes. A contractor can remove the worn interior finish, inspect the shell, repair appropriate cracks, and install a new smooth, waterproof finish. Options may include marble dust plaster, quartz, glass, hydrazzo, or stone pebble, depending on the pool’s condition and the desired appearance.

How often should a gunite pool be resurfaced?

Standard plaster commonly lasts about 7 to 12 years, while pebble finishes are often expected to last 15 to 20 years. Water chemistry, cleaning practices, exposure, and installation quality affect the actual service life. Regular inspection helps identify roughness, staining, cracking, or surface loss before the project becomes more extensive. Source

What is involved in a gunite pool renovation?

The scope can include draining the pool, evaluating the shell, repairing structural or surface damage. Resurfacing the interior, replacing coping and waterline tile, and updating lighting or drain covers. Homeowners may also add a tanning ledge, fountain, or waterfall while the pool is open.

How much does it cost to redo a gunite pool on Long Island?

There is no reliable single price because the scope may range from a finish replacement to a broader redesign with structural repairs, coping, tile, equipment, or water features. For context, a new Long Island gunite pool is published at a baseline of $90,000 to $140,000. While renovation pricing should be based on the existing shell and selected improvements rather than that new-construction figure.

Ready to Plan Your Gunite Pool Renovation?

A renovation plan can help you prioritize the work your pool needs, from a new plaster or pebble finish to updated coping, tile, lighting, or water features. A consultation gives you a chance to discuss the existing shell, the look you want, and the improvements that fit your Long Island property before decisions are made. Gappsi Group can review your goals and outline a practical path for the project. Contact Gappsi through our contact page When you are ready to move forward, bring your questions and renovation priorities to the conversation. The right scope can make the next step clearer and help you plan the finished pool with greater confidence.

Share this page:
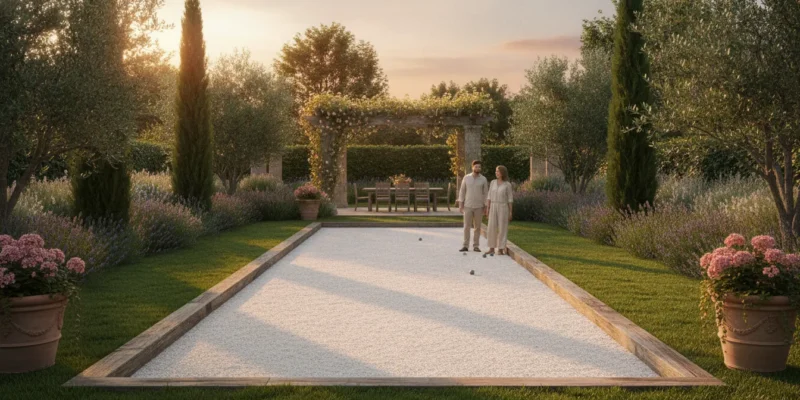
Backyard bocce ball court with crushed oyster shell playing surface on Long Island

Bocce Ball Court Construction: Cost, Materials & Design

A backyard bocce court can be a simple recreational feature or a carefully engineered part of a larger Long Island outdoor living plan. The right result depends on more than the playing surface. Yard dimensions, soil conditions, drainage, edging, lighting, and the way the court connects to patios and planting areas all affect cost and long-term playability.

A residential bocce ball court does not need to match the official tournament footprint. A full court is about 13 feet wide by 91 feet long, while many homeowners choose a smaller layout that preserves comfortable play without overwhelming the yard. Oyster shell offers a traditional feel and natural drainage, while synthetic turf provides a consistent roll with less routine maintenance.

Before selecting materials, start by determining how much usable space the court can occupy and how players will move around it. That planning decision establishes the proportions, access, and construction approach for the rest of the project. Contact Gappsi through our contact page

What Size Bocce Ball Court Fits Your Long Island Yard?

The right dimensions depend on how you plan to play, how much level space your property offers. And how the court will fit with patios, planting beds, fences, and drainage paths. A full-size layout can deliver a more authentic playing experience. But a carefully scaled residential court can still provide room for accurate rolls and competitive games without taking over the yard.

How large is a regulation bocce court?

For organized recreational play, one commonly cited regulation measurement is 60 feet long by 12 feet wide. The Mayfield Heights, Ohio, recreational rules specify that all courts should be regulation size at 60 feet by 12 feet. Read the cited municipal bocce rules. Rice University recreation rules also define the standard court as 60 feet by 12 feet. Review the Rice University rules. US Bocce Federation standards are often presented with a longer footprint: approximately 91 feet long by 13 feet wide. A court-planning guide that cites the USBF lists the measurement as 86.92 feet by 13.12 feet, which reflects a slightly different official specification. See the US Bocce Federation. For a Long Island residence, either regulation-scale layout may require a substantial portion of the usable yard after setbacks, access routes, and surrounding clearances are considered.

Common residential bocce court sizes

Most homeowners choose a smaller court that preserves the proportions and playing zones while matching the property. Before selecting dimensions, measure the available area in both directions and account for the court border, walking space, gate access, and any grading work. A long, narrow side yard may accommodate a different footprint than a broad backyard.

  • 40 feet by 10 feet: A compact option for smaller yards and casual games.
  • 50 feet by 10 feet: A balanced residential size with a useful playing length.
  • 50 feet by 12 feet: Adds width for comfortable movement and defined boundaries.
  • 60 feet by 10 feet: Preserves regulation-like length where the yard is narrow.
  • 60 feet by 12 feet: A regulation-style residential choice when the site allows it.

For many Nassau and Suffolk properties, a 40- to 60-foot length and 10- to 12-foot width offers the best balance. The final layout should be set after checking grade, surface drainage, mature roots, and access for construction equipment. Those practical constraints often matter more than choosing the largest possible footprint.

The Best Surfaces for a Bocce Ball Court: Oyster Shell vs Synthetic Turf

Surface selection affects how a bocce ball court looks, drains, plays, and fits into your maintenance routine. The two most practical choices for a Long Island backyard are crushed oyster shell and synthetic turf. Oyster shell delivers a traditional court character and a lower initial material cost. Synthetic turf creates a more uniform playing surface with less day-to-day upkeep. Both can work well when installed over a properly prepared base. For context, BocceMon’s surface comparison identifies oyster shell and artificial turf as the primary options for many residential courts. The right choice depends less on appearance alone than on how often the court will be used. How much maintenance you want to handle, and how the site manages stormwater.

Crushed oyster shell vs synthetic turf
Factor Crushed oyster shell Synthetic turf
Cost Lower upfront cost in many installations, although labor and edging still affect the final budget. Higher upfront cost because of the turf product, preparation, and installation.
Maintenance Needs regular raking, rolling, and occasional wetting to keep the surface settled and playable. Low maintenance with no routine raking. Periodic cleaning and inspection keep the surface in good condition.
Playability Provides a classic roll and can be adjusted as the material settles. Its condition changes if it becomes loose or uneven. Offers a consistent roll and predictable footing across the court when the installation is level.
Drainage Allows natural drainage when the layers below are graded and built correctly. Can drain effectively through a properly designed base and permeable system. Turf alone does not solve drainage problems.
Durability Can perform for years, but traffic and weather gradually move the loose material and require touch-ups. Durable in changing weather and less affected by surface displacement from regular play.
Long Island weather Rain, freeze-thaw cycles, and wind can shift shell material, making seasonal raking and leveling important. Handles frequent use and wet weather with less surface movement, provided the base drains and the edges are secured.
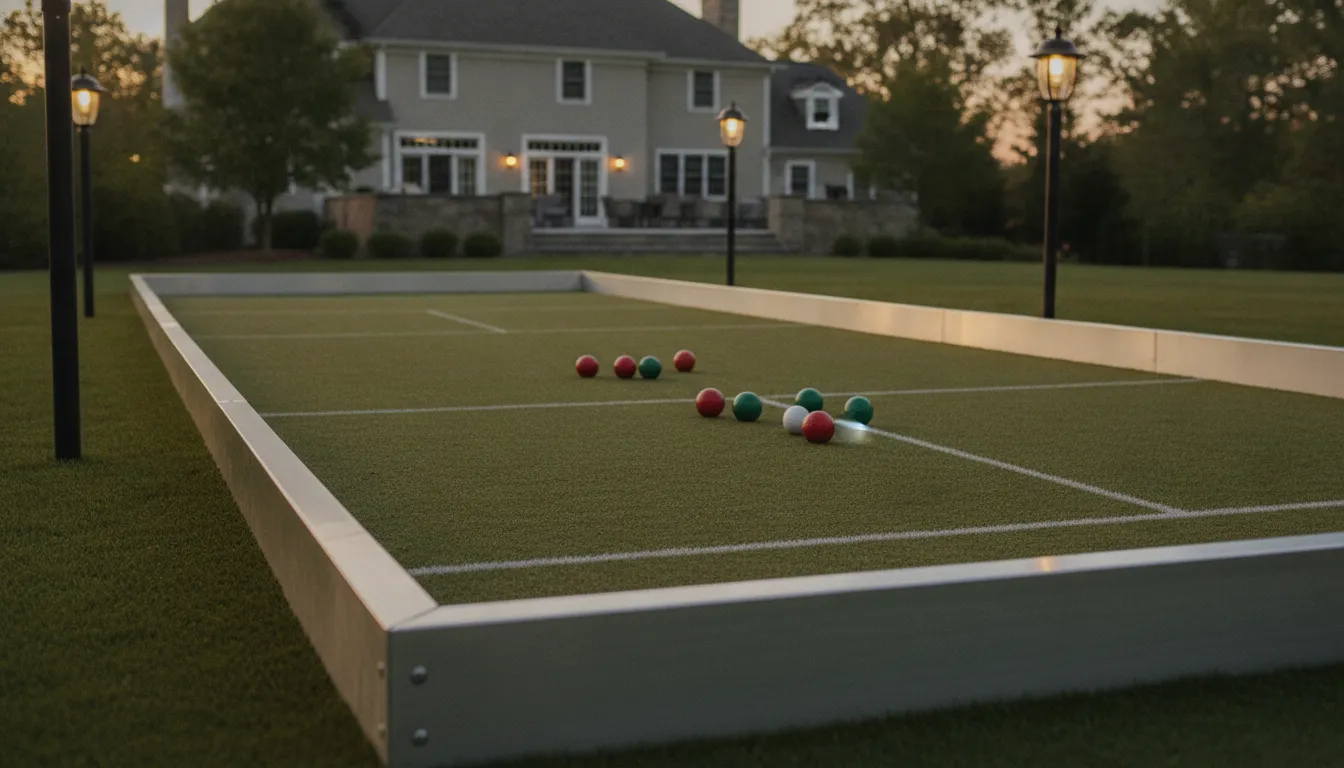
Synthetic turf bocce court surface with aluminum borders and outdoor lighting
A synthetic turf bocce court surface paired with aluminum borders and weather-rated lighting.

Choose oyster shell if you want the traditional appearance, natural drainage, and a lower starting cost, and you are comfortable maintaining the court. Choose synthetic turf if consistent play and reduced maintenance matter more than minimizing the initial investment. For many Long Island homeowners, synthetic turf is the stronger long-term recommendation for a frequently used court, while oyster shell remains a practical choice for homeowners who value its natural character and accept regular upkeep. A site review can determine which surface fits the drainage, grade, and landscape around your bocce court installation.

Building the Court Base, Borders, and Drainage

A bocce ball court performs only as well as the structure beneath its playing surface. The installation should begin with a carefully measured excavation and a level sub-base, commonly asphalt, concrete, or thoroughly compacted stone. This layer resists movement and settlement, helping the finished court maintain a consistent roll instead of developing soft spots, ridges, or low areas. Long Island weather makes drainage a primary construction concern. Rain, freeze-thaw cycles, and runoff from nearby patios or lawns can weaken the base if water remains trapped below the surface. The site plan should direct water away from the court while allowing the playing area to shed moisture efficiently. Depending on the property, that may involve grading, a stone drainage layer, perimeter drainage, or connections to an approved landscape drainage system. Addressing water flow before the surface is installed is far less disruptive than correcting standing water after the court is complete. The perimeter border keeps the base and playing material contained while giving the court a clean edge. A large 6-by-8-inch timber border is generally the more affordable choice and can suit a straightforward backyard installation. Aluminum or composite edging systems cost more initially, but they offer greater resistance to rot and moisture, along with straighter, more precise lines. The right option depends on the surrounding landscape, expected maintenance, appearance, and how permanently the court is intended to function. Border height and anchoring also matter. Edging should be set securely, aligned with the finished grade, and coordinated with adjacent paving or planting beds so it does not create an avoidable trip point. A properly built perimeter protects the surface from soil migration and makes routine brushing, raking, or turf maintenance easier. Gappsi combines site planning, masonry, base preparation, and border installation through one design-build process. Explore the company’s masonry design and construction service when the court needs to connect with patios, retaining walls, walkways, or other hardscape features.

How Much Does a Bocce Ball Court Cost to Build?

For a Long Island backyard, a residential bocce ball court commonly falls between $10,000 and $30,000. That range covers a wide variety of projects. From a straightforward recreational court with a practical surface to a larger installation with substantial base preparation, defined borders, and lighting. The final price depends on the site and the specifications, so an online range should be used for planning rather than treated as an exact quote. Site preparation is one of the largest cost variables. A contractor may need to excavate, grade, address drainage, and install a stable sub-base before placing the playing surface. Existing slopes, poor soil, restricted access, and the distance materials must be moved into the yard can all affect labor. On Long Island, proper drainage deserves particular attention because standing water can affect the court surface and its long-term playability. Surface selection also changes the budget. Crushed oyster shell can have a lower upfront cost, but the material must be properly graded and installed. And some oyster blends require substantial processing before they are ready for a court. Oyster surfaces also need periodic raking, rolling, wetting, or replenishment. Synthetic turf generally costs more at installation, especially when paired with a prepared base and specialized athletic-surface system, but it provides a consistent roll and reduces routine maintenance. Material choice is not limited to the playing surface. Borders help contain the court materials and establish clean edges. A basic timber border can be less expensive, while aluminum, composite, or other engineered edging systems may increase the initial investment. Larger courts, custom transitions, integrated planting areas, and decorative masonry can add both materials and installation time. Professional lighting is another common upgrade when the court is intended for evening use. For a simple residential layout, a budget near the lower end of the range may be realistic. A larger court with a more involved base, durable edging, a higher-grade oyster blend, synthetic turf, drainage work, or lighting can move toward $30,000 or more. The best way to narrow the number is to have the property evaluated before choosing a surface. Gappsi’s bocce court installation team can assess the backyard, compare material options, and prepare a site-specific quote that accounts for labor. Materials, access, and drainage rather than relying on a generic per-square-foot figure.

Lighting and Finishing Your Backyard Bocce Ball Court

Professional outdoor lighting can extend play into Long Island evenings, but the goal is even visibility rather than maximum brightness. Pole-mounted or overhead fixtures positioned along the court provide more consistent coverage than isolated landscape lights. Use low-glare, shielded fixtures so players can track the pallino and bocce balls without looking into the light source. Keep poles and fixtures outside the active playing area, and coordinate their placement with the court borders, nearby trees, and seating. If the court may host organized or tournament-style play, lighting should be designed around the applicable governing standards. Overhead fixtures have height limitations above the court in regulated settings, so confirm those requirements before installing poles or wiring. A lighting designer can also account for shadows created by fencing, retaining walls, and surrounding structures. Weather-rated equipment, protected conduit, and properly located controls are important for a system that will remain reliable through Long Island’s wet, windy, and freezing conditions.

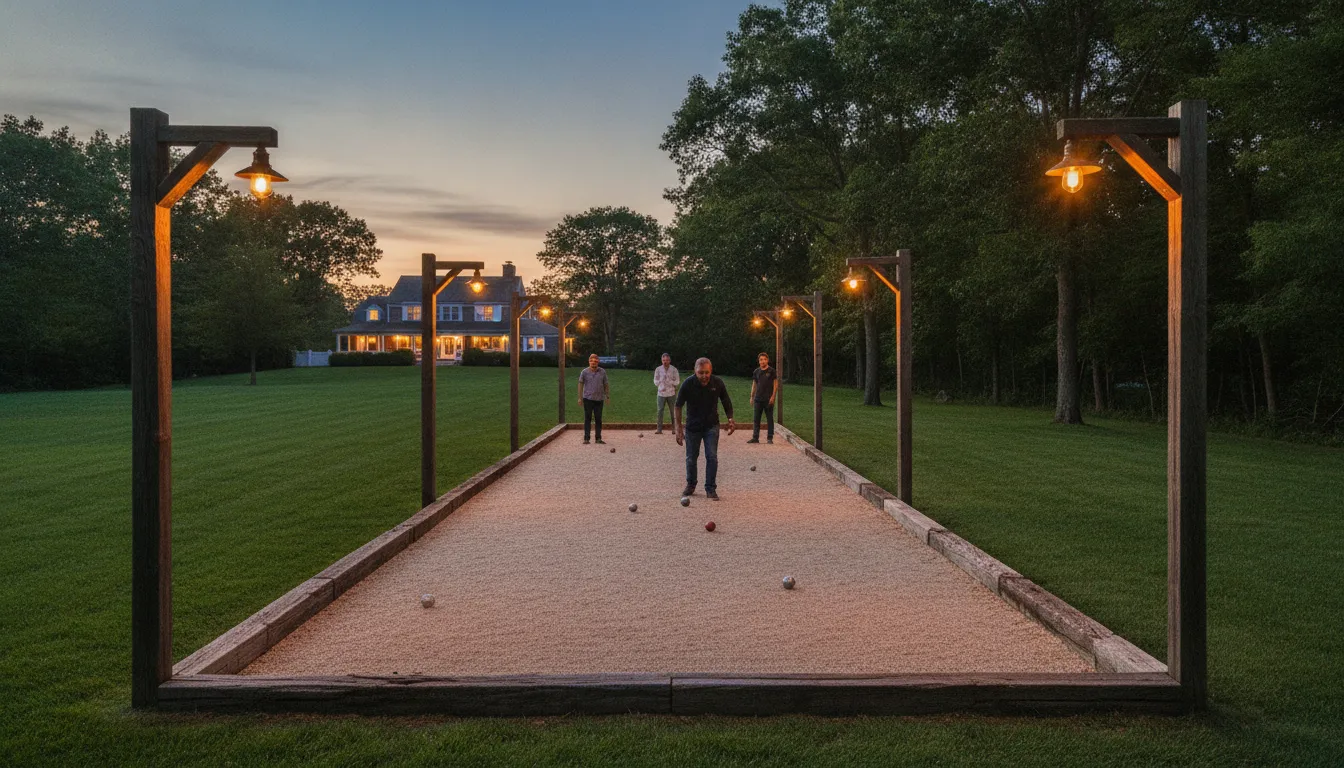
Illuminated bocce court at dusk with pole lights and timber border on a Long Island backyard
Even, shielded outdoor lighting helps a bocce court stay playable into Long Island evenings.

Finish the Edges for Clean Play and Easy Maintenance

Well-defined edges keep the playing surface from spreading into surrounding planting beds or lawn. Install durable edging with a consistent top line, then inspect transitions at the court entrances so players do not trip over raised corners or exposed fasteners. Edge cleanouts or accessible drainage points make it easier to remove leaves, shell buildup, and sediment after heavy rain. These small details help preserve the court’s shape and reduce seasonal maintenance. Plan comfortable seating near, but not directly beside, the playing surface. A bench gives players a place to wait between turns while keeping bags and drinks out of the court. For synthetic turf, remove leaves with a soft rake or blower and address stains promptly. Crushed oyster shell surfaces require periodic raking, rolling, and wetting to maintain a consistent roll. In either case, keep nearby trees trimmed and check the edges at the start of each playing season. Finishing choices that support drainage, visibility, and routine care will keep the bocce ball court ready for regular use.

Designing a Bocce Ball Court That Complements Your Long Island Landscape

A bocce ball court should feel like part of the backyard, not an isolated rectangle placed wherever space remains. On Long Island properties, the best location usually connects the court to an existing patio, outdoor kitchen, pool terrace, or primary lawn. Players stay close to guests, while spectators can follow the game without crossing planting beds or walking through the home. Start by studying how people already move through the yard. A court near a patio can extend the entertaining area, while a court along the edge of a lawn can create a defined transition between recreation and planting. Leave enough room beside the playing surface for circulation, seating, and equipment. Screening from a fence, hedge, or layered planting can also improve comfort without making the court feel closed in. The layout should account for drainage, afternoon sun, and views from the house before excavation begins. Material choices help connect the court to the rest of the property. A natural stone walkway can lead from the patio to the court entrance. And stone edging can repeat colors already used in a terrace, retaining wall, or outdoor kitchen. Bluestone, granite, or another selected masonry material can give the border a clear architectural line without competing with the playing surface. For related ideas, review Gappsi’s masonry design and construction services. The surrounding landscape should also be planned for maintenance. Keep loose mulch, falling leaves, and aggressive groundcovers away from the court edge. Low-growing plants, defined planting beds, and a stable walking surface reduce the amount of debris tracked onto the playing area. If synthetic turf is selected, it can connect visually with adjacent lawn areas while providing a distinct, consistent surface for play. Crushed oyster shell can work with a more traditional garden design, especially when paired with natural stone and simple timber or composite borders. Thoughtful integration can increase how often the backyard is used, which is often more valuable to homeowners than adding a feature without considering the larger plan. A well-positioned court may also strengthen a property’s outdoor-living appeal, although no landscape improvement guarantees a specific increase in resale value. Gappsi approaches the project as a design-build plan, coordinating court dimensions, base preparation, borders, paths, patios. Planting areas, and lighting so the finished court supports the entire outdoor setting rather than competing with it. Contact Gappsi through our contact page

Frequently Asked Questions

What dimensions work for a backyard bocce court?

A regulation court is 60 feet long by 12 feet wide. With the point line 4 feet from the backboard and the spock line 10 feet from it, according to published recreational rules (Mayfield Heights bocce rules). A Long Island backyard can use a shorter court. Often about 40 to 60 feet long and 10 to 12 feet wide, when property limits make full regulation dimensions impractical.

How much does a backyard bocce court cost on Long Island?

Plan on roughly $10,000 to $30,000 for a residential installation. The final price depends on excavation, drainage, the base, border material, surface, access conditions, and lighting. A simple oyster shell or turf layout will generally cost less than a larger court with engineered drainage, substantial edging, and electrical work.

Which surface is better, crushed oyster shell or synthetic turf?

Crushed oyster shell provides a traditional playing feel and natural drainage, but it needs periodic raking, rolling, and replenishment. Synthetic turf costs more at the outset, yet it delivers a consistent roll with less routine maintenance and holds up well through changing Long Island weather. The right choice depends on play preferences, maintenance time, and budget.

What base and drainage does a backyard bocce court need?

Start with a stable, properly graded base, such as compacted stone beneath an asphalt or concrete sub-base. Install the drainage plan before the playing surface and slope water away from the court. This preparation helps prevent settling, standing water, and uneven rolling after freeze-thaw cycles.

Can a bocce court include lighting and landscape borders?

Yes. Timber, aluminum, or composite borders can contain the surface and define the court against planting beds or paving. Outdoor lighting can extend evening play, but fixture placement and height should be planned to reduce glare and preserve clear sightlines.

Ready to Plan Your Long Island Bocce Ball Court?

A thoughtful site review can help align the court’s dimensions, surface, drainage, borders, and lighting with your backyard. To discuss your goals and next steps, Contact Gappsi through our contact page to schedule a free consultation for your bocce ball court project on Long Island.

Share this page:
Motorized aluminum louvered pergola over a Long Island patio at dusk

Louvered Pergola Guide: Adjustable Shade for Long Island

Long Island weather can shift from bright afternoon sun to coastal rain before dinner, making a fixed shade structure less useful than it first appears. Adjustable louvers let homeowners control sunlight, airflow, and overhead coverage without giving up the open-air feel of a patio or poolside space. Contact Gappsi through our contact page

A louvered pergola uses adjustable roof blades to create shade when you need it and open sky when you want it. A motorized aluminum system can add remote-controlled adjustment, integrated drainage, rain-sensing technology, and lighting, while powder-coated aluminum provides a practical, low-maintenance choice for humid and coastal conditions.

For Nassau and Suffolk homeowners, the right design starts with understanding how the roof system works. How it handles changing weather, and how it fits the rest of the outdoor living plan. That foundation makes it easier to compare materials, features, and installation options with confidence.

What Is a Louvered Pergola?

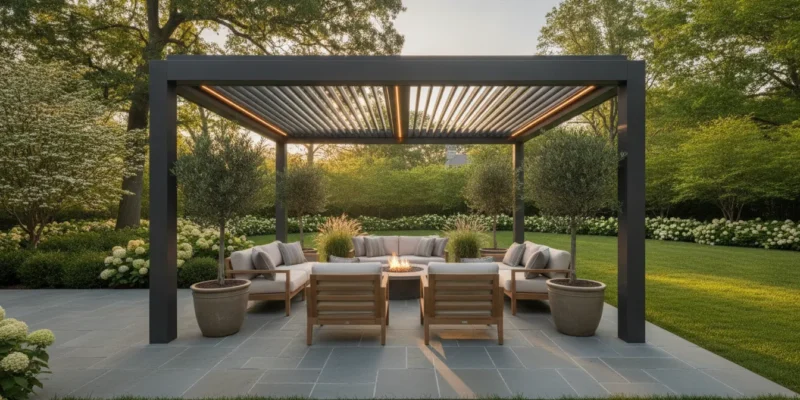
A louvered pergola is an outdoor roof structure built with parallel adjustable louvers instead of a fixed solid covering. On a motorized aluminum system, the louvers rotate to change how much sunlight reaches the patio below. Open them for full sun and airflow, angle them for dappled shade, or close them when you need a more sheltered outdoor setting. Unlike a traditional pergola with permanently spaced rafters, this design gives Long Island homeowners control over changing conditions throughout the day. A fully closed roof is designed to shed water, while integrated drainage can direct rain away from the seating or dining area. The result is a more usable patio without turning the structure into a permanently dark enclosure. Open-louver aluminum pergola over a Long Island patio

How Do the Louvers Control Sun and Airflow?

The louvers rotate around their horizontal axes. When they are open, sunlight and natural air pass through the roof. As they move toward a partially closed position, they reduce direct exposure while preserving ventilation. This makes it possible to adjust the space as the sun moves across the yard. Rather than choosing between bright sun and a fixed shadow for the entire afternoon. When the louvers close, their overlapping edges create a roof plane that helps move rain toward the structure’s drainage channels. The exact performance depends on the system, installation, slope, and site conditions, so a professional design should account for the patio layout and local weather exposure. Motorized systems can also be paired with rain-sensing technology, integrated lighting, and custom sizing as part of a larger outdoor living plan.

Why Is Aluminum Commonly Used?

Manufacturers offer pergolas in materials such as wood, vinyl, and powder-coated aluminum. Aluminum is often selected for its durability and resistance to rust, qualities that matter in humid or coastal outdoor environments. Compared with traditional wood, it generally requires less staining or sealing. A powder-coated finish adds another layer of defense against the elements while providing color options that can coordinate with pavers, masonry, a pool deck, or an outdoor kitchen. For Nassau and Suffolk homeowners, a louvered pergola can therefore function as more than a shade accessory. It can serve as a carefully sized architectural connection between the house and the rest of the yard. Gappsi’s design-build approach can coordinate the pergola with existing masonry, pool areas, and outdoor kitchens, helping the adjustable roof perform as part of a complete outdoor living space.

Louvered Pergola vs. Fixed Pergola and Pavilion: Which Is Right for Your Patio?

The best structure depends on how you use the patio throughout the day. A louvered pergola gives you an adjustable roof, while a fixed-slatted pergola provides filtered shade without moving parts. A pavilion creates the most consistent overhead cover. Comparing the practical differences helps you choose based on comfort, weather protection, budget, and the architecture of your home.

Comparing patio shade structures
Factor Louvered pergola Fixed-slatted pergola Pavilion
Shade adjustability Louvers open and close to adjust shade as the sun moves. Motorized systems make changes convenient. Provides a permanent pattern of partial shade. The amount of coverage cannot be changed during the day. Offers consistent shade beneath a solid roof. It does not provide an open-sky option unless designed with another roof system.
Rain protection When fully closed, the louvers are designed to shed water. Integrated drainage can help direct runoff away from the living area. Slats allow some rain and wind through, so furniture and occupants remain exposed during wet weather. A solid roof offers dependable overhead protection, although final performance depends on roof pitch, flashing, gutters, and construction details.
Sunlight control Lets you balance direct sun, filtered light, and open sky. Optional rain-sensing technology can respond to changing conditions. Creates stable filtered light, but the fixed spacing may leave too much or too little sun for certain seating areas. Blocks the most direct sunlight and creates a more enclosed, room-like atmosphere.
Cost Usually carries a higher investment because of the louvers, motorization, controls, drainage, and installation complexity. Can be a more economical choice for a simpler, nonmotorized design with fewer integrated systems. Cost varies widely with the roof, foundation, size, and materials. A simple prefabricated structure may cost less than a large custom build.
Look Clean, architectural, and adaptable. Powder-coated aluminum offers a range of color options and pairs well with contemporary patios. Provides a classic open-roof appearance that works well with traditional landscapes and homes. Has the strongest architectural presence and can resemble an outdoor room or a second roofline.

These differences reflect a broader cost principle: materials and design complexity affect both the initial investment and long-term maintenance. Prefabricated structures can be cost-effective for straightforward projects, while custom design-build work costs more when it includes site-specific sizing. Electrical features, drainage, or integration with a pool deck and outdoor kitchen. The choice should account for expected lifespan, maintenance, and how often the structure will be used, not just the purchase price. See Gappsi’s overview of pavilions, pergolas and gazebos for more context on these outdoor structures. For many Long Island patios, the louvered option offers the broadest daily flexibility. A fixed pergola suits homeowners who want filtered light and a simpler structure. A pavilion is the stronger fit when constant shade and rain protection matter most. Each can add architectural interest and improve the usefulness of an outdoor living area when its proportions and placement are planned carefully.

How a Motorized Louvered Pergola Gives You All-Day Shade Control

A motorized louvered pergola lets you adjust the roof as outdoor conditions change. With a remote control or compatible smart app, you can rotate the aluminum blades to manage direct sun, airflow, and the amount of daylight reaching the patio. Some systems offer roughly 115 degrees of blade travel, creating a broad range between open sky and a shaded, sheltered roof. This is more responsive than a fixed pergola, where the shade pattern stays the same throughout the day. Terra Summer describes 115-degree remote-controlled rotation for luminosity and airflow control. In the morning, the louvers can open to bring in low-angle light. Around midday, a partial rotation can reduce glare while preserving ventilation. Later, closing the blades provides a more enclosed setting for dining or conversation. The goal is not simply to block the sun. It is to make the space usable across more hours without constantly moving umbrellas or rearranging furniture.

What happens when rain moves in?

Many motorized systems can connect to an integrated rain sensor. When moisture is detected, the controls can signal the louvers to close automatically, helping protect seating and the area below. When fully closed, louvered roofs are designed to shed water rather than leave rain sitting on the roof. That protection still depends on correct installation, pitch, seals, and site-specific drainage design. So the system should be planned as part of the entire patio rather than treated as a stand-alone accessory. Integrated drainage gives the water a defined path through the frame and away from the living area. This reduces the need for temporary covers and helps keep runoff from falling directly at the edge of the patio. Rain sensing and drainage work together: one responds to changing weather, while the other manages water after the roof closes. Closed louvered pergola with integrated lighting at dusk

How can lighting extend the evening?

Optional integrated lighting can be built into the pergola structure, providing a more consistent evening environment without relying on freestanding lamps. Lights can support dining, conversation, or circulation after sunset, while the closed louvers add definition overhead. A design-build team can coordinate the pergola with nearby masonry, a pool deck. Or an outdoor kitchen so the controls, drainage, wiring, and lighting align with the rest of the project. Gappsi’s knowledge base identifies integrated lighting, rain-sensing technology, custom sizing, and drainage as available considerations for motorized pergola designs.

Why Aluminum Stands Up to Long Island Weather Better Than Wood

Long Island outdoor structures face humid summers, salt air near the coast, driving rain, temperature changes, and winter moisture. Those conditions make the frame material a practical decision, not just a design preference. Aluminum is naturally resistant to rust and decay, which makes it well suited to outdoor shade structures in humid or coastal climates. An aluminum louvered pergola can provide a stable structure without the moisture-related concerns that commonly affect untreated or poorly maintained wood. Aluminum structures are recognized for durability and resistance to rust. Wood can create a warm, traditional appearance, but it requires an ongoing maintenance schedule. Depending on exposure, homeowners may need to clean, stain, and reseal wood repeatedly to help limit fading, moisture absorption, cracking, and decay. Skipping those steps can shorten the useful life of the finish and leave the structure more vulnerable to weather. By comparison, aluminum reduces the recurring staining and sealing work associated with a wood pergola. That lower maintenance demand matters when the structure is attached to a patio, pool deck. Or outdoor kitchen that should be ready for use instead of waiting for another upkeep project. Finish selection adds another layer of protection. Powder-coated aluminum is available in multiple colors and helps defend the surface against environmental exposure while creating a consistent architectural finish. It also allows the pergola to coordinate with existing pavers, siding, masonry, or trim without relying on a wood stain that may weather unevenly. Homeowners comparing materials can review this louvered pergola vs wood pergola guide to weigh appearance, maintenance, and long-term use. Structural requirements deserve equal attention, especially in exposed locations. Aluminum louvered pergola systems can be approved for use in high-velocity hurricane zones when designed and installed to meet applicable building codes, as shown by Miami-Dade product approval documentation. That approval does not automatically apply to every system or every Long Island project, so the selected product. Anchoring, site conditions, and local permitting requirements must be reviewed by the design and installation team. A code-aware approach helps ensure the pergola is sized and secured for its location rather than treated as a generic kit. For Long Island homeowners, the comparison is therefore about more than initial appearance. Aluminum offers corrosion resistance, a durable powder-coated finish, and less routine maintenance, while wood may demand more frequent attention to preserve its condition. Choosing the right material, anchoring method, and finish creates a more dependable foundation for adjustable shade and year-round outdoor living.

Key Features to Look For: Rain Sensors, Integrated Lighting, and More

The right louvered pergola should do more than provide overhead shade. Its controls, drainage, lighting, dimensions, and finish should work together with your patio, pool deck, outdoor kitchen, or seating area. As you compare systems, focus on features that improve daily use and reduce problems during changing Long Island weather. Contact Gappsi through our contact page Use this guide when choosing the right pergola features, then match the specification to your home’s layout and how you plan to use the space.

  • Rain sensors: A rain-sensing control can detect incoming weather and close the adjustable louvers. While a fully closed roof is designed to shed water rather than leave the seating area exposed.
  • Integrated drainage channels: Built-in drainage routes water through the structure and away from the covered area. Helping keep runoff from falling directly onto furniture, walkways, or the edge of a pool deck.
  • Integrated LED lighting: Lighting within the frame or louvers can extend evening use and provide more consistent illumination than relying only on wall fixtures or portable lamps.
  • Custom sizing: A custom-sized system can be planned around existing walls, columns, property lines, dining areas, and cooking zones instead of forcing the space to fit a standard kit.
  • Powder-coat color options: Multiple powder-coat finishes let the aluminum coordinate with your home’s exterior, masonry, trim, or other outdoor materials while adding a protective finish for outdoor exposure.
  • Motorized drive: Motorized louvers offer convenient shade adjustment from a control, which is useful when the sun moves across the patio or weather changes while guests are outside.
  • Manual drive: A manual system can be appropriate for a smaller, straightforward installation when you want adjustable louvers without adding powered controls, wiring, or automation.

These features are not interchangeable upgrades. Drainage and rain sensing address weather response, while lighting and motorization affect comfort and convenience. Custom sizing and color selection determine how naturally the structure fits the rest of the property. Reviewing all of them together helps you specify a system that supports the way your household actually uses the space.

How Much Does a Louvered Pergola Cost in 2026?

There is no responsible single price for a louvered pergola without knowing the size, materials, controls, and installation conditions. A compact prefabricated kit and a custom structure built into an existing Long Island patio are different projects, even when both provide adjustable shade. The most useful way to plan the investment is to separate the cost drivers before comparing proposals.

What factors influence the design and installation cost?

  • Overall size and span: A larger roof requires more framing, louvers, posts, hardware, and labor. The layout also affects footing requirements and how the structure connects to the home or surrounding hardscape.
  • Material selection: Wood, vinyl, and powder-coated aluminum each create a different balance of appearance, maintenance, longevity, and upfront cost. Aluminum is rust-resistant and generally requires less recurring staining or sealing than traditional wood. Material choice therefore affects both the initial investment and long-term maintenance costs, as documented by this pergola cost reference.
  • Motorization and controls: A manual or fixed system has fewer components than a motorized roof. Motors, remote controls, wiring, switches, and professional electrical coordination add scope. Professional installation is recommended for motorized systems so the controls, alignment, and operation are set up correctly.
  • Integrated features: Rain sensors, lighting, and concealed drainage can make the pergola more useful, but each feature requires planning and installation. When the louvers close, the roof is designed to shed water, while integrated drainage helps direct that water away from the living area. These details are part of the system cost, not optional decoration.
  • Site preparation and integration: Footings, electrical access, permits, demolition, and difficult site conditions can change the labor budget. A structure that must align with existing masonry, a pool deck, retaining walls. Or an outdoor kitchen requires more design coordination than a freestanding kit on an open slab.

Is a prefabricated kit less expensive than a custom build?

In general, prefabricated pergola kits cost less because they use standardized dimensions, finishes, and connection details. That approach can make sense for a straightforward installation where the kit fits the site and the homeowner accepts its available features. It may not account for unusual spans, existing drainage, architectural details, or the electrical work needed for motorization. A custom design-build installation typically costs more because it solves those site-specific requirements. The team may coordinate the pergola with pool coping, natural stone, pavers, an outdoor kitchen, or the visual lines of the home. Gappsi’s design-build approach can integrate a pergola with existing masonry, pool decks, and outdoor kitchens rather than treating the shade structure as a separate object. Before selecting a system, review the process for designing a custom pergola.

How should homeowners evaluate the investment?

Compare proposals by what they include, not only by the starting price. Confirm the roof size, aluminum or wood specification, finish, motor and controls, drainage method, lighting, electrical work, footings, permits, and warranty. A lower initial cost may omit integration work or features that will be added later. The right choice depends on your budget, desired appearance, maintenance expectations, and how long you intend to use the structure. Quality materials and a properly coordinated installation can support a longer service life. That is why value should be measured over the life of the pergola, not just at purchase.

Designing and Installing a Custom Louvered Pergola on Long Island

A successful outdoor shade project starts with decisions that account for the property, the way your household uses the space, and the practical demands of Long Island weather. A custom louvered pergola should be sized and detailed as part of the surrounding landscape, not treated as an isolated kit placed on a patio. The following process helps keep the structure functional, coordinated, and ready for reliable daily use.

  1. Evaluate the site and discuss the design. The project begins with an on-site review of the patio, pool deck, garden, drainage patterns, sun exposure, access points, and existing structures. A design consultation should also identify how you plan to use the space, whether that means dining, poolside seating, cooking, or entertaining. These details guide the pergola’s location, orientation, height, shade coverage, and relationship to the home. If you are ready to discuss the property, you can Contact Gappsi through our contact page.
  2. Take measurements and establish custom sizing. Accurate measurements determine the clearances around doors, windows, pool equipment, outdoor kitchens, walkways, and furniture. The designer can then set the frame dimensions and louver span around the actual site rather than forcing the property to fit a standard footprint. Custom sizing also supports a cleaner connection to existing masonry and helps preserve circulation through the outdoor living area.
  3. Coordinate structural engineering and permits. A motorized roof adds weight, moving components, electrical requirements, and attachment considerations. The project team should review the proposed structure against applicable Long Island building requirements, property conditions, and local permit needs. Engineering and permitting are especially important where the pergola connects to a home, pool deck, masonry wall, or other permanent construction. Professional design also helps prevent structural issues before installation begins.
  4. Select materials, colors, and finishes. Aluminum, including powder-coated aluminum, provides a practical option for an outdoor structure exposed to humidity and changing weather. Material and finish choices affect appearance, maintenance, and long-term performance. Select the louver color, frame finish, lighting approach, drainage details. And motor controls together so the completed pergola looks intentional beside the home’s siding, stonework, pavers, or pool finishes.
  5. Install the structure and integrate it with the property. Installation should include the frame, louvers, posts, drainage, electrical connections, and any required foundations or attachment points. A design-build team can coordinate the pergola with existing pools, masonry, and outdoor kitchens rather than leaving separate trades to resolve conflicts in the field. Gappsi’s design-build approach is intended to manage the work from design through finish, giving homeowners one provider for a connected outdoor living transformation.
  6. Test motorization, rain sensors, and lighting. Before the project is handed over, the installer should cycle the louvers through their full range. Confirm that controls respond correctly, and verify that the roof closes and sheds water as intended. Test the rain sensor, drainage path, integrated lighting, switches, and any remote or smart controls. Professional installation is recommended for motorized systems because correct alignment, wiring, calibration, and safety checks are essential to proper function. A final walkthrough should explain routine care and demonstrate the controls to every household member who will use the space.

This structured process turns a louvered pergola into a coordinated part of the property. With its shade, drainage, technology, and finishes selected for the way the outdoor space is actually used. Contact Gappsi through our contact page

Frequently Asked Questions

Are louvered pergolas worth it?

They can be a strong choice when you want adjustable shade, occasional rain protection, and a defined outdoor living area in one structure. The louvers let you change sun exposure during the day, while the pergola adds architectural interest to a patio or pool area. The right value depends on how often you will use the space, the size and features selected, and how well the design fits your property.

How much does a motorized louvered pergola cost?

There is no responsible single price without a site review. Size, aluminum construction, motorization, drainage, lighting, finishes, foundation work, and installation complexity all affect the final investment. A simpler prefabricated structure generally costs less than a custom design-build project, while custom integration with a pool deck, masonry, or outdoor kitchen adds scope. Project size and materials are recognized cost drivers.

Do louvered pergolas provide shelter from rain?

Yes, when the louvers are fully closed, the roof is designed to shed water. An integrated drainage system can direct runoff through the structure rather than allowing it to fall through the roof. Rain sensors can also be included to help close the louvers when weather changes, although the system does not replace proper site drainage or storm preparation.

How long do louvered pergolas last?

Powder-coated aluminum is rust-resistant and requires less maintenance than wood, which may need recurring staining or sealing. Proper sizing, anchoring, drainage, finish care, and motor maintenance all influence service life. A well-maintained aluminum system can last more than 20 years, but actual performance depends on installation quality and local exposure. Aluminum durability and rust resistance support its use in outdoor settings.

Ready to Design Your Louvered Pergola?

An adjustable shade system is more than a roof. It can reshape how you use a patio, pool deck, or outdoor kitchen across the whole day. Whether you want open sun, dappled light, or a sheltered spot when rain moves in. A well-planned louvered pergola pairs the right motorization, drainage, lighting, and dimensions with the rest of your outdoor living space. Gappsi is a Long Island design-build contractor that coordinates pergolas with existing masonry, pool areas, and outdoor kitchens under one provider. During a free consultation, you can discuss your goals, your yard’s layout, and practical next steps for a custom design. There is no pressure and no obligation, just clear guidance on size, materials, features, and what the project involves. Contact Gappsi through our contact page to start planning a louvered pergola for your Long Island outdoor space.

Share this page:
Comparing wood and material samples to estimate custom pergola cost.

How Much Does a Custom Pergola Cost? A Guide

A pergola does more than just provide shade; it creates a destination in your own backyard. It’s the spot for morning coffee, family dinners, and quiet evenings under the stars. It extends your living space into the outdoors, turning an open patio into a true outdoor room. While the lifestyle upgrade is easy to see, the financial side can feel less clear. Understanding the custom pergola cost is the first step to bringing that vision to life. In this article, we will explore the key variables that determine the price, helping you make informed decisions that align your budget with your backyard aspirations.

Key Takeaways

  • Your Budget Is Shaped by Key Factors: A pergola’s cost is determined by four main things: its size, the material you choose, the complexity of the design, and your property’s specific conditions. Deciding on your priorities for these elements is the first step to a realistic financial plan.
  • Look Beyond the Structure’s Price Tag: Remember to budget for the entire project, which includes necessary expenses like building permits and site preparation. Also, consider optional add-ons like lighting or shade canopies that make the space truly functional for your lifestyle.
  • Invest Smartly for Long-Term Value: A custom pergola is a valuable addition to your home, and you can manage costs by simplifying the design or building in the off-season. Choosing durable, low-maintenance materials may cost more upfront but can save you money and time for years to come.

What Determines the Cost of a Custom Pergola?

Thinking about adding a pergola to your backyard is exciting, but figuring out the budget can feel a little overwhelming. The truth is, there’s no single price tag for a custom pergola because every project is unique. The final cost depends on a handful of key factors that work together to shape your project. It’s not just about the materials you choose, it’s also about the size of the structure, the intricacy of the design, and even the current state of your backyard.

Understanding these variables is the first step to creating a realistic budget. When you know what drives the cost, you can make informed decisions about where to invest and where you might be able to save. We’ll walk through the four main elements that influence the price of your dream outdoor structure: the dimensions, the design’s complexity, your property’s specific conditions, and the choice between a pre-made kit and a fully custom build. Getting familiar with these will help you plan your project with confidence.

Size and Dimensions

It might seem obvious, but the biggest factor influencing your pergola’s cost is its size. A larger pergola simply requires more materials and more labor to build. A spacious 20×20 foot structure designed to cover a full patio set and outdoor kitchen will naturally be a bigger investment than a quaint 10×10 foot pergola meant for a small seating area. When planning, think about how you want to use the space. Will you be hosting large family gatherings or looking for a quiet corner to read? Answering this question will help you determine the right dimensions for your needs and budget, ensuring you get a space that’s just the right fit for your lifestyle.

Design Complexity

Beyond size, the complexity of your pergola’s design plays a huge role in the final cost. A classic, four-post rectangular design is the most straightforward and budget-friendly option. The price starts to climb as you add custom details. Features like arched tops, intricate latticework for shade, or unique shapes that follow the curves of a patio will require more skilled labor and specialized cuts. Attaching a pergola directly to your house is also more complex than building a freestanding one. These custom touches are what make a structure truly your own, and a professional design and construction team can help you balance beautiful details with your budget.

Your Property’s Site Conditions

What’s happening on the ground is just as important as the structure you plan to build on top of it. Before any construction can begin, the site needs to be properly prepared, and this can sometimes add to the overall cost. If your yard has a significant slope, the ground will need to be leveled, a process known as grading. The posts of the pergola also need a stable foundation to rest on, which often means pouring concrete footings. If your property has rocky soil or is difficult to access with equipment, these challenges can also influence the labor costs. A thorough site assessment is crucial for uncovering these potential needs early on.

Custom vs. Kit: Understanding the Price Difference

When you start shopping, you’ll see two main options: pergola kits and custom-built pergolas. Kits can seem like a bargain at first glance, but it’s important to understand what you’re getting. They come in standard sizes with limited design options and often don’t include the cost of installation. A custom build, on the other hand, is designed and constructed specifically for your home. This approach offers complete freedom over the size, material, and style. The higher price reflects the personalized design work, on-site craftsmanship, and the expertise needed to create a structure that perfectly complements your home and landscape.

Choosing Your Pergola Material: A Cost Breakdown

The material you choose for your pergola is one of the biggest decisions you’ll make, influencing everything from the initial price to the long-term maintenance and overall vibe of your backyard. Think of it as choosing the foundation for your new favorite outdoor spot. Each option has its own unique blend of cost, durability, and style. At Gappsi, we work with a wide range of high-quality materials to create beautiful pavilions and pergolas that perfectly match your home and lifestyle. Let’s walk through the most popular choices so you can find the right fit for your vision and budget.

Pressure-Treated Pine

If you’re looking for the most budget-friendly starting point, pressure-treated pine is a solid choice. It typically costs between $20 and $35 per square foot. This wood is chemically treated to resist rot and insects, making it a durable option that gets the job done without a hefty price tag. While it doesn’t have the same refined look as more expensive woods, it can be stained or painted to match your outdoor decor. It’s a practical and widely available material that offers a great balance of affordability and function for your new pergola.

Cedar and Redwood

For a step up in natural beauty, cedar and redwood are fantastic options. These woods have a rich color and contain natural oils that make them resistant to decay and insects. You can expect to pay between $25 and $45 per square foot for a pergola made from cedar or redwood. They offer a classic, elegant look that ages gracefully, often turning a lovely silvery-gray over time if left unstained. Their natural durability and stunning appearance make them a favorite for homeowners who want a timeless and visually appealing outdoor structure.

Vinyl and Composite

If low maintenance is at the top of your list, you’ll want to consider vinyl and composite materials. Costing between $25 and $55 per square foot, these engineered options are built to withstand the elements. They won’t warp, rot, or fade, and you’ll never have to worry about staining or painting them. A simple cleaning with soap and water is all it takes to keep them looking new. Vinyl and composite pergolas come in various colors and styles, giving you a durable and hassle-free way to define your outdoor space.

Aluminum

Aluminum is another excellent low-maintenance choice, known for its sleek, modern aesthetic. It’s lightweight yet incredibly strong, and it will never rust, which is a huge plus for homes on Long Island. The cost for an aluminum pergola generally falls between $25 and $60 per square foot. Because it doesn’t require painting or sealing, it’s a set-it-and-forget-it material that holds up beautifully in humid, coastal climates. Its clean lines and durability make it a popular option for contemporary backyard designs.

Exotic Hardwoods

For a truly luxurious and long-lasting pergola, exotic hardwoods like Ipe or Teak are the premium choice. These materials are incredibly dense, strong, and naturally resistant to almost anything nature can throw at them. This level of quality comes at a higher price, typically ranging from $50 to $100 per square foot. The stunning grain and rich color of exotic hardwoods create a high-end, sophisticated look that makes a powerful statement in any backyard. With proper care, a pergola made from these materials can last for decades.

Factoring in Long-Term Maintenance

When you’re planning your budget, don’t forget to think about the future. The initial cost is just one part of the equation. Wood pergolas, for example, require the most upkeep. You’ll likely need to seal or stain them every one to three years to protect them from the weather, which can cost between $100 and $500 annually. On the other hand, vinyl and aluminum are virtually maintenance-free, only needing an occasional cleaning that costs around $50 to $100 per year. Thinking about these long-term needs, including potential restoration and sealing services, will help you choose a material that fits your lifestyle as well as your budget.

A Look at Pergola Costs by Size

Size is one of the most straightforward factors that influences your final pergola cost. A larger structure simply requires more materials, more labor, and often more complex engineering to ensure it’s stable and secure. To give you a clearer picture of what to expect, we can break down the costs into three common size categories. Think of these as starting points for your budget, since the final price for your project will always depend on your specific design, material choices, and property conditions.

The beauty of a custom build is getting the perfect fit for your space and lifestyle. Are you looking to create a small, intimate nook for morning coffee, or are you envisioning a grand outdoor living room for hosting summer parties? The function of your pergola is directly tied to its size. Understanding how you plan to use the space is the first step in determining the right dimensions. A smaller pergola might serve as a beautiful architectural accent, while a larger one becomes the central hub of your backyard activity. Let’s explore what you can expect from small, medium, and large pergolas and how their size impacts both function and price.

Small Pergolas (Under 100 sq. ft.)

A small pergola is perfect for creating a defined, intimate space in your backyard. Think of it as an accent for a cozy seating area, a cover for a hot tub, or a beautiful frame for a garden entrance. For a structure under 100 square feet, you can create a significant impact without taking over your entire yard. While DIY kits are an option, a professionally designed and installed small pergola ensures longevity and a seamless fit with your home’s architecture. A custom Gappsi pergola in this size range allows for high-quality materials and expert craftsmanship, giving you a durable and beautiful feature that truly enhances your property.

Medium Pergolas (100–200 sq. ft.)

This is the sweet spot for many homeowners. A medium-sized pergola, typically between 100 and 200 square feet, is large enough to cover an outdoor dining set or a comfortable lounge area. It creates a functional and inviting zone for entertaining friends and family. At this size, you have more room to incorporate features like ceiling fans, integrated lighting, or even retractable canopies for adjustable shade. A medium pergola can serve as the centerpiece of your backyard design, especially when paired with a beautiful stone patio. The cost reflects the increased materials and labor, but the result is a versatile and substantial outdoor living space.

Large Pergolas (200+ sq. ft.)

If you’re dreaming of a true outdoor room, a large pergola over 200 square feet is the way to go. These impressive structures can span across a large patio, cover an outdoor kitchen and dining area, or create multiple “zones” for lounging and entertaining. With a large-scale project, the design possibilities are nearly endless, but so is the need for expert planning and construction. Structural integrity is paramount, and professional installation ensures your investment is safe, secure, and built to last. You can see examples of these expansive outdoor rooms on our YouTube channel, where we showcase how a large pergola can completely transform a backyard into a luxurious retreat.

How Much Does Labor for a Custom Pergola Cost?

After you’ve chosen your materials, the next major line item in your budget is labor. This is where the expertise of a professional team comes into play, and the cost can vary based on the project’s scope and your own willingness to get your hands dirty. Understanding what drives labor costs will help you make the best decision for your timeline, budget, and the final quality of your pergola. Let’s look at what you can expect to invest in the construction of your new outdoor feature.

Professional Installation on Long Island

For a professional pergola installation on Long Island, you can generally expect labor costs to fall between $3,000 and $6,000 for a standard project. This price reflects the work of a skilled crew that handles everything from securing the foundation to ensuring the structure is perfectly level and built to last. When you hire a team like Gappsi, you’re not just paying for assembly. You’re investing in decades of experience, precision, and the peace of mind that comes from knowing your pergola is safely and correctly installed. Our pavilions and pergolas are built to withstand the elements and become a lasting part of your home.

DIY vs. Hiring a Pro: A Cost Comparison

It’s tempting to consider a DIY installation to save on labor, but it’s important to weigh the true costs. While you might save a few thousand dollars upfront, a DIY project requires a significant investment of your own time, specialized tools you may need to buy or rent, and a great deal of physical effort. A complete custom pergola project can range from $8,000 to over $25,000, and mistakes during a DIY build can be costly to fix. Hiring a professional removes the guesswork and stress. An experienced home remodeling team manages the entire process, ensuring an efficient and flawless installation.

How Complex Designs Affect Labor Costs

The more intricate your pergola design, the more labor will be required. A simple, freestanding square pergola will have lower labor costs than a custom design attached to your house, built on a slope, or featuring complex details. Factors that increase labor hours include elaborate latticework, built-in seating, or integrating other materials. For example, incorporating custom masonry pillars or a stone base requires specialized skills and more time on site. When you plan your design, remember that every unique cut, angle, and custom feature contributes to the final labor cost.

Customizing Your Pergola: Optional Add-On Costs

A custom pergola provides a beautiful frame for your outdoor space, but the real magic happens with the finishing touches. While the core structure is essential, optional add-ons are what transform your pergola from a simple feature into a fully functional outdoor room. These customizations allow you to tailor the space to your lifestyle, whether you want a cozy evening retreat, a sunny afternoon lounge, or an all-weather entertainment hub. Keep in mind that each feature you add will influence the final project cost, so it’s helpful to prioritize what matters most to you.

Think about how you plan to use the space. Do you host evening dinner parties? Integrated lighting and heaters might be at the top of your list. Are you looking for a quiet place to read on a sunny afternoon? A retractable shade canopy and privacy screens could be essential. Planning for these features from the beginning ensures they are seamlessly integrated into the design, rather than feeling like an afterthought. A professional design and build team can walk you through the possibilities, helping you create a cohesive and beautiful structure. Gappsi specializes in creating these fully realized outdoor living spaces, ensuring every element works together perfectly.

Roofing and Shade Options

While a traditional pergola has an open-rafter roof that offers partial shade, adding more substantial coverage can make your space usable in different weather conditions. Retractable fabric canopies or adjustable louvered roofs give you the flexibility to choose between sun and shade with the push of a button. For a more permanent solution, you might consider a solid roof, which effectively turns your pergola into a pavilion. A custom design from Gappsi makes it easy to integrate these features seamlessly into your structure, ensuring both function and style.

Integrated Lighting and Electrical

To get the most out of your pergola after sunset, integrated lighting is a must. Options range from simple string lights that create a warm ambiance to recessed LED lighting for a modern, polished look. You can also add ceiling fans for comfort on hot summer days. Planning for electrical wiring early in the design process is key. Adding outlets is also a smart move, giving you a convenient place to charge your phone, plug in a speaker, or power a blender for outdoor cocktails. Proper electrical work ensures your pergola is both beautiful and safe.

Heaters and Smart Technology

Why limit your pergola use to warm weather? Built-in infrared heaters can keep your outdoor living area comfortable on chilly evenings, extending its use into the spring and fall. You can also incorporate smart technology to control your lighting, shades, and even speakers directly from your phone. These modern conveniences make your pergola an even more enticing destination for relaxing or socializing. Integrating these systems smoothly requires expert planning, which is a core part of a professional custom build.

Stonework and Landscaping Integration

A pergola doesn’t have to stand alone; it should feel like a natural part of your backyard. You can achieve a cohesive and high-end look by integrating it with other landscape elements. This could mean building your pergola on a stunning patio made from porcelain or natural stone, adding stone-clad bases to the support posts, or designing surrounding garden beds. Thoughtful masonry and landscaping connect your new structure to your home and the rest of your yard, creating a truly unified outdoor living space.

Privacy Screens and Decorative Details

Adding privacy features can make your pergola feel like a secluded oasis. You can install fixed lattice panels, retractable screens, or even outdoor curtains to shield your space from neighbors or block unwanted views. These elements also offer an opportunity to add a decorative touch. From custom-cut rafter tails to unique hardware, small details can make a big impact on the final look. These finishing touches are where you can infuse your personal style and make your custom pergola uniquely yours.

What Hidden Costs Should You Budget For?

When you’re planning your budget for a new pergola, it’s easy to focus on the big-ticket items like materials and labor. But a few other expenses can sneak up on you if you’re not prepared. Thinking about these potential costs ahead of time helps you create a realistic budget with no surprises. From local paperwork to long-term care, let’s walk through the common costs that are easy to overlook so you can plan your project with confidence.

Long Island Permits and Inspections

Before any work begins, it’s important to check with your local municipality about building permits. On Long Island, many towns require a permit for structures like pergolas, especially if they are attached to your home or are over a certain size. The cost for these permits can vary, but budgeting a few hundred dollars is a safe bet. Handling the permit process can be tedious, which is why working with an experienced team is so valuable. A professional contractor will know exactly what paperwork is needed and will manage the entire submission and inspection process for you, ensuring everything is built to code.

Site Preparation and Grading

Your pergola needs a solid, level foundation to be safe and durable. The cost of preparing the site depends entirely on the current state of your yard. If the ground is already flat, you may not need much work. However, if the area is sloped, uneven, or needs clearing, you’ll need to budget for grading and excavation. Creating a proper base, like a paver patio or concrete slab, also adds to the cost. Proper site preparation is a critical step you can’t afford to skip, as it ensures the structural integrity of your pergola for years to come.

Delivery and Equipment Fees

Getting all the necessary materials and equipment to your home is another cost to factor in. Lumber, stone, and other heavy materials come with delivery fees that depend on the supplier and your location. Additionally, the installation may require specialized equipment, especially for larger or more complex designs. While some contractors roll these charges into the total labor cost, it’s always a good idea to ask for a clear breakdown. A transparent quote should outline all expenses, so you know exactly what you’re paying for without any last-minute additions to the bill.

Future Maintenance Costs

Your financial commitment to your pergola doesn’t necessarily end once it’s built. The material you choose will determine your long-term maintenance costs. Wood pergolas, for example, require the most upkeep. They need to be cleaned and resealed or stained every few years to protect them from weather and prevent rot. While materials like aluminum or vinyl have a higher upfront cost, they require very little maintenance, which can save you money over time. We offer professional restoration and sealing services to keep your outdoor structures looking their best, but it’s wise to plan for these recurring expenses from the start.

Common Budgeting Mistakes to Avoid

Creating a budget for your dream pergola is an exciting step, but it’s easy to stumble into a few common financial traps. Thinking through your project costs is about more than just the final number; it’s about understanding exactly where your money is going. A little foresight can prevent surprise expenses and ensure the building process is as relaxing as the afternoons you’ll spend under your new pergola. By being aware of these potential budgeting mistakes from the start, you can move forward with confidence, knowing you’re making a smart investment in your home and lifestyle. A well-planned budget is the foundation of any successful home improvement project, from a simple patio to a complete backyard transformation. It helps you communicate clearly with your contractor and keeps everyone on the same page. Let’s walk through some key areas where homeowners often miscalculate so you can approach your project with clarity and avoid any costly oversights.

Not Clarifying What’s Included in the Quote

When you receive a quote, it’s tempting to just look at the final price. However, a vague quote can be a red flag for hidden costs down the road. Make sure any estimate you receive is detailed and clearly outlines what is covered. Does it include materials, labor, delivery, and permit fees? What about site preparation or waste removal? Don’t be afraid to ask for a line-item breakdown. A professional contractor should be happy to explain every part of the cost. Clarifying these details upfront ensures there are no surprises, allowing you to compare different offers accurately and choose a partner who is transparent about their pergola construction services.

Overlooking Differences in Material Quality

The material you choose for your pergola is one of the biggest factors affecting the price, but not all materials are created equal. While a lower-cost wood like pressure-treated pine might seem appealing initially, it may require more maintenance and have a shorter lifespan than a premium option like cedar or aluminum. It’s important to weigh the upfront cost against long-term value. Consider Long Island’s climate and how much time you want to spend on upkeep. Investing in higher-quality, durable porcelain and natural stone for the base or durable aluminum for the structure can save you money and headaches over the years, making it a smarter financial decision in the long run.

Assuming DIY Is Always Cheaper

The idea of a DIY pergola project can be very appealing, especially if you’re looking to save on labor costs. However, it’s important to be realistic about what a do-it-yourself installation involves. You’ll need to factor in the cost of renting or buying specialized tools, and any mistakes could lead to wasted materials and extra expenses. More importantly, your time has value. A professional team has the experience to build your pergola efficiently and correctly, ensuring it’s structurally sound and beautifully finished. Hiring an expert is an investment in quality and peace of mind, which you can see in the craftsmanship of professionally completed Gappsi projects.

Skipping Permits to Cut Costs

Dealing with local building codes and permits can feel like a bureaucratic hassle, and some homeowners are tempted to skip this step to save time and money. This is a risky mistake. Building without the proper permits can result in significant fines, a stop-work order, or even a demand to tear down your new pergola. It can also create major problems if you decide to sell your home in the future. A reputable contractor will understand local regulations and manage the entire permitting process for you. This service is a key part of any major home remodeling project and ensures your investment is fully compliant, safe, and secure.

How to Save on Your Custom Pergola

A beautiful custom pergola doesn’t have to break the bank. While it’s a significant investment in your home, there are several smart ways to manage costs without compromising on the quality or the final look. It’s all about strategic planning and making informed decisions from the start. By focusing on the right materials, a smart design, and proper timing, you can create the outdoor oasis you’ve been dreaming of while staying on budget. A pergola adds so much value, not just to your property but to your lifestyle, giving you a perfect spot for morning coffee, family dinners, or quiet evenings outdoors.

Getting the most for your money simply means being a savvy homeowner. The key is to understand where costs come from and where you have flexibility. From choosing a durable material that saves you on future maintenance to scheduling your build during a less busy time of year, small choices can add up to big savings. We want you to feel confident and excited about your project, not stressed about the budget. Here are a few practical tips to help you save on your project and make every dollar count.

Select a Climate-Appropriate Material

Your choice of material is one of the biggest factors in your pergola’s final price tag, but it also determines its lifespan. Here on Long Island, our weather can be tough on outdoor structures, with humid summers, snowy winters, and salty air near the coast. Opting for a material that can withstand these elements is key. While pressure-treated pine is often the most budget-friendly option upfront, it requires regular maintenance. Materials like aluminum or high-quality vinyl may cost more initially but offer incredible durability and require very little upkeep, saving you money and time over the years. Thinking about long-term value helps you choose the best pavilions and pergolas for your home.

Simplify Your Design Without Sacrificing Style

When you hear “custom,” you might picture an elaborate, complex structure, but that doesn’t have to be the case. A simple, elegant design can be just as stunning and is much more cost-effective. Standard rectangular or square shapes are less expensive to build than intricate, multi-level, or curved designs. You can still achieve a high-end look by focusing on the details that matter most to you. Instead of a complex roof, you could invest in beautiful climbing plants, stylish outdoor furniture, or integrated lighting. A simple structure can serve as the perfect canvas for your landscape design, allowing other elements of your backyard to shine.

Build During the Off-Season

Timing your project strategically can lead to significant savings. Most homeowners think about outdoor projects in the spring and summer, which means contractors are in high demand. This peak season can lead to higher labor costs and longer wait times. If your timeline is flexible, consider scheduling your pergola installation during the off-season, like in the late fall or early winter. With fewer projects on their plate, contractors may offer more competitive pricing. It’s a simple shift in planning that can make a real difference in your budget, allowing you to get the same high-quality build for less.

Compare Quotes from Different Contractors

If you’re hiring a professional, it’s always a good idea to get estimates from a few different companies. However, don’t just look at the final number. A trustworthy contractor will provide a detailed quote that breaks down the costs for materials, labor, permits, and any additional features. Be wary of bids that seem too good to be true, as they might signal subpar materials or inexperienced labor. Use the quoting process to ask questions and see examples of their work. Reviewing a company’s past projects, like the ones on the Gappsi YouTube channel, can give you confidence in their craftsmanship and help you find a fair price for excellent work.

Bundle Your Project with Other Services

If a new pergola is part of a larger backyard vision, you can often save money by bundling projects together. It’s more efficient for a construction crew to handle multiple jobs at once than to come back for separate projects later. For example, if you want your pergola to sit on a new stone patio or include built-in lighting, it’s far more cost-effective to do it all at the same time. Planning to add a fire pit, an outdoor kitchen, or other masonry features down the line? Discussing your complete vision with your contractor upfront can streamline the entire process and reduce overall labor costs.

Is a Custom Pergola a Worthwhile Investment?

When you’re considering a big addition to your home, the question of “worth” always comes up. A custom pergola is more than just a financial calculation; it’s an investment in your property, your lifestyle, and your family’s enjoyment. While the initial cost is a key factor, the true value appears in the daily use and long-term benefits. It transforms an underused patch of your yard into the heart of your outdoor living space, creating a beautiful focal point and a functional area for making memories. Before you decide, it’s helpful to look at the complete picture, from property value to the simple joy of having a beautiful place to unwind. Let’s look at how a custom pergola pays off in more ways than one.

How It Affects Your Property Value

A beautiful, well-built pergola does more than just look good; it actively increases your home’s market value. Think of it as adding a dedicated outdoor room. For potential buyers, especially in the Long Island market, a functional and stylish outdoor living area is a major draw. It creates an immediate vision of summer barbecues and relaxing evenings. A custom pergola signals that a home has been cared for and thoughtfully improved. This addition not only helps your property stand out but can also provide a significant return on your investment when it’s time to sell.

Enhancing Your Outdoor Lifestyle

Imagine having a dedicated spot in your backyard that offers a perfect escape from the sun, a defined area to eat, talk, and relax. That’s what a pergola provides. It creates an enticing destination for reading, socializing, or simply enjoying a quiet moment. Instead of a simple patio, you get a structured, inviting space that extends your home into the outdoors. Whether you envision it as a poolside lounge, an alfresco dining room, or a cozy nook covered in climbing flowers, a pergola helps you get more use and enjoyment out of your property. It’s the key to creating a complete outdoor living space.

Long-Term Durability and Value

One of the biggest advantages of a custom pergola is its staying power. Unlike a store-bought kit, a custom structure is built to last. When you work with professionals, you get high-quality materials and meticulous construction that can withstand Long Island’s weather for decades. This durability means your investment won’t just look good for a season or two; it will become a permanent, valuable feature of your home. Choosing a custom build ensures your pergola is crafted with attention to detail and quality, providing enduring value and peace of mind.

Building Your Dream Pergola with Gappsi

Creating a custom pergola is a significant project, and it’s an investment in both your home and your lifestyle. As a general guide, many homeowners find their custom projects fall between $8,000 and $25,000. While it’s helpful to have a budget in mind, the true value comes from creating a space that perfectly fits your needs. This is where working with an experienced team makes all the difference.

At Gappsi, we see your pergola as the centerpiece of your outdoor living area. Our design and construction process is all about bringing your vision to life, whether you want a simple, elegant structure for shade or a fully-equipped outdoor room. We handle every detail, from securing permits to ensuring the final build is perfect. Professional installation is key to a long-lasting and safe structure, and our expertise ensures your custom pergola not only looks beautiful but also stands strong against the Long Island weather. We can integrate features like custom lighting, fans, or even retractable shades to make your space usable in any season.

More importantly, we think about the bigger picture. A pergola is rarely a standalone feature. It can define a dining area on a new porcelain stone patio, create a shaded lounge next to your swimming pool, or serve as the anchor for a complete outdoor kitchen. Because we offer a full range of services, we can design and build your entire backyard oasis cohesively. Choosing Gappsi means you get a partner dedicated to transforming your property into the functional, beautiful retreat you’ve always wanted.

Related Articles

Frequently Asked Questions

What is a realistic starting budget for a custom pergola? While every project is unique, a professionally designed and installed custom pergola typically falls in the range of $8,000 to $25,000. The final price depends on the size, the complexity of the design, the material you choose, and your property’s specific needs, like site grading. The best first step is to think about how you want to use the space, which will help you and your designer determine the right scale and features for your budget.

Which pergola material offers the best value for a Long Island home? For the best long-term value on Long Island, you should consider materials that stand up to our coastal climate with minimal upkeep. While pressure-treated pine is the most affordable option upfront, it requires consistent sealing to prevent wear. Materials like aluminum and vinyl have a higher initial cost but are incredibly durable, won’t rust or rot, and only need simple cleaning. This means you save significant time and money on maintenance over the life of your pergola.

How can I make my pergola more functional without a huge budget? You can create a highly functional space by being strategic with your design and add-ons. Instead of a complex structure, stick with a classic rectangular shape and focus your budget on one or two key features. For example, planning for electrical wiring from the start makes it easy to add string lights for ambiance and an outlet for music. You can also create shade and privacy with outdoor curtains or by planting beautiful climbing vines, which are cost-effective ways to make the space feel like a true outdoor room.

Is a building permit really necessary for a pergola? In most Long Island towns, yes, a building permit is required for a permanent structure like a pergola, especially if it’s over a certain size or attached to your house. Trying to skip this step can lead to fines and other headaches. A professional contractor will know the specific codes for your area and will manage the entire permitting process for you, ensuring your new pergola is safe, compliant, and a legitimate asset to your home.

How long does the process take from design to installation? The timeline for a custom pergola project can vary. The design phase might take a couple of weeks as you work with a designer to finalize the plans. After that, securing permits can take anywhere from a few weeks to a couple of months, depending on your local municipality. Once the permits are approved and materials are ordered, the actual on-site construction is usually quite fast, often taking about one to two weeks for a standard project.

Share this page: