Wood burning stove and oven combination from a dealer on Long Island, New York.

How to Find the Best Stove Oven Dealer on Long Island

Long Island winters can be unpredictable, and having a reliable source of heat and a way to cook during a power outage provides incredible peace of mind. A wood-burning stove and oven combo offers a completely off-grid solution, keeping your family warm and fed using a single, renewable fuel source. Modern units are incredibly efficient, burning cleaner and longer than older models, making them a practical choice for everyday use and emergency preparedness. This level of self-sufficiency starts with finding the right appliance, and a trusted wood burning stove and oven combination dealer on Long Island new york can help you select a high-performance model that meets your family’s needs.

Key Takeaways

  • Combine heating and cooking: A wood burning stove and oven combo serves two functions at once, providing an efficient way to warm your home and prepare meals, which is especially useful during power outages.
  • Focus on the right features: Look for key specifications like EPA certification for efficiency, the correct heating capacity for your room size, and durable materials to guarantee your stove performs well and is safe.
  • Partner with a trusted expert: The right dealer is as important as the right stove, so choose a local company that provides expert advice, certified installation, and ongoing support to ensure you get the most from your investment.

What is a Wood Burning Stove and Oven Combo?

A wood burning stove and oven combo is a single, hardworking appliance that heats your space and cooks your food. Think of it as the ultimate two-for-one for your home. These units combine the cozy warmth of a traditional wood stove with the practical function of an oven, making them a fantastic addition to any kitchen, living area, or even a covered outdoor patio. They offer a unique, rustic charm while providing a reliable source of heat and a way to prepare delicious meals, from roasted chicken to freshly baked bread. It’s a piece that feels both nostalgic and incredibly practical.

Unlike separate appliances, a cookstove is designed to be a centerpiece. It brings people together and creates a warm, inviting atmosphere that becomes the heart of your home. Whether you’re looking to add a functional statement piece as part of a home remodeling project or want a reliable off-grid cooking solution, these combos are incredibly versatile. Modern designs are much more efficient and cleaner-burning than the old-fashioned ranges you might picture. Some models reach up to 80% efficiency, meaning they can heat a significant portion of a home while providing consistent cooking temperatures. They truly blend timeless appeal with modern performance.

Why Choose a Stove and Oven Combo?

Choosing a stove and oven combo is about embracing efficiency and a unique way of life. These units are masters of multitasking. They use the heat generated from burning wood to both warm your home and cook your meals, which means you get more value from a single fuel source. This is perfect for anyone interested in reducing their reliance on electricity or gas, especially during a power outage. Plus, there’s nothing quite like the taste of food cooked with a real wood fire. It adds a distinct flavor that you just can’t replicate with a conventional oven. It’s a practical choice that also adds a lot of heart to your home.

How Do They Work?

The way these combos work is brilliantly simple. Inside the unit, there’s a firebox where you burn the wood. This fire generates heat that radiates out from the stove’s body, warming the surrounding room just like a standard wood stove. At the same time, the design cleverly channels a portion of that heat into an insulated oven compartment. This allows you to bake, roast, or warm food using the same fire. Since the entire unit is powered by wood, it operates completely without electricity or gas, giving you a steady, reliable source of heat for both cooking and comfort.

Key Features to Look For

When you start shopping for a wood-burning stove and oven combo, you’ll quickly see that there are many options available. It’s easy to feel a bit overwhelmed, but focusing on a few key features will help you find the perfect fit for your Long Island home. Think about how you plan to use your stove. Is it for heating a large open-plan living area, supplementing your current heating system, or creating a cozy cooking hub in your kitchen? Your answers will guide you toward the right model. Let’s break down the most important features to consider so you can make a choice you’ll be happy with for years to come.

Heating Capacity

The first thing to consider is how much space you need to heat. Wood stoves come in various sizes, designed to heat anything from a single room to an entire house. For chilly Long Island winters, you’ll want a stove with an adequate BTU (British Thermal Unit) rating to keep your space comfortable. A higher BTU rating means more heat output. Before you shop, measure the square footage of the area you want to heat. This information will help your dealer recommend a stove that’s powerful enough to do the job efficiently without being excessive for the space.

Efficiency and EPA Certification

A modern wood stove should be both powerful and efficient. An efficient stove burns less wood to produce the same amount of heat, saving you money on fuel and reducing your environmental impact. Look for the EPA certification label, which guarantees the stove meets strict federal air quality standards. The best models have an efficiency rating of 70% or higher and can offer long burn times, sometimes up to 12 hours on a single load of wood. This means less time spent loading the stove and more time enjoying its consistent, steady warmth.

Oven Size and Cooking Features

The oven is what makes this appliance so special, so think about how you’ll use it. These stoves are fantastic for everything from baking bread and roasting chickens to simmering stews, all while warming your home. Consider the oven’s size. Do you need enough space for a large holiday meal, or will you mostly be making smaller dishes? Some models also come with features like a built-in thermometer or a cooktop surface for even more versatility. A stove and oven combo can be a beautiful and functional centerpiece for any home remodeling project.

Quality Materials and Safety Clearances

Finally, pay close attention to the stove’s construction and safety requirements. High-quality materials like cast iron and heavy-gauge steel ensure durability and excellent heat retention. Safety is also a top priority. Every stove has specific clearance requirements, which is the minimum safe distance it must be from walls and other combustible materials. A professional installer will ensure these clearances are met. When you visit a showroom, ask about the materials and the installation process to ensure your new stove is both beautiful and safe. You can find a great selection of high-quality options at the Gappsi Store.

Top Brands and Models on Long Island

Once you know what features matter most, you can start exploring specific brands and models. The market has some fantastic options, but it helps to know which names are trusted for quality and performance. Here on Long Island, we have access to some of the best, so let’s look at what you should consider as you shop.

Explore Gappsi’s Premium Selection

At Gappsi, we’ve carefully selected a range of wood-burning stove and oven combos that blend timeless appeal with modern performance. A wood-burning cookstove can warm your living space while you cook a meal, combining the function of a wood stove with a fully operational oven. This makes them a wonderful solution for daily use and a reliable off-grid option for cooking and heating. Our collection at the Gappsi Store features models designed to fit your home’s aesthetic while delivering powerful, dual-purpose functionality. We focus on products that are not only beautiful but also built to last.

Popular Brands to Consider

As you do your research, you’ll come across a few key brands that are well-regarded in the industry. It’s a good idea to look for North American-made options, which are often recognized for their solid construction. For example, brands like Drolet offer models such as the Bistro and Chic-Choc, known for their quality Canadian manufacturing and long burn times. These brands have built a reputation for reliability, so they are a great starting point in your search. Keeping an eye out for established names with positive reviews gives you confidence in your investment.

Compare Key Models and Specifications

When comparing models, a few key specifications will tell you a lot about performance. Modern wood ranges are far more efficient and cleaner-burning than older versions, with some reaching up to 80% efficiency. One of the most important things to look for is an EPA certification label, which is usually on the back of the stove. This certification ensures the unit meets clean air standards. Also, check the burn time, which should ideally be between 8 to 12 hours, and aim for a real-world efficiency of over 70%. These factors together ensure you get the most value from your investment.

Understanding the Costs

When you start shopping for a wood-burning stove and oven, you’ll see a range of price points. The final cost involves more than just the appliance itself. It’s a combination of the unit’s quality, features, and the professional installation required to get it running safely in your home. Thinking about the total investment from the beginning helps you set a realistic budget and find a stove that delivers value for years to come. Let’s break down the key factors that contribute to the overall price.

What Affects the Price?

The sticker price of a stove oven is directly tied to its construction and capabilities. A well-built stove made from high-quality materials will naturally cost more upfront but often proves more durable and efficient over time. Key factors influencing the price include the heating capacity, which determines how large a space it can warm, and the oven size. North American-made models are often praised for their solid construction and long burn times, making them a worthwhile investment. When you browse the options at the Gappsi Store, you’ll notice how these features impact the final cost.

Ask About Promotions and Financing

Don’t hesitate to ask your dealer about any current promotions or financing options they might offer. These can make a premium stove more attainable for your budget. A great dealer wants to build a relationship with you and will be transparent about ways to make your purchase work. It’s also helpful to work with a company that provides a wide range of services. For instance, if your new stove is part of a larger kitchen update, a full-service provider can streamline your entire home remodeling project, which can be a huge advantage.

Factor in Installation and Service

Professional installation is a critical part of your stove’s total cost, and it’s not an area where you want to cut corners. A reputable dealer provides comprehensive support, from helping you choose the right model to ensuring it’s installed correctly and safely. This often involves specialized work, like custom masonry for the hearth and surround. Having knowledgeable staff guide you through the process saves you time and prevents potential issues later on. This end-to-end service is a key part of the value you receive from a trusted local dealer.

Finding the Best Dealer on Long Island

Choosing the right dealer is just as important as choosing the right stove. You want a partner who understands your vision, offers high-quality products, and provides expert guidance from start to finish. On Long Island, finding a local dealer you can trust makes the entire process smoother and more enjoyable. A great showroom will not only display a variety of models but will also have a team ready to answer your questions and help you find the perfect match for your home’s unique needs and style.

Why Gappsi is Your Go-To Showroom

When you’re ready to bring the warmth and charm of a wood-burning stove into your home, finding the right partner is key. At Gappsi, we pride ourselves on being more than just a showroom. We offer a wide range of high-quality wood-burning ovens from popular brands known for their incredible efficiency and beautiful designs. Our team isn’t just here to sell you a product; we’re here to help you find the perfect fit for your home and lifestyle. With years of experience, our knowledgeable staff can walk you through every option, answering your questions and making sure you feel confident in your choice. We believe the selection process should be exciting, not overwhelming.

What to Look for in a Local Dealer

As you explore your options on Long Island, there are a few key things to look for in any dealer. First, make sure they offer EPA-certified wood stoves. This certification is your assurance that the stove meets important standards for efficiency and environmental compliance, which is good for your wallet and the planet. A great resource for this is the EPA’s guide on choosing the right wood-burning stove. Also, consider the variety of stoves they have available. A good dealer should present a solid range of options that cater to different heating needs, cooking styles, and aesthetic preferences, so you never feel like you have to settle.

Prepare for Your Consultation

To get the most out of your visit to a showroom, a little preparation goes a long way. Before you go, take a few minutes to measure the space you plan to heat. Having these dimensions handy will help the experts find a stove with the right capacity for your home. It’s also helpful to think about your primary heating needs and how you envision using the oven. Are you looking for a primary heat source or supplemental warmth? A reputable dealer will offer a free consultation to discuss these details, helping you understand all your options and make a truly informed decision without any pressure.

How to Get Started

Once you have a short list of potential dealers, it’s time to take the next step. Moving forward with confidence comes down to knowing what to look for and what to ask. A great dealer will be a partner in your project, guiding you from the initial showroom visit to the final installation. Here’s how you can prepare to make the best choice for your home.

Reaching Out to a Dealer

Your first conversation with a dealer sets the tone for the entire experience. Look for a team that listens to your vision and helps you find a stove and oven combo that truly fits your home’s style. A quality dealer won’t just sell you a product; they will work with you to find the perfect fit for your space and needs. Think of them as a key part of your home remodeling team. They should be able to answer your questions clearly and provide personalized recommendations that make sense for your project.

Questions to Ask During Your Visit

Walking into a showroom prepared with questions will help you make an informed decision. Start by asking about the stove’s efficiency and environmental compliance. You can look for the EPA certification label on the unit or ask the dealer to show you which models are on the current list of EPA-certified wood stoves. Next, discuss the size of the space you need to heat. A stove that’s too small won’t be effective, while one that’s too large can be inefficient. Getting answers to these questions will help you compare your options and find a model that performs well for years to come.

The Installation Process and Ongoing Support

Your purchase is just the beginning. A crucial factor in your decision should be the dealer’s installation process and the support they offer after the sale. Ask if they have certified staff who handle the installation. A professional installation is essential for safety and proper performance. You should also clarify what the service includes, from delivery and setup to any ongoing maintenance support or warranties. Choosing a dealer who provides comprehensive service ensures you have a reliable resource to turn to, giving you complete peace of mind as you enjoy your new stove.

Related Articles

Frequently Asked Questions

Can a wood-burning stove and oven combo really heat my whole house? It certainly can, but it depends on the stove’s power and your home’s layout. The key is to choose a model with the right BTU rating for your square footage. A properly sized stove can easily serve as the primary heat source for a large, open-plan area or even a well-insulated home, providing consistent warmth all winter. During a consultation, an expert can help you match a stove’s heating capacity to your specific needs.

How difficult is it to cook with one of these ovens? There is a bit of a learning curve compared to a standard electric or gas oven, but most people find it enjoyable and rewarding. Modern designs are built for better heat control and often include built-in thermometers to help you maintain a consistent temperature. The process becomes intuitive with a little practice, and the delicious, subtly smoky flavor it gives to everything from baked bread to roasted vegetables is something a conventional oven just can’t match.

Do these stoves require electricity to operate? No, they don’t. A wood-burning stove and oven combo operates completely off the grid. It uses only wood to generate heat for both warming your home and cooking your food. This makes it an incredibly reliable appliance, especially during power outages, ensuring you can stay warm and prepare hot meals no matter what the weather brings.

What does the installation process typically involve? Professional installation is essential for safety and performance. The process starts with finding a suitable location that meets the stove’s specific clearance requirements from walls and other flammable materials. It also involves installing a proper chimney or flue system to vent smoke outside. Often, the installation includes creating a non-combustible base, or hearth, which might require custom masonry work to create a beautiful and safe foundation for your new stove.

Are modern wood stoves better for the environment than older models? Absolutely. Modern wood stoves that are EPA-certified are significantly more efficient and cleaner-burning than older, uncertified units. They are designed to burn wood more completely, which means they use less fuel to produce the same amount of heat. This process releases far fewer particulates into the air, making them a much more responsible and environmentally friendly choice for heating your home.

Share this page:
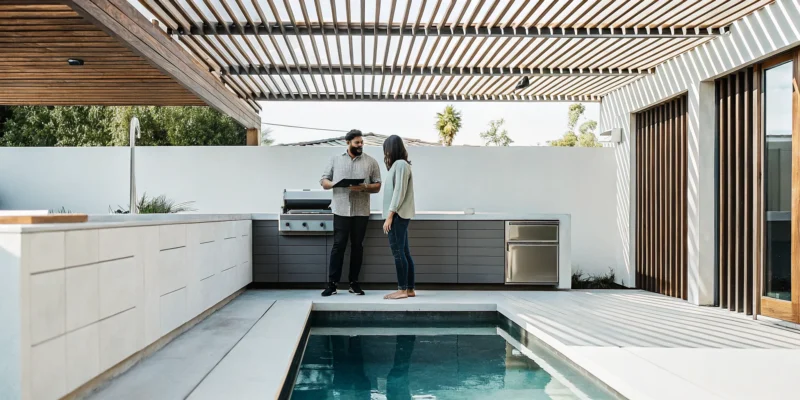
Modern outdoor kitchen with a grill and bar seating designed by a Long Island NY contractor.

Your Guide to Outdoor Kitchen Contractors on Long Island

If you love hosting, you know the routine: you’re stuck running between the grill outside and the kitchen inside, missing out on conversations with your guests. An outdoor kitchen solves this problem completely. It creates a seamless entertainment space where you can prep, cook, and socialize all in one place. Everything you need, from a refrigerator for cold drinks to a sink for quick cleanups, is right at your fingertips. This transforms hosting from a chore into a genuine pleasure. To create this effortless experience, you need a space designed for function and flow. That’s where an expert Outdoor Kitchen Designer Installer Contractor Long Island NY comes in, turning your backyard into the ultimate destination for friends and family.

Key Takeaways

  • Hire a professional to manage the entire process: A qualified contractor handles every phase of your project, from creating a functional design and securing permits to coordinating the full installation, which takes the stress of project management off your plate.
  • Select materials built for the outdoors: The longevity of your outdoor kitchen depends on choosing durable, weather-resistant options. Prioritize materials like natural stone and marine-grade appliances that can withstand Long Island’s climate and protect your investment for years to come.
  • Vet your contractor carefully to ensure quality: The right partner makes all the difference. Be sure to review a contractor’s portfolio of past work, confirm they are fully licensed and insured, and speak with recent references to feel confident in their ability to deliver a high-quality result.

What Can an Outdoor Kitchen Contractor Do for You?

Thinking about adding an outdoor kitchen is exciting, but turning that vision into a reality involves more than just picking out a grill. A professional outdoor kitchen contractor is your partner in the process, managing everything from the big picture design to the smallest installation details. They bring the expertise needed to create a space that’s not only beautiful but also functional, safe, and built to last. Let’s walk through exactly what a contractor can handle for you.

Design Your Dream Kitchen

A great contractor does more than just build; they design. They’ll help you create a well-planned space that functions as a cohesive system rather than just a collection of parts. This means thinking through the ideal layout for how you cook and entertain, ensuring easy access to utilities, and selecting materials that complement your home’s style. With their experience, a contractor can help you visualize the final product and make smart decisions that ensure your outdoor kitchen is a joy to use for years to come. Their expert design and construction knowledge is key to a successful project.

Source the Best Materials

Choosing the right materials is critical for an outdoor kitchen, especially with Long Island’s variable weather. A contractor has the expertise to guide you toward the best options that can withstand sun, rain, and snow. They have established relationships with suppliers and know which materials offer the best value and durability. Whether you’re considering durable outdoor cabinets, stainless steel appliances, or beautiful porcelain and natural stone countertops, your contractor will ensure every component is suited for outdoor use. This guidance helps you avoid costly mistakes and ensures your kitchen remains in great shape.

Handle the Full Installation

One of the biggest benefits of hiring a contractor is having a single point person to manage the entire project. From the initial site prep to the final installation, they coordinate every step. This includes working with electricians, plumbers, and other tradespeople to ensure everything is done correctly and on schedule. A contractor makes sure your new kitchen fits seamlessly with your existing patio, deck, or swimming pool area, taking the stress of project management completely off your shoulders. You get to sit back and watch your dream kitchen come to life without juggling multiple vendors.

Manage Permits and Codes

Building an outdoor kitchen often involves connecting utilities like water, gas, and electricity, which means you’ll likely need permits. A knowledgeable contractor understands local building codes and will handle the entire permitting process for you. This is a crucial step that ensures your kitchen is built safely and legally. They’ll manage the paperwork, schedule inspections, and make sure every aspect of the installation, from plumbing and drainage to electrical wiring, is up to code. This expertise provides peace of mind, knowing your investment is protected and your family is safe.

Choosing the Right Materials and Features

Your outdoor kitchen should be an extension of your home, which means it needs to be both beautiful and functional. The materials and features you select play a huge role in achieving that balance. It’s not just about picking a grill; it’s about creating a cohesive space that can handle backyard parties, family dinners, and the unpredictable Long Island weather. From the countertops where you’ll prep your meals to the lighting that sets the mood, every detail matters. Let’s walk through the key components that will make your outdoor kitchen a lasting and enjoyable part of your home.

Durable Countertops: Stone, Concrete, or Steel?

The right countertop is the workhorse of your outdoor kitchen. You need a surface that can stand up to sun, rain, and snow without staining, cracking, or fading. Natural stone, like granite, is a classic choice for its durability and timeless look. For a more modern feel, stainless steel offers a sleek, professional-grade surface that’s easy to clean. Concrete countertops can be custom-poured for a unique, industrial-chic vibe. We often recommend high-quality porcelain and natural stone because they are incredibly dense, non-porous, and resistant to the elements, making them a perfect fit for an outdoor cooking space.

Must-Have Appliances for Outdoor Cooking

A great outdoor kitchen is so much more than just a grill. To create a truly functional space, think about how you like to cook and entertain. A built-in grill is the centerpiece, but consider adding a side burner for simmering sauces or boiling corn. An outdoor refrigerator is a game-changer, keeping drinks and ingredients cold and saving you trips inside. A sink with running water makes prep and cleanup a breeze. For those who love to host, a pizza oven or a smoker can turn your backyard into the neighborhood’s favorite restaurant. The Gappsi Store offers a selection of high-performance appliances designed to handle the demands of outdoor cooking.

Smart Storage and Cabinetry

Nothing clutters a beautiful kitchen faster than having nowhere to put things. Ample storage is essential for keeping your cooking tools, serving dishes, and cleaning supplies organized and protected from the weather. Outdoor cabinets need to be tough. Stainless steel is a popular option because it resists rust and corrosion. Marine-grade polymer cabinets are another excellent choice, as they won’t warp, fade, or rot. Often, the best solution is to integrate storage directly into the kitchen’s structure with durable masonry that seamlessly matches your home’s aesthetic while providing weatherproof compartments for all your essentials.

Lighting and Power for Ambiance and Function

Proper lighting ensures your outdoor kitchen is usable and safe long after the sun goes down. A good lighting plan includes multiple layers. Task lighting, like spotlights over the grill and prep areas, is crucial for safety. Ambient lighting, such as string lights, under-counter lights, or sconces, creates a warm and inviting atmosphere for your guests. Don’t forget about power. You’ll need strategically placed, weatherproof outlets for blenders, speakers, or charging phones. Integrating lighting into your overall landscape design helps create a cohesive and magical backyard experience.

Built to Last: Weatherproofing for the Long Island Climate

Here on Long Island, our weather can be tough on outdoor structures. From humid, sunny summers to freezing winters with snow and ice, your kitchen needs to be built from materials that can handle it all. Choosing materials that withstand our specific climate, especially the damaging freeze-thaw cycles, is essential for the longevity of your investment. This means selecting frost-proof stone, marine-grade stainless steel appliances, and durable cabinetry. Proper construction techniques are just as important. Applying a protective sealant can also extend the life of your surfaces, and our restoration and sealing services can keep your kitchen looking new for years to come.

From Concept to Completion: The Installation Process

Seeing your outdoor kitchen come together is an exciting process. While every project is unique, a professional contractor will follow a clear, step-by-step plan to ensure everything goes smoothly. Understanding this process helps you know what to expect and feel confident from the first conversation to the final reveal. Here’s a look at the typical journey from a simple idea to a fully functional outdoor kitchen right in your Long Island backyard.

Step 1: The Initial Consultation

This first meeting is all about discovery. It’s a conversation where you share your vision, your must-have features, and your budget. A great contractor will listen carefully, ask questions about how you plan to use the space, and assess your property to discuss what’s possible. This is the perfect time to bring your inspiration photos and ideas to the table. At Gappsi, we see this as the foundational step where we align our expertise with your dream, ensuring the final project truly reflects your lifestyle. This initial planning is a key part of any successful home remodeling project.

Step 2: Bringing Your Design to Life

Once we have a clear understanding of your goals, the creative work begins. Using advanced design software, we transform your ideas into a detailed 3D rendering. This allows you to virtually walk through your new outdoor kitchen before construction even starts. You can see how the layout flows, experiment with different materials for countertops and finishes, and decide on the perfect placement for your grill, refrigerator, and sink. This collaborative design phase is crucial for making adjustments and finalizing every detail, ensuring the finished space is both beautiful and perfectly functional for your needs. You can see examples of our finished work on the Gappsi YouTube channel.

Step 3: Prepping the Site and Securing Permits

With a final design in hand, it’s time to prepare the site. This important phase involves all the groundwork, like clearing and leveling the area, creating a solid foundation, and running utility lines for water, gas, and electricity. One of the biggest advantages of working with an experienced contractor is that we handle all the logistics, including securing the necessary building permits for your town in Long Island. We make sure your project complies with all local codes and regulations, so you can have peace of mind knowing everything is being done correctly and safely.

Step 4: The Build and Installation

This is when your vision truly starts to take shape. Our team of skilled craftsmen gets to work, constructing the framework of your kitchen with expert masonry. We then meticulously install your chosen cabinets, countertops, and appliances with precision and care. We believe in using only high-quality, durable materials that are built to last. Whether you’ve chosen sleek stainless steel or gorgeous porcelain and natural stone, our focus on expert craftsmanship ensures your outdoor kitchen will be a beautiful and enduring addition to your home.

Step 5: The Final Walkthrough

Once the last appliance is in place and the final touches are complete, we’ll do a final walkthrough with you. This is your opportunity to inspect every detail of your new outdoor kitchen and make sure you are completely happy with the result. We’ll show you how to operate all your new equipment, from the grill to the outdoor refrigerator, and provide you with tips on how to care for the new surfaces. Our job isn’t finished until you are 100% satisfied and ready to start hosting barbecues and making memories in your stunning new space.

Why an Outdoor Kitchen Is a Great Investment

An outdoor kitchen is more than just a place to grill burgers. It’s a functional, beautiful extension of your home that completely changes how you use your backyard. Think of it as a long-term investment in your property and your lifestyle. It creates a central point for gatherings, makes hosting feel effortless, and allows you to enjoy the fresh Long Island air more often. From a practical standpoint, it adds significant appeal and functionality to your home, making it a smart choice for any homeowner looking to enhance their outdoor living space.

Add Value to Your Home

When it comes to home improvements, not all projects offer a great return. An outdoor kitchen, however, is a feature that consistently catches the eye of potential buyers. On Long Island, where outdoor living is a huge part of the lifestyle, a well-designed kitchen is a major selling point. It suggests a home that’s perfect for entertaining and family life. By investing in quality masonry and durable appliances, you’re not just building a space for today, you’re adding tangible value that will pay off down the road. It’s a functional upgrade that also makes your property more competitive on the market.

Create the Ultimate Entertainment Hub

Imagine hosting a party where you’re not stuck inside, away from your guests. An outdoor kitchen becomes the heart of your backyard, a natural gathering spot for friends and family. You can chat with everyone while you cook, and the open layout keeps the party flowing. Modern designs often include features like a bar or cocktail station, turning your patio into the go-to spot for evening get-togethers. By creating a multi-functional space, you can cook, dine, and relax without ever leaving the fresh air. It transforms your backyard from a simple lawn into a true entertainment destination.

Enjoy Your Backyard All Year Long

Many people think of outdoor kitchens as a summer-only feature, but that doesn’t have to be the case. With smart design choices, you can extend your outdoor season well into the spring and fall. Incorporating elements like a fire table, built-in patio heaters, or a covered pergola can create a cozy and inviting atmosphere even when the weather is cool. This allows you to get so much more use out of your investment. Instead of packing everything away after Labor Day, you can enjoy crisp autumn evenings and sunny spring afternoons in your beautiful outdoor space.

Make Outdoor Living Effortless

A thoughtfully designed outdoor kitchen makes everything easier. Instead of running back and forth to your indoor kitchen for supplies, everything you need is right at your fingertips. A great contractor will plan for utilities, layout, and materials to work together as a single, efficient system. This isn’t just about adding a grill; it’s about creating a complete outdoor living area that feels like a natural part of your home. When your landscape design seamlessly integrates your kitchen, patio, and garden, outdoor living becomes simple, comfortable, and a part of your daily routine.

Finding the Best Outdoor Kitchen Contractor for Your Project

Choosing the right contractor is the single most important decision you’ll make for your outdoor kitchen project. This is the team you’ll trust to turn your vision into a beautiful, functional space that lasts for years. A great partnership means clear communication, quality craftsmanship, and a smooth process from start to finish. But with so many options out there, how do you know who to choose? It comes down to finding a team that not only understands your aesthetic but also has the technical expertise to build a structure that can handle Long Island’s unique climate. The right contractor acts as your partner, guiding you through material selections, appliance choices, and layout decisions to create a space that truly works for your family. To find the best fit for your home, you’ll want to focus on a few key areas that separate the true professionals from the rest. By asking the right questions, reviewing their past work, and checking their credentials, you can feel confident you’re hiring a team that will deliver the outdoor oasis you’ve been dreaming of.

Look for Proven Experience and Credentials

Your outdoor kitchen needs to be more than just beautiful; it has to withstand hot summers, freezing winters, and everything in between. That’s why it’s so important to find a contractor with a long history of building durable outdoor living spaces specifically on Long Island. Look for a company that specializes in this type of work, not a generalist who does it on the side. A team with decades of experience in everything from masonry to landscaping will understand the unique challenges of our climate and how to select materials that won’t crack, fade, or warp. Proven expertise is your best guarantee of a kitchen that will host family barbecues for years to come.

Review Their Portfolio and Past Projects

A portfolio is your window into a contractor’s style and quality of work. Don’t just glance at the photos; study them. Do their projects have the look and feel you’re going for? Look for a variety of designs that show their range, from sleek, modern setups to rustic, traditional kitchens. Pay close attention to the details, like the stonework, appliance integration, and overall finish. A great way to see their craftsmanship up close is to check out videos of their completed work. Visiting a contractor’s YouTube channel can give you a much better sense of the scale and quality of their projects than static images alone.

Get Clear on Pricing and Timelines

Transparency is key when it comes to the project’s budget and schedule. A trustworthy contractor will provide a detailed, itemized quote that breaks down the costs for materials, labor, appliances, and permits. Be wary of anyone who gives you a single, vague number without explaining what it includes. You should also have a clear conversation about the project timeline. While unexpected delays can happen (especially with weather), an experienced contractor should be able to give you a realistic schedule and commit to keeping you updated on their progress. This open communication helps manage expectations and ensures there are no surprises along the way.

Always Check for Licenses, Insurance, and References

This step is non-negotiable. A reputable contractor must be fully licensed to work in your area and carry both liability insurance and worker’s compensation. This isn’t just about following rules; it’s about protecting you. If an accident happens on your property, their insurance ensures you aren’t held financially responsible. Don’t just take their word for it, ask to see the documents. Finally, ask for a list of recent references and take the time to call them. Hearing directly from past clients is one of the best ways to learn about a contractor’s communication skills, professionalism, and the quality of their finished home remodeling projects.

Common Pitfalls to Avoid When Hiring a Contractor

Choosing a contractor is one of the biggest decisions you’ll make for your home improvement project. It’s exciting to get started, but moving too quickly can lead to headaches down the road. Taking the time to find the right partner ensures your project is a success from start to finish. Let’s walk through a few common missteps homeowners make and how you can sidestep them to get the beautiful outdoor kitchen you’ve been dreaming of.

Mistake #1: Choosing Price Over Quality

It’s always tempting to go with the lowest bid, but when it comes to your home, price shouldn’t be the only factor. An unusually low estimate can be a red flag for subpar materials or inexperienced labor. Investing in quality from the start means you’ll have an outdoor kitchen that not only looks fantastic but also withstands Long Island’s weather for years to come. Skimping on materials often leads to an inferior product you’ll be unhappy with later. A reputable contractor will be transparent about costs and help you select durable, high-quality porcelain and natural stone that fits your vision and budget.

Mistake #2: Not Doing Your Homework

Before you start collecting quotes, take some time to research what you want and who you want to work with. Having a clear idea of your goals, style, and must-have features will help you communicate effectively with potential contractors. Look at their past projects, read client reviews, and check their credentials. Planning ahead allows you to properly research your options and find a company whose work resonates with you. Exploring a contractor’s project gallery is a great way to see their craftsmanship firsthand and gather inspiration for your own outdoor space. This preparation helps you make informed decisions and find the perfect team for your project.

Mistake #3: Forgetting to Talk About Long-Term Care

Your beautiful new outdoor kitchen is built, the last tool is packed away, and you’re ready to start grilling. But what happens next? It’s easy to forget about maintenance in the excitement of a finished project, but discussing long-term care is essential. Ask your contractor about the upkeep required for the materials and appliances you’ve chosen. A good partner will provide clear instructions for cleaning and care to ensure your investment remains a source of enjoyment for years. Understanding these needs upfront helps you protect your outdoor kitchen and keep it looking its best. Some companies even offer restoration and sealing services to help with upkeep.

Mistake #4: Overlooking Local Building Codes

Building codes and permits can feel complicated, but they are a non-negotiable part of any major home renovation. Every town on Long Island has its own set of regulations for things like plumbing, electrical work, and structural additions. Ignoring these rules can result in fines, project delays, or even having to tear down completed work. An experienced local contractor will be well-versed in these requirements and manage the entire permitting process for you. This ensures your project is not only beautiful and functional but also safe and fully compliant. This is where hiring a professional masonry and construction company makes all the difference.

Related Articles

Frequently Asked Questions

How long does it take to build an outdoor kitchen? The timeline for an outdoor kitchen project can vary quite a bit, but you can generally expect it to take several weeks to a few months from our first conversation to your first cookout. The initial design and material selection phase is followed by securing any necessary permits, which can sometimes take a few weeks on its own. Once the groundwork is ready, the actual construction is often the fastest part of the process.

What are the most important features for a kitchen that will last in Long Island’s weather? For a kitchen to endure our coastal climate, you need to focus on materials that can handle moisture and dramatic temperature swings. This means choosing non-porous countertops, like high-quality porcelain or granite, that won’t absorb water and crack in a freeze. It also means selecting cabinetry and appliances made from marine-grade stainless steel or other weatherproof materials that resist rust and corrosion.

Do I need to have a complete design idea before I call a contractor? Not at all. It’s helpful if you have a general sense of what you like and how you plan to use the space, but you don’t need a finished blueprint. A good contractor will work with you during the initial consultation to turn your rough ideas into a functional, beautiful design. We see it as a partnership where we bring the technical expertise to help shape your vision.

How much should I expect to invest in a quality outdoor kitchen? The cost of an outdoor kitchen depends heavily on the size, complexity, materials, and appliances you choose. A simple setup with a built-in grill and some counter space will be very different from a large, fully equipped kitchen with a refrigerator, sink, and pizza oven. The best approach is to think about it as a long-term investment in your home’s value and your family’s lifestyle, and a good contractor can help you design a project that aligns with your budget.

What is the biggest mistake homeowners make when planning an outdoor kitchen? One of the most common pitfalls is underestimating the importance of a functional layout. It’s easy to get focused on the grill or the countertops, but a great outdoor kitchen flows well and has a smart “work triangle” just like an indoor one. Thinking through where you’ll prep, cook, and serve is crucial. A specialized contractor has the experience to design a space that is not only beautiful but also incredibly practical to use.

Share this page:
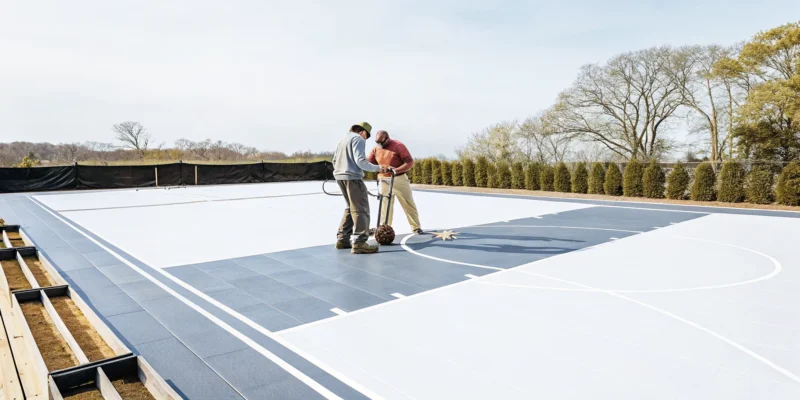
NextBase paver base panel system with smart drainage being installed on a driveway.

NextBase vs. Gator Base: The Paver Base Breakdown

The foundation of any paver project is the unsung hero that ensures your investment lasts for decades. A weak base leads to shifting stones, uneven surfaces, and costly repairs down the line. While traditional gravel bases have been the standard, they are vulnerable to the freeze-thaw cycles we experience here on Long Island. This is where modern engineering provides a superior solution. Companies like Techniseal and Gator Alliance have developed systems designed for long-term stability and excellent drainage. The NextBase Paver Base Panel System, for example, creates an interlocking grid that distributes weight evenly and manages water effectively. We’ll explore how these advanced systems work and compare them to help you build a beautiful outdoor space that truly stands the test of time.

Key Takeaways

  • Synthetic bases save time and labor: These modern panels replace tons of heavy gravel, which means less digging and a much faster installation for your patio or walkway compared to traditional methods.
  • Know the difference between the top brands: NextBase features a robust interlocking system for superior stability, while Gator Base stands out as a cost-effective and sustainable choice made from recycled materials.
  • Use the right base for the right job: Synthetic panels are perfect for pedestrian areas like patios and walkways, but for driveways that handle cars, you’ll need to stick with a traditional gravel foundation to support the heavy load.

What is NextBase Paver Base?

If you’ve ever considered a new patio or walkway, you’ve probably pictured the beautiful finished product. What you might not have pictured is the tons of gravel and sand that traditionally go underneath. Building that foundation is often the most labor-intensive part of the project. This is where a synthetic paver base comes in, and NextBase is a leading name in this modern approach. It’s a lightweight, engineered panel system designed to completely replace the thick layer of crushed stone typically used in hardscaping.

When you’re planning a project with beautiful porcelain and natural stone pavers, the foundation is just as important as the stones you choose. NextBase offers a simpler, faster, and less physically demanding way to create a stable and long-lasting base. Instead of excavating several inches of soil and hauling in heavy aggregate, you work with easy-to-handle panels. This innovation makes paver installation more accessible for DIY projects and more efficient for professional installers, saving time, money, and a lot of backaches. It’s a streamlined solution for creating the outdoor spaces you’ve been dreaming of.

How the System Works

NextBase is a panel system that replaces the heavy, traditional base materials used for outdoor surfaces like patios and walkways. Think of it as a high-tech floor for your pavers. The panels are designed to be easy to put together and create a very stable base. Each panel has an interlocking design, so they connect securely to one another for extra stability across the entire project area. This ensures the base acts as a single, solid unit. The panels are also easy to cut, allowing you to create custom shapes and fit them perfectly around curves or obstacles in your yard.

The Innovation Behind Techniseal

The secret behind NextBase is its material. The panels are made from a strong, durable material called high-density polypropylene. This isn’t just any plastic; it’s engineered to withstand heavy loads and the harsh weather cycles we experience here on Long Island. According to Techniseal’s product information, NextBase is also environmentally friendly and won’t harm the soil or water. A key feature is its excellent drainage. The panels are designed to allow water to flow through them, preventing pooling and frost heave, which helps your patio or walkway remain level and beautiful for years to come.

Meet Gator Base: How Does It Compare?

When you’re looking into synthetic paver bases, Gator Base is another name you’ll hear a lot. It’s a well-established product from Alliance Gator, a company known for its hardscaping solutions. Like NextBase, it’s designed to make paver installation faster and less physically demanding than the traditional method. But how does it work, and what makes it different? Let’s break down its approach and see how it stacks up against the competition.

The Gator Alliance Approach to Paver Installation

Gator Base is a high-density foam panel engineered to replace the thick layer of compacted crushed stone you’d normally use for a paver project. It’s specifically designed for pedestrian areas like patios, walkways, and pool surrounds. The main idea is efficiency. By swapping out tons of gravel for these lightweight panels, you drastically cut down on excavation, hauling, and labor. This makes the Gator Base system a go-to choice for both professional contractors and ambitious DIYers who want a solid foundation without the back-breaking work of a traditional base installation.

Key Differences: NextBase vs. Gator Base

So, what sets these two systems apart? A key difference is the amount of traditional base they replace. Each Gator Base panel takes the place of about 6 inches of compacted stone, which significantly reduces how deep you need to dig. It’s made from a lightweight yet strong polypropylene that’s also 100% recyclable. NextBase panels, on the other hand, are designed to replace up to 300 pounds of base material each. While both systems offer major savings on labor and time, Gator Base specifically highlights a potential 20% reduction in labor costs and up to 50% in excavation costs, making it a very appealing option for budget-conscious projects.

Synthetic vs. Traditional Base: Which Should You Choose?

When you picture building a new patio or walkway, you probably imagine a lot of digging and hauling heavy bags of gravel and sand. For decades, that was the only way to create a stable foundation for pavers. This traditional method involves excavating several inches of soil, laying down geotextile fabric, and then adding and compacting multiple layers of crushed stone and sand. It’s a proven technique, for sure, but it’s also incredibly labor-intensive, time-consuming, and creates a major mess in your yard that can last for days.

Today, you have another option: synthetic paver base panels. Systems like NextBase and Gator Base are engineered to replace that thick, heavy layer of crushed stone. These panels create a strong, stable foundation with significantly less excavation and effort. Choosing between a synthetic and traditional base comes down to weighing the benefits of modern technology against old-school methods. You’ll want to consider the impact on your timeline, your budget, and the long-term performance of your beautiful new masonry project. Let’s look at how these two approaches stack up in the areas that matter most to homeowners.

Lighter Materials and Less Labor

The most immediate advantage of synthetic bases is the dramatic reduction in heavy materials. A traditional base requires tons of crushed stone and sand, all of which needs to be moved from your driveway to your backyard, one wheelbarrow at a time. Synthetic panels, on the other hand, are incredibly lightweight and easy to handle. For example, a single NextBase panel can replace nearly 300 pounds of traditional base material. This means far less digging and heavy lifting. For you, this translates to a cleaner, less disruptive project and significant savings on labor costs, whether you’re doing it yourself or hiring a professional.

A Look at Installation Times

Because you get to skip most of the excavation and material hauling, synthetic base panels can cut your installation time dramatically. A project that might take several days with a traditional base can often be completed much more quickly. Using a product like Gator Base can reduce labor costs by at least 20 percent simply because the job gets done faster. This streamlined process means your yard returns to normal sooner, and you can start enjoying your new patio, walkway, or outdoor kitchen without a long wait. You can see how quickly these projects come together on the Gappsi YouTube channel, where our teams showcase their efficient work.

Benefits of Long-Term Durability

It’s natural to wonder if a lightweight plastic panel can really be as durable as several inches of compacted stone. The answer is a resounding yes. These panels are engineered from high-density polypropylene, a material designed to last. NextBase, for instance, is rated to remain stable for over 100 years. The panels lock together to create a rigid grid that distributes weight evenly, preventing pavers from shifting or sinking. They are also built to handle the freeze-thaw cycles we experience on Long Island, which helps prevent frost heave. This modern material won’t rot or decay, ensuring your investment stays beautiful for years, especially with proper paver maintenance.

A Feature-by-Feature Breakdown

When you get down to the details, both NextBase and Gator Base offer impressive advantages over traditional paver bases. But they achieve these results in slightly different ways. Understanding their unique features will help you decide which one is the perfect fit for your patio, walkway, or driveway project. Let’s break down what sets each system apart, from their design and materials to their environmental footprint.

NextBase: Interlocking Design and Smart Drainage

What really makes NextBase stand out is its clever interlocking panel system. Think of it like puzzle pieces that snap together to create a super stable and uniform foundation. This design replaces the need for tons of heavy, traditional base materials, which simplifies the installation process quite a bit. The panels also have a built-in drainage feature, with channels that direct water away from the surface. This is a huge plus for preventing water from pooling and causing damage over time, ensuring your beautiful natural stone pavers stay put for years to come. This smart design makes for a durable and long-lasting base.

Gator Base: Recycled Materials and Cost-Effectiveness

Gator Base takes a slightly different approach, focusing on efficiency and sustainability. It’s made from a lightweight yet incredibly strong polypropylene that is also 100% recyclable. For homeowners looking to make an eco-friendly choice, this is a major benefit. Beyond its green credentials, Gator Base is also very kind to your budget. Using this system can lead to significant savings on both labor and excavation costs, which can make a real difference in your project’s bottom line. It’s an attractive option for anyone wanting a high-quality result without overspending, making it a popular choice for many landscape design projects.

Sustainability and Environmental Impact

If you’re concerned about the environmental impact of your home improvement project, you can feel good about choosing either of these synthetic bases. Both companies have made sustainability a priority. NextBase is crafted from a high-density polypropylene that is designed to remain stable for over a century without leaching any harmful chemicals into the soil. Similarly, Gator Base is fully recyclable and won’t degrade when buried, minimizing its long-term effect on the environment. Choosing either of these products means you’re investing in a durable solution that’s also a responsible choice for your property and the planet.

How to Install NextBase and Gator Base Systems

Installing a synthetic paver base is much simpler than working with traditional aggregate, but following the correct steps is still key to a lasting result. Both NextBase and Gator Base share a similar installation process that saves you time and a lot of heavy lifting. Whether you’re building a new patio or a walkway, the process starts with proper ground preparation and ends with a beautiful, stable surface ready for years of enjoyment.

The main advantage here is the reduction in deep digging and material hauling. These lightweight panels create a solid foundation without the need for several inches of compacted stone, which means less strain on your back and a faster project timeline. This technology makes hardscaping projects more accessible, but precision is still essential for a professional-looking and durable outcome. Think of it as a smarter, not harder, approach to building the outdoor space you’ve been dreaming of. Let’s walk through the general steps for getting these systems installed correctly so you can feel confident about the process from start to finish.

Preparing Your Site

Your first step is to prepare the ground. Unlike traditional methods that require deep excavation, synthetic bases only need a shallow trench. When installing, you should dig about 3 ⅝ inches deep. The exact depth might change based on how thick your porcelain or natural stone pavers are. After clearing the area of grass and roots, you’ll want to make sure the soil is level and compacted. Once the ground is firm, you’ll add a thin layer of bedding sand, about ¾ of an inch, and screed it to create a perfectly smooth surface for the panels to rest on. This initial prep work is crucial for a professional-looking finish.

Laying and Cutting the Panels

This is where you really start to see the benefits of a synthetic base. The panels are lightweight and easy to handle. The panels connect together, which makes them easy to put down and creates a strong, stable base. You simply lay them on top of the prepared sand bed, locking each one into its neighbor. For edges or custom shapes, you usually don’t need special tools. The panels have cutting lines every 3 inches, so you can easily cut them to the size you need with a utility knife. This makes fitting them around curves or obstacles a straightforward task with materials you can find at the Gappsi Store.

Securing the Panels and Finishing Your Project

Once your panels are laid out and cut to size, the final steps bring your project together. To keep the perimeter secure, you’ll want to install an edge restraint. For example, you can use Gator Edge and Gator Base Screws to hold everything in place. These systems are also designed for excellent water management. Gator Base, for instance, is built to return water to the native soil through built-in evacuation channels, preventing water buildup. After the base is secure, you can begin laying your pavers. Once they are all in place, you’ll sweep polymeric sand into the joints and compact the surface to lock everything together for a durable, long-lasting finish.

Which Paver Base is Right for Your Project?

Choosing between NextBase and Gator Base comes down to the specifics of your project. Both are fantastic modern alternatives to the traditional gravel and sand method, but they are not one-size-fits-all solutions. The right choice depends on what you’re building, your budget, and even the weather in your area. Think of it like picking the right foundation for a house; it’s a critical step that ensures your beautiful new patio or walkway lasts for years. While traditional methods have served us well, these synthetic bases offer unique advantages in terms of installation speed, labor, and performance. They represent an evolution in hardscaping, making professional-grade results more accessible. To make the best decision for your home, you’ll want to consider a few key factors. We’ll walk through the size and expected use of your project, how your timeline and budget play a role, and why Long Island’s climate makes drainage a top priority. Understanding these elements will help you select a paver base that provides a stable, long-lasting surface for your outdoor masonry projects, whether you’re laying elegant porcelain pavers or classic natural stone.

Considering Project Size and Foot Traffic

First things first, what are you building? Both NextBase and Gator Base are designed specifically for pedestrian areas. This makes them an excellent choice for projects like garden paths, patios, and the areas around your swimming pool. They provide a solid, reliable foundation where people will be walking and relaxing. However, it’s important to know their limits. Neither of these synthetic bases is rated for vehicular traffic. If you’re planning a driveway or a parking area, you’ll need to stick with a traditional, deep aggregate base that can handle the weight of cars and trucks. For walkways and outdoor living spaces, these panels are more than up to the task.

Factoring in Your Budget and Timeline

If you’re looking to save time and money, synthetic bases are a compelling option. A traditional paver base requires significant excavation, often 6 to 12 inches deep, which means more labor and more material to haul away. With a product like NextBase, you may only need to dig down a few inches. This streamlined process can seriously speed up your project timeline. Gator Base also promises major savings, potentially cutting labor costs by 20% or more. While the panels themselves have an upfront cost, the reduction in excavation, labor hours, and aggregate material often makes them a more budget-friendly choice in the long run, getting you back to enjoying your yard faster.

Matching the Base to Your Climate and Drainage Needs

Here on Long Island, we get our fair share of rain and snow, which makes drainage a non-negotiable feature for any hardscaping project. Poor drainage can lead to shifting pavers, water damage, and freeze-thaw cycles that destroy your beautiful work. Both NextBase and Gator Base are engineered with this in mind. They feature built-in channels and slopes that allow water to flow through the panels and return to the soil beneath. This design prevents water from getting trapped, which protects the integrity of your installation. This advanced drainage management is a huge advantage over traditional bases and helps ensure your patio or walkway won’t require premature restoration and sealing.

DIY or Hire a Pro: Making the Call

Deciding whether to tackle a paver project yourself or bring in a professional is a big part of the planning process. Synthetic bases like NextBase and Gator Base have certainly made DIY installations more approachable by reducing the heavy labor and excavation involved. However, it’s still important to honestly assess the scope of your project, your budget, and your own skill set. The right choice comes down to balancing the potential cost savings of a DIY job with the expertise, efficiency, and peace of mind that comes with hiring a seasoned team. Let’s break down when it makes sense to go one way or the other.

When to Hire a Hardscaping Professional

For large or complex projects, hiring a professional is often the smartest investment. If you’re planning a high-traffic area like a new patio, a pool deck, or an intricate walkway, an expert touch ensures the job is done right. Professionals have the experience to handle challenges like proper site grading for drainage, ensuring the base is perfectly level, and creating a durable surface that will withstand years of use and harsh weather. A professional masonry contractor brings the right equipment and a deep understanding of materials, guaranteeing a polished, long-lasting result. Think of it as an investment in quality and your own peace of mind.

The Tools and Skills Needed for a DIY Install

If you’re feeling handy and your project is on the smaller side, a DIY installation is definitely within reach. Thanks to innovations like synthetic bases, you can save significantly on labor and excavation costs. Products like Gator Base can reduce digging, and NextBase panels are designed with cutting lines, so you often don’t need special tools to get a perfect fit. To succeed, you’ll need some basic skills: the ability to measure accurately, follow instructions carefully, and handle some light physical work. If you’re laying a simple garden path or a small, square patio, taking the DIY route can be a rewarding and budget-friendly option. You can find many of the necessary tools and supplies to get started at a local home improvement supplier.

Common Myths About Synthetic Bases, Busted

New technology always comes with a few questions, and synthetic paver bases are no exception. It’s smart to be skeptical, but let’s clear the air on some common misconceptions. Understanding the facts can help you feel confident about choosing the right foundation for your patio, walkway, or other outdoor project.

Are They Really Durable?

It’s easy to look at a lightweight plastic panel and wonder if it can really hold up over time, especially compared to tons of gravel. The truth is, these bases are engineered for incredible longevity. NextBase, for example, is made from a high-density polypropylene that won’t break down or leach chemicals into the soil for over a century. Similarly, Gator Base is designed to last, featuring built-in channels that help manage water and prevent shifting. These systems provide a stable, long-lasting foundation for beautiful masonry projects that stand the test of time.

Can You Use Them Anywhere?

This is a great question, and the answer is no, they aren’t a one-size-fits-all solution. It’s important to match the base to the project. Gator Base is specifically designed for pedestrian areas like patios and walkways, so you wouldn’t want to use it for a driveway. NextBase offers a bit more versatility and is compatible with a wide range of surfaces, including pavers, natural stone, and porcelain tiles. The key is to understand the load-bearing needs of your project. For areas with vehicle traffic, a traditional aggregate base or specialized gravel driveway solutions would be the right choice.

What About Material Safety?

Concerns about adding plastic materials to your yard are completely valid. Luckily, both NextBase and Gator Base were created with environmental safety in mind. They are made from polypropylene, a stable plastic that is 100% recyclable and won’t release harmful chemicals into your soil. This means you can build your dream patio without worrying about its impact on your lawn or garden. Choosing an environmentally friendly base is just one part of creating a beautiful and sustainable landscape design you can enjoy for years to come.

Where to Find NextBase and Gator Base

Now that you’ve weighed the pros and cons, the next step is figuring out where to buy these paver base systems. Unlike grabbing a bag of concrete from a big-box store, NextBase and Gator Base are specialized products. You’ll typically find them through authorized dealers and professional suppliers. As a full-service home improvement company, we at Gappsi handle all the material sourcing for you, ensuring you get authentic, high-quality products for your project. But if you’re curious about where they come from, here’s a quick guide to get you started.

Finding Authorized Dealers and Suppliers

Both NextBase and Gator Base are professional-grade materials, so you’ll find them at specialty landscape and hardscape supply stores rather than general home improvement centers. NextBase is a product from Techniseal, a company well-regarded for its hardscape installation solutions. You can learn more about their panel base system directly on their site. Similarly, Gator Base is an innovative foundation option from Alliance Gator. Working with a contractor like Gappsi simplifies this process entirely. We have long-standing relationships with the best suppliers on Long Island, which means we can source the right materials for your job without any hassle on your part.

A Note on Pricing and Availability

When you’re budgeting for your project, it’s helpful to understand how these systems are priced. The cost can vary based on your location and the supplier, but you’re making an investment in quality and convenience. For example, a 10-pack of NextBase panels often runs around $240. While Gator Base pricing is comparable, its main financial benefit comes from reducing labor costs by at least 20 percent, which can lead to significant savings on the total project. At the Gappsi Store, we provide transparent pricing and can help you compare the material and installation costs to find the best fit for your budget and timeline.

Maintaining Your Paver Base for Years to Come

Choosing a synthetic paver base like NextBase or Gator Base sets you up for a durable, long-lasting patio, walkway, or driveway. While these systems are designed to be incredibly low-maintenance, a little proactive care will keep your investment looking its best for decades. Think of it as a simple check-up for your outdoor space. By staying on top of a few small tasks, you can prevent minor issues from becoming bigger headaches down the road and ensure your beautiful paver surface remains stable and stunning.

Simple Inspection and Care Tips

A great habit to get into is walking your paver area with the changing seasons, especially before winter arrives. Look for any pavers that seem to have shifted or settled. Keeping the surface clean is also key. Regularly sweep away leaves and debris to prevent staining and organic growth. For a deeper clean, a gentle rinse with a garden hose usually does the trick. To give your pavers an extra layer of defense, consider applying a sealant every three to five years. This not only protects them from the elements but also helps lock the jointing sand in place. Our professional restoration and sealing services can keep your pavers looking brand new.

How to Handle Common Issues and Repairs

Even with a solid synthetic base, Long Island’s freeze-thaw cycles can sometimes cause a paver to shift slightly. If you spot one, the fix is often straightforward. You can carefully lift the paver, adjust the leveling sand underneath, and set it back in place. Also, pay attention to water flow. Make sure your gutters and the surrounding grade direct water away from your patio to prevent pooling. Proper landscape design is essential for good drainage. For stubborn stains or more significant repairs, it’s always a good idea to call in a professional. Our masonry experts can handle any repair, ensuring the integrity of your project is maintained.

Related Articles

Frequently Asked Questions

Can I use a synthetic base for my driveway? That’s a great question, and the answer is no. Both NextBase and Gator Base are specifically engineered for pedestrian areas like patios, walkways, and pool surrounds. They provide excellent stability for foot traffic but are not designed to handle the heavy, repeated weight of vehicles. For a driveway project, you will need to use a traditional, deep aggregate base to ensure it can withstand the load and last for years.

What’s the biggest advantage of using a synthetic base over traditional gravel? The most significant benefit is the massive reduction in labor and time. A traditional base requires you to dig out several inches of soil and then haul in tons of heavy gravel and sand. Synthetic panels are lightweight and replace almost all of that aggregate, which means far less digging, less heavy lifting, and a much faster installation. Your yard stays cleaner, and you get to enjoy your new space much sooner.

Are these plastic panels really as strong as tons of compacted stone? It’s natural to be skeptical, but yes, they are incredibly durable. These panels are made from high-density polypropylene, a material engineered to distribute weight evenly and withstand harsh weather, including Long Island’s freeze-thaw cycles. They are designed not to rot or decay and can last for decades, providing a stable foundation that prevents your pavers from shifting or sinking over time.

How much less digging is actually involved with a synthetic base? You save a significant amount of excavation work. A traditional paver installation often requires you to dig down 6 to 12 inches to create a proper foundation. With a synthetic system like NextBase or Gator Base, you typically only need to excavate about 3 to 4 inches. This difference saves you from removing, and disposing of, a huge amount of soil.

Do I need special tools to cut and fit the panels for a DIY project? For the most part, no. One of the best features of these panels is how easy they are to work with. They are designed with pre-marked cutting lines, allowing you to trim them to fit curves or edges using just a standard utility knife. This makes the installation process much more accessible for a DIY project, as you won’t need to rent or buy heavy-duty cutting equipment.

Share this page:
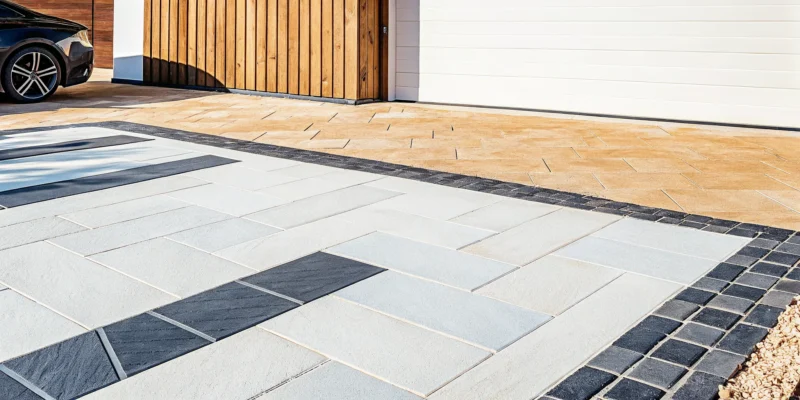
A modern patio with large porcelain pavers from the largest suppliers on Long Island, NY.

A Guide to Long Island’s Largest Porcelain Paver Suppliers

Your backyard should be a true extension of your home, a place for relaxing, entertaining, and making memories. Creating that perfect outdoor oasis starts with a solid foundation. While materials like wood and natural stone have their charm, they often come with demanding upkeep. Porcelain pavers offer a better way, giving you the sophisticated look of natural materials without the constant sealing and maintenance. The key is finding a partner who can help you explore all the possibilities. As one of the largest porcelain pavers Suppliers on long island ny, Gappsi provides an unmatched selection and the design expertise to help you craft a beautiful, functional, and worry-free space that perfectly suits your lifestyle.

Key Takeaways

  • Choose porcelain for lasting beauty and easy care: Porcelain pavers are a smart investment because they are incredibly durable, resistant to stains and weather, and require very little maintenance, giving you a beautiful patio without the constant upkeep.
  • Partner with a full-service expert: The best results come from working with a supplier who offers a local showroom to see materials firsthand, provides professional design guidance, and manages the entire installation with their own skilled team.
  • Start with a clear plan and a realistic budget: Begin your project by visiting a showroom to get samples and a detailed quote. A complete estimate should include the cost of the pavers, site preparation, and professional installation so you have a full financial picture.

How to Find the Best Porcelain Paver Supplier on Long Island

Finding the right supplier for your porcelain pavers is the first step toward creating a beautiful and lasting outdoor space. On Long Island, the best partners offer more than just materials. They provide expertise, design guidance, and a seamless installation process. When you start your search, look for a company that can support your project from the initial idea to the final paver being set. This ensures you not only get high-quality materials but also the professional support needed to bring your vision to life.

Why a Full-Service Supplier Matters

Choosing a supplier that also handles installation can make your project significantly smoother. When one company manages both material supply and construction, you have a single point of contact and a cohesive team working toward your goal. This eliminates the hassle of coordinating between a retailer and a separate contractor, which can lead to miscommunication and delays. A full-service partner ensures the team installing your pavers is intimately familiar with the product. Gappsi offers both porcelain paver supply and expert installation, giving you a streamlined experience and peace of mind that every detail is handled correctly.

The Benefit of a Local Showroom

While browsing online is a great way to gather ideas, nothing compares to seeing materials in person. Colors and textures can look different on a screen, and feeling the finish of a paver can help you make a confident decision. A local showroom allows you to compare different styles side-by-side and see how they look in natural light. At the Gappsi Store, you can explore a wide selection of porcelain pavers and get personalized advice from experts who understand Long Island’s unique climate and style. Visiting a showroom is a crucial step to ensure the pavers you choose are exactly what you envision for your home.

Look for Decades of Design Experience

A great supplier does more than just sell pavers; they help you design a space that is both beautiful and functional. Look for a company with a long history of successful projects and a strong portfolio. Ask to see examples of their previous work, as this is the best way to gauge their craftsmanship and design capabilities. An experienced team can offer valuable insights on everything from paver patterns to drainage solutions. With decades of masonry design and construction experience, a seasoned supplier can help you create a truly exceptional patio, walkway, or driveway that stands the test of time.

Gappsi: Your All-in-One Porcelain Paver Partner

Gappsi brings together all the elements of a top-tier supplier right here on Long Island. We are a full-service company, providing an extensive selection of premium porcelain pavers and handling the entire installation process with our own skilled team. Our showroom is the perfect place to start your journey, offering inspiration and expert guidance. We pride ourselves on our deep design experience and a portfolio filled with stunning local projects, which you can see on our YouTube channel. From selecting the perfect style to completing the final installation, we partner with you every step of the way to ensure your project is a complete success.

What Porcelain Paver Styles Can You Choose From?

One of the best parts about choosing porcelain pavers is the incredible range of styles available. You aren’t limited to a single look. Instead, you can find a design that perfectly matches your home’s aesthetic, whether you’re aiming for rustic charm, modern minimalism, or timeless elegance. Porcelain’s versatility means you can get the appearance of high-maintenance materials like wood or natural stone without the demanding upkeep. This allows you to create a truly personalized outdoor space that reflects your style and fits your lifestyle. Let’s explore some of the most popular options you’ll find.

The Warmth of Wood-Look Porcelain

If you love the classic, inviting look of a wood deck but dread the thought of splinters, staining, and sealing, wood-look porcelain is the perfect solution. These pavers capture the natural grain and warm tones of different wood species, from oak to walnut, giving your patio or walkway a beautiful, organic feel. They are ideal for creating a seamless transition from your indoor living spaces to your backyard oasis. Unlike real wood, these porcelain pavers won’t rot, warp, or fade from sun exposure, giving you a stunning wood aesthetic that lasts for decades with minimal effort.

The Elegance of Natural Stone-Look Porcelain

Natural stone like bluestone or travertine offers a sophisticated, high-end look, but it often comes with a high price tag and requires regular sealing to prevent stains. Natural stone-look porcelain gives you that same luxurious appearance without the drawbacks. You can choose from styles that mimic the subtle veining of marble, the earthy texture of slate, or the soft tones of limestone. This option provides a consistent color and pattern that can be difficult to achieve with quarried stone. It’s an excellent choice for pool surrounds and outdoor kitchens, as it resists stains, chemicals, and moisture, keeping its elegant look through every season.

The Modern Appeal of Concrete-Style Porcelain

For a clean, contemporary, and slightly industrial vibe, concrete-style porcelain pavers are an outstanding choice. They provide the minimalist aesthetic of poured concrete but with far greater design consistency and durability. These pavers won’t crack or stain like traditional concrete, and they come in various shades of gray and other neutral tones to complement a modern design palette. This style works beautifully for creating sleek patios, walkways, and pool decks that feel both sophisticated and understated. It’s the perfect foundation for modern outdoor furniture and bold landscaping, creating a chic, gallery-like outdoor setting.

Exploring Textures and Large Format Pavers

Beyond color and pattern, you can also choose from different textures and sizes to add another layer of customization to your project. Many porcelain pavers come with a textured surface that not only adds visual depth but also increases slip resistance, a key safety feature for pool decks and walkways. Large format pavers are another popular trend, as their size can make a smaller patio feel more spacious and open by reducing the number of grout lines. Using larger pavers creates a clean, uncluttered look that is central to many modern landscape designs.

A Look at Available Sizes and Finishes

The creative possibilities with porcelain are nearly endless thanks to the wide array of available sizes, shapes, and finishes. You can find everything from large square pavers to smaller rectangular planks that can be laid in creative patterns like herringbone or basketweave. Finishes range from a smooth matte look to a more structured, textured feel, each creating a different effect. This variety allows you and your designer to craft a truly unique outdoor surface. Whether you’re designing a cozy patio or an expansive entertainment area, you can find the perfect combination at the Gappsi Store to bring your vision to life.

Why Choose Porcelain Pavers for Your Patio?

When you’re planning a new patio, the material you choose is one of the biggest decisions you’ll make. You want something that looks beautiful, stands up to Long Island’s weather, and fits your lifestyle. That’s why so many homeowners are turning to porcelain pavers. They offer a perfect combination of sophisticated style, incredible strength, and easy living. If you’re looking for a material that will give you a stunning outdoor space without demanding constant upkeep, porcelain is an excellent choice. Let’s explore the specific benefits that make it a top contender for any patio project.

Unmatched Durability and Weather Resistance

One of the biggest advantages of porcelain is its sheer toughness. These pavers are built to last. Because they are fired at extremely high temperatures, they become incredibly dense and non-porous. This means they absorb very little water, which is a huge benefit for us here on Long Island. When water can’t seep in, there’s no risk of it freezing, expanding, and causing cracks during the winter. Gappsi’s porcelain pavers are frost-resistant, fade-resistant, and strong enough to handle heavy patio furniture and constant foot traffic without showing wear and tear. You get a patio that looks brand new for years.

The Appeal of Low-Maintenance Living

Let’s be honest, you want to spend your time enjoying your patio, not cleaning it. Porcelain pavers make that possible because they are one of the lowest-maintenance options available. Unlike natural stone or concrete, they never need to be sealed to protect them from stains or water damage. Spills from a summer barbecue, like wine or grease, can be wiped away easily without leaving a permanent mark. For routine cleaning, a simple sweep and a quick wash with mild soap and water are all it takes to keep them looking pristine. This saves you both time and money on the long-term upkeep of your patio.

Prioritizing Safety with Slip-Resistant Surfaces

Safety is always a top priority, especially for families with children or for areas around a pool. While some people assume porcelain’s smooth finish makes it slippery, that’s a common myth. Outdoor-rated porcelain pavers are specifically manufactured with a textured, slip-resistant surface that provides excellent traction, even when they’re wet. This makes them an ideal and safe choice for pool surrounds, walkways, and any patio space where people will be walking. You can have peace of mind knowing your beautiful patio is also designed to prevent slips and falls, letting everyone enjoy the outdoors safely.

Eco-Friendly Materials and Cooler Surfaces

If making sustainable choices is important to you, you’ll be happy to know that porcelain pavers are an eco-friendly option. They are typically made from natural clay and often include recycled materials in their composition, reducing their environmental footprint. Beyond their green credentials, they also offer a practical benefit during our hot summers. Lighter-colored porcelain pavers reflect more sunlight and stay cooler to the touch compared to darker materials like asphalt or certain types of stone. This makes your patio a more comfortable place to relax and walk barefoot on a sunny day.

Long-Term Value and Cost-Effectiveness

Investing in a new patio is a significant home improvement, and you want to know your money is well spent. While the initial cost of porcelain pavers can be comparable to other high-end materials, their long-term value is exceptional. Their incredible durability means you won’t be spending money on repairs or replacements down the line. Add in the savings from not needing to seal them every few years, and the cost-effectiveness becomes clear. A Gappsi masonry project using porcelain pavers is a smart investment that pays off with decades of beauty and performance.

How to Choose the Right Porcelain Paver Supplier

Finding the right porcelain paver supplier is about more than just getting a good price. It’s about finding a true partner for your project. The right company won’t just sell you materials; they will guide you through the entire process, from design to installation, ensuring your new patio, walkway, or pool deck is exactly what you envisioned. A great supplier acts as your resource, offering deep product knowledge, technical expertise, and a commitment to quality that protects your investment for years to come. This partnership approach transforms a potentially stressful renovation into a smooth and enjoyable experience.

When you start your search, think about the complete experience. Does the supplier have a physical location where you can see and touch the products? Do they have a team of designers and installers who can bring your vision to life? A full-service supplier can streamline your project, saving you the headache of coordinating with multiple contractors. They should be able to answer all your questions, from which porcelain and natural stone pavers are best for a high-traffic area to how to properly care for them. Choosing a supplier who offers comprehensive support is the first step toward a beautiful and lasting outdoor space that you and your family will enjoy for decades.

Verify Product Quality and Sourcing

The beauty of porcelain pavers lies in their quality, but not all pavers are created equal. Pictures online can be deceiving, so it’s essential to see the products in person before making a decision. Visiting a showroom allows you to feel the texture, see the true colors, and compare different styles side-by-side. This hands-on experience ensures there are no surprises when the materials arrive at your home. Don’t hesitate to ask where the pavers are sourced from and what quality standards they meet. A reputable supplier will be transparent about their products and confident in their durability, helping you make an informed choice for your home.

Ask About Installation and Technical Skill

The most beautiful, high-quality pavers can fail if they aren’t installed correctly. A proper installation is critical to the longevity and performance of your porcelain patio or walkway. Before you commit to a supplier, ask about their installation process. Do they have their own experienced crews, or do they subcontract the work? It’s always a good idea to verify that any installer is fully licensed and insured. You can also protect your investment by reading recent customer reviews. A supplier who provides expert masonry services or partners with trusted installers demonstrates a commitment to a successful outcome for your project.

Evaluate the Showroom and Design Support

A supplier’s showroom is more than just a store; it’s a hub of inspiration and expertise. When you visit, pay attention to the level of support you receive. Are the staff knowledgeable and eager to help? A great supplier offers valuable design support, helping you select pavers that complement your home’s architecture and your personal style. They can help you explore different patterns, color combinations, and paver sizes to create a unique look. This personalized guidance is invaluable, turning the potentially overwhelming process of choosing materials into an exciting creative collaboration. This is where a partner with extensive landscape design experience can make a real difference.

Check for Proper Licensing, Insurance, and Warranties

Working with a fully licensed and insured company is non-negotiable. This is your protection against liability for any accidents that might happen on your property during the project. A professional supplier will readily provide you with their credentials. Beyond that, ask about warranties. There should be a manufacturer’s warranty on the porcelain pavers themselves, which covers defects. You should also ask about a workmanship warranty for the installation. A company that stands behind its work with a solid warranty gives you peace of mind that you’re making a secure investment in your home.

Find a Partner with Local Market Expertise

Choosing a local Long Island supplier offers distinct advantages. A local company understands the specific challenges of our climate, from freeze-thaw cycles to salt air exposure, and can recommend products best suited for our environment. They are also familiar with local building codes and design trends. Plus, working with a local business means you get more personalized attention and often quicker delivery times. A supplier with deep roots in the community, like Gappsi, is invested in its reputation and is more accessible for any follow-up questions or future projects you may have.

What’s the Cost of Porcelain Pavers on Long Island?

When you start planning a new patio, walkway, or pool surround, one of the first questions that comes to mind is about the budget. It’s completely normal to want a clear picture of the investment before you get too far into picking out styles. The total cost of a porcelain paver project is shaped by a few key factors: the specific pavers you choose, the complexity of your design, the size of the area, and the cost of professional installation. Understanding how these elements work together will help you set a realistic budget and create the outdoor space you’ve been dreaming of without any surprises along the way.

Porcelain is a fantastic choice because it offers the luxurious look of natural stone but often at a more accessible price point. However, the final price tag is more than just the cost of the tiles. Think of it like baking a cake; you need more than just flour. You also have to account for the skilled labor required to prepare the ground correctly, the base materials that ensure a stable foundation, and the time it takes to lay each paver perfectly. A simple, small patio will have a very different budget from a large, multi-level space with intricate patterns. At Gappsi, we help you see the full picture, offering a wide selection of beautiful porcelain and natural stone pavers and the expertise to bring your vision to life.

Understanding Local Price Ranges

On Long Island, the material cost for porcelain pavers is quite competitive, making them a popular choice for homeowners looking for durability and style. Generally, you can expect the pavers themselves to range from $7 to $9 per square foot. This price point makes them an attractive alternative to other premium materials, giving you a high-end look without the most premium price tag. It’s important to remember that this is just the cost for the material. The final project total will also include installation, base materials, and any necessary site preparation. Shopping at a direct supplier like the Gappsi Store can help you explore high-quality options and find a style that fits comfortably within your budget.

How Material and Design Choices Affect Cost

The specific style of porcelain paver you select will definitely influence the material cost. Porcelain is incredibly versatile and comes in a wide range of colors, sizes, and finishes, from warm wood-look planks to sleek, large-format tiles that mimic natural stone. More intricate designs or premium finishes may fall at the higher end of the price spectrum. Beyond the material itself, the pattern you choose for installation affects labor costs. A simple running bond pattern is more straightforward to lay than a complex herringbone or a custom design with multiple paver sizes. These more detailed patterns require more cuts and time from your masonry design team, which is reflected in the installation price.

Professional Installation vs. DIY

While a DIY project might seem like a great way to save money, installing porcelain pavers correctly requires specific skills, tools, and experience. Professional installation costs on Long Island typically range from $5 to $10 per square foot. This fee is an investment in the longevity and beauty of your project. It covers the expertise needed to build a stable, level base, ensure proper drainage, and perfectly place each paver for a flawless finish. Attempting this yourself without the right knowledge can lead to an uneven surface, poor drainage, or cracked pavers, resulting in costly repairs down the road. You can see examples of stunning professional work on the Gappsi YouTube channel.

Factoring in Project Size and Site Prep

The overall size of your project is one of the biggest factors in determining the final cost. A larger patio will naturally require more materials and more labor, increasing the total price. Beyond just the square footage, proper site preparation is a critical part of your investment that ensures your new patio lasts for decades. This process includes excavating the area, grading it for proper water runoff, and installing a compacted base of aggregate. If your yard has a significant slope, poor soil, or needs an old patio removed, the site prep costs may be higher. A full-service landscape design company can manage this entire process for you, ensuring a solid foundation for your beautiful new space.

How to Start Your Porcelain Paver Project

You’ve decided that porcelain pavers are the perfect fit for your new patio, walkway, or pool deck. That’s a fantastic choice. Now, how do you turn that vision into a reality? Starting a home improvement project can feel like a big undertaking, but breaking it down into simple, manageable steps makes all the difference. It’s all about doing a little homework upfront to ensure a smooth process and a beautiful result you’ll love for years.

From seeing the materials in person to asking the right questions, each step helps you make confident decisions. Think of it as building a foundation of knowledge before the first paver is even laid. This approach not only protects your investment but also ensures the final product truly matches your home’s style and your family’s needs. Let’s walk through the first few steps you should take to get your porcelain paver project off the ground. We’ll cover everything from visiting a design center to knowing what to ask a potential supplier, so you can feel prepared and excited to get started.

Visit a Showroom and Design Center

Pictures online are helpful, but they don’t always tell the whole story. The best way to truly understand the color, texture, and scale of porcelain pavers is to see them in person. Visiting a showroom lets you touch the materials and see how they look under different lighting. At Gappsi, we always encourage homeowners to explore our Long Island showroom. It’s a chance to get a feel for the wide variety of porcelain and natural stone options available. Seeing the pavers firsthand is a critical step in making a choice you’ll be happy with for the long haul. It helps you visualize the final look and feel of your outdoor space with much greater clarity.

Request Material Samples and Project Quotes

Once you’ve narrowed down your choices at the showroom, the next step is to see how they look at home. Ask for samples of your top contenders to take with you. This allows you to see the pavers in your own space, next to your home’s exterior, and in the natural light of your yard. At the same time, it’s the perfect opportunity to request a free price estimate for your project. Having a clear quote helps you create a realistic budget and understand all the costs involved. This simple step of gathering samples and quotes from the Gappsi Store is essential for planning effectively and avoiding any surprises down the road.

What to Prepare Before Contacting a Supplier

Before you sign any contracts, it’s smart to do a little research to protect your investment. A reputable supplier will be fully licensed and insured, and they should be happy to provide you with proof. Take some time to read recent customer reviews and look at examples of their completed work. This gives you a sense of their craftsmanship and customer service. Checking out a company’s portfolio, like the projects on our YouTube channel, can give you confidence in their ability to deliver high-quality results. Doing this homework ensures you’re partnering with a trustworthy and experienced team that will bring your vision to life correctly.

Key Questions to Ask Your Supplier

When you’re ready to talk specifics, having a list of questions prepared will help you get all the information you need. Start by asking to see a portfolio of their past porcelain paver projects. This will give you direct insight into their experience and the quality of their work. You should also ask about their installation process and what makes it right for the Long Island climate. For example, you could inquire about the best paver material and installation technique for a gravel driveway versus a pool patio. A knowledgeable supplier will be able to explain their methods clearly and help you understand why they make certain recommendations for your specific project.

Related Articles

Frequently Asked Questions

How do I clean porcelain pavers, and are they really stain-proof? Keeping your porcelain pavers looking great is surprisingly simple. For everyday dirt, you can just sweep them or rinse them with a garden hose. Because they are non-porous, they are highly resistant to stains from things like spilled wine, grease, or fallen leaves. Most spills can be wiped away with a damp cloth without leaving a mark, especially if you get to them quickly. They don’t require any special sealers to maintain this resistance, which is a huge part of their low-maintenance appeal.

Will porcelain pavers get too hot to walk on in the summer? This is a great question, especially for families who love to be barefoot in the backyard. Lighter-colored porcelain pavers actually stay much cooler under the sun compared to darker materials like bluestone or concrete. They reflect more solar radiation instead of absorbing it, which keeps the surface temperature more comfortable for your feet. If you’re planning a patio or pool surround that gets a lot of direct sun, choosing a lighter shade is a smart way to ensure the space is comfortable all summer long.

Are porcelain pavers a good choice for a pool deck? Porcelain pavers are an excellent choice for pool decks for a couple of key reasons. First, they are manufactured with a textured surface that provides great slip resistance, which is a critical safety feature for wet areas. Second, their extremely low water absorption rate means they stand up beautifully to splashes from chlorinated or salt water without staining or deteriorating. They give you the elegant look of natural stone without the worry of water damage or chemical reactions.

How do porcelain pavers compare in cost to other popular materials like natural stone? When you look at the initial price, porcelain pavers are often competitive with many types of natural stone. The real savings, however, come from their long-term value. Many natural stones require regular sealing to protect them from stains and water damage, which adds to their lifetime cost. Porcelain never needs to be sealed. When you factor in the money and time saved on maintenance over the years, porcelain proves to be a very cost-effective investment for a high-end look.

Can porcelain pavers be installed over an existing concrete patio? In many cases, yes, you can install porcelain pavers over an existing concrete slab. This can be a great option that saves on the cost and mess of demolition. The key requirement is that the underlying concrete must be structurally sound, meaning it’s stable and free of major cracks or heaving. A professional installer will need to assess your current patio to confirm it’s a suitable base and ensure proper drainage can be established for a successful and long-lasting installation.

Share this page:
A modern stone veneered outdoor kitchen with a built-in grill and stainless steel appliances.

Your Guide to Stone Veneered Outdoor Kitchens

Creating the perfect backyard hub for family barbecues and summer parties is a common dream for homeowners. But the thought of a massive, complex masonry project can feel overwhelming, not to mention expensive. What if you could get the timeless, rugged beauty of a solid stone structure without the high cost and difficult installation? That’s the secret behind Stone Veneered Outdoor kitchens. This smart approach gives you the exact high-end look you want, from rustic charm to modern elegance, using a lightweight and durable material. It’s the key to building a beautiful, functional, and long-lasting outdoor space that fits your vision and your budget.

Key Takeaways

  • Stone veneer combines beauty with practicality: It delivers the stunning look of solid stone but is lighter, more affordable, and simpler to install, giving you a durable and stylish outdoor kitchen with less hassle.
  • Match the stone to your personal style: With options ranging from sleek quartzite to rustic slate, you can select a durable, exterior-grade veneer that perfectly complements your home’s design and can withstand the local climate.
  • A great design requires careful planning: To create a truly functional outdoor kitchen, focus on a smart layout and professional installation. This approach helps you avoid common mistakes and ensures your new space is built correctly to last for years.

What is a Stone Veneer Outdoor Kitchen?

An outdoor kitchen is the perfect way to combine cooking and entertaining in your backyard, creating a central hub for summer barbecues and family gatherings. When it comes to building one, the materials you choose for the base, countertops, and backsplash define its style and longevity. A stone veneer outdoor kitchen uses a thin layer of stone to create the beautiful, rugged look of a solid stone structure without the immense weight and cost. It’s a popular and practical approach to achieving a high-end finish.

Think of it as a clever design solution. Instead of building your kitchen island from heavy, full-sized stones, you build a structural frame (often from concrete blocks or steel) and then apply the stone veneer to the exterior surfaces. This gives you the same stunning visual appeal, from rustic charm to modern elegance, but with more flexibility and a simpler installation process. The veneer can be made from either thinly cut natural stone or a carefully crafted manufactured material that mimics the real thing. This technique allows you to achieve a durable finish that transforms your patio into a true outdoor living room. Gappsi offers a wide selection of porcelain and natural stone pavers that are perfect for creating a cohesive and beautiful outdoor kitchen space.

Understanding the Difference: Natural Stone vs. Veneer

It’s easy to get confused between a structure built from solid natural stone and one finished with stone veneer, but the difference is all about construction. A traditional natural stone wall or kitchen base is built with thick, heavy stones from foundation to top. It requires deep footings and specialized labor to manage the weight and complexity of fitting each piece.

Stone veneer, on the other hand, is a lightweight facing material. It comes in two main types: natural thin stone veneer, which is real stone sliced into thin pieces, and manufactured stone veneer, which is a concrete-based product molded and colored to look like real stone. Both are applied to a structural wall or frame, giving you the exact look of solid stone at a fraction of the weight and cost.

Why Choose Stone Veneer for Your Outdoor Space

Stone veneer is an excellent choice for any outdoor project, especially in a place with changing seasons like Long Island. First, it’s incredibly durable. It’s designed to handle sun, rain, snow, and ice, so it won’t crack or fade easily. This means your outdoor kitchen will look great for years with minimal upkeep.

Beyond its strength, stone veneer offers incredible design versatility. Whether you want the clean lines of slate or the warm, earthy tones of fieldstone, there’s a veneer to match your vision. Because it’s so much lighter than full-bed stone, it can be installed in places where heavy masonry wouldn’t be practical. This combination of beauty, durability, and affordability makes it a smart and stylish investment for your home’s masonry and construction projects.

Why Use Stone Veneer for Your Outdoor Kitchen?

Choosing the right material for your outdoor kitchen is a big decision. You want something that looks incredible, holds up to the elements, and fits your budget. Stone veneer checks all those boxes, offering the timeless beauty of natural stone with some very practical advantages. It’s a versatile choice that gives you the power to create a truly custom outdoor cooking and entertainment space. Let’s look at a few of the biggest reasons why stone veneer is such a popular choice for Long Island homeowners.

Enjoy Lasting Durability

Your outdoor kitchen needs to withstand everything from summer sun to winter snow. Natural stone veneer is incredibly strong and built to last, even in tough weather conditions. It resists fading from UV rays, damage from moisture, and the general wear and tear that comes with outdoor living. This resilience means your kitchen will maintain its stunning appearance for years with minimal upkeep. Investing in a durable material like stone veneer ensures your outdoor space remains a beautiful and functional part of your home for the long haul, making it a smart choice for any masonry project.

Benefit from a Simpler Installation

One of the best things about stone veneer is its straightforward installation process. Because it’s a lighter material than full-dimension stone, it doesn’t require extra structural support, which can save time and complexity. Some modern veneers are even designed to be installed without messy mortar, making the process cleaner and faster. This streamlined installation means less disruption to your daily life and can often lead to lower labor costs. A quicker project timeline gets you outside and enjoying your new kitchen sooner, which is always a plus.

Get the Exact Look You Want

With stone veneer, you don’t have to compromise on style. It comes in a vast array of colors, shapes, and textures, allowing you to achieve the exact aesthetic you envision. Whether you dream of a rustic, charming kitchen or a sleek, contemporary design, there’s a veneer to match. This versatility makes it easy to complement your home’s existing architecture and landscape design. Using natural stone veneer enhances your outdoor space, making it more enjoyable for your family and adding significant value to your property.

Save on Project Costs

Achieving a high-end look doesn’t have to come with a high-end price tag. Stone veneer offers the luxurious appearance of solid stone at a fraction of the cost. The material itself is generally more affordable per square foot compared to full-dimension stone. Plus, because it’s lighter, shipping and handling expenses are lower. The simpler installation process we mentioned also contributes to savings on labor. This cost-effectiveness makes a beautiful stone outdoor kitchen a more attainable goal, allowing you to allocate more of your budget to appliances or other features.

Which Stone Veneer Type is Right for You?

Choosing the right stone veneer for your outdoor kitchen is one of the most exciting parts of the design process. The material you select sets the tone for the entire space, influencing everything from the color palette to the overall vibe. Your decision should balance your personal style with practical needs like durability and maintenance, especially with Long Island’s variable weather. Think about the look you want to achieve. Are you dreaming of a sleek, modern entertainment area or a cozy, rustic retreat? The right stone can bring that vision to life.

Each type of stone has its own unique character and strengths. Some are incredibly tough and stand up to anything, while others offer a softer, more traditional look. To help you find the perfect match, let’s explore some of the most popular options for outdoor kitchens, including quartzite, slate, granite, and limestone. By understanding the distinct qualities of each, you can confidently select a natural stone that will not only look beautiful but will also last for years of backyard gatherings. We’ll walk through the pros of each so you can feel great about your final choice.

Exploring Quartzite Veneers

If you love the elegant look of marble but need something much tougher for the outdoors, quartzite is an excellent choice. Quartzite is a natural stone that is both beautiful and very strong. Because it’s hard and dense, it resists scratches and chips, making it a practical option for a busy outdoor kitchen. It also doesn’t soak up much liquid, which helps it stand up to weather, stains, and sun exposure. This durability means your kitchen will maintain its stunning appearance through hot summers and cold winters. With its sophisticated, often light-colored veining, quartzite brings a clean and luxurious feel to any outdoor space.

Creating a Rustic Look with Slate

For a rich, textured look that feels grounded and natural, consider slate. This versatile stone is known for its deep, earthy colors, including shades of gray, black, green, and blue. Slate’s naturally layered surface adds incredible depth and character, making it perfect for creating a rustic or modern design. Its flexibility allows it to complement a wide range of color schemes and architectural styles. As a veneer, slate provides a dramatic and organic backdrop for your grill and countertops. Our expert masonry team can help you create a layout that highlights the stone’s unique patterns and textures.

Choosing Granite for Maximum Durability

Granite is a classic choice for outdoor kitchens for a reason: it’s one of the most durable natural stones available. It can handle high heat from a grill, resist scratches from utensils, and stand up to the elements without losing its beauty. As a natural stone, each granite slab is unique, with distinct patterns and color variations that add character to any outdoor kitchen. From deep blacks to speckled whites and warm earth tones, you can find a granite veneer that perfectly matches your vision. Its proven strength and timeless appeal make it a reliable and stylish investment for any home.

Adding Warmth with Limestone

If you’re aiming for a warm, inviting atmosphere, limestone is a wonderful option. This classic and traditional choice for a natural veneer offers soft, muted colors like creams, tans, and light grays that create a relaxed and welcoming feel. It’s an ideal material for achieving a Mediterranean or classic country look in your backyard. While limestone is very strong and suitable for outdoor applications, it is more porous than granite or quartzite. To keep it looking its best, it’s important to have it properly sealed. A good sealant will protect it from stains and moisture, ensuring your beautiful kitchen remains a centerpiece for years to come. We recommend professional sealing services to preserve its natural charm.

How Much Does a Stone Veneer Outdoor Kitchen Cost?

Figuring out the budget for your dream outdoor kitchen is a key first step. The total cost can vary quite a bit, as it depends on the materials you choose, the complexity of the installation, and the overall scope of your project. The great news is that stone veneer gives you the stunning look of solid natural stone without the matching price tag, making it a fantastic choice for creating a high-end outdoor space. Let’s break down the main expenses you can expect.

Breaking Down Material Costs

The most significant advantage of stone veneer is its cost-effectiveness. Generally, stone veneer materials range from $6 to $9 per square foot. To put that in perspective, traditional natural stone siding can cost anywhere from $15 to $30 per square foot. This difference allows you to achieve a luxurious, textured finish for your kitchen island, backsplash, and cabinets at a fraction of the cost. The final price of the material will also depend on the specific type of stone you select. Gappsi offers a wide variety of beautiful and durable porcelain and natural stone options to fit your aesthetic and budget perfectly.

Factoring in Labor and Installation

While some home projects are great for a weekend DIY, installing stone veneer is a job best left to the professionals. Proper installation is critical for a flawless look and long-term durability. An expert team ensures the surface is correctly prepared, the veneer is securely attached, and the finished product can withstand Long Island’s changing seasons. Investing in professional masonry services means you are paying for quality craftsmanship that prevents costly repairs down the road. Think of labor not as an extra expense, but as an essential part of bringing your vision to life correctly.

What Influences the Final Price?

Beyond the stone itself, several other elements will shape your total project cost. The overall size is a major factor; a larger, more expansive kitchen will naturally require more materials and more installation time. The complexity of your design also plays a role. Features like curved walls, built-in storage, and arches demand more intricate work. Finally, remember to budget for the other components of your kitchen, including countertops, appliances like grills and refrigerators, and any plumbing or electrical work. Each of these choices contributes to the final price of your complete home remodeling project.

How to Choose a High-Quality Stone Veneer

Picking the right stone veneer is about more than just looks. It’s about finding a material that will last and bring your vision to life. With so many options, knowing what to look for can feel overwhelming. The key is to focus on the quality of the material and the expertise of your supplier. A great stone veneer gives you the timeless look of natural stone without the heavy lifting or high cost. Let’s walk through how to make the best choice for your outdoor kitchen.

Discover Gappsi’s Premium Selections

At Gappsi, we’ve already done the hard work of sourcing the best materials for you. We offer a curated collection of porcelain and natural stone veneers that combine beauty with performance. These products have the authentic look and feel of real stone but are much lighter and easier to install. This means you get a stunning outdoor kitchen faster and with less hassle. Our team helps you find the perfect veneer that not only looks incredible but is also built to withstand the elements, ensuring your outdoor space remains a beautiful retreat for years.

What to Look for in a Supplier

When choosing a supplier, you’re really choosing a partner for your project. A great supplier provides expertise, not just materials. Look for a company that can speak to the durability, texture, and color variations of their stone veneers and help you select a product that can handle Long Island’s weather. At Gappsi, our masonry design and construction experience means we understand how different materials perform over time. We guide you through the options to ensure your choice perfectly matches your design vision and practical needs.

Why Customer Reviews Matter

Customer reviews are an invaluable resource. They offer honest, real-world feedback on a product’s appearance and installation process. Hearing a homeowner say a veneer was “great looking and super easy to install” provides confidence you won’t get from a product description alone. Reviews can also highlight common mistakes to avoid, helping you ensure a flawless installation. We encourage you to explore our project videos to see what other Long Island homeowners have created with our materials and witness our commitment to quality and customer satisfaction.

How to Install and Maintain Your Stone Veneer

Bringing a stone veneer kitchen to life involves careful installation and consistent upkeep. Whether you’re a seasoned DIYer or prefer to leave it to the experts, understanding the process helps ensure your outdoor kitchen looks incredible and lasts for years. Proper care will protect your investment and keep your space ready for every barbecue and family gathering on your calendar.

Preparing Your Space for Installation

Before the first stone is laid, a little planning goes a long way. Think about how you want your kitchen to function. A great design ensures your cooking and entertaining areas flow together seamlessly, making hosting a breeze. Stone veneer is perfect for visually connecting different zones, like a grill station and a seating wall. The surface where you’ll install the veneer needs to be clean, dry, and structurally sound. Any cracks or damage should be repaired first to create a solid foundation. Proper preparation is the key to a flawless and durable finish, and it’s a step our masonry experts never overlook.

Comparing Installation Methods

Installing stone veneer isn’t quite like laying bricks. It requires a special high-bond mortar to ensure each piece stays securely in place for the long haul. Using a standard mortar is a common misstep that can lead to stones loosening over time. The right installation method also depends on the surface you’re working with. Some walls may need a metal lath and a scratch coat of mortar to create a grippable surface, while others might be ready for direct application. Each type of natural stone has its own characteristics, so matching the right adhesive and technique is essential for a professional-grade result that stands up to Long Island’s weather.

Keeping Your Veneer Looking New

Your beautiful stone veneer kitchen deserves to stay looking its best. The good news is that maintenance is straightforward. Regular cleaning with a gentle brush and mild detergent will handle most dirt and grime. The most important step, however, is sealing the stone. A quality sealant protects the veneer from moisture, stains, and weather damage. An improperly sealed veneer can allow water to seep in behind the stones, which can cause serious issues down the road. We recommend sealing your veneer after installation and then reapplying it every few years. If you need a hand, our restoration and sealing services can keep your outdoor kitchen in pristine condition.

Deciding Between Professional and DIY Installation

While it might be tempting to tackle the installation yourself, this is one project where calling a professional is often the best choice. A DIY installation can be rewarding, but it comes with risks. A simple mistake, like skipping the manufacturer’s instructions or using the wrong mortar, can void warranties and lead to costly repairs. Hiring an experienced team ensures the job is done correctly, efficiently, and safely. Think of it as an investment in your peace of mind and the long-term value of your home. Our home remodeling professionals have the expertise to bring your vision to life without the guesswork.

Designing Your Perfect Stone Veneer Kitchen

An outdoor kitchen is more than just a place to grill; it’s the heart of your backyard, a central spot for cooking, entertaining, and making memories. Using stone veneer gives you the perfect blend of high-end style and rugged durability. But a truly great outdoor kitchen starts with a smart design. Thinking through how you’ll use the space is the first step to creating an area that is both beautiful and functional for years to come.

From the layout of your appliances to the flow of foot traffic, every detail matters. A well-planned kitchen makes hosting feel effortless and encourages everyone to gather. Let’s walk through how to plan your features, explore popular styles, and sidestep common design mistakes to create the outdoor kitchen you’ve always wanted.

Planning for Essential Features

Before you get caught up in choosing finishes, think about how you want your kitchen to function. The best designs create a seamless connection between your cooking and entertaining areas. Consider the “work triangle” concept from indoor kitchens, placing your grill, sink, and refrigerator in an efficient layout to minimize steps. Also, think about your guests. You’ll want plenty of counter space for serving food and drinks, as well as comfortable seating that’s close enough to the action for conversation but far enough from the grill’s heat and smoke. Proper masonry design ensures these zones work together perfectly.

Exploring Popular Design Trends

Modern outdoor kitchens are all about combining a sleek look with personal touches. Modular designs are popular because they offer a clean, contemporary style that can be customized to fit your space and needs. You can create a setup that’s as simple as a single station for a pizza oven or as elaborate as a full kitchen with multiple grills, a sink, and a refrigerator. Incorporating stone veneer is a key trend because it provides the timeless beauty of natural stone with incredible durability. This ensures your outdoor kitchen not only looks stunning but also stands up to the elements, making it a lasting investment in your home.

How to Avoid Common Layout Mistakes

A few common missteps can keep an outdoor kitchen from reaching its full potential. One of the biggest is choosing the wrong location. Placing your kitchen too far from the house means endless trips back and forth for supplies. Another frequent mistake is not planning for the weather. Think about the prevailing winds so smoke from the grill doesn’t blow into your seating area. It’s also wise to consider sun and rain protection. Adding a structure like one of Gappsi’s custom pavilions or pergolas can provide necessary shade and shelter, extending the time you can enjoy your kitchen throughout the year.

Common Mistakes to Avoid with Your Outdoor Kitchen

Building your dream outdoor kitchen is an exciting project, but a few common missteps can lead to disappointment down the road. Thinking through your design and material choices carefully from the start will save you from costly fixes and ensure you create a space you’ll love for years to come. Let’s walk through some of the most frequent mistakes homeowners make so you can sidestep them completely. A little planning now goes a long way in creating a functional and beautiful outdoor entertaining hub.

Don’t Choose the Wrong Stone

Not all stone is suitable for the outdoors, especially here on Long Island where it has to endure everything from humid summer days to freezing winter nights. Choosing a stone that isn’t rated for exterior use can lead to cracking, discoloration, and premature wear. It’s essential to select a durable material that can withstand the elements. When you explore your options, look for high-quality porcelain and natural stone specifically designed to handle temperature fluctuations and moisture. This ensures your kitchen’s beautiful finish will last for many years of backyard gatherings.

Always Consider Your Climate

Our local climate is a major factor in how your outdoor kitchen should be built. A stone veneer that isn’t properly sealed can become a gateway for moisture, leading to serious problems like mold growth and damage to the underlying structure. The constant cycle of freezing and thawing during the winter can be particularly tough on masonry work. That’s why professional installation is so important. A skilled team will ensure every piece is perfectly placed and sealed, protecting your investment from the weather. Regular maintenance, including cleaning and sealing, is also key to keeping it in top condition.

Never Skimp on Quality Materials

It can be tempting to cut costs by using materials that aren’t specifically made for outdoor use, but this is almost always a mistake. Indoor-rated materials, from countertops to cabinet finishes, simply can’t stand up to UV rays, rain, and fluctuating temperatures. They will quickly fade, warp, or deteriorate, forcing you into expensive repairs. Think of your outdoor kitchen as a long-term investment. Using high-quality, durable materials from the Gappsi Store will not only give you a more beautiful result but will also ensure your space remains functional and safe for your family and friends to enjoy.

Avoid Poor Layout Planning

An outdoor kitchen needs to be just as functional as your indoor one. A common oversight is failing to plan a practical layout, which can make cooking and hosting feel awkward and inefficient. Think about how you’ll move between the grill, the sink, and your prep space. You want a natural flow that makes sense for your cooking style. Consider where your guests will gather so they aren’t in your way. A well-designed space is the difference between a frustrating experience and a joyful one. Working with an expert in masonry design and construction can help you create a layout that is perfectly tailored to your needs.

Related Articles

Frequently Asked Questions

How well does stone veneer hold up to Long Island weather? It holds up exceptionally well, which is why it’s such a popular choice here. Stone veneer is specifically designed to handle our region’s freeze-thaw cycles, humid summers, and coastal air. Materials like granite and quartzite are incredibly dense and resistant to the elements. The key to its longevity is professional installation and proper sealing, which creates a barrier against moisture and prevents weather-related damage.

Is stone veneer really a more affordable option than solid stone? Yes, it is significantly more budget-friendly. You get the same beautiful, high-end appearance of a solid stone structure without the associated costs. The savings come from multiple areas: the material itself is less expensive, its lighter weight reduces shipping expenses, and the installation is less labor-intensive. This makes a luxurious outdoor kitchen a much more attainable project.

With so many options, how do I choose the right type of stone for my style? Start by thinking about the overall atmosphere you want to create. If you envision a sleek, contemporary space, you might lean toward the clean look of quartzite or the dark, rich texture of slate. For a warmer, more traditional or rustic feel, the soft, earthy tones of limestone or the classic patterns of granite are excellent choices. It often helps to see samples next to your home’s existing materials to find the perfect complement.

Can I install a stone veneer kitchen myself? While it might be tempting, this is a project best left to professionals. Proper installation requires specific techniques, from preparing the surface correctly to using the right high-bond mortar that ensures a lasting hold. A small mistake can lead to bigger issues like loose stones or water damage down the line. Hiring an experienced team guarantees a durable, beautiful finish and gives you complete peace of mind.

What is the single most important thing I can do to maintain my stone veneer kitchen? The most critical maintenance step is sealing the stone. A quality sealant acts as an invisible shield, protecting the veneer from moisture, preventing stains, and making it much easier to clean. This is especially important for more porous stones. We recommend sealing the veneer right after it’s installed and then reapplying it every few years to keep your outdoor kitchen looking pristine.

Share this page: