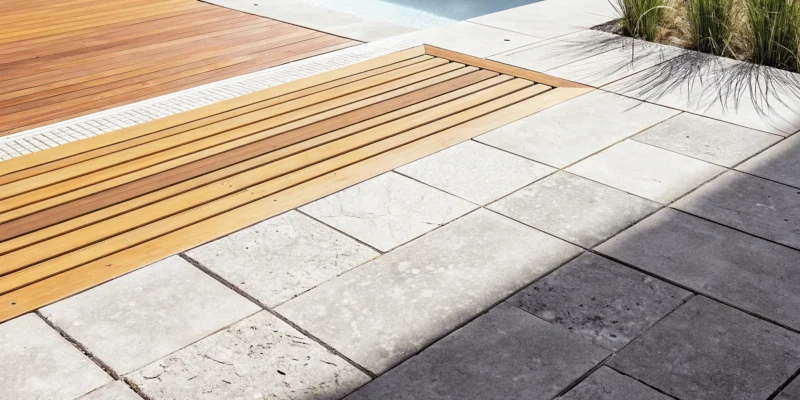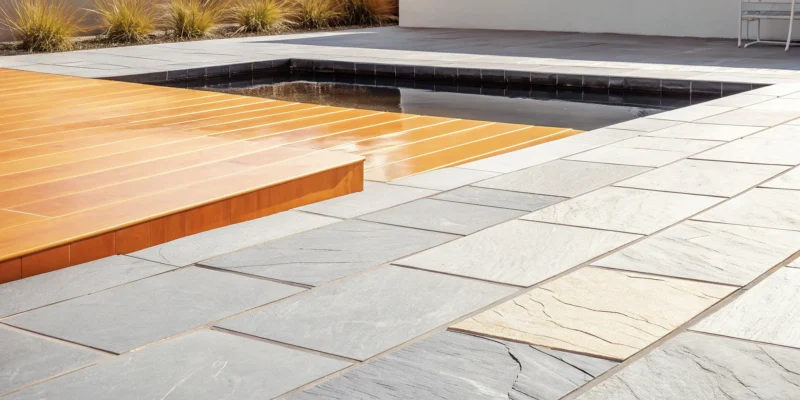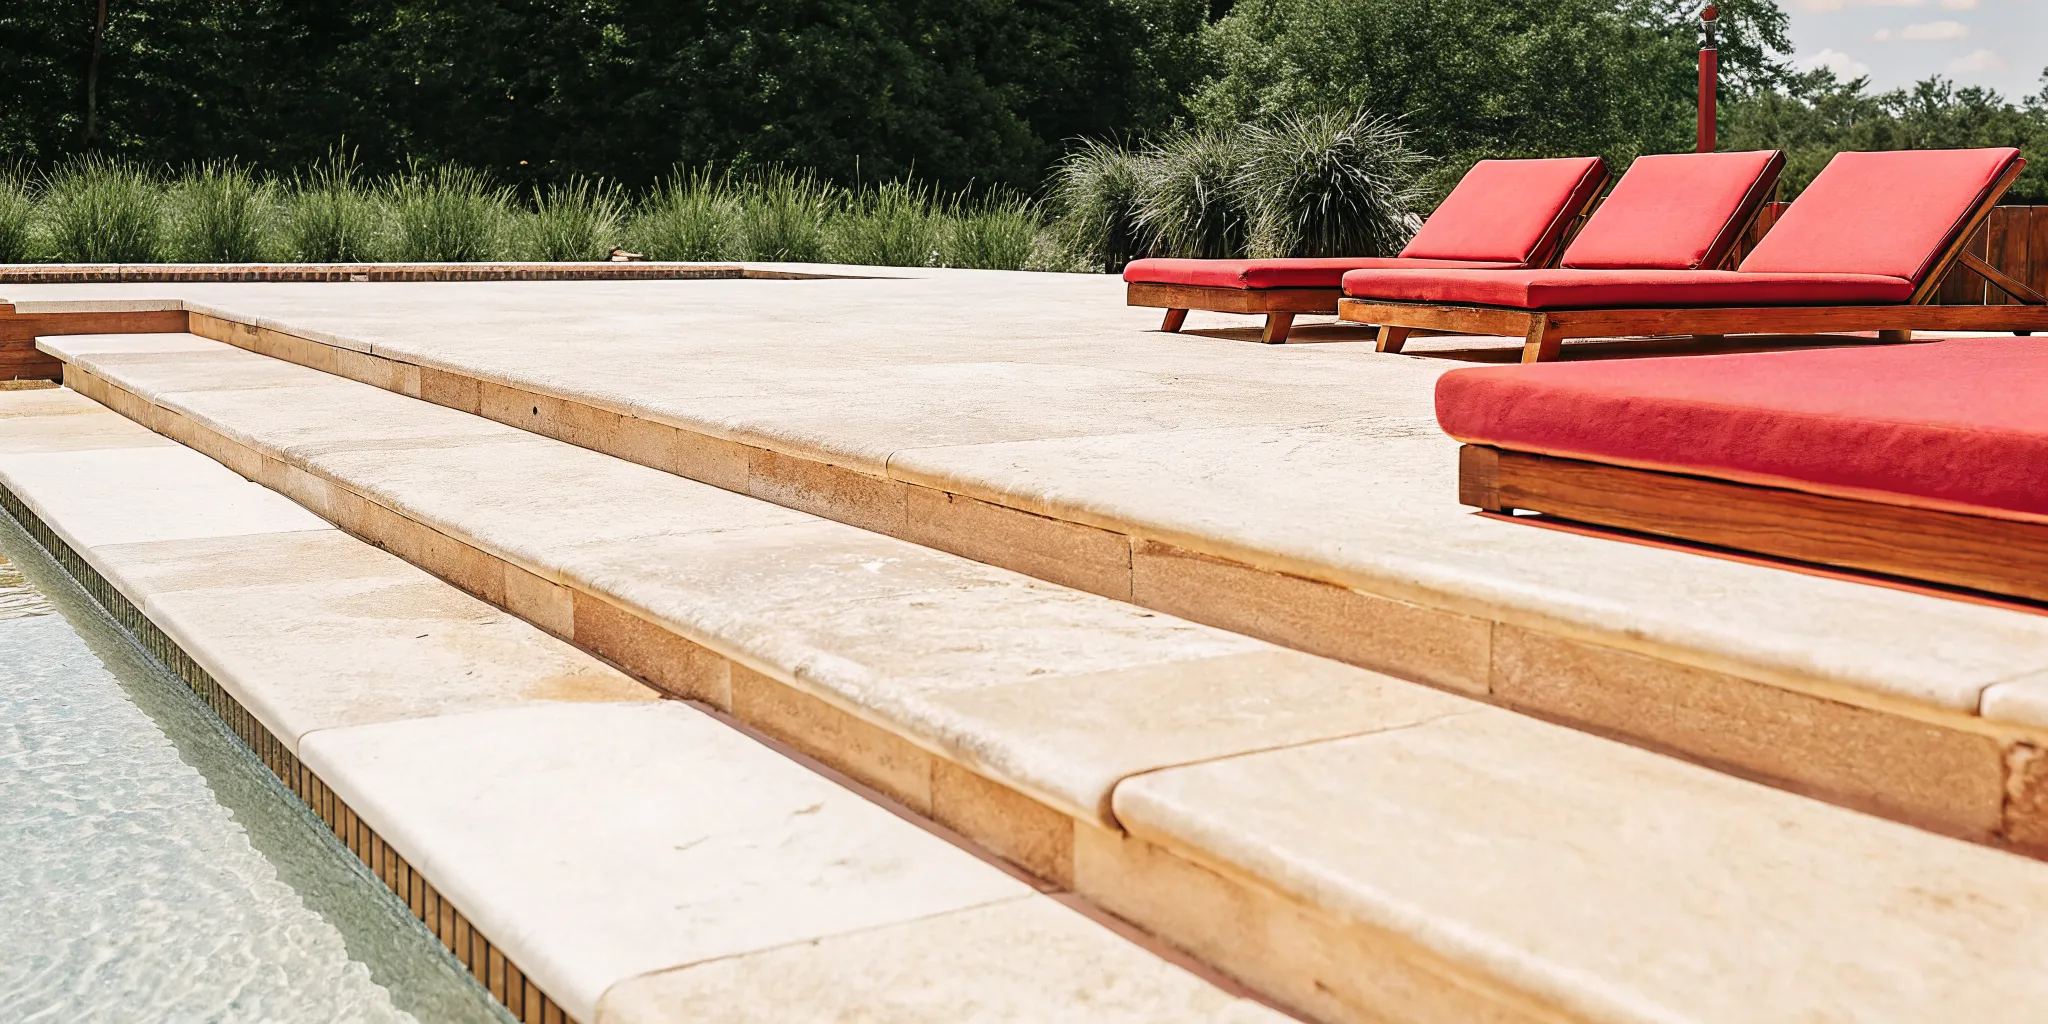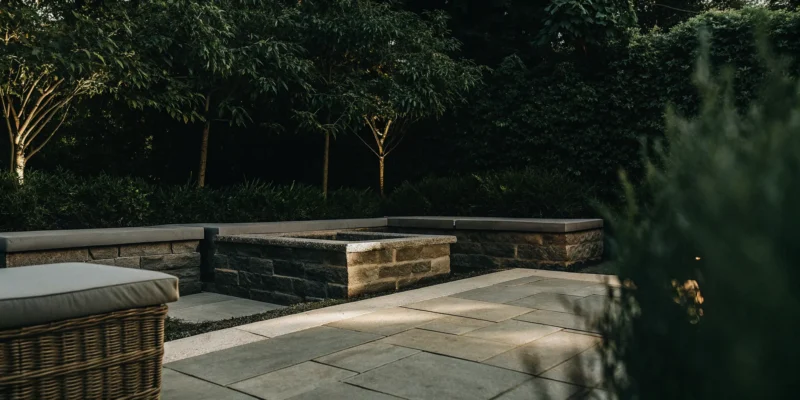
Natural bluestone paver patio with herringbone pattern and stone fire pit in a Long Island backyard

Paver Patio Ideas: Layouts, Patterns & Materials

Long Island homeowners need durable outdoor surfaces that survive freezing winters and hot summer days. Choosing the right layouts and materials ensures your yard remains safe and beautiful for years.

Durable paver patio ideas help you design a beautiful outdoor space that fits your home and lifestyle. This guide covers key layouts, patterns, and materials like natural bluestone, travertine, and concrete pavers to build a lasting backyard setup. We explain how to choose the right layouts, such as running bond or herringbone, to match your home. You will learn how to add features like fire pits, outdoor kitchens, and custom stone borders to make your yard more useful. We also show how proper base prep prevents settling in Nassau and Suffolk county soils. Choosing permeable materials helps water soak back into the ground to protect your lawn. This is recommended by the Clemson University Cooperative Extension.

Contact Gappsi through our contact page Why should you choose stone pavers over other options, and how do they boost your home value? You must look at their long-term durability and how they handle freezing winter weather. To understand these choices, we explore Why Paver Patios Are a Smart Investment for Long Island Homes.

Why Paver Patios Are a Smart Investment for Long Island Homes

A new patio can make your backyard a central hub for relaxation and fun. When you look at new paver patio ideas, you want a choice that looks great and lasts for many years. Building a stone or concrete patio is one of the smartest upgrades you can make for your property. It gives you a strong, beautiful space for outdoor dining and family gatherings. Wood decks rot and concrete slabs crack. A built stone patio stays strong and needs very little work to keep its charm. This makes it a great investment that saves you time and money on yearly repairs.

Weather resistance in our local climate

The weather on Long Island can be very harsh on outdoor stone surfaces. Cold winter months bring freezing temperatures that can crack solid concrete slabs. Paver patios solve this problem because the stones can move slightly without breaking. You can build these patios with strong materials like natural bluestone, granite, travertine, or concrete pavers. To ensure your patio lasts, proper base preparation is the most critical step. You must build a solid paver base using gravel and sand to help water drain away from the surface. This deep layer allows water to flow through instead of pooling under the stones. When water pools and freezes, it pushes the stones upward and ruins the flat surface. Also, using permeable materials helps reduce standing water and cut erosion in your backyard.

Boosting home resale value

A well-built patio is more than just a place to relax. It is a smart way to increase the market value of your home. Most home buyers on Long Island look for move-in ready outdoor spaces. A gorgeous stone patio makes your yard look finished and clean. It acts as an extra room where people can host guests or enjoy quiet nights. Because natural stone and concrete pavers hold their shape for decades, they offer a high return on your investment. You will not have to spend money on regular repairs or costly replacements. This strong design is a key selling point that can attract buyers if you sell your house in the future.

More space for year-round living

A custom paver patio expands your living space past the walls of your house. It creates a stable ground for cozy fire pits, outdoor kitchens, and seating areas. On Long Island, a well-planned layout lets you enjoy your backyard during spring, summer, and autumn. You can set up dining tables for warm summer dinners or add a fire pit to stay warm on crisp fall nights. This custom setup lets you make the most of your property throughout the year. It turns your backyard into a functional retreat where your family can make lasting memories. By adding paths and distinct zones, you create a smooth flow that connects your home directly to the natural landscape. Contact Gappsi through our contact page

What Paver Materials Work Best for a Long Island Patio?

Choosing the proper stone is a major part of your project. The best paver patio ideas rely on choosing materials that can stand up to local weather. You have several great options for your yard, ranging from natural stone to manufactured blocks.

Natural stone options for elegant patios

Many homeowners on Long Island choose bluestone because of its natural look. This popular stone has a unique color range and a rich texture that fits any yard. Another great option is travertine. This stone stays cool under your feet on hot summer days. Using light-colored stones in full sun helps keep the surface cool on warm days. For borders and pool edges, granite coping is very strong and offers a clean look. These natural materials add a timeless feel to your outdoor living space. They can last for decades with simple care. Choosing natural stones allows you to create a patio that feels like a natural part of the landscape. Each piece of stone has its own distinct markings and shades. This means no two patios will look exactly the same. You can mix these materials to create a beautiful and custom look.

The versatility of concrete pavers

If you want more options for shapes and colors, concrete pavers are a great choice. These blocks are durable and feel comfortable underfoot when you walk. They come in many sizes, which allows you to build unique patterns. You can find styles that look like natural stone or classic brick. When choosing the right paver material, you should think about how you will use the space. Some brands like Nicolock offer rich color blends that do not fade over time. These pavers hold up well against heavy foot traffic and changing seasons. Concrete blocks are also easy to replace if one gets stained or damaged. You can simply pull out the broken block and slide a new one in. This makes repairs very cheap and fast compared to poured concrete. Homeowners like this choice when they plan their yard.

Permeable pavers for better water flow

Managing water is a key part of designing any patio on Long Island. Patios built with permeable materials help water soak back into the ground. This helps to reduce standing water and soil loss in your yard after a storm. These special pavers allow rain to flow through the joints into the soil. This stops runoff from washing away soil and helps refill ground water. Using these stones is a smart way to protect your lawn. They keep your lawn dry and prevent pools of water from forming on your patio.

Material Appearance Durability Maintenance Best Use
Bluestone Blue and gray tones with natural texture High strength Low, regular sweeping Rustic patios and walkways
Travertine Warm tan and cream tones, smooth feel High, resists cracking Low, seal every few years Sunny patios and pool decks
Concrete Pavers Many shapes, colors, and textures Very high, handles heavy traffic Low, easy to wash Custom patio patterns
Granite Coping Sleek, modern gray or white colors Extreme strength Very low, resists wear Patio borders and pool edges

Timeless Paver Patio Ideas for Layouts and Patterns

When you begin to plan your paver patio installation, you must decide how the stones will lie. The way you arrange your pavers shapes the style, scale, and strength of your outdoor living space. Modern paver patio ideas rely on classic layouts to guide the eye and make yards feel larger or more cozy. Your pattern choice also affects how well the stones lock together to resist shifting over time.

The Classic Herringbone Layout

The herringbone pattern is a historic design with roots in old European roads. In this layout, builders place rectangular stones at 45-degree or 90-degree angles to form a classic v-shape. The pattern gets its name because the zig-zag lines look like the bones of a herring fish, a look drawn from ancient Roman roads. This interlocking design is highly stable, making it the best choice for high-traffic zones like driveways and main patios. When you lay these pavers at a 45-degree angle, you can make a small patio feel much wider. The slanted lines draw your eyes outward to the corners and edges of the yard. The type of stone you select plays a huge role in the final look of this pattern. Take time for choosing the right paver material before any work begins on your lawn.

The Traditional Basketweave Pattern

The basketweave pattern brings a warm, old-world look to your outdoor living space. In this layout, builders place rectangular pavers in neat, crossing pairs to make square blocks. This simple swap repeats across the floor to make the stones look like woven wooden strips. It is a detailed pattern that works best in flat areas where you want a cozy look. This layout works well for small seating areas and cozy alcoves. It adds rich texture to the ground without making the space feel busy or cluttered. Choosing a layout with wider joints can help you build a permeable hardscape for your yard. This design allows water to soak into the ground, which helps to replenish local groundwater and reduce yard runoff.

The Clean Running Bond Style

The running bond design is the most common pattern for modern patios. In this layout, builders lay pavers in straight, even lines across the yard. Each row is offset by half a stone, which creates a clean, classic look. This layout is easy to install and needs little cutting of stone, which speeds up the work and lowers your costs. You can use running lines to change how people see the scale of your patio. If you run the lines along your house, the patio will look wider from side to side. If you run the lines away from your house, the space will feel much longer to your guests. This pattern also lets you mix different colors to form borders that match your home landscape.

How Big Should Your Paver Patio Be and How Do You Lay It Out?

To design a backyard space that works well, plan your patio size based on how you want to use the area. A small space can feel tight, while a huge patio can look cold and bare. You need to map out your plans before you dig. When you plan your paver patio installation, match the size to your needs. This ensures you have enough room for dining tables, seating, and foot traffic.

Patio size rules by zone

Your patio must fit your chairs and tables. A small dining area with a table and four chairs needs a space of at least twelve by twelve feet. For large dining tables or a deep couch, plan for fifteen by fifteen feet. Fire pit seating areas need a space of at least ten to twelve feet wide. This size allows guests to sit at a safe distance from the heat while keeping their chairs on the paving stones.

Traffic flow and zoning plans

A good layout splits your outdoor space into clear zones. You can use different paver colors or textures to mark where the cooking area ends and the lounge area begins. Keep main walking paths three to four feet wide so people can pass easily. Always check the slope during planning. You want to make sure water drains away from your home. Hardscaping guides from Clemson University Extension show that pervious systems work best on slopes under two percent. This means your yard should not slope more than one foot for every fifty feet.

Steps to map your layout

To get the best results, follow a clear plan to map your yard. You want to make sure your new space fits well with your home’s style. Gappsi ensures that patterns and layouts complement your existing landscape and architecture. Here are the steps to size and lay out your new paver patio:

  1. List your patio uses. Write down how you want to use the space, such as for outdoor dining, cooking, or sitting by a fire pit. This list helps you find the total square footage you need.
  2. Measure your yard. Mark the edges of your lawn, trees, and gardens. Use these sizes to see how much flat space you have for paving.
  3. Stitch zones together. Arrange your zones so that the cooking area is close to the house door. Place lounging and fire pit areas further out in the yard for a quiet feel.
  4. Outline the shape with stakes. Use wood stakes and string to mark the patio edges in your yard. Use garden hoses if you want to test curved shapes.
  5. Test the traffic paths. Place your outdoor chairs and tables inside the outlined area. Walk around the furniture to make sure your paths are wide enough for guests to move around.

Adding Fire Pits, Outdoor Kitchens, and Borders to Your Patio

A well-planned outdoor space is more than just a flat stone surface. Homeowners can use fresh paver patio ideas to turn a simple backyard into a lively outdoor living room. Adding key features like a built-in fire pit, a stone outdoor kitchen, or a custom seating wall helps to zone your yard for different uses. Each feature works to draw people in, making the patio an active hub for outdoor life.

Defining Space with Custom Borders and Coping

A contrasting border or custom coping acts as a frame for your patio layout. Using different paver colors, textures, or sizes defines the outer edge of your patio and separates it from the surrounding lawn. This border gives the entire design a polished, high-end look. Beyond style, borders also keep your edge pavers locked tightly in place. Within the patio, low built-in sitting walls do double duty. They give you extra seating around a fire feature while they zone the space. For instance, a low wall can split a cozy fire pit lounge from a busy cooking area. This smart zoning keeps your foot traffic moving smoothly during backyard parties.

Integrating a Fire Pit and Outdoor Kitchen

When you plan to build heavy features like a stone fire pit or a stone outdoor kitchen, proper ground work is key. For any durable patio, the choice to build a solid paver base is the most important first step. Heavy stone features put extra weight on the soil. This weight can cause pavers to sink or shift over time if the base is weak. Proper base prep ensures that your cooking and lounging zones stay stable for years to come.

Managing Slope and Drainage for Heavy Features

Managing water runoff is another key detail when adding fixed stone features. Using permeable surfaces around your outdoor kitchen or fire pit helps rain soak directly into the ground. This cuts standing water and stops soil erosion around your heavy stone structures. A study on hardscaping from Clemson University Extension shows that permeable hardscapes let water soak into the soil instead of creating runoff. This simple change helps to fill local groundwater. To keep these surfaces working well, the work site must meet tight rules. According to university guidance on permeable hardscapes, pervious pavers work best on slopes under 2%. That is a one-foot drop for every 50 feet of length. Also, builders must leave two feet of space between the bottom of the base and any bedrock or the water table. Following these rules ensures that your custom patio stays dry, level, and safe in Long Island’s changing seasons.

Do Paver Patios Need a Solid Base and Maintenance?

Do you want your outdoor living area to stay beautiful and stable for years to come? Yes, every successful backyard design needs a strong base and regular care to last. When you explore different paver patio ideas, you must plan for what lies beneath the surface. Knowing how to prep the site and keep it clean will save you time and money.

Why base preparation determines patio lifespan

Long Island gets intense freeze and thaw cycles. This shift in the weather causes the soil to expand and shrink. To stop shifting, you must build a solid paver base with deep gravel layers. Proper base prep is key to help your patio last in this local climate. Without it, your stone layout will sag, crack, or become uneven over time. A strong gravel bed drains water away quickly to protect the joints. A standard build begins by digging deep into the ground. Most yards need about six inches of crushed stone under the pavers. This stone layer must be packed down with a heavy machine. Packing the gravel creates a hard surface that will not budge under heavy foot traffic.

Siting rules for permeable paver installations

Using permeable stone can improve your yard. These systems let rain soak into the ground to reduce runoff. According to Clemson University, these surfaces let water soak back into the earth. But you must place these systems on the right land. Permeable designs work best on gentle slopes of under two percent. A slope steeper than this will not let the water drain straight down. Also, you must keep at least two feet of space between the stone base and bedrock or the water table. This gap ensures that the filtered water can seep safely back into the earth. Proper water drainage keeps your lawn healthy. When water pools on top of your stones, it can flood your gardens. It can also seep toward your house foundation to cause wet basements. Permeable stones solve this problem by directing storm water down into the soil. This natural flow prevents erosion and keeps your outdoor space dry.

Routine steps to keep your patio clean

Once your patio is built, regular care is simple but vital. You should sweep loose leaves, dirt, and debris off the stones every week. This habit stops organic matter from staining the stone surfaces. Next, wash the stone with a garden hose and a mild soap to remove tough grime. Keeping the joints filled is another key step. You can secure the stones by finishing your patio joints with polymeric sand. This special sand hardens when wet to block weeds and ants. To protect against stains and frost damage, you should seal and protect your paver patio every one to three years. Sealing keeps the colors bright and keeps water from breaking down the concrete or natural stone. Contact Gappsi through our contact page

Frequently Asked Questions

What are the most durable patio pavers?

Granite pavers are the most durable option for your yard. This natural stone resists wear, chipping, and cracks from the cold winter freeze. Natural concrete pavers also offer high strength and come in many shapes. Proper base setup is key to keep them from shifting over time.

How do you maintain patio pavers?

To maintain your pavers, sweep them often to clear dirt. You should also fill the joints with polymeric sand to block weeds. Sealing your patio every one to three years will protect the stone from salt, oil, and the winter freeze. Read our guide to seal and protect your paver patio for best results.

What are some paver patio ideas on a budget?

For a low-cost patio, you can use gravel or crushed shell instead of full stone. These materials cost less and let water drain back into the soil. According to the Clemson University Cooperative Extension, a grid system can help hold these loose materials in place for a solid walkway.

How can I design a patio with fire pits and pavers?

You can center your design around a focal point by using circular paving patterns for your fire pit. Using a different brick color for the borders will help separate the fire area from your dining space. This layout keeps the yard organized and safe for your family.

Ready to design your ideal Long Island paver patio?

Putting off your project means missing out on prime warm weather and outdoor fun next year. If you wait until spring to start planning, busy build schedules and cold weather ground shifts will delay your job. Designing your yard now ensures that the hard work is done before the first warm day of the season. Our team handles every step from base prep to the final layout to make sure your stone patio looks great and stays stable. Do not let another year go by wishing you had a space to gather with your friends and loved ones. Ready to build? Contact Gappsi through our contact page to schedule a free paver patio consultation with Gappsi Group.
Share this page:
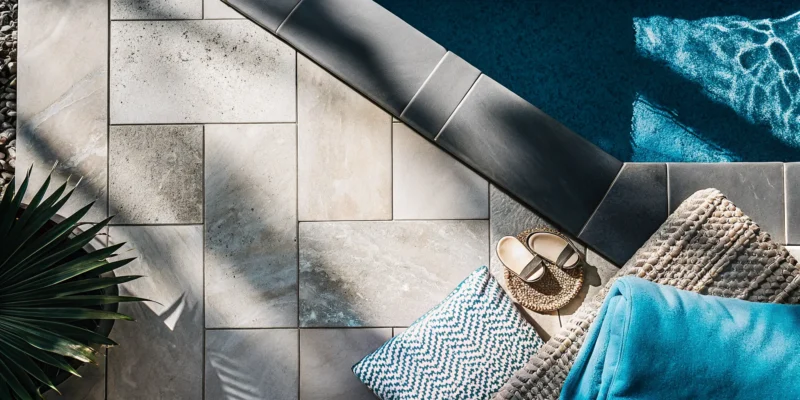
A beautiful natural stone patio by a pool, a major factor in overall project cost.

What’s the Real Cost of a Natural Stone Patio?

Planning a major home project like a new patio can feel overwhelming, especially when it comes to the budget. It’s easy to get a quote for materials, but what about all the other expenses? Hidden fees and unexpected charges are every homeowner’s fear. We believe you should feel confident and informed from start to finish. That’s why we’re breaking down the true cost of a natural stone patio, leaving no stone unturned. From local permit fees and essential site preparation to the price of professional installation and long-term maintenance, this guide gives you a complete financial picture. You’ll learn exactly what to expect so you can set a realistic budget without any last-minute surprises, ensuring a smooth and stress-free process.

Key Takeaways

  • Plan Your Budget with Key Factors in Mind: A professionally installed natural stone patio typically costs between $16 and $35 per square foot, but your final price depends on the stone type, design complexity, and necessary site preparation.
  • Invest in Professional Installation for Lasting Results: A professional build is crucial for a durable patio that adds value to your home. Proper installation prevents future issues like shifting stones and poor drainage, protecting your investment for years to come.
  • Account for the Finishing Touches: A complete budget includes more than just stone and labor, so remember to factor in costs for permits, drainage solutions, protective sealing, and surrounding landscaping for a polished result.

How Much Does a Natural Stone Patio Really Cost?

A natural stone patio brings a timeless elegance to any backyard, creating a perfect spot for relaxing and entertaining. But before you start dreaming of summer barbecues, you’re probably wondering about the budget. The cost of a natural stone patio is an investment, and the final price depends on several key factors, from the type of stone you choose to the complexity of the installation. Working with an expert masonry team ensures the job is done right, giving you a beautiful and durable patio that lasts for decades.

Understanding the costs upfront helps you make informed decisions without feeling overwhelmed. A well-built patio not only enhances your lifestyle but also adds significant value to your home. The beauty of natural stone is that each piece is unique, so your outdoor space will be truly one of a kind. Let’s break down the numbers so you can plan your project with confidence and get one step closer to the backyard of your dreams.

What to Expect Per Square Foot

When budgeting for your patio, it’s helpful to think in terms of square footage. On average, you can expect a professionally installed natural stone patio to cost between $16 and $35 per square foot. This range typically covers the cost of the stone itself, all base materials for a proper foundation, and the labor to get it all installed perfectly. Keep in mind that this is a general estimate. The final price can shift based on your specific site conditions, the intricacy of the design, and the type of high-quality natural stone you select for your Long Island home.

How Different Stones Impact the Price

The type of stone you choose is one of the biggest variables in your patio’s final cost. Each stone has a unique look, level of durability, and price point based on how abundant it is and where it’s sourced from. Here’s a quick look at some of the most popular options and what you can expect them to cost.

Bluestone

Known for its beautiful deep blue and gray tones and naturally rough texture, bluestone is a classic choice for patios. It’s incredibly durable and provides a non-slip surface, making it both safe and stylish. An installed bluestone patio typically costs between $15 and $31 per square foot.

Flagstone

Flagstone is a popular and versatile option, often seen in irregular, natural shapes that create a rustic feel. Because it’s widely available, it’s a relatively affordable choice, with installed costs generally running from $15 to $32 per square foot. Larger, more uniform pieces of flagstone will usually be at the higher end of that range.

Sandstone

If you’re looking for warm, earthy colors, sandstone is an excellent choice. It offers a soft, natural look that blends beautifully with garden landscapes. The price for an installed sandstone patio usually falls between $18 and $30 per square foot, depending on the specific color and finish you select.

Granite

For ultimate durability and a sophisticated look, granite is hard to beat. It’s one of the strongest natural stones available and resists scratches and stains, making it a fantastic long-term investment. An installed granite patio typically costs between $19 and $32 per square foot, offering a premium finish for your outdoor space.

What Factors Influence Your Patio’s Final Cost?

When you start budgeting for a new patio, it’s easy to focus only on the price of the stone itself. But several key elements come together to determine the final number on your invoice. Understanding these factors from the start helps you set a realistic budget and make informed decisions for your project. From the specific stone you fall in love with to the complexity of the design, each choice has an impact. Let’s walk through the main components that shape your patio’s total cost, so you know exactly what to expect.

Your Choice of Stone

The material you select is one of the biggest drivers of your patio’s cost. Natural stones like granite, slate, and limestone are premium materials, and their price reflects their beauty and durability. Material costs alone can range from $7 to $16 per square foot. When you factor in professional installation, a complete stone patio often lands between $16 and $35 per square foot. Exploring different types of porcelain and natural stone will give you a better sense of the aesthetic and budget that works for you. While some options are more of an initial investment, their longevity can offer greater value over time.

The Cost of Professional Installation

Hiring a skilled team to install your patio is an investment in getting the job done right. Professional installation for a natural stone patio can range from $3,900 to $15,000 for a typical 300-square-foot space. This price covers not just the labor but also the expertise required to ensure your patio is level, stable, and built to last for decades. Expert masonry services prevent common issues like uneven stones and poor drainage. While a DIY approach might seem tempting to save money, a professional build protects your investment and gives you a beautiful, worry-free outdoor space.

Prepping the Groundwork

What lies beneath your patio is just as important as the stones you see on top. Proper groundwork is the key to a long-lasting patio that won’t shift, sink, or crack over time. This process involves excavating the area and laying a compacted gravel base to create a stable foundation. In areas with clay soil, this step is especially critical. Skipping proper site preparation is one of the most common reasons patios fail, leading to expensive repairs down the road. A solid base ensures your beautiful new patio remains a durable and level surface for years of enjoyment.

How Intricate Designs Affect the Price

The shape and pattern of your patio also play a role in the final cost. Simple square or rectangular designs are generally the most budget-friendly because they require fewer cuts and less labor. As you introduce more complex elements like curves, custom inlays, or intricate patterns, the labor costs will increase. These designs demand more time and precision from the installation team to cut and fit each stone perfectly. While a custom design can create a stunning, one-of-a-kind look, it’s important to factor the additional labor into your overall budget.

Don’t Forget These Additional Costs

When you’re budgeting for a new natural stone patio, it’s easy to focus on the price of the stone and the installation labor. But a few other key expenses can influence your final total, and thinking about them ahead of time ensures there are no surprises. These aren’t just minor add-ons; they are crucial components that contribute to the longevity, safety, and overall beauty of your outdoor space. For example, without proper site preparation and drainage, your beautiful patio could shift or hold water after a heavy Long Island rainstorm. Similarly, skipping the permitting process can lead to headaches and fines down the road.

These additional costs are what separate a standard job from a truly professional one. They include the administrative work of securing permits, the foundational work of creating proper drainage, the protective step of sealing the stone, and the aesthetic details of post-installation landscaping. Each element plays a vital role in transforming a simple stone slab into a durable and inviting outdoor living area. By planning for these aspects from the beginning, you can create a comprehensive budget that covers every detail, guaranteeing a smooth process and a result you’ll love for years to come.

Handling Local Permits

Before any work begins, it’s important to figure out if your project requires a permit. Many towns and villages on Long Island have specific rules for construction, and your patio project might need approval. These requirements can involve paperwork and inspection fees that are not typically included in an initial installation estimate. As one industry resource notes, you might have extra costs for permits or inspection fees from your local government. Working with an experienced contractor like Gappsi can make this process much smoother, as we are accustomed to managing the necessary permits for our projects.

Planning for Proper Drainage

Proper drainage is one of the most critical, yet often overlooked, aspects of patio construction. Without a plan to manage rainwater and runoff, you could face issues like pooling water, shifting stones, and potential damage to your home’s foundation. A simple patio on level ground may not need much, but more complex sites often require drainage systems, which can add to the project cost. Investing in a well-designed drainage solution from the start is a smart move that protects your patio for years to come. It’s a key part of the expert site preparation that ensures a long-lasting installation.

The Final Touches: Sealing and Finishing

Once your beautiful natural stone patio is installed, the final step is to protect it. Sealing the stone is an important part of long-term care. A quality sealant helps shield the stone from stains, moisture, and weathering while enhancing its natural color and texture. While this adds an upfront cost, it significantly reduces future maintenance and keeps your patio looking new. Think of it as insurance for your investment. Professional restoration and sealing services can ensure the right product is applied correctly for maximum protection and beauty.

Post-Installation Landscaping Needs

A stunning patio rarely stands alone. To create a truly inviting outdoor oasis, you’ll want to consider the surrounding landscape. This might include planting new garden beds, installing irrigation for your lawn, or adding outdoor lighting to set the mood for evening get-togethers. These finishing touches are what tie the whole space together. A cohesive landscape design integrates your new patio with the rest of your yard, creating a seamless flow and making the entire area more functional and beautiful. Budgeting for these elements ensures your project feels complete.

Natural Stone vs. Pavers vs. Concrete: A Cost Comparison

When you’re planning your new patio, one of the biggest decisions you’ll make is choosing the right material. The three most popular choices are natural stone, concrete pavers, and poured concrete. Each one comes with a different look, feel, and, of course, price tag. Understanding the cost differences is key to creating a budget that works for you without sacrificing your vision for the perfect outdoor space. It’s easy to get caught up in beautiful inspiration photos, but knowing the real-world costs helps you set realistic expectations from the start.

Your choice will ultimately come down to balancing your aesthetic goals with your financial plan. Natural stone offers unmatched, high-end beauty but comes at a premium. Concrete pavers provide a fantastic middle ground, offering versatility and durability at a more accessible price. Poured concrete is the most budget-friendly option, giving you a solid foundation for your outdoor living area. At Gappsi, we work with all of these materials and can help you explore the options in person, ensuring your final decision fits both your home’s style and your budget. Let’s break down what you can expect to invest in each of these popular choices.

Natural Stone

Natural stone is the most luxurious and, therefore, the most expensive patio material. Think of it as a long-term investment in your home’s value and your own enjoyment. The material itself can range from $40 to $70 per square foot, and that’s before professional installation. When you factor in labor, the total cost often lands in a premium price range, reflecting its status as a top-tier material. While the upfront cost is significant, the result is a one-of-a-kind surface with timeless appeal. The unique colors and textures of natural stone create a patio that is truly unique and built to last for decades with proper care.

Concrete Pavers

If you love the look of stone but need a more budget-conscious option, concrete pavers are an excellent choice. They offer incredible design flexibility, coming in a huge variety of shapes, colors, and textures that can even mimic the appearance of natural stone. The cost for a professionally installed paver patio typically runs from $10 to $35 per square foot. For most homeowners, a complete project will fall somewhere between $4,000 and $12,000. This makes pavers a popular middle-ground solution that delivers durability and style without the premium price tag of natural stone. Our masonry experts can design a pattern that perfectly complements your home.

Poured Concrete

Poured concrete is the most affordable route for a new patio. With material costs around $6 to $10 per square foot, it’s a straightforward way to create a functional outdoor surface. A standard installation might cost between $9,000 and $15,000, depending on the size and complexity of the job. While a basic concrete slab is not as visually dynamic as stone or pavers, you can add some personality with stamping or staining techniques. However, it’s important to remember that concrete is more prone to cracking over time and doesn’t offer the same sophisticated texture or individual character you get from pavers or natural stone.

Design Trends and Their Price Tags

Today’s patios are so much more than a simple place to put a grill. They have become true extensions of our homes, reflecting our personal style and adding significant value. As outdoor living has grown in popularity, so have the design possibilities. From mixing materials to adding custom lighting, these modern trends can transform your backyard into a stunning retreat. Of course, these beautiful design choices also play a role in your project’s final cost, as they often require more specialized materials and expert craftsmanship. Let’s look at a few popular trends and what they mean for your budget.

Mixing Materials

Gone are the days of a single, uniform surface. A major trend in patio design is mixing materials to create texture, contrast, and visual interest. Think of a smooth bluestone patio bordered by rustic river stones, or natural stone slabs interspersed with strips of lush green turf. This approach turns your patio into a unique feature of your landscape. The cost of this trend varies widely depending on the materials you choose. Combining a premium stone with more affordable gravel or groundcover can be a creative way to get a high-end look without the high-end price tag for the entire area. A skilled masonry team can help you select a combination that fits both your aesthetic and your budget.

Geometric Patterns and Custom Layouts

If you love a clean, modern look, you might be drawn to geometric patterns. Designs like herringbone, basketweave, or large-scale repeating shapes can make a powerful statement. While stunning, these intricate layouts are more labor-intensive than a simple running bond pattern. Each stone often needs to be precisely cut and placed to create the desired effect. A natural stone patio is already a significant investment that includes both material and professional installation fees. The more complex your chosen pattern, the more time and skill it will require from your installers, which will be reflected in the labor portion of your final bill.

Natural Edges and Organic Shapes

Many homeowners are moving away from sharp, rectangular patios and embracing softer, more organic shapes. These free-form designs often feature curved edges that blend seamlessly into the surrounding garden beds and lawn. This style frequently uses irregular flagstone, fitted together like a custom puzzle to create a surface that feels like it was shaped by nature. While the result is beautiful, this trend requires a high level of artistry and handwork. Fitting and placing each unique stone takes considerable time and expertise, which can increase labor costs compared to working with uniform, pre-cut stones. This is where a team with deep landscape design experience truly shines.

Adding Built-In Lighting and Greenery

Integrating functional elements directly into your patio is a popular way to add both beauty and utility. Low-voltage lighting can be installed along edges or recessed into the stone itself, creating a warm ambiance and improving safety after dark. Built-in planters are another great option, allowing you to soften the hardscape with pockets of greenery. These features do add to the initial project cost, as they require extra steps like running electrical wiring or constructing proper drainage for planters. It’s crucial that this work is done correctly during the initial build to prevent future issues, like water seeping under the stones and causing instability. Investing in professional installation upfront helps protect your investment for years to come.

Is a Natural Stone Patio a Good Investment?

When you look at the initial price tag, it’s easy to wonder if a natural stone patio is truly worth it. It’s a significant project, and you want to be sure you’re making a smart choice for your home and your finances. The short answer is yes, a natural stone patio is an excellent investment. It’s more than just a beautiful addition to your backyard; it’s an asset that offers lasting value, enhances your home’s appeal, and improves your quality of life.

Unlike other home improvement projects that can quickly look dated, a natural stone patio has a timeless quality that endures for decades. It creates a durable, functional outdoor living space for you to enjoy with family and friends. When you consider the long-term benefits, from its incredible durability to its impact on your property value, the initial cost starts to look a lot more reasonable. Let’s break down exactly what makes it such a worthwhile investment.

Long-Term Durability and Value

One of the biggest advantages of natural stone is its strength. Materials like granite, bluestone, and travertine are incredibly resilient and can withstand harsh weather, heavy foot traffic, and the test of time. Natural stone is a popular choice for outdoor patios because it looks good, is strong, and doesn’t need much care. While the upfront cost might be higher than for other materials, you’re paying for longevity. A properly installed natural stone patio can last a lifetime, meaning you won’t have to worry about costly replacements down the road. This durability makes it a cost-effective choice over the long run.

Improving Curb Appeal and Home Value

A stunning stone patio does more than just give you a nice place to relax. A well-designed patio is one of the best outdoor improvements for increasing home value. It makes your property stand out to buyers. The unique colors and textures of natural stone create an elegant, high-end look that instantly enhances your home’s curb appeal. This isn’t just an expense; it’s an upgrade that adds tangible value to your property. Should you ever decide to sell, a beautiful and functional outdoor living space built with expert masonry techniques can be a major selling point that helps you secure a better price.

The Hidden Costs of Cutting Corners

While a natural stone patio is a great investment, its value depends heavily on proper installation and care. Natural stone patios require a significant upfront investment, covering both premium material costs and professional installation fees. Trying to cut costs with a DIY job or by hiring an inexperienced contractor can lead to disaster. Neglecting regular upkeep can also result in water seeping beneath the stones, causing unevenness and instability over time. To protect your investment, it’s crucial to have it installed correctly from the start and to perform routine maintenance. This prevents small issues from turning into expensive restoration projects.

What’s the Real Cost of Patio Maintenance?

Your beautiful natural stone patio is an investment in your home and your lifestyle, and like any good investment, it requires a little care to keep it in prime condition. The cost of your patio doesn’t stop once the last stone is laid. Thinking about maintenance from the start helps you protect its beauty and durability for decades. Luckily, maintaining a stone patio is straightforward and won’t break the bank, but it does require a consistent approach. By planning for routine upkeep and potential repairs, you ensure your outdoor space remains a stunning and safe place for relaxing and entertaining.

Budgeting for Routine Upkeep

Keeping your natural stone patio looking its best is mostly about simple, regular tasks. You’ll want to sweep it often to get rid of leaves, dirt, and other debris that can cause stains or become ground into the surface. An occasional rinse with a hose helps wash away dust and pollen. When it’s time for a deeper clean, it’s vital to use a pH-neutral cleaning solution made specifically for stone, as acidic or harsh chemicals can cause permanent damage. To give your patio the best defense against stains and weather, consider having it professionally sealed every few years. Our restoration and sealing services can protect your investment and make daily cleaning even easier.

Planning for Future Repairs

Over time, even the most well-installed patio can show signs of wear. The key is to catch small issues before they become big, expensive problems. If you neglect regular upkeep, water can get underneath the stones, leading to shifting and an uneven surface. A great habit is to walk your patio every spring and fall to inspect it. Pay close attention to the joints between the stones. If the sand or filler is washing away, it may need to be replenished to keep the stones secure. You should also check your joints and look for any pavers that have become stained, chipped, or broken so you can plan for their replacement. Addressing these minor repairs promptly will save you from a major overhaul down the road.

When to Call a Professional

While you can handle most routine maintenance yourself, some jobs are best left to the experts. If you notice widespread or significant issues, it’s time to make a call. Problems like multiple loose or uneven stones, drainage issues where water pools on the surface, or deep-set stains that don’t lift with simple cleaning are signs you need professional help. Trying to fix major structural problems without the right tools or experience can often make things worse. A professional can diagnose the root cause of the issue, whether it’s from settling or improper installation. For any significant patio repairs on Long Island, our expert masonry team can restore your patio’s safety and beauty.

Start Your Natural Stone Patio Project on Long Island

Taking the first step on a new patio project is exciting, and knowing what to expect can make the process feel much smoother. For a natural stone patio on Long Island, a good budget estimate is between $16 and $35 per square foot for the complete installation. This means a typical patio project often lands somewhere between $4,000 and $12,000, though this can change based on your site’s specific needs and the complexity of your design. The stone itself is a big part of that equation, with beautiful and durable options like granite, slate, and limestone usually costing between $7 and $16 per square foot.

Choosing the right material is about finding a look you love that fits your budget. At Gappsi, we can walk you through our extensive collection of porcelain and natural stone to help you find the perfect match for your home’s style. Our design team has been transforming Long Island backyards for decades, and we handle every detail, from preparing the ground to executing the final pattern. We believe a great patio is built on a solid foundation, which is why our masonry work is second to none.

We also help you think about the future of your investment. To keep your patio looking its best for years to come, regular care is key. Simple upkeep, like sealing the stone to protect it from the elements, makes a huge difference. We offer professional restoration and sealing services to ensure your outdoor space remains a source of pride and enjoyment. When you’re ready to turn your vision into a reality, our team is here to help you create a beautiful, lasting addition to your home.

Related Articles

Frequently Asked Questions

Why is natural stone so much more expensive than concrete pavers or poured concrete? The higher price of natural stone comes down to its uniqueness and durability. Each piece is quarried from the earth, meaning no two stones are exactly alike, giving your patio a one-of-a-kind character. This process is more labor-intensive than manufacturing concrete pavers. While pavers and concrete are excellent materials, natural stone offers a level of timeless elegance and natural variation that simply can’t be replicated, making it a premium, long-lasting investment in your home.

What’s a realistic starting budget for a typical natural stone patio? For a professionally installed natural stone patio, a good starting point for your budget is between $16 and $35 per square foot. So, for a common 300-square-foot patio, you could expect the total project cost to fall somewhere between $4,800 and $10,500. This range generally includes the stone, all the necessary base materials for a solid foundation, and the expert labor required to ensure a beautiful, long-lasting installation.

Besides the stone, what is the most important cost factor I shouldn’t overlook? The most critical factor beyond the stone itself is the groundwork and professional installation. A beautiful patio on a weak foundation will fail, leading to sinking stones, poor drainage, and expensive repairs. Investing in proper site excavation and a compacted gravel base is non-negotiable for a patio that will last. Hiring an expert masonry team ensures this foundational work is done right, protecting your entire investment for decades to come.

How can I get a high-end look if a full natural stone patio is outside my budget? You can absolutely achieve a luxurious feel without using natural stone for the entire surface. A popular and beautiful trend is to mix materials. Consider using more budget-friendly concrete pavers for the main area and adding a sophisticated border of natural stone. You could also create visual interest by interspersing strips of synthetic turf between larger stone slabs. This approach gives you a custom, high-end look while keeping the overall project cost more manageable.

How long will a professionally installed natural stone patio actually last? When a natural stone patio is installed correctly by a skilled team and properly maintained, it can easily last a lifetime. We’re talking 50 years or even longer. The key is the combination of a solid, well-drained base and periodic care, like cleaning and sealing the stone every few years to protect it from stains and weather. This incredible longevity is what makes natural stone such a fantastic long-term investment for your home.

Share this page:
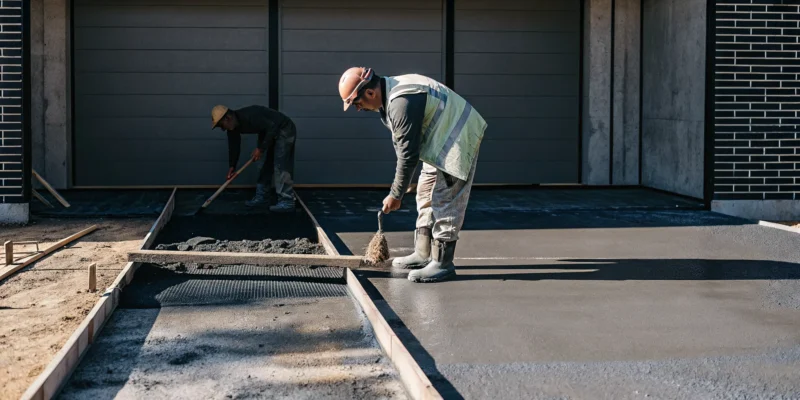
Concrete driveway installation services with a team smoothing the freshly poured concrete.

Concrete Driveway Installation Services: The 101 Guide

Are you tired of pulling weeds from between pavers or dealing with the ruts and dust of a gravel driveway? A driveway should be a source of pride, not a constant chore. Concrete offers a simple, elegant solution. It provides a solid, seamless surface that’s easy to clean, shovel, and maintain, freeing up your weekends for better things. Forget the old idea of plain gray slabs; modern concrete can be customized with colors and patterns to match any home’s style. Our concrete driveway installation services are designed to give you a beautiful, low-maintenance entrance that solves your driveway frustrations for good.

Key Takeaways

  • A Solid Foundation is Non-Negotiable: The long-term durability of your driveway relies on proper site preparation. A compacted base, correct grading for drainage, and planned expansion joints are essential to prevent cracks and structural failure.
  • Design Your Driveway to Match Your Home: Concrete is a versatile canvas for your home’s exterior. You can use stamped patterns, colored finishes, and unique textures to create a custom look that complements your property’s style and improves its curb appeal.
  • Choose a Partner, Not Just a Price: Selecting the right contractor is crucial. Look for a team with proven local experience, transparent pricing, and a focus on technical details like reinforcement, as this ensures a high-quality result that provides lasting value.

Why Choose a Concrete Driveway?

Choosing a new driveway is a major decision. It’s the welcome mat to your home, the first impression for guests, and a feature you’ll use every single day. While you have several material options, concrete remains a top choice for Long Island homeowners for good reason. It’s a classic that has evolved far beyond simple gray slabs, offering a powerful combination of strength, style, and practicality that’s hard to beat. A well-installed concrete driveway is more than just a place to park your car; it’s a long-term investment in your property’s value and curb appeal.

When you partner with an expert team, you get a driveway that not only looks fantastic but is also engineered to withstand Long Island’s changing seasons, from hot summers to freezing winters. The right masonry design and construction can transform your home’s entrance and tie your entire landscape together. If you’re looking for a solution that delivers on all fronts, concrete offers a compelling case. It provides a solid foundation for your home’s exterior aesthetic while giving you peace of mind for years to come. Let’s look at the three biggest benefits you can expect.

Enjoy Decades of Durability

One of the most significant advantages of a concrete driveway is its incredible longevity. When properly installed and maintained, a concrete driveway can easily last 30 years or more. Think about that, three decades of reliable performance with very little fuss. This isn’t a temporary fix; it’s a permanent improvement to your property. This durability makes it an excellent investment, saving you from the cost and hassle of premature replacements. To ensure your driveway reaches its maximum lifespan, periodic cleaning and applying a high-quality sealant every few years can protect it from moisture, stains, and wear. Our restoration and sealing services can keep your concrete looking its best for the long haul.

Enhance Your Curb Appeal with Versatile Designs

Forget the idea that concrete is boring. Modern concrete driveways are incredibly versatile and can be customized to perfectly match your home’s style. Concrete is a blank canvas that can greatly enhance your home’s exterior. You can choose from a wide range of decorative options, including stamped patterns that mimic the look of natural stone, brick, or slate. We can also integrate colors and stains to create a unique finish that complements your home’s siding, trim, or landscaping. This design flexibility allows you to create a truly custom look that improves your curb appeal. With our expertise in working with porcelain and natural stone, we understand how to create cohesive and beautiful hardscapes.

Save Time and Money with Low Maintenance

If you have a busy lifestyle, a low-maintenance driveway is a must. Concrete driveways don’t need a lot of upkeep, which is a huge plus for many homeowners. Unlike asphalt that requires regular sealing or pavers that can grow weeds in the joints, concrete is simple to care for. A seasonal cleaning with a pressure washer is usually all it takes to keep it looking fresh. This minimal maintenance not only saves you valuable time on the weekends but also reduces long-term costs. By avoiding the need for frequent repairs and resealing, you’ll find that a concrete driveway is one of the most cost-effective options over its entire lifespan, making it a smart part of any home remodeling plan.

How Concrete Compares to Other Driveway Materials

Choosing a driveway material can feel overwhelming, but it really comes down to balancing looks, longevity, and upkeep. While options like asphalt, pavers, and gravel each have their place, concrete consistently stands out for its unique combination of strength and style. Let’s break down how it stacks up against the other common choices for your Long Island home.

Concrete vs. Asphalt

Asphalt is a popular choice, but when you look at the long game, concrete often comes out ahead. A well-installed concrete driveway can last for more than 30 years with very little maintenance. It stands up beautifully to Long Island’s harsh weather, especially the freezing and thawing cycles that can wreak havoc on other materials. Plus, concrete is less prone to staining from oil leaks. While asphalt might have a lower initial price tag, it typically requires resealing every few years and is more susceptible to damage, making concrete a more durable and cost-effective investment over the life of your home.

Concrete vs. Pavers

Pavers offer a classic, elegant look, and we love designing with them. However, the main difference comes down to a solid surface versus individual units. Over time, pavers can sometimes shift or settle, and you’ll likely have to pull weeds from the joints. A poured concrete driveway gives you a seamless, solid surface that’s easy to clear and maintain. If you love the look of stone or brick, stamped concrete can replicate those intricate patterns without the individual seams, giving you the best of both worlds: high-end design on a stable, unified surface. We can help you explore all your porcelain and natural stone options to find the perfect fit.

Concrete vs. Gravel

Gravel is certainly the most budget-friendly option upfront, but it comes with a lifetime of maintenance. Gravel driveways develop ruts, need regular raking, and require periodic top-offs as stones get displaced. They can also be dusty in the summer and difficult to plow in the winter. One of the biggest myths about concrete is its cost; when you factor in its incredible lifespan and minimal upkeep, it proves to be a far more cost-effective solution over time. Think of it as a one-time investment for decades of performance, rather than a recurring project. While we can create beautiful gravel driveways, concrete offers a cleaner, more permanent solution for a polished home exterior.

Explore Your Concrete Driveway Design Options

A concrete driveway is much more than just a functional surface; it’s a design opportunity. Forget the idea of a plain gray slab. Modern concrete work offers a surprising amount of versatility, allowing you to create a custom look that enhances your home’s curb appeal. Whether you want the elegance of natural stone or a color that perfectly complements your home’s exterior, there’s a design solution for you. By exploring different finishes, you can transform your driveway from a simple necessity into a standout feature of your property. Here are a few popular design approaches to consider.

Stamped and Decorative Concrete

If you love the look of high-end materials like flagstone, slate, or brick but not the price tag, stamped concrete is an excellent solution. This technique involves pressing molds into freshly poured concrete to create realistic patterns and textures. The result is a decorative surface that provides the sophisticated look of natural stone with the durability and affordability of concrete. It’s a fantastic way to add character and visual interest, ensuring your driveway complements your home’s architecture and landscaping. Our expert masonry team can create intricate designs that truly refine your home’s entrance.

Colored and Stained Finishes

Why stick with gray when you can choose a color that perfectly matches your home? Concrete can be colored or stained to achieve a wide range of hues, from warm earth tones to cool, contemporary shades. Color can be mixed directly into the concrete before it’s poured for a consistent, uniform look. Alternatively, acid stains can be applied to cured concrete to create rich, marbled effects with unique variations. This versatility allows you to create a cohesive aesthetic, tying your driveway into your home’s color scheme for a polished and intentional design. It’s a key part of a thoughtful home remodeling project.

Patterns and Textures

Beyond stamping, you can add subtle patterns and textures to your driveway for both visual appeal and improved function. A classic broom finish, for example, creates fine lines across the surface that not only look clean but also provide excellent traction in wet or icy conditions. Another option is an exposed aggregate finish, which reveals the natural stones within the concrete mix for a pebbled, textured appearance. These finishes add a layer of sophistication and can be combined with colored concrete or decorative borders to create a truly unique look. Proper restoration and sealing will keep these beautiful textures looking their best for years.

Understanding Concrete Driveway Costs

When planning for a new concrete driveway, it’s helpful to know what goes into the final price tag. The total cost is more than just the size of the space; it’s a combination of site conditions, material quality, labor, and any custom features you choose. Understanding these elements will help you set a realistic budget and appreciate the value of a well-executed project. Let’s break down the key factors that influence the cost of your new driveway.

How Size and Site Conditions Affect Price

It’s true that a larger driveway will require more materials and labor, which increases the cost. However, what’s underneath the surface is just as important. Proper site preparation is the foundation of a long-lasting driveway. This involves excavating the area, ensuring the soil is correctly compacted, and laying a sufficient gravel base to support the concrete. If a contractor rushes this step or uses a thin base, your driveway could crack or settle over time. A professional assessment of your property’s grading and soil is essential for a durable installation, and this expert masonry work is a critical part of the investment.

Factoring in Material Quality and Labor

The quality of the concrete mix and the skill of the installation team play a huge role in both the price and the lifespan of your driveway. Using a high-strength concrete mix and proper reinforcement, like steel rebar, prevents cracking and ensures your driveway can handle vehicle loads for years. While it might be tempting to save money with lower-quality materials, this often leads to expensive repairs later. Skilled labor is just as vital. Experienced professionals know how to pour, finish, and cure concrete correctly, even in challenging weather. This expertise ensures a beautiful, resilient surface and is a hallmark of a company that values high-quality materials and craftsmanship.

The Impact of Decorative Features

A standard concrete driveway is functional, but decorative options can transform it into a stunning feature that enhances your home’s curb appeal. Features like stamped concrete, which can mimic the look of stone or brick, add texture and visual interest. You can also choose from a variety of colors and stains to complement your home’s exterior. These customizations require additional materials and specialized labor, which will increase the overall cost. Think of it as an investment in your home’s aesthetic. You can see many examples of how these features create unique outdoor spaces on the Gappsi YouTube channel, offering plenty of inspiration for your own project.

Why the Cheapest Bid Isn’t the Best Value

It’s natural to want the best deal, but when it comes to concrete work, the lowest bid can be a major red flag. An unusually low price often indicates that a contractor is cutting corners somewhere. This could mean they are using subpar materials, skipping crucial site preparation steps, or hiring unskilled labor. A poorly installed driveway might look fine at first, but it’s likely to fail prematurely, leading to costly repairs or a full replacement. A reputable contractor provides a detailed estimate that reflects the true cost of a quality installation. Investing in a job done right the first time will always provide better long-term value and peace of mind, saving you from future restoration and sealing headaches.

Your Concrete Driveway Installation: A Step-by-Step Guide

A beautiful, long-lasting concrete driveway is the result of a careful, multi-step process where every detail matters. Understanding these steps can help you appreciate the craftsmanship involved and know what to expect when our team arrives. Here’s a look at how we bring your new driveway to life, from the ground up.

Site Preparation and Excavation

The most important part of your driveway installation happens before any concrete is poured. Proper site preparation is the foundation for a surface that will last for decades. This critical phase involves clearing the area of any vegetation or old materials, then excavating the soil to the correct depth. We then build and compact a sub-base of crushed stone. This solid, stable base is essential for preventing the driveway from sinking, shifting, or cracking over time. Rushing this step is a common mistake, but our expert masonry team ensures it’s done right, creating a durable foundation for your investment.

Setting Forms and Reinforcement

Once the base is prepared, we set up wooden or metal forms around the perimeter. These forms act as a mold, defining the exact shape and dimensions of your new driveway. Inside these forms, we place a grid of steel reinforcement, known as rebar or wire mesh. This reinforcement is crucial because it adds tensile strength, helping the concrete withstand heavy loads and resist cracking from ground movement or temperature changes. We also strategically place control joints. These are planned grooves in the concrete that encourage any future cracking to happen in a straight, clean line, preserving the driveway’s structural integrity and appearance. You can see our team’s meticulous process on the Gappsi YouTube channel.

Pouring, Finishing, and Sealing

With the groundwork laid, it’s time to pour the concrete. Our team works efficiently to spread the concrete evenly within the forms, ensuring a consistent thickness throughout. Next comes finishing, a process that requires skill and timing to create the desired surface texture, whether it’s a standard broom finish for traction or a smoother troweled look. After the concrete has set but before it fully cures, we apply a high-quality sealant. This final layer is vital for protection. It acts as a barrier against moisture, road salts, oil, and UV rays, which helps prevent staining and surface damage. This step is a key part of our restoration and sealing services.

Curing Time and Aftercare

Your driveway isn’t finished the moment the truck leaves. The concrete now needs to cure, which is a chemical process where it hardens and gains its full strength. This can take up to a month, but the first week is the most critical. During this time, the concrete should be kept moist and protected from heavy traffic. We recommend waiting at least seven days before parking cars on it. Long-term aftercare is simple but effective. Keeping the surface clean and periodically reapplying a sealant every few years will protect your investment from the elements. With proper care, your driveway can easily outlast its typical 25-year lifespan, giving you decades of reliable performance and curb appeal.

How to Choose the Right Concrete Driveway Contractor

Selecting the right contractor is the most important step in ensuring your new concrete driveway is a success. A great partner will not only deliver a beautiful final product but will also make the entire process smooth and stress-free. It’s about finding a team with the right skills, a solid reputation, and a commitment to quality that matches your own. Taking the time to vet your options carefully will pay off for decades by preventing headaches and costly repairs down the road.

Experience and Local Reputation

Not all concrete crews have the specific skills needed for a high-quality driveway installation. Look for a contractor with a deep portfolio of completed driveway projects in the Long Island area. Ask to see examples of their work and read online reviews from local homeowners. A contractor with a strong local reputation has a track record to protect and is familiar with Nassau and Suffolk County’s specific building codes and climate considerations. A company that offers comprehensive masonry services often has the well-rounded expertise needed to handle complex driveway projects from start to finish, ensuring a professional result that lasts.

Transparent Pricing and Written Estimates

A trustworthy contractor will always provide a detailed, written estimate before any work begins. This document should clearly break down the costs for labor, materials, site preparation, and any special finishes. Be wary of vague quotes or bids that seem unusually low, as they often hide future costs or signal subpar work. You should look for a verifiably experienced concrete contractor who is transparent about their pricing and what’s included. A comprehensive estimate is a sign of professionalism and helps ensure there are no surprises when the final bill arrives. It protects both you and the contractor by setting clear expectations from the outset.

Proper Drainage and Reinforcement Plans

A beautiful driveway can quickly fail without a solid foundation and a plan for water management. Before you hire anyone, ask how they plan to handle drainage. Proper grading is essential to direct water away from your home’s foundation and prevent pooling that can erode the base of your driveway. The contractor should also explain their plan for reinforcement, such as using steel rebar or wire mesh, which helps control cracking and adds structural integrity. A contractor who proactively discusses these technical details is one who is focused on building a driveway that is engineered to last for years.

Warranties and Guarantees

A contractor who stands behind their work will offer a warranty or guarantee. This is your assurance that they have confidence in their materials and craftsmanship. Before signing a contract, ask for the warranty details in writing. Understand what is covered (for example, materials and labor), for how long, and what the process is for making a claim. A solid warranty protects your investment and gives you peace of mind, knowing that the contractor is committed to quality and won’t disappear if an issue arises. Investing your time to find a contractor who offers this protection can prevent costly repairs in the future.

Contractor Red Flags to Avoid

Knowing what to look for in a good contractor is just as important as knowing the warning signs of a bad one. Be cautious of anyone who pressures you to make a quick decision, asks for a large cash deposit upfront, or cannot provide proof of licensing and insurance. Always verify a contractor’s credentials and licenses to ensure they are qualified and that you are protected. Other red flags include a lack of a physical business address, poor communication, or an unwillingness to provide references. Trust your instincts; if something feels off, it’s best to walk away and find a more professional and reliable partner for your project.

Common Concrete Driveway Mistakes to Avoid

A new concrete driveway is a significant upgrade to your home, but a few common missteps can turn a great investment into a future headache. Knowing what to watch out for is the best way to ensure your project goes smoothly and your driveway looks fantastic for decades. A properly installed driveway is more than just a place to park your car; it’s a durable, functional part of your home’s landscape. Unfortunately, cutting corners at any stage of the process can lead to premature cracking, spalling, and discoloration, forcing you to spend more on repairs down the road.

From the unseen work that happens below the surface to the final finishing touches, every step matters. An experienced team understands that the long-term performance of your driveway depends on getting these details right. By familiarizing yourself with the most frequent errors, you can ask the right questions and feel confident that your contractor is committed to quality. Think of it as your checklist for success, ensuring your investment is protected from day one. Gappsi’s approach to masonry focuses on this foundational quality, creating surfaces built to withstand time and the elements. Let’s walk through the key mistakes to avoid when planning your new concrete driveway so you can feel empowered and prepared for your project.

Skipping Proper Site Preparation

Think of your driveway’s base as the foundation of a house. If the ground underneath isn’t solid, stable, and properly prepared, the structure on top is bound to have problems. One of the most critical errors in driveway installation is rushing or skipping site preparation. This involves excavating the area to the correct depth and creating a compacted base of gravel. A poorly prepared base will settle unevenly over time, causing the concrete slab above to sink, shift, and crack. A professional crew will take the time to ensure the subgrade is firm and uniform before any concrete is poured. This initial step is your best defense against future structural issues and costly repairs.

Ignoring Drainage and Expansion Joints

Water is one of concrete’s biggest enemies. Without a proper drainage plan, rainwater can pool on the surface or seep underneath the slab, eroding the base material. Here in Long Island, that trapped moisture can freeze and expand in the winter, causing the concrete to heave and crack. Equally important are expansion joints. These are the lines you see cut into large concrete surfaces. They aren’t just for decoration; they are planned separations that allow the concrete to safely expand and contract with temperature changes. Without them, the concrete would create its own jagged, uncontrolled cracks. Proper planning for both drainage and joints is a hallmark of professional porcelain and natural stone installation and is just as crucial for concrete.

Choosing a Contractor Based on Price Alone

It’s always tempting to go with the lowest bid, but when it comes to concrete work, a suspiciously low price can be a major red flag. The cost of a driveway reflects the quality of the materials, the skill of the crew, and the time taken to do the job right. A contractor who underbids the competition may be using a subpar concrete mix, skimping on base preparation, or hiring an inexperienced team. While you might save money upfront, you will likely pay for it later in the form of cracks and a much shorter lifespan. Instead, look for a contractor with a strong local reputation and a portfolio of quality work, like our team at Gappsi specializing in home remodeling and outdoor construction.

Neglecting Sealing and Maintenance

Many people assume that once concrete is cured, the work is done. However, neglecting simple maintenance is a mistake that can shorten your driveway’s life. Applying a high-quality sealer is one of the most important final steps. A sealer acts as a protective barrier, shielding the concrete from moisture penetration, oil stains, de-icing salts, and UV damage. It makes the surface easier to clean and helps preserve its color and finish. Without this protection, the porous concrete is vulnerable to staining and deterioration. Gappsi offers professional restoration and sealing services to keep your surfaces protected. Periodic cleaning and resealing every few years is a small task that provides huge returns by keeping your driveway looking new.

Partner with Gappsi for Your Long Island Driveway Project

Choosing the right team for your new driveway is a big step, and you want a partner who understands your vision and the unique demands of Long Island properties. At Gappsi, we’ve spent over 30 years transforming homes across Suffolk and Nassau counties, and we bring that local expertise to every project. Our foundation is built on exceptional masonry, and we specialize in creating driveways that are as durable as they are beautiful. We know that a driveway is more than just a place to park your car; it’s the first impression your home makes.

We believe you should feel completely confident in your investment before any work begins. That’s why we use advanced 3D design software to create a realistic rendering of your new driveway. This allows you to see exactly how different colors, patterns, and finishes will look with your home’s exterior, so you can make decisions with total peace of mind. Our goal is to collaborate with you to design a driveway that perfectly matches your style and functional needs.

Our commitment to you doesn’t end once the concrete is poured. Gappsi is your one-stop solution for the entire lifecycle of your driveway. From initial design and expert installation to long-term maintenance, we’ve got you covered. We even offer professional restoration and sealing services to protect your investment and keep it looking pristine for years to come. When you’re ready to create a stunning and long-lasting entrance to your home, let’s start the conversation.

Related Articles

Frequently Asked Questions

How long will my new concrete driveway last, especially with Long Island’s weather? A professionally installed concrete driveway is built to last for 30 years or even longer. The key is proper installation, which includes a solid base and reinforcement to handle our freeze-thaw cycles. When combined with a quality sealant, your driveway will be well-equipped to resist damage from road salts and moisture, making it a durable, long-term investment for your home.

I love the look of natural stone, but I’m interested in concrete. Can I get both? Yes, you absolutely can. This is where stamped concrete comes in. We can use special molds to press realistic patterns of slate, flagstone, or brick into the fresh concrete. You get the high-end, textured appearance of natural stone pavers with the strength, durability, and seamless surface of a solid concrete slab. It’s a fantastic way to achieve a custom look without the upkeep of individual stones.

How long does the installation process take, and when can I use my new driveway? The entire project, from excavation to final finishing, typically takes a few days, though the exact timeline depends on the size of your driveway and the weather. After the concrete is poured, the curing process begins. You can usually walk on the new surface after 24 to 48 hours, but we strongly recommend waiting at least a full week before parking any vehicles on it. This patience allows the concrete to gain the strength it needs for long-term performance.

What kind of maintenance does a concrete driveway actually need to look good for years? Concrete is wonderfully low maintenance. For the most part, keeping it clean with a simple wash from a hose or a light pressure washing is all you need to do. The most important maintenance task is sealing. We recommend having your driveway professionally cleaned and resealed every few years. This protective layer prevents stains, repels moisture, and keeps the surface looking fresh, which is the best way to protect your investment.

Is a concrete driveway really worth the investment compared to a cheaper option like asphalt? While asphalt may have a lower upfront cost, concrete provides far better long-term value. A concrete driveway lasts significantly longer and requires much less maintenance over its lifespan. You won’t have to deal with the recurring cost and hassle of resealing it every few years like you do with asphalt. When you consider its durability and curb appeal, concrete is a smarter financial decision that pays for itself over time.

Share this page:
The best travertine for a pool deck, featuring light-colored pavers around a modern swimming pool.

Best Travertine for Pool Deck: A Buyer’s Guide

You may have heard that travertine is too porous or delicate for a pool deck in New York, but that’s a common misconception. The truth is, the thick, high-grade travertine pavers used for outdoor projects are incredibly durable and specifically chosen for their strength. Unlike thinner tiles used indoors, these pavers are built to handle foot traffic, patio furniture, and our challenging weather. The key is knowing how to distinguish high-quality stone from lower-grade options that won’t last. This guide will bust the common myths and give you the essential information you need to confidently select the best travertine for your pool deck, avoiding common mistakes and ensuring a successful, long-lasting installation.

Key Takeaways

  • Choose Travertine for Comfort and Safety: This natural stone stays cool underfoot on hot days and provides excellent slip resistance around the pool, making it a smart and comfortable choice for families.
  • Balance Style with Quality: While finishes like tumbled or honed define your deck’s aesthetic, always choose a high-grade travertine; its density is essential for durability and resisting Long Island’s freeze-thaw cycles.
  • Protect Your Investment with Proper Care: Professional installation is non-negotiable for a lasting deck, and you can maintain its beauty for years with a simple routine of regular cleaning and periodic sealing.

Why Choose Travertine for Your Pool Deck?

When you picture a luxurious, resort-style pool, you’re likely imagining a travertine deck. This beautiful natural stone has become a top choice for Long Island homeowners, and for good reason. It strikes the perfect balance between elegance and practicality, creating a stunning foundation for your entire outdoor living space. Unlike other materials that can feel generic or become scorching hot under the summer sun, travertine offers a unique, timeless look that feels comfortable and safe underfoot.

Choosing the right material for your pool deck is a big decision. It needs to withstand everything from cannonballs and pool parties to Long Island’s changing seasons. Travertine is not just a pretty face; it’s a durable and resilient option that holds up beautifully over time. Its natural characteristics make it uniquely suited for poolside environments, providing a safe, cool, and sophisticated surface for relaxing, entertaining, and making memories. We work with a wide range of porcelain and natural stone pavers, and travertine consistently remains a favorite for its blend of function and high-end appeal. It transforms a simple backyard into a personal oasis.

What makes travertine special?

Travertine is a type of natural limestone formed by mineral deposits from natural springs. This formation process gives the stone its signature porous texture and unique, swirling patterns. No two travertine pavers are exactly alike, which means your pool deck will have a one-of-a-kind character that can’t be replicated. It delivers a timeless, resort-like look that feels both organic and incredibly sophisticated. For centuries, this stone has been used to build iconic structures, a testament to its enduring beauty and strength. Choosing travertine connects your modern backyard to a long history of classic design, ensuring your investment never goes out of style.

The benefits of travertine around pools

Beyond its stunning appearance, travertine offers several practical benefits that make it ideal for poolside applications. Travertine pavers are known for making a pool deck look great and last a long time. Their durability means they can handle the constant exposure to water, sun, and foot traffic that comes with a busy pool area. When properly installed by professionals, travertine can also withstand the freeze-thaw cycles we experience on Long Island. This longevity, combined with its high-end aesthetic, can add significant value to your home. It’s a key element in creating the luxurious swimming pools that become the centerpiece of a backyard retreat.

Stay cool and safe: Heat and slip resistance

Two of the biggest concerns for any pool deck are safety and comfort. Travertine excels in both areas. One of its most celebrated features is that it stays cool to the touch, even when the sun is very hot. Its natural porosity allows it to dissipate heat instead of absorbing it like concrete or darker pavers do. This means you and your family can walk around barefoot without worrying about burning your feet. Additionally, travertine’s surface helps prevent slips because it’s naturally a bit rough. This texture provides excellent traction, which is especially important around a wet pool where slips and falls are a risk. This makes it a smart and safe choice for families with children.

Find Your Travertine Style: Common Types

Once you decide on travertine for your pool deck, the next step is choosing a style. Travertine comes in several distinct finishes, and each one offers a unique look and feel. The finish you select will influence everything from the texture under your feet to the overall aesthetic of your backyard oasis. Think about the vibe you want to create. Are you aiming for something sleek and modern, or do you prefer a more rustic, old-world charm? Understanding these common types will help you find the perfect match for your Long Island home and create a space you’ll love for years.

Honed travertine

Think of honed travertine as the effortlessly chic option for your pool deck. This style has a smooth, matte finish that feels wonderful on bare feet. It’s created by grinding the stone to a flat, consistent surface without bringing it to a high polish. This process gives it a soft, elegant look that’s both modern and timeless. One of the biggest perks for a pool area is that honed travertine provides good slip resistance while staying cooler to the touch than darker materials. It’s a practical and beautiful choice that offers a clean, sophisticated backdrop for your swimming pool.

Tumbled travertine

If you love a rustic, weathered look that feels like it has a story to tell, tumbled travertine is for you. This finish is achieved by tumbling cut tiles in a drum with gravel and water, which softens the edges and creates a textured, aged appearance. The result is a surface full of character that looks incredibly natural in an outdoor setting. Tumbled travertine offers excellent slip resistance, making it one of the safest options around a pool. Its textured surface is also great at hiding minor dirt and wear, making it a forgiving choice for a busy backyard.

Filled travertine

Filled travertine offers a more uniform and refined look. In its natural state, travertine has small pits and holes. With this finish, those voids are filled with a durable grout or resin that matches the stone’s color, creating a solid, smooth surface. After being filled, the stone is typically honed. This makes it much easier to clean since there are no crevices for dirt to get trapped in. Filled travertine gives you the beautiful patterns of the stone without the natural texture, making it a great choice if you want a sleeker, more polished appearance for your outdoor space.

Brushed travertine

Brushed travertine strikes a lovely balance between the rustic feel of tumbled stone and the smoothness of honed stone. The finish is created by treating the surface with wire brushes, which wears away the softer parts of the stone and leaves a textured, matte finish. This process enhances the natural colors and gives the stone a unique, tactile quality that’s very appealing. It provides good traction for wet feet, making it another fantastic, slip-resistant option for pool decks. The subtle texture adds visual interest and a touch of antique charm without being overly rustic, complementing a wide range of natural stone designs.

Choosing the Right Travertine Color

Picking the right color for your travertine pool deck is one of the most exciting parts of the design process. The shade you choose sets the entire mood for your outdoor space, from classic and serene to warm and rustic. Beyond aesthetics, color also plays a practical role in how comfortable your deck is on a hot summer day. Let’s look at some popular color families to help you find the perfect match for your Long Island home.

Ivory and cream tones

Ivory and cream are timeless choices for a reason. These light, airy tones give your pool deck a clean, luxurious feel that feels both classic and fresh. Think of soft beiges and creamy whites that create a serene, spa-like atmosphere. One of the biggest advantages of light-colored travertine is its ability to reflect sunlight. This means the surface stays cooler underfoot, making it much more comfortable for bare feet during those hot July afternoons. It’s a practical and beautiful option for any poolside retreat.

Walnut and noce shades

If you’re drawn to warmer, earthier aesthetics, walnut and noce travertine might be perfect for you. These varieties feature rich tans, deep beiges, and even hints of chocolate brown. They create a cozy, inviting look that can feel rustic or Mediterranean, depending on your home’s style. What’s really special about these shades is their natural variation; the color can seem to shift with the sunlight, adding depth and character to your deck. These warmer tones are excellent for grounding your outdoor space and complementing lush landscape designs.

Silver and gold varieties

For a look that’s a bit more distinctive, consider silver or gold travertine. Silver travertine offers cool, elegant gray tones that are perfect for a modern or contemporary home. It provides a sophisticated backdrop that pairs beautifully with sleek patio furniture and minimalist designs. On the other hand, gold travertine brings a sunny, luxurious warmth to your pool area. With beautiful honey and golden hues, it creates an inviting, high-end feel. Both options offer a unique twist on traditional travertine, allowing you to make a personalized statement with your masonry choices.

How color choice impacts surface temperature

The color of your travertine has a direct effect on how hot it gets. As a rule, lighter colors like ivory, cream, and light silver will reflect more sunlight and stay significantly cooler to the touch. This is a huge plus for a pool deck where you and your family will be walking around barefoot. Darker shades, such as deep walnut or noce, absorb more of the sun’s heat and can become quite hot. While beautiful, it’s an important comfort factor to consider for your family’s enjoyment on sunny days. Proper sealing and care will protect any color you choose.

Selecting the Best Finish and Size for Your Pool Deck

Once you have a travertine color in mind, the next step is to think about the finish and tile size. These details might seem small, but they have a huge impact on your pool deck’s safety, style, and maintenance needs. The right combination will pull your entire outdoor space together, creating a cohesive look that is both beautiful and functional for your family and guests. Let’s walk through how to make the best choices for your Long Island home.

How finishes affect grip and style

The finish of your travertine is all about texture, which directly affects how slip-resistant the surface is. For a pool deck, safety is just as important as style. A tumbled finish is a popular choice because its textured, rustic surface provides excellent grip, even when wet. If you prefer a smoother feel, a honed finish offers a matte, modern look with moderate slip resistance. Another great option is a brushed finish, which has a soft, worn texture that adds traction while still feeling comfortable underfoot. Each finish contributes to the unique character of your natural stone pavers, so you can find the perfect balance of safety and design.

Choosing the right tile size

The size of your travertine tiles can dramatically change the look of your pool deck. Large-format tiles are fantastic for creating a clean, contemporary feel that makes your space seem bigger and more open. A major benefit of larger tiles is that you’ll have fewer grout lines, which simplifies cleaning and creates a more seamless look. On the other hand, smaller tiles or a pattern combining multiple sizes can lend a more traditional, classic charm to your pool area. When making your decision, consider the scale of your swimming pool and the overall aesthetic you want to achieve.

Why the grade of your travertine matters

When you’re investing in a new pool deck, you want it to last. That’s why the grade of the travertine is so important. Higher-grade travertine has fewer natural pits and imperfections, more consistent color, and a denser structure. This makes it much more durable and resistant to the wear and tear of foot traffic and weather. While lower-grade stone might seem like a good way to save money upfront, it can be more prone to cracking and fading over time. Opting for a premium-grade stone from a trusted source like the Gappsi Store ensures your pool deck will maintain its beauty and integrity for many years to come.

Pros and Cons of a Travertine Pool Deck

Deciding on the right material for your pool deck is a big step, and travertine is a popular choice for good reason. Like any material, it has its strengths and weaknesses. Understanding both sides will help you feel confident in your decision and ensure you create a poolside space you’ll love for years. Let’s walk through the key points to consider.

The advantages

One of the biggest draws of travertine is how comfortable it is. The stone is a natural insulator, which means it stays cool underfoot even on the hottest Long Island summer days. No more hopping from foot to foot on scorching surfaces. Safety is another major plus. Travertine is naturally porous, so its surface absorbs water quickly. This creates excellent slip resistance, reducing the risk of falls around the wet pool area and preventing puddles from forming. Beyond its practical benefits, travertine offers a timeless, resort-like look that can transform your backyard into a personal oasis. Its natural patterns and warm tones add a touch of elegance that is hard to match.

The disadvantages

While travertine is beautiful, it does require some care. Because the stone is porous, it can absorb spills, which can lead to stains if not addressed. To protect it, your deck will need to be sealed after installation and then resealed every few years. This is a straightforward process that our restoration and sealing team can handle for you. The porous nature can also mean that dirt and debris get trapped in the tiny surface holes. Regular sweeping and rinsing will keep it looking fresh. Finally, in a climate like New York’s, the freeze-thaw cycle can be a concern. Water that gets into unsealed stone can freeze, expand, and potentially cause cracks over time, which is why professional installation and proper sealing are so important.

Busting common travertine myths

You may have heard that travertine is fragile, but that’s simply not true for the kind used in landscaping. The material selected for pool decks is a thick, durable variety known as travertine pavers. These are specifically cut to a thickness that ensures they can handle foot traffic and patio furniture with ease. Another common concern is ending up with a mismatched look. This can happen if you buy from separate batches, as the color and pattern can vary from one stone to the next. When you work with a comprehensive supplier like Gappsi, we source all your material from the same lot, guaranteeing a beautiful, cohesive look for your entire project.

Travertine vs. Other Pool Deck Materials

Choosing your pool deck material is a big decision, and it’s helpful to see how travertine stacks up against other popular options. Each material has its own look and set of benefits, so the best choice for your Long Island home depends on your style, budget, and maintenance preferences. Let’s compare travertine to concrete, porcelain, other natural stones, and brick to help you find the perfect fit for your backyard oasis.

Travertine vs. concrete

Concrete is a common choice for pool decks, but it offers a very different experience than travertine. While stamped concrete can mimic the look of stone, it doesn’t quite capture the unique, natural beauty and luxurious feel of genuine travertine. Travertine’s durability is also a major advantage, as it resists the cracking that can happen with concrete, especially during Long Island’s freeze-thaw cycles. Perhaps the biggest difference you’ll feel on a hot summer day is the temperature. Travertine naturally stays much cooler to the touch, making it a more comfortable surface for bare feet around the pool.

Travertine vs. porcelain pavers

This comparison is all about natural versus manufactured. Travertine is a natural stone quarried from the earth, giving each piece a one-of-a-kind character. Porcelain pavers, on the other hand, are crafted from high-density clay and fired in a kiln. This process makes them incredibly dense and non-porous, so they are highly resistant to stains and don’t require sealing. While travertine offers authentic, earthy beauty, porcelain and natural stone pavers provide endless design flexibility with a vast range of colors, patterns, and finishes that can even look like wood or other stones. The choice often comes down to whether you prefer the authenticity of natural stone or the low-maintenance consistency of a manufactured product.

Travertine vs. natural stone

Since travertine is a type of limestone, you might wonder how it compares to other natural stones like bluestone, granite, or slate. Each stone has a distinct personality. Travertine is loved for its soft, earthy tones and characteristic pitting, which creates a warm, Mediterranean vibe. Other stones offer different aesthetics; for example, bluestone provides a classic, cool-toned look popular in the Northeast. While all are durable, travertine has a distinct advantage around pools because it doesn’t absorb as much heat as darker stones like slate or some granites. Its naturally porous texture also provides excellent slip resistance, making it a top contender for any pool project.

Travertine vs. brick pavers

Brick pavers create a timeless, traditional look that is charming and rustic. However, when placed next to travertine, the aesthetic difference is clear. Travertine provides a more elegant and high-end feel, elevating the entire pool area into a sophisticated retreat. In terms of comfort, travertine generally stays cooler underfoot than dense brick. Maintenance is another factor. The smooth surface of travertine is typically easier to sweep and keep clean, while the texture and numerous grout lines of brick can sometimes trap dirt or encourage moss growth in damp areas. For a truly custom look, our masonry designers can help you weigh the visual and practical aspects of each material for your home.

What to Expect During a Travertine Installation

Okay, you’ve chosen your gorgeous travertine, and you’re ready to see it transform your poolside. It’s exciting, but it can also feel a little overwhelming. Understanding the installation process step by step can make all the difference. Knowing what’s happening and why will give you peace of mind and help you appreciate the craftsmanship that goes into creating a durable, stunning pool deck. Let’s walk through what a professional installation looks like from start to finish.

Preparing the foundation and ensuring drainage

A beautiful travertine deck is only as good as the foundation beneath it. This is probably the most critical step for ensuring your pool deck lasts for decades. Our team starts by excavating the area and compacting the soil to create a stable base. Then, we add a layer of gravel. This isn’t just for support; it’s essential for proper drainage. Good drainage prevents water from pooling under the pavers, which can cause shifting, cracking, or frost heave during those Long Island winters. A solid masonry foundation is the secret to a long-lasting, low-maintenance patio.

Setting the stone and grouting

Once the foundation is perfectly prepared, the real artistry begins. Our installers will carefully lay each travertine tile, ensuring precise spacing and alignment for a seamless, professional look. We use a high-quality mortar to securely bond each stone to the base. After the tiles are set, we fill the joints with grout. We choose a grout that’s specifically designed for outdoor use, so it can withstand everything from intense sun to rain and snow. This meticulous process of working with natural stone is what brings the final design to life, creating a smooth and visually stunning surface for your poolside retreat.

Finishing touches: Coping and edges

The details are what truly define a great project. For a pool deck, the most important finishing touch is the coping. This is the material that caps the edge of the pool, creating a smooth, rounded border. Travertine coping not only provides a beautiful, cohesive look but also serves a practical purpose by offering a non-slip, safe edge for getting in and out of the water. Our team custom cuts the coping to fit the unique curves and lines of your swimming pool, ensuring a perfect, bespoke finish that ties the entire space together.

The importance of professional installation

While a DIY project can be tempting, installing a travertine pool deck is a job best left to the pros. There are so many variables, from ensuring the ground is properly graded for drainage to getting the cuts and layout just right. A professional team has the experience, tools, and knowledge to handle any challenges that arise. When you work with experts, you get the assurance that your investment is protected and your pool deck is built to last. Our home remodeling experts can also offer advice on long-term care, ensuring your travertine stays beautiful for years of poolside enjoyment.

How to Care for Your Travertine Pool Deck

A travertine pool deck is a beautiful investment, and with the right care, it will stay that way for years. Thankfully, maintaining travertine isn’t complicated. It just requires a consistent routine to protect the stone from the elements and everyday use. Following a few simple steps for sealing, cleaning, and making timely repairs will keep your poolside oasis looking pristine season after season.

Sealing your travertine: When and how

Think of sealant as sunscreen for your stone. Travertine is naturally porous, and sealing it helps prevent dirt, spills, and pool chemicals from seeping into the stone and causing stains. A quality sealant creates a protective barrier that keeps your deck looking clean and vibrant. We recommend you seal your travertine pavers every one to two years, depending on how much foot traffic and direct sunlight the area gets. If you notice water is soaking into the stone instead of beading on the surface, it’s time to reseal. For a professional application that ensures complete protection, our team offers expert restoration and sealing services.

Simple tips for routine cleaning

Keeping your travertine deck clean is easier than you might think. The most important step is to regularly sweep away leaves, dirt, and other debris before they have a chance to settle into the stone’s surface. For a deeper clean, you can wash the deck with water and a gentle, pH-neutral stone cleaner. Avoid using acidic or abrasive cleaners, like vinegar or harsh chemicals, as they can damage the stone over time. A simple wash-down every few weeks is usually enough to maintain its appearance. This small amount of effort will go a long way in preventing buildup and keeping your travertine looking its best.

Repairing stains, chips, and cracks

Accidents happen, but addressing them quickly is key to preserving your travertine. Because travertine is a porous stone, dirt and spills can get trapped in its tiny holes, especially if it’s near loose soil or garden beds. If you notice a stain, try to clean it as soon as possible. For minor chips or cracks, it’s wise to get them repaired promptly to prevent them from getting worse. Timely repairs not only maintain the beauty of your pool deck but also ensure its structural integrity and safety. If you encounter damage that seems beyond a simple fix, our masonry experts can help restore your travertine to its original condition.

Travertine Mistakes to Avoid for Your Pool Deck

Travertine is a fantastic choice for a pool deck, but a few common missteps can keep you from getting the beautiful, long-lasting result you want. Knowing what to watch for ahead of time is the best way to protect your investment and ensure your project is a success from day one.

One of the biggest mistakes is choosing a stone that isn’t suited for Long Island’s weather. Our freeze-thaw cycles can be tough on natural stone. Lower-grade travertine is more porous, meaning it absorbs more water. When that water freezes, expands, and thaws, it can cause the stone to crack and flake. Selecting a high-quality, dense travertine from a trusted supplier of porcelain and natural stone is essential for durability. Another visual pitfall is mixing tiles from different batches. Natural stone has variations, so buying all your material at once from the same lot ensures a consistent color and pattern across your entire pool deck.

It’s also important to have realistic expectations about upkeep. While travertine is durable, it’s not maintenance-free. To keep it looking its best and protect it from stains and weathering, it needs to be cleaned regularly and sealed periodically. Understanding this commitment upfront helps you plan for the long-term care of your beautiful new deck. We offer professional restoration and sealing services to make this part easy.

Finally, the quality of the installation is just as important as the quality of the stone itself. An improper base, poor drainage, or incorrect setting techniques can lead to shifting, cracking, and water issues down the road. Working with an experienced masonry and construction company ensures every step, from the foundation to the final seal, is handled correctly. This expertise is what turns a good material into a great, enduring outdoor space.

Is a Travertine Pool Deck Right for Your Long Island Home?

Deciding on the perfect material for your pool deck is a big decision, especially here on Long Island where we experience all four seasons. Travertine is a popular choice for its undeniable beauty, but you need to know if it can handle our specific climate. The short answer is yes, it absolutely can, but only if you choose the right kind and have it installed correctly.

There’s no denying the appeal of travertine. It offers a luxurious, resort-style feel that can transform a simple backyard into a stunning retreat. The stone naturally stays cooler underfoot than many other materials, which is a huge plus during those hot July and August days. Plus, its porous texture provides natural slip resistance, making it a safer choice for areas around your swimming pool. It delivers a timeless look that complements almost any home style.

The big question for any Long Island homeowner is how it holds up to our winters. It’s a valid concern. The freeze-thaw cycle, where water seeps into the stone, freezes, expands, and then thaws, can cause some natural stones to crack over time. This is where the quality of the travertine becomes incredibly important. For a pool deck that lasts, you need to invest in a high-grade, “premium select” travertine. This type of stone is denser and has fewer holes, making it far more resilient to water absorption and freezing temperatures. Choosing the right porcelain and natural stone is the key to ensuring your deck withstands the test of time.

Proper installation and maintenance also play a huge role. When you periodically restore and seal your deck correctly, you protect it from stains and moisture. Ultimately, a travertine pool deck can be a fantastic, long-lasting choice for your Long Island home, provided you select a high-quality stone and work with an installer who understands the specific demands of our local environment. It’s about making a smart investment in both the material and the craftsmanship.

Related Articles

Frequently Asked Questions

Will a travertine pool deck crack during a Long Island winter? This is a great question and a valid concern for our climate. A high-quality travertine deck installed by professionals is designed to handle our freeze-thaw cycles. The key is using a dense, premium-grade stone that absorbs very little water. When combined with a properly prepared foundation that allows for drainage, the risk of cracking is minimized. Problems typically arise from lower-grade, more porous stone or an improper installation, which is why choosing the right material and installer is so important.

Is travertine a good choice for a family with young kids? Absolutely. In fact, it’s one of the most family-friendly options available. Two of its biggest benefits are safety and comfort. The natural texture of the stone provides excellent traction, which helps prevent slips and falls on wet surfaces around the pool. Plus, travertine stays remarkably cool to the touch, even on hot, sunny days. This means little feet can run around comfortably without the risk of getting burned.

How often do I really need to seal my travertine deck? We generally recommend sealing your travertine every one to two years, but the best way to know for sure is to watch how water behaves on the surface. If water beads up nicely, your sealant is still working. If it starts to soak into the stone, it’s time to reseal. Sealing is a simple but crucial step that protects your investment from stains, dirt, and moisture damage, keeping it beautiful for years.

With so many options, what’s the main difference between a tumbled and a honed finish? Think of it as a choice between a rustic feel and a refined one. Tumbled travertine has a textured, weathered appearance with softened edges, giving it an old-world charm and excellent slip resistance. Honed travertine is sanded to a smooth, matte finish that feels soft underfoot and looks very clean and elegant. Both are great for pool decks, so the decision really comes down to the personal style you want for your outdoor space.

What’s the best way to clean my travertine deck without damaging it? The best practice is to be gentle. For routine cleaning, simply sweeping away debris and rinsing with a garden hose is often enough. When you need a deeper clean, use a pH-neutral cleaner specifically made for natural stone and a soft-bristle brush. You should always avoid acidic cleaners, like vinegar, or harsh chemicals because they can etch and damage the stone’s surface over time.

Share this page:
Natural stone pool deck pavers surrounding a residential inground swimming pool

Pool Deck Pavers: Choosing the Best Material for Your Pool

A pool deck has to do more than frame the water. On Long Island, it must handle wet feet, strong sun, freeze-thaw cycles, salt exposure, and the visual demands of the surrounding landscape. The surface, base, drainage plan, and coping detail all affect how the deck performs over time. Schedule a free pool deck consultation with Gappsi Group.

Pool deck pavers give Long Island homeowners a practical way to compare travertine, bluestone, granite, porcelain, and concrete by comfort, slip resistance, maintenance, appearance, and cost. Travertine stays cool and grips well when wet, porcelain resists stains and fading, granite handles heavy traffic, bluestone brings natural texture, and concrete offers broad design flexibility. The best choice depends on how your family uses the pool and how the installation is engineered.

Before comparing each material. It helps to understand why pavers are so widely used around pools and which installation decisions protect the finished surface from shifting, standing water, and unnecessary wear.

Why Long Island Homeowners Choose Pool Deck Pavers

For a pool area in Nassau or Suffolk County, the surface has to handle standing water, bare feet, furniture, sunscreen, and repeated seasonal use. Pool deck pavers give homeowners a durable, modular surface that can be selected for texture, drainage, color, and the surrounding landscape. Pool walkway guidance also emphasizes materials that are durable, slip-resistant, easily cleanable, and nonabsorbent, which makes material selection a practical safety decision, not just a design choice. Gappsi’s outdoor paving and installation services can help coordinate those choices with the pool, coping, and site conditions. Contact Gappsi through our contact page to schedule a free pool deck consultation.

A surface designed for wet conditions

Water changes how a deck performs. A suitable paver system should provide dependable traction when swimmers leave the pool and should not absorb water in a way that creates avoidable maintenance problems. Texture, joint design, surface finish, and the material itself all matter. The goal is a walking surface that remains comfortable and predictable around the water, including during rain and routine splash-out.

Repairs without removing the entire deck

Pavers are installed as individual units rather than as one continuous slab. If a section is damaged by a dropped object, settlement, or a future utility repair. The affected units can generally be lifted and replaced without demolishing the entire pool surround. That modular construction also makes it easier to blend repairs into an existing pattern, provided matching material remains available.

Drainage starts below the surface

Base preparation is non-negotiable. A well-compacted, properly drained crushed-stone base supports long-term stability and helps limit shifting, low spots, and trapped water. The walkway should also be planned to slope away from the pool, with pool-walkway guidance specifying a slope away from the water for at least four feet. Pervious paver systems offer another drainage option because their open joints and supporting structure can allow water to infiltrate and help reduce stormwater runoff. These benefits depend on correct excavation, compaction, grading, edge control, and installation. A paver deck can look finished on the day it is installed, but its long-term performance is determined largely by the work beneath it.

Travertine vs. Bluestone vs. Granite vs. Porcelain vs. Concrete

The right pool deck material depends on how the surface feels under bare feet. How much maintenance you want to handle, and how the deck should look beside the home and pool coping. The comparison below gives a practical starting point. For a broader discussion of pool deck pavers vs porcelain and travertine, review the material-specific details before choosing a finish.

Pool deck material comparison
Material. Slip resistance. Heat retention. Sealing need. Relative cost level.
Travertine. Very good when wet, especially with a suitable textured finish. Low; its porosity helps the surface stay cool. Recommended; porous stone needs stain care and protection. Moderate to high.
Bluestone. Excellent when the natural texture is retained. Moderate to high in direct sun. Recommended to help prevent staining. Moderate to high.
Granite. Good with a properly textured or flamed finish. Moderate to high. Usually limited, depending on the stone and finish. High.
Porcelain. High when a pool-rated, slip-resistant product is selected. Moderate; color and exposure influence surface warmth. None; dense porcelain does not require sealing. Moderate to high.
Concrete pavers. Good when the texture and installation are suited to wet areas. Moderate to high. Optional but useful for color and surface protection. Low to moderate.

Travertine is valued for a cooler walking surface and dependable wet grip, but spills should be cleaned promptly because its porous surface can stain. Bluestone brings a classic, textured appearance and excellent traction, while sealing helps protect its natural surface. See the travertine pool deck guide for more detail on that material’s finish and care requirements. Granite is the hardest option in this comparison and resists scratches and heavy use, though its weight and cost can affect installation planning. Porcelain is dense, resistant to stains, fading, and pool salt, and can offer high slip-resistance ratings without sealing. Concrete pavers are cost-effective and customizable in color, shape, and texture. If left unsealed or made with an inferior mix, they may fade over time and can become warm in direct sun. The best pool deck paving materials depend on balancing these performance factors with the home’s architecture, drainage plan, and maintenance expectations. Travertine and bluestone pool deck pavers around a residential inground swimming pool on Long Island

How Much Do Pool Deck Pavers Cost on Long Island?

The cost of a pool deck depends on more than the square footage. Material selection, demolition, excavation, base preparation, drainage, borders, coping, access to the property, and installation details all affect the final proposal. For that reason, a responsible estimate should be built around your site rather than copied from a generic online price list. Concrete pavers are generally the most budget-friendly material. They are available in many colors, shapes, and textures, so a lower material cost does not require a one-size-fits-all appearance. Their modular installation can also simplify future repairs because an individual damaged paver may be lifted and replaced without removing the entire deck. Material and labor costs still vary, but concrete is often the practical starting point for homeowners balancing design flexibility and budget. Porcelain pavers and manufactured options typically occupy a middle position. Porcelain is dense and resistant to staining, salt, and fading, while its installation requires careful handling and a properly prepared base. Some manufactured products offer a stone-inspired appearance with more predictable sizing, but the product, structural requirements, and installer experience should be evaluated together. Travertine, bluestone, and granite usually sit at the higher end of the material spectrum. Natural stone costs more because of the stone itself, selection, cutting, layout, and skilled installation. Travertine can provide a cooler walking surface in summer. Bluestone offers a textured, classic appearance and needs appropriate sealing. Granite is exceptionally hard and resistant to scratches and heavy traffic. Those characteristics may justify the added investment, but they should be matched to how your family uses the pool. Keep the hardscape as a separate line item in the overall project budget. Gappsi’s published guidance places a gunite swimming pool on Long Island at a baseline of approximately $90,000 to $140,000. The paver deck is an additional scope, not an amount that should be folded into or confused with the pool shell, equipment, and construction costs. A site-specific consultation can show how each material changes the total.

Are Pool Deck Pavers Slip-Resistant When Wet?

Yes, but safety depends on more than choosing a material labeled for pool use. A pool surround should combine durability, slip resistance, and low water absorption, while the installation must move water away from areas where people walk. Pool walkway guidance commonly calls for surfaces that are durable, slip-resistant, easily cleanable, and nonabsorbent. Review the referenced pool walkway requirements for the underlying safety language.

Which surfaces provide reliable grip?

Bluestone is a strong choice when grip is the priority. Its naturally textured surface provides excellent traction around a swimming pool, even when the stone is wet. The finish still matters, so homeowners should compare samples rather than selecting solely by color or pattern. A textured, brushed, or water-worn finish is generally more appropriate near the waterline than a highly polished surface. Bluestone may require careful sealing to help prevent staining, as described in Gappsi’s natural stone paver guidance. Travertine is another practical option for a Long Island pool deck. Its porous structure absorbs water quickly, helping the surface stay cooler under direct sun while retaining slip resistance when wet. Its finish and installation quality should be reviewed together, because a stone’s performance depends on how it is textured, set, and maintained. Porcelain pavers offer a denser alternative. Many products carry high slip-resistance ratings and meet or exceed standards commonly used for commercial pool decks. Ask for the manufacturer’s test rating for the specific porcelain selected, rather than assuming every product performs the same way.

How does drainage affect traction?

Even a textured surface can become hazardous if water remains on it. The deck should slope away from the pool, with the surrounding grade and joints planned to direct runoff toward suitable drainage points. One referenced pool-walkway standard specifies a slope away from the pool for at least four feet. Proper base preparation and careful grading help prevent puddles, settlement, and uneven transitions. In practice, the safest selection is a textured, water-shedding surface paired with an installer who understands both material behavior and pool-deck drainage.

Do Pool Deck Pavers Need to Be Sealed and Maintained?

A maintenance plan starts before the first paver is installed. The surface may look finished, but its long-term performance depends on the base, drainage, joints, material selection, and the products used to protect the finish. Follow these steps to keep the deck stable, clean, and ready for regular pool use.

  1. Build the foundation correctly. Require a well-compacted, properly drained crushed-stone base beneath the pavers. The base supports the surface and helps limit settlement caused by water and seasonal movement. Install durable edge restraints, such as a ribbon curb where appropriate, to keep the perimeter from spreading or shifting. Natural stone also brings inherent thickness variation, so the installer must understand how to adjust the base for a level, seamless surface. This is one reason an experienced natural-stone installer matters. See Gappsi’s stone installation guidance for more detail.
  2. Match sealing to the material. Porous natural stones such as travertine and bluestone should be sealed with a product suited to the stone, then resealed periodically as the protective layer wears. Sealing helps reduce staining and makes routine cleaning more manageable. Porcelain pavers do not require sealing because their dense, non-porous surface resists absorption. For concrete, use a good-quality sealer selected for outdoor exposure. Options include a natural matte finish or a deeper wet-look finish, depending on the appearance you want. Read more about concrete paver sealers before choosing a product.
  3. Clean spills promptly. Sweep away loose debris, rinse ordinary dirt, and address spills as soon as possible. Travertine’s natural porosity makes it especially vulnerable to marks from acidic or oily liquids, including wine and cooking oil, when they remain on the surface. Avoid letting a spill sit until it penetrates the stone. Use a cleaning method recommended for the specific material and sealer rather than applying an aggressive household chemical.
  4. Refresh the joint sand when needed. Inspect joints for erosion, weeds, ants, or areas where sand has washed out. Replenishing polymeric joint sand helps limit weed growth, reduces insect activity, and stabilizes the pavers against erosion. The joints should be clean and dry before new sand is installed, and the product must be activated according to its instructions. This maintenance protects the interlocking pattern and helps prevent individual units from shifting.
  5. Choose materials and products carefully. Higher-grade bluestone generally offers more consistent coloring and fewer inclusions, creating a more uniform appearance across the deck. Concrete pavers can lose color over time when they are inferior or poorly sealed, even though prolonged sun exposure may still cause gradual fading. Select a sealer designed for the paver type, confirm the desired finish, and keep the product information for future maintenance. Careful choices at installation make every later cleaning and resealing step more effective.

Porcelain and concrete pool deck pavers with clean joints beside a swimming pool

How Do You Coordinate Pool Deck Pavers With Your Pool Coping?

Pool coping is the finished edge installed around the pool shell. It frames the water, protects the pool structure, and creates the visual transition between the coping and the surrounding deck. When these two surfaces are selected together, the pool surround reads as one deliberate line rather than a collection of unrelated materials. A practical approach is to match the coping and deck closely, or choose materials with a clear relationship. Travertine coping with travertine pavers creates a continuous, light-toned surround and keeps the surface comfortable under summer sun. Bluestone coping can coordinate with bluestone pavers for a classic, textured appearance, while granite brings a harder, more structured edge to a granite deck. Porcelain and concrete pavers can also be paired with coping that repeats their color, texture, or border pattern. The goal is not necessarily an exact match. It is a consistent palette and finish that makes the edge look intentional. Installation details matter just as much as material selection. A well-compacted crushed-stone base provides the foundation for long-term paver stability, while an edge restraint, such as a ribbon curb, helps prevent the outer pavers from shifting. These restraints are especially important along the pool perimeter, where movement can make the coping and deck line separate visually and physically. Proper base preparation is a core requirement for a stable paver installation, as Gappsi explains in its paver installation guide. Pay close attention to finished elevations. Natural stone can vary in thickness, so the installer must adjust the base height before setting the coping and deck. If this step is overlooked, one material may sit higher than the other, creating an uneven transition, a trip point, or a broken-looking border. An installer experienced with natural stone can account for those variations and keep the surfaces aligned. For help coordinating materials, elevations, and edge details, schedule a pool design consultation with Gappsi.

Frequently Asked Questions

Which material is best for a pool deck on Long Island?

There is no single best choice for every property. Travertine is a strong fit when a cooler surface and natural texture matter. Bluestone offers a textured, classic appearance, while granite prioritizes hardness and resistance to wear. Porcelain is dense, stain-resistant, fade-resistant, and does not require sealing. Concrete pavers provide the widest range of colors, shapes, and textures at a more accessible material cost. The right selection depends on heat, maintenance, drainage, appearance, and budget. See Gappsi’s best pool deck paving materials guide for more comparison details.

Do pool deck pavers get hot in direct sunlight?

Some can, especially darker concrete pavers that absorb more solar heat. Travertine generally stays cooler under summer sun because its porous structure absorbs water quickly, while color, finish, shade, and installation conditions also affect comfort. Request material samples and compare them outdoors before choosing a surface for bare feet. Source: Gappsi’s Long Island travertine paver guidance.

Do all pool deck pavers need to be sealed?

No. Porcelain pavers are non-porous and typically do not require sealing. Bluestone and travertine may benefit from a sealer selected for the stone and exposure conditions. Concrete pavers can be sealed for added protection and a matte or wet-look finish. Travertine is porous, so spills containing oil or acidic ingredients should be cleaned promptly to reduce staining. Source: Gappsi’s porcelain paver maintenance guidance.

Can pavers be installed over an existing concrete pool deck?

Sometimes, but the existing slab must be evaluated first for cracks, drainage, elevation, structural condition, and the finished height around coping, doors, and steps. A sound slab may support an overlay system, while settlement or drainage problems usually require removal and proper rebuilding. In either case, a stable, well-compacted base and appropriate edge restraints are essential to limit movement. Source: Gappsi’s paver installation guidance.

Ready to Plan Your Pool Deck?

Choosing between travertine, bluestone, granite, porcelain, and concrete pavers is easier when the material, pool coping, drainage, and installation details are considered together. Gappsi Group can help you compare practical options for your Long Island property and define the next steps for your project. Schedule a free pool deck consultation: Contact Gappsi through our contact page.

Share this page: