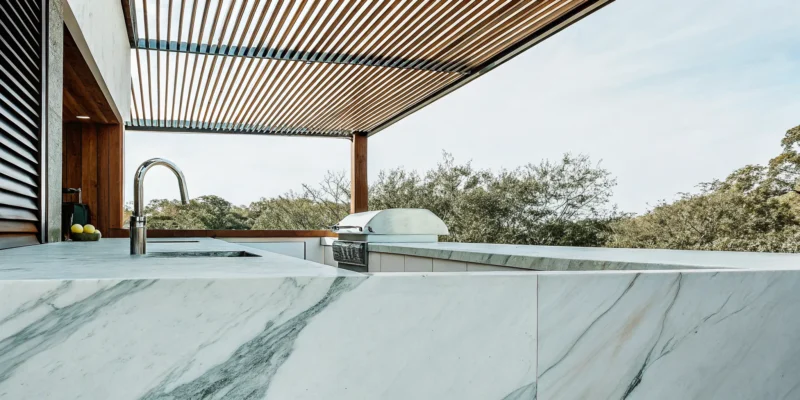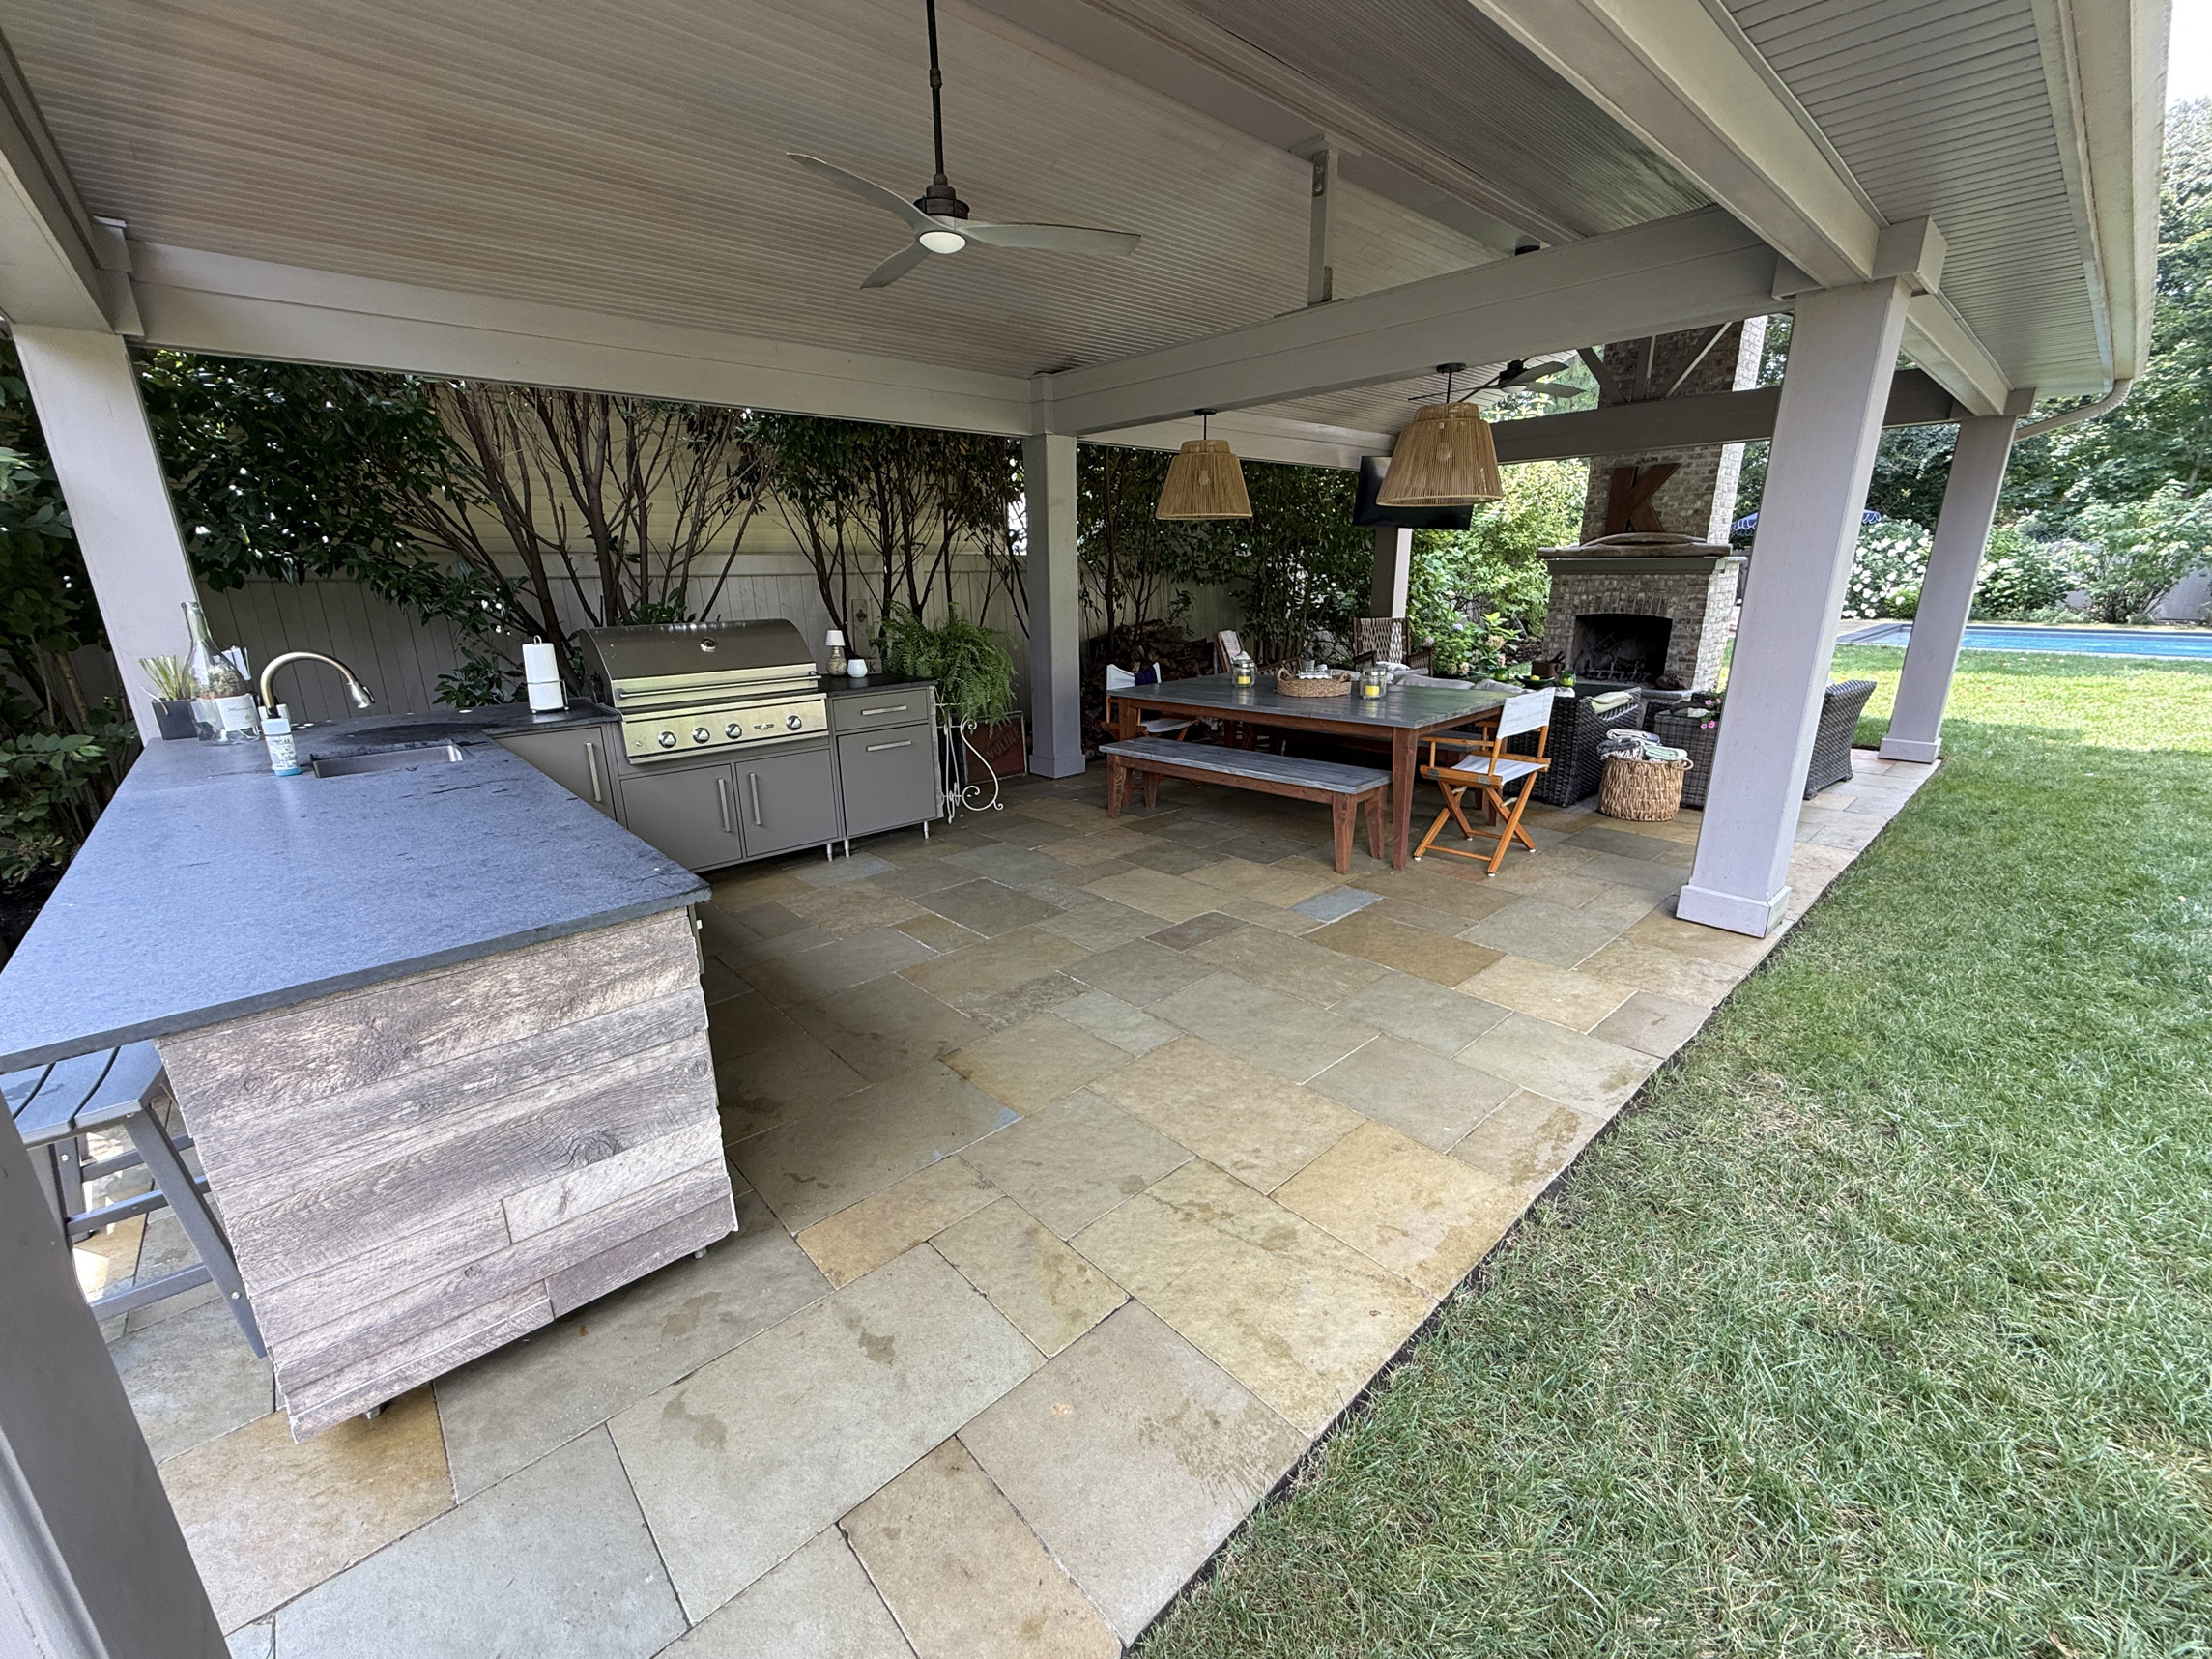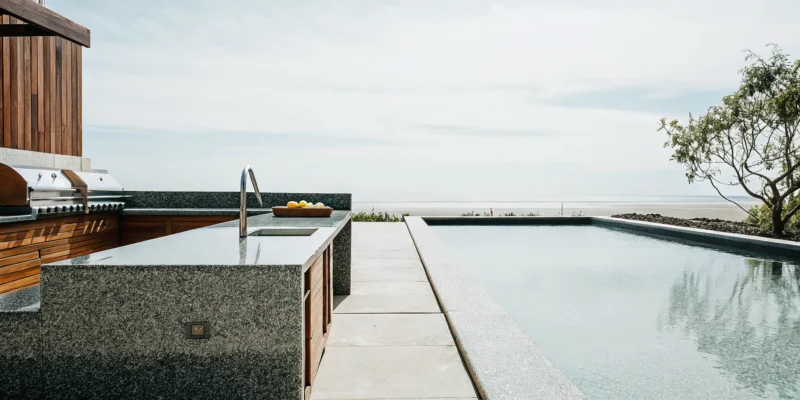
Modern kitchen with a blue marble island and white cabinets by kitchen design and build services.

Kitchen Design and Build Services: A Homeowner’s Guide

You have a vision for your perfect kitchen—a space with better flow, smarter storage, and a style that feels like you. But turning that vision into a buildable reality can be a challenge. Often, a gap exists between what a designer draws up and what a contractor can practically execute, leading to compromises and surprises. This is the exact problem that kitchen design and build services are designed to solve. By uniting the creative design process with the practical construction phase from day one, this integrated model ensures your original vision is honored and executed flawlessly, resulting in a seamless journey from concept to completion.

Key Takeaways

  • Streamline Your Remodel with a Design-Build Team: Working with a single team for both design and construction eliminates the stress of juggling multiple contractors. This integrated approach ensures better communication and a smoother process from the first idea to the final installation.
  • A Solid Plan Prevents Costly Surprises: Before demolition starts, finalize your layout, materials, and budget. Setting aside a 10-20% contingency fund and locking in your decisions early is the best way to keep your project on track and avoid unexpected expenses.
  • Vet Your Potential Partners Thoroughly: Your choice of contractor is critical. Always check for proper licensing and insurance, read online reviews from past clients, and ask to see a portfolio of their work to make sure their quality and style align with your vision.

What is a Kitchen Design-Build Service?

If you’ve ever considered a kitchen remodel, you’ve probably pictured juggling a designer, an architect, and a contractor. It sounds complicated because it often is. The traditional approach separates the design phase from the construction phase, which can lead to miscommunication, delays, and budget surprises. A design-build service flips that model on its head by bringing every part of the project under one roof. Think of it as having a single, dedicated team responsible for your kitchen from the first sketch to the final cabinet pull.

This integrated approach streamlines the entire remodeling process. Your designer and builder are colleagues, not strangers, which means they collaborate from day one to create a plan that is both beautiful and buildable. This synergy leads to better communication, a more efficient timeline, and greater cost control. At Gappsi, our home remodeling team manages every detail, ensuring a seamless transition from your dream design to a fully functional kitchen you’ll love for years to come. You get one point of contact and a cohesive vision, which makes for a much smoother and less stressful renovation experience.

The Design Consultation

The design consultation is the first and most important step. This isn’t just a meeting; it’s a creative conversation where we get to know you, your family, and how you live in your kitchen. We’ll discuss your goals, your must-haves, and your biggest frustrations with your current space. This is your chance to share your inspiration photos and ideas. Our experienced designers listen and provide expert advice, helping you refine your vision into a stunning and functional layout. We use this information to develop initial design concepts and a clear project plan tailored specifically to you.

Remodeling and Construction

Once you’ve approved the final design and materials are selected, the construction phase begins. This is where your vision starts to take physical form. Our skilled craftsmen work efficiently to bring the plan to life, from demolition and structural changes to installing plumbing and electrical systems. We know that living through a remodel can be challenging, which is why we prioritize clear communication and a clean worksite. Because our design and construction teams work together, we can quickly address any unexpected issues that arise, keeping your project on schedule and minimizing disruptions to your daily life.

Installation and Project Management

A successful remodel hinges on expert coordination, and that’s where your dedicated project manager comes in. This person is your go-to contact for the entire project, overseeing every detail to ensure a smooth process. They manage the schedule, coordinate all the tradespeople—from electricians to tile setters—and make sure every installation meets our high standards of quality. Clear and consistent communication is key. Your project manager will provide you with regular updates, answer your questions, and make sure the project stays on time and within budget, so you can relax and watch your new kitchen come together.

How to Choose the Right Kitchen Design-Build Company

Picking the right partner for your kitchen remodel is a huge decision. This is the team you’ll be trusting with your home, your budget, and your vision for one of the most important rooms in your house. It’s about more than just finding someone who can hang cabinets; you need a company that understands design, manages the project smoothly, and communicates clearly from start to finish. A great design-build firm will feel like a true partner, guiding you through every choice and challenge that comes up along the way. They bring expertise not just in construction, but in creating a space that truly works for your family’s lifestyle.

When you’re ready to find the right fit, it helps to have a clear process. Instead of getting overwhelmed by options, you can focus on a few key areas to vet potential companies. By looking at their credentials, hearing from past clients, and seeing their work firsthand, you can feel confident you’re making the best choice for your home remodeling project. Let’s walk through the three essential steps to finding a kitchen design-build company you can count on.

Check Credentials and Licensing

Choosing the right contractor is the single most important decision you’ll make in your remodeling journey. Before you fall in love with a portfolio, do a little homework to ensure the company is legitimate and qualified. Any professional firm operating in Long Island should be fully licensed and insured. Ask for their license numbers for both Nassau and Suffolk counties and verify them. Also, request proof of liability insurance and worker’s compensation. This isn’t just red tape—it protects you from liability if an accident happens on your property. A reputable company will have this information ready and will be happy to share it.

Read Reviews and Ask for References

Online reviews and personal references give you a behind-the-scenes look at what it’s like to work with a company. Check sources like Google, Houzz, and other local directories to see what past clients are saying. Look for patterns in the feedback. Do people consistently praise their communication and craftsmanship? How does the company respond to criticism? Don’t stop there—ask the company for a list of recent references and actually call them. Ask about their experience with the budget, timeline, and overall process. This is your chance to hear directly from homeowners who have been through the exact process you’re about to start.

Look Through Their Portfolio

A portfolio is where a company’s skills and style truly shine. As you browse their past projects, look for more than just pretty pictures. Do you see a consistent level of quality and attention to detail? Does their work align with your personal aesthetic, whether it’s modern, traditional, or something in between? Designers put in all the front-end work to create a cohesive vision, and their portfolio is proof of their capabilities. A strong portfolio of work shows you their range and helps you visualize what they could do in your own space, ensuring there are no major “surprises” in the final result.

How to Budget for Your Kitchen Remodel

Creating a budget for your kitchen remodel is one of the most important first steps you’ll take. It’s the roadmap that guides every decision, from the style of your cabinets to the finish on your faucet. While kitchen renovation projects can range from $20,000 to over $80,000, thinking of it as an investment can help frame the process. A high-quality remodel doesn’t just give you a beautiful space to cook and gather; it can also increase your home’s value. When you sell, you can often get back a significant portion of what you spent.

The key to a successful, stress-free renovation is a realistic and well-planned budget. It helps you set clear priorities and ensures there are no major financial surprises along the way. A solid budget is broken down into three main categories: the cost of materials, the fees for labor and professional services, and a contingency fund for those unexpected issues that pop up. By understanding each of these components, you can feel confident and in control as you move forward with your project.

Understanding Material Costs

Materials are the heart of your kitchen’s new look and will likely make up the largest portion of your budget. This includes everything from cabinets and countertops to appliances, flooring, lighting, and hardware. The cost can vary dramatically based on your choices. For example, custom cabinetry will be more expensive than stock options, and natural stone countertops will have a different price point than laminate. When selecting materials, think about both style and durability. Investing in high-quality, durable surfaces like porcelain and natural stone can pay off in the long run by standing up to daily wear and tear. It’s all about finding the right balance between the look you want, the function you need, and the budget you have.

Factoring in Labor and Professional Fees

Unless you’re a seasoned contractor, you’ll be hiring professionals to bring your vision to life, and their expertise is a critical part of your budget. This includes the cost of a design-build team, electricians, plumbers, and installers. Working with an experienced team offers incredible value. A kitchen design specialist helps you create a personalized design plan tailored to your specific needs, ensuring your new kitchen is both beautiful and functional. Hiring professionals for your kitchen redesign leads to less stress and a more efficient process, as they handle the complex logistics, scheduling, and problem-solving, saving you from costly mistakes and delays.

Planning for Hidden Costs

Even with the most meticulous planning, unexpected costs can arise during a remodel. That’s why it’s essential to build a contingency fund into your budget—typically 10% to 20% of your total project cost. This fund acts as a safety net for surprises, like discovering old plumbing that needs updating or finding structural issues once a wall is opened up. One of the biggest budget-busters is changing your mind mid-project. These “change orders” can significantly increase costs and extend your timeline. To avoid this, try to finalize all your design decisions before any demolition begins. A good project manager will help you anticipate potential challenges and keep the project on track.

Professional Designer vs. DIY: Which is Right for You?

Deciding whether to hire a professional or tackle your kitchen remodel yourself is one of the first major choices you’ll make. While the idea of a DIY project can be appealing, it’s important to weigh the benefits of professional expertise against the demands of managing a complex renovation. Your budget, timeline, and the project’s complexity will all play a role in this decision. Let’s break down what each path looks like so you can figure out the best fit for your home and lifestyle.

The Benefits of Hiring a Professional

Working with a professional designer is about more than just picking out pretty finishes. An expert brings a deep understanding of how to create a space that is both beautiful and highly functional. They see possibilities you might miss, offering creative storage solutions and an optimized layout tailored to how you actually live. An experienced designer ensures your home remodeling project results in a kitchen that works seamlessly for your family. They have access to industry knowledge, high-quality materials, and a network of trusted tradespeople, which means you get a cohesive, well-executed design from start to finish.

The Value of Project Management

A kitchen remodel involves coordinating plumbers, electricians, cabinet installers, painters, and more. This is where a dedicated project manager becomes invaluable. Having a single point of contact streamlines the entire process, ensuring clear timelines, transparent pricing, and consistent communication. A professional team handles the logistics, from scheduling deliveries to troubleshooting unexpected issues, which significantly reduces the stress on you as the homeowner. Choosing the right contractor to manage your project is often the most important decision you’ll make, as it sets the tone for the entire experience and guarantees a smoother, more predictable renovation.

When Does DIY Make Sense?

With countless online tutorials and resources, designing your own kitchen remodel can seem more achievable than ever. If you have a very clear vision, a knack for design, and experience with home improvement projects, a DIY approach might be a good fit, especially for smaller-scale updates. This path can be cost-effective if you have the time and skills to dedicate to it. However, it’s crucial to be realistic about the scope of work. For complex tasks involving plumbing, electrical, or structural changes, bringing in a professional is almost always the safer and more reliable option to ensure everything is done correctly and to code.

The Kitchen Design-Build Process: What to Expect

Starting a kitchen remodel is exciting, but it can also feel a bit overwhelming. The design-build approach simplifies everything by combining the design and construction phases under one roof. Instead of juggling a separate designer, architect, and contractor, you work with one cohesive team from the first sketch to the final walkthrough. This integrated process ensures seamless communication, a unified vision, and clear accountability every step of the way.

Knowing what to expect can make your renovation journey smoother and more enjoyable. A structured process means fewer surprises and a clear path forward. At Gappsi, our home remodeling team guides you through each phase, making sure your project stays on schedule and aligns with your vision. Let’s walk through the three main stages of bringing your dream kitchen to life.

Step 1: Initial Consultation and Planning

The journey begins with a conversation. Your initial consultation is a chance for us to get to know you and understand your vision for the kitchen. We’ll discuss your lifestyle, how you use your current space, your aesthetic preferences, and your budget. Think of it as a collaborative brainstorming session where we listen to your ideas, goals, and dreams for the heart of your home. This meeting is crucial because it lays the foundation for the entire project. We use the insights from this discussion to develop a tailored project plan and initial design concepts that truly reflect your personality and needs.

Step 2: Design and 3D Visualization

Once we have a clear understanding of your goals, our design team gets to work creating detailed plans for your new kitchen. One of the most exciting parts of this stage is seeing your vision come to life through 3D renderings. These realistic visualizations allow you to see exactly how the finished space will look and feel before any construction begins. During this phase, we’ll also guide you through selecting materials. From custom cabinetry and durable countertops to beautiful porcelain and natural stone flooring, we help you choose high-quality options that fit your style and budget, ensuring every detail is perfect.

Step 3: Construction and Key Milestones

With the design finalized and materials selected, it’s time to start building. Our construction team works efficiently to bring the approved plans to life, with a dedicated project manager keeping you informed every step of the way. We handle all the coordination, from demolition and plumbing to cabinet installation and finishing touches, ensuring a smooth workflow. Regular communication is key, and we make sure to meet with you at key milestones to review progress and answer any questions. Our goal is to complete your project on time and within budget, transforming your kitchen with minimal disruption to your daily life.

What Key Features Should You Prioritize in Your Kitchen?

When you decide to remodel your kitchen, you’re not just updating a room; you’re redesigning the heart of your home. It’s a chance to create a space that truly fits how you live, cook, and connect with family. But with so many options, it’s easy to get overwhelmed. Where should you focus your attention and budget to get the most impact? The most successful kitchen designs masterfully blend form and function, creating a space that looks incredible and works effortlessly. By prioritizing a few key areas—layout, storage, lighting, and materials—you can ensure your new kitchen is not only beautiful but also a joy to use every single day.

Thinking through these elements from the start will help you build a space that works for you now and for years to come. It’s about making smart choices that enhance your daily life, from the flow of traffic during a busy morning to the ease of finding the right spice while cooking dinner. A well-planned kitchen feels intuitive, making every task simpler and more enjoyable. Instead of getting lost in fleeting trends, focusing on these foundational features will give you a timeless design that adds real value to your home and your lifestyle.

Optimizing Layout and Workflow

The foundation of any great kitchen is its layout. A thoughtful floor plan makes everything from preparing a quick breakfast to hosting a dinner party feel seamless and intuitive. The goal is to create a natural flow of movement between your main work areas. You may have heard of the classic “work triangle,” which optimizes the path between the sink, stove, and refrigerator. While this is still a great starting point, modern kitchen design also considers other workstations, like a prep sink on an island or a dedicated coffee bar. A well-designed layout minimizes unnecessary steps, prevents traffic jams, and makes the entire space feel more open and efficient. When planning your home remodeling project, think about how you actually use your kitchen and what arrangement would make your daily routines easier.

Smart Storage and Organization

Effective storage is about more than just having enough cabinets; it’s about having the right kind of storage in the right places. A clutter-free kitchen is a functional kitchen, and smart organization is the key to achieving it. Instead of standard empty cabinets, consider solutions tailored to your needs. Deep drawers for pots and pans are often more accessible than lower cabinets, while a pull-out pantry can make finding ingredients a breeze. Other popular options include vertical dividers for baking sheets, custom drawer inserts for utensils, and clever corner systems that make use of every inch of space. The key is to assess your needs and prioritize storage solutions that improve both the function and the look of your kitchen.

Planning Your Lighting and Electrical

Great lighting can completely transform a kitchen, making it feel brighter, larger, and more welcoming. A well-thought-out lighting plan uses layers to create a versatile and inviting environment. Start with ambient lighting, like recessed ceiling lights, for overall illumination. Next, add task lighting directly above your work zones—think under-cabinet lights for countertops and pendants over an island. Finally, incorporate accent lighting to highlight architectural details or display items. It’s also crucial to plan your electrical outlets thoughtfully. Consider adding outlets inside your pantry for small appliances, on the side of your island for mixers or laptops, and even USB ports for charging devices. Planning this ahead of time ensures your kitchen is as practical as it is beautiful.

Choosing Materials for Durability and Style

The materials you choose for your countertops, backsplash, and flooring set the tone for your entire kitchen. Your goal should be to find a balance between durability and style. For countertops, materials like quartz and granite are popular for their resilience against heat, scratches, and stains. When it comes to flooring, you’ll want something that can withstand heavy foot traffic and spills. Gappsi offers a wide selection of high-quality porcelain and natural stone that is perfect for creating durable and stunning kitchen floors and backsplashes. Remember that these surfaces are long-term investments, so it’s worth choosing materials that not only match your aesthetic but will also hold up to the demands of daily life.

Common Kitchen Remodel Mistakes to Avoid

A kitchen remodel is one of the most exciting projects you can take on, but it’s also one of the most complex. It’s easy to get swept up in the vision of your dream kitchen and overlook a few key details along the way. Knowing the common pitfalls ahead of time can save you from headaches, unexpected costs, and a final result that doesn’t quite hit the mark. Let’s walk through some of the most frequent missteps homeowners make and how you can steer clear of them for a smoother, more successful renovation.

Inaccurate Budgeting

It’s the number one rule of remodeling: your project will likely cost more than you first expect. A common mistake is creating a budget that only covers the big-ticket items, like cabinets and appliances, while forgetting labor, permits, and a contingency fund for surprises. We recommend setting aside 10-20% of your total budget for those “just in case” moments. Another budget-buster is changing your mind mid-project. While it seems small, swapping out a countertop material or appliance model after orders are placed can lead to costly change orders and delays. A detailed plan from a home remodeling professional can help you lock in decisions and create a realistic budget from day one.

Rushing Design Decisions

The pressure to get started can lead to hasty choices you might regret later. It’s crucial to live with your ideas for a bit before committing. Think about your daily routine. Where do you set down groceries? How many people cook at once? Answering these questions helps create a layout that truly works for you. Don’t feel rushed to pick out every finish and fixture in a single weekend. A thoughtful design process considers everything from the flow of traffic to the placement of outlets. Taking the time to work through a detailed plan ensures your new kitchen isn’t just beautiful, but perfectly tailored to your lifestyle and built with durable materials that last.

Overlooking Functionality

A kitchen that looks stunning in photos but is frustrating to cook in is a design failure. Functionality should always be a top priority. One of the fundamentals of kitchen design is the “work triangle,” which ensures an efficient path between your sink, refrigerator, and stove. Beyond that, think about practical details. Do you have enough counter space next to your range for prep work? Is there a designated landing zone for hot dishes coming out of the oven? Smart storage, proper lighting, and durable custom masonry for countertops and backsplashes are just as important as the color of your cabinets. A great kitchen finds the perfect balance between form and function.

How Long Does a Kitchen Remodel Take?

One of the first questions every homeowner asks is, “How long will I be without a kitchen?” It’s a fair question—your kitchen is the heart of your home, and being without it is a major disruption. While there’s no single answer that fits every project, a typical kitchen remodel can take anywhere from a few weeks to several months. The final timeline depends entirely on the scope of your project, the materials you choose, and the team you hire. Understanding the key phases and potential roadblocks will help you set realistic expectations from the start.

What Affects Your Project Timeline?

Several moving parts can influence how long your kitchen renovation takes. Staying on schedule often comes down to careful planning and decisive action. One of the biggest factors is the scope of your project. Are you simply refacing cabinets and replacing countertops, or are you tearing down walls and reconfiguring the entire layout? The more complex the job, the longer it will take.

Making timely design decisions is also crucial. Delays often happen when homeowners are undecided about finishes, fixtures, or appliances. Similarly, the availability of your chosen materials can impact the schedule. Custom cabinetry or specialty tile can have long lead times, so it’s best to order them early. Finally, unexpected issues like hidden plumbing problems or outdated electrical wiring can pop up during demolition, adding time and cost. Working with an experienced home remodeling team helps you anticipate these challenges and build a realistic timeline with contingencies in place.

A Look at a Typical Timeline

For a standard, full kitchen remodel where the layout stays the same, you can generally expect the project to last between 4 and 8 weeks. This timeline covers everything from demolition to the final coat of paint. Larger projects involving structural changes, moving plumbing, or extensive custom work will naturally take longer.

Here’s a simplified breakdown of what that timeline might look like:

  • Week 1: Demolition and Prep. This involves tearing out the old kitchen, making any necessary repairs to the walls and subfloor, and handling the initial plumbing and electrical work.
  • Weeks 2-4: Installation. This is when the new kitchen starts to take shape. Flooring and cabinets are installed first, followed by countertop templating and installation. This phase can vary depending on the lead time for materials like porcelain and natural stone.
  • Weeks 5-6: Appliances and Fixtures. Once the countertops are in, the crew can install the sink, faucet, and major appliances like the refrigerator, oven, and dishwasher.
  • Weeks 7-8: Finishing Touches. The final phase includes installing the backsplash, painting, adding lighting fixtures, and finishing trim work. After a final walkthrough and inspection, your new kitchen is ready to use.

How to Prepare Your Home for a Kitchen Renovation

A kitchen renovation is an exciting step toward creating the heart of your home, but the process can temporarily turn your daily life upside down. A little preparation goes a long way in making the construction phase much more manageable for you and your family. By thinking ahead about your daily needs, protecting your space, and communicating with your build team, you can ensure a smoother, less stressful experience from demolition day to the final reveal. Taking these steps helps you focus on the exciting transformation happening in your home, not the temporary inconvenience.

Set Up a Temporary Kitchen

Before the first hammer swings, your top priority should be creating a functional temporary kitchen. You’ll need a dedicated space away from the construction zone to handle simple meals and your morning coffee routine. The dining room, a corner of the living room, or even the garage can work. Equip it with a few key appliances like a microwave, a coffee maker, a toaster oven, and a mini-fridge. Stock up on paper plates, disposable cutlery, and easy-to-prepare foods. Having this setup will help you maintain a sense of normalcy and save you from the expense and hassle of eating out for every meal during your home remodeling project.

Protect the Rest of Your Home

Construction dust has a way of getting everywhere. To keep the rest of your house clean, you’ll need to isolate the kitchen area. Professional contractors will typically do this, but it’s good to be prepared. Use plastic sheeting to seal off doorways leading into the renovation zone and cover any furniture in adjacent rooms. Lay down protective coverings or drop cloths on floors in high-traffic paths that workers will use. It’s also a smart idea to close or cover any air vents in and around the kitchen to prevent dust from circulating through your HVAC system. This proactive approach helps protect your belongings and makes the final cleanup much easier.

Plan Around Daily Disruptions

Living through a renovation requires flexibility. It’s important to plan your routine around the construction schedule. Talk to your project manager about typical work hours so you know when to expect noise and activity. If you work from home, you might want to arrange a temporary workspace in a room furthest from the kitchen. Plan for days when the water or electricity might be shut off for plumbing and electrical work. If you have children or pets, establish clear boundaries to keep them safely away from the work area. Clear communication with your design-build team is key to managing these daily disruptions effectively.

Ready to Start Your Kitchen Project?

Feeling inspired to bring your kitchen vision to life? Taking that first step can feel like the biggest hurdle, but it’s also the most exciting part of the process. A successful remodel hinges on finding a partner you can trust to guide you from the initial sketch to the final reveal. At Gappsi, we’ve been helping Long Island homeowners transform their spaces since 1987, and we understand what it takes to create a kitchen that is both beautiful and functional.

Our design-build approach means we’re with you for the entire journey. We handle every detail, from creating a smart layout that suits your family’s lifestyle to helping you select the perfect materials and finishes. We provide comprehensive home remodeling services that cover everything, ensuring your new kitchen is not only stunning but built with expert craftsmanship that lasts. You don’t have to juggle multiple contractors or worry about sourcing materials—we manage it all for you.

You don’t have to figure it all out on your own. If you’re ready to discuss your ideas, our team is here to listen and help you map out a clear plan. Let’s work together to create a kitchen you’ll love spending time in for years to come.

Related Articles

Frequently Asked Questions

What’s the biggest advantage of using a design-build service like Gappsi? The main advantage is having one dedicated team managing your entire project from the first idea to the final installation. Instead of you having to coordinate between a separate designer and contractor, our team works together under one roof. This streamlined approach means communication is seamless, the project runs more efficiently, and your vision is executed perfectly because everyone is on the same page from the very beginning. It simply takes a lot of the stress and guesswork out of the process for you.

How do I make sure my new kitchen design is timeless and won’t go out of style? The key to a timeless kitchen is focusing on a highly functional layout and high-quality materials for the core elements. Trends come and go, but a smart workflow and durable countertops will always be in style. We guide you toward classic choices for the big investments, like cabinetry and stone surfaces, that will look great for decades. You can always bring in current trends with smaller, easily updated details like hardware, light fixtures, or paint colors.

I have a specific budget in mind. Can a design-build firm work within it? Absolutely. A good design-build team works with your budget from day one. During our initial consultation, we’ll have an open conversation about your financial comfort zone. This allows our designers to create a plan that is both beautiful and realistic, suggesting materials and solutions that align with what you want to invest. Because the design and construction costs are considered together, we can help you make informed decisions and avoid surprises down the road.

What happens if something unexpected comes up during construction? Even with the best planning, surprises can happen when you open up walls in an older home. This is where having an integrated team truly shines. Your dedicated project manager will immediately address the issue with our construction crew to find the best solution. You’ll be informed right away about the situation and your options. This collaborative approach solves problems quickly and efficiently, keeping your project on track with clear communication.

I’m not sure where to even begin. What’s the very first step? The best first step is simply to start gathering ideas. Create a folder of inspiration photos and make a simple list of what you love and hate about your current kitchen. You don’t need to have it all figured out. The next step is to schedule a consultation with our team. It’s a low-pressure conversation where we can listen to your initial thoughts, answer your questions, and help you see the potential in your space.

Share this page:

A Complete Backyard Transformation in Massapequa, NY

A Complete Backyard Transformation in Massapequa, NY, designed and installed by Gappsi.  When a new home is built, the outdoor space should be just as carefully designed as the inside. For this Massapequa, NY residence, Gappsi was trusted to create a custom backyard that maximizes every inch for comfort, style, and function. The finished space combines luxury materials, a smart layout, and features you can enjoy year-round.  Although the property footprint is modest, every element of this backyard was carefully planned to serve a purpose. From a low-maintenance synthetic turf play area to a resort-style swimming pool, a limestone patio, and a fully equipped outdoor kitchen pavilion, this space now functions as a true extension of the home.

Designing With Purpose: Making the Most of Every Inch

Because this was a newly built house, Gappsi had the opportunity to start from scratch. The design goal was clear: use all available space efficiently while maintaining an unbroken flow between zones. Rather than crowding the yard, each area was positioned to complement the others, creating a layout that feels open, balanced, and practical.
The side of the house was transformed into a playground with high-quality synthetic turf sourced from the Gappsi showroom. This turf offers the look of natural grass without the maintenance, watering, or mud. It also dries quickly after rain, making it a dependable space for children to play year-round.  Using the side area for play means the main backyard can focus on entertaining, relaxing, and enjoying the pool. This holds the whole layout neat and organized.

Pavilion Living: Outdoor Kitchen, Fire Pit & Lounge

At the heart of the backyard is a 16×16 traditional pavilion with a classic metal roof supported by four columns. This structure grounds the space and creates a comfortable, shaded environment for cooking, dining, and gathering.  Under the pavilion, there is a full outdoor kitchen finished with silver travertine in a mixed-size pattern for extra depth and texture. The kitchen features Fire Magic appliances and cabinets, a top brand recognized for its durability, high performance, and style.
The large island features a black leather-finish granite countertop, supplying a striking contrast to the lighter stone finishes while providing a durable, weather-resistant surface. One side of the pavilion features bar seating for casual dining, while the other side transitions into a snug lounge area.
A gas fire pit surrounded by plush couches creates a warm, pleasant space that extends usability into cooler evenings. When hosting friends, enjoying family dinners, or relaxing after a long day, this pavilion serves as the backyard’s social hub.

Resort-Style Swimming Pool With Safety Features

The backyard also features a 16×36 concrete wall vinyl swimming pool, perfectly proportioned to the yard’s size. The pool serves as a visual centerpiece and a refreshing escape during the summer months.
Facing the house is a sheer descent water wall, capped with G045 24×24 limestone, which adds a modern water-feature element while enhancing sound and movement. This wall becomes a focal point both day and night, especially when the pool is illuminated.
a-complete-backyard-transformation-in-massapequa-ny
The pool is equipped with an outcover automatic safety cover, a valuable solution for properties where customary fencing is not an option. The cover provides:
  • Safety for children and pets
  • Heat retention supports maintaining water temperature
  • Energy efficiency, reducing the heater workload
  • Resale value, as buyers increasingly look for embedded safety features
This feature alone significantly extends the swimming season and adds peace of mind.

G045 Limestone Patio and Coping: Natural Beauty & Comfort

The entire patio area surrounding the pool and pavilion is paved with G045 limestone from the Gappsi natural stone collection. This stone was chosen for both its rustic appearance and soft, comfortable texture underfoot. The pool coping is also made of G045 limestone, which keeps the look consistent throughout the space. Its gentle color changes and natural finish give the area a classic, elegant style that suits the home.
The stoop leading to the sliding door was also constructed with G045 coping limestone and a silver travertine veneer, tying the home’s entry point directly into the patio and pavilion materials for an integrated design.

Privacy and Greenery: Evergreen Screening

To finish the backyard, Gappsi planted 10-foot-tall evergreen trees along the property’s edge. These trees offer:
  • Natural privacy
  • Wind protection
  • Year-round greenery
  • A softer visual boundary than fencing
This living border transforms the yard into a private retreat, making it feel like a hidden oasis even in a suburban neighborhood.

A Small Yard That Lives Large

This Massapequa backyard shows that even a small space can have a big impact. With prudent planning, top-quality materials, and skilled installation, Gappsi transformed a modest yard into a complete luxury retreat.
Every part of the yard has a purpose, and all materials were chosen for both strength and beauty. The layout moves seamlessly from one area to the next, making the backyard not just beautiful but also useful, safe, and enjoyable year-round.
This project is Gappsi’s latest backyard design and installation. It shows how skill, creativity, and careful attention to detail can completely change a home’s outdoor living space.

Contact Gappsi Today

📍 Serving all of Long Island, NY — Nassau & Suffolk Counties
🌐 www.gappsi.com
📞 Call now for a free consultation and estimate!

SCHEDULE A MEETING TODAY WITH GAPPSI

Share this page:
A modern bathroom renovation with a freestanding tub, the result of hiring local services.

Find the Best Local Bathroom Renovation Services

You’ve spent hours scrolling through inspiration photos, pinning images of serene, spa-like bathrooms and sleek, modern designs. Now it’s time to turn that vision into a reality. The bridge between your dream bathroom and the finished product is a skilled, trustworthy contractor. But finding the right fit among the many local bathroom renovation services is a project in itself. This guide is your practical roadmap to navigating the hiring process. We’ll break down how to check credentials, compare quotes without just focusing on price, and communicate your expectations clearly to ensure the final result is just as beautiful as you envisioned.

Key Takeaways

  • Your Project’s Success Hinges on Your Contractor: Do your homework before hiring. A great contractor will have a verifiable license, proof of insurance, a strong portfolio of similar bathroom projects, and a consistent pattern of positive, recent reviews.
  • Plan Your Budget Beyond the Big-Ticket Items: The final cost is a mix of materials, labor, and location. Always factor in a contingency fund of 10-20% to handle unexpected issues like hidden water damage, which can prevent project delays and stress.
  • Protect Your Project with Clear Communication: A detailed written contract is your best tool for avoiding misunderstandings. It should outline the full scope, timeline, and costs, ensuring your vision is executed correctly from start to finish.

What Services Do Bathroom Remodelers Offer?

When you decide to update your bathroom, you’ll find that remodeling contractors offer a wide spectrum of services. Whether you’re dreaming of a complete spa-like overhaul or just want to refresh a few key features, a professional team can handle the job. A great contractor manages every detail, from the initial design concepts to the final installation, ensuring a smooth process and a beautiful result.

Understanding the different services available helps you clarify your own vision and budget. Some projects involve moving walls and reconfiguring the entire layout, while others focus on cosmetic updates like new tile or fixtures. A full-service company like Gappsi provides comprehensive home remodeling solutions, which means we can coordinate every aspect of your project. This includes bringing in licensed plumbers and electricians, sourcing high-quality materials, and managing the construction timeline so you don’t have to juggle multiple contractors. From a simple powder room refresh to a luxurious master bath transformation, the right team has the skills to bring your ideas to life.

Full-Scale Bathroom Remodels

A full-scale bathroom remodel is a complete transformation from the ground up. This is the best option when you want to change the room’s layout, move plumbing fixtures like the toilet or shower, or take everything down to the studs and start fresh. This type of project involves a comprehensive plan that covers everything from demolition to the final touches. A full-service remodeler handles the entire process, including initial design, material selection, and all construction phases. It’s an intensive process, but the result is a brand-new bathroom tailored exactly to your needs and style, which can significantly improve your home’s value and your daily routine.

Partial Renovations

If you’re generally happy with your bathroom’s layout but feel it needs a modern touch, a partial renovation is a fantastic choice. This approach focuses on updating specific elements without the cost and time commitment of a full gut job. You might choose to replace an old bathtub with a sleek walk-in shower, install a new vanity and countertop, or update the lighting. Partial renovations allow you to address the most dated or inefficient parts of your bathroom, making a big impact on a smaller budget. It’s a flexible option that lets you refresh the space in stages or all at once, depending on your priorities and financial plan.

Upgrading Fixtures and Hardware

Sometimes, the smallest changes make the biggest difference. Upgrading your bathroom’s fixtures and hardware is a simple yet effective way to give the space an instant facelift. This can include installing a new faucet with a modern finish, replacing the toilet with a more efficient model, or swapping out old cabinet pulls and towel racks. New lighting can completely change the room’s ambiance, while a new mirror can make the space feel larger and brighter. These updates don’t require major construction but can dramatically alter the look and feel of your bathroom, making it feel more current and personalized.

Installing New Tile and Flooring

New tile and flooring can completely redefine your bathroom’s style. Whether you’re drawn to classic subway tile, intricate mosaics, or large-format porcelain, the right choice can set the tone for the entire room. Professional remodelers handle the installation for floors, shower walls, and backsplashes, ensuring everything is perfectly placed and properly waterproofed to prevent future issues. With so many durable and beautiful materials available, including a wide range of porcelain and natural stone, you can create a look that’s both timeless and easy to maintain. A professional installation guarantees a flawless finish that will last for years to come.

Essential Plumbing and Electrical Work

Any bathroom remodel that involves moving fixtures or adding new lighting requires skilled plumbing and electrical work. This is not a place to cut corners. Licensed professionals are essential for tasks like rerouting water lines for a new shower, installing a new vanity with a sink, or adding outlets and recessed lighting. A qualified remodeling contractor will manage these critical services, ensuring all work is done safely and up to code. This protects your home from potential hazards like leaks or electrical faults and gives you peace of mind that the job was done right. Proper plumbing and electrical work is the hidden foundation of a functional and safe bathroom.

How to Choose the Right Bathroom Contractor

Finding the right contractor is the single most important step in your bathroom renovation journey. This is the person or team you’re trusting to come into your home, tear things apart, and put them back together beautifully and functionally. The right partner makes the process smooth and exciting, while the wrong one can turn your dream project into a stressful, costly nightmare. So, how do you sort through the options and find a true professional you can rely on? It comes down to doing a bit of homework upfront.

Think of it like hiring for an important job—because you are. You’re looking for someone with the right skills, a proven track record, and a professional approach. This means checking their credentials, seeing what past clients have to say, and making sure their work aligns with your vision. It also means ensuring they have the proper protections in place, like insurance, to safeguard your home and your investment. Taking these steps will give you the confidence that you’re working with a reputable company that values quality and customer satisfaction. A great home remodeling expert will be happy to provide all this information, making the decision process that much easier.

Verify Their Credentials and License

First things first: make sure any contractor you consider is properly licensed to work in your area. A license isn’t just a piece of paper; it’s proof that they’ve met local and state requirements and are accountable for their work. Hiring an unlicensed contractor can leave you with little recourse if something goes wrong. You can typically verify a license through your local consumer affairs or licensing board’s website. It’s a quick check that provides a fundamental layer of protection and peace of mind before you even start talking about tile choices or bathtub styles.

Read Recent Reviews and Testimonials

Reviews from past clients are your window into what it’s actually like to work with a contractor. Don’t just look at the star rating; read the comments to understand the specifics. Were they on time? Did they communicate well? How did they handle unexpected issues? Pay close attention to recent reviews, as they reflect the company’s current performance. A consistent pattern of positive feedback about professionalism, quality, and communication is a great sign. This feedback gives you a much clearer picture than a sales pitch ever could.

Review Their Portfolio and Experience

You wouldn’t hire a portrait artist who only paints landscapes, right? The same logic applies here. Make sure the contractor has specific, proven experience with bathroom remodels. Ask to see a portfolio of their completed projects. As you look through their work, check for quality craftsmanship and attention to detail. Does their style match the vision you have for your own space? Gappsi’s YouTube channel is a great example of how you can see a contractor’s work in action, giving you a feel for their capabilities and the scope of their projects before you even pick up the phone.

Compare Quotes from a Few Professionals

It’s wise to get detailed, written quotes from at least three different contractors. This isn’t just about finding the cheapest price. Comparing quotes helps you understand the market rate and see what each contractor includes in their proposal. A quote should clearly break down the costs for labor, materials, and any permits. Be wary of a bid that’s significantly lower than the others—it could be a red flag for subpar materials or hidden costs down the line. Your goal is to find the best value, which is the ideal balance of cost, quality, and service.

Confirm They Have Insurance Coverage

This is a non-negotiable. Your contractor must have both general liability insurance and worker’s compensation coverage. General liability protects your property from any accidental damage that might occur during the renovation. Worker’s compensation covers the contractor’s employees if they get injured on the job, so you aren’t held liable. Don’t just take their word for it; ask to see a certificate of insurance. A professional contractor will expect this question and will have their documentation ready to share. This simple step protects you from major financial and legal risks.

What Factors Influence Your Renovation Cost?

Setting a budget for your bathroom renovation is one of the first steps, but it’s important to know what goes into that final number. The total cost isn’t just about the new tub or tiles; it’s a combination of several key factors. Understanding these variables will help you create a realistic budget, make informed decisions, and avoid surprises along the way. From your specific Long Island location to the complexity of the work, here’s a breakdown of what shapes your project’s price tag.

Your Location and Local Market Rates

Where you live plays a significant role in your renovation costs. Just as home prices vary by neighborhood, so do the rates for labor and materials. Here on Long Island, costs can differ between Nassau and Suffolk counties due to local market demand and operational expenses for contractors. The company you hire also matters, as different builders have different pricing structures based on their experience, crew size, and overhead. A well-established firm with a strong local reputation may have a different rate than a smaller, newer operation, reflecting their level of service and quality guarantees.

The Quality of Materials You Choose

Your taste in materials and fixtures is one of the biggest drivers of your budget. Every choice, from the floor tiles to the sink faucet, comes with a price range. For example, a standard bathtub might cost a few hundred dollars, while a high-end freestanding soaking tub can easily run into the thousands. The same goes for vanities, lighting, and countertops. Opting for luxury materials like custom cabinetry or premium porcelain and natural stone will naturally increase the overall cost compared to more standard, budget-friendly options. It’s all about balancing your aesthetic vision with your financial plan.

Project Scope and Labor Complexity

What are you planning to change? A simple cosmetic update is much less expensive than a full gut renovation. Labor is often the largest single expense in a remodel, typically accounting for 30% to 50% of the total budget. If your project involves moving walls, reconfiguring the plumbing, or updating electrical wiring, the labor costs will be higher due to the increased complexity and need for specialized trades. A straightforward fixture-for-fixture swap requires less time and expertise, keeping labor costs down. The more ambitious your home remodeling plans, the more you should allocate for skilled labor.

Planning for Unexpected Issues

Even with the most careful planning, renovations can uncover surprises. Once the walls and floors are opened up, you might find hidden problems like water damage, mold, outdated wiring, or pest issues that need to be addressed before the new work can begin. These unexpected repairs can quickly add to your costs. That’s why it’s smart to build a contingency fund into your budget—typically 10% to 20% of the total project cost. This financial cushion ensures that unforeseen issues don’t derail your project or force you to compromise on your design choices later on.

Local Building Permits and Requirements

Depending on the scope of your renovation, you may need to secure permits from your local municipality. Projects that involve altering the structure of your home, moving plumbing, or changing electrical systems almost always require a permit to ensure the work meets safety and building codes. The cost of permits and any required inspections will add to your total expenses. A professional contractor will know exactly which permits are needed for your project and can manage the application process for you, ensuring everything is done correctly and legally. This is a crucial step that protects your home’s value and safety.

How Much Does a Bathroom Renovation Cost?

Let’s talk numbers. Setting a realistic budget is one of the most important first steps in any renovation, and it’s often the hardest. Bathroom remodeling costs can vary widely based on the size of your space, the materials you select, and how much you change the existing layout. To give you a clearer picture of what to expect here on Long Island, we can break down the costs into a few common tiers.

Think of these numbers as a starting point. A small powder room refresh will naturally cost less than a full-scale primary bathroom overhaul that involves moving plumbing and electrical lines. The key is to align your vision with your budget. Whether you’re planning a simple cosmetic update or a complete spa-like transformation, understanding these price ranges will help you plan your project with confidence. At Gappsi, our home remodeling team works with you to design a bathroom that fits your financial comfort zone without compromising on quality or style.

Budget-Friendly Updates ($5,000-$10,000)

Yes, you can absolutely give your bathroom a significant facelift for under $10,000. The secret to staying in this range is to work with your bathroom’s existing footprint—meaning no moving toilets or showers. This budget is perfect for cosmetic changes that make a huge impact. Think a fresh coat of paint, a new vanity and sink, updated light fixtures, a modern toilet, and a reglazed tub. By making smart, high-impact choices, you can create a space that feels brand new and adds real value to your home without breaking the bank.

Mid-Range Remodels ($10,000-$20,000)

This is the sweet spot for many homeowners. In this range, you have more flexibility to upgrade materials and make more substantial changes. You could invest in a beautiful new tiled shower, install a semi-custom vanity with a stone countertop, or upgrade your flooring with high-quality porcelain and natural stone. You might even have enough room in the budget to move a fixture or two. A mid-range remodel allows for a more personalized design and better-quality materials that not only look great but also stand the test of time, often recouping a good portion of the cost when you sell your home.

High-End Transformations ($20,000+)

If you’re dreaming of a true luxury retreat, this is the budget for you. A high-end renovation opens the door to a complete transformation. We’re talking about custom cabinetry, premium materials like marble, heated floors, a steam shower, or a freestanding soaking tub. This budget allows for significant layout changes, like expanding the room’s footprint or moving all the plumbing to create a more functional and spacious design. This is where you can incorporate high-end technology and designer fixtures to build the custom, spa-like bathroom you’ve always wanted.

A Quick Cost Breakdown by Feature

Wondering where all that money goes? A bathroom renovation quote is a sum of many parts. Labor is a major component, covering the skilled work of plumbers, electricians, tilers, and installers. Materials are the next big piece of the puzzle. This includes everything from the bathtub and toilet to the vanity, faucets, and tile. For example, a standard tub might cost a few hundred dollars, while a high-end freestanding model can be several thousand. Tiling costs also vary based on the material you choose and the complexity of the design. Understanding these individual costs helps you see exactly how your budget is being allocated.

Key Questions to Ask a Potential Contractor

Choosing the right contractor is the most important decision you’ll make for your bathroom renovation. A great partnership leads to a smooth process and a beautiful result, while the wrong one can cause major headaches. Before you sign any contracts, it’s essential to have a detailed conversation with any potential hire. A professional and experienced contractor will welcome your questions and provide clear, confident answers. Think of this as an interview—you’re hiring them for a critical job. Use these questions to guide your conversation and find a team you can trust to bring your vision to life.

Project Timelines and Scheduling

One of the first things you’ll want to know is how long the project will take. Ask for a detailed project timeline, including start and estimated completion dates. A professional contractor should be able to provide a schedule that outlines each phase, from demolition to final inspection. Also, ask how they handle potential delays, which can happen due to material backorders or unexpected issues. Understanding their process for managing the schedule and communicating updates will help you set realistic expectations. This conversation will show you how organized they are and how they value your time, ensuring everyone is on the same page before the work begins.

Material Sourcing and Warranties

Discussing materials and warranties upfront can save you from costly surprises later. Ask your contractor where they source their materials and whether you’ll be selecting them together. Some contractors have preferred suppliers, which can sometimes lead to better pricing. At Gappsi, we guide homeowners through selecting high-quality materials like durable porcelain and natural stone to ensure a lasting finish. It’s also crucial to ask about warranties. You should clarify what is covered under their workmanship warranty and what manufacturer warranties apply to the products being installed. A reputable contractor will stand by their work and be transparent about all guarantees.

Policies for Changes and Communication

Even with the best planning, you might want to make a change mid-project, or an unexpected issue might require a pivot. Ask potential contractors how they handle these situations. They should have a formal process for “change orders,” which are written documents that detail the changes in scope, cost, and timeline. This protects both you and the contractor. You should also establish a communication plan. Will you have a dedicated point of contact? How often can you expect updates? Clear communication is the foundation of a successful home remodeling project, so make sure their style aligns with your expectations.

Proof of Insurance and Licensing

This is a non-negotiable step. Always ask a contractor for proof of their license and insurance before hiring them. They should be able to provide a copy of their state or local license, as well as certificates for general liability insurance and workers’ compensation. General liability protects your property from damage, while workers’ compensation covers any injuries that might happen on the job site, protecting you from liability. Verifying these credentials ensures the contractor operates legally and professionally. Any hesitation to provide this information is a major red flag, and you should move on to the next candidate.

Specific Experience with Bathroom Projects

Not all renovations are the same, and bathrooms come with unique challenges like intricate plumbing, waterproofing, and ventilation. Ask contractors to share their portfolio of recent bathroom projects. Look for examples that are similar in style and scope to what you have in mind. This is your chance to see the quality of their work firsthand. Ask them about a particularly challenging bathroom project they completed and how they handled it. Their answer will give you insight into their problem-solving skills and expertise. A contractor with a proven track record in bathroom remodels will be better equipped to handle the specific demands of your project.

Their Process for Handling Surprises

In any renovation, there’s always a chance of uncovering something unexpected, like hidden water damage, mold, or outdated electrical wiring behind the walls. A seasoned contractor knows this and has a plan. Ask them how they approach these discoveries. A good contractor will stop work, inform you immediately, and clearly explain the problem and your options for addressing it. They should provide a detailed change order outlining the additional work and costs required. This question helps you gauge their transparency, honesty, and ability to manage unforeseen challenges without causing unnecessary stress or blowing your budget without your approval.

How to Avoid Common Renovation Mistakes

A bathroom renovation is an exciting project, but it also comes with its fair share of potential headaches. The good news is that most common mistakes are entirely avoidable with a bit of planning. Taking the time to prepare before the first tile is laid will save you from budget overruns, timeline delays, and a finished product that doesn’t quite match your vision. The key is to find a partner you can trust and to stay involved in the process from start to finish.

When you work with an experienced team, they guide you through every step, from initial design to final installation. A professional home remodeling company will anticipate challenges and communicate clearly, ensuring your project runs smoothly. By following a few simple guidelines, you can protect your investment and make sure your renovation experience is a positive one.

Do Your Research Before You Hire

One of the biggest missteps you can make is hiring the wrong contractor. A team that is hard to reach, goes over budget, or delivers subpar work can turn your dream project into a nightmare. Before you sign any contracts, do your homework. Look for a company with a strong presence in Long Island and a long history of satisfied clients. Check their online portfolio, read reviews on multiple platforms, and ask for references you can actually speak with. A trustworthy contractor will be proud to show off their previous work and connect you with happy homeowners.

Get a Detailed Contract in Writing

A handshake and a verbal agreement aren’t enough when it comes to your home. Always ask for a detailed contract that outlines the complete scope of work. This document should be your project’s roadmap, clearly defining everything from the specific materials being used to the project timeline and payment schedule. A thorough contract protects both you and the contractor by setting clear expectations and preventing misunderstandings down the road. It ensures everyone is on the same page about deliverables and costs. If a contractor is hesitant to put everything in writing, consider it a major red flag and walk away.

Don’t Choose Based on Price Alone

It’s always tempting to go with the lowest bid, but this can be a costly mistake. An unusually low price often signals inexperience, low-quality materials, or a contractor who plans to cut corners. Instead of focusing only on the final number, evaluate the overall value. Consider the contractor’s experience, the quality of the porcelain and stones they use, and their reputation for craftsmanship. Investing a little more in a reputable company often means a better-finished product and fewer expensive repairs in the future. A quality job is an investment that pays off for years to come.

Know the Red Flags of Unprofessionalism

Learning to spot the warning signs of an unreliable contractor can save you a lot of trouble. Be wary of anyone who asks for a large cash deposit upfront, lacks proper licensing and insurance, or can’t provide you with references. Poor communication is another major red flag; if they are difficult to get in touch with before the project even starts, imagine what it will be like once they’ve begun demolition. A professional team will be transparent, responsive, and eager to answer all of your questions, making you feel confident and informed every step of the way.

Communicate Your Expectations Clearly

Your contractor can’t bring your vision to life if they don’t know what it is. Clear communication is essential for a successful renovation. Before the project begins, gather inspiration photos, make a list of your must-haves, and discuss your goals in detail with your contractor. The more specific you can be about what you want, the better. A great contractor will listen to your ideas and use their expertise to make recommendations, ensuring the final result not only looks beautiful but is also functional for your family’s needs. Don’t be afraid to speak up and ask questions throughout the process.

How to Read Customer Reviews Like a Pro

Reading customer reviews is one of the most important steps in finding the right contractor, but it’s about more than just scanning star ratings. To get a true feel for a company, you need to know how to read between the lines. A glowing five-star review and a frustrated one-star complaint are both just pieces of a larger puzzle. By looking for specific details, patterns, and even how a business handles criticism, you can get a much clearer picture of what it would actually be like to work with them on your bathroom renovation.

Check the Volume and Date of Reviews

When you start looking at reviews, the first things to check are how many there are and how old they are. A contractor with hundreds of reviews has a long track record, which gives you a lot more information to work with than a company with only a handful. But volume alone isn’t enough. You want to see a steady stream of recent feedback. A glowing review from five years ago doesn’t tell you much about the quality of their work today. Look for reviews from the last few months to get an accurate sense of their current performance, crew, and project management. Consistent, recent praise is a great sign you’re looking at a reliable company.

Look for Specific, Detailed Feedback

Vague comments like “great job” or “highly recommend” are nice, but they don’t give you much to go on. The most helpful reviews are the ones that get specific. Look for feedback that details the experience, mentioning things like the team’s communication style, their punctuality, how they kept the workspace clean, and how they handled unexpected issues. Did they stick to the timeline? Was the final cost in line with the initial quote? These details paint a vivid picture of the customer experience. When you’re planning a major project like a home remodel, this kind of specific insight is incredibly valuable for setting your own expectations.

See How the Business Responds to Concerns

No company is perfect, and even the best contractors might get a negative review from time to time. What really matters is how they respond. A professional and thoughtful reply to a complaint shows that the company values customer feedback and is committed to making things right. It’s a sign of accountability. On the other hand, a defensive or dismissive response—or worse, no response at all—is a major red flag. How a business handles criticism tells you a lot about their character and how they’ll likely communicate with you if a problem comes up during your project. Look for a contractor who listens and takes ownership.

Identify Overall Patterns and Sentiment

Instead of getting hung up on a single amazing review or one really bad one, take a step back and look for patterns. Are multiple customers praising the same project manager? Do several reviews mention how respectful the crew was of their home? These are strong positive indicators. Conversely, if you see recurring complaints about the same issue—like poor communication, messy job sites, or scheduling delays—take them seriously. One person’s bad experience could be an outlier, but the same complaint from three or four different people points to a real problem. Identifying these trends will give you a much more reliable understanding of a company’s strengths and weaknesses.

Watch Out for Red Flags in Comments

As you read, keep an eye out for specific red flags that could signal future headaches. Comments about poor communication, missed deadlines without any explanation, or unprofessional behavior from the crew are serious warnings. Another major red flag is any mention of surprise costs or feeling pressured to agree to extra work that wasn’t in the original contract. Your home renovation should be an exciting process, not a stressful one. Paying attention to these warning signs in reviews can help you avoid a contractor who might create problems down the road, ensuring your swimming pool or patio project goes smoothly from start to finish.

Where to Find a Great Local Contractor

Finding the right contractor can feel like a huge task, but it doesn’t have to be. With the right approach, you can connect with skilled professionals in your area who can bring your vision to life. These reliable methods will help you narrow down your options and find a partner you can trust for your bathroom renovation.

Online Directories and Review Sites

Online platforms are a great starting point. Websites like Houzz, Angi, and Google Maps gather local contractors in one place, letting you sort through them based on customer reviews and project photos. Pay close attention to recent reviews to get a current picture of their performance and how they interact with clients. These sites help you find reputable services, as contractors know a strong online presence and positive feedback are key to connecting with homeowners like you. A well-managed profile is often a good sign of a professional operation.

Referrals from Friends and Neighbors

Don’t underestimate the power of a good recommendation. Asking friends, family, and neighbors for referrals is one of the most trusted ways to find a great contractor. They can give you an honest, firsthand account of their experience—from communication and cleanliness to sticking to the budget and timeline. A personal recommendation means you’re finding a professional who has already earned trust in your community, giving you peace of mind as you move forward.

Local Trade Shows and Associations

If you prefer to meet professionals face-to-face, local home and garden shows are fantastic opportunities. These events allow you to see a contractor’s work up close and have a direct conversation about your project. You can get a feel for their personality and professionalism right away. Also, check if a contractor belongs to a professional organization like the National Association of the Remodeling Industry (NARI). Membership often indicates a commitment to high standards and ethical business practices.

Social Media and Professional Portfolios

A contractor’s social media profile or website portfolio is their digital showroom. Platforms like Instagram and Pinterest are perfect for browsing high-quality photos and getting inspiration. Look for detailed project galleries with before-and-after shots that show the transformations they can achieve. This is your chance to see if their style aligns with yours and to get a clear idea of the quality of their home remodeling work before you pick up the phone. A strong portfolio showcases everything from custom tile work to complete outdoor living spaces.

Related Articles

Frequently Asked Questions

How long will my bathroom renovation actually take? The timeline for a bathroom remodel really depends on the scope of the project. A simple cosmetic update, like replacing a vanity and fixtures, might only take a few days. A more involved, mid-range renovation could take two to three weeks. For a full-scale gut renovation that involves moving walls or plumbing, you should plan for the project to last anywhere from four to six weeks or more, factoring in inspections and any custom orders.

Can I stay in my home during the remodel? Absolutely. For most bathroom projects, you can comfortably live in your home while the work is being done. If you only have one bathroom, we can work with you to set up temporary solutions or plan the work in phases to minimize disruption. A professional crew will always make sure to clean up the work area at the end of each day and seal it off to contain dust and debris as much as possible.

What happens if you find a surprise problem like mold or a leak? It’s not uncommon to uncover hidden issues like old water damage or outdated wiring once we open up the walls. A professional contractor has a clear process for this. We immediately stop work in that area, show you exactly what we’ve found, and explain your options. We then provide a written change order that details the necessary repairs and any associated costs, so you can approve everything before we move forward.

What’s the best way to save money on my project without cutting corners? The smartest way to manage your budget is to keep your bathroom’s existing layout. Moving plumbing and electrical lines is one of the most significant labor costs in a renovation. You can also make a big impact by investing in a few high-quality focal points, like a beautiful vanity or custom tile in the shower, while choosing more standard, budget-friendly options for other elements.

Do I need to hire my own plumber or electrician? When you work with a full-service remodeling company, you don’t have to worry about coordinating different tradespeople. We manage the entire project for you, which includes bringing in our trusted and licensed plumbers, electricians, and other specialists as needed. This ensures every part of the job is done correctly, up to code, and on schedule, simplifying the entire process for you.

Share this page:
A wood frame wall with a brick veneer exterior.

Wood Frame Wall with Brick Veneer: A Simple Guide

The construction of your home’s exterior walls is more complex than it appears. While a house may look like it’s made of solid brick, it’s more likely a wood frame wall with brick veneer. This means a sturdy wood structure is doing all the heavy lifting, while a single layer of brick provides a beautiful and protective outer shell. This separation of structure and style is the key to its success. It’s a sophisticated system involving specific installation techniques, moisture management, and insulation strategies to ensure your home is not only attractive but also secure and dry. Let’s explore the components of this system and how they work together.

Key Takeaways

  • It’s a Smart System, Not Solid Brick: Brick veneer is a stylish and protective outer layer, while your home’s wood frame provides the actual structural support. This modern method gives you the classic brick look efficiently and effectively.
  • Moisture Management is Crucial: A properly installed brick veneer wall is designed to breathe. An air gap, weep holes, and flashing are essential components that work together to drain water away and protect your home from potential damage.
  • Get Classic Style with Modern Performance: You get the timeless curb appeal and low-maintenance durability of a traditional brick home, but with the superior energy efficiency and more affordable cost of wood-frame construction.

What is a Wood Frame Wall with Brick Veneer?

When you see a beautiful brick home, you might assume the entire wall is made of solid brick. But often, what you’re looking at is a wood frame wall with a brick veneer. This is a popular and smart construction method that gives you the best of both worlds: the structural integrity of a wood-framed house and the timeless, durable finish of brick. It’s a common approach in modern home building, combining classic aesthetics with contemporary construction techniques. Understanding how these two components work together is key to appreciating the strength and beauty of your home’s exterior.

Breaking Down Wood Frame Construction

At the heart of this wall system is the wood frame. Think of it as the skeleton of your house. This sturdy framework, typically built with lumber like 2x4s or 2x6s, is what actually supports the weight of the roof, floors, and everything else. The brick you see on the outside is just a covering; it doesn’t hold up the house—the wood frame does all the heavy lifting. This is a time-tested and reliable method for building homes. The structural frame is what gives the house its shape and strength, making it a critical component of any home remodeling project that involves exterior walls.

How Brick Veneer Complements a Wood Frame

The brick veneer is a single layer of full-sized bricks installed on the exterior of the wood frame. It acts as a protective and decorative skin for your home. This method gives you that classic, beautiful brick look that holds up incredibly well in different weather conditions and doesn’t require painting. Because it’s just one layer of brick, it’s much lighter than a traditional solid brick structure, which can reduce foundation costs. Our expert masonry services ensure this veneer is installed perfectly, providing a durable shield that protects the underlying wood structure from rain, wind, and sun.

Structure vs. Style: What’s Doing the Work?

It’s helpful to think of the roles as structure versus style. The wood frame is all about structure, providing the essential support for the entire building. The brick veneer, on the other hand, is primarily about style and protection. In modern building, brick is almost always used as a thin outer layer over a main structure like wood or steel. It’s not the main support for the building. This separation of duties is what makes the system so effective. You get the robust, reliable support of wood framing combined with the aesthetic appeal and weather-resistant qualities of a beautiful brick exterior, creating a home that is both strong and stunning.

The Benefits of Brick Veneer on Wood Frame Walls

Choosing an exterior for your home is a big decision, and brick veneer over a wood frame offers a fantastic combination of classic style and modern performance. It’s more than just a pretty face for your house; this construction method brings some serious advantages in terms of strength, value, and even your monthly energy bills. If you’re looking for a finish that will stand the test of time and keep your home comfortable and valuable, brick veneer is an excellent choice. Let’s walk through exactly what makes it such a smart investment for Long Island homeowners.

Durability and Weather Resistance

One of the biggest draws of brick veneer is its incredible resilience. It gives your home a timeless look that doesn’t need painting and holds up beautifully against Long Island’s varied weather, from humid summers to icy winters. The brick acts as a durable, protective shield for the wood structure underneath, defending it from rain, wind, and snow. This outer layer is also resistant to pests and fire, adding an extra layer of security. Because it’s so tough, brick veneer is also wonderfully low-maintenance, freeing you from the cycle of scraping and repainting that comes with other siding materials. Our expert masonry services ensure your veneer is installed to last a lifetime.

Improve Your Home’s Curb Appeal and Value

There’s no denying the powerful curb appeal of a brick home. It has a classic, substantial look that feels both elegant and welcoming. Opting for brick veneer allows you to achieve this high-end aesthetic and significantly increase your property’s value. Because the structural support comes from the wood frame, the walls are thinner than solid brick, which can even save you a bit of interior space. For new construction or a major remodel, using brick as a decorative outer layer is a fantastic way to get superior performance and a great return on your investment. A beautiful exterior is one of the first things potential buyers notice, making it a key part of any home remodeling project.

How It Helps with Energy Efficiency

A brick veneer wall system can make your home more comfortable and reduce your energy costs. Modern walls built this way include special layers of insulation and are designed to prevent heat from easily escaping in the winter or creeping in during the summer. Brick has excellent thermal mass, meaning it absorbs and releases heat slowly. This helps stabilize your home’s internal temperature, so your heating and cooling systems don’t have to work as hard. The small air gap intentionally left between the brick veneer and the wood frame also acts as an extra insulating layer, further improving the wall’s overall energy performance and saving you money.

Get the Brick Look for Less

If you love the look of brick but are concerned about the cost, brick veneer is the perfect solution. It’s a popular and flexible way to get that traditional brick appearance while saving money compared to a solid brick structure. The primary reason for the cost difference is that veneer uses thin bricks instead of full-sized structural bricks, which requires less material and a less substantial foundation. This reduction in both materials and labor makes the project much more affordable. It’s a practical approach that puts the sophisticated look of brick within reach for more homeowners, allowing you to get a premium finish without the premium price tag. You can explore a wide range of beautiful, high-quality materials at the Gappsi Store.

How is Brick Veneer Installed?

Seeing brick veneer go up is a fascinating process, but it’s far from simple. It requires precision, an understanding of how different materials work together, and a plan to manage moisture and movement over time. While the wood frame of your house does the heavy lifting of holding everything up, the brick veneer is a beautiful, protective covering that needs to be installed correctly to ensure it looks great and lasts for decades. A professional installation handles every detail, from the foundation that holds the brick to the tiny gaps that keep it from cracking. Let’s walk through the key steps a professional team takes to get the job done right.

Preparing the Foundation

Before the first brick is laid, the project needs a solid base. Because brick veneer is a single layer of full-sized bricks, it has significant weight that needs to be supported. This support comes from a dedicated foundation or a reinforced concrete ledge at the base of the wall. This footing is what carries the entire weight of the brickwork. It’s completely separate from your home’s main foundation, ensuring that the veneer and the house can settle independently without causing structural issues. Getting this step right is non-negotiable for a stable and long-lasting finish that protects your home for years to come.

Key Materials and Attachment Systems

Securing the brick veneer to your home’s wood frame is one of the most critical parts of the installation. This isn’t done with mortar alone. Instead, professional installers use special metal ties. These ties are fastened to the wood studs of your home and embedded into the mortar joints of the brick wall as it’s built. This creates a secure connection that holds the veneer in place while still allowing for a small amount of independent movement. The type and spacing of these ties are crucial for a successful masonry project, ensuring the brick facade is safely anchored to the structure.

Keeping Moisture Out with Barriers and Drainage

One of the biggest priorities during installation is moisture management. To protect the wood frame from water damage, a water-resistive barrier is installed over the sheathing before any bricks go up. This is typically a material like building paper or a modern house wrap. This barrier acts as your home’s last line of defense against any moisture that might get behind the brick. Combined with a dedicated air gap and weep holes for drainage, this system ensures that your home stays dry and free from mold, mildew, and rot, which is essential for maintaining a healthy home environment.

Allowing for Natural Movement with Control Joints

All building materials expand and contract with changes in temperature and humidity, and brick and wood do so at different rates. To account for this, installers incorporate control joints into the brickwork. These are small, vertical gaps, often filled with a flexible sealant, that are strategically placed within the veneer. They allow the brick to move naturally without putting stress on the wall, which prevents cracking and other structural problems down the road. It’s a small detail that makes a huge difference in the longevity and durability of your brick veneer, ensuring it stays beautiful for a lifetime.

Installation Techniques for a Solid Structure

Brick veneer is more than just a pretty face for your home. The real magic happens behind the scenes, where specific installation techniques ensure your new brick exterior is stable, durable, and protects your home’s structure. It’s a carefully designed system that manages moisture and supports the weight of the bricks. Getting these details right from the start is the key to a long-lasting finish that won’t cause problems down the road. That’s why professional masonry construction is so important—it’s about building a wall system that performs as well as it looks.

Using the Right Ties and Attachments

Think of wall ties as the essential connectors that anchor the brick veneer to your home’s wood frame. These small but mighty metal pieces are embedded in the mortar between the bricks and fastened directly to the structural wall. Their job is to prevent the brick wall from pulling away from the house, ensuring everything stays secure against wind and other pressures. Using the correct type and number of ties is critical. For instance, attaching brick veneer to a wood frame requires different ties than attaching it to a concrete wall. The right attachments provide the necessary support to keep your veneer stable for years to come.

The Role of Weep Holes and Drainage

It might sound strange, but a brick wall is designed to breathe. Brick is naturally porous, meaning it can absorb moisture. Instead of trying to seal it completely, a properly installed veneer system provides a way for that water to escape. This is where weep holes come in. These small gaps, intentionally left in the mortar at the bottom of the wall, act as drains. Any water that gets behind the brick trickles down and out through these openings. This simple feature is your home’s best defense against trapped moisture, which could otherwise lead to mold, rot, and damage to the wood frame.

Ensuring Proper Airflow and Ventilation

To help the drainage system work effectively, a small air gap is left between the brick veneer and the wood frame wall. This space, typically about one to two inches wide, is a crucial part of the design. It creates a drainage plane that allows water to run down freely to the weep holes and lets air circulate behind the brick. This ventilation helps dry out any residual moisture, protecting the integrity of your home’s underlying structure. Without this gap, moisture could get trapped against the wood sheathing, leading to serious issues. It’s this combination of an air gap and weep holes that makes the entire system work.

Insulating Your Brick Veneer Walls

Proper insulation is key to a comfortable, energy-efficient home, and with brick veneer, it’s crucial for protecting your home’s structure. It’s not just about stuffing insulation into a wall; it’s about creating a complete system that manages heat and moisture correctly. As part of any quality home remodeling project, getting these details right is what makes all the difference. Let’s look at the three most important factors for insulating your brick veneer walls.

Where to Place Insulation for Best Results

The most common spot for insulation is between the wood studs of your home’s frame. This is where you’ll typically see batt insulation installed. It does a great job of resisting heat transfer, but it’s important to know that the wood studs themselves can act as “thermal bridges.” This just means that heat and cold can travel through the wood more easily than through the insulation, slightly reducing its overall effectiveness. For this reason, ensuring a snug fit without compressing the insulation is key. A professional installation makes sure every gap is filled correctly, giving you the best possible thermal performance from your wall system.

The Importance of Air Space

It might seem strange, but one of the most important parts of your brick veneer wall is an empty space. A frame house with brick veneer is designed with a one- to two-inch air gap between the brick and the wood frame. This space is absolutely critical and should never be filled with insulation. It serves as a drainage plane, allowing any moisture that gets behind the brick to travel down and out through weep holes at the bottom. This gap also promotes airflow, which helps the entire wall assembly dry out. Proper masonry construction depends on this feature to prevent moisture damage, rot, and mold.

Installing a Vapor Barrier Correctly

While the air gap handles moisture from the outside, a vapor barrier is designed to manage moisture from the inside. Think of all the moisture generated in your home from cooking, showering, and even breathing. A vapor barrier is a special material that stops this water vapor from getting into your wall cavity, where it could condense and cause problems. For our climate in Long Island, the vapor barrier must be installed on the “warm-in-winter” side of the wall—right behind your interior drywall. This placement prevents warm, moist indoor air from hitting the cold outer wall sheathing and turning into condensation during the winter.

Managing Moisture: What to Watch For

Brick veneer looks fantastic, but its biggest challenge is moisture. Since it’s a cladding system with an air gap, water can sometimes find its way behind the brick. The goal is to ensure any moisture that gets in has a clear path to get out. Trapped water can lead to rot, mold, and structural issues with the wood frame. Paying attention to a few key areas will protect your home and keep your brick veneer looking great for years to come.

How to Prevent Water Intrusion

The first line of defense is preventing water from getting stuck behind the brick. This is where proper flashing comes in—a thin, waterproof material installed at the base of walls and above windows to direct water out. During construction, it’s common for mortar to fall into the air gap behind the brick, creating dams that block drainage. That’s why a complete system includes materials at the bottom of the wall cavity to keep this path clear. A professional masonry team knows how to install these components correctly to create a solid barrier against water intrusion.

Tips for Controlling Condensation

Water doesn’t just come from rain; it can also form as condensation inside your walls when warm, moist indoor air meets a cold surface. In a wood-frame wall, the studs can act as “thermal bridges,” transferring cold from the outside more easily than the insulated sections. This creates cold spots where condensation can form. The best way to manage this is with a continuous layer of insulation and a well-sealed air barrier. This combination helps keep the interior surfaces of your walls warm and dry. Getting these details right is a key part of any quality home remodeling project.

Maintaining Your Drainage System

Your wall’s drainage system is designed to let water escape. The most visible parts are the weep holes—small gaps in the mortar joints at the bottom of the brick wall. These little openings are essential for letting water out and allowing air to circulate, which helps everything dry. It’s important to make sure your weep holes are always open and clear, as they can get clogged with debris or soil from landscaping. A quick visual inspection a couple of times a year is all it takes to ensure your home’s drainage system is working as it should. If you notice any issues, it’s best to have them addressed promptly to prevent moisture buildup.

The Aesthetic Appeal of Brick Veneer

Beyond its structural benefits, brick veneer is a fantastic choice for its visual impact. It offers a unique combination of classic charm and modern versatility that can completely transform your home’s exterior. Whether you’re aiming for a cozy, traditional feel or a sleek, contemporary look, brick veneer provides the flexibility to bring your vision to life. It’s a finish that adds character, warmth, and a sense of permanence, making it a consistently popular choice for homeowners looking to enhance their curb appeal.

A Classic Look for Any Architectural Style

One of the biggest draws of brick veneer is its timeless quality. It gives a home a classic, elegant look that never goes out of style and holds up beautifully in different weather conditions without needing to be painted. This adaptability makes it a perfect match for nearly any architectural design, from a stately Colonial to a modern farmhouse. The rich, earthy tones of brick add a layer of warmth and sophistication that other siding materials often can’t replicate. Our expert masonry designers can help you select a style that complements your home’s existing features, creating a cohesive and polished look.

Exploring Your Color and Texture Options

Long gone are the days when “brick” meant one specific shade of red. Today, brick veneer is primarily used as a decorative outer layer, which opens up a world of creative possibilities. You can find options ranging from deep charcoals and soft grays to creamy whites and traditional reds, each available in various textures. Whether you prefer a smooth, uniform finish or a more rustic, tumbled appearance, there’s a brick veneer to suit your taste. This variety allows you to create a truly custom look, whether you’re covering your entire home or designing a stunning accent wall. We can even help you pair it with beautiful natural stone for a dynamic, mixed-material facade.

Enjoying a Low-Maintenance Finish

Brick veneer offers the beautiful aesthetic of solid brick without the demanding upkeep. Because the veneer is a single layer of brick that acts as a covering—while your home’s wood frame does the structural work—it’s incredibly durable and resilient. It resists fading from the sun, won’t dent like vinyl or aluminum siding, and never needs painting. A simple cleaning every now and then is usually all it takes to keep it looking its best. For homeowners who want a gorgeous exterior that stands the test of time with minimal effort, brick veneer is an ideal solution. And when it does need a refresh, our restoration and sealing services can bring it right back to its original beauty.

Your Guide to Brick Veneer Maintenance

Brick veneer gives you that timeless brick look without the structural weight, and one of its best features is that it’s relatively low-maintenance. But low-maintenance doesn’t mean no-maintenance. Taking a little time to inspect your brick veneer a few times a year can help you catch small issues before they turn into costly repairs. Think of it as a quick health checkup for your home’s exterior.

Regular maintenance is all about being proactive. You’re looking for signs of wear and tear from weather, moisture, and the natural settling of your home. A simple walk around your property is often all it takes to spot potential trouble. Keeping your brick veneer in top shape not only protects your home’s structure but also preserves its curb appeal and value. By knowing what to look for, you can ensure your home stays beautiful and secure for years to come.

What to Look for During Inspections

A couple of times a year, take a slow walk around your house and look closely at the brickwork. You’re searching for any changes, especially cracks in the bricks or mortar. While brick veneer isn’t holding your house up, cracks can be a red flag for issues with your home’s foundation. It’s best to fix cracks as soon as you spot them to prevent water from getting behind the veneer. Also, check for crumbling mortar, which can weaken the wall over time. Look for white, powdery stains on the brick, a sign of moisture called efflorescence. Finally, make sure the small weep holes at the base of the wall are clear of debris so moisture can escape properly.

Monitoring for Settling and Movement

As your home settles over time, the brick veneer can shift. Keep an eye out for any signs that the veneer is pulling away from the house, which might look like a widening gap near the roofline or around windows and doors. This is a serious issue that could mean the metal ties holding the veneer to the wood frame have failed. Another classic sign of settling is stair-step cracks that follow the mortar lines. While some minor settling is normal, significant movement requires immediate attention. If you notice these changes, it’s a clear signal that the veneer may need professional restoration and repair to ensure it remains safely attached to your home.

Knowing When to Call an Expert

It can be tough to tell a minor issue from a major problem, so a good rule of thumb is: when in doubt, call a professional. Because there are many challenges and a high risk if the job isn’t done right, it’s very important to hire experienced masonry contractors for any brick veneer project. You should definitely call for an expert opinion if you see large, expanding cracks, any sign of the veneer pulling away from the wall, or widespread moisture damage. A professional can assess the situation, determine the root cause, and recommend the right course of action. Investing in a professional inspection can save you a lot of headaches and protect the long-term integrity of your home.

Brick Veneer vs. Solid Brick: A Comparison

From the curb, brick veneer and solid brick can look nearly identical, but they are fundamentally different in how they are constructed and how they function. Think of it this way: one is a structural component of your home, while the other is a beautiful, protective skin. Understanding the key differences in structure, cost, and energy efficiency will help you make the best choice for your home improvement project. Choosing the right material is a big decision, and our masonry experts are always here to guide you through the process.

Comparing Structure and Support

The biggest distinction between these two options lies in their role in your home’s structure. Solid brick, also known as double brick, is a structural system. It uses two layers of brick that bear the weight of the house, making the walls themselves a core part of the building’s support.

Brick veneer, on the other hand, is a single layer of brick installed on the outside of a wood-frame wall. In this case, the brick is purely decorative and protective; it doesn’t hold up the house. The interior wood frame does all the heavy lifting. This modern approach gives you the timeless look of brick without relying on it for structural integrity.

Cost and Timeline Differences

When you’re planning a project, budget and timing are always top of mind. Building with solid brick is a more intensive process that requires more materials and specialized labor, which translates to higher costs—often significantly more than a wood frame with brick veneer.

Because brick veneer is an exterior finish rather than a structural element, it’s generally faster and more affordable to install. For most new construction and remodeling projects, using brick as a decorative outer layer over a structural wood frame is the more practical choice. It delivers that classic brick aesthetic and excellent performance without the higher price tag and extended timeline associated with solid masonry.

Which is More Energy Efficient?

It might seem like a thick, solid brick wall would be a great insulator, but that’s a common misconception. Brick itself doesn’t do a great job of preventing heat transfer. Modern homes with brick veneer are actually far more energy-efficient.

The wall cavity in a wood-frame structure is designed to hold high-performance insulation, and there’s an air gap left between the wood frame and the brick veneer. This combination creates a highly effective thermal barrier that keeps your home warmer in the winter and cooler in the summer. This is a key consideration in any home remodeling project, as it can lead to real savings on your energy bills over time.

The Lifespan of Brick Veneer Walls

One of the biggest draws of brick veneer is its staying power. When you invest in your home’s exterior, you want something that not only looks great but will also stand the test of time without demanding constant attention. Brick veneer delivers on that promise. It’s a tough, resilient material that holds up beautifully against the elements, but like any part of your home, it has a lifespan and will eventually show its age. Knowing what to expect and what to look for can help you keep your home looking its best for decades. Proper installation is the foundation for a long life, so starting with a team that understands the nuances of masonry is key to getting the most out of your investment.

How Long Can You Expect It to Last?

With professional installation and a little bit of care, a brick veneer wall can easily last between 50 and 100 years. Some well-maintained homes even have brick veneer that has lasted for over a century. Modern brick cladding systems are engineered to be even more durable, with many designed for a lifespan of 75 years or more. Of course, this depends heavily on the quality of the initial work and the specific conditions of your property. Here on Long Island, our homes face everything from humid summers to freezing winters, so ensuring your veneer is installed to handle those freeze-thaw cycles is crucial for its longevity. An expert installation ensures that all the components—from the ties to the drainage system—work together to protect your home.

Common Signs of Wear and Tear

Even the most durable materials need a check-up now and then. Over the years, you might notice a few common signs of aging on your brick veneer walls. Keep an eye out for cracked or spalling bricks, where the face of the brick flakes or peels off. This is often a sign that moisture has gotten trapped and frozen. You may also see the mortar joints between the bricks begin to crumble or recede. This is a normal part of the aging process, and repointing the mortar every 30 to 40 years can fix it right up. Another thing to watch for is efflorescence—a chalky white powder on the brick’s surface—which signals a moisture issue that needs addressing. Catching these things early can prevent small issues from becoming bigger problems, and a professional restoration can make your walls look new again.

Related Articles

Frequently Asked Questions

Is brick veneer actually real brick? Yes, it is. The term “veneer” simply describes how the brick is used—as a single, outer layer for siding rather than as the structural support for the house. You’re getting full-sized, genuine bricks that provide a beautiful and durable finish, not a thin, manufactured panel that only looks like brick. The home’s wood frame does the structural work, while the brick veneer acts as a protective and decorative skin.

If brick veneer isn’t holding my house up, is it still strong? Absolutely. While the brick veneer doesn’t bear the structural load of your home, it is incredibly tough and resilient. The veneer is securely fastened to the wood frame with strong metal ties, creating a solid connection that can withstand wind and weather. This system gives you a durable outer shield that resists damage, fire, and pests, ensuring your home is well-protected.

What are those small gaps or holes at the bottom of a brick wall for? Those are called weep holes, and they are a critical part of the wall’s design. Brick is porous, so some moisture can get behind it. Weep holes act as drains, giving that water a clear path to escape. They also allow air to circulate behind the brick, which helps the entire wall assembly dry out. It’s very important to make sure these openings are never clogged or sealed shut.

Can I add brick veneer to my existing home? Yes, adding brick veneer is a fantastic way to update your home’s exterior during a remodel. The process involves adding a new foundation or a reinforced ledge at the base of the wall to support the weight of the new brick. A professional team will then install the necessary moisture barriers and tie the new veneer securely to your home’s existing structure, completely transforming its curb appeal.

How do I know if my brick veneer needs professional repair? You should call an expert if you spot any major changes. Look for large cracks that are growing, especially ones that follow the mortar in a stair-step pattern. Other serious signs include any visible bulging in the wall or a noticeable gap forming between the brick and the rest of the house, particularly around windows or the roofline. While minor issues can be monitored, these signs point to potential problems that need a professional assessment.

Share this page:
A modern outdoor privacy wall with wood and greenery panels creating a secluded backyard patio.

5 Creative Privacy Wall Outdoor Ideas for Your Yard

A privacy wall is one of the most transformative elements you can add to your landscape. Think of it not as a barrier, but as a beautiful backdrop that defines your entire outdoor living area. It’s a blank canvas waiting for your personal touch. You can use it to showcase climbing plants, mount a soothing water feature, or display outdoor art. A thoughtfully designed privacy wall outdoor adds a crucial vertical element, turning a flat, open yard into a sophisticated space with the intimate feel of an outdoor room. Ahead, we’ll explore creative ideas and material combinations that turn a functional necessity into a stunning focal point for your Long Island home.

Key Takeaways

  • Define Your Goal First: Your main reason for the wall—whether it’s blocking noise, wind, or just a line of sight—should determine your material choice. A solid masonry wall is best for sound, while a decorative screen can provide simple visual separation.
  • Handle the Homework Beforehand: Avoid costly mistakes by doing three things first: get a professional survey to confirm property lines, check your local Long Island town codes for permit and height rules, and ensure the site is properly prepped for drainage and stability.
  • Think Beyond a Simple Barrier: A privacy wall is a major architectural element of your yard. Use it as an opportunity to add style and value by incorporating creative elements like a living wall, decorative panels, or mixed materials that complement your home’s aesthetic.

What’s an Outdoor Privacy Wall (And Why You’ll Want One)

Your backyard should be your personal retreat—a place to unwind after a long week, host a barbecue with friends, or just enjoy a quiet cup of coffee. But it’s hard to relax completely when you feel like you’re on display for the whole neighborhood. If you’ve ever wished for a bit more seclusion, an outdoor privacy wall might be exactly what you need.

So, what is it? An outdoor privacy wall is a freestanding structure designed to create a secluded, intimate space within your yard. Think of it as a more strategic and stylish version of a traditional fence. Instead of just marking a property line, its purpose is to shield a specific area, like a patio, pool, or outdoor kitchen, from prying eyes and unwanted noise. These walls can be crafted from a wide range of materials, from classic wood and modern metal to beautiful masonry work that adds architectural interest.

The real magic of a privacy wall is how it transforms your outdoor living experience. It’s not just about blocking your neighbor’s view; it’s about creating a sense of enclosure and comfort. A well-placed wall can turn an exposed patio into a cozy outdoor room, making it the perfect spot for family dinners or quiet evenings. It also adds a vertical element to your landscape design, serving as a stunning backdrop for plants, a water feature, or outdoor art. Essentially, it helps you get more use and enjoyment out of the space you already have.

A Guide to Privacy Wall Materials and Styles

Choosing the right material for your privacy wall is one of the most important decisions you’ll make. It sets the tone for your entire outdoor space, determining not just the look and feel but also how much time you’ll spend on upkeep. From the classic warmth of wood to the timeless strength of stone, each option has its own personality and practical benefits. Think about the style of your home, the Long Island climate, and the level of privacy you’re aiming for. Let’s walk through some of the most popular materials to help you find the perfect fit for your backyard retreat.

Wood Privacy Walls

Wood is a timeless choice for a reason. It offers a warm, natural look that can make any backyard feel more inviting and can be stained or painted to match your home’s aesthetic perfectly. Cedar is a fantastic option because its natural oils make it resistant to rot and insects, giving it a longer lifespan with proper care. While wood does require some maintenance—like sealing or staining every few years to protect it from the elements—its classic beauty is hard to beat. A well-built wood fence can create a truly private and organic-feeling sanctuary.

Metal and Aluminum Privacy Walls

If you’re leaning toward a more modern and sleek design, metal or aluminum could be the right choice. These materials offer a clean, contemporary look and are incredibly durable. Aluminum is especially great because it’s lightweight and won’t rust, making it a smart, low-maintenance option for our coastal climate. Metal panels can also be laser-cut into intricate, decorative patterns, turning your privacy wall into a stunning piece of art. They pair beautifully with modern pavilions and pergolas, creating a cohesive and sophisticated outdoor living area with minimal upkeep required.

Composite and Vinyl Privacy Walls

For homeowners who love the look of wood but not the maintenance, composite and vinyl are excellent alternatives. These engineered materials are designed to withstand the elements without warping, fading, or rotting. You’ll never have to worry about staining or painting, and cleaning is as simple as a quick spray with a hose. Composite and vinyl fencing comes in a wide variety of colors and textures that convincingly mimic real wood, giving you the best of both worlds: timeless style and modern convenience.

Natural Stone and Masonry Privacy Walls

For ultimate durability and a truly luxurious feel, nothing compares to natural stone or masonry. A stone wall provides superior privacy and sound reduction, creating a peaceful and secluded atmosphere. Materials like granite, fieldstone, or brick add a sense of permanence and elegance to your landscape that will last a lifetime. While the initial investment is higher, a beautifully constructed masonry wall is a lasting feature that adds significant value and character to your property. It’s a statement piece that is both functional and breathtakingly beautiful.

Fabric and Screen Privacy Walls

If you need a more flexible or budget-friendly solution, consider using outdoor fabric or decorative screens. These are perfect for sectioning off a patio, adding privacy to a pergola, or hiding an unsightly view without building a permanent structure. Modern outdoor fabrics are UV-resistant and designed to handle rain and wind. Screens come in materials like wood, composite, or metal and feature stylish patterns that can add a decorative touch. While they don’t offer the same security or soundproofing as a solid wall, they are a great way to define a space and add a pop of style.

More Than Just Privacy: The Benefits of an Outdoor Wall

When you hear “privacy wall,” your mind probably goes straight to blocking out nosy neighbors. And while that’s certainly a major perk, these structures offer so much more. Think of an outdoor wall as the foundation for creating a true extension of your home—a functional, beautiful, and peaceful retreat right in your own backyard. It’s about more than just seclusion; it’s about crafting an environment that feels safe, comfortable, and uniquely yours. From dampening street noise to serving as a stunning design feature, a well-planned privacy wall can completely transform how you experience your outdoor space.

Gain More Privacy and Security

Let’s start with the obvious: a privacy wall creates a secluded sanctuary. It gives you the freedom to enjoy your morning coffee, host a family barbecue, or lounge by the swimming pool without feeling like you’re on display. This sense of enclosure provides a powerful feeling of security, turning your yard into a safe haven for kids and pets to play freely. Whether you choose a solid stone wall or a classic wooden fence, you’re establishing a clear boundary that makes your property feel more personal and protected. It’s your space, and a privacy wall helps you claim it as a true personal oasis.

Block Out Noise and Wind

Life in Long Island can be bustling, and sometimes you need a quiet escape. A strategically placed privacy wall can act as an effective sound barrier, muffling the noise from nearby traffic, lawnmowers, or lively neighborhood gatherings. Solid structures built with masonry are particularly good at creating a more serene atmosphere. Beyond sound, a wall can also block persistent winds, making your patio or deck a much more pleasant place to relax, dine, or entertain. You’ll find yourself able to enjoy a calm conversation or a meal outdoors without everything blowing away.

Add Style and Value to Your Home

A privacy wall is far more than just a functional barrier; it’s a powerful design element that can define the entire look of your backyard. Imagine a beautiful wall made from natural stone serving as a dramatic backdrop for your garden, or a sleek, modern screen adding architectural interest to your patio. The right materials and design can complement your home’s style and turn a plain yard into a sophisticated outdoor living area. This kind of thoughtful improvement doesn’t just enhance your daily enjoyment—it also adds real, tangible value to your property when it comes time to sell.

Create a Comfortable, Sheltered Space

One of the best things a privacy wall does is help define an “outdoor room.” It creates a sense of enclosure that makes a large, open yard feel cozier and more intimate. This structure can provide welcome shade during the hottest parts of the day or offer shelter from a cool breeze, extending the hours you can comfortably spend outside. When combined with other elements like a pergola or pavilion, a privacy wall helps create a truly comfortable and sheltered retreat. It’s the key to transforming a simple patio into a destination for relaxation and connection.

How to Choose the Right Privacy Wall for Your Yard

Picking the perfect privacy wall feels like a big decision, but it doesn’t have to be overwhelming. With a little bit of planning, you can find an option that not only gives you the seclusion you want but also beautifully complements your home and yard. It’s all about balancing aesthetics with practicality. Think about what you truly need from the space, what your long-term maintenance tolerance is, and what your budget looks like. By breaking it down into a few key steps, you can confidently choose a privacy wall that you’ll love for years to come. Let’s walk through exactly what you need to consider.

Measure Your Space and Plan the Layout

Before you fall in love with a specific material or style, grab a tape measure and head outside. Figure out the exact length and desired height of your future privacy wall. Think about its purpose. Are you trying to block the view from a neighbor’s second-story window, or are you creating a cozy, enclosed patio space? The function will dictate the dimensions. Sketching out a simple layout of your yard can help you visualize how the wall will interact with your existing landscape, patio, or swimming pool. This is also the perfect time to consider your overall landscape design and ensure your new wall feels like an intentional part of the plan, not an afterthought.

Weigh Durability Against Maintenance

Every material comes with its own set of pros and cons, especially when it comes to upkeep. A classic wood fence is beautiful but will require regular staining or sealing to protect it from the Long Island weather. On the other hand, materials like vinyl, composite, and metal are incredibly durable and require little more than an occasional wash. For a truly permanent and low-maintenance solution, consider a masonry or natural stone wall. While the upfront investment may be higher, its longevity and resistance to the elements are unmatched. Be honest with yourself about how much time you’re willing to spend on maintenance each year—it will help you narrow down your options quickly.

Define Your Goal and Set a Budget

What is the number one reason you want a privacy wall? If your main goal is simply to create a visual barrier, a simple fence or screen might be enough. If you’re also looking to block noise or wind, a solid, taller structure made of stone or thick composite panels will be more effective. Your primary goal will heavily influence the best material and design for the job. At the same time, it’s important to establish a realistic budget. Remember to account for not just the materials but also the cost of professional installation, which ensures the structure is safe, secure, and built to last.

Know Your Local Rules and HOA Guidelines

This step is one you absolutely can’t skip. Before you break ground, you need to understand the local regulations in your town or village here on Long Island. Most municipalities have specific rules about fence and wall height, how far they must be set back from property lines, and whether you need a permit for the project. If you live in a community with a Homeowners Association (HOA), they’ll likely have their own set of guidelines on approved materials and styles. A quick check of your local building department’s website or a call to your HOA can save you from major headaches and costly mistakes down the road.

Get Inspired: Creative Ideas for Your Privacy Wall

A privacy wall is so much more than a barrier—it’s a blank canvas. Think of it as the backdrop for your entire outdoor living space, an opportunity to add personality, texture, and style. Instead of settling for a purely functional screen, you can create a stunning focal point that ties your whole yard together. Whether your style is modern and sleek, rustic and natural, or something in between, there’s a creative solution that will feel like a true extension of your home.

The right design can transform a simple patio into a secluded courtyard or turn an exposed yard into a private sanctuary. You can play with different materials, incorporate natural elements, and even add features that delight the senses, like the gentle sound of trickling water. It’s about creating a destination within your own property—a place where you can host dinner parties without feeling watched, or simply enjoy a quiet morning coffee in peace. We’ve put together a few ideas to get your imagination going. These concepts move beyond the basic fence and show how a privacy wall can become one of the most beautiful features of your landscape design. Let these examples inspire you to think creatively about how you can define your space.

Go Green with a Living Wall

Why build a wall when you can grow one? A living wall, or vertical garden, is a beautiful way to get privacy while surrounding yourself with lush greenery. You can achieve this look by installing a sturdy trellis and training climbing vines like clematis or ivy to cover it. Another option is to mount a system of planters directly onto a wall, filling them with a mix of ferns, grasses, and colorful flowers. This approach not only provides a natural screen but also helps absorb sound and improve air quality. For a lower-maintenance option, high-quality synthetic turf panels can create a similar green effect with zero upkeep.

Add Charm with a Trellis and Climbing Plants

A trellis is a classic and elegant solution for creating partial privacy without completely blocking light and air. These simple lattice structures provide the perfect support for climbing plants, adding a touch of romance and natural beauty to your yard. Imagine a wall of fragrant jasmine or vibrant bougainvillea defining your outdoor dining area. A trellis can be a standalone feature or integrated into a larger structure like one of Gappsi’s custom pavilions and pergolas. It’s a versatile choice that works well in both small and large spaces, offering a sense of enclosure while maintaining an open, airy feel.

Make a Statement with Decorative Screens

For a more modern and artistic touch, consider using decorative screens. These panels are often made from laser-cut metal, composite materials, or even carved wood, and they come in a huge variety of patterns. You can find everything from geometric designs to nature-inspired motifs like leaves and branches. These screens are fantastic for creating visual interest and casting beautiful, intricate shadows as the sun moves across your yard. They function as both a privacy solution and a piece of outdoor art, instantly adding a sophisticated, custom feel to your space. You can even use panels made from durable porcelain and natural stone for a truly unique look.

Mix and Match Materials for a Custom Look

Who says you have to stick to just one material? Combining different textures and finishes is a great way to create a privacy wall that is completely unique to your home. Picture a low wall built from rugged, natural stone with sleek wooden slats or frosted glass panels on top. Or, try pairing industrial-style corrugated metal panels with sections of warm cedar for a balanced, contemporary look. This approach allows you to get creative and design a wall that perfectly complements your home’s architecture and your personal style. Gappsi’s masonry experts can help you combine materials for a durable and beautiful result.

Incorporate a Soothing Water Feature

Turn your privacy wall into a multi-sensory experience by building a water feature directly into it. A wall-mounted fountain or a cascading waterfall not only looks stunning but also provides a gentle, soothing sound that helps mask unwanted neighborhood noise. The sound of moving water creates a tranquil, spa-like atmosphere, making your backyard feel like a true escape. This is an especially effective strategy for smaller yards, as it combines two features into one, saving valuable space. It’s the perfect finishing touch for creating a peaceful outdoor oasis where you can relax and unwind.

Avoid These Common Privacy Wall Mistakes

Building a privacy wall is an exciting project, but a few common missteps can turn your dream backyard feature into a real headache. Planning ahead is the key to making sure your investment is beautiful, functional, and built to last. Think of it as setting the foundation for success—literally. By sidestepping these frequent errors, you can avoid neighbor disputes, costly repairs, and the frustration of a project that doesn’t meet your expectations. A little bit of prep work and careful consideration will ensure your new privacy wall is a source of enjoyment for years to come, not a reminder of what could have gone wrong. Let’s walk through the four biggest mistakes homeowners make so you can get your project started on the right foot.

Mistake #1: Guessing Your Property Lines

Before you break ground, you need to be absolutely certain where your property ends and your neighbor’s begins. Guessing your property lines is one of the quickest ways to create a dispute. Even if you’re off by a few inches, building on a neighbor’s land can lead to serious legal issues and may even force you to tear down your brand-new wall. The best way to avoid this is to get a professional land survey. It provides a clear, legally recognized map of your property boundaries, giving you and your installation team the exact lines to work within. It’s a small upfront cost that can save you from major trouble later.

Mistake #2: Skipping Permits and Codes

It might be tempting to jump right into building, but ignoring local regulations is a risk you don’t want to take. Every town and village on Long Island has its own set of building codes that dictate things like how tall your wall can be, how far it needs to be from your property line (known as a setback), and what materials are allowed. Failing to secure the right permits can result in hefty fines or an order to remove the structure entirely. Before you finalize any plans, make a call or visit your local municipal building department’s website to understand the specific rules for your area. It’s a crucial step for a smooth, compliant project.

Mistake #3: Picking the Wrong Material for Your Climate

Long Island’s weather can be tough on outdoor structures. Between the humid summers, freezing winters, and salty air near the coast, materials that aren’t up to the task can quickly warp, rot, crack, or rust. Choosing a material simply for its looks without considering its durability can lead to constant maintenance and early replacement. Instead, opt for materials designed to withstand our four-season climate. High-quality vinyl, composite, aluminum, and professionally installed masonry are excellent choices that offer longevity and require minimal upkeep, keeping your wall looking great no matter what the weather throws at it.

Mistake #4: Neglecting Site Prep and Placement

A beautiful, sturdy wall needs to be built on solid, well-prepared ground. Simply clearing away the grass and starting to build is a recipe for future problems. Proper site preparation involves leveling the area, compacting the soil, and, most importantly, planning for proper water drainage. If water can’t flow away from the base of your wall, it can cause soil erosion, lead to frost heave in the winter, and ultimately compromise the structure’s stability. A leaning or sinking wall is often the result of a poorly prepared site. Taking the time to do this work correctly ensures your privacy wall will stand straight and strong for decades.

DIY vs. Pro: Who Should Install Your Privacy Wall?

So, you’ve picked out the perfect style and material for your new privacy wall. Now comes the big question: should you roll up your sleeves and build it yourself, or is it time to call in a professional? The answer really depends on the scale of your project, your comfort level with construction, and how much time you’re willing to invest.

A simple, freestanding screen might be a fun weekend project, but a permanent, structural wall made of stone or composite materials is a different story. It’s important to be honest about your skills and the tools you have on hand. While DIY can save you money on labor, a poorly executed installation can lead to costly repairs, safety issues, and a final product that doesn’t look quite right. On the other hand, hiring a professional ensures the job is done correctly, efficiently, and up to local code, giving you peace of mind and a beautiful, lasting result.

The Case for a DIY Installation

If you’re handy and love a good project, a DIY installation can be incredibly rewarding. Building your own outdoor privacy screen is a great way to customize your space while saving on labor costs. For smaller, simpler designs like a basic wooden lattice or a screen made from a kit, doing it yourself is often a practical choice. You get full control over the creative process and the satisfaction of seeing your vision come to life. There are countless tutorials and ideas online that can guide you through building everything from a simple panel to a more intricate design, making it an accessible option for those with the right tools and a bit of patience.

Why You Might Need a Professional

While DIY has its perks, some jobs are best left to the experts. A professional installation is about more than just convenience; it’s about expertise. Professionals understand the nuances of working with different materials, ensuring your wall is not only beautiful but also structurally sound and built to withstand Long Island weather. They can accurately survey your property lines to avoid any disputes with neighbors and handle complex site preparations, like leveling uneven ground. For projects involving heavy materials or intricate designs, a company that specializes in fences and netting will have the right equipment and experience to get the job done safely and efficiently, delivering a polished, high-quality finish.

A Quick Note on Permits and Requirements

Before you break ground, it’s crucial to understand your local regulations. Many towns in Nassau and Suffolk County have specific rules about the height, location, and materials you can use for fences and privacy walls. Ignoring these local codes or your HOA guidelines can result in fines or being forced to tear down your hard work. This is another area where a professional shines. An experienced contractor will be familiar with local requirements and can manage the entire permitting process for you. They can also help you create a realistic budget that accounts for all materials and labor, preventing unexpected costs from derailing your project.

How Much Do Outdoor Privacy Walls Cost?

Let’s talk about the numbers. The cost of an outdoor privacy wall can vary quite a bit, and it really comes down to three main things: the materials you choose, the size and complexity of the project, and the cost of professional labor. While it’s tempting to look for a single price tag, it’s more helpful to think of it as a flexible budget that you can shape based on your priorities. A simple, straight wall made from budget-friendly vinyl will cost significantly less than a custom-designed masonry wall with built-in planters, for example.

The key is to understand where your money is going so you can allocate your funds effectively. A larger portion of your budget will naturally go toward high-end materials like natural stone, while labor costs might be higher for intricate designs or difficult-to-access installation sites on your property. Thinking through these variables ahead of time helps you set realistic expectations. By breaking down the expenses, you can make informed decisions that align with both your vision and your wallet, ensuring you get a beautiful privacy wall without any financial surprises along the way. We’ll explore each of these cost factors so you can plan your project with confidence.

Breaking Down Material Costs

The material you select is the biggest factor in your project’s total cost. Each option comes with a different price point and aesthetic. For instance, natural wood offers a classic, warm look but can range from affordable pine to premium cedar. Sleek metal panels provide a modern, industrial feel, while versatile composite and vinyl fencing can mimic the look of wood or stone without the high maintenance. For a truly timeless and durable structure, natural stone and porcelain pavers create a substantial, high-end wall that becomes a permanent feature of your landscape. When choosing, consider materials that can stand up to Long Island’s weather, as durability is just as important as appearance.

Factoring in Labor and Installation

Beyond the cost of the panels or stones themselves, you need to account for professional installation. Labor costs cover everything from site preparation—like leveling the ground and digging post holes—to the actual construction of the wall. This is also where professional expertise becomes invaluable. A skilled team will know your local building codes and secure any necessary permits, avoiding costly mistakes down the road. They will also ensure your wall is built on your property—not your neighbor’s. The complexity of the design, the accessibility of your yard, and the overall size of the wall will all influence the final labor cost. Investing in a quality masonry and construction company ensures the job is done right the first time.

Thinking About Long-Term Value

When you’re setting a budget, it’s smart to think beyond the initial price tag. Some materials might be cheaper upfront but require more maintenance over time, leading to higher long-term costs. For example, untreated wood may need regular staining and sealing to prevent rot, while vinyl is waterproof and requires little more than an occasional wash. Materials like natural stone or high-quality composite are a bigger initial investment but often outlast other options with minimal upkeep. They resist weathering and retain their beauty for years, adding lasting value to your home. By choosing durable, low-maintenance materials, you’re not just buying a privacy wall; you’re making a smart investment in your property’s future.

Keeping Your Privacy Wall Looking Great: A Maintenance Guide

Your new privacy wall is more than just a structure; it’s a key part of your outdoor sanctuary. To keep it looking its best and standing strong for years, a little routine care goes a long way. The maintenance your wall needs will depend entirely on the material you chose, but don’t worry—it’s usually simpler than you think. A bit of seasonal attention can prevent small issues from becoming bigger problems, ensuring your investment continues to add beauty, privacy, and value to your home for years of enjoyment.

Think of it like any other part of your home’s exterior. Regular cleaning and inspections will preserve its integrity and appearance, protecting it from Long Island’s changing seasons. For many materials, this might just mean a quick rinse with a hose to wash away pollen and dirt. For others, a fresh coat of sealant every few years can make all the difference in shielding it from moisture and sun. If you ever spot something that needs a professional touch, like stubborn stains or cracked mortar, Gappsi offers expert restoration and sealing services to bring your surfaces back to life. Taking these small steps ensures your private retreat remains a beautiful and functional space for relaxing and entertaining.

Caring for Wood Walls

The natural warmth of a wood wall is hard to beat, and with the right care, it can last for decades. Woods like cedar are fantastic choices because they contain natural oils that make them resistant to rot and insects. To maintain that beautiful finish, plan on giving your wall a gentle cleaning once a year with mild soap and water to remove any dirt or mildew. Every few years, applying a fresh coat of stain or sealant will protect the wood from sun and moisture damage, preventing it from turning gray and splintering. A quick walk-around each season to check for loose boards or signs of wear will help you catch any issues early.

Maintaining Metal and Composite Screens

If you chose a metal or composite wall, you’re in luck—these materials are champions of low-maintenance living. Because materials like aluminum, vinyl, and PVC are designed to resist weather, rot, and pests, you can spend less time on upkeep and more time enjoying your yard. For the most part, a simple spray-down with a garden hose is all you need to wash away dust and pollen. If you notice any stubborn spots, a soft brush and some soapy water will do the trick. There’s no need for painting or sealing, making these fencing options a perfect “set it and forget it” solution for a busy homeowner.

Upkeeping Stone and Masonry

Stone and masonry walls are built to last a lifetime, offering a timeless look with incredible durability. Their maintenance is minimal and mainly involves keeping them clean. An occasional rinse with water can prevent moss or algae from growing, especially in damp or shady spots. Once a year, it’s a good idea to inspect the mortar joints between stones or bricks for any cracks. Addressing these small gaps promptly—a process called repointing—prevents water from getting in and causing damage over time. For added protection, consider having your wall professionally sealed to guard against stains and weathering, ensuring your masonry work remains a stunning feature of your landscape.

Ready to Build? Here’s How to Find the Right Partner

Choosing to add a privacy wall is exciting, but finding the right team to build it can feel like a huge task. The right partner won’t just build a wall; they’ll help you refine your vision, choose the best materials for our Long Island climate, and handle all the tricky details you might not have considered. A great contractor acts as your guide, ensuring the final result is exactly what you dreamed of—or even better.

Bringing a construction project to life involves more than just hammers and nails. It requires a deep understanding of local codes, a keen eye for design, and a commitment to quality craftsmanship. This is especially true for a structure that will become a permanent feature of your home and landscape. To make sure your project is a success from start to finish, it’s important to do a little homework upfront. By focusing on a contractor’s reputation, understanding what a professional installation truly involves, and asking smart questions before signing a contract, you can move forward with confidence. Let’s walk through how to find a reliable partner who will respect your home, your budget, and your timeline.

How to Find a Reputable Contractor

When you start looking for a contractor, begin with the people you trust. Ask friends, family, or neighbors for recommendations, especially if you admire their outdoor spaces. From there, head online to check reviews and look for a company with a strong portfolio of completed projects. A reputable contractor will be proud to showcase their masonry and construction work and should be happy to provide references from past clients. They should also be a source of expertise, offering guidance on which materials will best suit your needs and stand up to the local weather.

What a Professional Installation Should Include

A professional installation is seamless, safe, and built to last. One of the first things a true pro will do is confirm your property lines to ensure the wall is built exactly where it should be, avoiding any potential issues with your neighbors. They will also manage all the local regulations and permits for you. Every town in Nassau and Suffolk County has its own set of rules, and an experienced local contractor will know exactly what’s required. This expertise protects you from legal headaches and ensures your new privacy wall is fully compliant with all building codes.

Key Questions to Ask Before You Hire

Before you commit, it’s smart to have a conversation with any potential contractor to make sure they’re the right fit. Think of it as an interview. Start by discussing your budget and timeline to make sure you’re on the same page. Ask about their process for taking measurements and creating the design plan to prevent any surprises. It’s also a good idea to ask who will be the main point of contact on-site and what kind of warranty they offer on their work. A trustworthy home remodeling partner will be transparent and happy to answer all your questions.

Related Articles

Frequently Asked Questions

Is a privacy wall different from a regular fence? Yes, they serve slightly different purposes. Think of a traditional fence as a tool for marking your entire property line. A privacy wall, on the other hand, is more strategic. It’s designed to create a secluded, room-like feel for a specific area, like your patio, outdoor kitchen, or pool deck, shielding it from view and turning it into a more intimate space.

What material is best for the weather here on Long Island? While classic wood is beautiful, it does require regular upkeep to handle our coastal climate. For a more hands-off approach, materials like high-quality composite, vinyl, and aluminum are fantastic choices because they are built to resist moisture, salt air, and seasonal changes without warping or rotting. For ultimate durability and a timeless look, nothing beats a professionally installed natural stone or masonry wall.

How tall can I legally build my privacy wall? This is a great question, and the answer varies from town to town across Nassau and Suffolk counties. Most municipalities have specific height restrictions and rules about how far the structure must be from your property line. This is one of the most important reasons to work with an experienced local contractor who understands the specific codes in your area and can manage the permitting process for you.

Can a privacy wall be added to an existing patio or pool area? Absolutely. A privacy wall is one of the best ways to improve an existing outdoor space. A skilled design and construction team can create a wall that integrates perfectly with your current patio, deck, or pool surround. They can match materials and styles so the new wall looks like a natural, intentional part of your original landscape design.

How long does the installation process typically take? The timeline really depends on the size of the wall and the materials you choose. A straightforward installation of a few composite or vinyl panels might only take a couple of days. A more complex project, like a custom masonry wall, will take longer because it involves more extensive site preparation, foundation work, and detailed construction. During a consultation, a professional can give you a much more precise timeline based on your specific project.

Share this page: