Gunite Pool and Backyard Renovation in Upper Brookville, NY

View Gappsi’s YouTube Channel to view Gunite Pool and Backyard Renovation in Upper Brookville, NY

A backyard renovation is more than a construction project.  It is a complete transformation of how a home is experienced and enjoyed. View our recently completed gunite pool and backyard renovation in Upper Brookville, NY.  It is a prime example of how thoughtful design, premium materials, and expert craftsmanship can turn an outdated outdoor space into a cohesive luxury retreat. This project represents the latest backyard renovation completed by Gappsi.  It showcases the level of detail and customization that defines our work.

Starting Fresh: Removing the Old Patio

The renovation began with a clean slate. The existing backyard featured an old clay brick patio that had reached the end of its functional and aesthetic lifespan. To ensure a long-lasting and visually unified result, the entire patio area was removed. This enabled proper base preparation and allowed us to redesign the layout to suit better the homeowner’s lifestyle and the property’s scale.

By stripping the space down to its foundation, we were able to reimagine the backyard.  It is a valid extension of the home, seamlessly blending entertainment, relaxation, and architectural elegance.

Expansive Marble Patio with G040 Pavers

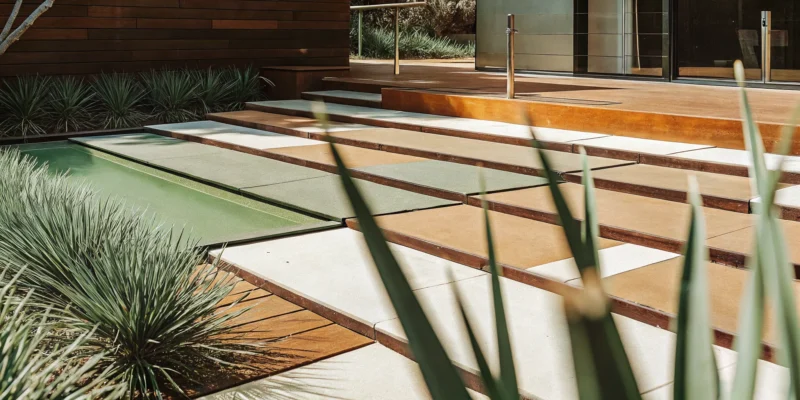
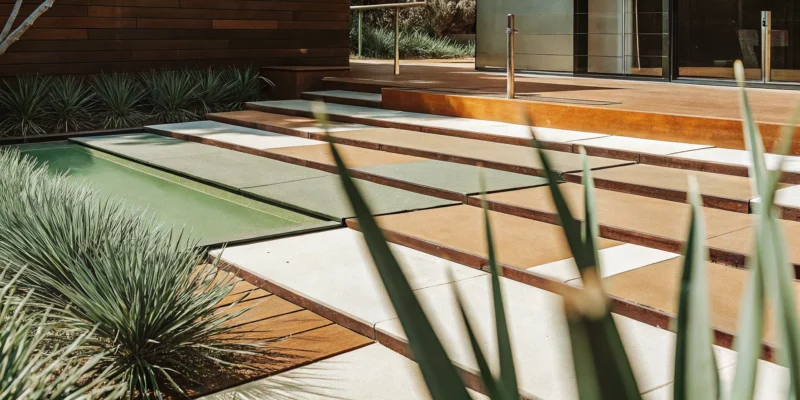
One of the most striking elements of this renovation is the expansive patio paved entirely with G040 marble pavers. This is a large-scale patio, and the choice of G040 marble was intentional. Known for its durability, refined texture, and light, elegant tone, G040 marble provides a timeless look while remaining cool underfoot, an essential feature for poolside areas.

The consistent use of G040 marble across the central pool patio creates a clean, uninterrupted visual flow.  It enhances the sense of openness in the yard. Precision installation ensured uniform joints and proper drainage, both critical to longevity and performance.

In addition to the central patio, we constructed a new stoop at the backyard sliding door. This transition point was designed to integrate seamlessly with the surrounding marble pavers, enhancing accessibility and visual continuity between the home and the outdoor living space.

Gunite Pool and Backyard Renovation in Upper Brookville, NY

Complete Gunite Pool Renovation

The existing gunite pool underwent a full renovation, beginning with a complete plumbing overhaul. All new pool equipment was installed to improve efficiency, performance, and reliability. Updating the plumbing and equipment ensures the pool operates at modern standards while reducing maintenance concerns for the homeowner.

Visually, the pool received a significant upgrade as well. New porcelain tiles were installed along the waterline, providing a crisp, clean contrast against the water’s surface. Porcelain was selected for its durability, resistance to staining, and refined appearance.

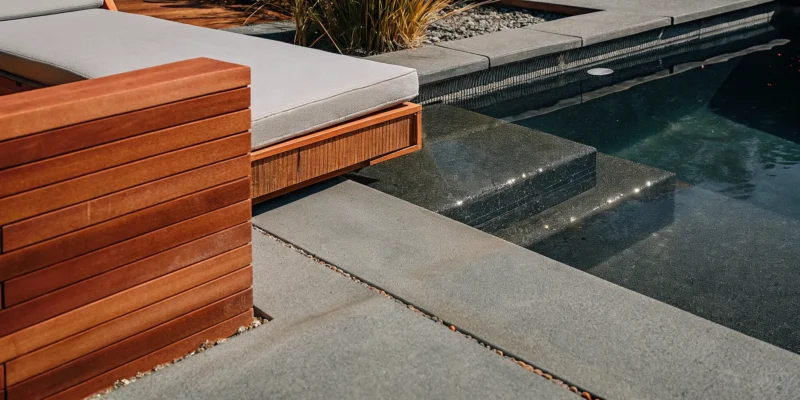
The pool coping was replaced with new marble coping, tying the pool seamlessly into the surrounding G040 marble patio. This creates a unified look that feels intentional and polished from every angle.

To complete the pool renovation, the interior was refinished with Diamond Brite Super Blue. This finish enhances water clarity and color, giving the pool a vibrant, inviting appearance. Tile markers were also installed on the pool steps, adding both a safety feature and a subtle design detail that improves visibility.

Pavilion Patio with Distinct Marble Transition

One of the standout design choices in this project is the transition from the pool patio to the pavilion patio. Rather than continuing the same stone throughout, we introduced a completely different marble color, G034 marble, to define the pavilion area as its own destination within the backyard.

This thoughtful change in material creates visual interest while still maintaining harmony with the overall design. The transition between G040 and G034 marble was carefully executed to ensure a smooth, elegant shift that feels natural rather than abrupt.

Custom 16×36 Country Lane Pavilion

Anchoring the pavilion patio is a custom-built 16×36 Country Lane Pavilion featuring substantial 8-inch columns. The pavilion serves as a focal point of the backyard and provides a shaded, weather-protected area for entertaining and dining.

Inside, the pavilion was left in bare wood, stained a rich mahogany color. This finish adds warmth and contrast to the surrounding stone, complementing the natural materials used throughout the space. The exposed wood ceiling enhances the pavilion’s architectural presence while maintaining a relaxed, inviting atmosphere.

Outdoor Kitchen and Cooking Island

Designed for serious outdoor entertaining, the custom cooking island is both functional and visually striking. The countertop is finished in black leather-finished granite, offering a textured, matte surface that resists fingerprints and glare while delivering a bold, modern look.

The base of the island is clad in a 4-inch silver travertine veneer, adding depth and natural variation that complements the marble patios. The kitchen is fully outfitted with premium Twin Eagles appliances and an Alpha oven, making it suitable for everything from casual family meals to large gatherings.

This outdoor kitchen transforms the pavilion into a true culinary hub, allowing homeowners to cook, serve, and entertain without ever leaving the backyard.

Fire Pit and Seating Wall

To complete the outdoor living experience, we constructed a custom fire pit featuring a Breeo smokeless insert. Known for its efficient burn and reduced smoke output, the Breeo fire pit enhances comfort and usability, even during extended gatherings.

Surrounding the fire pit is a built-in seating wall, designed to encourage conversation and provide ample seating without cluttering the space. This area serves as a natural gathering point, perfect for evenings spent outdoors in any season.

A Complete Backyard Transformation

This gunite pool and backyard renovation in Upper Brookville, NY, is a testament to what is possible when design, materials, and craftsmanship come together seamlessly. From the expansive marble patios and fully renovated pool to the custom pavilion, outdoor kitchen, and fire pit, every detail was thoughtfully planned and expertly executed.

This is the latest backyard renovation completed by Gappsi in Upper Brookville.  This project reflects our commitment to creating outdoor environments that are not only beautiful but also functional, durable, and tailored to how our clients live and entertain. The result is a backyard that feels cohesive, luxurious, and built to be enjoyed for years to come.

Contact Gappsi Today

📍 Serving all of Long Island, NY — Nassau & Suffolk Counties
🌐 www.gappsi.com
📞 Call now for a free consultation and estimate!

SCHEDULE A MEETING TODAY WITH GAPPSI

Share this page:
Best outdoor kitchen cabinets by Serene in sleek, weatherproof aluminum.

Serene Cabinetry: An Honest Review for Homeowners

After decades designing premier outdoor living spaces across Long Island, we’ve seen what works and what doesn’t. A common failure point? The cabinetry. We’ve watched beautiful materials fade, warp, or rust after just a few seasons. Your outdoor kitchen should be a joy, not a constant project. That’s why our experience points to one clear winner: Serene cabinetry. These serene outdoor cabinets are unmatched in performance. With welded tube frames and a coastal powder coating, their rust-proof guarantee means you get a beautiful, low-maintenance kitchen that truly lasts.

Key Takeaways

  • Engineered for Long Island Weather: Serene cabinets feature a welded aluminum frame and a coastal powder coating, making them completely rust-proof and ready to handle salt air and humidity with almost no maintenance.
  • Design a Kitchen That’s Uniquely Yours: You can personalize every detail, from colors and door styles to custom sizes, ensuring a perfect fit for your appliances and a seamless look that complements your home.
  • Invest in Enjoyment, Not Upkeep: Because these cabinets are so durable and easy to clean, you’ll spend less time on maintenance and more time using your beautiful outdoor kitchen, which adds lasting value to your home.

Is Serene Cabinetry Right for Your Outdoor Kitchen?

When you’re designing an outdoor kitchen, you need cabinets that can handle more than just plates and tongs—they need to withstand everything Long Island weather throws at them. That’s where Serene Aluminum Cabinets truly shine. They combine incredible durability with the sophisticated style you want for your backyard oasis, making them a top choice for any outdoor living space.

What sets Serene apart is its commitment to quality construction. Each cabinet is built on a 1-inch by 1-inch welded tube frame, making it exceptionally strong and stable. This sturdy foundation is then protected with a special coastal powder coating, a finish specifically designed to resist the salty air, humidity, and temperature swings we experience here. This means you get cabinets that are guaranteed not to rust and require very little maintenance. You can spend your time enjoying your patio, not worrying about upkeep.

But durability doesn’t mean you have to sacrifice style. Serene offers a fantastic range of customization options, from sleek, modern door styles to classic designs and even realistic wood grain finishes. You can create a look that perfectly matches your home’s aesthetic. Plus, these cabinets are engineered to provide a perfect, seamless fit for virtually any outdoor appliance, whether it’s a grill, side burner, or refrigerator. With a five-year limited warranty for peace of mind, choosing Serene means you’re investing in a beautiful, functional, and long-lasting outdoor kitchen you’ll love for years. You can explore different styles and finishes at the Gappsi Store to start imagining your perfect setup.

What’s the Secret Behind Serene Cabinetry’s Durability?

When you’re designing an outdoor kitchen, you need cabinetry that can handle more than just plates and spices—it needs to stand up to everything Long Island weather throws at it. Serene aluminum cabinets are engineered specifically for this challenge. They aren’t just indoor cabinets placed outside; they are built from the ground up with materials and construction methods that ensure they last. From their core structure to their final finish, every detail is designed for durability, performance, and style, giving you a beautiful and functional outdoor space for years to come.

How a Welded Frame Creates Unbeatable Strength

The foundation of any great cabinet is its frame, and this is where Serene truly excels. Each cabinet is constructed with a 1-inch by 1-inch welded tube frame. This isn’t the flimsy, screwed-together construction you might find elsewhere. A welded frame provides incredible strength and rigidity, ensuring your cabinets won’t warp or sag over time, even under the weight of heavy granite countertops and built-in grills. This robust structure is a key part of Gappsi’s high-quality masonry and outdoor kitchen projects, providing the solid backbone your investment deserves. It’s a commercial-grade build designed for a lifetime of backyard barbecues and family gatherings.

A Finish That Fights the Elements: Coastal Powder Coating

Living on Long Island means dealing with sun, salt, humidity, and snow. Serene cabinets are prepared for it all, thanks to a special “coastal powder coating.” This isn’t just a layer of paint; it’s a durable, baked-on finish that creates a protective barrier against the elements. The coating resists fading from UV rays, chipping from accidental bumps, and corrosion from salty air. This means your cabinets will maintain their color and finish season after season with minimal upkeep. It’s the same level of protection we recommend for all outdoor surfaces, similar to the importance of our restoration and sealing services for patios and stonework.

Say Goodbye to Rust, Guaranteed

One of the biggest concerns with any outdoor metal product is rust. With Serene cabinets, you can put that worry aside. They are made from aluminum and come with a guarantee against rust, offering you complete peace of mind. This commitment shows the manufacturer’s confidence in their materials and protective coating process. An outdoor kitchen is a significant investment, and this guarantee ensures your beautiful new cabinets won’t be compromised by rust or corrosion. When you shop at the Gappsi Store, you’ll find we only carry products with this level of reliability, ensuring your outdoor living space is built to last.

What “Made in the USA” Really Means for Your Cabinets

All Serene products are proudly made in the USA, and that makes a real difference in quality. American manufacturing standards mean greater attention to detail, higher-quality materials, and superior craftsmanship in every cabinet. By choosing Serene, you’re not only getting a top-tier product but also supporting local manufacturing. This commitment to quality is something we value deeply at Gappsi, whether we’re working on a full home remodeling project or installing a new outdoor kitchen. You can feel confident that your cabinets were built by skilled craftspeople who take pride in their work, resulting in a finished product that looks and performs exceptionally well.

How Serene Aluminum Stacks Up Against Other Materials

When you’re designing an outdoor kitchen, the material you choose for your cabinets is one of the most important decisions you’ll make. It’s the foundation of your space, and it needs to withstand everything Long Island weather throws at it—from humid, salty summer air to freezing winter temperatures. While materials like stainless steel, wood, and polymer are common choices, they each come with their own set of trade-offs that can lead to headaches down the road. You want something that not only looks great on day one but continues to perform year after year without demanding constant upkeep. After all, the goal is to spend more time enjoying your backyard, not maintaining it.

That’s where Serene’s aluminum cabinets really shine. Aluminum offers a unique combination of strength, weather resistance, and style that makes it perfectly suited for outdoor living. It solves many of the common problems associated with other materials, giving you a beautiful, functional kitchen that lasts. Let’s break down how aluminum compares to the other popular options so you can see why it’s such a smart choice for your home.

Aluminum or Stainless Steel: Which is Better?

Many people think of stainless steel as the go-to for outdoor appliances, and it’s definitely a strong material. However, when it comes to cabinetry, aluminum has some serious advantages. While stainless steel is tough, it’s not completely immune to rust, especially in the salty coastal air we get on Long Island. Certain grades are more resistant, but they come at a premium price. Aluminum, on the other hand, naturally forms a protective oxide layer that prevents corrosion, so you never have to worry about rust. Plus, aluminum is significantly lighter, which can make installation simpler. The biggest difference? Cost. Aluminum can be much more budget-friendly than stainless steel, giving you that premium, metallic look without the hefty price tag.

Why Choose Aluminum Over Traditional Wood?

There’s no denying the classic beauty of a wood kitchen, but that beauty comes at a high price in terms of maintenance. Wood requires regular sealing and staining to protect it from moisture, which can lead to rot, warping, and mildew. In an outdoor setting, it’s a constant battle against the elements. Serene’s powder-coated aluminum cabinets give you a durable, worry-free alternative. They won’t rot, warp, or attract pests. You can get a gorgeous, high-end finish without ever having to pick up a paintbrush or a sander, freeing you up to spend more time enjoying your beautiful outdoor space, perhaps under one of Gappsi’s custom pavilions or pergolas.

Weighing the Options: Aluminum vs. Polymer

Polymer (or HDPE) cabinets are often marketed as a low-maintenance option, but they have their weaknesses. Over time, exposure to direct sunlight can cause polymer to fade, turn brittle, and lose its original appeal. It’s also less resistant to heat, which can be a real concern for cabinets placed next to a hot grill. Aluminum is a far more durable long-term solution. The powder-coated finish is UV-stable, so the color stays true, and it won’t warp or degrade from sun exposure. It also provides the structural integrity and sleek, modern aesthetic that looks stunning paired with porcelain and natural stone countertops, giving your outdoor kitchen a truly premium feel that polymer just can’t match.

Make It Yours: Customizing Your Serene Cabinetry

One of the best parts of designing an outdoor kitchen is making it a true reflection of your style and how you love to entertain. This isn’t about picking a pre-packaged set from a big box store; it’s about creating a space that feels like a natural extension of your home. Serene cabinets are designed from the ground up to be completely customizable. You get to be the creative director, choosing the colors, finishes, and layout that work perfectly for your backyard and your family.

With Serene, you’re not just getting durable cabinets—you’re getting a custom-designed kitchen that fits your life. From the specific shade that complements your patio stone to the exact drawer configuration you need for your grilling tools, every detail is up to you. We work with you to translate your vision into a functional, beautiful outdoor kitchen that you’ll be excited to use for years to come. It’s your chance to build the space you’ve always imagined for hosting summer barbecues and quiet family dinners.

Defining Your Look with Doors and Hardware

The look of your cabinets sets the tone for your entire outdoor kitchen. Serene gives you a wide range of door styles to choose from, whether you prefer a sleek, modern look or something more traditional. You can select from different drawer setups to create the perfect combination of storage for your needs. The hardware—the handles and knobs—is like the jewelry of your kitchen, and choosing the right style adds that perfect finishing touch. This is your opportunity to match the cabinets to the architectural style of your home, ensuring your new outdoor space feels cohesive and thoughtfully designed from day one.

Finding the Right Color and Finish

This is where you can really let your personality shine. Serene offers a nearly endless spectrum of color options, so you’re not limited to a few standard choices. You can select a bold color to make a statement or a subtle neutral that blends with the natural surroundings. The finishes range from solid colors to beautiful woodgrains that offer the warmth of wood without the maintenance. You can even coordinate your cabinet color with your porcelain and natural stone pavers to create a seamless, professionally designed look. Whatever your vision, there’s a color and finish to bring it to life.

From Classic Neutrals to Custom Hues like “Gallant Blue”

Your outdoor kitchen should feel like an extension of your personal style, and color is a huge part of that. With Serene, you’re not confined to a handful of basic options. You can choose a soft, earthy neutral that blends beautifully with your landscaping or go for a vibrant, eye-catching color like “Gallant Blue” to create a stunning focal point. The possibilities are truly extensive, allowing you to create a space that feels custom-made for you. Imagine coordinating the exact shade of your cabinets with the veining in your countertops or the tones in your patio pavers. This level of detail is what transforms a nice outdoor kitchen into a professionally designed masterpiece. You can explore the full range of colors and finishes at the Gappsi Store to find the perfect hue for your home.

Getting a Perfect Fit for Your Space

No two backyards are the same, which is why custom sizing is so important. Serene designs and builds every outdoor kitchen to the exact specifications of your space, ensuring a perfect fit. Whether you have a compact patio or an expansive poolside area, the cabinets are tailored to maximize your layout. This bespoke approach means no awkward gaps or wasted space. Our design and construction experts will help you map out a plan that not only looks great but also improves the flow and functionality of your outdoor living area, making the most of every square inch.

Smart Storage for How You Really Cook

A great kitchen is one that works for you. Serene cabinets are designed to accommodate almost any outdoor kitchen appliance you can imagine. We create perfectly sized cutouts and enclosures for your grill, side burners, refrigerator, and even that pizza oven you’ve been dreaming of. Beyond appliances, you can customize the interior storage with pull-out trash bins, spice racks, and deep drawers for pots and pans. This level of planning ensures everything has its place, keeping your countertops clear and your cooking tools right where you need them. It’s all about creating an effortless cooking experience.

Real Homeowners Review Serene Outdoor Cabinets

When you’re making a big decision for your home, it helps to hear from people who have already been there. Homeowners who choose Serene Cabinets consistently talk about a few key things that made all the difference in their outdoor kitchen projects. From the solid build to the easy design process, their experiences highlight why these cabinets are a top choice for creating a beautiful and functional outdoor space. Here’s a look at what people are saying.

“The Craftsmanship is Unmatched”

When you talk to people who own Serene Cabinets, one thing comes up again and again: the quality. Homeowners rave about the exceptional craftsmanship and custom fit that make their outdoor kitchens feel truly high-end. They mention how tough the cabinets are, easily handling everything from coastal salt air to summer dust storms while keeping the interiors perfectly clean. This focus on creating a durable, custom product means you get cabinets that are not only beautiful but also built to handle real-life use for years to come.

“It Still Looks Brand New After Years Outside”

For those of us on Long Island, outdoor products have to be tough. Serene Cabinets are specifically designed to withstand the weather, which is a huge plus for homeowners. People report that the cabinets hold up beautifully in all conditions and require very little maintenance. A major benefit everyone points out is that they are guaranteed not to rust—a critical feature for any outdoor living space near the coast. This resilience gives you peace of mind, knowing your investment is protected from the elements season after season.

“The Whole Process Was So Easy”

The process of bringing an outdoor kitchen to life should be exciting, not stressful. Homeowners appreciate how straightforward and customer-focused Serene’s design process is. They love the personalized service, where every kitchen is designed and built specifically for their unique space. The company makes it simple: you work with their team to plan the layout, pick your colors and finishes, and select your appliances. Customers often mention the excellent communication they receive throughout the project, making the entire experience smooth and enjoyable from start to finish.

“Worth Every Penny”

Everyone wants to feel like they made a smart investment, and Serene homeowners certainly do. Because the company sells directly to customers, it cuts out the middleman, which helps keep costs reasonable without sacrificing quality. Many people feel they got a better product than they would have with other brands and that Serene truly exceeded their expectations. This combination of top-tier quality and fair pricing makes these cabinets a fantastic value for any home remodeling project, ensuring you get a dream kitchen that fits your budget.

Are Serene Aluminum Cabinets a Good Investment?

When you’re creating an outdoor living space, you want every element to be beautiful, functional, and built to last. Choosing the right cabinets is a huge part of that equation, and it’s a decision that impacts both the look and usability of your kitchen. Serene aluminum cabinets are a fantastic choice for Long Island homeowners, and it really comes down to a few key benefits. They offer a combination of durability, low maintenance, and style that makes them a smart addition to any backyard. An outdoor kitchen isn’t just a place to cook; it’s an extension of your home, and investing in quality components like Serene cabinets ensures you can enjoy it for years to come without worry.

Built to Handle Harsh Coastal Weather

Living on Long Island means dealing with salt air, humidity, and changing seasons, all of which can be tough on outdoor materials. Serene cabinets are engineered specifically for these conditions. Made from marine-grade aluminum with a durable powder-coated finish, they won’t rust, warp, or fade like wood or lesser-quality metals might. This means your outdoor kitchen will look just as good in five years as it does on day one. When we design an outdoor space, from masonry patios to poolscapes, we always choose materials that can handle our coastal climate, and Serene cabinets fit that standard perfectly.

Spend More Time Grilling, Less Time Cleaning

Let’s be honest: you want to spend your weekends enjoying your backyard, not scrubbing it down. The non-porous surface of Serene’s powder-coated aluminum cabinets makes cleanup incredibly simple. Spills, grease, and grime wipe away easily with just soap and water. Because they’re rust-proof and resistant to moisture, you don’t have to worry about the constant upkeep that wood cabinets require. This low-maintenance quality means more time for what matters—grilling, entertaining, and relaxing with family and friends. It’s the same principle we apply to our restoration and sealing services; protect your investment upfront so you can enjoy it with less work later.

Will It Increase Your Home’s Value?

An outdoor kitchen is one of the most sought-after features for homebuyers, and a well-built one can add significant value to your property. Investing in high-quality components like Serene cabinets ensures your outdoor kitchen is a true asset. Their sleek design, durable construction, and custom options create a premium look that elevates your entire backyard. Potential buyers see a beautiful, functional, and lasting space, which can make your home stand out. Think of it as part of a larger home remodeling project that pays you back in both enjoyment and resale value.

What Does the Serene Cabinetry Warranty Cover?

Making a significant purchase for your home can feel daunting, but a strong warranty provides valuable reassurance. Serene stands behind its products with a limited lifetime warranty, which speaks volumes about their confidence in the cabinets’ quality and durability. This protects your investment against defects and ensures that the centerpiece of your outdoor kitchen is built to last. When you work with Gappsi, we only recommend products from brands we trust. You can find top-tier options like Serene cabinets at the Gappsi Store, knowing you’re getting a product backed by a commitment to excellence.

Financing Options for Your Project

Investing in a beautiful, custom outdoor kitchen is one of the best upgrades you can make to your home, but we know it’s a significant project. The good news is you don’t have to pay for it all at once. There are many flexible financing options available that can help you bring your dream kitchen to life without straining your budget. From traditional bank loans to specialized financing designed for home renovations, there’s likely a path that fits your financial situation. Exploring these options can make a high-end project, like one featuring stunning Serene cabinets, much more accessible.

Many homeowners choose to use a home equity line of credit (HELOC), which allows you to borrow against the value you’ve built in your home, often at a lower interest rate. Personal loans are another straightforward choice. Some lenders even offer loans specifically for renovations that are based on your home’s future value after the project is complete. At Gappsi, we’re here to help you through every step, including understanding how to finance your home improvement project. We can help you explore the possibilities to find a solution that works for you.

How to Plan Your Serene Outdoor Cabinet Layout

A beautiful outdoor kitchen starts with a smart plan. Before you even think about colors or finishes, it’s crucial to consider how you’ll use the space. The right layout can make the difference between a kitchen that’s just for show and one that becomes the true heart of your backyard. Serene’s custom approach means you’re not limited by standard sizes or configurations. Instead, you can create a kitchen that’s perfectly tailored to your home, your family, and your love for outdoor cooking. Let’s walk through the key steps to designing a layout that’s both functional and stunning.

Step 1: Measure and Map Your Space

First, take a good look at your backyard. Where will the kitchen feel most natural? Consider the flow of traffic from your house to the patio and pool area. You’ll want to think about workflow, creating zones for prepping, cooking, and serving. Serene designs and builds every outdoor kitchen specifically for each customer, ensuring a perfect fit for your space. This means we can work with your unique footprint to create an efficient layout. The goal is to integrate your new kitchen seamlessly with your existing outdoor features, so it feels like it was always meant to be there. A great design considers everything from the view to the surrounding masonry and landscaping.

Step 2: Plan Storage for How You Cook

Think about how you cook and entertain. Are you a master griller who needs a dedicated spot for tongs, spices, and brushes? Do you host big parties and need plenty of space for platters and drinkware? Your storage should support your habits. With Serene, you can customize everything, from pull-out trash bins and deep drawers for pots to slim cabinets for cutting boards. Because you can specify custom sizes, you can design storage that fits your exact needs, ensuring everything has a place. This keeps your countertops clear and your cooking process smooth, letting you focus on your guests instead of searching for a misplaced tool.

Step 3: Place Your Grill and Appliances

It’s a good idea to choose your appliances before finalizing your cabinet design. Whether you’re dreaming of a high-end grill, a side burner for sauces, an outdoor fridge, or even a pizza oven, knowing their exact dimensions is key. Serene’s cabinets are made to fit almost any outdoor kitchen appliance perfectly, creating a clean, built-in look that elevates your entire space. Planning for appliances also means thinking about utility lines for gas, electricity, and water. Integrating your kitchen into a larger structure like one of Gappsi’s pavilions or pergolas can help conceal these lines while providing welcome shade for you and your guests.

The Gappsi Design and Installation Process

Our Simple 3-Step Design Process

Bringing your dream outdoor kitchen to life should be an exciting journey, not a complicated puzzle. At Gappsi, we’ve refined our process to be as simple and collaborative as possible. We break it down into three straightforward steps, guiding you through every decision from the initial layout to the final hardware. Our team works with you side-by-side, combining your vision with our expertise to create a space that’s not only beautiful but perfectly suited to your lifestyle. We handle all the details so you can focus on the fun part—imagining all the wonderful meals and memories you’ll create in your new kitchen.

Step 1: Design the Layout with Our Experts

The foundation of a great outdoor kitchen is a layout that just works. Our process begins with a deep dive into your space and how you envision using it. A Gappsi design expert will work with you to map out the area, considering everything from the flow of traffic to its connection with your patio or swimming pool. Because Serene builds every kitchen to order, we can create a custom footprint that maximizes your space for an efficient workflow. We’ll help you establish practical zones for prepping, cooking, and serving, ensuring your new kitchen feels like a natural and seamless extension of your home.

Step 2: Pick Colors, Finishes, and Hardware

This is where your personal style takes center stage. Serene offers a fantastic range of customization options, allowing you to create a look that perfectly matches your home’s aesthetic. You can choose from a wide spectrum of colors, sleek modern door styles, classic designs, and even realistic wood grain finishes that provide warmth without the maintenance. We’ll guide you through the samples and help you select a combination that complements your existing porcelain or natural stone surfaces. Finalizing the hardware adds that perfect finishing touch, ensuring every detail reflects your unique taste.

Step 3: Choose Your Appliances and Options

A truly functional kitchen is tailored to the way you cook. In this final step, we focus on integrating your chosen appliances and customizing your storage. Whether you have a specific grill in mind or want to include a refrigerator and side burner, we design the cabinets for a perfect, built-in fit. With Serene, you can also customize the interiors to fit your exact needs, incorporating features like pull-out trash bins, deep drawers for pots, or slim cabinets for cutting boards. This thoughtful planning ensures everything has its place, creating an organized and effortless cooking experience for every occasion.

How to Care for Your Serene Aluminum Cabinetry

One of the best things about Serene aluminum cabinets is how little work they require to stay beautiful. They’re designed to handle Long Island’s weather, from humid summers to salty sea breezes, without demanding constant attention. With just a bit of care and the right installation, your outdoor kitchen will remain a stunning, functional centerpiece of your backyard for years to come. Here’s how to make sure your cabinets always look their best.

Why Professional Installation Matters

While Serene cabinets are engineered for a straightforward setup, professional installation is the key to a flawless finish. An expert team ensures every cabinet is perfectly level, every door aligns just right, and the entire structure is securely integrated into your patio or deck. This precision prevents future issues and guarantees your outdoor kitchen not only looks great but also functions perfectly from day one. Our masonry and construction experts at Gappsi handle every detail, so you can be confident your investment is built on a solid foundation, ready for countless seasons of entertaining.

Your Easy Cleaning and Care Routine

Serene cabinets are built to be incredibly low-maintenance. Forget about the constant upkeep required by wood or other materials. To clean them, all you typically need is a soft cloth and a simple solution of mild soap and water. Gently wipe down the surfaces to remove any dust, pollen, or spills from your latest barbecue. It’s best to avoid harsh chemical cleaners or abrasive scrubbers, as they can damage the powder-coated finish. This simple routine is all it takes to keep your cabinets looking as new as the day they were installed.

Protecting Your Investment for the Long Haul

The long-term durability of Serene cabinets is where they truly shine. They are guaranteed not to rust and come with a five-year limited warranty, giving you complete peace of mind. The robust powder coating is designed to resist fading and chipping, so you won’t have to worry about repainting or resealing. By starting with a professional installation and following a simple cleaning routine, you’re setting your outdoor kitchen up for lasting success. It’s a smart choice that lets you spend less time on maintenance and more time enjoying your beautiful outdoor living space with family and friends.

Related Articles

Frequently Asked Questions

How do these aluminum cabinets handle the salty, humid air on Long Island? They are specifically engineered for our coastal climate. The cabinets are protected with a special coastal powder coating that acts as a barrier against moisture and salt, which is why they come with a guarantee not to rust. Unlike other materials that can corrode or degrade over time, these are built to last through our humid summers and harsh winters.

I love the look of wood, but not the upkeep. Can I get a similar style with Serene cabinets? Absolutely. Serene offers beautiful and realistic woodgrain finishes that give you the warmth and classic style of wood without any of the maintenance headaches. You get to skip the constant sealing and worry about rot or warping, while still achieving that natural aesthetic for your outdoor kitchen.

How much cleaning and maintenance do these cabinets actually need? They are incredibly low-maintenance, which is one of their biggest advantages. For most cleanups, all you need is a soft cloth with some mild soap and water to wipe away any spills or dust. There’s no need for special products or intensive scrubbing to keep them looking brand new.

Can these cabinets be designed to fit my specific grill and outdoor appliances? Yes, that’s a core part of the design process. Each kitchen is custom-built, so the cabinets are made to the exact dimensions of your appliances. This ensures a perfect, seamless fit for your grill, refrigerator, or side burner, giving your outdoor kitchen a clean and professional built-in look.

Why is professional installation so important for outdoor cabinets? Proper installation is key to the longevity and performance of your outdoor kitchen. A professional ensures that the cabinets are perfectly level, securely fastened, and properly aligned, which prevents issues with doors and drawers down the road. It guarantees your kitchen is built on a solid foundation, ready to withstand years of use and exposure to the elements.

How to Refresh Older Outdoor Cabinets

Even the most durable outdoor features can benefit from a little attention after years of hosting barbecues and weathering the seasons. The great news is that refreshing your Serene aluminum cabinets is a remarkably simple task. Unlike wood, which demands sanding and re-staining, or lower-quality metals that might need rust treatment, Serene cabinetry was designed for a lifetime of enjoyment with minimal fuss. Keeping them looking as good as new doesn’t require a weekend of hard labor—just a few easy steps to wipe away the years and restore their original shine, letting you get back to enjoying your beautiful outdoor kitchen.

Clean and Prep the Surface

The first step to making anything look new again is a thorough cleaning. For Serene cabinets, this process is refreshingly simple. The durable powder-coated surface is non-porous, meaning dirt, pollen, and even grease from the grill rest on the surface without seeping in. All you need is a soft cloth and a bucket of mild, soapy water to gently wipe everything down. This will remove any accumulated grime and instantly brighten the finish. While your stone patio might occasionally need our professional restoration and sealing services to stay pristine, your cabinets just need this quick, easy wipe-down to look their best.

Touch-Up and Repaint

Here’s the best part about refreshing your Serene cabinets: you likely won’t have to do anything. The coastal powder coating is specifically engineered to resist fading from the sun and won’t chip or peel under normal use. This means the color you chose on day one will remain vibrant for years, eliminating the need for the regular repainting that other materials demand. In the rare event of a deep scratch from a sharp object, a touch-up kit can be used for a targeted repair. But for general maintenance, you can put away the paintbrushes and simply enjoy the lasting, factory-perfect finish.

Check Your Hardware

While the cabinet boxes themselves are incredibly robust, it’s always a good practice to check on the moving parts after years of opening and closing drawers and doors. Take a moment to inspect the hinges and handles. Are any screws slightly loose from frequent use? A quick turn with a screwdriver is usually all it takes to tighten them back up. The high-quality hardware is chosen for its durability, but this simple check ensures everything continues to function smoothly and securely. It’s a small step that maintains the exceptional craftsmanship you invested in when designing your custom outdoor living space.

Share this page:
Comparing NextBase and Gator Base paver panel systems for a patio installation.

Paver Base Panels: Buy Online With This Guide

Every Long Island homeowner knows the headache of the freeze-thaw cycle. It can completely undo your beautiful patio, shifting pavers and creating an uneven mess. Thankfully, paver panel systems are designed for this exact problem. Brands like the NextBase paver base from Techniseal and panels from Gator Alliance offer a modern solution. They create a stable foundation that absorbs ground movement, preventing winter damage. This guide breaks down the differences to help you decide, covering performance, cost, and where to find the best “paver base panels” retailers or suppliers so you can confidently “paver base panels” buy online.

Key Takeaways

  • Modernize your base to save time and labor: Paver panel systems replace the traditional deep, heavy gravel foundation. This significantly reduces excavation, physical effort, and project costs, making a professional-grade patio installation faster and more accessible.
  • Select a system based on your property’s challenges: While both systems offer durability, they solve different problems. Gator Base is engineered to withstand Long Island’s freeze-thaw cycles, while NextBase features superior drainage channels to manage water in areas prone to pooling.
  • Don’t skip the fundamental prep work: Even though panel systems streamline installation, they require a solid, well-prepared site. Proper excavation, creating a slight slope for drainage, and laying a level bed of compacted sand are non-negotiable steps for a durable, professional-looking patio.

What Are NextBase Paver Base Panels?

If you’ve ever planned a patio or walkway, you know the most demanding part is often hidden underground: the base. Traditionally, building a proper foundation meant a whole lot of back-breaking work. You’d have to excavate nearly a foot of soil, then haul in and compact multiple layers of heavy gravel and sand. It’s a time-consuming, physically demanding, and expensive process. The NextBase Paver Base Panel System offers a modern alternative that completely changes the game. It’s a lightweight, high-performance panel system from Techniseal that replaces the thick, traditional aggregate base needed for your hardscape projects. Think of it as a shortcut to a durable, professional-grade foundation without all the heavy lifting.

These panels create a strong, stable surface for laying all types of porcelain and natural stone pavers, making them a fantastic choice for patios, walkways, and even outdoor kitchen areas. By simplifying the most labor-intensive step, NextBase makes it easier and faster for you and your contractor to build the outdoor space you’ve been dreaming of. It’s an innovative solution that significantly reduces excavation, materials, and time on site, all without compromising on the structural integrity or longevity of your project. It’s about working smarter, not harder, to get beautiful, lasting results.

How Do NextBase Paver Panels Actually Work?

The magic of NextBase lies in its simplicity and strength. The panels are designed to lock together, forming a single, solid foundation that distributes weight evenly across the surface. This interlocking system creates an incredibly stable base for your pavers, preventing them from shifting or settling over time. Because the panels are so effective at spreading out loads, you don’t need as much excavated material underneath. With NextBase, you typically only need to dig about eight inches deep, which is significantly less than the traditional method. This means less digging, less soil to remove, and a much faster installation process from start to finish.

What’s Special About the Techniseal Design?

Techniseal engineered NextBase with practical, user-friendly features that make installation a breeze. One of the standout design elements is that the panels can be rotated 90 degrees, giving you more versatility when laying out complex patterns or working in tight spaces. The panels connect with a secure interlocking mechanism, ensuring the entire base remains stable and unified. If your project has curves or needs to fit around existing structures, the panels are also very easy to cut to the exact size and shape you need. This flexibility allows for a truly custom fit for any hardscape design, from a simple garden path to an intricate patio.

How Does NextBase Manage Water and Drainage?

Proper drainage is essential for any paver project, especially in Long Island’s climate where freeze-thaw cycles can cause major damage. NextBase panels are designed with superior water management in mind. They feature built-in holes, slopes, and channels that allow water to drain through the surface and away from the foundation. This prevents water from pooling under your pavers, which can lead to shifting, sinking, and cracking over time. By effectively managing water, NextBase helps protect your investment and reduces the need for future restoration and sealing services. It’s a smart design that ensures your beautiful new patio stays that way for years to come.

NextBase vs. Traditional Paver Base: What’s the Difference?

If you’ve ever seen a traditional patio installation, you know it’s a serious undertaking. The classic method involves excavating a deep trench, hauling in tons of crushed stone and sand, and compacting it all in layers to create a stable foundation. It’s a time-tested process that works, but it’s also incredibly labor-intensive, time-consuming, and disruptive to your yard. It’s the kind of project that can leave your backyard looking like a construction zone for days, if not weeks.

NextBase offers a completely different approach. Think of it as a shortcut to a professional-grade paver base, without cutting any corners on quality. This system uses lightweight, high-density polypropylene panels that lock together to form a solid, uniform foundation. Instead of spending your weekend wrestling with a wheelbarrow full of gravel, you’re simply laying down and connecting panels. This modern method streamlines the entire process, making a new stone patio or walkway a much more manageable project. It’s an efficient alternative that delivers the same durability and longevity you expect from a traditional base but with a fraction of the work.

Understanding the Traditional Paver Base

To really appreciate what makes paver panel systems so innovative, it helps to know what they’re replacing. The traditional paver base is the old-school, tried-and-true method for building a lasting foundation. It’s a multi-layered system of compacted aggregate materials—like crushed stone, gravel, and sand—that sits between the soil and your beautiful new pavers. This method has been used for decades because, when done correctly, it creates an incredibly strong and durable surface. However, it requires a significant amount of excavation, materials, and sheer physical effort to get it right, which is why modern alternatives have become so popular for homeowners looking for a more efficient solution.

Function of a Traditional Base

The main job of a traditional base is to create a solid, unmoving foundation that can support the weight of your pavers and anything on top of them, from patio furniture to family cars. It acts as a crucial buffer, protecting the pavers from the natural shifting and settling of the soil underneath. A well-built base also plays a key role in drainage, allowing water to filter through instead of pooling and causing damage. For Long Island homeowners, this is especially important, as it helps prevent the upheaval caused by our notorious freeze-thaw cycles. Essentially, the base is the unsung hero of any masonry project, ensuring your investment stays level and stable for years.

Common Materials and Layers

A traditional paver base isn’t just one big pile of gravel; it’s a carefully constructed system of different layers. It typically starts with a sub-base of larger crushed stone, which provides the main structural support and allows for excellent drainage. On top of that goes a base layer of smaller, finer gravel that is compacted to create a dense, stable surface. The final layer, right before the pavers are laid, is a thin bed of coarse sand. This bedding sand provides a cushion for the pavers, making it easier to set them perfectly level and lock them into place. Each layer serves a specific purpose, working together to form a foundation that can withstand the elements and heavy use.

Required Depth for Patios and Driveways

The depth of a traditional base is not a one-size-fits-all measurement; it depends entirely on what the surface will be used for. For a standard patio or walkway that will only see foot traffic, a base depth of four to six inches is usually sufficient. However, for a driveway that needs to support the weight of vehicles, the requirements are much more demanding. A driveway base needs to be at least eight to twelve inches deep to prevent sinking, rutting, and shifting under the load. This significant difference in depth highlights just how much excavation and material a traditional driveway installation requires, making panel systems an attractive, labor-saving alternative for many home improvement projects.

Spend Less Time on Installation

One of the biggest advantages of using NextBase panels is the incredible amount of time you’ll save. A traditional paver base requires hours of digging, moving heavy materials, and compacting each layer perfectly. It’s a slow, methodical process. NextBase, on the other hand, is a modern and efficient way to build strong, stable bases for outdoor surfaces. It greatly reduces the amount of physical work and excavation needed for a project.

Instead of building a base from the ground up with loose aggregate, you’re laying down engineered panels that are ready to go. This can turn a multi-day project into a weekend job. For homeowners tackling a DIY project, this means less time working and more time enjoying your new space. For professional installers, it means faster project turnaround and happier clients.

Less Digging, Less Heavy Lifting

The traditional method for a paver base can require digging down 12 inches or more, depending on your soil and climate. That’s a lot of earth to move. With NextBase, you only need to excavate about half that depth. This means less disruption to your existing landscape and less soil you have to figure out what to do with.

Even better, you’re swapping out tons of heavy aggregate for lightweight panels. Each NextBase panel can replace up to 300 pounds of heavy base material, which is a game-changer for your back. You won’t need heavy equipment to move materials around your yard, making the entire process cleaner and quieter. This makes it an ideal solution for hard-to-access areas where getting a truckload of gravel just isn’t practical.

Save Money on Labor Costs

Saving time and reducing physical labor directly translates to saving money. With a traditional base, costs can add up quickly. You might need to rent heavy machinery like a plate compactor, pay for multiple truckloads of gravel and sand to be delivered, and even pay fees to dispose of the excavated soil. These hidden costs can significantly inflate your project’s budget.

By using a paver panel system, you eliminate many of these expenses. Because the installation is so much faster, you’ll also save on labor costs if you hire a professional team. A project that might have taken a crew several days can often be completed much more quickly, reducing the total number of billable hours. This makes achieving the beautiful, durable patio of your dreams more accessible and affordable.

NextBase vs. Gator Base: Which Panel System Is Right for You?

When you’re planning a new patio or walkway, the foundation is everything. Both NextBase and Gator Base offer modern panel systems that promise a faster, easier installation than traditional methods. But they aren’t exactly the same. Let’s break down the key differences to help you decide which one is the perfect fit for your Long Island backyard project.

A Closer Look at the NextBase Paver Base

Think of NextBase as a high-tech shortcut for your patio foundation. This system uses engineered panels to take the place of traditional, heavy base materials. Each panel does the work of about 300 pounds of gravel, which means you only need to excavate about 8 inches deep—much less than the old-school method. The panels are designed to lock together easily, creating a super stable base for your pavers. They also have built-in channels to manage water drainage effectively. Because of its robust design, NextBase is often the top choice for professional hardscape installers who need a foundation that’s truly built to last.

A Closer Look at Gator Base

Gator Base is another excellent alternative to a traditional crushed stone foundation, perfect for projects like patios, walkways, and even pool decks. It replaces about 6 inches of crushed stone, with each lightweight panel packing the punch of 288 pounds of stone. This makes them much easier to carry and position. The panels connect like puzzle pieces for a quick and straightforward assembly, which can cut your labor time and costs significantly. A unique feature of Gator Base is its insulating property—it has an R-value of 3.6, which helps protect the installation from the ground’s temperature fluctuations. It’s a smart, efficient system designed to simplify your project from the ground up.

Key Gator Base Performance Metrics

When you look at the specifics, it’s clear why Gator Base is a strong contender for any hardscape project. Each interlocking panel provides the same structural support as about 286 pounds of crushed stone, but without the back-breaking labor. This efficiency means you can replace a 6-inch layer of compacted aggregate with these lightweight panels, significantly reducing excavation time and effort. In fact, projects using Gator Base can often be completed at least 20% faster than with traditional methods. For Long Island homeowners, one of the most compelling features is its insulating property. With an R-Value of 3.6 per inch, Gator Base helps protect your beautiful stone pavers from the ground’s temperature shifts, providing an extra layer of defense against the damaging freeze-thaw cycles we experience every winter.

Considering Other Options: Brock Paver Base

While NextBase and Gator Base are leading choices, it’s helpful to know about other alternatives like Brock Paver Base. These panels are also lightweight, strong, and designed to simplify the installation of outdoor projects. They are a versatile option suitable for everything from patios to walkways. One of the main benefits of the Brock system is its claim to reduce the required base to just one inch, a substantial decrease from the traditional five-inch standard. Understanding the different technologies available helps you make the most informed decision for your property. Discussing these options with a professional ensures you select the perfect foundation for your project, whether you’re building a simple garden path or a complete landscape transformation.

Which Paver Panel Is More Durable?

When it comes to longevity, you can’t go wrong with either system. Both NextBase and Gator Base are made from high-density polypropylene, a tough and durable plastic that’s built to last underground. Techniseal, the maker of NextBase, states their panels have a lifespan of over 100 years without breaking down. Similarly, Gator Base is engineered to be extremely durable and won’t degrade in the soil. As a bonus, Gator Base is also 100% recyclable, making it an environmentally friendly choice. The bottom line is that both products offer incredible durability, ensuring your beautiful new patio or walkway has a solid foundation for decades to come.

Which Performs Better in Long Island’s Climate?

This is a crucial question for any Long Island homeowner. Our notorious freeze-thaw cycles can wreak havoc on hardscapes, causing pavers to shift and heave over time. While both systems improve performance over traditional bases, Gator Base was specifically engineered to handle these challenging conditions. Its design helps absorb the ground’s movement during freezes and thaws, protecting the integrity of the paver surface above. This focus on climate resilience makes projects faster and more efficient, saving you from potential headaches and costly repairs down the road. For a masonry project in Suffolk or Nassau County, Gator Base is an especially strong choice for withstanding our local weather.

Why Choose Paver Base Panels for Your Patio?

When you’re planning a new patio, the foundation might not be the most exciting part, but it’s definitely the most important. A weak base can lead to shifting, sinking, and cracking pavers down the road. Traditionally, creating a solid foundation meant excavating a deep trench and filling it with several inches of compacted gravel—a process that’s time-consuming, labor-intensive, and messy. Paver panel systems like NextBase and Gator Base offer a modern, engineered alternative that simplifies the entire process while delivering some serious advantages.

These interlocking panels create a strong, stable foundation without the need for excessive digging and heavy aggregate. For homeowners here on Long Island, this technology is a game-changer. It addresses some of our biggest local challenges, from harsh winter weather to the desire for more efficient and sustainable building practices. Using a paver panel system means your beautiful new outdoor living space is not only built faster but is also designed to last longer with less environmental impact. Let’s look at the key benefits you can expect.

Keep Your Patio Level Through Winter

If you’ve lived on Long Island for even one winter, you know how brutal our freeze-thaw cycles can be. When moisture in the ground freezes, it expands, and when it thaws, it contracts. This constant movement can heave and shift pavers, leading to an uneven, hazardous surface. Paver panel systems are specifically designed to handle this. For example, Gator Base was engineered to act as a thermal blanket, insulating the ground below and distributing the force of any movement. This keeps your porcelain and natural stone pavers locked in place, protecting your investment and ensuring your patio remains smooth and stable for years to come.

A More Eco-Friendly Patio Base

One of the most immediate benefits of using a paver panel system is how much less digging is involved. A traditional paver base requires deep excavation to accommodate many inches of crushed stone. In contrast, systems like Gator Base can replace up to six inches of that aggregate, meaning a much shallower dig. This isn’t just about saving your back; it’s a more environmentally friendly approach. Less excavation means less soil displacement, fewer heavy trucks hauling away dirt and bringing in gravel, and a smaller overall carbon footprint for your project. It’s a smarter, more sustainable way to build the patio of your dreams.

Say Goodbye to Puddles and Pooling Water

Proper drainage is critical for the longevity of any patio. Standing water can lead to stains, moss growth, and slippery surfaces, and in winter, it can turn into damaging ice. Both NextBase and Gator Base are designed with water management in mind. The panels feature built-in channels and drainage holes that allow water to flow through the system and away from the surface. This design prevents water from pooling on top of your pavers, keeping them dry, safe, and looking their best. By ensuring water drains efficiently, these systems help prevent erosion of the underlying soil and contribute to a healthier, more durable patio structure.

Ideal for Hard-to-Reach Installation Sites

Think about your backyard for a moment. Is there a narrow side yard? A gate that won’t fit heavy machinery? Or established landscaping you’d hate to disturb? For many Long Island homes, these are real challenges that can make a traditional patio installation a logistical nightmare. This is where paver panels truly shine. Instead of trying to maneuver a mini-excavator or wheelbarrowing tons of gravel through a tight space, you can simply carry lightweight panels to the site. Each panel replaces hundreds of pounds of heavy aggregate, saving your back and preventing your lawn from turning into a muddy track. This makes it a perfect solution for properties with limited access, allowing for a cleaner, quieter, and far less disruptive installation process for your next landscape design project.

More Than Just Patios: Versatile Applications

While paver panels are a fantastic choice for patios, their use doesn’t stop there. The strong, stable, and well-draining foundation they create is ideal for a wide range of hardscape projects. You can use them to build beautiful, long-lasting walkways that connect different areas of your yard, or to create a durable and level base for an outdoor kitchen. They are also an excellent choice for pool decks, providing a solid surface that can handle foot traffic and splashes while managing water effectively. This versatility allows you to think beyond a single patio and envision a complete, cohesive outdoor living space where every element is built on a reliable, modern foundation. It opens up possibilities for creating a truly integrated backyard design.

Seating Walls and Fire Pits

A great patio design often includes built-in features that add comfort and functionality. Paver panel systems provide a stable enough foundation to support more than just flat surfaces. They are an excellent base for low seating walls, typically up to 18 inches high, which can define the edge of your patio and offer permanent guest seating. This same stability makes them ideal for creating a solid footing for a custom fire pit, ensuring it won’t shift or settle over time. By using the same base system for your patio and its surrounding features, you create a unified structure that is built to last, making your masonry elements feel like a natural extension of the space.

Base for Turf and Game Courts

The benefits of a stable, well-draining base extend beyond hardscaping. These same principles are crucial for high-performance surfaces like synthetic turf and backyard game courts. A paver panel system can be used to create an exceptionally level and permeable foundation, which is key to preventing puddles on your artificial lawn or an uneven surface on your basketball court. This innovative application ensures your investment stays in top condition, providing a consistently safe and enjoyable playing surface for years. It’s a smart way to prepare the ground for a variety of recreational spaces, from a personal putting green to a multi-sport game court for the whole family.

Your Step-by-Step Guide to Installing Paver Base Panels

One of the biggest draws of paver panel systems like NextBase and Gator Base is how much they simplify the installation process. If you’ve ever seen a traditional paver project, you know it involves a massive amount of digging and hauling heavy materials. Panel systems cut down on that work significantly, but that doesn’t mean you can skip the prep work. A successful, long-lasting patio still depends on getting the foundation right.

The general steps for installing either system are quite similar. You’ll need to prepare the ground, lay the panels, and then place your pavers on top. While it’s a straightforward process that many homeowners can tackle themselves, paying close attention to the details at each stage is key. Properly preparing your site and following the manufacturer’s guide will ensure your new patio or walkway can handle everything from summer barbecues to Long Island’s tough freeze-thaw cycles. Think of it as setting the stage for a beautiful, durable outdoor space that you’ll enjoy for years.

How to Prepare the Ground for Paver Panels

Proper site preparation is the most critical step for any paver project. The biggest threats to a patio in our area are the freeze-thaw cycles, which can cause the ground to shift and your pavers to become uneven. Start by marking out the perimeter of your project and removing all the grass and topsoil. While you won’t need to excavate nearly as much as you would for a traditional base, you still need to create a shallow, stable foundation. Ensure the area has a slight slope—about a quarter-inch drop per foot—directing water away from your home’s foundation. Once the area is cleared, you’ll add and compact a layer of bedding sand to create a perfectly level surface for the panels. This solid base is essential for professional-looking masonry work.

Step-by-Step: Laying the Paver Panels

Once your site is prepped, it’s time to lay the panels. Always follow the specific instructions provided by the manufacturer, as there can be slight differences between NextBase and Gator Base. Generally, you’ll start by laying down a geotextile fabric over your prepared soil to prevent weed growth and keep the sand layer stable. Next, you’ll spread and level your bedding sand. Then, you can begin placing the panels, connecting them using their interlocking edges. This process is much faster and easier than hauling and leveling several inches of crushed stone, which can save you time and money on labor. After the panels are in place, you’re ready to start laying your chosen porcelain and natural stone pavers.

Tips for Cutting and Fitting Your Panels

What happens when you reach a curve, a corner, or need to fit a panel around a downspout? Fortunately, both NextBase and Gator Base panels are designed for easy customization. You won’t need any special saws or power tools to get the job done. The panels have built-in cutting lines, often spaced every few inches, that serve as a guide. For most cuts, a simple utility knife is all you need to score the panel and snap it to the desired size. This feature makes it incredibly simple to achieve a perfect fit along the edges of your project, ensuring a clean, professional finish without the hassle or expense of specialized equipment.

What Do Homeowners Say About NextBase and Gator Base?

When you’re investing in a project as important as your new patio or walkway, hearing from people who’ve been there is incredibly helpful. Real-world feedback cuts through the marketing claims and gives you a clear picture of what to expect. Homeowners who have used these paver panel systems often focus on three key areas: how simple the installation is, how well the base holds up over the years, and the quality of support when questions come up. Let’s break down what people are saying.

How Easy Are They to Install?

One of the most common points of praise for both systems is their user-friendly installation. Homeowners appreciate that NextBase panels are designed to replace the heavy, traditional aggregate base, which saves a tremendous amount of time and physical effort. The panels are lightweight and easy to handle, making the project feel much more manageable. Similarly, Gator Base is often highlighted for its simple tongue-and-groove system. This design allows the panels to lock together securely and quickly, simplifying the layout process and ensuring a uniform surface for your pavers. For many, this ease of use is a deciding factor.

How Do They Hold Up Over Time?

Durability is a huge consideration, especially with Long Island’s variable weather, and both products earn high marks from users. NextBase is made from a high-density polypropylene that is engineered to remain stable for over 100 years, giving you peace of mind that your investment is protected. It’s built to withstand the elements without degrading. Likewise, Gator Base is constructed from a lightweight yet strong plastic that is 100% recyclable and won’t break down when buried in the soil. Homeowners report that both systems effectively prevent pavers from shifting or sinking, maintaining a beautiful, level surface for years to come.

What Is the Customer Support Like?

While a smooth installation is ideal, knowing you have support if you hit a snag is crucial. The quality of customer service can make or break your project experience. Before you buy, it’s wise to check recent reviews for the manufacturer and see what others say about their responsiveness. More importantly, working with a knowledgeable local supplier is your best resource. An expert team can answer specific questions about your project, provide installation tips, and help you troubleshoot any issues. At the Gappsi Store, we can walk you through the features of each system to ensure you have everything you need.

Finishing Touches: Choosing the Right Jointing Sand

Once your pavers are perfectly placed, there’s one final step that locks everything together: the jointing sand. It’s not just filler; it’s the glue that holds your patio together, preventing weeds from sprouting and insects from making a home between your beautiful stones. Here on Long Island, the choice of sand is especially important. A standard loose sand can easily wash out, and some lower-quality polymeric sands can crack under the pressure of our freeze-thaw cycles, leading to shifting pavers and an unstable surface. This crucial finishing touch is what separates a good patio from a great one.

This is why high-performance polymeric sand is the go-to for professional installations. This isn’t your average playground sand; it’s a carefully formulated mix of sand and polymer binders that harden after being activated with water. This creates a firm yet flexible joint that resists erosion from rain and wind, stops weeds in their tracks, and stabilizes the entire paver surface. Brands like Techniseal and Alliance Gator offer advanced jointing compounds, such as Gator Maxx G2, that are specifically designed to withstand harsh weather. Choosing the right sand from the start ensures your patio remains a durable, low-maintenance centerpiece of your outdoor living space.

Breaking Down the Cost: NextBase vs. Gator Base

When you’re planning a new patio or walkway, the budget is always a top consideration. Both NextBase and Gator Base offer a modern alternative to traditional methods, but they come with different price tags. Understanding the full financial picture—from the cost of materials to long-term maintenance—will help you decide which system is the right investment for your Long Island home. Let’s break down what you can expect to spend.

How Much Do Paver Base Panels Cost?

Let’s be upfront: when you compare the per-panel price, Gator Base often costs more than NextBase. This is largely due to its design. Gator Base features a tongue-and-groove system that simplifies installation, and a single panel is engineered to replace about 288 pounds of crushed stone. While the initial sticker price might be higher, you could end up buying less aggregate base material, which can offset some of the cost. Think of it as an all-in-one solution that bundles some of the material and labor savings into the panel itself. When you’re selecting your pavers and stones, factoring in the base system’s price is a key step in budgeting your project accurately.

Cost of Traditional Base Materials

To really appreciate the value of a panel system, you have to understand the costs of the traditional method. The old-school way involves a lot more than just buying some gravel. You’re paying for deep excavation, which might require renting equipment. Then, you have the cost of the materials themselves—tons of crushed stone and sand—plus the delivery fees to get it all to your property. Don’t forget about disposing of all the soil you just dug up, which can also come with a fee. It’s a time-tested process, but it’s also incredibly labor-intensive and can be disruptive to your yard for days. These individual expenses add up, making the traditional base a significant portion of your total project budget.

Factoring in the Cost of Pavers

Of course, the base is only one part of the equation. The pavers you choose will have the biggest impact on your material costs. Think of it like choosing countertops for a kitchen—the material you select sets the tone for both the look and the budget. Your options range from affordable and classic concrete pavers to high-end, luxurious natural stone. Each material comes with its own price point, durability, and aesthetic. Before you can finalize your budget, you’ll need to decide on the style you want for your patio, walkway, or pool deck, as this choice will heavily influence the final number.

Concrete and Brick Paver Costs

If you’re looking for a durable and budget-friendly option, concrete and brick pavers are excellent choices. They offer a classic look that works well with many home styles. Generally, you can expect basic concrete pavers to cost around $10 to $15 per square foot. Brick or interlocking pavers, which offer a more traditional aesthetic, typically range from $12 to $20 per square foot. These materials are widely available and come in a variety of colors and shapes, giving you plenty of design flexibility without breaking the bank.

Natural Stone and Porcelain Paver Costs

For a more luxurious, high-end finish, natural stone and porcelain pavers are the way to go. These premium materials create a stunning, sophisticated look that can truly transform your outdoor space. Natural stone options like travertine or bluestone can cost anywhere from $20 to $35 or more per square foot. Gappsi offers a wide selection of beautiful porcelain and natural stone pavers that provide unmatched beauty and durability. While the initial investment is higher, the timeless appeal and long-lasting quality make them a worthwhile choice for many homeowners.

Estimating Installation Costs

This is where paver panel systems really shine. With a traditional base, installation costs can quickly escalate. You’re not just paying for labor; you’re also covering equipment rentals like plate compactors, delivery fees for multiple truckloads of aggregate, and disposal fees for excavated soil. These costs add up. By using a paver panel system, you eliminate many of these extra expenses. Because the installation is so much faster and requires less heavy machinery, you’ll see significant savings on labor, especially if you hire a professional team. A project that could take a crew several days with a traditional base can often be done much more quickly, reducing billable hours and getting you back to enjoying your yard sooner.

Calculating Your Total Project Cost

The price per panel is just one piece of the puzzle. Your total project cost includes materials, labor, and excavation. This is where panel systems really start to show their value. For example, each NextBase panel can replace up to 300 pounds of heavy base material. That means less digging, less hauling, and less aggregate to purchase. Gator Base makes a similar claim, suggesting you can save at least 20% on labor costs compared to a traditional installation. These savings on labor and materials can make the total project cost much more competitive, even if the panels themselves seem more expensive at first glance. A professional masonry contractor can give you a detailed quote comparing the total cost of each approach.

Sample Project Cost: A 300 sq. ft. Patio

Let’s imagine you’re planning a 300-square-foot patio—a perfect size for a cozy dining set and a grill. With a traditional base, this project would involve excavating several tons of soil and hauling in an equal amount of crushed stone. You’d likely need to rent equipment and pay for significant labor hours. Now, let’s look at the same project using a panel system. Instead of deep excavation, you’re only digging about eight inches down. You’re also replacing thousands of pounds of heavy aggregate with lightweight, easy-to-handle panels. This immediately cuts down on material delivery fees, soil disposal costs, and the sheer physical effort involved. The installation is also much faster—using Gator Base can reduce labor time by at least 20%, which means lower costs if you’re hiring a professional team from a company like Gappsi. While the panels have an upfront cost, the savings in time, materials, and labor often make it the more economical choice overall.

Which System Offers Better Long-Term Value?

A beautiful patio is a long-term investment in your home, so it’s important to think beyond the initial installation cost. Both systems are designed for durability. NextBase panels are engineered to last for decades, while Gator Base offers excellent protection against the frost and thaw cycles we experience here on Long Island. A stronger, more stable base means less shifting, cracking, and heaving over time. This translates directly into fewer repairs and lower maintenance costs down the road. Investing in a high-quality base system can save you money and headaches, ensuring your patio remains a beautiful feature for years to come. Proper sealing and maintenance will also extend the life of your investment.

Understanding the Return on Investment

When you’re upgrading your home, it’s smart to think about the long-term value, not just the upfront cost. A beautiful, well-built patio is a significant investment that adds to your property’s appeal and your family’s enjoyment. Both NextBase and Gator Base are engineered for exceptional durability, which is key to protecting that investment. A strong, stable foundation means your pavers are less likely to shift, crack, or become uneven due to Long Island’s freeze-thaw cycles. This directly translates to fewer headaches and lower maintenance costs over the years, reducing the need for future restoration work. By choosing a superior base system, you’re ensuring your outdoor space remains a stunning and functional asset for decades.

Budgeting Tips for Your Paver Project

Creating a realistic budget for your patio project means looking at the whole picture, not just the price per panel. While paver panel systems might seem more expensive at first, they often lead to significant savings in other areas. Because these systems require much less excavation, you’ll spend less on hauling away soil and purchasing heavy aggregate. For instance, Gator Base can reduce labor costs by at least 20% because the installation is so much faster than a traditional base. When you factor in the savings on materials and labor, the total project cost becomes much more competitive. The best approach is to consult with a professional who can provide a detailed quote comparing the different base options for your specific project.

Where to Buy Paver Base Panels Online and In-Store

Once you’ve decided which paver panel system fits your project, the next step is tracking it down. Both NextBase and Gator Base are popular choices, so they are widely available if you know where to look. Your best option will depend on whether you prefer to shop at a local supplier, buy from a major online retailer, or work with a contractor who sources materials for you. The good news is that homeowners on Long Island have plenty of choices for purchasing either system, making it easy to get your project started on the right foot.

Finding an Authorized Dealer Near You

Your first stop should be the manufacturers’ websites. Both Techniseal (the maker of NextBase) and Alliance (the maker of Gator Base) have tools to help you find local distributors. Buying from an authorized dealer ensures you’re getting the genuine product and can access expert advice from staff who are familiar with the materials. These dealers are typically local landscape or masonry supply yards that cater to both contractors and DIY homeowners. You can use the Alliance dealer locator to find Gator Base suppliers and the Techniseal locator for NextBase products near you.

Where to Buy Paver Base Panels Online

If you prefer the convenience of shopping from home, several major online retailers carry paver base panels. Big-box stores like The Home Depot and Lowe’s often stock both Gator Base and NextBase on their websites, allowing you to either have them shipped to your home or arrange for in-store pickup. You can also find these products at specialized online landscape supply stores. Shopping online makes it easy to compare prices and read reviews from other homeowners, but be sure to factor in shipping costs, as these panels can be bulky and heavy.

Paver Base Panel Suppliers on Long Island

For those on Long Island, finding these paver panels locally is often straightforward. Beyond the authorized dealers, many local hardware stores and building supply centers carry these systems, especially during peak landscaping season. It’s always a good idea to call ahead to check their current stock. Of course, the simplest way to get the right materials for your project is to work with a professional installer. At Gappsi, we handle all the material sourcing for our patio projects, ensuring we use the best base system for your specific site conditions. This saves you the hassle of hunting down and transporting the panels yourself.

The Gappsi Store in Smithtown, NY

For homeowners in Suffolk and Nassau County, having a local expert to turn to is invaluable. The Gappsi Store in Smithtown is more than just a place to buy materials; it’s a resource where you can get hands-on advice tailored to our local climate. Our team can walk you through the differences between NextBase and Gator Base, helping you select the right system for your specific soil conditions and project goals. Instead of guessing online, you can see the products and get your questions answered by people who install these systems every day. We make it easy to get the right materials and the confidence to build a patio that lasts.

How to Choose the Right Paver Base for Your Project

Deciding between two excellent paver base systems like NextBase and Gator Base can feel like a tough call. The good news is that the best choice for you becomes much clearer when you look at the specifics of your project. It’s not about which one is universally “better,” but which one is the perfect fit for your backyard, your climate, and your goals. By thinking through a few key factors, you can confidently select the right foundation for a beautiful, long-lasting paver surface that you’ll enjoy for years to come. Let’s walk through what you need to consider.

Does Your Climate and Soil Type Matter?

Here on Long Island, we’re no strangers to cold winters and humid summers. Our climate’s freeze-thaw cycles are one of the biggest challenges for any hardscape installation. When water in the soil freezes and expands, it can push pavers upward, and when it thaws, the ground settles again, often unevenly. This constant movement can lead to a warped, unstable patio over time. As the makers of Gator Base note, their system was specifically “engineered to address these issues.” Both panel systems act as an insulating layer, protecting the pavers from ground movement and helping your beautiful masonry work stay level and secure through every season.

How Big Is Your Patio Project?

The type of project you’re planning plays a huge role in your decision. Are you creating a quaint garden path or a sprawling patio for entertaining? Gator Base is designed exclusively for pedestrian areas like walkways and patios, so if you’re building a driveway, it’s not the right option. For larger projects, a system like NextBase can be a game-changer. Each panel replaces hundreds of pounds of heavy base material, which means you can reduce excavation and the amount of soil you need to haul away. This not only saves your back but can also trim labor costs, making it an efficient choice for expansive outdoor living spaces.

What Features Do You Actually Need?

At first glance, both systems seem similar, but their unique designs offer different advantages. NextBase panels feature built-in channels designed to efficiently manage water and prevent pooling on the surface. This superior drainage is a huge plus for maintaining the integrity of your porcelain and natural stone pavers and keeping them clean. On the other hand, Gator Base uses an easy-to-connect, puzzle-like design that creates a strong, unified foundation. Its structure also acts as a thermal blanket, offering robust protection against those harsh freeze-thaw cycles. Think about your property’s specific challenges—if you have a low-lying area prone to puddles, NextBase’s drainage might be the priority. If maximum stability and insulation are your main concerns, Gator Base’s design could be the better fit.

Related Articles

Frequently Asked Questions

Can I use these paver panels for a driveway? This is a great question, and the answer is generally no. Both NextBase and Gator Base are designed for pedestrian areas like patios, walkways, and pool surrounds. They create a fantastic, stable foundation for foot traffic but are not engineered to handle the weight and stress of vehicles. For a project like a driveway that needs to support cars, a traditional, deep aggregate base installed by a professional is still the best approach to ensure it lasts.

Do I still need to use sand if I’m using these panels? Yes, you do. While the panels replace the deep layers of heavy crushed stone, a thin layer of bedding sand is still a critical part of the installation. This sand layer isn’t for structural support but for creating a perfectly smooth and level surface to lay the panels on. It fills in any minor imperfections in the ground, ensuring the panels and your pavers sit flat and don’t rock or shift over time.

Which system is truly the best choice for Long Island’s weather? Both systems are excellent options that will protect your patio far better than a poorly installed traditional base. However, if we’re looking for an edge against our tough freeze-thaw cycles, Gator Base was specifically engineered to act as a thermal blanket. This insulating quality helps absorb the ground’s movement during winter, offering an extra layer of protection that keeps your pavers from heaving and shifting.

What types of pavers can I install on top of a panel system? You have just as much creative freedom as you would with a traditional base. These panel systems are compatible with a wide variety of materials, including elegant porcelain pavers, classic natural stone, and durable concrete pavers. The panels create a uniform, stable surface that is ready for whatever style you choose, so you don’t have to compromise on your design vision.

Is installing a panel system a good DIY project, or should I hire a professional? Using a panel system definitely makes a paver project more approachable for a skilled DIYer because it eliminates the most back-breaking part of the job. However, the success of any patio hinges on proper site preparation. Getting the excavation, slope, and grading right is essential for proper drainage and long-term stability. While you can certainly tackle it yourself, hiring a professional ensures these critical foundational steps are done perfectly, guaranteeing a beautiful result that lasts for decades.

Share this page:
Unfinished basement with exposed brick, a perfect project for affordable basement contractors.

How to Find Affordable Basement Contractors

For homeowners across Long Island, the basement is often a space of untapped possibility. But it also comes with unique challenges, from humidity to the quirks of older foundations. That’s why finding a professional who understands local homes is so critical to the success of your project. A great contractor does more than just build walls; they create a safe, functional, and lasting extension of your home. This guide will walk you through how to find affordable basement contractors right here in Suffolk and Nassau County who have the experience to get the job done right, ensuring your new space is ready for years of enjoyment.

Key Takeaways

  • Your contractor choice is your most important decision: A successful remodel depends on finding the right partner. Be sure to verify their license and insurance, check recent reviews, and speak directly with past clients before signing a contract.
  • Plan for the unexpected with a contingency fund: Basements often hide surprises like moisture issues or foundation cracks. Setting aside 10-20% of your total budget ensures that necessary repairs won’t derail your project or compromise its quality.
  • A detailed quote is a sign of a true professional: Look beyond the final price tag. The best bid will include an itemized breakdown of costs, a clear payment schedule tied to project milestones, and a written warranty for both labor and materials.

What Can a Basement Contractor Do for You?

When you think of a basement contractor, you might just picture someone putting up drywall and laying down carpet. But their skills go so much further than that. A great basement contractor is a project manager, a problem-solver, and a creative partner all in one. They can take a damp, forgotten space and transform it into a functional and beautiful part of your home. From the ground up, they handle the essential work that makes a basement safe, dry, and ready for living.

This includes tackling moisture problems at the source, repairing structural issues in your foundation, and ensuring everything is up to code. Once the groundwork is laid, they can bring your vision to life, whether you’re dreaming of a cozy family room, a sleek home office, or a personal gym. The team at Gappsi, for example, manages comprehensive home remodeling projects that turn underused basements into valuable living areas. A professional contractor coordinates every step, from initial design and permits to the final coat of paint, making the entire process smoother and more predictable for you.

Waterproofing and Moisture Control

Before you can even think about paint colors or furniture, your basement needs to be completely dry. This is where a contractor’s expertise is critical. They start by identifying and fixing any sources of moisture, whether it’s from cracks in the foundation, poor drainage outside, or high humidity. A contractor can implement a full waterproofing system, which might include sealing walls with a waterproof barrier, installing an interior drainage system to channel water away, and adding a sump pump to protect against flooding. This foundational step is non-negotiable; without it, any finishing work you do is at risk of being ruined by water damage, mold, and mildew.

Finishing and Remodeling

This is where your basement’s potential truly comes to life. A contractor can turn a concrete shell into virtually any room you can imagine. Want a home theater, a guest suite with a bathroom, a playroom for the kids, or even a custom sauna? A remodeling professional handles it all. This process involves framing new walls, running electrical wiring for lights and outlets, adding plumbing for a bathroom or wet bar, and installing insulation to keep the space comfortable. They manage the entire build-out, from hanging and finishing drywall to installing ceilings and doors, creating a seamless extension of your home.

Foundation and Structural Repair

Sometimes, a basement project uncovers more serious issues. A skilled contractor is equipped to handle critical foundation and structural repairs that ensure your home’s safety and stability. This can involve fixing significant cracks in the foundation walls or floor, reinforcing bowing walls that are under pressure from outside soil, or addressing problems caused by the house settling over time. These are not DIY tasks; they require an expert understanding of structural engineering and masonry. A contractor ensures these vital repairs are done correctly, giving you peace of mind that your home is secure from the ground up.

Flooring and Egress Window Installation

The final touches are what make a basement feel like a real living space. A contractor will help you choose and install the right flooring that can withstand the unique basement environment, like luxury vinyl plank, tile, or engineered wood. They’ll ensure the subfloor is properly prepared to prevent moisture issues down the line. Additionally, if you plan to add a bedroom, building codes require an egress window for safety. Installing one is a major job that involves cutting an opening in your foundation wall, which is why it’s essential to have a professional handle it. They’ll make sure the window is installed correctly and meets all local safety requirements.

How to Find a Great Basement Contractor

Finding the right person for your basement project can feel like a huge task, but it doesn’t have to be overwhelming. With a clear process, you can confidently choose a contractor who will turn your vision into a reality. It’s all about doing a little homework upfront to ensure a smooth project from start to finish. Let’s walk through the key steps to finding a reliable partner for your home improvement project.

Start Your Search Online

Your search for the perfect contractor will likely begin online. Start by looking for local professionals who specialize in basement projects in the Long Island area. Websites like Thumbtack can provide a list of basement contractors rated by people in your community. Beyond directories, take the time to explore each contractor’s individual website. A professional company will have a detailed portfolio showcasing their work. This allows you to see the quality of their craftsmanship and determine if their style aligns with your own. Building a shortlist of three to five promising candidates is a great first step.

Verify Their Credentials

Once you have a few names, it’s time to dig a little deeper. A reputable contractor will be licensed and insured, and they won’t hesitate to prove it. You’ll want to confirm they have the right licenses for all the work involved, especially if your project includes complex plumbing or electrical updates. Insurance is just as critical—it protects you from liability if an accident happens on your property. Don’t just take their word for it; you can often verify a license through state or local government websites. This step is non-negotiable and gives you essential peace of mind.

Read Reviews and Check References

Online reviews offer a window into other homeowners’ experiences. Look for consistent feedback on the things that matter most: Did they stick to the budget? Did they clean up the site daily? How did they handle unexpected issues? Pay attention to red flags, like multiple complaints about recurring water problems or poor communication. Beyond online reviews, ask your top candidates for a list of recent references. Speaking directly with a past client gives you a chance to ask specific questions about their project and overall satisfaction. It’s one of the best ways to gauge what it’s really like to work with a contractor.

Get Multiple Quotes

You should always get at least three detailed quotes before making a final decision. A good quote is more than just a final number; it should clearly break down the costs for materials, labor, and any necessary permits. This transparency helps you understand exactly what you’re paying for and allows for a fair comparison between professionals. Be wary of any quote that seems unusually low, as it could signal subpar materials or hidden costs down the line. The goal isn’t just to find the cheapest option, but to find the best value and a team you can trust to handle your home remodeling project with care.

How Much Does a Basement Project Cost?

Figuring out the budget is often the first step in any home improvement project, and basements are no exception. The final cost can vary widely depending on what you’re starting with and what you want to achieve. Are you fixing a damp, unfinished space, or are you creating a full-blown entertainment hub? Let’s break down the typical costs for different types of basement work so you can get a clearer picture of the investment required.

Typical Waterproofing Costs

Before you can think about flooring and furniture, you need a dry space. For many Long Island homes, that starts with waterproofing. This essential step prevents moisture from seeping in, protecting your home from mold, mildew, and water damage. On average, you can expect basement waterproofing to cost between $1,670 and $6,775. This price range typically covers sealing foundation cracks, applying waterproof coatings, and installing interior drainage systems. Proper restoration and sealing is a foundational investment that safeguards any further work you do downstairs.

Average Finishing and Remodeling Costs

This is where your vision for a new living area, home gym, or office comes to life. The average cost to finish a basement is around $18,400, but most projects fall somewhere between $12,000 and $34,500. This covers turning concrete walls and floors into a comfortable, finished room with drywall, electrical wiring, lighting, and flooring. A full-scale home remodeling project that includes a bathroom or kitchenette will be at the higher end of that range, but it also adds significant value and usable square footage to your home.

Pricing for Foundation Repair and Sump Pumps

Sometimes, a basement project uncovers deeper issues that need to be addressed. If you have persistent water problems, installing a sump pump is a smart move, typically costing between $730 and $1,100. For more serious structural problems, foundation repairs can cost $15,000 or more. While this can be a significant and unexpected expense, addressing foundation issues is critical for the safety and stability of your entire home. This type of work requires serious masonry expertise to ensure it’s done right.

What Factors Influence the Final Price?

So, what makes one project cost $15,000 and another $35,000? The biggest factors are the size of your basement, the materials you choose, and the amount of labor required. Labor alone can account for 45% to 65% of your total budget. Significant structural changes, like adding plumbing for a bathroom or moving walls, will also increase the price. Your material choices, from flooring to countertops, play a huge role, too. Opting for luxury vinyl tile over carpet or custom cabinetry over stock options will impact the final number.

How to Create a Realistic Project Budget

Before you start dreaming about home theaters and game rooms, it’s time to talk numbers. Creating a realistic budget is the single most important step in any successful basement renovation. It keeps your project on track, prevents stressful financial surprises, and helps you and your contractor stay on the same page. A well-planned budget is your roadmap, guiding every decision from the materials you choose to the features you include. It turns a vague idea into an actionable plan, ensuring your finished basement is a source of joy, not debt.

Set Your Total Budget (and a Contingency Fund)

First, decide on the total amount you’re comfortable investing in your home remodeling project. While costs vary, most basement renovations fall somewhere between $12,000 and $35,000. Once you have your top number, immediately set aside 10% to 20% for a contingency fund. Think of this as your project’s safety net. Basements are notorious for hiding surprises like moisture issues, cracks in the foundation, or outdated wiring. This fund ensures that an unexpected repair doesn’t derail your entire project, giving you the peace of mind to handle whatever comes up without blowing your budget.

Prioritize Needs Over Wants

It’s easy to get carried away with exciting features, so take a moment to separate your must-haves from your nice-to-haves. Your “needs” list should include the essentials for a safe and functional space: proper waterproofing, good insulation, adequate lighting, and safe electrical wiring. Your “wants” list might include things like a custom wet bar, a built-in entertainment center, or luxury saunas. By focusing on the foundational elements first, you ensure the space is sound. You can always add those high-end finishes and special features down the road as your budget allows.

Plan for Permits and Inspections

Don’t forget to account for the administrative side of your renovation. Any project that involves changing the structure or altering electrical, plumbing, or HVAC systems will require permits from your local municipality. These fees can range from a few hundred to a couple of thousand dollars, depending on the scope of your project. A reputable contractor will manage the permit application process for you, but the cost will be part of your overall project price. Factoring this in from the beginning prevents it from becoming an unexpected expense later on.

Look for Ways to Save from the Start

Being budget-conscious doesn’t mean you have to sacrifice quality. One of the best ways to ensure you’re getting a fair price is to get detailed quotes from at least three different contractors. You can also find savings in your material choices. For example, selecting durable and moisture-resistant flooring like luxury vinyl plank can give you a high-end look without the cost of real hardwood. If you’re handy, you can also save on labor by taking on simple tasks yourself, like painting the walls or handling the final cleanup.

How to Compare Contractor Quotes

Once you have a few quotes in hand, it’s tempting to just scan for the lowest number. But the cheapest bid isn’t always the best value. A truly great contractor provides a detailed, transparent quote that clearly explains what you’re paying for. Think of this step as comparing potential business partners, not just prices. A well-structured quote shows that a contractor is organized, thorough, and has a clear plan for your project. It’s your first real glimpse into their professionalism and how they’ll handle your home remodeling project from start to finish. Taking the time to carefully dissect each proposal will help you avoid surprise costs and ensure you’re partnering with a team that respects your home and your budget.

Understand Exactly What’s Included

To make a fair comparison, you need to know that you’re looking at the same scope of work across all quotes. A vague, one-line price is a major red flag. Instead, look for an itemized breakdown that separates the costs of materials, labor, and any necessary permits. This level of detail allows you to compare apples to apples. You can see if one contractor is proposing higher-quality materials or if another has budgeted more hours for labor. A transparent quote empowers you to ask smart questions and understand exactly where your money is going before you sign anything.

Evaluate the Warranties and Guarantees

A contractor’s willingness to stand behind their work speaks volumes about their confidence and craftsmanship. Always ask about the warranties or guarantees they offer on both labor and materials. A reputable company will have a clear policy and be happy to explain what’s covered and for how long. This isn’t just a piece of paper; it’s your peace of mind. Knowing that the contractor will return to fix any issues that arise gives you long-term security in your investment. It’s a key differentiator between a professional outfit and a contractor just looking to finish a job quickly.

Compare Timelines and Material Quality

Beyond the final price, consider the proposed timeline and the quality of the materials. One contractor might offer a lower bid by using builder-grade materials that won’t stand the test of time, while another might specify premium, durable options. Ask for specifics on the products they plan to use so you can do your own research. For example, understanding the difference between various types of porcelain and natural stone can dramatically impact your project’s look and longevity. Also, discuss the project timeline to ensure it aligns with your expectations and that they have a realistic plan for completion.

Review Payment Terms and Contract Details

Never move forward without a detailed written agreement. The contract is the most important document in your project, as it protects both you and the contractor. It should clearly outline the full scope of work, the total cost, a specific payment schedule, and all guarantees discussed. Pay close attention to the payment terms—a professional contractor will typically ask for a deposit upfront, with subsequent payments tied to project milestones, not arbitrary dates. A clear, comprehensive contract ensures everyone is on the same page and minimizes the chance of misunderstandings down the road.

What Hidden Costs Should You Plan For?

Even with a detailed quote in hand, it’s smart to plan for the unexpected. Basements, especially in older Long Island homes, can hide surprises that only reveal themselves after demolition begins. This is why having a contingency fund—typically 10% to 20% of your total project cost—is so important. It’s not about your contractor trying to nickel-and-dime you; it’s about preparing for the realities of a major renovation.

When you start opening up walls and floors, you might uncover issues that need to be addressed before the fun part of the remodel can continue. These aren’t “upgrades” but necessary fixes to ensure your new space is safe, dry, and structurally sound. A transparent contractor will discuss these findings with you immediately, explaining the problem and outlining the costs for the solution. Think of your contingency fund as a safety net that lets you handle these bumps without derailing your entire project.

Unexpected Foundation or Structural Issues

One of the most common surprises in a basement renovation is discovering problems with the home’s foundation. When the existing walls come down, you might find cracks in the concrete that need repair or signs of settling that require professional attention. These issues are critical to fix correctly to protect your home’s structural integrity. An experienced masonry team can assess the situation and recommend the best course of action. Ignoring these problems will only lead to bigger, more expensive headaches down the road, so it’s best to address them as soon as they’re found.

Necessary Electrical and Code Updates

Older homes often have outdated electrical systems that don’t meet current safety standards. Your contractor might discover old wiring, an overloaded panel, or improperly installed outlets that need to be brought up to code. While it’s an added expense, this is a non-negotiable part of any responsible home remodeling project. Ensuring your basement’s electrical, plumbing, and HVAC systems are safe and compliant protects your family and your investment. Licensed professionals must handle this work, which is why it’s crucial to hire a contractor who manages all aspects of the job properly.

Surprise Water Damage or Mold Remediation

Moisture is the enemy of any finished basement. Sometimes, a seemingly dry basement is hiding water damage behind the walls or under old flooring. If your contractor uncovers signs of past leaks, water seepage, or mold growth, it has to be dealt with immediately. This could involve professional mold remediation, installing a better drainage system, or applying comprehensive waterproofing solutions. While waterproofing can add a few thousand dollars to the budget, it’s essential for creating a healthy, comfortable living space that you can enjoy for years to come.

Permit and Inspection Fees

Every major renovation project requires permits from your local town or village to ensure the work is done to code. The cost of these permits can vary widely depending on the scope of your project, typically ranging from a few hundred to a couple of thousand dollars. These fees cover the administrative costs for the municipality to review your plans and conduct inspections at key stages of the project. A reputable contractor will handle the entire permitting process for you, but the fees themselves are a separate line item that should be factored into your overall budget from the start.

How to Save Money on Your Basement Project

A basement remodel is a fantastic investment, but it doesn’t have to drain your savings. With some strategic planning and smart decision-making, you can create an amazing new space while keeping your budget in check. It’s not about cutting corners on quality, but about being intentional with where your money goes. From timing your project to choosing the right materials, a few key choices can make a significant difference in the final cost. Let’s walk through some practical ways to save money without sacrificing the basement of your dreams.

Schedule Your Project for the Off-Season

Contractors, like many businesses, have peak seasons and slower periods. For home remodeling, spring and summer are often the busiest times. If you have some flexibility in your timeline, consider scheduling your basement project during the off-season, like late fall or winter. With fewer projects on their plate, contractors may offer more competitive pricing to keep their crews busy. This can also mean more focused attention on your project and potentially a faster completion time. Planning ahead and being flexible with your start date is one of the simplest ways to get a better deal.

Choose Cost-Effective Materials

Your material choices have a huge impact on the total cost. While it’s tempting to go for the most high-end finishes, there are many durable and beautiful alternatives that are much friendlier to your wallet. For basement flooring, for example, moisture is a major concern. Instead of expensive hardwood or moisture-trapping carpet, consider options like Luxury Vinyl Plank (LVP). It mimics the look of real wood but is waterproof and highly durable. When discussing options with your contractor, ask for a breakdown of different material costs to see where you can make smart substitutions without compromising on style or function.

Tackle Simple DIY Tasks Yourself

If you’re comfortable with a little hands-on work, taking on some of the simpler tasks yourself can cut down on labor costs. Demolition, painting, or installing baseboards are often manageable jobs for a handy homeowner. You could even handle the final cleanup. Just be realistic about your skills and the time you can commit. A poorly done DIY job can end up costing more to fix than it would have to hire a professional in the first place. Always discuss your DIY plans with your contractor beforehand to ensure it fits into their workflow and doesn’t void any warranties.

Bundle Services with a Single Contractor

Hiring one company to manage the entire project, from design to construction, can be more cost-effective than sourcing multiple specialized contractors. A full-service firm like Gappsi can handle everything from waterproofing and framing to electrical and finishing touches. This approach not only simplifies communication and project management but can also lead to a better overall price. Companies that offer comprehensive home remodeling services often have established relationships with suppliers and can get better deals on materials. Plus, having a single point of contact ensures accountability and a cohesive vision from start to finish.

Key Questions to Ask Every Contractor

Once you have a shortlist of potential contractors, it’s time to start the interview process. This is your chance to dig deeper than what you can find online and get a real sense of who you’ll be working with. Going into these conversations prepared with a list of specific questions will help you compare your options fairly and choose a partner you can trust. Think of it as a two-way interview—you’re evaluating them, and they’re learning about your project. A professional contractor will welcome your questions and provide clear, confident answers.

Ask About Their Experience and Specialty

Not all contractors are created equal, especially when it comes to basements. This space has unique challenges, from moisture control to integrating plumbing and electrical systems. Start by asking about their direct experience with projects like yours. You can ask, “How many basement remodels have you completed in the last year?” and “Can I see a portfolio of your finished basement projects?” It’s also critical to confirm they are properly credentialed for the job. A key question is, “Are you fully licensed and insured for all the work required, including any subcontractors you’ll use?” This ensures you’re protected and that every part of your home remodeling project is handled by a qualified professional.

Clarify the Project Timeline and Process

Understanding the timeline is about more than just knowing the final completion date. It’s about managing your expectations and planning for the disruption to your daily life. Ask for an estimated start date and a projected timeline for the entire project. A great follow-up question is, “Can you walk me through the key phases of the project?” A reliable contractor should be able to outline the major steps, from demolition and framing to inspection and the final touches. This conversation will give you a clear picture of the workflow and help you anticipate what’s coming next. You can even see examples of how professional teams manage projects by watching videos of their work in progress.

Discuss Payment Terms and Contracts

Talking about money upfront prevents misunderstandings later. Don’t just ask for a total price; ask for a detailed, itemized quote that separates the costs of labor, materials, and any necessary permits. This makes it much easier to compare bids from different contractors. Before you agree to anything, ask, “What are your payment terms, and what is the deposit schedule?” Most importantly, insist on a comprehensive written contract. It should clearly state the full scope of work, the total cost, the payment schedule, and any specific materials or products from the Gappsi Store that will be used. A solid contract is your best protection and ensures everyone is on the same page.

Understand Their Warranty and Post-Project Support

A contractor’s responsibility doesn’t end when they pack up their tools. A quality professional will stand behind their work. Be sure to ask, “What kind of warranty or guarantee do you offer on your workmanship and the materials you use?” Different elements may have different warranty periods, so get the specifics in writing. It’s also wise to understand their process for addressing any issues that might pop up after the job is done. Ask, “If a problem arises after you’ve left, what is the process for getting it fixed?” Their answer will tell you a lot about their commitment to customer satisfaction and the long-term quality of their work, much like offering ongoing restoration and sealing services.

Red Flags to Watch for When Hiring a Contractor

Choosing the right contractor is the most critical step in any home improvement project. While most professionals are honest and hardworking, knowing how to spot the warning signs of a bad one can save you from headaches, financial loss, and a project that never quite gets finished. Trust your instincts—if something feels off, it probably is. Here are the key red flags to watch for from your first meeting to the final handshake.

Warning Signs During the First Meeting

Your initial consultation is more than just a chance to get a quote; it’s an interview. Pay close attention to how the contractor presents themselves and their business. A major red flag is a refusal or hesitation to provide proof of licensing and insurance. Any reputable professional will have this information ready. You should also be wary of anyone who uses high-pressure sales tactics, like offering a “today only” discount to get you to sign immediately. A true professional will give you the space and time you need to make a thoughtful decision. Also, ask to see a portfolio of their past work. If they can’t provide one or offer references, consider it a warning sign.

Red Flags in the Contract or Payment Plan

The contract is your project’s blueprint and your primary protection. A contractor who offers a vague, one-page agreement or suggests working without one is a serious risk. Your contract should be highly detailed, outlining the full scope of work, specific materials to be used, a clear timeline, and a payment schedule. Another major red flag is a demand for a large upfront payment. While a reasonable deposit (typically 10% to 30%) is standard, you should never pay the full amount before the work is complete. Be cautious of contractors who insist on cash-only payments, as this can sometimes indicate they are operating without the proper insurance or permits, leaving you vulnerable.

Poor Communication or Vague Answers

Clear and consistent communication is the bedrock of a successful project. If a contractor is difficult to get in touch with from the very beginning—dodging calls or taking days to respond to emails—that pattern is unlikely to change once they’ve started the job. When you ask specific questions about the process, materials, or potential challenges, you should receive clear, confident answers. A contractor who gives vague responses or seems annoyed by your questions may lack the necessary experience or simply doesn’t value your input. A great partner will welcome your questions and keep you informed every step of the way, as you can see from the detailed project walkthroughs on the Gappsi YouTube channel.

Related Articles

Frequently Asked Questions

How long does a typical basement remodel take? While every project is different, a standard basement finishing project usually takes between 4 and 8 weeks from the start of construction to the final walkthrough. This timeline can be affected by the complexity of your design, such as adding a bathroom or kitchen, and the time it takes for local permit approvals and inspections. Any unexpected structural or moisture issues that need to be addressed can also extend the schedule.

Do I really need a general contractor, or can I just hire individual tradespeople myself? While you can act as your own project manager, hiring a general contractor simplifies the entire process and protects you from common pitfalls. A contractor coordinates all the moving parts, from scheduling plumbers and electricians to ensuring all work meets building codes. They handle the permits, manage the timeline, and are your single point of contact, which saves you an immense amount of time and stress.

What’s the very first step I should take if my basement is currently damp? Before you even think about design or finishes, your first step should be to have a professional assess the source of the moisture. A basement contractor can identify whether the issue is due to foundation cracks, poor exterior drainage, or high humidity. Solving the water problem is the essential foundation for any successful remodel, as any work you do will be at risk without it.

Will finishing my basement actually increase my home’s value? Absolutely. A properly finished basement adds valuable, usable square footage to your home, which is a major selling point. It can provide a significant return on your investment, especially if you add features like a full bathroom or a legal bedroom with an egress window. The key is to ensure the work is done professionally and to code to maximize its value.

How involved do I need to be in the project once I hire a contractor? Your main involvement will be during the initial planning and design phase, where you’ll make key decisions about the layout, materials, and finishes. Once construction begins, a good contractor should handle the day-to-day management of the project and the crew. They will provide you with regular updates and consult you on any important decisions, but you won’t need to be on-site managing the work yourself.

Share this page:
Light ivory travertine pavers create a non-slip patio surface with outdoor seating.

What to Know Before Choosing Travertine Pavers

Your dream backyard—that serene, resort-like oasis—starts from the ground up. The foundation is everything. To get that bright, luxurious feel, homeowners are turning to light ivory travertine pavers. With warm, creamy tones and a soft, natural texture, this stone instantly creates a welcoming and sophisticated atmosphere. This beautiful travertine provides a clean, elegant canvas that makes your landscaping pop and your furniture look chic. It does more than just cover the ground; it sets the entire mood for your personal outdoor retreat.

Key Takeaways

  • Choose a Smarter Surface for Family Fun: Light ivory travertine’s natural texture makes it slip-resistant for poolside safety and keeps it cool to the touch, ensuring comfort during hot Long Island summers.
  • Create a Cohesive, High-End Look: The stone’s warm, neutral tones and classic layouts, like the French Pattern, provide a versatile foundation for any design, seamlessly connecting everything from your patio to your indoor living areas.
  • Protect Your Investment with Smart Planning: A successful travertine project involves more than just the stone; ensure lasting results by selecting a reputable supplier, budgeting for professional installation, and committing to a simple sealing routine.

What Are Light Ivory Travertine Pavers?

If you’ve been dreaming of a bright, elegant outdoor space, you’ve likely come across light ivory travertine pavers. This beautiful material is a top choice for everything from patios to pool decks, and for good reason. It offers a timeless look that feels both luxurious and inviting. But before you start planning your project, let’s get to know this popular stone a little better. Understanding what it is, where it comes from, and what makes it unique will help you feel confident you’re making the right choice for your Long Island home.

Understanding This Beautiful Natural Stone

At its core, travertine is a type of limestone that forms around mineral spring deposits. Think of it as a story written by nature—over thousands of years, layers of minerals and organic matter (like shells) settle and compress to create a dense, durable stone. This process gives each paver its own unique character, with subtle variations and textures that you just can’t replicate with man-made materials. When you choose travertine, you’re choosing a piece of the earth, a truly natural stone that brings an organic, grounded feel to your landscape design.

The Origins of Travertine

The name itself sounds elegant, and it has a history to match. “Travertine” comes from the Italian word “travertino,” which is a nod to the town of Tivoli, near Rome, where this stone has been quarried for centuries. It’s a type of limestone that forms in fresh water, particularly around mineral hot springs. This connection to ancient Roman architecture is part of what gives travertine its timeless appeal. When you install it in your backyard, you’re not just choosing a paver; you’re bringing a piece of classical history and natural artistry to your home. It’s this rich background that makes it such a sought-after material for creating sophisticated masonry designs.

How This Unique Stone is Formed

The creation of travertine is a fascinating natural process. It begins when groundwater, rich with dissolved carbon dioxide, flows over limestone and dissolves it. When this mineral-rich water comes to the surface, the pressure changes, and the carbon dioxide escapes into the air. This change causes the dissolved limestone to re-solidify into layers of calcium carbonate, which slowly build up to form travertine. The stone’s characteristic pits and voids are created by escaping gases and organic matter. Pure travertine is white, but the beautiful light ivory, cream, and tan shades we love come from other minerals mixing in during its formation, giving each piece its unique color and pattern.

Defining Its Signature Warm Ivory Look

The name “light ivory” perfectly captures the color palette of these pavers. They feature a creamy, off-white base with soft, warm undertones of beige and tan woven throughout. This light, neutral color is incredibly versatile and acts as a stunning backdrop for any style, from modern to Mediterranean. It brightens up outdoor living areas, making them feel more spacious and open. The soft, warm tones create a welcoming atmosphere that looks gorgeous in the Long Island sun, providing a clean and sophisticated foundation for your outdoor furniture, landscaping, and masonry features.

What Gives Travertine Its Color?

The beautiful, warm color of travertine isn’t a dye or a stain; it’s a direct result of how the stone is born. As a type of limestone, travertine forms around mineral spring deposits. The primary mineral, calcium carbonate, gives the stone its classic light ivory or white base. But the real magic happens when other minerals get mixed in during this natural process. Think of it like adding spices to a recipe—a little bit of iron can introduce hints of brown or yellow, creating the warm, inviting appearance that homeowners love.

This natural formation is why no two travertine pavers are exactly alike. The subtle swirls and variations in color tell the story of the stone’s creation over thousands of years. This uniqueness is what sets it apart from manufactured materials and gives your patio or pool deck an authentic, organic character. When you choose a natural stone like travertine, you’re not just getting a durable surface; you’re getting a one-of-a-kind piece of art shaped by the earth itself, which adds incredible depth and sophistication to your outdoor living space.

How Does It Compare to Other Travertine?

You might see the terms “paver” and “tile” used when discussing travertine, and it’s important to know the difference. Travertine pavers are specifically cut for outdoor use. They are much thicker—typically around 30mm (or 1.25 inches)—which gives them the strength and durability to handle foot traffic, patio furniture, and changing weather conditions. Travertine tiles, on the other hand, are thinner (around 12mm) and are designed for indoor applications like flooring or bathroom walls. For any outdoor project like a patio, walkway, or pool deck, you’ll want to be sure you’re using travertine pavers.

Is Travertine a Type of Limestone or Marble?

It’s a common question, and the answer is simple: travertine is a type of limestone, not marble. While they are all natural stones, their origins are quite different. Travertine is formed in fresh water, typically around mineral springs, where minerals build up in layers over time. This unique formation process is what creates the characteristic pits and voids you see in the stone’s surface. Marble, on the other hand, is created when limestone is subjected to intense heat and pressure deep within the earth. So, while they are related, think of travertine as limestone’s more textured and porous cousin, perfectly suited for creating a warm, inviting outdoor atmosphere for your Long Island home.

Exploring Different Travertine Finishes

The finish of your travertine paver is about more than just looks; it affects the texture, slip resistance, and overall feel of your outdoor space. Choosing the right finish is key to getting the performance you need, whether it’s for a sun-drenched patio or a busy pool deck. Each finish is created through a different process that treats the stone’s surface to achieve a specific look, from rustic and weathered to smooth and refined. Let’s walk through the most common options so you can decide which one best fits your vision and lifestyle.

Polished

A polished finish gives travertine a glossy, reflective surface that makes the stone’s colors and patterns appear rich and vibrant. This high-shine look is achieved by grinding and buffing the stone until it’s completely smooth. While it creates a stunning, high-end appearance, polished travertine is very slippery when wet. For this reason, it’s almost exclusively used for indoor applications like countertops, backsplashes, or flooring in low-traffic areas. It’s a beautiful choice for an interior project but not the right fit for an outdoor patio or walkway where safety is a priority.

Honed

Honed travertine offers a smooth, flat surface with a matte or satin finish instead of a high gloss. This look is created by stopping the polishing process before the stone becomes reflective, resulting in a more subtle and natural appearance. A honed finish is a fantastic all-around choice because it’s less slippery than polished stone, making it suitable for both indoor and outdoor high-traffic areas. It provides a clean, contemporary feel that works beautifully for patios, walkways, and even indoor-outdoor transitions, offering a perfect blend of elegance and practicality for your home remodeling project.

Tumbled

If you’re aiming for a rustic, old-world charm, a tumbled finish is the perfect choice. To create this look, travertine pavers are literally tumbled in a drum with gravel and water, which softens their edges and gives the surface a weathered, textured feel. This process enhances the stone’s natural character and provides excellent slip resistance, making it the most popular finish for outdoor spaces, especially pool decks and patios. The textured surface feels great underfoot and adds a timeless, comfortable quality to any landscape design.

Split Face

A split face finish is the most natural and textured option available. It’s created by splitting the stone block, revealing a rough, uneven surface that showcases the raw beauty of the travertine. This finish is not meant for walking on; instead, its rugged texture makes it ideal for vertical applications. Think of it for creating a stunning accent wall, cladding an outdoor kitchen island, or adding character to retaining walls and fireplace surrounds. It’s a fantastic way to introduce depth and a dramatic, organic element to your masonry features.

Why You’ll Love Light Ivory Travertine for Your Outdoor Space

Choosing the right material for your patio, pool deck, or walkway is a big decision. You want something that looks incredible but also holds up to daily life—and Long Island weather. This is where Light Ivory Travertine truly shines. It offers a perfect blend of sophisticated style and practical performance that makes it a favorite among homeowners. Its warm, creamy tones create a welcoming and high-end feel, instantly making any outdoor area feel like a private resort.

But its appeal goes far beyond looks. Travertine is a smart investment in your home’s comfort and safety. It’s naturally slip-resistant, stays cool during hot summer days, and is tough enough to handle anything from poolside splashes to winter freezes. When you choose high-quality porcelain and natural stone pavers, you’re not just getting a beautiful surface; you’re getting a durable, low-maintenance foundation for years of outdoor memories. It’s a material that works as hard as it is beautiful, giving you peace of mind and a stunning space to enjoy.

Enjoy a Naturally Non-Slip Surface

When you’re designing an outdoor space, especially around a pool, safety is always top of mind. Light Ivory Travertine offers a naturally slip-resistant surface that’s perfect for wet areas. The stone has a porous texture filled with tiny, naturally occurring holes. These aren’t flaws—they’re a key feature that allows the stone to absorb water quickly, preventing slick spots from forming on the surface. This makes it an ideal choice for swimming pool decks, patios, and walkways where kids might be running around with wet feet. You can relax knowing your beautiful patio is also a safer space for your family and guests to enjoy.

A Note on Tumbled vs. Polished Finishes

When you’re selecting light ivory travertine pavers, the finish is a key detail to consider. For outdoor spaces, a tumbled finish is the most popular and practical choice. This process gives the stone a textured, slightly rustic surface that not only looks beautifully natural but also provides excellent grip. That texture is what makes it slip-resistant, a critical feature for poolside areas and patios where water is a constant. It offers a safe surface for everyone, from kids playing to guests mingling, allowing you to relax and enjoy your space without worry.

On the other hand, polished travertine offers a completely different look. It has a sleek, shiny surface that reflects light, creating an elegant and formal aesthetic. While this finish is undeniably beautiful, it becomes very slippery when wet. Because of this, polished travertine is generally reserved for indoor applications, like grand entryways or bathroom floors, where its sophisticated look can be appreciated without the risk posed by rain or pool water. For an outdoor project, it’s a finish best avoided.

So, while you can find travertine in various finishes, the choice for your outdoor living area is pretty clear. Tumbled travertine delivers that perfect combination of rustic charm and modern safety, ensuring your patio or pool deck is as functional as it is stunning. It preserves the organic beauty of the stone while providing the durability and peace of mind you need for a well-loved outdoor space.

Stays Cool Underfoot, Even in the Sun

We’ve all experienced that frantic hop across a scorching hot patio on a sunny July afternoon. With Light Ivory Travertine, you can say goodbye to burnt feet. Thanks to its light, creamy color and natural composition, travertine reflects sunlight and stays remarkably cool to the touch, even in direct sun. This makes it incredibly comfortable for walking barefoot, lounging by the pool, or letting the kids play on the patio. It’s a small detail that makes a huge difference in how much you can enjoy your outdoor living space during the peak of summer. You can step outside with confidence, knowing your patio will be a comfortable oasis.

Designed to Last Through Every Season

Investing in your outdoor space means choosing materials that can withstand the test of time and weather. Light Ivory Travertine is known for its exceptional durability. This dense, strong natural stone is built to handle Long Island’s demanding climate, from hot, humid summers to freezing winters. It’s resistant to the freeze-thaw cycles that can cause other materials to crack and crumble over time. With professional masonry installation, your travertine pavers will maintain their structural integrity and classic beauty for decades, making them a reliable and long-lasting choice for any outdoor project.

Say Goodbye to Puddles with Great Drainage

After a summer rainstorm, the last thing you want is a patio covered in puddles. The same porous nature that makes travertine slip-resistant also gives it excellent drainage capabilities. Water is absorbed into the stone and dissipates naturally, preventing standing water from accumulating on the surface. This not only keeps your patio cleaner and ready to use sooner after it rains but also helps protect the pavers and the foundation beneath them. For added protection against spills and stains, our restoration and sealing services can ensure your travertine stays looking pristine while maintaining its natural drainage benefits.

Choosing Your Travertine Paver Size and Pattern

Once you’ve decided on light ivory travertine, the next fun part is figuring out how it will all come together. The size of your pavers and the pattern you lay them in are just as important as the stone itself. These choices define the personality of your space, whether you’re aiming for a classic, rustic feel or something more modern and streamlined. Let’s walk through the options to help you find the perfect combination for your project.

Picking the Perfect Paver Size and Thickness

Light ivory travertine pavers offer a wonderful variety of sizes, which gives you a lot of creative freedom. Most commonly, you’ll find them in a set that includes 8×8, 8×16, 16×16, and 16×24-inch pieces. This mix is designed to be laid together in an interlocking pattern. The standard thickness is about 1.25 inches, which is perfect for handling foot traffic around a patio or pool. Having these different sizes to work with means you can avoid a monotonous, grid-like look and create something with more visual texture and interest. Our team can help you explore the full range of porcelain and natural stone options to find the perfect fit.

Classic Layouts: The Timeless French Pattern

One of the most beloved layouts for travertine is the French Pattern, also known as the Versailles pattern. Instead of using a single-sized paver, this design uses the four different sizes I mentioned earlier to create a beautiful, seemingly random arrangement that adds instant character. It’s a timeless choice that feels both elegant and relaxed. The interlocking design is not only visually appealing but also incredibly strong and stable once installed. This makes the French Pattern a fantastic and flexible choice for almost any application, from a sprawling patio to a winding garden path. The right masonry design can truly transform your outdoor space.

Design Ideas for Every Space, Big or Small

The beauty of light ivory travertine is its versatility—it looks right at home in so many different settings. Outdoors, it’s a go-to material for creating stunning, resort-like spaces. Think of elegant driveways, welcoming walkways, and spacious patios perfect for entertaining. It’s especially popular for swimming pool decks because it stays cool to the touch and isn’t slippery when wet. But don’t limit this gorgeous stone to the outdoors! You can also bring it inside to create a seamless flow from your patio to your interior. It works beautifully for bathroom floors, shower walls, and even laundry rooms, adding a touch of natural warmth and luxury throughout your home.

How Your Pattern Choice Shapes the Final Look

Your choice of pattern does more than just fill a space; it sets the entire mood. Because travertine is a natural stone, no two pavers are exactly alike. Each one has subtle variations in color, shade, and texture, which is what gives it so much depth and beauty. Most light ivory pavers come with a tumbled finish, which means the edges are softened and slightly rounded. This process gives the stone a rustic, aged appearance that feels comfortable and inviting from day one. The pattern you choose will highlight these unique characteristics, creating a final look that is completely your own. Proper care, including professional cleaning and sealing, will keep that look pristine for years.

Where Can You Install Light Ivory Travertine Pavers?

One of the best things about light ivory travertine is its incredible versatility. This isn’t a stone that’s limited to just one type of project. Whether you’re planning a complete backyard overhaul or a simple, elegant update, these pavers can fit beautifully into your vision. Their durability and classic look make them a fantastic choice for almost any flat surface, both inside and out. Let’s walk through some of the most popular and impactful ways you can use them to transform your Long Island home.

The Perfect Paver for Your Pool Deck

If you’re dreaming of a luxurious, resort-style pool area, light ivory travertine is your answer. Its naturally porous texture provides excellent grip, creating a non-slip surface that’s safer for wet feet—a must-have for any family with kids. Plus, its light color reflects the sun’s heat, so the ground stays comfortably cool on even the hottest summer days. Imagine stepping out of the water onto a surface that’s soft, cool, and beautiful. It’s the perfect material to frame your swimming pool, adding a touch of elegance that feels both timeless and inviting. This is how you create a backyard oasis you’ll never want to leave.

Design Your Dream Patio Space

Your patio is the heart of your outdoor living space, and light ivory travertine pavers provide the perfect foundation. Their warm, neutral tones blend seamlessly with any style, from rustic to modern, and complement lush greenery and colorful flowers. Because they are so durable, they can easily handle heavy patio furniture, grills, and years of foot traffic from family gatherings. A travertine patio serves as a beautiful, natural extension of your home, creating an ideal spot for morning coffee, evening dinners, or simply relaxing with a good book. It’s a classic choice that forms the backbone of a truly functional and beautiful outdoor design.

Craft Elegant Walkways and Driveways

Want to make a great first impression? Start with your driveway and walkways. Using light ivory travertine pavers for these high-traffic areas instantly adds curb appeal and a sense of refined elegance. This natural stone is incredibly strong and built to withstand the weight of vehicles and constant use, all while resisting the freeze-thaw cycles of Long Island winters. A beautiful travertine walkway guiding guests to your front door or a winding garden path creates a cohesive and polished look throughout your property. It’s a practical upgrade that proves you don’t have to sacrifice style for strength.

Create a Seamless Indoor-Outdoor Flow

For a truly high-end, cohesive design, consider using light ivory travertine both inside and outside your home. Imagine opening your patio doors and seeing the same beautiful flooring flow from your living room or kitchen directly onto your patio. This technique creates a seamless transition that makes your living space feel larger, brighter, and more connected to nature. It’s a sophisticated look that works especially well for homes with large glass doors or an open-concept layout. This approach can tie your entire home remodeling project together, creating a unified aesthetic that is both stunning and unique.

A Stone with a Storied History in Architecture

Travertine is more than just a beautiful material; it’s a stone with a story. Its use in architecture has a rich history that dates back thousands of years. The ancient Romans, in particular, relied on it for some of their most enduring structures. The Colosseum, for example, is the largest building in the world constructed primarily of travertine, a testament to its incredible strength and durability. The stone’s name even comes from its origins near Tivoli, Italy. When you choose travertine for your patio or pool deck, you’re not just selecting a paver. You’re connecting your home to a legacy of timeless design and proven longevity, bringing a piece of architectural history right to your backyard.

How to Budget for Your Travertine Paver Project

Breaking Down the Cost of Travertine Pavers

Planning your budget for Light Ivory Travertine is the first step to bringing your vision to life. The price for the pavers themselves typically ranges from about $4.25 to $5.79 per square foot. This gives you a solid baseline for the material costs, but keep in mind that the final price can vary depending on the specific finish and quality you choose. Think of it like picking out any other home finish—there are different tiers available. At Gappsi, we can walk you through our curated selection of porcelain and natural stone pavers to find the perfect match for your budget and aesthetic, ensuring you get a clear and accurate quote for your project.

Considering Installation and Long-Term Value

Beyond the price per square foot, your budget should also account for installation and future care. A pro tip from installers everywhere: plan on purchasing about 10% more material than your project measurements require. This extra stock covers any cuts, accidental breaks, or tricky corners, saving you from a last-minute scramble for more pavers. To protect your beautiful new patio or walkway for the long haul, consider the value of professional sealing. A quality sealant prevents stains and weather damage, and our team offers expert restoration and sealing services to keep your investment pristine. For everyday cleaning, a simple mix of soap and water is all you need—just be sure to avoid harsh, acidic cleaners.

How to Calculate How Much Travertine You Need

Calculating the right amount of material can feel a bit tricky, but a few key details make it much easier. Remember that travertine pavers are typically sold by the crate or pallet, so you’ll need to round up your order to the nearest full unit. This is an important detail to factor into your total cost. The installation method also plays a role; for example, setting the pavers on a packed sand bed is a common technique that will have its own material and labor costs. Working with our experienced masonry design and construction team takes the guesswork out of the equation. We handle all the precise calculations to ensure you get exactly what you need.

How to Choose a Quality Travertine Supplier

Finding the right travertine pavers is only half the battle; choosing the right supplier is just as crucial for a smooth project. A great supplier doesn’t just sell you stone—they provide expertise, stand behind their product, and ensure you get exactly what you need. When you partner with a company that has a long-standing reputation, you’re not just buying materials; you’re investing in peace of mind. The right partner will guide you through selecting the perfect grade, understanding warranties, and coordinating logistics, making the entire process feel effortless.

At Gappsi, we source and supply a wide range of porcelain and natural stone pavers, ensuring every piece meets our high standards for beauty and durability. We believe that a quality product is the foundation of any stunning outdoor space, and we’re here to help you find the perfect match for your home. By working with an experienced team, you can be confident that your investment is sound and your project will look incredible for years to come.

Where in the World Does Travertine Come From?

This beautiful stone has a rich history that spans the globe, and knowing its origins helps you appreciate its quality. Travertine is a special type of limestone that forms around mineral springs, which is what gives it those unique, porous textures we love. For over two thousand years, Italy was the heart of the travertine world, with quarries near Rome supplying the stone for iconic structures like the Colosseum. While Italy’s legacy is undeniable, the market has since expanded. Today, much of the high-quality travertine you see comes from quarries in Turkey, Mexico, Peru, and Spain. This global sourcing is great for homeowners because it means more variety in colors and patterns. When you choose your pavers, you’re not just picking a material; you’re selecting a piece of natural history from a specific part of the world.

How to Spot High-Quality Travertine

When you start shopping, you’ll notice that travertine comes in different grades. Premium or first-choice pavers will have the most consistent color and the fewest pits or imperfections. Light ivory travertine is prized for its delicate, off-white base with subtle hints of beige and tan, creating a soft, luxurious look. It’s important to remember that since travertine is a natural stone, no two pavers are exactly alike. You’ll see slight variations in shade and texture from piece to piece, which is part of what gives it such a unique and organic character. Embrace these differences—they ensure your patio or pool deck is truly one-of-a-kind.

Finding a Supplier You Can Trust

A reputable supplier will always stand by their products. Look for companies that offer a solid warranty and have a proven track record of excellent customer service. A good warranty protects your investment and shows that the supplier is confident in the quality of their materials. For over 30 years, Gappsi has been a trusted name in Long Island home improvement, building a reputation for quality craftsmanship and reliable service. When you source your materials through the Gappsi Store, you can rest assured that you’re getting premium products backed by a team that cares about your project’s success.

Key Questions to Ask Before You Buy

Before you commit, make sure you have all the information you need. Don’t hesitate to ask your supplier for a detailed estimate that includes the cost of the pavers and shipping. For larger projects, some suppliers may even offer discounts on bulk orders. It’s also a good idea to ask about their inventory, lead times, and return policy. If you have specific questions or a particularly large order, picking up the phone and speaking with a customer care representative can be incredibly helpful. And while you’re at it, ask if they offer installation—a full-service company can streamline your project by handling both supply and masonry construction.

What to Expect from Shipping and Delivery

Logistics are a key part of the process, so plan ahead for shipping and delivery. A great first step is to order a sample. This allows you to see and feel the paver in person and check how the color looks in your space before placing a full order. Once you’re ready to buy, confirm the delivery timeline, which can often be one to two weeks. Find out how the pavers will be delivered—will they be dropped at the curb, or can they be placed closer to your project area? Working with a local, full-service company like Gappsi simplifies this entire step, as we manage the sourcing, delivery, and installation for a seamless experience.

How to Care for Your Light Ivory Travertine

Your light ivory travertine pavers are an investment in your home’s beauty, and with a little care, they’ll look stunning for years. Travertine is naturally durable and stands up well to the elements, but like any natural stone, it needs some attention to maintain its classic charm. Think of it less as a chore and more as a simple routine to protect your beautiful outdoor space. A consistent cleaning schedule prevents dirt from settling into the stone’s porous surface and keeps stains from becoming permanent. Following a few key steps will ensure your patio, pool deck, or walkway remains a pristine and inviting retreat for your family and friends.

This guide will walk you through the simple, effective ways to care for your travertine, from daily upkeep to handling those inevitable spills. It’s all about establishing good habits that will protect your stone and keep it looking as good as the day it was installed. With the right approach, maintenance is straightforward and ensures your outdoor living area is always ready for relaxing or entertaining. We’ll cover everything from the best cleaning methods to the importance of sealing, so you can feel confident in keeping your beautiful pavers in top condition. The goal isn’t to spend every weekend scrubbing, but to implement small, consistent actions that make a huge difference in the long run.

Your Daily and Weekly Cleaning Routine

The best way to keep your travertine looking fresh is with simple, regular cleaning. For patios and walkways, a quick sweep with a broom a few times a week will do wonders. This prevents leaves, dirt, and other debris from getting ground into the surface, which can cause scratches and discoloration over time. You can also “dust mop daily” if your pavers are in a covered or indoor-to-outdoor space. For a deeper clean, simply rinse the area with a garden hose to wash away any loose grime. This small effort is the easiest way to preserve the natural beauty of your stone.

To Seal or Not to Seal Your Travertine?

This is a common question, and the answer is a definite yes. We highly recommend you “seal pavers to prevent stains” and protect them from moisture, dirt, and spills. Sealing creates an invisible barrier on the stone’s surface, making it much easier to clean up messes before they soak in. For the best protection, you should plan to “reseal regularly,” typically every one to two years, depending on how much foot traffic the area gets. If you prefer to leave it to the experts, Gappsi’s professional restoration and sealing services can ensure your pavers are perfectly protected.

Handling Spills and Preventing Stains

Accidents happen, especially when you’re enjoying your outdoor space. The key to preventing a permanent mark is to “clean up stains immediately.” Whether it’s a spilled glass of red wine during a barbecue or some grease from the grill, blotting the spill right away will keep it from setting into the porous stone. It’s also crucial to avoid using “acidic cleaners” like vinegar or citrus-based solutions, as they can etch and damage the travertine’s surface. Stick to gentle, pH-neutral cleaners or a simple mix of mild soap and water for the best results.

Protecting Your Pavers from Acidic Substances

When it comes to keeping your light ivory travertine looking its best, it’s important to know its one major vulnerability: acid. Because travertine is a calcium carbonate-based stone, similar to marble and limestone, it can be damaged by even mild acids. Spills from things like wine, citrus juice, or vinegar can react with the stone and cause etching, which looks like a dull or discolored spot on the surface. This isn’t a stain that sits on top; it’s a physical change to the stone itself, which is why prevention is so important for maintaining that smooth, elegant finish.

To keep your pavers safe, always avoid acidic cleaners. This means steering clear of common household products like vinegar or lemon-based cleaning solutions, which can do more harm than good. Instead, your go-to cleaning solution should be a gentle, pH-neutral cleaner specifically designed for natural stone, or a simple mixture of mild dish soap and warm water. This gentle approach will effectively clean your travertine without stripping its natural luster or causing any surface damage, ensuring it stays beautiful for every season of outdoor enjoyment.

Accidents are a part of life, but they don’t have to ruin your patio. The best defense against acidic spills is to act fast. By blotting spills immediately, you can prevent them from penetrating the stone and causing a permanent etch. For an added layer of defense, professional sealing is a game-changer. Our restoration and sealing services apply a protective barrier that gives you more time to clean up messes, helping to preserve the pristine condition of your investment for years to come.

Tips for Long-Term Travertine Care

Long-term care is all about consistency and using the right products. When you need to tackle a tougher spot, always “avoid harsh cleaning agents” and chemical-heavy products. A gentle scrub with “soap and water for stains” is often all you need. For more stubborn grime, look for a cleaner specifically designed for natural stone. An occasional deep clean with a pressure washer on a low setting can also help, but be careful not to use too much pressure, as it can damage the stone. With these straightforward habits, your light ivory travertine will remain a beautiful centerpiece of your home for a lifetime.

Is Travertine Suitable for Long Island Winters?

This is a big question for any Long Island homeowner, and a valid one. We know our winters can be tough, and you want to choose a material that won’t just survive, but thrive. The great news is that high-quality light ivory travertine is an excellent choice for our climate. This dense, strong natural stone is specifically built to handle demanding weather, from our humid summers to our freezing winters. Its inherent durability makes it resistant to the very issues that cause other materials to fail, ensuring your beautiful patio or walkway remains intact season after season. It’s a material you can count on to maintain its integrity and beauty, no matter what the weather brings.

Understanding Freeze-Thaw Cycles

The term “freeze-thaw cycle” describes winter’s biggest threat to outdoor surfaces. It’s what happens when moisture seeps into the tiny pores of a material, freezes, and expands. When the ice thaws, it contracts, and the cycle repeats, creating stress that eventually leads to cracking and crumbling. Light Ivory Travertine is exceptionally resistant to this damaging process. Its natural composition is dense enough to prevent significant water absorption that leads to structural damage. When paired with professional masonry installation that ensures proper drainage, your travertine pavers will withstand these cycles for decades, making them a smart and reliable investment for your home.

Related Articles

Frequently Asked Questions

Is travertine high-maintenance? Not at all. The best way to care for travertine is with simple, consistent habits. Regularly sweeping away leaves and dirt prevents grime from building up. For a deeper clean, a quick rinse with a garden hose is usually all you need. It’s more about routine upkeep than intense scrubbing, which keeps your outdoor space looking its best with minimal effort.

Will all my pavers look identical? Because travertine is a natural stone, you’ll see subtle variations in color and texture from one paver to the next. This isn’t a flaw—it’s actually one of its best features. These slight differences give the surface a rich, organic character and ensure your patio or walkway is completely unique. It’s a look that man-made materials just can’t replicate.

How well does travertine handle Long Island winters? It handles them beautifully. Light ivory travertine is a dense and durable stone that is well-suited for climates with freezing and thawing cycles. When installed correctly, it resists cracking and damage from the cold, making it a reliable and long-lasting choice for any outdoor project here on Long Island.

Is sealing my travertine pavers really necessary? Yes, I always recommend it. Think of sealant as an invisible shield for your stone. It helps prevent spills from soaking in and turning into permanent stains, making cleanup much easier. Sealing also protects the pavers from the elements and keeps them looking pristine. Plan on resealing every couple of years to maintain that protection.

Can I use these pavers for a project other than a patio or pool deck? Absolutely. Light ivory travertine is incredibly versatile. It’s strong enough to be used for driveways and creates beautiful, welcoming walkways. You can even bring it inside to create a seamless transition from your outdoor space into a mudroom, laundry room, or bathroom for a cohesive and high-end feel throughout your home.

Share this page: