Choosing a finish for your pavers is a design decision, just like picking a paint color for your living room. The final touch that ties your whole outdoor aesthetic together is the paver sealer. This single product can dramatically change the look and feel of your patio or walkway. Do you love the deep, rich tones your pavers have right after it rains? A wet-look sealer can make that look permanent. Or do you prefer the original, understated color of the stone? A natural-finish sealer offers invisible protection. This guide is all about style, helping you explore the different finishes, from matte to high-gloss, so you can find the perfect paver sealer to match your vision while protecting your surfaces.
Key Takeaways
- Protect your investment with paver sealer: It’s the best way to guard against stains, prevent weed growth, and defend your pavers from weather damage, which keeps them looking new for years.
- Choose a finish that matches your style: Select a sealer based on the final look you want, from a completely natural, invisible shield to a rich, wet-look gloss that makes colors pop.
- Prioritize preparation for a flawless result: The success of your project depends on a perfectly clean and completely dry surface; rushing the prep work is the most common cause of a cloudy or peeling finish.
Why Seal Your Pavers?
You’ve invested in a beautiful paver patio, walkway, or driveway, and it looks fantastic. But how do you keep it that way? The secret is paver sealer. Think of it as the final, crucial step in protecting your outdoor space. Sealing your pavers isn’t just about looks; it’s a practical measure that defends against stains, weather, and weeds, extending the life of your investment. By creating a protective barrier, a good sealer ensures your pavers stay as strong and vibrant as the day they were installed. It’s a simple process that saves you from future headaches and costly repairs, making it one of the smartest things you can do for your property.
Protect and Enhance Paver Color
One of the first things you’ll notice about unsealed pavers is how the sun can dull their color over time. Just like a coat of paint fades, the rich tones of your pavers can wash out from constant UV exposure. Applying a sealer acts like sunscreen, locking in the original color and preventing that sun-bleached look. It not only protects the color but can also enhance it, giving the stones a richer, deeper appearance. This simple step ensures your beautiful natural stone pavers maintain their vibrancy, keeping your outdoor space looking fresh and new for years to come.
Prevent Stains from Spills and Grime
Life happens, and on a patio, that often means spills. From a tipped-over glass of red wine during a barbecue to an oil leak from a car on the driveway, stains are a real threat. Pavers are naturally porous, meaning they absorb liquids quickly, which can lead to permanent discoloration. Sealer creates an invisible shield on the surface, preventing spills from soaking in. This makes cleanup incredibly easy, as most messes can be wiped or rinsed away without a trace. Taking the time to seal your surfaces is the best way to prepare for our professional restoration and sealing services down the line.
Stop Weed Growth and Stabilize Joint Sand
Few things ruin the clean look of a paver patio faster than weeds sprouting up between the joints. Sealing your pavers is a fantastic way to combat this problem. When applied, the sealer soaks into the joint sand and hardens it, creating a durable bond. This solid barrier makes it much more difficult for weed seeds to take root and grow. It also prevents the sand from washing out during heavy rainstorms, which keeps your pavers from shifting. This stabilization is a key part of any quality masonry project and helps reduce your long-term maintenance chores.
Defend Against Weather Damage
Here on Long Island, our pavers face everything from hot summers to freezing winters. This constant cycle of weather can take a toll. When water seeps into unsealed pavers and freezes, it expands, causing cracks and surface flaking. A quality sealer is water-repellent, preventing moisture from getting in and protecting against this freeze-thaw damage. It also helps stop the growth of mold and mildew and reduces efflorescence, that chalky white residue that can appear on the surface. This protection is vital for maintaining the structural integrity of your driveways and patios through every season.
What Are the Main Types of Paver Sealers?
Walking into the sealer aisle can feel a bit overwhelming. You’ll see terms like “water-based,” “solvent-based,” “penetrating,” and “film-forming,” and it’s easy to wonder which one is right for your beautiful patio or driveway. Think of it like choosing a top coat for a manicure: some give a subtle, natural sheen, while others provide a high-gloss, dramatic finish. Each type of paver sealer offers a different combination of look, protection, and application process, so it’s all about finding what works for your project and your personal style.
Understanding the main categories is the first step to making a great choice. The biggest decision you’ll make is between a water-based and a solvent-based formula. This choice affects everything from the application process and the final appearance to the level of maintenance required down the road. After that, you’ll want to consider whether you prefer a sealer that soaks into the paver or one that forms a protective film on top. Don’t worry, it’s not as complicated as it sounds. We’ll break down exactly what these terms mean so you can find the perfect match for your outdoor space. Our team at Gappsi is always ready to help with professional restoration and sealing services if you prefer to leave it to the experts.
Water-Based vs. Solvent-Based
The most common way to categorize sealers is by their base: water or solvent. Water-based acrylic sealers are a popular choice for homeowners because they are easy to work with, have low odors, and are generally safer for nearby plants and pets. They provide a lovely, subtle sheen without harsh chemicals. On the other hand, solvent-based sealers are known for creating that rich, “wet look” that really makes paver colors pop. They offer excellent protection and are especially effective on brick, giving it a deep, vibrant finish that enhances its natural texture.
Penetrating vs. Film-Forming
Next, you’ll want to decide if you want a sealer that works from within or one that protects from the top. Penetrating sealers do exactly what their name suggests: they soak deep into the paver material. This creates an invisible shield that protects from the inside out and won’t peel or flake over time. It’s the perfect choice if you love the natural look of your stone pavers and want protection without changing their appearance. Film-forming sealers create a protective layer on the surface, which can give your pavers a satin or glossy finish while guarding against stains and wear.
Exploring Eco-Friendly Options
If minimizing your environmental impact is a priority, you’ll be happy to know there are great eco-friendly paver sealers available. These products are typically water-based, non-toxic, and formulated to be safe for your family, pets, and garden. They have little to no odor and contain zero volatile organic compounds (VOCs), which are harmful chemicals found in many traditional formulas. You can get excellent protection with a natural finish while making a choice that’s better for the environment. You can find high-quality, responsible options at the Gappsi Store to complete your project with peace of mind.
Which Paver Sealer Finish Is Right for You?
Choosing a paver sealer isn’t just about protection; it’s also about style. The finish you select can dramatically change the look of your patio, walkway, or driveway. Do you love the original, dry look of your stone, or do you prefer a rich, vibrant appearance that makes the colors pop? Your answer will guide you to the perfect sealer. Think of it as the final touch that defines your outdoor space’s personality. Let’s walk through the most popular finishes to help you find the one that matches your vision.
The Natural Look: For Subtle Protection
If you adore the authentic color and texture of your pavers, a natural look sealer is your best bet. This type of sealer penetrates deep into the stone, creating an invisible shield against moisture, stains, and UV rays without adding any shine or altering the appearance. It’s the ideal choice for maintaining a classic, understated aesthetic while still getting all the protective benefits. Your pavers will look just as they did before sealing, but they’ll be much better equipped to handle spills and harsh weather. Consider it a hardworking, behind-the-scenes hero for your beautiful natural stone.
The Wet Look: To Deepen Color
Want to make your paver colors look richer and more saturated? A wet look sealer is the way to go. This finish enhances your pavers by giving them the deep, vibrant appearance they have right after it rains. It’s a fantastic option for bringing out the complex tones and details in decorative pavers, making your patio or pool deck a true standout feature. The glossy finish not only deepens the color but also adds a layer of shine that catches the light beautifully. This is a popular choice for anyone looking to give their outdoor surfaces a fresh, polished, and permanently lustrous look.
Semi-Gloss and High-Gloss Finishes
For those who want a noticeable shine, semi-gloss and high-gloss sealers deliver a striking, reflective finish. These film-forming sealers create a strong protective topcoat that offers excellent durability and color enhancement. A semi-gloss finish provides a subtle luster, while a high-gloss option creates a much more dramatic, polished effect. These finishes are great for making a bold statement and are especially effective on smooth pavers. While solvent-based versions typically offer the highest shine, water-based options can provide a lovely sheen with fewer odors. You can find a variety of these premium sealers to achieve the exact level of gloss you desire.
What Are the Best Paver Sealer Brands?
Walking down the sealer aisle can feel overwhelming with so many brands promising the best results. Over our decades of experience, we’ve worked with countless products and have learned which ones truly deliver on their promises. The right brand for you depends on the look you want to achieve, the level of protection you need, and how you plan to apply it. We’ve found that focusing on trusted, high-quality brands saves a lot of headaches down the road. A premium sealer not only looks better but also lasts longer, giving you more value for your investment.
To help you make a confident choice, we’ve broken down some of our top recommendations and what makes them stand out. Whether you’re looking for a high-gloss finish or something more subtle, there’s a great option available. We’ll also cover the key features to look for so you can evaluate any brand like a pro.
Our Professional Sealer Recommendations
When clients ask for our top picks, a few names consistently come to mind. For a beautiful, deep wet look with a semi-gloss finish, Super Seal 25 is an excellent all-around choice. It’s a solvent-based sealer that does a fantastic job of enhancing color and stabilizing the sand in paver joints. If you want an even glossier, high-shine finish, its counterpart, Super Seal 30, offers similar protective qualities with a more dramatic look. For those who prefer a water-based product, we often recommend Masonry Saver Paver Sealer. It provides a lovely satin shine and a subtle wet look while still locking joint sand in place effectively.
Comparing Top Brands: Techniseal, SureCrete, and More
Beyond our go-to sealers, other brands offer fantastic, specialized products. Techniseal is a popular choice, particularly its NS Joint Stabilizer & Paver Sealer. This product is great for creating a clear, protective film that prevents joint sand from washing away while guarding against stains and erosion. Another reliable name is SureCrete, which offers a wide range of sealers known for their excellent protection against moisture, stains, and UV damage. Choosing between these top-tier brands often comes down to the specific needs of your patio or driveway. Our team often handles the entire restoration and sealing process for homeowners, which gives us firsthand experience with how these products perform in Long Island’s climate.
What to Look For: Durability, Protection, and Ease of Use
When you’re comparing sealers, keep three key factors in mind: durability, protection, and ease of use. Durability determines how long the sealer will last. Solvent-based acrylics typically last two to four years, while water-based versions last one to three years. Penetrating sealers can last even longer, sometimes up to ten years. For protection, look for a product that offers UV defense to prevent fading, stain resistance, and joint stabilization to stop weed growth. Finally, consider ease of use. Water-based sealers are generally easier to work with, have less odor, and clean up with just soap and water, making them a great choice for DIY projects.
How Much Does Paver Sealer Cost?
Figuring out the budget for your paver sealing project is a great first step. The cost of paver sealer is an investment in protecting your beautiful patio, walkway, or driveway from the elements and everyday wear. While prices can vary, understanding the key factors will help you plan effectively and choose a product that gives you the best long-term results. The total cost depends on the type of sealer you choose, the size of your space, and the texture of your pavers. Let’s break down what you can expect to spend.
Typical Price Ranges by Sealer Type
Generally, you can expect paver sealer to cost between $50 and $60 per gallon, with some premium or specialized formulas costing more. For most residential projects, you’ll likely buy a larger container. A 5-gallon pail often runs from $150 to $300 or more, depending on the quality and type. Water-based sealers are sometimes more affordable than solvent-based options, but the price is really driven by the quality of the ingredients and the performance features, like UV resistance or stain protection. You can find a curated selection of high-quality options at the Gappsi Store to fit different project needs and budgets.
Calculating Cost Per Square Foot
To figure out exactly how much sealer you’ll need, you have to consider the coverage rate. A good rule of thumb is that one gallon of sealer will cover about 125 square feet, but this can change quite a bit. The key is the porosity and texture of your pavers. A smooth, dense surface might get up to 300 square feet of coverage per gallon, while more porous or textured pavers could absorb more sealer, bringing your coverage down to around 200 square feet per gallon. Before you buy, measure the length and width of your area to get the total square footage. This will help you understand the unique qualities of your porcelain and natural stone surfaces.
Finding the Best Value for Your Project
The best value isn’t always the lowest price tag. A cheaper sealer might save you money upfront, but if it requires reapplication every year, it can cost you more time and money in the long run. Think about the needs of your space. A high-traffic driveway will benefit from a more durable, protective sealer than a quiet garden path. Buying a 5-gallon pail is almost always more cost-effective per gallon than buying individual gallons. Ultimately, the best value comes from choosing a sealer that provides the right finish and level of protection for your specific pavers, ensuring they stay beautiful for years. If you want a perfect application without the guesswork, our professional restoration and sealing services offer excellent long-term value.
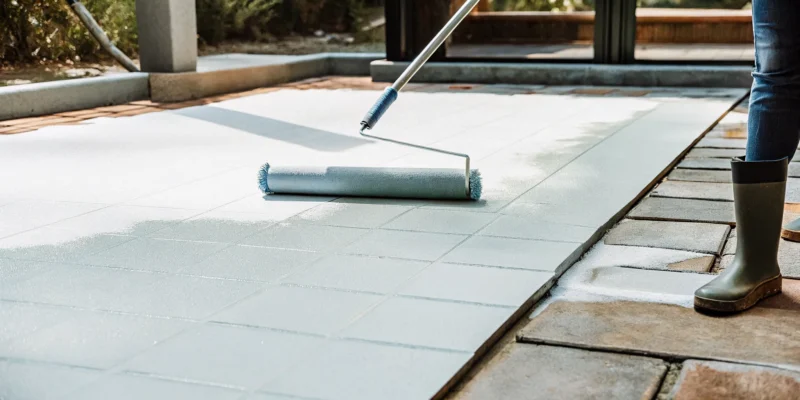
How to Apply Paver Sealer: A Step-by-Step Guide
Applying paver sealer is a fantastic weekend project that can make a huge difference in the look and longevity of your patio, walkway, or driveway. With the right preparation and a bit of patience, you can achieve a professional-quality finish that protects your investment for years to come. Before you begin, it’s a good idea to gather all your tools. You’ll likely need a stiff-bristle broom, a pressure washer, a paver cleaner, a pump-style garden sprayer or a paint roller with an extension pole, and of course, your chosen sealer.
The process isn’t complicated, but each step builds on the last, so it’s important not to rush. The goal is to create a clean, dry surface so the sealer can bond properly with the pavers. From there, it’s all about applying thin, even coats and giving the product enough time to cure. Think of it as painting a room: the prep work takes the most time, but it’s what guarantees a beautiful result. While this is a very manageable DIY job, if you’re short on time or want to ensure a flawless application, our team offers expert restoration and sealing services to handle the entire process for you.
Step 1: Clean and Prep Your Pavers
You can’t get a lasting finish without a perfectly clean surface. This is the most critical step, so take your time with it. Start by sweeping away all loose dirt, leaves, and debris. Next, tackle any weeds or moss growing in the joints between the pavers. For stubborn stains like oil, grease, or rust, you’ll need a dedicated paver cleaner designed for those specific spots. Once you’ve treated any stains, it’s time to power wash the entire area. This removes ground-in dirt and any remaining cleaning solution. After washing, you must let the pavers dry completely. This can take at least 24 to 48 hours, depending on the weather. Sealing damp pavers will trap moisture, leading to a cloudy, white haze that is very difficult to remove.
Step 2: Check the Weather Forecast
Your sealer’s performance is highly dependent on the weather, so play meteorologist for a day. The ideal time to apply sealer is on a clear, dry day with low humidity and moderate temperatures, typically between 50 and 80 degrees Fahrenheit. Applying sealer in direct, intense sunlight or when it’s too hot can cause it to dry too quickly, preventing it from bonding correctly and leaving streaks. Conversely, if it’s too cold or humid, the sealer won’t cure properly and can develop that dreaded cloudy look. Plan your project for a day when you have a clear 24-hour window with no rain in the forecast. Always read the product label, as each manufacturer provides specific temperature and weather recommendations for the best results.
Step 3: Do a Small Patch Test
Before you commit to sealing your entire patio or driveway, always perform a patch test. This is a simple but essential step to ensure you’re happy with the final look. Choose a small, out-of-the-way area, like a corner behind a planter or near your home’s foundation, and apply the sealer exactly as you plan to for the main project. Let it dry completely according to the manufacturer’s instructions. This test allows you to see the true effect of the sealer on your specific pavers. You can check if you like the level of color enhancement and the sheen (whether it’s matte, satin, or gloss). It’s much better to discover you don’t like the finish on a two-square-foot patch than after you’ve sealed the whole space.
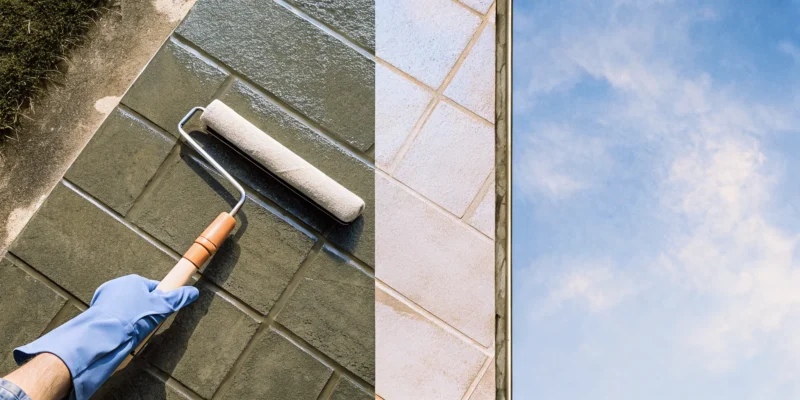
Step 4: Apply Thin, Even Coats
Now for the main event. The key to a smooth, uniform finish is applying the sealer in thin, even coats. A pump-style garden sprayer is often the best tool for the job, as it allows you to apply a consistent layer quickly. If you’re using a sprayer, work in manageable sections and use a sweeping motion. For smoother pavers, a short-nap roller can also work well. Your goal is to saturate the surface without letting the sealer puddle. If you see any pools forming, simply roll them out or back-brush them to spread the excess. Two thin coats are almost always better than one thick one. Let the first coat dry to the touch before applying the second, following the product’s specific instructions for recoating times.
Step 5: Let the Sealer Cure Completely
Patience is a virtue, especially when it comes to letting paver sealer cure. While the surface may feel dry to the touch within a few hours, it is not fully cured. Curing is the chemical process where the sealer hardens and bonds with the paver to create a durable, protective layer. This takes time. As a general rule, you should keep all foot traffic off the sealed area for at least four to six hours. Wait a full 48 to 72 hours before driving a car on a sealed driveway or placing heavy patio furniture back on your patio. Rushing this final step can lead to tire marks, scuffs, and a weakened finish, undoing all your hard work.
Common Paver Sealing Mistakes to Avoid
Sealing your pavers can feel like a big accomplishment, but a few simple missteps can undo all your hard work. Getting a durable, beautiful finish is all about the details. By learning what not to do, you can avoid the common issues that trip up many homeowners and ensure your patio or driveway looks fantastic for years. Let’s walk through the most frequent mistakes so you can get the job done right the first time.
Sealing Pavers While They’re Still Damp
Patience is truly a virtue when it comes to sealing pavers. One of the biggest mistakes is applying sealer before the pavers are completely dry after cleaning. Even a little bit of trapped moisture can cause big problems, leading to a cloudy, white haze under the sealer that’s difficult to fix. As experts note, this trapped moisture is a primary cause of whitening and sealer failure. To be safe, wait at least 24 to 48 hours after a deep cleaning or heavy rain before you even think about opening that can of sealer. Your pavers should be bone dry to the touch and below the surface.
Applying Too Much Sealer at Once
When sealing pavers, less is definitely more. It’s tempting to lay on a thick coat, thinking it will provide extra protection, but this often backfires. Applying too much sealer at once can create a host of issues, including whitening, peeling, and a splotchy, uneven finish. The goal is to apply thin, even coats that can properly absorb into the paver and cure correctly. Always follow the manufacturer’s guidelines on the product you purchase from the Gappsi Store. Using a roller or a sprayer can help you control the application and achieve that flawless, professional look without overdoing it.
Skipping Essential Prep Work
A great finish starts with a clean slate. Skipping the preparation stage is a recipe for a weak bond and a short-lived seal. Before you apply any sealer, the surface must be perfectly clean, free of dirt, grime, moss, and any chalky white residue, which is known as efflorescence. For the best results, you should wash the area thoroughly. Using a specialized paver preparator can help the sealer soak deeply into the concrete and adhere properly. Taking the time for meticulous prep work ensures your sealer performs its best and gives you the lasting protection you’re looking for. If the cleaning seems daunting, our restoration and sealing services can handle the prep for you.
Ignoring Temperature and Weather Warnings
Your local weather forecast is one of your most important tools for a paver sealing project. Applying sealer in the wrong conditions can ruin the finish. You should only apply sealer when air and surface temperatures are moderate, typically between 50°F and 95°F. If it’s too hot, the sealer can dry too quickly, leaving streaks and bubbles. If it’s too cold, it won’t cure properly. You should also avoid applying it on very windy days, which can blow debris onto the wet surface, or on rainy days, which will wash the sealer away. Always check the forecast for a clear, dry, and calm window of a few days to get the best results.
How Often Should You Reseal Your Pavers?
One of the most common questions we get is about how often pavers need to be resealed. As a general guideline, you should plan on resealing your paver patio, walkway, or driveway every two to three years. This simple maintenance step keeps them looking great and protects your investment from the elements. However, this isn’t a strict rule. The ideal frequency really depends on a few key factors, including Long Island’s weather, how much foot traffic the area gets, and the type of sealer you originally used. Some high-quality penetrating sealers can even last five years or more under the right conditions.
Think of paver sealer like sunscreen for your hardscape. It provides a protective barrier that wears down over time, exposing your pavers to UV rays that cause fading, moisture that can lead to cracks in the winter, and stains from spills. For homeowners who prefer a hands-off approach, Gappsi offers professional restoration and sealing services to ensure the job is done right, giving you long-lasting protection and peace of mind. Keeping up with a regular sealing schedule is the best way to preserve the color and integrity of your beautiful pavers for years to come.
Factors That Affect Your Sealer’s Lifespan
Several things can influence how long your paver sealer holds up. The type of sealer is a major factor. For example, a penetrating sealer soaks into the paver to form a protective shield from within and can last five years or more. A film-forming sealer, which creates a top coat, might need a fresh application every two to three years. The amount of traffic your pavers see also matters. A driveway or a popular patio space will show wear much faster than a decorative garden path. Finally, proper application is critical. Sealing pavers that are still damp or applying the sealer too thickly can cause it to fail early, leading to a cloudy or peeling finish.
Telltale Signs It’s Time to Reseal
So, how do you know when it’s time for a new coat? Your pavers will give you a few clear signals. The easiest way to check is with a simple water test. Sprinkle a little water onto the surface. If it beads up, your sealer is still doing its job. If the water soaks in and darkens the paver, the protective barrier has worn off. You might also notice that the colors look faded or that new stains from things like leaves or spills are becoming harder to clean. Any signs of whitening or flaking also mean it’s time to strip the old layer and reseal your porcelain and natural stone surfaces.
DIY vs. Hiring a Pro: What’s the Best Choice?
Deciding whether to seal your pavers yourself or call in a professional is a common crossroads for homeowners. The right choice really depends on your comfort level, the size of your project, and the results you’re aiming for. A DIY project can be rewarding, but a professional application offers peace of mind and a guaranteed finish. Let’s walk through the key considerations to help you decide which path is best for your patio, walkway, or driveway.
When to Tackle the Job Yourself
If you enjoy hands-on home projects and have a smaller area to cover, sealing your own pavers can be a great weekend task. You can apply sealer with a simple pump sprayer or a roller, but the key to success is all in the preparation. First, you must clean your pavers thoroughly to remove any dirt, grime, or stains. The most critical step, and the one where most DIY projects go wrong, is ensuring the pavers are completely dry before you apply the first coat. Sealing damp pavers can trap moisture, leading to a cloudy, white finish that’s difficult to fix.
The Benefits of a Professional Application
While doing it yourself can save some money upfront, hiring an expert often prevents costly mistakes down the road. Common issues like a milky finish, peeling, or an uneven sheen usually happen from applying too much sealer, not cleaning properly, or using the wrong product for your specific type of paver. A professional team has the experience and commercial-grade equipment to prepare the surface perfectly and apply the sealer correctly. Gappsi’s restoration and sealing services ensure a flawless, durable finish, saving you from the frustration of a DIY job gone wrong.
Comparing Costs and Long-Term Results
When you look at the budget, it’s important to think about long-term value. Many store-bought sealers need to be reapplied every two to three years. In contrast, professionals often use higher-quality penetrating sealers that can last five years or even longer, protecting your investment for years to come. Reapplying sealer too often can also cause a thick, unattractive buildup on the surface. By investing in a professional application, you not only get a better initial result but may also spend less time and money on maintenance over the life of your pavers.
Find Your Perfect Paver Sealer with Gappsi
Choosing the right paver sealer can feel like the final, crucial step in perfecting your outdoor space. Whether you’re a dedicated DIYer ready to tackle the project yourself or you’d prefer to leave it to the experts, we have the products and services to ensure your patio, walkway, or driveway looks its best for years to come. At Gappsi, we simplify the process by offering both high-quality materials and professional application, so you can find the exact solution that fits your needs and lifestyle. We’re here to help you protect your investment and keep your hardscapes looking beautiful.
Shop Our Selection of Premium Sealers
Finding the right sealer really comes down to the look you want to achieve and the level of protection your pavers need. Do you love the deep, rich color of your pavers when they’re wet? A wet-look sealer is perfect for that. Or maybe you prefer a subtle, matte finish that looks completely natural. We have options for that, too, along with semi-gloss and high-gloss finishes. At the Gappsi Store, you can browse our selection of premium sealers, each designed to protect your hardscapes from stains, water damage, and UV rays. A quality sealer also stabilizes the joint sand, which is key to preventing weed growth and insect infestations.
Schedule Your Professional Sealing Service
If you want a flawless finish without the guesswork, our team is ready to help. A professional application ensures every step is done right, from the initial cleaning to the final coat. We make sure your pavers are completely dry before application, which is critical for avoiding that hazy, cloudy look that can happen when moisture gets trapped. Our restoration and sealing services provide long-lasting protection and a perfect finish every time. Plus, we can advise you on the best maintenance schedule. Most pavers need resealing every two to three years to maintain their beauty and durability, especially with Long Island’s changing seasons. Let us handle the work so you can simply enjoy your beautiful outdoor space.
Frequently Asked Questions
Will sealing my pavers make them slippery? This is a great question, and a very common concern, especially for pool decks and walkways. The answer depends on the type of sealer you choose. Film-forming sealers, particularly high-gloss ones, can reduce the traction of the surface. However, many modern sealers include anti-slip additives to provide a safe, textured finish. If slipperiness is a concern, a penetrating sealer is an excellent choice because it soaks into the paver without forming a surface film, leaving the natural texture unchanged.
How soon can I seal newly installed pavers? It’s best to wait a bit before sealing a brand-new paver installation. Pavers can release a white, chalky substance called efflorescence as they cure, which is a natural process. Sealing too early can trap this haze underneath the protective layer. We generally recommend waiting at least 30 to 60 days after installation to give the pavers time to cure and release any initial efflorescence before you apply the first coat of sealer.
What’s the most common mistake people make when sealing their own pavers? By far, the most frequent mistake is applying sealer before the pavers are completely dry. Even a small amount of moisture trapped under the sealer can create a cloudy, milky-white haze that is very difficult to remove. After cleaning your pavers, you should wait at least 24 to 48 hours in dry, sunny weather to ensure they are bone dry all the way through before you begin sealing.
My pavers already have an old sealer on them. Can I just apply a new coat over it? It depends on the condition of the old sealer and the type you plan to use. If the existing sealer is a water-based product and is simply wearing thin without peeling or flaking, you can often apply a new coat after a thorough cleaning. However, if the old sealer is peeling, hazy, or if you are switching from a solvent-based to a water-based product (or vice versa), you will likely need to strip the old layer off first to ensure the new coat adheres properly.
How long do I have to wait to walk or drive on my newly sealed pavers? Patience is key after you’ve finished the job. While the sealer might feel dry to the touch in just a few hours, it needs more time to fully cure and harden. As a general rule, you should keep foot traffic off the area for at least four to six hours. For driveways, wait a full 48 to 72 hours before driving or parking a car on the surface to prevent tire marks and ensure a durable, long-lasting finish.