Changing the Color of a Nicolock Paver Driveway in East Northport, NY with Professional Paver Staining

View Gappsi’s YouTube Channel to view Changing the Color of a Nicolock Paver Driveway in East Northport, NY with Professional Paver Staining

A beautiful driveway is one of the first things people notice about a home. Over time, however, even the highest-quality pavers can begin to show their age. Homeowners often expand their driveways to accommodate additional vehicles, but matching new pavers to older ones can be nearly impossible. Differences in manufacturing batches, years of weather exposure, and discontinued color options often result in a driveway that looks mismatched rather than seamless.

At Gappsi, we specialize in creating custom outdoor living spaces that not only function beautifully but also enhance curb appeal. One of our newest projects involved transforming a Nicolock paver driveway in East Northport, NY, where the homeowner wanted to unify an older driveway with a newly installed extension. Instead of replacing thousands of dollars’ worth of pavers, we used professional paver-staining techniques to completely change the driveway’s appearance, giving it a modern, elegant black finish.

The Challenge: Matching Old and New Nicolock Pavers

This homeowner originally had a Nicolock paver driveway that had served the home well for years. As their needs changed, they decided to enlarge the driveway to create an additional parking space.

While the expansion solved the functional issue, it created a new aesthetic problem.

Although new Nicolock pavers were installed, the color did not match the original driveway. This is a common situation because:

  • Older paver colors fade over time from UV exposure.
  • Manufacturers occasionally discontinue or modify color blends.
  • New production runs often vary slightly from previous batches.
  • Years of weathering create natural differences between old and new installations.

The result was a driveway with two noticeably different shades, making the addition stand out rather than blend naturally with the original installation.

Rather than replacing the entire driveway, the homeowner contacted Gappsi to explore a more practical and cost-effective solution.

A Better Alternative Than Replacing the Driveway

Many homeowners assume the only way to achieve a uniform appearance is to tear out the old driveway and install new pavers throughout.

Fortunately, that’s not the case.

Professional paver staining allows homeowners to completely transform the color of existing pavers while maintaining their structural integrity. This process provides several important benefits:

  • Eliminates mismatched paver colors
  • Refreshes faded surfaces
  • Creates a completely new appearance
  • Extends the life of existing pavers
  • Costs significantly less than replacement
  • Reduces demolition waste
  • Maintains the original driveway structure

For this East Northport project, paver staining offered the ideal solution.

The Original Plan: A Dark Brown Driveway

Initially, the homeowner selected a rich dark brown finish.

The goal was to create a warm, elegant appearance that would unify both the original driveway and the newly added section. Dark brown is a popular option because it complements many home styles and blends naturally with landscaping.

During planning, we discussed how the new color would create a consistent look while hiding the differences between the old and new Nicolock pavers.

However, as the project progressed, the homeowner envisioned something even more dramatic.

A Design Change That Made a Big Impact

Before the staining process began, the homeowner decided to switch from dark brown to black.

The decision wasn’t made randomly; it was part of a complete exterior design plan.

The home already featured a black roof, and the owners planned to paint both the garage door and front entry door black as well. By changing the driveway to black, they could establish a cohesive color palette throughout the property.

This modern design approach creates strong visual contrast while giving the home a sophisticated, upscale appearance.

Instead of having isolated black elements, every exterior feature now works together:

  • Black driveway
  • Black garage door
  • Black front door
  • Existing black roof
  • Coordinated trim accents

The result is a home with exceptional curb appeal and a clean, contemporary aesthetic.
changing-the-color-of-a-nicolock-paver-driveway-in-east-northport

More Than Just the Driveway

To ensure the entire entrance looked cohesive, Gappsi stained more than just the main driveway surface.

Additional areas included:

  • Front walkway
  • Bullnose edging
  • Stoop platform

Treating these surfaces together ensured every hardscape element shared the same rich black finish.

Rather than stopping at the driveway, the entire entrance now flows together seamlessly from the street to the front door.

Professional Paver Staining Requires Experience

Many homeowners are surprised to learn that staining pavers is a specialized process.

Unlike ordinary paint, professional paver stains are designed to penetrate and bond with masonry surfaces while allowing the pavers to maintain their natural texture.

Proper preparation is critical to achieving lasting results.

The process generally includes:

Thorough Cleaning

Every surface must be professionally cleaned to remove.  View our page to learn more about cleaning and sealing bricks.

  • Dirt
  • Mold
  • Algae
  • Efflorescence
  • Previous sealers
  • Oils and contaminants

This ensures proper adhesion.

Surface Preparation

Damaged joints or areas requiring repair are addressed before staining begins. Preparation helps ensure a uniform finish across the entire installation.

Professional Color Application

Specialized masonry stains are applied evenly across the pavers to achieve complete color consistency.  Experienced installers carefully control application techniques to avoid uneven coloring or blotchy finishes.

Protective Sealing

Once staining is complete, the driveway is sealed with a high-quality sealer.  The sealer helps:

  • Protect against UV rays
  • Resist stains
  • Enhance durability
  • Preserve color
  • Improve water resistance

The finished surface maintains its appearance for years with proper maintenance.

Blending Old and New Into One Beautiful Driveway

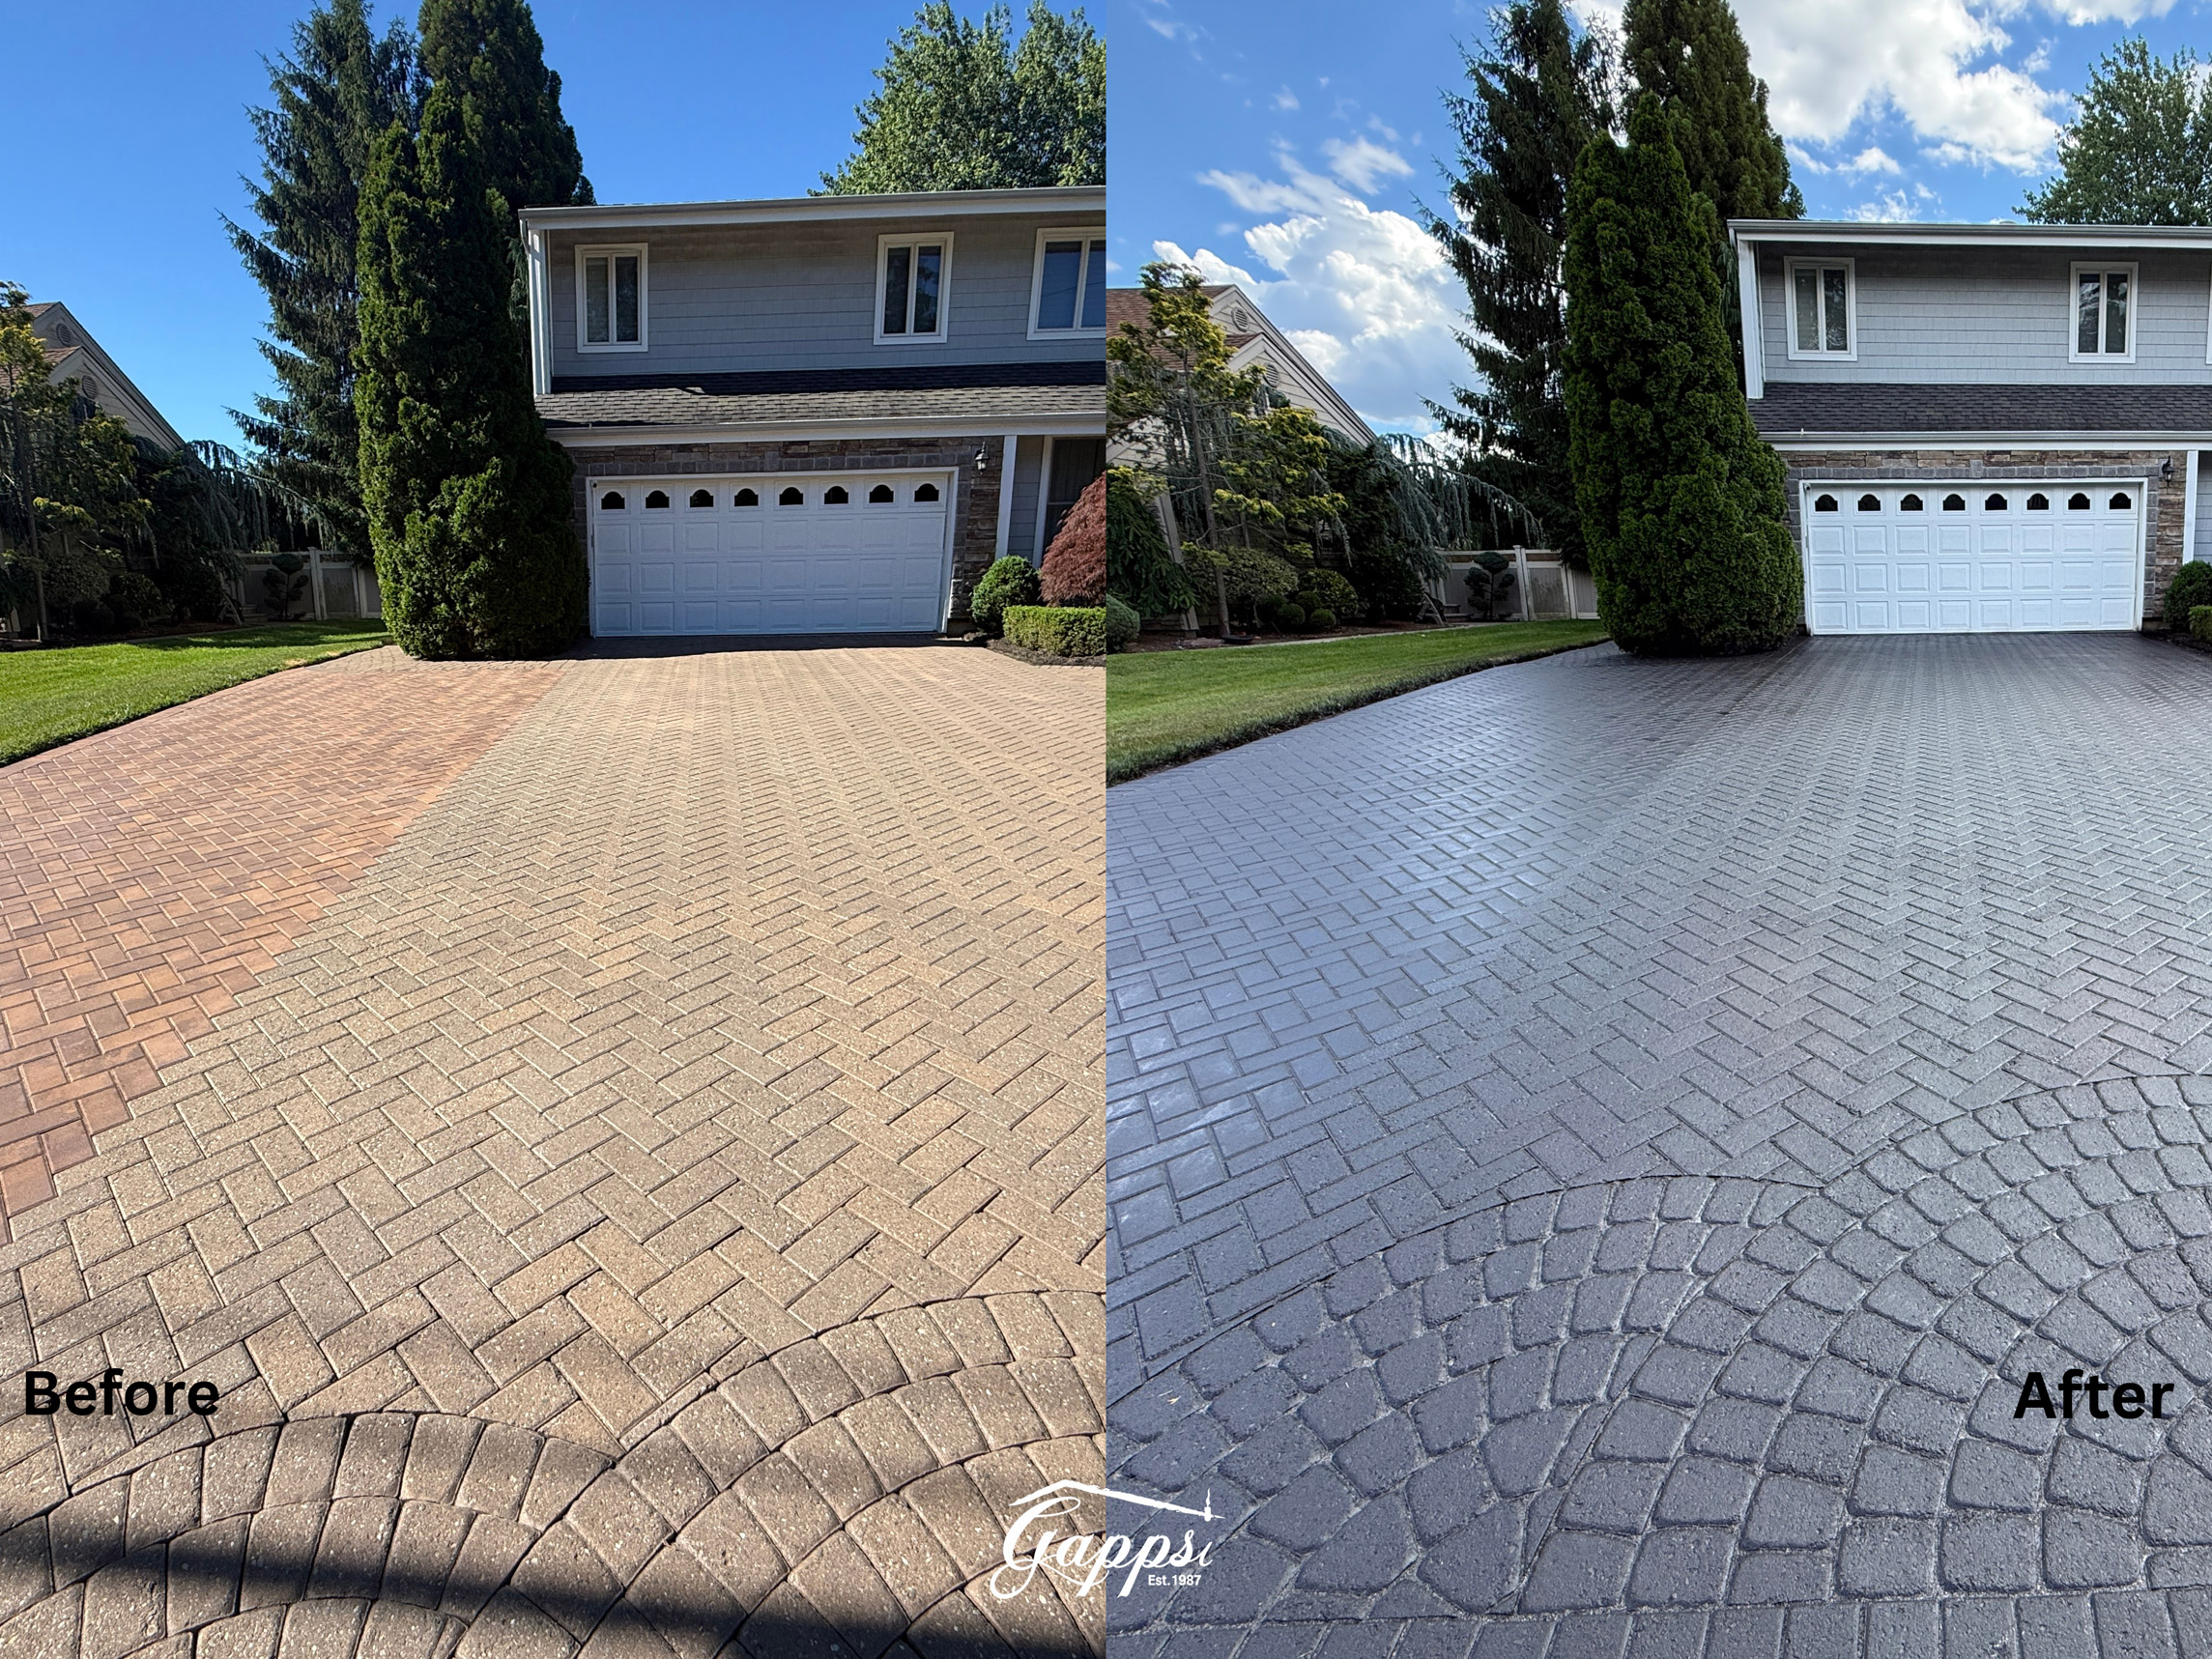
Perhaps the most satisfying aspect of this project was seeing how effectively the new addition disappeared.  Before staining, visitors could easily identify where the driveway had been expanded.  After staining, the distinction between the original driveway and the new section virtually disappeared.  Everything now looks like one continuous installation.  This is exactly what the homeowner hoped to accomplish. Instead of highlighting the addition, the project celebrates it by making the entire driveway appear as though it were installed at the same time.

Why More Homeowners Are Choosing Paver Staining

Replacing an entire paver driveway can be expensive, disruptive, and unnecessary.

Professional staining offers homeowners an opportunity to modernize their property without extensive demolition.

Popular reasons homeowners choose paver staining include:

  • Changing outdated colors
  • Matching driveway additions
  • Refreshing faded pavers
  • Increasing home value
  • Enhancing curb appeal
  • Coordinating with new exterior renovations
  • Extending the lifespan of existing hardscapes

As exterior design trends continue moving toward darker architectural colors, black driveways have become increasingly popular for both traditional and contemporary homes.

Another Quality Hardscape Project by Gappsi

This East Northport driveway is another example of how thoughtful design and skilled craftsmanship can completely transform a property’s appearance without requiring a full replacement.

By professionally staining the Nicolock pavers, Gappsi successfully unified the original driveway with its new extension while giving the home a bold, updated look. The addition of matching black accents, including the future garage door and front door, creates a sophisticated exterior design that dramatically improves curb appeal.

The project also included staining the front walkway, bullnose edging, and stoop platform, ensuring every hardscape element complements the overall aesthetic.

Whether you’re dealing with faded pavers, mismatched additions, or simply want to update your home’s exterior, professional paver staining can provide a durable, cost-effective solution that delivers stunning results.

At Gappsi, we specialize in custom hardscape construction, paver restoration, driveway renovations, outdoor living spaces, patios, walkways, pool decks, retaining walls, and professional paver staining throughout Long Island, including East Northport, Northport, Huntington, Smithtown, Commack, Dix Hills, and the surrounding communities.

Our latest paver staining and sealing project in East Northport, NY, demonstrates how expert craftsmanship and premium materials can completely transform an existing driveway into a modern architectural feature that looks as if it were built that way from day one. Whether you’re expanding your driveway or simply ready for a fresh new look, Gappsi can help bring your vision to life while protecting your investment for years to come.

Contact Gappsi Today

📍 Serving all of Long Island, NY — Nassau & Suffolk Counties
🌐 https://www.gappsi.com/
📞 Call now for a free consultation and estimate
SCHEDULE A MEETING TODAY WITH GAPPSI

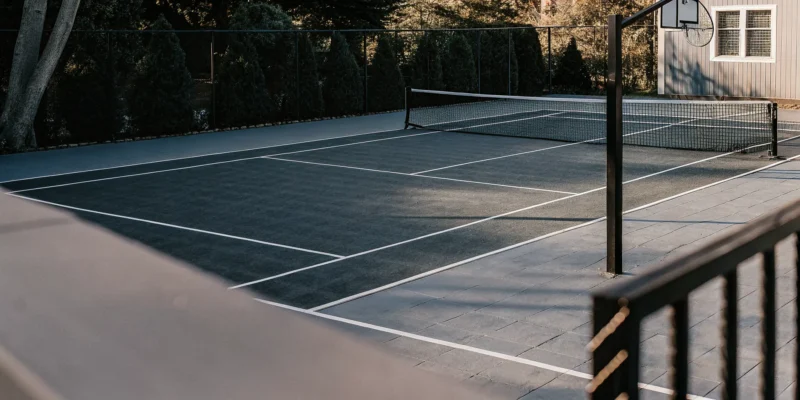
Backyard multi-sport games court with synthetic turf, basketball hoop, and pickleball lines on a sunny day

Sports Games Courts: Essential Space Requirements and Material Guide

Homeowners on Long Island often struggle to fit multiple sports into a single backyard layout. Standard dimensions for basketball and pickleball require specific clearance zones to ensure safe play for the whole family.

Sports Games Courts provide a special area for basketball, pickleball, and volleyball. These multi-sport areas let you combine several games into one spot by using crossed lines and movable nets. Experts at EVstudio note that a half-court for basketball needs about 2,350 square feet. A pickleball court fits in a much smaller 880 square foot area. Choosing the right size depends on your open lawn space and the sports you play most.

A flat base of concrete or asphalt serves as the floor for the project. We finish this base with Matflex tiles or synthetic turf to create a smooth surface. Proper planning ensures you have enough buffer space for safe play during fast games on your new backyard court.

Determining how much room you have is the first step. You must factor in the dimensions of the court plus the clearance zones for player safety. Space Requirements for Your Backyard Sports Games Courts will vary based on your property size and the games you choose.

Space Requirements for Your Backyard Sports Games Courts

Fitting a court into your yard starts with your goals. Most yards in Nassau and Suffolk County can fit a multi-use area if you plan the layout well. You must think about the size of the play zone and the space around it. These game court designers help you map out these zones to match your property lines and local rules.

Small to medium property layouts

A court size of 30×60 feet works well for most small to medium yards. This footprint gives enough room for a standard pickleball court while leaving space to move safely. Gappsi built a court of this size for an East Islip project using Snap Sports tiles on a concrete base. As shown by USA Pickleball, the standard court is 20×44 feet, so a 30×60 layout adds a helpful buffer for safe play.

Medium to large yard options

If you have more room, a 36×60 foot layout is a great choice. This size adds extra buffer space which is helpful for tennis or half-court basketball. For homes with very large lots, a 50×100 foot area can fit a full tennis court. These large setups often include paths made of Nicolock Stone Ridge pavers around the edge to keep the area clean and easy to reach.

Safety and clearance buffers

Every court needs a safety zone beyond the play lines. These buffer zones keep players from hitting walls, fences, or plants during a fast game. Most plans need at least 5 to 10 feet of clear space around the main court lines. Experts at EVstudio note that total space needs must include these safe zones to prevent injury. Gappsi checks these zones during the design phase to make sure your court is both fun and safe for all ages.

Standard Court Dimensions for Popular Sports

To plan for backyard sports games courts, you need a clear map of your space. Each sport has its own size. Knowing these sizes helps you pick the right plan for your yard on Long Island. Gappsi has built many multi-sport setups in Nassau and Suffolk County. We recently finished a 30 by 60 foot court in East Islip. This size is a great choice for mid-sized yards.

Basketball and tennis needs

Basketball is a top choice for multi-sport plans. A full pro court is 94 feet by 50 feet. Most people pick a half-court to save space. A standard half-court is 47 feet long and 50 feet wide. If your yard is small, you can still play with a 30 by 30 foot area. This size fits a three-point line and gives you room to shoot. It is a smart way to add value to your home.

Tennis needs the most room of any home sport. The play area for doubles is 78 feet by 36 feet. But you must add extra space to move around. A full tennis court usually needs a total space of 120 feet by 60 feet. Game court experts can help you fit these large courts into your yard. They use smart grading and stone walls to make the land flat and ready for play.

Pickleball and net games

Pickleball is a fast-growing sport for home sports games courts. The court size is 44 feet by 20 feet. This is much smaller than a tennis court. It makes the game a great fit for yards in towns like Smithtown. The 44 by 20 foot size also works for badminton. Using one area for both games is a smart way to get more use from your yard. You can swap nets in just a few minutes.

Volleyball needs a bit more room than pickleball. A standard court is 60 feet by 30 feet. When you plan for volleyball, remember to leave extra room to serve. Playing these sports keeps your family active and fit. The CDC says that adults need at least 150 minutes of exercise each week. Having a court at home makes it easy to hit that goal without leaving your house.

Comparing popular game plans

Sport Court Size (Feet) Total Space Needed (Feet)
Full Basketball 94 x 50 100 x 56
Half Basketball 47 x 50 52 x 56
Pickleball 44 x 20 60 x 30
Tennis (Doubles) 78 x 36 120 x 60
Volleyball 60 x 30 80 x 50

When you mix sports, you can save space with lines that overlap. A combined basketball and tennis court often needs about 94 feet by 60 feet. This plan uses a net you can take down. You can switch from hoops to a tennis game quickly. Gappsi uses tough tiles like Matflex to make sure the surface works well for every game you play. This modular surface is easy to keep clean and looks great for years.

Expert setup makes sure your court is flat and drains well. Good base prep is the most vital part of any sports games courts job. Gappsi brings years of local skill to every build on Long Island. We handle the 3D design and the permits so you can just enjoy the play. Our team works with you to pick the best spot and size for your needs.

Choosing the Right Surface Material for Your Sports Games Courts

The base and top layers you pick for your backyard define how the game feels and how well water drains. For homeowners on Long Island, the local weather makes drainage a top priority. Most Sports Games Courts services start with a solid base like concrete or asphalt before they add the final play surface. Concrete provides a flat and permanent floor that lasts for decades but has a higher upfront cost. Asphalt is a common choice for a budget-friendly base, but it may need more care over time to prevent cracks from winter freezes.

Synthetic Turf and Grass Options

Synthetic turf is a top choice for a soft feel and easy upkeep. Gappsi uses the Italgreen line to give you a pro-level experience at home. Homeowners interested in making the switch can read about the 10 key benefits of synthetic turf on Long Island. You can choose from types like the Soccer 52 Double X for active games or the Green HD 17 for tennis. These surfaces allow for fast play while being easy on your joints.

Many homeowners also add a Golf or Putting Green section to their sports games courts for more variety. Synthetic turf helps with outdoor water use because it does not need a hose to stay green. It also drains well after a heavy storm in Nassau County.

Interlocking Tiles and Modular Systems

Modular tiles offer a versatile and fast way to finish your court. Products like Matflex tiles or Snap Sports polypropylene tiles are popular because they snap together over a hard base.

In a recent project in East Islip, NY, Gappsi Inc used Snap Sports tiles on a recycled concrete base to build a 30×60 foot court. These tiles are made to grip well even when they get wet. They come in many colors, which helps you mark lines for different sports. You can also mix in Nicolock Stone Ridge pavers around the court edge to create a clean look that matches your patio.

Performance and Maintenance Needs

Each material has a different trade-off between how it plays and how you care for it. Hard surfaces like concrete or asphalt provide a fast ball bounce that is great for basketball. Tiles add a bit of cushion which helps protect your knees during a long game of pickleball.

If you want a court that works for many sports, a mix of tiles and turf is often the best path. No matter which you pick, a professional setup ensures the ground is level. This stops water from pooling and keeps your game court designers happy with the final result. Proper care keeps the court safe for your family for many years.

Designing a Multi-Sport Layout for Maximum Versatility

A smart layout lets you play many games in a small space. By using one area for basketball, volleyball, and tennis, you get the most out of your yard. The key is to plan how each game fits on the same floor. You can use different colors for the lines so players know where to look. This makes your multisport court guide easy for everyone to use.

Marking multiple sports

You can fit a lot of fun on one surface with the right lines. Most people use a solid color for the main sport, like basketball. Then, you can add dashed lines for other games. Use one color for pickleball and another for badminton. This helps players stay in bounds without getting mixed up. Different colors make each game clear even when they overlap on the court floor.

It is helpful to follow rules from groups like USA Pickleball when you plan. They list the right sizes for courts and zones. When you know the exact space you need, you can fit more games into your plan. This helps you avoid mistakes and keep the play fair for all who use the area. Precise measurements from a map or survey help you fit everything in.

Adjustable gear and nets

Good gear makes it easy to switch between sports. Use hoops that you can raise or lower for different ages. Removable nets are also a must for a multi-use area. You can take them down for soccer or basketball and put them up for tennis in minutes. This keeps the space open and safe when you do not need the net for a specific game.

For an East Islip project, we used top gear to give the owners full use of their space. Strong posts can hold nets for many games. Some posts have holes at different heights for volleyball or tennis. This setup means you do not need many extra parts in your yard. One set of posts does the work of three.

How to plan your layout

Setting up your sports games courts takes a few clear steps. You must think about space and gear before you start to build. Here is a simple path to follow:

  1. Measure your yard to see how much room you have for the court.
  2. Pick which sports you want to play most to set the main size.
  3. Plan a striping scheme using colors that stand out from each other.
  4. Select gear like adjustable hoops and net posts that fit many games.
  5. Mark the lines on the surface once the base and floor are ready.

Planning the right way ensures you do not waste space or funds. A good design keeps the court fun for years as your family grows. If you need help, professional game court designers can find the best fit for your home.

Planning Your Sports Games Courts Installation on Long Island

Building Gappsi Inc sports games courts in your backyard takes careful work and a clear plan. We have helped people on Long Island for over 38 years to create play spaces. Gappsi’s complete sports games courts services cover every part of the job from start to finish. We work across both Nassau and Suffolk Counties from our main office in Smithtown.

Initial site review and 3D design

The first step is a full check of your yard to see what will work best. We look at the space you have and the slope of the land. We use 3D tools to show you how the court will look in your yard before we start. This helps you find the best spot for play and see how it fits with your home. You can also visit our showroom in Smithtown to see the court parts in person. Our 12 divisions work as one team to handle the court, walls, and lights all at once.

During the design phase, you can choose the sports you want to play most. Some owners want a space for basketball and tennis. Others may want a smaller spot for a pickleball court or volleyball games. We help you pick the right size for your yard and your needs. A good plan at the start saves time and helps you get the most out of your new space.

Permits and base prep

Most towns on Long Island need a permit before you build sports games courts. Rules vary between Nassau and Suffolk, but Gappsi and our team help with the papers. We provide the drawings and data needed for town sign off. This ensures everything follows local laws. Once we have the permit, our team starts the site work. This is a key part of the build that ensures the court lasts for many years.

Site prep starts with clearing the land and grading the soil. We level the ground so water drains away from the court area. Good drainage is vital on Long Island to prevent pools of water after a storm. Then, we put down a firm base made of asphalt or concrete. This solid floor acts as the spine of the court. It keeps the surface flat and stops it from sinking over time. A strong base is the best way to keep your court safe and fun for decades.

Surface installation and line markings

When the base is set, we add the top play surface. You can pick from Matflex tiles or synthetic turf for your court. These materials help stop slips and protect your joints during play. Our team fits the pieces together with care to ensure a smooth finish. After the surface is down, we paint the lines for your chosen sports. We use bright, long-lasting paint that stays clear through many seasons.

We can make a half-court for basketball or a space for three or four other games. Our East Islip project is a great case of a 30×60 ft court that fits a yard well. Once the lines are dry, we set up the hoops and nets so you can start playing.

How to Budget for Your Sports Games Courts Project

Building a custom area for play involves several cost factors that homeowners should consider early. The total price for sports games courts depends mostly on the size of the court and the materials you choose for the base and surface. Proper planning helps you avoid hidden costs while ensuring your new court lasts for decades.

Primary cost factors for construction

The size of your project is the biggest driver of the final price. Larger courts need more raw materials and more labor for grading. For example, a half-court basketball setup may range from $8,600 to $38,000 depending on the size and site needs. You also need to budget for professional site prep. This includes grading and drainage to keep the court level and dry. According to the EPA, managing runoff with proper drainage is vital for any large paved surface to prevent local water issues.

Choosing your base and surface materials

Your choice of base material impacts your budget. Concrete is a permanent and tough option but usually costs more than asphalt. A synthetic turf surface over a gravel base is another path to consider. For the top layer, many homeowners choose modular Matflex tiles or Snap Sports polypropylene tiles. These materials handle the local climate in Nassau County and Suffolk County while they help protect players from hard falls.

Permits and professional design value

Working with a full-service firm like Gappsi helps simplify the process. We manage the drawings and plans needed to get permits in your local town. Our team has served Long Island since 1987. We provide clear 3D designs so you see the value before work starts. You can reach our Smithtown showroom at 631-543-1177 to discuss a plan that fits your backyard and your budget.

Frequently Asked Questions About Sports Games Courts

How much does a backyard sports games court cost?

Cost depends on court size, base material, and surface type. A half-court basketball layout (30×30 ft) on an asphalt base costs less than a full-size multi-sport surface (50×100 ft) with synthetic turf and multiple striping. Your site conditions, grading needs, and permitting also affect the final price. A professional consultation provides an accurate estimate based on your specific property.

What is the best surface for a multi-sport court?

The best surface depends on the sports you play most. Synthetic turf from Italgreen offers excellent drainage and low maintenance while supporting basketball, pickleball, and volleyball. Matflex polypropylene tiles provide a modular, cushioned surface that handles multiple sports well. Concrete and asphalt offer the most durability for basketball-heavy use but lack the shock absorption of turf or tiles.

How much space do I need for a backyard sports games court?

A versatile court starts at 30×60 ft, which fits a regulation pickleball court with room for half-court basketball and volleyball. For tennis or full-court basketball plus other sports, plan for at least 50×100 ft. You also need buffer space around the court for safe movement. Gappsi offers free site evaluations to measure your available space and recommend the best layout.

Can you put a sports games court on a sloped yard?

Yes. Professional grading and drainage solutions can transform sloped properties into level court foundations. Gappsi’s design-build team includes excavation and grading expertise as part of every project. And the company’s landscape division handles any retaining walls or drainage systems needed to prepare your site.

How long does it take to install a sports games court?

Most residential installations take 1 to 3 days depending on complexity. For a detailed walkthrough of the installation process, check out our detailed installation and maintenance guide for synthetic turf courts. A simple synthetic turf court on prepared ground may be installed in one day. Courts requiring concrete or asphalt base work, extensive fencing, or custom striping and equipment may take longer. Gappsi provides a clear timeline during the design phase.

What sports can I play on a single multi-sport court?

A well-designed multi-sport court can accommodate basketball (full or half court), pickleball, volleyball, badminton, tennis, bocce, shuffleboard, and soccer practice. Color-coded line markings and removable nets and hoops let you switch between sports in minutes.

Ready to Build Your Sports Games Courts?

Turn your backyard into a year-round destination for fun and fitness. Gappsi Group has been designing and building Sports Games Courts for Long Island homeowners since 1987. From the first site evaluation to the final line markings, our team handles every detail.

Call (631) 543-1177 or stop by our showroom at 1015 West Jericho Turnpike, Smithtown, NY 11787 to see material samples and discuss your project. Let us build a court your family will enjoy for decades.

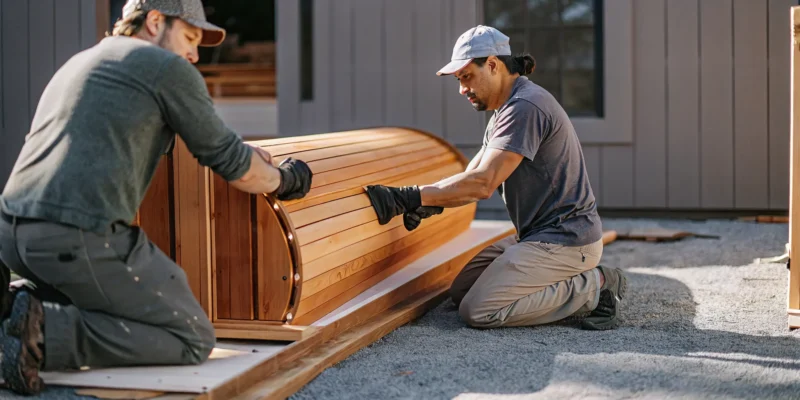
Barrel sauna installation in progress on Long Island.

Your Guide to Barrel Sauna Installation Long Island

Your backyard has the potential to be more than just a space for summer barbecues. With the right additions, it can become a true extension of your home and a hub for year-round wellness. A barrel sauna is a perfect example, offering a cozy retreat during chilly autumn evenings and a place to unwind after a day by the pool. It’s a lifestyle upgrade that also adds tangible value to your property. This article explores how to choose the perfect model for your needs and what the process entails, giving you a clear picture of a professional barrel sauna installation Long Island.

Key Takeaways

  • Design creates efficiency: A barrel sauna’s unique cylindrical shape is more than just stylish; it creates a natural convection that heats the space quickly and evenly, making your wellness routine more energy-efficient.
  • Plan your personal retreat: Choosing the right sauna involves key decisions about wood type, size, and heater style, all of which will influence the final cost and your overall experience.
  • Prioritize professional work and upkeep: A proper installation handles critical details like the foundation, wiring, and local permits, while simple, regular maintenance protects your sauna from the elements and ensures it remains a lasting investment.

What Is a Barrel Sauna?

Imagine stepping into a personal wellness retreat right in your own backyard. That’s exactly what a barrel sauna offers. It’s a beautifully crafted outdoor structure, shaped like a barrel lying on its side, designed to be a dedicated space for relaxation, health, and recovery. Unlike a typical shed or outbuilding, its unique cylindrical design is both functional and visually striking, adding a touch of rustic elegance to any Long Island landscape. It can stand alone as a peaceful escape or become the centerpiece of a larger outdoor living area, complementing features like a swimming pool, patio, or garden.

These saunas are more than just a luxury item; they represent an investment in your daily well-being. Having one at home provides a convenient way to unwind after a long day, soothe sore muscles after a workout, or simply enjoy a quiet moment of mindfulness. Gappsi offers a range of high-quality saunas that can be integrated seamlessly into your property, creating a complete and cohesive outdoor oasis. Whether you envision it nestled among trees or positioned next to your deck, a barrel sauna transforms a simple backyard into a year-round sanctuary for health and relaxation.

How It Differs from a Traditional Sauna

The most obvious difference is the shape, but the barrel design is about more than just looks. The circular form allows for highly efficient heating. As the air warms, it rises, follows the curved walls, and circulates back down, creating a consistent and even temperature throughout the space. This natural convection means there are no “cold spots,” and everyone inside enjoys the same level of heat. While some think barrel saunas are only for one or two people, many models can comfortably fit small groups, making them perfect for socializing with family and friends.

Key Features and Health Benefits

The unique cylindrical shape is incredibly sturdy, allowing it to naturally shed rain and handle a heavy snow load, a perfect feature for Long Island’s coastal weather. Beyond its durable construction, the primary draw is the wealth of wellness advantages. Regular sauna use can help you relax, reduce stress, and ease muscle pain. Many people also find it helps improve circulation and promotes mental clarity. It’s a simple, effective way to build a healthy routine without ever having to leave home.

How to Choose the Perfect Barrel Sauna

Finding the right barrel sauna for your home is an exciting process. It’s about creating a personal retreat that fits your lifestyle, budget, and backyard space. From the type of wood to the style of heater, each choice shapes your future wellness experience. Let’s walk through the key decisions you’ll need to make to select the perfect sauna for your Long Island home.

Selecting Your Wood Type and Quality

The wood you choose for your barrel sauna does more than just look good; it defines the atmosphere and durability of your retreat. Cedar is a popular, high-end choice, known for its rich aroma, natural resistance to rot and insects, and excellent heat insulation. Spruce is another fantastic option that also insulates well, creating a cozy and comfortable sauna session. For a more budget-friendly alternative, you might consider Pine. While it’s more affordable, it’s important to weigh that against long-term durability. At Gappsi, we can help you explore the different saunas and materials available to find the one that best suits your home and preferences.

Finding the Right Size and Seating

Don’t let the cozy look fool you; barrel saunas come in various sizes. While some are perfect for solo relaxation, many can comfortably seat two, four, or even six people. Think about how you plan to use your sauna. Will it be a private escape or a social spot for family and friends? Choosing a slightly larger size can make a big difference in comfort, allowing for more room to stretch out and relax. When planning your backyard, consider how the sauna will fit into the overall landscape design. A well-placed sauna can become a beautiful focal point in your outdoor living space.

Picking a Heater: Electric vs. Wood-Burning

Your sauna’s heater is its heart, and you have a few great options. Electric heaters are the most common choice for their convenience. With the push of a button, you can set your desired temperature and enjoy a consistent, controlled heat. Wood-burning heaters, on the other hand, offer a more traditional, rustic experience with their soft light and crackling sounds. They don’t require electricity but do need a chimney and a bit more hands-on effort. Another modern option is an infrared heater, which warms your body directly instead of the air around you. Regardless of your choice, your sauna will need a solid, level foundation, which our masonry experts can prepare for you.

Considering Insulation and Energy Efficiency

One of the best things about the barrel sauna design is its natural efficiency. The cylindrical shape allows for better heat circulation, meaning it heats up faster and uses less energy. The thick staves of wood provide excellent insulation, and the curved roof naturally sheds rain and snow, making it a durable choice for Long Island’s weather. It’s also important to ensure your installation meets all local safety regulations for wiring, ventilation, and materials. Working with a professional installer like Gappsi ensures your sauna is not only energy-efficient but also completely safe, giving you peace of mind as you relax and unwind.

Breaking Down Barrel Sauna Costs on Long Island

Adding a barrel sauna to your Long Island home is an exciting investment in your wellness and property value. As you begin planning, one of the first questions you’ll likely have is about the cost. The final price tag can vary quite a bit, depending on the sauna’s size, materials, and features, as well as the installation process. Understanding these components will help you create a realistic budget for your backyard oasis.

Think of the total cost in a few key parts: the sauna kit itself, the labor to build it, and any site preparation or electrical work needed to get it running. Let’s walk through what you can expect for each of these categories so you can plan your project with confidence.

Material and Labor Cost Estimates

The price of the sauna unit is your starting point. An infrared barrel sauna might range from $3,200 to over $6,500, while a traditional model with a wood or electric stove typically costs between $4,000 and $10,000 or more. Beyond the unit, you’ll need to budget for professional sauna installation, which can add $400 to $1,500 to the total. Finally, most saunas require dedicated electrical work. A certified electrician will ensure your setup is safe and up to code, which generally costs between $300 and $800 for a basic infrared sauna, with more complex installations costing more.

DIY vs. Professional Installation: A Cost Comparison

If you’re handy, a DIY installation might seem like a great way to save on labor costs. However, it’s a project that requires careful planning. A barrel sauna needs a perfectly level and solid foundation that can support its weight and allow for proper drainage. While you can save money upfront, any mistakes during assembly could lead to costly repairs later. Opting for a professional installation from a team like Gappsi ensures your sauna is built correctly and safely from the ground up, giving you peace of mind and a flawless finish.

Factors That Influence the Final Price

Several key choices will shape the final cost of your barrel sauna. The type of wood, the size of the unit, and the heater you select (electric versus wood-burning) are major factors. The unique cylindrical design of a barrel sauna is not just for looks; it promotes efficient heating and can withstand heavy snow, but the craftsmanship involved is reflected in the price. Additionally, the location you choose for your sauna can influence costs, especially if it requires extensive site preparation, like building a new patio or deck from porcelain and natural stone pavers. Any custom features, like upgraded lighting or smart controls, will also affect the final price.

A Step-by-Step Guide to Barrel Sauna Installation

Installing a barrel sauna is an exciting project, and knowing the steps involved can make the process feel much more manageable. While the final assembly can be surprisingly quick, a successful installation starts with careful planning. Here’s a breakdown of what to expect when you bring a barrel sauna to your Long Island home.

Preparing the Site and Foundation

Your sauna’s longevity starts from the ground up. Before anything else, you need a perfectly level and stable foundation that can handle the sauna’s weight without shifting over time. While a simple gravel base might seem tempting, it can settle and become uneven, potentially causing issues for your sauna structure down the road.

A concrete slab or a patio built with porcelain and natural stone pavers is your best bet for a solid, long-lasting base. This ensures the sauna stays level and provides proper drainage away from the structure. Getting this step right is critical, so it’s often best to have professionals prepare the site to guarantee a flawless foundation for your new backyard retreat.

Assembling, Wiring, and Weatherproofing

Once your foundation is ready, the barrel sauna itself comes together fairly quickly. Most kits can be assembled by two adults in about four to eight hours. The staves and bands are designed to fit together logically, making the build process straightforward for those with a bit of DIY confidence.

The most critical part of this stage is the electrical work. Hiring a qualified electrician is essential to safely connect your heater and lighting, ensuring everything is up to code. This is not a step to take on yourself. Your installer will also make sure the sauna is properly weatherproofed and that you have adequate drainage planned to protect your investment from Long Island’s coastal weather.

Understanding Local Permits in Nassau and Suffolk County

Before you begin installation, it’s important to check with your local building department. Most towns and villages across Nassau and Suffolk County have specific rules for outdoor structures, and you will likely need a permit for your new sauna. The requirements and fees can vary, so a quick call to your town hall is a necessary first step.

This is where working with an experienced local installer really pays off. A team familiar with Long Island’s regulations, like Gappsi, can manage the entire permitting process for you. They ensure all paperwork is filed correctly and that your installation meets every local code, saving you from potential headaches and delays.

What to Expect for an Installation Timeline

While the hands-on assembly of a barrel sauna might only take a day, the full project timeline is a bit longer. The entire process, from initial planning to your first relaxing session, involves several key phases. It starts with selecting the right model and features for your home.

Next comes site preparation and securing any necessary permits, which can take a few weeks depending on your town. Once the site is ready and your sauna is delivered, the assembly and electrical hookup can typically be completed. Planning for these distinct stages helps set a realistic timeline and ensures your sauna installation goes smoothly from start to finish.

Barrel Sauna Maintenance Tips for Long Island Homes

A barrel sauna is a beautiful addition to your home, and with the right care, it will provide relaxation for decades. Proper maintenance is not just about keeping it looking good; it’s about ensuring it functions safely and efficiently for years to come. For homeowners on Long Island, our coastal climate presents unique challenges, from humid, salty summer air to cold, snowy winters. Protecting your investment means paying special attention to the wood, the interior, and the heating components.

Think of sauna maintenance as a simple, seasonal routine. A little effort goes a long way in preserving the natural beauty of the wood and the integrity of the structure. Regular cleaning prevents buildup and keeps the space feeling fresh, while periodic sealing protects the exterior from moisture and sun damage. It’s also important to perform safety checks on the heater and prepare your sauna for the winter months. Following these straightforward steps will ensure your barrel sauna remains a pristine and peaceful retreat in your backyard, ready for you to enjoy whenever you need a moment to unwind.

Protecting Exterior Wood from Coastal Weather

The charming, cylindrical shape of a barrel sauna is great at naturally shedding rain and snow. However, Long Island’s weather requires an extra layer of defense. The combination of salt in the air, intense summer sun, and winter moisture can be tough on any exterior wood. To keep your sauna’s wood from weathering prematurely, applying a high-quality stain or sealant is essential. This protective coat acts as a barrier against moisture and UV rays, preventing the wood from warping, cracking, or discoloring over time. We recommend reapplying a sealant every few years as part of a regular maintenance schedule. Our professional restoration and sealing services can ensure your sauna gets the durable protection it needs to withstand our coastal climate.

Cleaning, Sealing, and Refinishing

Keeping your sauna clean is simple. For the interior, use a damp cloth to wipe down benches and walls after use, and always sit on towels to minimize sweat stains. Avoid using harsh chemical cleaners, as the heat can release fumes. For the exterior, regular sealing is your best defense against the elements. Over many years, you might notice the wood’s color beginning to fade. Refinishing the exterior can restore its original luster and add another layer of protection, helping to maintain its structural integrity. With consistent care, you can easily protect your sauna investment and ensure it remains a beautiful, functional feature of your home for a very long time.

Inspecting Heating Elements and Winterizing

Safety and performance go hand in hand, especially when it comes to your sauna’s heater. Whether you have an electric or wood-burning model, it’s wise to have the heating elements and wiring inspected periodically. A qualified electrician should always handle the initial hookup to ensure everything is up to code and functions correctly. As winter approaches on Long Island, preparing your sauna for freezing temperatures is a critical step. If your heater uses water for steam, make sure to drain it completely to prevent pipes or internal components from freezing and cracking. This simple winterizing task can save you from costly repairs and ensure your sauna is ready for use when the cold weather hits.

Finding a Barrel Sauna Installer on Long Island

Finding the right person to build your backyard oasis is just as important as picking the perfect sauna. A great installation experience means you can relax and look forward to your first steam session without worrying about permits, wiring, or construction mishaps. The right partner will handle the details, ensuring your sauna is built safely and to last. On Long Island, you have options, so it’s smart to know what separates a good installer from a great one. Let’s walk through what to look for and why a full-service team can make all the difference in your project.

Why Partner with Gappsi

When you’re ready to install a barrel sauna, working with a local expert simplifies everything. At Gappsi, we manage the entire project from start to finish, serving homeowners across both Nassau and Suffolk County. We don’t just supply and deliver your sauna; our team handles the complete installation, including all the necessary electrical work. Because we are so familiar with Long Island, we ensure your project complies with all local codes, taking that stress right off your plate. Our goal is to provide a seamless experience so you can simply anticipate the moment you get to enjoy your beautiful new sauna.

What to Look for in a Professional Installer

Beyond finding a company that can do the work, you want a team you can trust. Look for an installer with a proven track record and deep experience specifically with sauna installations. Ask to see a portfolio of their work. It’s also critical that they are familiar with local building codes, which can vary between towns in Nassau and Suffolk County. A professional installer will understand these requirements and ensure your sauna is compliant. Don’t hesitate to ask about their process, the expected timeline, and what they need from you to prepare the site. A clear plan is always a sign of a professional team.

Is a Barrel Sauna a Good Investment for Your Home?

Deciding to add a barrel sauna to your Long Island home is about more than just a financial calculation; it’s an investment in your well-being and lifestyle. Think of it as creating your own personal wellness retreat, just steps from your back door. Having a dedicated space to unwind can help you relax, ease muscle pain, and improve circulation after a long day. It’s a wonderful way to build a healthy routine, whether you’re looking for a quiet moment alone or a new activity to share with family.

From a property standpoint, a well-installed sauna is a desirable feature that adds value to your property, much like a deck or a swimming pool. It shows potential buyers that a home has been cared for and thoughtfully improved. When you work with a company like Gappsi, you can seamlessly integrate your sauna into a larger backyard design. We can help you create a cohesive outdoor living space that includes everything from the sauna and patio to landscaping and even one of our custom swimming pools.

Barrel saunas are also a practical choice. Their unique design heats up efficiently, and the assembly process is straightforward for professionals. This means you can start enjoying your new oasis sooner than you might think. Ultimately, a barrel sauna is a fantastic investment because it pays you back daily in relaxation and health benefits, all while improving your home’s long-term value. When you’re ready to explore the possibilities, our team at Gappsi can guide you through our beautiful selection of saunas and manage the entire installation.

Related Articles

Frequently Asked Questions

How much space do I really need for a barrel sauna? The exact footprint depends on the model you choose, but a good rule of thumb is to plan for a level area that is at least two feet longer and wider than the sauna itself. This gives you enough clearance for assembly, maintenance, and safe entry and exit. It’s also important to have a solid foundation, like a concrete pad or a paver patio, to ensure the structure remains stable for years to come.

Can I use a barrel sauna year-round, even during a Long Island winter? Absolutely. Barrel saunas are designed for four-season use, and many people find they enjoy them most during the colder months. The efficient, circular design allows them to heat up quickly and maintain a consistent temperature, even when it’s freezing outside. Just remember to properly winterize your unit, especially if it has a steam function, to prevent any water from freezing in the components.

What’s the real advantage of the barrel shape over a standard square sauna? The unique barrel shape is about much more than just aesthetics. Its primary advantage is superior heat circulation. The curved walls create a natural convection current that distributes heat evenly throughout the space, eliminating the cold spots you might find in a square sauna. This design is also incredibly strong and naturally sheds rain and snow, making it a durable and efficient choice for our coastal weather.

Do I absolutely need a permit for a sauna in my backyard? In most cases on Long Island, yes. Nearly every town and village in Nassau and Suffolk County has regulations for outdoor structures, and a sauna typically requires a permit. The specific requirements and fees can vary, so it’s a critical first step to check with your local building department. Working with an experienced installer who knows the local codes can save you a lot of time and prevent potential issues.

How long does the entire installation process take, from start to finish? While the hands-on assembly of the sauna kit can often be done in a day, the total project timeline is longer. You should plan for a few weeks from start to finish. This includes the time it takes to select your sauna, prepare the site and foundation, file for and receive any necessary permits, and schedule the final delivery, assembly, and electrical work.

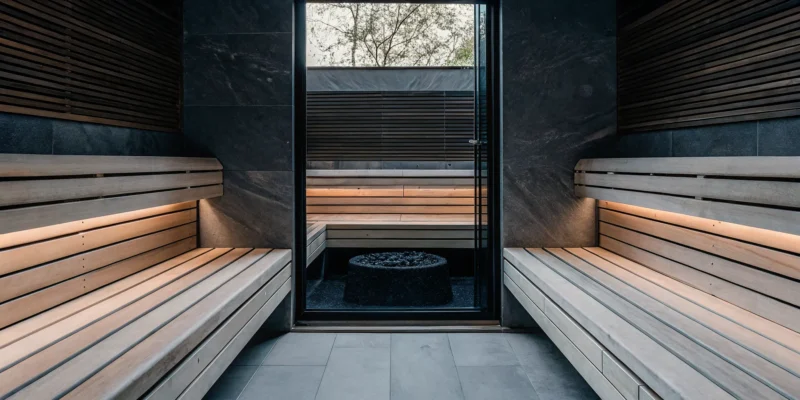
Custom sauna with wood benches and a stone heater built by a Long Island builder.

Custom Sauna Builder Long Island: A Complete Guide

A custom sauna is more than just a hot room; it’s a dedicated space for relaxation and health, designed specifically for you. Forget generic kits. A truly custom build means you choose the wood, the layout, the lighting, and the heat source that best fit your lifestyle. It’s about creating a seamless extension of your home, whether it’s a cozy indoor retreat or a stunning backyard feature. To make this happen, you need a team with deep expertise in design and construction. Finding the right custom sauna builder Long Island is the first step toward creating a personal sanctuary you’ll enjoy for years.

Key Takeaways

  • Determine your ideal sauna experience: Before you begin, decide if an indoor or outdoor model fits your home best and whether you prefer the steamy heat of a traditional sauna or the gentle warmth of an infrared one.
  • Vet your builder thoroughly: The right partner is crucial, so review their past projects, ask about the quality of their materials, and confirm they have deep knowledge of local building codes and safety regulations.
  • Understand the project from start to finish: A custom sauna is an investment, so get clear on costs related to size and materials, familiarize yourself with the installation timeline, and learn the simple maintenance steps to keep it pristine.

What Kind of Custom Sauna is Right for You?

Choosing to add a sauna to your home is an exciting step toward creating your personal wellness retreat. But with so many options available, how do you decide which one is the perfect fit? The best sauna for you depends on your lifestyle, the space you have, and what you hope to gain from the experience. Think of it less like buying an appliance and more like designing a space that’s entirely your own. We’ll walk through the key choices you’ll make, from where to put your sauna to the type of heat you prefer, so you can feel confident in your decision.

Indoor and Outdoor Sauna Options

First, let’s decide where your sauna will live. An indoor sauna offers incredible convenience, turning a master bathroom, basement, or home gym into a private spa. You can step right in after a workout or before bed without ever leaving the house. Because they are integrated into your home’s existing structure, they feel like a natural extension of your living space. On the other hand, an outdoor sauna creates a true backyard destination. It can be a beautiful focal point in your garden or next to your swimming pool, offering a resort-like escape. Imagine stepping out into the cool evening air after a hot session. Both are fantastic options, and the right choice simply comes down to how you envision using it.

Traditional vs. Infrared Saunas

Next up is the heat source. This is the heart of your sauna experience. A traditional sauna uses a heater to warm rocks, and you pour water over them to create steam. This results in a hot, humid environment that’s amazing for relaxing muscles, cleansing your skin, and promoting deep sleep. It’s that classic, steamy experience many people associate with saunas. An infrared sauna works differently. It uses infrared light to warm your body directly, rather than heating the air around you. This allows it to operate at a lower temperature while still providing benefits like improved circulation and pain relief. Many people find this gentle heat more comfortable for longer sessions. Gappsi offers a variety of premium saunas to match your preference.

Customizing Your Sauna Experience

This is where the fun really begins. A custom sauna is built to reflect your personal style and needs. Forget one-size-fits-all kits; we’re talking about a space designed just for you. You can choose the type of wood, like aromatic cedar or modern hemlock, to create the right atmosphere. The layout is also completely up to you, with options for multi-level benches, comfortable backrests, and beautiful glass doors or windows to let in natural light. You can also integrate modern technology, like Wi-Fi-controlled LED lighting to set the mood or a built-in sound system for music or meditation. Every detail, from the bench design to the door handle, can be selected to make your custom sauna a perfect personal sanctuary.

How to Choose a Custom Sauna Builder

Finding the right builder is the most critical step in bringing your dream sauna to life. You’re not just buying a product; you’re investing in a complex project that involves design, construction, and electrical work. The right partner will guide you through the process, ensuring the final result is safe, beautiful, and perfectly suited to your home. A great builder combines technical skill with a designer’s eye and a commitment to customer satisfaction. As you begin your search, focus on finding a professional who is transparent, experienced, and dedicated to quality. Taking the time to vet your options thoroughly will ensure your new wellness retreat is everything you hoped for and more.

Review Their Experience and Portfolio

Before you commit, you need to see a builder’s track record. An experienced contractor will have an extensive portfolio of completed projects that you can review. Ask to see examples of saunas they have built that are similar in style or scope to what you envision. Don’t just look at the pretty pictures; pay attention to the details in their craftsmanship. A company with deep roots in the community, like one that has built hundreds of saunas for homes and businesses across Long Island, demonstrates a level of trust and expertise that is hard to beat. Their portfolio is proof of their capabilities and a preview of the quality you can expect for your own project.

Assess Material Quality and Customization

The materials used in your sauna determine its longevity, performance, and overall feel. Ask potential builders what types of wood and heaters they recommend and why. A quality-focused builder will use top-grade materials like Nordic spruce or thermally modified wood, which are known for their durability and resistance to heat and moisture. Beyond materials, your sauna should be a reflection of your lifestyle. A one-size-fits-all approach just won’t do. The best builders offer deep customization, designing the sauna around your specific space, aesthetic preferences, and wellness goals. Your builder should be a partner in creating a space that is uniquely yours, from bench layout to lighting design.

Confirm Their Technical and Code Expertise

Sauna installation is more complex than it looks. It involves precise clearances for heaters, proper ventilation setups, and strict adherence to local building codes and safety regulations. An inexperienced builder can make mistakes that compromise the safety and function of your sauna. It’s essential to work with a team that has proven technical expertise and a thorough understanding of Long Island’s specific codes. Ask them directly about their process for ensuring compliance. A professional builder will be able to confidently explain how they handle electrical work, ventilation, and safety clearances, giving you peace of mind that your installation will be done correctly and safely from the start.

Check for Warranties and Ongoing Support

A reputable builder stands behind their work. Before signing any contract, make sure you understand the warranties offered on the sauna itself, the heater, and the labor. A strong warranty, such as a multi-year guarantee on key components, is a clear sign that the builder is confident in the quality of their materials and craftsmanship. This protects your investment and ensures you have support if any issues arise down the road. You should also ask about their process for handling service calls and ongoing support. Knowing you have a reliable partner to turn to for consumer advice on warranties and future maintenance provides valuable peace of mind for years to come.

Read Customer Reviews and Testimonials

Hearing from past clients is one of the best ways to gauge a builder’s reliability and the quality of their work. Look for reviews on independent sites like Google and Houzz, and check the builder’s website for testimonials. Pay attention to what customers say about the entire process, from the initial design consultation to the final installation and beyond. Comments noting excellent quality and that the sauna has become a favorite part of a client’s daily life are strong indicators of customer satisfaction. You can also check for video testimonials or project showcases on platforms like YouTube, which can give you a more dynamic look at their finished work and client relationships.

Understanding Custom Sauna Costs on Long Island

Figuring out the budget for your dream sauna is a big step, and the final cost depends on several key factors. It’s not just about the sauna itself, but about creating a seamless addition to your home that you’ll love for years. The price reflects the size, materials, technology, and the expertise required to bring your vision to life. Think of it as an investment in your home and your well-being. A quality build ensures your sauna is not only beautiful and effective but also safe and durable. Let’s break down the main elements that will shape the cost of your custom sauna project on Long Island.

How Size and Location Affect Price

The size of your sauna and where you plan to put it are the two biggest factors influencing the price. A smaller, cozy indoor sauna is a great starting point and can often be integrated into an existing space like a large bathroom or basement. On the other hand, a larger outdoor sauna becomes a true backyard feature. These projects are more complex, requiring a foundation, weatherproofing, and dedicated electrical work, which increases the overall investment. For example, a simple indoor sauna might start in one price range, while a more expansive outdoor model with custom features will naturally command a higher budget.

The Cost of Materials and Technology

The materials you choose directly impact your sauna’s longevity, appearance, and performance. We believe in using top-tier materials like high-grade Nordic spruce and thermally modified wood, which are known for their incredible durability and resistance to the elements. While premium materials have a higher upfront cost, they prevent issues like warping and decay, saving you money and headaches down the road. The technology inside, from the heater to the control panel, also plays a role. Investing in a reliable and efficient heater from a trusted brand ensures your sauna heats up properly and operates safely for years to come.

Factoring in Long-Term Energy Costs

It’s smart to think about the long-term operational costs, and the good news is that a well-built sauna is surprisingly efficient. A high-quality heater is designed to run effectively for many years with minimal upkeep, making your sauna one of the lowest-maintenance additions you can make to your home. Proper construction with excellent insulation is key to retaining heat, which means the heater doesn’t have to work as hard, saving you on energy bills. This focus on quality construction ensures your initial investment continues to pay off by keeping running costs low while you relax and unwind.

Exploring Financing and Payment Options

Once you have an idea of the sauna you want, the next step is to plan your budget. Because a custom build is a significant project, many top-tier builders have a limited number of slots available each season. It’s always a good idea to start the conversation early to secure your spot and get a clear understanding of the financial commitment. A professional builder can provide a detailed quote and walk you through the payment schedule. Discussing your budget openly allows the design team to make recommendations that align with your goals, ensuring the final project from your home remodeling team is exactly what you envisioned.

Your Custom Sauna Installation: What to Expect

Bringing a custom sauna to your home is an exciting project, and the installation process is a journey we take together. From initial designs to the final quality check, understanding the steps involved helps ensure everything goes smoothly. Here’s a look at what you can expect when you partner with Gappsi to build your personal wellness retreat.

The Initial Plan: Permits and Prep Work

It all starts with a solid plan. Before any construction begins, we’ll work with you to determine the perfect location for your sauna, whether it’s inside your home or in the backyard. This initial phase is also when we handle the technical details, like ensuring proper clearances for the heater, planning for adequate ventilation, and mapping out the electrical work. Our team manages all the necessary local permits and code requirements, so you can have peace of mind knowing your new sauna will be both beautiful and completely safe from day one. It’s all about laying the right foundation for a successful build.

The Build: From Components to Completion

Once the planning is complete, our craftsmen get to work bringing your vision to life. We build our custom saunas to perform year-round, creating a relaxing escape that feels like a natural extension of your home. We use only top-grade materials, like durable Nordic spruce and thermally modified wood, which are known for their excellent weather resistance and longevity. From framing the structure and installing the benches to fitting the heater and door, every step is handled with precision. This focus on quality materials and expert sauna construction ensures your personal oasis will stand the test of time.

Project Timelines and Communication

From our first conversation to your first sauna session, the entire process typically takes about 8 to 12 weeks. This timeline allows for careful design, permit approvals, material orders, and the construction itself. Throughout the project, we believe clear and consistent communication is key. We’ll keep you updated on our progress every step of the way, so you always know what to expect next. We want you to feel like a partner in the process, and you can always see examples of our finished work and craftsmanship on our YouTube channel. Our goal is to make the installation experience as seamless as the relaxation your new sauna will provide.

Final Walkthrough and Quality Checks

Before we hand over the keys to your new retreat, we conduct a thorough final walkthrough with you. This is our chance to confirm that every detail meets our high standards and your expectations. We’ll inspect the structure, insulation, heater performance, and all electrical components to ensure everything is working perfectly and safely. This is also when we’ll show you how to operate your new sauna and offer tips for its care. Our commitment to quality means we don’t consider the job done until you are completely satisfied and ready to enjoy your new custom wellness space.

Maintaining Your New Custom Sauna

Your new custom sauna is a space for relaxation and wellness, and keeping it in top condition is simpler than you might think. A little routine care will ensure your sauna remains a beautiful and functional retreat for years to come. By following a few easy steps for daily cleaning, long-term upkeep, and safety checks, you can protect your investment and enjoy countless hours of peaceful escape.

Daily Care and Cleaning Tips

Keeping your sauna fresh is all about creating a few simple habits. After you finish a session, the most important step is to help the room dry out properly. Just crack the door open for about ten to fifteen minutes. This allows moisture to escape and prevents the wood from staying damp. For cleaning, you don’t need harsh chemicals. Simply wipe down the benches, backrests, and any other surfaces you touched with a clean, damp cloth. This quick wipe-down removes sweat and oils, keeping the wood pristine and hygienic for your next session.

Long-Term Wood and Heater Care

The beautiful wood in your sauna is designed for durability, but periodic care will preserve its look and feel. We recommend you occasionally treat the wooden components with a breathable wood preservative. This helps protect the wood from moisture and wear without sealing it in a way that traps humidity. You can also apply a sealant to high-contact areas like door handles or floorboards to make them even easier to clean. Don’t forget about the heart of your sauna: the heater. Periodically check the sauna stones, removing any that are cracked and rearranging them to ensure good air circulation.

Performing Regular Safety Inspections

Your safety is our first priority, and every Gappsi sauna is built to meet strict safety codes. Still, it’s a good idea to perform your own quick inspections from time to time for peace of mind. Make sure the ventilation openings are clear and not blocked by towels or other items. Check that the heater guard is securely in place and that there is proper clearance around the heater itself. You should also test the door to confirm it opens easily from the inside. These simple checks help ensure every sauna session is a safe one.

Related Articles

Frequently Asked Questions

What’s the real difference between a traditional and an infrared sauna? Think about the kind of heat you enjoy most. A traditional sauna gives you that classic, steamy experience by heating the air around you, which is perfect for a hot, cleansing sweat. An infrared sauna uses a different approach, warming your body directly with gentle infrared light. This means the air temperature stays lower, which many people find more comfortable for relaxing during longer sessions. The best choice really just comes down to your personal preference for either a hot, humid environment or a milder, dry heat.

What are the main factors that determine the cost of a custom sauna? The final price of a custom sauna is shaped by a few key decisions. The biggest factors are its size and location; a larger, outdoor sauna requires more materials and site preparation, like a foundation, compared to a smaller indoor model. The specific materials you select, such as premium woods like Nordic spruce, and the technology you include, like advanced heaters or custom lighting, also play a significant role in the total investment.

How long does it take to build a custom sauna, and what’s expected of me? A typical custom sauna project, from the first design chat to the final walkthrough, usually takes about 8 to 12 weeks. Your main role is in the fun part at the beginning, which is sharing your vision for the space. Once we finalize the design, a professional team handles all the heavy lifting, including securing permits, managing construction, and coordinating the electrical work. We make sure to keep you informed throughout the process, but you can relax knowing all the technical details are being managed for you.

Are custom saunas hard to maintain? Not at all, they are surprisingly low maintenance. The most important habit is to let the sauna air out by leaving the door open for a few minutes after each use. For cleaning, a simple wipe-down of the benches with a damp cloth is usually all that’s needed. Long-term, you might apply a special wood preservative to keep the surfaces looking fresh, but a well-built sauna is designed to be a low-effort, high-reward addition to your home.

How do I know if I have enough space for a sauna? You might be surprised by how little space you actually need. A custom sauna can be designed to fit into a variety of places, from a corner of a master bathroom or basement to an unused closet. An experienced builder can assess your home and find creative solutions you may not have considered. Whether you have a small indoor nook or a wide-open backyard, there is likely a perfect spot for your personal wellness retreat.

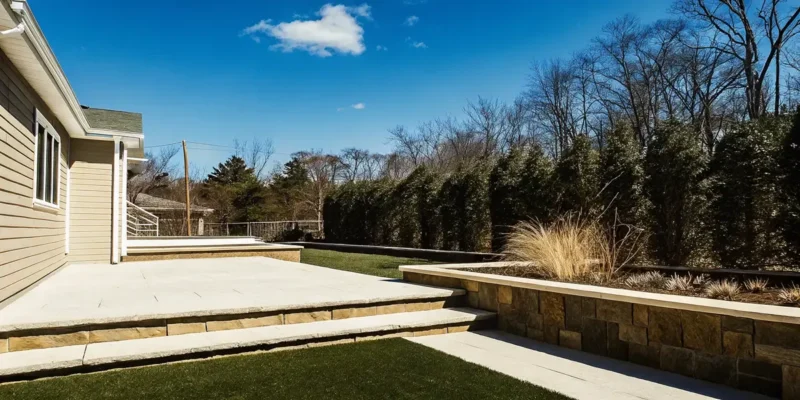
Low-maintenance luxury Long Island landscape with porcelain paver patio, synthetic turf, and evergreen privacy screens

Low-Maintenance Luxury Landscape Long Island: A Design Guide

A low-maintenance luxury landscape on Long Island pairs natural stone with materials that resist the harsh coastal elements. Many property owners want a beautiful yard but do not want to spend every weekend tending to it. Meeting these goals requires a shift in how we think about outdoor design.

A low-maintenance luxury landscape on Long Island is an expertly designed outdoor space that pairs an elegant style with specific features that minimize recurring labor. This approach starts with smart site planning to ensure proper drainage and sun exposure, as noted by researchers at Clemson University. By replacing high-effort elements like large lawns with durable options, homeowners can enjoy a resort-like feel without the burden of constant upkeep. Key components include stain-resistant porcelain pavers, natural stone like travertine, and synthetic turf solutions that eliminate the need for mowing or fertilizers. Native plantings further reduce water needs and pest control costs. A vertically integrated design model ensures the property stays beautiful with only minimal seasonal care from the homeowner.

Many people think that a fine backyard needs a full-time crew to stay tidy, but modern masonry design and construction and hardy plant choices offer a different way. To build a space that lasts, you must first understand what defines a low-maintenance luxury landscape.

Low-maintenance Luxury Landscape Long Island: What Defines a Low-Maintenance Luxury Landscape?

A low-maintenance luxury landscape is not the same as a no-care landscape. As experts at Clemson University note, there is no such thing as a maintenance-free landscape. The goal is to reduce the amount of care while keeping the property looking its best. This is achieved through intelligent design, durable materials, and strategic plant selection rather than through neglect.

Luxury in this context means investing in materials and systems that endure. Instead of standard concrete that cracks and stains, a luxury landscape uses porcelain pavers that resist frost and salt. Instead of a high-maintenance lawn that demands weekly mowing, it uses synthetic turf or groundcovers that require minimal attention. Instead of flimsy fencing, it uses permanent stone walls or mature evergreen hedges that provide privacy without constant trimming.

For Long Island homeowners, the coastal climate adds urgency to these choices. Salt air accelerates corrosion of metal fixtures. Frost heaves shift improperly installed pavers. Sandy soil drains quickly and dries out plants. A properly designed low-maintenance luxury landscape addresses each of these conditions with the right material choice at the start. This is why Gappsi Group, serving Nassau and Suffolk Counties since 1987, emphasizes planning and design as the foundation of every project. With 38 years of experience and 50-plus industry awards. The company understands that the upfront investment in quality materials and professional installation pays for itself many times over in reduced maintenance costs.

Think of it this way. Every weekend you spend repairing, weeding, mowing, or resealing is a weekend you could spend enjoying your yard. A low-maintenance luxury landscape shifts the balance away from work and toward relaxation.

Start with Strategic Site Planning and Design

Planning is essential to the development of a low-maintenance landscape. Extra time spent in planning will be repaid many times over in later leisure time, says Clemson University Extension. Before any material is ordered or any ground is broken, a thorough site analysis sets the stage for success.

Step 1: Analyze Your Site Conditions

Walk your property at different times of the day and in different seasons. Note where the sun hits in the morning versus the afternoon. An area that gets full morning sun but harsh afternoon heat requires different plant and material choices than a deeply shaded corner. Check for drainage issues, low spots where water pools, and runoff paths after heavy rain. These conditions, as noted by University of Missouri Extension, dictate whether you need grading work, drainage solutions, or raised beds to keep your landscape healthy.

Step 2: Document Your Family’s Needs

Consider both your present needs and future desires. Do you entertain frequently and need a large patio? Do children or pets need a safe play area? Would you like a space for gardening, a fire pit for cool evenings, or a quiet reading nook? Creating a clear priority list now prevents costly rework later. A luxury landscape that reflects how you actually live will serve you better than one designed around generic assumptions.

Step 3: Evaluate Existing Plants and Features

Identify trees and shrubs on the property and assess their health and future growth. A tree that will outgrow its current location may be less expensive to remove now than to manage as problems arise later. As Clemson specialists advise, preserving healthy mature trees adds immediate character and value, but struggling specimens should be replaced rather than maintained at high cost. Avoid tilling near established trees, since damaging their roots can lead to decline.

Step 4: Plan for Energy Efficiency

Shade trees placed on the east and west exposures of the home provide morning and late afternoon cooling during summer months. Keep the area south of the house open to allow winter sunlight to warm the structure. This passive approach reduces your energy bills while contributing to a comfortable outdoor environment. The same trees, if they are deciduous, allow sunlight through in winter when their leaves drop.

Step 5: Create a Phased Implementation Plan

A full property transformation does not have to happen all at once. Establish a phased plan that tackles the hardest elements first, such as grading, drainage, and hardscape installation, then follows with plantings and finishing touches. This approach spreads the investment over time and allows you to enjoy each phase as it is completed.

Select Hardscape Materials That Last

Your choice of hardscape materials determines how much maintenance your landscape will require for decades to come. On Long Island, salt air, frost, and heavy rain mean you need surfaces that stand up to the weather without constant attention.

Porcelain Pavers

Porcelain pavers are fired at extremely high temperatures, creating a dense, non-porous surface that resists stains, frost, and salt. They require no sealing, keep their color for decades, and clean easily with a rinse. For pool decks, patios, and walkways, porcelain paver installation by an experienced team ensures the base preparation matches the material’s long lifespan. Porcelain is also slip-resistant and stays cooler under direct sun than natural stone, making it a practical choice for sun-exposed areas.

Natural Stone

Travertine, bluestone, and granite offer a classic aesthetic that ages beautifully through Italian masonry craftsmanship. These materials require periodic sealing every three to five years with a water-based urethane sealer, a service Gappsi offers through its restoration program. Natural stone provides texture and character that cannot be replicated by manufactured products. It works well for pathways, patio borders, and retaining walls where a timeless look is desired.

Resin Stone Surfaces

Resin-bound aggregate systems combine small stones with a clear binder to create a permeable, smooth surface that drains water naturally. A durable resin stone patio prevents puddles and weed growth while offering a clean, modern appearance. These surfaces are ideal for driveways and high-traffic areas where you want excellent drainage with minimal upkeep.

Comparison of Hardscape Options

Material Care Level Typical Lifespan Best Use
Porcelain Pavers Very Low 50+ Years Patios, pool decks, walkways
Natural Stone Medium 30-50 Years Pathways, walls, borders
Resin Stone Low 25+ Years Driveways, high-traffic paths
Gravelfix Stabilized Gravel Low 20+ Years Driveways, natural paths
Standard Concrete Pavers High 15-20 Years Budget installations

Gappsi’s showroom at 1015 West Jericho Turnpike in Smithtown lets you see and feel these materials before making a decision. Touching the stone, walking on the pavers, and seeing the color in person ensures your selection matches your expectations.

Incorporate Synthetic Turf for Year-Round Greenery

Synthetic turf has evolved dramatically in recent years. Modern products from American manufacturers use advanced materials that look and feel like natural grass while requiring a fraction of the upkeep. There is no mowing, no fertilizing, no watering, and no re-seeding. For Long Island homeowners who want a green lawn without the weekly chore cycle, low-maintenance synthetic turf solutions offer a compelling alternative.

Applications extend beyond simple lawns. Synthetic turf works well for pet runs, putting greens, play areas, and the fields surrounding sports game courts. The ZeroFill infill system used by Gappsi reduces heat retention and provides a soft, natural feel underfoot. Because synthetic turf does not require pesticides or fertilizers, it eliminates chemical runoff that can affect local waterways. This is an increasingly important consideration for environmentally conscious homeowners on Long Island.

Synthetic turf pairs naturally with hardscape materials. A porcelain paver patio bordered by a strip of synthetic turf creates a clean, modern transition between living and leisure areas. The contrast between the structured geometry of pavers and the organic softness of the turf defines the luxury aesthetic while keeping maintenance minimal.

Gappsi’s 38 years in the landscape industry mean its team understands proper base preparation for synthetic turf. A correct base layer ensures drainage, prevents wrinkling, and maintains a level surface for the life of the installation.

Add Privacy Screens and Thoughtful Plantings

Privacy is one of the most requested features in a luxury landscape. The ability to enjoy your outdoor space without feeling exposed to neighbors or street traffic transforms the experience from merely functional to genuinely relaxing.

Evergreen plantings provide year-round screening. Arborvitae, leyland cypress, and other tall evergreens grow densely and require only occasional shaping. For faster results, a combination of fencing with climbing vines or espaliered trees creates layered privacy that matures quickly. Gappsi’s landscape design and construction services include custom planting plans that balance immediate screening needs with long-term growth patterns.

When selecting plants for a low-maintenance landscape, prioritize native species. Research from Cornell University shows that native plants do a better job of sustaining local insect communities than non-native alternatives. Plants like eastern red cedar, inkberry holly, and summersweet clethra thrive in Long Island’s climate without requiring excessive water or chemical inputs. They support local pollinators, resist pests naturally, and reduce the need for intervention.

Identify existing trees and shrubs during the planning phase. A healthy mature tree that screens an unsightly view is worth preserving. A struggling or poorly placed specimen may be easier and less expensive to replace now than to maintain over time. Make note of microclimates on your property areas that are particularly dry, wet, shaded, or exposed and select plants that match those conditions. This reduces the need for supplemental watering, soil amendments, and ongoing care.

Decorative containers with seasonal plantings add color and interest without requiring extensive garden beds. Planters can be moved, swapped, and refreshed with minimal effort, keeping the landscape feeling dynamic without demanding constant weeding and mulching.

Partner with a Full-Service Design-Build Contractor

A low-maintenance luxury landscape is only as good as the team that builds it. When multiple trades are involved, coordination matters. A masonry crew, a planting crew, an irrigation specialist, and a lighting installer need to work from the same plan with the same timeline. If one tradesperson finishes their work in a way that complicates the next step, the result suffers.

This is why a vertically integrated design-build contractor offers a clear advantage over hiring separate subcontractors. Gappsi’s 12 specialized divisions cover everything from initial 3D design through final installation, with in-house teams for masonry, landscape, synthetic turf, fencing, and restoration. There is no finger-pointing between subcontractors because the entire project is managed under one roof.

The company’s patented Gappsi Edge Restraint System is a specific example of how attention to detail reduces long-term maintenance. The system holds paver edges securely in place, preventing the shifting and settling that creates uneven surfaces and tripping hazards over time. Innovations like this, developed through decades of hands-on experience, distinguish a professional installation from a DIY or basic contractor approach.

The 3D design process used by Gappsi allows you to see your completed landscape before construction begins. This eliminates guesswork and ensures the final result matches your expectations. You can evaluate material combinations, test layout options, and refine the design until every element works together. For more information about how luxury outdoor contractors approach comprehensive landscape transformations, see Gappsi’s guide to selecting the right partner for your project.

Frequently Asked Questions

How do I design a low-maintenance landscape on Long Island?

Start with a thorough site analysis that evaluates sun exposure, drainage patterns, and existing vegetation. Choose durable materials like porcelain pavers and synthetic turf that require minimal ongoing care. Select native plants adapted to Long Island’s coastal climate. Work with a full-service contractor who can integrate all elements into a single cohesive plan.

What are the best low-maintenance materials for a luxury landscape?

Porcelain pavers offer the lowest maintenance with a 50-plus year lifespan and no sealing required. Resin stone surfaces provide excellent drainage and weed resistance for driveways and paths. Synthetic turf eliminates mowing and watering while maintaining a green appearance year-round. Natural stone like bluestone and travertine offer classic aesthetics with periodic sealing every three to five years.

How much does a luxury landscape cost on Long Island?

Costs vary based on property size, material choices, and scope of work. A comprehensive luxury landscape with hardscape, synthetic turf, plantings, and lighting typically ranges from moderate to significant investment per square foot. The best approach is to schedule a consultation where the design team can assess your property and provide a detailed estimate based on your specific goals.

Can I have a luxury landscape without hiring a full-service contractor?

While it is possible to coordinate separate contractors for different aspects of the project. The complexity of integrating multiple systems, materials, and timelines makes a single-provider approach more reliable. A full-service contractor ensures that the grading, drainage, hardscape, planting, and lighting work together as a unified system. This reduces coordination headaches and produces a more cohesive result.

How long does it take to install a luxury landscape on Long Island?

Timelines depend on project complexity, permitting requirements, and seasonal weather. A typical full-property transformation takes several weeks to a few months. Phased projects allow you to break the work into manageable stages, completing the most impactful elements first while planning future phases. A detailed timeline is established during the design phase before construction begins.

Ready to Design Your Low-Maintenance Luxury Landscape on Long Island?

Building a landscape that balances elegance with practicality requires expertise that only comes from experience. Gappsi Group has been designing and building luxury outdoor spaces on Long Island since 1987. From the first consultation to the final walkthrough. Every project receives the same attention to detail that has earned the company 50-plus industry awards and a patented paver restraint system.

Do not settle for a landscape that keeps you working instead of relaxing. Call Gappsi at 631-543-1177 or visit the showroom at 1015 West Jericho Turnpike in Smithtown to start the conversation. Your low-maintenance luxury landscape on Long Island is closer than you think.