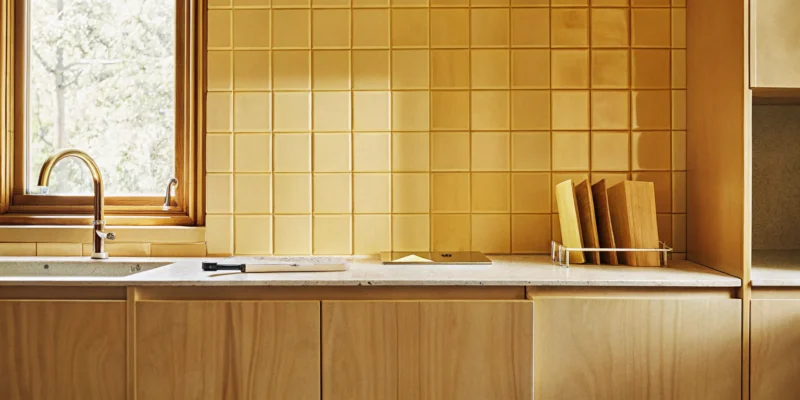
A modern kitchen renovation, the result of planning with a kitchen cost estimator.

Kitchen Renovation Cost Estimator: A Smart Guide

If you’ve started researching kitchen remodel costs, you’ve probably found a lot of conflicting advice. It’s easy to get overwhelmed by rules of thumb and national averages that don’t quite fit your specific situation. The best way to cut through the noise is to start with data that’s relevant to your actual project. Using a detailed kitchen renovation cost estimator provides a fact-based financial snapshot. It helps you understand the key factors that truly drive expenses, from labor to materials. This guide will walk you through how to build a realistic budget and avoid common myths that can derail your renovation plans.

Key Takeaways

  • Establish a realistic budget first: Use an online estimator for a ballpark figure, then create a detailed budget that includes materials, labor, permits, and a 10-20% contingency fund for any surprises.
  • Understand the main cost drivers: The final price depends on the project’s scope, like changing the layout, and your material choices, from cabinets to countertops. Knowing this gives you control over the total cost.
  • Make smart savings, not sacrifices: You can lower costs without compromising on style by refinishing cabinets, mixing high-end and budget-friendly materials, and selecting timeless designs for expensive items.

What Is a Kitchen Renovation Cost Estimator?

Think of a kitchen renovation cost estimator as your financial starting block. It’s a tool, often found online, that gives you a ballpark figure for what your dream kitchen project might cost. You can use it to get a general idea of your budget before you even start picking out tile or talking to a designer. These estimators are great because they let you play with different scenarios without any commitment. You can see how choosing high-end granite versus a more modest butcher block affects the bottom line.

The final cost of any home remodeling project will always depend on a few key factors: the size of your kitchen, the quality of materials you select, and the labor costs in your specific area, like here on Long Island. An estimator helps you understand these variables from the very beginning. It’s a free, simple way to get a handle on your potential investment, allowing you to move forward with a clearer financial picture and more confidence in your decisions.

How Do They Work?

These estimators are surprisingly straightforward. They work by asking you a series of questions about your project. You’ll input information like the dimensions of your kitchen, the types of materials you’re considering for countertops and cabinets, and the new appliances you want to install. The tool then uses this data, along with average local pricing, to generate a cost estimate. You can simulate different project levels, from a simple cosmetic refresh with new paint and hardware to a full-scale gut renovation. This process gives you a detailed and reliable cost breakdown, which is essential for managing your budget and setting realistic expectations for your project.

Why Use One Before You Start?

Using a cost estimator before you begin your renovation is one of the smartest moves you can make. It forces you to think through the details and create a preliminary budget. A well-planned budget is your best defense against financial stress, and it should account for everything: materials, labor, permits, and even a contingency fund for those unexpected surprises that can pop up. Starting with an estimate helps you avoid common remodeling mistakes and ensures you have a solid financial foundation. It also prepares you for more productive conversations when you decide to consult with a professional, as you’ll already have a clear idea of your goals and budget.

What Drives Your Kitchen Renovation Cost?

When you start dreaming about a new kitchen, one of the first questions that comes to mind is, “How much will this cost?” The answer isn’t a single number. A kitchen renovation budget is a puzzle made of several key pieces. The final price depends on the scope of your project, the materials you choose, and the complexity of the work involved. Understanding these cost drivers is the first step to creating a realistic budget and a kitchen you’ll love for years to come. By breaking down the expenses, you can see where your money is going and make informed decisions that align with your vision and your wallet.

Size and Layout

The size of your kitchen is one of the most straightforward factors affecting your budget. A larger space simply requires more materials, from flooring and cabinets to countertops and paint, which naturally increases the total cost. Beyond just square footage, the layout plays a huge role. If you plan to keep your kitchen’s existing footprint, you’ll save a significant amount of money. Changing the layout, such as moving the sink, dishwasher, or stove, often requires rerouting plumbing, gas, and electrical lines. This adds complexity and labor costs, so it’s important to weigh the benefits of a new configuration against the added expense.

Materials and Finishes

Your choice of materials and finishes is where your personal style comes to life, and it’s also where the budget can fluctuate the most. Cabinets are a major expense, with options ranging from refinishing your existing ones for a fresh look to installing semi-custom or fully custom cabinetry. Countertops are another key decision. You can choose from affordable laminates, popular mid-range quartz, or high-end materials like beautiful porcelain and natural stone. Every element, including flooring, backsplash tile, and hardware, comes in a wide range of price points, giving you control over the final cost.

Labor, Permits, and Design Fees

Unless you’re a seasoned contractor, you’ll be hiring professionals, and their labor will be a significant part of your budget, typically around 20% to 25% of the total project cost. This pays for the expertise of carpenters, plumbers, electricians, and installers who bring your vision to life. A quality home remodeling team ensures everything is done correctly and to code. Speaking of code, most kitchen renovations require permits from your local town or city. Your contractor can help manage this process, but the fees are an essential line item for your budget. Design fees may also apply if you hire a separate kitchen designer.

Appliances and Fixtures

Appliances are the workhorses of your kitchen, and their cost can vary dramatically. You can find reliable, budget-friendly models, or you can opt for high-end, professional-grade appliances with advanced features. This is an area where you have a lot of flexibility to scale your spending up or down based on your priorities and cooking style. Don’t forget that energy-efficient models might have a higher initial price but can save you money on utility bills over time. Fixtures like your sink, faucet, and lighting also contribute to the total cost and offer a wide spectrum of styles and price points to consider.

Hidden Costs to Watch For

No matter how well you plan, surprises can happen during a renovation. That’s why it’s smart to set aside a contingency fund, usually about 10% to 20% of your total budget, for unexpected issues. When you open up walls and floors, you might discover problems that need immediate attention, such as old, faulty wiring, leaky pipes, or hidden water damage. These issues must be fixed before the renovation can continue, and having a financial cushion prevents them from derailing your project. A good contractor will help you anticipate potential problems, but being prepared for the unknown is always a wise move.

How Much Does a Kitchen Remodel Cost?

Figuring out a realistic budget is one of the first and most important steps in any kitchen project. While the final cost depends on your specific choices, kitchen remodels generally fall into three main budget categories. Think of these as starting points to help you understand what’s possible and align your vision with your investment.

Keep in mind that these are national averages, and costs can vary based on the size of your space, the materials you select, and the complexity of the job. The best way to get an accurate number for your Long Island home is to work with a professional who can provide a detailed quote. Gappsi offers comprehensive home remodeling services to help you plan every detail, from initial design to final installation. Let’s look at what you can generally expect at different price points.

Minor Updates ($10,000–$15,000)

If you’re looking for a significant refresh without a full-scale demolition, this is your category. A minor kitchen update focuses on high-impact cosmetic changes that can completely change the feel of your space. With this budget, you can typically tackle projects like refacing your existing cabinets, installing new countertops, or updating your sink and faucet.

You could also replace your backsplash with beautiful porcelain or natural stone or upgrade your lighting fixtures. These smaller changes can make a huge difference in the kitchen’s functionality and style, giving you a fresh look without the time and expense of a complete overhaul. It’s a great way to add value and enjoyment to your home on a more modest budget.

Mid-Range Remodels ($20,000–$50,000)

This is the most common category for kitchen renovations, involving more substantial changes to the space. A mid-range remodel often includes everything from a minor update plus new semi-custom cabinetry, a full suite of new appliances, and flooring replacement. You might also have enough room in the budget to make minor adjustments to your kitchen’s layout for better flow and function.

While the national average sits around $26,500, a larger kitchen with higher-end appliances and materials can push the cost toward the top of this range or even higher. This level of investment allows you to create a truly personalized kitchen that meets your family’s needs and reflects your style, making it a popular choice for many homeowners.

High-End Renovations ($75,000+)

For those dreaming of a complete kitchen transformation, a high-end renovation offers limitless possibilities. This budget allows for a full gut remodel, including structural changes like removing walls to create an open-concept space or adding new windows for more natural light. You can invest in fully custom cabinetry, professional-grade appliances, and luxury materials like marble countertops or intricate tilework.

This is where you can incorporate unique features, such as a large island with a second sink, a walk-in pantry, or custom masonry work for a one-of-a-kind backsplash or accent wall. A high-end renovation is a significant investment that results in a truly bespoke kitchen designed and built without compromise.

Don’t Let These Kitchen Renovation Myths Derail Your Budget

Planning a kitchen remodel is exciting, but it’s easy to get sidetracked by well-meaning advice that’s actually just plain wrong. These common myths can cause you to miscalculate your budget, make choices you’ll regret, and add a lot of unnecessary stress to the process. Before you start picking out paint colors or dreaming about new appliances, let’s clear up a few things. Understanding the truth behind these misconceptions will help you create a realistic budget and a solid plan. A successful project starts with good information, ensuring your investment enhances your home for years to come. By separating fact from fiction, you can approach your home remodeling project with confidence and clarity.

Myth: A remodel’s cost is a set percentage of your home’s value.

You may have heard the old rule that you should spend between 5% and 15% of your home’s value on a kitchen remodel. While that might work as a very rough starting point, it’s not a rule to live by. The truth is, the cost of a kitchen remodel should depend on the magnitude of the project, not your home value. Are you simply swapping out countertops, or are you moving walls and reconfiguring the entire plumbing layout? A cosmetic update will cost far less than a complete structural change. Instead of relying on a generic percentage, focus on creating a detailed plan of what you want to achieve. This will give you a much more accurate picture of the actual costs involved.

Myth: DIY is always the cheapest option.

Tackling a project yourself can feel empowering, but it isn’t always the most cost-effective route for a kitchen remodel. Homeowners often underestimate the total cost of a kitchen remodel, and a simple mistake can become a major expense. Rushing the design process or making an error during installation can lead to paying a professional to fix it later, doubling the cost. Projects involving electrical, plumbing, and precise masonry work require specialized skills for a reason. Investing in professional design and construction from the start ensures the job is done correctly, safely, and efficiently, saving you from costly headaches down the road.

Myth: All contractor quotes are created equal.

When you start collecting quotes, you might be tempted to jump on the lowest offer. However, choosing the lowest estimate can lead to costly mistakes if the contractor cuts corners or uses subpar materials. A vague quote is a red flag. The best contractors provide a transparent contract with itemized costs, giving you better control and a clear understanding of where your money is going. This document should detail everything from labor charges to the specific porcelain and natural stone you chose for your countertops. A detailed quote reflects a contractor’s professionalism and commitment to quality, which is far more valuable than a low price tag.

Myth: You have to do a complete overhaul.

The idea of a full gut renovation can be overwhelming and, frankly, isn’t always necessary. You don’t need to tear everything down to the studs to create a kitchen you love. Proper planning is crucial for a successful kitchen remodel, and a thoughtful approach can help you make high-impact changes on a smaller scale. Sometimes, refinishing cabinets, installing a new backsplash, or upgrading your lighting is all it takes to completely transform the space. Working with a designer can help you identify which updates will give you the most bang for your buck, allowing you to achieve a fresh, modern look without the cost and disruption of a complete overhaul.

What to Look for in a Kitchen Cost Estimator

When you start searching for kitchen cost estimators online, you’ll find plenty of options. The trick is knowing which ones are genuinely helpful and which are just spitting out random numbers. A great estimator is more than a simple calculator; it’s a planning tool that gives you a realistic starting point for your budget. It should give you the confidence to have productive conversations with designers and contractors. Think of it as your first, smart step toward the kitchen you’ve been dreaming of. A reliable tool will have a few key features that set it apart from the rest, ensuring the information you get is both accurate and actionable for your Long Island home.

Local, Customizable Pricing

A generic, nationwide average for a kitchen remodel won’t do you much good here on Long Island. Material costs and labor wages vary significantly from one region to another. The best estimators use real-time, local data to give you a number that reflects our market. They should account for factors like current labor wages, which can increase annually. This ensures your projected budget is realistic from the start. A tool that lets you customize your project based on local pricing is essential for creating a budget that won’t fall apart a few weeks into the renovation.

Detailed Cost Breakdowns

A trustworthy cost estimator won’t just give you a single, lump-sum figure. Instead, it will provide a detailed breakdown that shows you where your money is going. Look for a tool that separates costs for cabinets, countertops, appliances, labor, permits, and other key items. This level of detail is crucial for effective budget management and helps you set realistic expectations. Seeing the costs itemized allows you to identify areas where you might want to invest more and where you could potentially save, giving you total control over your spending.

Visual Design Tools

It’s much easier to make decisions when you can see the potential outcome. Many modern estimators include visual design tools that let you experiment with different finishes and materials. You can swap out cabinet styles, test countertop options like porcelain or natural stone, and play with backsplash designs to see how each choice impacts the overall cost. This interactive feature makes the process more engaging and helps you connect the numbers on the screen to the actual look and feel of your future kitchen, making your design choices feel more tangible.

Professional Service Integration

An online estimator is an excellent starting point, but it’s not a substitute for professional expertise. The most helpful estimators are designed to be the first step in a larger process. They give you a broad, initial estimate that you can then take to a design professional. This makes your first consultation incredibly productive because you’re starting with a data-informed budget. The goal is to use the tool to get a clear financial picture, then easily connect with an expert team like Gappsi to refine the details and bring your vision to life.

How to Save on Your Renovation (The Smart Way)

A beautiful kitchen renovation doesn’t have to drain your savings. Saving money isn’t about cutting corners or settling for less; it’s about making smart, strategic decisions that give you the most value for your investment. By focusing your budget on what matters most and getting creative with the rest, you can create a stunning space that feels luxurious without the shocking price tag. It all comes down to planning and knowing where to splurge and where to save. With a thoughtful approach, you can balance your dream kitchen aspirations with your financial reality. Here are a few expert tips for keeping your renovation costs in check.

Refinish, Don’t Replace

Before you decide to tear everything out, take a good look at what you already have. If your kitchen cabinets are structurally sound but just look dated, refinishing them is a fantastic way to save a significant amount of money. A professional paint job, new stain, or updated hardware can completely transform the look and feel of your kitchen for a fraction of the cost of new custom cabinetry. This approach allows you to allocate more of your budget toward other high-impact features, like new countertops or modern appliances, as part of your overall home remodeling project.

Choose High-Impact, Low-Cost Materials

Achieving a high-end look is all about mixing materials wisely. You don’t need to select the most expensive option for every single surface. Instead, identify one or two “wow” features where you want to splurge, like a gorgeous quartz countertop or a statement backsplash. Then, balance that cost with more budget-friendly choices for other areas. For example, durable and stylish luxury vinyl flooring can provide the look of hardwood at a lower price point. Gappsi offers a wide selection of porcelain and natural stone, giving you the flexibility to find the perfect material that fits both your aesthetic and your budget.

Focus on Timeless Trends

While it’s tempting to jump on the latest design trend, it can make your kitchen feel dated in just a few years. For big-ticket items that are difficult and expensive to replace, like cabinets, flooring, and countertops, it’s best to stick with classic styles and neutral colors. These timeless choices have lasting appeal and provide a versatile backdrop that you can easily update over the years. You can still incorporate trendy elements with accessories that are simple and inexpensive to swap out, such as cabinet pulls, light fixtures, bar stools, or a fresh coat of paint.

Build In a Contingency Fund

No matter how carefully you plan, unexpected issues can and often do arise during a renovation. When walls are opened up, you might discover hidden problems like old plumbing, outdated electrical wiring, or water damage that need to be addressed. That’s why it’s essential to build a contingency fund into your budget from the very beginning. Most professionals recommend setting aside an extra 10% to 20% of your total project cost for these surprises. This financial cushion ensures that an unforeseen repair doesn’t derail your entire project or force you to make compromises on your design.

Plan Your Long Island Kitchen Remodel with Gappsi

Bringing your dream kitchen to life is an exciting project, and a solid plan is the first step toward a beautiful result. Before you start picking out paint colors, it’s smart to get a handle on your budget. The total cost of a kitchen remodel can vary quite a bit, depending on the size of your space, the quality of materials you select, and local labor rates right here on Long Island. This is where careful planning becomes your most valuable tool.

A well-thought-out budget should account for everything: materials, labor, permits, and even a small cushion for any surprises that might pop up. Taking the time to measure your space and assess your family’s needs helps you avoid costly changes later on. Do you need more counter space for meal prep, or is storage your top priority? Answering these questions early ensures your new kitchen is as functional as it is stunning.

At Gappsi, we guide you through every phase of your home remodeling project. Our design experts work with you to create a detailed plan that aligns with your vision and budget. We help you explore material options, from durable countertops to elegant porcelain and natural stone flooring, ensuring every choice reflects your style. By partnering with our experienced team, you can feel confident that your kitchen renovation will run smoothly, transforming your initial ideas into a space you’ll love for years to come.

Related Articles

Frequently Asked Questions

How accurate are online kitchen cost estimators? Think of an online estimator as a fantastic starting point, not a final quote. It gives you a realistic budget range based on average local data, which is incredibly helpful for initial planning. However, it can’t account for the unique details of your home, like the condition of your existing walls or specific material choices you might make. The most accurate number will always come from a detailed, in-person consultation with a professional who can assess your space and discuss your exact vision.

What’s the most important part of a kitchen renovation budget? Besides the obvious costs for materials and labor, the most crucial line item is your contingency fund. Setting aside an extra 10% to 20% of your total budget for unexpected issues is non-negotiable. Renovations can uncover surprises like old wiring or hidden leaks that must be fixed. Having this financial cushion means you can handle these problems without having to sacrifice parts of your design or go into debt.

Where should I splurge and where can I save to get the best value? For the biggest impact, consider splurging on the elements you touch and use every day, like your countertops and cabinet hardware. These high-use items define the feel of your kitchen. You can save money on things that are easier to upgrade later, such as lighting fixtures, faucets, or even appliances, where mid-range models often perform just as well as their high-end counterparts. It’s about creating a smart balance between luxury and practicality.

Do I really need to keep my kitchen’s current layout to save money? Keeping your kitchen’s existing footprint is one of the most effective ways to control costs. The moment you decide to move a sink, dishwasher, or stove, the project’s complexity increases significantly. This is because it requires rerouting plumbing, electrical, and gas lines, which adds considerable labor costs. If your current layout functions well, a cosmetic update can still deliver a dramatic transformation for a much smaller investment.

I have a rough budget in mind. What’s my next step? Once you have a budget range you’re comfortable with, the best next step is to schedule a professional design consultation. This is where your ideas start to become a concrete plan. A designer can help you refine your vision, make smart material selections that fit your budget, and create a detailed proposal. This conversation moves you from the “what if” stage to a clear, actionable path forward for your project.
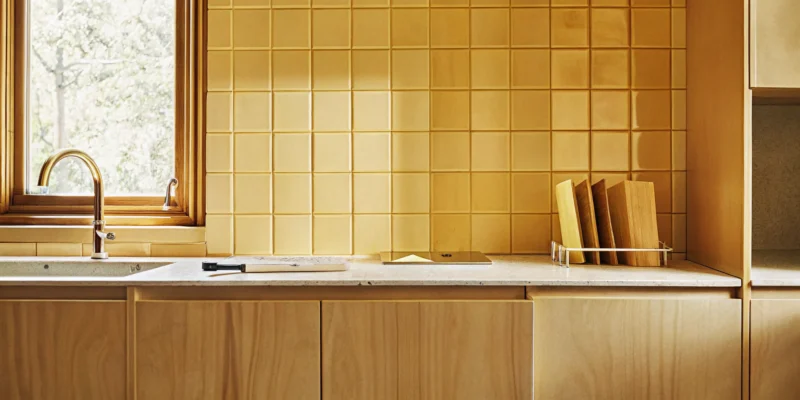
A modern kitchen renovation, the result of planning with a kitchen cost estimator.

Kitchen Renovation Cost Estimator: A Smart Guide

If you’ve started researching kitchen remodel costs, you’ve probably found a lot of conflicting advice. It’s easy to get overwhelmed by rules of thumb and national averages that don’t quite fit your specific situation. The best way to cut through the noise is to start with data that’s relevant to your actual project. Using a detailed kitchen renovation cost estimator provides a fact-based financial snapshot. It helps you understand the key factors that truly drive expenses, from labor to materials. This guide will walk you through how to build a realistic budget and avoid common myths that can derail your renovation plans.

Key Takeaways

  • Establish a realistic budget first: Use an online estimator for a ballpark figure, then create a detailed budget that includes materials, labor, permits, and a 10-20% contingency fund for any surprises.
  • Understand the main cost drivers: The final price depends on the project’s scope, like changing the layout, and your material choices, from cabinets to countertops. Knowing this gives you control over the total cost.
  • Make smart savings, not sacrifices: You can lower costs without compromising on style by refinishing cabinets, mixing high-end and budget-friendly materials, and selecting timeless designs for expensive items.

What Is a Kitchen Renovation Cost Estimator?

Think of a kitchen renovation cost estimator as your financial starting block. It’s a tool, often found online, that gives you a ballpark figure for what your dream kitchen project might cost. You can use it to get a general idea of your budget before you even start picking out tile or talking to a designer. These estimators are great because they let you play with different scenarios without any commitment. You can see how choosing high-end granite versus a more modest butcher block affects the bottom line.

The final cost of any home remodeling project will always depend on a few key factors: the size of your kitchen, the quality of materials you select, and the labor costs in your specific area, like here on Long Island. An estimator helps you understand these variables from the very beginning. It’s a free, simple way to get a handle on your potential investment, allowing you to move forward with a clearer financial picture and more confidence in your decisions.

How Do They Work?

These estimators are surprisingly straightforward. They work by asking you a series of questions about your project. You’ll input information like the dimensions of your kitchen, the types of materials you’re considering for countertops and cabinets, and the new appliances you want to install. The tool then uses this data, along with average local pricing, to generate a cost estimate. You can simulate different project levels, from a simple cosmetic refresh with new paint and hardware to a full-scale gut renovation. This process gives you a detailed and reliable cost breakdown, which is essential for managing your budget and setting realistic expectations for your project.

Why Use One Before You Start?

Using a cost estimator before you begin your renovation is one of the smartest moves you can make. It forces you to think through the details and create a preliminary budget. A well-planned budget is your best defense against financial stress, and it should account for everything: materials, labor, permits, and even a contingency fund for those unexpected surprises that can pop up. Starting with an estimate helps you avoid common remodeling mistakes and ensures you have a solid financial foundation. It also prepares you for more productive conversations when you decide to consult with a professional, as you’ll already have a clear idea of your goals and budget.

What Drives Your Kitchen Renovation Cost?

When you start dreaming about a new kitchen, one of the first questions that comes to mind is, “How much will this cost?” The answer isn’t a single number. A kitchen renovation budget is a puzzle made of several key pieces. The final price depends on the scope of your project, the materials you choose, and the complexity of the work involved. Understanding these cost drivers is the first step to creating a realistic budget and a kitchen you’ll love for years to come. By breaking down the expenses, you can see where your money is going and make informed decisions that align with your vision and your wallet.

Size and Layout

The size of your kitchen is one of the most straightforward factors affecting your budget. A larger space simply requires more materials, from flooring and cabinets to countertops and paint, which naturally increases the total cost. Beyond just square footage, the layout plays a huge role. If you plan to keep your kitchen’s existing footprint, you’ll save a significant amount of money. Changing the layout, such as moving the sink, dishwasher, or stove, often requires rerouting plumbing, gas, and electrical lines. This adds complexity and labor costs, so it’s important to weigh the benefits of a new configuration against the added expense.

Materials and Finishes

Your choice of materials and finishes is where your personal style comes to life, and it’s also where the budget can fluctuate the most. Cabinets are a major expense, with options ranging from refinishing your existing ones for a fresh look to installing semi-custom or fully custom cabinetry. Countertops are another key decision. You can choose from affordable laminates, popular mid-range quartz, or high-end materials like beautiful porcelain and natural stone. Every element, including flooring, backsplash tile, and hardware, comes in a wide range of price points, giving you control over the final cost.

Labor, Permits, and Design Fees

Unless you’re a seasoned contractor, you’ll be hiring professionals, and their labor will be a significant part of your budget, typically around 20% to 25% of the total project cost. This pays for the expertise of carpenters, plumbers, electricians, and installers who bring your vision to life. A quality home remodeling team ensures everything is done correctly and to code. Speaking of code, most kitchen renovations require permits from your local town or city. Your contractor can help manage this process, but the fees are an essential line item for your budget. Design fees may also apply if you hire a separate kitchen designer.

Appliances and Fixtures

Appliances are the workhorses of your kitchen, and their cost can vary dramatically. You can find reliable, budget-friendly models, or you can opt for high-end, professional-grade appliances with advanced features. This is an area where you have a lot of flexibility to scale your spending up or down based on your priorities and cooking style. Don’t forget that energy-efficient models might have a higher initial price but can save you money on utility bills over time. Fixtures like your sink, faucet, and lighting also contribute to the total cost and offer a wide spectrum of styles and price points to consider.

Hidden Costs to Watch For

No matter how well you plan, surprises can happen during a renovation. That’s why it’s smart to set aside a contingency fund, usually about 10% to 20% of your total budget, for unexpected issues. When you open up walls and floors, you might discover problems that need immediate attention, such as old, faulty wiring, leaky pipes, or hidden water damage. These issues must be fixed before the renovation can continue, and having a financial cushion prevents them from derailing your project. A good contractor will help you anticipate potential problems, but being prepared for the unknown is always a wise move.

How Much Does a Kitchen Remodel Cost?

Figuring out a realistic budget is one of the first and most important steps in any kitchen project. While the final cost depends on your specific choices, kitchen remodels generally fall into three main budget categories. Think of these as starting points to help you understand what’s possible and align your vision with your investment.

Keep in mind that these are national averages, and costs can vary based on the size of your space, the materials you select, and the complexity of the job. The best way to get an accurate number for your Long Island home is to work with a professional who can provide a detailed quote. Gappsi offers comprehensive home remodeling services to help you plan every detail, from initial design to final installation. Let’s look at what you can generally expect at different price points.

Minor Updates ($10,000–$15,000)

If you’re looking for a significant refresh without a full-scale demolition, this is your category. A minor kitchen update focuses on high-impact cosmetic changes that can completely change the feel of your space. With this budget, you can typically tackle projects like refacing your existing cabinets, installing new countertops, or updating your sink and faucet.

You could also replace your backsplash with beautiful porcelain or natural stone or upgrade your lighting fixtures. These smaller changes can make a huge difference in the kitchen’s functionality and style, giving you a fresh look without the time and expense of a complete overhaul. It’s a great way to add value and enjoyment to your home on a more modest budget.

Mid-Range Remodels ($20,000–$50,000)

This is the most common category for kitchen renovations, involving more substantial changes to the space. A mid-range remodel often includes everything from a minor update plus new semi-custom cabinetry, a full suite of new appliances, and flooring replacement. You might also have enough room in the budget to make minor adjustments to your kitchen’s layout for better flow and function.

While the national average sits around $26,500, a larger kitchen with higher-end appliances and materials can push the cost toward the top of this range or even higher. This level of investment allows you to create a truly personalized kitchen that meets your family’s needs and reflects your style, making it a popular choice for many homeowners.

High-End Renovations ($75,000+)

For those dreaming of a complete kitchen transformation, a high-end renovation offers limitless possibilities. This budget allows for a full gut remodel, including structural changes like removing walls to create an open-concept space or adding new windows for more natural light. You can invest in fully custom cabinetry, professional-grade appliances, and luxury materials like marble countertops or intricate tilework.

This is where you can incorporate unique features, such as a large island with a second sink, a walk-in pantry, or custom masonry work for a one-of-a-kind backsplash or accent wall. A high-end renovation is a significant investment that results in a truly bespoke kitchen designed and built without compromise.

Don’t Let These Kitchen Renovation Myths Derail Your Budget

Planning a kitchen remodel is exciting, but it’s easy to get sidetracked by well-meaning advice that’s actually just plain wrong. These common myths can cause you to miscalculate your budget, make choices you’ll regret, and add a lot of unnecessary stress to the process. Before you start picking out paint colors or dreaming about new appliances, let’s clear up a few things. Understanding the truth behind these misconceptions will help you create a realistic budget and a solid plan. A successful project starts with good information, ensuring your investment enhances your home for years to come. By separating fact from fiction, you can approach your home remodeling project with confidence and clarity.

Myth: A remodel’s cost is a set percentage of your home’s value.

You may have heard the old rule that you should spend between 5% and 15% of your home’s value on a kitchen remodel. While that might work as a very rough starting point, it’s not a rule to live by. The truth is, the cost of a kitchen remodel should depend on the magnitude of the project, not your home value. Are you simply swapping out countertops, or are you moving walls and reconfiguring the entire plumbing layout? A cosmetic update will cost far less than a complete structural change. Instead of relying on a generic percentage, focus on creating a detailed plan of what you want to achieve. This will give you a much more accurate picture of the actual costs involved.

Myth: DIY is always the cheapest option.

Tackling a project yourself can feel empowering, but it isn’t always the most cost-effective route for a kitchen remodel. Homeowners often underestimate the total cost of a kitchen remodel, and a simple mistake can become a major expense. Rushing the design process or making an error during installation can lead to paying a professional to fix it later, doubling the cost. Projects involving electrical, plumbing, and precise masonry work require specialized skills for a reason. Investing in professional design and construction from the start ensures the job is done correctly, safely, and efficiently, saving you from costly headaches down the road.

Myth: All contractor quotes are created equal.

When you start collecting quotes, you might be tempted to jump on the lowest offer. However, choosing the lowest estimate can lead to costly mistakes if the contractor cuts corners or uses subpar materials. A vague quote is a red flag. The best contractors provide a transparent contract with itemized costs, giving you better control and a clear understanding of where your money is going. This document should detail everything from labor charges to the specific porcelain and natural stone you chose for your countertops. A detailed quote reflects a contractor’s professionalism and commitment to quality, which is far more valuable than a low price tag.

Myth: You have to do a complete overhaul.

The idea of a full gut renovation can be overwhelming and, frankly, isn’t always necessary. You don’t need to tear everything down to the studs to create a kitchen you love. Proper planning is crucial for a successful kitchen remodel, and a thoughtful approach can help you make high-impact changes on a smaller scale. Sometimes, refinishing cabinets, installing a new backsplash, or upgrading your lighting is all it takes to completely transform the space. Working with a designer can help you identify which updates will give you the most bang for your buck, allowing you to achieve a fresh, modern look without the cost and disruption of a complete overhaul.

What to Look for in a Kitchen Cost Estimator

When you start searching for kitchen cost estimators online, you’ll find plenty of options. The trick is knowing which ones are genuinely helpful and which are just spitting out random numbers. A great estimator is more than a simple calculator; it’s a planning tool that gives you a realistic starting point for your budget. It should give you the confidence to have productive conversations with designers and contractors. Think of it as your first, smart step toward the kitchen you’ve been dreaming of. A reliable tool will have a few key features that set it apart from the rest, ensuring the information you get is both accurate and actionable for your Long Island home.

Local, Customizable Pricing

A generic, nationwide average for a kitchen remodel won’t do you much good here on Long Island. Material costs and labor wages vary significantly from one region to another. The best estimators use real-time, local data to give you a number that reflects our market. They should account for factors like current labor wages, which can increase annually. This ensures your projected budget is realistic from the start. A tool that lets you customize your project based on local pricing is essential for creating a budget that won’t fall apart a few weeks into the renovation.

Detailed Cost Breakdowns

A trustworthy cost estimator won’t just give you a single, lump-sum figure. Instead, it will provide a detailed breakdown that shows you where your money is going. Look for a tool that separates costs for cabinets, countertops, appliances, labor, permits, and other key items. This level of detail is crucial for effective budget management and helps you set realistic expectations. Seeing the costs itemized allows you to identify areas where you might want to invest more and where you could potentially save, giving you total control over your spending.

Visual Design Tools

It’s much easier to make decisions when you can see the potential outcome. Many modern estimators include visual design tools that let you experiment with different finishes and materials. You can swap out cabinet styles, test countertop options like porcelain or natural stone, and play with backsplash designs to see how each choice impacts the overall cost. This interactive feature makes the process more engaging and helps you connect the numbers on the screen to the actual look and feel of your future kitchen, making your design choices feel more tangible.

Professional Service Integration

An online estimator is an excellent starting point, but it’s not a substitute for professional expertise. The most helpful estimators are designed to be the first step in a larger process. They give you a broad, initial estimate that you can then take to a design professional. This makes your first consultation incredibly productive because you’re starting with a data-informed budget. The goal is to use the tool to get a clear financial picture, then easily connect with an expert team like Gappsi to refine the details and bring your vision to life.

How to Save on Your Renovation (The Smart Way)

A beautiful kitchen renovation doesn’t have to drain your savings. Saving money isn’t about cutting corners or settling for less; it’s about making smart, strategic decisions that give you the most value for your investment. By focusing your budget on what matters most and getting creative with the rest, you can create a stunning space that feels luxurious without the shocking price tag. It all comes down to planning and knowing where to splurge and where to save. With a thoughtful approach, you can balance your dream kitchen aspirations with your financial reality. Here are a few expert tips for keeping your renovation costs in check.

Refinish, Don’t Replace

Before you decide to tear everything out, take a good look at what you already have. If your kitchen cabinets are structurally sound but just look dated, refinishing them is a fantastic way to save a significant amount of money. A professional paint job, new stain, or updated hardware can completely transform the look and feel of your kitchen for a fraction of the cost of new custom cabinetry. This approach allows you to allocate more of your budget toward other high-impact features, like new countertops or modern appliances, as part of your overall home remodeling project.

Choose High-Impact, Low-Cost Materials

Achieving a high-end look is all about mixing materials wisely. You don’t need to select the most expensive option for every single surface. Instead, identify one or two “wow” features where you want to splurge, like a gorgeous quartz countertop or a statement backsplash. Then, balance that cost with more budget-friendly choices for other areas. For example, durable and stylish luxury vinyl flooring can provide the look of hardwood at a lower price point. Gappsi offers a wide selection of porcelain and natural stone, giving you the flexibility to find the perfect material that fits both your aesthetic and your budget.

Focus on Timeless Trends

While it’s tempting to jump on the latest design trend, it can make your kitchen feel dated in just a few years. For big-ticket items that are difficult and expensive to replace, like cabinets, flooring, and countertops, it’s best to stick with classic styles and neutral colors. These timeless choices have lasting appeal and provide a versatile backdrop that you can easily update over the years. You can still incorporate trendy elements with accessories that are simple and inexpensive to swap out, such as cabinet pulls, light fixtures, bar stools, or a fresh coat of paint.

Build In a Contingency Fund

No matter how carefully you plan, unexpected issues can and often do arise during a renovation. When walls are opened up, you might discover hidden problems like old plumbing, outdated electrical wiring, or water damage that need to be addressed. That’s why it’s essential to build a contingency fund into your budget from the very beginning. Most professionals recommend setting aside an extra 10% to 20% of your total project cost for these surprises. This financial cushion ensures that an unforeseen repair doesn’t derail your entire project or force you to make compromises on your design.

Plan Your Long Island Kitchen Remodel with Gappsi

Bringing your dream kitchen to life is an exciting project, and a solid plan is the first step toward a beautiful result. Before you start picking out paint colors, it’s smart to get a handle on your budget. The total cost of a kitchen remodel can vary quite a bit, depending on the size of your space, the quality of materials you select, and local labor rates right here on Long Island. This is where careful planning becomes your most valuable tool.

A well-thought-out budget should account for everything: materials, labor, permits, and even a small cushion for any surprises that might pop up. Taking the time to measure your space and assess your family’s needs helps you avoid costly changes later on. Do you need more counter space for meal prep, or is storage your top priority? Answering these questions early ensures your new kitchen is as functional as it is stunning.

At Gappsi, we guide you through every phase of your home remodeling project. Our design experts work with you to create a detailed plan that aligns with your vision and budget. We help you explore material options, from durable countertops to elegant porcelain and natural stone flooring, ensuring every choice reflects your style. By partnering with our experienced team, you can feel confident that your kitchen renovation will run smoothly, transforming your initial ideas into a space you’ll love for years to come.

Related Articles

Frequently Asked Questions

How accurate are online kitchen cost estimators? Think of an online estimator as a fantastic starting point, not a final quote. It gives you a realistic budget range based on average local data, which is incredibly helpful for initial planning. However, it can’t account for the unique details of your home, like the condition of your existing walls or specific material choices you might make. The most accurate number will always come from a detailed, in-person consultation with a professional who can assess your space and discuss your exact vision.

What’s the most important part of a kitchen renovation budget? Besides the obvious costs for materials and labor, the most crucial line item is your contingency fund. Setting aside an extra 10% to 20% of your total budget for unexpected issues is non-negotiable. Renovations can uncover surprises like old wiring or hidden leaks that must be fixed. Having this financial cushion means you can handle these problems without having to sacrifice parts of your design or go into debt.

Where should I splurge and where can I save to get the best value? For the biggest impact, consider splurging on the elements you touch and use every day, like your countertops and cabinet hardware. These high-use items define the feel of your kitchen. You can save money on things that are easier to upgrade later, such as lighting fixtures, faucets, or even appliances, where mid-range models often perform just as well as their high-end counterparts. It’s about creating a smart balance between luxury and practicality.

Do I really need to keep my kitchen’s current layout to save money? Keeping your kitchen’s existing footprint is one of the most effective ways to control costs. The moment you decide to move a sink, dishwasher, or stove, the project’s complexity increases significantly. This is because it requires rerouting plumbing, electrical, and gas lines, which adds considerable labor costs. If your current layout functions well, a cosmetic update can still deliver a dramatic transformation for a much smaller investment.

I have a rough budget in mind. What’s my next step? Once you have a budget range you’re comfortable with, the best next step is to schedule a professional design consultation. This is where your ideas start to become a concrete plan. A designer can help you refine your vision, make smart material selections that fit your budget, and create a detailed proposal. This conversation moves you from the “what if” stage to a clear, actionable path forward for your project.
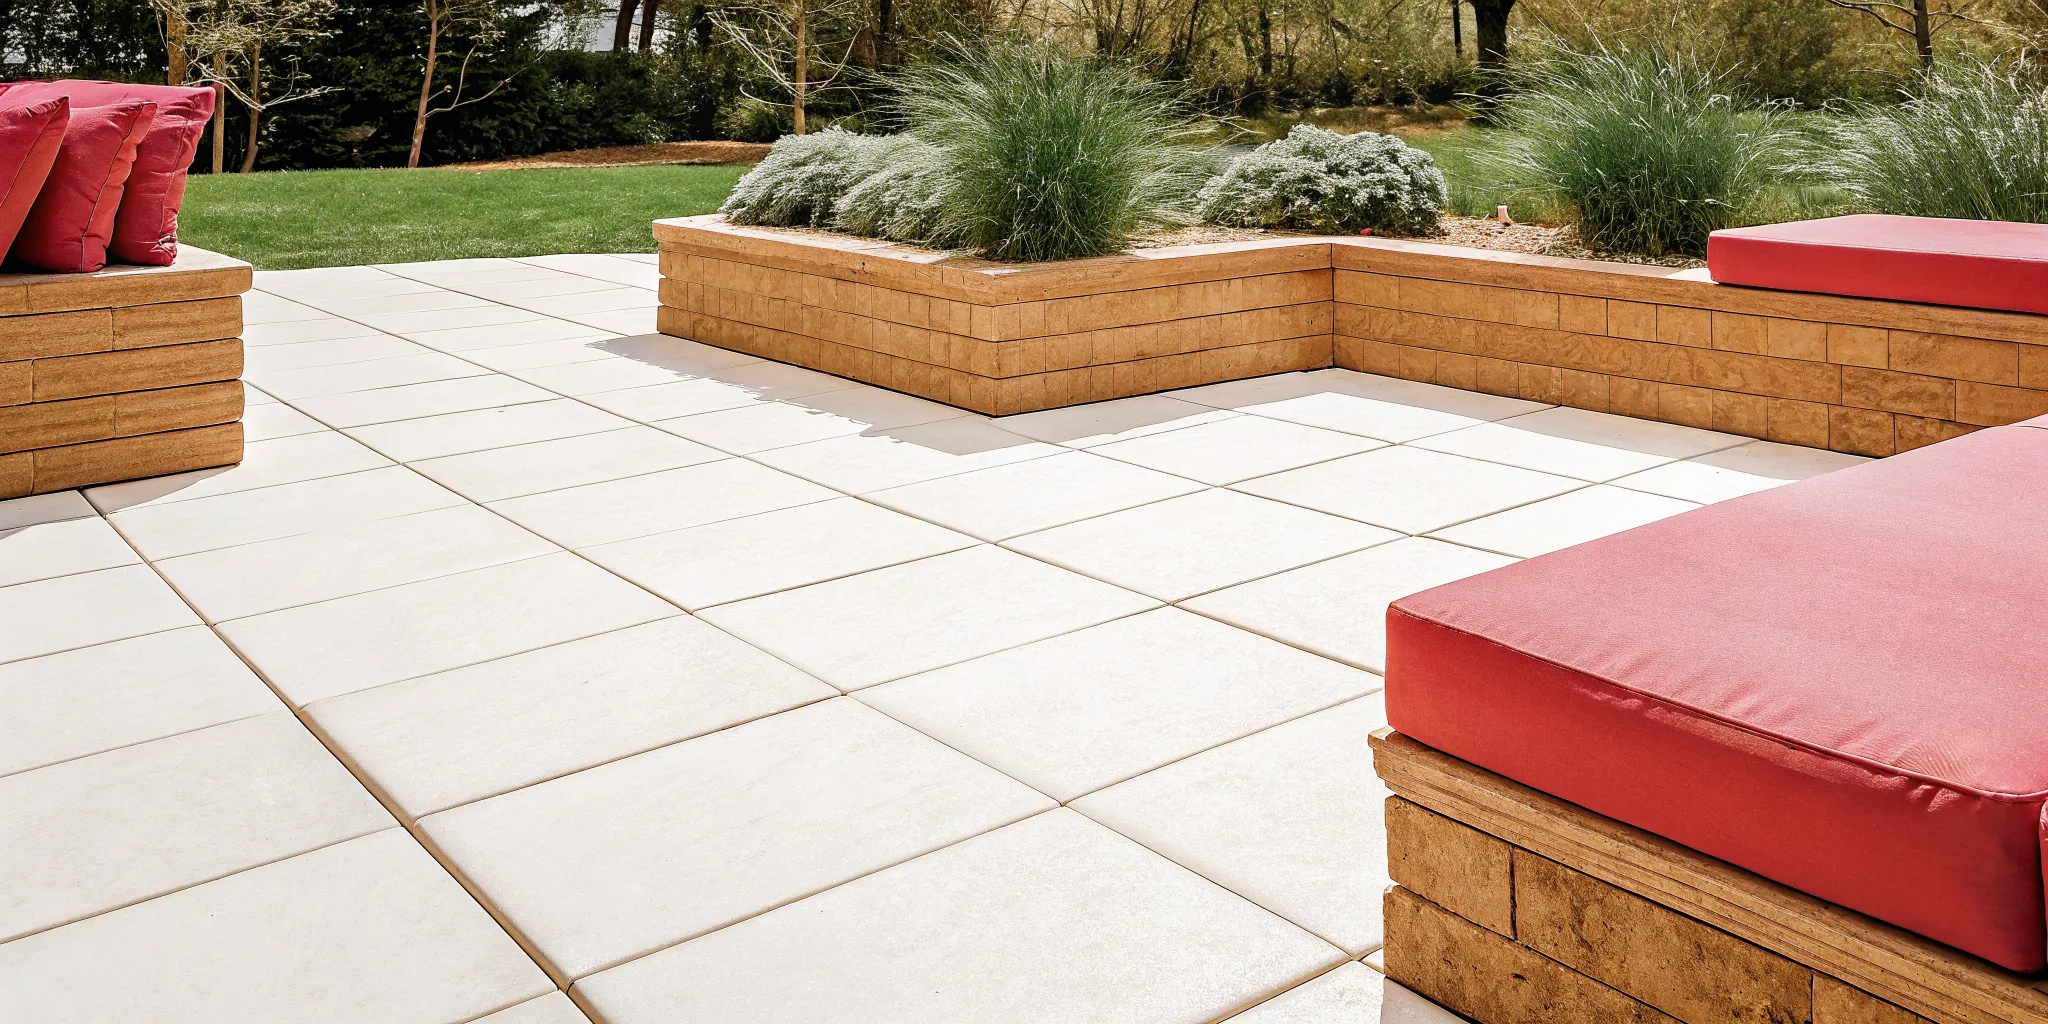
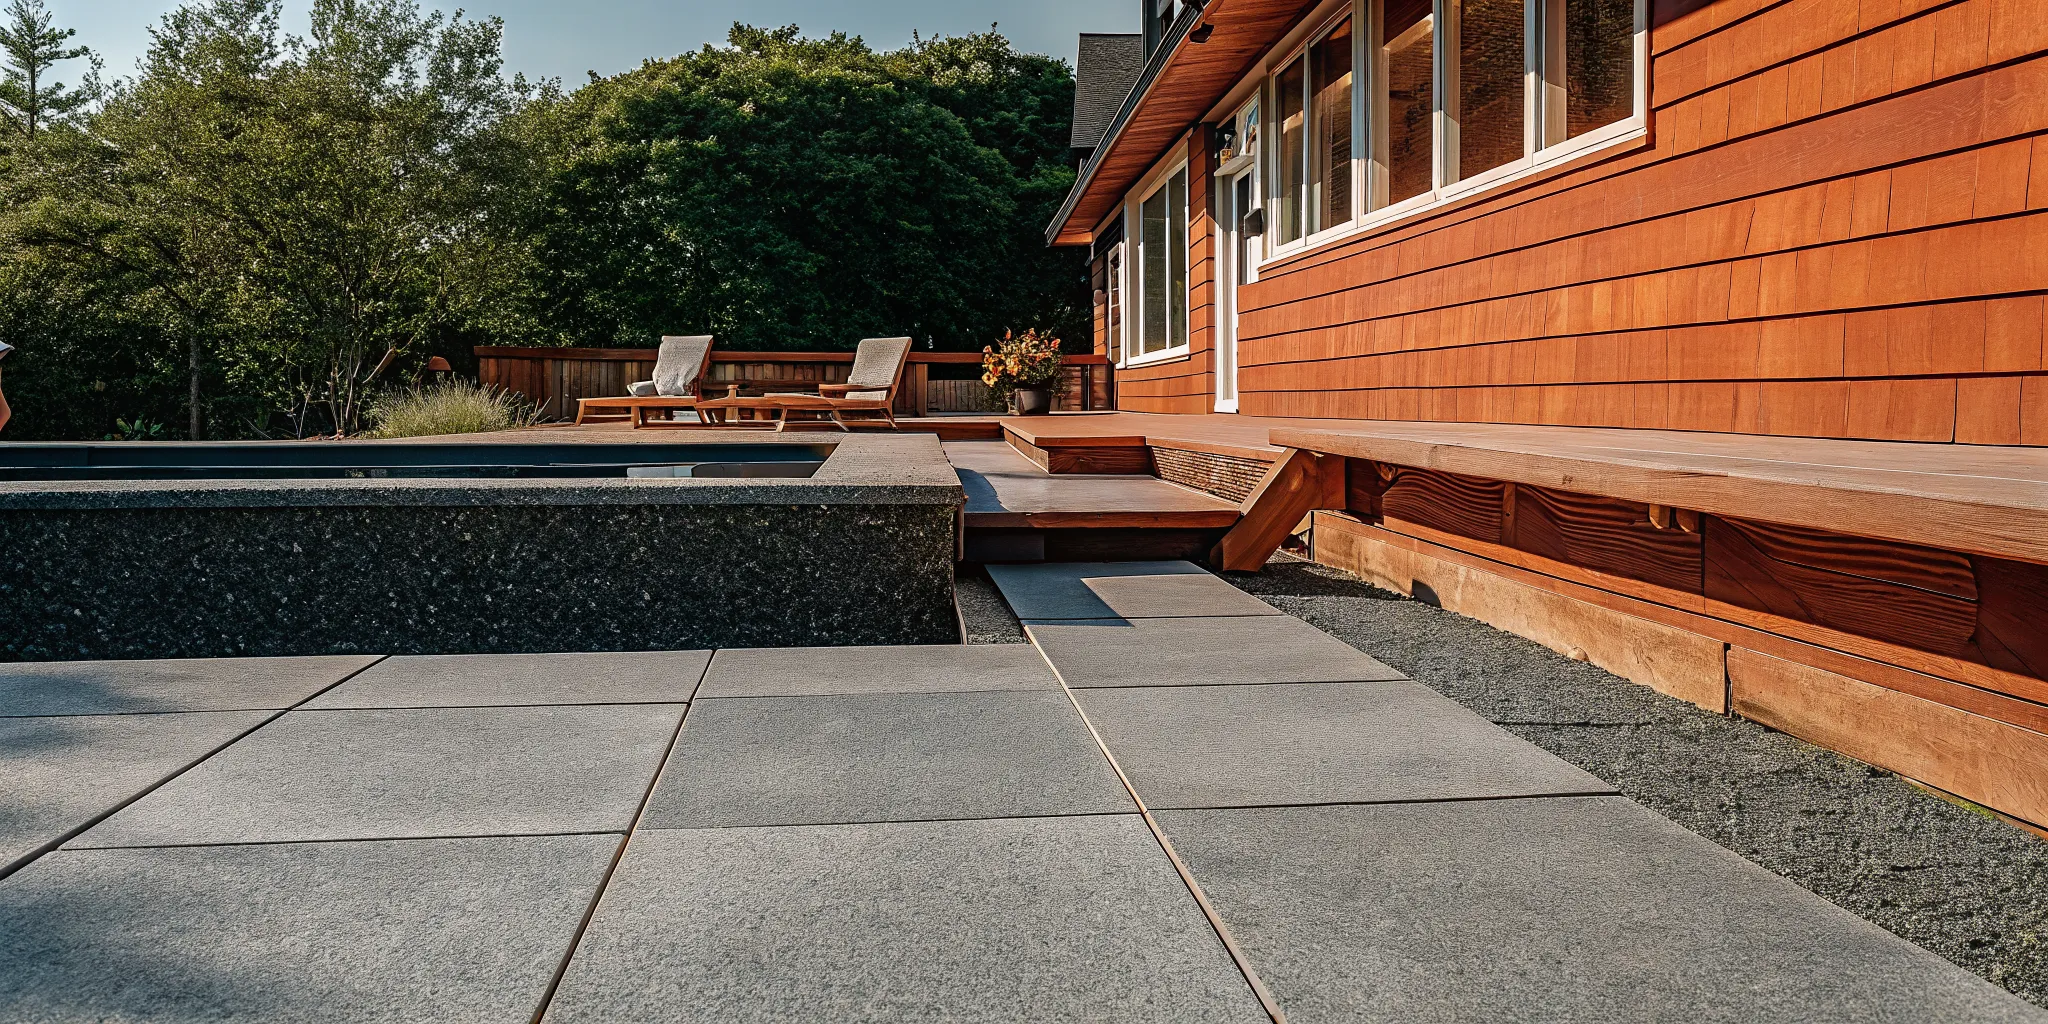
24x24x2 pavers installed around a modern Long Island pool

24x24x2 Pavers for Long Island Driveways and Patios

24x24x2 Pavers for Long Island Driveways and Patios

24x24x2 pavers give driveways, patios, and pool decks a clean large-format appearance while providing the thickness needed for demanding outdoor applications. The square format creates fewer visual interruptions than smaller units, which can make a compact backyard feel calmer and a wide driveway feel more intentional. The best result, however, depends on choosing the right material and building the base for the actual site conditions.

Contact Gappsi to compare materials and plan your Long Island project.

For homeowners in Nassau and Suffolk Counties, freeze-thaw cycles, drainage, vehicle loads, and pool exposure all influence the specification. Gappsi brings material selection, design, and installation planning together, helping homeowners move from a sample in the Smithtown showroom to a finished outdoor space with fewer handoffs.

What are 24x24x2 pavers?

In brief: A 24x24x2 paver is a large square paving unit measuring about two feet on each side and two inches thick. Its broad face creates a modern grid, while its substantial profile supports outdoor installations when paired with a properly engineered base.

The dimensions affect both appearance and construction. Each unit covers four square feet, so every paver becomes a noticeable part of the pattern. Straight joints emphasize architecture and symmetry. An offset layout softens the grid and can make long areas feel less rigid. Because the units are large, small changes in grade or base compaction are more visible than they might be with a smaller-format paver.

The term describes size, not one specific material. Options may include porcelain, natural stone, or concrete. Those materials differ in surface texture, edge character, stain response, color variation, and installation requirements. Homeowners should compare physical samples outdoors, where natural light reveals differences that showroom lighting may not show.

A useful design decision starts with the location, not the color. A driveway requires a different load strategy than a pedestrian patio. A pool surround adds wet-surface comfort and maintenance concerns. Gappsi’s porcelain and natural stone paver selection gives homeowners a practical place to compare those options.

Where do large-format pavers work best?

In brief: Large-format pavers work best where their scale can organize the view, including broad driveways, open patios, straight walkways, and pool decks. They can also suit smaller spaces when the layout is planned to limit awkward cuts.

On a driveway, a disciplined grid can visually connect the street, entry walk, and home. On a patio, the same format can create a restrained surface that allows furniture, planting, and an outdoor kitchen to stand out. Around a pool, broad units reduce the number of joints across the deck and help create a clean visual frame around the water.

Scale should be tested before installation. A two-foot module may land neatly between a house wall and pool edge on one property, but create narrow perimeter cuts on another. A layout drawing helps determine the starting line, border treatment, and joint alignment before the first paver is set. This planning step is especially valuable around steps, columns, curves, drains, and utility covers.

Large units can also bridge different outdoor zones. Repeating one format from a patio to a walkway creates continuity, while changing the laying direction can signal a transition without introducing another material. Homeowners considering a complete backyard plan can review Gappsi’s Long Island masonry design and construction services.

24x24x2 pavers forming a modern Long Island patio

How should homeowners choose the material?

In brief: Choose the material by balancing appearance with the site’s load, exposure, maintenance needs, and desired surface character. Size alone does not determine whether a paver is right for a driveway, patio, or pool deck.

Porcelain for a controlled, contemporary look

Porcelain can offer consistent sizing and a refined stone-look surface. It is often considered for contemporary outdoor designs where crisp edges and controlled color variation matter. Homeowners should confirm that the selected product, finish, and installation system are intended for the planned exterior application.

Natural stone for individual character

Natural stone brings variation in color, movement, and texture. Each piece contributes to the finished composition. So a sample should be evaluated as part of a broader range rather than as an exact promise of every installed unit. Stone selection should also account for the exposure and maintenance expectations of the property.

Concrete for additional design options

Concrete pavers are available in many colors and finishes. Product suitability still depends on the manufacturer specification and installation design. For any material, ask how edges will be restrained, joints handled, cuts placed, and transitions finished. These details often separate a deliberate result from a surface that merely uses attractive units.

The decision is easier when samples are compared next to siding, masonry, coping, and other permanent finishes. Gappsi’s porcelain pavers guide provides additional context for homeowners evaluating porcelain.

Material Visual character Planning focus
Porcelain Controlled sizing and refined stone-look options Confirm exterior application, finish, and installation system
Natural stone Individual color, movement, and texture Review expected variation, exposure, and maintenance
Concrete Broad range of colors and finishes Confirm product suitability and complete assembly design

Can 24x24x2 pavers be used for driveways?

In brief: They can be used for some driveway installations when the chosen product is approved for vehicular use and the complete assembly is designed for the expected loads. The paver, base, drainage, joints, and edge restraint must work as one system.

A driveway places repeated wheel loads on specific travel paths. Turning, braking, delivery vehicles, and edges can introduce concentrated stresses. That is why a two-inch thickness should never be treated as the only qualification. Product specifications and site conditions determine whether an option is appropriate.

The base is the hidden structure of the driveway. Excavation depth, subgrade condition, aggregate selection, lift thickness, and compaction all affect performance. Drainage must move water away from the paving assembly and nearby structures. Edge restraint helps keep the field from spreading under use. These are construction decisions, not finishing touches.

Large-format units make planning especially important because the joint grid is prominent. Designers can align the pattern with the garage doors, front walk, or facade. Borders may provide a visual frame and help resolve dimensions that do not fit the two-foot module evenly. Homeowners should ask for a plan that explains load suitability and layout, rather than selecting on appearance alone.

What matters most for patios and pool decks?

In brief: For patios and pool decks, prioritize drainage, comfortable circulation, surface texture, transitions, and a layout that works with furniture and pool geometry. The best-looking material must also support everyday outdoor use.

A patio is a working room. Dining chairs need stable placement. Door thresholds should transition cleanly. Water should move away from the home, and the finished elevation must account for steps, landscape beds, and adjacent lawn. A large-format layout can help define dining, cooking, and lounge zones without building visual clutter into the floor.

Pool decks add wet feet, splashing, coping interfaces, drains, and equipment access. Surface characteristics should be assessed for the intended setting, and the material should be reviewed in bright sun. Light-colored surfaces may create a different visual and comfort experience than darker selections. The pattern should also resolve cleanly around the pool shape.

Visit Gappsi’s swimming pool design and construction page to see how pool planning connects with the surrounding landscape. The U.S. Environmental Protection Agency also provides general information about permeable pavement and stormwater, which can help homeowners understand why drainage deserves early attention.

Light 24x24x2 pavers installed around a residential pool

How does a strong installation plan prevent problems?

In brief: A strong installation plan matches the assembly to the soil, load, drainage, and selected product before construction begins. It also resolves elevations, joints, borders, cuts, and transitions on paper instead of improvising them in the field.

Start with the site

The installer should understand existing grades, drainage paths, subgrade conditions, access constraints, and nearby structures. Long Island properties vary, so a method that works on one site should not automatically be copied to another. Water movement is particularly important because trapped water and seasonal temperature changes can affect outdoor paving systems.

Build and verify the base

Base preparation must follow the selected system and project conditions. Consistent compaction and grade help the broad paver faces remain aligned. If utilities, drains, or future structures need accommodation, those details should be coordinated before the finished surface is placed.

Protect the edges and joints

Perimeter restraint and joint treatment help the surface operate as intended. Their form depends on the product and installation method. The Concrete Masonry and Hardscapes Association is an additional industry resource for homeowners who want to learn more about segmental paving systems.

Request a Gappsi consultation before finalizing your paver installation plan.

What should you ask during a design consultation?

In brief: Ask about application suitability, base design, drainage, pattern layout, edge details, material variation, maintenance, and how the paving will connect with the rest of the property. Clear answers reveal whether the complete space has been considered.

  1. Is this exact product approved for the planned use? A driveway, patio, and pool deck may need different specifications.
  2. How will drainage be handled? Ask where water will go and how grades relate to the home, pool, and landscape.
  3. Where will cuts and borders appear? A drawing should show how the two-foot module fits the site.
  4. How will transitions be finished? Review thresholds, steps, coping, planting beds, and adjacent paving.
  5. What variation should we expect? Understand the natural or manufactured range before approving a material.
  6. How should the surface be maintained? Get guidance tailored to the selected material and exposure.

Bring photographs, approximate dimensions, and examples of styles you like. If the project includes a future pool, outdoor kitchen, pergola, or landscape renovation, mention it early. A coordinated plan can prevent a paving decision from limiting the next phase.

Why use a design-build approach on Long Island?

In brief: A design-build approach coordinates material selection, layout, grading, construction, and surrounding outdoor features through one planning process. That coordination is valuable when large-format paving must align with pools, masonry, landscaping, and architecture.

Gappsi has served Long Island since 1987 and works across specialized outdoor-living divisions. For a homeowner, the practical advantage is the ability to discuss the pavers as one part of a larger property plan. Material choice can be evaluated alongside a pool deck, retaining wall, steps, landscape, lighting, or outdoor kitchen rather than in isolation.

The Smithtown showroom also gives homeowners an opportunity to compare real materials. Photographs are useful for direction, but samples reveal scale, texture, edge character, and color more clearly. A consultation can then turn those preferences into a site-specific layout and construction plan for a Nassau or Suffolk County property.

Large-format pavers reward careful decisions. When the material, module, base, and surrounding features are coordinated, the result can feel simple without being generic. That is the core opportunity presented by 24x24x2 pavers: a strong visual framework supported by disciplined planning.

Frequently asked questions about 24x24x2 pavers

Are 24x24x2 pavers suitable for every driveway?

No. Suitability depends on the exact product specification, expected vehicle loads, base design, drainage, and installation system. Confirm that the selected unit is approved for vehicular use and have the complete assembly planned for the site.

Do large pavers make a small patio look bigger?

They can create a calmer surface with fewer visual breaks, which may make a compact space feel more open. The outcome depends on pattern direction, perimeter cuts, furniture placement, and how the paving connects to surrounding features.

What is the best material for a pool deck?

There is no single best material for every pool deck. Compare options based on intended exterior use, surface characteristics, exposure, maintenance, appearance, and compatibility with coping and drainage. Review physical samples before deciding.

Where can I see paver samples on Long Island?

Homeowners can contact Gappsi about visiting the Smithtown showroom to compare outdoor paving materials and discuss a site-specific design. Bring project photographs and approximate dimensions to make the consultation more productive.

Plan your 24x24x2 paver project with Gappsi

Whether you are planning a driveway, patio, or pool deck, the right result starts with a material and installation strategy tailored to the property. Gappsi can help Long Island homeowners compare options, resolve the large-format layout, and coordinate the paving with a broader outdoor-living plan.

Contact Gappsi to request a consultation or plan a visit to the Smithtown showroom.

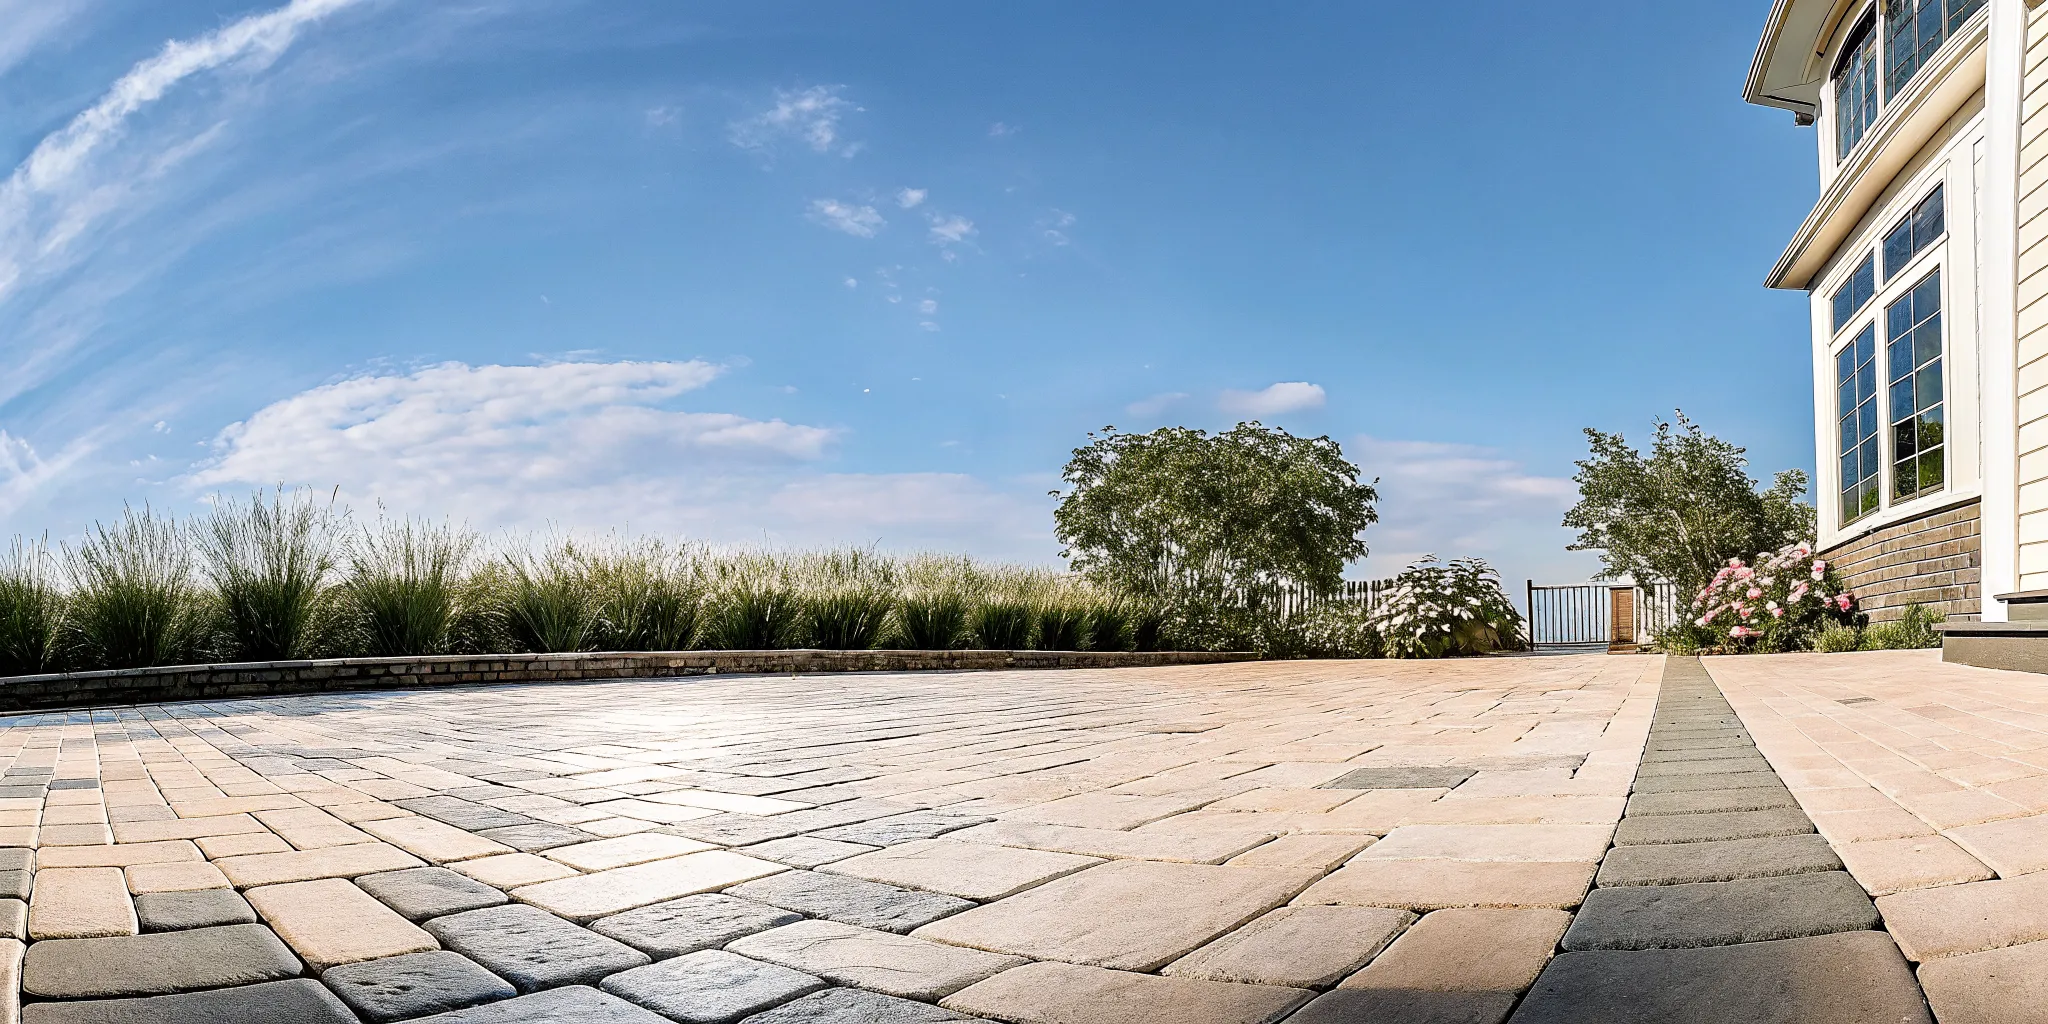
Paver sealer wet look finish on a Long Island patio

Paver Sealer Wet Look: Pros and Cons

A paver sealer wet look finish deepens the color of concrete or brick pavers and leaves a noticeable sheen, similar to the appearance of the surface after a light rain. It can make a faded patio look richer and easier to maintain, but it is not automatically the best choice for every walkway, driveway, or pool surround.

Request a consultation with Gappsi

The right decision depends on the paver material, existing condition, drainage, desired gloss level, traction needs, and willingness to maintain the finish. Long Island weather adds another consideration because outdoor paving regularly faces moisture, freeze-thaw cycles, summer heat, and seasonal debris. This guide explains the practical advantages and drawbacks so you can choose a finish with realistic expectations.

What is a paver sealer wet look finish?

A wet look sealer is a film-forming product designed to enhance paver color while creating a satin, semi-gloss, or glossy surface. The appearance varies by product and application. Some finishes produce a subtle color boost, while others create a reflective sheen that becomes a prominent design feature.

Wet look does not mean the patio remains physically wet. The phrase describes the darker, more saturated appearance that water temporarily gives many masonry surfaces. A compatible sealer can preserve a similar visual effect after it cures.

How it differs from a natural-look sealer

A natural-look penetrating sealer generally absorbs below the surface and changes the visible finish very little. A wet look product usually forms more of a surface film. That film can deliver stronger color enhancement, but it also makes surface preparation and future maintenance especially important.

Consideration Wet look finish Natural look finish
Appearance Deepened color with visible sheen Minimal visual change
Design impact Becomes part of the patio’s style Keeps attention on the original material
Surface behavior Often creates a film on top Usually penetrates below the surface
Preparation Requires careful cleaning, drying, and compatibility checks Still requires preparation and compatibility checks
Traction Gloss can affect traction, depending on product and conditions Often preserves more of the original surface texture

Paver sealer wet look finish enhancing the color of a Long Island patio

Product chemistry matters as much as finish type. Paver composition, porosity, prior coatings, and site conditions all influence how a sealer bonds and looks. Testing a small, inconspicuous area is one of the most useful ways to evaluate the real result before committing to the full space.

The advantages of a wet look paver sealer

The strongest reason to choose a wet look is visual impact. It can revive muted reds, browns, grays, and blended colors, helping individual pavers and patterns look more defined. On an outdoor living area, that richer color can complement masonry design elements, pool finishes, landscape plantings, and other features.

Richer color and a refreshed appearance

A clean, properly prepared paved surface may still appear faded or dusty when dry. Color-enhancing sealer can give it a more finished appearance without replacing the pavers. This can be especially appealing when the original installation has attractive color variation that no longer stands out.

A surface that may be easier to clean

A compatible film-forming sealer can reduce how readily certain spills and debris contact the porous paver surface. Routine dirt, leaves, and minor spills may be easier to address when maintenance happens promptly. Gappsi’s stone and paver cleaning and sealing services address the surface as a complete care system. Sealing does not make paving stain-proof, however. Cooking grease, rust, organic matter, and other contaminants can still leave marks if ignored.

Help managing joint sand and surface wear

Some products are formulated to help stabilize joint sand. That feature can reduce migration from rain, cleaning, or ordinary use when the product and installation method are suitable. Not every wet look sealer provides joint stabilization, so the product specification and application plan need to match the goal.

A deliberate design finish

Gloss changes how light moves across the paving. Used thoughtfully, it can make a patio, driveway, or walkway feel polished and intentional. Homeowners who want a strong visual transformation may prefer it over an invisible penetrating finish.

These benefits depend on preparation and compatibility. Applying a premium coating over dirty, damp, or previously coated pavers can produce a disappointing result. The finish should be selected as part of a complete material-care plan rather than as a quick cosmetic layer.

Potential drawbacks to consider before sealing

A wet look finish creates a stronger visual change than a natural sealer, so imperfections can also become more noticeable. Uneven coverage, roller marks, trapped contamination, or inconsistent absorption may show clearly after curing. Correcting a failed coating can be far more involved than applying it correctly the first time.

Gloss can affect traction

Some glossy films may feel more slippery when wet, particularly on smooth pavers or around areas exposed to splashing. Pool surrounds, steps, sloped walkways, and frequently wet zones deserve a careful traction assessment. Homeowners planning a pool area can review Gappsi’s custom swimming pool services to consider the deck and water features together. A professional can help evaluate whether a lower sheen, suitable additive, or different sealer type better fits the space.

Moisture can create a cloudy or white appearance

Moisture trapped beneath a film-forming coating can contribute to hazing, whitening, or adhesion problems. Poor drainage, damp pavers, and application too soon after cleaning can increase risk. Long Island’s variable weather makes choosing an appropriate dry application window particularly important.

Old coatings can cause compatibility problems

A new product may not bond properly over an unknown or incompatible old sealer. The surface can peel, turn cloudy, or develop an uneven sheen. Before resealing, identify the existing coating when possible and determine whether it needs professional removal.

The finish requires ongoing care

No exterior coating remains unchanged forever. Sunlight, weather, traffic, deicing materials, cleaning practices, and standing water all affect performance. High-traffic areas may change appearance sooner than protected sections, resulting in inconsistent sheen. A realistic maintenance plan should be part of the decision from the beginning.

Wet look sealer also changes the character of the original material. If you value the subtle texture and natural variation of the pavers, a glossy film may feel too pronounced. Seeing a test section in both sun and shade can prevent a finish choice that looks different than expected.

How do you decide if a wet look is right?

Choosing a finish is easier when you evaluate the site in a logical order instead of selecting based only on a product photo.

  1. Identify the paving material. Determine the type, porosity, texture, and condition of the pavers. Natural stone and manufactured concrete products can respond differently to sealers.
  2. Clarify the visual goal. Decide whether you want subtle color enhancement, a satin finish, or a high-gloss appearance. Test samples because product labels cannot show exactly how your specific paving will look.
  3. Evaluate water and drainage. Look for low areas, standing water, irrigation overspray, and moisture that rises through the paving. Address drainage concerns before adding a film-forming finish.
  4. Consider traction. Give special attention to pool decks, steps, slopes, and shaded areas that remain wet. Appearance should not outweigh safe everyday use.
  5. Check for prior sealer. Existing coatings can change the preparation process and limit compatible product choices. Unknown coatings warrant professional evaluation.
  6. Set maintenance expectations. Consider how the area is used, cleaned, and exposed to weather. A showcase patio and a heavily used driveway do not face the same conditions.
  7. Use a test area. Confirm color, sheen, absorption, and texture on a small section before treating the whole installation.

A wet look often suits homeowners who want bold color enhancement and are comfortable caring for a visible coating. A natural finish may be better when retaining original texture and minimizing visual change are the priorities. The best choice balances design, material performance, and use of the space.

Why preparation determines the final result

Sealer can only perform as well as the surface beneath it. Preparation starts with an inspection for damaged pavers, failed joints, stains, drainage issues, efflorescence, and old coatings. These concerns should be addressed before sealing rather than hidden beneath a glossy layer.

Cleaning must match the condition

General dirt, algae, grease, rust, and old coating residue require different cleaning methods. Aggressive pressure alone can damage joints or leave an uneven surface. The cleaning approach should remove contaminants without harming the pavers.

The surface needs adequate drying time

A patio can look dry on top while retaining moisture within the pavers or joints. Applying film-forming sealer too soon can trap that moisture. Weather, shade, humidity, and paver porosity all affect drying, so a fixed waiting period is not appropriate for every property.

Application needs controlled conditions

Temperature, direct sun, wind, and the possibility of rain can influence curing. Overapplication may leave a thick, uneven, or tacky finish. Underapplication or inconsistent technique can create visible differences between sections. Following the selected product’s requirements and applying uniform coats are essential.

Gappsi has served Long Island homeowners since 1987 with design-build and material expertise across outdoor environments. That broader perspective helps connect surface care with drainage, landscape design, masonry condition, and how the space is actually used. Explore Gappsi’s outdoor living services and materials when planning a coordinated improvement.

How should a wet look sealed patio be maintained?

Routine care should be gentle and consistent. Remove leaves and organic debris before they sit for long periods. Address spills promptly, and use cleaning methods that are compatible with both the paver and sealer. Harsh chemicals or overly aggressive washing can dull or damage the finish.

Watch for early signs of change

Uneven sheen, whitening, peeling, persistent stains, or areas that remain wet deserve attention. These signs do not always mean the entire surface needs another coat. Adding sealer without identifying the cause can compound the problem.

Avoid automatic resealing schedules

The correct maintenance timing depends on the product, exposure, traffic, cleaning, and site conditions. A sheltered patio may age differently than a sunny driveway. Have the surface evaluated before resealing so the new application is compatible and necessary.

Seasonal observation is useful on Long Island. Check drainage after heavy rain, inspect the surface after winter, and look for joint changes before they grow. Thoughtful upkeep protects the appearance of the whole paved area, not only its shine. For material selection and care questions, homeowners can also explore the Gappsi Store and Smithtown showroom.

Frequently asked questions

Does wet look paver sealer make pavers slippery?

It can affect traction, particularly when a glossy film is applied to a smooth or frequently wet surface. Product choice, paver texture, application rate, and site conditions matter. Pool surrounds, steps, and slopes should receive a specific traction assessment before sealing.

Will wet look sealer make old pavers look new?

It can deepen color and refresh the appearance of sound pavers, but it will not repair cracks, remove stains, correct drainage, or fix failed joints. Cleaning and repairs should come first so the finish does not highlight existing defects.

Can wet look sealer turn white?

Cloudiness or whitening can occur when moisture becomes trapped, incompatible products are layered, or application conditions are unsuitable. A professional evaluation can help identify the cause and the appropriate corrective process.

How long does wet look paver sealer last?

There is no single lifespan that applies to every installation. Product type, preparation, sunlight, weather, traffic, drainage, and maintenance all influence performance. Evaluate the condition before deciding when to reseal.

Can I apply wet look sealer over an old sealer?

Only when the products are compatible and the existing coating remains suitable. Applying a new coating over an unknown or failing sealer can cause adhesion and appearance problems. Testing and possible removal may be necessary.

Choose a finish that fits your Long Island property

A paver sealer wet look finish can add rich color and a polished appearance, but the best outcome starts with the right material assessment, preparation, and maintenance plan. Gappsi can help you evaluate the paving and coordinate the finish with the surrounding outdoor design.

Request a consultation with Gappsi or visit the Smithtown showroom to discuss your patio, walkway, driveway, or pool area.

Bring photos of the existing surface and note where water collects after rain. This information can help guide a more useful first conversation about cleaning, repair, finish choices, and the next steps for your property.