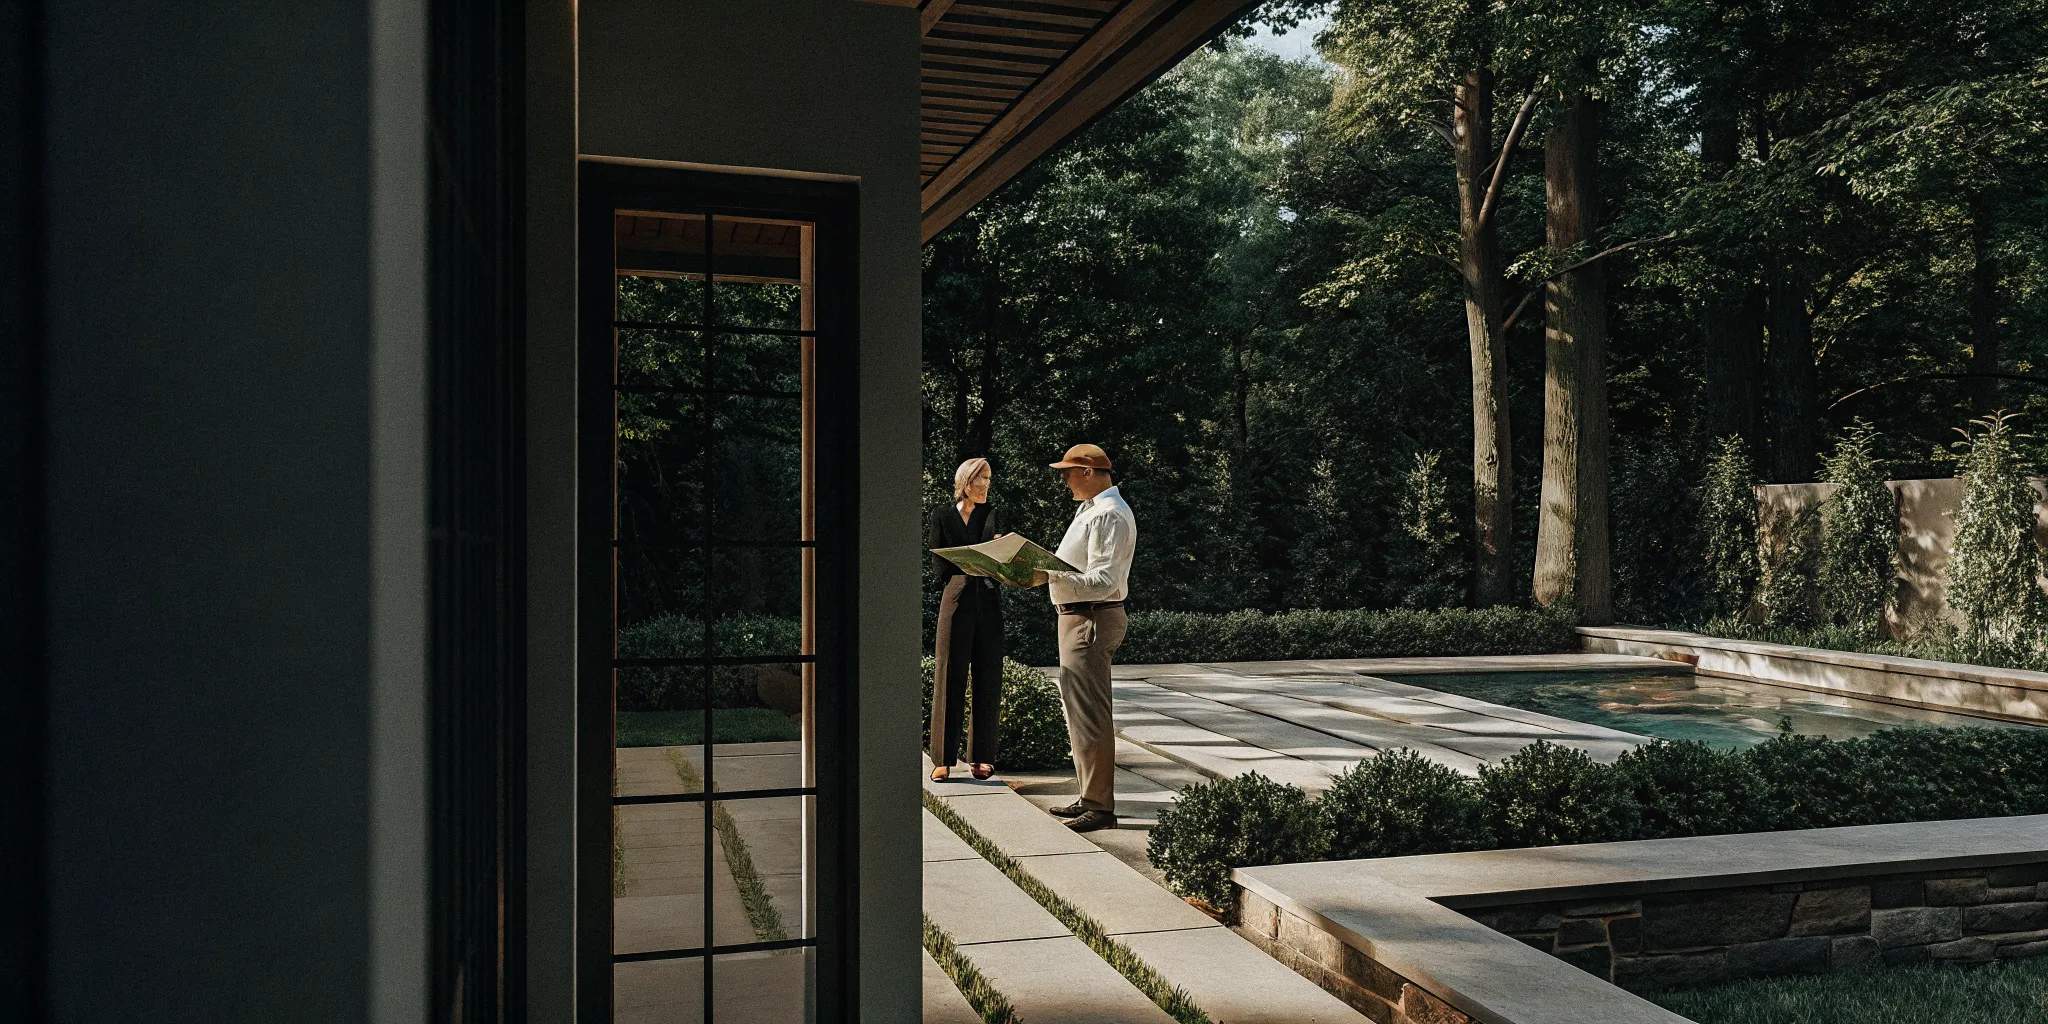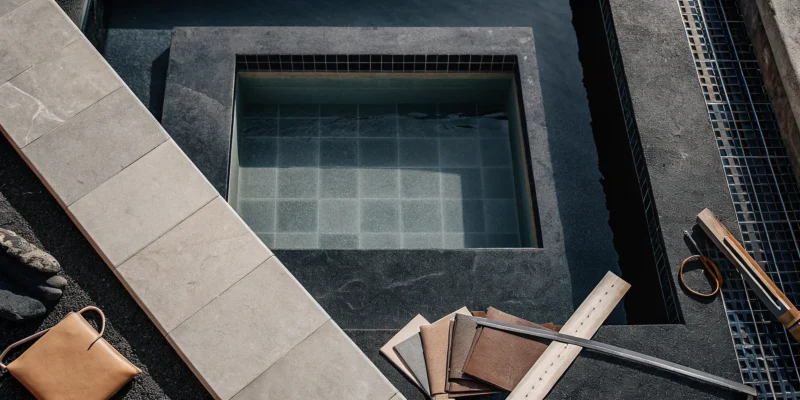
Gunite pool and patio contractors planning a new backyard installation.

Gunite Pool and Patio Contractors: What to Expect

Your backyard has incredible potential, and a gunite pool and patio can turn that potential into your family’s favorite destination. This isn’t just an upgrade; it’s a lifestyle investment that provides a beautiful setting for relaxation, entertainment, and making lasting memories. Because a gunite pool is a permanent structural addition to your home, the quality of the craftsmanship is paramount. The entire success of the project rests on the team you hire. You need more than just builders; you need dedicated partners who understand landscape integration, masonry, and high-end finishes. Choosing the right gunite pool and patio contractors is the first and most important step, ensuring your new outdoor space is built to last and exceeds all your expectations.

Key Takeaways

  • Gunite means custom and durable: Unlike other pool types, gunite is built to last for decades and can be designed in any shape or size you can imagine, making it a true extension of your home and personal style.
  • Plan your budget for today and tomorrow: Your total investment includes the initial construction, which is based on size and design, plus long-term care like annual maintenance and eventual resurfacing. Factoring in both from the start prevents future financial surprises.
  • Vet your contractor thoroughly: The right partner is essential for a smooth project, so protect your investment by verifying their license and insurance, calling their references, and insisting on a detailed contract that outlines the timeline, payment schedule, and warranties.

Is a Gunite Pool and Patio a Good Investment?

Deciding to add a pool and patio to your home is a big step, and it’s smart to ask if it’s a worthwhile investment. The answer is a resounding yes, especially when you choose a gunite pool. This isn’t just about adding a feature to your backyard; it’s about creating a lifestyle. A gunite pool and patio combination transforms your property into a personal resort, a place for making memories with family, entertaining friends, and enjoying quiet moments of relaxation. While the initial cost is a factor, the long-term value is undeniable, both in terms of enjoyment and property value.

Unlike other pool types, a gunite installation is built to last for decades, making it a permanent and valuable addition to your home. The design flexibility means you can create a space that is perfectly tailored to your landscape and personal style. When you combine a custom swimming pool with a beautifully designed patio, you’re not just improving your property, you’re expanding your living space. This cohesive outdoor environment becomes an extension of your home, offering a seamless transition from indoors to outdoors. It can significantly increase your home’s appeal and market value, making it a solid investment in both your property and your quality of life.

Unmatched Durability

When we talk about durability, gunite pools are in a class of their own. A gunite pool is a robust concrete structure created by spraying a specialized concrete mixture over a steel rebar frame. This process builds a solid, monolithic shell that is incredibly strong and built to withstand the test of time. Because they are constructed on-site, they become an integral part of your property. With proper maintenance, a gunite pool can easily last for more than 50 years, far outliving other pool types. This longevity means you won’t have to worry about costly liner replacements or structural issues down the road. Investing in gunite is an investment in permanence, giving you peace of mind and a beautiful backyard feature that your family can enjoy for generations.

Limitless Design and Customization

One of the most exciting aspects of a gunite pool is the complete creative freedom it offers. Since gunite is sprayed onto a custom-built frame, you are not limited to pre-fabricated shapes or sizes. Your imagination is truly the only boundary. Whether you envision a sleek, modern geometric pool, a free-flowing lagoon with natural rock features, or a classic Roman-style design, gunite can make it happen. This flexibility extends to custom features that can be integrated directly into the pool’s structure. Think about adding built-in benches for socializing, a shallow tanning ledge for lounging, or a cascading waterfall. Our expert masonry services allow us to craft these unique elements, ensuring your pool is a one-of-a-kind masterpiece.

The Perfect Patio Pairing

A stunning gunite pool deserves an equally beautiful patio to complete the scene. The patio is the bridge between your home and your pool, creating a cohesive and functional outdoor living area. It’s where you’ll place your lounge chairs, set up a dining table for alfresco meals, and gather with loved ones. A well-designed patio expands your home’s usable square footage and provides a comfortable, stylish space for entertainment and relaxation. We can help you select the perfect materials, like elegant porcelain or natural stone pavers, that complement both your pool and your home’s exterior. By integrating features like an outdoor kitchen or a shaded pergola, your patio becomes a true outdoor room, elevating your backyard into a luxurious retreat.

Breaking Down the Cost of a Gunite Pool and Patio

Let’s talk about one of the biggest questions on every homeowner’s mind: what will it cost? A gunite pool and patio is a major home improvement project, and understanding the budget is the first step to bringing your vision to life. The final price can vary quite a bit because every project is unique. Your dream design, the size of your yard, and the features you choose all play a role in the total investment.

Think of it less as a fixed price and more as a custom quote tailored to you. The beauty of a gunite pool is its flexibility, which also applies to the budget. You can create a simple, elegant retreat or a feature-rich entertainment hub. Our goal is to give you a clear picture of where your money goes so you can make informed decisions. From the initial design to the final tile, we’ll break down the expenses, helping you create a realistic budget that aligns with your goals for a stunning backyard transformation.

Key Factors That Influence Price

Several key elements will shape the final cost of your gunite pool. The most significant factors are size and depth; a larger, deeper pool requires more materials and labor. The shape also matters. A classic rectangular pool is typically more straightforward to build than a custom freeform design with curves and unique angles.

Beyond the basic structure, any special features will add to the price. Think about additions like a tanning ledge, a built-in spa, waterfalls, or custom lighting. The condition of your property is another consideration. A sloped yard or rocky soil may require extra excavation and site preparation, which can affect the cost. We can help you explore different swimming pool designs to find a perfect fit for your vision and budget.

Where Your Budget Goes

When you receive a quote for a gunite pool, the total is a sum of several distinct parts. On average, a complete installation can range from $65,000 to over $120,000, depending on the complexity. The bulk of your budget, often $60,000 or more, will go toward materials. This includes the steel rebar, the gunite itself, plumbing, electrical components, and your chosen interior finish.

Labor costs can range from $5,000 to $30,000, covering the skilled teams who handle excavation, construction, and finishing. Excavation itself can be a separate line item, along with necessary permits. The surrounding patio is also a key part of the budget, with costs depending on the size and the porcelain or natural stone you select.

How to Plan for Unexpected Costs

A smart budget accounts for more than just the initial construction. It’s wise to plan for the long-term care of your investment. Annually, you can expect to spend between $2,700 and $4,000 on routine maintenance, which includes chemicals, cleaning, and opening or closing the pool for the season. This ensures your pool water stays clean, safe, and sparkling.

Additionally, gunite pools require resurfacing every 7 to 15 years to maintain their integrity and appearance. This is a more significant expense, typically costing between $6,000 and $15,000. Planning for these future costs from the beginning helps prevent surprises down the road. Our restoration and sealing services can help keep both your pool and patio in top condition for years to come.

Your Gunite Pool and Patio Project: A Step-by-Step Guide

Seeing your dream backyard take shape is an exciting process. Building a custom gunite pool and patio is a major construction project, but it doesn’t have to be overwhelming. When you partner with an experienced team, you can feel confident and informed every step of the way. We believe in transparency, so we’ve broken down the entire construction journey from the first design sketch to the final walkthrough. This guide will give you a clear picture of what to expect as we transform your property.

The beauty of a gunite pool is its complete customization, which means the process is tailored to your unique vision. At Gappsi, we manage every detail in-house, from securing permits to installing the final paver. Our integrated approach ensures your new swimming pool and patio are built to the highest standards, creating a seamless and stunning outdoor oasis you’ll enjoy for decades. Let’s walk through the process together.

Step 1: Design, Planning, and Permits

This is where your vision starts coming to life. Our design process is a collaborative effort where we sit down with you to map out every detail. We’ll discuss the ideal shape, size, and depth of your pool, along with features like steps, benches, or sun shelves. At the same time, we’ll design the surrounding patio, ensuring it complements the pool and your home’s architecture. We consider how you plan to use the space, whether for quiet relaxation or large family gatherings. Once the design is finalized, our team handles the essential but tedious task of securing all necessary town and village permits on Long Island, making sure your project complies with local building codes from the very beginning.

Step 2: Excavation and Steel Framework

Once the permits are approved, the physical work begins. The first major step is excavation, where our crew carefully digs out the area for your new pool according to the design specifications. You’ll see your backyard transform as the shape of your pool emerges from the ground. Immediately following excavation, we install a complex web of steel rebar. This steel grid acts as the skeleton of your pool, creating a strong framework that will reinforce the gunite shell. This step is critical for the structural integrity and long-term durability of your pool, forming the backbone for the entire project.

Step 3: Gunite Application and Curing

This is the step that gives a gunite pool its name and its strength. Using a high-pressure hose, our team sprays a specialized, dry concrete mix called gunite over the entire steel framework. This technique allows us to create the fluid curves and custom shapes that make gunite pools so desirable. After the gunite is applied and expertly shaped, it needs to cure. This hardening process is crucial for achieving maximum strength. During this period, the pool shell is often lightly watered to ensure it cures evenly, preventing cracks and creating a monolithic, watertight structure that will last a lifetime.

Step 4: Plumbing, Electrical, and Finishes

With the gunite shell fully cured, we move on to installing the pool’s circulatory and electrical systems. Our technicians will strategically place all the necessary plumbing for skimmers, drains, and jets to ensure proper water filtration and flow. We also run the electrical lines for underwater lighting, pumps, and any automated features. Next comes the beautiful finishing touches. We’ll install your chosen waterline tile and the coping, which is the stone or paver edge around the pool’s perimeter. Finally, we apply the interior finish, such as plaster or a durable pebble aggregate, which gives the pool its smooth surface and beautiful water color.

Step 5: Patio Integration and Final Walkthrough

Now it’s time to connect your stunning new pool to your home by building the patio. Whether you’ve chosen elegant porcelain pavers or natural stone, our masonry experts will meticulously lay the foundation for your new outdoor living area. This is also when we install other features like outdoor kitchens, fire pits, or even a beautiful pergola to provide shade. Once the construction is complete, we’ll conduct a final walkthrough with you. We’ll inspect every detail, answer all your questions, and make sure you’re completely satisfied with your new backyard retreat before we consider the project finished.

How Long Will It Take?

Patience is key when building a high-quality custom pool and patio. On average, you can expect a gunite pool project to take between 8 and 12 weeks from excavation to completion. However, this timeline can vary. Larger, more intricate designs with complex features will naturally require more time. Other factors, like weather delays or unforeseen site conditions, can also extend the schedule. At Gappsi, we provide a realistic timeline from the start and maintain open communication throughout the project, so you always know what’s happening. Remember, the goal is to build a backyard oasis that lasts, and quality craftsmanship is always worth the wait.

Common Construction Challenges to Anticipate

Even with a perfect plan, any major construction project can face a few bumps in the road. Knowing what to expect ahead of time helps you prepare and keeps stress to a minimum. Think of these potential hurdles not as problems, but as part of the process that a great contractor will help you handle. From unpredictable Long Island weather to the specifics of your property, being aware of common challenges is the first step to a smooth and successful project. A transparent partnership with your build team is key to addressing these issues as they arise, ensuring your vision comes to life just as you imagined.

Weather and Permit Delays

Two things no one can control are the weather and administrative timelines. Here on Long Island, a sudden string of rainy days can pause excavation or gunite application, slightly shifting your project schedule. Similarly, securing building permits is a necessary step that involves local municipal offices, and their processing times can vary. A seasoned contractor anticipates these possibilities and builds buffer time into the project plan. They will handle the permit submissions for you and keep you updated, so while you can’t speed up the rain or the paperwork, you’ll always know what’s happening and feel confident in the timeline.

Managing Soil and Site Conditions

Every property is unique, and the ground beneath your yard plays a big role in the construction process. Things like rocky soil, a steep slope, or limited access for equipment can add time and cost to the excavation phase. This is why a thorough site assessment before any work begins is so important. An experienced team will evaluate your property’s specific conditions and discuss any potential complexities with you upfront. This initial landscape design and planning phase ensures that factors like drainage and grading are properly addressed, preventing surprises down the line and setting your project up for success.

How to Stay on Budget

Sticking to a budget is a top priority for most homeowners. The final price of your gunite pool and patio depends on many variables, including size, depth, design complexity, and your chosen materials. For example, the type of porcelain and natural stone you select for the patio will influence the overall cost. Beyond the initial build, it’s also wise to plan for the future. Remember to factor in the ongoing costs of ownership, such as monthly cleaning and chemicals. A detailed estimate from your contractor should break down all these costs clearly, helping you make informed decisions and ensuring your new backyard remains a source of joy, not financial stress.

How to Find the Right Gunite Pool Contractor

Choosing the right contractor is the most important decision you’ll make for your gunite pool and patio project. The right partner will bring your vision to life with skill and professionalism, while the wrong one can turn your dream project into a stressful ordeal. This isn’t just about finding someone who can build a pool; it’s about finding a team you can trust to manage a complex construction project in your backyard. A great contractor communicates clearly, respects your budget, and has a proven track record of creating beautiful, durable outdoor spaces. To ensure you find a reliable expert for the job, it’s essential to do your homework. Taking the time to properly vet potential builders will give you peace of mind and help you feel confident as you move forward with your investment. Think of it as building a partnership. You want someone who is as committed to the final result as you are.

Verify Credentials, Licensing, and Insurance

Before you even look at a portfolio, your first step is to confirm the contractor’s credentials. Any professional you consider should be fully licensed and insured in New York. This is a step you just can’t skip. Proper licensing ensures they meet state and local standards, while insurance protects you from liability in case of accidents on your property. A reputable company will have no problem providing you with proof of their general liability insurance and workers’ compensation. Don’t be shy about asking for these documents. A contractor who is hesitant to share this information is a major red flag. This simple verification step is your first line of defense in protecting your home and your investment in a new swimming pool.

Review Portfolios and Check References

Once you’ve confirmed a contractor is properly licensed and insured, it’s time for the fun part: seeing their work. Ask to see a portfolio of their completed gunite pool projects. Pay close attention to the details, the quality of the finishes, and the overall design. Do their projects align with the style you envision for your own backyard? A strong portfolio is a great sign, but don’t stop there. Ask for a list of recent references and actually call them. Ask previous clients about their experience with the contractor’s communication, timeliness, and professionalism. You can also watch videos of their work to get a better sense of their craftsmanship and the scope of their projects.

Contractor Red Flags to Avoid

As you meet with potential contractors, keep an eye out for warning signs. Be wary of anyone who pressures you to sign a contract immediately or offers a deal that seems too good to be true. Another major red flag is a request for a large upfront payment. Payments should be made in installments tied to specific project milestones. You should also be cautious of contractors who provide vague estimates or are unwilling to put all the details in writing. A trustworthy partner will provide a clear, itemized quote and a transparent payment schedule. Your contractor should be a partner in your home remodeling project, not a source of stress.

Key Questions to Ask Before You Sign

You’ve reviewed portfolios, checked references, and found a contractor you trust. Now comes the most important part: the contract. Before you put pen to paper, it’s essential to get crystal clear on the details. Asking the right questions now protects your investment and ensures a smooth process from start to finish. A professional contractor will welcome these questions and provide clear, confident answers. This final check helps you confirm you’re partnering with a team that values transparency and is committed to bringing your vision for a new swimming pool to life without any unwelcome surprises down the road.

Timelines, Milestones, and Payments

A well-defined project plan is your roadmap to completion. Ask for a detailed timeline with specific milestones, like excavation, gunite application, and patio installation. Your payment schedule should align directly with these milestones. It’s standard practice to avoid paying a large sum upfront. Instead, payments should be made as work is completed and approved by you. This structure keeps everyone accountable and ensures you only pay for work that meets your standards. Before agreeing to anything, confirm the contractor is fully licensed and insured for your protection.

What a Detailed Estimate Should Include

A professional estimate is more than just a final number. It should be a comprehensive document that breaks down every cost associated with your project. Make sure your estimate clearly itemizes expenses for materials, labor, permits, and equipment. It should also outline any allowances for finishes like tile or coping, so you know exactly what’s included. A transparent estimate prevents misunderstandings about unexpected costs later on. If an estimate seems vague or too good to be true, it’s a sign to ask for more detail before moving forward.

Understanding Warranties and Aftercare

Your relationship with your contractor shouldn’t end when the construction is finished. A quality gunite pool is a long-term investment, so it’s important to understand the warranties provided. Ask for specific details on the warranty for the pool structure itself, as well as for the individual components like pumps, filters, and heaters. You should also inquire about aftercare support. Does the company offer maintenance packages or restoration and sealing services to keep your pool and patio looking pristine for years to come? Knowing who to call for future upkeep provides valuable peace of mind.

Maintain Your New Gunite Pool and Patio

Your beautiful new gunite pool and patio are finished, and it’s time to enjoy them. To keep your backyard oasis looking and functioning its best for decades, a consistent maintenance routine is key. Think of it not as a chore, but as protecting your investment. Proper care prevents small issues from becoming costly problems and ensures your pool is always ready for a spontaneous swim. With a simple plan, you can easily manage the upkeep and spend more time relaxing.

Cleaning and Water Chemistry Basics

Keeping your gunite pool’s water clean and chemically balanced is the most important part of your maintenance routine. You’ll want to test the water weekly and adjust the chemicals as needed to keep it safe and sparkling. Regular skimming and vacuuming will also prevent debris from staining the surface. While you can do this yourself, many homeowners opt for professional service, which often costs between $80 and $150 per month. To maintain the plaster finish, your swimming pool will need an acid wash every three to five years and a complete resurfacing every 10 to 15 years.

Inspect for Cracks and Wear

A quick visual inspection of your pool and patio each week can save you a lot of trouble down the road. Take a few minutes to walk around and look for any small cracks in the gunite surface or the surrounding masonry. Because gunite can be more prone to algae if not cleaned often, it’s also a good time to check for any stubborn spots. Addressing a small crack is a relatively simple fix, but letting it go can lead to bigger structural issues. Prompt restoration and sealing is the best way to protect the integrity of your pool shell and keep it looking flawless.

Seasonal Sealing and Winterization

Here on Long Island, preparing your pool and patio for the winter is an essential step. Properly winterizing your gunite pool protects the plumbing from freezing and cracking, and it prevents damage to the pool shell and tile line. This process involves lowering the water level, clearing the lines, and adding winterizing chemicals before covering it securely. It’s also a great time to inspect your patio and apply a sealant if needed, protecting your masonry from the harsh freeze-thaw cycles. A proper seasonal shutdown ensures that when spring arrives, your pool is in great shape and ready for another season of fun.

Partner with Gappsi for Your Dream Backyard

Choosing a contractor for your gunite pool is one of the most important decisions you’ll make for your home. You’re not just hiring someone to dig a hole; you’re trusting a team to build the centerpiece of your family’s summer memories. At Gappsi, we’ve spent decades turning Long Island backyards into personal resorts, and we understand that this project is a significant investment in your home and lifestyle. Our goal is to make the entire process, from design to the first swim, a seamless and exciting experience.

Gunite offers incredible design freedom, which is why it’s such a popular choice. These swimming pools are built to last a lifetime and can be molded into any shape or size you can imagine. Whether you envision a sleek, modern rectangle with sharp lines or a freeform lagoon with natural rock features, we can create it. The construction process is meticulous, typically taking 8 to 12 weeks, because quality and durability are our top priorities. We build pools that stand the test of time, giving you a beautiful and functional space for decades.

A gunite pool is a long-term asset, often lasting more than 50 years with the right care. While they are incredibly durable, they do require periodic maintenance to stay in pristine condition. As your long-term partner, we can help you with everything from routine upkeep to future restoration and sealing to protect your investment.

Your dream backyard doesn’t stop at the water’s edge. We specialize in creating cohesive outdoor environments where the pool is perfectly integrated with its surroundings. Imagine a stunning patio made from elegant porcelain pavers, a custom outdoor kitchen for entertaining, or a cozy fire pit for cool evenings. Our expertise in masonry and landscape design ensures every element works together beautifully. When you partner with Gappsi, you get a single, dedicated team to manage your entire project, ensuring a smooth process and a spectacular result.

Related Articles

Frequently Asked Questions

How is a gunite pool different from a vinyl liner or fiberglass pool? Think of a gunite pool as a custom-built, permanent structure, while vinyl and fiberglass pools are more like pre-packaged options. Gunite is built on-site with a steel frame and sprayed concrete, so you can design any shape or size you want. Fiberglass pools are pre-molded shells that are dropped into place, limiting your design choices. Vinyl liner pools are built into a frame, but the liner needs to be replaced every several years. Gunite is built to last for decades, making it a true, long-term part of your property.

How much disruption should I expect in my backyard during construction? Building a pool is a major construction project, so you should expect your backyard to be a work zone for several weeks. There will be excavation equipment, building materials, and a team of professionals on-site. A great contractor, however, will work hard to minimize the impact on your daily life. They will establish a clear path for equipment, keep the site as tidy as possible, and communicate with you regularly about the schedule so you always know what to expect.

Why is it better to have one company handle both the pool and the patio? Using one company for your entire backyard project ensures a seamless and cohesive result. When the same team designs and builds both the pool and the surrounding patio, they can guarantee the styles, materials, and elevations all work together perfectly. This integrated approach also simplifies project management, as you have a single point of contact responsible for the entire timeline and budget. It eliminates the risk of miscommunication between different contractors, leading to a smoother process and a more unified final look.

Can I add features like a spa or waterfall to my gunite pool later on? While it is technically possible to add features to an existing gunite pool, it is a much more complex and expensive process than including them in the initial build. Adding a spa or integrated waterfall later would require significant work, including breaking into the original pool shell and redoing plumbing and finishes. For this reason, it’s always best to plan for all the features you want from the very beginning. This ensures they are structurally integrated and function perfectly from day one.

How soon after the pool is finished can I actually start swimming? This is the question everyone is excited to ask. Once the final interior finish is applied to your pool, it will be filled with water. After that, the water needs to be chemically balanced and the equipment needs to run for a bit to ensure everything is circulating properly. This process, often called the “start-up,” usually takes a few days. Your contractor will let you know exactly when the water is perfectly balanced and safe, giving you the green light to take your first official swim.

Share this page:
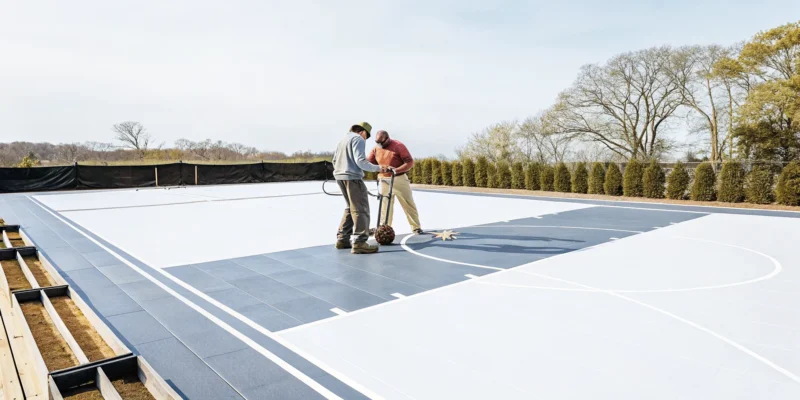
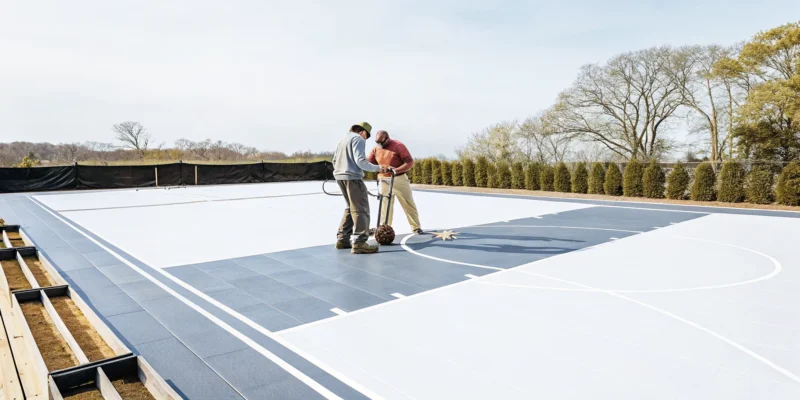
Custom indoor sports court with a basketball hoop, professionally installed by court builders.

Your Guide to Custom Sports Court Builders

Your backyard should be a reflection of your family’s personality and passions. A custom sports game court offers a unique opportunity to create a space that is truly your own. You can go far beyond a standard setup by choosing your favorite team’s colors, adding a family monogram to the center court, and including lines for multiple games like basketball, pickleball, and volleyball. The possibilities for personalization are nearly endless. This is where skilled custom sports court builders come in. They work with you to translate your ideas into a functional and beautiful design that fits your specific space and budget. From selecting the right high-performance surface to adding features like lighting and fencing, they help you craft a one-of-a-kind court that becomes the centerpiece of your outdoor life.

Key Takeaways

  • Partner with a full-service builder for a stress-free process: A professional handles every detail, from initial design and site preparation to installing the final surface, ensuring your project is managed correctly from start to finish.
  • Customize every detail to create your ideal playing space: Go beyond a standard design by choosing your court’s surface, colors, and layout, and adding features like lighting or custom logos to match your family’s needs and style.
  • Protect your investment with smart planning: A successful project depends on doing your homework, which means thoroughly vetting your builder’s experience, understanding all cost factors, and learning about long-term maintenance from the start.

What Does a Custom Game Court Builder Do?

Thinking about adding a game court to your backyard is exciting, but the thought of managing a big construction project can feel overwhelming. That’s where a custom game court builder comes in. A professional builder handles the entire process for you, from the first sketch to the final bounce of the ball. They act as your single point of contact, coordinating every detail so you can focus on picturing all the fun you’re about to have. Let’s walk through what a dedicated builder does at each stage of the project.

From Concept to Design

This is the fun part, where your vision starts becoming a reality. Your builder’s first job is to listen. They’ll ask about the sports your family loves, who will be playing, and what your dream setup looks like. From there, they translate your wishes into a professional design. This process involves more than just drawing lines on a blueprint. They’ll help you select features like adjustable hoops, rebounders, and even player benches. A thoughtful design also considers how the court integrates with your landscape and plans for practical elements like proper fencing and netting. They manage all the planning, ensuring the final layout is safe, functional, and a beautiful addition to your home.

Preparing Your Property

Before any construction starts, your property needs to be ready. A professional builder conducts a thorough site assessment to find the perfect spot for your new game court. They analyze your yard’s slope, soil type, and existing drainage to prevent future problems like puddles or an uneven surface. This step is crucial on Long Island, where managing water runoff is key to a lasting installation. By handling the complex work of excavation and grading, they create a perfectly level, stable base. This careful preparation is the literal foundation for a durable and high-performing custom sports games court that your family can enjoy for years.

Building the Foundation and Surface

With the site prepped, it’s time to build. Your builder will construct a strong foundation, usually with concrete or compacted stone, to provide a solid base for the playing surface. This is a non-negotiable step that guarantees your court’s stability and performance. Once the base is ready, they install your chosen surface. Whether you want the consistent ball response of modular tiles or the cushioned feel of synthetic turf, an expert ensures a flawless installation. They use high-quality materials and precise techniques to create a safe, professional-grade playing area that can handle everything from friendly games to intense competition, all while standing up to Long Island’s weather.

Providing Long-Term Care

A great builder’s commitment doesn’t end when the last line is painted. Reputable professionals stand by their work by offering long-term care to keep your court in top shape. This includes guidance on routine cleaning, seasonal inspections for wear and tear, and professional repairs if needed. Over time, even the best surfaces can show their age. When that happens, your builder can make your court look and feel new again with resurfacing. Having a trusted partner for maintenance gives you complete peace of mind. You can simply enjoy your court, knowing that expert restoration and sealing services are available to protect your investment for the long run.

Popular Game Courts for Long Island Homes

Choosing the right game court for your backyard is about matching your family’s favorite activities with your available space. A custom court can become the centerpiece of your outdoor life, a place for everything from serious practice to casual weekend fun with friends and neighbors. Whether you envision a space for one specific sport or a versatile area for multiple games, there are fantastic options that can be tailored to fit your Long Island home perfectly. Let’s look at some of the most popular choices homeowners are making.

Basketball Courts

A backyard basketball court is a timeless classic. It’s a perfect spot for kids to practice their shots, for you to get in a quick workout, or for hosting a friendly neighborhood tournament. Modern basketball courts are highly customizable, so you don’t have to settle for a one-size-fits-all design. You can select team colors, choose a size that fits your yard, and even add a personal logo to the center. This level of personalization ensures your court not only provides endless entertainment but also complements your home’s overall aesthetic. Gappsi specializes in creating custom synthetic turf and sports game courts that are built to last and designed just for you.

Tennis Courts

For those who love the game, a private tennis court offers a touch of luxury and a serious athletic outlet right at home. It’s a significant addition that can add real value to your property while providing a dedicated space for fitness and recreation. Professional builders can construct various types of courts, from classic clay to low-maintenance hard courts, each offering a different playing experience. Because a tennis court requires a substantial, level foundation, it’s a project that integrates well with broader landscape design and construction, ensuring it feels like a natural part of your property from day one.

Pickleball Courts

Pickleball has quickly become one of the most popular sports in the country, and for good reason. It’s easy to learn, fun for all ages, and incredibly social. Because a pickleball court is smaller than a tennis court, it’s a practical choice for many Long Island backyards where space might be a consideration. The growing demand means that dedicated pickleball courts are now a common request, turning underused parts of a yard into vibrant hubs of activity. It’s a fantastic way to bring family and friends together for some lighthearted competition.

Multi-Sport Game Courts

If your family has a wide range of interests, a multi-sport game court is the ultimate flexible solution. Why choose just one game when you can have several? You can design a primary court, like basketball, and add lines for other activities such as volleyball, badminton, or pickleball. This approach maximizes the utility of your outdoor space, ensuring there’s always a new game to play. A multi-sport court is a smart investment that keeps your backyard exciting and accommodates everyone’s favorite pastimes, making it the most versatile playground you can imagine.

How to Customize Your Game Court

Building a custom game court is your chance to create a space that’s perfectly suited to your family’s favorite activities. From the playing surface to the final details, every element can be tailored to your vision. Here’s how you can personalize every detail to design the backyard game court of your dreams.

Choosing Your Surface

The surface you choose sets the stage for your entire playing experience. Think about the sports you’ll play most. Are you dreaming of a fast-paced basketball game or a friendly match of pickleball? We can help you select the perfect material, whether it’s classic acrylic hard courts or versatile modular tiles that offer great performance and shock absorption. For a softer feel underfoot, you might even consider synthetic turf, which is great for multi-sport fun and has a lush, green look. Each option has its own benefits for ball bounce, player comfort, and durability, so we’ll walk you through the best fit for your home and activities.

Adding Colors, Lines, and Logos

This is where your personality really gets to shine. You can move beyond standard green and design a court that reflects your family’s style. Choose from a wide palette of colors to match your home’s exterior, show off your favorite team’s colors, or create a bold, unique design. We can add crisp, professional-grade lines for any sport you can imagine, from basketball and tennis to pickleball and four square. You can even add a custom logo, like a family crest or monogram, right in the center. A professional design makes your court not just a place to play, but a true centerpiece of your backyard.

Deciding on Size and Layout

You don’t need a massive estate to enjoy a custom game court. One of the biggest advantages of a custom build is its flexibility. We design courts that work with your specific property, not the other way around. Modular tiles can be configured to fit almost any dimension, allowing us to create a functional and fun playing area in the space you have available. Whether you have a compact side yard or a sprawling lawn, we can help you design a layout that maximizes playability. Our team will work with you to map out a custom sports game court that fits your ideas and your budget.

Selecting Fencing, Netting, and Lighting

A great game court is more than just the playing surface. The right features ensure your court is safe, functional, and ready for action anytime. Thoughtful lighting means a game of hoops doesn’t have to end when the sun goes down. Proper fencing and netting keep stray balls from ending up in your neighbor’s yard or your garden beds, making playtime safer and more convenient for everyone. As a full-service builder, we handle every aspect of the project, from the initial site prep to installing these essential finishing touches. This comprehensive approach ensures your court is fully equipped and seamlessly integrated into your landscape.

How to Choose the Right Game Court Builder

Building a custom game court is a significant investment in your home and your family’s fun, so choosing the right partner for the job is the most important first step. The right builder doesn’t just lay down a surface; they bring your vision to life, manage the project professionally, and deliver a final product that stands the test of time. A great contractor ensures the entire process is smooth and stress-free, from the initial design conversation to the first game you play.

When you start your search, you’ll find that the best builders stand out in a few key areas. They have a proven track record, they operate with full transparency, and they make communication a priority. Focusing on these qualifications will help you find a team that not only has the technical skills but also provides the support you need for a major home improvement project. Gappsi has been designing and installing custom turf and sports games courts for years, giving us a deep understanding of what makes a project successful from start to finish.

Review Their Experience and Portfolio

A builder’s experience is your best indicator of future success. Look for a company with a long history of building sports games courts specifically on Long Island. A seasoned team understands local zoning, soil conditions, and how to build a court that withstands our specific weather patterns. Go beyond their “About Us” page and ask to see a portfolio of their completed work. A quality portfolio should showcase a variety of projects, giving you a clear idea of their craftsmanship and design capabilities. You can often find project videos and galleries on a company’s YouTube channel, which provides a dynamic look at their work.

Verify Licenses, Insurance, and Warranties

This step is all about protecting your investment and your property. Before signing any contracts, confirm that your builder is fully licensed and insured to work in your area of Long Island. This is non-negotiable, as it protects you from liability in case of an accident on your property. A professional company will readily provide this documentation. Equally important is the warranty. Ask about the warranties offered on both the materials and the labor. A strong warranty, for example, a 15-year warranty on the court surface, shows that the builder stands behind their work and is committed to quality. This is a standard practice for any major home remodeling project.

Assess Their Communication and Support

You’re not just hiring a crew; you’re entering a partnership. The construction process can take weeks, so you want a team that is responsive, respectful, and easy to work with. Pay close attention to how they communicate during your initial consultation. Do they listen to your ideas and answer your questions clearly? A reputable builder will guide you through the entire process, from design choices to site preparation, ensuring you feel informed and confident at every stage. They should provide a clear timeline and be upfront about how they will handle any potential issues. This level of support is a hallmark of a true masonry designer and construction company, where client collaboration is key.

Is This Builder the Right Fit for You?

Once you have a shortlist of potential builders, the consultation is your chance to find the perfect partner for your project. Think of this meeting as a two-way interview. While they’re assessing your property and project scope, you should be evaluating their expertise, process, and whether they’re the right fit for your family. A great builder will welcome your questions and provide clear, confident answers. This initial conversation sets the tone for the entire project, so it’s important to feel comfortable and heard from the very beginning.

Coming prepared with a specific set of questions will help you compare builders and make an informed decision. You’re not just buying a product; you’re investing in a long-term relationship and a significant addition to your home. The right builder will make you feel like a valued partner, guiding you through each step with transparency and professionalism. They should be just as invested in bringing your vision to life as you are. A builder who understands the unique demands of constructing sports games courts on Long Island will be able to anticipate challenges and deliver a final product that exceeds your expectations.

Key Questions to Ask During Your Consultation

Your consultation is the perfect time to dig into the details. Don’t hesitate to ask specific questions that reveal a builder’s experience and process.

Start by asking about their background. How many years have they been building sports games courts in the Long Island area? A long track record often means they have a deep understanding of local soil conditions, weather patterns, and permitting requirements. Next, inquire about customization. Can you choose specific colors, add custom logos, or design a unique layout? A quality builder should offer a wide range of options beyond a standard kit. Also, clarify if they are a full-service company. Will they handle everything from excavation and base preparation to installing fences and netting? Finally, ask about the materials and warranty, as this reflects their confidence in the court’s durability.

Warning Signs to Watch For

Just as important as asking the right questions is knowing which answers to watch out for. A few red flags can help you steer clear of a difficult or disappointing experience.

Be cautious if a builder seems unfamiliar with Long Island’s specific building codes or environmental factors. A contractor without local knowledge may run into unexpected delays or structural issues. Another warning sign is a lack of flexibility. If they push a one-size-fits-all solution or seem reluctant to discuss your custom ideas, they may not be the right partner for a personalized project. Pay close attention to their communication style. A builder who is dismissive of your questions or provides vague answers during the consultation will likely be difficult to work with later. You want a team that prioritizes customer service and is committed to keeping you informed, as this shows they value your partnership and satisfaction.

What to Expect During Installation

Once you’ve finalized the design for your new sports games court, the construction phase begins. This is where your vision starts to become a reality, and it’s helpful to know what the process looks like from the ground up. A professional builder follows a meticulous process to ensure your court is not only beautiful but also safe and durable for years of enjoyment. From preparing the ground to painting the final lines, each step is handled with precision. At Gappsi, we manage the entire project, so you can relax and watch the transformation happen. We believe in clear communication, keeping you informed at every stage of the build. The installation journey involves several key stages: preparing the site, building a stable base, managing water drainage, installing the surface, and adding all the finishing touches. Understanding these steps can help you appreciate the craftsmanship that goes into creating a high-performance court that will last for decades. Our team coordinates everything, ensuring a smooth and efficient process from start to finish, so your backyard is disrupted for the shortest time possible.

Site Prep and Base Construction

The first step in building your dream sports games court is preparing the site. Think of this as creating the perfect canvas. Our team will start by clearing the designated area of any grass, rocks, or debris. Next, we grade the land to create a perfectly level surface, which is essential for proper play and drainage. Once the area is clear and level, we construct a solid base. This usually involves laying a foundation of crushed stone that is compacted to create a stable and supportive layer. Proper site preparation is the most important factor in the longevity and performance of your court, preventing issues like cracking or sinking down the road.

Managing Drainage on Long Island

Here on Long Island, we know how quickly a heavy rain can turn a backyard into a pond. That’s why effective drainage is a non-negotiable part of our installation process. Without it, water can pool on the surface, damaging the court and making it unsafe for play. We design our courts with a slight, almost imperceptible slope that directs water away from the playing area. Depending on your property’s specific needs, we might also install a French drain system or use permeable materials around the court. Our approach to landscape design ensures that water is managed effectively, protecting your investment and keeping your court ready for action, rain or shine.

Surface Installation and Finishing

With a solid and dry base in place, it’s time for the main event: installing the playing surface. Whether you’ve chosen asphalt, concrete, or a synthetic tile system, our crew installs it with expert precision. Each material has its own requirements for installation and curing, and we follow manufacturer guidelines to the letter to ensure a flawless finish. After the surface is installed and has had adequate time to cure, we add the finishing touches. This includes painting crisp, accurate lines for the sports you’ll be playing, adding any custom logos you’ve designed, and applying a protective sealant. Our restoration and sealing services ensure your court’s surface is durable and vibrant from day one.

Understanding the Cost of a Custom Game Court

Talking about budget is one of the most important parts of any home improvement project, and building a custom game court is no different. The final price tag can vary quite a bit because every project is unique. The total cost depends on your vision, your property, and the features you choose. Breaking down the expenses can help you create a realistic budget and understand exactly where your investment is going. Let’s walk through the main factors that influence the cost of bringing your dream court to life.

How Size and Surface Affect Price

The two biggest factors that will shape your budget are the court’s size and the surface material you select. A smaller half-court for basketball will naturally cost less than a full-size tennis court. When you consult with a builder, they will help you determine the best dimensions for your space and how you plan to use it.

The surface itself is the next major consideration. While a basic asphalt or concrete court is an option, many homeowners opt for high-performance surfaces designed for safety and playability. Gappsi offers a variety of synthetic turf and sports game courts options that provide better shock absorption and consistent ball bounce. The material you choose will have a direct impact on the price, so it’s important to weigh the upfront cost against long-term durability and performance.

The Cost of Site Preparation

Before any surface can be installed, your property needs to be properly prepared. This is a critical step that ensures your court will be stable, level, and well-drained for years to come. Site preparation can involve several tasks, including clearing the land, grading the soil to create a flat base, and ensuring proper drainage solutions are in place.

The complexity of this work depends entirely on your property’s current condition. A relatively flat, clear yard will require less work than a sloped area with trees or other obstacles. This phase can add a few thousand dollars or more to the project, but it’s an essential investment in the court’s longevity. Our expertise in landscape design and construction ensures this foundational work is done right.

Pricing for Custom Features

This is where you can truly make the court your own. Custom features are what transform a simple playing surface into a complete backyard destination. Popular additions include professional-grade lighting for evening games, containment fencing or netting, and adjustable-height basketball hoops. You can also add custom colors and logos to show off your favorite team or add a personal touch.

Each of these elements comes with its own price. For example, quality LED lighting can range from a couple thousand to several thousand dollars, while custom fences and netting will vary based on the height and materials. While these features add to the total cost, they also significantly enhance the court’s usability and aesthetic appeal.

Budgeting for Extras

When planning your budget, it’s wise to set aside a little extra for incidentals and future needs. A good rule of thumb is to add a contingency of about 10% to 20% to your total estimated cost. This buffer can cover any unexpected site challenges that might arise during construction.

This extra budget also accounts for things you’ll need once the court is finished, like new basketballs, tennis rackets, or a ball machine. It’s also smart to think about long-term maintenance. While our courts are built to last, occasional cleaning or future restoration and sealing will keep your court in top condition. Planning for these costs from the start helps ensure there are no surprises down the road.

Common Pricing Myths

One of the biggest myths about custom sports games courts is that they are always overwhelmingly expensive. While a high-end, multi-sport complex is a significant investment, a more modest court can be more attainable than many homeowners think. The final cost is not a fixed number; it’s a flexible total based on the choices you make.

By working with an experienced builder, you can explore different options for size, materials, and features to align the project with your budget. Opting for a simpler design or a phased approach, where you add features like lighting later on, can make the project more manageable. Don’t let assumptions about price stop you from exploring the possibilities. A professional consultation can give you a clear, accurate picture of what it would take to build your family’s new favorite hangout spot.

Mistakes to Avoid When Hiring a Builder

Hiring a builder for your custom sports game court is a major step, and you want to feel confident in your choice. Making the right decision from the start ensures a smooth process and a final product you’ll love for years. To help you feel prepared, let’s walk through a few common mistakes homeowners make during the hiring process, so you can sidestep them completely. By being aware of these potential pitfalls, you can find a partner who will bring your vision to life without any surprises.

Prioritizing Price Over Quality

It’s tempting to go with the lowest bid, but when it comes to a project like this, price shouldn’t be the only factor. A quote that seems too good to be true often is. Lower prices can mean subpar materials or rushed labor, leading to a court that cracks, fades, or becomes uneven sooner than you’d expect. Investing in a builder who uses high-quality materials and has proven expertise will save you money on repairs and replacements down the road. A well-built court is a durable, safe, and lasting addition to your home, making the initial investment in quality synthetic turf and sports games courts worthwhile.

Skipping the Vetting Process

In the excitement of starting a new project, it can be easy to rush the hiring decision. However, failing to thoroughly vet your builder is a risk you don’t want to take. Take the time to dig into their background. A reputable builder will proudly share a portfolio of their work and connect you with past clients. You can see examples of completed projects to get a feel for their craftsmanship and style. Check online reviews and make sure they have a solid reputation in the Long Island community. This due diligence ensures you’re partnering with a professional who consistently delivers quality results and has a history of satisfied customers.

Forgetting About Long-Term Maintenance

Your new sports game court will be the star of your backyard, but it needs a little care to stay in top condition. Many homeowners forget to discuss long-term maintenance before the project even begins. Ask potential builders what kind of upkeep their courts require. Do they offer maintenance plans or services? Understanding the routine cleaning, seasonal care, and potential for future repairs helps you protect your investment. For example, professional cleaning and sealing services can extend the life of many outdoor surfaces, and it’s good to know your options from day one.

Ignoring the Warranty and Support Plan

A warranty is your safety net. It’s a builder’s promise to stand behind their work, protecting you from material defects or installation issues that might pop up after the crew has packed up. Before you sign any contract, make sure you have a clear understanding of the warranty. What does it cover, and for how long? What is the process for making a claim? A builder who offers a strong, transparent warranty and a clear support plan shows confidence in their work and a commitment to your long-term satisfaction. This is a key part of any home remodeling project, big or small.

Underestimating the Risks of DIY

While taking on a DIY project can be rewarding, building a sports game court is a complex job that’s best left to the pros. The risks of a DIY installation are significant, from an uneven playing surface to improper drainage that can cause major damage over time. Professionals understand local building codes, soil conditions, and the precise techniques needed for a safe and durable foundation. Hiring an experienced masonry and construction company ensures the job is done right the first time, giving you a high-performance court that’s built to last and safe for your family to enjoy.

How to Maintain Your New Game Court

Your new custom sports games court is a fantastic addition to your home, and you’ll want to keep it in top shape. The good news is that maintenance is straightforward. A little regular care protects your investment, ensures the surface is safe for play, and keeps it looking great for years of family fun and friendly competition. Here’s how you can easily maintain your new court.

Simple, Regular Cleaning

Start with the basics. Keeping your court clean is the easiest way to extend its life. Leaves, twigs, and other debris can hold moisture and lead to stains or mildew. Make it a habit to sweep the surface regularly. For a deeper clean, the American Sports Builders Association suggests using a mild detergent with water. This simple routine prevents grime from building up and affecting the court’s performance. If you ever feel it needs a professional touch, our team offers expert restoration and sealing services to bring back that brand new look.

Inspecting for Wear and Tear

Once a month, take a quick walk around your court to check for any changes. You’re looking for small issues before they become big problems. Pay attention to the surface, looking for any small cracks, bubbling, or areas of significant wear. Check the painted lines to see if they are fading or chipping. Catching these things early can prevent more extensive repairs down the road and is a key part of court maintenance and safety. If you spot something concerning, it’s always best to have a professional from our sports games courts team take a look.

Seasonal Care for Long Island Weather

Living on Long Island means we get to experience all four seasons, and your court needs care that adapts to the changing weather. During our winters, it’s important to clear snow and ice promptly to prevent damage from the freeze-thaw cycle. Avoid using metal shovels or harsh chemical de-icers, which can harm the surface. In the summer, a regular rinse can wash away pollen and dust. Following these seasonal maintenance tips ensures your court can handle everything the local climate throws at it, keeping it ready for play year-round.

Knowing When It’s Time to Resurface

Even with perfect maintenance, every court surface will eventually show its age. Knowing the signs that it’s time to resurface is key to maintaining usability and safety. According to the International Tennis Federation, major indicators include widespread cracks, significant wear patterns in high-traffic areas, and a noticeable loss of traction that makes the surface feel slippery. Resurfacing isn’t just about looks; it restores the court’s safety and playability. When the time comes, our team can guide you through the process of giving your sports games court a fresh, high-performance surface.

Complete Your Backyard With Other Outdoor Features

Your new sports game court is more than just a place to play; it’s the anchor for your entire outdoor living space. Instead of just dropping a court into your yard, think about how it can connect with other features to create a complete backyard destination for family and friends. This approach, sometimes called “sportscaping,” is all about designing a cohesive environment for activity, relaxation, and entertainment. It’s how you turn a simple backyard into your family’s favorite hangout spot, with seamless flow from one area to the next.

Imagine having a comfortable, shaded spot for spectators or for taking a break between games. A custom pavilion or pergola provides just that, creating an elegant transition from the court to a relaxation zone. Proper fencing and netting are also essential, not just for keeping the ball in play but for defining the space and ensuring safety. We can help you choose materials that match your home’s aesthetic while providing the durability you need for years of fun.

Why stop with just the court? You can create the ultimate activity hub by adding a personal putting green with our high-quality synthetic turf. Or, you could connect your new court to a beautiful patio with elegant walkways made from porcelain or natural stone, perfect for setting up a barbecue area. For the ultimate resort-like feel, you could even add a swimming pool for a post-game cool-down or a relaxing sauna to soothe sore muscles. By integrating these elements, your backyard becomes a versatile space that offers something for everyone.

Related Articles

Frequently Asked questions

How much space do I really need for a custom game court? This is one of the most common questions I get, and the answer is always: it depends on your vision. You don’t need a huge property to create a fun, functional playing area. We design courts that fit your specific yard, whether that means a compact pickleball court, a half-court for basketball practice, or a smaller multi-sport layout. The beauty of a custom build is that we can tailor the dimensions to work with the space you have.

How long does the entire process take, from design to completion? The timeline can vary based on the project’s size, complexity, and even the weather, but a general estimate is usually a few weeks to a couple of months. The design and planning phase might take a week or two. After that, the actual on-site construction, including site preparation and surface installation, typically takes another two to four weeks. We always provide a clear, detailed timeline before we begin so you know exactly what to expect.

What’s the difference between a custom-built court and a DIY kit? While a DIY kit might seem like a good way to save money, building a sports games court is a complex construction project. A professional installation guarantees that the crucial foundation work, like grading and drainage, is done correctly. This prevents future problems like cracking, puddles, or an uneven surface. Our expertise ensures your court is safe, durable, and built to withstand Long Island’s weather for years of play.

Can I really play multiple sports on one court? Absolutely. Multi-sport game courts are one of our most popular requests because they offer incredible versatility. We can design a primary court, like basketball, and then add permanent lines for other games such as pickleball, volleyball, or even four square. This approach maximizes the fun you can have in your backyard and ensures there’s an activity for everyone in the family.

How do I keep my new game court looking and playing its best? Modern sports games courts are designed to be low-maintenance, but a little care goes a long way. The most important thing you can do is keep the surface clean by regularly sweeping away leaves and debris. It’s also a good idea to give it a gentle rinse with a hose periodically. We build our courts to last, and we’ll give you simple, specific care instructions to ensure your court stays in top condition for years to come.

Share this page:
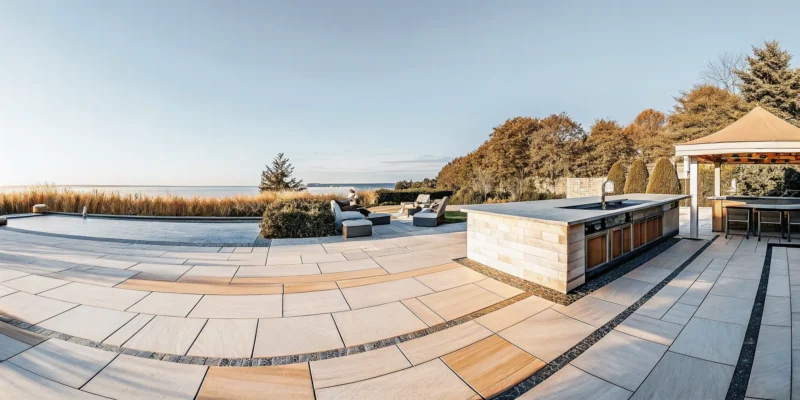
Specialized porcelain pool patio and coping with modern lounge chairs on Long Island, NY.

Porcelain Pool Patios & Coping: A Long Island Guide

The right patio material can completely transform your backyard, turning a simple pool into a luxurious retreat. While natural stone is beautiful, the constant upkeep can be a dealbreaker. This is where porcelain comes in, offering the best of both worlds. You can get the stunning look of Italian marble, rustic slate, or even warm wood planks, all with the incredible durability and low-maintenance benefits of an engineered material. It’s a choice that doesn’t force you to compromise on style or practicality. We’ll explore the amazing design flexibility you get with a specialized porcelain pool patio and coping on Long Island ny, from modern large-format tiles to classic stone looks that will elevate your outdoor living space.

Key Takeaways

  • Enjoy a truly low-maintenance patio: Porcelain’s non-porous surface naturally resists stains, pool chemicals, and frost damage, meaning you can forget about yearly sealing and spend more time enjoying your pool.
  • Combine poolside safety with high-end design: Modern porcelain pavers are engineered with a textured, slip-resistant finish for safety, while also offering a huge variety of styles that beautifully replicate natural stone or wood without the upkeep.
  • Prioritize the right product and professional installation: For a lasting investment, always choose outdoor-rated porcelain pavers with high slip-resistance and hire an experienced contractor who understands proper installation for our Long Island climate.

Why Choose Porcelain for Your Pool Patio and Coping?

When you’re designing the perfect backyard oasis, the material you choose for your pool patio and coping is one of the most important decisions you’ll make. It sets the stage for your entire outdoor space. While you have many options, porcelain has become a top choice for Long Island homeowners, and for good reason. It offers a fantastic combination of sophisticated style, incredible durability, and poolside safety. Think of it as the best of all worlds. You get a high-end look that can mimic natural stone or sleek modern concrete, but with technical properties that make it uniquely suited for life around a swimming pool.

Porcelain is an engineered material, fired at high temperatures to create a dense, strong, and non-porous tile. This manufacturing process is what gives it its superpowers. It’s built to handle everything from cannonballs and pool parties to harsh winter freezes without staining, fading, or cracking. When you invest in a porcelain patio, you’re choosing a surface that will look just as beautiful in ten years as it does on day one, with surprisingly little effort. It’s a smart, practical choice that doesn’t ask you to compromise on aesthetics.

Stands Up to Long Island Weather

We all know Long Island weather can be unpredictable. We get intense summer sun, heavy rain, and freezing winters, sometimes all in the same season. Your outdoor materials need to be tough enough to handle it all. This is where porcelain truly shines. Because it’s so dense and strong, it can endure these changing weather conditions without showing wear and tear. The vibrant color of your patio won’t fade under constant UV exposure, and the tiles won’t become brittle over time. This durability makes our selection of porcelain and natural stone a reliable, long-term investment for any outdoor project.

Ensures Poolside Safety with Slip Resistance

Safety is always the number one priority around a swimming pool, especially when you have kids and guests running around. A slippery surface is a major hazard. Fortunately, porcelain pavers made for outdoor use are designed with safety in mind. They are manufactured with a textured, slip-resistant finish that provides a secure grip underfoot, even when the surface is wet from splashes. Unlike some glossy indoor tiles, exterior-grade porcelain ensures you and your family can walk confidently around the pool. When we design a pool patio, we always use tiles with a high slip-resistance rating to give you total peace of mind.

Resists Water and Freeze-Thaw Damage

One of porcelain’s biggest advantages is its extremely low water absorption rate, typically less than 0.5%. This makes it practically waterproof. On Long Island, this is critical for preventing freeze-thaw damage during the winter. With more porous materials like concrete or certain natural stones, water seeps into the surface. When temperatures drop, that water freezes, expands, and creates cracks. Because porcelain doesn’t absorb water, there’s no risk of this cycle causing damage. Your patio will remain intact and free of cracks year after year, avoiding the need for frequent repairs or restoration and sealing services.

Withstands Pool Chemicals

Your pool needs chemicals like chlorine to stay clean and sanitary, but those same chemicals can be tough on surrounding surfaces. They can cause discoloration, staining, and gradual erosion on materials like natural stone or concrete pavers. Porcelain, however, is completely unfazed. Its non-porous surface prevents chemicals from penetrating and causing damage. Splashes of chlorinated water or other pool treatments won’t leave a lasting mark. This means your patio will maintain its original color and finish for years, looking clean and pristine without any special maintenance or worry about chemical spills.

Porcelain vs. Other Pool Patio Materials

Choosing the right material for your pool patio is a big decision. You want something that looks beautiful, feels great underfoot, and holds up to the demands of a poolside environment. While materials like concrete, natural stone, and traditional pavers have been popular for years, porcelain is quickly becoming the top choice for discerning Long Island homeowners. Let’s break down how it compares to other common options.

Porcelain vs. Concrete

Concrete pavers are often seen as a budget-friendly choice, and their straightforward installation can appeal to DIY enthusiasts. However, when you look at the long-term picture, porcelain really shines. Porcelain pavers are incredibly durable, resisting cracks, chips, and fading over time. They are also non-porous, which means you don’t have to seal them, and they stand up to stains from spilled drinks or pool chemicals. While concrete might save you money upfront, porcelain’s resilience and low maintenance offer lasting value and peace of mind, making cleaning simple with just a sweep and some mild soap.

Porcelain vs. Natural Stone

There’s no denying the beauty of natural stone like travertine or bluestone. The downside is the upkeep. Natural stone is porous, so it needs regular sealing to prevent stains and water damage. It can also be more susceptible to wear from pool chemicals and salt. This is where porcelain offers the best of both worlds. Modern porcelain and natural stone pavers can perfectly mimic the look of natural materials, from the veining of marble to the texture of slate. You get that high-end, organic aesthetic without the demanding maintenance routine, making it a practical and stylish option for your pool coping and patio.

Porcelain vs. Traditional Pavers

Traditional pavers have long been a go-to for outdoor projects, but porcelain brings a level of elegance and strength that’s hard to match. Porcelain pavers create a sleek, elegant and modern look that can transform your outdoor space. Because they are manufactured under extreme pressure and heat, they are exceptionally dense and strong, resisting scratches, stains, and everyday wear far better than many traditional options. This durability is a huge plus for a busy pool area. With porcelain, you can achieve a sophisticated appearance with the assurance that your patio will look amazing for years to come.

What Are Your Design Options with Porcelain?

One of the best parts about choosing porcelain for your pool area is the incredible design flexibility it offers. This isn’t just a practical material; it’s a canvas for creating your dream outdoor space. Thanks to modern manufacturing, porcelain can beautifully replicate the look of other materials like natural stone, rich wood, or even concrete, but without the demanding upkeep. This means you can achieve almost any aesthetic you have in mind, from a rustic, wood-plank look to the clean lines of a contemporary stone patio. The design possibilities are truly vast.

You can select from an extensive range of colors, textures, and sizes to perfectly complement your home’s architecture and your personal style. Whether you envision a sleek, modern oasis or a cozy, traditional backyard retreat, there’s a porcelain option that fits. At Gappsi, we help you sort through these choices to find the perfect match. You can see a wide variety of high-quality porcelain and natural stone pavers at our showroom to get a real feel for how they look and feel. This hands-on experience is often the key to making a confident decision for your home. It allows you to compare different styles side-by-side and imagine how they will transform your backyard into a personal paradise.

Explore Colors, Finishes, and Textures

When you start exploring porcelain, you’ll be amazed by the variety. You can find tiles in a huge spectrum of colors, from soft, sandy beiges that create a coastal vibe to deep, dramatic charcoals for a modern edge. Beyond color, porcelain comes in different finishes, including matte, textured, and semi-polished. For a pool patio, a textured finish is an excellent choice because it provides extra grip underfoot, making the area safer. These textures can mimic the feel of natural slate or grained wood, adding another layer of dimension to your design. The color and finish you choose are baked into the tile, so you don’t have to worry about them fading from sun exposure over the years.

Create a Seamless Look with Large Format Tiles

A popular trend in outdoor design is using large format porcelain tiles. These larger tiles, often 24×24 inches or even bigger, create a sophisticated and expansive feel for your patio. With fewer grout lines, the surface appears more continuous and clean, which can make your entire outdoor space feel larger and more open. This seamless look is not only stylish but also practical, as fewer grout lines mean less space for dirt to accumulate and less cleaning for you. You can extend these large tiles from your patio directly to the pool’s edge, using the same material for the coping to create a stunning, unified design that flows beautifully. This approach is a fantastic way to enhance your swimming pool design.

Discover Popular Styles on Long Island

On Long Island, homeowners often lean into styles that reflect our beautiful coastal surroundings. Light-colored porcelain pavers that mimic sand or light gray stone are incredibly popular because they create a bright, airy, and beach-inspired atmosphere. These lighter shades also have the practical benefit of staying cooler under the summer sun. For more traditional homes, porcelain that looks like classic bluestone or brick offers timeless appeal. As experts in Long Island landscape design, we’ve seen how perfectly porcelain coping and treads fit into local projects, from Westhampton Beach to Smithtown, providing a durable and stylish finish for pool edges and steps.

How to Match Your Coping to Your Patio

The coping is the finishing piece that caps the edge of your pool shell, and it plays a huge role in the final look. You have two main design paths: matching or contrasting. Using the same porcelain tile for both your patio and coping creates a cohesive, monolithic look that is very sleek and modern. It makes the pool and patio feel like one continuous surface. Alternatively, choosing a contrasting coping can create a beautiful visual frame around your pool, highlighting its shape. For example, a dark gray coping paired with light gray patio pavers can add a dramatic and custom touch. You can see how different combinations come to life by exploring videos of Gappsi’s completed projects.

What Is Pool Coping and Why Does It Matter?

If you’ve ever sat on the edge of a pool and dangled your feet in the water, you’ve interacted with pool coping. Simply put, coping is the cap or edging placed on the top of a pool’s shell. Think of it as the finishing frame around your aquatic masterpiece. But it’s much more than just a decorative touch. Coping serves a critical dual role: it protects your pool’s structure and enhances its overall safety and style. It’s the material that bridges the gap between your pool and your patio, creating a cohesive and polished look.

Functionally, coping directs water that splashes out of the pool toward deck drains and away from the pool’s foundation, preventing potential damage. It also creates a smooth, non-abrasive edge for swimmers to hold onto, making it safer to get in and out. Aesthetically, it provides a seamless transition from the water to your surrounding patio. Choosing the right material and style for your coping is a key decision in any swimming pool project, as it ties the entire look of your backyard oasis together. Without it, you’d just have an exposed concrete edge, which is neither safe nor attractive. This single element can define the character of your pool area, so it’s worth careful consideration.

Types of Porcelain Coping Profiles

When you choose porcelain for your coping, you also get to select its profile, which is the shape of the edge. This choice has a big impact on both the look and feel of your pool area. One of the most popular options is the bullnose profile, which has a smooth, fully rounded edge. It’s comfortable to sit on and offers a classic, soft look that’s great for families.

For a more modern and sleek design, a square or straight-edge profile provides clean, 90-degree angles that complement contemporary architecture. Another great option is a drop-down edge. This profile features a thicker front face that extends downward, covering the top of the pool wall. It’s perfect for creating a substantial, high-end look and can cleverly hide the mortar bed for an ultra-clean finish. Gappsi offers a wide selection of porcelain and natural stone coping with various profiles to suit any design vision.

How Coping Protects Your Pool’s Structure

Coping is your pool’s first line of defense against the elements. It acts as a protective shield for the pool’s upper edge, or bond beam, preventing water from seeping in behind the pool shell. This is especially important on Long Island, where freeze-thaw cycles can cause water to expand and lead to serious structural cracks. Properly installed coping creates a waterproof seal that safeguards your investment.

Beyond protecting the shell, coping also provides a safe, sturdy edge for swimmers. It gives you a secure handhold when entering or exiting the water and a comfortable place to sit and relax. Because porcelain doesn’t absorb much heat, it also stays cooler under the summer sun than many other materials, making it more comfortable for bare feet and hands. Our expert masonry team ensures your coping is installed flawlessly to maximize both protection and safety.

Coordinate Coping with Your Patio Design

Your pool coping is the visual link between your pool and your patio, so making a thoughtful choice is key to a cohesive design. You generally have two main approaches. The first is to use the exact same porcelain tile for both the coping and the patio. This creates a seamless, uniform look that can make your outdoor space feel larger and more integrated. It’s a popular strategy in modern and minimalist designs.

Alternatively, you can create contrast by choosing a coping that is a different color, texture, or even material from your patio pavers. This technique frames the pool, making it a distinct focal point in your backyard. For example, a dark gray coping around a pool set in a light-colored patio can create a stunning visual statement. You can explore different combinations of pavers and coping at the Gappsi Store to find the perfect pairing for your home.

Is Porcelain a Truly Low-Maintenance Option?

When you invest in a beautiful pool patio, the last thing you want is to spend your summers scrubbing and sealing it. You want to be swimming, hosting barbecues, and relaxing. This is where porcelain truly shines. The term “low-maintenance” gets used a lot in home improvement, but for porcelain, it’s not just a marketing buzzword, it’s a core feature. Because porcelain is non-porous, it naturally resists stains, mold, and mildew. Spilled drinks, wet leaves, and even pool chemicals don’t easily penetrate the surface, making cleanup incredibly simple.

This durability means you can spend more time enjoying your outdoor space and less time worrying about its upkeep. Unlike other materials that require constant attention to keep them looking their best, porcelain holds its color and finish for years with minimal effort. For busy Long Island homeowners, choosing porcelain for your pool patio and coping means choosing a material that works for your lifestyle, giving you a pristine-looking poolside retreat without the demanding maintenance schedule. It’s a practical choice that delivers long-lasting beauty and peace of mind.

Simple Routine Cleaning Tips

Keeping your porcelain patio looking brand new is refreshingly simple. You don’t need any special products or harsh chemicals. For routine cleaning, all it takes is a quick sweep with a broom to remove loose dirt and leaves. After that, you can wash the area with a simple mixture of mild soap and water. A gentle scrub with a soft-bristle brush is usually enough to handle any grime that has built up. Then, just rinse it clean with a hose. This straightforward process is all that’s needed to maintain the beauty and safety of your poolside area throughout the season.

Does Porcelain Need Sealing?

Here’s some great news: porcelain tiles do not need to be sealed. Ever. This is one of their biggest advantages over natural stone and concrete pavers. Because porcelain is fired at extremely high temperatures, it becomes vitrified, which means it has a very low water absorption rate. The surface is so dense and non-porous that it naturally repels water, oils, and other liquids that could cause stains. This eliminates the need for the regular sealing that other materials require to stay protected. While we offer professional restoration and sealing services for materials that need it, you can rest easy knowing your porcelain patio won’t be one of them.

Upkeep: Porcelain vs. Other Materials

When you compare the upkeep of porcelain to other popular patio materials, the difference is clear. Natural stone, while beautiful, is porous and can easily stain without regular sealing. It’s also susceptible to damage from salt and pool chemicals. Concrete pavers can fade over time and are prone to efflorescence, a white powdery deposit that requires special cleaners to remove. Porcelain, on the other hand, is built to withstand the elements. It resists fading from UV rays, stands up to harsh pool chemicals, and won’t stain from everyday spills. This superior durability makes both porcelain and natural stone great options, but porcelain’s minimal upkeep gives it a clear edge for a hassle-free outdoor space.

Debunking Myths About Porcelain Patios

Porcelain is a fantastic choice for outdoor projects, but it’s surrounded by a few persistent myths. If you’ve heard whispers that porcelain is slippery, fragile, or a one-size-fits-all material, it’s time to set the record straight. These misconceptions can keep you from choosing one of the most durable and beautiful materials available for your Long Island home. Let’s clear up the confusion so you can feel confident about your patio decisions. Understanding the truth about porcelain helps you appreciate why it’s such a popular and practical option for everything from patios to pool surrounds. We’ll tackle the three biggest myths head-on.

Myth: Porcelain Is Too Slippery for Pool Areas

This is probably the most common concern I hear from homeowners, and it’s a valid one. Safety around the pool is non-negotiable. The good news is that this myth is largely false. While a high-gloss, polished porcelain tile meant for indoor use would certainly be slippery when wet, outdoor porcelain pavers are a completely different product. Manufacturers design these pavers with safety in mind, creating textured, matte finishes that provide excellent grip. These anti-slip surfaces make them a secure choice for swimming pools and other wet areas, giving you peace of mind without sacrificing style.

Myth: It’s Too Fragile for Outdoor Use

When you hear “porcelain,” you might picture delicate teacups, but the porcelain used for patios is engineered for toughness. These pavers are fired at extremely high temperatures, making them incredibly dense, strong, and resistant to wear and tear. They can easily handle heavy foot traffic, patio furniture, and the freeze-thaw cycles we experience on Long Island. Unlike some other materials, porcelain is non-porous, so it stands up to stains, mold, and pool chemicals without fading or deteriorating. It’s a durable, long-lasting material that proves its strength season after season.

Myth: Any Porcelain Tile Will Work for a Pool

This is a critical myth to bust because choosing the wrong tile can lead to serious problems. Not all porcelain is created equal. A tile designed for a kitchen backsplash is not the same as a paver meant for a patio. For outdoor and pool applications, you must select a product specifically rated for that purpose. Look for porcelain and natural stone pavers with a high slip-resistance rating, proper thickness, and frost-proof certification. This is where professional advice is invaluable. When you work with experts, you can be sure you’re selecting a beautiful tile that also meets every safety and durability requirement for your project.

How to Choose the Right Porcelain for Your Pool

Okay, you’ve decided on porcelain for your pool area. That’s a fantastic choice. But before you start picking out colors, it’s important to know that not all porcelain tiles are suitable for poolside applications. The beautiful tile you saw for a bathroom floor is very different from what you need for an outdoor patio on Long Island. Choosing the right product is about more than just looks; it’s about ensuring safety, durability, and a long-lasting return on your investment. Let’s walk through the key factors to consider so you can select your porcelain with confidence.

Look for High Slip-Resistance Ratings

Safety around the pool is non-negotiable, especially with kids, pets, and guests splashing around. When wet, some surfaces can become incredibly slick, but the right porcelain is designed to prevent that. Look for tiles with a high slip-resistance rating, often indicated by a Dynamic Coefficient of Friction (DCOF) value. You want a tile specifically made for wet and outdoor areas. These tiles have a textured surface that provides grip underfoot, even when soaked. Choosing high-quality porcelain pavers with a proper non-slip finish gives you peace of mind, allowing everyone to enjoy the pool without you having to worry about slips and falls. It’s a simple choice that makes a world of difference.

Consider Tile Thickness and Strength

Your pool patio is a high-traffic zone. It needs to handle everything from constant foot traffic to heavy lounge chairs and tables. This is where tile thickness and strength become critical. Standard indoor porcelain tiles are typically too thin and fragile for outdoor use. For a pool deck, you should look for porcelain pavers, which are much thicker (usually 2cm or 3cm) and engineered for superior durability. These robust pavers resist cracking, chipping, and scratching, so you don’t have to stress about everyday wear and tear. When you are installing a new pool patio, using the correct thickness ensures your beautiful new space will stand strong for years to come, handling summer parties and patio furniture with ease.

Verify Frost and Weather Resistance

Here on Long Island, our patios have to endure it all: hot summers, heavy rain, and freezing winters. The freeze-thaw cycle, where water seeps into materials, freezes, expands, and causes cracks, can destroy a patio in just a few seasons. This is where porcelain truly shines. Because it is non-porous, it absorbs very little water (less than 0.5%). This low absorption rate means there’s almost no water inside the tile to freeze and expand, making it exceptionally frost-resistant. By choosing a quality, weather-resistant porcelain, you protect your investment from the harsh elements. Your patio will maintain its integrity and appearance through every season, without the cracking and spalling common in other materials.

Balance Your Style with Function

Functionality is key, but you also want a pool patio that reflects your personal style. The great news is that with porcelain, you don’t have to choose between durability and design. Modern porcelain pavers come in an incredible range of colors, patterns, and finishes. You can get the rich, warm look of natural wood, the elegant veining of marble, or the rustic texture of slate, all with the unbeatable performance of porcelain. This versatility allows you to create a cohesive look that complements your home and landscape. You can explore different styles to find the perfect match, whether you’re aiming for a sleek, modern oasis or a classic, timeless retreat. It’s the best way to get a high-end aesthetic without compromising on poolside practicalities.

What Is the Cost of a Porcelain Pool Patio on Long Island?

Let’s talk about one of the most important parts of any home project: the budget. When planning for a porcelain pool patio on Long Island, it’s helpful to have a general idea of the investment. On average, you can expect the cost to range from $15 to $30 per square foot, which typically includes both the porcelain pavers and professional installation. For premium tiles, intricate designs, or challenging installations, the price can go up to $50 per square foot or more.

Think of this as more than just an expense; it’s an investment in your home’s value and your family’s enjoyment for years to come. The final price tag is unique to every project because it depends on your specific choices and property. The quality of the porcelain and natural stone pavers you select, the complexity of the design, and the current condition of the installation site all play a role. We’ll break down these factors next, so you can see exactly what goes into creating a beautiful and lasting poolside retreat. Understanding these details will help you plan your budget effectively and make choices that align with your vision for the perfect outdoor space.

What Factors Influence the Final Cost?

Several key elements will shape the final cost of your porcelain patio. First is the material quality itself. Higher-end porcelain tiles may cost more upfront, but they offer superior durability and more sophisticated designs. Second, the complexity of the installation is a major factor. A project that requires extensive site preparation, like leveling uneven ground or installing a new drainage system, will require more labor. Your design choices, such as custom patterns or mixing different tile sizes, can also influence the cost. Finally, the expertise of your installation team is crucial. A highly skilled masonry designer ensures the job is done right, preventing costly issues in the future.

Is Porcelain a Good Long-Term Investment?

Absolutely. A porcelain pool patio is one of the smartest investments you can make for your home. Its incredible durability means it can handle Long Island’s weather, from hot, sunny summers to freezing winters, without cracking, fading, or staining. Unlike other materials that require frequent upkeep, porcelain is famously low-maintenance. You won’t have to spend your weekends pressure washing or sealing it. This saves you time and money year after year, a benefit you’ll appreciate when comparing it to materials that need restoration and sealing services. Plus, a stunning, high-quality pool deck significantly enhances your property’s appeal and can increase its overall market value.

How to Hire the Right Contractor for Your Project

Choosing the right material for your pool patio is only half the battle; finding the right team to install it is just as important. Your contractor can make or break your project, turning your vision into a stunning reality or a costly headache. A great installation ensures your porcelain patio is not only beautiful but also safe, durable, and built to withstand Long Island’s specific climate challenges. Taking the time to vet your options will give you peace of mind and a finished product you can enjoy for years to come.

When you partner with an experienced team, you’re not just paying for labor. You’re investing in expertise, precision, and the assurance that the job will be done correctly from the ground up. This is especially true for materials like porcelain, which require specialized knowledge for a successful installation.

Key Questions to Ask Before You Hire

Before you sign a contract, it’s essential to ask a few key questions to gauge a contractor’s expertise. Think of it as an interview for one of the most important jobs at your home. Start by asking about their specific experience with porcelain pavers, especially for pool surrounds. You’ll want to know if they understand the unique installation methods required. Also, ask to see a portfolio of their work, paying close attention to completed porcelain pool projects. Finally, inquire about how they handle challenges specific to our area, like preparing for freeze-thaw cycles, to ensure your patio is built to last.

Why Professional Installation Is Crucial

While a DIY project can be tempting, installing a porcelain pool patio is a job best left to the pros. Professional installation is crucial for ensuring the safety and stability of your patio. Experts know how to properly prepare the ground and lay the stones to create a perfectly level, secure surface that prevents tripping hazards. They also manage critical details like creating proper drainage to guide water away from your pool’s foundation. A skilled masonry team ensures every element is perfect, protecting your long-term investment and adding significant value to your home.

Find the Perfect Porcelain for Your Project at Gappsi

Choosing the right material is one of the most exciting parts of planning your new pool patio. At Gappsi, we make it easy to find high-quality porcelain that fits your style and budget, with expert support to guide you through the entire process. We are dedicated to helping you create a beautiful, functional, and lasting outdoor space for your Long Island home.

Explore the Gappsi Showroom

Choosing the right material for your pool patio is a big decision, and pictures online can only show you so much. Visiting our showroom lets you see and feel the quality of our porcelain pavers for yourself. You can compare different textures, appreciate the subtle variations in color, and see how the light hits various finishes. We have a huge selection of stylish and durable porcelain and natural stone options perfect for any Long Island backyard. Seeing the materials in person is the best way to feel confident in your choice and truly imagine how your new poolside oasis will look and feel underfoot.

Your One-Stop Shop for Design and Materials

Planning a new pool patio involves more than just picking out pavers. You need a cohesive design that works with your home and landscape. At Gappsi, we simplify the process by being your single source for both design and materials. Our team provides comprehensive masonry design and construction services, ensuring your project is seamless from the first sketch to the final installation. You won’t have to juggle different contractors or suppliers. We handle everything, providing high-quality porcelain pavers and the expert craftsmanship needed to bring your vision to life, whether it’s for your home or a commercial property.

Get Expert Guidance from Start to Finish

With so many beautiful options, choosing the right porcelain can feel overwhelming. That’s where our team comes in. We’re here to offer expert guidance every step of the way. We’ll listen to your ideas and help you select the best porcelain for your specific needs, considering everything from slip resistance for safety around the water to durability for our Long Island climate. Our goal is to make sure you feel informed and excited about your decision. We combine our product knowledge with our extensive experience in building swimming pools to ensure your new patio is not only stunning but also perfectly suited for your lifestyle.

Related Articles

Frequently Asked Questions

Is porcelain really safe for a pool deck? I’m worried about it being slippery. This is a great question and a very common concern. The key is knowing that the porcelain used for outdoor patios is completely different from the glossy tile you might have in your bathroom. Exterior-grade porcelain pavers are specifically manufactured with a textured, matte finish that provides excellent grip, even when wet. We always use tiles with a high slip-resistance rating to ensure your pool area is as safe as it is beautiful.

Does a porcelain patio get too hot to walk on in the summer? Any surface will get warm in the direct Long Island sun, but porcelain handles heat remarkably well. Lighter-colored porcelain tiles, like sandy beiges or light grays, reflect more sunlight and stay much cooler underfoot compared to dark-colored pavers or even some natural stones. When you’re choosing your style, we can help you select a color that not only looks great but also feels comfortable on bare feet during the hottest days of summer.

You say porcelain is low-maintenance, but what about the grout lines? Won’t they get stained? This is a detail that many people worry about, but modern installation techniques have made it much less of a concern. We use high-performance grouts that are designed to resist stains, mold, and mildew. Also, because porcelain pavers are so precisely manufactured, we can install them with very narrow grout lines. This creates a sleek, seamless look and means there’s simply less grout to worry about cleaning in the first place.

Porcelain sounds more expensive upfront. Is it really worth the cost compared to concrete or other pavers? It’s true that the initial investment for porcelain can be higher than for some other materials. However, it’s important to think about the total cost over the life of your patio. Materials like concrete and natural stone require regular sealing and are more prone to staining or cracking, which leads to ongoing maintenance costs. Porcelain doesn’t need sealing and resists stains and weather damage, so you save a significant amount of time and money on upkeep year after year. It’s a long-term investment in a hassle-free backyard.

Can you install porcelain pavers directly over my old concrete patio? This is a possibility, but it depends entirely on the condition of your existing concrete. For a porcelain installation to last, it needs a perfectly stable and level base. If your current patio has major cracks, is uneven, or has drainage issues, it’s not a suitable foundation. A professional needs to assess the site to determine the best approach, which often involves removing the old concrete to properly prepare the base from scratch. It ensures your new patio will be flawless for decades.

Share this page:
A homeowner and residential home extension builder shaking hands over building plans.

How to Hire Residential Home Extension Builders

Building on Long Island comes with its own unique set of rules. From navigating the specific zoning laws in your village to choosing materials that can withstand our coastal weather, a home extension here requires local expertise. A beautiful addition does more than just add space; it should complement your home’s style and feel like it was always meant to be there. This is especially true in our diverse architectural environment. To get it right, you need a team that understands the local landscape. This guide is designed for Long Island homeowners like you, covering everything from permits to finding experienced residential home extension builders who know how to build for our community.

Key Takeaways

  • Choose Your Builder Wisely: Your project’s success hinges on your builder, so look past the portfolio. Verify their license and insurance, speak with recent references, and ask detailed questions during your consultation to confirm their expertise and communication style.
  • Protect Your Budget: Smart financial planning is essential for a successful project. Always get detailed quotes that break down costs, be cautious of low-ball estimates, and include a contingency fund of 15-20% to handle any surprises without stress.
  • Get It All in Writing: A handshake is not a contract, so protect yourself with a detailed written agreement. It should specify the project scope, materials, timeline, and payment milestones, and you should use formal change orders for any mid-project adjustments.

What Is a Home Extension, and Is It Right for You?

If you love your home and neighborhood but find yourself running out of room, a home extension might be the perfect solution. An extension is simply a way to add more living space to your existing house, whether it’s a new room, a second story, or a converted garage. It allows you to customize your home to fit your family’s changing needs without the stress and expense of moving. From creating a dedicated home office to building a spacious in-law suite, a well-designed extension can completely transform how you live in your home.

Deciding if an extension is right for you comes down to your goals, budget, and how much disruption you’re willing to handle. These projects can add significant value and function to your property, but they require careful planning. The first step is understanding the different types of extensions and figuring out which one aligns with your vision. Exploring your options will help you create a space that not only meets your immediate needs but also serves your family for years to come. A professional home remodeling team can guide you through the entire process, from initial design to final construction.

Single-Story Additions

A single-story addition expands your home’s footprint on the ground level. This is a fantastic way to add a specific room you’ve always wanted, like a bright sunroom, a family game room, or a much-needed guest bedroom. Because it’s built on one level, this type of extension can often be integrated seamlessly with your home’s existing layout, improving its flow and functionality. It’s a popular choice for adding a master suite on the main floor or expanding a kitchen to create a large, open-concept living area. The key is to design a space that feels like it was always part of the original home.

Multi-Story Additions

When you need a significant amount of new space, a multi-story addition is an excellent option. This involves adding rooms on multiple levels, or even adding an entire second story to your home. This type of project can double your square footage, making it possible to add multiple bedrooms and bathrooms, a spacious media room, or a private mother-in-law suite. While it’s a more complex undertaking, a multi-story addition is a powerful way to get the space you need without sacrificing your yard. You can see examples of these large-scale transformations on the Gappsi YouTube channel, which showcases what’s possible when you build up instead of out.

Sunrooms and Enclosed Patios

A sunroom or enclosed patio is the perfect way to bridge the gap between your indoor and outdoor living areas. These additions are designed with large windows to let in plenty of natural light, giving you a comfortable spot to enjoy the beauty of your backyard year-round, no matter the weather. A sunroom can serve as a cozy reading nook, a vibrant playroom, or a beautiful dining area for entertaining guests. Similarly, enclosing a patio creates a versatile, protected space for relaxing or hosting gatherings. These additions are a wonderful way to enhance your lifestyle and make the most of your Long Island property.

Garage and Loft Conversions

If you’re looking for a creative way to add living space without changing your home’s footprint, consider converting your garage or attic. These underutilized areas hold incredible potential. A garage can be transformed into a home gym, a guest suite, or a functional home office. Likewise, an attic or loft can become a charming bedroom, a quiet study, or a fun home theater. Since you’re working within the existing structure, garage and loft conversions can often be a more streamlined and cost-effective project than building a brand-new addition from the ground up. It’s all about reimagining the space you already have.

How to Choose a Home Extension Builder

Choosing a builder for your home extension is one of the most important decisions you’ll make during your renovation. This is the team you’re trusting to transform your living space, so it’s essential to find a partner who is skilled, reliable, and a good fit for your vision. Think of it as assembling your dream team for a major project. The right builder acts as more than just a contractor; they are a guide, helping you make informed decisions about design, materials, and budget. A little research upfront can save you from major headaches down the road and ensure your project runs smoothly from the initial design to the final walkthrough.

Finding the right fit means looking beyond the price tag. You want a company with a proven track record, a commitment to quality, and a communication style that works for you. This process involves several steps, from verifying credentials to speaking with past clients. Each step gives you a clearer picture of who you’ll be working with for the next several months. By focusing on a few key areas, you can confidently select a builder who will not only meet your expectations but exceed them, bringing your dream extension to life with professionalism and care. The following steps will help you evaluate potential builders and make a choice you feel great about.

Check for Licenses, Insurance, and Certifications

Before you even look at a portfolio, make sure any builder you consider has their paperwork in order. This is a non-negotiable first step. A reputable builder must be licensed to work in your area and carry both liability insurance and workers’ compensation. This protects you from financial risk if an accident happens on your property. Don’t just take their word for it; ask for proof of their license and insurance policies. A professional company will have this information ready and will be happy to provide it. This simple check ensures you’re working with a legitimate business that adheres to local regulations and professional standards for home remodeling.

Review Their Experience and Portfolio

Once you’ve confirmed a builder is licensed and insured, it’s time for the fun part: looking at their past work. A portfolio is more than just a collection of pretty pictures; it’s proof of their experience and a window into their craftsmanship. Look for a builder with a strong track record of completing projects similar to yours. Do their designs align with your aesthetic? Pay attention to the quality of the materials and the attention to detail. A company that showcases a wide range of projects, from custom masonry to complex additions, demonstrates versatility and deep expertise. This review helps you find a team that can not only build your extension but also manage the entire process seamlessly.

Read Reviews and Ask for References

A builder’s reputation is built on the experiences of their past clients. Start by reading online reviews on various platforms to get a general sense of customer satisfaction. While a few negative comments aren’t always a deal-breaker, look for patterns in the feedback. Next, ask the builder for a list of recent references, and be sure to follow up with them. Speaking directly with former clients gives you a chance to ask specific questions about their experience. Were they happy with the communication? Did the project stay on schedule and on budget? Seeing project videos and testimonials on a platform like YouTube can also provide unfiltered insight into a builder’s work and client relationships.

Finding Reputable Builders on Long Island

When you’re ready to find a builder for your home extension on Long Island, your search should focus on quality and reputation. A great starting point is looking for builders who are active in local industry groups, as this often shows a commitment to their craft. But a truly great partner goes beyond affiliations. You want a team that is transparent, communicative, and dedicated to bringing your specific vision to life, whether you’re adding a new wing or simply enclosing a patio.

The Gappsi Standard of Excellence

To understand what to look for, it helps to have a benchmark. At Gappsi, we’ve built our reputation since 1987 on a foundation of exceptional craftsmanship and total customer satisfaction. We believe the best projects happen when you are involved and informed every step of the way. Our approach to home remodeling is centered on transparency, from the initial design to the final walkthrough. This commitment is why so many Long Island homeowners trust us not just for extensions, but for everything from swimming pools and masonry to complete landscape transformations. We bring decades of experience to every job, ensuring your project meets the highest standards of quality.

How to Evaluate Local Builder Listings

As you browse local builders, use a consistent method to assess each one. First, read their online reviews and testimonials. What past clients say is incredibly telling about a company’s work ethic and final product. Next, carefully review their portfolio. A builder should be proud to show off their work, giving you a clear picture of their style and capabilities. You can often find project galleries or even videos on their website or social media channels that showcase their past projects. Finally, pay attention to their professionalism from the very first call. A responsive, clear communicator is exactly who you want managing your project.

How to Vet a Builder Before You Hire Them

Once you have a shortlist of potential builders, it’s time to do your homework. This vetting stage is arguably the most important part of the entire process. It’s where you move beyond glossy portfolios and have real conversations to find a partner you can trust with your home and your investment. Taking the time to ask smart questions, verify credentials, and check in with past clients will give you the confidence you need to move forward and protect you from costly surprises down the road.

Key Questions to Ask During Your Consultation

Your initial consultation is more than just a sales pitch; it’s a fact-finding mission. Come prepared with questions to understand each builder’s process and expertise. A great start is asking for a detailed quote that separates material costs from labor. You should also ask about their project management style, who your main point of contact will be, and how they handle communication. Inquire about their typical timeline for a home remodeling project similar to yours and how they manage unexpected delays. A professional builder will welcome these questions and provide clear, confident answers.

Verify Their Licenses and Insurance

Never, ever skip this step. A legitimate builder must be licensed to operate in your area and carry adequate insurance. This isn’t just red tape; it’s your primary protection. Ask for a copy of their state or local license and proof of both general liability insurance and workers’ compensation. General liability covers damage to your property, while workers’ comp protects you from being liable if one of their crew members gets injured on your job site. You can often verify a contractor’s license online through state government websites. A builder who hesitates to provide these documents is a major red flag.

How to Properly Check References

Talking to past clients is the best way to get an unfiltered look at what it’s like to work with a builder. Don’t just settle for a list of names. Ask for references from projects completed in the last year that are similar in scope to yours. When you call, go beyond asking, “Were you happy with the work?” Ask specific questions like: Did the project stay on budget? Was the team respectful of your home? How did the builder handle challenges when they arose? Did they communicate clearly and consistently? You’re looking for patterns of professionalism, reliability, and quality craftsmanship, like the kind you’d see in a detailed masonry portfolio.

How to Compare Quotes Without Getting Burned

Receiving quotes for your home extension is an exciting step. It’s when your project starts to feel real. But this is also where you need to be the most careful. Comparing bids isn’t just about finding the lowest number; it’s about understanding what you’re truly getting for your money. A quote that seems like a bargain on the surface can hide major problems, from surprise costs to subpar work. To make a confident decision, you need to know how to read between the lines, identify what a comprehensive quote looks like, and spot the red flags that signal a bad deal. Think of it as your project’s first quality control check. A builder who provides a clear, detailed, and honest quote is likely to bring that same level of professionalism to the actual construction of your home.

What a Detailed Quote Should Include

A trustworthy quote is a transparent one. You should always aim to get at least three bids to have a solid basis for comparison. A professional builder will provide a quote that clearly separates the costs of materials from the costs of labor. This breakdown is essential because it helps you see exactly where your money is going and compare different offers accurately. Vague, one-line totals are a sign that a contractor might be hiding something. Also, a good contract should specify that the final payment is held until the entire home remodeling job is finished to your satisfaction, ensuring the builder is motivated to complete every last detail.

Spot Red Flags in Low-Ball Estimates

While it’s tempting to jump on the lowest offer, an unusually low bid is often a major red flag. Some contractors might give you a low price just to get the job, only to cut corners on materials or hit you with unexpected charges later. Be wary if a builder’s price magically matches the budget you mention. A true professional prices the job based on the work required, not on what they think you can pay. Choosing a builder shouldn’t be based on price alone. You need someone with proven experience and a deep understanding of Long Island’s local building codes, especially for complex projects like masonry and structural additions.

Understand Your Cost Breakdown

Before you even look at quotes, it’s helpful to have a realistic grasp of your total budget. While every project is unique, understanding the general costs of construction can provide valuable context. More importantly, always leave room in your budget for a contingency fund, typically 10% to 20% of the total project cost. This isn’t just for “what if” scenarios; it’s a practical tool for managing unexpected issues, like discovering hidden structural problems or deciding on a last-minute upgrade. Having this buffer prevents financial stress and ensures your project, whether it’s a new sunroom or a full swimming pool installation, can proceed smoothly without compromising on quality.

What Does a Home Extension Actually Cost?

Let’s talk about the numbers. While every project is unique, you can get a general idea of the investment required. A typical home addition often falls in the range of $160 to $280 per square foot. For a standard 400-square-foot room, that could mean a budget between $65,000 and $115,000. Of course, this is a starting point. The final price tag depends heavily on what you’re building. Adding a simple family room or office will cost less than a more complex space. If your extension includes a full kitchen or a luxurious primary bathroom with high-end fixtures, the cost can easily climb above $350 per square foot.

The key is to understand that you are not just paying for square footage; you are paying for the complexity, materials, and craftsmanship that go into it. A well-planned home remodeling project is an investment in your property’s value and your family’s quality of life. Working with an experienced builder who can provide a transparent and detailed quote is the best way to understand exactly where your money is going and ensure there are no surprises along the way.

Factors That Affect the Final Price

Several key factors influence the final cost of your home extension, and it’s helpful to know what they are. The location of your home, the materials you select, and local labor rates are the biggest drivers. On Long Island, both labor and materials can have different costs compared to other regions. As a general rule, your budget will be split between materials, which make up about 60% of the total, and labor, which accounts for the other 40%. Your choice of finishes can create a wide price swing. For example, selecting high-end porcelain and natural stone will have a different budget impact than choosing more standard options.

How to Budget for Permits, Materials, and Labor

A good budget goes beyond the basic costs of construction. You should also plan for an additional $10,000 to $15,000 to cover essential pre-construction expenses. This portion of the budget typically includes things like architectural plans, soil tests, and municipal permits and fees. These aren’t optional extras; they are necessary steps to ensure your project is safe, compliant, and built to last. A reputable builder will help you account for these costs upfront in their initial estimate, so you have a complete picture of the total investment required before any work begins. This transparency is a sign you’re working with a true professional.

Why You Need a Contingency Fund

No matter how carefully you plan, unexpected issues can arise during a renovation. That’s why a contingency fund is an absolute must. Think of it as a safety net for your budget. Most professionals recommend setting aside an extra 15% of your total project cost for this fund. It can cover anything from addressing a hidden structural problem discovered during demolition to a last-minute material price increase. Having this fund in place provides peace of mind and ensures that a minor hiccup doesn’t derail your entire project. It gives you the flexibility to handle surprises without compromising on the quality of your extension.

Common Mistakes to Avoid When Hiring a Builder

Hiring a builder for your home extension is a major decision, and it’s easy to feel overwhelmed. You want to find someone trustworthy who can bring your vision to life without the drama. Unfortunately, a few common missteps can turn your dream project into a stressful ordeal. Knowing what these pitfalls are ahead of time is the best way to protect your investment and your peace of mind. These mistakes are surprisingly common, but they are also completely avoidable with a little bit of foresight.

From handshake deals that leave out critical details to falling for a price that seems too good to be true, these errors can lead to budget overruns, project delays, and disappointing results. The goal isn’t to make you second guess your project, but to empower you to move forward with confidence. A professional and transparent process is the foundation of any successful build. When you work with an experienced team, they will guide you through each step, ensuring every detail is covered before the work even begins. This proactive approach is key to a smooth home remodeling experience. Let’s walk through the most frequent mistakes so you can sidestep them entirely.

Skipping the Written Contract

A verbal agreement or a simple handshake is not enough when it comes to your home. You should always get every single detail in writing. A comprehensive contract is your most important tool, acting as a roadmap for the entire project. It protects you and the builder by clearly outlining expectations, preventing misunderstandings and arguments down the line. Your contract should specify the full scope of work, a detailed list of materials, a project timeline with key milestones, and a clear payment schedule. Think of it as the official rulebook for your project. A professional builder will insist on a detailed contract before starting any work.

Paying Too Much Upfront

It’s understandable that a builder needs funds to get started, but paying the full amount before the work is complete is a huge red flag. A large upfront payment removes the builder’s incentive to finish the job to your satisfaction. In a worst case scenario, a dishonest contractor could take your money and disappear. The industry standard is a modest deposit, typically 10% to 20%, to cover initial material costs. After that, you should agree on a payment schedule tied to the completion of specific project phases. For example, you might make a payment after the foundation is poured, another when framing is complete, and so on, with the final payment due only when the project is finished and you are completely satisfied.

Choosing Based on Price Alone

Everyone loves a good deal, but when it comes to building an extension on your home, the lowest bid is rarely the best one. An unusually low estimate can be a sign of trouble, often indicating that the builder is cutting corners with subpar materials, using inexperienced labor, or planning to surprise you with extra charges later. Instead of focusing only on the price, consider the overall value. A reputable builder’s quote reflects their experience, quality craftsmanship, and use of durable materials. Investing in a well-built swimming pool or home addition means it will last for decades, saving you money on future repairs.

Ignoring Planning Permissions

The excitement of starting a new project can sometimes overshadow the less glamorous, but essential, administrative tasks. In Long Island, obtaining the correct permits from your town or village is a legal requirement for most construction projects. If your home is part of a homeowners association (HOA), you will likely need their approval as well. Ignoring these steps can lead to serious consequences, including hefty fines, work stoppages, or even being ordered to tear down the new construction. An experienced local builder will be familiar with the specific codes and permitting processes in Nassau and Suffolk counties, managing this complex step on your behalf.

Having Unclear Expectations

To get exactly what you want, you need to be crystal clear about your vision from the very beginning. Vague instructions lead to ambiguous results. Before any work starts, take the time to define every detail of your project. This includes everything from the layout and dimensions to the specific brands and models of fixtures, the type of flooring, and even the paint colors. The more detailed you are, the better. All these specifications should be written directly into your contract. This ensures there is no room for misinterpretation and helps your builder deliver a final product that perfectly matches what you had in mind.

How to Manage Your Home Extension Project

Once you’ve signed the contract, the real journey begins. Managing a home extension might sound intimidating, but it’s all about clear communication and staying organized. A great builder will guide you through every phase, but your involvement is what ensures the final result matches your vision perfectly. Think of yourself as the project’s director and your builder as the expert producer making it all happen. The key is to establish a collaborative relationship from day one.

At Gappsi, we manage the entire project from start to finish, which takes a lot of the pressure off you. We believe in a transparent process where you’re always in the loop. By breaking the project down into manageable steps, you can track progress, handle any surprises, and keep an eye on the budget without feeling overwhelmed. Let’s walk through how to keep your project running smoothly.

Set Clear Milestones and Check-Ins

Before the first hammer swings, you and your builder should agree on a series of project milestones. These are specific, measurable stages of completion, like finishing the foundation, completing the framing, or installing the windows. Having these milestones written into your contract creates a clear roadmap for the project and helps manage payment schedules.

Schedule regular check-ins, whether it’s a quick daily chat or a more formal weekly walkthrough. This is your time to see the progress firsthand, ask questions, and discuss what’s next. Consistent communication prevents misunderstandings and ensures you and your builder are always on the same page. A company that provides comprehensive home remodeling services will already have a structured system for this, making the process feel organized and predictable.

How to Handle Mid-Project Changes

Even with the best planning, changes can happen. You might decide you want different light fixtures, or your builder might uncover an unexpected structural issue. The most important thing is to handle these changes formally. Don’t rely on a verbal agreement. Instead, ask for a written “change order.”

A change order should clearly describe the new work, detail the impact on the total cost, and adjust the project timeline accordingly. Both you and your builder should sign it before any new work begins. This document protects everyone and keeps the budget transparent. It’s also smart to plan for the unexpected from the start. Many experts suggest setting aside an extra 10% to 15% of your total budget just for these kinds of situations.

Tips for Staying on Budget

Sticking to a budget is one of the biggest concerns for any homeowner. Your best defense is a detailed plan and a contingency fund. As we just mentioned, having extra funds set aside for unexpected costs is essential. You can’t predict everything, so having a financial cushion prevents a small issue from turning into a major crisis.

As a general guideline, some financial experts point to the 30% rule for home renovations, which suggests the total cost shouldn’t exceed 30% of your home’s current value. This can help you set a realistic initial budget. Throughout the project, track every expense against your initial cost breakdown. By monitoring spending and approving any changes in writing, you can maintain financial control and finish your project without any stressful surprises.

Extending Your Home on Long Island: What Makes It Different

Adding an extension to your home is a big step, and on Long Island, it comes with its own set of unique considerations. Our beautiful island has a distinct character, from its charming villages to its stunning coastline, and these features play a big role in any construction project. Understanding the local landscape is the first step to a successful home addition.

First, Long Island is a patchwork of towns and villages, each with its own specific zoning laws and building codes. What’s permissible in one part of Nassau County might be different from the rules in Suffolk. This is why working with a builder who has deep local experience is so important. They can help you manage the permitting process and ensure your project complies with all local requirements.

Given our coastal geography, you also have to think about the environment. Many areas are subject to special regulations to protect against flooding and erosion. Your extension might need to be elevated or built with specific materials that can withstand salt air and strong storms, following state guidance for building in coastal areas. A knowledgeable builder will know exactly how to source the right materials and apply the proper construction techniques to protect your investment from the elements.

Finally, think about style. Long Island boasts a wonderful mix of architectural designs, from historic colonials to sleek, modern homes. A great extension doesn’t just add space; it complements the existing structure and enhances your home’s character. In our competitive real estate market, a thoughtful, well-integrated addition can significantly increase your property’s value, making it a smart investment for the future.

Related Articles

Frequently Asked Questions

How long will my home extension project take? The timeline for a home extension can vary quite a bit depending on the project’s size and complexity. A straightforward, single-room addition might take a few months, while a large, multi-story extension could take six months or longer. Factors like obtaining permits, weather delays, and the availability of specific materials also play a role. A professional builder will provide you with a detailed project schedule upfront so you have a clear understanding of the timeline from start to finish.

Will I need to hire a separate architect for the design? Not necessarily. While you can certainly hire an architect first and then find a builder, many homeowners prefer working with a design-build company. A design-build firm, like Gappsi, handles the entire process for you, from the initial design concepts and architectural drawings to the final construction. This integrated approach streamlines communication and ensures the design is perfectly aligned with your budget and the practicalities of construction.

Can I live in my house during the construction? For most home extensions, you can absolutely continue living in your home. A professional construction team will take great care to minimize disruption to your daily life. They will seal off the work area to control dust and debris and maintain a clean, organized job site. If the project involves a major renovation of a critical area like your only kitchen, you might need to make temporary arrangements, but your builder will discuss this with you well in advance.

How do you ensure the new addition matches the style of my existing home? Making an extension feel like a natural part of your home is a top priority. This is achieved through careful planning during the design phase. We pay close attention to matching architectural details like rooflines, window styles, and exterior materials, whether it’s siding, brick, or stone. The goal is to create a seamless transition so that the finished project looks like it was always meant to be there, not like an afterthought.

What is the first step I should take if I’m interested in a home extension? The best first step is to define your goals and gather inspiration. Think about what you need from the new space and collect photos of extensions or rooms you love. Once you have a general idea of your vision, the next step is to schedule a consultation with an experienced builder. This initial meeting allows you to discuss your ideas, understand what’s possible with your property, and get a preliminary sense of the budget and process.

Share this page:
A Cambridge pavers installer on Long Island, NY, reviewing design plans for a new patio.

What to Ask a Cambridge Pavers Installer on Long Island NY

When you think about your dream backyard, what do you see? Maybe it’s a spacious patio for summer barbecues, an elegant deck surrounding your pool, or a cozy fire pit area for cool evenings. The foundation for all these beautiful outdoor living spaces is the ground you stand on. Cambridge Pavers provide a durable and stylish base for any backyard vision, offering endless design possibilities with their wide range of colors and textures. But turning that dream into a functional, long-lasting reality requires more than just great materials. It takes skill and experience. This guide will show you how to plan your project and select a trusted Cambridge pavers installer on Long Island ny who can bring your perfect outdoor oasis to life.

Key Takeaways

  • Get strength and style in one package: Cambridge Pavers are popular on Long Island for a reason; their ArmorTec technology ensures they won’t fade or crack from our weather, while a huge selection of styles lets you create a completely custom look.
  • Prioritize the installer, not just the brand: The success of your paver project depends almost entirely on proper installation. A solid, well-prepped base is essential to prevent sinking and shifting, so vetting your contractor is the most important step you will take.
  • Use pavers to unify your entire yard: Don’t just stop at the patio. Pavers are the perfect material to create a cohesive flow between your driveway, walkways, pool deck, and outdoor kitchen, tying your whole property together.

What Are Cambridge Pavers and Why Are They a Long Island Favorite?

If you’ve started dreaming up a new patio or driveway for your Long Island home, you’ve likely come across the name Cambridge Pavers. They are a top choice in our area, and for good reason. Unlike poured concrete that can crack under pressure, Cambridge Pavingstones are individually manufactured from a special high-density concrete. This process makes them incredibly strong and resistant to water absorption, which is key to preventing the freeze-thaw damage that can ruin an outdoor space over time. For homeowners in Suffolk and Nassau counties, this means investing in a beautiful, durable surface that will look great for years to come.

The real magic of Cambridge Pavers is how they combine this durability with stunning design. They provide the foundation for countless outdoor living projects, from elegant pool decks to welcoming walkways and robust driveways. When you choose Cambridge, you’re not just getting a functional surface; you’re getting a key design element that defines your home’s curb appeal and backyard atmosphere. Gappsi’s expertise in masonry design allows us to transform these high-quality materials into a space that perfectly reflects your style and needs, ensuring the final result is both beautiful and built to last.

How ArmorTec Technology Stands Up to Long Island Weather

One of the biggest advantages of Cambridge Pavers is their exclusive ArmorTec technology. Think of it as a built-in shield for your investment. Every paver has a super-strong outer layer made from a mix of fine sand and granite aggregates. This process creates a smooth, dense surface that’s tough enough to handle anything Long Island throws at it. From scorching summer sun to freezing winter temperatures, ArmorTec ensures your pavers won’t fade or wear down. It also provides excellent protection against damage from snowplows and de-icing salts, a major concern for any Long Island homeowner. This innovative technology is why your patio or driveway will keep its rich color and texture season after season.

Find Your Perfect Color, Style, and Design

Your outdoor space should be a reflection of you, and Cambridge Pavers makes that possible with a huge selection of colors, styles, and patterns. Whether you love the classic look of European cobblestone or the rustic charm of natural stone, there’s a collection for you. For example, the Renaissance collection offers timeless, old-world elegance, while the Ledgestone series provides a more rugged, natural appearance. This variety gives you the freedom to create a truly custom look. You can mix and match colors, create intricate borders, or design a stunning centerpiece for your patio. With so many options, it’s easy to design a space that feels completely unique to your home.

How Do Cambridge Pavers Compare to Other Options?

On Long Island, the two most popular paver brands you’ll hear about are Cambridge and Nicolock. Both are excellent local companies known for producing high-quality, durable products. In terms of strength, they are very similar, both meeting industry standards of over 8,000 PSI, which means they are built to last for decades. The main differences often come down to specific color blends and textures. One brand might have the exact shade of gray or the specific surface finish that you fall in love with. The most important factor, however, isn’t choosing one brand over the other. It’s ensuring they are installed correctly. Proper masonry installation is what guarantees your pavers will withstand our climate and look beautiful for a lifetime.

Where to Use Cambridge Pavers in Your Yard

One of the best things about Cambridge Pavers is their incredible versatility. They aren’t just for one type of project; you can use them to define, connect, and beautify almost any part of your property. From creating a grand entrance to designing a private backyard retreat, these pavers provide a durable and stylish foundation. Their wide range of colors and patterns means you can create a cohesive look that flows from your front yard to your back, tying all your outdoor living spaces together. Let’s explore some of the most popular ways to incorporate them into your Long Island home.

Design Stunning Patios and Pool Decks

A paver patio is the heart of a backyard, creating a perfect spot for morning coffee, family barbecues, or relaxing evenings. Cambridge Pavers allow you to design a surface that complements your home’s architecture and your personal style. For homes with a pool, these pavers are an excellent choice for the surrounding deck. Their durable, non-slip surface provides a safe and beautiful area for lounging and entertaining. A professionally installed paver deck from a swimming pools company can transform your pool area into a true resort-like oasis, giving you a seamless and elegant space to enjoy all summer long.

Create Welcoming Driveways and Walkways

Your driveway and front walkway make the first impression on every guest who visits your home. Swapping out cracked asphalt or plain concrete for Cambridge Pavers instantly adds curb appeal and value. Thanks to their ArmorTec technology, these pavers are engineered to withstand the weight of vehicles and the rigors of Long Island’s freeze-thaw cycles without cracking or fading. Our expert masonry services ensure your driveway and walkways are not only beautiful but also built to last, creating a warm and welcoming path to your front door.

Build Your Dream Outdoor Kitchen and Entertainment Space

Think beyond just the ground you walk on. Cambridge Pavers are the ideal foundation for a complete outdoor living room. You can use them to build a dedicated floor for an outdoor kitchen, a cozy fire pit area, or even a multi-level patio with built-in seating walls. The design possibilities are endless. Pavers can define different “zones” in your yard, creating a distinct area for cooking under a pergola, dining with family, or playing on a nearby turf lawn. By integrating pavers with other features like pavilions and pergolas, you can build a fully functional and stylish outdoor entertainment space.

How to Choose a Cambridge Pavers Installer on Long Island

Selecting the right installer for your Cambridge Pavers is just as important as choosing the pavers themselves. The most beautiful stones can fail if the foundation beneath them is weak. A great contractor ensures your new patio, walkway, or driveway not only looks stunning on day one but also withstands Long Island’s changing seasons for years to come. Your investment deserves expert hands. Finding a qualified professional means looking beyond a simple price quote and evaluating their credentials, experience, and process. Here’s what to focus on to find a reliable Cambridge Pavers installer for your home.

Look for Certifications and Manufacturer Credentials

A great starting point in your search is to look for installers who are recognized by Cambridge. While Cambridge provides a tool to find a professional installer, they also make it clear that you are responsible for vetting the contractor’s quality of work. Think of a certification as a sign that the installer has a strong relationship with the manufacturer and is familiar with their specific products and installation guidelines. It shows a level of commitment to their craft. However, it shouldn’t be your only criteria. Use it to create a shortlist of potential candidates, then continue your research from there to ensure they meet your standards for quality and service.

Review Their Experience and Local Portfolio

You wouldn’t hire an artist without seeing their paintings, so don’t hire a paver installer without seeing their work. Ask for a portfolio of completed projects, paying close attention to jobs that are similar to what you have in mind. A top-tier installer will have a robust gallery of local Long Island projects. This proves they have experience with the area’s specific soil conditions and weather patterns. Gappsi showcases a wide range of completed masonry projects that demonstrate our expertise. Don’t hesitate to ask for addresses of recent installations you can drive by to see the quality of their work in person. An experienced contractor will be proud to share their successes.

Confirm They Are an Authorized Product Source

This is a simple but critical step. Make sure your installer sources their materials from an authorized Cambridge distributor. This guarantees you are receiving genuine, first-quality Cambridge Pavers that are covered by the manufacturer’s warranty. Asking this question protects you from contractors who might try to substitute a lower-quality, look-alike product to cut costs. A reputable installer will be transparent about their supply chain and will order your materials promptly after you sign a contract. Working with a company that values high-quality materials, from natural stone pavers to composite decking, ensures the integrity and longevity of your entire project.

Know the Red Flags to Avoid

Trust your gut, but also know the common warning signs of a less-than-reputable contractor. The biggest red flag is an unusually low price. While it might seem tempting, a bargain bid often means the contractor is cutting corners on essential steps like base preparation, using subpar materials, or hiring unskilled labor. These shortcuts can lead to a failing patio or driveway that costs much more to fix in the long run. Also, be wary of anyone who pressures you for a quick decision, asks for a large cash deposit, or is unwilling to provide a detailed written contract, license, or proof of insurance. A true professional will offer a clear, comprehensive plan for your home improvement project.

Clearing Up Myths About Paver Installation

When you’re planning a big project like a new patio or driveway, it’s easy to get tangled up in conflicting advice. Pavers are a fantastic investment for your Long Island home, but a few common myths can cause confusion and lead to costly mistakes. Let’s clear the air on some of the biggest misconceptions about paver installation so you can move forward with confidence. Knowing the facts will help you protect your investment and ensure you get the beautiful, long-lasting results you’re looking for.

Myth: Any Contractor Can Install Them

This is one of the most dangerous myths out there. While many contractors might offer paver installation, the quality of the work can vary dramatically. The long-term success of your patio or driveway depends far more on the installation technique than on the brand of paver you choose. A proper installation requires a solid, well-compacted base, the right type of sand, and secure edge restraints to prevent shifting. An inexperienced installer can cut corners on these critical steps, leading to sinking, separating, and an uneven surface down the road. Your best bet is to work with a team that has deep masonry experience and a proven track record.

Myth: Pavers Need Zero Maintenance

While pavers are incredibly durable, they aren’t completely maintenance-free. Think of it like any other valuable part of your home; it needs a little care to stay in top shape. Over time, dirt and organic matter can accumulate, and weeds might try to sprout in the joints. Regular cleaning with a broom and a simple rinse can make a big difference. To keep your pavers looking brand new and protect them from stains and weathering, it’s also a good idea to have them professionally cleaned and sealed every few years. These simple restoration and sealing services are a small investment that protects the beauty and integrity of your hardscape for years to come.

Myth: You Always Have to Remove the Old Surface

Many homeowners assume that installing pavers means a full demolition of their old concrete driveway or patio. That’s not always the case. In some situations, pavers can be installed directly over an existing concrete surface, which can save you significant time and money on the project. This method, called an overlay, is only possible if the underlying concrete is stable, level, and free of major cracks. A professional installer can assess your existing surface to determine if it’s a suitable base. This flexibility is a great benefit of working with porcelain and natural stone, but getting an expert opinion first is essential to ensure the job is done right.

How Much Does Cambridge Paver Installation Cost on Long Island?

Talking about cost is one of the most important parts of planning any home project. While it’s impossible to give a one-size-fits-all price without seeing your space, we can walk through the different elements that contribute to the final cost of a Cambridge paver installation. Understanding these factors will help you set a realistic budget and know what to expect when you get a quote. On Long Island, several local conditions influence pricing, from labor rates to the ground beneath your feet. A professional installation is an investment in your home’s beauty and function, and knowing where your money is going is the first step. Let’s break down the costs so you can feel confident in your decisions.

What Factors Affect Your Project’s Cost?

The total price of your paver project depends on more than just the square footage. Costs on Long Island are often higher than national averages because of factors like local labor rates, material delivery fees, and specific town regulations. The unique geology of our area, including high water tables and sandy soil, means your contractor needs to do extra work to create a stable foundation. Our harsh winters, with their constant freeze-thaw cycles, also demand a more robust installation process to prevent shifting and cracking. The complexity of your design, such as intricate patterns, curves, or multiple levels, will also influence the labor involved. A quality masonry project accounts for all these variables from the start.

Understanding Material vs. Labor Costs

Many homeowners are surprised to learn that the pavers themselves are not the biggest part of the budget. The material cost for Cambridge pavers is very similar to other major brands on Long Island, typically falling between $4 and $10 per square foot. Where the costs really differ is in the labor and preparation. The final project cost is more dependent on the design’s complexity, the amount of excavation and site prep required, and the skill of the installation team. Choosing a simple pattern versus a complex one can significantly change the labor hours needed. This is why focusing solely on the price per paver can be misleading. Instead, it’s better to consider the total value of a durable, well-crafted installation.

Why Proper Site Prep Is So Important

You can have the most beautiful porcelain and natural stone pavers, but if the foundation is weak, the project is destined to fail. The base of your patio, walkway, or driveway is the most critical part of the entire installation. If it’s not done right, the surface won’t last, no matter how high-quality the pavers are. Proper site preparation involves excavating to the right depth, laying and compacting a sub-base of aggregate, and ensuring proper drainage. This process prevents the pavers from sinking, shifting, or becoming uneven over time, especially with Long Island’s weather. Skipping these steps might lower the initial price, but it will almost certainly lead to expensive repairs down the road.

Why Choose Gappsi for Your Cambridge Paver Project

Choosing the right installer is just as important as choosing the right paver. You need a team with the technical skill to ensure your investment lasts and the creative vision to bring your dream yard to life. At Gappsi, we combine decades of hands-on experience with a comprehensive approach to outdoor design, making us a trusted partner for homeowners across Long Island. We handle every detail, so you can focus on enjoying the beautiful results.

Our Decades of Masonry and Paving Experience

When you’re installing a new patio or driveway, you want it done right the first time. With a foundation in masonry and paving that dates back to 1987, our team has the deep expertise required for a flawless Cambridge Paver installation. We understand the specific challenges of Long Island’s soil and climate, ensuring your project is built on a proper base that prevents shifting and settling. Our long-standing reputation is built on quality craftsmanship and a commitment to using the best materials. We don’t just lay pavers; we build lasting outdoor spaces designed to be enjoyed for generations.

Visualize Your Project with Custom 3D Designs

It can be hard to picture how different paver styles, colors, and patterns will look in your own yard. That’s why we offer custom 3D design services to take the guesswork out of the process. We can create a detailed, realistic rendering of your project, allowing you to see exactly how your new patio, walkway, or pool deck will integrate with your home and landscape. You can experiment with different options and make confident decisions before any work begins. Our design portfolio shows how we turn initial ideas into stunning, functional realities for our clients.

Go Beyond Pavers with Our Full Outdoor Services

Your paver project is often just one piece of a larger outdoor vision. Instead of juggling multiple contractors, you can rely on Gappsi for a completely cohesive design. We are a full-service home improvement company offering everything from landscape design and swimming pools to outdoor kitchens and pavilions. Our integrated approach ensures every element of your backyard works together beautifully. We can build a Cambridge Paver patio that flows seamlessly into a lush garden, a custom pool area, or a fully equipped outdoor entertainment space, creating a unified and polished look for your entire property.

Proudly Serving Homeowners Across Suffolk and Nassau County

We are a Long Island company through and through. For over 30 years, Gappsi has been proud to serve homeowners throughout Suffolk and Nassau County, from the North Shore to the South Shore. Our team lives and works in the same communities as our clients, giving us a unique understanding of local styles, needs, and regulations. We’ve built a strong reputation by consistently delivering high-quality work and exceptional service to our neighbors. When you work with us, you’re partnering with a local expert who is committed to improving our shared community one beautiful backyard at a time.

Related Articles

Frequently Asked Questions

How long will my Cambridge Pavers last, and what kind of maintenance do they need? With a professional installation, your Cambridge Pavers are built to last for decades. The real key is the solid foundation prepared underneath them. As for upkeep, it’s much simpler than you might think. Regular sweeping and an occasional rinse with a hose will handle most of the cleaning. To keep the color vibrant and protect against stains, we recommend having your pavers professionally cleaned and sealed every few years. It’s a small step that protects your investment and keeps your patio or driveway looking brand new.

What’s the real difference between Cambridge and other paver brands like Nicolock? Both Cambridge and Nicolock are excellent, high-quality brands that we trust and use often. They are very similar in terms of strength and durability. The main difference usually comes down to your personal taste. One brand might offer a specific color blend or a unique texture that perfectly matches the vision you have for your home. The most important decision isn’t the brand name on the paver, but the quality of the hands that install it.

Why is the installation so much more important than the paver brand I choose? You can have the most expensive, beautiful paver in the world, but if it’s put on a weak base, it will fail. The long-term success of your project depends entirely on the preparation of the ground beneath it. A proper installation involves excavating the soil to the correct depth and building a compacted base that won’t shift during Long Island’s freeze-thaw cycles. This is what prevents sinking, wobbling, and weeds, ensuring your investment looks great for a lifetime.

Can I really install pavers over my old concrete patio or driveway to save money? Sometimes, yes. This process is called an overlay, and it can be a great way to reduce project time and cost. However, it’s only an option if your existing concrete is in very good shape, meaning it’s level, stable, and has no major cracks. An expert needs to evaluate the surface to see if it’s a suitable foundation. If it’s not, attempting an overlay will only lead to problems down the road.

I’m worried about picking the wrong color or style. How can I be sure I’ll love the final look? This is a completely valid concern, especially with so many beautiful options available. Looking at photos and samples is a great start, but it can still be hard to imagine the full picture. This is why we use 3D design software. We can create a realistic rendering of your home with the new pavers, allowing you to see exactly how different colors, patterns, and styles will look. It takes all the guesswork out of the decision, so you can feel completely confident in your choice.

Share this page: