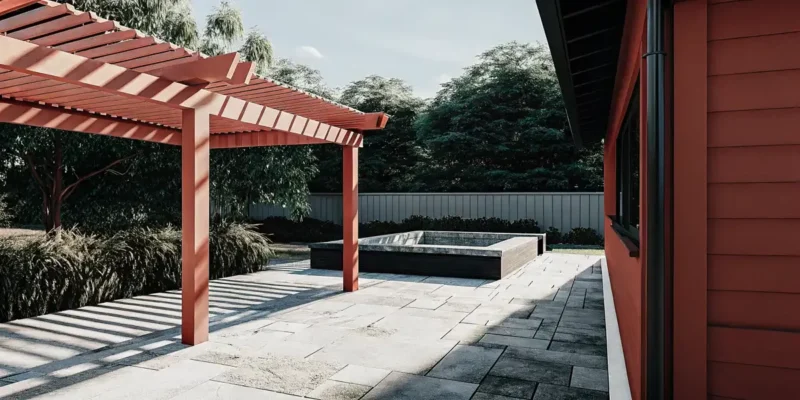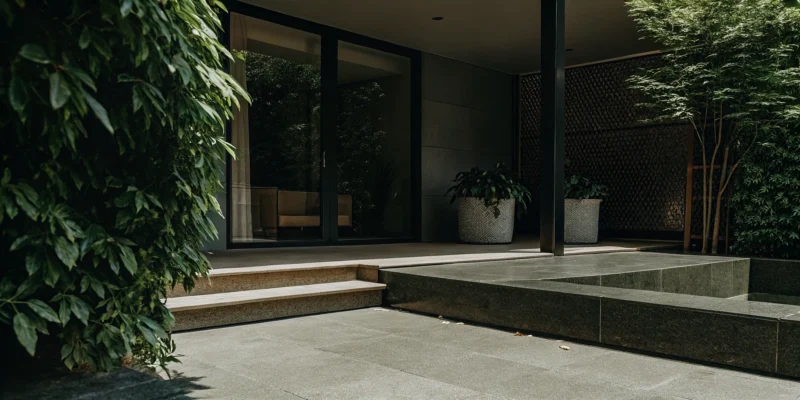
Large gray porcelain pavers on a modern patio with steps and surrounding lush greenery.

The Homeowner’s Guide to Porcelain Pavers

Creating a beautiful outdoor living area starts from the ground up. The surface you choose is the foundation for your entire design, influencing everything from furniture choices to the overall mood. While natural stone is beautiful and concrete is practical, neither offers the perfect blend of style and simplicity. Porcelain pavers give you the freedom to design without compromise. You can achieve the rich, warm look of hardwood or the elegant veining of Italian marble, all in a material that resists stains, fading, and frost. This versatility allows you to create a truly custom, high-end look that’s also incredibly easy to live with.

Key Takeaways

  • Porcelain is built to last: These pavers are engineered to be incredibly dense and strong, so they can handle harsh weather without cracking or fading. Their textured surface also provides great slip resistance, making them a safe and practical choice for pool decks and walkways.
  • Get the look you want without the hassle: You can have the beautiful appearance of natural stone or wood without the constant upkeep. Porcelain comes in a huge range of colors, styles, and sizes, giving you the creative freedom to design a custom outdoor space that feels uniquely yours.
  • Save time and money in the long run: While the initial cost can be higher than some materials, porcelain’s durability makes it a smart investment. You will not need to spend money on yearly sealing, and cleanup is simple, which means more time enjoying your space and less time working on it.

What Are Porcelain Pavers?

If you’re planning a new patio, walkway, or pool deck, you’ve likely come across porcelain pavers as an option. Think of them as the modern, high-tech sibling to traditional paving materials. They are incredibly dense, strong, and versatile tiles specifically engineered for outdoor use. Unlike indoor porcelain tiles, these pavers are thicker and built to withstand everything from harsh weather to heavy foot traffic, making them a fantastic choice for creating beautiful and long-lasting outdoor living spaces. Let’s look at what makes them unique.

How They’re Made

Porcelain pavers are crafted from a very pure, refined clay that is pressed and fired in a kiln at extremely high temperatures. This intense process creates a tile that is exceptionally dense and non-porous. Because the material is so compact, it absorbs very little water (less than 0.5%), which is key to its durability. This manufacturing method is what gives our collection of porcelain and natural stone pavers their signature strength, consistency, and resistance to the elements, ensuring your outdoor space looks great for years to come.

Porcelain vs. Natural Stone

Many homeowners love the look of natural stone, but it often comes with high maintenance. Porcelain offers the best of both worlds. Advanced printing technology allows porcelain pavers to realistically mimic the appearance of materials like slate, travertine, and bluestone, complete with authentic-looking textures and color variations. The key difference is consistency and upkeep. While every piece of natural stone is unique, porcelain provides a uniform look and requires far less maintenance. It doesn’t need sealing and is highly resistant to staining, giving you a flawless finish with minimal effort.

Porcelain vs. Concrete

Concrete pavers are a classic choice, known for creating traditional and rustic looks. However, they are porous, making them susceptible to stains, fading from UV rays, and moisture damage over time. Porcelain, on the other hand, is much less porous. This quality makes it highly resistant to stains from spills like oil or wine and prevents fading, so the color stays vibrant. While concrete pavers can offer certain textural styles, our expert masonry services often incorporate porcelain for projects that demand a sleek, modern aesthetic and superior long-term performance with less maintenance.

Why Choose Porcelain Pavers?

When you’re planning a new patio, walkway, or pool deck, the material you choose is one of the biggest decisions you’ll make. You want something that looks beautiful, of course, but it also needs to stand up to the demands of outdoor living. This is where porcelain pavers truly shine. They offer a unique combination of strength, style, and simplicity that makes them a top contender for any outdoor project.

Porcelain pavers are a fantastic choice for homeowners who value both performance and appearance. Unlike some materials that require you to compromise on one for the other, porcelain delivers on all fronts. From its incredible durability against Long Island weather to its minimal maintenance needs, it’s a material designed for modern life. If you’re looking for a surface that will stay beautiful for years with very little effort, exploring the benefits of porcelain and natural stone is a great place to start. Let’s look at the specific reasons why so many homeowners are making the switch.

Durability and Weather Resistance

One of the most compelling reasons to choose porcelain pavers is their exceptional durability. These pavers are manufactured by firing refined clay at extremely high temperatures, creating a dense and incredibly strong material. For Long Island homeowners, this means you get a surface that can handle everything from hot, sunny summers to freezing winters without cracking, chipping, or fading.

Because they are non-porous, porcelain pavers absorb very little water. This makes them highly resistant to frost damage, a common issue with other materials. They also stand up to UV rays, so the color you choose today will remain vibrant for years to come. This resilience makes them a reliable foundation for any landscape design, ensuring your investment looks great season after season.

Stain Resistance and Easy Maintenance

If you love entertaining outdoors but dread the cleanup, porcelain pavers are a game-changer. Their dense, non-porous surface naturally resists stains from common culprits like spilled wine, oil from the grill, or fallen leaves. Unlike porous materials that can soak up spills and develop stubborn marks, messes on porcelain typically sit on the surface, waiting to be wiped away.

This quality also means porcelain pavers don’t require sealing. You can skip the yearly chore of applying a sealant and still have a patio that resists mold, mildew, and moss growth. A simple sweep and occasional wash with soap and water are all it takes to keep them looking pristine. This low-maintenance appeal frees you from constant upkeep, giving you more time to simply enjoy your beautiful outdoor space.

Superior Slip Resistance

Safety is always a top priority, especially in areas that get wet. Porcelain pavers are engineered with a textured surface that provides excellent traction, making them a safe choice for pool decks, patios, and walkways. Even when wet, they offer a reliable grip underfoot, reducing the risk of slips and falls. This feature provides peace of mind, particularly for families with children or for anyone who enjoys hosting poolside gatherings.

When designing an area around one of Gappsi’s custom swimming pools, choosing a safe and durable decking material is critical. The inherent slip resistance of porcelain makes it an ideal partner for any poolside environment, combining safety with sophisticated style.

Endless Design Versatility

Your outdoor space should be a reflection of your personal style, and porcelain pavers offer the flexibility to bring any vision to life. They are available in a vast range of colors, patterns, and finishes. You can achieve the timeless look of natural stone like travertine or slate, or the warm, rustic feel of wood planks, all without the maintenance headaches associated with those materials.

Porcelain pavers also come in large formats and modular shapes, allowing for modern, clean lines and creative patterns. This design versatility means you can create a cohesive look that flows from your patio to your walkways and even complements your home’s architecture. With so many options, you can design a truly custom outdoor living area that is both beautiful and functional.

Excellent Long-Term Value

While the initial cost of porcelain pavers can be higher than some other options like concrete, they represent an excellent long-term investment. Their incredible durability means you won’t be spending money on frequent repairs or replacements. Plus, since they don’t require sealing or specialized cleaning, you’ll save significantly on maintenance costs over the years.

When you factor in their longevity and low upkeep, porcelain pavers often prove to be a more economical choice over their entire lifespan. By choosing a material that is built to last, you are investing in your home’s value and your own enjoyment for decades to come. You can explore a wide selection of high-quality options at the Gappsi Store to find the perfect fit for your project.

Designing with Porcelain Pavers

Now for the fun part: bringing your vision to life. Porcelain pavers are like a blank canvas for your outdoor space, offering an incredible range of design possibilities. Whether your style is rustic and natural or sleek and modern, there’s a porcelain paver that will perfectly match your home’s personality. Let’s look at how you can use these versatile pavers to create a stunning patio, pool deck, or walkway that you’ll love for years to come.

Achieve Natural Stone and Wood Looks

If you love the timeless beauty of natural materials but worry about the upkeep, porcelain is your answer. Advanced manufacturing techniques allow porcelain pavers to beautifully mimic the look of materials like travertine, slate, and even rich hardwoods. You can get the warm, inviting appearance of a wood-plank deck without ever having to worry about splinters, staining, or rot. Gappsi offers a stunning selection of porcelain and natural stone pavers that give you these authentic looks combined with incredible durability, so your patio looks perfect season after season.

Create Modern and Minimalist Spaces

For a clean, contemporary aesthetic, porcelain pavers are an unbeatable choice. Their crisp lines and uniform finish create a sophisticated and uncluttered look that is perfect for modern homes. Using large-format pavers can make a space feel bigger and more seamless by minimizing grout lines. This sleek appearance is ideal for creating a smooth flow from your indoor living area to your outdoor patio, blurring the lines between the two. A well-designed landscape using these pavers can transform your backyard into a chic, minimalist retreat for relaxing or entertaining.

Explore a Spectrum of Colors

Your color options with porcelain pavers are nearly limitless. You can find them in a whole spectrum of shades, from brilliant whites and soft beiges to cool silvers and dramatic, dark grays. Lighter colors are great for pool decks because they stay cooler under the sun and can make a smaller patio feel more open and airy. Darker tones, on the other hand, can create a bold, modern statement. This wide color palette allows you to perfectly coordinate your new outdoor surface with your home’s siding, trim, or even your garden’s color scheme. You can browse options at the Gappsi Store to find the perfect hue for your project.

Your Porcelain Paver Installation Options

One of the best things about porcelain pavers is their incredible versatility, which extends to how they’re installed. Unlike some materials that lock you into one method, porcelain gives you options. This flexibility means you can find the perfect installation technique for your specific project, whether you’re creating a new patio from scratch or covering an old one. Understanding these methods will help you plan your project and see what’s possible for your outdoor space.

Dry-Laid Over Sand or Gravel

This is a classic, mortar-free technique that works beautifully for ground-level patios and walkways. The pavers are set on a compacted base of sand or gravel. This method allows rainwater to permeate the joints and drain naturally into the ground, which is great for your landscape. It also makes future adjustments simple. If a paver ever needs to be replaced, you can lift it out without having to break any mortar. Proper base preparation is key, so ensuring the ground is perfectly graded and compacted is a job best left to a masonry professional for a flawless, long-lasting finish.

Install Over Existing Concrete

Have an old, tired concrete patio that’s seen better days? You don’t necessarily have to tear it out. If the concrete slab is structurally sound, you can install porcelain pavers directly on top of it. This is a fantastic way to completely transform a space with less demolition, mess, and expense. It’s an ideal solution for upgrading pool decks, patios, and front porches. Before installation, the existing surface needs to be clean and properly prepared to ensure a strong bond and prevent issues down the line. Our restoration services can help get your old concrete ready for its new, beautiful porcelain overlay.

Use Raised Pedestal Systems

For rooftops, balconies, or sloped areas, a raised pedestal system is an innovative solution. Adjustable pedestals are placed on the ground to support each corner of the pavers, creating a perfectly level, elevated surface. This method is excellent for drainage, as water flows through the open joints and away underneath. The space below the pavers can also cleverly hide irrigation lines or electrical wiring for lighting, keeping your patio looking clean and uncluttered. This system is ideal for creating modern outdoor living areas, especially when integrated with features like our custom pavilions and pergolas.

DIY vs. Professional Installation

While a simple, dry-laid porcelain paver path might seem like a manageable weekend project, most installations benefit from professional expertise. Achieving a durable, beautiful finish requires precise site preparation, accurate grading for drainage, and specialized tools for cutting the dense porcelain material. A professional ensures the foundation is solid and that the final surface is perfectly level and secure. For a project that adds significant value to your home and will last for decades, working with an experienced landscape design and construction team is the best way to guarantee a successful outcome.

Understanding Porcelain Paver Costs

Budget is a huge part of planning any home improvement project, and it’s smart to have a clear picture of the investment before you begin. When it comes to porcelain pavers, the initial price tag for the material is just one piece of the puzzle. The total cost depends on the specific tiles you choose, the complexity of your project, and the installation method you select. While porcelain can have a higher upfront cost compared to some other materials, its incredible durability and low maintenance requirements often make it a more economical choice in the long run. Let’s break down what goes into the cost of a beautiful new porcelain paver patio, walkway, or pool deck so you can plan your project with confidence.

Cost Per Square Foot

When you start shopping, you’ll find that the porcelain pavers themselves typically cost between $5 and $15 per square foot. This price point is generally higher than standard concrete pavers, which might make you pause. However, it’s important to think about the long-term value. Because porcelain is so dense and non-porous, you won’t be spending money on sealants every few years. Its resistance to stains and fading means you also avoid the cost and hassle of intensive cleaning or replacements down the line. Viewing your new patio or pool deck as a long-term investment helps put the initial material cost into perspective. The right porcelain and natural stone pavers can truly transform your space for decades.

Price Comparison with Other Materials

So, how does porcelain stack up against other popular choices? Compared to concrete pavers, porcelain offers a distinctly sleek and modern look with far less maintenance. Concrete is a workhorse, often preferred for its traditional textures and ability to handle heavy loads on driveways. Natural stone, like travertine or bluestone, offers unique, organic beauty but can be porous, requiring regular sealing to prevent stains and weather damage. Porcelain gives you the best of both worlds: you can get the stunning look of natural materials with superior performance and consistency. This makes it an excellent choice for homeowners who want a high-end look without the demanding upkeep, blending beauty with practicality. Our masonry design experts can help you compare these options side-by-side.

Factors That Affect Total Cost

The price per square foot for the tiles is just the starting point. Several other factors will influence your project’s final budget. The size and style of the pavers you select play a role, as do any intricate patterns or designs that require more complex cuts. The installation method is another major variable; a dry-laid patio on a sand base will have a different cost than one installed over a concrete slab or on a raised pedestal system. Finally, site preparation, such as grading the land or building a proper foundation, and other necessary materials will contribute to the total cost. Understanding these elements is key to creating a realistic budget for your home remodeling project.

How to Maintain Your Porcelain Pavers

One of the best parts of choosing porcelain pavers is how incredibly easy they are to care for. Unlike other materials that demand constant attention, porcelain is designed for a low-maintenance lifestyle. You can spend less time on upkeep and more time enjoying your beautiful outdoor space, whether it’s a new patio, pool deck, or walkway. Keeping your pavers looking brand new is straightforward and doesn’t require harsh chemicals or intensive labor.

The non-porous surface of porcelain pavers is the key to their simple maintenance. This quality prevents dirt, grime, and liquids from penetrating the surface, making cleanup a breeze. A little routine care is all it takes to preserve their beauty for years to come. If you ever run into tougher grime or want a professional touch, Gappsi also offers expert cleaning and restoration services for all types of outdoor surfaces, ensuring your entire property looks its best. Following a few simple steps will protect your investment and keep your outdoor living area looking pristine season after season.

Simple Routine Cleaning

For day-to-day upkeep, maintaining your porcelain pavers is as simple as a quick sweep or rinse. Use a broom to clear away leaves, dirt, and other debris that can accumulate. About once a month, or whenever they start to look a little dusty, give the area a good rinse with a garden hose. For a slightly deeper clean, you can use a mixture of mild soap and warm water. Just apply the solution, gently scrub with a soft-bristle brush, and rinse it all away. There’s no need for abrasive cleaners or power washers, which can sometimes damage the joint material between pavers. This gentle approach is all you need to keep your patio looking fresh.

How to Handle Spills and Stains

Accidents happen, but with porcelain pavers, they don’t have to become permanent problems. Because porcelain is virtually non-porous, spills like wine, oil, or barbecue sauce sit on the surface instead of soaking in. This gives you plenty of time to clean them up without worrying about lasting stains. In most cases, you can simply wipe the spill away with a damp cloth. For stickier or dried-on messes, a little mild detergent and a soft sponge will do the trick. This impressive stain resistance is a major advantage over porous materials like concrete or some natural stones, which often require regular sealing to protect them from discoloration. With porcelain, you get lasting beauty without the extra work.

Long-Term Inspection

While porcelain itself is incredibly durable, it’s a good practice to perform a quick inspection of your paved area once or twice a year. Take a walk across your patio or walkway and look at the overall installation. Check to see if any pavers have shifted and ensure the joints between them are still filled and stable. The extreme durability of porcelain means it resists cracking, fading, and scratching, so you’re unlikely to find issues with the pavers themselves. These inspections are more about ensuring the foundation and jointing material are holding up as they should. A high-quality installation from an experienced masonry team is the best way to prevent long-term issues and ensure your outdoor space remains solid and beautiful for decades.

Ready to Start Your Project?

Feeling inspired to begin your outdoor transformation? Bringing a new patio, walkway, or pool deck to life is an exciting process, and choosing the right materials is the first step toward creating a space you’ll love for years. With so many possibilities, it helps to have a clear plan and an expert partner to guide you.

The most enjoyable part is often selecting the perfect look. With porcelain pavers, you can achieve the rich appearance of natural wood or stone without the intensive maintenance. Whether you envision a sleek, modern outdoor kitchen or a rustic, charming garden path, there’s a style to match. We can help you explore a wide selection of high-quality porcelain and natural stone options at our showroom to find the one that fits your home’s aesthetic perfectly.

Once you’ve found your style, the next step is planning the installation. One of the great advantages of porcelain is its versatility. Depending on your property, pavers can be laid over a sand and gravel base, installed directly over an old concrete slab, or even placed on a pedestal system for a rooftop deck. You don’t have to figure this out alone. Our team of masonry experts will evaluate your space and recommend the best installation method for a durable and beautiful result.

Seeing how these materials can completely transform a space is often the best source of inspiration. You can watch our team in action and view a gallery of completed projects on our YouTube channel to gather ideas for your own home. When you’re ready to discuss your project, our designers are here to help you through every step, from the initial concept to the final installation.

Related Articles

Frequently Asked Questions

Are porcelain pavers slippery, especially around a pool? This is a great question, and a really important one for safety. Porcelain pavers designed for outdoor use are manufactured with a textured surface to provide excellent slip resistance. This makes them a fantastic and safe choice for pool decks, walkways, and any area that might get wet. You get that sleek, beautiful look without having to worry about creating a slippery surface.

How do porcelain pavers hold up to Long Island’s winter weather? They perform exceptionally well. The key is their incredibly low water absorption rate. Because the pavers are so dense, they absorb almost no water, which prevents them from cracking during the freeze-thaw cycles we experience every winter. Unlike more porous materials that can take on water and then split when it freezes, porcelain is built to resist that kind of damage, making it a very durable choice for our climate.

Do porcelain pavers get too hot for bare feet in the summer? Any surface will get warm in direct summer sun, but porcelain gives you options to manage the heat. Lighter-colored pavers will reflect more sunlight and stay significantly cooler to the touch than dark-colored ones. If you’re planning a pool deck or a patio where you’ll often be barefoot, choosing a white, light gray, or beige porcelain paver is a smart move to keep the surface comfortable.

Can I use porcelain pavers for my driveway? While standard porcelain pavers are perfect for patios and walkways, driveways require a bit more strength to handle the weight of vehicles. There are specific, thicker porcelain pavers engineered for this purpose. If you love the look of porcelain for your driveway, it’s definitely possible, but it’s critical to work with a professional to ensure you select and install a product that is rated for vehicular traffic.

Is professional installation really necessary for porcelain pavers? For the best and most lasting results, yes. While a very small, simple path might be a manageable DIY project, a patio or pool deck installation is more complex. Proper installation requires precise grading for drainage, a perfectly compacted base to prevent shifting, and specialized tools to cut the dense porcelain material cleanly. A professional installation ensures your investment is secure, looks flawless, and will last for decades without issues.
Share this page:
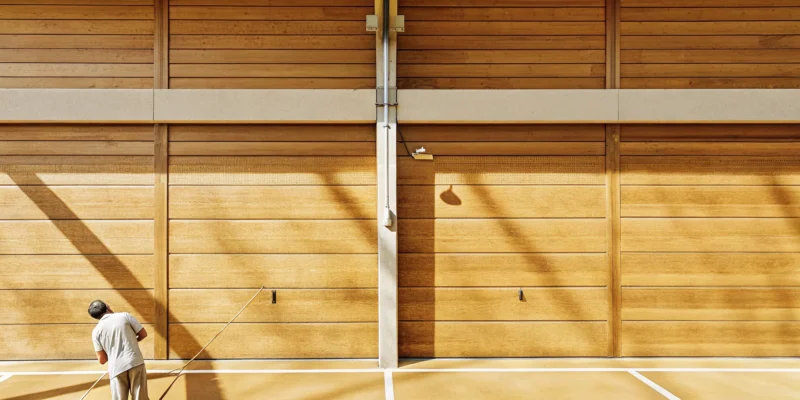
A custom sports game court from top builders on Long Island, NY.

3 Best Sports Game Courts Builders on Long Island

Your backyard sports games court should be a direct reflection of your family’s personality and passions. Forget a one-size-fits-all approach; modern courts are a canvas for customization. You can choose your favorite team’s colors, add a family logo at center court, or include lines for multiple sports like basketball and pickleball. Bringing this unique vision to life requires a builder with creativity and precision. Finding the right partner is key to transforming your ideas into a functional and beautiful reality. We’ve put together this guide to help you connect with the top sports game courts builders on Long Island, NY, who specialize in creating personalized, high-performance courts.

Key Takeaways

  • Select a builder with local expertise: Your project’s success hinges on a team that understands Long Island’s building codes, offers high-quality materials, and has a strong portfolio of completed sports games courts.
  • Customize your court to fit your style: Modern sports games courts are highly personalizable, allowing you to choose the size, colors, logos, and even add lighting to create a space that perfectly matches your family’s needs.
  • Understand the key cost factors: Your total investment depends on the court’s size, your choice of surface material, the amount of site preparation needed, and any custom features you decide to include.

Who Are the Top Game Court Builders on Long Island?

Adding a sports games court to your backyard is an exciting project, but choosing the right team to build it is a big decision. You need a company that understands your vision, uses durable materials, and knows the ins and outs of Long Island’s local building codes. To help you get started, I’ve put together a list of some of the most reputable builders in Nassau and Suffolk counties. Each one brings something different to the table, from specialized tennis court construction to fully customizable multi-sport surfaces.

Whether you’re dreaming of a classic basketball court for family games or a professional-style surface for serious training, one of these companies can help bring your project to life. Exploring your options is the first step toward creating a space for endless fun, exercise, and memories right at home. These builders have a proven track record for creating exceptional synthetic turf and sports games courts across the area.

Gappsi

Gappsi is a fantastic choice if you’re looking for a team that handles everything from start to finish. We specialize in creating beautiful custom basketball courts and manage the entire process, from the initial design to the final installation. Our focus is on using high-quality materials and expert craftsmanship to build a court that perfectly fits your backyard and your family’s needs. We’re also very familiar with local regulations in towns from Huntington to Southampton, so we can guide you through obtaining the necessary permits. With Gappsi, you get a personalized space built for years of convenient play and family fun.

R.S. Site & Sports

If tennis is your game, R.S. Site & Sports is a name you should know. They are a leading builder of tennis courts on Long Island, offering everything from new construction to repairs and resurfacing. Their team works on projects of all sizes, from private backyard courts to larger public facilities. They have expertise in different court systems, including advanced ‘post-tension’ concrete that ensures excellent durability and performance. R.S. Site & Sports manages the entire project, including site preparation and drainage, making them a reliable choice for any tennis court project.

Tour Greens Long Island

For those who love customization, Tour Greens Long Island offers highly customizable backyard basketball courts using the innovative VersaCourt tile system. You can personalize your court with a wide range of sizes, colors, and even add custom logos or game lines for multiple sports. Their court surface is designed to provide great traction while being gentler on players’ joints, which is a great feature for athletes of all ages. As a certified VersaCourt partner, Tour Greens Long Island delivers high-quality installations that are tailored specifically to your preferences and style.

What Types of Game Courts Can You Build?

When you decide to add a sports games court to your backyard, you’re not just adding a feature, you’re creating a destination for fun, fitness, and family memories. The beauty of building a court today is the sheer amount of choice you have. It’s no longer a one-size-fits-all situation. Your decision can be perfectly tailored to your family’s favorite activities, the amount of space you have, and your long-term vision for your outdoor living area. Think about how you want to use the space. Are you raising the next basketball star, or do you prefer a leisurely game of pickleball with friends? Maybe you need a versatile area that can adapt as your kids’ interests change.

Modern sports games courts are about more than just a concrete slab and a hoop. You can choose from advanced surfacing materials that are easier on the joints, customize the colors to match your home’s aesthetic, and even add lines for multiple games. A professional builder can walk you through the process, from assessing your property for proper drainage and orientation to helping you select the features that make the most sense for your goals. To help you get started, let’s explore some of the most popular types of courts Long Island homeowners are building right now.

Classic Basketball Courts

There’s something timeless about a backyard basketball court. It’s a space for practicing free throws, playing a friendly game of H-O-R-S-E, or hosting a neighborhood 3-on-3 tournament. A dedicated basketball court is perfect for families who are passionate about the sport. You can customize everything from a compact half-court for shooting practice to a full-size court for more competitive play. Gappsi specializes in creating custom basketball courts right here on Long Island, managing the entire project from the initial design to the final installation. This ensures your court is built exactly to your specifications, giving you a professional-quality playing experience just steps from your door.

Professional-Style Tennis Courts

For the serious tennis player, having a court at home is the ultimate dream. It means no more booking court time or traveling to a club for a match. Building a professional-style tennis court requires precision and expertise, from ensuring the base is perfectly level to selecting the right surface for your style of play. Whether you prefer a classic hardcourt or another surface, a quality installation is key to proper ball bounce and player safety. Companies like R.S. Site & Sports focus on tennis court construction and resurfacing in the Long Island area, delivering professional-grade courts that meet the standards of dedicated players and provide a top-tier experience for years of enjoyment.

Popular Pickleball Courts

Pickleball has taken the world by storm, and for good reason. It’s easy to learn, fun for all ages, and less physically demanding than tennis, making it an incredibly social and accessible sport. Because a pickleball court is smaller than a tennis court, it’s a fantastic option for backyards with limited space. You can build a dedicated court just for pickleball or have the lines added to a basketball or multi-sport court. As its popularity grows, more homeowners are choosing to install pickleball courts to bring this fun and engaging activity home. It’s a wonderful way to get the whole family moving and laughing together.

Versatile Multi-Game Courts

Why choose just one sport when you can have several? A multi-game court is the ultimate solution for active families with diverse interests or for anyone who loves to host gatherings. These courts are designed with blended lines to accommodate a variety of sports like basketball, pickleball, volleyball, and even roller hockey, all in one space. Using high-quality, modular surfaces like those from VersaCourt ensures the area is safe, durable, and comfortable for every activity. A versatile court design maximizes your investment and your backyard’s potential, guaranteeing there’s always a new game to play and that everyone in the family has something to enjoy.

How to Choose the Right Game Court Builder

Choosing the right builder is the most important step in bringing your dream backyard court to life. You want a partner who understands your vision, has the technical skill to execute it, and makes the process smooth from start to finish. A great builder doesn’t just lay down a surface; they create a space for family fun and friendly competition that will last for years. To find the best fit for your project, focus on a few key areas: their experience, the materials they use, their local expertise, the support they offer, and their reputation in the community.

Proven Experience and a Strong Portfolio

When you start talking to builders, you want to see a track record of success. A contractor with proven experience will be able to manage the entire project, from initial site excavation to the final line painting. Ask to see a portfolio of their completed Sports Games Courts. This will give you a clear idea of their craftsmanship and design capabilities. Look for a variety of projects that show their versatility. A strong portfolio is more than just a collection of pictures; it’s proof that the builder can deliver on their promises and create high-quality, functional, and beautiful courts for homeowners just like you.

High-Quality Materials and Surfaces

The performance and longevity of your court depend heavily on the materials used. A top-tier builder will offer a range of high-quality surfaces designed for safety and optimal play. Some advanced court systems are engineered to provide better traction and reduce stress on players’ joints. Don’t hesitate to ask builders what materials they recommend and why. A knowledgeable contractor will explain the benefits of different options, from the base construction to the surface tiles. They should be committed to using professional-grade materials that ensure your court withstands the elements and years of play.

Local Knowledge and Permit Guidance

Building a game court on Long Island often involves navigating local town regulations and securing permits. This process can be confusing and time-consuming if you’re not familiar with it. A builder with deep local knowledge is invaluable. They will understand the specific requirements in your town, whether it’s in Nassau or Suffolk County. The best builders handle this for you, drawing up the necessary plans and managing the permit application process. This expertise not only saves you from potential headaches but also ensures your project is fully compliant with local laws from day one.

Warranty and Long-Term Support

Your investment in a game court should come with peace of mind. A reliable builder will stand behind their work with a solid warranty. Ask potential contractors about the warranties they offer for both their labor and the materials they use. Some high-end court surface systems even come with limited lifetime warranties, which speaks volumes about their durability. Beyond the initial installation, consider a builder who offers long-term support, such as restoration and sealing services, to keep your court in top condition for years to come. This shows a commitment to a long-term relationship with their clients.

Stellar Reputation and Client Reviews

Finally, do your homework on the builder’s reputation. Look for client reviews and testimonials on their website and other third-party platforms. What are past customers saying about their experience? A builder with a stellar reputation will have a history of satisfied clients who praise their professionalism, communication, and the quality of the final product. Industry awards and recognition can also be a strong indicator of a builder’s commitment to excellence. You’re not just buying a product; you’re hiring a team, so make sure it’s one that Long Island homeowners trust.

How Can You Customize Your Game Court?

One of the best parts of adding a game court to your backyard is making it completely your own. Forget cookie-cutter designs. A modern sports game court is a blank canvas, ready to be tailored to your family’s style, the sports you love, and the layout of your property. From choosing team colors to adding features that let you play after dark, customization is what transforms a simple playing surface into the heart of your home’s outdoor entertainment. Let’s look at a few ways you can personalize your design.

Custom Colors, Logos, and Linework

This is where you can really let your personality shine. You’re not limited to standard green or gray. You can select from a wide range of colors to match your home’s aesthetic, represent your favorite sports team, or create a vibrant, energetic space for the kids. Beyond the surface color, you can add custom colors and logos to make the court uniquely yours. Imagine your family’s initial at center court or the logo of your alma mater. You can also have multiple game lines painted for different activities, turning a basketball court into a multi-sport zone with lines for volleyball or four-square. This flexibility ensures your court is both beautiful and functional for years of fun.

Integrated Lighting for Nighttime Games

Why let the fun stop when the sun goes down? Integrating a professional lighting system means you can enjoy your game court for evening matches, late-night shootarounds, or family parties. Modern LED lighting is energy-efficient and can be strategically placed to provide bright, even coverage across the entire playing surface without creating harsh glare. A well-designed lighting plan also considers your neighbors, directing light downward to keep your yard illuminated without causing a disturbance. This simple addition dramatically increases the hours of enjoyment you’ll get from your investment, making it a truly year-round feature for your home.

Protective Fencing and Netting

Practicality is just as important as aesthetics, and that’s where fencing and netting come in. Installing protective fencing around your game court is a smart move for both safety and convenience. It keeps stray basketballs, tennis balls, and pickleballs contained, so you spend more time playing and less time chasing them down the street or into your garden beds. Fencing options range from classic chain-link to more decorative styles that blend seamlessly with your landscaping. You can also add rebounder nets for practice or high netting for sports like tennis to ensure every serve stays in play. This thoughtful addition protects your property and keeps the game moving.

Flexible Sizing and Layouts

You don’t need a massive estate to build the game court of your dreams. One of the biggest advantages of a custom build is that the design can be adapted to fit your yard. Whether you have a sprawling lawn or a more compact space, a skilled builder can create a layout that works. Popular options include half-courts for basketball, which offer plenty of room for practice and games of 3-on-3, or dedicated pickleball courts that fit neatly into smaller areas. A professional site assessment will help you determine the best placement and dimensions to maximize your available space without overwhelming your backyard. The goal is to create a court that feels like a natural part of your landscape.

What’s the Investment for a Long Island Game Court?

Figuring out the budget for a backyard game court is a lot like planning any other major home improvement project. The final price tag depends on several moving parts, from the size of the court to the materials you choose. It’s not just about the court itself, but also the groundwork needed to make it last and the custom features that make it uniquely yours. Think of it as an investment in your home’s value and your family’s enjoyment for years to come. A well-built court becomes the centerpiece for making memories, staying active, and even hosting friendly neighborhood competitions.

To give you a clear picture of what goes into the total cost, let’s break down the main factors. Understanding these components will help you plan your budget and have a productive conversation with your builder. We’ll cover everything from the type and size of your court to the essential site prep and finishing touches that complete the project. This way, you can go into the process with confidence, knowing exactly what to expect and how each decision impacts the final number. It’s all about creating a space that fits your family’s needs and your property’s potential.

Your Court’s Type and Size

The most significant factor influencing your budget is the size and type of game court you envision. A compact half-court for basketball will naturally have a different price point than a full-size tennis court or a versatile multi-game surface. On Long Island, popular sizes for backyard basketball often range from 20 by 24 feet to 30 by 60 feet. The larger the footprint, the more materials and labor are required for the base and surface. Deciding how you want to use the space, whether for a single sport or multiple activities, is the first step in defining the scope and cost of your sports games courts project.

Choice of Surface Material

Your choice of surface material plays a huge role in both the cost and the playing experience. While traditional asphalt or concrete are options, many homeowners are opting for advanced surfaces like modular interlocking tiles. These tiles are often recommended because they are softer on your joints, stay cooler during hot summer days, and allow for excellent drainage after it rains. This means less downtime and a more comfortable game. High-quality materials might have a higher upfront cost, but they often provide better longevity and performance, which you can explore at the Gappsi Store. Investing in a durable, safe surface ensures your court will be a family favorite for years to come.

Site Prep and Drainage Solutions

Before any surface can be installed, your yard needs to be properly prepared. This is a critical step that you can’t afford to overlook. The process involves excavating the area, ensuring the ground is perfectly level, and installing a solid base, often made of concrete or compacted stone. Proper drainage is also essential to prevent water from pooling on the surface or damaging the foundation. If your yard has a significant slope or poor soil, more extensive site work will be needed, which will affect the overall cost. A professional builder will assess your property and include the necessary masonry and prep work in their quote.

Permits, Labor, and Custom Features

Beyond the physical court, your investment includes several other key elements. Most towns on Long Island require a building permit for a game court, a process that involves submitting detailed plans for approval. A full-service company like Gappsi handles these logistics for you. Labor is another major component of the budget, covering the skilled team that handles everything from excavation to installation. Finally, custom features like unique color schemes, painted logos, adjustable hoops, and integrated lighting for nighttime play will add to the final cost. These personalized touches are what truly make the court your own, and you can see examples on our YouTube channel.

What to Expect During the Installation Process

Bringing a professional Sports Games Court to your backyard is an exciting project, and knowing what happens next can make the experience feel seamless. A great builder will walk you through a clear, step-by-step process, turning your vision into a reality without the guesswork. From the first design sketch to the final net installation, every phase is carefully planned and executed. This ensures your project stays on track and that you end up with a high-quality court built to last.

Step 1: Design and Site Assessment

This is where your dream court starts to take shape. The process begins with a collaborative design session and a thorough site assessment. Your builder will meet you at your home to walk the property, discuss your goals, and measure the proposed area. This initial meeting is all about understanding how you want to use the space. We’ll talk about which sports you want to play, your preferred aesthetics, and any custom features you have in mind.

This personalized approach ensures the final design fits your family’s needs and complements your landscape perfectly. At Gappsi, we specialize in creating custom Sports Games Courts that are tailored to each Long Island backyard. We handle everything from the initial layout to helping you select the right colors and materials, making sure your vision is the foundation of the entire project.

Step 2: Handling Permits and Local Regulations

Dealing with paperwork is probably the least exciting part of any home improvement project, but it’s a critical step. Most towns across Long Island require a building permit for a new Sports Games Court. The good news is that you don’t have to figure this out on your own. An experienced local builder will manage the entire permit process for you.

This service includes preparing the necessary architectural plans, filling out the applications, and submitting everything to your local building department. Because we have decades of experience with home remodeling projects in Suffolk and Nassau counties, we understand the specific requirements of each town. We take the lead on coordinating with officials so you can stay focused on the more enjoyable aspects of your project, like planning your first game.

Step 3: Base Construction and Surface Installation

With the designs approved and permits in hand, the physical construction begins. The first and most important task is building a solid foundation. This typically involves excavating the area and installing a durable base, often made of concrete or compacted stone, to ensure your court remains level and stable for years. Proper site preparation and drainage solutions are key to preventing future issues like cracking or puddling.

Once the base is cured and ready, the team will install your chosen court surface. Whether you’ve selected a classic acrylic hard court or modern interlocking tiles, this is when your court truly starts to look like a professional playing surface. Our masonry experts construct foundations with precision, guaranteeing a flawless and long-lasting base for any type of game surface you choose.

Step 4: Finishing Touches and Project Timeline

The final step is all about the details that make your court complete and ready for action. This includes painting the precise lines for your chosen sports, installing the basketball hoops or tennis nets, and putting up any surrounding features. Many homeowners choose to add lighting for nighttime play or protective fencing to keep the ball in bounds.

A typical installation for a Sports Games Court can take anywhere from two to six weeks from start to finish. This timeline depends on factors like the project’s complexity, weather conditions, and the permit approval process. We add all the finishing touches, including high-quality fences and netting, to ensure your court is not only beautiful but also safe and functional. Our team works efficiently to get your court ready for play as soon as possible.

Backyard vs. Commercial Game Courts: What’s the Difference?

Thinking about adding a game court is an exciting first step toward bringing more fun and activity right to your home. As you begin planning, you’ll notice that a court designed for your backyard is quite different from one built for a commercial space like a park or school. The main distinctions come down to how the space will be used, who will be using it, and your overall goals. A backyard court is all about personal enjoyment and fitting into your landscape, while a commercial court is built for high traffic and often needs to meet regulation standards. Understanding these differences will help you make the right choices for your property and budget.

Space, Sizing, and Surface Needs

One of the biggest distinctions is size. A backyard game court is designed to fit your specific property. While popular sizes for home basketball courts are often 20 by 24 feet or 30 by 60 feet, the final dimensions are completely flexible. The goal is to create a functional playing area that works with your yard’s unique layout. Commercial courts, however, usually stick to standardized, regulation dimensions to accommodate official games and larger groups. The surface material is another key variable. For your home, you can choose from a variety of materials, including comfortable synthetic turf or classic clay, depending on the look and feel you want. Commercial courts typically require ultra-durable surfaces designed to withstand constant use and weather exposure.

Budgeting and Available Features

Your budget and desired features will also guide your project. A backyard game court offers incredible opportunities for personalization. You can truly make it your own by choosing custom colors, adding your family’s initials or a favorite team’s logo, and including lines for multiple games. This flexibility allows your court to be a unique reflection of your family’s personality. We can help you design a court that integrates beautifully with your overall landscape and outdoor living space. Commercial courts, on the other hand, usually have a larger initial budget. This is due to their size, the need for heavy-duty materials, and adherence to regulatory standards for safety and playability. Their features are more standardized, focusing on performance and durability for a high volume of players.

Why a Game Court Is a Great Investment for Your Home

Adding a game court to your home is one of the best decisions you can make for your family and your property value. It’s more than just a place to play, it’s a long-term investment in fun, health, and your home’s appeal. When you’re ready to build a space for endless activity, a custom court delivers on every front.

Enjoy Year-Round Fun and Increase Property Value

Imagine stepping outside for a quick game whenever you want, with no need to book a time or drive anywhere. Having your own court is a fantastic way to stay active, unwind after a long day, and create lasting memories with friends and family. Beyond the daily enjoyment, a professionally installed game court is a unique feature that adds significant appeal and value to your property. For potential buyers, especially on Long Island, a home with its own dedicated space for recreation stands out from the rest, making it a smart financial move.

Creating a Complete Outdoor Entertainment Zone

A game court can be the centerpiece of a fully integrated outdoor entertainment area. Think beyond just the court itself and picture how it fits into your larger backyard vision. You can design your sports games courts to complement a nearby swimming pool, patio, or outdoor kitchen, creating a seamless flow for entertaining. Customization is key to making the space truly yours. You can choose team colors, add a family logo, and even include lines for multiple games like basketball and pickleball. This transforms a simple playing surface into a versatile hub for activity that perfectly matches your home’s aesthetic and your family’s interests.

Related Articles

Frequently Asked Questions

How long does the whole process take, from our first meeting to the first game? The complete timeline can vary, but a good rule of thumb is to plan for several weeks to a few months. The initial design and permit approval phase can take a few weeks on its own, depending on your town’s specific requirements. Once the permits are secured and the work begins, the actual on-site construction and installation typically lasts between two and six weeks. Factors like weather and the complexity of your design can influence the schedule, but a professional builder will keep you updated every step of the way.

What if my backyard isn’t perfectly flat or has limited space? This is a very common situation, so don’t worry. A key part of the installation process is professional site preparation. A skilled team will assess your property and can perform the necessary excavation and grading to create a perfectly level and stable foundation for your court. If space is a concern, there are many creative solutions, such as building a compact half-court for basketball or a dedicated pickleball court, which requires less room. A good designer will help you maximize the potential of whatever space you have.

What kind of maintenance is required to keep my court in good shape? Modern sports games courts are designed to be durable and relatively low maintenance. Your main task will be to keep the surface clear of leaves, branches, and other debris to ensure it’s always ready for play and to prevent staining. An occasional rinse with a garden hose is usually enough to handle dust and dirt. For a deeper clean, or to address any issues that may arise over time, we offer professional restoration and sealing services to keep your court looking and playing its best for years.

Do I really need a permit for a backyard game court? Yes, in most towns on Long Island, a building permit is required for a project of this scale. This process ensures that your court is built safely and complies with all local zoning and construction codes. While it might seem like a hassle, it’s a crucial step that protects your investment and your property’s value. The best part of working with an experienced builder is that they handle this entire process for you, from drawing up the plans to communicating with the building department.

Can I choose different surfaces for different sports, like a softer one for basketball? Absolutely. The surface you choose has a huge impact on the playing experience, and you have many options. Many homeowners are moving away from traditional concrete and opting for advanced modular tile surfaces. These systems are specifically engineered to provide better shock absorption, which is easier on the joints during high-impact activities like basketball. They also offer better traction and drain quickly after it rains, so you can get back to your game faster.

Share this page:
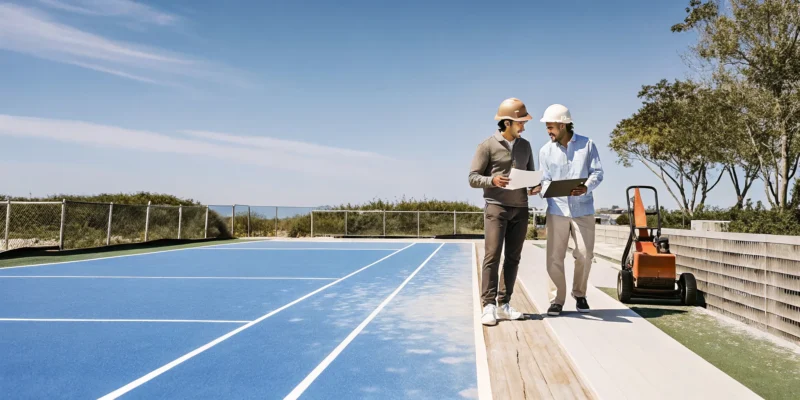
Pickleball builders on Long Island NY discussing court construction plans beside a blue pickleball court.

Find the Best Pickleball Builders on Long Island, NY

Building a pickleball court on Long Island isn’t the same as building one anywhere else. Our unique environment, with its freeze-thaw cycles and diverse soil types, demands specific expertise. A builder who doesn’t understand these local challenges can leave you with a court that puddles, cracks, or shifts over time. Furthermore, every town in Nassau and Suffolk County has its own zoning laws and permit requirements. This is why finding experienced pickleball builders on Long Island, NY, is so critical. You need a team that not only builds a great court but also handles the complex logistics to ensure your project is done right and fully compliant.

Key Takeaways

  • Focus on proven local experience: A builder who knows Long Island’s specific zoning laws, permit requirements, and soil conditions is critical. This local knowledge ensures your court is built correctly and avoids future headaches with compliance or structural issues.
  • Look for a comprehensive plan: A professional builder provides a complete service, not just a playing surface. Your quote should clearly outline every step, including site preparation, drainage, surfacing, fencing, and lighting, so there are no surprise costs.
  • Consider the long-term value: A pickleball court is more than a fun feature; it’s an investment in your home and your family’s well-being. It adds property value and creates a built-in destination for health, social connection, and making memories right in your backyard.

Finding the Best Pickleball Court Builder on Long Island

With pickleball’s popularity soaring across Long Island, adding a court to your backyard is a fantastic way to bring the fun home. But finding the right builder is key to ensuring your investment lasts for years. You need a team that understands the local landscape, from soil conditions to town permits. A great builder will guide you through every step, turning your vision into a reality that’s both beautiful and functional. Let’s look at what makes a premier local expert and what you should look for when comparing your options.

Gappsi: A Premier Local Expert

When you want a job done right, you turn to a local expert with a long-standing reputation. Gappsi has been designing and building custom outdoor spaces in Nassau and Suffolk Counties since 1987. We specialize in creating custom pickleball courts tailored to your property, whether that means building from scratch or converting an old tennis court.

Our process starts with a detailed consultation to understand exactly what you’re looking for. We handle everything from site preparation and drainage to surfacing and fencing, ensuring your court not only performs perfectly but also complements your home’s aesthetic. Hiring a professional team like ours guarantees your court is built correctly and meets all local requirements, giving you peace of mind and a durable, high-performance playing surface.

What to Look for in Other Specialists

As you research builders, you’ll find other specialists on Long Island. A quality builder will manage the entire court-building process from start to finish, making the experience straightforward for you. Look for companies with a strong portfolio of completed projects that showcase their craftsmanship. Ask about the materials they use; some may offer unique surfaces designed for enhanced durability and performance.

A reputable builder will also have deep experience with custom designs, including multi-sport layouts if you want more than just pickleball. Most importantly, they should be committed to building courts that meet official standards for play. You can see examples of our complete project transformations to get a feel for what a start-to-finish professional build looks like.

What Services Do Pickleball Court Builders Offer?

When you decide to add a pickleball court to your Long Island home, you’re not just hiring someone to paint lines on a slab of concrete. Professional builders offer a complete suite of services to take your project from a simple idea to a fully functional and beautiful addition to your property. A true expert handles every detail, ensuring your new court is built to last and perfectly integrated into your backyard. From initial ground-breaking to installing the final net, they manage the entire process so you can focus on planning your first match.

New Court Construction

Building a pickleball court from the ground up is a comprehensive project, and a qualified builder will guide you through every step. The process starts with evaluating your property to find the best location, ensuring proper dimensions and orientation. From there, they handle site preparation, which includes excavation, grading, and establishing a stable base. After the foundation is set, they install your chosen surface, whether it’s traditional acrylic or a modern synthetic material. Gappsi provides end-to-end construction for sports games courts, managing the entire build so you get a professional-grade court right in your backyard.

Court Resurfacing and Conversion

If you have an old, worn-out tennis court or a cracked basketball court taking up space, you don’t have to start from scratch. Many builders specialize in court resurfacing and conversion. They can repair cracks, level the surface, and apply fresh acrylic layers to make an old court look and play like new. This is also a fantastic way to convert an underused tennis court into multiple pickleball courts, maximizing your space and bringing a popular new activity to your home. A quality resurfacing job can extend the life of your court and significantly improve its safety and performance.

Custom Surfaces and Design

Your pickleball court doesn’t have to be standard green. Builders with design expertise can help you create a court that reflects your personal style and complements your home’s aesthetic. You can choose from a wide range of color combinations for the playing area and out-of-bounds sections. Some homeowners even add custom logos or create a multi-sport layout that incorporates basketball or other activities. At Gappsi, we see your court as part of a larger vision for your outdoor living space, and our landscape design team can help you integrate it seamlessly with patios, walkways, and plantings.

Fencing, Netting, and Lighting

A great pickleball court needs more than just a perfect surface. The best builders also provide essential accessories to make your court safe and functional. This includes installing the right kind of fencing to contain stray balls without obstructing views or airflow. They can also install high-quality, permanent net posts and nets. If you dream of playing on cool summer evenings, lighting is a must. A professional will help you plan for and install tall, sturdy light poles that provide even, glare-free illumination across the entire court. Gappsi offers a variety of fencing and netting solutions to complete your project.

What to Look for in Your Pickleball Court Builder

Choosing the right builder for your pickleball court is one of the most important decisions you’ll make. You’re not just hiring a contractor; you’re finding a partner to bring your backyard vision to life. A great builder combines technical skill with a deep understanding of your local environment to create a court that’s not only beautiful but also built to last. They’ll guide you through every step, from initial design to the final net installation. To make sure you find the best fit for your project, focus on a few key qualities that separate the experts from the rest.

Proven Experience and Local Knowledge

When you’re investing in a pickleball court, you want a team that has done this before, many times. Look for a builder with a strong track record of constructing sports games courts specifically on Long Island. Local experience is invaluable because they’ll understand the unique challenges of the area’s soil, climate, and weather patterns. An experienced builder knows how to prepare the ground properly to handle our freeze-thaw cycles, ensuring your court remains level and crack-free for years. They can also recommend the best materials and surface types that will stand up to the sun, rain, and snow, giving you a durable and high-performing playing surface.

Expertise in Long Island Zoning and Permits

Navigating local building regulations can be a real headache, but a professional builder will handle it for you. Every town in Nassau and Suffolk County has its own set of zoning laws, setback requirements, and permit processes. An expert builder will be well-versed in these rules and can manage the entire application process on your behalf. This saves you from the stress of paperwork and potential delays. Before you even break ground, they should be able to tell you exactly what’s possible on your property, ensuring your new court is fully compliant. This expertise is a clear sign of a professional and reliable home improvement company.

Proper Drainage and Site Preparation

What lies beneath your court is just as important as the surface you play on. Proper site preparation and drainage are critical for the longevity of your pickleball court. A professional builder will start with a thorough site evaluation, followed by precise excavation and grading. A correctly installed court should have a slight, almost imperceptible slope (typically 1%) to allow rainwater to drain away naturally. This prevents puddles from forming, protects the surface from water damage, and keeps your court playable more often. The quality of the masonry and base materials used is also essential for creating a stable foundation that won’t shift or settle over time.

Transparent Pricing and Accurate Quotes

You should feel confident and clear about the cost of your project from the very beginning. A trustworthy builder will provide a detailed, transparent quote that breaks down all the expenses, including materials, labor, and any additional features like fencing or lighting. Be wary of vague estimates or quotes that seem too good to be true, as they often lead to surprise costs down the road. A professional company will take the time to discuss the quote with you, explain each line item, and answer any questions you have. This commitment to clear communication builds trust and ensures there are no misunderstandings about the final budget.

A Strong Portfolio and Positive Reviews

The best way to gauge a builder’s quality of work is to see it for yourself. Ask to see a portfolio of their completed pickleball court projects. A proud builder will be happy to share photos and even videos of their past work. Pay attention to the details: are the lines crisp, is the surface smooth, and does the overall installation look professional? You can often find project galleries on their website or social media channels, like a YouTube channel. Additionally, look for reviews from other Long Island homeowners. Positive testimonials are a great indicator that the builder delivers on their promises and provides excellent customer service from start to finish.

How Much Does a Long Island Pickleball Court Cost?

One of the first questions homeowners ask is about the cost. On Long Island, building a new pickleball court can range from $15,000 to $50,000. This is a wide range because the final price depends entirely on your property, your design choices, and the features you include. Think of it less as a simple installation and more as a custom construction project tailored to your backyard. The total investment covers everything from preparing the ground to painting the final lines, and it’s important to understand what goes into that number.

Factors like the type of court surface, the need for significant site work, and additions like fencing and lighting will all shape your budget. A basic court on a perfectly flat piece of land will fall on the lower end of the spectrum, while a fully-equipped court with extensive landscaping and premium materials will be at the higher end. While it’s a significant investment, a well-built pickleball court adds tremendous value to your home and lifestyle. At Gappsi, we specialize in creating beautiful and functional sports games courts that integrate perfectly with your overall landscape design, ensuring your new court is a centerpiece for fun and activity for years to come.

Factors That Influence Your Budget

Several key elements will determine the final cost of your pickleball court. The surface material is a major one. While asphalt is common, a reinforced concrete base is often preferred for its durability and longevity, though it comes at a higher initial cost. According to USA Pickleball, the surface is foundational to the playing experience. Site preparation is another critical factor. A flat, clear area will cost less to prepare than a sloped yard that requires extensive grading and drainage solutions. Adding professional fencing and netting for safety and lighting for nighttime play will also increase the budget. Finally, consider amenities like benches or adjacent pavilions and pergolas for shade, which complete the space but add to the project scope.

How to Get an Accurate Quote

To get a realistic idea of what your project will cost, the best first step is to consult with local builders. An experienced contractor can assess your property and provide a detailed estimate based on Long Island’s specific labor and material costs. Before you call, it helps to have a clear vision of what you want. Defining your requirements, from the court’s dimensions to the type of surface and any extra features, will help a builder give you a more precise quote. As the Sports Facility Advisory group notes, detailed specifications are key to accurate planning. Finally, think about the total cost of ownership. A higher-quality installation might cost more upfront but can save you money on maintenance and repairs down the road, making it a smarter long-term investment.

Why Add a Pickleball Court to Your Property?

Thinking about adding a pickleball court to your Long Island home? It’s more than just a fun trend. A personal court is a fantastic investment in your lifestyle, your health, and your property’s overall appeal. It transforms your backyard from a simple lawn into a destination for fun, fitness, and connection, creating a space where memories are made right at home.

The Health and Lifestyle Benefits

Imagine stepping out your back door for a friendly game that gets your heart pumping without being too hard on your joints. That’s the beauty of pickleball. It’s an incredibly social and accessible sport, perfect for all ages and fitness levels. You can teach your kids, invite your neighbors, or have a weekly match with friends. It’s a wonderful way to stay active, improve your balance, and spend quality time together outdoors. Having one of your own sports games courts means you can play whenever you want, no reservations required. It’s an instant, built-in plan for family fun and personal wellness.

Increase Your Home’s Value and Appeal

A pickleball court is a smart and strategic home improvement. In a competitive real estate market, unique features make a property stand out, and a well-built pickleball court is a highly desirable amenity. It signals that a home is designed for an active and modern lifestyle. This kind of addition can significantly increase your property’s appeal to potential buyers, making your home more memorable and potentially increasing its market value. It’s a home remodeling project that offers a return not just in dollars, but in the enjoyment and distinction it brings to your property.

Completing Your Outdoor Living Space

A pickleball court can be the centerpiece that ties your entire backyard together. It’s not just a standalone feature; it’s an integral part of a complete outdoor living environment. Picture a court situated near a beautiful patio made with porcelain and natural stone, with a shaded pergola for spectators to relax. Gappsi specializes in creating these cohesive spaces, and we can even convert an old or unused tennis court into a brand new pickleball court. By integrating the court with your landscape, pool, and outdoor kitchen, you create a seamless and functional space for both recreation and relaxation.

Related Articles

Frequently Asked Questions

How much space do I actually need for a pickleball court? A standard pickleball court has playing dimensions of 20 feet by 44 feet. However, you need extra space around the perimeter for safe play and runoff. We recommend a total area of at least 30 feet by 60 feet. This gives you enough room to move comfortably without feeling cramped and ensures your court meets official guidelines for play. A professional builder can evaluate your specific property to find the best placement and orientation.

Can I convert my old tennis court into a pickleball court? Absolutely. Converting an underused or worn-out tennis court is a very popular and cost-effective option. The process typically involves repairing any cracks or surface damage, applying a fresh acrylic resurfacer, and then painting the new lines for one or more pickleball courts. Since a tennis court is much larger, you can often fit two, or even four, pickleball courts into the same space, which is perfect for hosting friends and family.

How long does the construction process usually take? The timeline for building a new pickleball court from scratch can vary, but a typical project often takes a few weeks from start to finish. The exact duration depends on several factors, including the extent of site preparation needed, the local permit approval process, and of course, the weather. A project involving extensive grading or custom features will naturally take longer than a straightforward installation on a flat, clear lot.

Why is professional site preparation so important for a court’s longevity? The work done before the surface is even poured is the most critical part of building a lasting court. Professional site preparation ensures the ground is perfectly graded with a slight slope for proper drainage, which prevents water from pooling and causing damage. A stable, compacted base of materials is also essential to prevent the court from shifting, settling, or cracking over time, especially with Long Island’s freeze-thaw cycles. This foundation is what guarantees your court will remain smooth and playable for years.

What kind of maintenance will my new court need? A professionally installed pickleball court is surprisingly low-maintenance. The most important task is to keep the surface clean by periodically using a leaf blower or broom to remove debris like leaves, dirt, and twigs. This prevents stains and keeps the surface safe for play. You should also check the net tension occasionally to make sure it’s at the proper height. A high-quality acrylic surface is built to withstand the elements, so you can spend less time on upkeep and more time playing.

Share this page:
Custom pergola over a landscaped Long Island patio

Pergola Installers Near Me: Compare 3 Structures

The wrong shade structure can leave a Long Island backyard underused for years. The right choice starts with how you plan to use the space.

Pergola installers near me should help Long Island homeowners compare function, weather coverage, and site conditions before recommending a structure. A pergola defines an outdoor living area with partial shade and an open feel, making it well suited to patios, dining areas, and poolside seating. A pavilion adds a solid roof for greater protection from sun and rain, while a gazebo creates a freestanding destination with a more enclosed feel. The best choice depends on the yard, planned use, desired shade, drainage, local permit needs, and connection to the home. Before hiring, ask each installer to explain materials, footings, placement, water management, upkeep, and project responsibilities in plain language. A careful site review and detailed proposal will help you compare designs, avoid surprises, and select a structure built for everyday use.

The real question is not which structure looks best in a photo, but which one fits your yard and routine. Next, Pergola installers near me: start with the right structure shows how to match the structure to your yard before comparing contractors with confidence. Here is how.

Pergola installers near me: start with the right structure

Before searching for a contractor, decide how you want the new outdoor area to work. A pergola, pavilion, and gazebo each shape the yard in a different way. Your choice affects shade, views, furniture placement, and how the space connects with your Long Island home.

Match the structure to daily use

Start with the moments you want to enjoy outside. A pergola suits an open lounge, dining area, or poolside retreat where filtered light adds to the setting. Its open sides keep conversations and sightlines connected to the rest of the yard.

A pavilion works well when full overhead cover is the main goal. It can shelter a dining table, outdoor kitchen, or gathering space while leaving the sides open. A gazebo creates a more defined destination, often with a traditional shape and a sheltered, enclosed feel.

Pergola, pavilion, or gazebo?

Use this comparison to narrow the options before meeting with pergola installers near me. Think about how much sun reaches the site during the hours when you plan to use it. Also note nearby doors, paths, pools, and mature plants.

Feature Pergola Pavilion Gazebo
Shade Filtered and adjustable Full overhead cover Full overhead cover
Openness Open above and around Open sides, solid roof More defined and enclosed
Common use Lounge or dining area Outdoor kitchen or gatherings Quiet seating or garden retreat
Overall feel Light and connected Roomy and sheltered Traditional and distinct

Plan for the Long Island setting

The best option should fit both the house and the site. On a compact property, an open pergola can define a seating area without making the yard feel closed in. On a larger lot, a pavilion or gazebo may create a clear destination away from the home.

Bring contractors photos of the yard and a short list of must-haves. Ask how each structure would sit within the available space and relate to the home’s style. Discuss desired shade, planned furniture, lighting, and the path people will take from the house.

A clear direction also makes contractor quotes easier to compare. Each installer can price a similar scope instead of guessing what you want. That gives you a stronger basis for reviewing materials, layout ideas, and project details.

When is a pergola the best choice?

Partial shade with an open feel

A pergola is a strong choice when you want some shade without closing off the sky. Its open roof filters bright sun while keeping the space airy. This balance works well where a solid roof might feel heavy or block a valued view.

Shade levels depend on the roof design, slat spacing, and the sun’s path across the yard. Adjustable louvers offer more control, while fixed rafters create a steady pattern of light and shadow. The U.S. Department of Energy guidance on shade also shows why sun direction matters when planning outdoor comfort.

Clear definition for outdoor living areas

Pergolas give an open patio a clear purpose. Posts and overhead lines create a room-like shape without adding walls. This visual frame can define a dining area, lounge, poolside seating zone, or gathering place beside an outdoor kitchen.

The structure also helps connect separate features into one planned setting. A pergola near a pool can mark a quiet place away from active water. Over a patio, it can center furniture and help the paved area feel tied to the home.

Placement should support how people move, cook, sit, and gather. It should not crowd key paths or block access to grills and counters. A coordinated landscape design and construction plan can align the pergola with paving, masonry, lighting, planting, and nearby amenities.

Materials and details that fit the setting

The right material depends on the home’s style, upkeep goals, and exposure to weather. Wood brings warmth and can suit traditional settings, but it needs routine care. Aluminum offers crisp lines and lower upkeep, making it a practical fit for many modern yards.

  • Roof style: Fixed rafters create patterned shade, while louvers can adjust light and cover.
  • Post placement: Supports should frame the space without interrupting walkways, seating, or views.
  • Finish and color: These details should relate to the home, patio surface, and outdoor kitchen materials.
  • Built-in features: Lighting, fans, and screens work best when planned before construction starts.

When comparing pergola installers near me, look beyond the structure alone. Ask how the pergola will relate to drainage, utilities, footings, and existing hardscape. Design-build planning helps each part work together and reduces changes after construction begins.

Why choose a pavilion for a Long Island backyard?

A pavilion makes sense when the outdoor living area needs dependable overhead cover. Its solid roof blocks direct sun and helps keep light rain away from the space below. The result feels more like an outdoor room than an open garden feature.

This fuller cover can extend the time a family spends outside during changing Long Island weather. It also gives furniture, serving areas, and outdoor appliances more shelter. Homeowners comparing custom pavilions can plan the roof, posts, and finishes around the wider backyard design.

Pavilion or pergola?

A pergola has an open or slatted top, so it filters sunlight while keeping an airy feel. A pavilion uses a solid roof for more shade and better rain cover. That key difference often decides which structure fits the way a homeowner plans to use the yard.

Searching for pergola installers near me may be a useful starting point, but the first question should be about daily use. A pergola suits a patio where filtered light is welcome. A pavilion better supports meals, gatherings, and long periods outside when steady cover matters.

Space for cooking and seating

A pavilion can define zones without closing off the backyard. One side may hold an outdoor kitchen, while the center supports a dining table. Lounge seating can face the pool, garden, or another key view.

  • Keep cooking heat and smoke away from the main seating area.
  • Leave clear walking paths between counters, tables, and yard access points.
  • Place posts where they will not block views from the house or patio.
  • Plan lighting and power before the roof and finished surfaces are installed.

Good sightlines make the covered area feel connected to the rest of the property. They also help adults watch children near a pool or play area. The pavilion should frame the view instead of becoming a visual wall.

Roof drainage and site planning

A solid roof collects water, so drainage must be part of the first design conversation. Gutters, downspouts, and grading should move runoff away from posts, patios, and the house foundation. The EPA explains how green infrastructure can help capture and soak up stormwater near where it falls.

Long Island sites also differ in wind exposure, salt air, lot size, and nearby trees. These conditions affect roof shape, material choices, and pavilion placement. A careful plan balances overhead protection with open views, safe movement, and a natural link to the home.

Where does a gazebo work best?

A destination within the landscape

A gazebo works best where it can become a destination, not just a cover beside the house. Its freestanding form draws people across a yard and gives the landscape a clear point of focus. Place it where the approach feels inviting and the view rewards the walk.

A garden gazebo can sit at the end of a path, beside a pond, or within a broad planting bed. This setting lets the structure frame flowers, trees, and changing views through the seasons. Before choosing a low area, review the site’s drainage and check the FEMA flood maps for known flood risk.

A focal point beside the pool

Near a pool, a gazebo creates a separate place to rest, talk, or enjoy shade between swims. It should feel connected to the pool area without crowding the main path around the water. A clear view from the house can also help the whole yard feel planned.

Allow enough open space around the gazebo for easy movement, furniture, and routine care. The roofline should also suit the scale of the pool and nearby home. Gappsi’s custom gazebo designs show how shape, materials, and placement can make the structure a true backyard focal point.

Gazebo, pergola, or pavilion?

Each structure serves a different design goal. A gazebo is usually a distinct, freestanding destination with a defined roof and an enclosed visual shape. It fits spaces that need a classic garden feature or an intimate gathering point.

A pergola has a more open roof and often defines a patio, walkway, or seating zone. Its lighter frame can support vines while keeping a strong link to the space around it. A pavilion offers a broad solid roof, making it well suited to larger dining, cooking, or event areas.

  • Choose a gazebo when the yard needs a classic focal point and a smaller retreat.
  • Choose a pergola when filtered light and an open connection matter most.
  • Choose a pavilion when a large covered space is the main goal.

Good placement starts with how people will use the yard each day. Consider views, walking paths, sun, drainage, and the size of nearby features. When comparing gazebo builders with pergola installers near me, ask how each plan supports the site’s purpose and overall layout.

How to evaluate pergola installers near you

Searching for pergola installers near me gives you a starting list, but the best choice depends on the fit for your property. Use the same questions with each installer. A clear process helps you compare design skill, site planning, materials, and project scope.

Start with your space and goals

First, decide how you plan to use the pergola. You may want shade over a dining area, shelter near a pool, or a defined outdoor room. Note your preferred size, style, shade level, and any features you may add later.

  1. Define the project. Share photos, rough measurements, and your main goals with each installer. Explain how people move through the area and when you expect to use it.
  2. Review relevant work. Ask for recent pergola projects with a similar size, material, and setting. Look closely at post placement, roof details, finishes, and how each structure meets the surrounding landscape.
  3. Discuss materials and site conditions. Ask why the installer recommends a material for your location. The discussion should also cover drainage, existing patios, utilities, access, soil, sun, wind, and nearby structures.
  4. Clarify responsibility. Confirm who handles design drawings, engineering needs, permits, site preparation, installation, cleanup, and final checks. Ask how the team manages the different rules used by towns across Nassau and Suffolk Counties.
  5. Compare complete proposals. Request a written scope that lists dimensions, materials, finishes, features, site work, schedule, warranties, and exclusions. Compare the full scope instead of choosing from one headline number.

Questions about design and local rules

A strong installer should explain how the proposed pergola fits your site, not just show a standard model. Ask how roof direction, post locations, drainage, and attachment points affect the final plan. If answers stay vague, request more detail before moving forward.

Permit and code needs can vary by project and local authority. Before work begins, check with your town and review New York State’s building standards and codes resources. The proposal should state who will prepare documents, submit applications, answer questions, and schedule required checks.

A fair proposal comparison

Place each written proposal beside the same project notes. Check whether every installer included the same structure size, materials, shade features, electrical planning, site work, and cleanup. A missing item can make two proposals look more alike than they are.

Also review communication before you sign. Note whether the installer asks useful questions, documents changes, and explains tradeoffs in plain language. These habits help you judge how the team may handle choices and site issues during installation.

What should a design-build process include?

A detailed site review

A consultation-led process starts with the site, not a catalog. The installer should review sun, shade, drainage, access, grade, and nearby structures. This visit also helps define how the pergola will support dining, cooking, relaxing, or poolside use.

The review should cover the home, patio, pool, outdoor kitchen, walkways, and planting beds as one connected setting. It should also flag setbacks, utility locations, permit needs, and local construction rules. FEMA’s building-code research explains how modern codes can reduce damage from natural hazards.

Clear design and material choices

Next, the homeowner and designer should select the structure type, size, roof style, posts, colors, and finish. These choices should fit the home’s scale and the way the yard is used. The plan may also address lighting, fans, privacy panels, power, and future additions.

Material samples make these choices easier to judge. A finish can look different outdoors than it does on a screen. Visiting the Gappsi Smithtown showroom lets homeowners compare materials, construction details, and built examples before approving a design.

  • Confirm the pergola’s purpose, location, size, and preferred level of shade.
  • Compare structural materials, colors, roof options, and care needs.
  • Plan connections to patios, pools, kitchens, lighting, and landscape features.
  • Review drawings, scope, costs, permit duties, and the expected schedule.

Planning through installation

After the design is set, the contractor should provide a written scope and clear plan. It should show what is included, who handles permits, and how crews will reach the work area. Homeowners should also know how existing paving, planting, and utilities will be protected.

Installation should follow the approved plan, with key details checked before final sign-off. Those details include post placement, alignment, drainage, finishes, lighting, and connections to nearby features. A final walk-through should explain care needs and address any remaining work.

When comparing pergola installers near me, ask to see related projects and discuss how the whole yard will work together. Gappsi’s experience since 1987 offers useful context for reviewing long-term design and construction choices. A complete process should leave no gap between the first site visit and the finished outdoor setting.

Frequently Asked Questions

Does a pergola require a permit on Long Island?

Permit requirements depend on the structure, its size, attachment method, and the local building department. Rules can differ among towns and villages in Nassau and Suffolk Counties. Ask the installer who will prepare drawings, submit applications, and schedule inspections. Homeowners can also review New York State building standards and codes resources before confirming the project scope.

How much does professional pergola installation cost?

Professional pergola installation costs vary based on dimensions, materials, roof design, footings, electrical work, site access, and existing hardscape. Custom features such as adjustable louvers, lighting, fans, or screens can also affect the total. Request itemized proposals from several installers using the same project details. Compare included site work, permit responsibilities, warranties, cleanup, and exclusions rather than relying on one headline price.

How long does it take to install a pergola?

The installation schedule depends on design complexity, material availability, permit review, site preparation, and weather. A straightforward pergola on a prepared site may require less field time than a custom structure with new footings and electrical features. Ask each installer for separate estimates covering design, approvals, material lead times, construction, and inspections. Confirm how delays and schedule changes will be communicated.

What maintenance does a pergola need after installation?

Maintenance depends mainly on the pergola material, finish, roof system, and exposure to weather. Wood typically needs periodic cleaning, inspection, and refinishing, while aluminum usually requires simpler washing and hardware checks. Adjustable louvers, lighting, fans, and drainage parts may need added service. Ask the installer for a written care schedule, approved cleaning products, warranty terms, and instructions for checking fasteners after severe weather.

Plan your Long Island outdoor structure with Gappsi

Start with your space and goals

A useful design consultation starts with how you want to use the space. Bring photos, rough measurements, and ideas for shade, seating, lighting, and finishes.

Your town may also have rules that shape the project. Review New York’s building standards and codes, then confirm permit needs with your local building department.

Meet the Gappsi design team

Searching for pergola installers near me can produce many names, but reviewing Long Island pergola, pavilion, and gazebo options before an in-person visit helps you compare practical choices. Visit Gappsi’s Smithtown showroom to see materials, construction details, colors, and outdoor structure styles before making key choices.

Bring your questions and project details, including the site location and preferred timeline. Schedule your design consultation to discuss a Long Island outdoor structure planned around your home and yard.

Share this page:
outdoor kitchen near me layout with stone counters in a Long Island backyard

Outdoor Kitchen Near Me: Long Island Design Guide

A great outdoor kitchen starts with a layout that fits how your family actually uses the yard.

Schedule a visit to Gappsi’s Smithtown showroom to compare outdoor kitchen layouts and materials in person.

An outdoor kitchen near me should help Long Island homeowners compare local design, materials, and installation experience before they commit to a build. The right layout connects cooking, prep, seating, shade, and foot traffic, so the space works for weeknight dinners and larger gatherings. For Nassau and Suffolk homes, a local design-build team can also plan around yard size. Coastal weather, utilities, masonry, and the way the kitchen will connect to patios, pools, and pavilions. Gappsi brings that planning into one process with 3D design, showroom material selection, and installation experience across Long Island.

If you are searching because you want a real plan, not just grill photos, start with the provider and the layout. The first step is understanding how to choose an outdoor kitchen near me on Long Island. Here’s how to compare the options with confidence.

How to choose an outdoor kitchen near me on Long Island

Choose an outdoor kitchen near me by comparing local design-build experience, showroom access, material knowledge, and examples from similar Long Island properties. The best fit should explain layout, utilities, masonry, appliances, and installation before you approve the project.

Local search intent

Searching for an outdoor kitchen near me is usually the first step, not the full plan. A useful local search should lead to a provider who can assess the property and explain the build process. For Nassau and Suffolk homeowners, local knowledge also makes early planning more practical.

Start by looking beyond a photo gallery. Review the provider’s custom outdoor kitchen designs to see whether the work includes more than a grill island. Look for layouts that fit the yard and connect with nearby patios, pools, or pavilions.

The planned use matters. According to Realtor.com guidance on outdoor kitchens, a functional kitchen needs a cooking area, refrigeration, and a sink. Ask how each item will fit the way your household cooks and hosts guests.

A design-build process

An outdoor kitchen is part of the property, not a stand-alone appliance purchase. The right provider should discuss layout, materials, appliances, masonry, and installation before construction starts. Ask whether one team can coordinate these parts from the first design meeting through the final checks.

Three-dimensional planning can make that discussion easier. It lets homeowners review counter placement, seating space, work zones, and the kitchen’s fit within the yard before installation. Ask to see the proposed layout from several angles. Also confirm how the plan accounts for access paths and the wider outdoor living area.

A strong plan should answer practical questions early. Where will guests sit while someone cooks? How will the kitchen relate to the house and other outdoor features? Clear answers help the project move from an idea to an organized build.

Showroom access and installation experience

Materials should be judged in person when possible. Countertops, stone facades, cabinet finishes, and paving materials can look different in a small online image. A chance to visit a Long Island showroom helps homeowners compare surfaces and make a more informed choice.

Installation experience matters as much as design. Ask who will prepare the site, build the structure, fit the selected materials, and manage the final details. A provider should explain the sequence in plain terms. The answer should make clear who is responsible at each stage.

  • Ask to review a three-dimensional layout before approving the build.
  • Compare countertop, facade, cabinet, and paving materials in person.
  • Confirm who manages site work, masonry, appliance placement, and final checks.
  • Request examples that reflect the scale and style of your own yard.

For Long Island homeowners, the best local fit is a provider with a clear process and visible materials. Showroom access, detailed planning, and hands-on installation experience make it easier to compare options before work begins.

Best outdoor kitchen layouts for Long Island yards

The best outdoor kitchen layout depends on yard size, traffic flow, and how close the cooking area sits to patios, pools, pavilions, or the house. Straight-line, L-shape, U-shape, island, and pavilion-adjacent layouts all work when they match the way the family cooks and hosts.

Match the layout to the yard

The best layout starts with the way the yard is used. A straight-line kitchen can fit a narrow patio or deck without taking over the seating area. An L-shape adds prep space while keeping the cook connected to guests. For larger yards, a U-shape can create a more defined cooking zone.

An island layout works well when guests gather around the cook. Pavilion- or pergola-adjacent kitchens can add shade and support seasonal use. A poolside kitchen can serve swimmers and hosts, but it needs a clear path that does not cross the cooking area. Gappsi’s custom outdoor kitchens on Long Island show how a kitchen and pavilion can share one outdoor living plan.

Layout Best fit Planning note
Straight-line Narrow patio Keeps walkways open.
L-shape Medium patio Separates prep and seating.
U-shape Large yard Creates a defined cook zone.
Island Open entertainment area Invites guests to gather.
Pavilion-adjacent Covered outdoor room Adds shelter for mixed weather.

Plan utilities and exposure first

Before choosing a shape, map the grill, sink, refrigeration, lighting, and storage. Place each utility line before masonry begins. This helps avoid awkward appliance gaps or costly changes later. If the kitchen sits far from the house, decide whether the distance improves the yard enough to justify longer utility runs.

A functional outdoor kitchen needs more than a grill. A guide to outdoor kitchen planning notes that the minimum includes a cooking area, refrigeration, and a sink. Wind matters too. Avoid placing the cooking surface where smoke will drift toward dining seats, doors, or open windows.

Shade also needs a plan. A pavilion or pergola can make the space more useful during hot afternoons and light rain. For a homeowner searching for an outdoor kitchen near me, local yard conditions matter as much as the kitchen shape.

Keep hosting zones connected

Plan a simple route from the house to the kitchen, dining table, pool, and lounge area. The cook should not stand in the main walkway. Guests also need a place to gather without blocking a refrigerator door or prep counter. Use nearby seating to keep the kitchen social, then leave enough open space for safe movement.

Seasonal use can guide the final choice. Long Island homeowners who host through spring and fall may prefer a sheltered cooking and dining zone. Those focused on pool season may favor a poolside layout with direct access to drinks and serving space. Zillow research on outdoor kitchens found that these features can help homes sell for more than expected.

What should your outdoor kitchen include?

A practical outdoor kitchen should include a cooking zone, durable counter space, weather-ready storage, safe circulation, and seating that lets guests stay near the cook without blocking prep work. Refrigeration, sinks, shade, and lighting can be added when the property and budget support them.

A useful outdoor kitchen starts with the way you host. Some homeowners cook for a few guests, while others serve large family meals. Plan zones for cooking, prep, serving, and cleanup before choosing finishes. The NIH environmental wellness toolkit notes that your daily surroundings can affect your health.

Cooking zone essentials

Start with a grill sized for your usual gatherings. Add side burners or a specialty appliance only if you will use them often. A refrigerator keeps drinks and ingredients near the grill. A sink gives you a place to rinse produce, wash hands, and handle cleanup.

These items form the practical core of the space. Realtor.com notes that an outdoor kitchen needs a cooking area, refrigeration, and a sink at minimum. Put the refrigerator away from the hottest part of the grill. Keep the sink close enough for easy prep.

Prep space and durable surfaces

Leave clear counter space beside the grill and sink. This gives you room for trays, ingredients, and finished food. A masonry base helps the kitchen feel tied to the patio. Stone or porcelain surfaces add a polished finish and suit a custom layout.

Weather protection also matters on Long Island. A pavilion, pergola, or well-placed roof can shade the prep area and make outdoor meals more comfortable. Task lighting over the grill and counters supports evening use. For a built example, review this custom outdoor kitchen on Long Island.

Seating and storage choices

Storage should match how you serve food. Use drawers near the prep area for tools, utensils, and towels. Add cabinets for dishes, serving trays, and supplies that stay outside. Keep trash storage close to the sink, but away from bar seating.

Bar seating works best along an outer edge or raised counter. Guests can talk with the cook without crowding the work zones. If you often host larger groups, leave open space between stools and nearby paths. When comparing results for an outdoor kitchen near me, look for a plan that fits your real hosting habits.

outdoor kitchen near me material planning for a Long Island backyard

Outdoor kitchen materials that hold up in Nassau and Suffolk

Long Island outdoor kitchens need materials that can handle freeze-thaw cycles, salt air, sun exposure, and regular entertaining. Masonry bases, porcelain or natural stone surfaces, stainless appliances, and compatible pavers help the kitchen stay durable and consistent with the rest of the yard.

Material choice shapes how an outdoor kitchen looks, feels, and ages. In Nassau and Suffolk, the plan should account for coastal exposure, winter cold, and freeze-thaw cycles. Start with surfaces made for outdoor use, then compare colors and textures in person.

A durable masonry base

Masonry gives an outdoor kitchen a solid foundation and a built-in look. Natural stone, porcelain, and concrete can each suit the facade or nearby hardscape. The right mix depends on the home, patio, pool area, and desired finish.

Pavers also matter because the kitchen sits within a larger outdoor room. Choose a surface that supports foot traffic, seating, and the path between cooking and dining zones. For a local example, see this Merrick project featuring one of Gappsi’s custom outdoor kitchens on Long Island.

Ask how each exposed surface fits the setting and seasonal care plan. A coastal property may call for a different material review than a more sheltered yard. The base, facade, counter, and pavers should work as one system.

Counters and appliance finishes

A counter needs enough work space for prep, serving, and cleanup. Ask which natural stone, porcelain, or concrete options are intended for exterior use. Also review the edge, seams, and color beside the selected facade rather than as a separate sample.

Stainless steel is a practical finish to consider for grills, doors, drawers, and refrigeration. Appliance placement still needs careful thought. It should support the cooking flow while leaving clear room for guests, seating, and service access.

  • Compare facade materials beside the planned counter.
  • Review pavers with the kitchen, patio, and pool setting in mind.
  • Check appliance sizes before the masonry layout is final.
  • Discuss seasonal care for every exposed surface.

A local material review

When searching for an outdoor kitchen near me, look beyond a catalog image. Gappsi is a direct importer of premium stone and materials, with options for kitchen counters and facades. Its custom outdoor kitchen designs can pair those materials with the full layout.

Outdoor kitchens can also support resale appeal. Zillow reports that homes with outdoor kitchens can sell for as much as 3.1% more than expected. That makes a durable, cohesive plan more useful than chasing one trendy finish.

A showroom visit makes the choice more concrete. Compare stone, porcelain, concrete, stainless finishes, and pavers together before the final design is set. This helps align the kitchen with the home’s style and the wider outdoor space.

Request an outdoor kitchen consultation with Gappsi before choosing appliances, counters, or masonry finishes.

How does the design-build process work?

A design-build outdoor kitchen process usually moves from consultation and site review to 3D layout, material selection, utility planning, construction, and final walkthrough. One coordinated team helps the kitchen fit the patio, pool, pavilion, and wider outdoor living plan.

From site review to a working plan

A well-planned outdoor kitchen starts with the property, not a standard package. Gappsi’s full-service design-build contractor approach keeps layout, materials, utilities, and installation connected from the first meeting. This helps the finished space fit the home, patio, and way the family cooks outside.

For a homeowner searching for an outdoor kitchen near me, the process should answer practical questions early. The team needs to know where people gather, how food reaches the grill, and which views should remain open. It also needs to account for existing hardscape, access paths, and nearby structures.

  1. Consultation and site review. The process begins with a discussion of cooking habits, seating needs, appliances, and style. A site visit then checks the available space, the flow from the house, and access for construction.
  2. Layout and 3D design. The team maps the kitchen footprint and places the main work zones. A 3D design helps the homeowner review counter runs, appliance locations, seating areas, and nearby features before installation begins.
  3. Material and appliance selection. The homeowner chooses the facade, countertop, cabinets, and cooking equipment. These choices should suit the home and planned use, while also standing up to Long Island weather.
  4. Utility planning. The design team plans gas, electric, water, drainage, and lighting needs around the approved layout. This step keeps appliance locations practical and limits changes once masonry work is underway.
  5. Masonry and kitchen installation. The crew builds the base, installs the selected finishes, and sets the appliances. The work can also connect the kitchen with patios, walkways, walls, or other expert masonry and hardscaping features.
  6. Final walkthrough. The homeowner reviews the completed outdoor kitchen with the team. This is the time to confirm the finished details, appliance placement, work areas, and care needs for the selected surfaces.

One team for connected decisions

Outdoor kitchens work best when each choice supports the next one. The counter layout affects appliance placement. Appliance placement affects utility runs. Utility runs affect the masonry base, so these decisions should not be handled as separate tasks.

A single design-build team can keep those details aligned and reduce handoffs between contractors. Homeowners can also review a completed outdoor kitchen design-build experts project to see how a kitchen can fit an existing deck and outdoor setting.

A plan shaped around the property

The final plan should support more than cooking. It should make the yard easier to use for meals, guests, and time outside. A research review indexed by NCBI found associations between greenspace exposure and several health measures, including lower heart rate and diastolic blood pressure.

That does not mean every yard needs the same layout. A compact patio may call for a focused grill station. A larger property may need separate cooking, dining, and lounge areas linked by matching masonry and clear walking paths.

What is the average cost for an outdoor kitchen?

Outdoor kitchen cost varies by size, appliances, masonry, counters, utilities, shade structures, and site conditions. Instead of relying on a generic estimate, Long Island homeowners should define the layout and feature list first, then request a scoped consultation.

Cost depends on scope

The average cost for an outdoor kitchen depends on what the space must do. A simple grill station has a very different scope than a full masonry kitchen with refrigeration, storage, lighting, and seating. For that reason, a reliable local estimate should start with a site review and a layout discussion.

Homeowners searching for an outdoor kitchen near me often want a quick number. The better question is what drives the final investment. Size, appliances, utility runs, stone or porcelain choices, countertop length, patio work, shade structures, and access to the work area can all change the scope.

Features that change the budget

A cooking-only station usually needs less counter space and fewer utility decisions. A kitchen built for hosting needs more prep room, guest seating, storage, refrigeration, and lighting. If the kitchen connects to a pool patio, pavilion, retaining wall, or new paver area, those details should be planned together.

Appliances also shape the budget. Built-in grills, side burners, pizza ovens, ice makers, sinks, and outdoor refrigerators each need space and support. Some features may also need gas, electric, water, or drainage planning. A design-build team can help decide which items are worth including now and which can wait.

How to plan without pricing surprises

The best way to control cost is to define the layout before selecting finishes. Start with the way your family cooks and entertains. Then set priorities for the grill area, prep space, seating, storage, and weather protection. This keeps the design focused on use, not impulse upgrades.

Gappsi’s guide to outdoor kitchen installation cost is a helpful next step for homeowners who want to understand pricing factors in more detail. Use it with an in-person consultation, so the estimate reflects your actual Long Island property.

  • Decide whether the kitchen is for daily cooking, weekend hosting, or both.
  • Choose the core appliances before finalizing counter runs and cabinet space.
  • Review utility needs before masonry work begins.
  • Compare material samples in person when possible.

A good estimate should explain what is included, what is optional, and what may change after site review. That level of detail helps you compare outdoor kitchen options without relying on vague package pricing.

Frequently asked questions about outdoor kitchens

Does an outdoor kitchen add value to a house?

An outdoor kitchen can add value when it is well planned, built with durable materials, and matched to how buyers use the yard. On Long Island, the strongest value often comes from a complete outdoor living plan, not a stand-alone grill island.

What is the cheapest way to build an outdoor kitchen?

The cheapest approach is usually a compact layout with fewer built-in appliances and a clear utility plan. Still, low cost should not mean weak materials. A smaller masonry kitchen with the right grill, counter space, and storage can work better than an oversized design with poor flow.

What is the best outdoor kitchen layout?

The best layout depends on yard size, cooking habits, and guest flow. Straight-line kitchens suit compact patios. L-shaped and U-shaped layouts add more prep and serving space. Island layouts work well when guests gather around the cook.

How close should an outdoor kitchen be to the house?

Many outdoor kitchens work best close enough for easy access to the indoor kitchen, but far enough to manage smoke, heat, and foot traffic. A design-build review should account for doors, windows, utilities, seating, and safe movement through the yard.

Schedule your Long Island outdoor kitchen consultation

If you are ready to compare outdoor kitchen layouts for your Nassau or Suffolk County home, Gappsi can help you move from ideas to a buildable plan. Visit the Smithtown showroom to review materials, discuss appliances, and see how a 3D design can connect your kitchen with the rest of your outdoor living space.

Call 631-543-1177 to schedule a 3D design consultation or plan your showroom visit with Gappsi.

If you are moving from initial ideas to a permanent layout, use our built in outdoor kitchen planning guide to compare location, materials, utilities, appliances, and weather-ready details before construction.

Share this page: