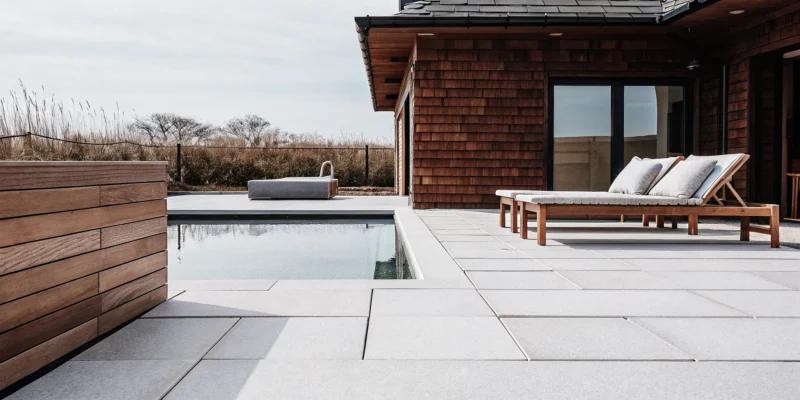
Modern outdoor kitchen design with a large stone island, built-in grill, and poolside seating.

10 Stunning Outdoor Kitchen Design Ideas with Stone

Your backyard should be a reflection of your personal style, and an outdoor kitchen is the perfect place to make a statement. Stone is an incredibly versatile material that can bring any vision to life, whether you dream of a sleek, modern entertainment space or a cozy, rustic cooking nook. The type of stone, its cut, and how you pair it with other elements will define the entire atmosphere. We’ve gathered our favorite outdoor kitchen design ideas with stone to inspire your project. From the classic elegance of granite to the charming texture of stone veneer, we’ll show you how to create a space that is uniquely yours.

Key Takeaways

  • Match the stone to its purpose: For a kitchen that lasts, select materials based on their function. Use durable, dense stones like granite for hardworking countertops and choose strong pavers to build a stable, attractive foundation.
  • Plan your layout for real life: A beautiful kitchen is only great if it’s easy to use. Think through your workflow, making sure you have plenty of counter space, smart storage, and good lighting to create a space that’s as practical as it is pretty.
  • Use stone to create your ideal vibe: Stone is a design powerhouse that can bring any style to life. Whether you want a cozy rustic retreat with stacked stone or a sleek modern space with polished granite, the right material choice is key to achieving your desired aesthetic.

Why Choose Stone for Your Outdoor Kitchen?

When you imagine your perfect backyard, an outdoor kitchen is often the star of the show. It’s where you’ll grill on a summer evening, host family gatherings, and make memories that last. To build a space that stands up to both the weather and the test of time, your choice of materials is crucial. While there are many options out there, stone consistently comes out on top. It’s a fantastic choice because it delivers on three key fronts: incredible durability, timeless beauty, and simple maintenance.

An outdoor kitchen is a significant investment in your home and your lifestyle, so you want materials that you can count on for years to come. Unlike wood that can rot and require constant staining, or certain metals that might rust in our coastal air, stone is built to last. It provides a sturdy, reliable foundation for your entire outdoor cooking area, from the countertops where you prep food to the flooring underfoot. The natural elegance of stone also creates an inviting atmosphere that makes your backyard feel like a true retreat. Let’s look at why stone is such a popular and practical choice for outdoor kitchens on Long Island.

It Lasts Through Every Season

Here on Long Island, we get to experience all four seasons, from sunny summer days to snowy winter nights. Your outdoor kitchen needs to withstand it all. Stone is naturally resilient and can handle drastic temperature changes without warping, cracking, or fading. Using high-quality, long-lasting materials like granite and other porcelain and natural stones ensures your outdoor kitchen remains beautiful and functional year-round. You won’t have to worry about covering it constantly or performing extensive repairs after a tough winter. It’s a durable choice that gives you peace of mind and more time to simply enjoy your space.

It Brings Natural Beauty to Your Space

Stone has a way of making any structure feel grounded and connected to its surroundings. It brings an organic, sophisticated texture to your backyard that other materials just can’t replicate. Whether you prefer the sleek, polished look of granite or the rustic charm of stacked stone veneer, there’s a style for every taste. This natural beauty enhances the overall aesthetic of your outdoor living area, creating a seamless flow from your home to your garden. Our expert masonry services can help you design a kitchen that feels like a natural extension of your landscape.

It’s Easy to Maintain

The last thing you want to do after hosting a barbecue is spend hours scrubbing your outdoor kitchen. With stone, cleanup is refreshingly simple. Most stone surfaces, especially when properly sealed, are resistant to stains, moisture, and bacteria. A quick wipe-down with soap and water is usually all it takes to clean up spills and splatters. This low-maintenance quality means you can spend less time on upkeep and more time cooking and relaxing with friends and family. To keep your stone looking its best for years, consider professional restoration and sealing services to protect it from the elements.

What Are the Best Types of Stone for an Outdoor Kitchen?

Choosing the right stone for your outdoor kitchen is a big decision, but it’s also one of the most exciting parts of the design process. The material you select sets the tone for the entire space, influencing everything from the overall aesthetic to daily maintenance. Your final choice will depend on your personal style, your budget, and how you plan to use the kitchen. Some stones are perfect for high-traffic countertops, while others add incredible texture to backsplashes or flooring. Think about the kind of gatherings you want to host. Are you planning big family cookouts or more intimate dinners? The answer can help guide you toward a stone that fits your lifestyle.

The key is to find a balance between beauty and function. You want a material that can handle Long Island’s changing seasons, from sunny summer barbecues to chilly autumn evenings. A well-chosen stone will not only look incredible but will also stand up to the elements, resist stains, and require minimal upkeep. This means less time scrubbing and more time enjoying your new space with friends and family. With so many beautiful and durable options available, you can create a kitchen that is both a functional workspace and a stunning centerpiece for your backyard. Let’s explore some of the best options to help you find the perfect fit for your backyard oasis.

Granite: The Classic Choice for Countertops

Granite is a top contender for outdoor kitchen countertops for good reason. It’s incredibly durable, heat-resistant, and can withstand whatever the weather throws at it. You can place a hot pan directly on the surface without worrying about damage, which is a huge plus when you’re grilling. A well-designed outdoor kitchen built with granite can significantly increase your home’s value. Plus, it comes in a wide range of colors and patterns, from deep, dramatic blacks to light, speckled whites, so you can easily find a slab that complements your home’s exterior and your personal style.

Slate: For Textured Floors and Backsplashes

If you want to add rich texture and a touch of rustic elegance, consider slate. Its naturally layered surface brings a unique visual interest that smoother stones can’t replicate. Stone patio kitchens often feature slate on floors and backsplashes to create a more dynamic look. As a flooring material, its slightly uneven texture provides excellent slip resistance, which is a great safety feature around a pool or after a rainstorm. The deep, earthy tones of slate, like charcoal, green, and gray, can ground your design and create a warm, inviting atmosphere for your outdoor gatherings.

Stone Veneer: Get the Look for Less Weight

Love the look of a massive stone island but concerned about the weight and cost? Stone veneer is the perfect solution. It’s a thin layer of real or manufactured stone applied to a structural base, giving you the authentic appearance of solid stone without the heavy lifting. Using stone veneer helps create a natural, rustic look for your kitchen’s base, walls, or columns. It makes your space feel more custom and offers all the practical benefits of cooking outside and hosting parties, often at a more accessible price point.

Natural Stone Pavers: For a Foundation That Lasts

The foundation of your outdoor kitchen is just as important as the appliances and countertops. Your kitchen needs a solid, level surface to rest on, and natural stone pavers provide a durable and attractive foundation that’s built to last. Pavers are designed to withstand heavy foot traffic, shifting weather conditions, and the weight of your grill and cabinets without cracking or fading. They also allow for proper drainage, which is essential for any outdoor project. With a variety of stones, colors, and patterns available, you can design a patio floor that perfectly anchors your entire outdoor living space.

Travertine and Bluestone: Two Versatile Alternatives

Beyond the classics, materials like travertine and bluestone are fantastic options that offer versatility in design. Travertine, with its soft, earthy tones, brings a touch of Mediterranean warmth to a space. It stays cool to the touch, making it a great choice for pool surrounds and patios in sunny spots. Bluestone offers a more traditional, Northeastern feel with its signature blue-gray hues that develop a beautiful patina over time. Both materials are commonly used for patios and other kitchen elements, allowing you to create a cohesive and stylish outdoor environment that feels both timeless and personal.

How to Use Stone in Your Outdoor Kitchen Design

Stone is incredibly versatile, and there are so many ways to incorporate it into your outdoor kitchen. From the ground up, stone can define the look and feel of your space, turning a simple patio into a gourmet cooking and entertainment hub. Let’s explore some of the most popular and practical ways to use stone in your design.

Countertops: Create a Durable Prep Surface

Your countertops are the workhorse of your outdoor kitchen. They need to handle everything from food prep and spills to the hot Long Island sun and chilly winters. This is where choosing a durable material like granite or quartzite really pays off. These natural stones are tough, resistant to heat and scratches, and relatively easy to clean. A beautiful slab of stone not only provides a reliable surface for cooking and serving but also acts as a stunning visual anchor for your entire kitchen design. Using high-quality, long-lasting porcelain and natural stone ensures your countertops will look great and function perfectly for years of backyard gatherings.

Backsplashes: Add Visual Interest and Protection

A backsplash does more than just look pretty. It protects the wall behind your grill and prep areas from grease, smoke, and food splatters, making cleanup much easier. Using stone for your backsplash adds texture and a natural, rustic feel to the space. Stone veneer is an excellent choice here. It gives you the authentic look of solid stone without the heavy weight and complex installation. A stone backsplash can tie your countertops and cabinetry together, creating a cohesive and polished design that feels both functional and high-end. It’s a simple addition that makes a big impact on the overall aesthetic.

Islands: Build a Functional Centerpiece

The kitchen island is often the social hub of an outdoor kitchen, a place where guests gather while you cook. Cladding your island in stone transforms it from a simple utility space into a striking centerpiece. A stone island can house your grill, a sink, or even a beverage cooler, all while providing valuable counter space and seating. This is a fantastic opportunity to showcase beautiful masonry work, whether you prefer the rugged look of stacked stone or the sleek finish of polished granite. It grounds the space and creates a durable, impressive focal point for your outdoor entertaining area.

Flooring: Establish a Solid Foundation

The right flooring is the foundation of a great outdoor kitchen. You need a surface that is durable, slip-resistant, and easy to clean. Natural stone pavers, like travertine or bluestone, are an ideal choice. They provide a stable and attractive base that can withstand heavy foot traffic, dropped utensils, and the occasional spill. Stone flooring also helps to define the kitchen area, separating it from the rest of your yard or patio. A well-laid stone floor not only looks beautiful but also provides a safe and practical surface for cooking and entertaining, ensuring your outdoor kitchen is built to last from the ground up.

Fire Features: Think Pizza Ovens and Fireplaces

Take your outdoor cooking to the next level by adding a stone fire feature. A built-in, stone-clad pizza oven or a cozy outdoor fireplace can become the heart of your entertainment space. Stone is a natural choice for these elements because it’s non-combustible and excellent at retaining and radiating heat. Imagine pulling a perfectly cooked pizza from your own wood-fired oven or gathering with friends around a crackling fire on a cool evening. These features add incredible ambiance and functionality, extending the usability of your outdoor kitchen well beyond the summer months and creating unforgettable experiences.

Mixed Materials: Combine Stone with Wood and Metal

While stone is a fantastic standalone material, it pairs beautifully with other textures. Combining stone with elements like wood and metal can create a rich, layered design with plenty of visual interest. For example, you could pair rustic stone walls with sleek stainless steel appliances for a modern-meets-natural look. Or, you could top your stone island with a warm wood countertop for a more traditional feel. Adding a wooden pavilion or pergola over your kitchen can also soften the look and provide welcome shade. Mixing materials allows you to personalize your space and create a truly unique outdoor kitchen that reflects your style.

What Styles Can You Create with a Stone Outdoor Kitchen?

One of the best things about using stone is its incredible versatility. It’s a design chameleon that can anchor any aesthetic you’re dreaming of for your backyard. Whether you want a space that feels like a cozy mountain retreat or a sleek, modern extension of your home, the right stone can make it happen. The key is in the type of stone you choose, its cut and finish, and how you pair it with other materials like wood, metal, and even tile.

From the rugged texture of stacked fieldstone to the smooth, clean lines of polished granite, your material choices will define the entire mood of your outdoor kitchen. Think about the overall vibe you want to create. Are you hosting casual family barbecues or sophisticated evening get-togethers? Answering that question will help you narrow down the options and create a space that truly feels like you. Let’s walk through five popular styles you can achieve with a beautiful stone foundation.

Rustic: For a Warm and Inviting Atmosphere

A rustic outdoor kitchen feels like a natural extension of the landscape. It’s all about creating a warm, cozy, and inviting atmosphere that encourages everyone to gather around. This style leans heavily on natural materials and textures. Using a stone veneer with varied shapes and earthy tones helps create that authentic, rugged look. Think of materials like fieldstone or stacked slate for your island base and backsplash.

To complete the design, pair the stone with other organic elements. A heavy timber pergola, reclaimed wood shelving, or a butcher block prep area can add warmth and character. For hardware and fixtures, consider oil-rubbed bronze or wrought iron. A built-in, stone-clad pizza oven is the perfect functional centerpiece for this charming, back-to-nature style.

Modern: For a Sleek, Contemporary Look

If your taste leans more toward clean lines and minimalism, a modern stone kitchen is a perfect fit. This style is defined by its simplicity, geometric shapes, and a sophisticated, uncluttered feel. The focus here is on smooth surfaces and a neutral color palette. Stones like polished Cambrian Black granite or a uniform gray slate can create a sleek, contemporary look that feels both luxurious and understated.

Pair these stones with high-end stainless steel appliances, flat-panel cabinetry, and simple, handle-free hardware. For countertops, a waterfall edge where the stone continues down the side of the island makes a dramatic statement. Keep accessories to a minimum and focus on high-impact design elements to maintain that clean, polished aesthetic.

Mediterranean: For Earthy Textures and Colors

Inspired by the sun-drenched coasts of Italy and Greece, a Mediterranean outdoor kitchen is warm, vibrant, and full of life. This style embraces earthy textures and colors to create a relaxed, old-world feel. Consider using natural stone pavers like travertine or limestone for the flooring, as their warm tones and gentle textures are characteristic of Mediterranean design.

For the kitchen structure, combine textured stone with smooth stucco walls in shades of white, cream, or terracotta. A colorful mosaic tile backsplash can add a beautiful pop of color and personality. Complete the look with wrought-iron details, potted herbs, and a wooden pergola draped with climbing vines to provide shade and create a truly enchanting atmosphere for dining al fresco.

Traditional: For Timeless Elegance

A traditional outdoor kitchen offers a classic, timeless elegance that complements many home styles, from colonial to cape cod. This design approach focuses on symmetry, rich details, and high-quality materials that feel both stately and welcoming. Traditional outdoor kitchens often feature classic materials like brick and stone, which provide a sense of permanence and grace.

Consider using bluestone for the patio flooring and a classic cut granite for the countertops with a detailed ogee or bullnose edge. The layout is often symmetrical, creating a balanced and orderly space. Incorporating architectural details that match your home, like columns or moldings, can create a seamless transition from indoors to out. Classic lantern-style lighting and sophisticated masonry work will complete this enduring look.

Farmhouse: Combine Charm with Function

The modern farmhouse style perfectly blends rustic charm with clean, practical function. It’s all about creating a space that feels comfortable, welcoming, and ready for a crowd. Farmhouse-style outdoor kitchens often combine rustic stone elements with functional features like large countertops and open, airy layouts. A stacked stone or fieldstone base for the island provides a beautiful, textured foundation.

Pair the stone with practical surfaces like soapstone or even concrete countertops. An apron-front sink is a signature element of this style, as is open shelving for easy access to plates and glasses. You can soften the look by incorporating painted wood elements and comfortable seating. The goal is to create a hardworking kitchen that feels like the heart of your backyard, perfect for everything from canning summer vegetables to hosting a family reunion.

Common Mistakes to Avoid with Your Stone Outdoor Kitchen

Building a stone outdoor kitchen is an exciting project, but a few common missteps can turn your dream space into a source of frustration. Thinking through the details from the start helps you create a kitchen that’s not only beautiful but also functional for years of cookouts and family gatherings. A well-designed outdoor kitchen is a true extension of your home, adding significant value and countless opportunities for enjoyment. It becomes the heart of your backyard, a place where memories are made over sizzling grills and shared meals under the stars on a warm Long Island evening.

Avoiding these pitfalls isn’t about being perfect; it’s about being prepared. From planning the flow of your space to selecting materials that can handle our coastal weather, every decision matters. A little foresight can prevent major headaches down the road, like realizing you don’t have enough counter space mid-party or discovering that your beautiful stone has cracked after one harsh winter. Let’s walk through some of the most frequent mistakes homeowners make. By understanding them now, you can approach your project with confidence and ensure the final result is exactly the functional, stunning outdoor oasis you envisioned for your home.

Mistake #1: Poorly Planning Your Layout

It’s easy to get caught up in choosing appliances and finishes, but the layout is the foundation of a great outdoor kitchen. Before you build, think about how you’ll actually use the space. Are you planning intimate family dinners or large neighborhood parties? Your answer will determine the scale and features you need. Consider the classic work triangle: your grill (cook station), sink (clean station), and prep counter should be arranged for an easy, natural workflow. A thoughtful masonry design also accounts for traffic patterns, ensuring guests can move around without getting in the cook’s way.

Mistake #2: Choosing the Wrong Stone for Your Climate

Long Island’s weather can be tough on outdoor materials, with its freeze-thaw cycles and humid summers. Not all stone is created equal. Some porous stones can absorb moisture, leading to cracks or staining over time. It’s essential to select a durable, low-porosity material that can withstand the elements year after year. High-quality porcelain and natural stone options like granite are excellent choices for countertops and structures because they are dense and resistant to weathering. Investing in the right materials from the start saves you from costly repairs and ensures your kitchen remains beautiful through every season.

Mistake #3: Forgetting About Drainage

Water is one of the biggest enemies of an outdoor structure. Without proper drainage, rainwater and snowmelt can pool on your countertops and patio, leading to stains, mildew, and potential damage to your appliances and cabinetry. A professional design always incorporates subtle slopes in countertops and flooring to direct water away from key areas. Proper landscape construction ensures the foundation of your kitchen is graded correctly, preventing water from collecting around the base. This small detail makes a huge difference in the longevity and safety of your outdoor kitchen.

Mistake #4: Not Enough Counter or Storage Space

Think about how much counter space you use in your indoor kitchen for chopping vegetables, seasoning meat, and plating finished dishes. You’ll need just as much, if not more, outside. It’s a common regret to underestimate the need for clear surfaces for food prep and serving. The same goes for storage. Having dedicated cabinets for grilling tools, cleaning supplies, and serving platters keeps your outdoor kitchen organized and ready for action. A custom design can integrate smart storage solutions that keep everything you need within arm’s reach.

Mistake #5: Overlooking Lighting and Electrical Needs

Most outdoor entertaining happens in the evening, so good lighting is non-negotiable. You’ll want a mix of task lighting directly over the grill and prep areas so you can see what you’re doing, plus ambient lighting to create a warm, inviting atmosphere for your guests. It’s also important to plan for electrical outlets. Whether you need to power a blender for frozen drinks, a speaker for music, or a mini-fridge, having accessible outlets is a must. Integrating these elements into structures like pavilions and pergolas during the initial design phase is far easier and more affordable than adding them later.

Mistake #6: Skipping a Professional Installation

While a DIY project can be tempting, an outdoor kitchen involves much more than just stacking stones. A professional installation ensures that heavy materials are handled safely, gas and electrical lines are installed to code, and everything is perfectly level and secure. Experts understand the specific requirements for building durable outdoor structures that can withstand the local climate. Trying to manage it yourself can lead to costly mistakes and a finished product that doesn’t last. Working with an experienced team like Gappsi protects your investment and guarantees a safe, beautiful, and functional kitchen you’ll enjoy for years to come.

Related Articles

Frequently Asked Questions

How much maintenance does a stone outdoor kitchen really need? Stone is surprisingly low maintenance, which is a huge plus. For most spills on countertops like granite, a simple wipe-down with mild soap and water is all you need. The most important step for long-term care is sealing. We recommend having your stone professionally sealed to protect it from stains and moisture. Depending on the type of stone and its exposure to the elements, you might need to re-seal it every few years, but this simple step keeps it looking fantastic for a very long time.

Will dark-colored stone get too hot for countertops in the summer? This is a great question, and something to consider for any sunny Long Island backyard. Darker stones, like black granite, will absorb more heat from the sun than lighter-colored stones like travertine or light gray pavers. While they can get warm to the touch on a very hot day, they are incredibly durable and won’t be damaged by the heat. If your kitchen is in direct, all-day sun, you might prefer a lighter shade for your main prep surfaces or consider adding a pergola for shade.

What’s the most budget-friendly way to get the stone look? If you love the substantial, rustic look of a solid stone kitchen but are working with a specific budget, stone veneer is an excellent option. Veneer is a thin layer of real or manufactured stone that gets applied over a structural base. It gives you the exact same authentic appearance and texture for features like your kitchen island base or backsplash, but it typically involves lower material and labor costs compared to building with solid stone blocks.

Can I combine different types of stone in one kitchen? Absolutely. Mixing different stones is a fantastic way to create a custom look with a lot of depth and character. For example, you could use a durable, polished granite for your countertops and pair it with a more textured, rustic stacked stone for the island base. You could also choose a smooth bluestone for the patio flooring to complement the other textures. The key is to select stones that share a complementary color palette to ensure the final design feels cohesive and intentional.

How long does it take to build a stone outdoor kitchen? The timeline for any project depends on its size and complexity. A straightforward kitchen island with a grill might take a couple of weeks, while a more elaborate setup with a pizza oven, extensive countertops, and a full patio foundation will naturally take longer. Factors like material availability and weather can also play a role. The best first step is a design consultation, where we can map out your vision and give you a realistic timeline from start to finish.

Share this page:
The best way to install porcelain pavers with a proper base for Long Island weather.

Best Way to Install Porcelain Pavers for LI Weather

If you’ve ever seen a paver patio that’s buckled or uneven, the culprit is almost always a faulty base. Think of it this way: the pavers are just the finishing touch, while the foundation beneath them is what ensures they stay put for decades. This is particularly true for us on Long Island, where ground movement from freezing and thawing can wreak havoc on improperly prepared surfaces. This article will focus on creating that unshakable foundation, showing you the best way to install porcelain pavers, base for Long Island weather so your outdoor living area remains stable, safe, and beautiful year after year.

Key Takeaways

  • A proper base is the key to longevity: The success of your paver project relies entirely on what’s underneath. A well-compacted subbase combined with a slight slope for drainage is essential to prevent shifting, water damage, and cracks from Long Island’s weather.
  • Choose porcelain for its weather-proof durability: Porcelain pavers are engineered to handle our region’s climate. Their dense, non-porous surface resists water absorption, which prevents damage from freeze-thaw cycles and makes them highly resistant to stains and fading.
  • Pay attention to the details for a flawless finish: Small steps make a big difference in the final outcome. Using correct joint spacing, pH-neutral materials, and gentle cleaning methods will protect your investment and keep your outdoor space looking beautiful for years.

Why Choose Porcelain Pavers for Long Island Weather?

If you live on Long Island, you know our weather is demanding. From humid summers to icy winters, outdoor materials have to be tough. This is where porcelain pavers really shine. They are engineered to handle our climate’s challenges, making them a smart choice for patios, walkways, and pool surrounds. Unlike materials requiring constant upkeep, porcelain is durable and low-maintenance, looking great year after year. It’s a perfect fit for a busy lifestyle, giving you more time to enjoy your backyard instead of working on it.

They Withstand Freeze-Thaw Cycles

The freeze-thaw cycle of a Long Island winter is brutal on outdoor surfaces. Water seeps into pores, freezes, expands, and creates cracks. Porcelain is built differently. It’s incredibly dense, absorbing very little water (less than 0.5%). Because water can’t get inside, it can’t expand and cause damage when temperatures drop. This resistance makes porcelain an exceptionally durable option that won’t crack or split after harsh winters. It’s a reliable foundation for any masonry project designed to last.

They Resist Stains and Fading

Your outdoor space is for living, which means spills from barbecues, muddy footprints, and constant sun. Porcelain pavers handle it all. Their hard, non-porous surface is highly resistant to stains from wine, oil, or rust. Most spills wipe away easily without leaving a mark. Plus, the color is baked through the entire tile, so it won’t fade under the summer sun. Your patio will look just as vibrant in five years as it did on day one, without needing constant sealing or restoration.

They Absorb Less Water to Prevent Frost Damage

Porcelain’s strength in cold weather comes from its low water absorption rate. Other materials can act like sponges, soaking up water that freezes and causes internal damage. Because porcelain is manufactured to be so dense, it repels water. This quality prevents frost damage and makes porcelain ideal for areas around swimming pools, where it’s constantly splashed. Its ability to keep water out ensures a long-lasting, stable surface for any outdoor application.

What Is the Best Base for Your Porcelain Pavers?

The secret to a beautiful, long-lasting porcelain paver patio isn’t just the pavers themselves; it’s what lies beneath. The base is the foundation of your entire project, and getting it right is essential for preventing cracks, shifting, and water damage down the road. With Long Island’s variable weather, a solid base ensures your investment stands strong through every season. The right foundation provides stability and proper drainage, which are the two most important factors for a successful installation. Choosing the best base depends on your project’s specific needs, whether it’s a simple garden path or a driveway that needs to support vehicles. At Gappsi, we specialize in creating durable and stunning outdoor spaces with high-quality porcelain and natural stone pavers.

A Compacted Gravel and Sand Base

For most patios, walkways, and pool surrounds, a compacted gravel and sand base is the go-to method. This approach creates a strong yet flexible foundation that allows for excellent drainage. The process involves excavating the area about six to eight inches deep, then laying and compacting four to six inches of a gravel aggregate base. On top of that, we add a layer of about one inch of sand, which is screeded to be perfectly level before the pavers are placed. This layered system provides a stable surface that can subtly shift with the ground during freeze-thaw cycles, minimizing the risk of cracks.

A Concrete Slab for Maximum Stability

If you’re planning a driveway or installing pavers over an existing concrete patio that’s in good condition, a concrete slab base is your best bet. This method offers unmatched stability and is ideal for areas that will handle heavy loads, like vehicles. Instead of sand, the porcelain pavers are set directly onto the concrete using a specialized thin-set mortar. The joints are then filled with a cement-based grout rather than polymeric sand to create a completely rigid surface. This type of expert masonry work ensures your pavers won’t budge, providing a durable and uniform finish for high-traffic zones.

How to Plan for Proper Drainage

No matter which base you choose, planning for proper drainage is non-negotiable. Water is the biggest enemy of any paver installation. If it pools on the surface or gets trapped in the base, it can cause shifting, staining, and dangerous ice patches in the winter. To prevent this, the entire paved surface must have a slight slope to guide water away from your home’s foundation. A gentle grade of about 1.5% to 2% is typically all you need to ensure effective drainage. This small detail makes a huge difference in the longevity and safety of your patio, preventing costly water-related issues for years to come.

Which Installation Method Is Right for You?

Choosing the right installation method for your porcelain pavers is just as important as selecting the pavers themselves. The best approach depends entirely on where you’re installing them. A driveway that needs to support vehicles has very different requirements than a quiet backyard patio or a rooftop terrace. Each technique offers specific benefits that help your pavers stand up to Long Island’s unique weather, from humid summers to icy winters.

Understanding these methods will help you have a more informed conversation with your contractor and ensure your project is built to last. The three primary methods are mortar bedding, dry-lay installation, and pedestal systems. Let’s look at what each one involves and which applications they are best suited for, so you can feel confident you’re making the right choice for your home. A solid installation is the foundation of a beautiful, long-lasting outdoor space.

Mortar Bedding for Long-Term Stability

If you’re planning a driveway or any surface that will handle vehicle traffic, the mortar bedding method is the way to go. This technique provides the highest level of stability and durability. It involves setting the pavers with a special thin-set mortar over a concrete base and using a cement-based grout for the joints instead of polymeric sand. This creates a rigid, unified surface that won’t shift under heavy loads. For this method to be successful, it’s important that the joints are at least 4mm wide. This small gap allows for natural movement with temperature changes, preventing cracks and ensuring your masonry work lasts for years.

Dry-Lay Installation on Sand or Gravel

The dry-lay method is a popular and effective choice for patios, walkways, and other pedestrian areas. This technique involves laying the porcelain pavers over a compacted base of gravel and a layer of sand. It’s a flexible system that allows for excellent drainage, which is a huge plus for dealing with Long Island’s rainfall. When laying the pavers, using spacers is key to keeping the gaps even and creating a professional look. It’s also important to frequently check that the surface is level to prevent any wobbling or instability. This method creates a beautiful and durable surface perfect for enjoying your backyard.

Pedestal Systems for Elevated Patios

For rooftops, balconies, or elevated patios, pedestal systems are the ideal solution. This method involves placing pavers on adjustable pedestals that raise them off the base surface. This creates a perfectly level deck while allowing water to drain freely underneath, protecting the structure below. It also provides easy access to any wiring or plumbing that might be concealed. Because these elevated surfaces are more exposed, it’s essential to consult with a landscape architect or engineer. They can ensure the system is right for your project and can safely handle factors like wind load, giving you peace of mind.

Plan Your Installation Around Long Island Weather

Timing your paver installation is just as important as choosing the right materials. Long Island’s weather can be unpredictable, so planning your project around the forecast is key to ensuring your new patio or walkway lasts. Working within the right weather window prevents issues with the base, adhesive, and pavers, leading to a durable, professional finish. At Gappsi, our installation teams are experts at scheduling projects to align with ideal conditions for laying porcelain and natural stone pavers.

Find the Best Temperature for Installation

Think of paver installation as having a “Goldilocks” temperature zone. The ideal range is between 41°F and 95°F. This moderate weather allows the base materials and setting agents to cure properly without interference from frost or extreme heat. If temperatures dip below 41°F, it’s critical that the ground isn’t frozen or wet, as this can compromise the foundation. The best practice is to aim for those mild, clear days we love on Long Island during the spring and fall.

Work Around Rain and Humidity

We’re no strangers to rain and humidity on Long Island. If your installation days are damp, the project requires careful management. Your crew will work in stages, ensuring the pavers and tools stay dry. Proper drainage is even more critical in our climate. A slight, carefully calculated slope is built into the design to guide water away from the surface. This small detail, handled by our expert masonry construction team, prevents water from pooling and causing damage over time.

Avoid Installing in Extreme Weather

Some weather conditions are simply a no-go for paver installation. Never lay pavers on frozen or soggy ground, as frost and excess moisture can weaken the base and cause pavers to shift or crack later. On the other end of the spectrum, installing during a summer heatwave above 95°F presents its own challenges. The intense sun can cause the setting bed to dry out too quickly, preventing a strong bond. A professional team will know to schedule the work for a cooler part of the day to guarantee a flawless result.

Follow These Steps for a Flawless Installation

A successful paver project is all about what happens before you lay the first stone. Proper preparation is the key to creating a beautiful, long-lasting patio or walkway that can handle everything Long Island weather throws at it. By following a few essential steps, you can ensure your installation is solid, drains correctly, and looks professional for years to come. Think of it as building a strong foundation for your outdoor oasis. Let’s walk through the process.

Prepare and Excavate the Site

First things first, you need to map out your project area. Use marking paint or stakes and string to create a clear outline. Before you dig, always call 811 to have underground utility lines marked. This is a crucial safety step you can’t skip. Once the area is clear, it’s time to gather your tools and start excavating. You’ll want a shovel, a wheelbarrow, a tape measure, and a plate compactor to create a firm base. After digging out the area, lay down landscape fabric to prevent weeds from popping up between your beautiful new pavers. This initial groundwork is what separates a DIY look from a professional masonry installation.

Create the Right Slope for Drainage

Proper drainage is non-negotiable, especially with our coastal storms and winter freezes. You need to ensure water has a path to run off your patio instead of pooling on the surface. A gentle, almost unnoticeable slope is the perfect solution. Aim for a grade of about one-quarter inch for every foot of distance, directing water away from your home’s foundation. This prevents standing water, which can turn into hazardous ice in the winter and lead to moisture issues over time. Getting the slope just right is a critical step for protecting your investment in high-quality porcelain pavers and ensuring their longevity.

Get Joint Spacing and Width Right

While it might seem like a minor detail, the space between your pavers is incredibly important. You should leave a consistent gap, typically between 3mm and 5mm, between each paver. These gaps, or joints, give the pavers room to expand and contract slightly with temperature changes. Without this breathing room, pavers can press against each other, leading to chipping and cracking along the edges. Using paver spacers can help you keep the joints uniform for a clean, polished look. This small step makes a huge difference in preventing damage and maintaining the pristine appearance of your patio surface.

Use pH-Neutral Jointing Materials

Once your pavers are in place, you’ll need to fill the joints to lock them together. The material you choose depends on your installation base. For a dry-laid project on a gravel and sand base, polymeric sand is an excellent choice. When swept into the joints and activated with water, it hardens to form a firm yet flexible bond that resists weeds and insects. For pavers set on a concrete slab, grout is the standard. Whatever you use, make sure it’s a pH-neutral formula. This prevents any chemical reactions that could stain or discolor your porcelain pavers, keeping them looking brand new. Proper jointing is the final touch that secures your project and helps with long-term paver maintenance.

Maintain Your Pavers for Lasting Beauty

Your beautiful new porcelain pavers are incredibly durable, but a little routine care will keep them looking brand new for years to come. Thankfully, maintaining them is simple and doesn’t require a lot of time or special equipment. By following a few key steps, you can protect your investment and ensure your outdoor space remains a stunning, safe, and inviting retreat through every Long Island season. From gentle cleaning to smart winter prep, consistent upkeep is the best way to preserve the beauty and integrity of your patio or walkway.

Clean Regularly with the Right Pressure

Keeping your pavers clean is the first step to lasting beauty. For general dirt and grime, you can use almost any type of outdoor cleaner. The real key is how you rinse it off. If you use a pressure washer, be careful not to go overboard. We recommend keeping the pressure at or below 1,600 PSI. Any higher and you risk blasting away the jointing material between the pavers, which can lead to shifting and weed growth. A gentle but thorough cleaning is all you need. For tougher stains or seasonal deep cleans, our professional restoration and sealing services can bring back that perfect finish without risking damage.

Select Safe Ice Melt for Winter Care

When winter arrives on Long Island, ice can make your beautiful patio a slippery hazard. While reaching for an ice melt product is a smart move, make sure you grab the right one. Some harsh chemical de-icers can damage the surface of your porcelain pavers or degrade the joints over time. To stay safe, always look for an ice melt that is specifically labeled as safe for use on tile or porcelain surfaces. This small step prevents unnecessary wear and tear, ensuring your pavers look just as good in the spring as they did in the fall.

Inspect and Clear Debris Seasonally

Make a habit of checking on your pavers a few times a year, especially as the seasons change. In the fall, sweep away fallen leaves and twigs to prevent staining. Throughout the winter, clear away snow and ice to keep the area safe for walking. A quick seasonal inspection allows you to catch any minor issues before they become bigger problems. Keeping the surface clear of debris not only maintains the pristine look of your porcelain and natural stone but also reduces the risk of slips and falls, so you can enjoy your outdoor space with peace of mind.

Avoid These Common Installation Mistakes

A porcelain paver patio is a fantastic investment, but a flawless finish depends on avoiding a few common pitfalls during installation. Getting the process right from the start saves you from future headaches like shifting pavers, cracked grout, and a surface that doesn’t last. These mistakes are easy to sidestep with a little planning and know-how. By paying attention to the foundation, timing your work with the weather, and using the right cleaning techniques, you can ensure your new outdoor space looks beautiful for years. Let’s walk through the most critical mistakes to avoid.

Skipping Proper Subbase Preparation

This is the most critical step, and cutting corners here will cause problems down the road. Your beautiful porcelain pavers need a solid foundation to rest on. Without a properly prepared subbase, pavers can shift, sink, or become uneven, especially with Long Island’s freeze-thaw cycles. You should always start with a strong, sturdy sub-base to make sure your paving lasts. This involves excavating the area and then laying and compacting layers of gravel and sand. Using a tamper to pack the gravel down tightly prevents it from moving later, giving your porcelain pavers the stable support they need to handle foot traffic and weather without budging.

Installing at the Wrong Temperature

Long Island weather can be unpredictable, but timing your installation is key. The mortar and adhesives used to set porcelain pavers are sensitive to temperature. Ideally, you should install them when the temperature is between 41°F and 95°F. If it’s too cold, the materials may not cure correctly, leading to a weak bond. If it’s too hot, they can dry out too quickly, which also compromises their strength and can cause cracking. While some special adhesives work in colder temperatures, it’s always best to plan your project during milder weather to ensure a durable, long-lasting bond for your outdoor patio.

Using Harsh Chemicals for Cleaning

One of the best things about porcelain pavers is how easy they are to maintain. They are non-porous, which means they naturally resist stains from things like spilled wine, oil, or fallen leaves. Because of this, you don’t need aggressive, harsh chemicals to keep them clean. In fact, acidic or abrasive cleaners can damage the grout or the paver’s surface over time. A simple cleaning with water and a pH-neutral soap is usually all you need to make them look new again. Proper paver maintenance is about gentle, consistent care, not powerful chemicals.

Related Articles

Frequently Asked Questions

Are porcelain pavers slippery, especially around a pool? This is a great question and a common concern for anyone planning a poolside patio. Porcelain pavers designed for outdoor use are manufactured with a textured, slip-resistant finish. This makes them a very safe option for areas that get wet, like pool surrounds and walkways. You get the sleek look of porcelain without compromising on safety for your family and guests.

Can I install porcelain pavers over my existing concrete patio? Yes, you often can, and it’s a fantastic way to upgrade an old space. The most important factor is the condition of your current concrete slab. As long as it’s stable and free from major cracks or heaving, we can install porcelain pavers directly on top using a specialized mortar. This creates a durable, beautiful new surface without the need for a full demolition.

What’s the real difference in maintenance between porcelain and natural stone? While both materials are excellent choices, porcelain is significantly easier to maintain. Its surface is non-porous, which means it naturally resists stains, mold, and mildew, so you won’t need to seal it. Natural stone, on the other hand, is porous and requires regular sealing every few years to protect it from absorbing spills and moisture.

How do you ensure the pavers won’t shift or become uneven over time? The long-term stability of your patio comes down to the foundation beneath it. A proper installation involves creating a deep, compacted subbase of gravel and sand that can withstand Long Island’s freeze-thaw cycles. We also incorporate a slight, carefully measured slope to ensure water drains away properly. This preparation prevents water from getting trapped underneath, which is the main cause of shifting and unevenness.

What happens if a paver gets chipped or cracked? Porcelain is incredibly durable, so damage is rare, but accidents can happen. One of the biggest advantages of a paver system is that individual pavers can be replaced. If one gets damaged, a professional can carefully lift out the single paver and set a new one in its place. This is a much simpler and more cost-effective fix than repairing a large, solid surface like poured concrete.

Share this page:
Light gray porcelain outdoor pavers on a modern pool deck.

Porcelain Outdoor Pavers: A Complete Guide

Your backyard should be a true extension of your home, a place that reflects your personal style. Finding the right foundation for your patio, walkway, or pool deck is the first step in bringing that vision to life. If you feel limited by the standard options, you’ll love the creative freedom that comes with porcelain. These pavers are design chameleons, able to convincingly mimic the rustic warmth of a wood plank or the elegant veining of natural marble. With a vast range of colors, textures, and sizes, porcelain outdoor pavers / tiles allow you to create a completely custom look that’s both beautiful and built to last for decades.

Key Takeaways

  • Porcelain offers lasting strength with less work: Because they are fired at extreme temperatures, porcelain pavers are incredibly dense and durable. This non-porous surface naturally resists stains, frost, and fading, which means you get a beautiful patio without the need for constant sealing or scrubbing.
  • Achieve any aesthetic without compromise: Porcelain gives you complete creative freedom. You can get the high-end look of natural stone or wood without the difficult upkeep, choosing from a huge range of colors, textures, and sizes to perfectly match your home’s style.
  • Invest in a versatile, long-term solution: While the initial price might be higher, porcelain’s long lifespan and minimal maintenance needs make it a smart financial choice. Its strength makes it suitable for any project, from elegant pool decks and patios to durable driveways and Sports Games Courts.

Why Choose Porcelain Pavers for Your Outdoor Space?

When you’re planning a new patio, walkway, or pool deck, the material you choose is a big decision. It needs to look great, stand up to the elements, and fit your lifestyle. That’s why so many Long Island homeowners are turning to porcelain pavers. They offer a unique combination of sophisticated style, incredible toughness, and surprisingly low maintenance. Unlike some traditional materials that can require a lot of upkeep, porcelain gives you a beautiful outdoor space you can actually spend your time enjoying, not constantly working on. Let’s look at the specific benefits that make porcelain a top choice for any outdoor project.

Enjoy Lasting Durability and Strength

One of the biggest advantages of porcelain is its remarkable strength. Because these pavers are fired at extremely high temperatures during manufacturing, they become incredibly dense and durable, often even stronger than natural stone. This means they can handle heavy foot traffic, patio furniture, and the general wear and tear of outdoor living without chipping or cracking. Think of it as a long-term investment in your home. A properly installed porcelain paver patio can last for decades with basic care, giving you a beautiful, functional space for countless family barbecues and quiet evenings. You can explore a wide selection of high-quality porcelain and natural stone options to find the perfect fit for your project.

Find Your Perfect Aesthetic

Your outdoor space should be an extension of your home’s personality, and porcelain pavers make it easy to achieve the exact look you want. Whether your style is sleek and modern or rustic and traditional, there’s a porcelain paver to match. They are perfect for creating an elegant and luxurious feel for any patio, pool deck, or walkway. The manufacturing process allows for an incredible range of colors, patterns, and finishes, giving you complete creative control. This versatility ensures your new outdoor area will seamlessly blend with your home’s existing architecture and your overall landscape design. You aren’t just building a patio; you’re designing a custom outdoor retreat.

Resists Stains, Fading, and Frost

Here in Long Island, we get everything from scorching summer sun to freezing winter storms. Porcelain pavers are built to handle it all. Their surface is non-porous, which means liquids can’t penetrate it. Spilled wine, greasy drips from the grill, or fallen leaves won’t leave behind stubborn stains. This non-porous quality also makes them resistant to mold and mildew growth. Plus, they are completely frost-proof, so you don’t have to worry about cracking during the freeze-thaw cycles of winter. While other materials might need regular cleaning and sealing to stay protected, porcelain maintains its color and integrity year after year with minimal effort.

Spend Less Time on Maintenance

If you’d rather spend your weekends relaxing on your patio than working on it, porcelain pavers are an excellent choice. They are one of the lowest-maintenance paving options available today. Because they are non-porous and resist staining, you can say goodbye to harsh chemical cleaners and hours of scrubbing. Most of the time, a simple sweep and a rinse with a garden hose are all that’s needed to keep them looking new. Unlike many types of natural stone or concrete pavers, porcelain does not require sealing to protect it from water absorption or stains. This saves you time and money over the life of your patio, giving you a consistently beautiful surface without the constant upkeep.

Your Design Options with Porcelain Pavers

One of the best parts about choosing porcelain pavers is the incredible design flexibility they offer. Forget feeling limited by a small selection of colors or styles. Porcelain opens up a world of creative possibilities, allowing you to design an outdoor space that truly reflects your personal taste. Whether you dream of a rustic patio that looks like aged wood or a sleek, modern pool deck, there’s a porcelain paver to match your vision. You can mix and match colors, textures, and sizes to create a one-of-a-kind look for your Long Island home.

The technology behind porcelain manufacturing means you can achieve almost any aesthetic you can imagine. From rich, earthy tones to cool, contemporary grays, the options are vast. This versatility ensures your new patio, walkway, or driveway will not only be durable but also a beautiful extension of your home’s style. Let’s look at the specific design choices you can make.

Get the Look of Natural Stone and Wood

If you love the timeless appeal of natural materials but worry about the upkeep, porcelain pavers are the perfect solution. Advanced manufacturing techniques allow porcelain to convincingly replicate the look of natural stone, from the subtle veining of marble to the rustic texture of cobblestone. You can find pavers in a range of earthy colors that bring a warm, organic feel to your landscape. Similarly, if you want the cozy look of a wood deck without the constant sealing and staining, wood-look porcelain tiles offer a stunning and practical alternative. You get all the beauty of these classic materials with the superior durability and low maintenance of porcelain.

Explore a Spectrum of Colors and Finishes

Your outdoor space should be a reflection of your style, and porcelain pavers provide a full palette to work with. The color options go far beyond basic beige and gray. You can find pavers in crisp whites, deep blues, and even multi-tonal varieties that add depth and character. This spectrum of colors allows you to create a cohesive design that complements your home’s exterior and landscaping. Beyond color, you can also choose from various finishes. A matte finish offers a soft, contemporary look, while a more textured surface can add rustic charm. The right combination of color and finish helps you set the perfect mood for your outdoor oasis.

Add Texture for Safety and Style

Texture does more than just add visual interest to your patio or walkway; it’s also a key safety feature. Many porcelain pavers are designed with slip-resistant surfaces, making them an ideal choice for areas that get wet, like pool decks and entryways. These “grip” finishes provide extra traction underfoot, giving you peace of mind without sacrificing style. Textured pavers can also mimic the feel of natural materials like slate or travertine, adding a layer of authenticity to your design. This blend of beauty and function ensures your outdoor space is not only stunning but also safe for family and friends.

Choose from Various Sizes and Thicknesses

The size and shape of your pavers play a huge role in the final look of your project. Porcelain pavers come in a wide array of sizes, from smaller 8×8 squares to large-format rectangular tiles like 12×48. Using large pavers can make a small patio feel more spacious, while mixing different sizes can create intricate, eye-catching patterns. Our masonry design experts can help you choose a layout, like a classic running bond or a sophisticated herringbone, that enhances your space. The paver’s thickness is also important, as thicker pavers are recommended for high-traffic areas like driveways to ensure long-lasting strength and stability.

Where to Use Outdoor Porcelain Pavers

Porcelain pavers are incredibly versatile, making them a fantastic choice for almost any outdoor project you can imagine. Their unique combination of strength, beauty, and low maintenance allows them to perform beautifully in a variety of settings. Whether you’re creating a cozy patio for quiet evenings or a durable driveway that can handle daily traffic, porcelain provides a reliable and stylish foundation. At Gappsi, we use porcelain and natural stone pavers to transform outdoor spaces into functional works of art. From poolside lounges to elegant walkways, these pavers offer a practical solution that doesn’t compromise on design. Let’s look at some of the most popular applications for outdoor porcelain.

Patios and Outdoor Living Areas

Your patio is the heart of your backyard, and porcelain pavers can make it both stunning and simple to care for. They provide a clean, contemporary look that can seamlessly extend your indoor living space to the outdoors. Because they resist stains from spills like wine or oil, you can host barbecues and family gatherings without worrying about cleanup. As landscaping professionals note, “Porcelain pavers offer a modern, low-maintenance alternative to traditional outdoor materials to create long-lasting outdoor living spaces.” This durability means your beautiful masonry patio will look incredible for years with minimal effort.

Pool Decks and Walkways

Safety and style are top priorities around a swimming pool, and porcelain pavers deliver on both. Many collections are engineered with textured, slip-resistant surfaces, which is a huge plus for wet areas. This feature provides better grip underfoot, reducing the risk of slips and falls around your swimming pool. Porcelain also resists fading from UV rays and damage from pool chemicals, so your pool deck will maintain its color and integrity. Its low water absorption rate prevents it from warping or cracking, ensuring a safe, beautiful, and long-lasting surface for summer fun.

Driveways and High-Traffic Zones

A driveway needs to be tough enough to handle the weight of vehicles and constant use. Porcelain pavers are an excellent choice for these high-traffic zones because of their exceptional strength. They are “stronger, more durable and denser than natural stones,” making them perfectly suited for driveways and busy walkways. Unlike some other materials that can crack under pressure, high-quality porcelain pavers are built to withstand heavy loads without showing signs of wear. This makes them a smart investment for a durable and attractive entrance to your home that will stand the test of time.

Sports Games Courts and Entertainment Spaces

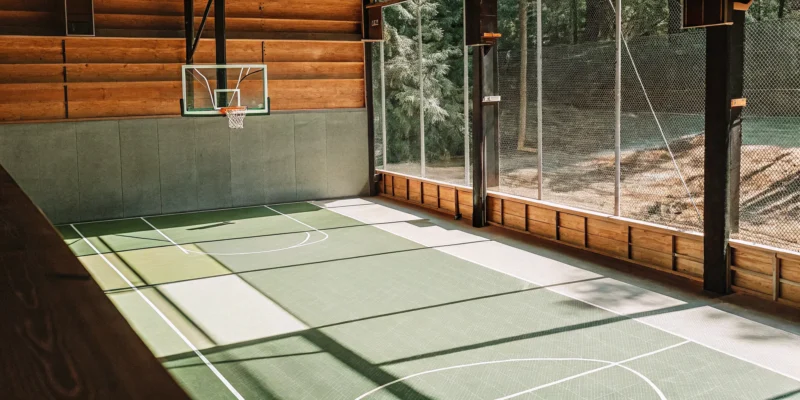
Porcelain pavers are a fantastic surface for custom backyard Sports Games Courts. Their incredible durability and uniform surface create a reliable and high-performance area for basketball, pickleball, or other activities. Porcelain’s “low water absorption and high breakage resistance ensure its durability,” which means it won’t easily crack or weather from intense activity or changing seasons. This makes it a superior choice over materials that might degrade over time. You can create a professional-quality playing surface that doubles as a versatile entertainment space, perfect for any home with an active family. Explore our synthetic turf and Sports Games Courts to see what’s possible.

Understanding Paver Costs and Performance

Making a smart investment in your outdoor space means looking at both the initial cost and the long-term performance of your materials. Porcelain pavers stand out because they deliver incredible value. While the upfront price might be higher than some alternatives, their durability and low maintenance needs often make them the more economical choice over time. Let’s break down what goes into the cost and what you can expect.

What Affects the Price?

The price of porcelain pavers can vary, and it’s helpful to know what factors are at play. The brand, design complexity, size, and thickness all influence the cost. Pavers that mimic intricate wood grains or natural stone patterns may come with a higher price tag. Larger or thicker pavers designed for driveways will also cost more. Remember that the total project cost includes site preparation and professional installation, which is essential for ensuring your new patio or walkway lasts for decades.

Comparing Long-Term Value

When you look at the big picture, porcelain pavers are a fantastic long-term investment. Their durability means you won’t spend money on frequent repairs. Unlike wood decks that need regular staining or some stones that require sealing, porcelain is a low-maintenance material that saves you time and money. A properly installed porcelain paver patio can easily last 50 years or more with just basic cleaning, helping maintain your property’s value and keeping your outdoor space looking pristine.

Proven Performance and Reliability

There’s a myth that porcelain isn’t as strong as natural stone, but the opposite is often true. During manufacturing, porcelain is fired at extremely high temperatures, making it denser and more durable than many stones. This process gives it a very low water absorption rate, so it’s resistant to frost, cracking, and staining. Its high breakage resistance ensures it can handle heavy foot traffic and harsh weather, making it a reliable choice for any outdoor living area.

What to Know About Installation

Porcelain pavers offer great installation flexibility. They can be dry-laid over sand or gravel, placed on grass for a modern look, or installed over an existing concrete slab. For rooftop decks or uneven surfaces, they can even be installed on pedestal systems. Regardless of the method, correct installation is crucial for performance. Working with experienced professionals ensures the base is properly prepared and the pavers are set correctly, guaranteeing a stable, long-lasting surface.

Common Questions About Porcelain Pavers

When you’re planning a big project, it’s natural to have questions. Porcelain pavers are a fantastic choice for outdoor spaces, but there are a few common myths and queries that pop up. Let’s clear the air so you can feel confident in your decision.

Clearing Up Common Misconceptions

The word “porcelain” might bring to mind delicate teacups, but when it comes to pavers, the reality is completely different. Thanks to a manufacturing process that involves firing fine clay at extremely high temperatures, porcelain pavers are incredibly dense, strong, and durable. In fact, they are often stronger than many types of natural stone. This strength makes them a practical, low-maintenance solution for patios, walkways, and driveways. They are built to handle Long Island weather and daily life without chipping or cracking easily, giving you a beautiful surface that lasts for years.

Do They Get Hot in the Sun?

This is a great question, especially if you’re planning a new pool deck or a patio where your family will be running around barefoot. While any surface will warm up in direct summer sun, porcelain pavers don’t get significantly hotter than other materials. The key factor is actually the color, not the material itself. Lighter-colored pavers reflect more sunlight and stay much cooler to the touch than darker shades. If you’re designing a space for sunbathing or poolside fun, choosing a porcelain paver in a white, beige, or light gray will keep the area comfortable all summer long.

Professional vs. DIY Installation

While some porcelain pavers are marketed for easy installation, achieving a flawless and long-lasting result requires proper groundwork. The base beneath your pavers is critical for preventing shifting, cracking, and drainage issues down the road. A professional installation ensures the site is correctly excavated, graded, and compacted. An expert team has the right tools and experience to handle any challenges your property might present. For a project that adds significant value to your home, trusting a professional masonry team is an investment in getting it done right the first time.

Sustainability and Eco-Friendliness

If being environmentally conscious is important to you, porcelain pavers are an excellent choice. They are made from natural and abundant raw materials like clay and feldspar. Their incredible durability also means they have a very long lifespan, so you won’t need to replace them often, which reduces waste. Furthermore, because porcelain is non-porous, it naturally resists stains, mold, and mildew without the need for chemical sealants. This means fewer chemicals are used during routine maintenance, which is better for your family and the local environment.

Related Articles

Frequently Asked Questions

Are porcelain pavers slippery when they get wet? This is a very common and important question, especially for pool decks and walkways. Many porcelain pavers are specifically designed with safety in mind and feature textured, slip-resistant surfaces. This “grip” finish provides excellent traction even when wet, making them a much safer choice than many smooth natural stones or sealed concrete options for areas where people will be walking with wet feet.

How do porcelain pavers handle the changing seasons on Long Island? Porcelain is exceptionally well-suited for our climate. Because the pavers are non-porous, they don’t absorb water. This means they are completely frost-proof and won’t crack during the winter’s freeze-thaw cycles. In the summer, their dense composition and factory-sealed colors resist fading from harsh UV rays, so your patio will look just as vibrant after many years of sun exposure.

What does “low-maintenance” actually mean for porcelain pavers? It truly means you get to spend more time enjoying your outdoor space and less time working on it. For most messes, a simple sweep and a rinse with a garden hose are all you need. Because porcelain is non-porous, spills from things like wine, oil, or fallen leaves don’t soak in and cause stains. You can skip the annual power washing, chemical treatments, and sealing that other materials often require to stay looking their best.

Is porcelain really strong enough for a driveway? Absolutely. Don’t let the name fool you; these aren’t delicate tiles. Porcelain pavers are fired at extremely high temperatures, which makes them incredibly dense and durable, often even stronger than natural stone. When you choose the appropriate thickness and have them installed professionally, they can easily handle the weight of vehicles and daily traffic without cracking or showing wear.

Why should I choose porcelain pavers if other materials cost less upfront? While some materials might have a lower initial price, porcelain pavers often prove to be the more economical choice over the long run. Their incredible durability means you won’t be spending money on frequent repairs or replacements. Plus, you save significantly on maintenance costs year after year since they don’t require sealing or special cleaners. It’s an investment in a beautiful, worry-free outdoor space that adds lasting value to your home.

Share this page:
A bocce court with the best floor materials for long-lasting play in Long Island, NY.

4. Long Island’s Best Bocce Court Floor Materials

Here on Long Island, our backyards face it all: hot summer sun, heavy rain, and freezing winter nights. Your bocce court surface needs to handle these conditions without becoming a soggy, uneven mess. Drainage is everything. A material that holds water will quickly become unplayable and can lead to long-term damage. This is why selecting the best bocce courts floors materials for long island ny is about more than just looks; it’s about smart, weather-ready engineering. We’ll explore durable, all-weather solutions that stay ready for play year-round, making your court a practical and lasting addition to your home.

Key Takeaways

  • Match your court surface to your lifestyle: Consider how you plan to play and how much upkeep you want to perform. Synthetic turf is ideal for low-maintenance family fun, while natural surfaces like oyster shell offer a classic experience for those who enjoy the traditional care routine.
  • Prioritize a professional foundation: The secret to a lasting court is what’s underneath. A properly built base with excellent drainage is crucial for preventing an uneven, soggy playing surface and for handling Long Island’s diverse weather.
  • Balance your budget with long-term upkeep: The cheapest material upfront is not always the most cost-effective choice. Factoring in future maintenance costs and time will help you see the value in a more durable, low-effort surface that fits your budget over time.

What Are the Best Materials for a Bocce Court?

Choosing the right surface for your bocce court is one of the most important decisions you’ll make. The material you pick affects everything from how the balls roll to how much time you spend on upkeep. It’s a choice that defines not just the game, but the entire look and feel of your outdoor space. Your court is more than just a place to play; it’s a feature of your backyard landscape, an extension of your home. The right surface will complement your home’s style while giving you the perfect playing experience. Think about what you want from your court. Are you looking for the classic, traditional feel of an Italian courtyard? Or do you prefer a sleek, modern surface that requires almost no maintenance? The good news is, there’s a material that fits your vision. From the authentic crunch of oyster shells to the smooth consistency of synthetic turf, each option offers a unique set of benefits. Let’s walk through the most popular options for Long Island backyards to help you find the perfect foundation for your new favorite pastime. Gappsi offers a wide selection of materials for building custom sports games courts that are both functional and beautiful, ensuring your new court is a perfect match for your lifestyle.

Synthetic Turf for Easy Upkeep

If you’d rather spend your weekends playing bocce than maintaining your court, synthetic turf is an excellent choice. This surface gives you a consistently smooth and level playing field without the constant work of natural grass. You can forget about watering, mowing, or weeding. Plus, modern synthetic turf is designed with superior drainage, so a little rain won’t sideline your game for long. It’s a durable, all-weather solution that stays green and ready for play year-round, making it a practical and attractive addition to any Long Island home. It’s all the fun with none of the fuss.

Crushed Oyster Shell for a Classic Feel

For the bocce purist, nothing beats the traditional feel of a crushed oyster shell court. This is the surface used in classic Italian courts, and it provides an authentic playing experience, complete with the satisfying crunch underfoot. Oyster shells drain well and offer a firm surface for a true ball roll. However, this classic charm comes with a commitment to maintenance. You’ll need to rake the court regularly to keep it level and clear of debris. It can also be a bit messy, but for those who love the game’s history, the extra care is a small price to pay for an authentic experience.

Decomposed Granite for a Natural Look

Decomposed granite, or DG, strikes a great balance between a natural aesthetic and a stable playing surface. This material is essentially fine gravel that compacts tightly to create a firm, smooth court that’s perfect for bocce. Its earthy tones blend seamlessly into almost any landscape design, giving your court a subtle, organic look. DG is also a durable and relatively low-maintenance option. Once it’s properly installed and compacted, it holds up well to foot traffic and weather. It’s a fantastic choice if you want a reliable court that feels like a natural part of your backyard.

Poured-in-Place Rubber for a Modern Touch

A poured-in-place rubber surface brings a modern, clean, and highly functional touch to your bocce court. This option is incredibly durable, low-maintenance, and provides a perfectly consistent ball roll every time. One of its biggest advantages is safety; the soft, cushioned surface is forgiving, making it a great choice for families with children. Poured rubber also comes in a wide range of colors, allowing you to customize the court to match your patio, pool deck, or home exterior. It’s a versatile and long-lasting material that combines high performance with contemporary style for your outdoor entertainment space.

How to Choose the Right Bocce Court Surface

Picking the right surface for your bocce court is about more than just aesthetics. It’s the single most important decision you’ll make for the quality of your game and the longevity of your court. The material underfoot dictates how the balls roll, how much maintenance you’ll be doing on weekends, and how well your court holds up to Long Island’s weather. Getting this choice right means more time playing and less time worrying about repairs or poor drainage.

Think of it as the foundation for years of fun. A surface that’s perfect for a casual player might not suit a competitive family, and a material that works in a dry climate might not be the best choice for our coastal weather. You want a court that not only looks great in your yard but also plays consistently and withstands everything from summer barbecues to autumn rain. It’s a significant part of your outdoor living space, so it’s worth taking the time to understand your options. To find the perfect fit, you need to balance three key elements: how you want to play, our local climate, and how much you plan to use the court. Let’s walk through what you need to know to make a choice you’ll be happy with for years to come.

Compare Playability and Ball Roll

The surface you choose is critical to the performance of your bocce court. Each material offers a unique playing experience, so it’s helpful to think about what kind of game you want. Are you looking for fast, competitive matches or a more relaxed, casual roll? Synthetic turf, for example, provides a consistent and smooth surface, allowing for a faster and more predictable game. It’s a great option if you want a professional feel right in your backyard.

On the other hand, natural surfaces like crushed oyster shell or decomposed granite offer a more traditional, classic feel. The ball roll might be slightly slower and less uniform, which many players feel adds to the authentic charm and challenge of the game. The choice really comes down to personal preference and how you envision using your court for backyard entertainment.

Consider Long Island’s Climate

Here on Long Island, we get a little bit of everything: hot summer sun, heavy rain, and chilly winters. Your bocce court surface needs to be able to handle it all. Drainage is the most important factor. A surface that holds water will quickly become a soggy, unplayable mess. Materials like crushed oyster shell are popular for a reason; they provide an ideal playing surface that drains exceptionally well, making the court ready for a game soon after a storm.

Properly installed synthetic turf and decomposed granite with a solid base layer are also excellent choices for managing moisture. The key is ensuring the entire court system, from the base to the surface, is designed to handle our specific weather patterns, preventing puddles and protecting your investment through every season.

Match Durability to How Often You’ll Play

How often do you see your family and friends gathering for a game? Your answer will help determine the best material for your lifestyle. If you anticipate frequent, high-energy matches with kids and neighbors, you’ll want a surface that can stand up to heavy foot traffic. While artificial turf is incredibly durable, a significant tear or imperfection could require a larger replacement.

For those who play often, a surface like crushed oyster shell is not only durable but also easy to maintain and patch yourself. Natural stone or porcelain pavers can also be used to create a highly durable, low-maintenance border or playing area. By matching the material’s resilience to your expected use, you ensure your court remains a beautiful and functional part of your landscape for the long haul.

What’s the Budget for a Bocce Court?

Figuring out the budget for your bocce court is a key step in bringing your backyard vision to life. The total cost depends on several factors, including the size of the court, the materials you choose, and whether you hire a professional for installation. Think of it as an investment in your home that adds a fun, social element to your outdoor space. While there’s a range of price points, understanding the breakdown helps you make a choice that fits your wallet and your long-term plans for your yard. From simple, classic surfaces to premium, low-maintenance options, there’s a solution for every budget.

Breaking Down Material Costs

On average, you can expect a professionally installed bocce court to cost between $30 and $40 per square foot. This price can shift based on a few important variables. The final size of your court is the biggest factor, but site accessibility also plays a role; a hard-to-reach backyard might increase labor costs. The materials you select, whether it’s natural stone or synthetic turf, will significantly influence the price. Finally, any custom features like built-in lighting, surrounding patios, or benches will add to the total project cost.

Weighing Upfront Cost vs. Long-Term Value

When budgeting, it’s smart to think about the long-term value, not just the initial price tag. For instance, synthetic turf has a higher upfront cost, but it’s the only surface that offers a truly low-maintenance experience. You won’t spend your weekends raking, weeding, or replenishing materials. Other surfaces like crushed stone or oyster shell might be more affordable to install, but they require consistent upkeep to stay in top playing condition. Investing more initially in a durable, easy-care surface can save you time, effort, and money over the years.

Find Quality, Budget-Friendly Options

You don’t need a massive budget to build a beautiful and functional bocce court. There are several excellent materials that offer great performance without the premium cost. Crushed stone and decomposed granite are popular choices that create a classic, firm playing surface. Another fantastic option is using oyster shell, which is not only affordable but also one of the most DIY-friendly surfaces available if you’re looking to save on installation. These materials prove that you can create a high-quality court that provides endless fun for family and friends while staying within a comfortable budget.

How Much Maintenance Does Each Surface Need?

The amount of time you spend maintaining your bocce court depends almost entirely on the surface you choose. Some materials offer a set-it-and-forget-it experience, while others require regular attention to stay in top playing condition. Understanding these differences will help you pick a surface that fits your lifestyle, ensuring you spend more time playing and less time working on your court. Let’s break down the typical upkeep for the most popular options.

Caring for Synthetic Turf

If you’re looking for the lowest maintenance option, synthetic turf is your answer. Modern synthetic turf is designed to be incredibly durable and clean. It requires no watering, mowing, or weeding, and its excellent drainage system means you can get back to playing quickly after it rains. You won’t have to worry about dust or displaced material, either. The most you’ll typically need to do is occasionally remove leaves or other debris with a leaf blower. This makes it a perfect choice for busy homeowners who want a beautiful, ready-to-use court all year round.

Maintaining Natural Surfaces

Natural surfaces like crushed oyster shell and clay offer a traditional aesthetic but come with more hands-on maintenance. Crushed oyster shell, a classic choice, provides great drainage but needs frequent raking and replenishing to keep the surface level and clean. It can also be a bit messy, with shells getting tracked into your home. Clay courts are tough and resist dents, but they drain poorly. This means you’ll need to manage water carefully and work to prevent the surface from becoming too hard or cracking, especially with Long Island’s variable weather.

Plan for Seasonal Upkeep

Regardless of your chosen surface, every bocce court benefits from some seasonal attention. The most important task is simply keeping it clean by clearing away fallen leaves, twigs, and other debris that can interfere with play or clog your drainage system. A solid base and proper drainage are the foundation of a low-maintenance court, preventing grooves and standing water from forming. Before winter, a final sweep and check of the perimeter will help ensure your court is in great shape when the playing season returns in the spring.

Avoid These Common Bocce Court Material Mistakes

Building a bocce court is an exciting project, but a few common missteps can turn your dream court into a maintenance headache. Choosing the right material involves balancing aesthetics, playability, and your budget. By thinking through your options and avoiding these frequent mistakes, you can create a beautiful, long-lasting court that your family will enjoy for years. It’s all about making informed decisions from the ground up.

Don’t Choose Based on Cost Alone

It’s tempting to pick the most affordable material and call it a day, but this approach can cost you more down the road. Cheaper materials often require more frequent maintenance, repairs, and even full replacement sooner than you’d expect. Think of your bocce court as an investment in your home. High-quality surfaces like professionally installed synthetic turf or properly sourced oyster shell blends offer better durability and performance. Spending a bit more upfront for a resilient material means less time and money spent on upkeep and more time playing.

Never Overlook the Base and Drainage

The success of your bocce court lies in what’s underneath. A solid base and a good drainage system are absolutely essential for preventing problems. Without proper drainage, your court can hold water after it rains, making it unplayable and leading to ruts or soft spots. A poorly constructed base will cause the surface to become uneven over time, ruining the game. A professional installation ensures the ground is properly excavated, graded, and layered to create a stable foundation that can withstand Long Island’s weather and keep your court in top shape.

Understand How Each Surface Plays

Not all bocce court surfaces are created equal when it comes to gameplay. The material you choose directly affects how the balls roll. For example, a crushed oyster shell court offers a traditional, slower roll, while synthetic turf provides a faster, more consistent playing experience. Decomposed granite falls somewhere in between. Before you decide, think about who will be using the court. Are you hosting competitive matches or enjoying casual family games? Understanding the unique playability of each surface helps you select one that matches your style.

Make Sure It Complements Your Landscape

Your bocce court should feel like a seamless part of your backyard, not something that looks out of place. Consider the overall aesthetic of your outdoor space. A natural surface like decomposed granite or crushed oyster shell can blend beautifully with lush gardens and stone patios. A modern synthetic turf court might be the perfect addition to a sleek, contemporary design. The goal is to choose a material that not only performs well but also enhances your home’s landscape design.

What Does Bocce Court Installation Involve?

Building a bocce court is more than just picking a surface and spreading it out. A proper installation is a multi-step process that ensures your court not only looks great but also plays perfectly and lasts for years. Think of it like building a tiny, specialized patio. The real magic happens underneath the surface, where a solid foundation and smart preparation prevent future problems like uneven spots, poor drainage, and pesky weeds.

From the ground up, every layer has a purpose. It starts with creating a stable base that can handle Long Island’s weather, followed by preparing the area to keep it low-maintenance. Finally, the finishing touches, like borders and surrounding landscaping, tie the court into your backyard’s design. Each step is crucial for creating a professional-quality court that becomes a favorite gathering spot for family and friends. At Gappsi, we handle every detail of our Sports Games Courts installations to ensure a flawless result.

Building the Right Base and Drainage

The secret to a long-lasting bocce court is a solid foundation. Without a proper base, your court can develop ruts, hold water, and become uneven over time. A well-built base provides stability and, most importantly, excellent drainage. This typically involves excavating the area and installing a system like a French drain buried in a layer of gravel. This setup ensures rainwater flows away from the playing surface, preventing puddles and protecting the court materials. Over the gravel, a special stabilizing fabric and rigid base panels create a perfectly level and durable foundation for years of play.

Preparing the Surface and Preventing Weeds

Before the final surface material goes down, a little prep work goes a long way in keeping your court looking its best. One of the most important steps is laying down a high-quality weed barrier. This special fabric is placed underneath the base layers to stop weeds and grass from growing up through your court. It’s a simple but effective solution that drastically cuts down on future maintenance. This proactive approach is a core part of any good landscape design, ensuring your new bocce court remains a beautiful, hassle-free feature in your yard.

Integrating Borders and Landscaping

The borders, or sideboards, are what officially define the playing area and keep the surface material contained. They are typically about six to eight inches high and can be built from a variety of materials to match your home’s aesthetic. Wood offers a classic, rustic look, while concrete or landscape wall blocks provide a more permanent and polished finish. The right border not only serves a practical purpose but also helps integrate the court seamlessly into your backyard. You can use beautiful natural stone pavers to create a border that complements a nearby patio or walkway.

Key Factors to Guide Your Decision

Choosing the right material for your bocce court is about more than just looks. It’s about creating a space that fits your family’s lifestyle, stands up to the local weather, and complements your home’s design. Thinking through a few key factors will help you land on the perfect surface that you’ll enjoy for years to come. Let’s walk through what you should consider before you break ground.

How You’ll Use the Court

First, think about who will be playing. Are you planning casual weekend games with the kids, or are you a serious player looking to host competitive matches? The answer will point you toward the right surface. For family fun, a forgiving material like synthetic turf is a great choice because it’s soft, consistent, and handles a lot of activity. If you’re aiming for tournament-level play, a traditional surface like crushed oyster shell or decomposed granite offers a classic, fast roll. The choice of material is critical to the court’s performance, so matching it to your playing style is the first step to building a court you’ll love.

Long Island’s Weather

We all know Long Island weather can be unpredictable. From humid summer days to freezing winter nights, your bocce court needs to handle it all. Materials like sand can become a headache, compacting too much in the rain or getting too loose when it’s dry. A professionally installed court with a proper base and drainage system is essential to prevent heaving and cracking. Surfaces like synthetic turf and poured-in-place rubber are designed to drain efficiently and withstand our freeze-thaw cycles, making them durable, year-round options for your backyard.

Your Commitment to Maintenance

Be honest with yourself about how much time you want to spend on upkeep. Natural surfaces like crushed oyster shell and decomposed granite look beautiful but require regular maintenance. You’ll need to rake, water, and roll them to keep the surface smooth and playable. If you’d rather spend your time playing than maintaining, a low-maintenance option is your best bet. Artificial turf, for example, only needs occasional rinsing and brushing to stay in top shape. Thinking about long-term care now will save you a lot of work later and ensure your court always looks its best.

Your Backyard’s Overall Design

Your bocce court should feel like a natural extension of your home and landscape. The material you choose plays a big role in the overall aesthetic. Do you have a rustic, naturalistic backyard? Decomposed granite or crushed stone might blend in perfectly. If your home has a more modern or manicured look, the clean lines and consistent color of synthetic turf can create a polished feel. We can help you integrate your court into a cohesive landscape design that includes surrounding patios, walkways, and plantings for a truly seamless outdoor living space.

Where to Find Bocce Court Materials and Installers in Long Island

Once you have a vision for your bocce court, the next step is finding the right materials and the right team to bring it to life. For homeowners on Long Island, this means looking for a local partner with proven expertise in outdoor construction and access to high-quality supplies. A great bocce court is more than just a playing surface; it’s a well-engineered space that requires a solid foundation, proper drainage, and durable materials that can handle both gameplay and the local weather. Partnering with a company that understands these details is the key to building a court you’ll enjoy for years to come.

Why Choose Gappsi for Your Bocce Court

When it comes to creating custom bocce courts on Long Island, Gappsi is a specialized designer and builder for both homes and commercial properties. We handle every detail of the installation, offering a personalized service that matches your specific vision. You can choose from a wide variety of high-quality surfaces, including classic bluestone dust, low-maintenance synthetic turf, clay, or even our unique crushed marble dust. We work with you to design a court that fits your needs perfectly, whether you’re planning for casual family games or more competitive play. Our goal is to give you a range of excellent choices in materials and design so the final result is exactly what you imagined.

Finding Local Material Suppliers

The surface you choose is critical to your court’s performance and appearance. While you can find suppliers for common materials like crushed stone or oyster shells, sourcing the best options requires a good understanding of what makes a great playing surface. You have to think about playability, aesthetics, durability, and the level of maintenance you’re willing to commit to. Instead of spending your time vetting different suppliers, working with an established installer simplifies the process. We source a wide selection of premium porcelain and natural stone pavers and other materials, ensuring you get top-tier quality without the headache of coordinating multiple vendors.

Partner with a Professional Installer

Building a bocce court correctly is a complex project that requires real expertise. A professional installation ensures the court is built to last, giving you a durable and high-performing playing area. The most critical steps, like preparing a solid base and creating an effective drainage system, prevent future problems like ruts or water damage. A professional team will handle the essential site preparation and add the right edging to protect the court’s structure. With our deep experience in masonry design and construction, we build bocce courts with a solid foundation, ensuring stability and function for the long haul.

How to Make Your Bocce Court Last

A bocce court is a fantastic addition to your backyard, a place for fun, laughter, and friendly competition. To keep the games going for years to come, a little bit of care goes a long way. The longevity of your court starts with a solid, professional installation, but consistent maintenance is what truly protects your investment. By following a few simple steps, you can ensure your court stays smooth, level, and ready for play, no matter the season. It’s all about being proactive and understanding what your specific court surface needs to stay in top condition for endless enjoyment.

Keep Up with Regular Cleaning

Many homeowners find that keeping a bocce court clean and level is easier than they imagined, especially when they choose the right material from the start. For instance, a court made with synthetic turf simply needs regular brushing to clear away leaves and debris. A quick rinse with a hose can wash away dust, and using a stiff brush keeps the fibers standing tall for a perfect roll. If you have a natural surface like decomposed granite or oyster shells, regular raking is your best friend. This simple task removes debris and keeps the surface perfectly even, preventing low spots where water might collect. A little routine cleaning goes a long way in preventing bigger issues down the road.

Prevent Common Maintenance Problems

The best way to handle maintenance problems is to stop them before they start. A proper base and drainage system are crucial for preventing ruts and ensuring water drains away correctly, which is why professional installation is so important. Some surfaces, like crushed oyster shell, require regular maintenance like raking, watering, and rolling to stay in top shape. This keeps the surface compact and smooth for consistent play. It’s also a good idea to periodically inspect your court’s borders. Well-built masonry or wood borders should remain stable, but catching any shifting early can prevent bigger problems. For natural surfaces, staying on top of any weeds that pop up will keep your court looking pristine.

Protect Your Court Through the Seasons

Long Island weather brings a mix of everything, from sunny summer days to snowy winters, and your court needs to be ready for it all. Materials like synthetic turf have excellent drainage, so water doesn’t pool on the surface, and you can get back to playing soon after it rains. For any court type, proper grading and a well-designed drainage system are key to managing rainwater effectively. During the winter, you might consider covering a natural surface court to protect it from erosion. If you have a turf court, be sure to remove snow gently to avoid damaging the fibers. A little seasonal attention ensures your court can handle whatever the weather brings and remains a beautiful feature of your yard.

Related Articles

Frequently Asked Questions

Which bocce court surface is truly the easiest to take care of? If your goal is to spend more time playing and less time working, synthetic turf is the clear winner. It requires almost no upkeep beyond occasionally clearing off leaves and debris. Unlike natural surfaces such as crushed oyster shell or decomposed granite, you will not need to rake, water, or roll it to keep it level. It provides a consistently clean and ready-to-play surface year-round.

How important is the base of the court? Can I skip it to save money? The base is the most critical part of your entire bocce court. Skipping or cutting corners on the foundation is a mistake that will lead to costly problems later. A professionally installed base provides essential stability and drainage, preventing the surface from becoming uneven, developing ruts, or holding water after it rains. It is the key to a long-lasting court that plays well for years.

What’s the best surface for a family with kids and pets? For a busy backyard with lots of activity, you need a surface that is both durable and safe. Synthetic turf is an excellent choice because it can withstand heavy foot traffic and constant play without developing bare spots. Another great option is a poured-in-place rubber surface, which provides a soft, cushioned feel that is very forgiving and helps minimize scrapes from falls.

Can a bocce court fit in a smaller Long Island backyard? Absolutely. While there are regulation dimensions for competitive play, a backyard court can be customized to fit the space you have available. You don’t need a massive yard to enjoy the game. We can design a beautiful, functional court that works with your landscape’s specific size and shape, ensuring it feels like a natural part of your outdoor living area.

How long does the installation process usually take? The timeline for installing a bocce court can vary depending on the size, chosen materials, and the specific conditions of your property. A professional installation is a thorough process that includes excavation, building a proper base and drainage system, and carefully laying the final surface. Generally, you can expect the project to take several days to a couple of weeks to ensure every step is completed correctly for a durable, high-quality result.

Share this page:
Applying a protective paver sealer to an outdoor patio with a roller.

The Homeowner’s Guide to Using Paver Sealer

Choosing a finish for your pavers is a design decision, just like picking a paint color for your living room. The final touch that ties your whole outdoor aesthetic together is the paver sealer. This single product can dramatically change the look and feel of your patio or walkway. Do you love the deep, rich tones your pavers have right after it rains? A wet-look sealer can make that look permanent. Or do you prefer the original, understated color of the stone? A natural-finish sealer offers invisible protection. This guide is all about style, helping you explore the different finishes, from matte to high-gloss, so you can find the perfect paver sealer to match your vision while protecting your surfaces.

Key Takeaways

  • Protect your investment with paver sealer: It’s the best way to guard against stains, prevent weed growth, and defend your pavers from weather damage, which keeps them looking new for years.
  • Choose a finish that matches your style: Select a sealer based on the final look you want, from a completely natural, invisible shield to a rich, wet-look gloss that makes colors pop.
  • Prioritize preparation for a flawless result: The success of your project depends on a perfectly clean and completely dry surface; rushing the prep work is the most common cause of a cloudy or peeling finish.

Why Seal Your Pavers?

You’ve invested in a beautiful paver patio, walkway, or driveway, and it looks fantastic. But how do you keep it that way? The secret is paver sealer. Think of it as the final, crucial step in protecting your outdoor space. Sealing your pavers isn’t just about looks; it’s a practical measure that defends against stains, weather, and weeds, extending the life of your investment. By creating a protective barrier, a good sealer ensures your pavers stay as strong and vibrant as the day they were installed. It’s a simple process that saves you from future headaches and costly repairs, making it one of the smartest things you can do for your property.

Protect and Enhance Paver Color

One of the first things you’ll notice about unsealed pavers is how the sun can dull their color over time. Just like a coat of paint fades, the rich tones of your pavers can wash out from constant UV exposure. Applying a sealer acts like sunscreen, locking in the original color and preventing that sun-bleached look. It not only protects the color but can also enhance it, giving the stones a richer, deeper appearance. This simple step ensures your beautiful natural stone pavers maintain their vibrancy, keeping your outdoor space looking fresh and new for years to come.

Prevent Stains from Spills and Grime

Life happens, and on a patio, that often means spills. From a tipped-over glass of red wine during a barbecue to an oil leak from a car on the driveway, stains are a real threat. Pavers are naturally porous, meaning they absorb liquids quickly, which can lead to permanent discoloration. Sealer creates an invisible shield on the surface, preventing spills from soaking in. This makes cleanup incredibly easy, as most messes can be wiped or rinsed away without a trace. Taking the time to seal your surfaces is the best way to prepare for our professional restoration and sealing services down the line.

Stop Weed Growth and Stabilize Joint Sand

Few things ruin the clean look of a paver patio faster than weeds sprouting up between the joints. Sealing your pavers is a fantastic way to combat this problem. When applied, the sealer soaks into the joint sand and hardens it, creating a durable bond. This solid barrier makes it much more difficult for weed seeds to take root and grow. It also prevents the sand from washing out during heavy rainstorms, which keeps your pavers from shifting. This stabilization is a key part of any quality masonry project and helps reduce your long-term maintenance chores.

Defend Against Weather Damage

Here on Long Island, our pavers face everything from hot summers to freezing winters. This constant cycle of weather can take a toll. When water seeps into unsealed pavers and freezes, it expands, causing cracks and surface flaking. A quality sealer is water-repellent, preventing moisture from getting in and protecting against this freeze-thaw damage. It also helps stop the growth of mold and mildew and reduces efflorescence, that chalky white residue that can appear on the surface. This protection is vital for maintaining the structural integrity of your driveways and patios through every season.

What Are the Main Types of Paver Sealers?

Walking into the sealer aisle can feel a bit overwhelming. You’ll see terms like “water-based,” “solvent-based,” “penetrating,” and “film-forming,” and it’s easy to wonder which one is right for your beautiful patio or driveway. Think of it like choosing a top coat for a manicure: some give a subtle, natural sheen, while others provide a high-gloss, dramatic finish. Each type of paver sealer offers a different combination of look, protection, and application process, so it’s all about finding what works for your project and your personal style.

Understanding the main categories is the first step to making a great choice. The biggest decision you’ll make is between a water-based and a solvent-based formula. This choice affects everything from the application process and the final appearance to the level of maintenance required down the road. After that, you’ll want to consider whether you prefer a sealer that soaks into the paver or one that forms a protective film on top. Don’t worry, it’s not as complicated as it sounds. We’ll break down exactly what these terms mean so you can find the perfect match for your outdoor space. Our team at Gappsi is always ready to help with professional restoration and sealing services if you prefer to leave it to the experts.

Water-Based vs. Solvent-Based

The most common way to categorize sealers is by their base: water or solvent. Water-based acrylic sealers are a popular choice for homeowners because they are easy to work with, have low odors, and are generally safer for nearby plants and pets. They provide a lovely, subtle sheen without harsh chemicals. On the other hand, solvent-based sealers are known for creating that rich, “wet look” that really makes paver colors pop. They offer excellent protection and are especially effective on brick, giving it a deep, vibrant finish that enhances its natural texture.

Penetrating vs. Film-Forming

Next, you’ll want to decide if you want a sealer that works from within or one that protects from the top. Penetrating sealers do exactly what their name suggests: they soak deep into the paver material. This creates an invisible shield that protects from the inside out and won’t peel or flake over time. It’s the perfect choice if you love the natural look of your stone pavers and want protection without changing their appearance. Film-forming sealers create a protective layer on the surface, which can give your pavers a satin or glossy finish while guarding against stains and wear.

Exploring Eco-Friendly Options

If minimizing your environmental impact is a priority, you’ll be happy to know there are great eco-friendly paver sealers available. These products are typically water-based, non-toxic, and formulated to be safe for your family, pets, and garden. They have little to no odor and contain zero volatile organic compounds (VOCs), which are harmful chemicals found in many traditional formulas. You can get excellent protection with a natural finish while making a choice that’s better for the environment. You can find high-quality, responsible options at the Gappsi Store to complete your project with peace of mind.

Which Paver Sealer Finish Is Right for You?

Choosing a paver sealer isn’t just about protection; it’s also about style. The finish you select can dramatically change the look of your patio, walkway, or driveway. Do you love the original, dry look of your stone, or do you prefer a rich, vibrant appearance that makes the colors pop? Your answer will guide you to the perfect sealer. Think of it as the final touch that defines your outdoor space’s personality. Let’s walk through the most popular finishes to help you find the one that matches your vision.

The Natural Look: For Subtle Protection

If you adore the authentic color and texture of your pavers, a natural look sealer is your best bet. This type of sealer penetrates deep into the stone, creating an invisible shield against moisture, stains, and UV rays without adding any shine or altering the appearance. It’s the ideal choice for maintaining a classic, understated aesthetic while still getting all the protective benefits. Your pavers will look just as they did before sealing, but they’ll be much better equipped to handle spills and harsh weather. Consider it a hardworking, behind-the-scenes hero for your beautiful natural stone.

The Wet Look: To Deepen Color

Want to make your paver colors look richer and more saturated? A wet look sealer is the way to go. This finish enhances your pavers by giving them the deep, vibrant appearance they have right after it rains. It’s a fantastic option for bringing out the complex tones and details in decorative pavers, making your patio or pool deck a true standout feature. The glossy finish not only deepens the color but also adds a layer of shine that catches the light beautifully. This is a popular choice for anyone looking to give their outdoor surfaces a fresh, polished, and permanently lustrous look.

Semi-Gloss and High-Gloss Finishes

For those who want a noticeable shine, semi-gloss and high-gloss sealers deliver a striking, reflective finish. These film-forming sealers create a strong protective topcoat that offers excellent durability and color enhancement. A semi-gloss finish provides a subtle luster, while a high-gloss option creates a much more dramatic, polished effect. These finishes are great for making a bold statement and are especially effective on smooth pavers. While solvent-based versions typically offer the highest shine, water-based options can provide a lovely sheen with fewer odors. You can find a variety of these premium sealers to achieve the exact level of gloss you desire.

What Are the Best Paver Sealer Brands?

Walking down the sealer aisle can feel overwhelming with so many brands promising the best results. Over our decades of experience, we’ve worked with countless products and have learned which ones truly deliver on their promises. The right brand for you depends on the look you want to achieve, the level of protection you need, and how you plan to apply it. We’ve found that focusing on trusted, high-quality brands saves a lot of headaches down the road. A premium sealer not only looks better but also lasts longer, giving you more value for your investment.

To help you make a confident choice, we’ve broken down some of our top recommendations and what makes them stand out. Whether you’re looking for a high-gloss finish or something more subtle, there’s a great option available. We’ll also cover the key features to look for so you can evaluate any brand like a pro.

Our Professional Sealer Recommendations

When clients ask for our top picks, a few names consistently come to mind. For a beautiful, deep wet look with a semi-gloss finish, Super Seal 25 is an excellent all-around choice. It’s a solvent-based sealer that does a fantastic job of enhancing color and stabilizing the sand in paver joints. If you want an even glossier, high-shine finish, its counterpart, Super Seal 30, offers similar protective qualities with a more dramatic look. For those who prefer a water-based product, we often recommend Masonry Saver Paver Sealer. It provides a lovely satin shine and a subtle wet look while still locking joint sand in place effectively.

Comparing Top Brands: Techniseal, SureCrete, and More

Beyond our go-to sealers, other brands offer fantastic, specialized products. Techniseal is a popular choice, particularly its NS Joint Stabilizer & Paver Sealer. This product is great for creating a clear, protective film that prevents joint sand from washing away while guarding against stains and erosion. Another reliable name is SureCrete, which offers a wide range of sealers known for their excellent protection against moisture, stains, and UV damage. Choosing between these top-tier brands often comes down to the specific needs of your patio or driveway. Our team often handles the entire restoration and sealing process for homeowners, which gives us firsthand experience with how these products perform in Long Island’s climate.

What to Look For: Durability, Protection, and Ease of Use

When you’re comparing sealers, keep three key factors in mind: durability, protection, and ease of use. Durability determines how long the sealer will last. Solvent-based acrylics typically last two to four years, while water-based versions last one to three years. Penetrating sealers can last even longer, sometimes up to ten years. For protection, look for a product that offers UV defense to prevent fading, stain resistance, and joint stabilization to stop weed growth. Finally, consider ease of use. Water-based sealers are generally easier to work with, have less odor, and clean up with just soap and water, making them a great choice for DIY projects.

How Much Does Paver Sealer Cost?

Figuring out the budget for your paver sealing project is a great first step. The cost of paver sealer is an investment in protecting your beautiful patio, walkway, or driveway from the elements and everyday wear. While prices can vary, understanding the key factors will help you plan effectively and choose a product that gives you the best long-term results. The total cost depends on the type of sealer you choose, the size of your space, and the texture of your pavers. Let’s break down what you can expect to spend.

Typical Price Ranges by Sealer Type

Generally, you can expect paver sealer to cost between $50 and $60 per gallon, with some premium or specialized formulas costing more. For most residential projects, you’ll likely buy a larger container. A 5-gallon pail often runs from $150 to $300 or more, depending on the quality and type. Water-based sealers are sometimes more affordable than solvent-based options, but the price is really driven by the quality of the ingredients and the performance features, like UV resistance or stain protection. You can find a curated selection of high-quality options at the Gappsi Store to fit different project needs and budgets.

Calculating Cost Per Square Foot

To figure out exactly how much sealer you’ll need, you have to consider the coverage rate. A good rule of thumb is that one gallon of sealer will cover about 125 square feet, but this can change quite a bit. The key is the porosity and texture of your pavers. A smooth, dense surface might get up to 300 square feet of coverage per gallon, while more porous or textured pavers could absorb more sealer, bringing your coverage down to around 200 square feet per gallon. Before you buy, measure the length and width of your area to get the total square footage. This will help you understand the unique qualities of your porcelain and natural stone surfaces.

Finding the Best Value for Your Project

The best value isn’t always the lowest price tag. A cheaper sealer might save you money upfront, but if it requires reapplication every year, it can cost you more time and money in the long run. Think about the needs of your space. A high-traffic driveway will benefit from a more durable, protective sealer than a quiet garden path. Buying a 5-gallon pail is almost always more cost-effective per gallon than buying individual gallons. Ultimately, the best value comes from choosing a sealer that provides the right finish and level of protection for your specific pavers, ensuring they stay beautiful for years. If you want a perfect application without the guesswork, our professional restoration and sealing services offer excellent long-term value.

How to Apply Paver Sealer: A Step-by-Step Guide

Applying paver sealer is a fantastic weekend project that can make a huge difference in the look and longevity of your patio, walkway, or driveway. With the right preparation and a bit of patience, you can achieve a professional-quality finish that protects your investment for years to come. Before you begin, it’s a good idea to gather all your tools. You’ll likely need a stiff-bristle broom, a pressure washer, a paver cleaner, a pump-style garden sprayer or a paint roller with an extension pole, and of course, your chosen sealer.

The process isn’t complicated, but each step builds on the last, so it’s important not to rush. The goal is to create a clean, dry surface so the sealer can bond properly with the pavers. From there, it’s all about applying thin, even coats and giving the product enough time to cure. Think of it as painting a room: the prep work takes the most time, but it’s what guarantees a beautiful result. While this is a very manageable DIY job, if you’re short on time or want to ensure a flawless application, our team offers expert restoration and sealing services to handle the entire process for you.

Step 1: Clean and Prep Your Pavers

You can’t get a lasting finish without a perfectly clean surface. This is the most critical step, so take your time with it. Start by sweeping away all loose dirt, leaves, and debris. Next, tackle any weeds or moss growing in the joints between the pavers. For stubborn stains like oil, grease, or rust, you’ll need a dedicated paver cleaner designed for those specific spots. Once you’ve treated any stains, it’s time to power wash the entire area. This removes ground-in dirt and any remaining cleaning solution. After washing, you must let the pavers dry completely. This can take at least 24 to 48 hours, depending on the weather. Sealing damp pavers will trap moisture, leading to a cloudy, white haze that is very difficult to remove.

Step 2: Check the Weather Forecast

Your sealer’s performance is highly dependent on the weather, so play meteorologist for a day. The ideal time to apply sealer is on a clear, dry day with low humidity and moderate temperatures, typically between 50 and 80 degrees Fahrenheit. Applying sealer in direct, intense sunlight or when it’s too hot can cause it to dry too quickly, preventing it from bonding correctly and leaving streaks. Conversely, if it’s too cold or humid, the sealer won’t cure properly and can develop that dreaded cloudy look. Plan your project for a day when you have a clear 24-hour window with no rain in the forecast. Always read the product label, as each manufacturer provides specific temperature and weather recommendations for the best results.

Step 3: Do a Small Patch Test

Before you commit to sealing your entire patio or driveway, always perform a patch test. This is a simple but essential step to ensure you’re happy with the final look. Choose a small, out-of-the-way area, like a corner behind a planter or near your home’s foundation, and apply the sealer exactly as you plan to for the main project. Let it dry completely according to the manufacturer’s instructions. This test allows you to see the true effect of the sealer on your specific pavers. You can check if you like the level of color enhancement and the sheen (whether it’s matte, satin, or gloss). It’s much better to discover you don’t like the finish on a two-square-foot patch than after you’ve sealed the whole space.

Step 4: Apply Thin, Even Coats

Now for the main event. The key to a smooth, uniform finish is applying the sealer in thin, even coats. A pump-style garden sprayer is often the best tool for the job, as it allows you to apply a consistent layer quickly. If you’re using a sprayer, work in manageable sections and use a sweeping motion. For smoother pavers, a short-nap roller can also work well. Your goal is to saturate the surface without letting the sealer puddle. If you see any pools forming, simply roll them out or back-brush them to spread the excess. Two thin coats are almost always better than one thick one. Let the first coat dry to the touch before applying the second, following the product’s specific instructions for recoating times.

Step 5: Let the Sealer Cure Completely

Patience is a virtue, especially when it comes to letting paver sealer cure. While the surface may feel dry to the touch within a few hours, it is not fully cured. Curing is the chemical process where the sealer hardens and bonds with the paver to create a durable, protective layer. This takes time. As a general rule, you should keep all foot traffic off the sealed area for at least four to six hours. Wait a full 48 to 72 hours before driving a car on a sealed driveway or placing heavy patio furniture back on your patio. Rushing this final step can lead to tire marks, scuffs, and a weakened finish, undoing all your hard work.

Common Paver Sealing Mistakes to Avoid

Sealing your pavers can feel like a big accomplishment, but a few simple missteps can undo all your hard work. Getting a durable, beautiful finish is all about the details. By learning what not to do, you can avoid the common issues that trip up many homeowners and ensure your patio or driveway looks fantastic for years. Let’s walk through the most frequent mistakes so you can get the job done right the first time.

Sealing Pavers While They’re Still Damp

Patience is truly a virtue when it comes to sealing pavers. One of the biggest mistakes is applying sealer before the pavers are completely dry after cleaning. Even a little bit of trapped moisture can cause big problems, leading to a cloudy, white haze under the sealer that’s difficult to fix. As experts note, this trapped moisture is a primary cause of whitening and sealer failure. To be safe, wait at least 24 to 48 hours after a deep cleaning or heavy rain before you even think about opening that can of sealer. Your pavers should be bone dry to the touch and below the surface.

Applying Too Much Sealer at Once

When sealing pavers, less is definitely more. It’s tempting to lay on a thick coat, thinking it will provide extra protection, but this often backfires. Applying too much sealer at once can create a host of issues, including whitening, peeling, and a splotchy, uneven finish. The goal is to apply thin, even coats that can properly absorb into the paver and cure correctly. Always follow the manufacturer’s guidelines on the product you purchase from the Gappsi Store. Using a roller or a sprayer can help you control the application and achieve that flawless, professional look without overdoing it.

Skipping Essential Prep Work

A great finish starts with a clean slate. Skipping the preparation stage is a recipe for a weak bond and a short-lived seal. Before you apply any sealer, the surface must be perfectly clean, free of dirt, grime, moss, and any chalky white residue, which is known as efflorescence. For the best results, you should wash the area thoroughly. Using a specialized paver preparator can help the sealer soak deeply into the concrete and adhere properly. Taking the time for meticulous prep work ensures your sealer performs its best and gives you the lasting protection you’re looking for. If the cleaning seems daunting, our restoration and sealing services can handle the prep for you.

Ignoring Temperature and Weather Warnings

Your local weather forecast is one of your most important tools for a paver sealing project. Applying sealer in the wrong conditions can ruin the finish. You should only apply sealer when air and surface temperatures are moderate, typically between 50°F and 95°F. If it’s too hot, the sealer can dry too quickly, leaving streaks and bubbles. If it’s too cold, it won’t cure properly. You should also avoid applying it on very windy days, which can blow debris onto the wet surface, or on rainy days, which will wash the sealer away. Always check the forecast for a clear, dry, and calm window of a few days to get the best results.

How Often Should You Reseal Your Pavers?

One of the most common questions we get is about how often pavers need to be resealed. As a general guideline, you should plan on resealing your paver patio, walkway, or driveway every two to three years. This simple maintenance step keeps them looking great and protects your investment from the elements. However, this isn’t a strict rule. The ideal frequency really depends on a few key factors, including Long Island’s weather, how much foot traffic the area gets, and the type of sealer you originally used. Some high-quality penetrating sealers can even last five years or more under the right conditions.

Think of paver sealer like sunscreen for your hardscape. It provides a protective barrier that wears down over time, exposing your pavers to UV rays that cause fading, moisture that can lead to cracks in the winter, and stains from spills. For homeowners who prefer a hands-off approach, Gappsi offers professional restoration and sealing services to ensure the job is done right, giving you long-lasting protection and peace of mind. Keeping up with a regular sealing schedule is the best way to preserve the color and integrity of your beautiful pavers for years to come.

Factors That Affect Your Sealer’s Lifespan

Several things can influence how long your paver sealer holds up. The type of sealer is a major factor. For example, a penetrating sealer soaks into the paver to form a protective shield from within and can last five years or more. A film-forming sealer, which creates a top coat, might need a fresh application every two to three years. The amount of traffic your pavers see also matters. A driveway or a popular patio space will show wear much faster than a decorative garden path. Finally, proper application is critical. Sealing pavers that are still damp or applying the sealer too thickly can cause it to fail early, leading to a cloudy or peeling finish.

Telltale Signs It’s Time to Reseal

So, how do you know when it’s time for a new coat? Your pavers will give you a few clear signals. The easiest way to check is with a simple water test. Sprinkle a little water onto the surface. If it beads up, your sealer is still doing its job. If the water soaks in and darkens the paver, the protective barrier has worn off. You might also notice that the colors look faded or that new stains from things like leaves or spills are becoming harder to clean. Any signs of whitening or flaking also mean it’s time to strip the old layer and reseal your porcelain and natural stone surfaces.

DIY vs. Hiring a Pro: What’s the Best Choice?

Deciding whether to seal your pavers yourself or call in a professional is a common crossroads for homeowners. The right choice really depends on your comfort level, the size of your project, and the results you’re aiming for. A DIY project can be rewarding, but a professional application offers peace of mind and a guaranteed finish. Let’s walk through the key considerations to help you decide which path is best for your patio, walkway, or driveway.

When to Tackle the Job Yourself

If you enjoy hands-on home projects and have a smaller area to cover, sealing your own pavers can be a great weekend task. You can apply sealer with a simple pump sprayer or a roller, but the key to success is all in the preparation. First, you must clean your pavers thoroughly to remove any dirt, grime, or stains. The most critical step, and the one where most DIY projects go wrong, is ensuring the pavers are completely dry before you apply the first coat. Sealing damp pavers can trap moisture, leading to a cloudy, white finish that’s difficult to fix.

The Benefits of a Professional Application

While doing it yourself can save some money upfront, hiring an expert often prevents costly mistakes down the road. Common issues like a milky finish, peeling, or an uneven sheen usually happen from applying too much sealer, not cleaning properly, or using the wrong product for your specific type of paver. A professional team has the experience and commercial-grade equipment to prepare the surface perfectly and apply the sealer correctly. Gappsi’s restoration and sealing services ensure a flawless, durable finish, saving you from the frustration of a DIY job gone wrong.

Comparing Costs and Long-Term Results

When you look at the budget, it’s important to think about long-term value. Many store-bought sealers need to be reapplied every two to three years. In contrast, professionals often use higher-quality penetrating sealers that can last five years or even longer, protecting your investment for years to come. Reapplying sealer too often can also cause a thick, unattractive buildup on the surface. By investing in a professional application, you not only get a better initial result but may also spend less time and money on maintenance over the life of your pavers.

Find Your Perfect Paver Sealer with Gappsi

Choosing the right paver sealer can feel like the final, crucial step in perfecting your outdoor space. Whether you’re a dedicated DIYer ready to tackle the project yourself or you’d prefer to leave it to the experts, we have the products and services to ensure your patio, walkway, or driveway looks its best for years to come. At Gappsi, we simplify the process by offering both high-quality materials and professional application, so you can find the exact solution that fits your needs and lifestyle. We’re here to help you protect your investment and keep your hardscapes looking beautiful.

Shop Our Selection of Premium Sealers

Finding the right sealer really comes down to the look you want to achieve and the level of protection your pavers need. Do you love the deep, rich color of your pavers when they’re wet? A wet-look sealer is perfect for that. Or maybe you prefer a subtle, matte finish that looks completely natural. We have options for that, too, along with semi-gloss and high-gloss finishes. At the Gappsi Store, you can browse our selection of premium sealers, each designed to protect your hardscapes from stains, water damage, and UV rays. A quality sealer also stabilizes the joint sand, which is key to preventing weed growth and insect infestations.

Schedule Your Professional Sealing Service

If you want a flawless finish without the guesswork, our team is ready to help. A professional application ensures every step is done right, from the initial cleaning to the final coat. We make sure your pavers are completely dry before application, which is critical for avoiding that hazy, cloudy look that can happen when moisture gets trapped. Our restoration and sealing services provide long-lasting protection and a perfect finish every time. Plus, we can advise you on the best maintenance schedule. Most pavers need resealing every two to three years to maintain their beauty and durability, especially with Long Island’s changing seasons. Let us handle the work so you can simply enjoy your beautiful outdoor space.

Frequently Asked Questions

Will sealing my pavers make them slippery? This is a great question, and a very common concern, especially for pool decks and walkways. The answer depends on the type of sealer you choose. Film-forming sealers, particularly high-gloss ones, can reduce the traction of the surface. However, many modern sealers include anti-slip additives to provide a safe, textured finish. If slipperiness is a concern, a penetrating sealer is an excellent choice because it soaks into the paver without forming a surface film, leaving the natural texture unchanged.

How soon can I seal newly installed pavers? It’s best to wait a bit before sealing a brand-new paver installation. Pavers can release a white, chalky substance called efflorescence as they cure, which is a natural process. Sealing too early can trap this haze underneath the protective layer. We generally recommend waiting at least 30 to 60 days after installation to give the pavers time to cure and release any initial efflorescence before you apply the first coat of sealer.

What’s the most common mistake people make when sealing their own pavers? By far, the most frequent mistake is applying sealer before the pavers are completely dry. Even a small amount of moisture trapped under the sealer can create a cloudy, milky-white haze that is very difficult to remove. After cleaning your pavers, you should wait at least 24 to 48 hours in dry, sunny weather to ensure they are bone dry all the way through before you begin sealing.

My pavers already have an old sealer on them. Can I just apply a new coat over it? It depends on the condition of the old sealer and the type you plan to use. If the existing sealer is a water-based product and is simply wearing thin without peeling or flaking, you can often apply a new coat after a thorough cleaning. However, if the old sealer is peeling, hazy, or if you are switching from a solvent-based to a water-based product (or vice versa), you will likely need to strip the old layer off first to ensure the new coat adheres properly.

How long do I have to wait to walk or drive on my newly sealed pavers? Patience is key after you’ve finished the job. While the sealer might feel dry to the touch in just a few hours, it needs more time to fully cure and harden. As a general rule, you should keep foot traffic off the area for at least four to six hours. For driveways, wait a full 48 to 72 hours before driving or parking a car on the surface to prevent tire marks and ensure a durable, long-lasting finish.

Share this page: