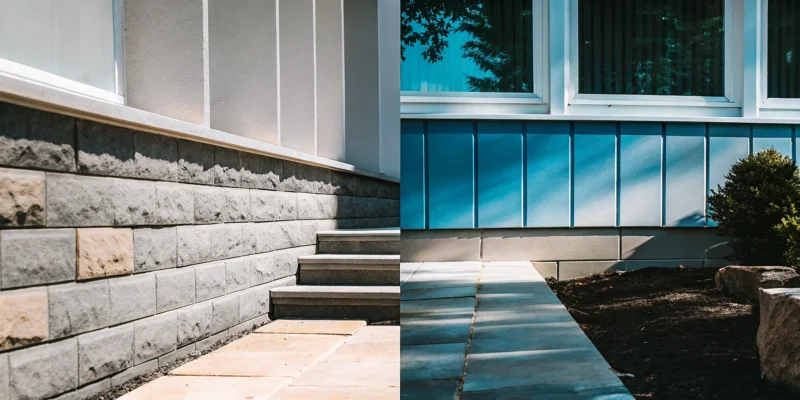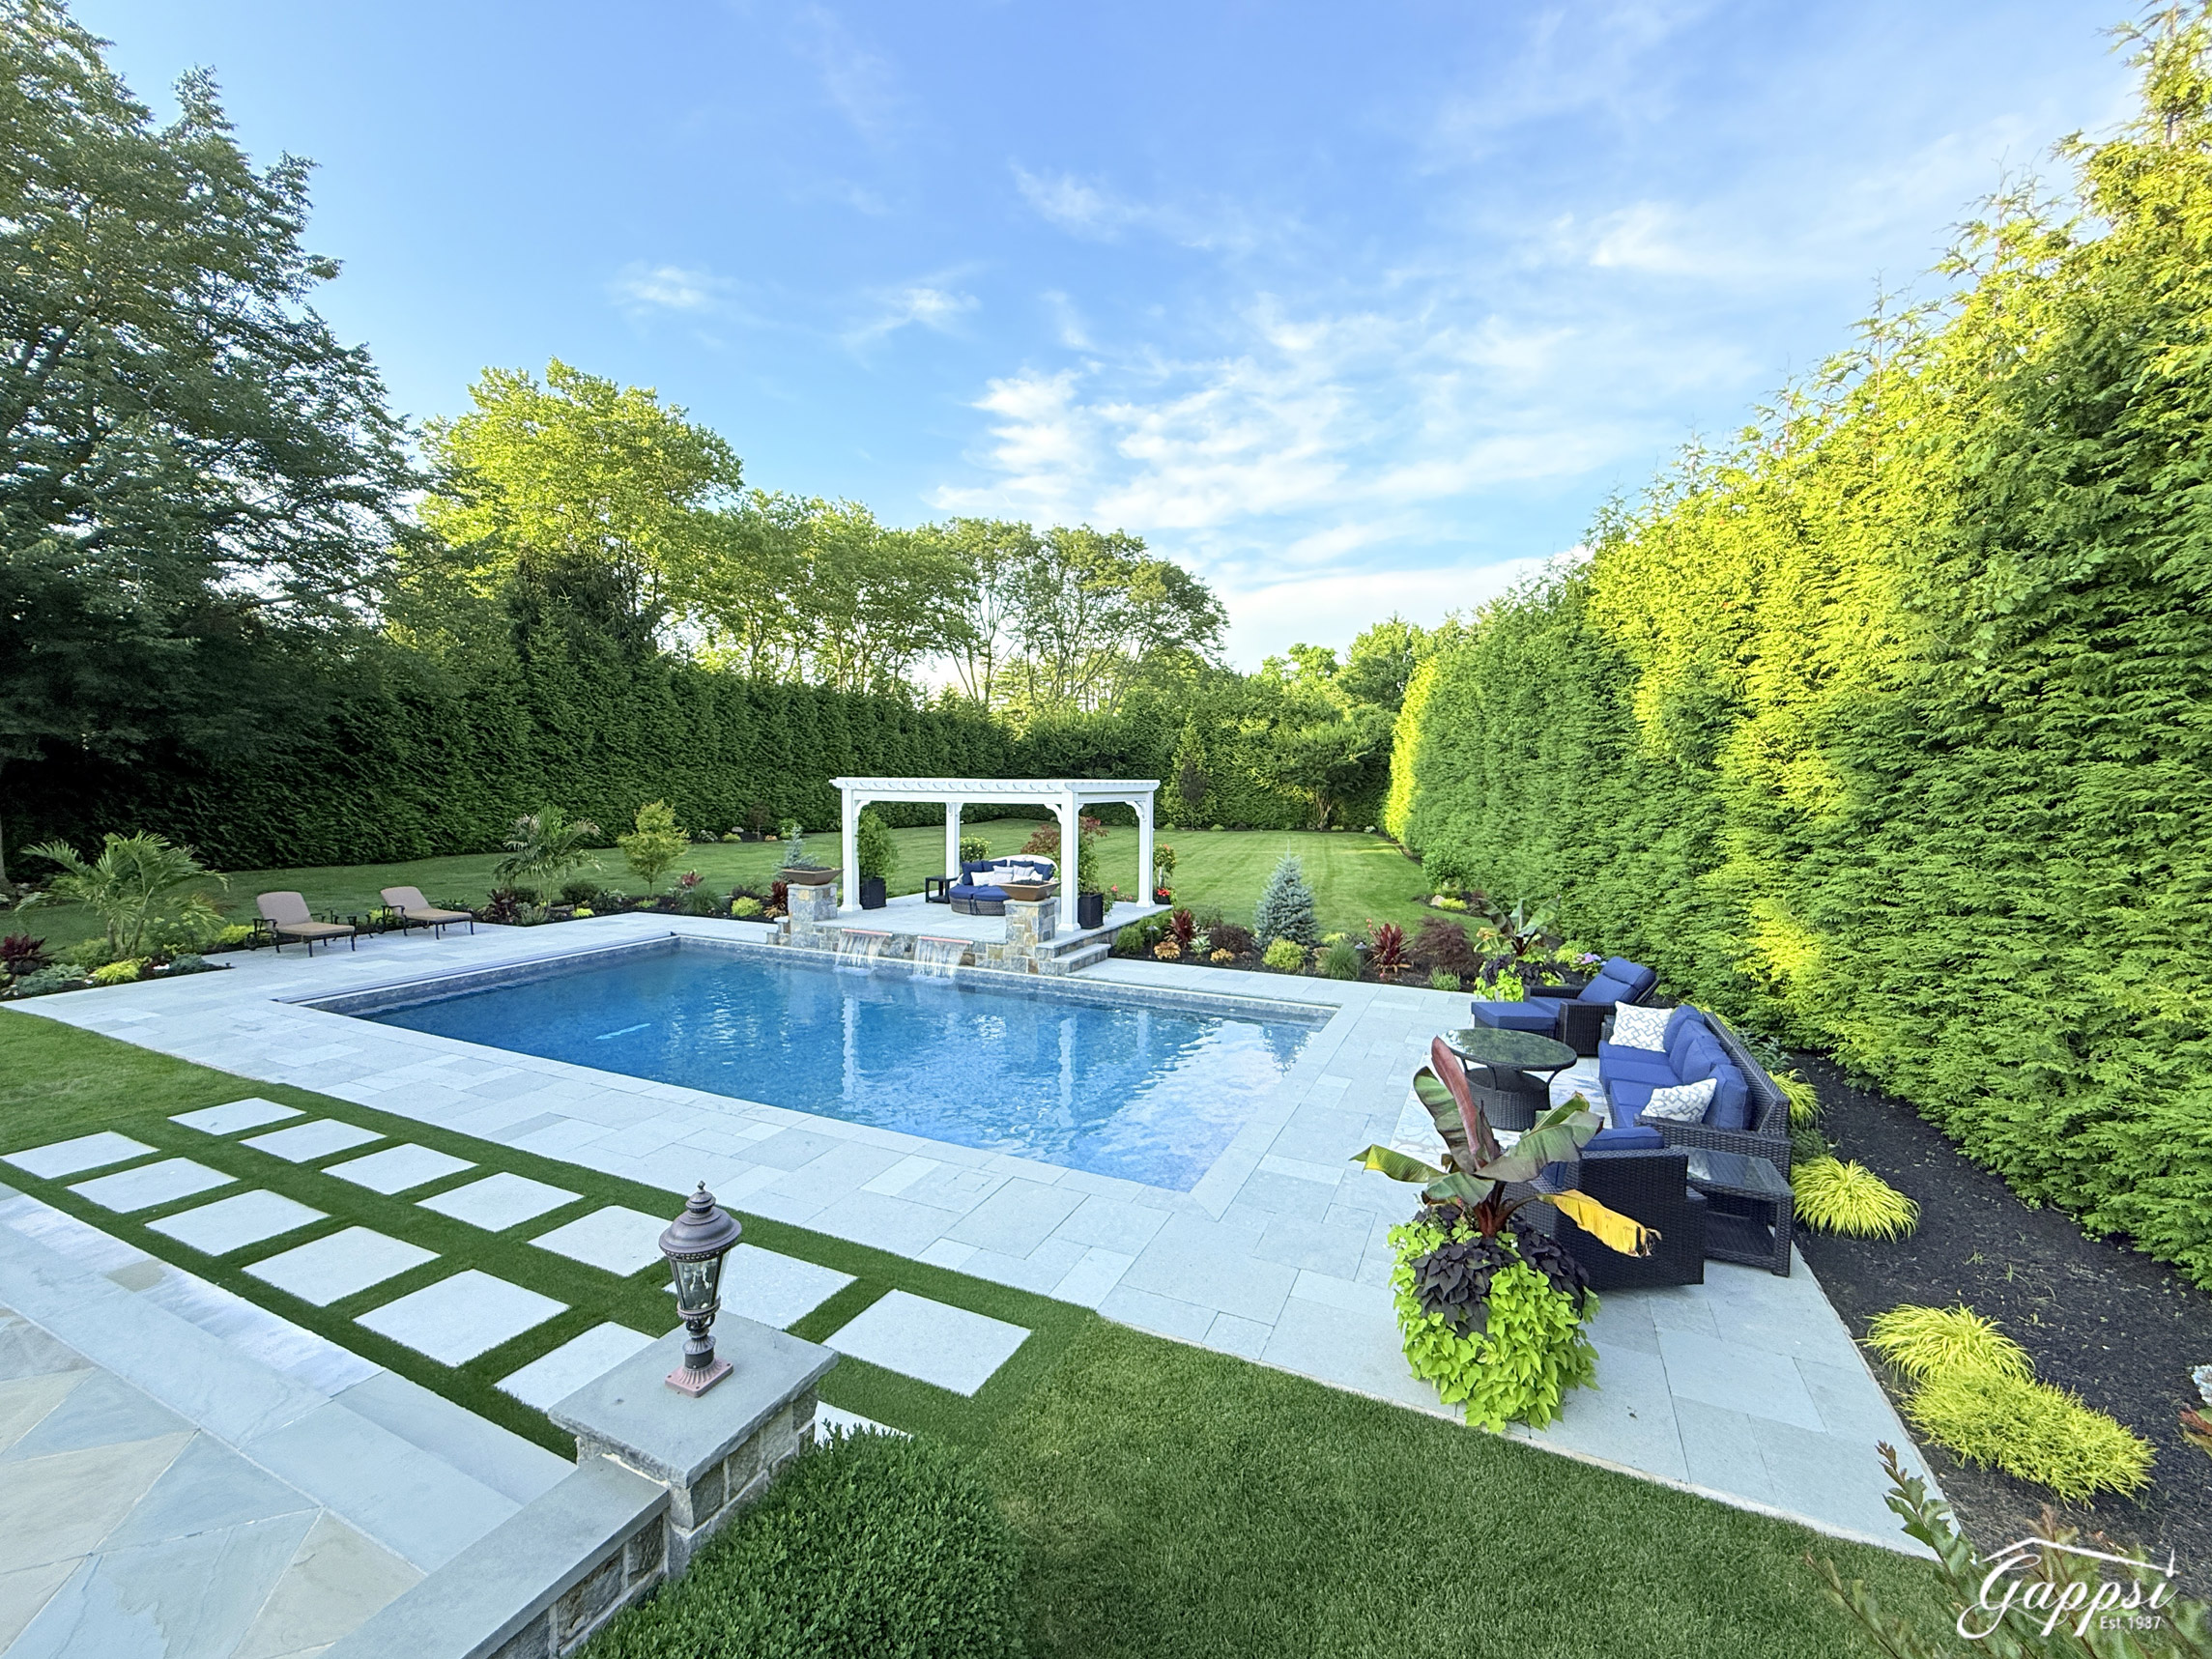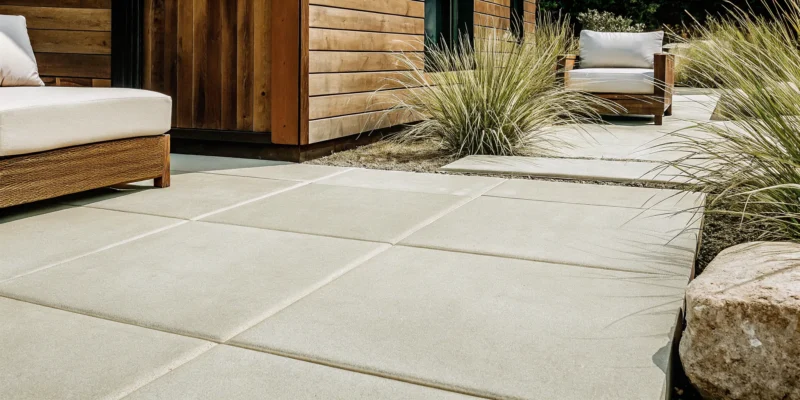
Slip resistant patio pavers on a modern Long Island patio with outdoor furniture.

Top Slip Resistant Patio Pavers for Long Island

Your patio is the heart of your outdoor living space, the stage for everything from kids’ birthday parties to quiet evenings with friends. The experience should be about enjoyment, not anxiety. You shouldn’t have to worry about someone slipping near the pool or taking a fall on a dewy morning. Building a truly functional and relaxing backyard starts from the ground up with a safe foundation. By prioritizing safety in your material selection, you ensure your outdoor oasis is a source of joy for years to come. Let’s explore the top slip resistant patio pavers Long Island families are using to create beautiful, worry-free spaces.

Key Takeaways

  • Focus on Function for a Safer Patio: Your paver’s safety performance in wet or icy conditions is critical. Prioritize materials with low water absorption rates and textured surfaces, like porcelain, to prevent slips and resist damage from Long Island’s freeze-thaw cycles.
  • Factor in Maintenance When Budgeting: The initial price is only part of the story. While porcelain may cost more upfront, it saves you money and effort in the long run by not requiring the regular sealing and intensive cleaning that materials like concrete need.
  • Protect Your Investment with Proper Installation: Even the best pavers will fail on a poor foundation. Professional installation guarantees a stable base and correct drainage, which is essential for preventing shifting, cracking, and dangerous tripping hazards down the road.

Why Slip Resistance Is a Must for Your Patio

Your patio should be a place for relaxation and making memories, not a space where you have to worry about every step. When you’re hosting a summer barbecue or just enjoying a quiet morning coffee, the last thing you want on your mind is the risk of a slip or fall. That’s why choosing a slip-resistant paver isn’t just a design choice; it’s a fundamental part of creating a safe and functional outdoor living area for your family and guests.

On Long Island, we see it all: summer rain showers, humid mornings with heavy dew, and icy winter days. These conditions can make any outdoor surface slick and hazardous. The right patio material provides the traction you need to feel secure, no matter the weather. By prioritizing safety from the start, you ensure your beautiful new patio is a source of enjoyment for years to come. Gappsi’s expertise in masonry and patio design focuses on combining stunning aesthetics with practical, safe materials that stand up to the local climate, giving you total peace of mind. We believe a great design is one that looks incredible and keeps everyone safe, blending form and function seamlessly into your backyard.

How Long Island Weather Affects Patio Safety

Long Island’s weather patterns present a unique challenge for outdoor materials. We experience frequent freeze-thaw cycles, where moisture seeps into surfaces, freezes, expands, and then thaws. This process can wreak havoc on porous pavers, causing them to crack, spall, and create uneven, dangerous surfaces over time. A compromised paver isn’t just an eyesore; it’s a tripping hazard waiting to happen.

This is where material selection becomes critical. For example, porcelain pavers are exceptionally well-suited for our climate because they absorb less than 0.5% of water. With almost no water getting into the material, there’s virtually no risk of it freezing, expanding, and causing damage. This inherent durability ensures your patio remains smooth, stable, and safe through countless winters.

Where You Need Slip Resistance Most

While patios are a top priority, they aren’t the only area where slip resistance is crucial. Think about all the high-traffic zones around your home that are exposed to the elements. Pool decks are the most obvious example, as they are constantly wet and see a lot of barefoot traffic. A slip-resistant surface around your swimming pool is non-negotiable for safety.

Walkways and entryways also need secure footing, especially since they can become slick with morning dew, rain, or frost. Even your driveway can benefit from slip-resistant pavers, providing better traction for both people and vehicles. Modern materials like outdoor porcelain pavers are designed with textured surfaces that provide excellent grip, giving you confidence with every step, even when the ground is wet.

What Makes a Paver Slip-Resistant?

A paver’s ability to prevent slips isn’t based on just one feature. It’s a combination of material science, texture, and how the paver handles moisture. Understanding these three elements will help you choose a surface that is both beautiful and safe for your family. When you’re selecting materials for your new patio, pool deck, or walkway, paying attention to these details makes all the difference, especially during a wet Long Island spring or an icy winter.

What Is a COF Rating?

The Coefficient of Friction, or COF, is a technical term for a very simple concept: how much grip a surface has. It’s a rating that measures the resistance between two objects, in this case, your shoe and the paver. A higher COF rating means more friction and better slip resistance. This is especially important for outdoor surfaces that are frequently exposed to rain, pool splashes, or morning dew. Materials like porcelain pavers are engineered with textured surfaces that earn high COF ratings, making them a reliable choice for keeping your footing secure, even when the pavers are wet.

How Texture and Finish Impact Safety

Beyond technical ratings, the physical texture of a paver plays a huge role in its safety. A smooth, glossy surface might look sleek, but it can become incredibly slippery when wet. For outdoor spaces, you should always look for pavers with a textured finish. Options like brushed, tumbled, or naturally cleft stone provide an uneven surface that gives your feet more to grip onto. This texture creates tiny ridges and valleys that channel water away and increase the surface area for contact, which is essential for stability. The right masonry design incorporates both beauty and practical safety, ensuring your patio is as functional as it is stunning.

Why Water Absorption and Freeze-Thaw Cycles Matter

On Long Island, we know our weather can be tough on outdoor materials. The freeze-thaw cycle, where water seeps into pavers, freezes, expands, and then thaws, can cause significant damage. Pavers with high water absorption rates are prone to cracking and spalling from this cycle, creating uneven and unsafe surfaces. That’s why a paver’s absorption rate is a critical safety factor. Materials like porcelain are ideal because they absorb almost no water, less than 0.5%. This means there’s no water to freeze, expand, and cause damage, ensuring your patio remains intact and safe for years. Proper restoration and sealing can also protect more porous stones from moisture.

Best Slip-Resistant Pavers for Long Island Patios

When you’re ready to choose the perfect material for your patio, safety should be at the top of your list, right alongside style and durability. For Long Island homeowners, this means selecting pavers that can handle everything from summer rainstorms to icy winter mornings without turning your beautiful outdoor space into a slip-and-slide. The good news is that you don’t have to sacrifice aesthetics for function. The best slip-resistant pavers combine texture, low water absorption, and high-quality materials to give you a secure and stunning surface that provides peace of mind for your family and guests.

Three standout options consistently perform well in our climate: porcelain, textured concrete, and natural stone. Each one offers a unique blend of benefits, and the right choice for you will depend on your home’s style, your maintenance preferences, and how you plan to use the space. Whether you’re designing a serene poolside lounge, a bustling entertainment area, or a simple, elegant walkway, there’s a slip-resistant paver that fits your vision. We’ll explore the specific advantages of porcelain and natural stone as well as textured concrete to help you make a confident decision for your home.

Porcelain Pavers

Porcelain pavers are a fantastic choice for outdoor patios, especially in areas that see a lot of moisture. Because they are non-porous, they absorb very little water, which helps prevent the slick, icy buildup that can occur during Long Island’s freeze-thaw cycles. Their textured surfaces are specifically engineered for grip and are rated to be highly slip-resistant even when wet. This makes them an ideal material for pool surrounds and uncovered patios. Beyond safety, porcelain pavers are incredibly low-maintenance. They resist stains, scratches, and fading, so your patio will continue to look great for years with minimal effort.

Textured Concrete Pavers

Concrete pavers offer a world of design versatility, but it’s important to choose the right finish for safety. A smooth, sealed concrete surface can become quite slippery, particularly after a rain shower or when sealed with a high-gloss finish. To get the best of both worlds, opt for textured concrete pavers. The texture provides the necessary grip underfoot to reduce the risk of slips and falls. This makes them a much safer choice for any outdoor space. With a wide range of colors, shapes, and patterns available, textured concrete is a reliable and customizable masonry solution for creating a safe and stylish patio.

Natural Stone (Bluestone and Granite)

There’s a timeless beauty to natural stone that’s hard to replicate, and options like bluestone and granite are excellent for slip-resistant patios. These stones are known for their incredible strength and durability, easily handling harsh weather without cracking or fading. Their naturally varied and textured surfaces provide excellent traction, making them a safe choice for walkways and patios. Natural stone pavers require very little upkeep and age gracefully, developing a rich patina over time. If you’re looking for a material that combines classic elegance with rugged performance, bluestone and granite are dependable options that stand up to Long Island’s demanding climate.

Porcelain vs. Concrete: Which Is Best for Long Island?

Choosing between porcelain and concrete pavers is one of the biggest decisions you’ll make for your patio, walkway, or pool deck. Both materials can create a beautiful outdoor space, but they perform very differently, especially with Long Island’s dramatic weather shifts. While concrete has been a traditional choice for years, porcelain has become incredibly popular for its strength and low-maintenance appeal. Understanding the key differences in how they handle weather, how much upkeep they need, and their overall durability will help you decide which material is the right long-term investment for your home.

The best choice depends on your priorities. Are you looking for a material that will look brand new for decades with minimal effort, or is budget your primary concern? We’ll break down the performance of both porcelain and natural stone pavers compared to traditional concrete options. As experts in all types of masonry construction, we can help you weigh the pros and cons to find the perfect fit for your lifestyle and outdoor vision. Let’s look at how these two materials stack up in the areas that matter most to Long Island homeowners.

Freeze-Thaw Performance

Here on Long Island, we’re no strangers to the freeze-thaw cycle, where temperatures drop below freezing at night and rise during the day. This cycle can be brutal on outdoor materials. When water seeps into pavers, freezes, and expands, it creates internal pressure that leads to cracks and surface damage. This is where porcelain truly shines. Because it’s non-porous and absorbs less than 0.5% of water, there’s almost no moisture inside to freeze. Concrete, on the other hand, is more porous and can absorb between 5% and 8% of water, making it much more vulnerable to cracking and spalling over many winters.

Water Absorption Rates

A paver’s water absorption rate tells you a lot about its long-term durability. Porcelain’s incredibly low absorption rate (under 0.5%) means it’s highly resistant to more than just freezing. It naturally repels water, which helps prevent stains from spills, mold, and mildew growth. You won’t have to worry about a spilled glass of wine or moss taking root. Concrete’s higher absorption rate means it’s more susceptible to these issues. Without proper sealing, moisture can penetrate the surface, leading to discoloration and the need for more frequent, intensive cleaning to keep it looking its best.

Maintenance Needs

If you’re looking for a low-maintenance patio, porcelain is the clear winner. Its dense, non-porous surface resists stains and grime, so a simple wash with soap and water once a year is usually all it takes to keep it looking pristine. You can spend more time enjoying your patio and less time scrubbing it. Concrete pavers require more hands-on care. To protect them from stains, fading, and water damage, it’s recommended to have them professionally cleaned and sealed every two to three years. This ongoing maintenance adds to the lifetime cost and effort of owning a concrete patio.

Long-Term Durability and Value

When you think about the value of your investment, it’s important to look beyond the initial price tag. Porcelain pavers are built to last. They are exceptionally hard and resistant to scratches, fading from UV rays, and wear and tear from foot traffic. Your porcelain patio will look just as good in twenty years as it does on day one. While some high-quality concrete pavers are durable, lower-quality options can start to show their age within 10 to 15 years, fading or cracking under Long Island’s tough conditions. Investing in porcelain often means you avoid the future costs and headaches of repairs and replacements.

Comparing Pavers on Price and Maintenance

Choosing the right paver involves balancing your budget with how much time you want to spend on upkeep. Some materials have a higher initial cost but save you money and effort down the road, while others are more affordable upfront but require consistent care. Thinking about both the initial price and the long-term commitment will help you find the perfect fit for your lifestyle and your wallet. Let’s break down what you can expect from different paver options when it comes to cost and maintenance.

Upfront Cost vs. Long-Term Value

When you first look at pricing, concrete pavers seem like the more budget-friendly choice. However, the story doesn’t end there. While porcelain has a higher initial investment, its long-term value is impressive because it requires almost no maintenance. You won’t need to factor in the recurring cost of sealing it every few years. Concrete, on the other hand, needs that regular sealing to protect it from stains and weather damage. Over the life of your patio, those maintenance costs add up, making the total cost of ownership for both materials more comparable than you might think. We can help you explore all the beautiful and durable porcelain and natural stone pavers available.

Cleaning and Sealing Needs

This is where porcelain truly shines. Its non-porous surface is a game-changer for maintenance. Spills like wine, oil, or grill grease sit on the surface instead of soaking in, so you can usually wipe them away with just soap and water. Concrete is more porous and will absorb stains if it isn’t sealed properly. To keep a concrete paver patio looking its best, you’ll need to commit to a routine of cleaning and sealing every few years. If a low-maintenance lifestyle is your goal, porcelain is hard to beat.

What to Know About Repairs and Replacements

No matter which paver you choose, the quality of the installation is what guarantees its longevity. Even the most expensive, durable material will fail if it’s not installed on a proper base with adequate drainage. A well-built patio can last for decades with minimal issues. If a paver does crack or get damaged, it’s much easier to replace a single unit than to repair a large concrete slab. Working with an experienced masonry construction company ensures your foundation is solid and your pavers are set to last, preventing future headaches and costly repairs.

Common Myths About Slip-Resistant Pavers

When it comes to choosing patio materials, a lot of misinformation can steer you in the wrong direction. Let’s clear up some of the most common myths about slip-resistant pavers so you can make a confident and safe choice for your home.

Myth: “Any Textured Surface Is Fine”

It’s easy to assume that any paver with a bit of texture will prevent slips, but that’s not always the case. The type of texture and the material itself are what truly count. Some surfaces may feel rough when dry but become surprisingly slick with a little water. On the other hand, materials like porcelain pavers are specifically engineered with textured surfaces that are rated for high slip resistance, even around a wet pool deck. The right texture is designed to channel water away and provide a secure grip, something not all textured materials can promise.

Myth: “Smooth Concrete Is Safe Enough”

A simple, smooth concrete slab is a common sight for patios, but it can be a hidden hazard. Poured concrete, especially if it has been sealed with a glossy finish, becomes extremely slippery when wet. This creates a significant risk for slips and falls, particularly for kids running around or for guests during a summer barbecue. While concrete can be stamped or brushed to add texture, a standard smooth finish is not a reliable option for areas that will see rain, splashes from a pool, or morning dew. Choosing a paver with a built-in, non-slip surface from the start is a much safer approach for your family.

Myth: “Porcelain Can’t Handle the Cold”

Some homeowners worry that a beautiful material like porcelain might be too delicate for Long Island’s harsh winters. This is simply not true. In fact, porcelain is one of the best-performing materials in cold climates. Because it absorbs almost no water (less than 0.5%), there is no moisture trapped inside to freeze, expand, and cause cracks or chipping. Unlike more porous materials that can be damaged by the freeze-thaw cycle, high-quality porcelain and natural stone will maintain its integrity and appearance year after year, making it a durable and smart investment.

Myth: “Slip Resistance Only Matters When It Rains”

Thinking you only need to worry about a slippery patio on rainy days is a major oversight. Your outdoor surfaces can get wet for all sorts of reasons. Consider the area around your swimming pool, morning dew on your walkway, runoff from sprinklers, or even a spilled drink during a party. Slip-resistant surfaces are essential for any high-traffic outdoor area, including patios, pool decks, and walkways, to ensure safety in all conditions. Choosing a non-slip paver gives you peace of mind, knowing your outdoor space is safer for your family and guests every single day, rain or shine.

Are Porcelain Pavers a Smart Investment for Your Patio?

Porcelain pavers have quickly become a top choice for homeowners, and for good reason. They offer a fantastic combination of beauty, strength, and low-maintenance living that’s hard to beat. When you’re thinking about a long-term addition to your home, you want something that not only looks great on day one but also holds up for years to come. Porcelain checks all those boxes, making it a truly smart investment for any patio project. From its incredible design versatility to its impressive performance in our tricky Long Island weather, this material delivers on all fronts. Let’s look at exactly why porcelain is such a standout option for your outdoor space.

Design Flexibility and Style

One of the best things about porcelain is that you don’t have to compromise on style. Whatever vision you have for your patio, there’s a porcelain paver to match. They come in a huge range of styles, colors, and textures, allowing you to create a look that’s uniquely yours. Whether you want the clean, sleek lines of a modern patio or the rustic charm of natural stone, you can find it in porcelain. These pavers can even mimic the appearance of wood without the risk of rot or fading. This design freedom means your new patio will perfectly complement your home’s existing architecture and your personal taste.

How They Perform in Rain and Ice

Porcelain is a champion in cold and wet weather. Because it absorbs very little water (less than 0.5%), there’s almost no risk of it cracking during Long Island’s freeze-thaw cycles. When water can’t seep into the paver, it can’t freeze, expand, and cause damage from within. This makes it an incredibly durable choice for our climate. Plus, outdoor porcelain pavers are manufactured with textured surfaces that provide excellent slip resistance, even when they’re wet. This is a huge safety benefit for any patio, especially around swimming pools or in areas that see a lot of rain.

Adding Value to Your Home

Investing in a porcelain paver patio is a decision that pays off in the long run. Their exceptional durability means your patio will withstand Long Island’s changing weather and continue to look beautiful for years with very little upkeep. This lasting quality is a major selling point for any potential homebuyer. For those of us living near the coast, porcelain offers another key advantage: it’s immune to salt damage. You won’t have to worry about salty air or de-icing products degrading your patio’s surface. A stunning, low-maintenance outdoor space created with expert masonry significantly enhances your home’s curb appeal and overall value.

Choose the Right Paver for Each Outdoor Area

Not every part of your yard has the same job, so why should you use the same paver everywhere? Thinking about how you use each space is the key to creating a landscape that is both beautiful and functional. The pavers that work perfectly for a sun-drenched patio might not be the best fit for a pool deck or a high-traffic driveway. By matching the paver to the purpose, you ensure your outdoor areas are safe, durable, and look great for years to come. Let’s break down the best choices for the most common outdoor spaces.

Pool Decks and Wet Areas

When you’re choosing pavers for the area around your swimming pool, safety has to be your number one priority. These surfaces are constantly wet, making slip resistance non-negotiable. Outdoor porcelain pavers are an excellent choice here because they are designed with textured surfaces that provide a secure grip underfoot, even when splashed with water. Beyond safety, they are also incredibly low-maintenance and resistant to pool chemicals and fading from the sun. This means your pool deck will stay safe and stylish with minimal effort, letting you focus more on enjoying the water.

Patios and Entertainment Spaces

Your patio is the heart of your outdoor living area, a place for everything from quiet morning coffees to lively evening gatherings. For these versatile spaces, you need pavers that offer a blend of durability, slip resistance, and style. Both porcelain and natural stone pavers are fantastic options. They are strong enough to handle heavy foot traffic and patio furniture while providing a safe surface for you and your guests. With a wide variety of colors and textures available, you can find the perfect look to complement your home and create a welcoming atmosphere for any outdoor entertainment space.

Walkways and Driveways

Walkways and driveways demand the toughest pavers of all. These areas face constant foot traffic, the weight of vehicles, and the full force of Long Island’s weather. Natural stone is a classic choice, known for its incredible longevity and minimal upkeep. Similarly, high-strength porcelain and natural stone pavers are an outstanding solution for driveways. Their low water absorption rate is a major advantage, as it helps prevent cracking and damage during our harsh freeze-thaw cycles. Choosing a robust paver ensures your home’s entrance remains safe and impressive through every season.

Maintain Your Slip-Resistant Pavers All Year

Choosing the right pavers is the first step, but keeping them safe and beautiful requires a little upkeep. A great patio is an investment in your home, and with a simple maintenance routine, you can protect that investment for years to come. These steps will help you preserve the texture that provides slip resistance and keep your outdoor space looking as good as the day it was installed. Following a straightforward plan ensures your patio remains a safe, inviting extension of your home through every season.

Keep Them Clean

Think of regular cleaning as the easiest way to maintain your patio’s safety and appearance. Sweeping away leaves, dirt, and other debris is crucial because this buildup can cover the paver’s texture and become slippery when wet. For a deeper clean, a simple rinse with a garden hose can wash away grime. Be sure to tackle spills like grease from the grill or a dropped glass of wine right away to prevent staining. A little proactive cleaning goes a long way in keeping your patio ready for family and friends at a moment’s notice.

Seal for Weather Protection

To protect your pavers from Long Island’s varied weather, it’s a good idea to seal them every few years. Sealing creates a protective barrier that helps prevent stains from setting in and reduces fading from the sun. More importantly, it limits water absorption, which is key to preventing cracks during our freeze-thaw cycles. Gappsi offers professional cleaning and sealing services that restore your pavers’ look while adding a durable layer of protection. This simple step ensures your patio remains functional and beautiful for years.

Care for Grout and Joints

The joints between your pavers are just as important as the pavers themselves. Regularly inspect the sand or grout lines for any cracks, erosion, or weeds. Damaged joints can allow water to get underneath the pavers, leading to shifting and creating uneven surfaces that become tripping hazards. If you notice the joint sand is low, you can sweep new polymeric sand into the gaps to stabilize them. For any significant damage, it’s best to consult a masonry professional to maintain the structural integrity of your patio.

Does Professional Installation Really Matter?

You’ve spent hours picking the perfect slip-resistant pavers, but your work isn’t done yet. The truth is, even the best materials will fail if they are not installed correctly. A beautiful, high-quality paver on an unstable base is like a luxury car with flat tires; it simply won’t perform as it should. Professional installation isn’t just about making your patio look good on day one. It’s about ensuring it remains safe, stable, and beautiful for years to come. Think of it as the most important insurance policy for your investment, protecting your family and your home’s value.

How Proper Installation Impacts Safety

A poorly installed patio is a collection of tripping and slipping hazards waiting to happen. When pavers are laid on an uneven or improperly prepared base, they can quickly shift, sink, or heave, creating a dangerously irregular surface. This is especially risky around a pool or on a patio where you, your family, and your guests are walking, often with bare feet. Proper installation by a masonry construction expert ensures every paver is secure, level, and graded correctly to prevent these issues. It transforms a simple collection of stones into a solid, unified surface that you can enjoy with peace of mind.

The Importance of Drainage and a Solid Base

What happens underneath your pavers is just as important as what you see on top. A professional installation starts with proper excavation, digging deep enough to create a solid foundation. A thick, compacted layer of gravel is then added to form a stable base. This crucial step prevents pavers from shifting underfoot and protects against the freeze-thaw cycles we experience on Long Island. It also allows for proper drainage, so water does not pool on the surface or get trapped underneath, which could lead to slippery spots and long-term damage. A solid base is the unsung hero of a durable and safe patio.

Why Partner with a Long Island Pro

A properly installed patio using quality materials can last for decades, but the key is choosing the right contractor. Their work is just as important as the materials you pick. A professional team with experience in Long Island knows our specific soil conditions and weather patterns. They understand how to build a patio that can withstand hot summers, icy winters, and everything in between. Partnering with an expert landscape designer and construction company means you’re not just getting pavers laid; you’re getting a structurally sound outdoor living space built to last. It’s an investment in your home’s safety, function, and value.

Related Articles

Frequently Asked Questions

What’s the most important factor when choosing a slip-resistant paver? Instead of focusing on just one thing, think about three key elements working together: a high COF rating which measures grip, a textured surface, and low water absorption. A paver that excels in all three areas, like porcelain, will give you the most reliable safety in wet or icy conditions. It’s this combination that truly makes a surface secure.

Is porcelain really worth the higher upfront cost compared to concrete? It’s helpful to think about the total cost over the life of your patio. While porcelain may have a higher initial price, it often saves you money and time in the long run. You will not have the recurring expense of professional sealing every few years, which is necessary for concrete. Plus, porcelain’s incredible durability means you are less likely to face repair or replacement costs down the road, making it a great long-term value.

Do I need to use the same type of paver for my pool deck and my front walkway? Not at all, and it is often better if you do not. The best approach is to choose the right paver for the job. For a pool deck, maximum slip resistance and resistance to pool chemicals are your top priorities, making textured porcelain an ideal choice. For a front walkway, you might prioritize durability against heavy foot traffic and a classic look, where natural stone could be a perfect fit. Matching the material to the specific area ensures both safety and longevity.

How much work is it to maintain a slip-resistant patio? The maintenance really depends on the material you choose. With a porcelain paver patio, you are looking at very minimal work, usually just sweeping it clean and occasionally washing it with soap and water. For materials like concrete or some natural stones, you will need to be more proactive. This includes regular cleaning and having them professionally sealed every few years to protect them from weather and stains.

Can I save money by installing slip-resistant pavers myself? While DIY projects can be tempting, paver installation is a job where professional expertise truly matters for safety. An installer ensures the ground is properly excavated and a solid base is built for drainage and stability. Without this foundation, pavers can shift, sink, or create uneven spots, turning your new patio into a tripping hazard. Proper installation is the best way to protect your investment and ensure your patio is safe for decades.
Share this page:
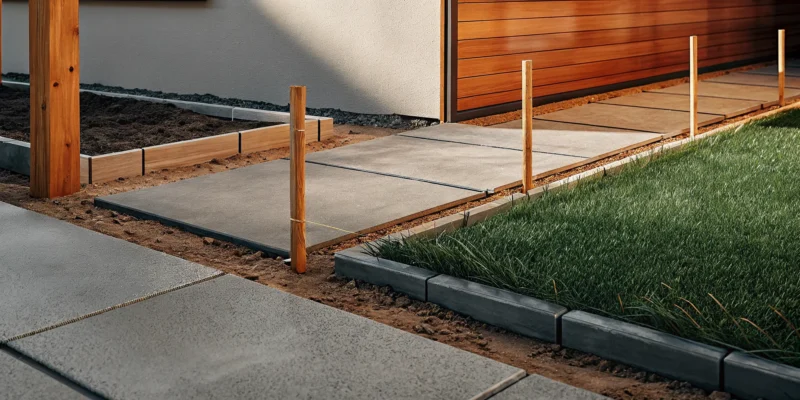
Laying pavers for a walkway on a compacted base with edge restraints.

How to Lay Pavers for a Walkway in 8 Steps

Let’s talk about what you don’t see. While the beautiful pattern and color of your pavers get all the attention, the real hero of a durable walkway is the foundation hidden beneath. So many projects fail because of what’s happening underground. A poorly prepared base is the number one reason for sinking, shifting, and uneven pavers. This guide focuses on getting that crucial first step right. We will show you how to lay pavers for a walkway the correct way, starting with proper excavation and building a rock-solid base that can withstand Long Island’s seasons. This is the secret to a professional-grade installation that prevents future headaches and protects your hard work for decades to come.

Key Takeaways

  • Your Foundation is Everything: The most critical step for a lasting walkway is creating a solid base. Properly excavating and compacting the ground in layers is the best way to prevent pavers from sinking or shifting over time.
  • Lock Your Pavers in Place: Don’t skip the finishing steps that ensure durability. Installing edge restraints prevents pavers from spreading apart, while filling the joints with polymeric sand locks them together and stops weeds from growing through.
  • Design for Longevity and Easy Care: A successful project starts with a smart plan. Ensure your design includes a slight slope for proper drainage, and commit to simple maintenance like regular cleaning and re-sealing every few years to keep your walkway looking its best.

Gather Your Materials and Tools

Before you can bring your beautiful walkway to life, you need to get organized. Having all your materials and tools ready to go makes the entire process smoother and much more enjoyable. Think of it as your project’s prep work, setting you up for success from the very first step. This initial phase is also the perfect time to finalize your design choices and make sure you have everything you need within arm’s reach. Let’s walk through what you’ll need to gather.

How to Choose the Right Paver Material

Your choice of paver is the most exciting part of this step. You’re not just picking a stone; you’re setting the entire mood for your outdoor space. Materials like concrete, brick, and natural stone are all excellent, durable choices for a walkway. At Gappsi, we have a special appreciation for high-quality porcelain and natural stone pavers because they offer an incredible range of colors and textures with unmatched longevity. Think about your home’s style. Are you going for a rustic, charming look with cobblestone, or a sleek, modern path with large format porcelain? Choose a material that you love and that complements your landscape.

Consider Your Climate and Walkway Traffic

Living on Long Island means we get to experience all four seasons, which is something you need to consider for your paver project. Your walkway will face hot sun, heavy rain, and freeze-thaw cycles in the winter. It’s important to select a dense, low-porosity material that can withstand these changes without cracking or shifting. Also, think about how much foot traffic the path will get. A main entrance walkway needs a more robust paver than a decorative garden path. Choosing the right material for your specific climate and use ensures your walkway will stay beautiful for years to come.

Essential Tools for the Project

Having the right tools on hand is a game-changer. It’s the difference between a frustrating weekend and a project you’re proud of. Before you start, make sure you have the basics covered. You will need a digging shovel, a wheelbarrow for moving materials, a tape measure, and a long level. For preparing the base, you’ll want a metal rake, a hand tamper for small areas, and a plate compactor for a truly solid foundation. A straight 2×4 board works perfectly as a screed to level the sand. Finally, have a hammer and chisel ready for any necessary cuts.

Don’t Forget Your Safety Gear

This might be the last point, but it’s one of the most important. Home improvement projects should be rewarding, not risky. Please make sure you have the proper safety equipment before you start digging or laying pavers. A good pair of work gloves will protect your hands from blisters and scrapes. Safety glasses are a must to shield your eyes from flying debris, especially when cutting pavers or compacting the base. Finally, a pair of sturdy, closed-toe shoes or work boots will protect your feet. It’s a simple step that keeps you safe and focused on the job.

How to Plan and Mark Your Walkway

A beautiful paver walkway starts with a solid plan. This is arguably the most important phase, where you make all the key decisions that will guide your project from start to finish. Taking the time to carefully plan and mark your layout now will save you from major headaches and costly mistakes later. Think of it as creating the blueprint for your outdoor space; the more detailed it is, the smoother the construction will be. This is your chance to map out a path that is not only functional but also a beautiful, welcoming addition to your home’s landscape. Before you even think about picking up a shovel, you need a clear vision. Consider how the walkway will integrate with your existing garden, patio, or driveway. Think about the materials, the colors, and the overall feeling you want to create when you or your guests approach your home. A well-planned walkway does more than just get you from point A to point B; it enhances your home’s curb appeal, adds significant value to your property, and sets the tone for your entire outdoor living area. It’s the first impression of your home’s exterior. In this section, we’ll walk through every step of the planning process, from defining the path to ensuring it drains correctly, so you can start your project with total confidence.

Define Your Walkway’s Path, Shape, and Width

First, decide on the journey your walkway will take. Consider the natural flow of foot traffic from your driveway to the front door or through your garden. Do you prefer a formal, direct path, or a more organic, meandering one? A straight walkway creates a sense of formality, while gentle curves can make a yard feel more natural and spacious. Use a garden hose or a long rope to lay out the shape on the ground. This lets you visualize the path and make adjustments easily before you start digging. Also, think about width. A main entrance walkway should be at least 48 inches wide, allowing two people to walk comfortably side by side. For secondary paths, 36 inches is usually sufficient.

Select a Paver Pattern and Design

The pattern you choose for your pavers has a huge impact on the final look and feel of your walkway. Classic patterns like running bond or herringbone are timeless, while a random layout using various paver sizes can create a more modern, dynamic feel. The right pattern can complement your home’s architectural style and your overall landscape design. When selecting your materials, consider the vast options available. High-quality porcelain and natural stone pavers come in many shapes, colors, and textures, giving you the freedom to create a truly custom look that reflects your personal style.

Measure and Mark the Layout

Once you are happy with the path and design, it’s time to make it official. Precision is key here. Start by placing wooden or metal stakes at the beginning and end of the walkway, as well as along any curves or corners. Next, run a tight string line between the stakes to define the edges of your path. For the clearest possible guide, use marking paint to spray a line on the ground directly beneath the string. This painted line will serve as your guide for excavation, ensuring your walkway has clean edges and smooth, consistent curves. Double-check all your measurements before moving on to the next step.

Plan for Proper Drainage

Proper drainage is a non-negotiable part of a lasting walkway. Without it, you risk water pooling, foundation damage, or dangerous ice patches in the winter. Your walkway needs a slight slope, or pitch, to direct water away from your home and other structures. A good rule of thumb is to create a drop of about one-quarter inch for every foot of walkway width. This is subtle enough that you won’t notice it when walking, but it’s very effective at shedding water. Plan for the water to run off into a lawn or garden bed that can absorb it. For more complex properties, a professional landscape design can ensure your drainage is perfect.

Excavate and Prepare the Ground

This is where the real work begins, and honestly, it’s the most important part of the entire project. A beautiful paver walkway is only as good as the foundation it’s built on. Taking the time to properly excavate and prepare the ground will prevent sinking, shifting, and wobbling pavers down the road. Think of it as setting the stage for a project that will look great for years to come. If this step feels a bit overwhelming, remember that getting the foundation right is something our masonry experts focus on for every single project.

How Deep Should You Dig?

Before you grab your shovel, it’s smart to call 811 to have any underground utility lines marked. Once you’re clear, it’s time to dig. For a standard walkway, you’ll need to excavate deep enough to fit all your layers. Plan on digging about 4 to 6 inches for your crushed stone base, another inch for the sand layer, plus the height of your pavers. Most natural stone pavers are between 2 and 3 inches thick. All together, you should aim for a total depth of 7 to 10 inches. This depth ensures your walkway has a sturdy foundation that can handle foot traffic and Long Island’s changing seasons without moving.

Level and Compact the Soil

After you’ve excavated the area, your next goal is to create a perfectly level and solid subgrade. Use a hand tamper for small areas or rent a plate compactor for a larger walkway to make the job easier and more effective. As you add your base material (which we’ll cover next), don’t dump it all in at once. Compaction equipment works best on layers of 3 to 4 inches at a time. Compacting in these thinner layers, or “lifts,” ensures the entire base is solid from the bottom up. Skipping this step is a recipe for a lumpy, uneven walkway later on. You can see pros in action on the Gappsi YouTube channel to get a feel for the process.

What to Avoid Putting Under Pavers

It’s just as important to know what not to use in your base as it is to know what to use. A common mistake is laying down a plastic sheet as a weed barrier. This actually traps water underneath your pavers, which can destabilize the base and lead to more problems. You should also steer clear of using stone dust or limestone screenings for your bedding layer. These materials contain fine particles that hold onto water. During the winter, that trapped water can freeze and expand, causing your pavers to heave and become uneven. Stick with the proper materials, like coarse sand, to ensure your walkway drains correctly and stays put.

Build a Solid Base

Think of the base as the unsung hero of your paver walkway. While the beautiful pavers get all the attention, it’s the solid foundation underneath that does the heavy lifting. A properly built base is your best defense against sinking, shifting, and wobbling pavers down the road. Taking the time to get this step right ensures your walkway will look great and remain stable for years. This process involves creating a sturdy layer of crushed stone followed by a smooth bed of sand.

Building a strong base is a non-negotiable part of any professional masonry project. It provides the necessary support and drainage to protect your investment. While it requires some physical effort, the steps are straightforward. By carefully layering and compacting your materials, you create a durable foundation that can handle foot traffic and weather whatever Long Island seasons throw at it.

Add and Spread the Crushed Stone Base

Your first step is to create the main support layer using crushed stone or a gravel aggregate. Begin by shoveling the material into your excavated trench, spreading it out as you go. Instead of dumping it all in at once, work in layers. A good rule of thumb is to add about 3 to 4 inches of stone at a time. Spreading it evenly is key to avoiding low spots. For even better results, you can lightly mist the stone with a garden hose. The moisture helps the small particles settle and lock together, creating a denser, more stable base for your walkway.

Compact the Base in Layers

Once you have your first layer of crushed stone down, it’s time to compact it. Most plate compactors work best on layers that are 3 to 4 inches thick, so trying to compact a deep layer all at once won’t be effective. Run the compactor over the entire surface until the stone is tightly packed and level. Then, add your next 3 to 4 inch layer of stone and repeat the process. Continuing this layering and compacting method ensures your entire base is uniformly solid from the bottom up, which is a critical step for a lasting installation.

Lay the Sand Bedding

With the crushed stone base fully compacted, you’re ready for the final layer: the sand bedding. This thin layer creates a smooth surface that makes setting the pavers much easier. Spread about 1 inch of coarse sand over the entire base. To get it perfectly level, a technique called “screeding” works wonders. Just lay two parallel 1-inch pipes on top of your stone base, pour the sand between them, and pull a straight 2×4 board across the pipes to level the sand. Once you’re done, carefully remove the pipes and fill in the small trenches left behind.

How to Lay Pavers: A Step-by-Step Guide

Choose a Starting Point

With your base prepared, it’s time for the most satisfying part: laying the pavers. I always recommend starting against a fixed, straight edge, like the foundation of your house or the side of your driveway. This gives you a solid line to build from and helps keep your pattern straight. As you begin, place each paver straight down onto the sand bed. Try not to slide them into place, as this can push the sand around and create an uneven surface. Once a paver is down, give it a gentle but firm tap with a rubber mallet. This helps set it securely into the sand. Getting this first row right is key, as it guides the rest of your project.

Place and Align Each Paver

As you continue laying pavers, your main goal is consistency. Use paver spacers to maintain even gaps between each stone; this ensures your joint lines are uniform and gives the finished walkway a professional look. It’s a good idea to work from several open pallets of pavers at once, mixing them as you go. This helps blend any slight color variations that naturally occur in porcelain and natural stone pavers, resulting in a more balanced and attractive finish. Remember to follow the pattern you chose earlier, placing each paver carefully and tapping it into place. Take your time here, as these details are what create a truly beautiful walkway that you’ll be proud of for years to come.

Cut Pavers to Fit Edges and Corners

Unless your walkway is a perfect rectangle, you will eventually need to cut some pavers to fit along the edges or around curves. This might sound intimidating, but it’s a standard part of the process. For precise cuts, a wet saw with a diamond blade is your best tool. You can often rent one from a local hardware store. For smaller adjustments, a hammer and chisel can also work. Always measure twice and mark your cut line clearly on the paver with a pencil. Wearing safety glasses is a must. Making these custom cuts is what separates a DIY project from professional masonry, as it ensures a snug fit and a clean, polished edge.

Check Your Levels as You Work

As you lay each section of pavers, it’s incredibly important to check that the surface is level. Keep a long level handy and place it across the pavers every few feet. You’re not just checking for levelness from side to side but also for a consistent, gentle slope away from your house to ensure proper drainage. If you find a paver that’s too high or too low, simply lift it out and add or remove a small amount of sand underneath to adjust its height. Tapping it with the mallet will help you fine-tune its position. This constant checking prevents wobbly pavers and puddles, which is essential for the long-term stability and safety of your walkway.

Install Edge Restraints

After laying all your pavers, the next step is to lock them in place with edge restraints. This is a critical step that you absolutely shouldn’t skip. Think of it as building a frame for your walkway. It prevents the pavers from shifting, spreading apart, and creating unsafe gaps over time. Proper edging is what gives a paver project its sharp, professional finish and ensures it stands the test of time against foot traffic and Long Island’s changing seasons. By securing the perimeter, you are protecting the entire interlocking system you just worked so hard to create.

Why Edge Restraints Are Crucial

Edge restraints are the unsung heroes of a durable paver walkway. Without them, the outer pavers will inevitably begin to drift outwards, compromising the tight fit of the entire installation. This movement leads to widening joints, wobbly pavers, and an uneven surface that can become a serious tripping hazard. These restraints, typically made from heavy-duty plastic, aluminum, or concrete, are installed along the sides of the walkway to hold everything together. Taking the time to install them correctly is one of the most important steps for ensuring your walkway looks great and remains stable for years to come. A solid edge is a hallmark of professional masonry work.

How to Secure Your Edge Restraints

Securing your edge restraints is straightforward but requires attention to detail. Once your pavers are laid, place the edging directly against the outer border, making sure it’s snug. You don’t want any wiggle room. Drive 10-inch steel spikes through the holes in the restraint and deep into the compacted base material about every 12 inches. This anchors the entire system and prevents any lateral movement. For curves, you may need to snip the connecting tabs on the back of plastic edging to help it bend smoothly. This step happens right before you sweep sand into the joints, effectively locking in your beautiful porcelain and natural stone pavers from all sides.

Add the Finishing Touches

Your walkway is laid out, and it’s already looking fantastic. Now it’s time for the final steps that will lock everything in place and protect your hard work for years to come. These finishing touches are what separate a good DIY project from a great one. Taking the time to properly fill the joints, compact the surface, and seal the pavers will ensure your walkway remains stable, beautiful, and easy to maintain through every Long Island season.

Fill Joints with Polymeric Sand

Once your pavers are set, you need to fill the gaps between them. For this, you’ll use polymeric sand. This isn’t just regular sand; it contains special polymers that harden when you add water, creating a firm yet flexible joint. This process locks the pavers together, prevents weeds from growing through the cracks, and stops ants from making a home in your new walkway.

To apply it, pour the sand over the dry paver surface and use a push broom to sweep it into every joint. Make sure the joints are completely filled. Then, use a leaf blower on a low setting to gently blow any excess sand off the tops of the pavers. Finally, lightly mist the entire walkway with a garden hose to activate the polymers. You can find all the necessary materials at the Gappsi Store.

Complete the Final Compaction

After filling the joints, the next step is to run a plate compactor over the entire walkway one last time. This final compaction serves two important purposes: it settles the pavers firmly into the sand bedding and helps lock the polymeric sand into the joints. The result is a perfectly even, solid surface that feels secure underfoot and won’t shift over time.

Before you start, make sure you place a protective pad or a piece of plywood over the compactor’s plate. This prevents the machine from scuffing, scratching, or cracking your beautiful new pavers. Go over the entire surface slowly to ensure everything is pressed down evenly. This professional step is a key part of our masonry construction process and guarantees a long-lasting finish.

Decide if You Should Seal Your Pavers

Sealing your paver walkway is an optional step, but it’s one I highly recommend. A quality sealant acts as a protective barrier, shielding your pavers from stains like oil and fallen leaves. It also helps protect against weathering, enhances the natural color of the stone, and makes cleaning much easier. Plus, a sealed surface can further inhibit weed growth and moss.

However, sealing does require some upkeep, as you’ll need to reapply it every few years. If you decide to seal, choose a product designed for your specific paver material and follow the application instructions carefully. If you’d rather leave it to the experts, our team offers professional paver restoration and sealing services to keep your walkway looking its best.

Avoid These Common Paver-Laying Mistakes

Laying a paver walkway is a rewarding project, but a few common missteps can turn your dream path into a future headache. Taking the time to get these key details right will ensure your walkway looks beautiful and lasts for years. Let’s walk through some of the most frequent mistakes so you can sidestep them like a pro.

Forgetting to Compact the Base

This is probably the most critical mistake you can make. The base is the foundation of your entire walkway, and if it’s not solid, nothing else will be. A poorly compacted base will inevitably lead to pavers shifting, sinking, or becoming uneven over time. This creates tripping hazards and allows water to pool, causing even more damage. To avoid this, you must compact the crushed stone base in layers, ensuring each one is firm and level before adding the next. A stable foundation is the key to a long-lasting project, something our masonry experts prioritize in every installation.

Skipping the Weed Barrier

After all your hard work, the last thing you want is to spend your weekends pulling weeds from between your beautiful new pavers. Skipping the weed barrier is a shortcut you’ll regret. This simple layer of fabric, laid down before your sand bed, is essential for preventing weeds and grass from growing up through the joints. It helps maintain the clean, polished look of your walkway and saves you a lot of future maintenance. A well-planned project considers long-term upkeep, which is a core part of creating a sustainable landscape design. Don’t skip this step; your back will thank you later.

Overlooking Proper Drainage

Water is a powerful force, and if you don’t tell it where to go, it will find its own path, often to the detriment of your hardscaping. A perfectly flat paver walkway is a recipe for drainage problems. You need to build in a slight, almost unnoticeable slope (about a quarter-inch drop per foot) to guide rainwater away from your home’s foundation and off the walkway surface. This prevents water from pooling, which can erode the sand in the joints and cause the base to deteriorate. Proper drainage is crucial for preventing future issues that might require professional restoration and sealing.

Using the Wrong Tools

Trying to tackle a paver installation with the wrong equipment will make the job ten times harder and compromise the quality of your results. While a shovel is great, you might need a pickaxe to break up compacted soil or tough roots. More importantly, you need a mechanical plate compactor for the base. Simply tamping it by hand won’t achieve the necessary density. Remember that most compactors work best on layers of about three to four inches at a time. Using the right tools ensures efficiency and a professional finish, which is why our teams at the Gappsi Store always rely on specialized equipment for every project.

Maintain Your New Paver Walkway

You’ve put in the work, and now you have a beautiful paver walkway to show for it. Congratulations! The good news is that pavers are incredibly durable, but a little routine care will keep them looking brand new for years to come. Proper maintenance protects your investment, prevents small issues from becoming big problems, and ensures your walkway remains a stunning feature of your home. From simple sweeping to knowing when a professional touch is needed, we’ll walk you through the essentials of paver care.

Clean and Weed Your Walkway Regularly

Keeping your walkway clean is the easiest way to maintain its beauty. A simple sweep with a stiff broom every week or two will clear away leaves, dirt, and other debris that can stain the surface or make it slippery. You’ll also want to keep an eye out for weeds popping up between the pavers. If you installed a weed barrier, this should be a minor issue. You can typically pull small weeds by hand or use a specialized tool to clear the joints. Regular cleaning not only keeps your walkway looking tidy but also helps maintain the overall appeal of your landscape design. A clean walkway makes the whole property feel more polished.

Know When to Re-Sand and Re-Seal

The sand in the joints between your pavers, called polymeric sand, is essential for locking them together and preventing movement. Over time, this sand can wash away due to rain or pressure washing. Inspect the joints annually. If you see gaps, it’s time to re-sand. Just sweep new polymeric sand into the joints and activate it with water. Sealing your pavers is another key step. A good quality sealant protects the pavers from stains, sun damage, and harsh weather. As a general rule, you should plan on sealing your pavers every three to four years. If you notice the color looks faded or water soaks in instead of beading up, it’s time to apply a new coat. This is a job you can do yourself, or you can hire a service for professional restoration and sealing.

Signs It’s Time to Call a Professional

While most maintenance is straightforward, some problems require an expert eye. If you notice significant issues, it’s best to call a professional before the damage gets worse. Watch for signs of a failing base, such as multiple pavers sinking or shifting, creating an uneven and hazardous surface. Widespread, deep-rooted weeds can also indicate a deeper problem with the base layer. Another major red flag is poor drainage, where water pools on the walkway instead of running off. These issues often point to problems with the initial installation, like improper compaction. A professional masonry contractor can assess the situation and provide a lasting solution to protect your home’s value and safety.

Related Articles

Frequently Asked Questions

How deep do I really need to dig for my walkway? The depth can feel like a lot of work, but it is essential for a walkway that lasts. You should plan for a total depth of 7 to 10 inches. This accounts for a 4 to 6 inch compacted stone base, a 1 inch layer of sand, and the height of the pavers themselves, which are typically 2 to 3 inches thick. This deep foundation is what prevents the pavers from sinking and shifting through Long Island’s freeze and thaw cycles.

Is renting a plate compactor absolutely necessary? Yes, I would say it is. While it might be tempting to save the rental fee and just tamp the base by hand, it’s a shortcut that often leads to problems. A plate compactor provides the force needed to create a dense, solid foundation that won’t settle over time. An improperly compacted base is the main reason walkways fail, leading to sunken spots and wobbly pavers. Think of it as a crucial investment in the longevity of your project.

What happens if I decide not to seal my pavers? Sealing is a personal choice, and your walkway won’t fall apart if you skip it. However, unsealed pavers are more porous, meaning they will absorb moisture and are much more susceptible to stains from things like fallen leaves, dirt, or spilled drinks. A sealant also protects the pavers from fading due to sun exposure and can enhance their natural color. If you prefer a lower-maintenance option, sealing every few years is the way to go.

Why is polymeric sand better than regular sand for the joints? Polymeric sand is a game-changer for paver projects. Unlike regular sand, which can easily wash out in the rain, polymeric sand contains a binding agent that hardens when you add water. This creates a firm, durable grout that locks the pavers together, prevents weeds from growing through the cracks, and keeps ants from tunneling through the joints. It’s the key to a stable, clean-looking finish.

A few of my pavers are already wobbly. What did I do wrong? Don’t worry, this is usually an easy fix. A wobbly paver typically means the sand bed underneath it wasn’t perfectly level or has a slight low spot. To fix it, carefully lift the wobbly paver and the ones next to it. Add a small amount of sand to level the area, use a board to smooth it out, and then place the pavers back. A firm tap with a rubber mallet should set them securely in place.

Share this page:
Porcelain paver showroom on Long Island with a modern display of large format tiles.

Porcelain Paver Showroom Long Island: A Buyer’s Guide

If the word “porcelain” makes you think of delicate teacups, it’s time for a new perspective. The porcelain used for outdoor pavers is a completely different material, engineered for incredible strength and resilience. Made from fine clay fired at extreme temperatures, these pavers are dense, non-porous, and built to withstand heavy foot traffic and harsh weather without cracking or chipping. They combine the elegance of high-end materials with an unmatched toughness that makes them perfect for any outdoor project. The best way to understand their durability is to see and feel them for yourself at a porcelain paver showroom on Long Island, where you can compare their quality directly.

Key Takeaways

What Are Porcelain Pavers?

If you’re picturing the delicate porcelain of a teacup, it’s time to think bigger and stronger. Porcelain pavers are a type of ceramic tile made from a very fine, dense clay that is fired at extremely high temperatures. This intense manufacturing process makes them incredibly strong, dense, and long-lasting. Unlike other materials, they are non-porous, meaning they don’t absorb water. This key quality makes them a superior choice for a wide range of projects.

Whether you’re designing a stunning new patio or looking for a sleek, modern material for your kitchen, porcelain and natural stone pavers offer a versatile solution. They combine the beauty of natural materials like stone and wood with unmatched performance, giving you a surface that looks fantastic and holds up beautifully over time. It’s a smart investment that provides both elegance and peace of mind for any home improvement project.

Why They’re a Long Island Favorite for Outdoor Living

Long Island weather can be tough on outdoor materials, with hot, sunny summers and cold, icy winters. This is where porcelain truly shines. Because the material is so dense and doesn’t soak up water, it naturally resists stains, mold, and the cracking that often happens during our seasonal freeze-thaw cycles. This makes it an ideal choice for everything from walkways to driveways.

Porcelain pavers are also one of the lowest-maintenance options on the market. They resist fading from UV rays and stand up to heavy foot traffic without showing wear. A simple cleaning is usually all it takes to keep your beautiful swimming pool deck or patio looking brand new, giving you more time to relax and enjoy your outdoor space.

Thinking Beyond the Patio: Indoor Uses

Porcelain’s durability and sophisticated style aren’t just for the outdoors. Many homeowners are bringing this versatile material inside to create seamless, flowing designs from their patio to their living room. Large porcelain slabs can be used for stunning kitchen countertops, elegant bathroom walls, or even as a durable and stylish flooring option for high-traffic areas.

This ability to bridge indoor and outdoor living is perfect for creating a cohesive and modern feel throughout your property. Imagine a continuous floor that runs from your kitchen out to your poolside lounge area. By working with a team that specializes in home remodeling, you can use porcelain to create a unified aesthetic that is both practical and beautiful.

How Porcelain Compares to Other Pavers

Choosing the right paver is a big decision, and it’s about more than just looks. You’re weighing cost, durability, and how much time you want to spend on upkeep. While traditional materials have their charm, porcelain pavers bring some serious advantages to the table. Let’s look at how they stack up against other popular choices like natural stone, concrete, and brick, so you can feel confident you’re picking the perfect material for your Long Island home.

Porcelain vs. Natural Stone

There’s no denying the appeal of natural stone. Each piece is completely unique, and materials like bluestone are a Long Island favorite because they’re strong, not slippery, and age beautifully. It’s a classic choice that connects your patio or walkway to the natural landscape. However, that natural beauty can come with a bit more maintenance.

Porcelain offers a modern alternative that is incredibly strong, dense, and long-lasting. It’s even more scratch-resistant than many types of natural stone. This means that patio furniture, high foot traffic, and everyday life won’t cause the same wear and tear you might see on softer stone. You get a pristine look that lasts for years, combining the aesthetic of stone with superior durability. Gappsi offers a wide selection of both porcelain and natural stone, so you can compare them side-by-side.

Porcelain vs. Concrete

Concrete pavers are a common sight, often chosen for their initial affordability. They get the job done and come in a variety of shapes and colors. The main drawback, however, is the long-term commitment to maintenance. Concrete is porous, so it easily absorbs stains from oil, wine, or fallen leaves. To keep it looking its best, it typically requires regular cleaning and sealing.

In contrast, porcelain pavers are one of the lowest-maintenance options available. They don’t need to be sealed every year, and because they are non-porous, spills just sit on the surface, making them easy to wipe clean with soap and water. While the upfront material cost for porcelain may be higher, its minimal upkeep can make it a more cost-effective choice over time. This is a key factor when planning your masonry project.

Porcelain vs. Brick

Brick pavers offer a timeless, traditional look that many homeowners love. They can create a warm and inviting atmosphere for patios and walkways. However, brick can be prone to chipping, and the color can fade over time with exposure to the sun and elements. The porous nature of brick also means it can absorb moisture, making it susceptible to moss growth and freeze-thaw cycles in the winter.

When you choose pavers, it’s smart to look at both the installation cost and the long-term upkeep. Porcelain pavers are designed with slip resistance in mind, making them a safe choice for high-traffic areas around pools and patios. Their incredible durability and low maintenance needs add up to a cost-effective solution over the life of your project. You won’t have to worry about the kind of annual restoration and sealing that older materials often require.

The Advantages of Porcelain Pavers for Your Home

When you invest in your home’s outdoor space, you want materials that look beautiful and perform exceptionally for years. Porcelain pavers deliver on both fronts, offering a powerful combination of style, strength, and practicality. They have quickly become a go-to choice for Long Island homeowners for several key reasons, making them a smart addition to any patio, walkway, or pool deck project. Unlike some traditional materials that require a lot of upkeep, porcelain provides a foundation for outdoor living that you can enjoy without constant worry or work. Let’s look at the specific advantages that make them such a compelling option.

Built to Last Through Long Island Weather

Long Island’s weather can be tough on outdoor materials, with freezing winters and humid summers. Porcelain pavers are engineered to handle these extremes. Because they are incredibly dense and non-porous, they absorb very little water. This quality makes them highly resistant to cracking during freeze-thaw cycles, a common problem with other materials. Their durability also means they resist fading from sun exposure and won’t develop mold or mildew. Choosing porcelain and natural stone means you are installing a surface that is built to maintain its integrity and appearance for decades with minimal upkeep.

Stain-Proof and Easy to Clean

Imagine hosting a backyard barbecue without worrying about spilled wine or grease staining your beautiful patio. With porcelain pavers, that’s the reality. They are one of the lowest-maintenance paving options available because their non-porous surface prevents spills from soaking in. Oil, wine, and dirt simply sit on top, making cleanup as easy as wiping with soap and water. Unlike many types of natural stone that require regular sealing to protect them, porcelain pavers do not need to be sealed. This saves you time and money on long-term maintenance, which you can learn more about by exploring typical restoration and sealing services.

A Style for Every Aesthetic

Your patio or walkway should feel like a natural extension of your home’s design, and porcelain offers the versatility to achieve just that. These pavers are available in a huge range of styles, colors, and sizes, from standard squares to large, modern slabs. Advanced manufacturing technology allows porcelain to convincingly mimic the look of other materials, including the warm grain of wood, the sleek finish of concrete, or the rich texture of natural stone like slate or travertine. This design flexibility ensures you can find the perfect look to complement your home, whether your style is classic, contemporary, or rustic. You can explore options at the Gappsi Store.

Safe and Slip-Resistant

Safety is always a top priority, especially in high-traffic areas or around a pool where surfaces can get wet. Many porcelain pavers are manufactured with a textured, anti-slip finish specifically for this reason. This surface provides excellent traction underfoot, reducing the risk of slips and falls even when the pavers are wet. It’s an ideal choice for families with children or for anyone wanting extra peace of mind around their outdoor living spaces. This makes porcelain a top material for surrounding swimming pools, creating a secure and stylish deck area for everyone to enjoy.

What’s the Cost of Porcelain Pavers on Long Island?

When you’re planning a new patio, walkway, or pool surround, the budget is always a top consideration. Understanding the cost of porcelain pavers helps you plan your project with confidence. The final price tag is a combination of two main things: the pavers themselves and the professional installation. Think of it as an investment in your home’s beauty and functionality, one that pays off for years with minimal upkeep. Let’s walk through what you can expect to budget for a porcelain paver project here on Long Island.

The total investment depends on the specific materials you choose and the complexity of your project. A simple, straightforward patio will have a different cost than a multi-level design with intricate patterns. At Gappsi, we provide clear, detailed estimates so you know exactly what to expect before any work begins. Our goal is to help you create a stunning outdoor space that fits your vision and your budget.

Breaking Down Material Costs

First, let’s talk about the pavers. The material cost for high-quality porcelain pavers on Long Island typically falls between $7 and $9 per square foot. This range accounts for the wide variety of styles, colors, and finishes available. For example, a paver that mimics the look of rare Italian marble might be at the higher end of the scale, while a more standard, solid-color paver could be more budget-friendly. The price reflects the quality, durability, and design of the product you select. Visiting a showroom is a great way to see these differences firsthand and find a style that you love.

Budgeting for Professional Installation

Next is the installation, which is just as important as the pavers themselves. Professional installation costs generally range from $5 to $10 per square foot. This fee covers more than just laying down the tiles; it includes essential site preparation like grading the land for proper drainage and building a stable base to prevent shifting or cracking. The complexity of the job, such as creating curved pathways or intricate patterns, can also influence the price. Investing in expert masonry services ensures your beautiful new surface will last for decades.

What Influences the Final Price?

Several factors come together to determine the final price of your project. The total square footage is the biggest driver, but the condition of the installation site also plays a role. If your yard requires significant excavation or grading, the labor costs may be higher. The specific installation method and the complexity of your chosen design will also affect the final number. While it’s important to consider the upfront cost, remember that porcelain’s incredible durability and low maintenance needs offer significant long-term savings. Unlike other materials that may require regular sealing and restoration, porcelain holds its beauty with very little effort.

How to Choose the Right Porcelain Paver Showroom

Choosing your porcelain pavers is an exciting step, but it’s also a big decision. While browsing online galleries is a great way to gather inspiration, nothing replaces the experience of visiting a showroom in person. This is where your project starts to feel real. A great showroom isn’t just a store; it’s a resource center where you can see, touch, and compare materials to find the perfect match for your home. It’s the difference between simply buying a product and finding a true partner for your project.

When you start looking for a showroom on Long Island, you’ll want to find one that offers more than just a catalog of options. The right place will provide a wide selection with plenty of samples you can take home, offer expert design guidance to help you visualize the final look, and have a team of skilled professionals to handle the installation. Knowing what to look for and which questions to ask will help you feel confident in your choice and ensure your new patio, walkway, or pool deck looks incredible for years to come. This is about creating a space you love, and it all begins with finding the right team and the right materials.

A Great Selection and Plenty of Samples

The first thing you’ll notice in a quality showroom is the sheer variety of options. You want a place that offers a wide selection of porcelain and natural stone pavers so you can explore different colors, textures, and styles. Pictures online can be a helpful starting point, but they rarely capture the true character of a paver. Visiting a showroom, like the Gappsi showroom in Smithtown, NY, lets you see and feel the materials firsthand. This hands-on experience is essential. Ask if you can take a few samples home. Seeing how the pavers look next to your house in the morning sun versus the evening shade can make all the difference in finding the perfect fit for your space.

Expert Design Guidance

A great showroom provides more than just materials; it offers expertise. Look for a team that can give you professional design guidance to help bring your vision to life. The best suppliers have designers on staff who can help you plan your space, select complementary colors, and create a cohesive look that ties into your home’s existing architecture and landscape. This support is invaluable, especially if you’re feeling a little overwhelmed by all the choices. Instead of just selling you pavers, a design-focused team acts as a creative partner, helping you map out a beautiful and functional outdoor living area, from the patio to the surrounding landscape.

Professional Installation and Support

Finding the perfect pavers is only half the battle. The quality of the installation is just as important as the quality of the material itself. That’s why it’s a huge advantage to choose a showroom that also offers professional installation. A full-service company like Gappsi not only sells the pavers but also has an experienced masonry team to install them correctly. This creates a seamless process from start to finish. You have one point of contact, which simplifies communication and ensures accountability. It gives you peace of mind knowing that the team laying your pavers is an expert in working with that specific product, guaranteeing a beautiful and durable result.

Key Questions to Ask Your Supplier

Walking into a showroom prepared with the right questions will make your decision process much smoother. Beyond just looking at samples, you’ll want to dig a little deeper. Start by asking about the paver’s durability rating and slip resistance, especially if you’re planning to use them around a pool. Inquire about the recommended installation method and what kind of base is required for our Long Island climate. Don’t forget to ask about the warranty for both the materials and the labor. Finally, it never hurts to ask about any current promotions, discounts on older styles, or bundled deals that include both the paver materials and installation. Being informed helps you make the best investment for your home.

Finding the Best Porcelain Paver Showroom on Long Island

Finding the right porcelain pavers for your home is a big decision, and pictures online can only tell you so much. To truly get a feel for the texture, color variation, and quality of a paver, you need to see it in person. This is where a great showroom makes all the difference. The best showrooms on Long Island are not just warehouses with stacks of stone; they are design destinations created to inspire you. You should be able to walk through thoughtfully arranged displays, see how different pavers look in various lighting conditions, and feel the material for yourself.

A top-quality showroom experience is about more than just the products. It’s about the people who guide you. You want to work with a team that understands design principles and the technical aspects of installation. They should be able to answer your questions about everything from slip resistance to which base is best for your soil type. When you find a supplier that combines an extensive selection of porcelain and natural stone with genuine expertise, you can feel confident moving forward with your project. It turns a potentially overwhelming process into an exciting and creative part of your home improvement journey.

Gappsi: Your Long Island Porcelain Destination

For a showroom experience that checks all these boxes, Gappsi is the premier destination on Long Island. Located in Smithtown, their showroom is designed to give you a hands-on feel for their extensive collection of Italian-made porcelain pavers. You can explore a huge variety of styles, from pavers that mimic the warm look of natural wood to modern, large-format tiles perfect for a sleek patio. Gappsi even offers options strong enough for driveways, ensuring a beautiful and durable entrance to your home. Their team is not just there to sell; they are design and construction experts who can help you bring your vision to life, ensuring your outdoor space is both beautiful and built to last.

Popular Porcelain Paver Brands to Know

When you start exploring porcelain pavers, you’ll quickly see a few brand names appear consistently. These manufacturers are leaders in the industry, known for their commitment to quality, design innovation, and durability. Getting familiar with what makes each brand unique can help you find the perfect material for your project, whether you’re planning a new patio, walkway, or pool surround. At the Gappsi showroom, we carry a wide selection from top-tier brands, giving you the chance to see and feel the difference for yourself.

Marazzi

If you love the warm, inviting look of wood but worry about its upkeep outdoors, Marazzi is a brand you need to see. They are masters at creating porcelain tiles with a stunningly realistic wood-like appearance, giving you that natural aesthetic without the risk of rot or fading. Their tiles are non-porous and incredibly durable, making them a fantastic choice for Long Island patios and pool decks. Because they are so easy to sanitize and resistant to stains and scratches, Marazzi’s fade-resistant tiles offer a beautiful finish that stands up to busy family life and changing seasons with ease.

Daltile

Daltile is all about providing options. This brand is recognized for its incredibly extensive range of porcelain tiles, ensuring there’s a style to match nearly any design vision. Whether your home is classic and traditional or sleek and modern, Daltile offers a huge variety of colors, finishes, and sizes to bring your ideas to life. They focus on combining beautiful aesthetics with practical functionality, so you can trust their products are not only stylish but also durable and simple to maintain. This makes them a go-to choice for both residential and commercial projects across Long Island.

Emser Tile

For homeowners looking for something with a bit of artistic flair, Emser Tile delivers. This brand is celebrated for its innovative designs and high-quality materials that truly enhance the beauty of any space. Emser Tile is a great choice if you want your patio or outdoor living area to feel distinctive and thoughtfully designed. Their products are engineered for excellent performance and durability, especially in outdoor applications where they need to withstand the elements. We often recommend Emser to clients who want their porcelain pavers to be a standout feature of their landscape.

Porcelanosa

Porcelanosa is a leading name in the industry, known for its luxurious porcelain tiles that feel both sophisticated and timeless. This brand is a favorite for high-end residential projects, offering exceptional aesthetic appeal without sacrificing functionality. Porcelanosa places a strong emphasis on innovation and sustainability in its manufacturing process, which resonates with many homeowners today. Their collections often reflect modern design trends, providing a clean, elegant look perfect for creating a chic outdoor oasis or a seamless indoor-outdoor transition. Their reputation for quality makes them a trusted choice for any home remodeling project.

Florida Tile

Florida Tile is recognized for its strong commitment to producing high-quality, sustainable porcelain tiles right here in the United States. The brand offers a diverse selection of products that are as stylish as they are durable, making them a versatile choice for many different applications. Whether you’re designing a rustic patio or a contemporary pool deck, Florida Tile provides beautiful options designed to meet the demands of everyday life. Their focus on quality and responsible manufacturing gives homeowners peace of mind, knowing they are investing in a product that is built to last and created with care.

Exploring Popular Porcelain Paver Styles

One of the best parts about choosing porcelain pavers is the sheer variety of styles available. Modern porcelain can convincingly replicate almost any material, giving you complete creative control over your project’s final look. Whether your home has a rustic, traditional, or ultra-modern vibe, there’s a porcelain paver that will fit right in. This design flexibility is a major reason why porcelain and natural stone have become so popular for outdoor living projects across Long Island. Let’s look at a few of the most sought-after styles you can explore for your own backyard transformation.

The Natural Look of Wood

If you love the warm, inviting look of a wood deck but dread the thought of staining, sealing, and dealing with splinters, wood-look porcelain is your answer. These pavers capture the beautiful grain and rich tones of natural wood with stunning realism. You get all the aesthetic benefits without any of the constant upkeep. They are perfect for creating a cozy patio, a rustic walkway through a garden, or a seamless transition from your indoor hardwood floors to your outdoor space. Plus, unlike real wood, they won’t rot, warp, or fade, even after a harsh Long Island winter.

The Classic Look of Stone

There’s a reason natural stone has been used for centuries: it’s timeless, elegant, and substantial. Porcelain pavers masterfully replicate the appearance of classic materials like slate, bluestone, and travertine. You can find pavers with subtle color variations and authentic-looking textures that give your project a high-end, custom feel. This allows you to achieve the luxurious look of exotic stone without the associated cost or sourcing challenges. It’s an ideal choice for creating grand entryways, sophisticated patios, and walkways that complement traditional masonry work, giving your home a cohesive and stately appearance.

Sleek, Contemporary Designs

For a clean, modern aesthetic, sleek porcelain pavers are an excellent choice. These styles often come in large format tiles and monochromatic colors like cool grays, deep charcoals, and crisp whites. They create an uncluttered, sophisticated foundation for contemporary homes and minimalist landscapes. This look is perfect for designing a resort-style pool deck, a chic rooftop terrace, or a streamlined patio for outdoor entertaining. The clean lines and uniform appearance of these pavers pair beautifully with modern architectural elements, creating a polished and intentional outdoor living area that feels both spacious and refined.

Are Financing and Promotions Available?

A beautiful new porcelain paver patio or walkway is a wonderful investment in your home, but it’s also a significant one. The good news is you don’t have to pay for the entire project all at once. Many homeowners use financing and seasonal promotions to make their dream outdoor space a reality without straining their budget. Thinking ahead about the financial side of your project can make the whole process smoother and more enjoyable. Let’s look at a couple of ways you can make your paver project more affordable.

Understanding Your Financing Options

Bringing your vision to life is the exciting part, and figuring out how to pay for it shouldn’t be a roadblock. Many home improvement companies understand this and offer plans to help. It’s quite common for them to provide a variety of affordable financing solutions designed to fit different budgets, so you can find a payment schedule that works for you. This approach allows you to get your project started sooner and pay for it over time in manageable installments. Don’t hesitate to ask your design consultant about the financing options available; they are there to help you find the right fit.

Finding Seasonal Deals and Discounts

Beyond financing, a little savvy shopping can go a long way. Keep an eye out for seasonal sales and special promotions, which can significantly lower your total project cost. With material costs for quality porcelain pavers often falling between $7 and $9 per square foot, even a small discount can add up to substantial savings. When you visit a porcelain paver showroom on Long Island, always ask about any ongoing sales, clearance items, or package deals. Planning your project around these promotions is a smart way to get the high-end look you want for less.

Planning Your Long Island Porcelain Paver Project

Once you have a style in mind, it’s time to get into the details of your project. Proper planning is the key to a smooth installation and a beautiful, long-lasting result. From the ground up, every step matters. Thinking through the base, your budget, and your professional partners ahead of time will save you from headaches later on. A successful project isn’t just about picking the right paver; it’s about ensuring it’s installed correctly and fits within your financial plans. Let’s walk through the essential steps to get your porcelain paver project started on the right foot.

Selecting the Right Base and Installation Method

The foundation of your paver project is just as important as the pavers themselves. Porcelain pavers need a properly prepared base to ensure they last. Simply laying them over an old concrete slab isn’t enough, as this can lead to poor drainage, shifting, and cracking over time. A solid foundation, typically made of compacted aggregate, allows for proper water drainage and creates a stable surface that can handle Long Island’s changing seasons. This expert site preparation is a core part of professional masonry services and is critical for the longevity of your patio, walkway, or pool surround.

How to Measure and Estimate for Your Project

Creating a realistic budget starts with understanding all the costs involved. The total price includes the pavers themselves, which can range from a few dollars to over $35 per square foot, and the cost of professional installation. Don’t underestimate the installation budget; it’s a significant part of the investment because it involves extensive ground preparation to do the job right. To get a clear estimate, measure the square footage of your project area. Then, you can explore different porcelain and natural stone options to see how material choices affect your total cost. Always factor in a small cushion for any unexpected needs that might arise.

Partnering with a Design and Installation Expert

Working with the right team can make all the difference. A great showroom does more than just sell pavers; it provides comprehensive support to bring your vision to life. Look for experts who offer help with design, space planning, and complete project management. A full-service partner can guide you through every phase, from initial concept to final installation. They can also provide valuable tips on how to care for your new pavers and offer creative solutions for unique projects, like a rooftop deck or an intricate patio design. This level of landscape design expertise ensures your new space is both beautiful and functional.

Related Articles

Frequently Asked Questions

Are porcelain pavers slippery, especially around a pool? This is a great question and a top concern for anyone with a pool. Many porcelain pavers are specifically made with a textured, anti-slip finish. This provides excellent grip, even when the surface is wet, making them a very safe choice for pool decks, patios, and walkways. When you’re choosing your pavers, just be sure to ask about the slip-resistance rating to find the perfect option for your space.

How do porcelain pavers hold up during a Long Island winter? They perform exceptionally well. The secret is in how they are made. Porcelain is fired at very high temperatures, which makes the material incredibly dense and non-porous. This means it doesn’t absorb water, so when temperatures drop below freezing, there is no trapped moisture to expand and cause cracks. This resistance to the freeze-thaw cycle is why porcelain is such a durable, long-lasting choice for our climate.

Do porcelain pavers get too hot to walk on in the summer sun? Like any paving material, porcelain will absorb some heat from direct sunlight. However, the color you choose makes a big difference. Lighter-colored pavers in shades of white, beige, or light gray will reflect more sunlight and stay significantly cooler underfoot than darker colors like charcoal or black. If your patio gets a lot of direct sun, opting for a lighter-colored paver is a smart way to keep the surface comfortable for bare feet.

Can I just lay porcelain pavers over my old concrete patio? While it might seem like a convenient shortcut, we strongly advise against it. Laying pavers directly over an existing concrete slab can lead to major problems with drainage and stability. An old slab can shift or crack, and that movement will transfer directly to your new pavers. A proper installation requires a stable, well-draining base made of compacted aggregate to ensure your beautiful new surface lasts for decades without issues.

What’s the real difference in cost between porcelain and concrete pavers over time? While concrete pavers might have a lower initial price, porcelain often proves to be more cost-effective in the long run. The main reason is maintenance. Porous materials like concrete require regular, costly sealing to protect them from stains and water damage. Porcelain, being non-porous, never needs to be sealed. You save money and time every year on upkeep, making it a smart investment that holds its value and beauty with minimal effort.

Share this page:
A newly built small retaining wall with stacked concrete blocks and a capstone finish.

How to Build a Small Retaining Wall: A 6-Step Guide

A retaining wall does more than just hold back soil; it adds structure, character, and immense value to your property. It’s a design element that can define outdoor rooms, create stunning terraced gardens, or frame a perfect patio space. From classic natural stone to versatile concrete blocks, the material you choose helps set the tone for your entire landscape. But a beautiful wall must also be a strong one. This guide breaks down the essential steps for how to build a small retaining wall that is both structurally sound and a gorgeous addition to your home, ensuring your hard work results in a feature you’ll be proud of for years to come.

Key Takeaways

  • Plan Before You Dig: Before starting, map out your wall’s location, check local Long Island building codes for permit requirements, and choose materials that suit both your style and the project’s structural needs.
  • Focus on a Level Base and Proper Drainage: The two biggest factors for a long-lasting wall are its foundation and its ability to manage water. Create a compact gravel base that is perfectly level, and install a drainage system with gravel backfill to prevent water pressure from causing damage.
  • Build Methodically from the Ground Up: For a strong and straight wall, ensure your first course is perfectly level. As you build, stagger the joints of each new layer, backfill with gravel as you go, and secure the final capstones with construction adhesive for a polished look.

What Is a Small Retaining Wall?

A retaining wall is a structure designed to hold back soil, turning a sloped, uneven yard into a more functional and beautiful space. Think of it as a hardworking landscape feature. It prevents soil erosion from washing away your precious topsoil and protects your home’s foundation from shifting ground. For many Long Island properties with hilly terrain, a retaining wall is the key to creating level areas for patios, gardens, or even a safe play space for the kids. While they serve a very practical purpose, retaining walls also add incredible visual appeal, defining outdoor rooms and adding texture with beautiful stone or block.

Engineered vs. DIY Walls: What’s the Difference?

The main difference between an engineered wall and a DIY one comes down to height and complexity. For walls under three or four feet, many homeowners can use interlocking segmental concrete blocks that stack without mortar. These systems are designed to be user-friendly. However, once a wall gets taller or has to support a heavy load (like a driveway or patio), you’re entering engineered territory. An engineered wall is designed by a professional to handle significant pressure and requires a deeper understanding of soil mechanics and drainage. While a small garden wall can be a great weekend project, it’s often best to hire a professional for larger, more critical structures to ensure they are safe and built to last.

When Do You Need a Retaining Wall?

You might need a retaining wall if your yard has noticeable slopes or erosion problems. These structures are perfect for properties with steep grades, as they can stabilize the land and protect against shifting soil caused by gravity and water runoff. A retaining wall can also help redirect drainage to protect your home’s foundation or prevent soil from washing over walkways and driveways. Beyond solving problems, they create opportunities. A retaining wall can carve out a flat, usable patio space from a hillside, create terraced garden beds for planting, or build a raised seating area around a fire pit. If you’re looking to add both function and form to your landscape, a retaining wall is an excellent solution.

Know the Rules: Height, Limits, and Permits

Before you even think about digging, it’s essential to understand the local rules. In most areas, any retaining wall over four feet tall requires a building permit and a design from a licensed engineer. This isn’t just red tape; it’s about safety. A poorly built wall can fail under pressure, causing a landslide of soil. You should always check with your local building department for specific codes, as regulations can vary between towns across Long Island. Factors like how close the wall is to a property line or if it supports a structure above it also come into play. This is where working with an experienced team like Gappsi makes all the difference, as we handle the permits and ensure your project is fully compliant and secure.

Step 1: Plan Your Retaining Wall Project

Before you grab a shovel or order a pallet of stone, taking the time to plan is the most important step you can take. A solid plan is the foundation for a retaining wall that is not only beautiful but also strong and long-lasting. This initial phase is all about thinking through your project’s goals, understanding your property’s specific needs, and making key decisions that will guide the entire construction process. It’s where you get to be the architect of your outdoor space, ensuring every detail is considered before any ground is broken.

Thinking ahead helps you avoid common pitfalls, like choosing the wrong materials for your soil type or discovering halfway through that you need a permit. A well-considered plan ensures your project runs smoothly, stays on budget, and results in a feature you can be proud of. From mapping the layout to selecting the perfect style, every choice you make now will impact the final outcome. This is your chance to align your vision with the practical requirements of masonry construction and create a functional, durable addition to your landscape. A little bit of forethought now saves a lot of headache later.

Map Out Your Space

First, walk your property and get a clear picture of where the wall will go. This is more than just a casual glance. Grab a tape measure, some stakes, and string to physically outline the wall’s intended path. This simple exercise helps you visualize the scale of the project and see how it will interact with existing features like trees, patios, or walkways. As you map it out, consider the slope of the land. Are you trying to create a single level tier, or will you need a series of smaller, terraced walls? Thinking about this now helps you estimate the amount of materials you’ll need and understand the complexity of the job ahead.

Pick the Perfect Spot

Choosing the right location is critical. A retaining wall is a permanent structure, and moving it later is a difficult and expensive task. The perfect spot is one that effectively solves your landscaping problem, whether that’s managing a steep slope, preventing soil erosion, or creating a usable flat area for a garden or patio. Think about water flow and drainage across your yard. You don’t want to build a wall that inadvertently creates a dam and causes water to pool against your home’s foundation. Planning the location carefully ensures the wall serves its purpose without creating new problems down the line.

Check Long Island’s Local Building Codes

This step is non-negotiable, especially here on Long Island. Local towns and villages in Nassau and Suffolk counties have specific rules about retaining walls. Generally, any wall over four feet in height requires a building permit and the involvement of a structural engineer. The same often applies to walls built near property lines or those supporting significant weight, like a driveway or patio. A quick call or visit to your local building department’s website will clarify the regulations you need to follow. It’s always better to check first, as building without a required permit can lead to fines and orders to tear down your work.

Select Your Materials and Style

Now for the fun part: choosing the look of your wall. The material you select determines the wall’s aesthetic, durability, and installation process. Concrete blocks are a popular and versatile choice, often designed to stack together easily without mortar. For a more timeless and rugged appearance, natural stone is a top-of-the-line option that offers unmatched durability and character. Your choice should complement your home’s style and the surrounding landscape. Consider visiting a showroom or looking at project galleries to see how different materials look once installed. This will help you find a style that you love and that fits your budget.

Step 2: Gather Your Supplies

With your plan in hand, it’s time to gather your supplies. Getting all your materials and tools together before you start makes the entire process feel much more manageable and efficient. Think of it as setting up your workspace for success. A quick trip to a supplier or our own Gappsi Store can get you everything you need. Let’s walk through your shopping list so you can feel confident heading into the build.

Your Materials Checklist

Before you can start building, you need the right building blocks, literally. Here’s a list of the essential materials you’ll want to have ready.

  • Retaining Wall Blocks: Concrete segmental blocks are a fantastic choice for DIY walls. They are specifically designed to stack and interlock without mortar, which makes them strong and relatively easy to work with. They come in a huge variety of colors, textures, and sizes, allowing you to find the perfect style to complement your home and landscape.
  • Capstones: These are the flat, finished pieces that sit on the top row of your wall. They provide a clean, professional look, but they also serve the important function of protecting the wall structure from the elements and securing the blocks below.
  • Gravel and Drainage Fabric: Proper drainage is the secret to a long-lasting wall. You’ll need enough crushed stone or gravel to create a solid, level base and to backfill behind the wall. This backfill allows water to drain away freely, preventing the immense pressure that can cause a wall to bulge or fail.
  • Landscape Adhesive: A strong, construction-grade adhesive is necessary for securing the capstones firmly in place. This is the final touch that locks everything together and gives your wall a durable, polished finish.

The Tools You’ll Need for the Job

Having the right tools can make the difference between a frustrating afternoon and a project you’re proud of. Most of these are standard for outdoor work, but each one plays a key role in getting the job done right.

  • Shovel and Mattock: You’ll need these for the initial excavation, digging the trench for your wall’s foundation, and cutting through any stubborn roots you might encounter.
  • Wheelbarrow: This is a real back-saver. You’ll be moving a lot of soil, gravel, and heavy blocks, and a wheelbarrow will make the job much easier.
  • Level and String Line: A long carpenter’s level is your most important tool. The stability of your entire wall depends on a perfectly flat and level first course. A string line will help you keep your rows straight.
  • Hand Tamp: You’ll use this to compact the gravel in your trench, creating a firm, unmoving foundation for your first layer of blocks.
  • Rubber Mallet: This is perfect for gently tapping blocks into their final position without chipping or cracking them.
  • Safety Gear: Always protect yourself. Heavy-duty gloves will save your hands from scrapes, and safety glasses are a must when cutting or positioning blocks.

Step 3: Prepare the Foundation

With your plan and materials ready, it’s time to get your hands dirty. The foundation is arguably the most important part of your retaining wall. A strong, level base prevents your wall from shifting, settling, or failing over time. Taking your time on this step will save you major headaches later. Think of it as the essential groundwork for any successful outdoor project, whether it’s a simple garden wall or a full-scale masonry installation. A solid foundation ensures your hard work will last for years to come, so let’s get it right from the start.

Mark Your Layout

Before you pick up a shovel, you need a clear guide for where to dig. Use stakes and a string line to mark the path for a straight wall. This creates a perfectly straight line to follow. If your wall has curves, a flexible garden hose or spray paint works well to outline the shape on the ground. Stand back and look at your layout from different angles to make sure you’re happy with the placement and flow. This simple visual check is your last chance to make easy adjustments before the real work begins, ensuring your wall fits perfectly into your overall landscape design.

Dig the Trench to the Correct Depth

Now it’s time to dig. Your trench needs to be deep enough to bury at least half of your first course of blocks, plus about four to six inches for the gravel base. For example, if your blocks are eight inches tall, aim for a trench depth of about eight to ten inches. The width should be twice the depth of your block to give you plenty of room to work. As you dig, use a tape measure to check the depth periodically, ensuring it’s consistent along the entire length of the wall. This creates a stable footing that anchors the wall securely into the ground.

Create a Compact Gravel Base

A wall is only as good as its foundation. Once your trench is dug, fill it with four to six inches of compactable gravel or crushed stone. Spread the gravel evenly and then use a hand tamper to pack it down firmly. This creates a solid, interlocking base that won’t settle over time. After tamping, use a long level to make sure the entire base is perfectly flat, both front-to-back and side-to-side. Add or remove small amounts of gravel as needed to get it just right. This step is critical for the stability of your wall and is a core principle for installing durable porcelain and natural stone patios, too.

Step 4: Build the Wall, Course by Course

Lay a Perfectly Level First Course

Getting this first row right is everything. Seriously, the success of your entire wall depends on it. Before you place a single block, double-check that your gravel base is perfectly flat. Grab a long carpenter’s level and make sure there are no high or low spots. Once the base is level, carefully set your first course of blocks. Check them for level both front-to-back and side-to-side. If a block is off, use a rubber mallet to gently tap it into place or add a little gravel underneath to adjust it. Taking your time here saves you a massive headache later, ensuring your wall is strong and straight. This is the kind of foundational work our masonry experts never rush.

Stack and Stagger the Next Layers

With your foundation set, you can start building upwards. The key to a strong wall is staggering the joints, just like a brick pattern. Each block should sit on top of the seam between the two blocks below it. This running bond pattern distributes pressure evenly across the wall. Many modern retaining wall blocks have a small lip on the back edge that helps lock them into place and creates a consistent setback. As you add each new course, use your level to make sure the blocks are staying even. Small adjustments now are much easier than fixing a major lean later. Choosing the right natural stone can also make this process smoother, as high-quality blocks are more uniform in size and shape.

Backfill With Gravel as You Go

Here’s a pro tip that makes a huge difference: backfill as you build, not all at once at the end. After you lay each course of blocks, fill the space behind it with drainage gravel. A common mistake is to use the dirt you dug out, but soil (especially Long Island’s clay) holds water. Trapped water creates immense pressure that can push your wall over. Using clean, angular gravel creates a drainage zone that lets water flow down to the perforated pipe at the base. This simple step is your wall’s best defense against the forces of nature. For larger projects, specialized solutions like GravelFix can provide even more stability for gravel-based areas.

Cut and Fit Blocks for Corners

Unless your wall is a perfectly straight line, you will eventually need to make some cuts. For clean corners and smooth curves, you’ll need a circular saw with a masonry blade. Always wear safety glasses and a mask when cutting concrete or stone blocks. Measure twice and cut once to ensure a snug fit. Some block systems offer special corner units that make 90-degree turns simple. For curves, you may need to make small angled cuts on the back of several blocks to help them form a gentle arc. This detail work is what separates a DIY project from a professional one and helps integrate the wall into your overall landscape design.

Step 5: Ensure Proper Drainage

This might be the most important step in the entire process. A retaining wall’s biggest enemy isn’t what’s in front of it; it’s the water that gets trapped behind it. When soil becomes saturated, it gets heavy and exerts immense force, known as hydrostatic pressure. This pressure can cause even the most carefully built wall to bow, crack, or completely fail. Proper drainage is your wall’s internal defense system, and skipping it is a recipe for having to rebuild it in a few years.

Creating a path for water to escape is non-negotiable. It involves a simple but critical system of gravel, pipes, and outlets that work together to relieve pressure and keep your wall stable for the long haul. Think of it as giving water a safe and easy exit route so it doesn’t have to push its way through your wall. At Gappsi, we’ve seen firsthand how a well-designed masonry project stands the test of time, and it always starts with managing water correctly.

Install a Perforated Drain Pipe

A perforated drain pipe is your primary tool for collecting water. This is a lightweight plastic pipe with small holes or slits that allow water to enter. After laying your first course of blocks, place the pipe at the back of the wall, resting on the gravel base. To make sure it works correctly, wrap the pipe in a fabric sleeve, or “sock,” to prevent dirt and small bits of gravel from clogging the holes.

The most critical part is ensuring the pipe has an outlet. Water needs somewhere to go. You should slope the pipe slightly (about 1/8 inch per foot) so gravity can carry the water away. Run the end of the pipe out to daylight at the end of the wall or connect it to a larger drainage system on your property.

Use Gravel Backfill to Relieve Pressure

Never backfill your retaining wall with the native soil you dug out of the trench. Soil, especially the clay-heavy types common on Long Island, holds water like a sponge. Instead, you need to create a drainage zone directly behind the wall using clean gravel. As you stack each course of your wall, fill the space behind it with about a foot of 3/4-inch angular gravel.

This gravel layer creates a porous channel. Water moving through the ground will hit the gravel and flow freely down to the perforated pipe at the bottom instead of building up pressure against your blocks. This simple material swap is one of the key differences between a DIY wall that lasts two years and one that lasts twenty.

Manage Runoff With Weep Holes

Weep holes are another great way to help relieve water pressure. They are small openings in the face of the wall that allow trapped water to escape. For a small block wall, creating them is easy. Every few feet along the second or third course, simply leave a small, staggered gap between two blocks. You can also insert a small piece of PVC pipe through a block to create a more defined channel.

While a good gravel backfill and a drain pipe are your main lines of defense, weep holes provide extra insurance. They are especially useful if you expect a lot of water runoff. Over time, these holes can get clogged, so it’s important to keep them clear as part of your regular maintenance, which might include professional cleaning and sealing.

Step 6: Add the Finishing Touches

You’re on the home stretch. Your retaining wall is built, but these final steps are what will give it a polished, professional look and ensure it lasts for years. Taking the time to properly cap the wall, integrate it into your landscape, and perform a final check will make all your hard work shine. It’s the difference between a project that’s just done and one that’s done right. Let’s walk through these last few details to complete your new outdoor feature.

Secure the Capstones With Adhesive

The capstones are the flat, finishing blocks that sit on the very top of your wall. They provide a clean, finished surface and also help hold the top course of blocks together. Before you commit, lay the capstones out to make sure you like the arrangement. Once you have a layout you’re happy with, it’s time to secure them. Apply a generous amount of landscape block adhesive to the top of the wall, then press each capstone down firmly. The adhesive takes a while to set, which gives you a little time to make minor adjustments for a perfect fit. For high-quality capstones and adhesives, you can find a great selection at the Gappsi Store.

Landscape Around Your New Wall

Your retaining wall is more than just a structure; it’s an opportunity to create a beautiful and functional new space. Now that the wall is in place, you can transform the newly leveled area. Consider planting a colorful garden bed along the top or bottom, or use the space to build a cozy patio for outdoor seating. A simple stone pathway can also add a charming touch. This is your chance to get creative and fully integrate the wall into your yard’s design. If you need inspiration or professional help bringing your vision to life, our landscape design team can help you create the perfect setting around your new wall.

Complete a Final Inspection

Before you put your tools away, do one last walkthrough to inspect your work. Check that the wall has a slight backward lean, or batter, into the soil it’s retaining. This is crucial, as a wall that leans into the earth is much stronger against soil pressure. Make sure no blocks are wobbly and that your drainage system is clear and functional. Clean off any dirt or adhesive residue from the face of the blocks. To keep your wall looking its best for the long haul, you might also consider applying a protective sealant. Proper restoration and sealing can prevent staining and weather damage, preserving the beauty of your work.

Common Retaining Wall Mistakes to Avoid

Building a retaining wall can be a rewarding project, but a few common missteps can turn your hard work into a leaning, bulging, or collapsing problem. Even small errors in the early stages can cause major issues down the road. Taking the time to get the details right from the start will ensure your wall is strong, safe, and beautiful for years to come. Let’s walk through the most frequent mistakes so you can steer clear of them.

Skipping a Solid Base

The success of your entire wall rests on its foundation. A common mistake is creating a trench that is too narrow or shallow. A weak base can’t distribute the weight of the wall and the soil behind it, leading to shifting and failure. It’s also critical that the first course of blocks is perfectly level. Any slight imperfection at this stage will become much more noticeable as you build higher. Think of it as the foundation for any quality masonry project; if the base isn’t right, the whole structure is compromised. Take your time to dig a proper trench and create a solid, level base.

Forgetting About Drainage

Water is the number one enemy of a retaining wall. When water gets trapped in the soil behind your wall, it creates immense hydrostatic pressure. This force pushes against the blocks and is a leading cause of bulging, cracking, and total collapse. A frequent error is backfilling the wall with the native soil you excavated, especially if it’s dense clay. This traps water instead of letting it escape. To prevent this, you must create a proper drainage zone with clean gravel behind the wall and install a perforated pipe to channel water away safely. Proper drainage is the secret to a long-lasting wall and helps you avoid costly restoration work later on.

Ignoring Local Building Codes

Before you even dig, it’s essential to check with your local building department for codes and permit requirements, especially for walls taller than three or four feet. These rules aren’t just suggestions; they are in place to ensure safety for you and your property. In many areas on Long Island, a wall exceeding a certain height requires a professional engineer’s approval and a building permit. Ignoring these regulations can lead to fines and an order to tear down your completed wall. Working with an experienced team ensures your project is fully compliant from day one, giving you complete peace of mind.

Choosing the Wrong Materials

Selecting materials based on looks alone is a recipe for trouble. You might underestimate the strength needed for your specific situation, choosing blocks that can’t handle the pressure from the soil they are holding back. The right material depends on your wall’s height, the soil type, and the slope of your yard. Using the wrong type of block or stone can lead to instability and premature failure. At the Gappsi Store, you can find a wide variety of durable porcelain and natural stone options. Consulting with an expert can help you choose a material that provides both the aesthetic you want and the structural integrity your project requires.

Related Articles

Frequently Asked Questions

How high can I build a retaining wall before I need to call a professional? A good rule of thumb is to keep any DIY wall under four feet tall. Once you go beyond that height, the amount of pressure the wall has to hold back increases significantly. Most towns on Long Island require you to get a building permit and a plan from a licensed engineer for walls over four feet. This is for your safety, as a tall, improperly built wall can fail and cause a lot of damage.

What is the single most common mistake people make when building a retaining wall? Hands down, the biggest mistake is failing to plan for drainage. It’s easy to focus on how the wall looks, but its real enemy is the water you can’t see. When water gets trapped in the soil behind the wall, it creates immense pressure that can make the wall bulge, crack, or even collapse. Using a gravel backfill and a perforated pipe isn’t just a suggestion; it’s the most important step for ensuring your wall lasts.

Do I really need to use all that gravel for the base and backfill? Can’t I just use the dirt I dug out? I know it’s tempting to reuse the soil you just spent all that time digging up, but you really shouldn’t. The soil you removed, especially if it’s clay-heavy, will hold onto water like a sponge. Gravel, on the other hand, creates a porous zone that allows water to drain away freely, relieving pressure on your wall. A solid gravel base and proper backfill are your wall’s best insurance policy.

My yard has a slope, but how do I know if it’s bad enough to actually need a retaining wall? You might need a wall if you see clear signs of soil erosion, like dirt washing over your walkways after it rains. Another good indicator is if the slope is so steep that it’s difficult or unsafe to mow. Beyond solving problems, think about opportunities. If you dream of having a flat area for a patio, a garden, or a play space for your kids, a retaining wall is the perfect way to create that usable land from an otherwise tricky slope.

What’s the real difference in effort and cost between using concrete blocks versus natural stone? Concrete segmental blocks are generally the more DIY-friendly and budget-conscious option. They are manufactured to be uniform in size and often have interlocking systems, which makes stacking them straight and level a much simpler process. Natural stone offers a beautiful, one-of-a-kind look but is more challenging to work with. The stones are irregular in shape and weight, so fitting them together securely requires more skill, time, and often the expertise of a professional mason, which can increase the overall project cost.

Share this page:

Backyard and Swimming Pool Design and Construction in Melville, NY

View Gappsi’s YouTube Channel to view Backyard and Swimming Pool Design and Construction in Melville, NY

Our recent backyard and swimming pool design and construction project proves a well-designed backyard can become more than an outdoor space; it can become an extension of your home and a place where family and friends gather, relax, entertain, and enjoy the outdoors. For this recent project in Melville, NY, Gappsi transformed an existing backyard into a complete outdoor living environment featuring a new swimming pool, custom patio, raised entertaining area, synthetic turf, pergola, gas fire features, landscaping, and outdoor lighting.

This project is a great example of how thoughtful backyard and swimming pool design and construction can bring multiple outdoor elements together into one cohesive space.

Designing the Backyard Around the Pool – Swimming Pool Design and Construction

The project began with designing and installing a new swimming pool. The homeowners wanted a backyard that offered both recreation and comfortable areas for entertaining. Rather than treating the pool as a standalone feature, the design incorporated the pool, patios, landscaping, walkways, lighting, and outdoor living areas into one unified backyard plan.

The result is a backyard that feels intentional from every angle, with each element serving a purpose while complementing the home’s architecture and existing features.

20 x 40 Vinyl Swimming Pool With Concrete Walls

At the center of the renovation is a 20-foot-by-40-foot vinyl swimming pool with concrete walls. The pool provides plenty of room for swimming, relaxing, and enjoying time with family and guests.  The pool also includes an automatic pool cover, adding convenience for homeowners. An automatic cover can make opening and closing the pool easier while also helping homeowners manage the pool when it is not in use.

The pool layout includes stadium stairs leading into the shallow area. These wide entry steps provide an attractive transition into the water while creating a comfortable place to sit or relax.

The pool was carefully positioned within the overall backyard design so that the surrounding hardscape and landscaping could flow naturally around it.

backyard-and-swimming-pool-design-and-construction-in-melville

Custom Bluestone Patio Design

Surrounding the pool is a beautiful custom patio constructed using G45 blue limestone in a Roman pattern. The Roman pattern creates visual variation throughout the patio while giving the outdoor space a classic, sophisticated appearance.

The patio provides generous space around the swimming pool for lounge chairs, entertaining, and enjoying the backyard. The natural stone also complements the home’s existing exterior and helps create a seamless transition between the house and the newly renovated outdoor area.

For the pool coping, Gappsi installed G45 coping with a split-faced and tumbled finish. This particular coping offers an interesting combination of appearance and feel. It has a rustic, naturally weathered look, but the surface is remarkably smooth to the touch.

This combination provides the visual character of natural stone while maintaining a comfortable finished surface around the swimming pool.

Connecting the Existing Patio to the New Pool Area

An important part of this backyard renovation was creating a natural connection between the existing patio at the house and the newly constructed pool area.

To accomplish this, Gappsi incorporated stepping stones and synthetic turf into the design. The stepping stones create a defined pathway between the existing house patio and the new outdoor living areas, while the synthetic turf adds greenery without the ongoing maintenance required for traditional grass.

Together, they give the backyard a softer appearance and help visually connect the different areas of the property.

VIEW OUR SWIMMING POOL GALLERY

Raised Patio and Outdoor Living Area

One standout feature of this backyard design is the raised patio adjacent to the shallow end of the pool.

The raised patio creates a separate level within the backyard and provides another area for relaxing and entertaining. Gappsi utilized a stone veneer that matches the existing patio at the house, helping the new construction blend naturally with the home’s established design.

Matching materials is an important detail in a comprehensive backyard renovation. Rather than making the new addition look like a separate project, the matching stone veneer helps tie the original and newly constructed areas together.

Vinyl Pergola for a Covered Outdoor Space

Over the raised patio, Gappsi installed a vinyl pergola to provide definition and visual interest to the outdoor living area.

The pergola creates a dedicated space where homeowners can enjoy the backyard while adding architectural character to the raised patio. It also defines the entertaining area and gives the space a more finished, room-like feel.

A pergola can be an excellent addition to a backyard renovation because it helps transition an open patio into a more comfortable outdoor living environment without completely enclosing the space.

Gas Fire Features Add Evening Ambiance

The backyard also incorporates gas fire features, providing warmth, atmosphere, and a dramatic focal point when the sun goes down.  During the day, the fire features are an attractive architectural element within the patio design. At night, however, they truly come to life. The flames become much more visible after dark, creating a warm and inviting atmosphere throughout the outdoor entertaining area.

Fire features are particularly effective when combined with outdoor lighting and landscaping because they create multiple layers of illumination throughout the backyard.

Landscaping With Seasonal Plantings

To complete the renovation, Gappsi also handled the landscaping throughout the property.  The landscape design incorporates a selection of exotic and seasonal plants that add color, texture, and visual interest around the pool and patio areas. These seasonal plantings can be replaced each year, allowing the homeowners to change the look and feel of portions of the landscape over time.

The landscaping was designed to complement rather than compete with the pool and hardscape. Plantings soften the edges of the patio and pool area while helping the backyard feel more natural and established.

Outdoor Lighting Completes the Design

Another important component of this project was installing outdoor landscape lighting.  Lighting allows the homeowners to enjoy the backyard well after sunset while highlighting important features throughout the property. The pool, patio, landscaping, pathways, pergola, and fire features can all take on a different appearance in the evening.

Good landscape lighting is not simply about making a backyard brighter. Properly positioned fixtures can highlight architectural elements, illuminate pathways, accent landscaping, and create a more comfortable environment for nighttime entertaining.

The combination of landscape lighting and the gas fire features gives this Melville backyard a completely different character after dark.

A Complete Backyard Transformation in Melville, NY

This Melville, NY backyard renovation demonstrates what is possible when pool construction, hardscape design, landscaping, outdoor living features, and lighting are planned as part of one comprehensive project.  Gappsi completed the project from the initial backyard design through the installation of the new swimming pool, custom patio, pool coping, raised patio, synthetic turf, stepping stones, vinyl pergola, gas fire features, landscaping, and outdoor lighting.

Instead of simply adding a swimming pool to an existing backyard, the team redesigned the entire property to create a cohesive outdoor living environment.

The finished space provides multiple ways for the homeowners to enjoy their property—from swimming and relaxing beside the pool to entertaining on the raised patio, gathering around the fire features, or enjoying the landscaping and outdoor lighting in the evening.

For homeowners considering a backyard renovation, custom swimming pool, patio installation, outdoor living area, or complete landscape transformation in Melville, NY, a comprehensive design approach can make all the difference.

By coordinating the pool, hardscape, landscaping, lighting, and outdoor living features from the beginning, it is possible to create a backyard that looks beautiful, functions efficiently, and feels like a natural extension of the home.

Gappsi specializes in creating custom outdoor spaces throughout Long Island, bringing together pool design and construction, patios, landscaping, pergolas, outdoor kitchens, fire features, lighting, and other outdoor living elements to create complete backyard environments tailored to each property and homeowner.

Contact Gappsi Today

📍 Serving all of Long Island, NY — Nassau & Suffolk Counties
🌐 https://www.gappsi.com/
📞 Call now for a free consultation and estimate

SCHEDULE A MEETING TODAY WITH GAPPSI

Share this page: