Sunlight can drive guests away from an outdoor patio before they even order their first drink. This loss of sales happens every day at food and drink venues across Long Island. A thoughtfully designed commercial pergola can help keep the heat from cutting into valuable outdoor operating time.
Schedule a commercial pergola consultation with Gappsi to explore a shade structure designed around your venue, guests, and Long Island property.
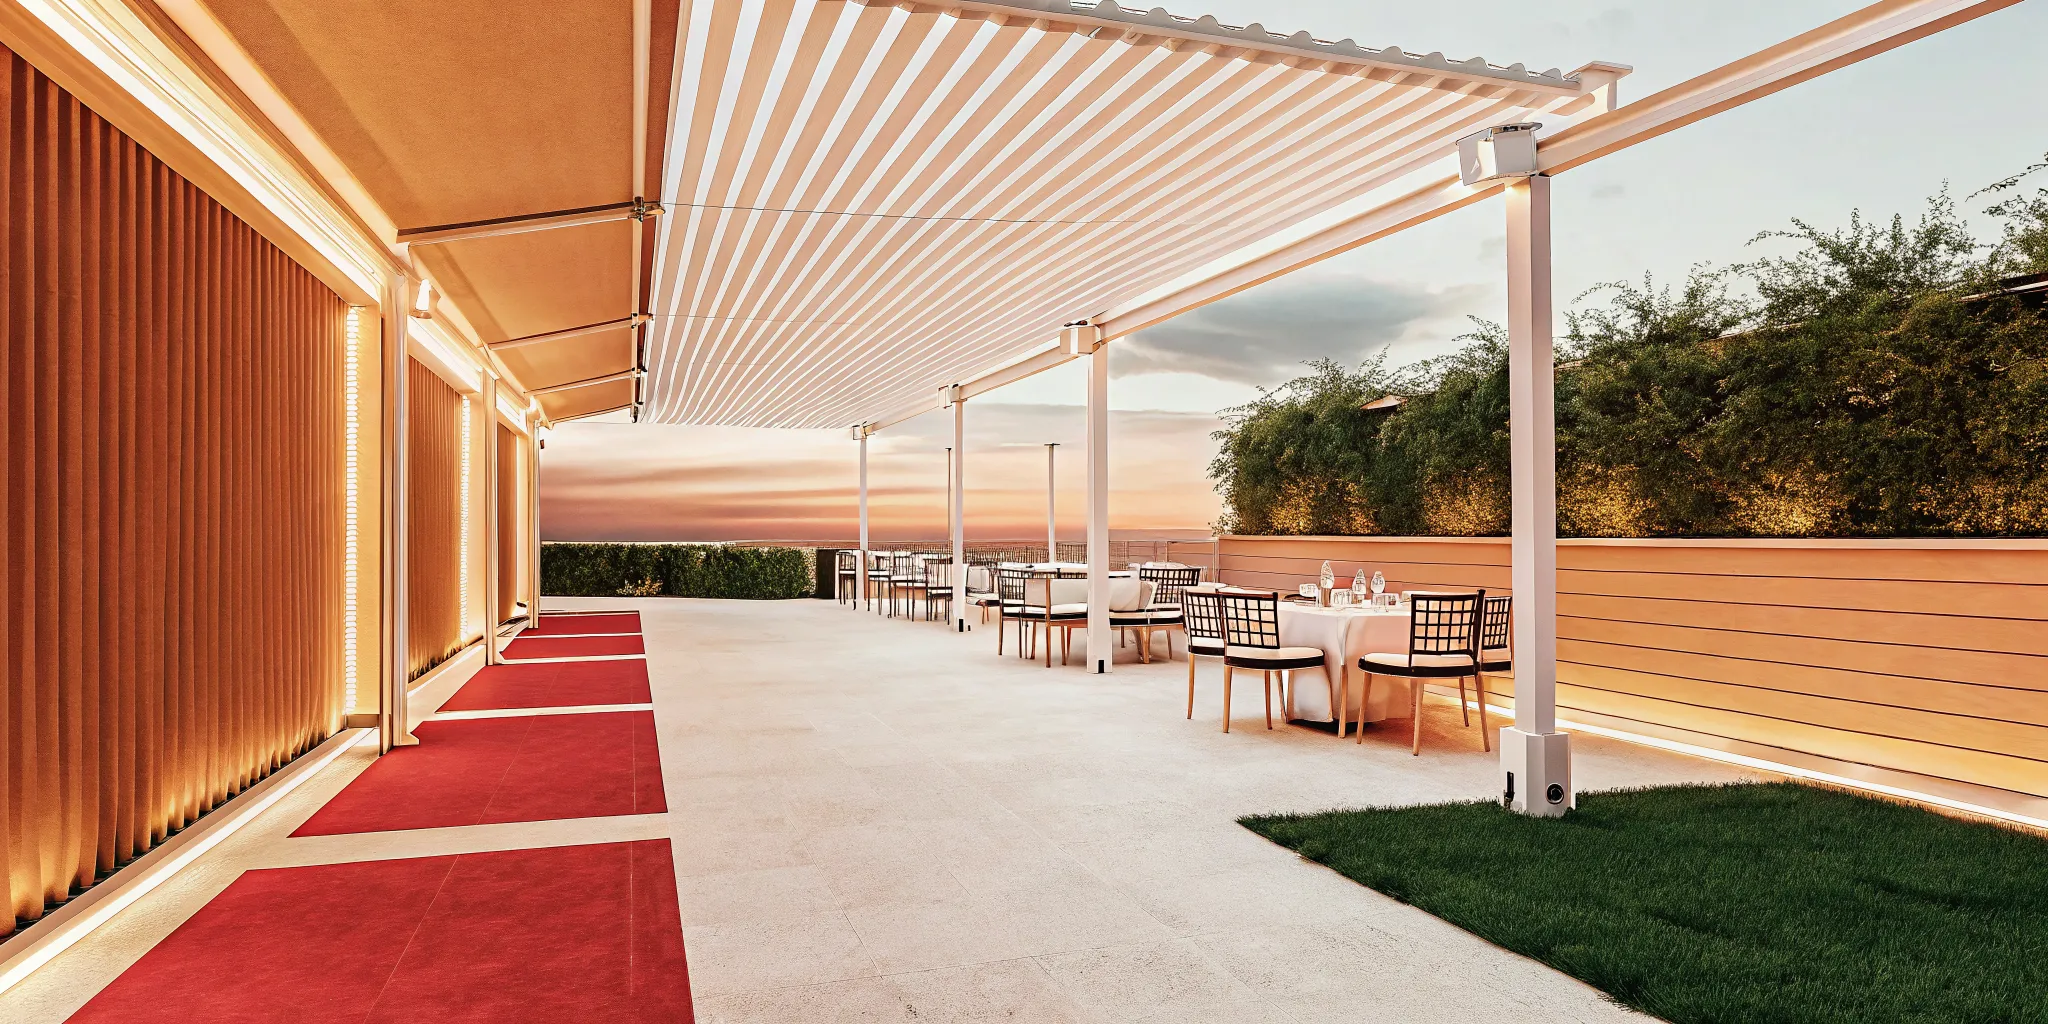
A commercial pergola is an outdoor structure designed to bring shade and definition to busy hospitality spaces. It can help venue owners organize patios into comfortable seating, dining, lounge, or event areas. A custom design also gives operators the opportunity to coordinate the structure with their brand, property, guest flow, and seasonal plans.
Adding an outdoor frame is a big choice for any club boss who wants to grow their business. You must see how these tools can support your sales and why a commercial pergola earns its space. This move changes your land use. The path begins with
Why a commercial pergola earns its space
A commercial pergola earns its place by turning an exposed outdoor area into a more defined, comfortable, and operationally useful guest space. For clubs and hospitality venues, the right structure can support dining, lounging, events, and service while complementing the property design.
Adding a commercial pergola to your business site is a smart move for many reasons. These structures do more than just look good. They provide a clear area for guests to gather and help you use your outdoor space better. For clubs and hotels, your patio or pool deck can work for you. It stays open even when the sun is high or the wind picks up. By setting up a permanent shade system, you can keep guests comfy and keep your staff safe from the heat.
Improving the guest stay
Guest comfort is the main goal for any business. When the weather gets hot, outdoor areas often sit empty because they are too warm. Research shows that shade structures like trees and pergolas help lower the impact of extreme heat on people. This cooling effect makes your outdoor lounge or dining area a top choice for guests during the summer months. People are more likely to stay longer and return often when they feel cool and relaxed.
A well-placed pergola also sets the tone for your brand. It defines the space and makes it feel private and high-end. You can add lights, fans, or heaters to keep the area comfortable in different seasons. This range of choices is a key part of custom commercial pergola design. It allows you to build the space to your own business needs while keeping your guests happy.
Growing your outdoor capacity
Every square foot of your land should help your profits. Using commercial aluminum pergola options can help you turn a plain lawn or deck into a high-value zone. These systems can cover large spans of 20 to 40 feet without needing many posts. This open layout is perfect for big events like weddings or parties. It gives you the room to host more people at once without making the space feel crowded.
Having a covered area also helps with staff health and work flow. Providing shade for your team is a proven way to keep them healthy in hot places. When your staff is comfortable, they can serve guests better and faster. This leads to a smoother business and better reviews for your brand. A pergola is a long-term fix that helps both your guests and your team day after day.
Building for the long term
When you spend money on your land, you want parts that last. Metal and vinyl systems are popular because they need very little care. They do not rust or rot like wood often does in the Long Island air. Choosing a lasting design is vital for the health and profit of your site over time. High-quality builds handle wind and rain well so you do not have to worry about wear and tear.
Modern pergolas also offer smart features like louvered roofs. These allow you to open the roof for sun or close it for shade and rain. This control means your outdoor space stays open for more days each year. Whether you run a shop in Smithtown or a hotel on the East End, these structures earn their keep. They are a solid part of a smart plan for any business with a yard or patio.
Which commercial pergola material fits your venue?
The right commercial pergola material depends on the venue’s visual character, exposure, maintenance capacity, and desired roof control. Wood offers warmth, aluminum supports adjustable louvered systems, and vinyl can provide a clean appearance with comparatively straightforward upkeep.
Picking the right shade for your restaurant, club, or hotel is a significant choice. A strong commercial pergola can make the outdoor space feel like part of your brand. Thoughtful shade also helps guests stay comfortable when it is hot. Research shows that shade infrastructure can moderate the effects of extreme heat in shared outdoor spaces. Whether you manage a club, restaurant, or hotel, a carefully planned structure can set the stage for a better guest visit.
Classic wood for high end style
Wood is a top choice for places that want a classic look. It has a warm feel that is hard to beat. Many upscale spots use wood to match stone floors or lush gardens. You can pick from many types of wood to get the right color for your deck. Gappsi helps you plan every step of your custom commercial pergola design. This makes sure the frame fits your style and needs just right. But wood needs a lot of work to stay in good shape. You must stain it and seal it every few years. If you do not, the wood can rot or fade in the sun. It is a great fit for spots that want a rustic vibe and do not mind the extra care.
Smart aluminum for full control
Aluminum is a modern choice for active hospitality spaces. A commercial aluminum pergola may be configured to cover substantial areas while maintaining open sight lines. With a louvered system, operators can adjust the roof to manage sunlight and changing conditions. The appropriate layout, span, supports, and seasonal use should always be established through site-specific design and engineering.
Low upkeep with vinyl and fixed roofs
Vinyl is the best choice if you want low stress and a neat look. It does not rot, peel, or rust. You do not need to paint or sand it ever. A simple wash with water keeps it looking bright and new. Most vinyl types come in white or tan to match light-colored walls. They look clean and sharp next to pool areas or clubs. Vinyl is also a safe choice for areas near salt water or wet air on Long Island. This Long Island pergola installation gives you a high-end look without the chores. Some spots prefer a fixed roof to keep things dry. A fixed-roof build gives you full shade all the time. It protects your gear from rain and wind. You can even place them near your Sports Games Courts to give players a place to rest between games.
| Material. | Appearance. | Control. | Upkeep. | Best Fit. |
|---|---|---|---|---|
| Classic Wood. | Warm and Natural. | Open roof. | Higher. | Traditional Venues. |
| Clean Vinyl. | White and Bright. | Open roof. | Lower. | Low-Maintenance Projects. |
| Fixed Roof. | Solid and Substantial. | Consistent Shade. | Varies. | Weather Coverage. |
| Louvered Aluminum. | Sleek and Modern. | Adjustable Louvers. | Lower. | Flexible Hospitality Spaces. |
Commercial pergola ideas for memorable guest spaces
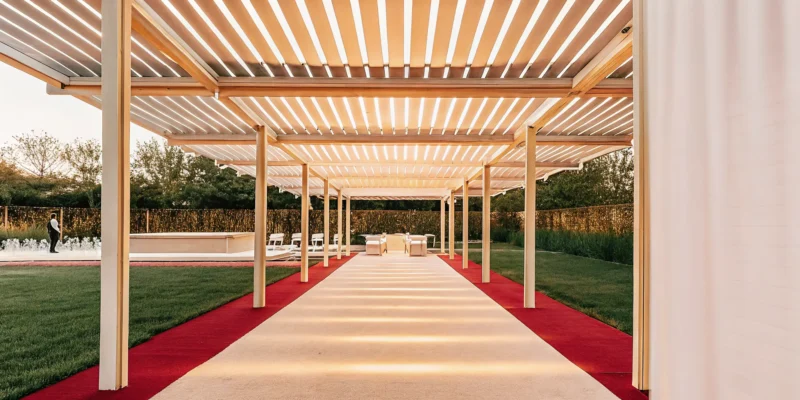
Memorable commercial pergola ideas begin with the guest experience: create clear zones, protect key seating, support smooth staff circulation, and coordinate lighting and furnishings. The strongest concepts make the outdoor area feel intentional while preserving practical access for service and events.
A commercial pergola does more than give shade to an outdoor area. It can define the look of a guest space. When you design a patio for a hotel or club, the goal is to make people feel at home. A well-placed structure creates a memorable destination and can make the outdoor space usable for more hours of the day.
Design starts with the user in mind. You want to offer a spot that feels private but still part of the fun. For a food spot, this might mean small units over dining tables. For a large venue, it might be one big span that covers a bar or a stage. Choosing the right style for your commercial pergola helps set the mood. You can go with a sleek metal look or a classic wood feel. Each choice changes how guests see and use the space.
Zone large patios for better flow
Large outdoor patios can often feel too open. You can use a commercial pergola to break up these big areas into smaller rooms. This helps you create different moods in one large space. For example, you can set up a quiet lounge area on one side. Then, you can have a bar area on the other. Using these structures to define zones helps keep guest traffic moving the right way. It also helps manage noise by keeping groups in their own spots.
Zoning is also useful near play areas. If your club has Long Island pergola installation near a pool, you can create a safe zone for parents. You might also place a shaded spot next to your Sports Games Courts. This gives players a place to sit and cool off between games. Using these structures as points of change makes the whole layout feel planned. It ensures that guests do not feel lost in a big sea of stone or grass.
Pool and hotel lounge ideas
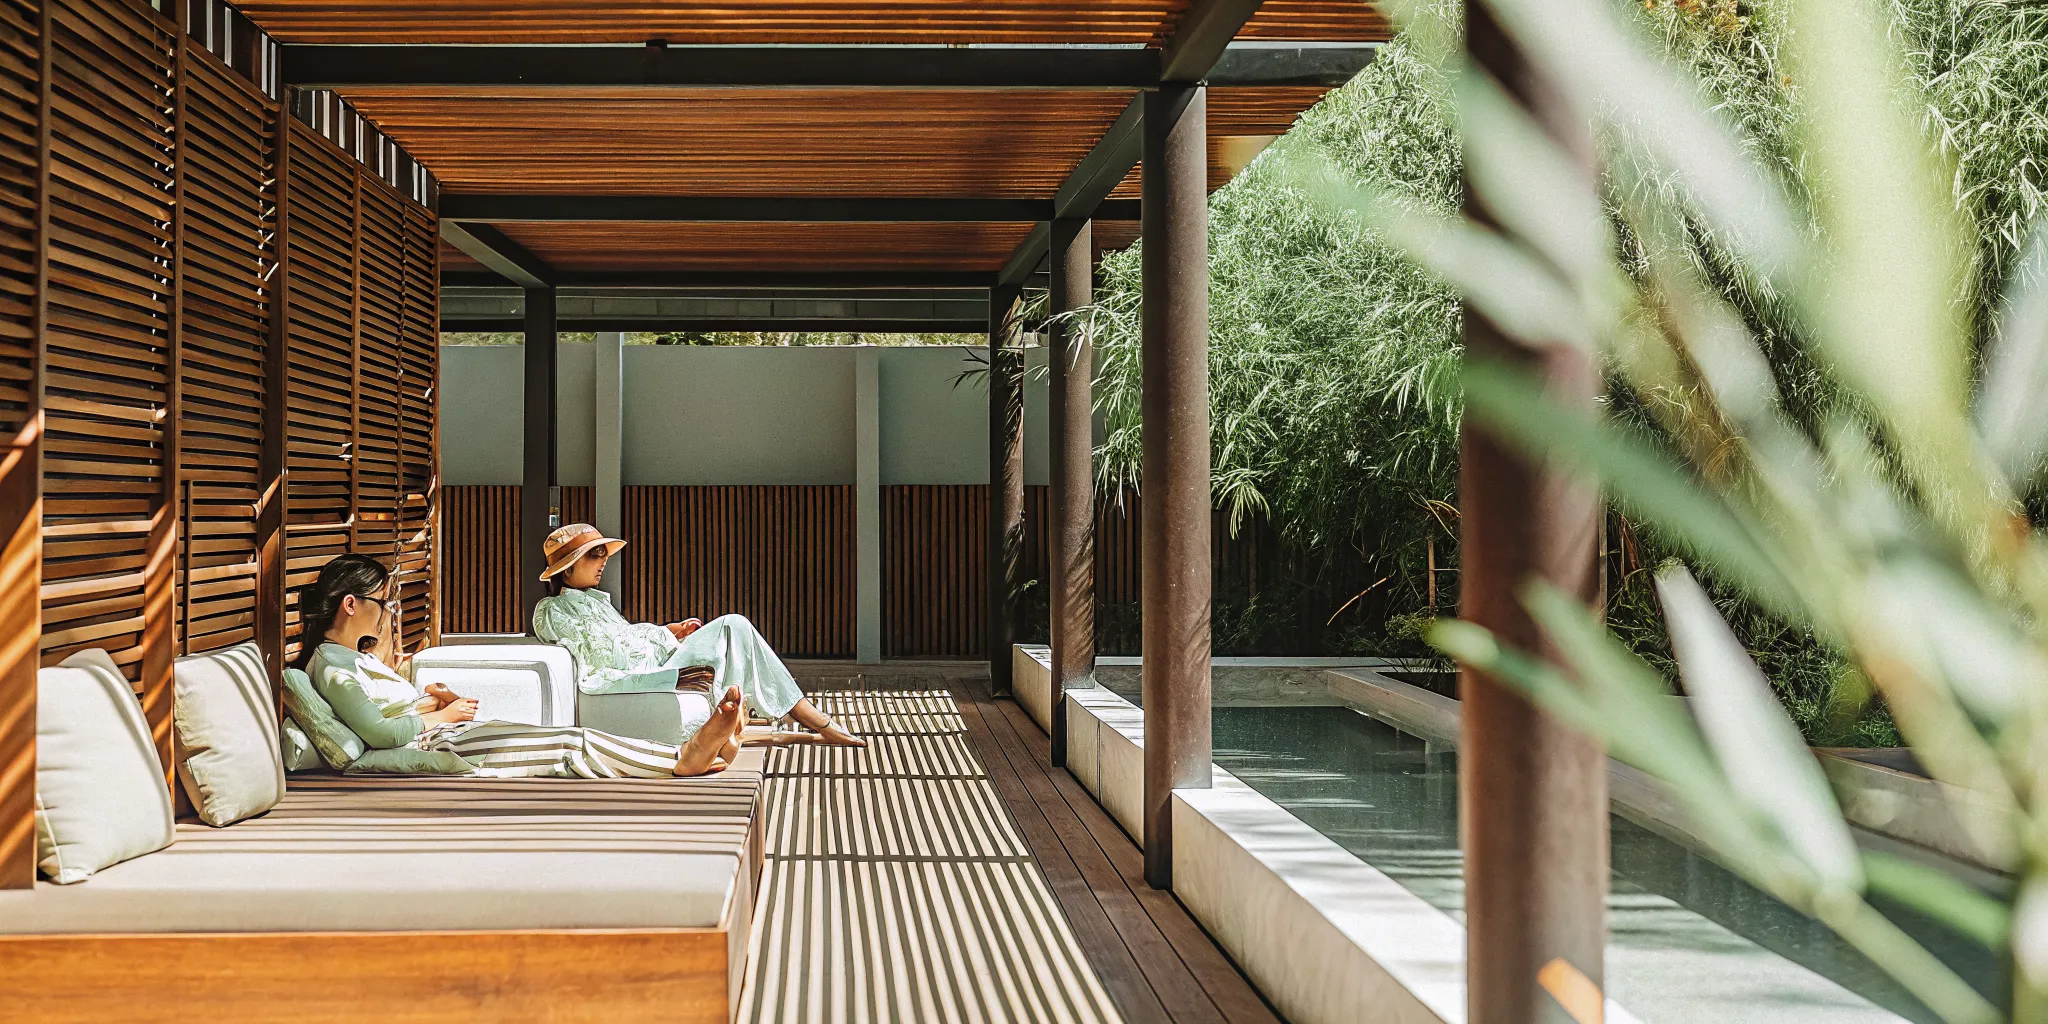
Hotels and high-end clubs rely on their pool decks to draw in guests. A plain deck with just chairs can feel cheap. Adding a commercial pergola turns the pool area into a high-end lounge. It offers a sense of escape that guests love. These structures help with heat control in public spots. Research shows that shading infrastructure helps cut the impact of high heat on people using shared outdoor spaces. This keeps guests happy and safe even on the hottest summer days.
You can also create private spots using small units. By adding curtains or screens, you give guests a VIP feel. This level of privacy is a big plus for hotels. It allows you to offer more value and charge higher rates for some areas. A row of clean pergolas next to blue water creates a look that people love. It looks great in photos, which helps your brand look good on the web. Making the space look and feel top-tier is a key part of guest design.
Integrate lighting and smart shade
A good guest space should work well both day and night. You can add built-in lights to your commercial pergola to keep the setting welcoming after dark. Small lights can be hidden in the frame for a clean look, while soft string lights create a more relaxed feel. Thoughtful lighting makes the space feel warm and invites guests to stay for food or drinks after sunset.
Smart shade features also make a big difference in guest comfort. Many businesses now choose commercial aluminum pergola options with roofs that move. These roofs allow you to let in sun or block out rain with a button. This means you do not have to close your patio just for a light rain. Keeping your outdoor seats open in all weather is vital for a profit. Using a smart design ensures the space stays useful for many years to come.
How do you plan a commercial pergola project?
Plan a commercial pergola project by defining its business purpose, documenting site conditions, selecting a material and roof system, and coordinating engineering, utilities, drainage, and code requirements. A unified design-build process helps keep these decisions aligned from concept through installation.
Visit Gappsi’s pergola and pavilion service page to start planning a structure that fits your hospitality property.
Planning a commercial aluminum pergola needs close care for site use and local weather. Business owners must look at how the space will work for guests while meeting safety rules. A solid plan keeps the structure safe and useful for many years.
Assessing the business site
Start by looking at the ground and the wind. On Long Island, structures must handle strong sea gusts and heavy snow. High heat can also hurt business if guests have no shade. Data shows that shading infrastructure can moderate heat impact and keep outdoor spots pleasant for people. You should check where the sun hits during busy hours to place the pergola for the best shade.
Think about how people move through the space. A custom commercial pergola design should match your work flow. For a food spot, leave enough room for staff to carry trays and for guests to move around tables. If the site is for a hotel pool, make sure it fits with lounge areas and paths.
Engineering and code coordination
Commercial structures often need larger spans than home units. Some systems can cover spans of 20 to 40 feet or more to host big events. This needs heavy-duty bases and strong frames. You will also need to work with local permit offices to ensure the design meets all safety codes. This includes checking for pipe lines and making sure the site stays easy to use for all guests.
- Site study and goals: Define how you will use the space and check the ground for strength.
- Wind and sun analysis: Map the sun path and wind loads to choose the best spot and frame type.
- Drafting the layout: Create a plan that allows for smooth guest flow and fits your business needs.
- Foundation and utility check: Find buried lines and plan for heavy-duty bases to hold the weight.
- Permit and code review: Submit your plans to local offices to ensure they follow all building laws.
- Material selection: Choose tough materials like aluminum or vinyl that need low care.
- Finalizing the build: Set a timeline that cuts down on stops to your daily work.
Maintenance and long-term health
Choosing the right materials is a big part of sustainable shade design for any business. Low-care choices like aluminum or vinyl help keep costs down over time. Regular checks of the joints and roof will ensure the pergola stays safe. For more help with your project, look into Long Island pergola installation experts who know local weather.
When is a louvered commercial pergola the right choice?
A louvered commercial pergola is a strong choice when a venue needs flexible control over sun, shade, airflow, and light rain. Adjustable roof louvers can help operators respond to changing conditions while maintaining a refined outdoor dining, lounge, or event area.
Choosing the right outdoor structure is a key step for any business looking to grow its seating space. A louvered commercial pergola is often the best fit when you need to control the environment. These systems use slats that tilt to let in sun or block out rain. This choice is often better than fixed roofs that stay closed all the time.
Adjustable shade for all day use
The main goal of a louvered system is to give you more control over light. During a hot lunch rush, you can close the louvers for shade. As the sun sets, you can open them to admit light and create a view of the sky. This flexibility can help a restaurant adapt its patio setting throughout the day.
These structures are not just for dining. Hotels can use adjustable shade to shape pool decks, lounges, and gathering areas. The ability to change the amount of light gives hospitality teams another way to manage the guest setting at different times of day.
Rain control and durability
A key benefit of a louvered commercial pergola is its adjustable roof. Depending on the selected system, closed louvers may help manage light rain and direct water toward integrated drainage. Performance varies by product and site conditions, so operators should discuss weather goals, drainage, and maintenance during design.
For more shade, you can add EZShade tools like side curtains. These help block low sun or wind that comes in from the side. You can see how these fit into a full Long Island pergola installation by looking at our design plans. By mixing motorized slats with side screens, you get a space that works well 365 days a year.
Why integrated design-build matters on Long Island
Integrated design-build matters because a commercial pergola must work with the property’s layout, utilities, materials, guest circulation, and local requirements. One coordinated team can evaluate these connected details early, reducing disconnects between the design concept, material selections, and installation plan.
Choosing a commercial pergola for your business on Long Island takes more than just picking a kit. It needs a plan that works with the local weather and rules in Nassau and Suffolk counties. At Gappsi, we use an integrated design-build model to make sure every part fits your space and brand. This method brings our design and build teams together to work on your project from start to finish.
Joint project planning
When you start a project with us, you get full access to our team and our supplies. You can visit our showroom to see many pergola types and colors in person. This helps you make phased choices about how the structure will look and work. We study the landscape of your site so the new feature blends with your paths or plants. Our staff manages the planning between different teams, which cuts down on delays and keeps your costs on track.
For many local firms, a commercial pergola is a key part of a larger outdoor upgrade. We handle how it fits with other features like swimming pools, outdoor kitchens, or masonry. This is vital for hotels and restaurants that need a clean look for their guest areas. High heat can make guests less happy, but the right shade helps moderate the impact of extreme heat on your guests and staff.
Fast supply and setup
Our supply team gets the best parts for the Long Island air. We offer options like vinyl and louvered aluminum that stand up to salt air and wet weather. Since we supply our own parts, we have better control over value and speed. This joint supply chain means we can quickly change things if needed during the build phase. You do not have to worry about finding new vendors for each part of the work.
The right shade is also a key factor in keeping workers safe and busy during hot summer months. Experts say that rest and shade programs are helpful plans for outdoor worker health. Our team sets up your pergola with a focus on a long life and structural health. By caring for every step, we make sure your outdoor space is ready to serve your clients for many years.
What should you decide before requesting a pergola quote?
Before requesting a pergola quote, define the intended guest use, approximate coverage area, preferred material, desired roof control, utility needs, and maintenance expectations. Sharing those priorities during a site consultation helps the design team develop a more relevant commercial pergola concept.
Planning a new outdoor structure for your business starts with a clear set of goals. A well-planned commercial pergola can increase your floor space and help your bottom line. Before you call for a price, you need to know how the space will work. This helps your builder give you a fair and right cost. Taking time to prep now means fewer changes later.
Primary purpose and guest space
First, think about how you will use the space. Do you want a quiet spot for guests to sit or a big area for large events? A restaurant may need to seat fifty more people to boost sales. Some studies show that sustainable shade design is key for long-term profit. You should also decide if you need cover from rain or just shade from the sun. Knowing your guest count helps your team find the right size and span for the build.
Think about the seasons too. Do you want a spot that guests can use all year long? In some cases, pergolas help keep heat down so more people can stay outside. If you plan to host winter events, you will need a roof that can hold snow. A clear goal for use makes it easy to pick the right frame for your project.
Material choice and care needs
Next, pick the materials that fit your brand and budget. Wood offers a classic look but needs more care over time. Vinyl and aluminum are great for a low-care life. If you want a modern feel, look into commercial aluminum pergola options that have moving parts. These allow you to open or close the roof based on the weather. Decide if you want a natural look or a sleek metal finish before you meet with a pro.
Ask yourself how much work you want to do. Wood needs stain and paint every few years to look new. Aluminum only needs a quick wash to stay clean. A business owner often picks metal to save on labor costs. It is also good to check if the material can handle salt if you are near the coast. Choosing the right parts now keeps your future costs low.
Site state and power needs
The place for your build will change the final price. Look at your ground to see if it is flat or if it needs work first. You also need to think about lights, fans, and heat. If you want to add these features, you will need power lines in the ground. Good custom commercial pergola design includes these details from the start. Planning for power now will save you time and money later.
Consider these site details:
- Current soil and slope of the land
- Distance to power and water lines
- How the sun moves across your patio
- Local rules for building on a business lot
- Future plans to grow or add more features
Your site may have hidden pipes or lines. It is vital to find these before any digging starts. If you want a full outdoor kitchen, you may need gas lines as well. Tell your builder about these needs so they can plan for them in the quote. This keeps the project on track and helps you avoid extra fees.
Frequently Asked Questions
Hospitality operators commonly ask how a commercial pergola can support revenue, which venues can use one, how durable a system can be, and what span is practical. The answers depend on site conditions, design, engineering, operations, and the selected material.
Do commercial pergolas increase restaurant revenue?
A covered patio can create more usable seating and help restaurants serve guests through changing conditions. Results depend on the venue, operations, demand, and weather. Shade systems make outdoor areas more comfortable for guests, but owners should evaluate the opportunity using their own capacity and operating data.
Can commercial pergolas be used for hotels and hospitality?
Hotels often use pergolas to create polished outdoor spaces. A shaded lounge or pool area can improve comfort and give the property another memorable guest setting. The right design should support the hotel’s service model, visual identity, and plans for the surrounding landscape.
Are commercial pergolas durable enough for year-round use?
Commercial pergolas can be designed for lasting use, but the appropriate structure depends on site exposure, materials, engineering, and maintenance. Long Island businesses should discuss wind, snow, drainage, and seasonal operating plans during design. A qualified team can help determine which system fits the specific location.
How big can a commercial pergola span?
Commercial systems can be configured for substantial outdoor areas. The feasible span depends on the selected system, engineering, loads, supports, and site conditions. Custom designs can also connect multiple pergola bays to organize larger patios for clubs, restaurants, and hotels on Long Island.
Ready to schedule a commercial pergola consultation?
Gappsi can help Long Island hospitality operators explore a commercial pergola shaped around their property, guest experience, and operational priorities. Begin with a consultation to discuss the site, compare material options, and create a coordinated path toward design and installation.
Without a shaded outdoor spot, you lose sales on hot days when guests stay inside. Wet days also keep your deck empty and cost you money each week. Each day your yard stays bare is a day your rivals on Long Island grow. If you do not start now, you will lose work time and miss the next rush. A custom pergola keeps your guests happy and lets you host events all year long. Our team will help you pick a style from our Long Island pergola options today. We build structures that fit your brand and last for a very long time. Do not let one more season pass with a yard that you cannot use for work. You should be making more money for your club by using all of your space.
Ready to schedule a commercial pergola consultation? Call 631-543-1177 to discuss your Long Island hospitality space with Gappsi.