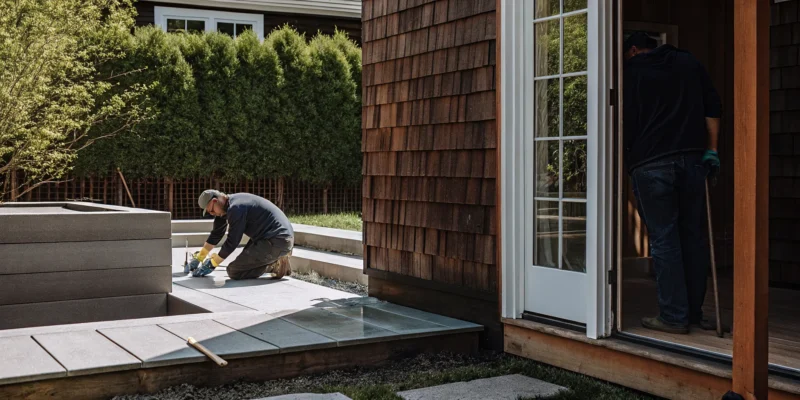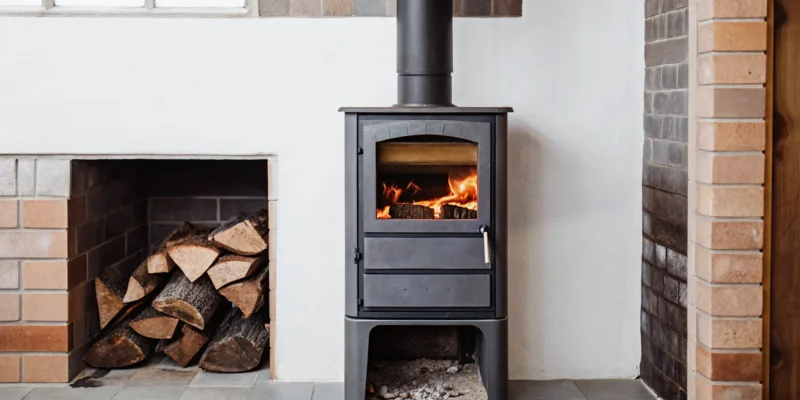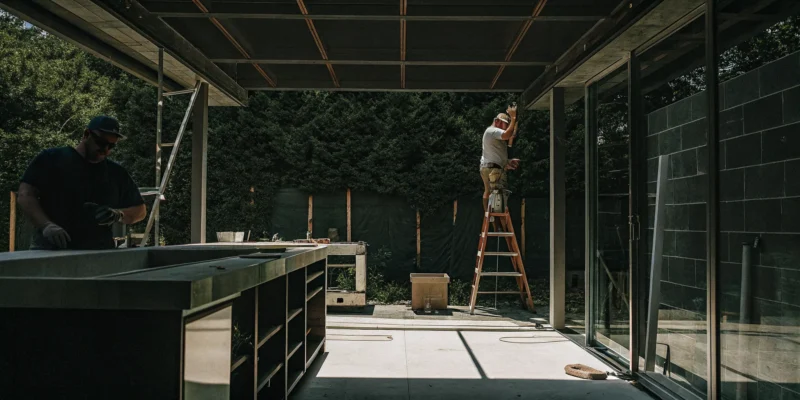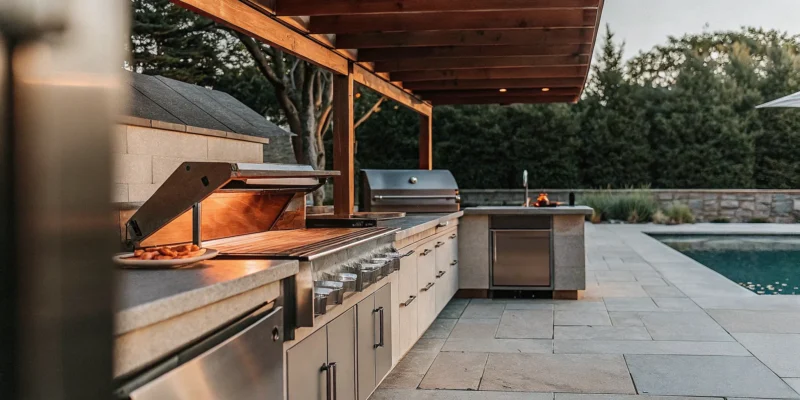
A professionally installed modern pergola design for a stylish outdoor living space.

A Pro’s Guide to Pergola Design and Installation

A pergola can completely transform how you use your outdoor space, turning a simple patio into a four-season retreat. Modern pergolas offer much more than just shade. With features like adjustable louvered roofs, integrated lighting, and built-in heaters, you can create a comfortable atmosphere no matter the weather. This level of functionality allows you to extend your outdoor enjoyment from early spring through late fall. Achieving this requires careful planning and execution. This guide explores the innovative features available today and how to incorporate them into your backyard. A smart pergola design and installation is the key to unlocking your yard’s full potential and creating a versatile space for year-round living.

Key Takeaways

  • Define Your Pergola’s Role First: Your pergola’s main function, whether for dining, lounging, or as a garden feature, should guide every decision. This purpose will help you choose the right size, style (like attached or freestanding), and placement to create a space that truly works for you.
  • Select Materials Suited for Long Island Weather: The material you choose determines both maintenance and lifespan. Low-maintenance options like aluminum and vinyl are ideal for resisting coastal air and humidity, while classic wood requires consistent sealing to protect it from rot and weather damage.
  • Ensure a Safe and Stable Installation: A pergola is only as good as its foundation. A successful build requires a solid, level base, secure anchoring for every post, and the correct local permits. Getting these details right is critical for safety and prevents costly mistakes down the road.

Which Pergola Style Is Right for You?

Once you decide to add a pergola to your yard, the fun part begins: choosing a style. The right design will feel like a natural extension of your home and support how you want to live outdoors. Your main choices come down to placement, aesthetic, and functionality. Let’s walk through the most popular options to help you find the perfect fit for your Long Island home.

Attached vs. Freestanding Pergolas

An attached pergola connects directly to your house, creating a smooth transition from your indoor living room to an outdoor patio. This style is a fantastic choice if you want to extend your living area, providing a shaded, comfortable spot for dining or relaxing just steps from your door. On the other hand, a freestanding pergola is a standalone structure you can place anywhere in your yard. This gives you more flexibility. You could create a quiet retreat in a garden, a shaded lounge area by your swimming pool, or a stunning focal point in your landscape design. The choice really depends on how you envision using your new outdoor room.

Traditional vs. Modern Designs

Your pergola’s design should complement your home’s architecture. Traditional pergolas often use classic materials like wood, featuring beautiful details like latticework and decorative post ends. They bring a timeless, romantic charm to gardens and patios, pairing wonderfully with classic home styles. Modern pergolas, however, focus on minimalism and clean lines. They often use materials like aluminum, steel, or sleek composites for a sharp, functional aesthetic. These designs are a perfect match for contemporary homes, creating a sophisticated outdoor space that feels both simple and luxurious. The right design will harmonize with your existing masonry and landscaping.

What Is a Bioclimatic Pergola?

For the ultimate in function and control, a bioclimatic pergola is an incredible option. These innovative structures feature adjustable motorized slats or louvers in the roof. With the touch of a button, you can open the slats to let in the sun, close them completely for rain protection, or angle them to create the perfect amount of shade and airflow. This adaptability means you can comfortably use your outdoor space nearly year-round, regardless of the weather. Bioclimatic pavilions and pergolas are designed to help regulate temperature naturally, making them a smart and sophisticated addition to any modern home looking to maximize its outdoor living potential.

How to Choose the Best Pergola Material

The material you choose for your pergola is one of the most important decisions you’ll make. It defines the structure’s appearance, how much maintenance it will need, and how long it will last in your backyard. Your choice will likely come down to three popular options: classic wood, low-maintenance vinyl, or modern aluminum. Each has its own set of benefits and considerations, especially when you factor in Long Island’s unique climate. Thinking through these options will help you find the perfect fit for your home, lifestyle, and budget, ensuring your new outdoor space is exactly what you envisioned.

The Classic Look of Wood

Wood is a timeless choice for a reason. It offers a natural, warm beauty that blends seamlessly into any landscape design. You can stain it to highlight the grain or paint it to perfectly match your home’s exterior, giving you plenty of design flexibility. Wood’s timeless appeal makes it a favorite for creating a traditional and inviting outdoor room. However, this classic look comes with a commitment. To protect it from moisture, insects, and rot, wood requires regular maintenance, including sealing or staining every few years. If you love the authentic look of real wood and don’t mind the upkeep, it’s an excellent option.

The Low-Maintenance Appeal of Vinyl

If your goal is to spend more time relaxing under your pergola and less time maintaining it, vinyl is an outstanding choice. Vinyl pergolas have become incredibly popular with busy homeowners because they require almost no upkeep. You’ll never have to worry about painting or staining, and cleaning is as simple as a quick rinse with a hose. Because vinyl is resistant to rot and insects, it’s a durable material that won’t fade, crack, or warp over time. It’s a practical, long-lasting solution that keeps its fresh look for years with minimal effort.

The Modern Durability of Aluminum

For a sleek, contemporary look combined with incredible strength, aluminum is the top contender. Aluminum pergolas are lightweight yet exceptionally durable, offering a clean, minimalist aesthetic that complements modern architecture. They are naturally resistant to rust and corrosion, making them a perfect fit for Long Island’s humid, salty air. Aluminum is a fantastic choice for a long-lasting structure that can handle extreme weather conditions without showing wear and tear. If you want a structure that is both stylish and requires virtually no maintenance, aluminum is an ideal investment for your property.

Select a Material Built for Long Island Weather

Here on Long Island, we get a bit of everything: hot and humid summers, strong coastal winds, and heavy snow in the winter. Your pergola material needs to be tough enough to handle it all. While wood is beautiful, it requires diligent care to prevent weather-related damage. Materials like aluminum and vinyl are especially well-suited for our coastal climate because they resist corrosion and decay. Choosing a material designed for these conditions ensures your investment is protected for years to come. At Gappsi, we help homeowners select from a range of high-quality pavilions and pergolas built to last in our local environment.

How to Choose the Right Pergola Size

Picking the right pergola size is about more than just making sure it fits. It’s about creating a structure that feels proportional to your home and yard, and that perfectly suits how you plan to use it. A pergola that’s too small can feel cramped and insignificant, while one that’s too large can overwhelm your landscape. The goal is to find that sweet spot where the size enhances both the function and the beauty of your outdoor living area.

Before you fall in love with a specific design, think about what you want to do under your pergola. Will it be a cozy reading nook for two? An outdoor dining room for family dinners? Or a spacious lounge area for entertaining guests? Answering these questions will give you a realistic idea of the footprint you need. We can help you visualize the possibilities and find a size that complements your home and lifestyle, ensuring your new pergola or pavilion becomes your favorite spot.

Measure Your Outdoor Space

First things first, grab a tape measure. Accurately measuring your available space is a critical first step. As you measure, consider the flow of traffic around the area and leave enough room for landscaping and walkways. It’s also interesting to note that with many pergola kits, bigger can be a better value. The price per square foot often decreases as the size increases. For example, a 12×10 foot kit provides nearly double the usable area of an 8×8 foot kit but may only cost about 25% more. Thinking about the scale from the start helps you maximize both your space and your budget.

Match the Pergola to Your Home’s Architecture

Next, decide if you want your pergola to be an extension of your home or a standalone feature. An attached pergola connects directly to your house, creating a seamless transition from indoors to outdoors. This style is often more economical because it uses the house for support, requiring only two posts instead of four. A freestanding pergola, on the other hand, can be placed anywhere in your yard. It acts as a destination, defining a specific area like a poolside lounge or a garden retreat. Your choice will depend on your property’s layout and the overall look you want to achieve with your landscape design.

Account for Sun, Wind, and Shade

Think about how the natural elements interact with your yard. Where does the sun fall throughout the day? A pergola’s primary function is to provide shade, so its placement and orientation are key. The direction of the rafters and the spacing between them will determine how much sunlight filters through. You can design it for dappled light or for more complete coverage. For Long Island homes, it’s also wise to consider the wind. A well-built, properly anchored pergola is essential to withstand coastal weather, ensuring your structure is both beautiful and durable for years to come.

How to Integrate a Pergola into Your Landscape

A pergola should feel like it was always meant to be part of your yard, not just an afterthought. Integrating it thoughtfully into your existing landscape is the key to creating a space that looks beautiful and functions perfectly. It’s about making the pergola a natural extension of your home and garden, connecting different elements to create one cohesive outdoor retreat. By considering how it relates to your home, patio, and plants, you can build a structure that truly belongs.

Create Visual Balance with Proportion and Scale

Getting the size right is one of the most important steps. A pergola should feel balanced with your home and the scale of your yard. If you have a large, sprawling backyard, a tiny pergola will look lost and insignificant. On the other hand, a massive structure can easily overwhelm a smaller, cozier space. The goal is to find that sweet spot where the pergola complements its surroundings. Think about the height of your home’s roofline and the overall footprint of your outdoor area to guide your pergola design choices.

Pair It with a Patio, Pool, or Masonry

A pergola works best when it connects to other features in your yard. Placing it over a patio creates a designated outdoor room for dining or lounging. When positioned next to a swimming pool, it offers a shady spot to relax between dips. You can use a pergola to create a seamless transition from your back door to your garden. By pairing it with beautiful masonry walkways or a stone patio, you can build a cohesive and functional outdoor living area that flows naturally from one space to the next.

Use Climbing Plants and Greenery

Wrapping your pergola in climbing plants is a wonderful way to soften its lines and merge it with your garden. Vines not only add a touch of romance and natural beauty but also provide extra shade as they grow. Imagine fragrant wisteria, vibrant clematis, or classic climbing roses weaving through the rafters. This living canopy makes the space feel lush and inviting. Choosing the best plants for your pergola can transform it from a simple structure into a vibrant part of your landscape design.

Add Smart Technology and Lighting

To get the most out of your pergola, think about how you’ll use it after the sun goes down. Integrating lighting is a must for evening entertaining or quiet relaxation. You can opt for simple string lights for a festive mood or install built-in LED lighting for a sleeker, more modern look. Many modern pavilions and pergolas also offer smart features like automated retractable canopies, built-in heaters, or ceiling fans, allowing you to control the climate with the touch of a button and enjoy your outdoor space in any weather.

Key Features of a Quality Pergola

When you start looking at pergolas, you’ll quickly see that they come in all shapes, sizes, and materials. But what really separates a great pergola from a mediocre one? It comes down to a few key features that ensure your new outdoor structure is not just beautiful, but also functional and long-lasting. A quality pergola is an investment in your home and lifestyle, so it’s worth paying attention to the details that guarantee you’ll be enjoying it for years to come. From the sturdiness of its frame to the cleverness of its shade options, these are the features to look for.

Structural Integrity and Durability

A quality pergola is built to last. The best structures are made from high-quality materials that can handle anything Long Island weather throws at them, from humid summers to coastal winds. Materials like cedar, pine, or durable aluminum provide the strength needed for a stable and secure structure. A well-built pergola is designed to stand up to strong winds and resist wear over time. When you work with experts, you can be confident that your pergola’s structural integrity is a top priority, ensuring it remains a safe and beautiful centerpiece in your yard for many seasons.

Roof and Shade Options

One of the main purposes of a pergola is to provide shade, and a quality design gives you control over how much sun you get. You can choose between a freestanding pergola that acts as a destination in your yard or one that attaches to your house to extend your living space. Many modern pavilions and pergolas come with smart roof options, like retractable canopies for adjustable shade or louvered roofs that you can open and close with the touch of a button. This versatility lets you create the perfect atmosphere, whether you’re soaking up the morning sun or seeking cool relief on a hot afternoon.

Custom Add-Ons: Curtains, Screens, and Furniture

Customization is what transforms a simple structure into your personal outdoor retreat. A quality pergola allows you to tailor the design to your exact needs and style. Beyond choosing the material and size, you can incorporate a wide range of add-ons to enhance comfort and privacy. Adding flowing curtains can create a soft, resort-like feel, while integrated screens can protect you from insects on summer evenings. These custom features allow you to design an outdoor space that truly feels like an extension of your home, complete with lighting, heating, and comfortable furniture.

DIY Pergola Kits vs. Custom Builds

One of the first decisions you’ll make is whether to use a DIY pergola kit or hire a professional for a custom build. Kits offer a straightforward, budget-friendly path, while custom designs provide limitless possibilities and a truly integrated look. Your choice depends on your budget, your timeline, your comfort with DIY projects, and your vision for your backyard. Let’s walk through the key differences to help you decide which approach is the right fit for your Long Island home.

What’s Included in a Pergola Kit?

A pergola kit is essentially a structure in a box. These kits are designed for accessibility, providing everything you need for assembly in one package. Inside, you’ll find all the wood or vinyl pieces pre-cut to the correct size and often pre-drilled for easier construction. The kit also includes all the necessary hardware, like screws and brackets, along with a set of step-by-step instructions. Most are designed so that two people with basic tool knowledge can put one together in a single afternoon, typically within four to six hours. This makes it a very appealing option if you’re looking for a quick and simple weekend project.

The Pros and Cons of a DIY Project

The most significant advantage of a DIY pergola project is the cost savings. By assembling it yourself, you can save thousands of dollars in labor costs. For many homeowners, there’s also a great sense of pride and accomplishment that comes from building something with your own hands. However, it’s important to be realistic about your skills. A DIY project requires the right tools, a bit of patience, and a clear understanding of the instructions. A small mistake can lead to a wobbly structure or an unprofessional finish. You are also limited to the specific sizes, materials, and designs offered by the kit manufacturer.

Why Choose a Custom-Built Pergola?

A custom-built pergola is designed to be a perfect extension of your home and landscape. Unlike a one-size-fits-all kit, a custom design is tailored to your exact specifications, matching your home’s architectural style and fitting precisely into your desired location. Working with a professional team gives you access to higher-quality materials and expert craftsmanship, ensuring your pergola is not only beautiful but also structurally sound enough to handle Long Island’s coastal weather. A professionally designed and installed structure from Gappsi can become a stunning centerpiece, especially when integrated with other features like a stone patio or pool deck, significantly increasing your home’s value.

Compare the Costs: Kits vs. Professional Installation

When you look at the upfront price tag, a DIY kit is almost always the cheaper option. You are only paying for the materials, not the professional labor, which can cut the total cost by half or more. However, it’s helpful to think of a custom build as a long-term investment. While the initial cost is higher, you are paying for durability, superior materials, and a flawless installation that is guaranteed to last for years. A custom pavilion or pergola also eliminates the risk of costly DIY errors and ensures your structure is safely and securely anchored, adding lasting value and enjoyment to your property.

What Does Pergola Installation Involve?

So, you’ve picked out the perfect pergola style and material for your Long Island home. What’s next? The installation process might seem like a huge undertaking, but it’s really just a series of manageable steps. Breaking it down can help you decide whether to tackle it yourself or bring in a professional. The journey from a bare patch of lawn to a beautiful, shaded retreat involves preparing the site, securing the right permits, assembling the structure, and making that final call on who will do the building.

Understanding what the installation entails is the first step toward a successful project. Whether you’re a seasoned DIYer ready for a weekend challenge or you’d prefer to have an expert team handle everything, knowing the process helps you plan your time and budget. A well-installed pergola not only looks great but also stands strong against the elements for years to come. At Gappsi, we specialize in creating stunning, durable pavilions and pergolas that are built to last, handling every detail from the ground up.

Prepare Your Site and Foundation

Before any posts go up, you need a solid base. The first step in any pergola installation is preparing the site. This means clearing the designated area of any grass, plants, rocks, or debris to create a clean slate. Most importantly, the ground must be perfectly level. An uneven surface can compromise the structural integrity of your pergola, so taking the time to get this right is crucial. You should also confirm the location of any underground utility lines before you start digging.

Your pergola needs to stand on a firm foundation to ensure it’s safe and stable. For a pergola on a lawn, this typically involves digging holes and pouring concrete footings to anchor the posts. If you’re installing it on an existing surface, you’ll need to securely anchor the posts to the patio. A professionally installed masonry patio provides an ideal, durable base that ensures your pergola will remain stable and secure through every season.

Understand Local Permit Requirements

This is one step you definitely do not want to skip. Many towns across Long Island, in both Nassau and Suffolk counties, require a building permit for outdoor structures like pergolas. The specific requirements often depend on the pergola’s size, its height, and whether it is attached to your house or freestanding. It’s always best to call your local building department to get clear information on what’s needed for your project.

Trying to get a permit can feel complicated, but it protects you from potential fines and ensures your structure is built to code. Some pergola kits even provide custom drawings that can help with your application. If you work with a professional installer, they will typically handle the entire permitting process for you. This service alone can save you a lot of time and prevent common headaches associated with municipal rules.

A Look at the Assembly Process

Once your site is prepped and your permits are in hand, it’s time for the fun part: assembly. If you’ve opted for a DIY pergola kit, you’ll find that most of the hard work has been done for you. These kits typically arrive with all the wood or vinyl pre-cut, holes pre-drilled, and a set of easy-to-follow instructions. With a helper, most small to medium-sized pergolas can be put together in a weekend, requiring just some basic tools and a bit of patience.

For a custom-built pergola, the assembly process is handled entirely by a professional crew. Our team at Gappsi manages the construction from start to finish, ensuring every joint is secure and every angle is perfect. This approach not only guarantees a high-quality result but also allows for unique designs and features that a standard kit can’t offer.

Know When to Hire a Professional

While a DIY pergola project can be a rewarding experience and may save you money on labor, it’s not the right fit for everyone. It requires some basic woodworking skills, the right tools, and a willingness to dedicate a weekend or two to the project. If you’re short on time or not confident in your building abilities, hiring a professional is often the better choice. A pro can handle complex installations, like those on uneven ground or attached to a house, with ease.

Hiring an expert ensures your pergola is not only beautiful but also structurally sound and safely installed. A professional team manages all the logistics, from securing permits to site preparation and final assembly. This gives you a stress-free experience and a flawless finish that integrates perfectly with your existing landscape. For a truly custom structure designed to complement your home, a professional installation delivers peace of mind and exceptional quality.

Common Pergola Installation Mistakes to Avoid

Building a pergola is an exciting project, but a few common missteps can turn your dream addition into a headache. Knowing what to watch out for ahead of time can save you from costly fixes and ensure your new outdoor structure is safe, beautiful, and built to last. Let’s walk through some of the most frequent installation mistakes so you can avoid them.

Incorrect Measurements and Sizing

One of the easiest mistakes to make is getting the measurements wrong. A pergola that’s too large can overwhelm your yard, while one that’s too small looks out of place and won’t provide the function you need. Beyond aesthetics, accurate measurements are crucial for structural integrity. If your posts are unevenly spaced or the beams are cut to the wrong length, the entire structure can become unbalanced and unsafe. Always measure your space twice (or even three times) before you cut any materials or dig any holes. This simple step ensures everything fits together perfectly and looks just right in your backyard.

Weak Anchoring and Foundation

A pergola is only as strong as its foundation. A critical error is failing to anchor the structure properly, leaving it vulnerable to Long Island’s strong winds and changing weather. Every post needs to be secured into a solid footing, typically made of concrete, to prevent it from shifting, leaning, or even collapsing over time. A pergola must be anchored securely with appropriate hardware to create a stable and permanent structure. Skimping on the foundation might save a little time upfront, but it creates a serious safety hazard and will ultimately shorten the life of your beautiful new addition.

Forgetting to Secure Permits

“Do I really need a permit for that?” It’s a question many homeowners ask, and skipping this step is a frequent oversight. The answer is, you probably do. Many towns on Long Island require permits for structures like pergolas, especially if they are over a certain size or attached to your house. Building without a permit can lead to fines from your local municipality, and you might even be ordered to take the structure down. Checking with your local building department before you start is a non-negotiable part of the process. It ensures your project is compliant with all safety codes and saves you from major trouble later.

Using Materials Unsuited for Long Island Weather

The materials you choose have a huge impact on how long your pergola will last and how much maintenance it will need. Long Island’s climate, with its humid summers, freezing winters, and salty air near the coast, can be tough on outdoor structures. Selecting weather-resistant materials is essential for durability. While some woods look beautiful initially, they can rot or warp without proper treatment. Materials like aluminum, high-quality vinyl, or naturally resilient woods like cedar are excellent choices for our area. They stand up to moisture and temperature swings, ensuring your pergola remains a stunning feature for years to come.

How to Maintain Your Pergola

Your new pergola is the centerpiece of your backyard, and a little routine maintenance will keep it looking beautiful for years to come. The care your pergola needs depends on its material, but the effort is well worth it to protect your investment. Here’s a simple breakdown of how to care for your structure through the seasons.

Caring for Wood Pergolas

A wood pergola offers timeless, natural beauty, and with a bit of annual care, you can keep it that way. I recommend giving it a gentle wash each year with mild soap and water to clear away any dirt or mildew. After a good rinse, let it dry completely. To protect it from Long Island’s weather, apply a quality wood sealant every few years. This simple step is the best way to prevent rot and insect damage. If you notice any stubborn stains or wear, our team offers professional restoration and sealing services to bring it back to life.

Maintaining Vinyl and Aluminum

If you chose a vinyl or aluminum pergola, you’re in luck because they are incredibly low-maintenance. These materials are built to withstand the elements without needing to be painted or stained. For routine cleaning, a simple wash with soap and water is usually all you need to remove surface dirt. For any tougher spots, a soft cloth and a non-abrasive cleaner will do the trick. Just be sure to avoid harsh chemicals that could damage the finish. These durable pergola options are designed for an easy-care lifestyle, giving you more time to simply enjoy your outdoor space.

Seasonal Maintenance for Long Island Homes

Living on Long Island means your pergola will experience all four seasons, so a little seasonal prep is smart. In the fall, make it a habit to clear away fallen leaves and debris from the roof. This prevents moisture from getting trapped, which can lead to mold. When winter arrives, gently remove any heavy snow accumulation to avoid putting excess strain on the frame. Throughout the year, it’s a good idea to periodically check for any loose fittings and ensure the area has proper drainage. A quick seasonal check-up will keep your pergola safe for every backyard occasion.

Find the Right Pergola Company on Long Island

Once you have a vision for your pergola, the next step is deciding how to bring it to life. You generally have two paths: using a DIY pergola kit or hiring a professional company. DIY kits, which you can order online, come with pre-cut and pre-drilled materials and are designed for home assembly. For some, this can be a rewarding weekend project, and the initial cost might seem lower than a custom build. These kits are available in materials like cedar and fiberglass, with options for both freestanding and attached designs.

However, the DIY route puts all the responsibility on your shoulders. You’ll need to ensure your measurements are perfect, prepare a stable foundation, and secure any necessary local permits. An improperly anchored pergola can be a safety hazard, and using materials not suited for Long Island’s coastal climate can lead to premature wear and costly repairs. While kits offer a starting point, they often lack the customization and durability needed to truly complement your home and withstand the local weather for years to come.

Working with an experienced Long Island pergola company removes the guesswork and ensures a high-quality, lasting result. A professional team handles every detail, from initial design to final installation. They can create a structure that perfectly fits your space and architectural style, something a one-size-fits-all kit can rarely achieve. This expertise is invaluable for integrating your new pergola with existing features like a patio or for planning it as part of a larger backyard transformation, perhaps alongside a new swimming pool.

A full-service company like Gappsi provides a seamless experience, offering a wide selection of premium materials built to last. We guide you through choosing the best options, whether it’s classic wood, low-maintenance vinyl, or modern aluminum. Our design and construction experts manage the entire project, ensuring your pergola is not only beautiful but also structurally sound and perfectly integrated into your landscape. By partnering with a professional, you invest in peace of mind and a stunning outdoor feature that you and your family will enjoy for decades. You can explore a gallery of our custom pavilions and pergolas to see the difference professional craftsmanship makes.

Related Articles

Frequently Asked Questions

How do I choose between wood, vinyl, and aluminum for my pergola? The best material really comes down to your personal style and how much maintenance you’re willing to do. If you love a classic, natural look and don’t mind some annual upkeep like sealing or staining, wood is a beautiful choice. For a truly low-maintenance option, vinyl is fantastic because it resists rot and just needs an occasional rinse. If you prefer a modern aesthetic and want maximum durability, especially for our coastal Long Island weather, aluminum is an excellent investment that won’t rust or corrode.

What are the main factors that determine the cost of a new pergola? The final cost of a pergola is influenced by three main things: its size, the material you choose, and whether it’s a standard kit or a custom build. A larger, more complex structure will naturally cost more than a smaller, simpler one. Premium materials like aluminum or bioclimatic systems are a bigger investment than a standard pine kit. Finally, professional custom design and installation will have a higher upfront cost than a DIY kit, but it ensures a perfect fit, superior quality, and long-term durability.

What makes a bioclimatic pergola different from a regular one? Think of a bioclimatic pergola as the smart version of a traditional pergola. While a standard pergola has a fixed roof, like open rafters or a solid cover, a bioclimatic pergola has adjustable louvers. With the touch of a button, you can change the angle of these roof slats to let in full sun, create partial shade, or close them completely to block out rain. This gives you total control over the environment, making your outdoor space comfortable in almost any weather.

Do I really need a permit to build a pergola on Long Island? Yes, in most cases, you will need a permit. The specific rules can vary between towns in Nassau and Suffolk County, but most municipalities require one for outdoor structures of a certain size or height. Skipping this step can lead to fines or even having to remove the structure. It’s always best to check with your local building department before you begin. When you work with a professional company, they typically handle the entire permitting process for you, which saves a lot of time and hassle.

Is a DIY pergola kit a good idea, or should I hire a professional? A DIY kit can be a great option if you are confident in your building skills, have the right tools, and are looking to save on labor costs. However, a custom build by a professional team ensures the structure is perfectly tailored to your home and landscape. Professionals can handle complex installations, guarantee the pergola is safely anchored to withstand our weather, and deliver a higher-quality finish. It really comes down to balancing your budget against your desire for a flawless, long-lasting result.

Pressure washing a paver patio in preparation for sealing for beginners.

Paver Sealing for Beginners: Your How-To Guide

Are you noticing weeds popping up between your pavers? Or maybe a few stubborn stains from last summer’s barbecue that just won’t budge? Without a protective layer, your beautiful pavers are exposed to everything from spilled drinks to harsh sun, which can lead to permanent damage. The good news is there’s a straightforward solution: paver sealing. This simple process creates a barrier that locks out stains and prevents fading. In this guide to paver sealing for beginners, we’ll walk you through every step, ensuring your hardscape stays as stunning as the day it was installed.

Key Takeaways

  • Sealing is essential protection: Think of sealer as a shield for your investment. It guards your pavers against stains, prevents color fading from the sun, and makes routine cleanups much easier.
  • Preparation determines the result: A beautiful, long-lasting finish starts with proper prep. Your pavers must be completely clean and dry, with joints properly filled, before you apply the first drop of sealer.
  • Work with the weather, not against it: For a successful application, choose a mild day with no rain in the forecast. The right conditions are crucial for preventing a cloudy finish and ensuring the sealer cures properly.

What Is Paver Sealing and Why Is It Important?

Think of paver sealing as the final, protective touch for your beautiful patio, walkway, or driveway. It’s a simple step that makes a huge difference in how your outdoor spaces look and how long they last. A sealer is a liquid coating that you apply over your pavers, creating an invisible shield that guards against the elements. It’s one of the best ways to protect your investment and keep your hardscaping looking as good as the day it was installed. Let’s walk through exactly why it’s such a crucial part of paver maintenance.

The benefits of sealing your pavers

Sealing your pavers is one of the smartest things you can do to protect your outdoor living area. This protective coating helps your pavers resist stains from things like spilled drinks, oil, and fallen leaves. It also shields them from the sun’s harsh UV rays, which prevents their beautiful colors from fading over time. Beyond protection, a sealer can enhance the look of your pavers, bringing out their rich tones and giving them a clean, finished appearance. Plus, it makes cleanup a breeze. A quick sweep or a rinse with soap and water is usually all it takes to keep sealed pavers looking fresh, saving you time and effort on maintenance.

What happens if you don’t seal your pavers?

If you decide to skip the sealer, your pavers are left exposed to everything nature throws at them. Without that protective layer, they can easily absorb spills, leading to permanent stains. Over time, you might notice mildew or rust spots appearing, and the vibrant color of your pavers can start to look dull and faded from sun exposure. Harsh weather can also take a toll, causing pavers to degrade more quickly. While you might choose to leave pavers unsealed in a very low-traffic area to preserve their natural texture, for most patios and driveways, sealing is the best way to protect your beautiful masonry and avoid difficult repairs down the road.

How to Choose the Right Paver Sealer

Choosing the right sealer can feel overwhelming, but it boils down to your paver type and the look you want. The right product protects your investment and enhances the beauty of your outdoor space. Before you buy, let’s break down the key factors to help you make a confident choice.

Water-based vs. solvent-based sealers

Your first choice is between water-based and solvent-based formulas. Water-based sealers are eco-friendly, low-odor, and a great match for concrete pavers. They create a breathable film that helps lock joint sand in place while allowing any trapped moisture to escape. Solvent-based sealers contain more acrylic solids and are known for deeply enhancing the color and texture of pavers. They are often the top choice for bringing out the rich tones in porcelain and natural stone pavers or clay bricks, providing a vibrant finish and excellent UV protection against the sun.

Pick your finish: matte, satin, or gloss

The sealer’s finish determines the final look of your pavers, much like picking a paint sheen. If you love the natural, unaltered appearance of your stone, a matte finish provides protection without adding shine. For a bit more flair, a satin or semi-gloss finish offers a subtle sheen that makes the colors pop. If you want a bold, dramatic effect, a high-gloss or “wet look” sealer will give your pavers a dark, reflective surface, as if they were just rained on. This choice is all about personal style, so consider how it complements your home’s overall aesthetic and the masonry work you want to feature.

Match the sealer to your paver type

Using the right sealer for your specific paver material is non-negotiable. Porous concrete pavers, for example, need a “breathable” sealer that lets moisture escape to prevent a cloudy film from forming. Denser materials like clay brick or certain natural stones require a sealer that can bond properly to their less porous surface. A good seal also helps harden any polymeric sand in the joints, keeping it from washing away during the next downpour. Always check the product label for compatibility to avoid issues. If you’re unsure, our professional restoration and sealing services can ensure the job is done right with the perfect product for your pavers.

Gather Your Tools and Materials

Getting your supplies together before you start is one of the best things you can do to make this project go smoothly. Think of it like preparing a recipe; having everything measured and within reach makes the actual process much more enjoyable and efficient. A little prep work now saves you from making frantic trips to the store mid-project. You’ll need three main categories of items: supplies for cleaning, tools for applying the sealer, and gear to keep you safe. Let’s break down exactly what you should have on hand before you apply that first drop of sealer.

Cleaning supplies

Your pavers need to be completely clean for the sealer to adhere properly and last as long as possible. A pressure washer is fantastic for lifting dirt and grime, but be gentle if you have sand in your paver joints, as you don’t want to blast it all out. For stubborn oil spots or leaf stains, a stiff-bristled deck brush and a good paver cleaner will be your best friends. You can also create a simple solution of dish soap and water for general cleaning. Taking the time for a thorough cleaning is a non-negotiable step for a professional-looking finish. If you run into tough stains, our restoration and sealing services can get your surface ready for sealing.

Application tools

When it’s time to apply the sealer, having the right tools makes all the difference in achieving an even, consistent coat. A garden pump sprayer is often the easiest and fastest method, allowing you to apply a thin, uniform layer across a large area. Alternatively, you can use a roller with a thick nap, about 3/4 to 1 inch, attached to an extension pole. This method is great for working the sealer into the texture of the pavers and ensuring full coverage. It’s also a good idea to have a small paintbrush handy for cutting in along edges or walls where a sprayer or roller can’t reach.

Safety gear

Please don’t skip this part. Working with chemical sealers requires you to protect yourself. At a minimum, you should have chemical-resistant gloves to keep the sealer off your skin and safety glasses to protect your eyes from any splashes. If you are working with a solvent-based sealer or are sensitive to strong smells, a respirator mask is a very good idea. It’s also smart to wear old clothes you don’t mind getting stained, along with closed-toe shoes. These simple DIY safety precautions are easy to take and ensure your paver sealing project is safe from start to finish.

Find the Best Time to Seal Your Pavers

Timing is just as important as technique when sealing pavers. Applying sealer under the wrong conditions can ruin the finish and waste your effort. To get that perfect, durable coat, you need to work with the weather, not against it. Here’s how to pick the best time for the job.

Ideal temperature range

When it comes to sealing your pavers, think of it like Goldilocks: you need the temperature to be just right. The sweet spot is between 50 and 90 degrees Fahrenheit, with 75 degrees being pretty much perfect. If you try to apply sealer when it’s too hot, it can dry too quickly, leading to a blotchy or peeling finish. On the other hand, if it’s too cold, the sealer won’t cure properly. Before you start, check the forecast for the day and the next couple of days to make sure you have a good window. Getting the timing right is a huge part of achieving a professional look, but if you’re ever unsure, our restoration and sealing services team can handle it for you.

Weather and moisture checks

Moisture is the enemy of a fresh coat of sealer. You’ll want to work on a clear, sunny day with no rain in the forecast for at least 24 to 48 hours after you finish. Any rain can wash away the sealer or create a cloudy, uneven look. Also, if your pavers are new, you might notice a hazy white film on the surface. This is called efflorescence, and it’s just natural salts coming out of the stone. It’s best to wait for this to disappear on its own before sealing, which can take a few months. Trying to seal over it will only trap the white film underneath. Patience here will pay off with a much cleaner result for your beautiful natural stone pavers.

Sun exposure and time of day

The time of day you choose to seal your pavers matters, too. It’s generally best to start your project in the morning. This gives the sealer plenty of time to dry before the evening dew sets in, which can add unwanted moisture. You should also try to avoid working in direct, intense sunlight, as it can heat the paver surface too much and cause the sealer to dry too fast. Another thing to watch out for is wind. A windy day can blow dust, leaves, and other debris onto your wet sealer, getting trapped in the finish. Picking a calm, clear morning is your best bet for a smooth, flawless application.

How to Prepare Your Pavers for Sealing

Proper preparation is the secret to a flawless, long-lasting paver seal. Skipping these steps can trap dirt, moisture, and stains under the sealer, leading to a cloudy finish and potential damage down the road. Think of it like painting a room; you would not just paint over a dirty wall. Taking the time to prep your patio, walkway, or driveway ensures the sealer adheres correctly and gives you that beautiful, protective finish you’re looking for. Follow these six steps to get your pavers ready for their new coat.

Step 1: Clear the area

First things first, you need a completely empty canvas. Move all patio furniture, grills, planters, and outdoor decor off the paver surface. This gives you unobstructed access to every inch of the area, ensuring you do not miss any spots during the cleaning and sealing process. It also protects your belongings from cleaning solutions and sealer overspray. Find a temporary home for these items on your lawn or in the garage. A clear space not only makes the job easier and safer but also guarantees a more uniform and professional-looking result when you’re finished.

Step 2: Deep clean the surface

With the area clear, it’s time to give your pavers a thorough cleaning. Start by using a stiff-bristle broom to sweep away all loose debris like leaves, dirt, and twigs. Next, you’ll want to wash the surface. A pressure washer is very effective for this, but a garden hose with a high-pressure nozzle can also work. Spray the pavers at a slight angle, working in sections and overlapping your passes to lift away ground-in dirt and grime. This deep clean is essential for allowing the sealer to bond directly with the paver material. If the job feels too big, professional cleaning and sealing services can handle the deep cleaning for you.

Step 3: Remove stains, weeds, and efflorescence

Now, inspect the surface for any lingering issues. Pull any weeds that have sprouted up between the paver joints. For stubborn oil, grease, or rust stains, you may need a specialized paver cleaner designed for that specific type of spot. You might also notice a white, chalky film on the surface, which is called efflorescence. This is just salt residue that has migrated out of the pavers. You can typically remove it by scrubbing the area with an efflorescence cleaner. Addressing these specific problems now prevents them from being permanently trapped under the new layer of sealer.

Step 4: Fill joints with polymeric sand

After a deep clean, you may find that some of the sand between the paver joints has washed away. Refilling these gaps is crucial for stabilizing the pavers and preventing future weed growth. Polymeric sand is the best choice for this job. It’s a fine sand mixed with a binding agent that hardens when activated with water. Sweep the sand across the dry paver surface until all the joints are completely full. Then, use a leaf blower on a low setting to blow any excess sand off the paver tops. This step ensures your masonry work remains stable and secure for years to come.

Step 5: Let the pavers dry completely

Patience is key for this step. Before you even think about opening a can of sealer, the pavers and the sand in the joints must be bone dry. Applying sealer to a damp surface can trap moisture, resulting in a hazy, white finish that is very difficult to fix. In dry, sunny weather, you should wait at least 24 hours after cleaning or a rainstorm. If it’s humid or overcast, it’s safer to wait 48 hours or more. To be certain, you can touch the joints to feel for any dampness. It’s always better to wait an extra day than to rush and ruin the entire project.

Step 6: Do a spot test first

Before you commit to sealing the entire area, perform a small spot test. Choose an inconspicuous spot, like a corner behind a planter, and apply the sealer according to the manufacturer’s directions. Let it dry completely so you can see the final result. This simple test allows you to check two important things: the color and the finish. Some sealers can slightly darken or enrich the color of your pavers, and this test ensures you like the change. It also confirms the sealer dries clear and does not have any adverse reactions with your specific paver material. This little bit of due diligence can save you from a big headache later.

Apply the Sealer: A Step-by-Step Guide

Now for the main event: applying the sealer. With your pavers clean, dry, and ready, you’re on the final stretch. This is where your hard work pays off, creating a protective shield that will keep your patio or driveway looking fantastic. The key is to work methodically with thin, even coats. A little patience ensures a beautiful finish without streaks. If you decide this part is better left to the experts, Gappsi offers professional restoration and sealing services to handle it for you.

Step 7: Apply the first coat in sections

To avoid painting yourself into a corner, start applying the sealer at the farthest point from your exit. Working in small, manageable sections of about four-by-four feet helps maintain a wet edge and prevent overlap marks. Use a roller for large areas and a small paintbrush for edges and corners. Apply a thin, even coat, making sure not to let the sealer pool in the joints. A good strategy is to outline your section first, then fill in the middle. This approach ensures complete coverage and a smooth finish across your beautiful porcelain and natural stone pavers.

Step 8: Let it dry and apply a second coat

Patience is your best friend during the drying phase. Most sealers require at least two coats, and you need to let the first coat dry completely before applying the next. Rushing this can trap moisture between the layers, resulting in a cloudy appearance that’s difficult to fix. Check the manufacturer’s instructions, but a good rule is to wait a full day between coats, as humidity can slow drying time. Once the first coat is dry to the touch and no longer tacky, you can apply the second coat using the same technique.

Step 9: Understand the curing process

Drying and curing are two different things. While the sealer might feel dry in a few hours, it needs more time to cure, which means it’s fully hardening and bonding to the paver. This is a critical period for long-term durability. As a guideline, wait at least 24 hours before allowing light foot traffic. For driveways, wait at least 72 hours before parking on them. During this time, keep the area completely dry, so turn off any nearby sprinklers. Properly protecting your pavers now ensures they’ll stand up to years of enjoyment.

Avoid These Common Paver Sealing Mistakes

Sealing your pavers seems straightforward, but a few common missteps can lead to a finish you’re not happy with. Taking the time to get it right ensures your patio, walkway, or driveway looks great and stays protected for years. By avoiding these simple mistakes, you can achieve a professional-quality result that preserves the beauty of your outdoor space. Think of it as the final, protective touch that locks in the investment you’ve put into your hardscape. If you’re ever in doubt or just want to ensure a perfect finish without the hassle, remember that a professional restoration and sealing service can handle the job for you.

Sealing pavers that are wet or dirty

This is the most common mistake, and it’s a big one. Applying sealer over dirt, stains, or grime will trap them against the paver’s surface, making them a permanent feature. Before you even think about opening a can of sealer, you need to make sure your pavers are spotless. More importantly, the surface must be completely dry. Sealing damp pavers can trap moisture, leading to a cloudy, hazy finish or causing the sealer to peel away later. Plan for at least 24 to 48 hours of dry weather after cleaning to let your pavers air out entirely. A little patience here goes a long way.

Applying too much sealer

When it comes to paver sealer, more is definitely not better. The goal is to apply a thin, even coat that absorbs into the paver’s pores. Drenching the surface with too much product can create a thick film on top that looks blotchy and feels sticky. An overly thick coat can also make your pavers dangerously slippery when wet, which is a major safety concern for pool decks and walkways. Stick to the “less is more” approach. A light, uniform layer is all you need for effective protection and a beautiful finish. You can always add a second thin coat if needed.

Working in direct sun or extreme temperatures

The weather plays a huge role in how well your sealer applies and cures. Sealing in the scorching midday sun or on a very hot day can cause the sealer to dry too quickly, before it has a chance to properly bond with the paver. This can result in streaks, bubbles, or a peeling finish. On the other hand, applying it in temperatures that are too cold can prevent it from curing correctly. The ideal temperature is typically between 50 and 90 degrees Fahrenheit. Always check the forecast and plan your project for a mild, overcast day if possible for the best application conditions.

Sealing over white, chalky residue

Have you ever noticed a white, chalky film on your pavers? This is a natural phenomenon called efflorescence, caused by mineral salts migrating to the surface. If you apply sealer over this residue, you’ll trap it, leaving a permanent white haze on your beautiful pavers. While efflorescence often fades on its own over several months, you can also remove it with a specialized cleaner before sealing. Don’t seal until every trace of that white powder is gone. This ensures your sealer enhances the true color of your porcelain and natural stone, rather than obscuring it.

Ignoring the manufacturer’s instructions

Every sealer formula is slightly different, with its own specific application methods and drying times. It might be tempting to just get started, but skipping the instructions on the product label is a recipe for failure. The manufacturer provides the best guidelines for everything from the ideal application temperature to how long you should wait between coats. Following these directions is the single best thing you can do to ensure a successful project. You can find professional-grade products and expert advice at the Gappsi Store to get you started on the right foot and answer any questions you might have.

How Often Should You Reseal Your Pavers?

Sealing your pavers is a fantastic way to protect your investment, but it’s not a one-and-done task. The sealer acts as a shield for your patio or driveway, and over time, it wears down from traffic and weather. Knowing when to reapply it is key to keeping your pavers looking great. The good news is your pavers will give you clear signals when they need attention.

Signs it’s time for a fresh coat

As a general rule, plan to reseal your pavers every three to five years. Your pavers might tell you they need it sooner, though. The most obvious sign is that their color looks dull or faded. The vibrant look they had when the sealer was fresh will start to disappear. You can also do a quick water test: splash a little water on the surface. If it beads up, your sealer is still working. If the water soaks in and darkens the paver, it’s time for a new coat. You might also notice a hazy white film, called efflorescence, which should clear up before you apply a new seal.

Factors that affect resealing frequency

The three-to-five-year timeline is a great starting point, but several factors can change how often you’ll need to reseal. High-traffic areas, like your driveway, will naturally wear down faster than a secluded garden path. Long Island’s weather also plays a big role; constant exposure to sun, rain, and winter ice can break down the sealer more quickly. The type of paver matters, too. Different porcelain and natural stone materials may have unique requirements. Ultimately, it also comes down to personal preference and how much you want to maintain that enhanced, just-installed look.

Tips to maintain your sealed pavers

A little upkeep can go a long way in extending the life of your paver sealer. The best thing you can do is keep the surface clean. Sweep away leaves and dirt regularly so they don’t get ground into the sealer. For a deeper clean, a simple mix of mild soap and water with a gentle scrub is all you need. It’s also smart to clean up spills like oil or wine as soon as you spot them to prevent staining. If you’re ever unsure about tackling tough stains or feel the job is too big, professional restoration and sealing services can get your pavers looking brand new again.

Should You DIY or Hire a Pro?

Deciding whether to seal your pavers yourself or call in a pro is one of the biggest questions you’ll face. A DIY project can be really satisfying, but paver sealing isn’t just a simple weekend task. It requires specific tools, some technical know-how, and a decent amount of time. Being honest about the job’s complexity and your own comfort level is key. A misstep could leave you with a finish you don’t love or even cause damage to your beautiful pavers. Let’s walk through the details so you can make the best choice for your home.

When to call a professional

If you’re an experienced DIYer with a small patio, you might feel totally comfortable taking this on. But if you’re short on time, don’t have the right equipment, or are looking at a large area like a long driveway, calling a professional is usually the smarter move. Experts come with commercial-grade tools and the experience to get the job done right and efficiently. They know how to avoid common mistakes, like applying sealer unevenly or trapping moisture underneath, which can save you from some major headaches later. A professional touch ensures your investment is protected and looks fantastic for years.

What a professional service includes

Hiring a professional means you’re getting a complete service, not just a quick coat of sealant. A full package ensures every step is handled with expertise. It usually starts with a thorough, deep cleaning using pressure washers to get rid of all the built-up dirt, grime, and moss. The team will also take care of any necessary repairs and refill the joints with sand. Professionals use high-quality sealants that offer much better protection and longevity. Plus, many reputable companies provide a detailed assessment before starting and a warranty on their work, giving you complete peace of mind.

How Gappsi can help Long Island homeowners

For those of us on Long Island, our pavers put up with a lot, from humid summers to freezing winters. Gappsi offers expert restoration and sealing services tailored to our local climate. Our team knows exactly how to treat different types of natural stone and pavers to protect them from the harsh elements. We start with a detailed evaluation of your patio, walkway, or driveway, followed by a professional cleaning and the application of premium sealants. We handle all the details, taking the guesswork out of the process and leaving you with a durable, beautiful finish for your outdoor space.

Related Articles

Frequently Asked Questions

Can I seal my brand new pavers immediately after they’re installed? It’s best to wait a few months before sealing brand new pavers. New pavers often release natural mineral salts, which can create a temporary white, chalky film on the surface called efflorescence. If you seal them too soon, you will trap that white haze underneath the sealer. Giving your pavers some time to breathe and weather naturally ensures you get a clear, beautiful finish when you finally apply the sealer.

Will sealing my pavers make them slippery, especially around my pool? This is a great question and a common concern. A properly applied sealer should not make your pavers dangerously slippery. The key is to apply it in thin, even coats. Slipperiness usually happens when too much sealer is applied, creating a thick film on the surface instead of soaking into the paver. For extra peace of mind in wet areas, you can also look for sealers that contain anti-slip additives.

How long does the entire paver sealing process take from start to finish? You should plan for this to be a multi-day project, mostly due to drying times. After a deep cleaning, you need to let the pavers dry completely, which takes at least 24 to 48 hours. Applying the sealer itself is relatively quick, but you will need to wait for the first coat to dry before adding a second. After the final coat, the surface needs to cure for 24 to 72 hours before it can handle foot traffic or cars.

What happens if I mess up? Can a bad sealing job be fixed? Fixing a bad sealing job is possible, but it is a difficult process. If the sealer was applied incorrectly and looks cloudy or blotchy, the only solution is to chemically strip it all off and start over. This is a labor-intensive task that requires harsh chemicals and a lot of scrubbing. It’s a big reason why taking your time, doing a spot test, and following all the prep steps is so important.

Is it really worth the cost to hire a professional for this? Hiring a professional is a great choice if you want to guarantee a perfect finish without the stress. A pro has the commercial-grade equipment for deep cleaning and the experience to choose the exact right sealer for your specific stone. They know how to avoid all the common pitfalls, like applying too much product or sealing over a damp surface. It takes the guesswork out of the project and ensures your investment is protected correctly from the start.

Pressure washing a paver patio in preparation for sealing for beginners.

Paver Sealing for Beginners: Your How-To Guide

Are you noticing weeds popping up between your pavers? Or maybe a few stubborn stains from last summer’s barbecue that just won’t budge? Without a protective layer, your beautiful pavers are exposed to everything from spilled drinks to harsh sun, which can lead to permanent damage. The good news is there’s a straightforward solution: paver sealing. This simple process creates a barrier that locks out stains and prevents fading. In this guide to paver sealing for beginners, we’ll walk you through every step, ensuring your hardscape stays as stunning as the day it was installed.

Key Takeaways

  • Sealing is essential protection: Think of sealer as a shield for your investment. It guards your pavers against stains, prevents color fading from the sun, and makes routine cleanups much easier.
  • Preparation determines the result: A beautiful, long-lasting finish starts with proper prep. Your pavers must be completely clean and dry, with joints properly filled, before you apply the first drop of sealer.
  • Work with the weather, not against it: For a successful application, choose a mild day with no rain in the forecast. The right conditions are crucial for preventing a cloudy finish and ensuring the sealer cures properly.

What Is Paver Sealing and Why Is It Important?

Think of paver sealing as the final, protective touch for your beautiful patio, walkway, or driveway. It’s a simple step that makes a huge difference in how your outdoor spaces look and how long they last. A sealer is a liquid coating that you apply over your pavers, creating an invisible shield that guards against the elements. It’s one of the best ways to protect your investment and keep your hardscaping looking as good as the day it was installed. Let’s walk through exactly why it’s such a crucial part of paver maintenance.

The benefits of sealing your pavers

Sealing your pavers is one of the smartest things you can do to protect your outdoor living area. This protective coating helps your pavers resist stains from things like spilled drinks, oil, and fallen leaves. It also shields them from the sun’s harsh UV rays, which prevents their beautiful colors from fading over time. Beyond protection, a sealer can enhance the look of your pavers, bringing out their rich tones and giving them a clean, finished appearance. Plus, it makes cleanup a breeze. A quick sweep or a rinse with soap and water is usually all it takes to keep sealed pavers looking fresh, saving you time and effort on maintenance.

What happens if you don’t seal your pavers?

If you decide to skip the sealer, your pavers are left exposed to everything nature throws at them. Without that protective layer, they can easily absorb spills, leading to permanent stains. Over time, you might notice mildew or rust spots appearing, and the vibrant color of your pavers can start to look dull and faded from sun exposure. Harsh weather can also take a toll, causing pavers to degrade more quickly. While you might choose to leave pavers unsealed in a very low-traffic area to preserve their natural texture, for most patios and driveways, sealing is the best way to protect your beautiful masonry and avoid difficult repairs down the road.

How to Choose the Right Paver Sealer

Choosing the right sealer can feel overwhelming, but it boils down to your paver type and the look you want. The right product protects your investment and enhances the beauty of your outdoor space. Before you buy, let’s break down the key factors to help you make a confident choice.

Water-based vs. solvent-based sealers

Your first choice is between water-based and solvent-based formulas. Water-based sealers are eco-friendly, low-odor, and a great match for concrete pavers. They create a breathable film that helps lock joint sand in place while allowing any trapped moisture to escape. Solvent-based sealers contain more acrylic solids and are known for deeply enhancing the color and texture of pavers. They are often the top choice for bringing out the rich tones in porcelain and natural stone pavers or clay bricks, providing a vibrant finish and excellent UV protection against the sun.

Pick your finish: matte, satin, or gloss

The sealer’s finish determines the final look of your pavers, much like picking a paint sheen. If you love the natural, unaltered appearance of your stone, a matte finish provides protection without adding shine. For a bit more flair, a satin or semi-gloss finish offers a subtle sheen that makes the colors pop. If you want a bold, dramatic effect, a high-gloss or “wet look” sealer will give your pavers a dark, reflective surface, as if they were just rained on. This choice is all about personal style, so consider how it complements your home’s overall aesthetic and the masonry work you want to feature.

Match the sealer to your paver type

Using the right sealer for your specific paver material is non-negotiable. Porous concrete pavers, for example, need a “breathable” sealer that lets moisture escape to prevent a cloudy film from forming. Denser materials like clay brick or certain natural stones require a sealer that can bond properly to their less porous surface. A good seal also helps harden any polymeric sand in the joints, keeping it from washing away during the next downpour. Always check the product label for compatibility to avoid issues. If you’re unsure, our professional restoration and sealing services can ensure the job is done right with the perfect product for your pavers.

Gather Your Tools and Materials

Getting your supplies together before you start is one of the best things you can do to make this project go smoothly. Think of it like preparing a recipe; having everything measured and within reach makes the actual process much more enjoyable and efficient. A little prep work now saves you from making frantic trips to the store mid-project. You’ll need three main categories of items: supplies for cleaning, tools for applying the sealer, and gear to keep you safe. Let’s break down exactly what you should have on hand before you apply that first drop of sealer.

Cleaning supplies

Your pavers need to be completely clean for the sealer to adhere properly and last as long as possible. A pressure washer is fantastic for lifting dirt and grime, but be gentle if you have sand in your paver joints, as you don’t want to blast it all out. For stubborn oil spots or leaf stains, a stiff-bristled deck brush and a good paver cleaner will be your best friends. You can also create a simple solution of dish soap and water for general cleaning. Taking the time for a thorough cleaning is a non-negotiable step for a professional-looking finish. If you run into tough stains, our restoration and sealing services can get your surface ready for sealing.

Application tools

When it’s time to apply the sealer, having the right tools makes all the difference in achieving an even, consistent coat. A garden pump sprayer is often the easiest and fastest method, allowing you to apply a thin, uniform layer across a large area. Alternatively, you can use a roller with a thick nap, about 3/4 to 1 inch, attached to an extension pole. This method is great for working the sealer into the texture of the pavers and ensuring full coverage. It’s also a good idea to have a small paintbrush handy for cutting in along edges or walls where a sprayer or roller can’t reach.

Safety gear

Please don’t skip this part. Working with chemical sealers requires you to protect yourself. At a minimum, you should have chemical-resistant gloves to keep the sealer off your skin and safety glasses to protect your eyes from any splashes. If you are working with a solvent-based sealer or are sensitive to strong smells, a respirator mask is a very good idea. It’s also smart to wear old clothes you don’t mind getting stained, along with closed-toe shoes. These simple DIY safety precautions are easy to take and ensure your paver sealing project is safe from start to finish.

Find the Best Time to Seal Your Pavers

Timing is just as important as technique when sealing pavers. Applying sealer under the wrong conditions can ruin the finish and waste your effort. To get that perfect, durable coat, you need to work with the weather, not against it. Here’s how to pick the best time for the job.

Ideal temperature range

When it comes to sealing your pavers, think of it like Goldilocks: you need the temperature to be just right. The sweet spot is between 50 and 90 degrees Fahrenheit, with 75 degrees being pretty much perfect. If you try to apply sealer when it’s too hot, it can dry too quickly, leading to a blotchy or peeling finish. On the other hand, if it’s too cold, the sealer won’t cure properly. Before you start, check the forecast for the day and the next couple of days to make sure you have a good window. Getting the timing right is a huge part of achieving a professional look, but if you’re ever unsure, our restoration and sealing services team can handle it for you.

Weather and moisture checks

Moisture is the enemy of a fresh coat of sealer. You’ll want to work on a clear, sunny day with no rain in the forecast for at least 24 to 48 hours after you finish. Any rain can wash away the sealer or create a cloudy, uneven look. Also, if your pavers are new, you might notice a hazy white film on the surface. This is called efflorescence, and it’s just natural salts coming out of the stone. It’s best to wait for this to disappear on its own before sealing, which can take a few months. Trying to seal over it will only trap the white film underneath. Patience here will pay off with a much cleaner result for your beautiful natural stone pavers.

Sun exposure and time of day

The time of day you choose to seal your pavers matters, too. It’s generally best to start your project in the morning. This gives the sealer plenty of time to dry before the evening dew sets in, which can add unwanted moisture. You should also try to avoid working in direct, intense sunlight, as it can heat the paver surface too much and cause the sealer to dry too fast. Another thing to watch out for is wind. A windy day can blow dust, leaves, and other debris onto your wet sealer, getting trapped in the finish. Picking a calm, clear morning is your best bet for a smooth, flawless application.

How to Prepare Your Pavers for Sealing

Proper preparation is the secret to a flawless, long-lasting paver seal. Skipping these steps can trap dirt, moisture, and stains under the sealer, leading to a cloudy finish and potential damage down the road. Think of it like painting a room; you would not just paint over a dirty wall. Taking the time to prep your patio, walkway, or driveway ensures the sealer adheres correctly and gives you that beautiful, protective finish you’re looking for. Follow these six steps to get your pavers ready for their new coat.

Step 1: Clear the area

First things first, you need a completely empty canvas. Move all patio furniture, grills, planters, and outdoor decor off the paver surface. This gives you unobstructed access to every inch of the area, ensuring you do not miss any spots during the cleaning and sealing process. It also protects your belongings from cleaning solutions and sealer overspray. Find a temporary home for these items on your lawn or in the garage. A clear space not only makes the job easier and safer but also guarantees a more uniform and professional-looking result when you’re finished.

Step 2: Deep clean the surface

With the area clear, it’s time to give your pavers a thorough cleaning. Start by using a stiff-bristle broom to sweep away all loose debris like leaves, dirt, and twigs. Next, you’ll want to wash the surface. A pressure washer is very effective for this, but a garden hose with a high-pressure nozzle can also work. Spray the pavers at a slight angle, working in sections and overlapping your passes to lift away ground-in dirt and grime. This deep clean is essential for allowing the sealer to bond directly with the paver material. If the job feels too big, professional cleaning and sealing services can handle the deep cleaning for you.

Step 3: Remove stains, weeds, and efflorescence

Now, inspect the surface for any lingering issues. Pull any weeds that have sprouted up between the paver joints. For stubborn oil, grease, or rust stains, you may need a specialized paver cleaner designed for that specific type of spot. You might also notice a white, chalky film on the surface, which is called efflorescence. This is just salt residue that has migrated out of the pavers. You can typically remove it by scrubbing the area with an efflorescence cleaner. Addressing these specific problems now prevents them from being permanently trapped under the new layer of sealer.

Step 4: Fill joints with polymeric sand

After a deep clean, you may find that some of the sand between the paver joints has washed away. Refilling these gaps is crucial for stabilizing the pavers and preventing future weed growth. Polymeric sand is the best choice for this job. It’s a fine sand mixed with a binding agent that hardens when activated with water. Sweep the sand across the dry paver surface until all the joints are completely full. Then, use a leaf blower on a low setting to blow any excess sand off the paver tops. This step ensures your masonry work remains stable and secure for years to come.

Step 5: Let the pavers dry completely

Patience is key for this step. Before you even think about opening a can of sealer, the pavers and the sand in the joints must be bone dry. Applying sealer to a damp surface can trap moisture, resulting in a hazy, white finish that is very difficult to fix. In dry, sunny weather, you should wait at least 24 hours after cleaning or a rainstorm. If it’s humid or overcast, it’s safer to wait 48 hours or more. To be certain, you can touch the joints to feel for any dampness. It’s always better to wait an extra day than to rush and ruin the entire project.

Step 6: Do a spot test first

Before you commit to sealing the entire area, perform a small spot test. Choose an inconspicuous spot, like a corner behind a planter, and apply the sealer according to the manufacturer’s directions. Let it dry completely so you can see the final result. This simple test allows you to check two important things: the color and the finish. Some sealers can slightly darken or enrich the color of your pavers, and this test ensures you like the change. It also confirms the sealer dries clear and does not have any adverse reactions with your specific paver material. This little bit of due diligence can save you from a big headache later.

Apply the Sealer: A Step-by-Step Guide

Now for the main event: applying the sealer. With your pavers clean, dry, and ready, you’re on the final stretch. This is where your hard work pays off, creating a protective shield that will keep your patio or driveway looking fantastic. The key is to work methodically with thin, even coats. A little patience ensures a beautiful finish without streaks. If you decide this part is better left to the experts, Gappsi offers professional restoration and sealing services to handle it for you.

Step 7: Apply the first coat in sections

To avoid painting yourself into a corner, start applying the sealer at the farthest point from your exit. Working in small, manageable sections of about four-by-four feet helps maintain a wet edge and prevent overlap marks. Use a roller for large areas and a small paintbrush for edges and corners. Apply a thin, even coat, making sure not to let the sealer pool in the joints. A good strategy is to outline your section first, then fill in the middle. This approach ensures complete coverage and a smooth finish across your beautiful porcelain and natural stone pavers.

Step 8: Let it dry and apply a second coat

Patience is your best friend during the drying phase. Most sealers require at least two coats, and you need to let the first coat dry completely before applying the next. Rushing this can trap moisture between the layers, resulting in a cloudy appearance that’s difficult to fix. Check the manufacturer’s instructions, but a good rule is to wait a full day between coats, as humidity can slow drying time. Once the first coat is dry to the touch and no longer tacky, you can apply the second coat using the same technique.

Step 9: Understand the curing process

Drying and curing are two different things. While the sealer might feel dry in a few hours, it needs more time to cure, which means it’s fully hardening and bonding to the paver. This is a critical period for long-term durability. As a guideline, wait at least 24 hours before allowing light foot traffic. For driveways, wait at least 72 hours before parking on them. During this time, keep the area completely dry, so turn off any nearby sprinklers. Properly protecting your pavers now ensures they’ll stand up to years of enjoyment.

Avoid These Common Paver Sealing Mistakes

Sealing your pavers seems straightforward, but a few common missteps can lead to a finish you’re not happy with. Taking the time to get it right ensures your patio, walkway, or driveway looks great and stays protected for years. By avoiding these simple mistakes, you can achieve a professional-quality result that preserves the beauty of your outdoor space. Think of it as the final, protective touch that locks in the investment you’ve put into your hardscape. If you’re ever in doubt or just want to ensure a perfect finish without the hassle, remember that a professional restoration and sealing service can handle the job for you.

Sealing pavers that are wet or dirty

This is the most common mistake, and it’s a big one. Applying sealer over dirt, stains, or grime will trap them against the paver’s surface, making them a permanent feature. Before you even think about opening a can of sealer, you need to make sure your pavers are spotless. More importantly, the surface must be completely dry. Sealing damp pavers can trap moisture, leading to a cloudy, hazy finish or causing the sealer to peel away later. Plan for at least 24 to 48 hours of dry weather after cleaning to let your pavers air out entirely. A little patience here goes a long way.

Applying too much sealer

When it comes to paver sealer, more is definitely not better. The goal is to apply a thin, even coat that absorbs into the paver’s pores. Drenching the surface with too much product can create a thick film on top that looks blotchy and feels sticky. An overly thick coat can also make your pavers dangerously slippery when wet, which is a major safety concern for pool decks and walkways. Stick to the “less is more” approach. A light, uniform layer is all you need for effective protection and a beautiful finish. You can always add a second thin coat if needed.

Working in direct sun or extreme temperatures

The weather plays a huge role in how well your sealer applies and cures. Sealing in the scorching midday sun or on a very hot day can cause the sealer to dry too quickly, before it has a chance to properly bond with the paver. This can result in streaks, bubbles, or a peeling finish. On the other hand, applying it in temperatures that are too cold can prevent it from curing correctly. The ideal temperature is typically between 50 and 90 degrees Fahrenheit. Always check the forecast and plan your project for a mild, overcast day if possible for the best application conditions.

Sealing over white, chalky residue

Have you ever noticed a white, chalky film on your pavers? This is a natural phenomenon called efflorescence, caused by mineral salts migrating to the surface. If you apply sealer over this residue, you’ll trap it, leaving a permanent white haze on your beautiful pavers. While efflorescence often fades on its own over several months, you can also remove it with a specialized cleaner before sealing. Don’t seal until every trace of that white powder is gone. This ensures your sealer enhances the true color of your porcelain and natural stone, rather than obscuring it.

Ignoring the manufacturer’s instructions

Every sealer formula is slightly different, with its own specific application methods and drying times. It might be tempting to just get started, but skipping the instructions on the product label is a recipe for failure. The manufacturer provides the best guidelines for everything from the ideal application temperature to how long you should wait between coats. Following these directions is the single best thing you can do to ensure a successful project. You can find professional-grade products and expert advice at the Gappsi Store to get you started on the right foot and answer any questions you might have.

How Often Should You Reseal Your Pavers?

Sealing your pavers is a fantastic way to protect your investment, but it’s not a one-and-done task. The sealer acts as a shield for your patio or driveway, and over time, it wears down from traffic and weather. Knowing when to reapply it is key to keeping your pavers looking great. The good news is your pavers will give you clear signals when they need attention.

Signs it’s time for a fresh coat

As a general rule, plan to reseal your pavers every three to five years. Your pavers might tell you they need it sooner, though. The most obvious sign is that their color looks dull or faded. The vibrant look they had when the sealer was fresh will start to disappear. You can also do a quick water test: splash a little water on the surface. If it beads up, your sealer is still working. If the water soaks in and darkens the paver, it’s time for a new coat. You might also notice a hazy white film, called efflorescence, which should clear up before you apply a new seal.

Factors that affect resealing frequency

The three-to-five-year timeline is a great starting point, but several factors can change how often you’ll need to reseal. High-traffic areas, like your driveway, will naturally wear down faster than a secluded garden path. Long Island’s weather also plays a big role; constant exposure to sun, rain, and winter ice can break down the sealer more quickly. The type of paver matters, too. Different porcelain and natural stone materials may have unique requirements. Ultimately, it also comes down to personal preference and how much you want to maintain that enhanced, just-installed look.

Tips to maintain your sealed pavers

A little upkeep can go a long way in extending the life of your paver sealer. The best thing you can do is keep the surface clean. Sweep away leaves and dirt regularly so they don’t get ground into the sealer. For a deeper clean, a simple mix of mild soap and water with a gentle scrub is all you need. It’s also smart to clean up spills like oil or wine as soon as you spot them to prevent staining. If you’re ever unsure about tackling tough stains or feel the job is too big, professional restoration and sealing services can get your pavers looking brand new again.

Should You DIY or Hire a Pro?

Deciding whether to seal your pavers yourself or call in a pro is one of the biggest questions you’ll face. A DIY project can be really satisfying, but paver sealing isn’t just a simple weekend task. It requires specific tools, some technical know-how, and a decent amount of time. Being honest about the job’s complexity and your own comfort level is key. A misstep could leave you with a finish you don’t love or even cause damage to your beautiful pavers. Let’s walk through the details so you can make the best choice for your home.

When to call a professional

If you’re an experienced DIYer with a small patio, you might feel totally comfortable taking this on. But if you’re short on time, don’t have the right equipment, or are looking at a large area like a long driveway, calling a professional is usually the smarter move. Experts come with commercial-grade tools and the experience to get the job done right and efficiently. They know how to avoid common mistakes, like applying sealer unevenly or trapping moisture underneath, which can save you from some major headaches later. A professional touch ensures your investment is protected and looks fantastic for years.

What a professional service includes

Hiring a professional means you’re getting a complete service, not just a quick coat of sealant. A full package ensures every step is handled with expertise. It usually starts with a thorough, deep cleaning using pressure washers to get rid of all the built-up dirt, grime, and moss. The team will also take care of any necessary repairs and refill the joints with sand. Professionals use high-quality sealants that offer much better protection and longevity. Plus, many reputable companies provide a detailed assessment before starting and a warranty on their work, giving you complete peace of mind.

How Gappsi can help Long Island homeowners

For those of us on Long Island, our pavers put up with a lot, from humid summers to freezing winters. Gappsi offers expert restoration and sealing services tailored to our local climate. Our team knows exactly how to treat different types of natural stone and pavers to protect them from the harsh elements. We start with a detailed evaluation of your patio, walkway, or driveway, followed by a professional cleaning and the application of premium sealants. We handle all the details, taking the guesswork out of the process and leaving you with a durable, beautiful finish for your outdoor space.

Related Articles

Frequently Asked Questions

Can I seal my brand new pavers immediately after they’re installed? It’s best to wait a few months before sealing brand new pavers. New pavers often release natural mineral salts, which can create a temporary white, chalky film on the surface called efflorescence. If you seal them too soon, you will trap that white haze underneath the sealer. Giving your pavers some time to breathe and weather naturally ensures you get a clear, beautiful finish when you finally apply the sealer.

Will sealing my pavers make them slippery, especially around my pool? This is a great question and a common concern. A properly applied sealer should not make your pavers dangerously slippery. The key is to apply it in thin, even coats. Slipperiness usually happens when too much sealer is applied, creating a thick film on the surface instead of soaking into the paver. For extra peace of mind in wet areas, you can also look for sealers that contain anti-slip additives.

How long does the entire paver sealing process take from start to finish? You should plan for this to be a multi-day project, mostly due to drying times. After a deep cleaning, you need to let the pavers dry completely, which takes at least 24 to 48 hours. Applying the sealer itself is relatively quick, but you will need to wait for the first coat to dry before adding a second. After the final coat, the surface needs to cure for 24 to 72 hours before it can handle foot traffic or cars.

What happens if I mess up? Can a bad sealing job be fixed? Fixing a bad sealing job is possible, but it is a difficult process. If the sealer was applied incorrectly and looks cloudy or blotchy, the only solution is to chemically strip it all off and start over. This is a labor-intensive task that requires harsh chemicals and a lot of scrubbing. It’s a big reason why taking your time, doing a spot test, and following all the prep steps is so important.

Is it really worth the cost to hire a professional for this? Hiring a professional is a great choice if you want to guarantee a perfect finish without the stress. A pro has the commercial-grade equipment for deep cleaning and the experience to choose the exact right sealer for your specific stone. They know how to avoid all the common pitfalls, like applying too much product or sealing over a damp surface. It takes the guesswork out of the project and ensures your investment is protected correctly from the start.

Modern patio built with Nicolock PaverShield pavers, showing their vibrant, long-lasting color.

Nicolock Pavers PaverShield: A Homeowner’s Guide

As Long Island’s premier outdoor living designers, we’ve worked with countless materials over the years. Our experience has shown us what truly stands up to our local climate. When homeowners ask for a paver that combines timeless beauty with exceptional durability, we consistently recommend one product. The advanced technology behind Nicolock pavers PaverShield makes them a reliable choice for any project. Their ability to resist fading and withstand harsh weather is unmatched. In this post, we’ll share our expert insights on why these pavers are a smart choice for your home and how our masonry team ensures a perfect installation.

Key Takeaways

  • Prioritize Fade-Proof Color: Unlike standard pavers, Nicolock’s color is mixed throughout the entire stone. This Paver-Shield technology means your patio or driveway will resist fading from sun and wear, keeping its vibrant look for years.
  • Choose Pavers Built for Our Climate: Nicolock pavers are engineered to handle Long Island’s weather. Their dense structure resists damage from winter freeze-thaw cycles and salt, resulting in a durable, low-maintenance surface that lasts.
  • Invest with Confidence: The versatility of Nicolock pavers allows for a cohesive design across your property. They are also backed by a transferable lifetime warranty, which protects your investment and provides long-term peace of mind.

What Are Nicolock Pavers?

If you’re planning a new patio, walkway, or driveway, you’ve probably discovered that not all pavers are created equal. Nicolock pavers are a top-tier choice for outdoor landscaping projects, known for their exceptional durability and rich, long-lasting color. Think of them as the gold standard for creating beautiful and resilient outdoor living spaces. Unlike basic concrete pavers that can fade and wear over time, Nicolock products are engineered with advanced technology to look stunning for decades.

At their core, Nicolock pavers are high-quality paving stones designed to handle everything from backyard barbecues to Long Island’s demanding weather. They are manufactured with a special process that ensures strength and vibrant color from top to bottom. This makes them a smart investment for homeowners who value both beauty and performance. When you choose Nicolock, you’re not just getting a paver; you’re getting a foundation for your home’s curb appeal and a key element in your masonry design. We’ll get into the specifics of the technology later, but for now, just know that these pavers are built to impress and built to last.

How They’re Made

The secret behind Nicolock’s quality is its innovative Paver-Shield™ technology. This isn’t just a surface coating. During manufacturing, a smooth, ultra-dense layer of color is fused to the core of every paver. This process uses high-quality materials and iron oxide pigments, ensuring the color is integrated throughout the top portion of the stone. Because the color runs deep, it’s guaranteed not to fade from sun exposure or wear and tear. This advanced manufacturing process creates a paver that is not only beautiful but also incredibly strong and resistant to chipping or cracking, giving you a reliable and attractive surface for years to come.

A Look at Styles, Colors, and Sizes

One of the best parts about designing with Nicolock is the sheer variety of options available. Whether your home’s style is modern, rustic, or traditional, there’s a paver that fits your vision. Nicolock offers an extensive selection of shapes, textures, and rich color blends that mimic the look of natural stone. You can explore everything from the clean lines of the Alpine Contemporary style to the classic look of Cobblestone or the unique shape of a Hex Paver. With so many Paver-Shield™ paving stones to choose from, you have the creative freedom to design a truly personalized outdoor space that reflects your taste and complements your home’s architecture.

What Is Nicolock Paver-Shield Technology?

When you invest in a new patio or driveway, you want it to look great for years, not just for the first season. Nicolock’s Paver-Shield technology is a special manufacturing process designed to make that happen. Think of it as a built-in defense system for your pavers. This innovative method ensures the color stays vibrant and the surface remains smooth, solving some of the most common issues homeowners face with outdoor hardscapes.

The entire process focuses on creating a paver that is dense, strong, and deeply colored from top to bottom. Unlike standard pavers that can show wear and tear over time, those with Paver-Shield are engineered for superior durability and lasting beauty. This makes them an excellent choice among the high-quality porcelain and natural stone pavers available for your home. It’s this commitment to quality that makes Nicolock a standout option for any outdoor project, from a welcoming walkway to an expansive outdoor living area.

The Secret to Lasting Color

One of the biggest disappointments with standard pavers is watching their color fade under the sun. Nicolock tackles this head-on with its unique color-mixing method. The secret is that the color isn’t just a thin layer on top; it permeates the entire paver. Nicolock explains that “the color goes all the way through the paving stone, from top to bottom.” They achieve this by mixing rich iron oxide pigments throughout the stone during manufacturing. This means that even with heavy foot traffic and constant exposure to the elements, the vibrant hue you fell in love with will not fade away.

A Closer Look at the Smooth, Dense Surface

Have you ever walked barefoot on an old paver patio and felt the rough, gritty surface? Paver-Shield technology helps prevent that. The manufacturing process creates an exceptionally tight and dense surface, which gives the pavers a smooth, refined finish. According to Nicolock, “these pavers have a tight, smooth surface that stays nice,” maintaining their elegant appearance for years. This is especially important for areas like pool decks, where comfort underfoot is key. This smooth finish not only feels better but also contributes to the paver’s overall strength. We often recommend them when we install swimming pools for this very reason.

Paver-Shield vs. Standard Pavers: What’s the Difference?

So, what really sets a Paver-Shield paver apart from a standard one? The difference lies in how they age. With many traditional pavers, weathering and foot traffic can eventually wear down the top layer, exposing the larger stones (or aggregate) underneath. This can make the surface look “rough, worn, and faded,” as Nicolock points out. Paver-Shield technology was specifically developed to prevent this. By creating a paver with consistent color and a dense composition, Nicolock ensures your hardscape maintains its original character and quality. When you choose Paver-Shield, you’re choosing a product designed by masonry experts to look and perform its best for a lifetime.

Key Benefits of Nicolock Paver-Shield Pavers

When you’re investing in your home’s outdoor space, you want materials that look beautiful and last for years. Nicolock pavers with Paver-Shield technology deliver on both fronts. They offer some incredible advantages that make them a top choice for Long Island homeowners. Let’s walk through what makes these pavers such a smart and reliable option for your next project.

Built to Withstand the Elements

Living on Long Island means dealing with everything from hot summers to freezing winters. Your outdoor surfaces need to be tough. Nicolock’s Paver-Shield technology creates pavers that are incredibly strong and durable, designed to handle heavy foot traffic around a busy swimming pool and resist wear from harsh weather. This means your patio or walkway will stay intact and look great for a long time. You can worry less about cracks and damage and more about enjoying your beautiful outdoor space, knowing it’s built to endure.

Enjoy Vibrant Color for Years to Come

One of the biggest worries with colored pavers is fading. Nicolock solves this problem beautifully. With Paver-Shield pavers, the color isn’t just a top layer; it’s mixed throughout the entire stone. This process ensures a rich, consistent color that won’t fade, even under intense summer sun. Your patio will keep its vibrant, ‘just installed’ look for years. This deep color saturation is a key reason they stand out among other porcelain and natural stone options, giving you lasting beauty you can count on.

Spend Less Time on Upkeep

Let’s be honest, you want to spend your weekends relaxing on your patio, not scrubbing it. Nicolock Paver-Shield pavers are a fantastic choice for busy homeowners because they are designed for minimal maintenance. Their smooth, dense surface resists stains and makes cleaning simple, so you won’t have to deal with constant upkeep to keep your outdoor areas looking pristine. This means more time for family gatherings. When it is time for a deep clean, our professional restoration and sealing services can make them look brand new again.

Peace of Mind with a Lifetime Warranty

Making a significant investment in your home can feel daunting, which is why a good warranty is so important. Nicolock stands firmly behind its products by offering a transferable limited lifetime warranty. This shows their confidence in the durability and long-term performance of Paver-Shield technology. For you as a homeowner, this provides incredible peace of mind. You know that your investment is protected for the long haul. It’s a promise of quality that ensures your new outdoor space is built to last and adds value to your home.

Where Can You Use Nicolock Paver-Shield Pavers?

One of the best things about Nicolock pavers with Paver-Shield technology is their versatility. You can use them for nearly any outdoor project you can imagine. Because they are engineered for both beauty and durability, they are a fantastic choice for creating a cohesive, high-end look across your entire property. From the front curb to the backyard, these pavers provide a consistent and polished look that holds up to the demands of daily life and Long Island’s four-season climate.

Creating Stunning Patios and Outdoor Living Areas

Your patio is the heart of your backyard, a place for grilling, relaxing, and making memories. Nicolock Paver-Shield pavers are perfect for these essential outdoor living spaces. Their inherent strength ensures your patio can handle heavy furniture and high foot traffic without showing wear. Plus, the Paver-Shield technology means the rich color you choose will stay vibrant for years, resisting sun fade. With a huge selection of styles, from modern to rustic, you can design a patio that matches your home’s aesthetic. Gappsi’s expert masonry team can help you craft a custom layout that brings your vision to life.

Designing Welcoming Driveways and Front Entrances

Your driveway makes the first impression, playing a huge role in your home’s curb appeal. Nicolock Paver-Shield pavers offer the perfect combination of beauty and brawn for this high-impact area. They are designed to withstand the weight of vehicles, so you don’t have to worry about cracking. They also stand up beautifully to Long Island’s weather, from summer heat to winter snow and de-icing salts. Unlike asphalt, a paver driveway adds elegance. By choosing from Gappsi’s wide array of porcelain and natural stone options, including Nicolock, you can create a grand entrance that is both welcoming and incredibly durable.

Perfecting Your Pool Decks, Walkways, and Paths

Around your pool, safety and durability are just as important as style. Nicolock Paver-Shield pavers are an excellent choice for pool decks because many styles offer a slip-resistant texture for better grip. The color is infused throughout the entire paver, so it won’t fade from constant exposure to sunlight and pool chemicals, keeping your pool area looking pristine. This same durability makes them ideal for creating walkways that connect different parts of your yard. You can create a seamless flow from your patio to your swimming pool or through a garden, turning simple paths into beautiful landscape features.

Are Nicolock Pavers Right for Long Island’s Climate?

When you’re investing in a new patio, driveway, or walkway, you want to know it will last. Here on Long Island, our weather can be tough on outdoor materials, with freezing winters and humid summers. The good news is that Nicolock pavers are specifically engineered to handle these exact conditions. Their unique manufacturing process and durable materials make them an excellent choice for any home in Suffolk or Nassau County. Let’s look at exactly how they hold up to our local climate.

Standing Up to Freeze-Thaw Cycles

One of the biggest challenges for any paved surface on Long Island is the freeze-thaw cycle. This happens when moisture seeps into tiny pores in a material, freezes, expands, and then thaws, creating cracks and movement over time. Nicolock pavers are designed to combat this problem head-on. They are manufactured to be incredibly dense, which significantly reduces water absorption. This means there’s very little opportunity for water to get inside and cause damage during a freeze. As a result, your patio or driveway is far less likely to crack, shift, or heave, even after a long, cold winter. Proper masonry installation is key to ensuring this performance for years to come.

How They Handle Salt and Moisture

Between winter de-icing and coastal air, salt and moisture are a constant presence on Long Island. These elements can be corrosive, causing standard pavers to pit, spall, or lose their color. This is where Nicolock’s Paver-Shield technology truly shines. It creates an ultra-smooth, non-porous surface that acts as a barrier, protecting the paver from salt and chemical penetration. This resilience makes them a perfect material for driveways and walkways that see winter salt. It also makes them ideal for pool decks, where they can easily withstand splashes of chlorinated or salt water without fading or deteriorating. For added protection, professional restoration and sealing can extend the life of any paver, but with Nicolock, you start with a huge advantage.

Choosing an Eco-Friendly Permeable Option

Managing stormwater runoff is becoming increasingly important for protecting our local environment. Nicolock offers permeable paver options that provide an attractive and eco-friendly solution. Unlike traditional solid surfaces that cause water to run off into storm drains, permeable pavers have small gaps between them filled with fine gravel. This design allows rainwater to filter through the surface and absorb naturally into the ground below. This process helps reduce local flooding, recharge our groundwater supply, and filter out pollutants. Choosing a permeable system means you can have a beautiful, durable driveway or patio that also does its part for the Long Island ecosystem.

Common Myths About Paver-Shield Pavers

When you’re investing in a new patio or driveway, you want to be sure you’re making the right choice. It’s easy to get overwhelmed by conflicting advice, so let’s clear the air. We’re going to walk through some of the most common myths about Nicolock’s Paver-Shield pavers and separate the facts from fiction. Understanding the truth behind these materials will help you feel confident in your decision and know what to expect from your beautiful new outdoor space for years to come. These pavers are a popular choice for everything from walkways to pool decks, and for good reason. Let’s look at what makes them stand out.

Myth #1: “All Pavers Fade Eventually”

This is a valid concern. You picture your perfect patio, and the last thing you want is for its rich color to wash out after a few seasons. While many standard pavers do fade from sun exposure and wear, Nicolock pavers with Paver-Shield technology are different. The secret is that their color isn’t just a top layer; it’s mixed throughout the entire stone. This through-and-through color means that even as the paver wears naturally over decades, the vibrant hue remains consistent. Your investment continues to look as stunning as the day it was installed, standing up to Long Island’s sun and weather without losing its appeal.

Myth #2: “Premium Pavers Mean More Maintenance”

This is a myth I love to bust because it’s often the other way around. You might think a premium product requires delicate, complicated care, but Nicolock pavers are built for real life. The Paver-Shield manufacturing process creates an incredibly dense and smooth surface. This finish not only looks great but also makes the pavers less porous, so they resist stains from spills, dirt, and leaves. While professional restoration and sealing is always an option for long-term protection, your day-to-day upkeep will be minimal. This means you get to spend more time enjoying your beautiful patio and less time worrying about its maintenance.

Myth #3: “A Paver Is Just a Paver”

This is like saying all cars are the same. On the surface, pavers might look similar, but the real difference lies in how they are made and how they perform over time. Nicolock’s commitment to quality is clear in their process. Each paver undergoes strict quality checks to ensure superior strength and a tight, uniform texture. While other pavers might look good initially, they can quickly show wear, become faded, and develop a rough surface. Choosing Nicolock is an investment in lasting quality, ensuring your masonry project maintains its elegance and structural integrity for a lifetime.

How to Care for Your Nicolock Pavers

One of the best things about choosing high-quality pavers is that they don’t demand a lot of your time. Keeping your Nicolock pavers looking as good as the day they were installed is surprisingly simple. With a little routine cleaning and knowing when to call for backup, you can protect your beautiful patio, walkway, or driveway for decades. Here’s a straightforward guide to paver care.

Simple Tips for Routine Cleaning

Keeping your pavers looking fresh doesn’t require a complicated routine. For most of the year, a simple sweep or rinse with a garden hose is enough to handle leaves and loose dirt. At least once a year, I recommend giving them a more thorough cleaning to wash away any built-up grime. All you need is a stiff-bristled brush and a mild, pH-neutral cleaner. Just scrub the surface gently and rinse it clean. This simple step helps maintain that vibrant, like-new color and prevents dirt from settling into the paver surface, ensuring your outdoor space is always ready for you to enjoy.

When to Call for Professional Sealing and Restoration

While Nicolock’s Paver-Shield technology makes the pavers incredibly durable, life happens. Spills, heavy foot traffic, and Long Island’s weather can take a toll over many years. Because the color in Paver-Shield pavers runs completely through the stone, you won’t see the kind of patchy fading common with lesser-quality products. However, if you notice stubborn stains that your cleaning efforts can’t remove, or if the surface just doesn’t look as crisp as it used to, it might be time for professional help. Our expert restoration and sealing services can deep clean, treat stains, and apply a high-quality sealer to protect your pavers and restore their original beauty, safeguarding your investment for years to come.

Partner with Gappsi for Your Nicolock Paver Project

Starting a paver project is exciting, but choosing the right materials and contractor can feel like a huge task. When you’re ready to transform your outdoor space, working with an experienced partner makes all the difference. At Gappsi, we specialize in creating beautiful, durable outdoor living areas, and we often recommend Nicolock pavers for their exceptional quality. Their Paver-Shield technology provides a strong, beautiful surface that truly lasts.

The secret to Nicolock’s performance is its unique manufacturing process. Unlike other pavers where color is just a thin top layer, Paver-Shield ensures the rich color penetrates the entire stone. This means that even with years of foot traffic and exposure to the elements, your patio or walkway won’t look faded or worn. Our team brings years of experience in masonry design and construction to every job, so we know how to install these pavers to maximize their beauty and longevity. You get a stunning finish that is built to last, without the worry of chipping or fading color.

Choosing Gappsi for your Nicolock paver installation means you’re getting more than just a new patio; you’re getting peace of mind. We handle every project with expert care, ensuring the final result meets our high standards and your vision. Plus, Nicolock backs their Paver-Shield products with a transferable limited lifetime warranty, protecting your investment for years to come. When you combine a superior product with our expert installation, you get an outdoor space that becomes a true extension of your home. This commitment to quality is central to all our home remodeling projects.

Related Articles

Frequently Asked Questions

What really makes Nicolock Paver-Shield pavers different from standard pavers? The biggest difference is how they age. Many standard pavers have color applied only to the top surface, which can wear away over time, exposing the plain concrete underneath and looking faded. Nicolock’s Paver-Shield technology mixes color all the way through the stone. This means the vibrant hue you choose is there to stay. Their manufacturing process also creates a much denser, smoother surface, so they resist that rough, worn-out look you see on older paver patios.

Are Nicolock pavers worth the higher initial cost? Think of it as an investment in long-term value. While the upfront cost may be higher than some basic pavers, you save money and headaches down the road. Because they are so durable and the color is guaranteed not to fade, you won’t be facing repair or replacement costs in a few years. Their low maintenance nature also saves you time and money on upkeep. When you factor in the transferable lifetime warranty, the long-term value becomes very clear.

How do Nicolock pavers hold up around a swimming pool? They are an excellent choice for pool decks. Many Nicolock styles are designed with a slip-resistant texture, which is a key safety feature for wet surfaces. Furthermore, the Paver-Shield technology makes them highly resistant to fading from constant sun exposure and damage from chlorinated or salt water. Their dense surface also makes them comfortable for bare feet, unlike rougher materials.

What does ‘low maintenance’ actually mean for Nicolock pavers? Low maintenance means you get to spend more time enjoying your patio and less time working on it. For routine care, a simple sweep with a broom or a rinse with a garden hose is usually all you need to clear away leaves and dirt. For a deeper clean once or twice a year, a gentle scrub with a pH-neutral cleaner will keep them looking fresh. You won’t need to perform constant, heavy-duty cleaning to maintain their beauty.

Why is professional installation so important for Nicolock pavers? Even the best paver in the world will fail if the foundation underneath it is not built correctly. Professional installation is critical, especially here on Long Island where our freeze-thaw cycles can cause the ground to shift. An expert team ensures the base is properly excavated and compacted, which prevents your patio or driveway from sinking, shifting, or becoming uneven. Proper installation guarantees your investment looks great and performs correctly for a lifetime.

Rossofuoco Clessidra wood-fired oven with a modern stainless steel design and a fire burning inside.

How to Use the Rossofuoco Clessidra Wood-Fired Oven

If you love cooking outdoors but feel limited by the capabilities of a standard grill, you’re not alone. Achieving that perfect sear on a steak or baking a crusty loaf of bread often feels out of reach. The Wood-fired oven ROSSOFUOCO model CLESSIDRA – was designed to solve these exact problems. This oven gives you the precise temperature control and even heat distribution needed for restaurant-quality results at home. Its smart design eliminates hot spots and makes managing the fire simple, so you can cook with confidence. It’s the ultimate tool for expanding your culinary horizons beyond the grill.

Key Takeaways

  • Master Both High-Heat and Slow-Roasting Techniques: The Clessidra’s unique dual combustion system is its greatest strength, allowing you to cook with intense, direct heat for perfect pizzas or use gentle, indirect heat for baking bread and slow-cooking roasts.
  • Add a Lasting, Stylish Centerpiece to Your Yard: Built with durable Italian craftsmanship, this oven is a long-term investment in your outdoor living space. Its sleek, modern design integrates beautifully, becoming a functional and elegant focal point for any patio.
  • Take the Guesswork Out of Wood-Fired Cooking: Thoughtful features like a built-in thermostat, an internal light, and a separate fire chamber for continuous heat give you precise control, making it easier to manage temperature and achieve consistent, delicious results every time.

What is the Rossofuoco Clessidra Wood-Fired Oven?

If you’ve been dreaming of adding an authentic wood-fired oven to your backyard, the Rossofuoco Clessidra is a name you need to know. This isn’t just any pizza oven; it’s a versatile, Italian-made cooking powerhouse designed for people who are passionate about food and outdoor living. Its standout feature is a unique combustion system that gives you incredible control over your cooking, opening up a world of culinary possibilities right in your own Long Island backyard. Let’s look at what makes the Clessidra so special.

Key Specs and Features

The Clessidra is thoughtfully designed for performance. Its cooking area measures a generous 31.5 inches wide by 25.6 inches deep, giving you plenty of room for multiple pizzas or large roasts. The oven’s most impressive feature is its dual direct and indirect combustion system. This means you can build a fire directly in the main cooking chamber for classic, high-heat pizza making, or use a separate firebox below for slower, more controlled roasting and baking. This flexibility is what truly sets it apart from other outdoor ovens. You can find this and other premium outdoor cooking appliances in the Gappsi store.

Built to Last: Italian Craftsmanship

When you see a “Made in Italy” label, you expect a certain level of quality, and the Clessidra delivers. This oven is a product of exceptional Italian craftsmanship, built with durable materials to withstand the elements and years of use. Every detail is focused on reliability and performance, from the heavy-duty steel construction to the precise welding. Think of it as a long-term addition to your home, much like a custom stone patio. Gappsi’s own masonry work is built on this same principle of using quality materials and expert skill to create something beautiful that lasts.

Design and Outdoor Aesthetics

The Clessidra is designed to be the heart of your outdoor kitchen, not just a bulky appliance. Its modern, sleek lines and black finish allow it to blend seamlessly with various design styles, from rustic to contemporary. But its design is about more than just looks. Inside, a special system ensures heat spreads evenly for consistent cooking results every time. Imagine this beautiful oven as the centerpiece of your new patio, perfectly situated under one of Gappsi’s custom pavilions or pergolas. It’s the perfect combination of high-end function and sophisticated style for your outdoor entertaining space.

Understanding the Direct/Indirect Combustion System

The Rossofuoco Clessidra oven stands out because of its unique dual-combustion system. This brilliant design gives you incredible cooking flexibility by letting you choose between two different ways to cook with fire: direct and indirect. Each method offers its own benefits and allows you to cook a huge variety of dishes. Let’s break down what each method means for your backyard feasts.

How Direct Cooking Works

Think of direct cooking as the classic wood-fired experience. With this method, you build your fire right inside the main cooking chamber, alongside your food. This intense, radiant heat is what creates that perfect, leopard-spotted crust on a pizza in just minutes. It’s also fantastic for searing steaks or charring vegetables, infusing everything with a subtle, smoky flavor you can’t get from a conventional oven. This method is all about high heat and fast results, making it a core feature for any authentic outdoor kitchen.

How Indirect Cooking Works

Indirect cooking offers a gentler approach. In the Clessidra, the fire is contained in a separate chamber below the cooking surface, so heat circulates around the food like in a convection oven. This creates a consistent temperature that is perfect for dishes that require a slower, more even bake. Think tender roasts, bubbling lasagnas, or even cakes. Because the food isn’t exposed to the direct flame, you don’t have to worry about charring. It’s the ideal method for preparing meals while you relax with guests under your pavilion or pergola.

Why Two Cooking Modes Are Better Than One

Having both direct and indirect cooking in one oven is a true game-changer. It means the Clessidra isn’t just a pizza oven; it’s a complete outdoor cooking station. You get the high-heat, flame-kissed results of direct cooking and the slow, even consistency of indirect cooking. This versatility allows you to cook anything you can imagine, from a quick weeknight pizza to an elaborate holiday roast. The Clessidra merges traditional techniques with modern convenience, giving you creative freedom to explore new recipes. You can find this oven and other great products in the Gappsi Store.

Explore the Standout Features

The Clessidra oven is packed with thoughtful details that make wood-fired cooking a genuinely enjoyable and successful experience. It combines the rustic charm of traditional cooking with modern precision, giving you the confidence to create amazing food right in your backyard. These features are designed to solve common outdoor cooking challenges, so you can focus less on managing the oven and more on enjoying the meal with your family and friends. From smart controls to an innovative fire chamber, every element is crafted to help you get consistent, delicious results.

Smart Cooking: Thermostat, Timer, and Light

Getting the temperature right is the key to great wood-fired cooking, and the Clessidra makes it simple. It comes equipped with a built-in thermostat, so you can accurately monitor the heat without any guesswork. A handy timer helps you keep track of your dishes, while an internal light lets you check on your food without opening the door and losing heat. This is especially useful for evening gatherings under your pavilion or pergola. These smart features work together to give you complete control, making it easier than ever to achieve that perfect, crispy pizza crust or beautifully roasted chicken.

Masterful Heat Retention and Distribution

One of the biggest frustrations with lesser-quality outdoor ovens is uneven cooking, resulting in burnt edges and undercooked centers. The Clessidra’s design tackles this problem head-on. By blending traditional craftsmanship with modern engineering, it delivers exceptional heat retention and even distribution throughout the cooking chamber. This means your food cooks uniformly every single time. The superior construction, reminiscent of expert masonry work, ensures that the oven holds a stable temperature, giving you a reliable and forgiving cooking environment for a wide range of recipes.

Continuous Cooking with the Lower Fire Chamber

If you love hosting, you’ll appreciate the Clessidra’s lower fire chamber. This brilliant feature allows you to feed the fire from below without disturbing the food cooking above. The design keeps the oven floor consistently hot, which is a game-changer when you’re making multiple pizzas back-to-back. You can serve fresh, hot food to your guests without long pauses or a drop in oven temperature. This continuous cooking capability turns your backyard into a seamless outdoor eatery, perfect for parties and large family get-togethers. You can find this and other premium outdoor appliances at the Gappsi store.

What Can You Cook in the Clessidra?

The Rossofuoco Clessidra is so much more than just a pizza oven. Its clever design opens up a whole world of culinary possibilities right in your backyard. From quick, high-heat searing to slow, gentle baking, this oven is a versatile powerhouse. Whether you’re hosting a big family gathering or just enjoying a quiet weeknight dinner outdoors, you can create a huge variety of delicious meals. Let’s get into some of the amazing dishes you can make.

Perfect Pizzas and Flatbreads

If you dream of making authentic, restaurant-quality pizza at home, the Clessidra is for you. It was designed to solve common problems like hot spots and uneven cooking that can ruin a perfectly good pie. The oven’s excellent heat distribution creates a perfectly crispy crust with that classic smoky flavor you can only get from a real wood fire. You can finally say goodbye to soggy bottoms and burnt toppings. This oven makes it simple to craft everything from classic Neapolitan pizzas to cheesy garlic flatbreads that will have everyone asking for your secret. You can find the Clessidra and other essential cooking tools at the Gappsi Store.

Sizzling Steaks, Roasts, and Meats

The Clessidra truly shines when it comes to cooking meats. Using the direct cooking method, where the fire is in the chamber right next to your food, you can achieve an incredible sear on steaks. This technique locks in the juices and imparts a rich, smoky flavor that’s impossible to replicate on a standard grill. But it’s not just for fast cooking. The oven’s consistent temperature also makes it ideal for slow-roasting a whole chicken, a leg of lamb, or a pork shoulder until it’s fall-apart tender. Imagine pulling a perfectly roasted meal from your oven, ready to serve under your beautiful custom pavilion.

Hearty Breads, Casseroles, and Veggies

Ready to expand your outdoor cooking menu? The Clessidra’s versatility makes it perfect for baking. The even, radiant heat is exactly what you need to bake crusty, artisan-style breads with a soft, airy interior. You can also use it for comforting casseroles, baked pasta dishes, and roasted vegetables. Just slide in a pan of seasonal veggies tossed with a little olive oil and herbs, and let the oven work its magic. The steady heat caramelizes them beautifully, bringing out their natural sweetness. This oven can be the centerpiece of a complete outdoor kitchen, seamlessly integrated with custom masonry work for a stunning and functional space.

How to Use Your Clessidra Oven

Getting your new Clessidra oven fired up for the first time is an exciting moment. It’s the start of countless delicious meals and memorable evenings in your backyard. The process is straightforward, and with a little practice, you’ll feel like a seasoned pro. Think of it less as a technical task and more as the art of building the perfect fire for the perfect meal. Following these simple steps will help you get consistent, amazing results every time you cook.

Start Your Fire the Right Way

First things first, let’s build a great fire. Begin by opening the oven door and the chimney vent completely to ensure there’s plenty of airflow. Inside the oven, stack your kindling, like small logs or even pine cones, into a teepee shape right in the center. Place a natural firelighter underneath the teepee and light it. You’ll want to give the kindling a few minutes to really catch fire and start burning well on its own. Once you have a steady flame, you can add three or four small to medium sized logs to help the fire grow. This gradual process is the key to evenly heating the oven dome and floor, setting you up for a perfect cook.

Choose the Best Wood for Flavor

The type of wood you use makes a huge difference in both the heat of your oven and the flavor of your food. For the best results, always choose a dense, seasoned hardwood like oak, ash, or birch. These woods burn very hot and clean, producing minimal smoke, which is exactly what you want for cooking. “Seasoned” simply means the wood has been left to dry for a long time, so it has a very low moisture content. You should never use wet or “green” wood, as it creates a lot of smoke and won’t get your oven hot enough. Also, be sure to avoid any wood that has been painted, treated with chemicals, or has a lot of sap, since it can release harmful fumes and ruin the taste of your meal.

Manage Temperature Like a Pro

Controlling your oven’s temperature is simpler than it sounds, and it all comes down to mastering the chimney damper. Think of the damper as your oven’s temperature dial. When the damper is wide open, it allows more air to circulate, which will cause the oven’s temperature to drop. If you want to maintain a steady heat for roasting or even increase it for searing, you’ll want to close the damper most of the way. This traps the heat inside, keeping your oven at a consistent temperature. You can see how our team integrates these beautiful ovens into custom outdoor kitchens to get a feel for the complete setup. Mastering the damper is the secret to perfectly cooked food every single time.

Avoid Common First-Time Mistakes

Patience is your best friend when you’re heating a wood-fired oven. One of the most common mistakes is rushing the process, which can lead to hot spots and uneven cooking. Let the fire build slowly and give the oven plenty of time to absorb the heat safely and thoroughly. For a perfect, crispy pizza, you’re aiming for a temperature between 350 and 400°C. The best way to check this is with a laser thermometer, an essential tool for any outdoor chef. You can find high-quality cooking accessories at the Gappsi Store. Once your oven reaches that target temperature, close the chimney’s smoke control vent to hold that intense heat inside. This creates the ideal environment for a delicious, perfectly cooked pizza in minutes.

Essential Accessories for Your Clessidra

While the Clessidra is a masterpiece on its own, the right accessories can make your outdoor cooking sessions even more seamless and enjoyable. Think of these additions as the supporting cast that helps your star performer shine. From essential tools to clever add-ons for prep and mobility, you can customize your setup to perfectly match your cooking style. You can find many of these high-quality accessories right at the Gappsi Store. Let’s look at a few must-haves that will complete your wood-fired oven experience.

Pizza Peels and Cooking Tools

To get the most out of your Clessidra, you’ll want a solid set of pizza peels and cooking tools. The good news is that the oven comes ready for action with trays, a wood holder, and hooks, giving you a great starting point. This comprehensive setup ensures you can fire it up and start cooking immediately. A quality pizza peel makes sliding pizzas in and out of the hot oven feel effortless and professional, while long-handled brushes and turners help you manage your creations safely. Investing in a dedicated toolset keeps everything you need within arm’s reach, making your cooking experience smooth and stress-free.

Add Prep Space with Side Worktops

Every great chef knows that counter space is gold, and the same is true for outdoor cooking. You can expand your workspace by adding optional side worktops to your Clessidra. These handy surfaces give you valuable room for prepping ingredients, assembling pizzas, or plating finished dishes right next to the oven. As a bonus, some of these optional accessories even include a kit with six pizza peels and holders. This added functionality streamlines your entire cooking process, making your time outdoors more organized and fun.

Go Mobile with a Custom Cart

If you love the idea of a flexible outdoor kitchen, a custom cart for your Clessidra is a game-changer. This accessory transforms your oven into a mobile cooking station, allowing you to easily move it around your patio or backyard. You can purchase extra items like a beautifully designed cart and a tool set to create a complete, transportable unit. This is perfect for repositioning your oven for a party, moving it under a pavilion for shade, or simply finding the best spot for your next cookout. It gives you the freedom to redesign your outdoor space whenever you like.

Keep Your Clessidra in Top Shape

Your Rossofuoco Clessidra is more than just an oven; it’s a beautiful piece of Italian engineering designed to be the heart of your outdoor kitchen. To keep it performing flawlessly and looking its best for countless pizzas, roasts, and gatherings, a little routine care goes a long way. Think of it as part of the ritual of wood-fired cooking, not a chore. Just as you’d care for a high-quality cast iron pan, maintaining your oven protects your investment and ensures every meal is as delicious as the first. These simple habits will preserve its integrity and performance, so it remains a stunning and functional centerpiece in your backyard for years to come.

At Gappsi, we believe in building things that last, from stunning stone patios to durable driveways. We even offer professional restoration and sealing services to keep outdoor surfaces looking new. The same principle applies to your Clessidra oven. With just a bit of attention, you can ensure its longevity and enjoy the unmatched flavor of wood-fired cooking season after season. Taking care of your oven doesn’t require special skills, just a consistent routine. The following steps are all you need to keep your oven in prime condition, protecting the beautiful craftsmanship and ensuring it’s always ready for your next culinary adventure.

Daily Care: Cleaning and Ash Removal

After the embers have cooled and your guests are happily fed, a quick cleanup will set you up for your next cooking session. Once the oven is completely cool, use a metal ash shovel to scoop out the ashes from the cooking chamber. It’s a good practice to leave a very thin layer of ash on the oven floor. This small step actually helps protect the refractory stone from thermal shock and can improve heat retention for your next fire. Regular cleaning prevents soot and ash from building up, which ensures your oven heats efficiently and your food always tastes pure and delicious.

Seasonal Checks and Weatherproofing

As the Long Island seasons shift, it’s smart to give your oven a quick inspection. Before you fire it up for the spring, or as you prepare to close it down for winter, take a moment to look for any small cracks or signs of wear. While the Clessidra is built to be incredibly durable, protecting it from harsh weather is always a good idea. A simple weatherproof cover can shield it from rain, snow, and intense sun. For a more permanent and elegant solution, consider integrating your oven into a custom pavilion or pergola. This not only protects your oven but creates a true all-weather outdoor cooking station.

Maintain Your Chimney and Vents

Proper airflow is the secret to mastering temperature control in a wood-fired oven, and that starts with a clean chimney. Over time, a substance called creosote can build up inside the chimney, which can restrict airflow and even pose a fire hazard. We recommend inspecting and cleaning the chimney at least once a year, or more often if you use your oven frequently. Make sure the vents are also clear of debris and functioning correctly. A clear chimney and clean vents ensure safe operation and give you the precise control needed to cook everything perfectly. For a detailed guide, you can learn more about proper chimney maintenance from trusted cooking resources.

Season Your Oven for Long-Term Use

Before you cook your first pizza, you need to season, or cure, your new Clessidra oven. This simple, one-time process is crucial for its long-term health. Seasoning involves building a series of small, low-temperature fires over several days. Start with a small kindling fire and let it burn out. The next day, build a slightly larger one. This gradually heats the dome and floor, slowly drawing out any residual moisture from the refractory materials. This slow curing process prevents thermal shock and cracks, ensuring your oven will withstand high cooking temperatures for years to come. Think of it as breaking in your oven for a lifetime of incredible meals.

Is the Clessidra Right for Your Backyard?

Deciding on a major addition to your outdoor space is a big deal, and you want to be sure it’s the right choice for your home and lifestyle. The Rossofuoco Clessidra is a fantastic oven, but its true value comes from how well it fits into your specific backyard vision. Whether you have a sprawling lawn or a cozy patio, this oven is designed to integrate beautifully and become a natural extension of your home. It’s not just about adding an appliance; it’s about creating a new focal point for cooking, gathering, and making memories with the people you love. Let’s walk through how the Clessidra can fit perfectly into your outdoor plans.

Find the Perfect Fit for Your Space

One of the first questions homeowners ask is, “Will this actually fit in my yard?” It’s a valid concern, but the Clessidra was designed with exactly that in mind. Measuring just over a meter wide, it has a surprisingly compact footprint that works well in a variety of outdoor settings, from spacious patios to more intimate garden corners. You get a generous 800mm by 650mm cooking surface, which is plenty of room for a couple of pizzas or a large family roast, without the oven dominating your entire space. We can help you create the perfect spot for it with custom masonry work to ensure it feels like a natural part of your landscape.

Integrate with Your Outdoor Kitchen or Pavilion

The Clessidra truly shines when it becomes the heart of your outdoor entertaining area. Think of it as the final piece of your dream outdoor kitchen, bringing an authentic taste of Italy right to your backyard. Because it handles both direct and indirect cooking, its versatility is incredible. You can fire up classic Neapolitan pizzas one night and slow-roast a tender brisket the next. Imagine it nestled under one of our custom pavilions or pergolas, creating a cozy, all-weather cooking station where friends and family can gather. It’s more than just an oven; it’s a centerpiece for making memories.

Clessidra Pricing and Where to Buy

After learning about all the incredible meals you can make with the Rossofuoco Clessidra, you’re probably asking two things: how much is it, and where can I find one? As a premium piece of Italian craftsmanship, the Clessidra is a significant investment in your home’s outdoor living space and your culinary adventures. Because pricing can vary based on accessories and installation, the best way to get an accurate number is to connect directly with an authorized dealer who can tailor a quote to your specific needs.

While you can find plenty of information online, I always believe it’s best to see and touch a product of this quality before making a final decision. For anyone on Long Island, you have a fantastic opportunity to do just that. I highly recommend visiting the Gappsi showroom at 1015 West Jericho Turnpike in Smithtown, NY. Seeing the oven up close lets you truly appreciate its solid build, feel the quality of the materials, and admire its beautiful design. It’s one thing to see pictures, but another to experience it in person. The team at Gappsi can answer all your questions, discuss how it could integrate with your existing patio or a new outdoor kitchen, and provide you with detailed, all-inclusive pricing. It’s the perfect way to feel confident in your choice and start planning your dream backyard.

Related Articles

Frequently Asked Questions

Is this oven just for making pizza? Not at all. While it makes incredible, authentic pizza, think of the Clessidra as a complete outdoor oven. Its dual-combustion system allows you to slow-roast meats, bake crusty breads, sear steaks, and even cook casseroles. It’s a versatile cooking station that can handle almost any recipe you would make in your indoor oven, but with the added flavor of a real wood fire.

How difficult is it to control the temperature with wood? It’s more of a skill you learn than a difficult task, and the Clessidra makes it very approachable. The built-in thermostat gives you an accurate reading, so you’re not just guessing. The main control is the chimney damper; opening it cools the oven down, while closing it traps heat to raise or maintain the temperature. After a couple of uses, you’ll get a feel for how to manage the fire and the damper to hit your target temperature.

What kind of maintenance does the Clessidra oven require? The routine care is quite simple. After each use, once the oven is completely cool, you just need to scoop out the ash. It’s also a good idea to do a yearly check of the chimney to make sure it’s clear of any buildup. To protect it from the elements, especially during harsh Long Island winters, using a weatherproof cover is a smart and easy way to keep it in top condition.

Can I use this oven year-round on Long Island? Yes, absolutely. The Clessidra is built with high-quality, durable materials designed to withstand the elements. For the best experience and protection, you can use a weatherproof cover during periods of heavy rain or snow. Many homeowners also choose to integrate the oven under a custom pavilion, which creates a fantastic all-weather cooking and entertaining space you can enjoy no matter the season.

What’s the main advantage of the dual-combustion system? The biggest advantage is flexibility. It’s like having two types of ovens in one. The direct cooking method, with the fire in the main chamber, gives you the intense, radiant heat needed for perfect, crispy pizza in minutes. The indirect method, with the fire in a separate chamber below, creates a gentler, convection-style heat that’s ideal for slow-roasting, baking, and any dish that needs even, consistent cooking without direct flame.