


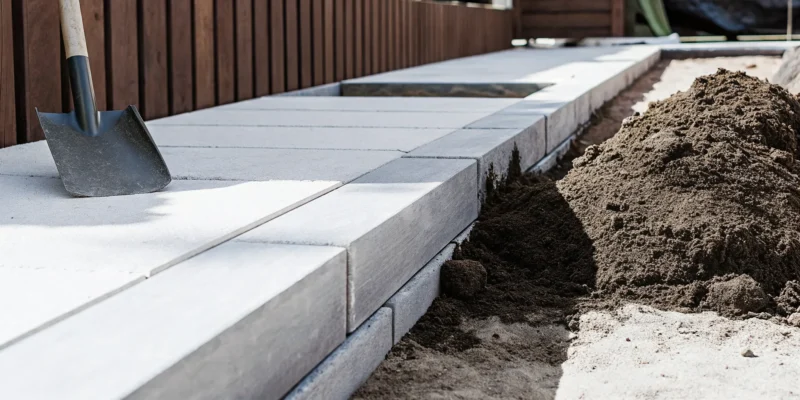
A wood fence is a significant investment for your home, and protecting it should be a top priority. The biggest threat to its longevity isn’t a storm; it’s the slow, silent damage caused by moisture from the ground. When soil and wet grass are in constant contact with the base of your fence, it creates the perfect conditions for rot and decay. Installing a wood fence paver border is one of the smartest preventative measures you can take. It physically separates the wood from the damp ground, creating a dry zone that can add years to your fence’s life. It’s more than just a decorative edge; it’s a functional barrier that safeguards your investment from the ground up.
Key Takeaways
- Protect Your Fence and Simplify Yard Work: Installing a paver border is a practical move that shields the base of your wood fence from rot and damage from lawn equipment. It also creates a clean mowing edge, which saves you time and effort on regular maintenance.
- A Solid Base is the Key to Longevity: The most critical step for a lasting border is creating a proper foundation. A well-compacted base of gravel and sand ensures good drainage and prevents pavers from sinking or shifting over time.
- Match Materials to Your Style and Budget: The pavers you choose, from affordable concrete to elegant natural stone, will define your project’s look and cost. Plan ahead by balancing your material choices with the decision to install it yourself or hire a professional for the best results.
Why Border Your Wood Fence with Pavers?
Adding a paver border to your wood fence is one of those projects that looks great and works hard behind the scenes. It’s more than just a decorative touch; it’s a practical upgrade that protects your investment, simplifies your yard work, and adds a polished, professional finish to your landscape. Think of it as the perfect frame for your beautiful fence.
A well-designed border creates a clean, intentional line between your fence and your lawn or garden beds. It’s a small detail that makes a huge impact on your property’s overall curb appeal. By creating this separation, you’re not only improving the look of your yard but also setting up your fence for a longer, healthier life. Let’s explore the key reasons why this simple addition offers so much value.
Protect Your Fence and Simplify Mowing
A paver border acts as a protective buffer for the base of your wood fence. Lawn mowers and string trimmers can cause a surprising amount of damage over time, leading to nicks, scrapes, and splintering that expose the wood to the elements. By installing a sturdy paver edge, you create a physical barrier that keeps your equipment at a safe distance, preventing accidental damage and preserving the integrity of your fence posts and panels.
This simple addition also makes lawn maintenance much easier. Instead of carefully trimming along the entire fenceline with a weed whacker, you can simply run your mower’s wheels along the flat, even surface of the pavers. This creates a crisp, clean edge every time you mow, saving you time and effort on your weekend chores.
Keep Weeds Out and Moisture Away
One of the biggest challenges with any fenceline is keeping weeds and grass from creeping up against it. A paver border, especially when installed over a weed barrier fabric, creates a highly effective block that stops unwanted growth in its tracks. This means less time spent pulling weeds and a cleaner, more defined look for your yard. A tidy fenceline instantly makes your entire outdoor space feel more maintained and put-together.
More importantly, a paver border is crucial for moisture management. Direct contact with damp soil and grass is the number one enemy of a wood fence, as it leads to rot and decay. The border elevates the base of the fence, creating a dry zone that prevents moisture from wicking into the wood. This simple separation can dramatically extend the life of your fence, protecting your investment from the ground up.
Paver Borders vs. Other Edging Options
When you compare pavers to other landscape edging options like plastic, metal, or simple trenched edges, the benefits become even clearer. While plastic or metal edging can work in some garden applications, they often lack the durability to stand up to lawn equipment and can become warped or damaged over time. Pavers, on the other hand, are built to last.
Materials like concrete, brick, and especially porcelain and natural stone provide a solid, stable edge that won’t bend or break. They offer a high-end, custom look that flimsy plastic edging just can’t match. A paver border provides a wider, more substantial surface that is both more functional for mowing and more visually appealing, truly integrating your fence into your landscape design.
How to Choose the Right Pavers for Your Border
Picking the right pavers for your fence border is about more than just looks; it’s about finding the perfect match for your home’s style, your budget, and how much maintenance you’re willing to do. The material you choose sets the tone for your entire outdoor space, creating a cohesive look that ties your fence and landscape together. From the uniform and versatile shapes of concrete pavers to the timeless appeal of classic brick and the unique elegance of natural stone, your options are wide open. You can even opt for a more rustic look with loose materials like gravel.
Each material comes with its own set of benefits and considerations. Concrete offers affordability and a huge range of styles, while brick provides a traditional charm that never fades. Porcelain and natural stone pavers bring a touch of luxury and organic beauty, though they often require a bit more care. Think about the overall aesthetic you want to achieve. Are you aiming for a clean, modern line or a soft, rustic edge? Answering this question will help you narrow down your choices and find a material that not only protects your fence but also beautifully frames your yard for years to come.
Concrete Pavers
If you’re looking for a durable material that’s also budget-friendly, concrete pavers are an excellent choice. They are just as strong as natural stone but typically come at a lower price point. Plus, they are available in a massive variety of colors, shapes, and textures, giving you complete creative control. You can find concrete pavers that mimic the look of classic brick, cobblestone, or even natural slate. This versatility allows you to create a grand statement or a subtle, clean border that complements your fence and landscaping perfectly. Their uniform shape also makes them one of the easier materials to install for a DIY project.
Brick Pavers
There’s a reason brick is a classic choice for landscape edging. It offers a warm, traditional look that feels both timeless and inviting. Using brick for your paver border can create a charming, established feel that pairs beautifully with a wood fence. You can play with different shades and lay them in eye-catching patterns like herringbone or basketweave to add extra visual interest. Brick is incredibly durable and holds up well against the elements, making it a reliable option for your fence border. Its rich color and texture provide a beautiful contrast against the green of your lawn and the natural tones of the wood.
Porcelain and Natural Stone Pavers
For a truly high-end and elegant look, consider porcelain or natural stone. Natural stone pavers, like bluestone or granite, bring an organic, one-of-a-kind beauty to your landscape, as no two stones are exactly alike. They create a formal, sophisticated appearance but may require sealing to protect them from stains and weather. On the other hand, porcelain pavers offer the stunning look of natural stone with incredible durability and almost no maintenance. They are resistant to stains, scratches, and fading, making them a fantastic long-term investment for your border.
Gravel and Decomposed Granite
If you prefer a more rustic or informal style, gravel and decomposed granite are wonderful, cost-effective options. These loose-fill materials create a strong and solid border that is perfect for curved or free-form designs, as they can easily be set around any angle. They offer a softer texture that contrasts nicely with both the wood fence and your lawn. While they are generally more affordable than solid pavers, you will need to install a quality edge restraint to keep the stones contained. This option is great for creating a natural-looking path or a simple, clean edge along your fence line.
Key Factors: Durability and Weather Resistance
Living on Long Island means your outdoor materials need to withstand a lot, from hot summers to freezing winters. Durability and weather resistance are crucial when selecting pavers for your border. Materials must be able to handle freeze-thaw cycles without cracking or shifting. High-quality concrete, dense natural stone, and non-porous porcelain are all excellent choices for this climate. No matter which material you choose, proper base preparation is the key to longevity. A solid, well-drained base prevents the ground from heaving and your pavers from becoming uneven over time. Investing in quality materials from the Gappsi Store will ensure your border stays beautiful and functional for years.
What Does a Paver Border Cost?
Understanding the budget for your paver border project is a crucial first step. The total cost can vary quite a bit, depending on a few key factors: the materials you choose, the size of your border, and whether you decide to tackle the installation yourself or hire a professional. Breaking down these costs will help you plan effectively and create a beautiful fence border that fits your budget without any surprises. Let’s look at what you can expect to spend and where you can find opportunities to save.
How Materials Impact Your Budget
The type of paver you select is the biggest factor in your material costs. Simple concrete pavers are often the most budget-friendly option, while premium materials like natural stone will be at the higher end of the price scale. For example, basic fieldstone can start around $12 per linear foot, but high-end granite can go up to $70 per linear foot or more. We find that many Long Island homeowners love the look of porcelain and natural stone for its durability and classic appeal. While these materials may have a higher initial cost, their longevity often makes them a worthwhile investment, saving you from replacement costs down the road.
DIY vs. Professional Installation Costs
Your next major cost consideration is labor. Doing the work yourself is a fantastic way to save money, as you’ll only need to pay for materials and tool rentals. However, it’s important to be realistic about the time and physical effort involved. Professional installation adds to the budget, with costs often ranging from $36 to $100 per linear foot depending on the complexity of the job and your property’s accessibility. Hiring masonry experts ensures the job is done correctly and efficiently, giving you a flawless finish and peace of mind that your border will last for years.
Smart Ways to Source Materials and Save
You can create a high-end look without a high-end price tag by being strategic. Simple design choices, like the paver’s orientation and the spacing of the joints, can add visual sophistication while keeping material costs in check. Before you buy, create a detailed plan and measure your border carefully to purchase the right amount of materials and avoid waste. We always recommend visiting a local supplier like the Gappsi Store to see materials in person. You can explore different options, get expert advice, and sometimes find great deals on remnant pieces perfect for a smaller project like a fence border.
Your Tools and Materials Checklist
Getting all your ducks in a row before you start is the secret to any successful DIY project. It saves you from making extra trips to the store and keeps your momentum going. Here’s a complete checklist of what you’ll need to build a beautiful paver border for your wood fence.
Essential Tools
For this project, you’ll need a few key tools to get the job done right. Gather a sturdy shovel or spade for digging the trench, a wheelbarrow for moving soil and materials, and a tape measure for accuracy. You’ll also want a level to ensure your pavers are even, a rubber mallet to gently tap them into place, and a hand tamper to compact the base. Don’t forget safety gear like gloves and safety glasses. Having the right equipment makes all the difference between a frustrating afternoon and a project you can be proud of.
Materials List
Now for the fun part: the materials that will bring your design to life. Your main component will be the pavers themselves. You can find a stunning variety of porcelain and natural stone options that will complement your fence and landscape. You will also need a base material, like crushed stone or gravel, and a layer of coarse sand for leveling. To finish the project, you’ll use polymeric sand to fill the joints between pavers and edge restraints to hold everything securely in place. We’ll also be using a weed barrier fabric, which is a non-negotiable for a low-maintenance finish.
Why You Need Weed Barrier Fabric and Edge Restraints
Let’s talk about two items you should never skip: weed barrier fabric and edge restraints. The fabric goes down before your base material and does exactly what it sounds like, it stops weeds from growing up through the paver joints. This simple step will save you hours of weeding later. Edge restraints are just as important. These sturdy plastic or metal strips are installed along the sides of your paver border, holding the pavers tightly together and preventing them from shifting or spreading apart over time. These are the details that ensure your hard work looks great for years, a principle we apply to all our landscape design projects.
How to Install a Paver Border Along a Wood Fence
With your tools and materials ready, it’s time to get to work. Installing a paver border is a manageable weekend project that adds instant curb appeal and function to your yard. Following these steps will help you create a clean, professional-looking edge that protects your fence and makes your landscape pop. We’ll walk through the process from the initial layout to the final finishing touches, making sure you have the confidence to tackle each stage.
Step 1: Mark and Measure Your Border
First things first, you need a clear plan. Use a tape measure, stakes, and string to outline exactly where your paver border will go. This visual guide helps you stay straight and ensures your border is a consistent width. Before you dig, always call 811 to have underground utility lines marked. It’s a simple, free service that prevents costly and dangerous accidents. You should also double-check your property lines to make sure your new border and fence are entirely on your land. This initial prep work saves a lot of headaches later on and is a crucial first step for any outdoor project.
Step 2: Excavate and Prepare the Base
Now it’s time to grab your shovel. Dig a trench along your marked line that is wide enough for your pavers and deep enough for both the pavers and a 4 to 6-inch base of gravel. A solid foundation is the most critical part of any paver project. It prevents the pavers from sinking or shifting over time, especially with Long Island’s freeze-thaw cycles. Make sure the bottom of your trench is firm and compacted. For larger projects, a hand tamper will be your best friend here. This is the same principle our masonry experts use for patios and walkways to ensure lasting results.
Step 3: Add a Gravel or Sand Base for Drainage
Once your trench is excavated, fill it with a 4-inch layer of crushed gravel. This layer provides a stable base and allows for proper drainage, which is essential for preventing water from pooling and damaging your fence or paver installation. Compact the gravel thoroughly with your hand tamper until it’s level. After compacting the gravel, add a 1-inch layer of coarse sand on top. This sand layer creates a smooth, even surface to set your pavers on, making it much easier to get them perfectly level. Using quality gravel solutions is key to a long-lasting border.
Step 4: Lay and Level Your Pavers
This is the fun part where your vision starts to come to life. Begin laying your pavers one by one on top of the sand bed, placing them tightly against each other. Use a rubber mallet to gently tap each paver into place. As you go, use a level to check that the pavers are even with each other and have a slight slope away from the fence for drainage. You can choose from a variety of beautiful and durable materials, including classic brick or elegant porcelain and natural stone, to match your home’s style. Take your time with this step, as it determines the final look.
Step 5: Fill Joints, Secure Edges, and Finish
With all your pavers in place, install plastic or metal edge restraints along the outside of the border to hold everything together. Secure them into the ground with landscape spikes. Next, sweep polymeric sand into the joints between the pavers. This special sand hardens when wet, locking the pavers together and preventing weeds from growing through the cracks. Lightly mist the area with water to activate the sand. Finally, consider applying a sealant to protect your new border from stains and weather, a service our restoration team specializes in to keep outdoor surfaces looking their best.
Design Ideas for Your Wood Fence Paver Border
Once you have the practical side of your paver border figured out, it’s time for the fun part: design. A paver border is more than just a functional edge; it’s a design element that can tie your entire outdoor space together. Think of it as the frame for your backyard picture. The right design connects your fence to your garden beds and patio, creating a polished and intentional look. Whether your style is classic and clean or modern and eclectic, there’s a paver border design that will fit perfectly.
You can go for a simple, understated look that neatly defines the space, or you can turn the border itself into a standout feature. The key is to consider the style of your home, your fence, and your existing landscaping. Do you want the border to blend in or stand out? Are you drawn to straight lines or gentle curves? Exploring different masonry design concepts can give you a wealth of inspiration. From simple single rows to intricate patterns using mixed materials, the possibilities are truly exciting. Let’s look at a few popular approaches to get your creative ideas flowing.
Straight, Single-Row Borders
Sometimes, the simplest solution is the most elegant. A straight, single-row border offers a timeless, clean look that complements almost any landscape style. This design creates a crisp, defined line between your fence and your lawn or garden bed, making your yard feel neat and organized. It’s also one of the most straightforward designs to install yourself. But simple doesn’t have to mean boring. You can create visual interest by selecting pavers with unique shapes or textures. Playing with different shades of porcelain and natural stone pavers can also produce a subtle, eye-catching pattern that adds a touch of personality without overwhelming the space. This classic approach is perfect for achieving a polished look with minimal fuss.
Curved and Angled Layouts
If you want to create a more dynamic and organic feel in your yard, consider moving beyond straight lines. A curved paver border can soften the rigid lines of your fence, adding a sense of flow and movement to your landscape. Gentle curves are perfect for wrapping around garden beds, trees, or a patio, integrating them seamlessly with the fence line. For a more contemporary or geometric aesthetic, you can create a border with sharp angles and clean lines. This approach works especially well with modern fence designs. A creative layout can transform your border from a simple edge into a true focal point, guiding the eye through your outdoor space. A professional landscape designer can help you map out a complex pattern that perfectly suits your yard.
Mixed Material Combinations
Why stick to just one material? Combining different materials is a fantastic way to add texture, contrast, and a custom feel to your paver border. Imagine pairing smooth, large-format concrete pavers with a channel of dark river rock or polished pebbles. The contrast in texture and color creates immediate visual interest. You could also frame your main pavers with a different type of stone or brick to create a layered, dimensional look. This technique is perfect for making a statement and adding a touch of luxury. Using a contrasting material, like natural stone against a wood fence, can also help you build a beautiful, fence-flush planter box that really stands out.
Pair Colors and Textures with Your Fence
The relationship between your fence and your paver border is key to a cohesive design. Think about how their colors and textures will work together. A popular designer trick is to stain a wood fence a dark color like charcoal or black. This makes the structure itself pop against the greenery in your yard. You can then use light-colored pavers to create a dramatic, high-contrast border. Alternatively, for a more harmonious and natural look, you can pair a warm, wood-toned fence with earthy pavers that pick up on its natural hues. You can find a wide variety of materials and colors at the Gappsi Store to find the perfect match. Don’t forget about texture; a smooth fence paired with rustic, textured cobblestones can create a beautiful and balanced composition.
Common Installation Mistakes to Avoid
A DIY paver border is a fantastic weekend project, but a few common slip-ups can turn your beautiful addition into a future headache. Taking the time to get the details right from the start will make all the difference in how your border looks and how long it lasts. The biggest mistakes usually happen in the prep stage and often involve things you can’t easily see, like what’s happening with water and soil underneath your pavers.
Getting your border perfectly level, giving your materials room to breathe, and protecting your fence from moisture are all critical steps. If you skip them, you might find yourself with a wavy, sinking border that traps water and causes your fence posts to rot. Think of it this way: a little extra care now prevents a lot of repair work later. By avoiding these common errors, you ensure your hard work pays off with a durable, professional-looking border that protects your fence for years. If you ever run into trouble, remember that our masonry experts are always here to help.
Forgetting Proper Drainage
One of the most critical jobs of a paver border is to keep moisture away from your fence, but a poorly installed one can do the exact opposite. Water is the main enemy of any fence, causing wood to rot and metal hardware to rust. If your paver border doesn’t allow water to drain properly, it essentially creates a mini-dam that holds moisture against the base of your fence posts. This is especially true in Long Island, where we get our fair share of rain and snow. The key is to create a permeable base beneath the pavers using gravel or coarse sand. This layer gives water a path to drain down and away from the wood, preventing long-term damage.
Dealing with Uneven Ground and Leveling Errors
It’s rare to have a perfectly flat yard, and failing to account for slopes and dips is a recipe for a messy-looking border. If your base isn’t perfectly graded and level, your pavers will follow suit, creating a wavy, uneven line that looks unprofessional. Worse, unstable soil or a poorly compacted base can cause pavers to shift and sink over time, leading to tripping hazards and constant repairs. As you excavate the trench for your border, use a level constantly to ensure the base is smooth and properly sloped for drainage. Taking your time on this step is the best way to get a crisp, clean edge that stays put. Proper site preparation is something our landscaping team handles every day.
Ignoring Thermal Expansion
You might not think of stone or brick as materials that move, but they do. All outdoor materials, including pavers and edging, expand in the heat and contract in the cold. This is called thermal expansion. If you pack your pavers tightly against each other or the fence itself, they will have no room to move when the summer sun heats them up. This pressure can cause the border to buckle, heave, or even crack your pavers. The solution is simple: leave a small, consistent gap (about 1/8 inch) between each paver. Filling these joints with polymeric sand will secure them while still allowing for tiny, unnoticeable movements, keeping your border stable through every season.
Failing to Protect the Fence Base from Moisture
Your new paver border will sit directly against the bottom of your wood fence, which is the area most vulnerable to rot. Even with good drainage, the base of the fence will be in close contact with damp soil, mulch, and splashing water. Before you even lay the first paver, you should protect the wood. Applying a quality waterproof sealant to the bottom 6 to 12 inches of your fence panels and posts adds a crucial layer of defense. This simple, proactive step keeps moisture from soaking into the wood grain. Regular cleaning and sealing is the best way to reduce the need for future repairs and keep your fence looking great for years to come.
How to Maintain Your Paver Border
You’ve put in the work to install a beautiful paver border, and now it’s time to make sure it stays that way. A little bit of upkeep goes a long way in preserving both the look and function of your border. Proper maintenance prevents weeds, protects your pavers from the elements, and keeps your fence line looking crisp and clean. By staying on top of a few simple tasks, you can ensure your paver border remains a durable and attractive feature of your landscape for years to come.
Prevent Weeds for Good
One of the main reasons for installing a paver border is to create a low-maintenance area along your fence, and that includes keeping weeds out. If you used polymeric sand in the joints during installation, you’ve already given yourself a major head start. This type of sand hardens to form a strong yet flexible bond that blocks weeds from sprouting. If any stubborn weeds do manage to pop through, pull them by hand immediately before their roots can get established. Regular inspections will help you catch them early. A solid masonry edge is your best defense against unwanted growth.
Clean and Seal Your Pavers
To keep your paver border looking its best, regular cleaning is key. Start by sweeping away leaves, dirt, and other debris. For a deeper clean, you can rinse the pavers with a garden hose. If you notice any stains, use a gentle cleaner designed for pavers and a stiff-bristle brush. After cleaning, consider applying a sealant. Sealing your pavers every few years protects them from stains, moisture, and UV damage while also enhancing their color. This protective layer is a crucial step, and if you prefer a professional touch, Gappsi offers expert restoration and sealing services to get the job done right.
Fix Shifting or Sunken Pavers
Over time, you might notice a paver or two has shifted or sunk slightly. This is usually caused by the ground settling underneath. Luckily, it’s a fairly easy fix. Carefully use a flathead screwdriver or a paver extractor to lift the sunken paver out of place. Add a small amount of paver base or sand to the empty spot, leveling it out until it matches the height of the surrounding pavers. Place the paver back in its spot, making sure it’s snug and level. Finally, sweep more jointing sand into the cracks to secure it. The quality of your initial porcelain and natural stone pavers can also impact long-term stability.
Know When to Inspect and Reseal
Proactive maintenance starts with regular inspections. At least twice a year, perhaps in the spring and fall, take a walk along your fence line and check on your paver border. Look for any new weed growth, cracks, or pavers that have become loose or uneven. Pay attention to how water behaves on the surface. If it soaks in immediately instead of beading up, it’s a clear sign that your sealant is wearing off. As a general rule, you should plan to reseal your pavers every two to three years to maintain an effective barrier against moisture and wear. You can find the necessary supplies at the Gappsi Store to handle the project yourself.
Know When to Call a Professional
There’s a special kind of pride that comes from completing a home project with your own two hands. But there’s also wisdom in knowing when a project is better left to an expert. A DIY paver border can be a rewarding weekend task, but certain situations call for professional help to avoid headaches and costly redos down the line. If you start digging and discover major drainage problems or unstable soil, it’s a sign that a bigger issue is at play. A simple border won’t fix underlying ground issues, and this is a perfect time to get an expert opinion from a landscaping or masonry professional.
The scale and complexity of your project also matter. A short, straight border on level ground is very different from a long, curving one on a sloped yard. If your fence itself is in rough shape, with multiple leaning panels or rotting posts, adding a paver border is just a temporary fix. Addressing the fence’s structural problems first is essential. A professional can assess the damage and determine if a repair or a full replacement is needed, ensuring your new border has a solid, long-lasting companion. Our teams are experts in installing all types of fences and netting.
Ultimately, calling a professional isn’t admitting defeat; it’s making a smart investment in your home. If you feel unsure about your ability to get the base perfectly level, handle the materials correctly, or if you simply don’t have the time or heavy-duty tools, hiring a pro guarantees a beautiful, durable result. An expert masonry team will get the job done efficiently and correctly, giving you a flawless finish that adds lasting value and curb appeal to your property.
Related Articles
- masonry and landscape estimate long island – Gappsi Group
- Backyard Pavers & Poolscape Ideas for Long Island Homes | Gappsi Inc
- Nicolock Pavers: Cleaning, Sealing & Installation Guide | Gappsi Inc
- Landscaping Archives – Gappsi Group
- A Guide to Polymeric Sand Colours for Pavers
Frequently Asked Questions
How long does it take to install a paver border? For a relatively straight and simple border, a determined DIYer can usually complete the project over a weekend. The first day often involves the heavy lifting like digging the trench and preparing the base, while the second day is for laying the pavers and finishing the joints. If your design includes complex curves or you have a very long fence line, it’s wise to set aside a little extra time.
Can I add a paver border to my existing, older wood fence? You absolutely can, but you should give your fence a thorough inspection first. A paver border is a finishing touch, not a structural support. If your fence posts are wobbly, leaning, or showing signs of significant rot at the base, it’s best to address those repairs first. Adding a beautiful border to a failing fence will only lead to more work for you down the road when the fence needs to be replaced.
What’s the single most important part of the installation process? Without a doubt, the most critical step is preparing the base. It might not be the most exciting part of the project, but a solid, well-compacted gravel and sand base is what prevents your pavers from sinking, shifting, and becoming uneven over time. Taking your time to get this foundation right is the secret to a professional-looking border that will last for years, especially with Long Island’s freeze-thaw cycles.
Is sealing the pavers really necessary for just a small border? Yes, I highly recommend it. Think of sealant as an insurance policy for your hard work and material investment. For a border, it does two important things: it helps protect the pavers from stains and moisture, and it creates another barrier that keeps water away from the base of your wood fence. A quick seal every few years will keep the colors vibrant and make cleaning much easier.
My yard has a slight slope. Will a paver border still work? A sloped yard is no problem at all. The key is not to fight the slope but to work with it. Instead of trying to make the paver border perfectly level horizontally, you should focus on making the trench and base follow the natural grade of the land. This ensures the border has a consistent, smooth line that runs parallel to the ground, creating a clean and intentional look rather than an awkward, stepped appearance.