


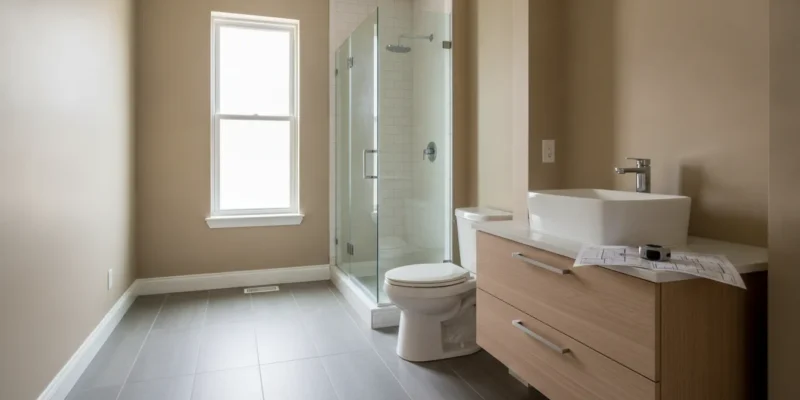
A bathroom can look spacious on paper and still feel cramped. The door, vanity drawers, and shower entry often compete for the same inches. Before choosing tile, sketch the room from the walls inward. Note what can stay, measure every fixture, and protect the walking paths.
For a bathroom remodeling layout long island project, keep a fixture where it sits when the approach still works. Do not let a door and a fixture fight for the same clearance. As a planning target, allow about 30 inches of clear floor in front of a lavatory, toilet, tub, or shower. Local code minimums can be tighter. The NKBA Bathroom Planning Guidelines distinguish recommended clearances from code points, so confirm the final plan against the requirements that apply to your home.
That makes measuring the first real design decision, not a formality after the finishes are selected. Start with the room’s fixed boundaries and openings. Record each door’s size and swing before you decide that a fixture should move.
Contact Gappsi through our contact page to review a bathroom layout before you order finishes.
What should you measure before moving a fixture?
Start with the room as it exists, not the vanity or shower you hope to install. A careful measured plan gives the layout a dependable starting point for a bathroom remodel in Nassau or Suffolk County. Record the length of every wall at the floor, then measure again at counter height. Those readings can differ when walls bow, taper, or are slightly out of square. Older Nassau and Suffolk houses often have walls that are not perfectly square, so a single measurement may not describe the space accurately.
Measure the ceiling height in several places, especially if the ceiling slopes or includes a dropped area. Note every soffit, boxed-out pipe, vent, and other obstruction. These details affect where a tall cabinet, mirror, shower head, or light can fit. Also measure the door slab, the opening, and the full door swing. Mark the arc on the plan and show whether it enters the bathroom, swings toward a fixture, or conflicts with a cabinet. Record window width, height, sill height, trim, and how far each window projects into the room.
Plumbing locations deserve the same attention as the walls. Identify the existing drains and supply lines for the toilet, lavatory, tub, and shower. Measure their locations from fixed walls rather than from temporary finishes or removable trim. Photographing the connections before demolition can help preserve a visual record, but the plan should show measured positions and pipe direction wherever visible.
Finally, account for the finished wall and floor, not just the framing or exposed subfloor. Tile, mortar, backer board, waterproofing, and other buildup can take away usable inches from a narrow room or change the depth at a doorway. Put those assumptions on the plan before choosing fixture locations. This basic record supports the broader home remodeling process on Long Island and makes it easier to test a layout against the room’s actual constraints.
What clearance does a bathroom remodeling layout long island home need?
Fixture placement should leave enough room for people to approach, use, and maintain each element without making the room feel pinched. The National Kitchen and Bath Association bathroom planning guidelines distinguish design recommendations from the code points they cite. Treat the recommended dimensions as useful planning targets, then have the local building department confirm which code minimum applies to your house and project.
| Fixture or space. | NKBA recommended clearance. | Cited code minimum. |
|---|---|---|
| Lavatory, toilet, bidet, tub, or shower front. | Clearance of at least 30 inches from the front edge to an opposite fixture, wall, or obstacle. | 21 inches in front of a lavatory, toilet, bidet, or tub; 24 inches in front of a shower entry. |
| Toilet or bidet. | Centerline at least 18 inches from a wall, bath fixture, or other obstacle. | Code minimum of 15 inches from the centerline. |
| Single lavatory. | Centerline at least 20 inches from a sidewall or tall obstacle. | Code minimum of 15 inches from the centerline to a wall. |
| Double lavatory. | At least 36 inches between centerlines. | Code minimum of 30 inches between centerlines. |
| Separate toilet compartment. | At least 36 by 66 inches, with a swing-out or pocket door. | Code minimum of 30 by 60 inches, with 15 inches from the toilet center to a sidewall and 21 inches in front. |
These measurements can change how you place a door, vanity, toilet, tub, and shower on the floor plan. A few inches saved in one location may create an uncomfortable approach somewhere else, especially where a door swing overlaps a fixture’s usable space. Use the recommended clearance when the room allows it, but do not label the recommendation as a legal requirement. The full National Kitchen and Bath Association bathroom planning guidelines identify the referenced standards and remind designers to follow applicable local, state, and national laws. For a Long Island bathroom remodeling layout, the local building department is the final source for what applies to the specific property.
Where should the door swing in a bathroom remodeling layout?
A bathroom door can take more usable space than its footprint suggests. This matters in Long Island hall baths and powder rooms, where the doorway may be the tightest object in the room. Before placing a vanity, toilet, or storage cabinet, map the door’s full path and make sure the entry remains comfortable for daily use.
The NKBA Bathroom Planning Guidelines recommend a clear opening of at least 32 inches. NKBA notes that this generally requires a 2-foot-10-inch door. A 2-foot door is an option only when the existing structure prevents a wider opening. Local requirements still apply, so confirm the final dimensions with the appropriate professional.
The door swing should not collide with another door, block safe use of a fixture, or prevent a cabinet from opening. NKBA cites IRC P2705.1.6 for this safety point. Also check the space directly in front of the toilet and vanity. NKBA recommends at least 30 inches of clear floor space from the front edge of a fixture to an opposite wall, fixture, or obstacle. The cited code minimum is 21 inches in front of a lavatory or toilet, while a shower entry needs at least 24 inches.
When a door swing takes needed clearance.
An in-swing door can eat the space in front of the toilet or vanity. A pocket door or an out-swing door can give that space back. A pocket door can preserve the room’s floor area, while an out-swing door keeps its arc outside the bathroom. Both choices require careful checking of wall conditions, hallway traffic, trim, and nearby doors. The safest choice is the one that leaves fixtures usable even when the door is fully open.
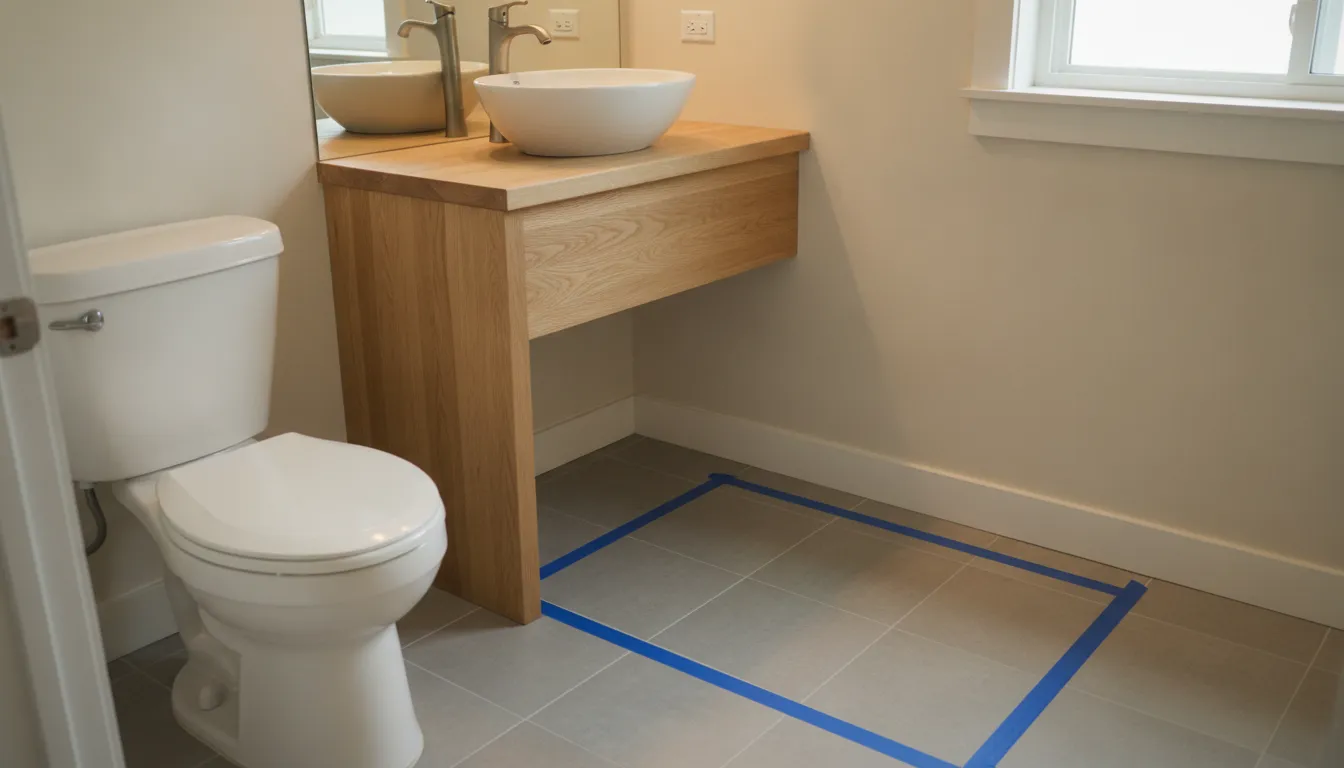
Test the plan before construction by taping the proposed swing on the floor. Mark the door width, hinge side, and full arc. Then walk in, stand at the vanity, and open any planned cabinet. This simple test often reveals a conflict that a two-dimensional bathroom remodeling layout can hide.
Contact Gappsi through our contact page if you want a second look at fixture placement before walls move.
Where should the shower sit in a Long Island bathroom?
Place the wet zone where it supports a clear path through the room and keeps water contained. In many Long Island homes, that means reviewing the existing drain location before moving walls or fixtures. Keeping the shower on or near the current drain can limit plumbing changes. The final plan still needs slope, access, ventilation, and a sound structure.
For planning purposes, the NKBA recommends a shower interior of at least 36 by 36 inches. The cited code minimum is smaller: a 30 by 30 inch interior, or 900 square inches, with enough space for a 30-inch disc. The finished, unobstructed shower opening must be at least 22 inches under the cited IRC provisions, P2708.1 and P2708.1.1. Treat the recommendation as a usable planning target rather than designing only to the minimum when the room allows more space.
Keep the shower entry easy to approach and leave the cited 24 inches of clearance in front of it. That space affects more than comfort. It also helps prevent the entry from colliding with the toilet, vanity, door swing, or another obstacle. Draw the door and shower entry arcs before you approve fixture locations. In a narrow bathroom, a few inches decide whether the layout works.
Ceiling height matters inside the wet zone as well. The NKBA guidance cites IRC R305.1. That section sets an 80-inch minimum ceiling height. It also calls for 80 inches above a 30 by 30 inch area at the shower head. Measure the finished ceiling, not just the framing, and check any soffit or sloped section that could reduce usable headroom.
New York requirements also address the surfaces around the shower. Section R307.2 requires nonabsorbent finishes on shower floors and on walls in shower compartments, extending at least 6 feet above the floor. Review the New York residential code section on toilet, bath, and shower spaces. Then ask the local building department what applies to the house. Lock the drain, entry clearance, ceiling height, and finished wet-zone boundaries into the floor plan before selecting finishes.
How does a small bath layout differ from a primary bath?
The room’s job should guide the floor plan more than a catalog of styles. A small hall bath serves people moving through the house. A primary bath needs room for a longer morning routine. That difference changes which fixtures earn space and where circulation can remain clear.
Planning a small hall bath
In a compact Long Island hall bath, start by testing the existing toilet and lavatory locations. Keeping both fixtures on their existing drains can limit plumbing changes, but only if the finished plan still provides usable clearances. A single lavatory is usually the more practical choice than forcing in a double vanity. Preserve a clear approach to the toilet and keep the door from opening across it or consuming the space needed to use it.
Storage should sit outside the walking path. A shallow cabinet, recessed niche, or carefully placed wall storage can hold daily supplies without narrowing the route from the door to the fixtures. Draw the full door swing and cabinet openings on the plan before construction. If the swing conflicts with the toilet or lavatory, an out-swing or pocket door may help, subject to the wall and hallway conditions.
Planning a primary bath
A primary bath can justify more floor area for movement between fixtures, but added fixtures still need room to work. When the room allows it, plan for a shower that is at least 36 by 36 inches. Consider a separate toilet compartment only when it can be at least 36 by 66 inches. The door still has to let someone enter without a struggle.
A second lavatory is useful only when the centerlines can be 36 inches apart and there is 30 inches of clear floor in front. If those dimensions force the toilet, shower entry, or door into a conflict, one well-placed lavatory may produce the better layout. Removing a tub to gain a walk-in shower is therefore a layout choice, not an automatic improvement. It works only when the remaining toilet, lavatory, door, and shower clearances still work together. For a bathroom remodeling layout on Long Island, confirm the final dimensions and applicable local requirements before work begins.
When should you lock the layout on Long Island?
For a bathroom remodeling layout in Long Island, lock the layout before ordering tile, a vanity, or other finish materials. A finish can be exchanged more easily than a drain, wall, or door position, so resolve the room’s physical constraints in sequence.
- Measure the existing room first. Record finished wall-to-wall dimensions, ceiling height, door and window locations, and the position of every drain and supply line you intend to keep. Mark the drains on the plan so a proposed fixture move is evaluated as a plumbing change rather than treated as a simple finish decision.
- Test the footprints at full size. Tape the proposed toilet, vanity, tub, and shower footprints on the floor. Mark the door width, hinge side, and complete swing arc as well. Walk through the opening, stand at the vanity, and test the space in front of the toilet and shower entry before accepting the drawing.
- Compare recommendations with code. Use the NKBA Bathroom Planning Guidelines as a planning reference, then compare its recommended clearances with the cited code minimums. NKBA recommends 30 inches in front of many fixtures. The cited minimum is 21 inches in front of a lavatory, toilet, bidet, or tub. A shower entry needs 24 inches. Its guidance also recommends an 18-inch toilet centerline from a wall, compared with the cited 15-inch minimum. Do not treat a recommendation as a legal requirement.
- Verify headroom and ventilation. Confirm at least 80 inches of finished ceiling height at the shower head and over the required shower area. Before closing the plan, identify a duct route for a fan that exhausts outdoors, not into an attic. NKBA cites a window of at least 3 square feet, with half of it operable. A fan of at least 50 cubic feet per minute, exhausted outdoors, is the other cited option. NKBA also cites a heat source able to hold 68 degrees Fahrenheit.
- Ask the local building department before moving walls. The rules that apply can depend on the home’s location and the scope of the work. Confirm permit, plumbing, electrical, ventilation, structural, and clearance requirements before approving a wall move or changing fixture locations.
- Choose finishes last. Settle the measured room, fixture footprints, door swing, clearances, headroom, and ventilation route first. Then select tile, vanity materials, colors, and hardware that fit that plan.
Which related decisions should stay on other pages?
This page stays on fixture placement. Style options live in the bathroom remodel ideas guide. The broader hiring, budget, and permit path is in the Long Island bathroom renovation guide. Surface choice is covered by bathroom tile materials for Long Island homes. Grout upkeep cost is a separate question in the bathroom grout sealing cost guide. If you are comparing who should set the tile after the plan is locked, read how to hire a bathroom tile contractor on Long Island. Gappsi’s home remodeling service includes bathroom remodeling, and the Gappsi history page explains the company behind the work. A finished example is the East Islip bathroom remodel.
Contact Gappsi through our contact page to walk through your measured plan.
Frequently Asked Questions
How far apart should two bathroom sinks be?
For a double lavatory, plan for at least 36 inches between the sink centerlines as a recommended layout guideline. The cited code minimum is 30 inches between centerlines, so the final plan should be checked against the requirements adopted for the house. NKBA Bathroom Planning Guidelines
How much space is needed inside a separate toilet compartment?
A separate toilet compartment is recommended at 36 by 66 inches, paired with a swing-out or pocket door. The cited code minimum is 30 by 60 inches. Keep at least 15 inches from the toilet centerline to a side wall. Leave 21 inches of clearance in front of the toilet. NKBA Bathroom Planning Guidelines
What should be checked before moving bathroom plumbing?
Confirm the proposed fixture locations, required clearances, ceiling conditions, ventilation, and applicable local requirements before deciding to move plumbing. New York residential code addresses fixture spacing, minimum room conditions, ceiling height, lighting, and ventilation. The local building department confirms what applies to that house. Residential Code of New York State context
How should a bathroom be ventilated?
A bathroom can use a window of at least 3 square feet, with half of it operable. The other cited option is a fan of at least 50 cfm exhausted outdoors. The exhaust should not discharge into an attic, soffit, ridge vent, or crawlspace. NKBA Bathroom Planning Guidelines
Ready to review your bathroom layout?
A bathroom remodeling layout is easier to fix on paper than after the drain and the door are set. Gappsi plans and builds bathroom remodeling projects for homeowners in Nassau and Suffolk Counties.
Contact Gappsi through our contact page to review your bathroom layout.
Posted by Gappsi Group.