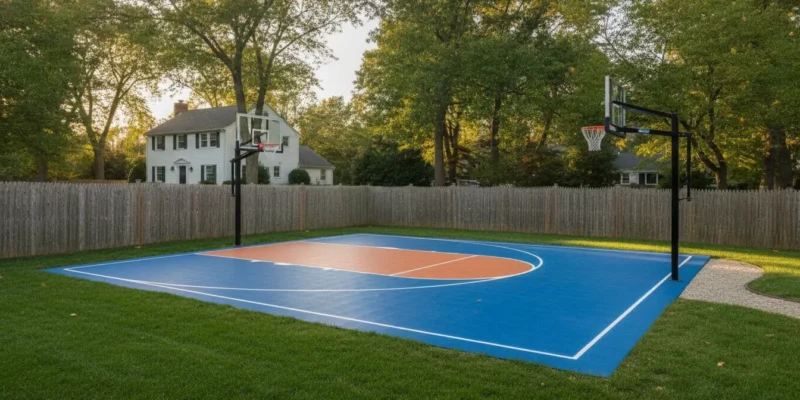
Residential basketball court with open lawn clearance behind a Long Island colonial home

How Big Is a Basketball Court? Size Guide

How big is a basketball court depends on the rule book you use and the space around the lines. An NBA court is 94 feet long and 50 feet wide. A high school court is 84 feet by 50 feet. A FIBA court is 28 meters by 15 meters, about 92 by 49 feet. Those numbers cover only the painted playing area. A Long Island backyard also needs runout and a place for water to leave the slab. It also needs a path wide enough for the crew and the hoop.

Contact Gappsi through our contact page to review a measured lot before you commit to a full court or a half court.

Gappsi Group has designed outdoor projects across Nassau and Suffolk Counties since 1987, from a Smithtown showroom at 1015 West Jericho Turnpike. Basketball courts are one part of that Sports Games Courts work. The size question is the first filter, before surface or fence details. If the playing lines fit but the fence, the gate, or the downspout does not, the court still does not fit the yard.

How Big Is a Basketball Court Under Each Rule Book?

The short answer changes with the league, and the NBA Rule No. 1 court diagram sets the professional playing court at 94 feet by 50 feet, which is 4,700 square feet inside the lines. High school play uses a shorter floor than that pro court. NFHS lists an optimum size of 84 feet by 50 feet, which is 4,200 square feet. FIBA’s venue guide sets the inner playing area at 28.0 meters long and 15.0 meters wide, which converts to about 91 feet 10 inches by 49 feet 3 inches.

Width is the stable number in the United States, because NBA and high school courts are both 50 feet wide, while length is what changes. Ten feet is the gap between a high school court and an NBA court. On a narrow Long Island lot, those extra 10 feet often decide whether a full court is realistic.

Standard Playing area Square feet What else the rule adds
NBA. 94 ft by 50 ft. 4,700 sq ft. Free-throw line 15 ft from the backboard. Three-point arc 23 ft 9 in.
High school, NFHS optimum. 84 ft by 50 ft. 4,200 sq ft. Same 50 ft width. It is 10 ft shorter than the NBA court.
FIBA. 28 m by 15 m. About 4,521 sq ft. At least 2 m of boundary area on every side.
High school half court. 42 ft by 50 ft. 2,100 sq ft. One basket, one lane, and a free-throw line.

A few markings stay familiar across those courts, and the NBA rule puts the free-throw line 15 feet from the plane of the backboard. The rim sits 10 feet above the floor, and the ring has an 18-inch inside diameter. The NBA three-point arc is 23 feet 9 inches from the middle of the basket. High school uses a closer arc, commonly 19 feet 9 inches. You do not need every hash mark on a family court, but you do need the length, the width, and the space past the baseline.

What Extra Space Does a Full Court Need?

A 94-by-50 playing area is not a 94-by-50 project, because players step out of bounds and a fence at the line is a collision waiting to happen. NFHS calls for at least 3 feet of clear space outside the lines, and it prefers about 10 feet. FIBA is stricter for a competition floor: at least 2 meters, about 6 feet 7 inches, of boundary area on every side. That boundary makes the whole FIBA floor at least 32 meters by 19 meters before any fence.

Use the smaller residential number as a planning floor, not as a finish line for the slab. Three feet on every side turns an NBA court into a pad about 100 feet by 56 feet. Ten feet of runout on every side turns the same court into about 114 feet by 70 feet. A high school court with 5 feet of clear space on each side needs about 94 feet by 60 feet of slab, which is 5,640 square feet before the hoop pole behind the baseline.

Gappsi’s basketball court design page lists residential footprints that already reflect this reality: 20 by 24 feet, 30 by 30 feet, and 30 by 60 feet, with room to customize. None of those footprints is a regulation NBA floor, but they are sizes that fit Nassau and Suffolk yards while still leaving a lane, a free-throw distance, and space to move.
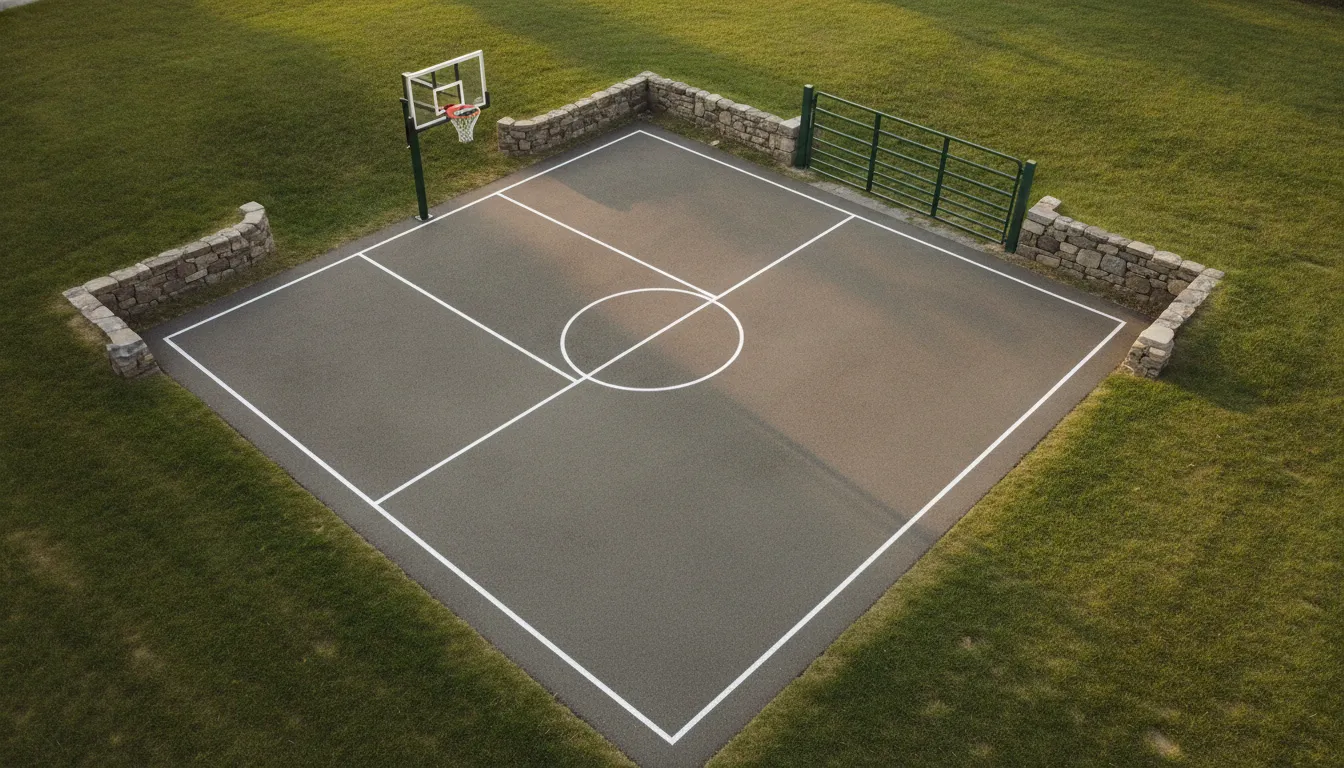
Overhead view of a residential court with lawn clearance, a stone edge, and a side gate for access

Measure the open yard, then subtract the pieces you cannot pave over. A setback, a septic field, a tree the family wants to keep, and the swing of a gate all come off that rectangle. If the remaining pad cannot hold 42 feet of depth plus runout, a half court is the honest layout for that yard. Forcing a full court against a fence makes the official length useless, because play stops at the boundary instead of at the painted line.

Count the painted lines as part of the court, not as extra space you can borrow later. A two-inch line looks small on a tape, but a lane, a free-throw circle, and a three-point arc all need the full width to land inside the slab. If the painter has to clip the arc because the fence arrives early, the court is shorter than the rule book you planned to follow. Set the border first, and paint the lines only after that border is fixed.

Rim height does not change when the court gets shorter. NBA equipment rules put the upper edge of the ring 10 feet above the playing floor. The nearest inside edge of the ring sits 6 inches out from the face of the backboard. A residential adjustable hoop can sit lower when younger players are the main users. The pole location does not get smaller when the rim drops, and the footing is still behind the baseline.

Backboard size is another fixed piece: an NBA backboard is 6 feet wide and 3.5 feet tall. A smaller residential board still needs a clear swing, so a player driving the baseline does not meet the pole. If you only have room for a wall-mounted or fence-mounted hoop, say so before the slab size is final, because the mount changes where the baseline can sit.

How Big Is a Half-Court Basketball Setup?

Most home courts are half courts rather than full floors, and that is usually the better fit. Half of the high school length is 42 feet from baseline to midcourt. So a regulation half court is 42 feet deep and 50 feet wide, which is 2,100 square feet inside the lines. Add 5 feet of clear space on every side and the pad grows to about 52 by 60 feet, or about 3,120 square feet. Add the preferred 10-foot runout and the same half court is near 62 by 70 feet.

Smaller family courts are common, and they are still useful for daily play. A 30-by-30 pad gives one hoop, a lane, and room for free throws when the pole sits at the edge. A 30-by-60 pad can hold more than one activity, which is why that size shows up on Gappsi residential layouts across Long Island. It is not a second full court squeezed in half. It is a playing surface with enough depth for a shot and enough width for two people to move past each other.

The hoop itself takes space past the line, because an in-ground pole and the backboard overhang sit behind the baseline rather than inside the painted box. If the fence is the back of the slab, the pole has nowhere to go unless the fence and the footing allow a mount. Plan that base before you lock the court length on the drawing.

  1. Mark the playing rectangle you want: 42 by 50, 30 by 60, or a custom size.
  2. Add at least 3 feet of clear space outside every line, and more where players will drive.
  3. Place the pole and backboard behind the baseline, then check the fence.
  4. Walk the corners, and if a corner hits a patio, a pool deck, or a garden bed, shrink the rectangle before you pour.

If the same pad may also carry pickleball lines, read the basketball and pickleball combined guide after you have a rectangle. That page covers shared lines, and this one stops at whether the basketball surface fits.

How Should Drainage and the Surface Change the Footprint?

A flat court still needs a way for water to leave, because Long Island yards take heavy rain and a dead-level slab holds puddles on the lane.

Plan a slight, even slope toward a lawn edge, a swale, or a drain before the base goes in. That slope is small, but the drain and the swale sit outside the playing lines, so they belong in the measurement.

The playing size stays the same on concrete, asphalt, modular tile, or synthetic turf, but the build around the lines does not. Gappsi’s basketball court design page lists asphalt with acrylic paint and modular interlocking tiles such as Mateflex as the two primary outdoor options, and it also names synthetic turf among the floor materials. Tile and turf both need a firm base under the finish. A base that stops at the painted line leaves no room to finish the edge, seat a drain, or keep grass from creeping onto the court over time. The backyard installation guide covers site prep and the surface choice in more detail. Do not treat a grass pad as a shortcut to a finished court. The tile-over-grass note explains why a grass base fails under tile.
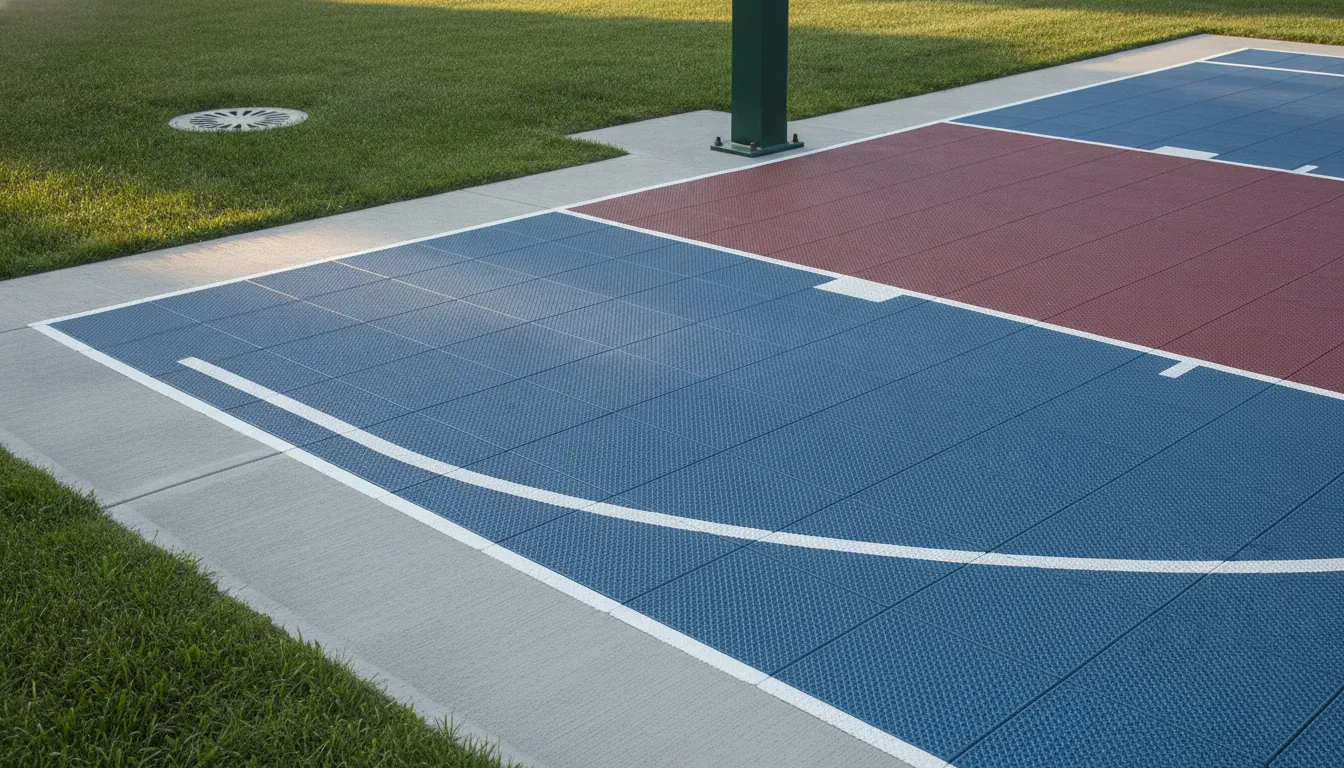
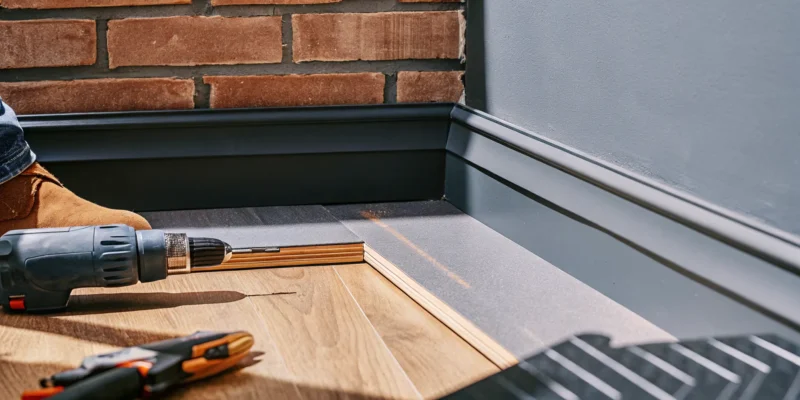
Modular basketball court tiles meeting a concrete border beside a lawn drain

Surface choice also changes how the edge feels underfoot. A concrete or acrylic court is fast and firm underfoot. Modular tiles add give and let water pass through the surface, which is why many family courts use them. Synthetic turf is a different bounce, and it needs a different infill plan. For the material comparison itself, use the outdoor surfacing guide. For this size check, note only that every one of those surfaces needs a border past the painted line.

Keep the pool and the fence in the same sketch as the court. A court next to a pool needs a dry path between them, not a shared edge where splash lands in the lane during play. Fence and netting posts need footings outside the runout. Put the post line on the plan when you draw the rectangle, not after the slab is cured. A post inside the runout steals the clearance you just measured.

What Access Does the Build Need?

A court that fits on paper can still fail if the crew cannot reach the pad. Concrete, tile pallets, a hoop pole, and base stone come through a side yard or a rear gate, and a 3-foot garden gate is a real problem. Plan an opening wide enough for the equipment you expect, and keep that route open until the surface is down.

Access also means the way the family will use the court after the crew leaves. A gate at the corner lets you bring out a portable net or a maintenance tool without crossing a planting bed each time. If the only approach is across a finished patio, the court size may need to shrink so that path stays intact. Smithtown, Islip, Huntington, and the rest of Nassau and Suffolk have plenty of deep lots that still hide a narrow side yard. Measure the side yard, not only the open back lawn.

Permits belong in the same pass as the tape measure. Many towns treat a court as an accessory structure, and the setback from the lot line can be larger than the 3-foot runout you planned. A setback of 10 feet on the rear line can erase a full-court plan even when the lawn looks big enough from the patio. Gappsi prepares drawings for that town review on Long Island basketball projects. Bring a current survey if you have one, because the survey is more useful than a tape pulled from the fence you hope to move.

See basketball court design options and compare a 30-by-30 or 30-by-60 layout with the open space you measured.

How Do You Check a Long Island Yard Against These Sizes?

Start with two measurements you can repeat. Take the clear depth from the back of the house or patio to the rear fence, and then the clear width between side obstacles such as a shed or a pool fence. Write down anything inside that box, then test three rectangles against what is left.

  • Full NBA court: 94 by 50 inside the lines, plus runout. Few residential lots hold this once you keep 5 or more feet of clear space.
  • High school court: 84 by 50 inside the lines. It is still a large pad once you add the pole and the drain outside the lines.
  • Half court or a Gappsi residential size: 42 by 50, 30 by 60, or 30 by 30. This is the size range that fits most family yards on Long Island.

A multi-sport yard is a different question from a single basketball pad. The Sports Games Courts space guide covers shared footprints, including a half-court area near 2,350 square feet once the safety zone is included. Use that page when the goal is basketball plus another game, and use this page when the goal is the basketball dimension itself.

Gappsi’s Sports Games Courts space guide describes a finished 30 by 60 foot court in East Islip, built with Snap Sports tiles on a concrete base. That footprint is a useful local reference, because it is wide enough for a real lane, short of a regulation full court, and still small enough to leave lawn. Your lot may want a different ratio, but the check is the same: lines, runout, slope, and a way in.

Posted by Gappsi Group.

Frequently Asked Questions

How big is a basketball court in feet?

An NBA court is 94 feet long and 50 feet wide. A high school court is 84 feet long and 50 feet wide. A FIBA court is 28 by 15 meters, about 92 by 49 feet. A home court is often smaller than all three of those official floors.

How many square feet is a full basketball court?

An NBA court is 4,700 square feet inside the lines, and a high school court is 4,200 square feet. Add runout and the built pad is larger than either of those painted areas. Five feet of clear space around a high school court brings the whole pad to about 94 by 60 feet.

Is a half court half the size?

A high school half court is 42 feet deep and still 50 feet wide, which is 2,100 square feet. Many yards use 30 by 30 or 30 by 60 instead of that full half-court width. Those sizes fit a hoop, a lane, and free throws without asking the yard for a full 50-foot width.

How much space should I leave outside the lines?

Leave at least 3 feet, and leave more where players drive toward a fence or a post. NFHS prefers about 10 feet in a gym, and FIBA asks for at least 2 meters on a competition floor. A backyard should also fit the pole and its footing behind the baseline.

Does the drain count as court space?

The drain is outside the playing lines, but it is still part of the project footprint. A slight slope, a swale, or a grate at the lawn edge keeps standing water off the lane. Measure that edge before you lock the rectangle on the plan.

Contact Gappsi through our contact page and ask for a court layout based on your survey, the gate width, and the space past the lines.
Share this page:
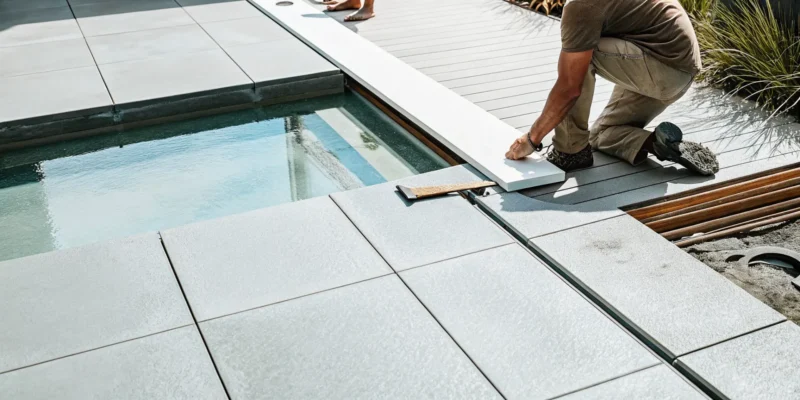
Contractor builds a poolside patio with porcelain pavers in Long Island.

How to Find Who Builds Porcelain Pavers in Long Island

Living on Long Island means embracing a unique coastal environment, but that environment can be tough on our homes. The salt air can corrode surfaces, and our dramatic freeze-thaw cycles can crack and heave traditional pavers. Porcelain pavers are uniquely suited to handle these specific challenges. Because they are non-porous, they are immune to salt damage and won't absorb the water that leads to winter cracking. This makes them the ideal, worry-free choice for any local property. For homeowners asking who builds porcelain pavers in Long Island with this local expertise, this guide provides the essential information for making a confident choice.

Key Takeaways

  • Porcelain is a Smart Investment for Long Island Weather: Its non-porous nature means it resists stains, salt damage, and cracking during freeze-thaw cycles, all without the need for regular sealing.
  • Achieve Any Design Without the Drawbacks: Modern porcelain realistically mimics the look of high-maintenance materials like wood or natural stone, giving you complete creative freedom for your patio, walkway, or pool deck.
  • Your Installer's Expertise is Crucial: The durability of your pavers depends on a flawless installation, so it is vital to hire a licensed and insured professional with proven experience specifically with porcelain.

What Are Porcelain Pavers?

If you're exploring materials for a new patio, walkway, or pool deck, you have likely come across porcelain pavers. They have become a popular choice for Long Island homeowners, and for good reason. Porcelain pavers are a type of engineered paving material celebrated for their incredible strength and sleek, modern appearance. Unlike other materials, they offer a unique combination of beauty and brawn, standing up to just about anything our coastal weather can throw at them. Let's break down what makes them so special.

How They're Made

Porcelain pavers get their superpowers from their creation process. They start as a very fine, high-quality clay that is pressed and then fired in a kiln at extremely high temperatures, much hotter than those used for standard ceramic tiles. This intense heat vitrifies the clay, which is a fancy way of saying it turns it into a glass-like material. The result is a paver that is incredibly dense, hard, and non-porous. Because the material is so compact, it’s exceptionally resistant to water absorption, stains, and scratches. This manufacturing method is what gives porcelain its signature durability and long-lasting finish.

Porcelain vs. Natural Stone

Many homeowners love the timeless look of natural stone, but it often comes with a demanding maintenance schedule. This is where porcelain truly shines. Thanks to modern digital printing technology, porcelain pavers can realistically mimic the appearance of everything from slate and travertine to rich hardwoods. You can get the exact aesthetic you want without the inherent drawbacks of the real thing. While natural stone can be porous and prone to staining, our selection of porcelain and natural stone pavers gives you a consistent and durable alternative that looks just as stunning. You get the best of both worlds: sophisticated design and practical performance.

Porcelain vs. Concrete

Concrete pavers are a common sight, but porcelain offers key advantages, especially for a long-term investment. While porcelain typically has a higher upfront cost, it requires almost no maintenance. Concrete pavers, on the other hand, need to be sealed every few years to protect them from stains and weather damage, adding to their lifetime cost. For Long Island homes, porcelain’s performance in cold weather is a major plus. It absorbs less than 0.5% of water, which means there's very little risk of it cracking during a freeze-thaw cycle. Concrete is more porous and can be susceptible to this kind of damage. When considering your masonry options, thinking about this long-term durability can make all the difference.

Why Choose Porcelain Pavers for Your Long Island Home?

When you invest in your outdoor space, you want materials that are not only beautiful but also built to last. Porcelain pavers check both boxes, offering a perfect blend of sophisticated style and practical durability that makes them an ideal choice for any Long Island property. From poolside patios to elegant walkways, porcelain provides a high-performance surface that stands up to the demands of our local climate while giving you the freedom to create a truly personalized outdoor oasis. If you're weighing your options, here are a few key reasons why porcelain pavers are gaining so much popularity.

Built for Coastal Weather

Living on Long Island means enjoying beautiful beaches and coastal breezes, but it also means dealing with salt in the air. Salty air can be tough on outdoor materials, causing concrete and some natural stones to pit and degrade over time. Porcelain, however, is a game-changer. Because it's non-porous, it’s naturally immune to salt damage, making it an excellent choice for homes near the ocean or bay. This resilience ensures your patio or walkway will maintain its integrity and appearance for years, even with constant exposure to our coastal environment. It’s a smart investment in your home’s long-term beauty and value.

Resists Stains, Fading, and Sun Damage

Your outdoor living area should be a place for relaxation, not worry. Porcelain pavers are incredibly strong against the elements. Their low water absorption rate means they won't soak up moisture, which prevents cracking during New York's freeze-thaw cycles. This same quality makes them highly resistant to stains from spilled wine, grill grease, or fallen leaves. Plus, they are manufactured to be UV-stable, so their color won't fade under the summer sun. You can choose a rich, dark-colored paver and trust that it will look just as vibrant years from now, which is why they are a top choice for porcelain and natural stone projects.

Enjoy a Low-Maintenance Yard

One of the biggest advantages of porcelain is how little maintenance it requires. Unlike natural stone or concrete pavers that need regular sealing to protect them from stains and moisture, porcelain’s dense surface is naturally protective. There’s no need for annual sealing, which saves you time and money. Most spills and dirt can be cleaned up easily with just water and a mild soap, so you can spend less time on upkeep and more time enjoying your beautiful yard. This makes porcelain an especially great material for high-traffic areas like pool decks and outdoor kitchens where spills are common.

Versatile Designs for Any Aesthetic

Your home has a unique style, and your outdoor space should reflect that. Modern porcelain pavers offer incredible design flexibility, with options that can realistically mimic the look of natural stone, rich wood grains, or sleek concrete. This versatility allows you to achieve the exact aesthetic you want without the maintenance or durability issues of the real materials. You can create a rustic, wood-look patio that never splinters or a classic bluestone-style walkway that never stains. With a wide range of colors, textures, and sizes available at the Gappsi Store, you can design distinctive patterns and define different zones for a truly custom outdoor environment.

How to Choose the Right Porcelain Pavers

Once you’ve decided on porcelain, the next step is picking the perfect paver for your project. It’s about more than just color. To make a choice you’ll be happy with for years, you need to consider performance, safety, and style. Thinking through these key factors will help you select a paver that not only looks beautiful but also stands up to the unique demands of Long Island’s climate. From poolside safety to winter durability, the right porcelain paver will check every box.

Water Absorption

One of porcelain’s greatest strengths is its incredible density. Because it’s fired at such high temperatures, it has a very low water absorption rate, typically under 0.5%. This might sound technical, but it has a huge practical benefit for us on Long Island. When water can’t seep into the paver, it can’t freeze, expand, and cause cracks during the winter. This simple property makes porcelain exceptionally durable and a reliable foundation for any patio, walkway, or outdoor living area that has to endure our cold, wet winters.

Slip Resistance

Safety should always be a priority for any outdoor surface, especially in areas that get wet. Outdoor-rated porcelain pavers are designed with safety in mind. They are manufactured with a textured surface that provides excellent grip, reducing the risk of slips and falls around swimming pools or on rainy days. Unlike some smooth, sealed surfaces that can become slick, you can feel confident that your porcelain patio or walkway will provide a secure footing for your family and guests, no matter the weather.

Frost and Salt Tolerance

The same low water absorption that prevents cracking also gives porcelain pavers excellent frost tolerance. They are built to handle the repeated freeze-thaw cycles of a Long Island winter without breaking down. Beyond the cold, porcelain is also completely immune to salt damage. This is a major advantage for coastal homes exposed to salt air and for any driveway or walkway where de-icing salts are used in the winter. This dual resistance ensures your masonry investment stays beautiful and intact for decades.

Finishes and Styles

Now for the fun part: choosing a look you love. Modern porcelain pavers offer incredible design flexibility. You are no longer limited to a few basic colors. Today’s pavers come in a vast range of finishes that realistically mimic the look of natural stone, rich wood planks, or sleek concrete. This versatility allows you to match any architectural style, from a rustic farmhouse to a modern coastal home. You can even use different styles to create beautiful patterns or define separate "rooms" in your outdoor space. You can explore the many options at the Gappsi Store to find the perfect fit.

Where to Use Porcelain Pavers on Your Property

One of the best things about porcelain pavers is their incredible versatility. They aren’t just for one specific part of your yard; you can use them to create a cohesive, elegant look across your entire property. From high-traffic walkways to serene poolside lounges, their durability and wide range of styles make them a fantastic choice for almost any outdoor project you can dream up. Thinking about how different areas of your landscape can connect is the first step to creating a truly unified and functional outdoor living space. Let’s look at some of the most popular places to use porcelain pavers on a Long Island property.

Pool Decks and Patios

If you have a pool, you know the surrounding deck needs to be safe, durable, and comfortable. Porcelain pavers check all those boxes, making them an ideal material for your poolside oasis. They are naturally slip-resistant, which gives you peace of mind when kids are running around with wet feet. Plus, they tend to stay cooler to the touch than many other materials, a huge benefit during hot summer days. Because they are non-porous, they also resist stains from pool chemicals, sunscreen, and spilled drinks. This makes them a perfect choice for creating stunning and functional swimming pools and patio areas that are built to last with minimal upkeep.

Walkways and Driveways

Your walkways and driveway are the first things guests see, and they handle a lot of foot and vehicle traffic. Porcelain pavers offer a durable and stylish solution that holds up beautifully over time. Unlike some materials that can fade with constant sun exposure, porcelain’s color stays true, keeping your entrance looking crisp and new for years. Their incredible strength, when installed on a proper foundation, makes them suitable even for driveways. Using porcelain for your walkways creates a beautiful, guiding path through your garden or from the driveway to your front door, tying your entire landscape design together with a clean and modern feel.

Indoor-Outdoor Living Spaces

Creating a seamless flow between your home’s interior and your patio or backyard is a popular design goal, and porcelain pavers are perfect for the job. Many porcelain collections offer matching tiles for both indoor and outdoor use, allowing you to extend your living space with a continuous, uninterrupted floor. This technique can make your home feel larger and more connected to nature. You can use these versatile pavers to design beautiful patterns, define specific zones for dining or lounging under a pavilion or pergola, and craft a truly distinctive outdoor environment that feels like a natural extension of your home.

Why Professional Installation Is Key

You’ve chosen beautiful, durable porcelain pavers for your home, and that’s a fantastic investment. To make sure that investment pays off for decades, the installation has to be perfect. While a weekend DIY project can be satisfying, installing porcelain pavers is a specialized skill. Unlike traditional materials, porcelain has unique requirements that demand precision and expertise.

Hiring a professional team ensures every detail is handled correctly, from the unseen foundation to the final, flawless surface. It’s about more than just laying down stones; it’s a technical process that guarantees your new patio, walkway, or pool deck will withstand Long Island’s weather and years of enjoyment. A professional masonry contractor has the right tools, experience, and understanding of local conditions to create a space that is not only stunning but also structurally sound. This approach saves you from common pitfalls that can lead to costly repairs down the road, giving you peace of mind and a finished project you’ll be proud of.

The Importance of a Proper Foundation

The secret to a long-lasting paver patio isn't the pavers themselves, but the foundation beneath them. A strong, properly prepared base is essential to prevent the pavers from sinking, shifting, or becoming uneven over time. For Long Island homeowners, this is especially critical due to our freeze-thaw cycles, which can wreak havoc on improperly installed surfaces. A professional crew excavates to the right depth and builds a multi-layered base that provides stability and promotes excellent drainage. This prevents water from pooling and causing damage, ensuring your beautiful surface remains level and intact through every season.

The Risks of a DIY Project

Porcelain pavers require a more specialized installation than other materials. Because they are often thinner and more rigid, the ground base must be perfectly level to avoid cracks under pressure. Cutting porcelain also requires specific diamond-tipped blades and tools that most DIYers don't have on hand. Without the right equipment and technique, you risk chipping expensive pavers and creating a lot of waste. Even some general contractors lack the specific experience needed to work with porcelain. Opting for a team that specializes in porcelain and natural stone eliminates these risks and ensures a clean, professional result.

Save Time and Ensure a Lasting Finish

Hiring an experienced installation team saves you more than just a few weekends of hard labor. Professionals work efficiently to complete the job correctly and on schedule. They use specialized tools to ensure every paver is perfectly level and that the entire surface has the correct slope for water drainage. This is crucial for preventing puddles on your patio or ice patches in the winter. Ultimately, a professional installation gives you a durable, beautiful finish that is ready to enjoy right away. It’s the best way to protect your investment and avoid the stress of future repairs.

How to Vet Your Porcelain Paver Installer

Choosing the right installer is just as important as selecting the perfect paver. The most beautiful, durable porcelain can fail if it’s not installed correctly, leaving you with a wobbly patio or cracked walkway. A great installation ensures your investment looks stunning for decades. Finding a contractor you trust involves a little homework, but it’s a crucial step for getting the results you want. You’re looking for a team that not only has the technical skills but also understands the specific challenges of building on Long Island.

When you start your search, focus on finding a partner who can guide you through the process, from design to the final paver. A professional team will have a deep understanding of how to work with porcelain and natural stone pavers, ensuring every detail is handled with care. Taking the time to properly vet your installer protects your home and your budget, giving you peace of mind and a beautiful outdoor space you can be proud of.

Check for Licensing and Insurance

Before you even start talking about designs or costs, your first question should always be about licensing and insurance. This is a non-negotiable. A valid license proves the contractor meets state and local requirements to perform the work, while proper insurance protects you from any liability if an accident happens on your property. Think of it as your first line of defense. Any reputable company will be upfront with this information. When you choose your installer carefully, you’re not just hiring a contractor; you’re partnering with a professional home remodeling business that values safety and accountability.

Verify Their Porcelain-Specific Experience

Working with porcelain pavers is a specialized skill. It’s not the same as laying brick or concrete pavers. Porcelain is incredibly dense, which means it requires specific diamond-tipped blades for clean cuts and a precise installation method to prevent issues down the road. A good installer knows how to build things that last in this climate, especially with our freeze-thaw cycles. Ask potential installers about their direct experience with porcelain. How many porcelain projects have they completed? Do they understand the right base preparation and jointing techniques? True masonry experts will be able to walk you through their process with confidence.

Review Their Portfolio of Work

Seeing is believing. A portfolio is your window into an installer’s craftsmanship and attention to detail. Ask to see pictures of their past work, specifically focusing on porcelain paver projects. Look at the details: Are the cut lines straight and clean? Are the grout lines consistent? Does the overall finish look professional and polished? A strong portfolio, like the project showcases on the Gappsi YouTube channel, demonstrates a history of quality work and happy clients. This step helps you visualize what they can do for your property and ensures their style aligns with your vision.

Ask About Warranties and Support

A confident installer will always stand behind their work. Before signing a contract, find out what guarantees they offer for their work and the materials. A solid warranty on labor protects you from any installation errors, while a manufacturer's warranty covers the pavers themselves. This shows the company is committed to quality and is prepared to address any issues that might arise. It’s also a good idea to ask about long-term care and support. A company that offers restoration and sealing services is invested in the longevity of your project, not just the initial installation.

Common Hiring Mistakes to Avoid

Choosing an installer for your porcelain pavers is a big decision. To make sure your project goes smoothly and the results are stunning, it helps to know what pitfalls to look out for. A beautiful new patio or pool deck is a significant investment in your home, and the last thing you want is a process filled with stress or an outcome that doesn't meet your expectations. By being aware of a few common missteps, you can hire with confidence and find a true partner for your project. Let’s walk through the key mistakes to sidestep when selecting a porcelain paver installer for your Long Island home.

Skipping the Vetting Process

It’s tempting to hire the first contractor who gives you a quote, but taking time to properly vet your options is crucial. A professional installer will be fully licensed and insured, which protects you from liability during the project. Don’t be shy about asking for proof. You should also ask to see a portfolio of their recent porcelain paver projects. This helps you confirm they have specific experience with the material. A reputable masonry company will gladly provide these details, giving you the confidence that you’re working with a qualified expert who is proud of their work.

Choosing Based on Price Alone

While your budget is important, a quote that seems too good to be true probably is. Porcelain pavers are a premium material, and their installation requires a specific skill set and foundation work. An unusually low bid can be a red flag for an installer who cuts corners, uses subpar base materials, or lacks the right experience. This can lead to an uneven surface, cracked pavers, or drainage issues down the road. Think of your project as a long-term investment. It’s better to pay a fair price for high-quality porcelain and natural stone installation that will last for decades than to save a little now and face costly repairs later.

Forgetting to Discuss Warranties

One of the most common oversights homeowners make is failing to talk about warranties before signing a contract. You need to know what guarantees the installer offers on their workmanship and the materials themselves. A confident contractor will stand behind their work with a clear warranty. Ask them directly: What does your workmanship warranty cover, and for how long? Are the pavers covered by a separate manufacturer's warranty? Getting these answers upfront provides peace of mind and protects your investment. It shows the company is committed to the long-term success and restoration of your property.

Ignoring Past Client Reviews

Before you commit, take a few minutes to see what past clients have to say. Online reviews on platforms like Google give you an honest look into what it’s like to work with a company. Look beyond the star rating and read the comments. Do clients mention good communication, a clean job site, and a professional crew? These details paint a picture of the entire customer experience. You can also look for video testimonials or project showcases, as seeing the finished work on the Gappsi YouTube channel can provide even deeper insight. This feedback from fellow Long Island homeowners is one of the most valuable resources you have.

Understanding Porcelain Paver Installation Costs

Investing in a porcelain paver patio or walkway is a fantastic way to add lasting beauty and function to your Long Island home. Before you get started, it’s helpful to have a clear picture of the potential costs so you can plan your budget accordingly. The final price tag depends on the materials you choose, the complexity of the job, and the expertise of the installer you hire. A professional installation ensures your investment not only looks great on day one but also stands the test of time.

Typical Cost Ranges on Long Island

Let's talk about budget. Knowing the numbers upfront helps you plan your project without any surprises. On Long Island, the porcelain pavers themselves typically cost between $12 and $19 per square foot. Professional installation, which is key for a lasting finish, usually runs from $28 to $45 per square foot. So, for a standard 400-square-foot patio, the total investment is higher than for materials like concrete. While the initial cost is more, you're paying for incredible durability, minimal maintenance, and a look that won't fade. Think of it as a long-term investment in your home's beauty and value.

Factors That Influence the Final Price

The final quote for your project will depend on more than just the size of the area. Several factors can influence the price. First is the condition of your yard. A solid foundation is non-negotiable for porcelain, so preparing the ground properly is a must. If your space requires significant digging, grading, or removing an old concrete slab, that will add to the labor costs. The complexity of your design also plays a role. A simple, straight-edged patio will cost less to install than one with intricate curves, custom cuts, or detailed patterns. Our masonry experts can walk you through how these choices affect your specific project.

What a Quality Quote Includes

When you're ready to get quotes, it's important to know what to look for. A quality quote from a trustworthy installer is more than just a number. Make sure any contractor you consider is fully licensed and insured for work in your area. Ask to see a portfolio of their recent porcelain paver projects, not just general patio work. A great installer will be proud to show you their craftsmanship. Don't hesitate to ask about warranties or guarantees on their work, as this shows they stand behind their quality. A comprehensive home remodeling partner will provide a detailed proposal that covers all these points, giving you complete peace of mind.

Protecting Your Porcelain Paver Investment

Choosing porcelain pavers is a smart decision for your Long Island home, and with the right care, they will look beautiful for years. One of the biggest advantages of porcelain is its incredible durability, especially during our cold, wet winters. Because porcelain absorbs almost no water (less than 0.5%), there’s virtually no risk of it cracking or flaking during a freeze. This resilience means you can count on your patio or walkway to withstand the elements season after season without the constant worry of weather damage that can affect other materials.

Unlike materials that require ongoing upkeep, porcelain is refreshingly low maintenance. You can forget about the recurring task and expense of sealing your pavers every few years. While concrete and some natural stones need this protection to prevent staining and water damage, porcelain’s non-porous surface handles that on its own. This saves you time and money over the life of your patio, making your initial investment even more valuable. You get to spend more time enjoying your outdoor space and less time working on it. Gappsi offers a wide selection of high-quality porcelain and natural stone options to fit any design, ensuring your investment is not only durable but also perfectly suited to your home's aesthetic.

Simple Care and Maintenance Tips

Keeping your porcelain pavers looking brand new is incredibly simple. For routine cleaning, all you need to do is sweep away leaves and debris or give the area a quick rinse with a hose. Because the surface is so dense, common culprits like spilled wine, oil, or grime won't soak in, making cleanup easy. For any tougher spots, a little mild soap and water are all it takes.

An annual wash is usually enough to keep your pavers in pristine condition. You’ll never have to worry about sealing them, and their resistance to mold and mildew growth means your patio stays cleaner with minimal effort. You can see how pristine these surfaces stay by viewing some of our completed projects on the Gappsi YouTube channel.

Designing Your Complete Outdoor Space

Beyond their practical benefits, porcelain pavers offer amazing design flexibility to create a truly custom look. Modern porcelain can realistically mimic the appearance of natural stone, rich wood grains, or sleek concrete, allowing you to achieve your desired aesthetic without the maintenance drawbacks of those materials. This versatility makes it easy to match your home’s style, whether it’s classic and traditional or clean and contemporary.

You can use porcelain pavers to define different zones in your backyard, creating distinct areas for dining, lounging, or gathering around a fire pit. By combining different sizes, colors, or laying patterns, you can design a truly unique outdoor setting. This level of customization is key to creating a cohesive and functional space that flows seamlessly from one area to the next. Thinking about the bigger picture is where a professional landscape designer can help tie everything together.

Related Articles

Frequently Asked Questions

Are porcelain pavers really worth the higher upfront cost compared to concrete? It’s true that porcelain pavers often have a higher initial price, but it’s helpful to think about the total cost over the life of your patio. Concrete pavers require regular sealing every few years to protect them from stains and weather, which adds up in time and money. Porcelain, on the other hand, never needs to be sealed. Its incredible durability also means you’re far less likely to face repair costs from cracking or weather damage. You’re investing in a surface that will look just as good in ten years with very little effort.

What does "low maintenance" actually involve for porcelain pavers? Low maintenance with porcelain truly means what it says. For day-to-day care, a simple sweep or rinse with a garden hose is usually all you need to clear away dirt and leaves. Because the pavers are non-porous, spills like wine or oil from the grill sit on the surface instead of soaking in, so you can wipe them up easily with mild soap and water. You can forget about the annual chore of sealing, which gives you more time to simply relax and enjoy your outdoor space.

How well do porcelain pavers handle Long Island winters and poolside safety? Porcelain is exceptionally well-suited for our local climate. Its very low water absorption rate means water can't seep in, freeze, and cause cracks, making it perfect for our freeze-thaw cycles. This same quality, combined with its resistance to salt and pool chemicals, makes it a top choice for pool decks. For safety, outdoor-rated porcelain pavers are manufactured with a textured, slip-resistant finish, providing secure footing even when the surface is wet.

Will porcelain pavers look fake or manufactured compared to natural stone? This is a common concern, but modern manufacturing has come a long way. High-definition printing technology allows porcelain pavers to realistically capture the unique colors, veining, and textures of natural materials like travertine, slate, or even wood. You can get the exact aesthetic you love without the inherent issues of the real thing, such as the porosity of stone or the splintering of wood. It gives you the best of both worlds: sophisticated design and practical performance.

Why can't my regular contractor install porcelain pavers? While a general contractor may be great at many things, installing porcelain pavers is a specialized skill. The material is incredibly dense and requires specific diamond-tipped blades for clean, precise cuts. More importantly, the foundation beneath the pavers must be perfectly level and stable to prevent the rigid pavers from cracking under pressure. A masonry expert who specializes in porcelain understands these unique requirements and has the right tools and experience to ensure your investment is beautiful, secure, and built to last.

Share this page:
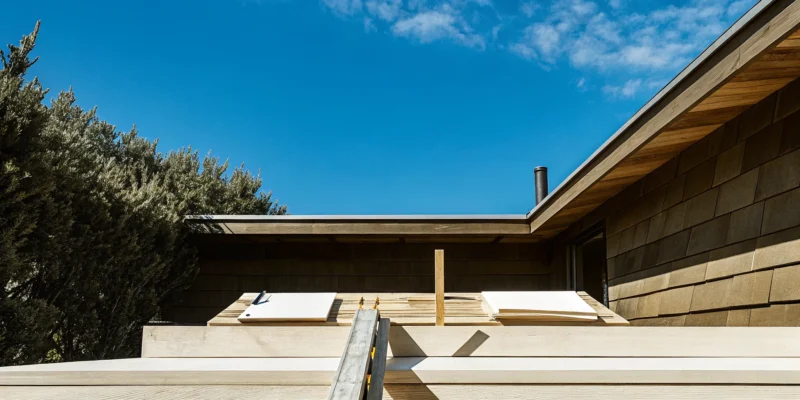
Whole property renovation of a modern home exterior on Long Island.

Whole Property Renovation Long Island: A Cost Guide

Over the years, your home can become a collection of separate updates that don’t quite work together. The kitchen was redone five years ago, the patio was added last summer, but the spaces still feel disconnected. A whole property renovation Long Island project is the solution for creating a unified home with a seamless flow from the inside out. It’s an opportunity to establish a consistent design, improve functionality, and ensure every element of your property works in harmony. This guide will show you how to plan a cohesive transformation that turns your house into a beautifully integrated home.

Key Takeaways

  • Create a clear plan before you begin: A successful renovation starts with knowing what you want and what you can spend. Define your must-haves, set a realistic budget that includes a 10-20% contingency fund, and research your material options to make informed decisions.
  • A whole property renovation transforms your lifestyle: This is more than just a cosmetic update; it’s an opportunity to increase your home’s value, improve energy efficiency, and create a cohesive flow between your indoor and outdoor spaces, making your entire property work better for you.
  • Your contractor choice is critical for success: The right partner makes all the difference in a large-scale project. Look for a licensed and insured team with extensive local Long Island experience, a strong portfolio, and the ability to manage your entire project from design to construction.

What Is a Whole Property Renovation?

A whole property renovation is a project that transforms your entire home, both inside and out. Think of it as a comprehensive overhaul rather than a simple, one-room update. It’s about creating a cohesive, functional, and beautiful living space that truly reflects your lifestyle and needs. This type of project involves making significant changes to almost every area of your property, from the kitchen to the backyard, ensuring every element works together in harmony.

For Long Island homeowners, this often means not just updating the interior but also creating an outdoor oasis for relaxation and entertainment. The goal is to reimagine your entire property to better suit your family. Whether you’re looking to modernize an older home or customize a new one, a whole property renovation allows you to create the home you’ve always envisioned. It’s a chance to improve flow, add functionality, and build a space that feels completely new.

Defining Your Scope: Indoors and Out

When you start planning, the first step is to define the scope of your project. This means deciding exactly what you want to change. A whole property renovation can include a wide range of updates. Indoors, this often involves a complete home remodeling effort, focusing on key areas like kitchens and bathrooms, which can dramatically change your daily life. You might also consider new flooring, fresh paint, updated trim, and even changing the layout of rooms to create a more open and inviting atmosphere.

Don’t forget to think about the exterior. Your outdoor space is an extension of your home, and a full renovation can connect the two seamlessly. This could mean designing a new landscape, adding beautiful masonry for patios and walkways, or installing a new fence for privacy.

What a Full Property Overhaul Includes

A full property overhaul delivers more than just a new look; it enhances your entire living experience. One of the biggest benefits is creating a highly functional space tailored to your lifestyle. You can reconfigure layouts for better flow, add rooms for a growing family, or design dedicated areas for work and play. These changes can significantly increase your property’s value, making it a smart long-term investment.

This is also the perfect opportunity to incorporate modern, energy-efficient upgrades. New windows, insulation, and updated systems can lower your utility bills and make your home more comfortable year-round. An overhaul can also include exciting additions that transform how you use your property, like installing a custom swimming pool or building a beautiful pergola for outdoor dining. It’s about creating a home that works for you in every way.

Why Renovate Your Entire Long Island Property?

Deciding to renovate your entire property is a major step, but it’s also one of the most rewarding investments you can make in your home. A whole-property renovation goes beyond simple updates; it’s a complete overhaul that reimagines your living space, both inside and out. This process allows you to create a cohesive environment that perfectly suits your family’s lifestyle, fixes long-standing issues, and prepares your home for the future.

While the thought of coordinating a large-scale project can feel overwhelming, the benefits are substantial. A comprehensive renovation allows you to address everything at once, ensuring that all elements, from your kitchen layout to your backyard patio, work together seamlessly. It’s an opportunity to not only increase your home’s financial worth but also to significantly improve your quality of life. By transforming your property into a space that is more functional, efficient, and beautiful, you’re creating a home that you’ll love for years to come.

Increase Your Property Value

One of the most compelling reasons to undertake a whole-property renovation is the significant return on investment. A thoughtfully planned renovation can dramatically increase your home’s market value and appeal. Buyers on Long Island are looking for modern, move-in-ready homes, and a property with a cohesive design, updated systems, and functional living spaces stands out. Projects like a full home remodeling effort that includes a new kitchen or luxurious bathrooms often provide a high return. Similarly, enhancing your home’s exterior with beautiful masonry and professional landscaping creates lasting curb appeal. A properly planned renovation enhances both your lifestyle and your long-term equity.

Improve Energy Efficiency

An older home often comes with outdated windows, poor insulation, and inefficient appliances, all of which lead to high utility bills. A complete home alteration is the perfect opportunity to introduce energy-efficient upgrades that save you money month after month. By replacing drafty windows and doors, adding modern insulation, and installing energy-saving appliances, you can create a more comfortable and sustainable living environment. These improvements not only lower your carbon footprint but also make your home more attractive to future buyers who value sustainability and lower running costs. It’s a smart investment that pays for itself over time through reduced energy consumption.

Enhance Functionality and Modernize Your Home

Your home should adapt to your life, not the other way around. A whole-property renovation allows you to redesign your space to fit your current needs and lifestyle. You can create an open-concept floor plan for better flow, add a dedicated home office, or build the ultimate outdoor entertainment area. Imagine hosting summer parties around a new swimming pool or enjoying quiet evenings under a custom-built pergola. By updating the layout and features, you can modernize your home and make daily life more enjoyable. This is your chance to transform a house that works into a home you truly love living in.

How Much Does a Whole Property Renovation Cost in Long Island?

Figuring out the cost of a whole property renovation is often the first, and biggest, question on a homeowner’s mind. The truth is, the final price tag can vary widely. It all depends on the size of your property, the scope of your vision, and the materials you choose. To give you a clearer picture, we can break down renovation costs into three general tiers. Think of these as starting points to help you align your budget with your goals. Whether you’re looking for a simple cosmetic update or a complete structural overhaul, understanding these budget ranges will help you plan your project with confidence.

The Basic Refresh: Budgets Under $100,000

If your budget is under $100,000, you can give your home a significant facelift. This tier is perfect for making an older house feel fresh and modern without tearing down walls. A basic refresh typically includes a fresh coat of paint throughout the home, new flooring, updated light fixtures, and simple upgrades to your kitchen and bathroom faucets and hardware. It’s about enhancing what’s already there to create a more personal and inviting space. This budget is ideal for homeowners who want to update the look and feel of their property and can be a great first step in a larger home remodeling plan.

The Mid-Range Renovation: $100,000–$175,000

With a budget between $100,000 and $175,000, you can start making more substantial changes to your home’s layout and functionality. This is where you can tackle a full kitchen or bathroom remodel, perhaps removing a non-load-bearing wall to create the open-concept living area you’ve always wanted. This level of investment often includes necessary upgrades to plumbing and electrical systems to support your new design. You can also select more premium materials, like beautiful porcelain and natural stone for countertops and floors, to truly transform your space. This tier focuses on improving your home’s flow and making it work better for your lifestyle.

The Full-Scale Transformation: $175,000+

For budgets of $175,000 and beyond, you’re entering the realm of a full-scale transformation. This is a gut renovation, where rooms are taken down to the studs and completely reimagined. You can make significant changes to your home’s footprint, add new rooms like a home office or gym, and integrate high-end materials and smart home technology. This is your opportunity to build your dream home from the inside out, creating luxurious spa-like bathrooms and a chef’s kitchen. A project of this scale can also extend outdoors, seamlessly connecting your interior with stunning pavilions and pergolas for the ultimate living experience.

What Factors Influence Your Renovation Cost?

Figuring out a renovation budget can feel like trying to hit a moving target. While every project is unique, several key factors consistently shape the final cost. Understanding these variables from the start helps you create a more accurate budget and set realistic expectations for your Long Island home transformation. Let’s walk through the main elements that will influence your total investment.

Property Size and Condition

It’s a straightforward rule: the larger your property, the more it will cost to renovate. More square footage means more materials and more labor hours. Beyond size, the current condition of your home plays a huge role. An older Long Island house might have charming character, but it can also hide outdated plumbing, old wiring, or structural issues that need to be brought up to code. Addressing these underlying problems is essential for a safe and lasting home remodeling project, but it will add to your overall expenses. A thorough initial inspection can help uncover these potential costs before work begins, preventing surprises down the road.

Project Scope and Material Choices

The scale of your vision is one of the biggest cost drivers. A simple cosmetic update is very different from a full gut renovation. On Long Island, a whole home remodel can range from $50,000 to over $250,000, depending on how extensive the changes are. Projects like kitchens and bathrooms are typically the most expensive due to the complex plumbing, electrical work, and cabinetry involved. Your choice of materials also makes a significant impact. Opting for high-end finishes, custom features, or premium porcelain and natural stone will naturally increase the budget compared to standard options. It’s all about balancing your dream aesthetic with your financial plan.

Labor, Permits, and Local Regulations

Labor costs are a major component of any renovation budget, but there are other administrative expenses to consider, especially on Long Island. Each town in Nassau and Suffolk County has its own specific zoning rules, permit requirements, and inspection processes. Major changes, particularly structural ones, often require architectural plans and engineering validation before you can even break ground. Working with a contractor who has deep local knowledge is key. They can manage the permit application process efficiently, helping you avoid costly delays and ensuring your project complies with all local regulations from start to finish. This expertise is invaluable for a smooth renovation experience.

Breaking Down the Costs by Project Type

To give you a clearer picture of where your budget will go, let’s look at some common renovation projects on Long Island. Costs can shift based on the size of your space, the quality of materials you choose, and the complexity of the work. Think of these numbers as a starting point to help you plan. A full-service team can provide a detailed estimate tailored to your specific vision, from initial design to the final build.

Kitchen and Bathroom Remodeling

Kitchens and bathrooms are the heart of the home, and they are often the first places homeowners look to update. For a smaller kitchen under 100 square feet, a budget-friendly refresh might cost between $20,000 and $30,000. A mid-range remodel for a 200-square-foot kitchen typically starts around $30,000, while a high-end, custom renovation can easily reach $75,000 or more. Similarly, a basic bathroom update can range from $15,000 to $20,000. If you’re planning a more extensive home remodeling project with premium materials, expect costs to be between $21,000 and $40,000, with luxury projects starting at $40,000.

Structural and Interior Renovations

When you’re looking at a full-home renovation, costs are often calculated per square foot. For projects using standard, quality materials, you can expect to start around $100 per square foot. For high-end properties with luxury finishes and custom details, that starting point is closer to $250 per square foot. It’s also wise to remember that whole-home projects can sometimes uncover unexpected issues. Building a contingency fund into your budget is a smart way to prepare for any surprises, ensuring your renovation stays on track without compromising your vision.

Outdoor Living Spaces: Pools, Masonry, and Landscaping

Creating a beautiful outdoor oasis is one of the best ways to enhance your Long Island property. The cost for these projects varies widely depending on your design and material choices. Installing a custom swimming pool is a significant investment that adds incredible value and enjoyment. High-quality masonry for patios, walkways, and retaining walls provides structure and elegance to your yard. A professional landscape design ties everything together, creating a cohesive and inviting space for you and your family to enjoy for years to come.

Specialty Additions: Pavilions, Pergolas, and Game Courts

Specialty additions are all about tailoring your home to your lifestyle. Adding a custom structure like a pavilion or pergola can create a perfect spot for outdoor dining or relaxation, extending your living space into the backyard. For active families, installing custom sports games courts for basketball, tennis, or pickleball can provide endless entertainment. These projects are designed to integrate seamlessly with your home’s existing style while adding unique functionality that makes your property stand out.

How to Plan and Budget for Your Long Island Renovation

A whole property renovation is an exciting prospect, but it’s also a major undertaking. The key to a successful project that you’ll love for years to come is a solid plan. Thinking through your goals, budget, and timeline before any walls come down will help the entire process run more smoothly and prevent stressful surprises along the way. While it might seem like a lot to organize, breaking it down into manageable steps makes it much easier.

A thoughtful plan acts as your roadmap, guiding every decision from the big picture down to the smallest details. It ensures that you, your designer, and your contractor are all on the same page. This alignment is crucial for transforming your vision into a reality without unnecessary delays or budget overruns. By following a structured approach, you can confidently begin your home remodeling journey, knowing you’ve set your project up for success from the very start. These six steps will help you create a clear and effective plan for your Long Island renovation.

Step 1: Define Your Goals and Priorities

Before you start looking at paint colors or tile samples, take some time to think about what you truly want to achieve with your renovation. What are the main reasons you’re remodeling? Are you looking to create a more open and inviting kitchen for entertaining, add a functional home office, or build an outdoor oasis with a new swimming pool? Make a list of your must-haves and your nice-to-haves. This simple exercise will help you clarify your vision and establish clear priorities, which is essential for allocating your budget effectively and making smart decisions when it matters most.

Step 2: Set a Realistic Budget with a Contingency Fund

Once you know what you want, it’s time to figure out what you can spend. Setting a realistic budget is one of the most important steps in the planning process. Be honest about your finances and what you’re comfortable investing in your home. After you arrive at a total number, plan to set aside an extra 10% to 20% as a contingency fund. Renovations, especially in older homes, can sometimes reveal unexpected issues. Having this financial cushion will give you peace of mind and prevent a small surprise from derailing your entire project.

Step 3: Research Materials and Get Multiple Quotes

With your goals and budget in hand, you can start exploring the fun stuff: materials, fixtures, and finishes. Thorough research is the foundation of a well-executed renovation. Visit showrooms, browse online galleries, and gather inspiration to find the styles you love. This is also the time to start talking to contractors. Getting detailed quotes from a few reputable companies will help you understand the potential costs and find a team that fits your project. You can explore a wide range of high-quality materials, from natural stone to modern porcelain, at the Gappsi Store to see what’s possible.

Step 4: Choose the Right Contractor

Your contractor is your partner in bringing your vision to life, so choosing the right one is critical. Look for a team with a proven track record, a strong portfolio of work similar to your project, and positive client reviews. A great contractor does more than just build; they communicate clearly, provide detailed estimates, and help you solve problems. A full-service design and build firm like Gappsi can streamline the process by managing everything from initial design to final construction, ensuring a cohesive and well-managed project. You can see our team in action on the Gappsi YouTube channel.

Step 5: Secure Permits and Approvals

Nearly every significant home renovation on Long Island requires permits. This process ensures that all work is done safely and up to local building codes. While it might seem like a bureaucratic hassle, it’s a crucial step that protects you and your investment. An experienced local contractor will be well-versed in the specific requirements for your town or village and can manage the entire permitting process for you. This includes preparing the necessary architectural plans and ensuring all structural changes are properly engineered and approved, taking a significant weight off your shoulders.

Step 6: Track Expenses and Manage the Timeline

Once construction begins, staying organized is key to keeping your project on track and on budget. Create a simple spreadsheet to track all expenses and keep copies of every invoice and receipt. This not only helps you monitor your spending but also provides a valuable record for tax purposes or future reference. Work with your contractor to establish a clear project timeline with key milestones. Regular check-ins will help you stay informed about progress and address any potential delays quickly, ensuring a smooth and efficient renovation from start to finish.

How to Choose a Long Island Renovation Contractor

Choosing a contractor is one of the most important decisions you’ll make for your whole property renovation. This isn’t just about hiring someone to do a job; it’s about finding a partner who will guide you through a complex, and sometimes stressful, process. The right team will not only deliver beautiful results but also make the entire experience smoother from start to finish. For a project of this scale, you need a contractor with a proven track record, excellent communication skills, and deep knowledge of Long Island’s specific building requirements. Taking the time to thoroughly vet your options will save you from headaches, budget overruns, and disappointment down the road. Think of it as building the foundation for a successful project before the first wall ever comes down.

Review Their Experience, Portfolio, and Reputation

When you start looking at contractors, their experience should be at the top of your checklist. You want a team that has a long history of successful projects similar to yours. Ask to see a portfolio of their work; a picture is worth a thousand words, and a video is even better. A contractor’s YouTube channel can give you a real feel for their craftsmanship and the scope of their projects. As one expert notes, homeowners on Long Island face unique challenges like “town permits, zoning rules, inspections, and structural considerations.” A contractor with years of local experience will know how to handle these complexities, ensuring your project stays on track. Don’t forget to read client testimonials and online reviews to get a sense of their reputation in the community.

Look for Clear Communication and Detailed Estimates

A great renovation experience depends on clear and consistent communication. From your very first conversation, pay attention to how a contractor listens to your ideas and answers your questions. You should feel heard and respected. When you receive an estimate, it should be detailed and transparent, breaking down the costs for labor, materials, and permits. A vague quote is often a red flag. It’s also important to “discuss the renovation timeline upfront and make temporary adjustments to your living situation.” A proactive contractor will help you prepare for the construction phase, minimizing disruption to your daily life. This level of planning is essential for complex home remodeling projects and shows a commitment to a positive client experience.

Verify Licensing, Insurance, and Local Knowledge

Before you sign any contracts, it’s crucial to do your due diligence. Always verify that your contractor holds the proper licenses for Nassau or Suffolk County and carries comprehensive liability and workers’ compensation insurance. This protects you from financial risk in case of accidents or property damage. Beyond the paperwork, look for a contractor with extensive local knowledge. A team that is deeply familiar with the area will understand the specific building codes and permit processes for your town. As local experts point out, a contractor who knows “a lot about local building rules and permits on Long Island” can streamline the entire process. This expertise is invaluable for projects like swimming pools, which have strict safety and zoning regulations, helping you avoid costly delays and ensuring everything is built to code.

How to Finance Your Long Island Renovation

Once you have a vision for your renovation, the next big question is how to pay for it. Funding a large-scale project can feel like a huge task, but many financing options are available to help you turn your dream home into a reality. From using your home’s existing value to leveraging state-specific programs, Long Island homeowners have several excellent paths to secure the funds for their whole property renovation. Understanding these options will help you choose the best financial strategy for your project’s scope and your personal budget.

Home Equity Loans and HELOCs

One of the most popular ways to finance a renovation is by using the equity you have already built in your home. You can do this through a home equity loan or a Home Equity Line of Credit (HELOC). A home equity loan gives you a lump sum of cash upfront with a fixed interest rate, which is great if you have a clear budget and a single large payment to make. A HELOC, on the other hand, works more like a credit card. It gives you a revolving line of credit that you can draw from as needed during your project, which offers flexibility for ongoing or unexpected costs. Both options often have lower interest rates than other types of loans.

SONYMA RemodelNY and CDLI Home Improvement Loans

Living in New York gives you access to some unique financing programs. The RemodelNY program from SONYMA is a fantastic option if you are buying a home that needs significant work. It allows you to combine the purchase price and the cost of renovations into a single mortgage, simplifying the process. For current homeowners, the Community Development Long Island (CDLI) offers a Home Improvement Program. This resource provides assistance to income-eligible households that need to make essential repairs to their property, helping to correct structural issues or update basic building systems. These local programs are worth looking into as you plan your renovation.

FHA 203(k) Loans and Personal Loans

FHA 203(k) loans are another excellent tool for financing a home and the cost of its rehabilitation through one mortgage. This federal program is designed for buyers who want to purchase a fixer-upper and roll the renovation expenses into their home loan from the start. If you prefer not to borrow against your home, a personal loan is another route. These loans are unsecured, meaning your home isn’t used as collateral. They are typically faster to secure but often come with higher interest rates. A personal loan can be a good fit for smaller projects or for homeowners who may not have enough equity for a home equity loan.

Top Renovation Trends on Long Island

When you’re planning a major renovation, it’s helpful to know what trends are shaping modern homes on Long Island. This isn’t about chasing fads. It’s about making smart, forward-thinking choices that will bring you joy for years to come while also adding significant value to your property. The most impactful trends focus on creating homes that are more efficient, more connected, and more in tune with our desire for flexible living spaces.

From embracing sustainable materials that are kind to the environment and your wallet, to integrating technology that simplifies daily life, today’s renovations are all about thoughtful improvements. We’re also seeing a major shift toward erasing the boundaries between inside and out, creating expansive, beautiful areas for relaxing and entertaining. Thinking about these trends can help you refine your vision and ensure your investment pays off in both lifestyle and equity. Let’s look at the top three trends guiding Long Island home renovations.

Sustainable Materials and Energy-Efficient Design

Homeowners are increasingly looking for ways to make their properties more environmentally friendly and cost-effective. This trend is about choosing materials and systems that reduce your home’s energy consumption and long-term maintenance. Think energy-efficient windows and doors, high-performance insulation, and modern HVAC systems that lower your utility bills. When it comes to materials, selecting durable and responsibly sourced options like natural stone for patios and walkways means you get a beautiful finish that lasts for decades without needing frequent replacement. These upgrades are not just good for the planet; they are a major selling point for future buyers who prioritize sustainability and lower living costs.

Smart Home Technology Integration

Integrating smart technology is no longer a futuristic concept; it’s a practical upgrade that adds convenience, security, and value to your home. During a renovation is the perfect time to wire your property for these modern enhancements. Imagine automated lighting for your new outdoor kitchen, a smart irrigation system that keeps your landscaping lush without wasting water, or integrated speakers in your pavilion for seamless entertaining. You can also add smart controls for your swimming pool’s temperature and lighting right from your phone. These features make your home more enjoyable and intuitive to live in, and they are highly attractive to tech-savvy buyers.

Open Floor Plans and Expanded Outdoor Living

The desire for spacious, connected living areas continues to drive renovation decisions. Inside, homeowners are knocking down walls to create open-concept kitchens that flow into dining and living rooms, making the space feel larger and more social. This trend extends directly into the backyard, where the goal is to create a true outdoor extension of the home. A seamless transition from your great room to a stunning patio becomes an entertainer’s dream. By incorporating features like an outdoor kitchen, a cozy fire pit, or a beautifully designed swimming pool, you create a functional and inviting environment for family gatherings and quiet relaxation alike.

Why Choose Gappsi for Your Whole Property Renovation?

Choosing the right partner for your renovation is the most important decision you will make. When you are transforming your entire property, you need a team that can handle every detail with skill and a deep understanding of Long Island homes. A whole property renovation requires a unified vision, from the front curb to the back fence, and inside every room. Gappsi stands apart by offering a truly integrated approach, ensuring your project is seamless, cohesive, and beautifully executed from start to finish. We combine design, material supply, and construction under one roof, simplifying the process for you.

Comprehensive Indoor and Outdoor Services

Managing a whole property renovation can feel like conducting an orchestra, with different contractors for every part of the job. Gappsi simplifies this by serving as your single, expert partner for everything. Our expertise in home remodeling covers everything from stunning kitchen and bathroom updates to complete basement transformations. This skill extends seamlessly into your backyard, where we design and build everything from custom swimming pools and elegant patios to functional outdoor kitchens. Having one team oversee both your indoor and outdoor spaces ensures a harmonious design and a much smoother construction process, saving you the stress of coordinating multiple vendors.

Decades of Long Island Craftsmanship

We have been building and renovating homes on Long Island since 1987. That experience is more than just a number; it represents decades of understanding the unique character, climate, and building codes of our community. Our long history means we have a proven track record of quality and reliability. We know which materials stand up to coastal weather and what design styles complement local architecture. This deep-rooted knowledge allows us to provide practical, beautiful solutions that last. You can see the results of our dedicated craftsmanship on our YouTube channel, where our projects showcase the quality we bring to every home.

Related Articles

Frequently Asked Questions

I’m interested in a whole property renovation, but where do I even begin? Starting a project this size can feel overwhelming, but the first step is simple: define your goals. Before thinking about contractors or materials, take some time to walk through your home and yard. Think about what works and what doesn’t. Make a list of your must-haves, like a more functional kitchen or a private backyard space. This initial list will become the foundation for your entire project and will help you communicate your vision clearly when you’re ready to talk to a professional.

How long will a whole property renovation take? The timeline for a whole property renovation depends heavily on the scope of your project. A cosmetic refresh might take a few months, while a full gut renovation with new additions could take a year or more. Factors like permit approvals, material availability, and unexpected structural issues can also affect the schedule. A good contractor will provide a detailed timeline with key milestones before work begins, so you have a clear understanding of the process from start to finish.

Can I live in my home during the renovation? This is a practical question that depends on the scale of the work. For smaller updates or projects contained to one area, you can often remain in your home. However, for a full-scale transformation that involves major systems like plumbing and electrical, or the entire interior, it is often safer and more efficient to arrange for temporary housing. This allows the construction crew to work more quickly and keeps your family away from the dust and disruption.

Why is having one company for both indoor and outdoor work a good idea? Using a single design and build firm for your entire property ensures a cohesive vision and a much smoother process. When one team handles everything from your kitchen remodel to your new swimming pool, the design elements can flow seamlessly from inside to out. It also simplifies communication, as you have one point of contact for the entire project. This integrated approach helps prevent the logistical headaches and design disconnects that can happen when you’re managing multiple separate contractors.

How do I make sure my renovation adds real value to my home? To ensure a strong return on your investment, focus on quality and function over passing fads. Choose timeless designs and durable materials that will stand the test of time, especially for big-ticket items like kitchens, bathrooms, and outdoor masonry. Improving your home’s energy efficiency and modernizing its layout to create better flow are also smart investments. A well-planned renovation that enhances how you live in the space will almost always appeal to future buyers and add lasting value.

Share this page:
Homeowners and a remodeling professional reviewing revised project plans at a Long Island home

Home Remodeling Change Orders Long Island: How Should Homeowners Handle Them?

Home remodeling change orders Long Island homeowners receive can affect more than one selection. A request to move a wall, change a finish, or address an unexpected condition may alter the work, price, and schedule. The practical response is to pause, compare the proposal with the original scope, ask what else changes, and approve only when the revision is understandable and documented.

Contact Gappsi through our contact page

Posted by Gappsi Group

This article offers general project-planning information, not legal advice. Your signed agreement and local requirements determine the process that applies to your project. If a proposal raises a contract or dispute question, consider getting independent professional advice before you decide.

What is a remodeling change order?

A change order is a written record of a revision to the agreed project scope. It may add work, remove work, or replace an earlier specification. Examples include switching a tile selection, changing cabinetry, relocating a fixture, adding a built-in, or revising work after concealed conditions become visible.

The document should connect the proposed revision to the agreement, plans, or selection it changes. A conversation, text, or updated drawing can help explain the request, but on its own may not describe every effect. Check the contract for its change-approval procedure, required signatures, and any instructions for urgent site conditions.

It also helps to distinguish a request from an approved change. A homeowner may ask about an alternate finish without authorizing the work. Likewise, a contractor may explain a possible response to an unforeseen condition without the owner yet accepting the proposed scope or price. Keep those stages clear in messages and project records.

How should homeowners handle home remodeling change orders on Long Island?

Use a repeatable review process instead of making a rushed decision during a site conversation. The details will vary by project, but these steps create a useful basis for discussion:

  1. Pause and define the change. Write down what is different and what stays as originally planned. Name the room, feature, drawing, or selection involved. If the change responds to a site condition, ask what was found and why the current plan needs to be revised.
  2. Ask for a written proposal. Request a description of the revised work, materials or selections, price adjustment, and expected timing effect. Ask whether it supplements or replaces a specific part of the original agreement.
  3. Identify related work and exclusions. Check whether demolition, disposal, patching, painting, permits, protection, cleanup, or follow-up work is included, excluded, or unchanged. A connected task is not automatically part of the proposed change.
  4. Compare the proposal with the original scope. Locate the affected specification, drawing, allowance, or selection. If the revision was initiated by someone else, ask why it is proposed and whether there are alternatives.
  5. Resolve open questions before approval. Ask for clearer wording if the proposal leaves the quantity, finish, price basis, or schedule impact uncertain. Keep the question and answer with the proposal.
  6. Approve using the contract’s process. Follow the written procedure and retain the dated approval with the final version of the change. Avoid relying on an informal assurance that the missing details will be settled later.

For broad consumer information, the Federal Trade Commission website is a government resource. It is not a guide to the terms of your particular construction agreement, so use your contract and qualified advice for questions about your rights or obligations.

For projects that include connected indoor and outdoor work, it can be useful to make a clear list of affected spaces and decisions. Gappsi’s pages on pool remodeling and pool-house projects illustrate examples of project areas where one design choice may sit alongside other work. The relevant scope still needs to be stated in your own agreement.

Talk with Gappsi about your remodeling project

What should a change order include?

A useful change record lets someone who was not part of the conversation understand what was proposed and what was approved. Look for enough detail to identify the revision, its price effect, and its timing consequences. The following checklist can help you review the document before responding.

Review item What to verify Question to ask
Scope Work added, removed, or revised, with its location Which original item or drawing does this change?
Materials Product or agreed description, finish, size, and quantity when known Does this match the selection we discussed?
Price Added amount or credit, and what it covers Are related tasks and allowances included?
Schedule Expected effect on ordering, sequence, and milestones Which dates or stages may move?
Responsibilities Items assigned to the contractor, owner, or another party Who is responsible for each open task?
Approval Required written confirmation or signatures What method does our agreement require?

A bare total may not answer whether the amount includes the related work needed to complete the revision. If the proposal combines several tasks, ask whether it can identify the major components or explain the basis in plain language. The goal is not to demand one universal estimating format; it is to understand what you are accepting and how it relates to the agreed work.

Homeowner and remodeling professional comparing a renovation plan with written change notes

How can you evaluate cost and schedule effects?

Review the proposed work and its knock-on effects separately. A different finish may have a material cost, but it could also change ordering, preparation, installation, or coordination with the next trade. Ask the contractor to explain the added work and any credit for work no longer needed, then compare the full revised scope with the original.

  • Separate additions from credits. Ask what new work is being added, what original work is removed, and whether any allowance or deposit is being adjusted. Confirm whether the quoted figure is an increase, a replacement total, or another kind of adjustment.
  • Ask what the price covers. Clarify labor, materials, delivery, removal, protection, finishing, and any other items that matter to the particular change. Do not assume that related work is included because it seems necessary to you.
  • Trace the timing effect. Find out whether the revision affects ordering, demolition, installation, inspection, access, or later work. Ask which milestones might move and whether the schedule effect depends on a selection or delivery date.
  • Consider alternatives fairly. If the proposal is more disruptive than expected, ask whether another material or approach could meet the same goal. Compare scope, appearance, maintenance needs, coordination, and timing, not just the initial price.
  • Check dependencies. A revision in one area may affect an adjacent surface, trim, fixture, or finish. Ask what must also change so the finished result is complete, and whether those related items are in this proposal.

For example, imagine a homeowner wants to replace a specified floor tile after the installation date has been planned. Before approving, compare the original selection with the alternate, confirm the area and finish, ask whether the new material is available when needed, and clarify whether preparation or installation steps change. Then ask which following work depends on the floor being complete. This example does not predict a particular cost or delay; it shows the questions that make the proposal easier to evaluate.

When a revision crosses between indoor remodeling and exterior spaces, list the interfaces rather than assuming the scopes are interchangeable. Related Gappsi pages on patio projects and pool patios can provide context for outdoor project areas, while the proposal for your home should identify the exact work being changed.

What happens after a change is approved?

Approval is not the end of the recordkeeping. Compare the final signed version with the proposal you reviewed and make sure the approved scope, amount, and timing language are the same. If the parties revised the proposal during discussion, save the final copy and mark earlier drafts so nobody mistakes them for the current decision.

As work proceeds, use the approved change as a reference point. When the revised work begins, confirm that the room, material, or task matches the document. If the actual site condition or selected item differs from what the proposal describes, stop and ask whether another written revision is needed. Do not assume that a new difference is already covered by the earlier approval.

At closeout, check that completed changed work is reflected in the project records and that any remaining questions are resolved. This does not replace the contract’s payment or inspection procedures. It gives you a clear trail from the original scope to the approved revision and then to the work completed. A dated photo, marked drawing, or written completion note can help identify the result later, especially when the area will be covered by another finish.

When should you question or delay approval?

Ask for clarification before approving if the proposal does not identify the affected work, offers a total you cannot relate to the change, or leaves timing and dependencies unresolved. The same applies if the document conflicts with an earlier drawing, selection, or written commitment. A corrected proposal is a better decision record than a verbal promise to fill in details later.

Take particular care when the change is presented as urgent. Ask what needs attention immediately, what can wait for a written decision, and what evidence or explanation is available. If there is a condition behind a wall or beneath a finish, request a description and, where practical, photographs or a site review. Keep the discussion factual and distinguish observed conditions from proposed solutions.

If you believe a proposal conflicts with the contract, if responsibility is disputed, or if the financial effect is significant and unclear, consider pausing approval and seeking independent advice. A concise written question can keep the conversation focused: “Please identify the affected contract item and explain the revised work, price, and timing.” Avoid signing a document with blank fields or wording you do not understand.

How do selections and allowances affect changes?

A change may begin with a selection that differs from an allowance or earlier choice. First confirm what the contract says the allowance covers and which selection was included. Then ask how the replacement affects both the material and the work to install or finish it. The proposal should make clear whether the allowance is being adjusted and how the new amount is treated.

Keep selections specific enough to identify later. “Different tile” is not a complete record. Note the agreed product or description, size, finish, quantity if known, and the location where it will be used. If you are still comparing options, ask whether a decision date matters to ordering or the work sequence. Save the selection record with the related change order rather than in a separate place that is hard to find.

For a material change on a project that also includes exterior improvements, use the same discipline: identify the surface and location, record what is being replaced, and clarify the edge conditions or adjacent work. Pages about hardscaping and masonry offer examples of distinct work categories, but your change document should define your specific project rather than rely on a general category label.

How can you keep a reliable change-order record?

Use one project folder, digital or physical, for the signed agreement, drawings, selections, proposals, approvals, and related messages. Give each proposed change a date or simple reference number. Keep the approved version beside the original proposal so you can trace what was requested, what questions were answered, and what the parties accepted.

  • Record who raised the change and the reason given.
  • Save supporting photos, revised drawings, or selection details when relevant.
  • Keep the written price and schedule explanation with the proposal.
  • Mark unanswered questions and record when they are resolved.
  • Store the approval in the same folder as the final change document.
  • Compare later progress notes or invoices with the approved revision and raise differences promptly.

A short log can make a long project easier to follow. Use columns for date, change description, status, price effect, schedule effect, and file location. Mark an item as “requested,” “under review,” “approved,” or “not proceeding,” so a draft does not get confused with an authorization. For multiple decisions in one meeting, give each one a separate entry and attach the relevant drawing or selection.

Remodeling plans, material samples, and a project schedule arranged for review

Keep communication easy to search. Use a subject line or message heading that names the room and change, and refer to the same wording used in the proposal. After a meeting, send a brief recap of the decisions and open questions. If several people are involved in approvals, confirm who is authorized to make the decision under the agreement before treating a message as final.

Gappsi’s project archive and backyard project category show broader project contexts; use your own dated drawings and signed change records as the authority for your home’s agreed scope. For a remodeling conversation, the Gappsi contact page is the appropriate place to start.

What communication habits reduce confusion?

Choose a clear channel for project decisions and confirm important conversations in writing. Keep each message focused on one change where possible. Use the same names for rooms, selections, and plan details that appear in the contract or drawings. If terminology differs between a conversation and a proposal, ask the other person to confirm that both refer to the same item.

Before a meeting, prepare five questions: What is changing? Why is it proposed? What work is included or excluded? What is the price effect? What happens to timing? Add a sixth question when relevant: what decision is needed by what date? Afterward, send a short factual recap and invite corrections. This practice is especially helpful when you are comparing several options or when a change affects later work.

For example, a homeowner choosing between two cabinet finishes can record each option, the date a choice is needed, and any stated effect on ordering. That does not mean every choice changes the contract or schedule. It simply makes clear which issue is open and what information is needed to close it. If the choice changes the agreed scope, ask for the formal written record required by the contract.

Discuss your home remodeling project with Gappsi

Frequently Asked Questions

Can a homeowner request a change after work begins?

A homeowner can ask whether a revision is possible, but whether it can be accommodated and how it affects the agreement depend on the contract, project conditions, and timing. Ask for the revised scope and its cost and schedule effects before authorizing changed work.

Should I approve a change order verbally?

Follow the approval method stated in your contract and keep the decision in the required written form. A conversation can clarify the request, but it may not capture the full scope, price, schedule, and authorization in a record that can be checked later.

What if the change is needed because of a concealed condition?

Ask what was discovered, how it affects the planned work, and what response is proposed. Request available supporting information, such as photos, and review the revised scope, price, and timing. If the issue involves a disagreement about responsibility, consider independent advice before approving.

Can a change order affect the completion date?

Yes. A revision may affect ordering, work sequence, or coordination with later tasks. Ask which milestones may move and whether the stated timing depends on a selection, delivery, or other decision. Keep the explanation with the approved change record.

What should I do if a proposal is unclear?

Do not guess at missing scope or terms. Ask for a revised version that identifies the affected work, price effect, exclusions, schedule implications, and approval process. If the issue remains significant or disputed, consult an appropriate independent professional.

Plan the next step

Review each proposed revision against the agreement, ask direct questions about scope, cost, and timing, and keep the approved version with the project documents. A consistent written record helps everyone track what the project includes as work moves forward.

Contact Gappsi through our contact page to discuss your remodeling project

When every approved change is specific and easy to find, it is simpler to follow the agreed work through completion.

Share this page:
DIY installation of a faux brick wall panel using a power drill in a modern home.

Faux Brick Wall Panels: A Complete Homeowner’s Guide

When you think of faux brick, you might picture the shiny, plastic-looking sheets from decades past. It’s time to forget everything you thought you knew. Modern manufacturing has completely changed the game, creating materials that are remarkably authentic. Today’s high-quality faux brick wall panels are cast from molds of real brick, capturing every crack, texture, and color variation with incredible accuracy. They offer a lightweight, durable, and cost-effective way to get the genuine look of masonry. This guide will walk you through the different materials, styles, and installation tips for this surprisingly realistic design solution.

Key Takeaways

  • A Smart Alternative to Real Brick: Faux brick panels give you the classic, textured look you love for a fraction of the cost and without the complex installation or heavy maintenance of traditional masonry.
  • Find the Perfect Style for Any Room: Modern panels come in a huge variety of materials, colors, and textures, making it easy to find a match for your design vision, whether it is a rustic kitchen or a modern minimalist living room.
  • Installation Determines the Final Look: While many panels are DIY-friendly for simple accent walls, a professional installation is the best way to guarantee a seamless, durable finish for larger or more complex projects.

What Are Faux Brick Wall Panels?

If you love the timeless, textured look of brick but aren’t ready to commit to a full masonry project, faux brick wall panels are a fantastic alternative. Think of them as the perfect way to get that classic charm without the heavy lifting. These panels are crafted from durable materials like high-density polyurethane or composite wood and are designed to mimic the appearance of real brick. The best ones feature interlocking edges that hide the seams, creating a continuous and surprisingly authentic finish once they’re installed.

Faux brick panels give you the creative freedom to transform a room, add an accent wall, or update a fireplace without the cost and complexity of traditional brickwork. Whether you’re aiming for a rustic farmhouse kitchen or an industrial-style living room, these panels are a versatile tool in any home remodeling project. They offer a practical solution for achieving a high-end look with a straightforward installation process.

Faux Brick vs. Real Brick: What’s the Difference?

The most significant difference between faux and real brick comes down to weight and maintenance. A traditional brick wall is incredibly heavy and often requires structural reinforcement, which means you might need an engineer to sign off on your project. Faux brick, on the other hand, is a lightweight alternative that you can install on almost any wall without worry. This makes it a much more accessible option for interior updates.

Beyond weight, faux brick is also much easier to care for. Real brick is porous and can require sealing to prevent moisture damage or mold growth, especially in certain environments. Faux brick panels are non-porous and require virtually no special care. You won’t need to scrub them or worry about weathering over time, giving you the beautiful aesthetic of masonry without the upkeep.

Common Materials You’ll Find

When you start exploring faux brick, you’ll quickly realize it’s a broad category with panels made from several different materials. The material you choose will influence the panel’s texture, durability, cost, and ideal placement in your home. Some are better suited for capturing fine detail, while others offer superior moisture resistance or a more budget-friendly price point.

Understanding the key differences will help you select the perfect option for your project’s specific needs. The most common materials you’ll encounter are high-density polyurethane, MDF (medium-density fiberboard), and brick-look tiles made from ceramic or porcelain. Each has its own set of benefits, so let’s look at what makes them unique. You can often find a variety of these options at a dedicated home improvement store.

Polyurethane

High-density polyurethane is a top choice for faux brick panels, and for good reason. This material is lightweight yet exceptionally durable, making it easy to handle during installation while being tough enough to resist dents and scratches. Its biggest advantage is its ability to capture the intricate textures and imperfections of real brick. The molds used for polyurethane panels are often cast from actual bricks, so they replicate the authentic look and feel with incredible accuracy.

Another major benefit is its resistance to moisture. Because polyurethane is a type of plastic, it won’t warp, crack, or grow mold when exposed to humidity. This makes it a solid option for any room in your house, including basements, bathrooms, and kitchens, where moisture can be a concern.

MDF

Medium-density fiberboard, or MDF, is another popular material for faux brick panels. MDF is an engineered wood product made by breaking down wood residuals into fibers, combining them with wax and a resin binder, and forming panels by applying high temperature and pressure. This process results in a dense, stable, and smooth material that is easy to work with.

The primary advantages of MDF panels are their affordability and customizability. They are often more budget-friendly than polyurethane panels, making them a great choice for larger projects. Since MDF has a smooth surface, it’s also very easy to paint, allowing you to create a custom brick finish in any color you can imagine. However, because it’s a wood-based product, it’s not recommended for high-moisture areas like bathrooms.

Ceramic and Porcelain

While not technically a “panel,” brick-look tiles made from ceramic and porcelain offer another excellent way to achieve a faux brick aesthetic. These tiles are installed individually, much like a traditional backsplash or floor tile, but are designed to look like thin bricks. They provide a highly durable and realistic surface that’s perfect for areas that need to withstand wear and tear.

Ceramic tiles are a great fit for indoor applications like kitchen backsplashes or fireplace surrounds. For projects that require even more durability, especially outdoors, porcelain and natural stone options are ideal. Porcelain is denser and less porous than ceramic, making it strong enough to handle outdoor elements without fading or cracking. This makes it a perfect choice for an exterior accent wall or outdoor kitchen.

Are Faux Brick Wall Panels Worth It?

Deciding on the right materials for your home is a big deal. You want a look you love without breaking the budget or signing up for years of difficult upkeep. If you’re drawn to the classic, textured look of brick, you might be wondering if faux brick panels are a worthwhile alternative. The short answer is a resounding yes. Faux brick offers the timeless charm of traditional brick with a host of modern benefits that make it a smart and stylish choice for any home improvement project. From saving money to simplifying installation, let’s look at why these panels are gaining so much popularity.

Get the Brick Look for Less

One of the most compelling reasons to choose faux brick is the cost savings. Real brickwork is expensive, not just for the materials but also for the skilled labor required to install it. Faux brick panels give you a similar aesthetic for a fraction of the price. This allows you to achieve a high-end look, like an accent wall or a kitchen backsplash, without the hefty price tag. The savings extend beyond the initial purchase, since you won’t need to budget for structural reinforcements or extensive construction time. This makes it a fantastic option for any home remodeling project where you want to make a big impact while managing your budget effectively.

Enjoy a Lightweight, Easy Installation

Unlike real brick, which is incredibly heavy and often requires an engineer to ensure your walls can support the weight, faux brick panels are surprisingly lightweight. This key difference makes the installation process much simpler, faster, and less invasive. Because they are so light, the panels can be installed on almost any wall without needing extra structural support. This ease of installation makes it a manageable project for a seasoned DIYer, but it also means a professional installation is quicker and more affordable. Despite being lightweight, high-quality panels are built to last and can easily withstand the bumps and scrapes of daily life, giving you a durable and beautiful finish.

Find a Versatile Design for Any Room

Faux brick panels are a designer’s dream because they bring instant texture, warmth, and character to a room. Whether you’re aiming for a rustic farmhouse kitchen, an industrial-style living room, or a cozy bedroom accent wall, there’s a panel to match your vision. The versatility doesn’t stop at style. These panels come in a wide array of colors, from classic reds and weathered whites to modern grays and deep charcoals. This variety allows you to perfectly tailor the look to your home’s existing decor. Much like our diverse collections of porcelain and natural stone, faux brick gives you the creative freedom to design a space that feels uniquely yours.

Spend Less Time on Maintenance

If you love the look of brick but dread the thought of upkeep, you’ll appreciate how low-maintenance faux panels are. Real brick can require periodic sealing to prevent moisture damage, and cleaning can be a chore. Over time, you might even need to deal with crumbling mortar or mold growth. Faux brick, on the other hand, requires virtually no special care. A simple dusting with a soft brush or vacuum attachment is usually all it takes to keep your walls looking fresh. You won’t have to worry about sealing, scrubbing, or weathering, giving you more time to simply enjoy your beautiful space. This is a huge plus for busy homeowners who want great style without the extra work.

Add Insulation and Improve Energy Efficiency

An often-overlooked benefit of faux brick panels, particularly those made from high-density polyurethane, is their insulating properties. These panels can add an extra layer of insulation to your walls, which helps regulate the temperature in your home. By preventing heat from escaping in the winter and keeping your home cooler in the summer, they can contribute to better energy efficiency. This small improvement can lead to noticeable savings on your heating and cooling bills over time. It’s a fantastic bonus, adding functional value to a beautiful design choice and making your home improvement project even more rewarding.

What Design Styles Work Best With Faux Brick?

One of the best things about faux brick panels is their incredible versatility. They aren’t just for one type of look. Whether your Long Island home is a cozy cottage or a sleek, modern build, there’s a faux brick style that can complement your vision. The key is to match the panel’s color, texture, and pattern to your existing decor. From creating a warm, inviting atmosphere to adding a touch of industrial edge, these panels can transform a room. Let’s explore some of the most popular design styles where faux brick truly shines.

Rustic and Modern Farmhouse

If you love the idea of a cozy, welcoming space, the rustic or modern farmhouse style is a perfect match for faux brick. Think of the warmth and character of an old country home. Faux brick panels, especially those with a distressed or whitewashed finish, can create that lived-in, charming feel instantly. This look pairs beautifully with natural wood beams, comfortable furniture, and vintage accents. It’s an ideal way to add texture and a sense of history to a living room, dining area, or kitchen. Whether you’re doing a full-scale renovation or just updating a single room, incorporating a faux brick wall can be a key part of your home remodeling project.

Industrial Urban Loft

For a look that’s more raw and edgy, faux brick is essential for achieving an industrial urban loft aesthetic. This style is inspired by old warehouses and factories converted into living spaces. A classic red or weathered gray brick panel can create a powerful backdrop that defines the room. Pair it with exposed ductwork, metal light fixtures, concrete floors, and reclaimed wood furniture to complete the look. The texture of the brick adds a layer of grit and authenticity that feels both rugged and sophisticated. You can even combine it with other materials, like porcelain and natural stone, to create a rich, layered design that feels curated and intentional.

Modern Minimalism

You might think brick is too busy for a minimalist design, but that’s not the case with faux panels. In a modern minimalist space, a faux brick wall can serve as a textural focal point without adding clutter. The secret is to choose a panel with clean lines and a uniform color, like a sleek gray, crisp white, or even a bold black. This adds visual interest and warmth, preventing the room from feeling too sterile. When paired with simple furniture, a neutral color palette, and plenty of open space, a faux brick wall can bring depth and sophistication to your minimalist design.

Coastal and Elegant Spaces

Faux brick can also find a home in coastal and elegant design schemes. For a coastal vibe, a whitewashed or light-toned brick panel adds texture that mimics the feel of weathered seaside materials. It keeps the space feeling bright, airy, and relaxed, pairing perfectly with light woods, soft blues, and natural fabrics. In a more traditional or elegant setting, a classic red brick panel can add a touch of timeless character and warmth. It can ground the space and provide a beautiful backdrop for classic furniture, ornate mirrors, and sophisticated decor, creating a sense of established grace.

Best Rooms for Faux Brick Panels

Once you’ve picked a style, the next question is where to put it. The beauty of faux brick is that it works in almost any room. Before you start, take a look at the room’s existing colors and furnishings to make sure the brick style you choose will create a harmonious look. You can use it to define a specific area in an open-concept space, add character to a boring hallway, or create a cozy nook for reading. The goal is to integrate the panels in a way that feels natural and enhances the room’s overall design, rather than competing with it.

Accent Walls and Entryways

If you’re not ready to commit to four brick walls, an accent wall is the perfect solution. It’s a fantastic way to create a dramatic focal point in a living room behind a sofa, in a bedroom behind the headboard, or in a dining room. An accent wall draws the eye and adds depth and personality without overwhelming the space. Entryways are another excellent spot for faux brick. It makes a strong first impression on guests and sets the tone for the rest of your home. For some great visual inspiration on how to use accent walls, you can find many examples of completed projects.

Kitchen Backsplashes

The kitchen is the heart of the home, and a faux brick backsplash is a popular way to give it some personality. It adds texture and a rustic or industrial touch, depending on the style of brick you choose. A classic red brick can make a kitchen feel warm and inviting, while a whitewashed style can brighten up the space. When choosing panels for a backsplash, make sure they are made from a material that is easy to clean and can withstand moisture and heat, like ceramic or specially treated panels. It’s a simple update that can completely change the feel of your kitchen.

Home Offices and Commercial Spaces

Faux brick is also a great choice for home offices and commercial settings. In a home office, a brick accent wall can create a stylish and professional backdrop for video calls, making your space look polished and put-together. For commercial spaces like cafes, boutiques, or offices, faux brick can help establish a brand’s aesthetic, creating a welcoming atmosphere for customers and employees. Because it’s a cost-effective material, you can achieve an upscale look without a high-end budget, making it a smart choice for various home remodeling projects and commercial build-outs.

How Much Do Faux Brick Wall Panels Cost?

Let’s talk numbers. One of the first questions homeowners ask is about the cost of faux brick panels. The price can vary quite a bit depending on the material, brand, and overall quality. While it’s an investment, it’s important to look at the bigger picture. Faux brick is almost always more budget-friendly than traditional brick, especially when you factor in the cost of labor. Installing real brick is a complex, time-consuming job that requires a skilled mason, mortar, and specialized tools. With faux panels, you get that classic, textured look without the hefty price tag for installation.

Think of it as a smart way to get a high-end finish for your home remodeling project. You’re not just paying for the panels themselves; you’re paying for a durable, beautiful, and transformative product that’s much simpler to install. The final cost will depend on the size of your space and the specific panels you choose, but the savings on labor and structural modifications are where you’ll really see the value. It’s about achieving that dream look for your home in a way that’s both practical and financially savvy. This approach lets you allocate more of your budget to other parts of your renovation, like new lighting or furniture to complement your new accent wall.

Breaking Down the Price by Material

When you start shopping, you’ll notice that prices are often listed per panel. High-quality polyurethane panels, which offer the most realistic look and feel, typically start around $230 to $240 per panel. Some brands even offer primed versions that are ready to paint, giving you a blank canvas for a slightly lower initial cost. While that might sound like a lot for one panel, remember that these panels cover a significant amount of wall space. More importantly, you’re avoiding the much larger expense of hiring a mason, buying individual bricks, and paying for mortar and other supplies. The straightforward installation process means you save a huge amount on labor, making it a cost-effective choice overall.

Debunking Common Faux Brick Myths

Faux brick has come a long way from the shiny, plastic-looking sheets you might remember from decades ago. Technology has completely changed the game, but some outdated myths still linger. It’s easy to be skeptical, especially when you want the final result to look authentic and add value to your home. Before you make a decision, let’s clear up a few common misconceptions. Understanding what modern faux brick panels are really like will help you see why they’ve become such a popular choice for designers and homeowners who want style without compromise.

Myth: It Looks Cheap or Artificial

This is probably the biggest concern I hear, and it’s a valid one. The good news is that today’s high-quality faux brick panels are incredibly realistic. Manufacturers create them using molds taken from actual brick walls, capturing every crack, groove, and textural imperfection. This process ensures the panels have an authentic appearance that’s hard to distinguish from the real thing. When you work with a company that sources premium materials, you get panels with rich, varied colors that mimic the natural look of aged brick. From a normal distance, your guests will never know the difference. It’s all about choosing a quality product from a trusted masonry designer.

Myth: It’s Heavy and Needs Support

If you’ve ever considered a real brick accent wall, you know it’s a major construction project. Real brick is incredibly heavy and requires a reinforced foundation or structural support to ensure the wall can handle the weight. This often involves hiring an engineer and can add significant costs and complexity. Faux brick, on the other hand, is a lightweight alternative. Made from materials like high-density polyurethane, these panels are light enough to be installed on almost any interior wall without any structural modifications. This makes them a perfect solution for a weekend project, allowing you to add character without the engineering headache.

Myth: Styles and Colors Are Limited

Years ago, your choices for faux brick were pretty much “red” or “also red.” That’s definitely not the case anymore. The market is now filled with a huge variety of styles, colors, and textures to match any design vision. Whether you’re dreaming of a rustic, whitewashed wall for your farmhouse kitchen or a sleek, industrial gray for a modern loft space, there’s a panel for you. You can find styles that evoke the feel of a historic colonial home or a sun-bleached coastal cottage. And if you still can’t find the perfect shade, many panels come primed and ready for you to paint any color you can imagine, offering truly limitless design possibilities.

How to Install Faux Brick Wall Panels

One of the best things about faux brick panels is how straightforward they are to install. With the right preparation and a bit of patience, you can completely transform a room in a weekend. While it’s a great project for a confident DIYer, remember that a professional installation guarantees a seamless, durable finish. If you’re dreaming of a perfect accent wall without the work, our home remodeling team is always here to help. But if you’re ready to roll up your sleeves, here’s how you can get started.

Gather Your Tools and Materials

Before you begin, it’s smart to gather everything you’ll need. A smooth installation starts with good preparation. You’ll want a tape measure, a level, and a caulking gun. For cutting the panels to size, a table saw, circular saw, or even a simple hand saw will work. You will also need the recommended adhesive for your specific panels and a putty knife for any touch-ups. Finally, have a screwdriver, screw gun, or nail gun on hand to secure the panels to the wall. Having all your tools ready means you won’t have to stop your progress midway through the project.

Your Step-by-Step Installation Guide

Ready to get started? First, make sure your wall is clean, dry, and smooth. Any bumps or dirt can prevent the panels from sticking properly. Next, measure your wall and lightly mark where your first row of panels will go. Carefully cut your panels to fit, especially around outlets or windows. Apply a quality construction adhesive to the back of the panel, following the manufacturer’s instructions. Press the first panel firmly onto the wall, then secure it with screws or nails. Continue this process, making sure each panel fits snugly against the last. For more project ideas, you can find plenty of inspiration on the Gappsi YouTube channel.

Pro Tips for a Flawless Finish

The secret to a professional-looking faux brick wall is all in the details. The most common mistake is rushing the prep work. Taking the time to install panels over a clean, even wall will save you from headaches later on. Don’t be afraid to take it slow. Measure twice and cut once, as they say. When you’re applying the panels, a snug fit is key to minimizing the seams and creating a more realistic look. If you want a truly flawless finish without the stress, our home remodeling construction experts can handle the entire project for you.

Start From the Bottom and Work Up

Always begin your installation at the bottom of the wall and work your way up. This method uses gravity to your advantage, allowing each new row to rest on the one below it for support. This helps keep your lines straight and prevents the panels from sliding down while the adhesive sets. As you place each panel, make sure it fits as tightly as possible against the adjoining one. This simple technique is crucial for creating nearly invisible seams, which gives your wall that authentic, continuous brick appearance that makes the whole project shine.

Use the Right Adhesive

This might seem like a small detail, but it’s one of the most important. Always use the adhesive recommended by the panel manufacturer. Different panel materials, like polyurethane or MDF, have different properties and require a specific type of adhesive to bond correctly to your wall. Using the wrong kind can cause the panels to peel away or fail to adhere properly over time. A strong, appropriate adhesive is your best insurance for a wall that looks great for years to come. It’s a simple step that ensures the durability and longevity of your new accent wall.

Check for Level as You Go

Here’s a tip that makes a huge difference: use a level for every single row. Your floors or ceilings might not be perfectly straight, but your brick lines should be. After you place your first panel, use a level to ensure it’s perfectly horizontal before moving on to the next one. Continue checking as you complete each row. A laser level can make this process even faster and more accurate. This prevents the dreaded crooked or slanted look and ensures your finished wall has clean, professional lines that mimic the work of a master mason.

Allow for Expansion Gaps

Many people forget that building materials can expand and contract with changes in temperature and humidity. Faux brick panels are no exception. To prevent your panels from buckling or warping over time, it’s important to leave a very small expansion gap around the perimeter of the wall. This means not pushing the panels tightly against the ceiling, floor, or corner trim. This tiny bit of breathing room is usually hidden by trim or filled with a flexible caulk, so you’ll never even see it. It’s a crucial step for long-term durability.

Tips for Indoor vs. Outdoor Installation

While the basic process is similar, there are a few key differences between installing faux brick indoors and outdoors. For an outdoor project, like an accent on your home’s exterior or around a patio, you must use panels and adhesives specifically rated for exterior use. These materials are designed to withstand moisture, UV rays, and temperature shifts. For any outdoor masonry project, ensuring the surface is completely clean and dry is critical for a strong bond. Indoors, the focus is more on a smooth wall surface and good ventilation while the adhesive cures.

How to Keep Your Panels Looking Great

One of the biggest advantages of faux brick is how easy it is to maintain. Unlike real brick, there’s no need for special sealants or mortar repair. To keep your wall looking its best, all you need to do is dust it from time to time. You can use a soft brush, a feather duster, or the brush attachment on your vacuum cleaner to gently remove any dust that settles on the surface. That’s it. This simple routine is all it takes to maintain that fresh, just-installed look for years, giving you more time to enjoy your beautiful new space.

Are Faux Brick Panels Right for Your Long Island Home?

Deciding on the right materials for your home is a big deal, and faux brick panels are a fantastic option to consider. They bring an incredible amount of texture, warmth, and character to a space, but without the cost and complexity of installing real brick. If you have a smaller room, like a home office or powder room, you can use lighter-colored panels in white or soft gray to make the space feel bigger and brighter. These shades reflect light beautifully while still adding that cozy, textured feel you’re looking for. This makes them a versatile choice for nearly any room you want to update.

One of the best parts about faux brick is how easy it is to care for. Life on Long Island is busy, and you probably don’t want to spend your weekends on intense home maintenance. To keep your faux brick wall looking fresh, all you need is an occasional dusting with a soft brush. If you get any scuffs or spills, a simple wipe-down with a damp cloth and a little mild soap will usually do the trick. This low-maintenance quality makes it a practical and stylish choice for any home remodeling project, giving you a timeless look that lasts without adding to your to-do list.

Should You DIY or Hire a Professional?

So, should you tackle this project yourself or call in the pros? Faux brick panels are known for being DIY-friendly. Many systems are designed to snap together like a puzzle, which means you can get that classic brick aesthetic without paying for professional mortar or bricklaying. For a small accent wall, a DIY installation can be a rewarding weekend project.

However, a flawless finish depends on having the right tools and a bit of know-how. For larger or more intricate projects, like a full kitchen backsplash, an exterior wall, or a two-story fireplace surround, hiring a professional is often the best choice. A pro ensures the panels are perfectly aligned, securely attached, and seamlessly integrated, giving you a polished look that stands the test of time.

How Gappsi Can Perfect Your Home Remodel

This is where our team at Gappsi comes in. We believe you can have an upscale, designer look without the high-end price tag. Our expertise goes beyond simply installing panels. We help you create a cohesive design, whether you’re aiming for rustic charm, industrial chic, or modern minimalism. We’ll guide you in selecting high-quality porcelain and natural stone alternatives that deliver professional, natural-looking results.

Choosing a quality product and ensuring expert installation saves you from frustrating maintenance and costly repairs down the road. Our design and construction team can integrate faux brick into any indoor or outdoor project, from a stunning kitchen remodel to a cozy outdoor living area. We handle every detail to ensure your new feature looks like it was always meant to be there.

Related Articles

Frequently Asked Questions

How realistic do these panels actually look up close? This is a great question, and it’s the number one concern for most people. High-quality faux brick panels are incredibly convincing because they are made from molds cast from real, time-worn bricks. This process captures all the subtle cracks, pits, and textures that make brick so appealing. While older versions might have looked flat or artificial, today’s panels have a depth and color variation that makes them nearly indistinguishable from the real thing, especially once they are installed on the wall.

Can I use faux brick panels in a high-moisture area like a bathroom or basement? Yes, you can, but you need to choose the right material. Panels made from high-density polyurethane are an excellent choice for bathrooms, basements, and even kitchen backsplashes because they are completely waterproof and will not warp or grow mold. On the other hand, you should avoid using panels made from MDF (medium-density fiberboard) in these areas, as their wood-based composition makes them susceptible to moisture damage over time.

How durable are these panels for a busy household with kids or pets? You’ll be happy to know that faux brick panels are surprisingly tough. High-quality polyurethane panels are resistant to dents, scratches, and scuffs from everyday life, making them a durable choice for high-traffic areas like hallways or living rooms. They are also very easy to clean. Unlike real brick, which is porous and can stain, most spills or marks on a faux panel can be wiped away with a damp cloth, making them a practical option for a busy home.

Is this a project I can realistically do myself, or should I hire a professional? This really depends on your comfort level and the scale of your project. For a simple, straightforward accent wall, a DIY installation is very manageable for someone with basic tool skills. However, for larger jobs, walls with lots of angles or outlets, or for a truly seamless and professional finish, hiring an expert is often the best route. A professional ensures perfect alignment and a secure installation that will look great for years to come.

Can I paint the panels if I decide to change my room’s color scheme later? Absolutely. This is one of the best features of faux brick panels. Many panels, especially those made from MDF or primed polyurethane, are designed to be painted. This gives you the ultimate creative freedom to match your wall to any color palette you can dream up. If you ever decide to redecorate, you can simply paint over the panels with a quality interior paint to give the room a completely new look without having to remove the wall.

Share this page: