


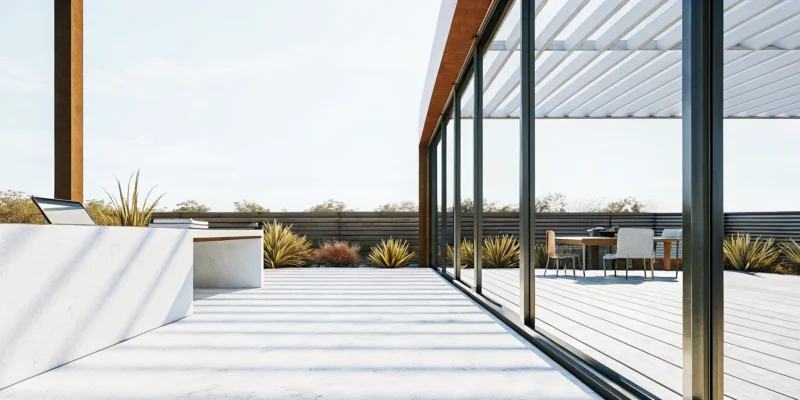
You have a beautiful patio or deck, but it gets too much sun to be comfortable, or it just feels like a big, undefined slab. A well-designed pergola can solve that. It adds architectural character, creates welcome shade, and defines a space, turning an ordinary area into an inviting outdoor living room. The process of learning how to design a pergola is about making smart choices that fit your lifestyle and your home’s unique style. We’ll walk you through the key decisions, from size and placement to materials and finishing touches, so you can create a functional and beautiful structure that you’ll enjoy for years.
Key Takeaways
- Start with a Clear Purpose: First, determine how you will use your pergola, as this function dictates its ideal size, location, and budget. Checking local permit requirements before you begin will also ensure a smooth and compliant project.
- Match Materials and Style to Your Home: Select a material like wood, metal, or composite based on your desired maintenance level and a design style that complements your home’s architecture. This ensures the pergola looks like a natural extension of your property.
- Add Finishing Touches for Ambiance: Transform your pergola from a simple structure into an outdoor room by integrating it with your landscape. Add elements like climbing plants, strategic lighting, and comfortable furniture to create a beautiful and usable space.
What is a Pergola? (And How It Can Transform Your Backyard)
If you’ve ever dreamed of creating a true outdoor room, a pergola might be exactly what you’re looking for. Think of it as an elegant, open-air structure that adds architectural charm and function to your backyard. A pergola is built with vertical posts or columns that support a roof of cross-beams and rafters. Unlike a solid roof, this open design filters sunlight, casting a beautiful pattern of light and shade without completely blocking the sun. It’s the perfect way to define a space and make it feel intentional, giving you the feeling of an indoor room with the fresh air of the outdoors.
Whether it’s attached to your house to extend your living area or standing freely by the pool, a pergola instantly creates a destination in your yard. It can turn an ordinary patio into a sophisticated dining spot or a simple deck into a cozy lounge. The structure itself adds a vertical element to your landscape, drawing the eye upward and making your entire outdoor space feel more dynamic and complete. It’s a simple addition that makes a huge impact, transforming a plain patch of grass or concrete into a purposeful, inviting retreat. With so many ways to customize them, Gappsi can help you design a pergola that feels like a natural extension of your home and lifestyle.
Pergola vs. Gazebo vs. Pavilion: What’s the Difference?
It’s easy to get these terms mixed up, but each structure serves a different purpose. A pergola is defined by its slatted or open-beam roof, which provides partial shade. It’s ideal for creating a sense of enclosure without sacrificing an open, airy feel.
A gazebo, on the other hand, is a freestanding, often octagonal structure with a solid, pitched roof and a floor. It offers full protection from sun and rain, making it more of a self-contained shelter. A pavilion is like a simplified gazebo, usually larger and rectangular, with a solid roof supported by posts. It’s designed to cover a larger area, like an outdoor kitchen or seating area, providing complete shelter while remaining open on all sides.
How Can You Use a Pergola?
A pergola is a wonderfully versatile backdrop for outdoor living. Its primary function is to define a space, creating a designated zone for dining, relaxing, or entertaining. You can place one over a stone patio to frame an outdoor dining table or next to your pool to create a chic lounge area. The open rafters are perfect for training climbing plants like wisteria, clematis, or grapevines, which will eventually form a lush, living canopy for more natural shade.
Beyond that, a pergola is a blank canvas for personalization. You can hang string lights for evening ambiance, install an outdoor fan for a cooling breeze, or even add retractable shades for more sun protection. It provides a framework to integrate with your landscape, blending your home’s architecture with the natural elements of your yard.
Planning Your Pergola: 4 Things to Consider First
Jumping straight into picking out materials and styles is tempting, but a little forethought makes all the difference. Before you get lost in design details, taking a step back to plan the fundamentals will ensure your new pergola is not only beautiful but also perfectly functional for your lifestyle. These four key considerations will set your project up for success from the very beginning, saving you time and preventing headaches down the road. By thinking through your purpose, size, budget, and local rules first, you create a solid foundation for the outdoor oasis you’ve been dreaming of.
Define Its Purpose: How Will You Use the Space?
First, think about how you envision using your new pergola. Will it be a quiet, shaded retreat for your morning coffee, an elegant outdoor dining room for entertaining guests, or a relaxing lounge area next to your swimming pool? Your answer will guide almost every other decision you make. A pergola’s primary job is to create shade and define an outdoor living space, so its function is key. If you plan to host large dinners, you’ll need enough room for a table and chairs. If it’s for poolside lounging, its placement and size should offer the best sun protection. Clearly defining its purpose helps you choose the right location, size, and features.
Choose the Right Size and Scale
Once you know its purpose, you can determine the right size. A pergola should feel like a natural extension of your home and landscape, not an afterthought. A structure that’s too small will feel cramped, while one that’s too large can overwhelm your yard. Start by measuring the area where you plan to build. A good way to visualize the footprint is to use stakes and string to mark the perimeter. Stand back and look at it from different angles, including from inside your house. Does it feel balanced with your home’s architecture and the surrounding landscape? Getting the scale right is essential for creating a harmonious and inviting space.
Set a Realistic Budget
Establishing a budget early on helps you make informed decisions about materials, size, and custom features. The cost to build a pergola can range from a few thousand dollars for a simple kit to over $15,000 for a large, custom-built structure with high-end materials. Factors like wood versus metal, a fixed or retractable canopy, and integrated lighting will all influence the final price. Don’t forget to account for labor, which can add a significant amount to the total cost. Working with a professional can help you understand all the expenses involved and design a beautiful pergola that respects your budget without sacrificing quality.
Check Long Island’s Permit and Zoning Rules
Before you break ground, it’s crucial to understand your local building codes. Many towns and villages across Long Island require a permit for outdoor structures like pergolas, especially if they are attached to your house, exceed a certain size, or are located near property lines. Zoning rules can also dictate how close to your property line you can build. The permit process can seem daunting, but it’s a non-negotiable step that ensures your structure is safe and compliant. Ignoring these regulations can lead to fines and may even require you to tear the structure down. A local professional will be familiar with these requirements and can handle the entire permit process for you.
Where Should Your Pergola Go?
Deciding where to place your pergola is one of the most important steps in the design process. The right location can turn a simple structure into your favorite spot for relaxing and entertaining, while the wrong one can leave it sitting unused. Placement is about more than just aesthetics; it’s about creating a functional, comfortable, and beautiful extension of your home. A well-placed pergola feels like it was always meant to be there, seamlessly blending with your house and landscape.
Before you break ground, let’s walk through a few key factors. Thinking about sunlight, your home’s layout, and local property rules will ensure your new pergola is perfectly positioned to fit your lifestyle. Taking the time to plan this now will pay off for years to come, giving you an outdoor space you’ll love and use constantly.
Consider Sunlight, Shade, and Airflow
The perfect pergola placement works with nature, not against it. Spend some time in your yard at different times of day to see how the sun moves across the space. A pergola meant for morning coffee should face east, while one for watching the sunset should face west. We can orient the overhead rafters to control the amount of shade you get throughout the day, giving you a cool retreat during the hottest hours. Airflow is just as important, especially during warm Long Island summers. A well-placed pergola can catch a nice breeze, making your outdoor space much more comfortable and inviting.
Think About Proximity to Your Home
Do you envision your pergola as a seamless extension of your house or a separate destination in your yard? An attached pergola, often built right off the back door, can make your indoor and outdoor living areas feel connected. It’s perfect for creating an outdoor dining room just steps from your kitchen. A freestanding pergola, on the other hand, can define a specific area of your yard, like a quiet reading nook in the garden or a shaded lounge area next to your swimming pool. If you place a freestanding structure near your house, it’s a good idea to leave a few feet of space for airflow and maintenance.
Check Property Lines and Setbacks
Before you get too far into planning, it’s essential to understand your local building codes. Many towns on Long Island have specific rules, known as setbacks, that dictate how far a structure must be from your property lines, your house, and other buildings. You may also need a permit, especially if the pergola is attached to your home or is over a certain size. These regulations vary between Nassau and Suffolk County, so it’s crucial to check what applies to your property. Working with an experienced pergola builder removes this burden, as we handle the permits and ensure your project complies with all local requirements.
What’s the Best Material for Your Pergola?
Choosing the right material for your pergola is one of the most important decisions you’ll make. This choice influences not just the look and feel of your outdoor space, but also its durability, cost, and the amount of maintenance it will need down the road. Think about your personal style, your budget, and how much time you want to spend on upkeep. The three most common options are wood, metal, and composites, each with its own set of benefits. At Gappsi, we design and build custom pavilions and pergolas using a variety of high-quality materials, helping you find the perfect fit for your Long Island home. Let’s look at the pros and cons of each so you can make a confident choice.
Wood: Classic and Natural
There’s a reason wood is a timeless choice for outdoor structures. Materials like cedar or redwood offer a warm, natural beauty that blends seamlessly into any landscape. A wooden pergola has a classic charm that can be customized with different stains and paints to match your home’s exterior. However, this classic look comes with a commitment to maintenance. Wood requires regular sealing, staining, or painting to protect it from moisture, rot, and insects. Without proper care, it can splinter or weather, especially in Long Island’s climate. If you love the authentic look of real wood and don’t mind some annual upkeep, this could be the perfect option for you.
Metal: Modern and Durable
If you prefer a sleek, modern aesthetic with minimal maintenance, a metal pergola is an excellent choice. Aluminum is a popular option because it’s lightweight yet incredibly strong and durable. Unlike wood, aluminum won’t rot, rust, or fall victim to pests, making it a practical, long-lasting solution for your backyard. Metal pergolas come in a variety of colors and finishes to complement a contemporary home design. Cleaning is simple, usually just requiring a quick rinse with a hose. For homeowners who want a stylish, set-it-and-forget-it structure that stands up to the elements, metal is hard to beat.
Composites: Low-Maintenance and Versatile
Composite materials, like cellular PVC, offer the best of both worlds. They are designed to mimic the beautiful appearance of wood while providing the low-maintenance durability of a synthetic material. Composites resist moisture, splitting, rot, and insects, so you get the look of a wooden pergola without the demanding upkeep. This material is also highly versatile and can be painted to achieve your desired look. For many homeowners, composites are the ideal solution, delivering timeless style with modern convenience. It’s a smart choice if you want a beautiful pergola that requires very little work to keep it looking great.
How to Choose Based on Climate and Maintenance
Here on Long Island, our weather can be tough on outdoor structures. From humid summers and snowy winters to the salty air along the coast, your pergola needs to be able to handle it all. Wood requires the most attention, typically needing a fresh coat of sealant or paint every one to three years to prevent damage. Metal and composites, on the other hand, are built to withstand these conditions with minimal fuss. When you are planning your project, it’s helpful to factor in the long-term cost to build a pergola, which includes not just the initial price but also the time and money spent on future maintenance. Choosing the right material from the start ensures your pergola remains a beautiful backyard retreat for years to come.
Find a Pergola Style That Fits Your Home
Choosing a pergola style is about more than just picking a design you like; it’s about finding one that feels like a natural extension of your home. The right style will complement your house’s architecture and blend seamlessly with your landscape, creating a cohesive and inviting outdoor living area. Whether your taste leans toward the timeless elegance of a classic design or the clean simplicity of a modern look, there’s a perfect pergola to match your vision. Let’s explore some popular styles to help you find the right fit for your Long Island home.
Traditional and Classic Designs
A traditional pergola brings a sense of timeless elegance to any backyard. These designs often feature decorative details like scrolled rafter ends, ornate post caps, and stately columns. Typically built from rich woods like cedar or low-maintenance vinyl, classic pergolas create a charming and structured outdoor room. This style is a perfect match for homes with traditional architecture, such as Colonial, Cape Cod, or Victorian houses. A classic pergola can beautifully frame a patio, define an outdoor dining space, or create an enchanting garden walkway. The open-rafter roof provides partial shade, making it an ideal spot for climbing plants like wisteria or roses to grow.
Modern and Minimalist Designs
If your home has a more contemporary feel, a modern pergola will complement it perfectly. These designs are all about clean lines, simple forms, and a “less is more” philosophy. Instead of decorative flourishes, you’ll find features like blunt-cut rafters, sleek metal components, and a focus on functionality. Materials like aluminum, steel, and even smooth-finished wood are common choices. Many modern pavilions and pergolas incorporate functional upgrades like retractable canopies, integrated LED lighting, or adjustable louvers for customized shade. This minimalist approach creates a sophisticated and uncluttered outdoor space that feels both stylish and practical.
Attached vs. Freestanding: Which is Better?
Deciding between an attached or freestanding pergola depends on how you plan to use the space and your yard’s layout. An attached pergola connects directly to your house, creating a smooth transition from your indoor living area to your outdoor patio. This is a great option if you want to extend your kitchen or living room outdoors for easy entertaining. On the other hand, a freestanding pergola is a standalone structure you can place anywhere in your yard. It can act as a destination, creating a relaxing oasis by a swimming pool or a quiet reading nook in the garden.
Match the Pergola to Your Home’s Architecture
The most successful pergola designs are those that feel like they were built with the house. To achieve this, take cues from your home’s architectural style. Look at its roofline, window trim, and exterior materials. A rustic farmhouse might call for a rugged wood beam pergola, while a stately brick home could be complemented by a classic white vinyl structure. The goal is to create harmony between your home and your outdoor structures. A well-chosen pergola will not only add function and beauty but also feel like an integral part of your overall landscape design.
The Anatomy of a Pergola: Basic Components
To design the perfect pergola, it helps to know the lingo. Understanding the basic parts makes the whole process much clearer and ensures you get exactly what you want when working with a designer. Think of it like learning the ingredients to your favorite recipe; knowing what goes into it helps you appreciate the final result even more. Every pergola, whether simple or complex, is built from a few key components that work together. You have the posts that form its foundation, the beams and rafters that create the overhead framework, and the roofing or lattice that provides shade and style. By getting familiar with these elements, you can have more confident conversations about your vision and make informed choices about the look, feel, and function of your new outdoor space. Let’s look at each piece and the role it plays.
Posts, Footings, and Columns
The posts, or columns, are the vertical supports that hold up your entire pergola. They are the structure’s backbone, so they need to be strong and secure. This starts below the ground with footings, which are concrete bases that anchor the posts and prevent them from shifting or sinking. The style of your columns also sets the aesthetic tone. You can choose simple wood or metal posts for a clean look, or you can wrap them in stone for a more substantial, elegant feel. Our masonry experts can create custom columns that perfectly match your home and landscape.
Beams, Rafters, and Stringers
The overhead structure of a pergola is a layered system of beams, rafters, and sometimes stringers. Beams are the main horizontal supports that rest directly on top of the posts. Rafters are smaller boards that run across the beams, typically in the opposite direction. The spacing of these rafters is what creates the signature open-roof look and determines how much sunlight filters through. For additional shade and a more detailed design, smaller pieces called stringers can be placed on top of the rafters. This interplay between beams and rafters is where you can truly customize the character of your pergola design.
Roofing and Lattice Options
The top layer of your pergola is what provides shade and protection. A traditional design with open rafters offers partial shade, but you have many other options. Adding lattice panels creates a classic, decorative pattern that increases sun coverage. For ultimate control, a louvered roof has adjustable slats that can open to let in the sun or close completely to block it out. You can also opt for a fixed or retractable canopy to provide protection from rain, turning your pergola into a true all-weather outdoor room. The right choice depends on how you plan to use the space and how it fits into your overall landscape design.
Simple Design Principles for a Stunning Pergola
A truly beautiful pergola does more than just provide shade; it creates an intentional and inviting outdoor atmosphere. It should feel like a natural extension of your home and garden. While the structural components are important, a few simple design principles can make the difference between a standard build and a stunning backyard feature. By focusing on proportion, sunlight, landscaping, and final touches, you can create a space that is both functional and breathtaking. These guidelines will help you think like a designer and plan a pergola that perfectly suits your space.
Get the Proportion and Scale Right
One of the most common design mistakes is getting the size wrong. A pergola that is too small for your yard can look insignificant, while one that is too large can overwhelm your home and patio. The key is to find a balance. The structure’s scale should feel appropriate for the surrounding space and your house. Think about the overall footprint and height. Custom design elements like decorative trim or a more substantial roof can also affect its visual weight and cost. Our team can help you visualize different sizes and find the perfect proportions for your property, ensuring your new pergola or pavilion feels just right.
Plan for Sun Exposure
Before you build, spend some time observing your yard. Take note of the sun’s path throughout the day to understand where you need shade the most. This simple step will help you decide on the best placement and orientation for your pergola. The direction of the overhead rafters plays a huge role in how much sun or shade the space receives. For example, rafters running north to south will provide different shade patterns than those running east to west. For maximum flexibility, you might consider options like a retractable canopy or adjustable louvers, which let you control the amount of sunlight with ease.
Blend Your Pergola with the Landscape
Your pergola shouldn’t look like it was just dropped into your yard. Instead, it should feel completely integrated with its surroundings. You can achieve this by connecting it to other elements in your outdoor space. For instance, you could use a stone for the column bases that matches your existing patio or walkways. A well-designed pergola can act as a beautiful transition between your home and your garden. Surrounding it with complementary plantings or adding climbing vines can soften the structure’s lines and help it merge beautifully with your landscape design.
Add Lighting, Plants, and Finishing Touches
The final details are what transform a pergola from a simple structure into a true outdoor room. The right lighting is essential for extending its use into the evening. You can create a magical ambiance with string lights, add a touch of elegance with a pendant light or chandelier, or install subtle floodlights to highlight the architecture. Plants also bring life and color to the space, whether they are climbing vines like wisteria and roses or vibrant hanging baskets. Consider adding outdoor curtains for privacy and a resort-like feel, or a ceiling fan for a comfortable breeze on warm days. You can find plenty of inspiration on the Gappsi YouTube channel.
Common Pergola Design Mistakes to Avoid
Designing a pergola is an exciting project, but a few common missteps can turn your dream addition into a bit of a headache. Being aware of these potential pitfalls from the start will help you plan better, stick to your budget, and create a beautiful, lasting structure you’ll love for years. A little foresight goes a long way in ensuring your new outdoor space is everything you hoped for. Let’s walk through some of the most frequent design mistakes and how you can easily avoid them.
Skipping the Permit Process
It’s tempting to jump right into building, but one of the biggest mistakes is overlooking local regulations. Many towns across Long Island require a permit for outdoor structures like pergolas, especially if they are attached to your home or exceed a certain size. Skipping this step can lead to fines or, in the worst-case scenario, an order to tear down your new structure. The permit process ensures your pergola is safe and meets all local building codes. Working with an experienced team that handles pavilions and pergolas can make this step seamless, as they will manage the paperwork and ensure everything is compliant from day one.
Choosing the Wrong Size or Placement
A pergola should feel like a natural extension of your home and landscape, not an afterthought. A structure that’s too small will look out of place and won’t be very functional, while one that’s too large can overwhelm your yard and block views. Before you decide, measure the area carefully and use stakes or spray paint to outline the footprint. Think about how you plan to use the space. Will it be for a small seating area or a large dining table? Proper placement is just as important. Consider the sun’s path, prevailing winds, and how the pergola relates to your home’s entry points. A professional landscape designer can help you find the perfect spot.
Underestimating the Full Cost
Budgeting for a pergola involves more than just the price of materials. Many homeowners are surprised by the total project cost when they forget to account for labor, site preparation, permits, and potential add-ons like electrical wiring for lights and fans. While a simple DIY kit might seem affordable, a custom-built pergola often involves labor costs that can make up a significant portion of the budget. It’s wise to get a detailed quote that breaks down all expenses. This transparency helps you set a realistic budget and avoids unexpected costs, ensuring your project stays on track financially from start to finish.
Forgetting About Long-Term Maintenance
Your material choice has a direct impact on how much time and money you’ll spend on upkeep. For example, a classic wood pergola is beautiful but requires regular maintenance. You’ll likely need to seal, stain, or paint it every one to three years to protect it from rot and weather damage. Over time, these costs can add up. If you prefer a more hands-off approach, consider low-maintenance materials like aluminum or vinyl composites. Thinking about long-term care from the beginning will help you choose a material that fits your lifestyle. If you already have a structure that needs care, professional restoration and sealing services can bring it back to life.
When Should You Hire a Professional?
While a DIY pergola project can be a rewarding experience, there are times when calling in a professional is the smartest move. If your design is complex, attached to your home, or you simply want the assurance of a flawless and lasting structure, working with an expert is a great choice. A professional team handles everything from securing permits to ensuring the final build is safe, beautiful, and perfectly integrated with your landscape.
Hiring a professional crew is an investment in peace of mind. Think of it this way: you’re not just paying for labor, you’re paying for years of experience, specialized tools, and the confidence that your pergola can withstand Long Island’s weather. An expert can see the big picture, helping you choose the right materials and placement while ensuring the structure is sound. At Gappsi, we specialize in creating custom pavilions and pergolas that transform outdoor spaces, and we manage every detail so you don’t have to.
The Benefits of Working with a Pro
Bringing in a professional offers a level of quality and security that’s hard to achieve on your own. While labor costs can add to your project total, that fee covers the expertise needed to get the job done right the first time. A professional build ensures your pergola is structurally sound and safe for your family and friends. They have the knowledge to build a structure that will stand strong for years, saving you from future repairs. A pro also provides a design that meets local building codes and accounts for environmental factors, giving you a beautiful and durable addition to your home.
Find a Pergola Designer on Long Island
Handling local regulations is one of the biggest hurdles in any construction project. Many towns on Long Island require permits for outdoor structures like pergolas, especially if they are attached to your house or are over a certain size. A local designer understands these requirements and can manage the permit process for you. They can also help you explore customizations that fit your budget and style. Whether you want to upsize the span for more coverage or add extra rafters for a unique look, a designer ensures your vision becomes a reality while adhering to all necessary guidelines. A professional can help you create a truly custom outdoor living space with a stunning pergola design.
Related Articles
- pergola Archives – Gappsi Group
- Hiring Custom Pergola Builders: A Complete Guide
- Gazebo | Pavilion | Pergola Archives – Gappsi Group
- Pergola Pros & Cons Archives – Gappsi Group
Frequently Asked Questions
How much shade will I actually get from a pergola? This is a great question, and the answer is: it depends on the design. A traditional pergola with widely spaced rafters will give you partial shade, creating a beautiful pattern of light and shadow that moves throughout the day. If you want more consistent shade, we can design it with rafters placed closer together or add a top layer of stringers. For the most control, you can opt for a retractable canopy or a louvered roof, which allows you to switch between full sun and complete shade with the push of a button.
What’s the best pergola material for Long Island’s climate? Given our humid summers, snowy winters, and salty coastal air, durability is key. While classic wood is beautiful, it requires consistent sealing or painting to prevent rot and weather damage. For a more hands-off approach, metal (like aluminum) and composite materials are fantastic choices. They are built to withstand the elements without rusting, rotting, or warping, so you can spend more time enjoying your pergola and less time maintaining it.
Do I really need a permit for a pergola in Nassau or Suffolk County? It’s very likely that you will. Most towns on Long Island require a permit for outdoor structures, especially if they are over a certain size or attached to your house. These rules are in place for your safety and to ensure the structure is sound. Trying to skip this step can lead to fines and other headaches. A professional builder will be familiar with your town’s specific codes and can handle the entire permit process for you, which is a huge relief.
How long does the whole process take, from design to build? The timeline can vary quite a bit depending on the complexity of your project. A simple, freestanding pergola might take a few weeks from start to finish, while a large, custom design with masonry and electrical work will naturally take longer. The design phase, material selection, and the local permit approval process are all part of the timeline. We can give you a much clearer estimate once we discuss your specific vision and the details of your property.
Can I add things like lights, fans, or a retractable roof later on? Absolutely, but it’s always best to plan for these features from the beginning. If you think you might want a ceiling fan or built-in lighting down the road, we can run the necessary electrical wiring inside the posts and beams during construction. This keeps everything looking clean and seamless. Planning ahead for future additions makes them much easier and more cost-effective to install later.