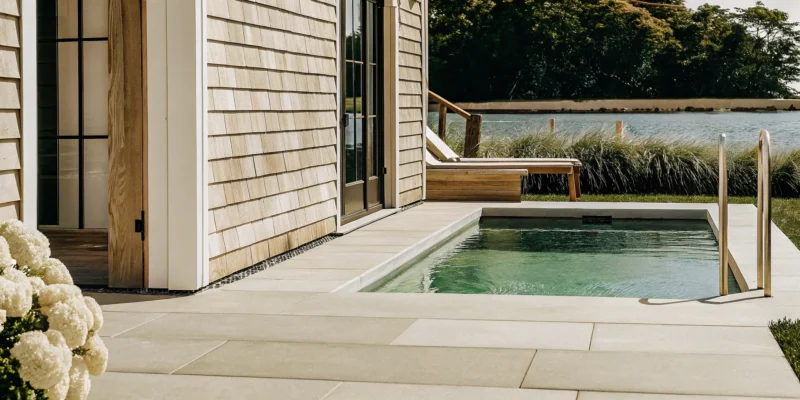
Blueprint and calculator for determining vinyl pool installation cost per square foot.

Vinyl Pool Installation Cost Per Square Foot: A Guide

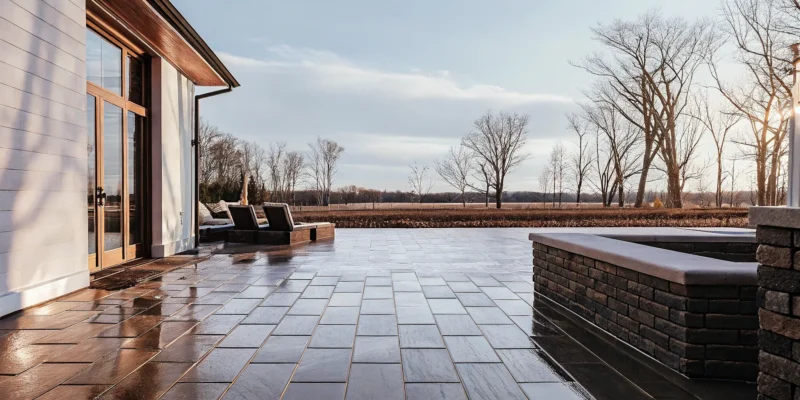
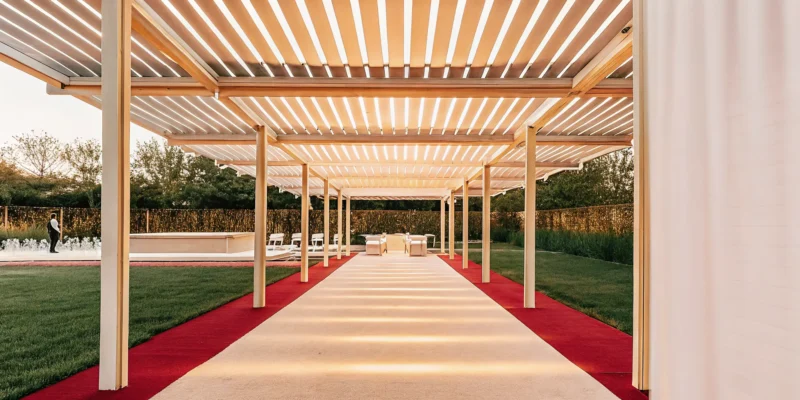
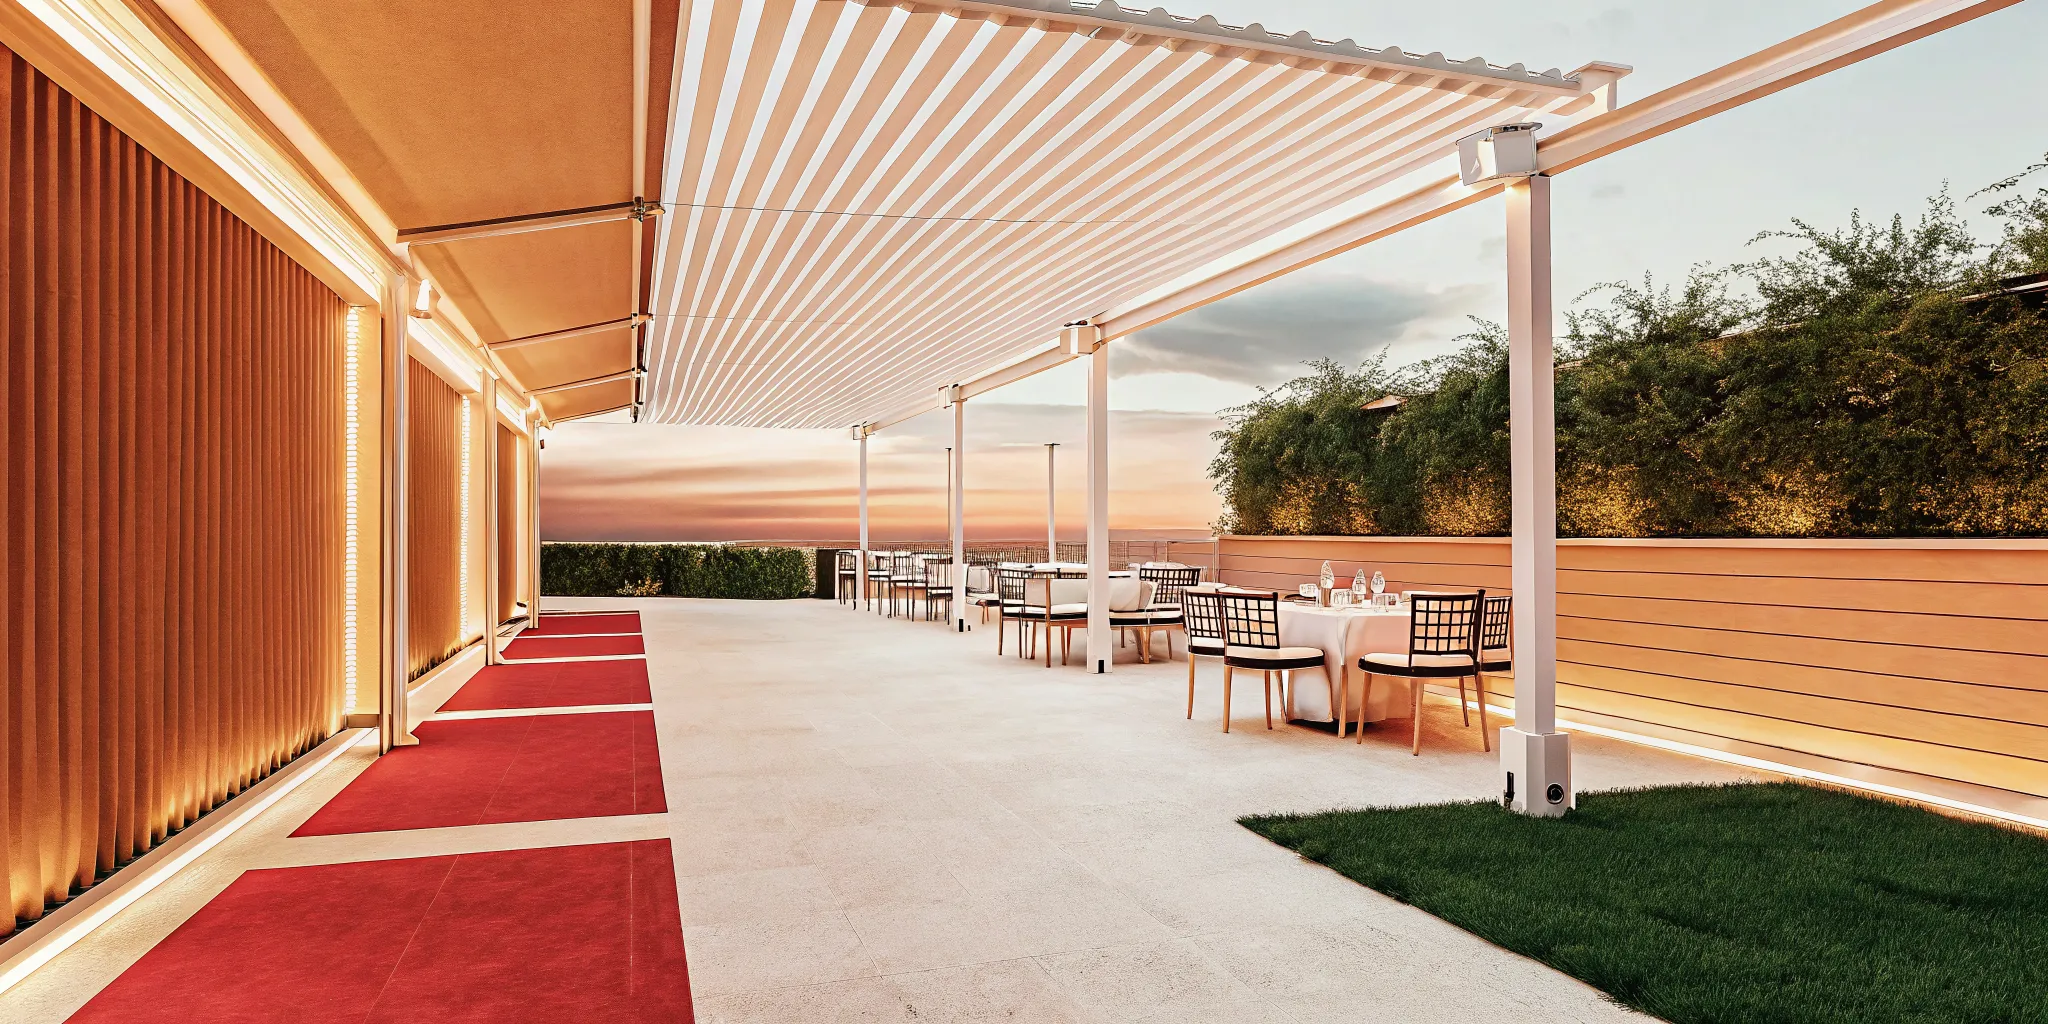
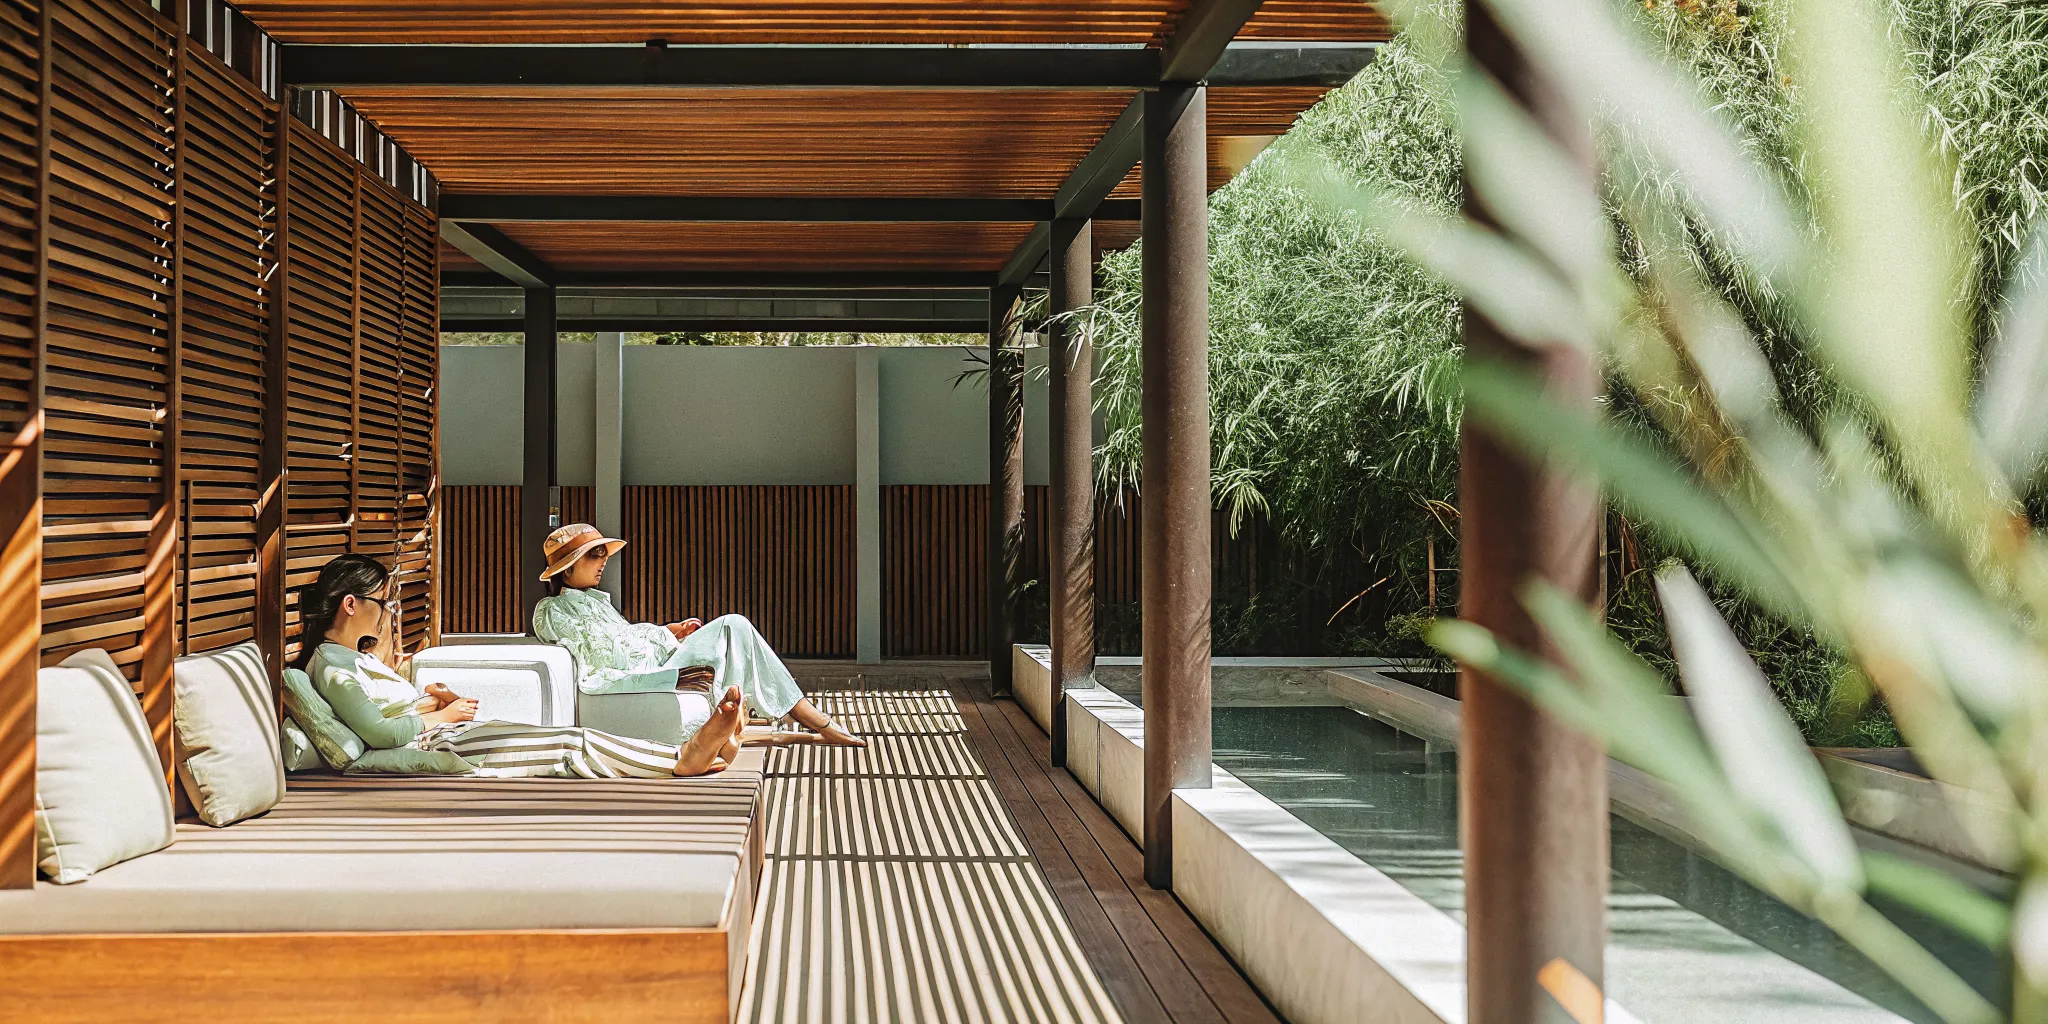
A new pool is more than just a place to swim; it’s the centerpiece of your entire outdoor living space. While understanding the vinyl pool installation cost per square foot is a critical first step, a truly stunning backyard involves thinking about the complete picture. Picture a beautiful stone patio for lounging, a custom pavilion for shade, and professional landscaping that ties it all together. This article will help you budget for the entire project, not just the pool itself. We will explore how integrating these elements from the start creates a cohesive, resort-like atmosphere that adds significant value and enjoyment to your Long Island home.

Key Takeaways

  • Budget for the Complete Project: A realistic budget includes more than just the pool itself; remember to factor in essential costs like site preparation, decking, safety fencing, and local permits.
  • Your Pool’s Design Dictates the Cost: The biggest factors affecting your initial cost are the pool’s dimensions and complexity. A classic rectangular pool is the most budget-friendly choice, while custom shapes and added depth will increase the total price.
  • Understand the Main Long-Term Expense: Vinyl pools have a lower upfront cost, but their primary long-term expense is liner replacement every five to nine years. Planning for this predictable cost is key to managing your investment.

How Much Does a Vinyl Pool Cost Per Square Foot?

Figuring out the budget for a new pool can feel like a huge task, but breaking it down makes it much more manageable. While a simple per-square-foot price can be misleading because of all the variables involved, we can look at average costs to get a solid starting point. From there, you can begin to picture how different sizes and features will shape your final investment.

The great news is that vinyl liner pools are one of the most affordable inground options available. This allows you to create a beautiful backyard oasis without the higher price tag of other pool types. Let’s look at the typical cost ranges and how you can start estimating the price for your own dream pool.

Understanding the Average Cost Range

When you start planning for new swimming pools, it helps to have a general budget in mind. For a professionally installed inground vinyl liner pool, the total project cost typically lands somewhere between $35,000 and $65,000. Many homeowners find their final cost sits around the $45,000 mark for a complete installation. This average price often includes the essential components you need to get started, like the pool pump, filter, basic steps, and a simple concrete patio surround. Of course, this range can shift based on the complexity of the job, the materials you choose, and any fun extras you decide to add.

How to Calculate Your Pool’s Square Footage

While a simple square footage calculation (length times width) is a start, it’s more practical to look at how common pool sizes affect the overall budget. The size of your pool is one of the biggest factors influencing the final price. For example, a smaller pool around 10 by 20 feet might have an estimated cost between $20,000 and $50,000. If you have a bit more space, a mid-size 12-by-24-foot pool could range from $25,000 to $50,000. For a larger family pool, something like a 14-by-28-foot design often falls between $35,000 and $55,000. These numbers give you a clearer picture of how your project’s scale connects directly to your budget.

What Factors Influence the Per-Square-Foot Cost?

Thinking about cost in terms of square footage is a great starting point, but it’s only one piece of the puzzle. The final price of a vinyl liner pool is a blend of several key factors, each playing a role in your total investment. From the size and shape you envision to the specific liner you choose and even the unique characteristics of your backyard, every decision influences the budget. Understanding these variables will help you see where your money is going and allow you to make informed choices that align with your vision and financial plan. Let’s walk through the main elements that shape the cost of bringing your dream pool to life.

Pool Size and Depth

It might seem obvious, but the bigger and deeper your pool, the more it will cost. A larger pool requires more excavation, more materials for the walls and floor, and a larger vinyl liner to fit. Think of it this way: every extra foot of length, width, or depth adds to the labor and material totals. While a sprawling pool is a beautiful centerpiece, a more modest size can still provide a perfect backyard oasis without stretching your budget. When you begin planning your swimming pool installation, considering how you’ll use the space can help you find the perfect dimensions that balance your desires with your budget. A simple, classic rectangle will almost always be more cost-effective than a sprawling, complex design.

Design Shape and Complexity

Beyond simple size, the shape and complexity of your pool design are major cost drivers. A standard rectangular pool is the most straightforward and affordable to build. Once you venture into custom shapes, like freeform lagoons, L-shapes, or designs with intricate curves, the cost begins to climb. These complex designs require more specialized labor, custom-cut materials, and a more involved installation process. Features like built-in benches, tanning ledges, or custom stairs also add to the price tag. While these elements create a truly unique and luxurious experience, it’s important to account for them in your budget from the start. Our team specializes in creating custom masonry features that can turn a simple pool into a stunning backyard resort.

Liner Quality and Thickness

The vinyl liner is the heart of your pool, and not all liners are created equal. The thickness of a liner is measured in mils, and a thicker liner, while more expensive, offers greater durability. It’s more resistant to punctures and tears from pool toys, pets, or debris, which can save you from future repairs. Thicker liners often come with longer warranties, giving you extra peace of mind. Beyond thickness, you’ll find a wide array of patterns and textures that can mimic the look of tile or stone. While premium patterns can add to the cost, they also offer a chance to customize the look of your pool’s interior and create a high-end finish.

Your Location and Local Labor Rates

Where you live plays a significant role in the overall cost of your pool installation. Here on Long Island, factors like local labor rates, the cost of materials, and transportation all get factored into the final price. Permitting processes and building codes in towns across Nassau and Suffolk counties can also influence the project timeline and associated costs. Working with a local contractor who has deep experience in the area is invaluable. A team that understands the regional landscape, literally and figuratively, can anticipate challenges and ensure your project runs smoothly from start to finish. This local expertise is something we pride ourselves on at Gappsi.

Site Conditions and Property Access

Every backyard is different, and the specific conditions of your property can have a big impact on installation costs. A perfectly flat, open yard is the ideal scenario, but that’s not always the reality. If your yard has a significant slope, you may need retaining walls to create a level area for the pool, which adds to the budget. The presence of large rocks, poor soil conditions, or the need to remove trees can also increase excavation costs. Furthermore, if your backyard is difficult to access with heavy machinery, more work may need to be done by hand, which is more labor-intensive and expensive. A thorough site evaluation is essential to uncover these potential costs before work begins and is a key part of our landscape design process.

How Pool Size and Shape Impact Your Budget

When you start planning your new vinyl pool, two of the most significant decisions you’ll make are its size and shape. These choices are the primary drivers of your project’s total cost because they directly influence the amount of materials needed and the labor required for excavation and construction. A larger, more complex pool will naturally require a bigger budget than a smaller, standard one. Understanding how these elements work together will help you design a pool that fits both your backyard and your finances perfectly. From a simple rectangle for swimming laps to a custom freeform oasis, every choice has an impact on the bottom line.

Comparing Costs: Small vs. Large Pools

It’s no surprise that bigger pools come with a bigger price tag. The larger the pool’s footprint, the more you’ll spend on excavation, materials, and labor. A larger surface area requires more vinyl liner, more wall paneling, and more water to fill it. The surrounding pool deck will also be larger, adding to the cost of materials like stone or pavers. For perspective, industry data shows that a standard 12-foot by 24-foot inground vinyl pool often has a starting cost of around $45,000. This price typically includes the basic necessities like a filter, heater, and a simple concrete deck. Think of this as a baseline, as every extra square foot you add will increase the overall cost. We can help you explore different swimming pools to find the perfect size for your space and budget.

Standard Rectangles vs. Custom Freeform Shapes

If you want to get the most value from your budget, a classic rectangular shape is the most cost-effective design. The straight lines and 90-degree angles make construction straightforward, allowing for the use of standard-sized materials and simpler labor processes. This efficiency translates directly into cost savings for you. On the other hand, custom freeform shapes like kidney, lagoon, or L-shapes create a more organic and unique look. While visually stunning, these designs require more intricate work. The liner must be custom-made, the excavation is more complex, and the construction process demands more time and skill. These factors increase both material and labor costs. A beautiful freeform pool often becomes the centerpiece of a backyard, especially when paired with custom masonry and patio work.

The Role of Depth in Material and Labor Costs

The depth of your pool plays a quiet but important role in your budget. A deeper pool requires significantly more excavation, which increases labor hours and may require specialized equipment, especially if we encounter rocky soil. The pool’s structure also needs to be stronger to withstand the added water pressure, which can mean more robust wall supports. A typical backyard pool might have a shallow end and a deep end around 6.5 feet. However, if you’re dreaming of a diving board, safety standards require a depth of at least nine feet. This extra depth not only adds to excavation and material costs but also increases the volume of water needed to fill the pool. When planning your home remodeling project, considering how you’ll use the pool will help determine the right depth for your family and your budget.

What Other Costs Should You Budget For?

When you’re planning for a new vinyl liner pool, the price of the pool itself is just the starting point. To create a complete and accurate budget, you need to account for all the other elements that turn a simple pool into a finished backyard oasis. These additional costs, from preparing the ground to adding the final safety features, are essential for a successful project. Thinking about these expenses upfront helps you avoid surprises and ensures your vision can come to life without a hitch. Let’s walk through the other major costs you should factor into your total investment.

Excavation and Site Prep

Before your pool can be installed, your yard needs to be prepared. The construction process, which includes digging the hole for the pool, is often the most labor-intensive part of the project. This phase covers the heavy machinery, the skilled labor to operate it, and the initial framing of your pool structure. The cost for excavation can vary depending on your property. If your yard has rocky soil, a steep grade, or limited access for equipment, the site preparation may require more time and resources. A professional swimming pool company will assess your site early on to give you a clear idea of these costs.

Pool Decking, Coping, and Patios

The area immediately surrounding your pool, known as the pool deck or patio, is where you’ll do most of your lounging and entertaining. The cost for this part of the project depends heavily on the materials you choose and the total square footage. Coping, the material used to cap the pool shell wall, creates a finished edge and is another key design choice. You might opt for classic concrete, elegant natural stone, or modern porcelain pavers. Each material comes with a different price point and maintenance level, giving you the flexibility to match your budget and style.

Long Island Permits and Inspections

Building a pool on Long Island involves securing permits from your local town or village, and this process comes with its own set of fees. Each municipality in Nassau and Suffolk County has specific regulations for residential pools, which often include requirements for safety features like alarms, gates, and covers. Navigating these local codes can be complex, which is why working with an experienced contractor is so valuable. A builder who is familiar with your town’s requirements can manage the entire permitting process for you, ensuring everything is filed correctly and your project complies with all safety standards from the start.

Essential Add-Ons: Lighting, Heaters, and Water Features

This is where you can truly personalize your pool. While not strictly necessary, features like lighting and heaters can dramatically improve your swimming experience. LED lighting allows you to enjoy your pool after dark, while a heater can extend your swim season into the cooler days of spring and fall. You might also consider adding water features like a gentle waterfall, deck jets, or even an attached hot tub. These elements add movement, sound, and a touch of luxury to your backyard. It’s a good idea to decide which add-ons are most important to you and include them in your initial budget.

Landscaping and Safety Fencing

The final touches around your pool are what tie the whole space together. Professional landscaping can create a seamless transition from your new pool to the rest of your yard, adding privacy and beauty. Just as important is the installation of a safety fence. Most Long Island towns legally require a fence of a certain height with a self-latching gate to enclose the pool area. You have many options for fencing materials, from classic aluminum to low-maintenance vinyl, allowing you to choose a style that complements your home while meeting all safety codes.

Potential Changes to Homeowners Insurance

Adding a pool to your property will almost certainly affect your homeowners insurance. Because a pool is considered an “attractive nuisance,” it increases your liability, so your provider will likely require you to increase your coverage. It’s a smart move to call your insurance agent before you begin construction to understand how your premium will change. You should also discuss your pool’s construction with your builder. For instance, if you’re considering a saltwater system, it’s important to use polymer walls instead of metal ones, as salt can cause corrosion if the vinyl liner is ever punctured. Discussing these details ensures your pool is built for long-term enjoyment.

Popular Upgrades to Consider for Your Budget

Once you have the basic structure of your vinyl pool planned, it’s time for the fun part: choosing the features that will make it uniquely yours. While these upgrades will add to your initial investment, they can dramatically improve your pool’s functionality, beauty, and overall enjoyment. Think of them as investments in your backyard lifestyle. From creating a resort-like atmosphere to simplifying maintenance, here are some of the most popular upgrades Long Island homeowners add to their vinyl pools.

Waterfalls, Built-In Steps, and Tanning Ledges

If you’re dreaming of a backyard that feels like a private resort, custom water features are the way to go. A gentle waterfall adds soothing sounds and a beautiful focal point, transforming your pool area into a tranquil escape. For easier access and a more integrated look, consider built-in steps instead of a standard ladder. They provide a graceful entry point and double as in-pool seating. Another popular choice is a tanning ledge, also known as a sun shelf. This is a wide, shallow area perfect for placing a lounge chair in the water or giving toddlers a safe place to splash. These custom swimming pool features are best incorporated during the initial build to ensure a seamless design.

LED Lighting and Smart Automation

Adding LED lighting is one of the best ways to extend your pool time into the evening hours. Modern LED systems can create a stunning ambiance with a full spectrum of colors, all controlled with the touch of a button. It’s not just about looks; lighting also improves safety for night swimming. To make pool ownership even easier, you can integrate smart automation. Imagine adjusting your pool’s lights, heater, and water features directly from your smartphone. This technology gives you complete control over your pool environment without having to fiddle with equipment. It’s a modern convenience that many homeowners find is well worth the investment for the ease and flexibility it provides.

High-Efficiency Heaters

A pool heater is practically a necessity on Long Island if you want to maximize your swimming season. A high-efficiency heater allows you to comfortably open your pool earlier in the spring and keep it open well into the fall. While adding a heater will increase the upfront cost, think of all the extra weeks or even months of enjoyment you’ll get each year. Modern heaters are more energy-efficient than ever, helping you manage long-term operating costs while ensuring your pool is always the perfect temperature. It’s an upgrade that pays for itself in priceless family memories and extended relaxation time.

Upgraded Pumps and Filtration Systems

While not as glamorous as a waterfall, the pump and filter are the heart of your pool, and upgrading them can make a huge difference. A variable-speed pump is a smart investment that can save you a significant amount on your energy bills. Unlike single-speed pumps that run at full power all the time, a variable-speed model can operate at lower, more efficient speeds to circulate water. Pairing it with an upgraded filtration system, like a cartridge or diatomaceous earth (DE) filter, will keep your water clearer and healthier. These systems trap finer particles than standard sand filters, meaning you’ll enjoy sparkling water with less maintenance and fewer chemicals.

Comparing Pool Types: Vinyl, Fiberglass, and Concrete

While this guide focuses on vinyl pools, it’s helpful to see how they stack up against the other main players: fiberglass and concrete. Each type has its own set of benefits and considerations, and the right choice for your Long Island backyard depends on your budget, aesthetic goals, and how much maintenance you’re willing to handle. Understanding these differences will help you feel confident in your final decision. Gappsi has extensive experience installing all types of swimming pools, so we can help you find the perfect fit for your home. Let’s break down how they compare.

Vinyl vs. Fiberglass Cost and Maintenance

Think of vinyl and fiberglass pools as two different paths to the same destination. A vinyl liner pool typically has a lower initial installation cost, which is a major draw for many homeowners. It also offers great flexibility in size and shape. However, fiberglass pools often have a lower long-term cost of ownership.

While the upfront price for fiberglass is higher, you won’t have to replace a liner every five to nine years. Over a decade or two, this can make the total cost very similar, or even less than vinyl. Fiberglass pools are also known for their durability and low-maintenance, non-porous surface, which resists algae growth and requires fewer chemicals. The trade-off is that fiberglass shells come in predetermined shapes and sizes, offering less design freedom than a custom-built vinyl pool.

Vinyl vs. Concrete Cost and Maintenance

When you want complete design freedom, a concrete (or gunite) pool is the top choice. You can create any shape, size, or depth you can imagine, and integrate unique features like built-in tanning ledges or intricate tile work. This level of customization comes with the highest upfront cost and the longest installation time. A concrete pool is a significant masonry project that is built to last for decades.

In contrast, vinyl pools are much more budget-friendly and can be installed relatively quickly. The smooth vinyl surface is also gentle on your feet and less prone to algae than a porous concrete finish. The main downside is durability. A vinyl liner can be punctured and will need to be replaced eventually, whereas a concrete shell is incredibly strong and permanent.

A Look at Long-Term Ownership Costs

When you budget for a new pool, it’s important to think beyond the initial price tag. For vinyl pools, the biggest long-term expense is liner replacement. A new liner can cost several thousand dollars every five to nine years, depending on its quality and your pool’s size. This is a predictable cost you should factor into your annual home maintenance budget.

Fiberglass pools avoid this expense entirely, and their primary long-term cost is just routine chemical and electricity use. Concrete pools fall somewhere in the middle. While their structure is permanent, they do need to be resurfaced every 10 to 15 years, which is a significant expense. Proper care, including professional cleaning and sealing of the surrounding patio, also contributes to the overall upkeep of any pool area.

How to Finance Your New Vinyl Pool

A new vinyl pool is an exciting investment in your home and lifestyle, but it’s natural to think about how to pay for it all. The good news is you have several options for financing your project, making it easier to create the backyard oasis you’ve been dreaming of. Here’s a look at a few common paths homeowners take to fund their new pool.

Home Equity Loans and HELOCs

If you have equity built up in your home, a home equity loan or a Home Equity Line of Credit (HELOC) can be a smart way to fund your pool project. These options often come with lower interest rates than other types of loans because your home serves as collateral. Some lenders even offer renovation-specific loans that let you borrow against your home’s estimated value after the pool is installed, giving you more borrowing power. This approach is great for larger projects where you might be bundling your pool installation with other home remodeling updates, like a new patio or outdoor kitchen.

Personal Loans and Pool Financing Options

A personal loan is another popular route that doesn’t require you to use your home as collateral. While interest rates can sometimes be higher, these loans provide a straightforward way to get the funds you need and spread the cost over a set period. This makes the dream of owning a pool much more achievable without a huge upfront expense. Many homeowners find this to be a simple and effective solution. At Gappsi, we can help you understand all the possibilities for bringing your dream swimming pool to life, so you can choose the path that feels right for your family and your budget.

Paying with Cash and Seasonal Timing

If you have the funds available, paying with cash is the most direct way to finance your pool. You’ll avoid interest payments entirely, which keeps your total cost down and simplifies the whole process. Another smart strategy is to think about timing. You might find some savings by scheduling your pool installation during the off-season, like in the fall or early spring, when demand is typically lower. Planning ahead not only helps your budget but also ensures your backyard is ready for the first warm day of summer. We can work with you to find the ideal timeline for your new pool project.

Is a Vinyl Pool Right for Your Long Island Home?

Deciding on the right type of pool is a big step, and for many Long Island homeowners, a vinyl liner pool is an excellent choice. It’s about finding the perfect balance between your budget, your vision for your backyard, and the amount of maintenance you’re comfortable with. Vinyl pools offer a fantastic, customizable, and affordable way to create the backyard of your dreams. But before you take the plunge, it’s smart to weigh the specific considerations for our region, from the seasonal weather to the long-term costs. Let’s break down what owning a vinyl pool on Long Island really looks like.

Weather and Seasonal Use in Long Island

Here on Long Island, we love our summers, but we know they don’t last forever. This seasonal reality is exactly why vinyl liner pools are such a popular choice. They are generally more affordable to install than concrete or fiberglass options, which makes them a practical investment for an amenity you’ll use intensely for a few months each year. You get all the fun and relaxation of a private backyard oasis without the higher initial expense. Plus, modern vinyl swimming pools are known for their smooth, non-porous surfaces, which makes them easier to care for during the swimming season and simpler to winterize when the cool weather returns.

Understanding Liner Replacement and Maintenance

Let’s be direct about the most significant long-term cost of a vinyl pool: the liner. A high-quality vinyl liner typically lasts between five and nine years. When it’s time for a replacement, you can expect the cost to be around $4,500, which includes the new liner, labor, and fresh water. While this is a notable expense, it’s a predictable one you can plan for. Think of it as a periodic refresh that keeps your pool looking brand new. This process also gives you the chance to update the look of your pool with a new liner pattern or color, which is a unique benefit of vinyl pools.

Breaking Down Annual Upkeep Costs

Beyond the eventual liner replacement, your annual upkeep costs for a vinyl pool are quite manageable. On average, you can expect to spend between $350 and $800 per year on the chemicals and supplies needed to keep your pool water clean, safe, and sparkling. Over a decade, this regular maintenance adds up to about $7,000. This covers everything from chlorine and pH balancers to algaecide. When you consider the countless hours of enjoyment, family time, and relaxation your pool provides, this annual cost is a small price to pay for a beautiful addition to your home and backyard.

How to Maximize Your Pool Investment

A new pool is more than just a place to swim; it’s an investment in your home, your family’s happiness, and your lifestyle. To get the most out of this exciting addition, it helps to think strategically from the very beginning. Maximizing your investment isn’t just about finding the lowest price. It’s about making smart choices that ensure quality, longevity, and enjoyment for years to come. This means looking at the bigger picture, from who you hire to when you build and what you build around your pool.

Thinking ahead can save you from future headaches and unexpected costs. A well-planned project results in a beautiful, functional space that truly fits your needs and adds significant value to your property. By focusing on a few key areas, you can turn a simple pool installation into a complete backyard transformation. We’ll walk through how to select the right team for the job, the best time to schedule your installation for potential savings, and how to create a complete outdoor living environment that will be the envy of the neighborhood. These steps will help you feel confident in your decisions and thrilled with the final result.

Select the Right Pool Contractor

Choosing your pool contractor is the single most important decision you’ll make in this process. An experienced builder does more than just dig a hole; they guide you through every step, from initial design to final inspection. It’s best to work with a seasoned professional who can manage site preparation and understands all the local safety rules and permitting requirements here on Long Island. A reputable swimming pools company will have a proven track record, a portfolio of completed projects, and the expertise to handle any challenges that arise. This ensures your pool is built correctly, safely, and to the highest standards, protecting your investment for the long haul.

Time Your Installation for Potential Savings

While you might dream of a new pool during the summer heat, planning your installation for the off-season can be a smart financial move. You might save money by installing your pool during the fall, winter, or early spring when demand is lower. Contractors are often less busy during these months, which can lead to more scheduling flexibility and sometimes better pricing on labor and materials. Building in the off-season also gives you a head start, ensuring your pool is ready for the very first warm day of summer instead of being a construction zone during peak season.

Enhance Your Space with Outdoor Living Features

A pool is a fantastic centerpiece, but the features you build around it are what create a true backyard oasis. Don’t forget to budget for extra elements like waterfalls, special lighting, and beautiful patios, as these can complete the vision for your space. Think about how you want to use the area. A stunning masonry patio provides the perfect spot for lounge chairs, while a custom pavilion offers shade and a place for outdoor dining. Integrating these features from the start creates a cohesive, resort-like feel that extends your living space and makes your backyard the ultimate destination for relaxation and entertainment.

Related Articles

Frequently Asked Questions

What’s a realistic all-in budget I should plan for, beyond just the pool itself? While the pool itself might range from $35,000 to $65,000, it’s smart to plan for the total finished project. A good rule of thumb is to add 25 to 50 percent to your pool’s base cost to cover essentials like the patio, safety fencing, landscaping, and any electrical work. This means if your pool is quoted at $45,000, your complete backyard transformation could land somewhere between $56,000 and $67,000 once all the necessary and desired elements are included.

How often will I really need to replace the vinyl liner, and what does that involve? You can expect a quality vinyl liner to last between five and nine years with proper care. The replacement process is fairly straightforward for a professional team. It involves draining the pool, removing the old liner, making any minor surface repairs, and installing the new one. It’s a predictable maintenance item, and many homeowners see it as a great opportunity to give their pool a fresh look with a new color or pattern.

Why is a simple rectangular pool so much more affordable than a custom shape? A classic rectangular design is cost-effective because it relies on standard materials and a straightforward construction process. The straight lines and right angles are simpler to excavate and build, which reduces labor time. Custom, freeform shapes require more specialized work, including a custom-made liner and more complex framing and excavation, all of which add to the final cost.

What is the most common “surprise” cost I should be prepared for? The most frequent unexpected cost comes from site preparation. Every backyard is unique, and issues like a steep slope requiring a retaining wall, rocky soil that’s difficult to dig, or poor access for machinery can add to the budget. This is why a thorough site evaluation by an experienced contractor before any work begins is so important, as it helps identify these potential challenges upfront.

How long does the actual pool installation process take from start to finish? Once the permits are secured, the physical construction of a vinyl liner pool is relatively quick. For a standard project without major site complications, the installation process typically takes between two and five weeks. This timeline covers everything from the initial excavation to filling the pool with water, getting you ready to swim much faster than with other pool types.

Share this page:
A modern resin bound surfacing driveway with a blue accent in Long Island, NY.

Your Guide to Resin Bound Surfacing in Long Island, NY

Upgrading your outdoor space should be an exciting creative process, not a choice between boring shades of gray and black. Your driveway, patio, and walkways are blank canvases waiting for a touch of personal style. While traditional materials offer limited options, resin bound surfacing opens up a world of design possibilities. You can choose from a wide spectrum of natural stone colors, from warm, earthy tones to cool, contemporary grays, allowing you to perfectly complement your home’s architecture and landscaping. You can even create custom borders and patterns. For a truly bespoke look that reflects your taste, resin bound surfacing Long Island ny provides the flexibility and beauty to create a cohesive and stunning outdoor design.

Key Takeaways

  • Solve drainage and maintenance issues: Resin bound surfaces are permeable, so water drains right through to prevent puddles and ice. The seamless finish also means no more pulling weeds or sweeping loose stones.
  • Design a surface that is uniquely yours: With a wide range of aggregate colors and textures, you can create a custom finish for your driveway or patio that perfectly matches your home’s style and complements existing masonry or landscaping.
  • Hire an expert for a lasting investment: The quality of your resin bound surface depends heavily on the installer’s skill. Choosing an experienced contractor ensures the job is done right, protecting your investment and guaranteeing a beautiful, durable result.

What Is Resin Bound Surfacing?

You may have seen those smooth, seamless driveways that look like a mosaic of tiny stones. That’s likely resin bound surfacing. Think of it as mixing small stones, or aggregate, with a special clear resin to create a durable, single layer. This mixture is then troweled onto a prepared base, forming a solid surface that’s both strong and beautiful. The real magic is that it’s permeable, which means water can drain right through it, preventing those annoying puddles after a rainstorm.

Resin Bound vs. Traditional Surfaces

When you think of driveways, concrete or asphalt probably come to mind first. While those are classic choices, resin bound offers some unique advantages. The biggest one is drainage. A resin bound surface is permeable, allowing rainwater to soak through into the ground below. This means no more puddles or icy patches forming on your driveway. Traditional surfaces like concrete are non-porous and require separate drainage solutions. Resin bound is also incredibly durable and flexible, making it resistant to cracks. While the initial cost of a resin bound driveway can be higher than concrete, its longevity and low maintenance often make it a great long-term investment for your home.

Resin Bound vs. Resin Bonded: What’s the Difference?

It’s easy to mix up “resin bound” and “resin bonded,” but they are very different. With a resin bound system, the aggregate and resin are thoroughly mixed together before being applied. This creates a smooth, permeable surface that water can pass through. In contrast, a resin bonded system involves applying a layer of resin to a surface and then scattering loose stones on top. This creates a rougher texture and, most importantly, a non-permeable surface that seals the base underneath. For driveways and patios where you want to avoid standing water, a resin bound application is the superior choice for proper drainage.

Understanding Aggregate Types and Finishes

One of the best parts about choosing a resin bound surface is the design freedom it offers. You can select from a huge variety of aggregates, which are the small stones used in the mix. These come in different sizes, shapes, and a wide spectrum of colors, from natural grays and golds to bolder shades. This allows you to create a truly custom look that complements your home’s exterior and landscaping. For lasting color, it’s important to use a UV-resistant resin, which prevents the surface from fading in the sun. By working with experts in porcelain and natural stone, you can choose the perfect aggregate to achieve the exact finish you envision for your property.

Why Choose Resin Bound for Your Long Island Home?

When you’re thinking about upgrading your driveway, patio, or walkways, you want a material that not only looks great but also holds up to our unique Long Island climate. Resin bound surfacing is a fantastic choice that combines a sleek, modern aesthetic with serious practical benefits. It’s created by mixing a durable resin with small, decorative stones, resulting in a smooth, seamless, and hard-wearing finish. This method provides a beautiful and functional surface that can transform the look and feel of your property.

More importantly, it solves common homeowner headaches like poor drainage and constant upkeep. Instead of dealing with cracks in your asphalt or weeds popping up between pavers, you get a uniform surface that’s built to last. It’s a smart investment that pays off in both curb appeal and peace of mind, giving you a beautiful foundation for your outdoor living space. Whether you’re envisioning a new patio for summer barbecues or a welcoming driveway that stands out, resin bound surfacing offers a versatile and reliable solution that complements any home style.

Durability Through Long Island’s Seasons

Long Island weather can be tough on outdoor surfaces. From hot, humid summers to freezing winters with snow and ice, materials need to be resilient. Resin bound surfacing is specifically engineered for this kind of challenge. The combination of flexible resin and strong aggregate creates a surface that can withstand temperature fluctuations without cracking. Unlike concrete or asphalt, which can become brittle and break apart over time, a resin bound system moves with the ground. This durability makes it an ideal material for high-traffic areas, ensuring your driveway or patio looks pristine for years. Our expertise in masonry gives us a deep understanding of what it takes to build lasting outdoor features.

Better Drainage for a Puddle-Free Yard

One of the biggest advantages of resin bound surfacing is its permeability. The surface is designed to let water pass directly through it and drain naturally into the ground below. For Long Island homeowners, this means no more puddles on your patio after a rainstorm or treacherous ice patches on your driveway in the winter. Proper drainage prevents water from pooling near your home’s foundation and reduces runoff into storm drains. This not only makes your property safer but also helps manage stormwater more responsibly. You can restore and seal other surfaces to protect them, but resin bound offers this protection as a built-in feature.

A Safer, Low-Maintenance Surface

If you’re tired of pulling weeds from between paving stones or sweeping loose gravel back into place, you’ll appreciate how easy resin bound surfaces are to maintain. The seamless finish leaves no room for weeds to grow and ensures no loose stones get scattered across your yard. This creates a smooth, even surface that’s perfect for walking, playing, and rolling strollers or wheelchairs. A simple sweep and an occasional power wash are all it takes to keep it looking new. It’s a similar low-maintenance appeal found in our synthetic turf and Sports Games Courts, giving you more time to simply enjoy your beautiful outdoor space.

Is Resin Bound Right for Your Property?

Deciding on the perfect surface for your driveway, patio, or walkway is a big step. You want something that looks great, holds up to Long Island weather, and fits your lifestyle. Resin bound surfacing is a fantastic and versatile option, but is it the right one for you? Let’s walk through where it works best, what you need to consider, and the unique benefits it offers to help you make a confident choice for your home.

Where to Use Resin Bound Surfaces

One of the best things about resin bound surfacing is its incredible versatility. Because it creates a smooth, durable, and seamless finish, you can use it almost anywhere you need a reliable surface. It’s a popular choice for driveways, creating a stunning first impression. You can also use it for garden paths, garage floors, and even basements.

Its non-slip properties make it an ideal surround for swimming pools, providing a safe and comfortable surface for bare feet. Imagine a sleek, uniform surface connecting your patio to your pool deck or a clean, modern walkway winding through your landscape. The possibilities are wide open, allowing you to create a cohesive and beautiful look across your entire property.

Checking Local Rules and Permits

Before you fall in love with a specific material for your driveway or patio, it’s important to think about local guidelines. Every town in Nassau and Suffolk County has its own set of rules and permit requirements for home improvement projects. The choice between different surfaces often depends on more than just your budget and personal taste; it involves meeting these local regulations.

This is where working with an experienced contractor becomes so valuable. A team that understands Long Island’s specific building codes can guide you through the process, ensuring your project is fully compliant. They can help you understand if your project requires a permit and manage the paperwork for you, making your home remodeling project smooth and stress-free from the start.

The Eco-Friendly Benefits

If you’re looking for a more environmentally conscious option, resin bound surfacing is an excellent choice. Its permeable nature is one of its biggest advantages. This means that rainwater doesn’t pool on the surface or create runoff. Instead, it drains right through the material and back into the ground below. This feature makes it compliant with Sustainable Urban Drainage Systems (SUDS), which are designed to manage water responsibly.

For you as a homeowner, this means fewer puddles on your driveway and less strain on local storm drains. By helping to replenish natural groundwater, you’re making a positive impact on the local environment. It’s a smart, sustainable choice that aligns modern living with ecological responsibility, similar to other permeable options like our specialized gravel driveways.

Designing Your Perfect Surface: Colors and Finishes

One of the best parts of choosing resin bound surfacing is the creative freedom it offers. This isn’t just a practical upgrade; it’s a design choice that can completely transform the look of your property. Forget the limited options of traditional materials like plain concrete or asphalt. With resin bound surfacing, you have a vast palette of colors and aggregate textures at your fingertips, allowing you to create a truly bespoke finish for your driveway, patio, or walkway. This is your chance to move beyond the standard and design something that reflects your unique taste.

Whether you want a surface that blends seamlessly with your home’s exterior or a contrasting color that makes a statement, the possibilities are extensive. You can mix different aggregates to achieve a unique speckled effect or choose a single, uniform color for a sleek, modern look. The aggregates themselves, which are small stones, come in various shapes and sizes, adding another layer of texture and visual interest. This level of customization ensures your new surface perfectly complements your home’s architecture and your personal style. By working with a designer, you can explore different porcelain and natural stone combinations to create a cohesive and beautiful outdoor space. The final result is a durable, functional surface that is also a key element of your home’s overall design, tying everything together beautifully.

Customizing Your Driveway and Patio

Your driveway and patio are blank canvases, and resin bound surfacing provides the perfect medium to bring your vision to life. You can choose from a wide spectrum of natural stone colors, from warm golds and reds to cool silvers and grays, to create a look you love. This allows you to perfectly match the surface to your home’s siding, trim, or surrounding landscape features. For an even more personalized touch, you can incorporate custom patterns, contrasting borders, or even house numbers directly into the surface. Our team at Gappsi can walk you through the options and show you examples of completed projects to help you find the perfect design for your home.

Increase Your Home’s Curb Appeal and Value

A new resin bound driveway or patio does more than just improve the look of your home; it’s a smart investment that adds tangible value. First impressions matter, and a smooth, vibrant, and crack-free surface creates immediate curb appeal. Unlike cracked concrete or faded asphalt, a resin bound surface looks polished and well-maintained, signaling quality to visitors and potential buyers. This aesthetic improvement is a good long-term investment that makes your property more attractive and can increase its overall market value. It’s a key part of a larger home remodeling strategy that pays off for years to come.

How Is Resin Bound Surfacing Installed?

Seeing a project come to life is one of the most exciting parts of any home improvement. While resin bound surfacing looks sleek and seamless, its installation is a multi-step process that requires precision and expertise. Understanding how it works can help you appreciate the craftsmanship that goes into creating a durable and beautiful surface for your driveway, patio, or walkway. The process ensures not just a great look but also a long-lasting result that can handle everything Long Island weather throws at it.

From the initial groundwork to the final finishing touches, every stage is critical. A professional installation is key to achieving the permeability and durability that make resin bound surfaces so popular. At Gappsi, our team has refined this process to guarantee a flawless finish every time. Let’s walk through the key steps involved in transforming your outdoor space with a new resin bound surface.

Step 1: Prepare the Base

A beautiful surface is only as good as the foundation it sits on. The first and most important step is preparing the base. For a resin bound installation to last, it needs a solid, stable sub-base. This often involves excavating the old surface and installing a new base of compacted stone or porous asphalt. Proper base preparation prevents future cracks or sinking and ensures water can drain away effectively. Our masonry experts handle this crucial groundwork to create the perfect foundation for your new surface.

Step 2: Mix the Resin and Aggregate

This is where the custom look of your surface comes together. We carefully mix a clear, UV-stable polyurethane resin with your chosen aggregate, which is a collection of small, decorative stones. The stones come in a wide range of colors, sizes, and textures, allowing you to create a truly unique finish. This mixture creates a strong, flexible material that is both durable and permeable. We source high-quality natural stone aggregates to ensure your surface is as beautiful as it is functional.

Step 3: Apply and Cure the Surface

Once the resin and aggregate are perfectly mixed, our skilled installers get to work. They pour the mixture onto the prepared base and carefully trowel it by hand to a smooth, consistent depth. This is a meticulous process that requires a keen eye and a steady hand to achieve a seamless finish without any trowel marks. After the surface is laid, it needs time to cure. This chemical process hardens the resin, bonding the aggregate together and to the base below, creating a tough and resilient final surface.

How Long Does Installation Take?

One of the great things about resin bound surfacing is its relatively quick installation time compared to other paving methods. While the exact timeline depends on the size of the project and the condition of the existing base, most residential driveways and patios can be installed in just a few days. The surface is typically ready for you to walk on in about 24 hours and ready for vehicle traffic after about 48 to 72 hours of curing. Our team at Gappsi works efficiently to minimize disruption and deliver your beautiful new surface as quickly as possible.

What Does Resin Bound Surfacing Cost in Long Island?

When you’re planning a project for your home, the budget is always a top concern. So, let’s talk numbers. For a resin bound surface in Long Island, you can generally expect the cost to fall between $10 and $30 per square foot. This range typically covers both the high-quality materials and the professional installation needed for a flawless finish. Think of it as a great starting point for your calculations.

Of course, this is an average. The final price tag can shift based on the specifics of your project. Is your existing driveway cracked and in need of repair before the new surface can be laid? Are you dreaming of an intricate, multi-color pattern for your patio? These details will influence the total investment. The best way to get a clear picture is to have a professional assess your space. At Gappsi, we provide detailed consultations to help you understand every aspect of your project, ensuring there are no surprises. We believe in transparency so you can make the best decision for your home and your budget.

What Influences the Final Price?

Several key factors come into play when determining the final cost of your resin bound surface. First is the size of the area; a larger driveway will naturally require more material and labor than a small garden path. The condition of the existing base is also crucial. If your current surface is uneven or damaged, it will need preparation work to create a stable foundation, which can add to the cost.

The materials you choose also matter. You can select from a wide variety of aggregates, including different types of porcelain and natural stone, each with its own price point and aesthetic. Finally, the complexity of your design plays a role. A simple, single-color surface will be more budget-friendly than a custom pattern with intricate borders, which requires more time and precision from the installation team.

Understanding the Long-Term Value

While the initial cost is important, it’s also wise to consider the long-term value. A resin bound surface is a smart investment in your property. Its durability is one of its biggest selling points. This surface is built to withstand Long Island’s varied weather, from hot summers to freezing winters, without cracking or fading. Because it’s permeable, rainwater drains right through it, preventing puddles, ice slicks, and damage from freeze-thaw cycles. This means fewer repairs down the line. A well-maintained surface can keep its beautiful appearance for years, adding lasting curb appeal and value to your home.

How to Maintain Your New Surface

One of the best things about a resin bound surface is how easy it is to care for. You can say goodbye to hours of tedious upkeep. For routine cleaning, a simple sweep with a stiff broom to remove leaves and debris is usually all it takes. For a deeper clean, you can use a pressure washer on a low setting. If you happen to get a stain, a bit of gentle detergent and water will typically lift it right out. The key is to avoid harsh chemicals or wire brushes that could damage the resin. With just a little bit of regular care, your driveway, patio, or walkway will continue to look fantastic for years to come.

How to Find the Right Contractor in Long Island

Choosing the right contractor is the most critical step in ensuring your new resin bound surface looks incredible and lasts for years. The final result depends just as much on the skill of the installer as it does on the quality of the materials. While it might feel tempting to go with the lowest bid, the expertise and reliability of your installation team will ultimately determine the success of your project. Finding a team you can trust will make the entire process smooth and enjoyable, giving you peace of mind that your investment is in good hands. A true professional partner will guide you through material selection, design choices, and the installation itself, ensuring the outcome perfectly matches your expectations. Here’s how to find the best professionals for your Long Island home.

What to Look For: Credentials, Portfolios, and Experience

When you start your search, focus on contractors with proven experience in resin bound applications. This isn’t a job for a general paver; it requires specific skills. A company with wide-ranging expertise across various outdoor projects often indicates a high level of craftsmanship and a deep understanding of how different elements work together. Always ask to see a portfolio of their completed resin bound projects. This visual proof is the best way to gauge the quality of their work. Also, pay attention to the materials they use. A reputable contractor will be transparent about sourcing high-quality materials to ensure your surface is durable and beautiful for years to come.

Key Questions to Ask Before You Hire

Once you have a shortlist, it’s time to ask some important questions. A professional contractor will welcome your curiosity. Start by asking about their specific experience with resin bound driveways and patios on Long Island and request references you can speak with. You should also ask about their installation process, the project timeline, and what kind of warranty they offer on their work. A great consultation is a two-way street; the right team will also ask you questions to fully understand your vision. This collaborative approach is a sure sign you’ve found a partner who is invested in your project’s success, not just another contractor.

Integrating Resin Bound with Your Outdoor Design

A new driveway or patio is more than just a functional surface; it’s a major part of your home’s overall design. Choosing the right material can tie your entire outdoor space together, creating a polished and intentional look. Resin bound surfacing is especially effective for this because of its incredible versatility. With a huge selection of colors and aggregates, it can be customized to fit any style, from classic to contemporary. It’s not just about pouring a new surface, it’s about thoughtfully blending it with your home’s existing character and features. This is where you can really get creative, pairing your new surface with beautiful stonework or lush garden beds to create a seamless transition from your home to your yard.

Pairing Your Surface with Masonry and Landscaping

One of the best features of resin bound surfacing is its ability to complement other materials. The wide range of available aggregates means you can select a color and texture that perfectly matches your home’s brick, stone, or siding. Imagine a warm, golden-hued driveway that picks up the tones in your masonry work, creating a unified and harmonious look. The smooth, clean finish of a resin bound surface also provides a beautiful contrast to the organic shapes and textures of your garden. It creates a crisp, defined edge for flower beds and lawns, making your landscape design appear even more vibrant and well-maintained. It gives you the aesthetic of fine gravel without the hassle of loose stones.

How Gappsi Brings Your Vision to Life

Bringing a cohesive design together requires more than just great materials; it requires a clear vision and expert execution. At Gappsi, we specialize in creating comprehensive outdoor living spaces where every element works in harmony. Our design process starts with understanding your style and how you want to use your space. We help you choose the perfect resin bound aggregate that not only suits your home’s architecture but also complements other features like your patio furniture or a new swimming pool deck. We see the bigger picture, integrating your new surface with lighting, walkways, and plantings to create a complete and inviting environment. Our goal is to transform your property into a beautiful, functional extension of your home.

Related Articles

Frequently Asked Questions

How long will a resin bound surface actually last? With a professional installation and proper care, you can expect your resin bound surface to look great for many years. Its longevity comes from the combination of a strong, stable base and the flexible, UV-resistant resin that binds the stones. This construction helps it resist cracks from temperature changes, which is a common issue with other surfaces here on Long Island.

Can you install resin bound surfacing directly over my old concrete or asphalt driveway? While it might seem like a good shortcut, installing a resin bound surface requires a solid and stable foundation to ensure it lasts. If your existing driveway is in excellent condition with no cracks or crumbling, it might be possible to use it as a base. However, in most cases, we recommend preparing a new, purpose-built sub-base to guarantee proper drainage and prevent any future issues from showing through.

Is a resin bound surface slippery, especially in the rain or during winter? Not at all, which is one of its best safety features. The texture of the small, aggregated stones provides a natural grip, making it a non-slip surface that’s great for walkways and pool surrounds. Because the surface is permeable, water drains right through instead of pooling on top, which significantly reduces the formation of ice patches during the winter.

What happens if the surface gets damaged? Can it be repaired? Accidents can happen, but one of the benefits of a resin bound surface is that it can be repaired. If a small area gets damaged, a skilled professional can cut out the affected section and re-lay a new mixture of resin and matching aggregate. While a patch may be slightly visible at first, it often weathers over time and blends in with the surrounding surface.

Will the color of the stones fade after a few years in the sun? You don’t have to worry about the color fading. We use a high-quality, UV-stable resin in our installations. This special type of resin acts like a powerful sunscreen for the aggregate, protecting the natural color of the stones from the sun’s ultraviolet rays and ensuring your driveway or patio remains vibrant for years.

Share this page:
Couple admiring their new vinyl fence after installation by the best company.

How to Find the Best Company for Vinyl Fence Installation

A fence is rarely just a fence; it’s part of a larger vision for your outdoor living space. Perhaps it’s the finishing touch on a new masonry patio, a secure enclosure for a swimming pool, or a charming border for your garden. When all these elements work together, they create a cohesive and beautiful backyard retreat. Choosing a full-service company that can manage your entire project ensures a seamless design and a stress-free experience. This guide will explain the vinyl fence installation process from start to finish, showing you why Gappsi is the best company for vinyl fence installation and for bringing your complete outdoor vision to life with expert craftsmanship.

Key Takeaways

  • Opt for vinyl to get style without the stress: A vinyl fence is a smart choice for its durability and low-maintenance qualities. It holds up against the weather and only needs simple cleaning, giving you a beautiful fence that improves your home’s value without requiring constant upkeep.
  • Protect your investment by vetting your installer: A great fence requires a great installer. Make sure you choose a licensed and insured professional, get a detailed contract in writing, and understand the warranties to avoid costly mistakes and ensure quality workmanship.
  • Do your part to ensure a smooth installation: A little preparation makes a big difference for the installation crew. Before they arrive, confirm your property lines, clear the work area of any obstacles, and discuss unique features like slopes or sprinkler systems with your contractor.

Why Choose a Vinyl Fence?

When you’re thinking about adding a fence to your property, the material you choose makes all the difference. Wood is classic, and metal has its place, but vinyl fencing has become a favorite for so many homeowners for good reason. It offers a fantastic combination of modern style, serious durability, and easy living. If you want a fence that looks great year after year without demanding a lot of your time and energy, vinyl is an excellent choice. It’s a practical investment that pays off in both appearance and peace of mind, letting you spend more time enjoying your yard instead of working on it.

Enjoy Durability and Weather Resistance

One of the biggest advantages of vinyl is its strength. Unlike wood, which can warp, rot, or fall victim to insects, vinyl is built to last. It holds up beautifully against Long Island’s varied weather, from hot, humid summers to cold, snowy winters. A quality vinyl fence won’t crack, chip, or peel. Plus, the color is solid all the way through the material, so you don’t have to worry about fading from the sun or scratches showing a different color underneath. Gappsi offers a range of high-quality fences and netting options designed to withstand the elements and keep your property secure and looking sharp for years to come.

Improve Curb Appeal and Property Value

A fence is one of the first things people see when they look at your home, and a crisp, clean vinyl fence makes a great first impression. It can define your property lines, frame your garden, and add a polished look that instantly improves curb appeal. With so many styles available, from classic white picket fences to tall privacy panels, you can find a design that perfectly complements your home’s architecture. This visual upgrade isn’t just for you to enjoy; it’s also a smart investment that can increase your property value. A beautiful, durable fence is a major selling point that contributes to your home’s overall landscape design.

Benefit from Low-Maintenance Living

If you love the look of a painted fence but dread the upkeep, vinyl is your solution. This is where it truly shines. Wood fences require scraping, staining, or painting every few years to keep them from looking weathered. Vinyl, on the other hand, needs almost no maintenance. A simple spray with a hose and maybe a gentle wash with soap and water is usually all it takes to remove dirt and keep it looking brand new. You can forget about the time-consuming and costly tasks like restoration and sealing that other materials demand. For busy homeowners, this low-maintenance lifestyle is a huge plus.

How to Choose the Right Vinyl Fence Installer

Finding the right team to install your vinyl fence is just as important as picking out the perfect style. You’re not just hiring a contractor; you’re choosing a partner to help bring your vision to life. A great installer ensures your fence not only looks beautiful on day one but also stands strong for years to come. To make sure you find a reliable professional, focus on a few key areas: their credentials, past work, pricing, and the promises they make for the future.

Check for Licensing, Insurance, and Experience

Before you get too far in the conversation, it’s smart to confirm that any installer you’re considering is properly licensed and insured. This is a crucial first step that protects you from liability and ensures the company follows local Long Island regulations. Beyond the paperwork, look for a team with deep roots in the community and a long history of quality work. A company with decades of experience has weathered industry changes and built a reputation on solid results. Their longevity is often a clear indicator of their reliability and commitment to craftsmanship, giving you peace of mind that your project is in capable hands.

Review Their Portfolio and Style Options

The best way to gauge an installer’s quality is to see it for yourself. Ask to see a portfolio of their completed vinyl fence projects. This will give you a clear idea of their workmanship and attention to detail. As you look through their photos, see if their style aligns with your vision. A top-tier company will offer a wide variety of fencing options, including different colors, textures, and decorative elements. This variety shows they can create a custom look that complements your home’s architecture and landscape, rather than offering a one-size-fits-all solution.

Ask for Transparent Pricing and Detailed Estimates

A trustworthy fence installer will always provide a clear, itemized estimate. Be wary of quotes that seem vague or are just a single number written on a business card. A professional estimate should break down all the costs, including materials, labor, permit fees (if applicable), and debris removal. This transparency helps you understand exactly what you’re paying for and prevents unexpected charges down the road. Don’t feel pressured to make a quick decision. A reputable company will give you the time and information you need to feel confident before moving forward with your landscape design.

Understand Warranties and Post-Installation Support

A new fence is a significant investment, so it’s important to know how it’s protected. Ask potential installers about the warranties they offer. Typically, there are two: a manufacturer’s warranty that covers the vinyl material against defects like cracking or fading, and a workmanship warranty from the installer that covers their labor. A company that stands behind its work will gladly provide both in writing. It’s also a good idea to ask about their process for post-installation support. Knowing they’ll be available to help with any future adjustments or repairs ensures your fence remains a beautiful and functional part of your property for years.

Common Vinyl Fence Styles to Consider

One of the best parts about choosing vinyl is the sheer variety of styles available. You can find a look that perfectly matches your home’s personality and your family’s needs, whether you want total seclusion or a charming, decorative border. Let’s walk through some of the most popular options to help you find the right fit for your Long Island property.

Privacy Fences

If creating a secluded backyard retreat is your top priority, a privacy fence is your best friend. These fences typically stand at least six feet tall and feature solid, interlocking panels that block the view from the outside. This style is ideal for creating a personal sanctuary where you can relax, entertain, or let your kids and pets play freely without worrying about prying eyes. A privacy fence is an excellent choice for enclosing a backyard with a swimming pool or patio, giving you a true sense of security and peace. They offer a clean, modern look while serving a very practical purpose.

Picket Fences

Nothing says “welcome home” quite like a classic picket fence. This timeless style adds charm and character to any property, defining your yard without completely closing it off. Picket fences are usually shorter than privacy styles and feature evenly spaced vertical boards, creating a friendly and inviting look. Modern vinyl picket fences come in a variety of designs, from traditional straight-top to elegant scalloped or arched patterns. They are a wonderful way to enhance your home’s curb appeal and complement your landscape design, providing a beautiful frame for your front yard or garden.

Ranch Rail Fences

Ranch rail fences, also known as horse fences, offer a rustic and open feel that is perfect for larger properties or for homeowners who want to define a boundary without obstructing the view. Characterized by their horizontal rails, these fences create a spacious look while clearly marking your property lines. Vinyl ranch rail fences are a durable, low-maintenance alternative to traditional wood, so you never have to worry about painting or staining. They are an excellent choice for lining long gravel driveways or sectioning off different areas of your yard, adding a touch of pastoral charm to your home.

Semi-Privacy and Decorative Fences

For those who want the best of both worlds, a semi-privacy fence offers a perfect balance. This style provides some screening but features small gaps between the panels, allowing light and air to flow through. It creates a sense of enclosure without making your yard feel completely closed in. Decorative fences take this a step further, incorporating elements like lattice tops, alternating picket heights, or unique post caps. These stylish fences and netting options can become a true design feature, adding elegance and a custom touch to your outdoor space while still defining the area.

Custom Colors and Textures

Gone are the days when vinyl fencing only came in basic white. Today, you can choose from a wide range of custom colors and textures to perfectly match your home’s aesthetic. From classic white and tan to modern grays and rich, dark tones, there is a color to suit any style. Even more exciting are the textured finishes that convincingly mimic the look of natural materials. You can get the warm, rustic appearance of wood or the sophisticated look of stone without any of the demanding upkeep. This allows you to coordinate your fence with other outdoor elements, like your porcelain and natural stone patio.

What Is the Vinyl Fence Installation Process?

Understanding what to expect from a professional fence installation can make the entire experience feel smooth and predictable. While every project is unique, the process generally follows a clear path from your initial idea to the final, beautiful result. A professional installer will guide you through each phase, ensuring your vision comes to life exactly as you planned. It all starts with a simple conversation and ends with a fence that enhances your home for years to come.

Step 1: Initial Consultation and Site Check

This first meeting is all about getting on the same page. During the initial consultation, a project designer will visit your property to walk the grounds with you. This is your opportunity to share your vision, ask questions, and discuss your goals for the fence, whether it’s for privacy, security, or curb appeal. The designer will assess the terrain, identify potential challenges like slopes or existing landscaping, and take precise measurements. This site check ensures that the final plan is perfectly tailored to your property. It’s a collaborative step where your ideas and the team’s expertise come together to create a solid foundation for the project.

Step 2: Custom Design and Material Selection

Once the site assessment is complete, you can move on to the creative part: designing your fence. This is where you select the specific style, color, and texture that best complements your home’s architecture and your personal taste. You can choose from a wide variety of fences and netting options, including classic white picket fences, modern privacy panels, or textured vinyl that mimics the look of natural wood. Your installer should provide samples and a portfolio to help you visualize the final product. Seeing examples of completed projects on platforms like YouTube can also provide inspiration and help you finalize your design choices with confidence.

Step 3: The Day of Installation

On installation day, a professional crew will arrive ready to turn your design into a reality. The team will begin by carefully marking out the fence line according to the agreed-upon plan and preparing the area for post installation. A key part of a quality installation is ensuring every post is set correctly, creating a strong and level framework for the fence panels. The crew will work efficiently, using high-quality materials and proven techniques to build a durable and attractive fence. This focus on expert masonry and construction principles ensures your fence will stand straight and strong for years.

How Long Does Installation Usually Take?

The timeline for a vinyl fence installation can vary depending on several factors. The length and complexity of the fence, the condition of the terrain, and even the weather can influence how long the project takes. A straightforward fence on a flat, clear property might only take a day or two, while a more intricate project on a sloped or rocky yard could take longer. A good installer will give you a realistic timeline during the consultation. It’s also worth noting that fence installation is not limited to a specific season; a professional team can work year-round to complete your project, similar to how they might schedule a patio restoration and sealing.

Do You Need a Permit for a Vinyl Fence on Long Island?

Figuring out the rules for a new fence can feel like a project in itself. The short answer is yes, you will likely need a permit for your vinyl fence installation on Long Island. The specific requirements depend on where you live, but getting this step right is essential to ensure your project goes smoothly and you avoid any future headaches or fines. Let’s walk through what you need to know about the permit process.

Understanding Nassau and Suffolk County Rules

In both Nassau and Suffolk counties, fence regulations are primarily based on height. Generally, a permit is required for any fence taller than four feet in your front yard or six feet in your side or backyards. However, each town and village has its own specific zoning codes that can add another layer to these rules. It’s always best to check directly with your local building department. Nassau County provides a helpful guide on fences and walls, and you can find general information on Suffolk County building permits online. Confirming these details early prevents delays and ensures your new fence is fully compliant from day one.

Checking HOA Rules and Property Lines

Beyond your town’s regulations, you may also have a Homeowners Association (HOA) with its own set of guidelines. HOAs often have specific rules about fence materials, colors, and heights that can be even stricter than local laws. Understanding your HOA rules and getting written approval before installation is a critical step to avoid being asked to remove a non-compliant fence. Equally important is confirming your property lines. A simple mistake can lead to a costly dispute with a neighbor. If you are not 100% certain of your boundaries, it’s wise to hire a surveyor to mark them clearly before any posts go in the ground.

How a Professional Handles the Permit Process

This is where working with an experienced installer really pays off. The permit process can be tedious, involving specific drawings, forms, and trips to the town office. A professional contractor is familiar with the local codes and the entire application process. They can prepare and submit all the necessary paperwork for you, ensuring everything is filled out correctly to prevent rejections or delays. This is a major reason why homeowners choose to hire a professional fence installer. Having an expert manage the permits not only saves you time and stress but also provides peace of mind that your project is being handled correctly from the very beginning.

What Does Vinyl Fence Installation Cost?

Let’s talk about the numbers. Understanding the potential cost of a vinyl fence helps you budget and plan for your project. While every project is unique, the average cost for professional vinyl fence installation typically falls between $20 and $40 per linear foot. For a standard Long Island property, this can translate to a total project cost of around $2,000 to $5,000.

Of course, this is just a ballpark figure. The final price depends on several key variables, from the style of fence you choose to the specific conditions of your property. At Gappsi, we provide a full range of fencing options and believe in transparent pricing, so you know exactly what you’re paying for. A detailed estimate from a reputable installer is the best way to get an accurate number for your home.

What Factors Influence the Price?

Several elements contribute to the total cost of your vinyl fence installation. The quality of the vinyl itself is a major factor; higher-grade materials cost more upfront but offer superior durability and a longer lifespan. The fence’s height and style also play a significant role. For example, a tall privacy fence requires more material and labor than a simple, shorter picket fence.

Your property’s specific conditions are another important consideration. A flat, clear yard is straightforward to work with, but a sloped, rocky, or heavily landscaped area may require extra site preparation, which can increase labor costs. Finally, local permit requirements and the removal of an old fence can also add to the final price.

What Should a Quote Include?

A professional and trustworthy quote is more than just a single number. It should be a detailed document that breaks down every aspect of the project so you can see exactly where your money is going. A comprehensive estimate should clearly outline the cost of materials, specifying the type and quantity of vinyl fencing, posts, and hardware.

It should also include an itemized cost for labor, any fees for permits or old fence removal, and a clear project timeline. Finally, look for information on warranties. A great contractor will stand by their work and the materials they use, so make sure the quote includes details on both material and workmanship guarantees. This transparency protects you and ensures there are no surprises.

How to Spot Red Flags in Low Estimates

While it’s tempting to go with the lowest bidder, an unusually low estimate can be a major red flag. Be cautious of quotes that are vague or lack a detailed cost breakdown, as this may hide subpar materials or surprise fees later on. One of the most important steps is to choose a fencing contractor who is fully licensed and insured. An uninsured contractor puts you at risk for liability if an accident happens on your property.

Also, be wary of high-pressure sales tactics or “today only” deals that rush your decision. A reputable company will give you the time and information you need to feel confident. If a contractor can’t provide recent references or a portfolio of their work, it’s best to walk away. Your fence is a long-term investment, and quality workmanship is worth paying for.

How to Prepare Your Property for a New Fence

Once you’ve chosen your perfect vinyl fence and scheduled the installation, you might think your work is done. While your professional installers will handle all the heavy lifting, a little bit of prep work on your end can make a huge difference. Taking a few simple steps to prepare your property ensures that the installation team can work efficiently and safely, which helps your project stay on schedule and on budget. Think of it as rolling out the welcome mat for your new fence.

A smooth installation starts with a clear and ready workspace. Before the Gappsi team arrives, you can help by marking boundaries, clearing the fence line, and thinking about your yard’s specific features. These preparations prevent surprises and allow the crew to focus on what they do best: building you a beautiful, sturdy fence. By tackling these small tasks beforehand, you play a key role in bringing your vision to life without any hiccups along the way.

Mark Property Lines and Clear the Area

First things first, let’s talk boundaries. Knowing exactly where your property ends and your neighbor’s begins is the most critical step before any work starts. You can find this information on your property survey. If you can’t locate it, you may need to hire a surveyor to mark the lines for you. This simple action prevents any potential disputes with neighbors and ensures your new fence is installed legally on your land.

Once your property lines are clearly marked, walk along the proposed fence line and clear a path about two to three feet wide on each side. Remove any obstacles like shrubs, small trees, rocks, garden decor, or children’s toys. It’s also a good idea to mark the locations of any private underground lines, such as sprinkler systems or landscape lighting wires, so the installation crew can avoid them.

Plan for Slopes, Drainage, and Access

Many yards have their own unique character, including gentle slopes or uneven spots. This is rarely a problem for an experienced team, but it’s important to discuss it during your initial consultation. Your installer can explain how the fence will be installed to follow the contour of the land, either by “stepping” the panels or “racking” them to match the slope.

You also want to consider how water flows across your property, especially during heavy rain. A new fence shouldn’t act like a dam, causing water to pool in your yard or your neighbor’s. Point out any drainage patterns to your installation team so they can make sure the fence doesn’t interfere. Finally, make sure the crew has easy access to the work area. Clear a path for them to carry materials and equipment from their truck to the fence line.

Schedule Your Installation with Weather in Mind

Weather can have a big impact on a fence installation. While you can’t control Mother Nature, you can plan around her. It’s best to schedule your fence installation during a period of dry, mild weather if possible. Rain can turn the ground into mud, making it difficult to dig post holes and set them securely with concrete. A soggy work area can cause delays and a bigger mess in your yard.

Extreme temperatures can also affect the process. In very cold weather, the ground can be frozen and hard to dig, and vinyl can become more brittle. In extreme heat, the material can become more flexible. A professional company like Gappsi will always monitor the forecast and advise you on the best time to build, but being aware of the weather yourself helps you understand the ideal conditions for a successful and lasting installation.

Mistakes to Avoid When Hiring a Fence Installer

Choosing the right installer is just as important as picking the perfect fence style. A great installation ensures your fence looks beautiful and lasts for years, while a poor one can lead to headaches and extra costs. To make sure your project goes smoothly from start to finish, it helps to know what common mistakes to watch out for. By being aware of these potential issues, you can confidently select a contractor who will deliver the quality and peace of mind you deserve. Here are three key mistakes to avoid when hiring a fence installer for your Long Island home.

Choosing Based on Price Alone

It’s tempting to go with the lowest bid, but price shouldn’t be the only factor in your decision. An unusually low estimate can be a red flag for subpar materials, inexperienced labor, or a contractor who cuts corners. The best value comes from a balance of fair pricing and excellent quality. Instead of focusing only on the cost, consider what you’re getting for your money. A reputable company will use durable materials and follow proper installation techniques, ensuring your fence stands strong against Long Island’s weather. Investing a little more upfront for a quality job can save you from expensive repairs and replacements later on.

Skipping the Contract and Warranty Review

A handshake is nice, but a detailed contract is essential for protecting your investment. Before any work begins, make sure you receive a written agreement that clearly outlines the project scope, materials to be used, payment schedule, and an estimated timeline. It’s also crucial to understand the warranties offered. A professional installer should provide a workmanship warranty that covers their labor, in addition to any manufacturer warranties on the vinyl materials. Reviewing these documents carefully ensures everyone is on the same page and gives you clear recourse if any issues come up after the installation is complete.

Forgetting to Ask About Permits

Fence installations on Long Island often require permits, and overlooking this step can cause major problems. Failing to secure the right permits could result in fines or even an order to tear down your new fence. A professional installer should be knowledgeable about local regulations in Nassau and Suffolk counties and guide you through the process. Ask potential contractors if they handle permitting or what you need to do to get the necessary approvals. An experienced company will help you make sure your project is fully compliant with town codes and HOA rules, giving you one less thing to worry about.

How to Read Customer Reviews

Customer reviews are a goldmine of information, but you have to know how to sift through them to find the real gems. It’s not just about the star rating; it’s about reading between the lines to see if a company’s values and work ethic align with your expectations for your home. A savvy approach to reading feedback will help you choose an installer with confidence.

What to Look for in a Review

When you’re scrolling through reviews, look for recurring themes. Are multiple people mentioning the crew’s professionalism or how clean they left the yard? That’s a great sign. Pay attention to comments about communication. Did the company keep the homeowner updated on timelines and progress? A review that says, “They answered all my questions and were so easy to work with,” speaks volumes. Also, look for details about the quality of their fences and netting. Comments on the sturdiness of the installation and the durability of the vinyl can give you confidence in the final product. How a company handles unexpected issues is also telling, so a review that explains how a problem was quickly resolved can be more valuable than a simple five-star rating.

Where to Find Trustworthy Feedback

Start with the obvious places like Google and Yelp, but don’t stop there. A company’s own website can be a great resource, not just for testimonials, but for visual proof of their work. Look for a project gallery or portfolio. Pictures and videos of completed projects, like those on a company’s YouTube channel, show you the company is proud of their craftsmanship and can help you visualize what’s possible for your own yard. Also, check out their social media channels. Seeing how a company interacts with its community and showcases its work in real-time can provide a more authentic feel for their business. A consistent pattern of positive feedback across multiple platforms is the goal.

Why Choose Gappsi for Your Vinyl Fence Installation?

Choosing an installer is just as important as picking the right fence style. You need a partner who understands your vision, respects your property, and has the expertise to deliver a flawless result. At Gappsi, we’ve been helping Long Island homeowners transform their properties since 1987. Our approach is built on a foundation of expert craftsmanship, clear communication, and a deep understanding of what makes a house a home. We don’t just install fences; we create beautiful, secure, and lasting boundaries that enhance your outdoor living experience. Let’s look at what sets the Gappsi experience apart.

Explore Our Custom Styles and Options

Finding a fence that matches your home’s unique character is key. We believe your fence should be more than just a barrier; it should be a seamless part of your landscape design. That’s why we offer an extensive selection of vinyl fence styles, colors, and heights. Whether you’re looking for a classic white picket fence to add charm to your front yard or a tall privacy fence for a quiet backyard retreat, we have options to suit your needs. Our design team works with you to select the perfect combination that provides security while complementing your home’s aesthetic. We offer a variety of fences and netting to ensure your project is exactly as you imagined.

Get Expert Design and Permit Support

Dealing with local building codes and permit applications can be one of the most stressful parts of any home improvement project. When you work with Gappsi, you can leave the paperwork to us. Our team is well-versed in the specific regulations for both Nassau and Suffolk County, so we can manage the permit process for you from start to finish. We ensure your new fence is fully compliant with all local requirements, saving you from potential fines or project delays. This expert support gives you peace of mind, knowing that every detail is handled correctly and professionally, letting you focus on the exciting part: watching your new fence come to life.

Discover Our Other Fencing and Outdoor Services

A new fence is often just one piece of a larger outdoor vision. At Gappsi, we are a full-service home improvement company, which means we can help you create a completely cohesive outdoor space. Imagine your new vinyl fence perfectly framing a beautiful masonry patio, a lush garden, or a fun sports games court. Because we handle everything from design to construction, you benefit from a streamlined process and a unified aesthetic across all your projects. Instead of juggling multiple contractors, you have one trusted team dedicated to bringing your entire backyard dream to reality, ensuring every element works together in harmony.

Related Articles

Frequently Asked Questions

How much maintenance does a vinyl fence really need? This is one of the best parts about choosing vinyl. It’s not completely maintenance-free, but it’s very close. For most of the year, you won’t have to do anything at all. If it starts to look a little dirty from dust or pollen, a simple spray with your garden hose is usually enough to make it look new again. For any stubborn spots, a little soap and water with a soft cloth will do the trick. You can say goodbye to the scraping, painting, and staining that wood fences require.

Will a vinyl fence hold up in Long Island’s weather? Absolutely. A quality vinyl fence is built to handle everything our local weather throws at it, from hot, sunny summers to icy winters. The material is designed to be flexible and strong, so it resists cracking in the cold. Plus, the color is mixed into the vinyl itself, not just painted on the surface. This means it won’t fade from sun exposure or show a different color if it gets scratched.

My yard isn’t perfectly flat. Can a vinyl fence be installed on a slope? Yes, this is a very common situation and a professional installer has no problem with it. There are a couple of ways to handle slopes. The fence panels can be “stepped,” where each panel is slightly lower than the one before it, creating a stair-step look. Or, they can be “racked,” where the panel itself adjusts to follow the angle of the ground. Your installer will assess your property and recommend the best method for a secure and attractive result.

What’s the difference between the manufacturer’s warranty and the installer’s warranty? This is a great question, and it’s important to understand both. The manufacturer’s warranty covers the vinyl material itself against defects like cracking, peeling, or unusual fading. The installer’s warranty, often called a workmanship warranty, covers the quality of the installation. This means if a post becomes loose or a gate starts to sag due to how it was installed, the installer is responsible for fixing it. A reputable company will provide both in writing.

Do I have to handle the permit application myself? While you can, you don’t have to navigate that process alone. Figuring out local codes and filling out paperwork can be a huge headache. An experienced, professional installer is familiar with the specific permit requirements in Nassau and Suffolk counties. They can handle the entire application process for you, from preparing the necessary drawings to submitting the paperwork, ensuring your project is compliant from the start.

Share this page:
Couple admiring their new vinyl fence after installation by the best company.

How to Find the Best Company for Vinyl Fence Installation

A fence is rarely just a fence; it’s part of a larger vision for your outdoor living space. Perhaps it’s the finishing touch on a new masonry patio, a secure enclosure for a swimming pool, or a charming border for your garden. When all these elements work together, they create a cohesive and beautiful backyard retreat. Choosing a full-service company that can manage your entire project ensures a seamless design and a stress-free experience. This guide will explain the vinyl fence installation process from start to finish, showing you why Gappsi is the best company for vinyl fence installation and for bringing your complete outdoor vision to life with expert craftsmanship.

Key Takeaways

  • Opt for vinyl to get style without the stress: A vinyl fence is a smart choice for its durability and low-maintenance qualities. It holds up against the weather and only needs simple cleaning, giving you a beautiful fence that improves your home’s value without requiring constant upkeep.
  • Protect your investment by vetting your installer: A great fence requires a great installer. Make sure you choose a licensed and insured professional, get a detailed contract in writing, and understand the warranties to avoid costly mistakes and ensure quality workmanship.
  • Do your part to ensure a smooth installation: A little preparation makes a big difference for the installation crew. Before they arrive, confirm your property lines, clear the work area of any obstacles, and discuss unique features like slopes or sprinkler systems with your contractor.

Why Choose a Vinyl Fence?

When you’re thinking about adding a fence to your property, the material you choose makes all the difference. Wood is classic, and metal has its place, but vinyl fencing has become a favorite for so many homeowners for good reason. It offers a fantastic combination of modern style, serious durability, and easy living. If you want a fence that looks great year after year without demanding a lot of your time and energy, vinyl is an excellent choice. It’s a practical investment that pays off in both appearance and peace of mind, letting you spend more time enjoying your yard instead of working on it.

Enjoy Durability and Weather Resistance

One of the biggest advantages of vinyl is its strength. Unlike wood, which can warp, rot, or fall victim to insects, vinyl is built to last. It holds up beautifully against Long Island’s varied weather, from hot, humid summers to cold, snowy winters. A quality vinyl fence won’t crack, chip, or peel. Plus, the color is solid all the way through the material, so you don’t have to worry about fading from the sun or scratches showing a different color underneath. Gappsi offers a range of high-quality fences and netting options designed to withstand the elements and keep your property secure and looking sharp for years to come.

Improve Curb Appeal and Property Value

A fence is one of the first things people see when they look at your home, and a crisp, clean vinyl fence makes a great first impression. It can define your property lines, frame your garden, and add a polished look that instantly improves curb appeal. With so many styles available, from classic white picket fences to tall privacy panels, you can find a design that perfectly complements your home’s architecture. This visual upgrade isn’t just for you to enjoy; it’s also a smart investment that can increase your property value. A beautiful, durable fence is a major selling point that contributes to your home’s overall landscape design.

Benefit from Low-Maintenance Living

If you love the look of a painted fence but dread the upkeep, vinyl is your solution. This is where it truly shines. Wood fences require scraping, staining, or painting every few years to keep them from looking weathered. Vinyl, on the other hand, needs almost no maintenance. A simple spray with a hose and maybe a gentle wash with soap and water is usually all it takes to remove dirt and keep it looking brand new. You can forget about the time-consuming and costly tasks like restoration and sealing that other materials demand. For busy homeowners, this low-maintenance lifestyle is a huge plus.

How to Choose the Right Vinyl Fence Installer

Finding the right team to install your vinyl fence is just as important as picking out the perfect style. You’re not just hiring a contractor; you’re choosing a partner to help bring your vision to life. A great installer ensures your fence not only looks beautiful on day one but also stands strong for years to come. To make sure you find a reliable professional, focus on a few key areas: their credentials, past work, pricing, and the promises they make for the future.

Check for Licensing, Insurance, and Experience

Before you get too far in the conversation, it’s smart to confirm that any installer you’re considering is properly licensed and insured. This is a crucial first step that protects you from liability and ensures the company follows local Long Island regulations. Beyond the paperwork, look for a team with deep roots in the community and a long history of quality work. A company with decades of experience has weathered industry changes and built a reputation on solid results. Their longevity is often a clear indicator of their reliability and commitment to craftsmanship, giving you peace of mind that your project is in capable hands.

Review Their Portfolio and Style Options

The best way to gauge an installer’s quality is to see it for yourself. Ask to see a portfolio of their completed vinyl fence projects. This will give you a clear idea of their workmanship and attention to detail. As you look through their photos, see if their style aligns with your vision. A top-tier company will offer a wide variety of fencing options, including different colors, textures, and decorative elements. This variety shows they can create a custom look that complements your home’s architecture and landscape, rather than offering a one-size-fits-all solution.

Ask for Transparent Pricing and Detailed Estimates

A trustworthy fence installer will always provide a clear, itemized estimate. Be wary of quotes that seem vague or are just a single number written on a business card. A professional estimate should break down all the costs, including materials, labor, permit fees (if applicable), and debris removal. This transparency helps you understand exactly what you’re paying for and prevents unexpected charges down the road. Don’t feel pressured to make a quick decision. A reputable company will give you the time and information you need to feel confident before moving forward with your landscape design.

Understand Warranties and Post-Installation Support

A new fence is a significant investment, so it’s important to know how it’s protected. Ask potential installers about the warranties they offer. Typically, there are two: a manufacturer’s warranty that covers the vinyl material against defects like cracking or fading, and a workmanship warranty from the installer that covers their labor. A company that stands behind its work will gladly provide both in writing. It’s also a good idea to ask about their process for post-installation support. Knowing they’ll be available to help with any future adjustments or repairs ensures your fence remains a beautiful and functional part of your property for years.

Common Vinyl Fence Styles to Consider

One of the best parts about choosing vinyl is the sheer variety of styles available. You can find a look that perfectly matches your home’s personality and your family’s needs, whether you want total seclusion or a charming, decorative border. Let’s walk through some of the most popular options to help you find the right fit for your Long Island property.

Privacy Fences

If creating a secluded backyard retreat is your top priority, a privacy fence is your best friend. These fences typically stand at least six feet tall and feature solid, interlocking panels that block the view from the outside. This style is ideal for creating a personal sanctuary where you can relax, entertain, or let your kids and pets play freely without worrying about prying eyes. A privacy fence is an excellent choice for enclosing a backyard with a swimming pool or patio, giving you a true sense of security and peace. They offer a clean, modern look while serving a very practical purpose.

Picket Fences

Nothing says “welcome home” quite like a classic picket fence. This timeless style adds charm and character to any property, defining your yard without completely closing it off. Picket fences are usually shorter than privacy styles and feature evenly spaced vertical boards, creating a friendly and inviting look. Modern vinyl picket fences come in a variety of designs, from traditional straight-top to elegant scalloped or arched patterns. They are a wonderful way to enhance your home’s curb appeal and complement your landscape design, providing a beautiful frame for your front yard or garden.

Ranch Rail Fences

Ranch rail fences, also known as horse fences, offer a rustic and open feel that is perfect for larger properties or for homeowners who want to define a boundary without obstructing the view. Characterized by their horizontal rails, these fences create a spacious look while clearly marking your property lines. Vinyl ranch rail fences are a durable, low-maintenance alternative to traditional wood, so you never have to worry about painting or staining. They are an excellent choice for lining long gravel driveways or sectioning off different areas of your yard, adding a touch of pastoral charm to your home.

Semi-Privacy and Decorative Fences

For those who want the best of both worlds, a semi-privacy fence offers a perfect balance. This style provides some screening but features small gaps between the panels, allowing light and air to flow through. It creates a sense of enclosure without making your yard feel completely closed in. Decorative fences take this a step further, incorporating elements like lattice tops, alternating picket heights, or unique post caps. These stylish fences and netting options can become a true design feature, adding elegance and a custom touch to your outdoor space while still defining the area.

Custom Colors and Textures

Gone are the days when vinyl fencing only came in basic white. Today, you can choose from a wide range of custom colors and textures to perfectly match your home’s aesthetic. From classic white and tan to modern grays and rich, dark tones, there is a color to suit any style. Even more exciting are the textured finishes that convincingly mimic the look of natural materials. You can get the warm, rustic appearance of wood or the sophisticated look of stone without any of the demanding upkeep. This allows you to coordinate your fence with other outdoor elements, like your porcelain and natural stone patio.

What Is the Vinyl Fence Installation Process?

Understanding what to expect from a professional fence installation can make the entire experience feel smooth and predictable. While every project is unique, the process generally follows a clear path from your initial idea to the final, beautiful result. A professional installer will guide you through each phase, ensuring your vision comes to life exactly as you planned. It all starts with a simple conversation and ends with a fence that enhances your home for years to come.

Step 1: Initial Consultation and Site Check

This first meeting is all about getting on the same page. During the initial consultation, a project designer will visit your property to walk the grounds with you. This is your opportunity to share your vision, ask questions, and discuss your goals for the fence, whether it’s for privacy, security, or curb appeal. The designer will assess the terrain, identify potential challenges like slopes or existing landscaping, and take precise measurements. This site check ensures that the final plan is perfectly tailored to your property. It’s a collaborative step where your ideas and the team’s expertise come together to create a solid foundation for the project.

Step 2: Custom Design and Material Selection

Once the site assessment is complete, you can move on to the creative part: designing your fence. This is where you select the specific style, color, and texture that best complements your home’s architecture and your personal taste. You can choose from a wide variety of fences and netting options, including classic white picket fences, modern privacy panels, or textured vinyl that mimics the look of natural wood. Your installer should provide samples and a portfolio to help you visualize the final product. Seeing examples of completed projects on platforms like YouTube can also provide inspiration and help you finalize your design choices with confidence.

Step 3: The Day of Installation

On installation day, a professional crew will arrive ready to turn your design into a reality. The team will begin by carefully marking out the fence line according to the agreed-upon plan and preparing the area for post installation. A key part of a quality installation is ensuring every post is set correctly, creating a strong and level framework for the fence panels. The crew will work efficiently, using high-quality materials and proven techniques to build a durable and attractive fence. This focus on expert masonry and construction principles ensures your fence will stand straight and strong for years.

How Long Does Installation Usually Take?

The timeline for a vinyl fence installation can vary depending on several factors. The length and complexity of the fence, the condition of the terrain, and even the weather can influence how long the project takes. A straightforward fence on a flat, clear property might only take a day or two, while a more intricate project on a sloped or rocky yard could take longer. A good installer will give you a realistic timeline during the consultation. It’s also worth noting that fence installation is not limited to a specific season; a professional team can work year-round to complete your project, similar to how they might schedule a patio restoration and sealing.

Do You Need a Permit for a Vinyl Fence on Long Island?

Figuring out the rules for a new fence can feel like a project in itself. The short answer is yes, you will likely need a permit for your vinyl fence installation on Long Island. The specific requirements depend on where you live, but getting this step right is essential to ensure your project goes smoothly and you avoid any future headaches or fines. Let’s walk through what you need to know about the permit process.

Understanding Nassau and Suffolk County Rules

In both Nassau and Suffolk counties, fence regulations are primarily based on height. Generally, a permit is required for any fence taller than four feet in your front yard or six feet in your side or backyards. However, each town and village has its own specific zoning codes that can add another layer to these rules. It’s always best to check directly with your local building department. Nassau County provides a helpful guide on fences and walls, and you can find general information on Suffolk County building permits online. Confirming these details early prevents delays and ensures your new fence is fully compliant from day one.

Checking HOA Rules and Property Lines

Beyond your town’s regulations, you may also have a Homeowners Association (HOA) with its own set of guidelines. HOAs often have specific rules about fence materials, colors, and heights that can be even stricter than local laws. Understanding your HOA rules and getting written approval before installation is a critical step to avoid being asked to remove a non-compliant fence. Equally important is confirming your property lines. A simple mistake can lead to a costly dispute with a neighbor. If you are not 100% certain of your boundaries, it’s wise to hire a surveyor to mark them clearly before any posts go in the ground.

How a Professional Handles the Permit Process

This is where working with an experienced installer really pays off. The permit process can be tedious, involving specific drawings, forms, and trips to the town office. A professional contractor is familiar with the local codes and the entire application process. They can prepare and submit all the necessary paperwork for you, ensuring everything is filled out correctly to prevent rejections or delays. This is a major reason why homeowners choose to hire a professional fence installer. Having an expert manage the permits not only saves you time and stress but also provides peace of mind that your project is being handled correctly from the very beginning.

What Does Vinyl Fence Installation Cost?

Let’s talk about the numbers. Understanding the potential cost of a vinyl fence helps you budget and plan for your project. While every project is unique, the average cost for professional vinyl fence installation typically falls between $20 and $40 per linear foot. For a standard Long Island property, this can translate to a total project cost of around $2,000 to $5,000.

Of course, this is just a ballpark figure. The final price depends on several key variables, from the style of fence you choose to the specific conditions of your property. At Gappsi, we provide a full range of fencing options and believe in transparent pricing, so you know exactly what you’re paying for. A detailed estimate from a reputable installer is the best way to get an accurate number for your home.

What Factors Influence the Price?

Several elements contribute to the total cost of your vinyl fence installation. The quality of the vinyl itself is a major factor; higher-grade materials cost more upfront but offer superior durability and a longer lifespan. The fence’s height and style also play a significant role. For example, a tall privacy fence requires more material and labor than a simple, shorter picket fence.

Your property’s specific conditions are another important consideration. A flat, clear yard is straightforward to work with, but a sloped, rocky, or heavily landscaped area may require extra site preparation, which can increase labor costs. Finally, local permit requirements and the removal of an old fence can also add to the final price.

What Should a Quote Include?

A professional and trustworthy quote is more than just a single number. It should be a detailed document that breaks down every aspect of the project so you can see exactly where your money is going. A comprehensive estimate should clearly outline the cost of materials, specifying the type and quantity of vinyl fencing, posts, and hardware.

It should also include an itemized cost for labor, any fees for permits or old fence removal, and a clear project timeline. Finally, look for information on warranties. A great contractor will stand by their work and the materials they use, so make sure the quote includes details on both material and workmanship guarantees. This transparency protects you and ensures there are no surprises.

How to Spot Red Flags in Low Estimates

While it’s tempting to go with the lowest bidder, an unusually low estimate can be a major red flag. Be cautious of quotes that are vague or lack a detailed cost breakdown, as this may hide subpar materials or surprise fees later on. One of the most important steps is to choose a fencing contractor who is fully licensed and insured. An uninsured contractor puts you at risk for liability if an accident happens on your property.

Also, be wary of high-pressure sales tactics or “today only” deals that rush your decision. A reputable company will give you the time and information you need to feel confident. If a contractor can’t provide recent references or a portfolio of their work, it’s best to walk away. Your fence is a long-term investment, and quality workmanship is worth paying for.

How to Prepare Your Property for a New Fence

Once you’ve chosen your perfect vinyl fence and scheduled the installation, you might think your work is done. While your professional installers will handle all the heavy lifting, a little bit of prep work on your end can make a huge difference. Taking a few simple steps to prepare your property ensures that the installation team can work efficiently and safely, which helps your project stay on schedule and on budget. Think of it as rolling out the welcome mat for your new fence.

A smooth installation starts with a clear and ready workspace. Before the Gappsi team arrives, you can help by marking boundaries, clearing the fence line, and thinking about your yard’s specific features. These preparations prevent surprises and allow the crew to focus on what they do best: building you a beautiful, sturdy fence. By tackling these small tasks beforehand, you play a key role in bringing your vision to life without any hiccups along the way.

Mark Property Lines and Clear the Area

First things first, let’s talk boundaries. Knowing exactly where your property ends and your neighbor’s begins is the most critical step before any work starts. You can find this information on your property survey. If you can’t locate it, you may need to hire a surveyor to mark the lines for you. This simple action prevents any potential disputes with neighbors and ensures your new fence is installed legally on your land.

Once your property lines are clearly marked, walk along the proposed fence line and clear a path about two to three feet wide on each side. Remove any obstacles like shrubs, small trees, rocks, garden decor, or children’s toys. It’s also a good idea to mark the locations of any private underground lines, such as sprinkler systems or landscape lighting wires, so the installation crew can avoid them.

Plan for Slopes, Drainage, and Access

Many yards have their own unique character, including gentle slopes or uneven spots. This is rarely a problem for an experienced team, but it’s important to discuss it during your initial consultation. Your installer can explain how the fence will be installed to follow the contour of the land, either by “stepping” the panels or “racking” them to match the slope.

You also want to consider how water flows across your property, especially during heavy rain. A new fence shouldn’t act like a dam, causing water to pool in your yard or your neighbor’s. Point out any drainage patterns to your installation team so they can make sure the fence doesn’t interfere. Finally, make sure the crew has easy access to the work area. Clear a path for them to carry materials and equipment from their truck to the fence line.

Schedule Your Installation with Weather in Mind

Weather can have a big impact on a fence installation. While you can’t control Mother Nature, you can plan around her. It’s best to schedule your fence installation during a period of dry, mild weather if possible. Rain can turn the ground into mud, making it difficult to dig post holes and set them securely with concrete. A soggy work area can cause delays and a bigger mess in your yard.

Extreme temperatures can also affect the process. In very cold weather, the ground can be frozen and hard to dig, and vinyl can become more brittle. In extreme heat, the material can become more flexible. A professional company like Gappsi will always monitor the forecast and advise you on the best time to build, but being aware of the weather yourself helps you understand the ideal conditions for a successful and lasting installation.

Mistakes to Avoid When Hiring a Fence Installer

Choosing the right installer is just as important as picking the perfect fence style. A great installation ensures your fence looks beautiful and lasts for years, while a poor one can lead to headaches and extra costs. To make sure your project goes smoothly from start to finish, it helps to know what common mistakes to watch out for. By being aware of these potential issues, you can confidently select a contractor who will deliver the quality and peace of mind you deserve. Here are three key mistakes to avoid when hiring a fence installer for your Long Island home.

Choosing Based on Price Alone

It’s tempting to go with the lowest bid, but price shouldn’t be the only factor in your decision. An unusually low estimate can be a red flag for subpar materials, inexperienced labor, or a contractor who cuts corners. The best value comes from a balance of fair pricing and excellent quality. Instead of focusing only on the cost, consider what you’re getting for your money. A reputable company will use durable materials and follow proper installation techniques, ensuring your fence stands strong against Long Island’s weather. Investing a little more upfront for a quality job can save you from expensive repairs and replacements later on.

Skipping the Contract and Warranty Review

A handshake is nice, but a detailed contract is essential for protecting your investment. Before any work begins, make sure you receive a written agreement that clearly outlines the project scope, materials to be used, payment schedule, and an estimated timeline. It’s also crucial to understand the warranties offered. A professional installer should provide a workmanship warranty that covers their labor, in addition to any manufacturer warranties on the vinyl materials. Reviewing these documents carefully ensures everyone is on the same page and gives you clear recourse if any issues come up after the installation is complete.

Forgetting to Ask About Permits

Fence installations on Long Island often require permits, and overlooking this step can cause major problems. Failing to secure the right permits could result in fines or even an order to tear down your new fence. A professional installer should be knowledgeable about local regulations in Nassau and Suffolk counties and guide you through the process. Ask potential contractors if they handle permitting or what you need to do to get the necessary approvals. An experienced company will help you make sure your project is fully compliant with town codes and HOA rules, giving you one less thing to worry about.

How to Read Customer Reviews

Customer reviews are a goldmine of information, but you have to know how to sift through them to find the real gems. It’s not just about the star rating; it’s about reading between the lines to see if a company’s values and work ethic align with your expectations for your home. A savvy approach to reading feedback will help you choose an installer with confidence.

What to Look for in a Review

When you’re scrolling through reviews, look for recurring themes. Are multiple people mentioning the crew’s professionalism or how clean they left the yard? That’s a great sign. Pay attention to comments about communication. Did the company keep the homeowner updated on timelines and progress? A review that says, “They answered all my questions and were so easy to work with,” speaks volumes. Also, look for details about the quality of their fences and netting. Comments on the sturdiness of the installation and the durability of the vinyl can give you confidence in the final product. How a company handles unexpected issues is also telling, so a review that explains how a problem was quickly resolved can be more valuable than a simple five-star rating.

Where to Find Trustworthy Feedback

Start with the obvious places like Google and Yelp, but don’t stop there. A company’s own website can be a great resource, not just for testimonials, but for visual proof of their work. Look for a project gallery or portfolio. Pictures and videos of completed projects, like those on a company’s YouTube channel, show you the company is proud of their craftsmanship and can help you visualize what’s possible for your own yard. Also, check out their social media channels. Seeing how a company interacts with its community and showcases its work in real-time can provide a more authentic feel for their business. A consistent pattern of positive feedback across multiple platforms is the goal.

Why Choose Gappsi for Your Vinyl Fence Installation?

Choosing an installer is just as important as picking the right fence style. You need a partner who understands your vision, respects your property, and has the expertise to deliver a flawless result. At Gappsi, we’ve been helping Long Island homeowners transform their properties since 1987. Our approach is built on a foundation of expert craftsmanship, clear communication, and a deep understanding of what makes a house a home. We don’t just install fences; we create beautiful, secure, and lasting boundaries that enhance your outdoor living experience. Let’s look at what sets the Gappsi experience apart.

Explore Our Custom Styles and Options

Finding a fence that matches your home’s unique character is key. We believe your fence should be more than just a barrier; it should be a seamless part of your landscape design. That’s why we offer an extensive selection of vinyl fence styles, colors, and heights. Whether you’re looking for a classic white picket fence to add charm to your front yard or a tall privacy fence for a quiet backyard retreat, we have options to suit your needs. Our design team works with you to select the perfect combination that provides security while complementing your home’s aesthetic. We offer a variety of fences and netting to ensure your project is exactly as you imagined.

Get Expert Design and Permit Support

Dealing with local building codes and permit applications can be one of the most stressful parts of any home improvement project. When you work with Gappsi, you can leave the paperwork to us. Our team is well-versed in the specific regulations for both Nassau and Suffolk County, so we can manage the permit process for you from start to finish. We ensure your new fence is fully compliant with all local requirements, saving you from potential fines or project delays. This expert support gives you peace of mind, knowing that every detail is handled correctly and professionally, letting you focus on the exciting part: watching your new fence come to life.

Discover Our Other Fencing and Outdoor Services

A new fence is often just one piece of a larger outdoor vision. At Gappsi, we are a full-service home improvement company, which means we can help you create a completely cohesive outdoor space. Imagine your new vinyl fence perfectly framing a beautiful masonry patio, a lush garden, or a fun sports games court. Because we handle everything from design to construction, you benefit from a streamlined process and a unified aesthetic across all your projects. Instead of juggling multiple contractors, you have one trusted team dedicated to bringing your entire backyard dream to reality, ensuring every element works together in harmony.

Related Articles

Frequently Asked Questions

How much maintenance does a vinyl fence really need? This is one of the best parts about choosing vinyl. It’s not completely maintenance-free, but it’s very close. For most of the year, you won’t have to do anything at all. If it starts to look a little dirty from dust or pollen, a simple spray with your garden hose is usually enough to make it look new again. For any stubborn spots, a little soap and water with a soft cloth will do the trick. You can say goodbye to the scraping, painting, and staining that wood fences require.

Will a vinyl fence hold up in Long Island’s weather? Absolutely. A quality vinyl fence is built to handle everything our local weather throws at it, from hot, sunny summers to icy winters. The material is designed to be flexible and strong, so it resists cracking in the cold. Plus, the color is mixed into the vinyl itself, not just painted on the surface. This means it won’t fade from sun exposure or show a different color if it gets scratched.

My yard isn’t perfectly flat. Can a vinyl fence be installed on a slope? Yes, this is a very common situation and a professional installer has no problem with it. There are a couple of ways to handle slopes. The fence panels can be “stepped,” where each panel is slightly lower than the one before it, creating a stair-step look. Or, they can be “racked,” where the panel itself adjusts to follow the angle of the ground. Your installer will assess your property and recommend the best method for a secure and attractive result.

What’s the difference between the manufacturer’s warranty and the installer’s warranty? This is a great question, and it’s important to understand both. The manufacturer’s warranty covers the vinyl material itself against defects like cracking, peeling, or unusual fading. The installer’s warranty, often called a workmanship warranty, covers the quality of the installation. This means if a post becomes loose or a gate starts to sag due to how it was installed, the installer is responsible for fixing it. A reputable company will provide both in writing.

Do I have to handle the permit application myself? While you can, you don’t have to navigate that process alone. Figuring out local codes and filling out paperwork can be a huge headache. An experienced, professional installer is familiar with the specific permit requirements in Nassau and Suffolk counties. They can handle the entire application process for you, from preparing the necessary drawings to submitting the paperwork, ensuring your project is compliant from the start.

Share this page:
Backyard putting green with synthetic turf from a professional Long Island, NY builder.

How to Choose a Putting Green Builder on Long Island, NY

You love golf, but finding the time to get to the course can be a challenge. A personal putting green offers the perfect solution, letting you practice your chipping and putting whenever you have a spare moment. However, a poorly installed green can be more frustrating than helpful. The difference between a lumpy, uneven surface and a true-rolling practice area comes down to craftsmanship. This is where a professional Putting Green contractor builder Long Island NY proves their worth. They manage every detail, from site preparation to turf selection, ensuring your investment results in a beautiful, functional space that genuinely improves your game and your home.

Key Takeaways

  • Choose a Contractor Who Is a True Partner: The quality of your putting green depends on your builder’s expertise. Select a team with a strong local portfolio, experience with Long Island’s climate, and a commitment to using premium synthetic turf and materials.
  • Customize Your Green to Match Your Goals: The final cost is determined by size, complexity, and features like bunkers or lighting. Work with your contractor to design a green that fits your practice needs, your property, and your budget.
  • Do Your Homework Before Signing a Contract: Avoid costly mistakes by researching your options. Compare multiple quotes, check references, and review the contract to confirm it includes the project scope, timeline, and warranty details.

What Is a Putting Green Contractor?

A putting green contractor is a specialist who designs and installs artificial golf greens for your backyard. Think of them as more than just installers; they are craftsmen who create a personalized golfing experience right at your home. A professional contractor handles every step of the process, from initial design and site preparation to selecting the perfect turf and shaping the green for a realistic ball roll. They understand the specific challenges of Long Island’s climate and soil, ensuring your green has proper drainage and will last for years. Their expertise is crucial for creating a surface that not only looks great but also plays true, with consistent ball speed and response.

These experts, like the team at Tour Greens Long Island, focus on installing high-performance artificial golf greens and other recreational surfaces. A comprehensive builder can do more than just the green itself. They can integrate it into a complete backyard transformation, combining it with beautiful landscaping, patios, or even multi-sport Sports Games Courts. Choosing the right contractor means you’re not just getting a patch of turf; you’re investing in a dedicated professional who will bring your vision for outdoor recreation to life with precision and skill.

Designing and Installing Your Custom Green

The best part of building a home putting green is making it completely your own. A great contractor will work with you to create a design that is truly unique to your space and how you want to play. As the experts at Personal Putting Greens note, the focus should be on building a green that reflects the customer’s specific wishes. This collaborative process ensures the final product fits your skill level, whether you’re a casual putter or a serious golfer looking to shave strokes off your game. The design phase considers everything from the green’s shape and contours to its integration with your existing landscape design, making it a natural and beautiful addition to your yard.

Choosing the Right Size, Layout, and Turf

The size and layout of your putting green are key decisions that will shape your practice experience. You can opt for a small, simple practice green of around 600 square feet or go for a much larger, more complex layout. Some custom golf areas can be up to 3,000 square feet and include features like sand traps and chipping areas, giving you a more versatile practice space. The layout, including the number of holes and the subtle slopes (or breaks), should match your practice goals. Equally important is selecting the right synthetic turf, as different materials offer varying speeds and textures to mimic the feel of your favorite course.

Adding Features like Bunkers and Lights

To make your putting green feel like a true golf course experience, consider adding custom features. Many homeowners choose to include sand traps or bunkers to practice their short game. You can also add different cuts of fringe and rough around the green for chipping practice. As installers like Back Nine Greens demonstrate, the goal is to build a custom green that looks and feels like the real thing. For those who want to practice after sunset, incorporating landscape lighting is a fantastic option. A skilled contractor can seamlessly integrate these elements, creating a professional-grade practice area that complements your home’s masonry and overall outdoor aesthetic.

Why Should You Install a Putting Green?

A backyard putting green is more than just a fun feature, it’s a lifestyle upgrade that adds value, beauty, and entertainment to your home. Imagine stepping outside to practice your short game whenever you want, without having to book a tee time. It’s a unique addition that transforms your property into a personal retreat for recreation and relaxation. Whether you’re a serious golfer looking to lower your handicap or a family seeking a new way to enjoy your outdoor space, a custom putting green offers benefits that go far beyond the game itself. From enhancing your property’s appeal to providing year-round enjoyment, it’s an investment in your home and your happiness.

Upgrade Your Lifestyle and Recreation

Think of the convenience of having a personal putting green just steps from your back door. You can practice your chipping and putting for a few minutes before work or unwind with a friendly competition after dinner. It’s a fantastic way to introduce your kids to golf and create lasting family memories. A putting green also serves as a beautiful and functional centerpiece for outdoor entertaining, giving your guests a unique activity to enjoy. By installing a custom green, you’re not just adding a recreational feature, you’re creating a hub for fun and relaxation that perfectly complements your outdoor living space. It’s an everyday luxury that helps you make the most of your time at home.

Increase Your Property’s Value and Appeal

A professionally installed putting green is a standout feature that can significantly increase your property’s market value. For potential buyers, especially those who love golf, it’s a memorable amenity that sets your home apart from others on the market. It signals a commitment to quality and a luxury lifestyle, adding a unique “wow” factor that enhances curb appeal. This kind of specialized landscaping is an investment that pays off, not just in personal enjoyment but also in financial returns. When integrated thoughtfully into your overall landscape design, a putting green becomes a premium asset that makes your property more attractive and desirable.

Play All Year with Synthetic Turf

One of the biggest advantages of a modern putting green is the use of high-quality synthetic turf. Unlike natural grass, which requires constant watering, mowing, and fertilizing, artificial turf is incredibly low-maintenance, saving you time and money. Gappsi’s advanced synthetic turf is designed to withstand Long Island’s diverse weather, staying lush and green from the hottest summer days to the coldest winter months. This means your putting green remains perfectly playable all year round, without developing brown spots or becoming unusable after heavy rain. You get a consistently smooth and true roll every time you play, with none of the hassle of traditional lawn care.

How a Putting Green Can Benefit Your Business

Putting greens aren’t just for homes. They can be a powerful asset for commercial properties, too. Imagine offering a putting green as an amenity at your office park, hotel, or residential community. It’s a fantastic way to attract and retain clients, provide a unique recreational outlet for employees, or give residents a fun social activity. A small indoor green can be a great addition to a break room, while a larger outdoor installation can become a focal point for corporate events. You can see the wide range of Gappsi’s beautiful and functional project installations on our YouTube channel. It’s an investment in your brand that shows you care about creating an exceptional experience for your clients and staff.

How to Choose the Best Putting Green Contractor on Long Island

Finding the right contractor is the most important step in bringing your dream putting green to life. A great builder does more than just lay down turf; they partner with you to create a beautiful, functional, and long-lasting addition to your home. The quality of their work will determine how much you enjoy your green for years to come. With so many options on Long Island, it’s smart to do a little homework to find a team that has the right skills and experience. By focusing on a few key areas, you can confidently choose a contractor who will deliver a professional-grade putting green that exceeds your expectations and becomes a favorite feature of your backyard.

Look for Premium Synthetic Turf and Materials

The look, feel, and performance of your putting green all come down to the quality of the materials. A top-tier contractor will use premium synthetic turf designed to mimic the ball roll of a real golf course. Don’t hesitate to ask potential builders about the turf they use, where it comes from, and why they chose it. High-quality turf is more durable, holds its color better, and provides a more realistic playing experience. Beyond the turf, ask about the base materials, infill, and even the cups. A contractor who is proud of their materials will be happy to explain the benefits of what they use.

Insist on Advanced Drainage and Precision Grading

What’s underneath your putting green is just as important as the surface itself. Proper site preparation is essential for a green that lasts. A skilled contractor will prioritize creating a stable base with an advanced drainage system to prevent water from pooling and causing issues down the line. Precision grading is also critical for ensuring a true and consistent ball roll. A lumpy or uneven surface can be frustrating and defeats the purpose of practicing at home. An experienced landscape design team understands how to work with Long Island’s specific terrain to ensure your green performs perfectly in any weather.

Check Their Experience, Portfolio, and Local Reputation

Experience is a huge indicator of a contractor’s ability to deliver a quality product. Look for a company that has been designing and installing putting greens for many years and has a strong presence in the Long Island community. Ask to see a portfolio of their completed projects. Pictures and videos can give you a great sense of their design style and the quality of their craftsmanship. You can often find project galleries on their website or even on their YouTube channel. Finally, check online reviews and ask for local references you can speak with. A contractor with a solid reputation is one you can trust.

Confirm Warranty and Maintenance Support

Your relationship with your contractor shouldn’t end the day the installation is finished. A reputable builder will stand behind their work with a solid warranty. This protects your investment and gives you peace of mind. Be sure to ask what the warranty covers and for how long. It’s also a good idea to ask about ongoing maintenance support. While synthetic greens are low maintenance, they may need occasional brushing or infill adjustments to stay in top shape. Knowing your installer offers restoration services provides a convenient and reliable option for keeping your green looking and playing its best.

How Much Does a Putting Green Cost on Long Island?

Figuring out the budget for your dream backyard putting green is a common first step. On Long Island, the cost for a professionally installed putting green can range from around $3,000 to over $15,000. For larger, more complex designs with custom features, the investment can be $25,000 or more. Think of it less as a simple expense and more as a long-term investment in your home’s value, your family’s enjoyment, and your golf game.

The final price tag depends entirely on your vision. A simple, compact green for practicing your short game will naturally cost less than a sprawling, multi-hole course with sand traps and unique contouring. The key is to balance your desires with a realistic budget. Working with an experienced contractor allows you to explore different options and understand exactly where your money is going. They can help you design a green that fits your space and financial plan perfectly, ensuring you get the most value and enjoyment from your new backyard feature.

What Factors Influence the Price?

Several key elements determine the final cost of your putting green. The size and complexity of the design are the biggest drivers. Larger greens require more materials and labor, and intricate shapes or slopes add to the installation time. The materials you choose also play a significant role. High-quality synthetic turf has a higher upfront cost but saves you money on maintenance. Finally, preparing the site is crucial. If your yard needs significant grading or a specialized drainage system to handle Long Island’s weather, this will be factored into the project’s cost. Proper site preparation is essential for a long-lasting, high-performance green.

How to Budget for Additional Costs

When planning your budget, it’s smart to think beyond the initial installation. Consider the long-term costs of maintenance. While synthetic greens are low-maintenance, they still benefit from occasional cleaning to stay in top shape. You should also think about any extra features you might want. Fun additions like sand traps, chipping stations, or ambient lighting for evening practice will add to the total investment. A good rule of thumb is to set aside an extra 10 to 20 percent of your installation budget to cover these enhancements. This ensures you can create a complete and functional space without any financial surprises.

Common Mistakes to Avoid When Hiring a Contractor

Choosing the right contractor is the most important step in bringing your backyard putting green to life. To make sure your project goes smoothly from start to finish, it helps to know what common pitfalls to look out for. A great partnership with your builder is the foundation of a successful project, so avoiding these key mistakes will set you up for a stress-free experience and a green you’ll love for years.

Don’t Skip Your Research and Reference Checks

It can be tempting to hire the first contractor who gives you a quote, but taking time for research is a step you can’t afford to skip. Start by looking for a company with a strong local reputation and a portfolio of completed projects. Look for detailed reviews that mention specifics like skill, communication, and tidiness. Happy customers often point out that a team was helpful and that they would recommend the company to others. You can also watch videos of past projects to get a feel for a contractor’s craftsmanship and see the quality of their work firsthand before you even pick up the phone.

Take Your Time and Compare Your Options

Getting several estimates is about more than just comparing prices. It’s your chance to interview potential builders and understand their unique approach. Since Long Island has many installers, you have the power to find the perfect fit for your vision. When you compare offers, look beyond the bottom line. Ask about the quality of the synthetic turf and materials they use, their design process, and what’s included in their installation. A lower bid might mean lower quality materials or a less experienced team, so a detailed comparison is key to making an informed decision.

Factor in Long Island’s Climate and Drainage Needs

A beautiful putting green is only as good as the base it’s built on, especially with Long Island’s weather. Our region gets plenty of rain and snow, so your contractor must have a solid plan for drainage. Without it, water can pool on the surface or cause the base to shift, ruining your green. Ask potential builders how they prepare the ground and what drainage solutions they use to ensure your turf stays pristine all year. A professional will be able to explain their process for creating a stable, permeable foundation that can handle anything our climate throws at it.

Always Read the Contract Carefully

Before you sign on the dotted line, make sure you read and understand every word of the contract. This document is your protection, so it should clearly outline the entire scope of the project. Look for specifics like the total cost, a detailed payment schedule, the project timeline, and a list of all materials. It should also include warranty information, such as a five-year guarantee on the installation or turf. If anything seems vague or is missing, don’t hesitate to ask for clarification. A trustworthy home improvement company will be happy to walk you through the contract and ensure you feel completely comfortable before moving forward.

Related Articles

Frequently Asked Questions

How much space do I really need for a putting green? You might be surprised to learn that you don’t need a massive yard to install a functional and fun putting green. While larger spaces allow for more complex designs with multiple holes and chipping areas, a beautiful and effective green can be designed for a smaller, dedicated corner of your property. A skilled contractor can create a custom layout that makes the most of your available space, ensuring it feels like a natural and integrated part of your landscape, not just an afterthought.

How long does the installation process typically take? The timeline for installing a putting green can vary, but a standard project is often completed within a week. The total time depends on factors like the size of the green, the complexity of the design, and the amount of site preparation needed. Creating a stable, well-drained base is the most critical part of the process, so a professional team will take the necessary time to get that right before laying the turf.

Can I customize the speed of the green to match my home course? Absolutely. This is one of the best parts of designing a custom green. The speed, or “stimp,” is determined by the type of synthetic turf and the amount of sand infill used. During the design consultation, you can discuss your preferences with your contractor. Whether you prefer the faster greens of a championship course or a slightly slower speed for casual play, they can adjust the materials and installation technique to give you the exact playing experience you want.

What kind of maintenance is required for a synthetic putting green? While synthetic greens are known for being low-maintenance, they aren’t zero-maintenance. To keep your green in top condition, you will want to periodically remove leaves and other debris with a leaf blower. It’s also a good idea to occasionally brush the turf fibers to keep them standing upright, which ensures a consistent ball roll. This simple routine takes far less time and effort than caring for natural grass and keeps your green ready for play year-round.

Is a backyard putting green a good investment for my home? Yes, it’s an excellent investment in both your property and your lifestyle. A professionally installed putting green is a unique luxury feature that can significantly increase your home’s appeal and resale value, making it stand out to potential buyers. Beyond the financial aspect, it’s an investment in your own enjoyment, providing a convenient way to practice your golf game, entertain guests, and spend quality time with your family right in your own backyard.

Share this page: