When you hear the word “porcelain,” you probably think of delicate teacups or fine china, not a surface strong enough to hold your SUV. It’s a common misconception, but outdoor porcelain pavers are an entirely different material. They are crafted from highly refined clay and fired at extreme temperatures, creating a tile that is incredibly dense, strong, and built for performance. This process results in a paver that is tougher than many natural stones and exceptionally resistant to scratches, stains, and fading. This guide will debunk the myths and show you how to find the best porcelain pavers for driveway use, proving this sophisticated material is also one of the toughest options available.
Key Takeaways
- Porcelain offers lasting beauty without the work: This material is a low-maintenance dream because it naturally resists stains, frost, and fading, so you can skip the annual sealing required by concrete or natural stone.
- Thickness is non-negotiable for driveways: Always use 3cm thick pavers for any area with vehicle traffic; thinner 2cm pavers are only suitable for patios and will crack under the weight of a car.
- A professional installation protects your investment: The long-term performance of your driveway relies on expert work, including a properly prepared base for drainage and correct joint spacing to prevent shifting and damage.
What Are Porcelain Pavers?
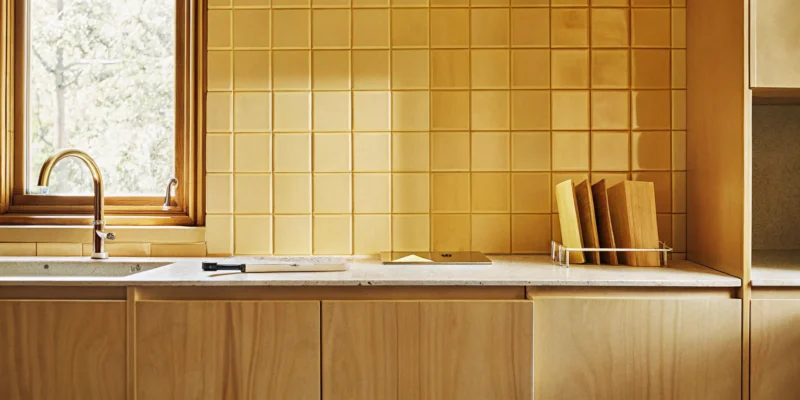
When you think of porcelain, you might picture delicate teacups, but outdoor porcelain pavers are a completely different story. Think of them as the heavy-duty, super-strong sibling to the tile in your kitchen. They are crafted from a highly refined clay that is fired at extremely high temperatures. This process creates a paver that is incredibly dense, strong, and non-porous, making it perfect for handling the tough conditions of a Long Island driveway.
Because of how they’re made, porcelain pavers are often stronger and more durable than even some types of natural stone. They resist stains, scratches, and fading, which means your driveway will look fantastic for years with very little fuss. They also come in a huge variety of styles that can mimic the look of natural stone, wood, or concrete, giving you endless design possibilities without the associated maintenance headaches. This versatility allows you to achieve a high-end look that perfectly complements your home’s aesthetic while getting a surface built for performance.
How They Compare to Concrete and Natural Stone
It’s helpful to see how porcelain stacks up against other popular driveway materials. Concrete pavers, made from a mix of concrete, sand, and gravel, are known for their strength and affordability. Natural stone offers unique, one-of-a-kind beauty. However, porcelain combines the best of both worlds. It offers superior durability and is even more scratch-resistant than many natural stones, so you don’t have to worry about damage from high traffic. Unlike porous concrete or stone, porcelain’s low absorption rate means spills, oil, and salt are less likely to cause permanent stains. Our expert masonry team can walk you through the specific benefits for your property and help you compare your options.
Why 3cm Thickness Is the Standard for Driveways
When it comes to a driveway, thickness matters, and not all porcelain pavers are created equal. While 2cm (about 0.8 inches) thick pavers are great for patios and walkways, they aren’t suitable for handling the weight of vehicles. For driveways, 3cm (about 1.2 inches) is the required standard. This extra thickness is specifically engineered to withstand the heavy, repeated loads of cars and SUVs. The 3cm paver is significantly stronger and better at distributing weight across the surface. This prevents the cracking and structural failure that can happen with thinner pavers, ensuring your investment is beautiful, safe, and built to last for decades.
Are Porcelain Pavers a Good Choice for Driveways?
When you think of porcelain, you might picture delicate tiles inside your home, not a surface tough enough for a driveway. But modern porcelain pavers are a completely different material. They are engineered specifically for outdoor use and have become a fantastic choice for driveways, combining sophisticated style with incredible strength. If you’re wondering whether they can handle the demands of daily life, from parked cars to Long Island’s changing seasons, the answer is a resounding yes. Let’s look at exactly why they perform so well.
Can They Withstand Daily Wear and Tear?
Your driveway takes a lot of abuse, so its surface needs to be exceptionally strong. This is where porcelain pavers truly shine. Unlike standard tiles, driveway-grade porcelain pavers are extra thick, typically 3 centimeters (about 1.2 inches). This added thickness gives them the structural integrity to handle the weight of vehicles without cracking. They are specifically made to be very strong and resist hard hits, making them a reliable choice for high-traffic areas. The dense, non-porous material also resists scratches and scuffs, so your driveway will continue to look great even with constant use.
How They Hold Up to Weather, Sun, and Frost
Here on Long Island, we get everything from scorching summer sun to freezing winter ice. Porcelain pavers are built to endure these extremes. Because they absorb very little water (less than 0.5%), they are highly resistant to frost. Water can’t seep in, freeze, and cause cracks, which is a common problem with more porous materials like concrete. This exceptional durability also means they resist fading from UV exposure, so the color you choose will stay vibrant for years. You can trust that your driveway will withstand the elements without cracking, scratching, or fading.
Are They Slip-Resistant in Wet Conditions?
Safety is always a top priority, especially for a surface that you and your family will walk and drive on in rain and snow. High-quality porcelain pavers are manufactured with a textured surface designed to provide grip and prevent slips. When you select your pavers, it’s important to choose a finish rated for outdoor use. These pavers are engineered to be slip-resistant, even when wet, giving you peace of mind. A professional installer can guide you to the products with the right texture and slip-resistance rating for a driveway application, ensuring your surface is both beautiful and safe.
What to Expect for Maintenance
If you’re looking for a driveway that looks amazing without demanding a lot of your time, porcelain is an excellent option. Porcelain pavers are one of the lowest-maintenance paving materials available. Since they are non-porous, they naturally resist stains from oil, salt, and other chemicals, which can be easily wiped or washed away. They don’t require sealing to protect them from water or stains, saving you time and money year after year. Routine cleaning is simple, usually just requiring a quick spray with a hose or a wash with mild soap and water to keep your driveway looking brand new.
Porcelain Pavers vs. Other Driveway Materials
Your driveway is the first impression your home makes, so choosing the right material is a big decision. It’s not just about looks; it’s about finding a surface that can handle daily traffic, Long Island weather, and your lifestyle. While traditional options like concrete, natural stone, and gravel have been popular for years, porcelain pavers are gaining serious traction for good reason. Let’s break down how porcelain stacks up against the competition to help you decide what’s best for your home.
Porcelain vs. Concrete Pavers
At first glance, porcelain and concrete pavers might seem similar, but they are fundamentally different. Concrete pavers are made from a mix of cement and sand, which creates a porous surface. Porcelain, on the other hand, is crafted from fine clay and baked at extremely high temperatures, resulting in a dense, non-porous material. This key difference is why porcelain is so much better at resisting stains from oil, grease, and grime. While concrete will soak up spills and require sealing, Gappsi’s porcelain and natural stone options wipe clean with ease. Concrete can also fade over time, but porcelain’s color is baked all the way through, so it stays vibrant for decades.
Porcelain vs. Natural Stone
Natural stone like granite or bluestone offers a beautiful, classic look, but it comes with its own set of challenges. Because it’s a natural product, its quality and durability can be inconsistent. Some stones are prone to flaking or require regular sealing to prevent water damage and staining. Porcelain gives you the best of both worlds: the high-end look of natural stone with engineered consistency and strength. Modern manufacturing allows porcelain pavers to mimic the textures and color variations of stone perfectly. Plus, they are incredibly dense and won’t absorb water, so you never have to worry about sealing them. This makes them a practical, low-maintenance alternative for a stunning masonry look.
Porcelain vs. Gravel
Gravel is an affordable and quick option for a driveway, but it often creates more problems than it solves. It’s messy, gets tracked into your home, and makes snow removal a nightmare. A gravel driveway also requires constant maintenance, as ruts form easily and the stones need to be raked and replenished. A porcelain paver driveway, in contrast, provides a solid, stable, and elegant surface that truly completes your home’s curb appeal. It creates a clean, polished entrance that is easy to walk on, drive on, and maintain. While Gappsi offers high-quality gravel driveways, a paver driveway is an investment in lasting beauty and functionality.
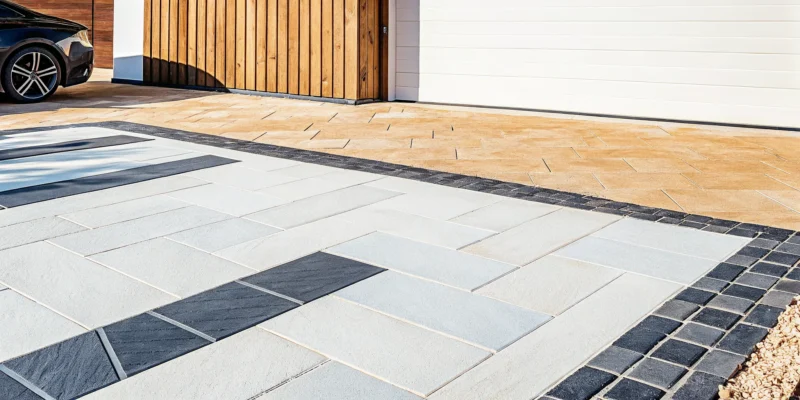
How to Choose the Best Porcelain Pavers for Your Driveway
Once you’ve decided that porcelain is the right material for your driveway, the fun part begins: picking the perfect paver. This decision is about more than just color. You’ll want to consider safety, style, and strength to ensure your new driveway looks incredible and performs flawlessly for years. Think of it as choosing the perfect accessory for your home, one that needs to be both beautiful and incredibly durable. By focusing on a few key details, you can confidently select a paver that enhances your home’s curb appeal and stands up to the demands of daily life on Long Island.
Check for High Slip-Resistance Ratings
Safety should always be a top priority, especially for a surface you’ll be walking and driving on in all kinds of weather. Porcelain pavers are known for being slip-resistant, but it’s still important to verify the specific rating. Look for pavers with a high dynamic coefficient of friction (DCOF), which simply means they provide excellent grip even when wet. This is a huge advantage during rainy spring days or after a summer downpour. A textured surface, rather than a highly polished one, will also offer better traction. When you explore options, don’t hesitate to ask us about the slip-resistance ratings to ensure your driveway is as safe as it is stunning.
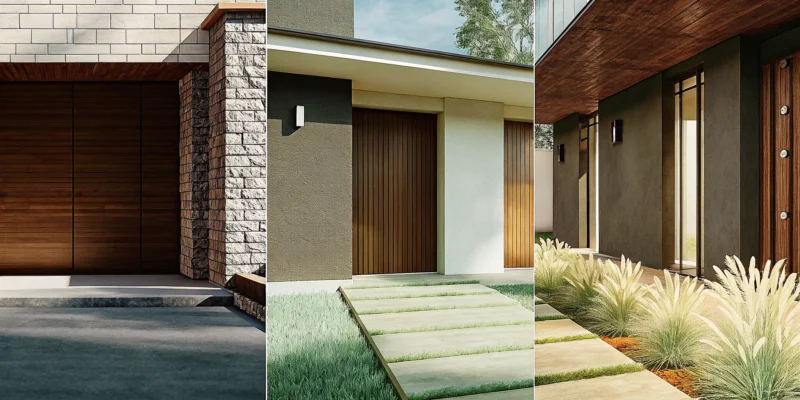
Explore Your Color, Texture, and Finish Options
This is where you can really let your personal style shine. Porcelain pavers offer an amazing range of design possibilities. You can find them in countless colors, from soft, sandy beiges to deep, dramatic charcoals. Many are designed to perfectly mimic the appearance of other materials, like natural stone, rustic wood, or even sleek concrete, giving you endless creative freedom. We recommend getting a few samples to see how they look next to your home’s exterior in different lighting conditions. You can see a wide variety of these finishes in our project showcases on the Gappsi YouTube channel.
Match Your Home’s Exterior Style
A great driveway should feel like a natural extension of your home. The best way to achieve this is by choosing a paver that complements your home’s existing architecture and color scheme. Consider the style of your house: is it a modern colonial, a classic ranch, or a coastal cottage? A paver with clean lines and a monochrome color might suit a contemporary home, while a textured, multi-tonal paver could be perfect for a more traditional property. Look at your siding, trim, and roof colors to find a paver that ties everything together. A well-coordinated landscape design creates a harmonious and polished look that significantly improves curb appeal.
Verify the Paver’s Weight and Load Ratings
This is a technical but crucial step. A driveway paver must be strong enough to handle the weight of vehicles without cracking or breaking. Not all porcelain pavers are created equal, and it’s essential to choose one specifically engineered for driveways. For vehicular traffic, the industry standard is a 3cm (1.2-inch) thick paver. These robust pavers have a high load rating, or breaking strength, ensuring they can withstand thousands of pounds of pressure from cars, SUVs, and even delivery trucks. Using a thinner paver meant for patios is a common mistake that leads to costly repairs, so always confirm the paver’s thickness and specifications with your masonry contractor.
What Are the Downsides of a Porcelain Driveway?
Porcelain pavers are an incredible choice for driveways, but it’s smart to understand the potential challenges before you commit. When we talk about “downsides,” it’s often a matter of perspective, budget, and making sure the right product is used for the job. Let’s look at the three main concerns homeowners have and get the real story on each one, so you can make a confident and informed decision for your Long Island home.
Balancing the Upfront Cost with Long-Term Value
The most significant consideration for many homeowners is the initial investment. Porcelain pavers typically have a higher upfront cost compared to traditional concrete. However, it’s important to look at this as a long-term investment in your home’s value and curb appeal. Unlike other materials that require frequent sealing and intensive cleaning, porcelain is incredibly low maintenance. Its non-porous surface resists stains from oil and salt, and it won’t fade over time. When you factor in the money and time saved on upkeep over decades, the initial cost often proves to be a smarter financial choice. You can explore a wide range of high-quality porcelain and natural stone options to find a style that fits your vision.
Debunking the Myth That Porcelain Is Fragile
When people hear “porcelain,” they might think of delicate dinner plates, not a material that can support a car. This is a common myth we need to clear up. The porcelain used for pavers is an entirely different product. It is engineered for extreme durability, fired at very high temperatures to create a dense, hard-wearing tile that is exceptionally strong. In fact, its density makes it highly resistant to water absorption, so it stands up beautifully to Long Island’s freeze-thaw cycles without cracking. When installed correctly by a professional masonry team, a porcelain driveway is built to last for generations, handling daily traffic with ease.
The Problem with Using the Wrong Thickness
Here is a potential downside that is very real: using the wrong type of paver. This is where professional guidance is non-negotiable. While standard 2cm thick porcelain pavers are perfect for patios and walkways, they are not designed to handle the weight and stress of vehicles. Using them on a driveway will inevitably lead to cracks and failure. For a driveway application, you must use pavers that are at least 3cm thick. These are specifically manufactured to be drive-over rated, providing the strength needed for daily use. Choosing the right material is just as important as the installation itself, ensuring your driveway remains beautiful and functional for years to come.
Why Professional Installation Is So Important
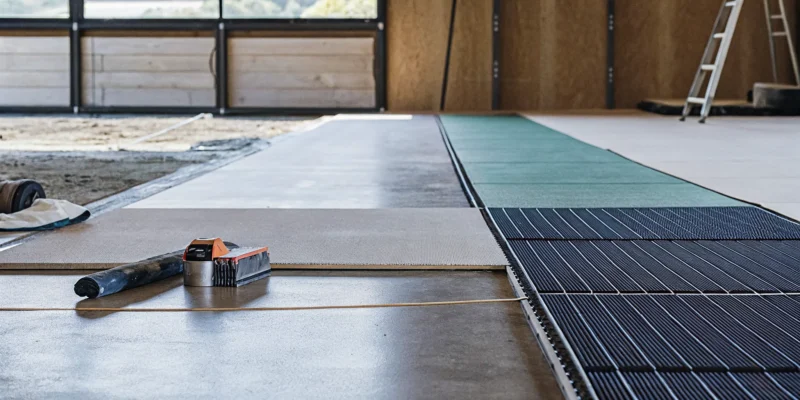
Choosing beautiful, durable porcelain pavers is the first step. The second, and equally crucial, step is ensuring they are installed correctly. The quality of the installation determines not just how your driveway looks, but how it performs and how long it lasts. While a DIY project can be tempting, the technical demands of laying a porcelain driveway make professional installation a wise investment. A pro team has the experience to avoid common pitfalls and build a driveway that stands the test of time. They understand the specific needs of our Long Island climate, from humid summers to freezing winters, and prepare for them accordingly.
A professional installation isn’t just about laying stones in a pattern. It involves a deep understanding of soil composition, water drainage, material science, and precision craftsmanship. An expert installer ensures the ground is perfectly graded, the base is compacted for maximum stability, and each paver is set with the correct spacing to allow for natural expansion and contraction. This attention to detail prevents long-term problems like sinking, shifting, and water pooling. Ultimately, investing in a professional means you get to enjoy a beautiful, worry-free driveway for years to come, knowing the foundation beneath it is just as solid as the pavers on top.
Understanding the Risks of a DIY Installation
Porcelain pavers are a premium material, and a DIY installation can put that investment at risk. Even the highest-quality pavers can fail if they aren’t installed with precision. Common mistakes, like an improperly prepared base or incorrect spacing, can lead to shifting, cracking, or water damage over time. Fixing these issues is often more expensive than getting it right the first time, sometimes requiring a complete tear-out and replacement. A professional installation protects your investment by ensuring every detail is handled correctly from the start, giving you a flawless finish and lasting peace of mind.
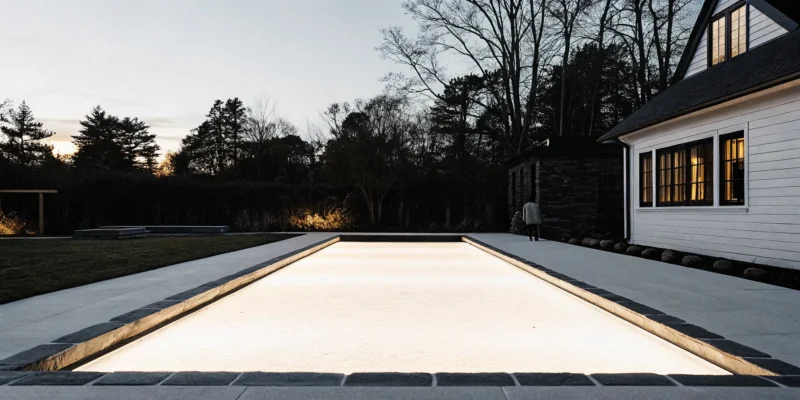
Preparing the Base for Proper Drainage
A driveway is only as strong as its foundation. For porcelain pavers, proper base preparation is essential for longevity and performance, especially with Long Island’s weather. A professional installer will begin by excavating the area and grading it to ensure water flows away from your home. They will then lay a geotextile fabric to stabilize the soil and prevent the base layers from mixing. Finally, they build a compacted base of gravel and sand. This multi-step process creates a stable, permeable foundation that prevents water accumulation, which can cause pavers to shift or crack during freeze-thaw cycles.
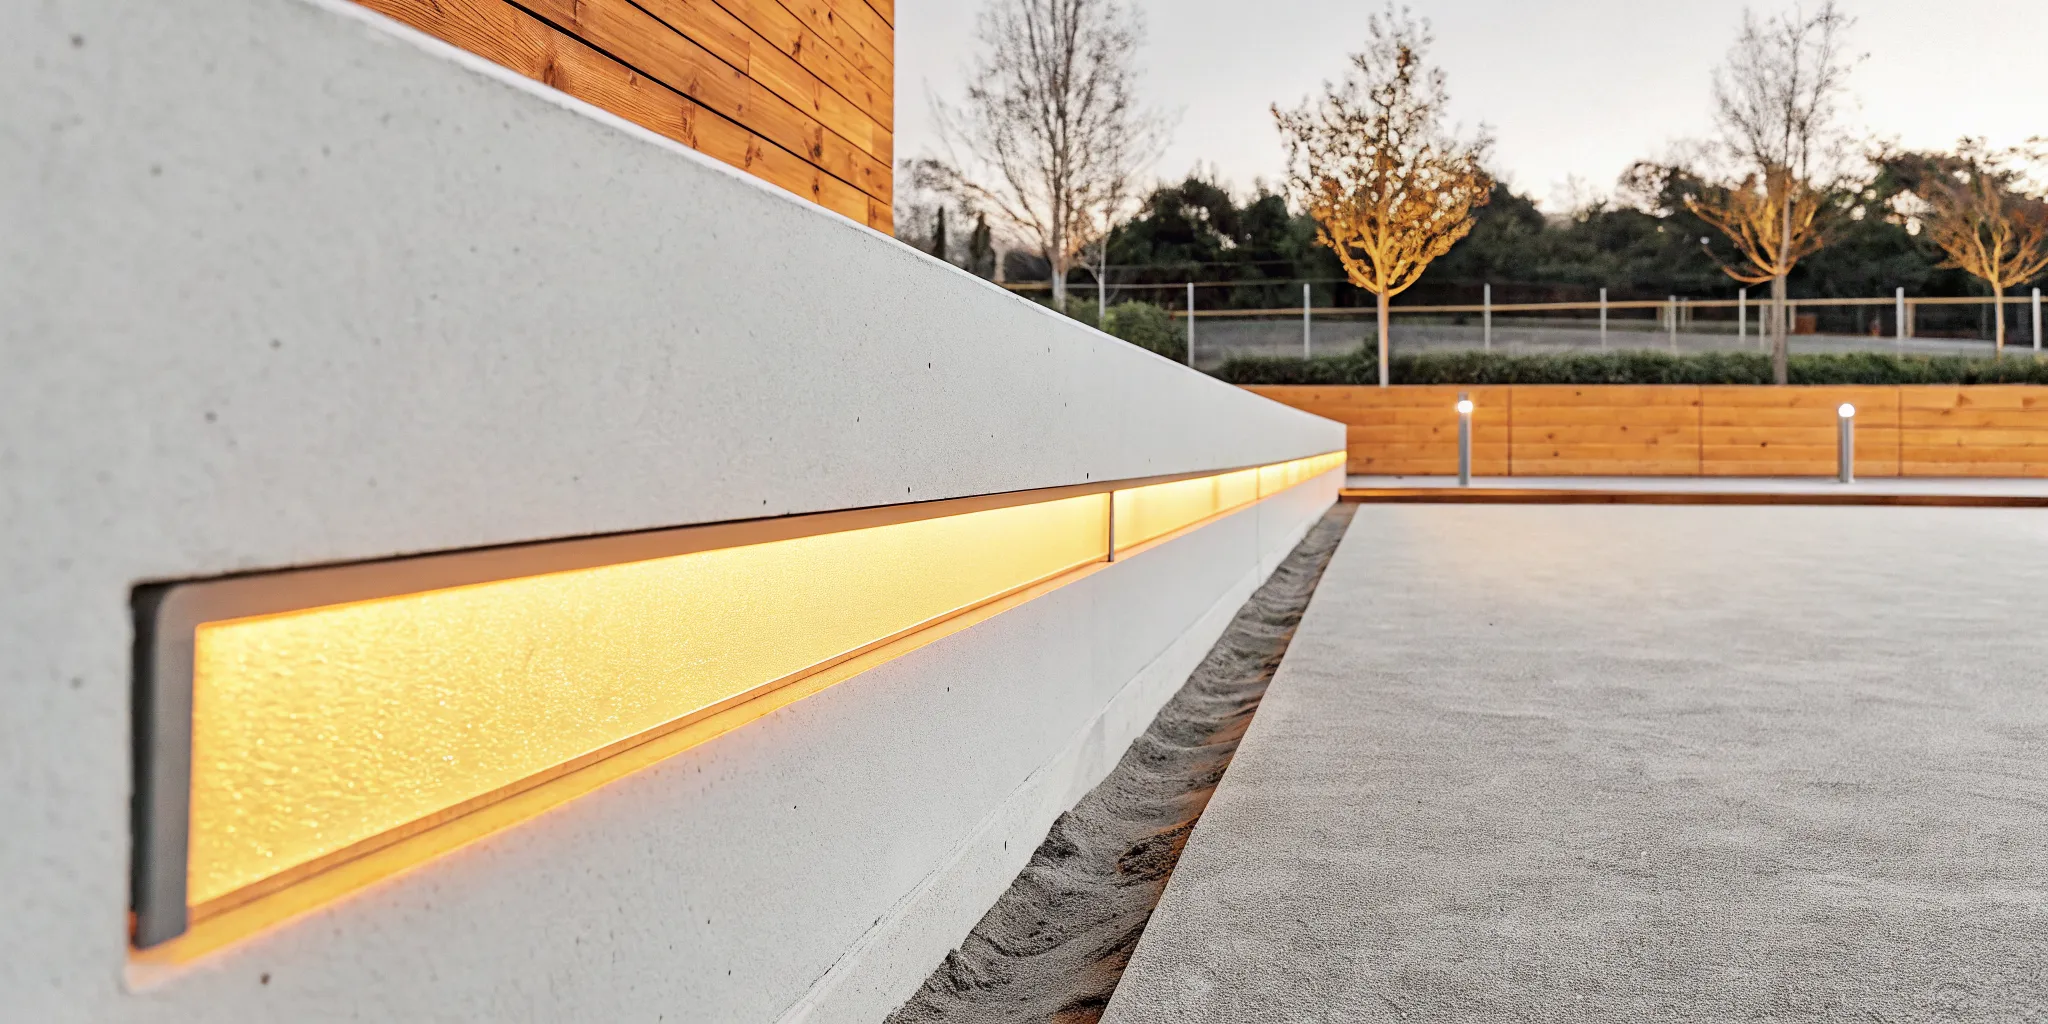
Allowing for Joint Spacing and Expansion
You might not think about it, but pavers move. All outdoor materials expand and contract with changes in temperature, and porcelain is no exception. That’s why leaving the right amount of space between each paver is so important. These gaps, or joints, give the pavers room to move without pressing against each other, which can cause chipping and cracking. An experienced masonry contractor knows the precise joint spacing needed for your specific pavers and our local climate. This small detail makes a huge difference in the structural integrity and lifespan of your driveway.
How to Find a Trusted Paver Contractor on Long Island
When you’re ready to find a contractor, look for a company that specializes in outdoor living projects and has extensive experience with porcelain pavers. Check their portfolio to see examples of their work and read online reviews from other homeowners in your area. A trusted contractor will be able to guide you through the entire process, from selecting the right porcelain and natural stone pavers to executing a flawless installation. At Gappsi, our team has been designing and building stunning, durable driveways across Long Island for decades, ensuring every project meets our high standards for quality and craftsmanship.
How to Care for Your New Porcelain Driveway
One of the best things about a porcelain driveway is how little you have to do to keep it looking fantastic. Unlike other materials that demand constant attention, porcelain is incredibly resilient and low-maintenance. A little bit of routine care is all it takes to protect your investment and ensure your driveway looks as good as the day it was installed. Think of it less as a chore and more as a simple way to preserve your home’s beautiful curb appeal for years to come. Here are a few straightforward tips to guide you.
Simple Tips for Routine Cleaning
Keeping your porcelain driveway looking pristine is surprisingly simple. For day-to-day upkeep, just sweep away leaves, dirt, and other debris. When it’s time for a wash, all you need is warm water and a gentle, pH-neutral detergent. This will lift most grime without harming the paver’s surface. Be sure to avoid acidic cleaners or harsh chemicals, as they can cause damage over time. For more stubborn spots, a stiff-bristle brush (not a wire one) can provide a little extra scrubbing power. Once you’re done, a quick rinse with a hose is all it takes to wash everything away. If you ever want a deeper, professional refresh, our restoration and sealing services can bring back that brand-new sparkle.
Protecting Your Grout Lines
The grout lines between your pavers are the most vulnerable part of your driveway, but protecting them is easy. The best defense is a good offense, which starts with professional installation using a high-quality jointing compound. This minimizes gaps where weeds can grow. If you do spot a few weeds popping up, pull them by hand before their roots can take hold. For any discoloration or stains on the grout, you can gently scrub the lines with the same warm water and mild detergent you use on the pavers. This simple maintenance helps maintain the clean, uniform look of your entire driveway and prevents small issues from becoming bigger problems.
How to Handle a Damaged Paver
Porcelain is extremely durable, but accidents can happen. If a paver gets a chip or a crack, it’s best to address it quickly to prevent moisture from getting underneath. For a minor chip, a porcelain repair kit can sometimes do the trick. However, for more significant damage like a deep crack, the best solution is to replace the paver entirely. This is where working with an experienced installer pays off. We can help you source a perfect replacement from our extensive collection of porcelain and natural stone pavers to ensure a seamless match. A professional can then swap out the damaged paver, making your driveway look flawless once again.
Related Articles
- Porcelain Pavers for Driveways: The Ultimate Guide
- porcelain tiles for driveways Archives – Gappsi Group
- Driveway Paver Installation & Design Guide | Gappsi Inc
- porcelain driveway tiles Archives – Gappsi Group
- Porcelain Driveway and Walkway Pavers Archives – Gappsi Group
Frequently Asked Questions
Are porcelain pavers slippery when it rains or snows? This is a great question, as safety is always the top priority for a driveway. High-quality porcelain pavers made for outdoor use are specifically manufactured with a textured surface to provide excellent grip. When choosing your pavers, you should always look for a product with a high slip-resistance rating. This ensures they provide secure footing for both walking and driving, even in wet or icy conditions, giving you peace of mind throughout the year.
What is the biggest mistake to avoid with a porcelain driveway? The most critical mistake is using the wrong type of paver. Many people don’t realize that the 2cm thick pavers used for patios are not strong enough to handle the weight of cars. For a driveway, you must use 3cm thick pavers that are specifically rated for vehicular traffic. The second biggest mistake is improper installation, especially an uneven or poorly compacted base, which can lead to cracking and shifting. This is why professional installation is so important.
I’ve heard porcelain is expensive. Is it worth the investment? While porcelain pavers do have a higher upfront cost than some materials like concrete, they provide incredible long-term value. Think about the costs you will save over the years. Porcelain doesn’t require sealing, it resists stains from oil and salt, and its color won’t fade in the sun. When you consider its durability and the minimal maintenance required, it often proves to be a more cost-effective and stress-free choice over its entire lifespan.
Do I need to seal a porcelain paver driveway? No, and that’s one of their best features. Because porcelain is fired at such high temperatures, it becomes non-porous, meaning it absorbs very little water. This natural density is what makes it so resistant to stains and water damage. Unlike concrete or natural stone that must be sealed regularly to protect them, a porcelain driveway maintains its beauty and integrity without any need for sealing, saving you time and money.
How do porcelain pavers handle Long Island’s freeze-thaw cycles? They handle our winters beautifully. The main cause of cracking in other materials is water absorption. Water seeps into pores, freezes, expands, and breaks the paver apart from the inside. Since porcelain absorbs almost no water (less than 0.5%), this simply doesn’t happen. This exceptional resistance to frost makes porcelain an ideal and reliable choice for a driveway that needs to endure the demanding weather here on Long Island.