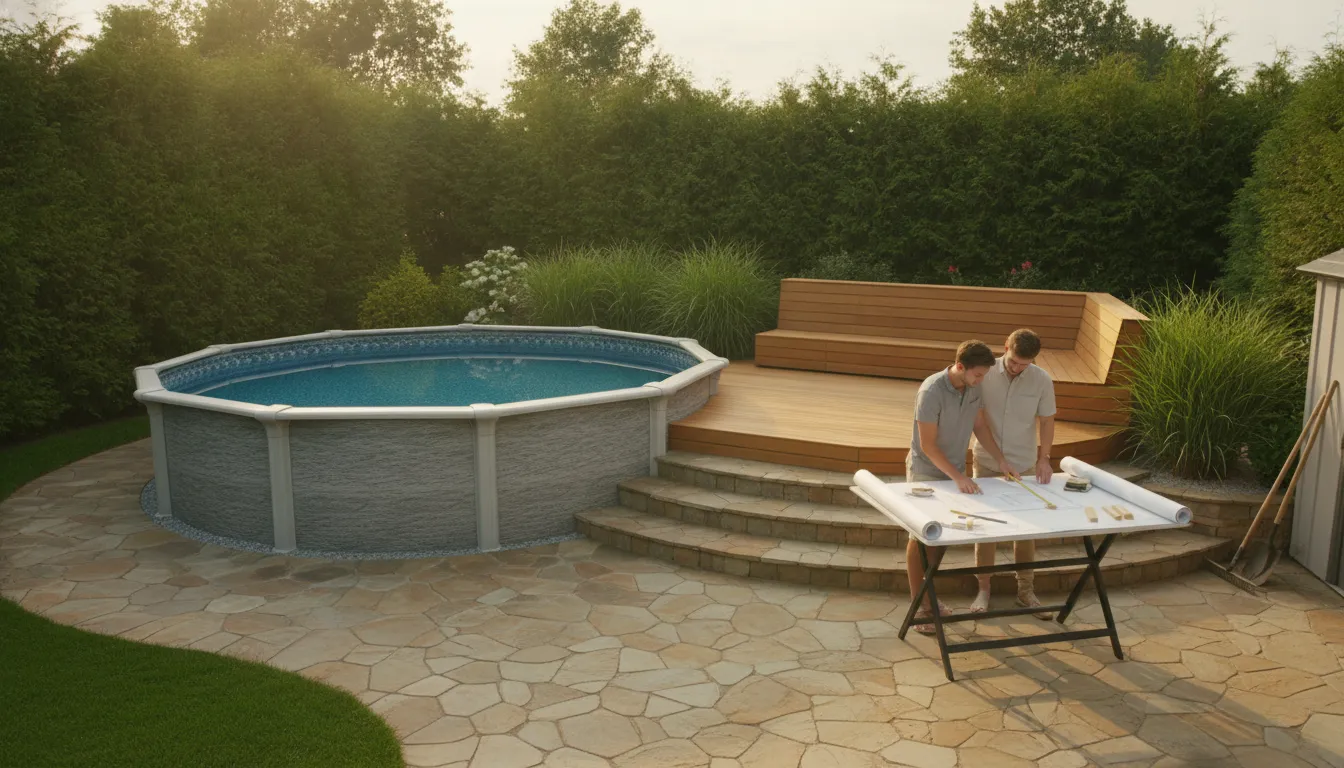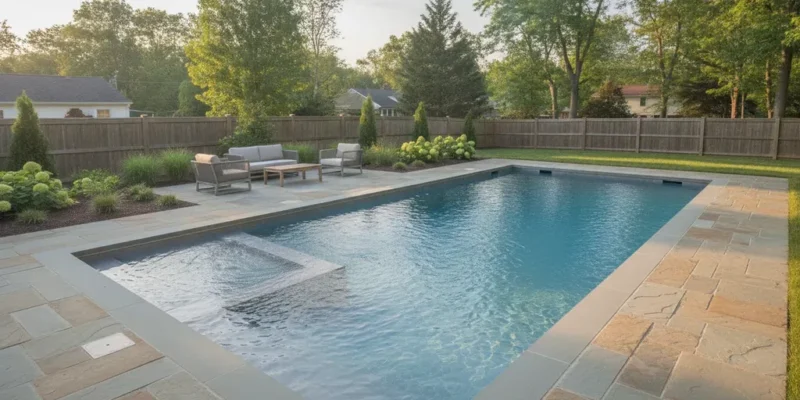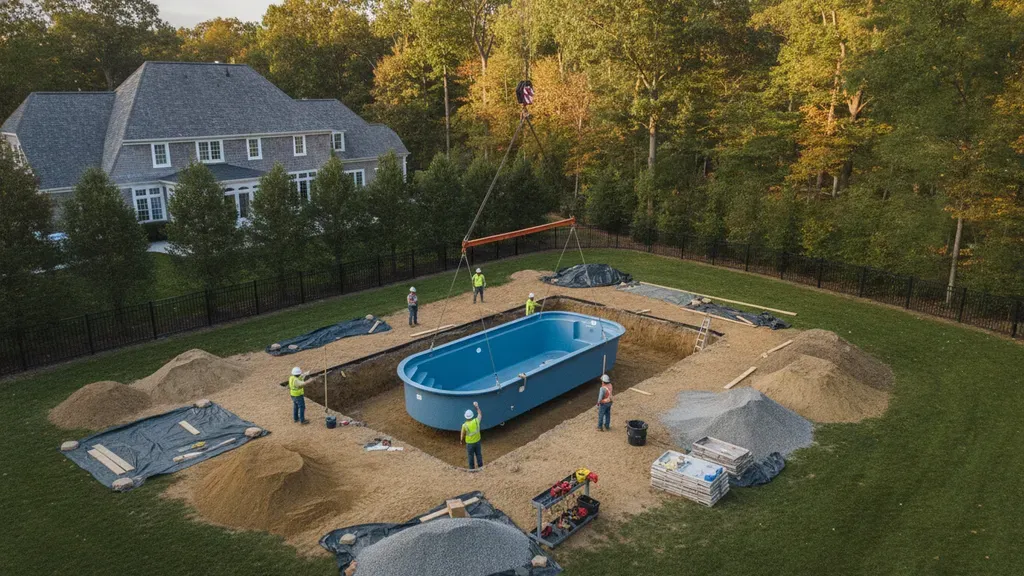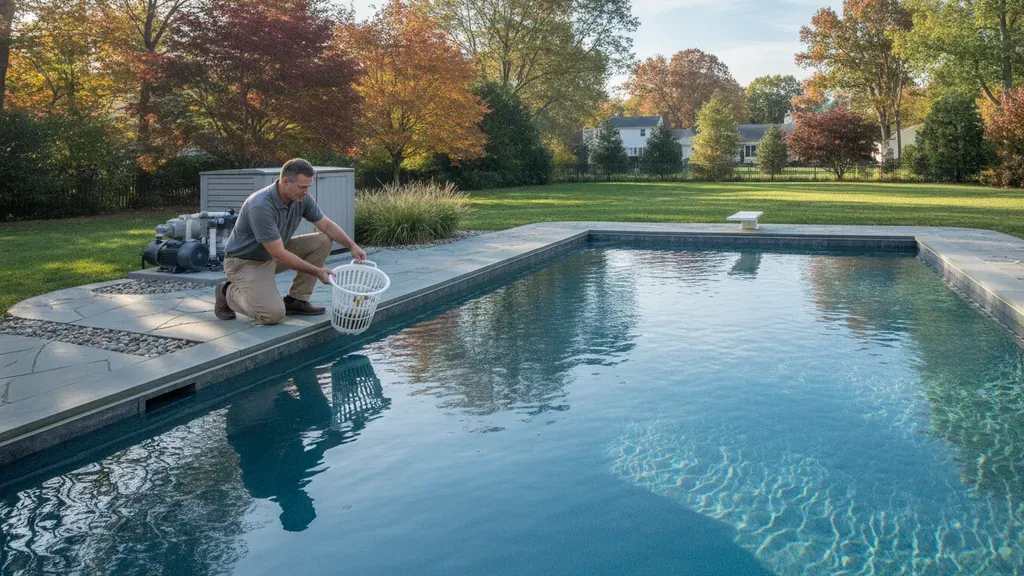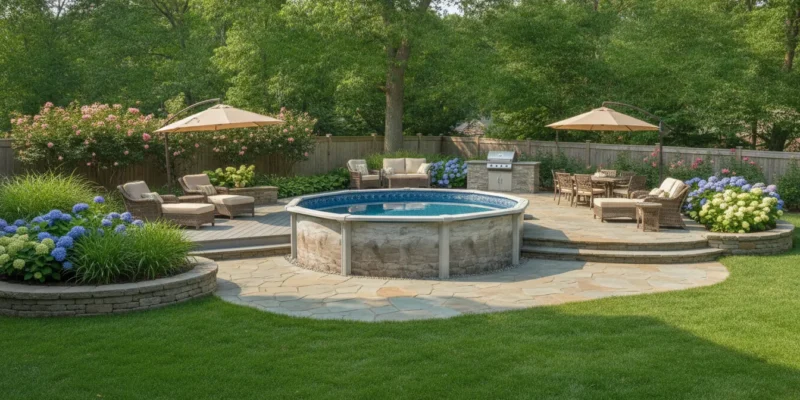
Custom backyard putting green at a Long Island home

Putting Green Builder Long Island: Homeowner Checklist

A backyard putting green succeeds or fails long before the turf is installed.

To choose a putting green builder on Long Island, compare more than finished-project photos. Look for a builder who evaluates grading, drainage, access, and the surrounding landscape before developing a design. Ask how the planned contours, cup locations, fringe, and chipping areas support the way you want to practice. Review material samples, base-preparation details, edge treatments, and a written scope that explains what is included. A strong builder should also show relevant local work, explain the installation sequence, and provide clear care guidance. This checklist helps Nassau and Suffolk County homeowners compare proposals based on design quality, construction detail, and fit for the property rather than price alone.

Use the following questions during consultations to find a team capable of creating a green that plays well and belongs in your outdoor space.

Putting green builder Long Island checklist: start with site planning

The first useful conversation is about your property, not turf color. A builder should walk the proposed area, note how people move through the yard, and understand nearby patios, pools, plantings, utilities, and structures. The green must work as part of the landscape while leaving practical access for installation.

Evaluate space and access

Share how you expect to use the green. A dedicated golfer may want varied putts and chipping practice, while a family may value an inviting layout for casual play. Ask how the available footprint affects shot variety, safety, and circulation. The team should also identify how equipment and materials can reach the work area without unnecessary disruption.

Discuss grading and drainage early

Long Island properties vary, so the drainage plan should respond to observed site conditions. Ask where runoff currently travels, how the proposed contours affect water movement, and whether adjacent hardscapes or planting beds need consideration. Good planning protects both playability and the surrounding yard.

  • Identify the primary practice and entertainment goals.
  • Review access from the street to the installation area.
  • Map nearby patios, pools, walkways, trees, and planting beds.
  • Confirm how grading and drainage will be addressed.

How do you compare putting green builders?

A polished portfolio is a starting point, not the entire decision. Compare how each builder thinks through your site and translates your goals into a specific plan.

What to compare What a strong proposal shows Warning sign
Local experience Relevant completed work and knowledge of Long Island properties Only generic product photos
Design process A site-specific layout tied to your practice goals A standard shape offered before evaluation
Construction scope Clear details for preparation, drainage, turf, seams, cups, and edges Important work described only as “as needed”
Communication A defined contact and clear process for decisions No explanation of who manages the project

Review comparable projects

Ask to see greens with a similar footprint, landscape setting, or practice objective. Look closely at transitions, edge finishing, and how each green fits its surroundings. If references are available, ask homeowners how the builder handled communication and the final walkthrough.

Compare scope, not just totals

Two proposals with different preparation, materials, and finish work are not directly comparable. Request enough detail to understand what each team will build and what decisions remain open.

What should your putting green design include?

A custom design should turn your golf goals into a useful sequence of shots. Before approving a layout, explain which parts of your short game you want to practice and who else will use the space.

Contours with a purpose

Breaks and slopes should create variety without making every putt frustrating. Ask the designer to explain how the contour plan supports straight putts, breaking putts, and different approaches to each cup. Cup placement should create distinct practice routes rather than repeat the same line.

Fringe and chipping options

When space allows, fringe and landing areas can expand the green beyond putting practice. Discuss the shots you want to play, the safe direction of play, and how balls will be contained within the yard. Thoughtful transitions can also make the green feel integrated with nearby lawn and planting.

Connection to the wider landscape

The most convincing greens look intentional from the patio, house, and gathering areas. Shape, stone edging, paths, lighting, and planting can help the installation complement the rest of an outdoor living plan. Explore Gappsi’s landscape design capabilities when the green is part of a larger backyard project.

Which materials and construction details matter most?

A convincing putting green starts below the visible turf. Ask each builder to explain the complete assembly, including excavation, compacted base, drainage strategy, turf system, seams, cup setting, and finished edges. The answer should be specific to your site rather than a one-size-fits-all description.

Judge the surface by how it plays

Putting turf should deliver a consistent roll that matches the way you want to practice. During the consultation, discuss preferred speed, expected shot types, and whether the green is mainly for focused practice, family play, or entertaining. Review physical samples and, when possible, completed projects. The color and texture should also complement nearby lawn, stonework, and planting beds.

Inspect the details you will not see later

Base preparation and drainage influence how well a green performs after rain and through changing Long Island seasons. Ask how the builder evaluates runoff, creates stable contours, secures edges, and keeps seams unobtrusive. If the green meets a patio, walkway, pool area, or planting bed, confirm how each transition will be finished.

  • Request the proposed turf and fringe materials in writing.
  • Ask where seams will be placed and how edges will be secured.
  • Confirm the drainage and grading plan for your property.
  • Clarify what care is recommended after installation.

What should the installation process look like?

  1. Consultation: The builder learns how you want to practice, entertain, and use the surrounding yard.
  2. Site evaluation: The team reviews measurements, access, grading, drainage, and nearby features.
  3. Design: You review the proposed shape, contours, cups, fringe, and landscape connections.
  4. Preparation: The crew excavates as required and constructs the planned base and drainage solution.
  5. Installation: Turf, cups, seams, edges, and transitions are fitted according to the approved design.
  6. Finishing: Surrounding areas are completed and the site is cleaned.
  7. Walkthrough: The builder reviews the finished green and explains recommended care.

Gappsi’s consultation-led design-build approach can help coordinate a putting green with other backyard elements. Homeowners planning a wider transformation can also review outdoor living ideas before the design meeting.

Questions to ask before signing a proposal

Use the final consultation to make sure the design, scope, and expectations are clear. A qualified putting green builder should be able to explain the reasoning behind the plan and document what is included.

  • Can I review putting greens you have completed on Long Island?
  • How will the design support the shots and practice routines I care about?
  • What excavation, base preparation, grading, and drainage work is included?
  • Which putting and fringe turf products are proposed?
  • How will the green connect to patios, walkways, pools, or planting areas?
  • Who will manage the project and communicate during installation?
  • What site access, cleanup, and care guidance are included?
  • How are design changes handled after work begins?

Compare proposals by scope and design quality, not just the bottom-line number. A detailed proposal makes it easier to see whether two builders are actually offering the same result.

Frequently asked questions

How much space does a backyard putting green need?

There is no single ideal size. A builder should shape the green around your available yard, desired shot variety, surrounding features, and safe circulation. Even a compact area can support useful practice when the design is intentional.

How long does a putting green installation take?

The schedule depends on design complexity, site access, preparation requirements, drainage work, and surrounding landscape improvements. Ask for a project-specific schedule after the builder evaluates your property.

Can a putting green include a chipping area?

Yes. A design can pair a putting surface with fringe, rough, and designated landing areas when space allows. Tell the builder which shots you want to practice so those areas can be planned together.

What maintenance does an artificial putting green require?

Artificial putting greens need less routine care than natural grass, but they are not maintenance-free. The installer should explain debris removal, brushing, inspection, and any seasonal care recommended for the selected system.

Plan a putting green that belongs in your backyard

The right putting green builder combines site planning, golf-focused design, durable construction, and thoughtful integration with the rest of your landscape. Taking time to compare those capabilities now can lead to a green that is enjoyable to practice on and attractive from every part of the yard.

Gappsi has served Long Island homeowners since 1987 with a consultation-led design-build approach. Visit the Gappsi website to schedule a consultation or plan a visit to the Smithtown showroom to discuss your Nassau or Suffolk County property.

Share this page:
Premium types of artificial turf in a Long Island residential backyard

Types of Artificial Turf for Long Island Home Yards

The best backyard turf is not simply the greenest sample on a shelf. The right choice has to match muddy paws, bare feet, pool water, golf balls, or everyday entertaining without becoming a maintenance headache. This guide compares the main types of artificial turf and explains which details matter for a residential yard on Long Island.

Explore Gappsi synthetic turf options and request a consultation.

Quick answer: Most residential lawns use soft polyethylene turf, while pet areas need fast drainage. Play areas benefit from an appropriate shock-absorbing system, and putting greens require a short, dense surface designed for consistent ball roll. The best system depends on use, drainage, sun exposure, surrounding materials, and installation quality.

Types of artificial turf at a glance

In short: Residential turf is best compared by its intended use, not by color alone. Lawn, pet, play, poolside, putting green, and rooftop products solve different problems.

Manufacturers can adjust fiber material, blade profile, pile height, density, backing, and drainage to create very different surfaces. A lush lawn product may feel comfortable underfoot but roll too slowly for a putting green. A dense, short pet product may be easy to clean but look less meadow-like in a front yard. Start with what the area must do every day.

Turf type Most important trait Best fit
Landscape lawn turf Natural appearance and soft feel Front and back yards
Pet-friendly turf Drainage and easy cleanup Dog runs and pet yards
Play-area turf Complete surface system designed for play Family activity zones
Poolside turf Drainage and stable edges Pool surrounds and transition areas
Putting green turf Predictable ball roll Backyard golf practice
Balcony or rooftop turf Low-profile, suitable drainage system Finished outdoor living areas
Different types of artificial turf arranged in a residential backyard with a lawn, pet area, and putting green
A residential plan can combine turf types when each zone has a different purpose.

What are the main artificial turf fiber materials?

In short: Polyethylene is common in residential landscapes because it balances softness, resilience, and appearance. Nylon and polypropylene can be useful in specialized applications, but the complete product specification matters more than a material name by itself.

Polyethylene for everyday residential lawns

Polyethylene fibers are widely used for landscape lawns. They can be manufactured in varied blade shapes and green tones, often with a contrasting thatch layer near the backing. That combination helps a finished lawn avoid the flat, uniformly bright appearance associated with older artificial grass.

For a family yard, compare how samples recover after being pressed, how they feel against skin, and how they look in direct sun and shade. A sample that appears perfect under showroom lighting can look different beside existing shrubs, masonry, or a swimming pool.

Nylon for specialized durability

Nylon fibers are known for strength and can be used where durability or shape retention is a priority. The tradeoff is that nylon can feel firmer and may not be the first choice for a soft, casual lawn. It can be useful in specialized products, including some golf applications.

Polypropylene for select low-profile uses

Polypropylene can appear in economical or specialized turf products. Because product construction varies, homeowners should not choose based on price or fiber label alone. Review the intended application, backing, drainage, warranty terms, and installer guidance together.

Which turf is best for a family lawn?

In short: Choose landscape turf that feels comfortable, springs back after foot traffic, complements the property, and works with a properly prepared base.

A residential lawn is a visual surface and a living area. It may need to support outdoor dining, children’s activities, and routes between the house, patio, and pool. For that reason, the best product is rarely the tallest or densest sample. Very long blades can look plush but may show traffic patterns or require more brushing. A balanced pile height and supportive thatch can provide a realistic appearance with practical upkeep.

Color should also fit the setting. Long Island yards often combine mature plantings with natural stone, porcelain, or concrete pavers. A nuanced blend of greens and tan thatch generally integrates more naturally than a single bright-green tone. Gappsi’s broader landscape design and construction services can help coordinate the lawn with planting beds, grading, and outdoor living zones.

How do pet, play, and poolside turf differ?

In short: Pet areas prioritize drainage and cleaning access, play zones need a surface system suited to the intended activity, and poolside turf requires careful transitions and water management.

Pet-friendly turf

Pet turf should be selected as a complete system. Permeable backing, a drainage-ready base, accessible edges, and a practical cleaning plan all matter. A shorter, resilient pile can make solid-waste pickup and brushing easier than an extra-plush lawn. The layout should also prevent trapped runoff near fences, walls, or low spots.

For homeowners planning a dedicated dog area, see Gappsi’s guide to choosing artificial grass for pets. Discuss the number and size of pets with the installer because those details influence the surface and base recommendation.

Play-area turf

A play area is more than grass fibers. Its design should reflect the age group, equipment, expected activity, and surrounding edges. Ask the project team what complete system is appropriate for the planned use rather than assuming any soft-looking lawn product is suitable.

Poolside turf

Poolside turf can create a green visual break between hard surfaces and planting areas. Good drainage, secure perimeter details, and clean transitions are essential because the area will regularly receive splash water and foot traffic. The turf plan should be coordinated with the pool deck rather than added after every edge is fixed. Homeowners considering a larger renovation can review Gappsi’s swimming pool design and construction work for integrated ideas.

Visit the Gappsi showroom in Smithtown to compare outdoor materials in person.

What makes putting green turf different?

In short: Putting green turf is designed around ball behavior, not the plush appearance of a lawn. Surface selection and contouring should support the speed, breaks, and practice experience the homeowner wants.

Backyard putting greens generally use a shorter, denser surface than landscape lawns. The design team must consider the green’s shape, cups, fringe, slopes, drainage, and approach areas as one system. A visually attractive green that does not roll consistently will quickly become frustrating.

Before selecting a product, explain how you plan to practice. A casual family green has different goals from a challenging practice area with multiple breaks and fringe shots. Gappsi’s synthetic turf design-build team can connect material selection with the finished layout.

Why does the installation system matter?

In short: Even premium turf can fail to perform if grading, base preparation, drainage, seams, edges, or infill are poorly planned.

Turf is the visible finish, but much of its performance comes from the layers and workmanship below it. The project team should inspect existing grades and runoff patterns before choosing a construction approach. Water needs a reliable path away from structures and should not collect under the surface or at perimeter edges.

Long Island conditions make that site review especially useful. Sandy areas can drain quickly, while compacted soil, low spots, and hardscape borders may restrict runoff. A design-build team can coordinate excavation depth, base preparation, and finished elevations with nearby patios, pools, planting beds, and structures. That planning helps each surface meet cleanly and keeps the turf from becoming an isolated finish selected without regard to the rest of the yard.

Professional artificial turf installation detail beside natural stone pavers
Base preparation and precise edge details help the finished turf perform as intended.

Seams and transitions deserve equal attention. They should be positioned and secured to minimize visibility and suit the direction of the blades. Edges beside pavers, planting beds, steps, fences, and pool decks need durable restraint and a neat finish. When several materials meet, an integrated design-build plan can reduce awkward gaps and afterthoughts.

Installation questions to ask

  • Drainage: How will water move through and away from this specific area?
  • Base: What preparation is recommended for the site’s soil and intended use?
  • Edges: How will turf meet pavers, planting beds, walls, and other surfaces?
  • Seams: Where will seams be located, and how will blade direction be managed?
  • Care: What brushing, rinsing, or debris removal will the finished surface require?

How to choose the right turf for your yard

In short: Define the purpose of each zone, compare complete systems, evaluate samples in realistic light, and plan turf together with drainage and surrounding materials.

  1. Map daily use. Note where pets run, children play, guests gather, and people travel between outdoor spaces.
  2. Identify site conditions. Review shade, drainage, slopes, trees, access, and the surfaces that border the future turf.
  3. Compare relevant samples. Judge feel, recovery, blade variation, and appearance in both sun and shade.
  4. Review the whole system. Discuss backing, base, drainage, edge restraint, seams, and maintenance rather than focusing only on fibers.
  5. Coordinate the design. Make sure turf, masonry, planting, pool areas, and recreation features form a coherent outdoor plan.

A consultation-led process is especially valuable for yards with several uses. One property may benefit from soft landscape turf near the patio, a drainage-focused pet zone along the side yard, and a purpose-built putting green farther from the house. The materials can look unified while performing differently.

Frequently asked questions about artificial turf

In short: The best turf choice depends on how the yard will be used and how the complete surface system is designed, installed, and maintained. Homeowners should compare samples, ask about the layers below the surface, and select the product only after drainage and surrounding materials are considered.

What type of artificial turf looks most like real grass?

Residential polyethylene landscape turf often provides a natural-looking balance of soft blades, varied green tones, and contrasting thatch. The most convincing option is the one that complements the property’s plants, light, and surrounding hardscape.

Is taller artificial grass always better?

No. Taller fibers can appear lush, but they may show traffic patterns and need more brushing. Pile height should suit the area’s use, desired appearance, density, and maintenance expectations.

Can the same turf be used for pets and a putting green?

Usually, these applications call for different surfaces. Pet areas prioritize drainage and cleanup, while putting greens prioritize consistent ball roll. Separate products can still be designed to look cohesive.

Does artificial turf need drainage?

Yes. The backing and prepared base must work with the site’s grades and runoff conditions. Drainage planning is especially important near pools, structures, fences, and pet areas.

Should I choose turf before planning the rest of the yard?

It is better to coordinate turf with the full outdoor design. Grades, planting beds, pavers, pool decks, steps, and recreation areas all affect turf edges, drainage, and appearance.

Plan a turf system built around your home

In short: The right turf is the product and installation system that fits the way your household actually uses the yard.

Gappsi has served Long Island homeowners since 1987 and brings design, material selection, and construction planning together. Visit the Smithtown showroom to compare materials, or speak with the team about a lawn. Pet area, poolside transition, or backyard putting green for a Nassau or Suffolk County property.

Contact Gappsi to request a residential turf consultation.

Share this page:
Premium types of artificial turf in a Long Island residential backyard

Types of Artificial Turf for Long Island Home Yards

The best backyard turf is not simply the greenest sample on a shelf. The right choice has to match muddy paws, bare feet, pool water, golf balls, or everyday entertaining without becoming a maintenance headache. This guide compares the main types of artificial turf and explains which details matter for a residential yard on Long Island.

Explore Gappsi synthetic turf options and request a consultation.

Quick answer: Most residential lawns use soft polyethylene turf, while pet areas need fast drainage. Play areas benefit from an appropriate shock-absorbing system, and putting greens require a short, dense surface designed for consistent ball roll. The best system depends on use, drainage, sun exposure, surrounding materials, and installation quality.

Types of artificial turf at a glance

In short: Residential turf is best compared by its intended use, not by color alone. Lawn, pet, play, poolside, putting green, and rooftop products solve different problems.

Manufacturers can adjust fiber material, blade profile, pile height, density, backing, and drainage to create very different surfaces. A lush lawn product may feel comfortable underfoot but roll too slowly for a putting green. A dense, short pet product may be easy to clean but look less meadow-like in a front yard. Start with what the area must do every day.

Turf type Most important trait Best fit
Landscape lawn turf Natural appearance and soft feel Front and back yards
Pet-friendly turf Drainage and easy cleanup Dog runs and pet yards
Play-area turf Complete surface system designed for play Family activity zones
Poolside turf Drainage and stable edges Pool surrounds and transition areas
Putting green turf Predictable ball roll Backyard golf practice
Balcony or rooftop turf Low-profile, suitable drainage system Finished outdoor living areas
Different types of artificial turf arranged in a residential backyard with a lawn, pet area, and putting green
A residential plan can combine turf types when each zone has a different purpose.

What are the main artificial turf fiber materials?

In short: Polyethylene is common in residential landscapes because it balances softness, resilience, and appearance. Nylon and polypropylene can be useful in specialized applications, but the complete product specification matters more than a material name by itself.

Polyethylene for everyday residential lawns

Polyethylene fibers are widely used for landscape lawns. They can be manufactured in varied blade shapes and green tones, often with a contrasting thatch layer near the backing. That combination helps a finished lawn avoid the flat, uniformly bright appearance associated with older artificial grass.

For a family yard, compare how samples recover after being pressed, how they feel against skin, and how they look in direct sun and shade. A sample that appears perfect under showroom lighting can look different beside existing shrubs, masonry, or a swimming pool.

Nylon for specialized durability

Nylon fibers are known for strength and can be used where durability or shape retention is a priority. The tradeoff is that nylon can feel firmer and may not be the first choice for a soft, casual lawn. It can be useful in specialized products, including some golf applications.

Polypropylene for select low-profile uses

Polypropylene can appear in economical or specialized turf products. Because product construction varies, homeowners should not choose based on price or fiber label alone. Review the intended application, backing, drainage, warranty terms, and installer guidance together.

Which turf is best for a family lawn?

In short: Choose landscape turf that feels comfortable, springs back after foot traffic, complements the property, and works with a properly prepared base.

A residential lawn is a visual surface and a living area. It may need to support outdoor dining, children’s activities, and routes between the house, patio, and pool. For that reason, the best product is rarely the tallest or densest sample. Very long blades can look plush but may show traffic patterns or require more brushing. A balanced pile height and supportive thatch can provide a realistic appearance with practical upkeep.

Color should also fit the setting. Long Island yards often combine mature plantings with natural stone, porcelain, or concrete pavers. A nuanced blend of greens and tan thatch generally integrates more naturally than a single bright-green tone. Gappsi’s broader landscape design and construction services can help coordinate the lawn with planting beds, grading, and outdoor living zones.

How do pet, play, and poolside turf differ?

In short: Pet areas prioritize drainage and cleaning access, play zones need a surface system suited to the intended activity, and poolside turf requires careful transitions and water management.

Pet-friendly turf

Pet turf should be selected as a complete system. Permeable backing, a drainage-ready base, accessible edges, and a practical cleaning plan all matter. A shorter, resilient pile can make solid-waste pickup and brushing easier than an extra-plush lawn. The layout should also prevent trapped runoff near fences, walls, or low spots.

For homeowners planning a dedicated dog area, see Gappsi’s guide to choosing artificial grass for pets. Discuss the number and size of pets with the installer because those details influence the surface and base recommendation.

Play-area turf

A play area is more than grass fibers. Its design should reflect the age group, equipment, expected activity, and surrounding edges. Ask the project team what complete system is appropriate for the planned use rather than assuming any soft-looking lawn product is suitable.

Poolside turf

Poolside turf can create a green visual break between hard surfaces and planting areas. Good drainage, secure perimeter details, and clean transitions are essential because the area will regularly receive splash water and foot traffic. The turf plan should be coordinated with the pool deck rather than added after every edge is fixed. Homeowners considering a larger renovation can review Gappsi’s swimming pool design and construction work for integrated ideas.

Visit the Gappsi showroom in Smithtown to compare outdoor materials in person.

What makes putting green turf different?

In short: Putting green turf is designed around ball behavior, not the plush appearance of a lawn. Surface selection and contouring should support the speed, breaks, and practice experience the homeowner wants.

Backyard putting greens generally use a shorter, denser surface than landscape lawns. The design team must consider the green’s shape, cups, fringe, slopes, drainage, and approach areas as one system. A visually attractive green that does not roll consistently will quickly become frustrating.

Before selecting a product, explain how you plan to practice. A casual family green has different goals from a challenging practice area with multiple breaks and fringe shots. Gappsi’s synthetic turf design-build team can connect material selection with the finished layout.

Why does the installation system matter?

In short: Even premium turf can fail to perform if grading, base preparation, drainage, seams, edges, or infill are poorly planned.

Turf is the visible finish, but much of its performance comes from the layers and workmanship below it. The project team should inspect existing grades and runoff patterns before choosing a construction approach. Water needs a reliable path away from structures and should not collect under the surface or at perimeter edges.

Long Island conditions make that site review especially useful. Sandy areas can drain quickly, while compacted soil, low spots, and hardscape borders may restrict runoff. A design-build team can coordinate excavation depth, base preparation, and finished elevations with nearby patios, pools, planting beds, and structures. That planning helps each surface meet cleanly and keeps the turf from becoming an isolated finish selected without regard to the rest of the yard.

Professional artificial turf installation detail beside natural stone pavers
Base preparation and precise edge details help the finished turf perform as intended.

Seams and transitions deserve equal attention. They should be positioned and secured to minimize visibility and suit the direction of the blades. Edges beside pavers, planting beds, steps, fences, and pool decks need durable restraint and a neat finish. When several materials meet, an integrated design-build plan can reduce awkward gaps and afterthoughts.

Installation questions to ask

  • Drainage: How will water move through and away from this specific area?
  • Base: What preparation is recommended for the site’s soil and intended use?
  • Edges: How will turf meet pavers, planting beds, walls, and other surfaces?
  • Seams: Where will seams be located, and how will blade direction be managed?
  • Care: What brushing, rinsing, or debris removal will the finished surface require?

How to choose the right turf for your yard

In short: Define the purpose of each zone, compare complete systems, evaluate samples in realistic light, and plan turf together with drainage and surrounding materials.

  1. Map daily use. Note where pets run, children play, guests gather, and people travel between outdoor spaces.
  2. Identify site conditions. Review shade, drainage, slopes, trees, access, and the surfaces that border the future turf.
  3. Compare relevant samples. Judge feel, recovery, blade variation, and appearance in both sun and shade.
  4. Review the whole system. Discuss backing, base, drainage, edge restraint, seams, and maintenance rather than focusing only on fibers.
  5. Coordinate the design. Make sure turf, masonry, planting, pool areas, and recreation features form a coherent outdoor plan.

A consultation-led process is especially valuable for yards with several uses. One property may benefit from soft landscape turf near the patio, a drainage-focused pet zone along the side yard, and a purpose-built putting green farther from the house. The materials can look unified while performing differently.

Frequently asked questions about artificial turf

In short: The best turf choice depends on how the yard will be used and how the complete surface system is designed, installed, and maintained. Homeowners should compare samples, ask about the layers below the surface, and select the product only after drainage and surrounding materials are considered.

What type of artificial turf looks most like real grass?

Residential polyethylene landscape turf often provides a natural-looking balance of soft blades, varied green tones, and contrasting thatch. The most convincing option is the one that complements the property’s plants, light, and surrounding hardscape.

Is taller artificial grass always better?

No. Taller fibers can appear lush, but they may show traffic patterns and need more brushing. Pile height should suit the area’s use, desired appearance, density, and maintenance expectations.

Can the same turf be used for pets and a putting green?

Usually, these applications call for different surfaces. Pet areas prioritize drainage and cleanup, while putting greens prioritize consistent ball roll. Separate products can still be designed to look cohesive.

Does artificial turf need drainage?

Yes. The backing and prepared base must work with the site’s grades and runoff conditions. Drainage planning is especially important near pools, structures, fences, and pet areas.

Should I choose turf before planning the rest of the yard?

It is better to coordinate turf with the full outdoor design. Grades, planting beds, pavers, pool decks, steps, and recreation areas all affect turf edges, drainage, and appearance.

Plan a turf system built around your home

In short: The right turf is the product and installation system that fits the way your household actually uses the yard.

Gappsi has served Long Island homeowners since 1987 and brings design, material selection, and construction planning together. Visit the Smithtown showroom to compare materials, or speak with the team about a lawn. Pet area, poolside transition, or backyard putting green for a Nassau or Suffolk County property.

Contact Gappsi to request a residential turf consultation.

Share this page:
Combined basketball and pickleball court in a landscaped Long Island backyard

Basketball and Pickleball Court Combined Guide

Long Island properties often lack the space for two separate outdoor game areas.

Contact Gappsi to plan your combined basketball and pickleball court.

A basketball and pickleball court combined layout allows you to enjoy two popular games in a single space. This design uses a standard basketball area and adds the right lines needed for pickleball play. Since both games work well on hard surfaces like concrete or asphalt, you do not need to change the base type to switch sports. Homeowners on Long Island often choose this option to save space while making the most of their backyards. Gappsi Group provides complete design-build service for Sports Games Courts that includes 3D design, site prep, and final building. By using one court for many games, you can avoid the high cost and land use of building two other areas. This approach ensures your yard remains open and useful for other family fun through the year.

Many people worry that mixing two sports might ruin the play for both. You need to know if one surface can truly handle the needs of every player. We will address these concerns and answer the big question: Can basketball and pickleball share one court? The path begins with…

Basketball And Pickleball Court Combined: Can basketball and pickleball share one court?

Yes, these two top sports can share the same space with ease. A basketball and pickleball court combined is a smart choice for many homes. This setup lets you play both games without needing twice the land. It works well on Long Island where yard space is often tight. Families can enjoy both sports in one area.

Planning a joint game space

To make this work, you need the right floor. You can use asphalt, concrete, or tiles like Matflex. These parts give a firm and even bounce for both balls. Picking a tough floor is key to keeping the area safe for years. Top parts help ensure your playing surface stays tough through all types of weather. This choice is vital for long-term use.

Gappsi does the full build for these areas. They offer a complete design-build service that starts with a 3D plan. This helps you see how the court fits in your yard before work starts. Their team also takes care of permits and site prep like grading and drainage. Having one team for the whole job saves time and stress for the owner.

Court size and layout

Pickleball and basketball have their own needs for size. An official pickleball court is 20 feet wide and 44 feet long for both singles and doubles. Basketball needs can vary, but most home courts are smaller than a pro floor. When designing a combined basketball and pickleball court, you must plan for both sets of lines. Good layout ensures that one game does not get in the way of the other. This makes the court useful for all.

You can use a multi-sport net that is easy to move. Some nets can move up for games like tennis and down for pickleball. For basketball, the hoop stays at one end or on the side. This smart design makes the most of every square inch of your land. It allows for a fast switch between sports when you want to play a new game.

Surface care and lines

The lines on a multi-use court use bold colors to help players. This makes it clear which line belongs to which sport. It prevents a mix-up during fast play. Good paint or colored tiles make the court look organized and polished. You can pick colors that match your home or your best team.

Keeping the court in good shape is vital for safety. Frequent cleaning and care will help the floor last a long time. Experts suggest that proper court construction and care are the best ways to protect your value. A well-built backyard multi-sports game court adds value to your home. It gives your family a place to stay active right at home. Gappsi uses their years of skill to build these Sports Games Courts for Long Island families.

  • Full turn-key design and build.
  • Tough Matflex, concrete, or asphalt floors.
  • Custom line colors for clear and easy play.
  • Expert site prep including grading and drainage.
  • Local Long Island service since 1987.

Choose a court footprint that fits your property

Picking the right size for a basketball and pickleball court combined takes smart planning. You need to look at how much land you have and how you will use it. A standard pickleball court is 20 feet by 44 feet for both singles and doubles play. While a pro court is 94 feet by 50 feet, most Long Island homes use custom sizes to save space. Gappsi helps you find a mix that fits your yard and meets your play needs.

Small and mid-size court plans

If you have a small yard, a tight court is often the best choice. These plans often focus on one hoop and a full pickleball area. This lets you have a combined basketball and pickleball court without taking up the whole lawn. A 30 by 60 foot plan is a top mid-size pick on Long Island. It gives you enough room for a three-point line and a full pickleball match. Using designing a combined basketball and pickleball court steps helps you use every inch of your land well.

Zoning and safety rules

Before you build, you must think about local rules and safe play zones. Setbacks are the gaps needed between the court and your fence or house. Water flow and drainage are also key, mostly on Long Island where soil types change. Gappsi handles all Sports Games Courts permits and site work to ensure your project meets town laws. Safe play zones add a few extra feet around the edge to stop hits or falls. This extra space helps keep players safe if they run off the main court surface.

Comparing common court sizes

Different yard sizes need different plans for the layout. The table below shows common sizes used for home projects. Keep in mind that these are just ideas, and Gappsi can build any custom size you want.

Court Size Best Use Case Main Benefit
25′ x 45′ Small backyard spots Fits in most standard lots
30′ x 60′ Normal home yards Includes three-point line
44′ x 64′ Large estate lands Full pickleball with runoff
Custom Odd yard shapes Matches property lines well

Using good materials is the best way to make sure your surface lasts. Quality materials and installation help keep the playing surface safe and durable for years. Whether you pick a 30 by 60 plan or a small layout, the goal is to have the most fun. Gappsi offers a multisport game court project plan that covers everything from 3D design to final lines.

Combined basketball and pickleball court layout in a Long Island backyard
A well-planned layout keeps each set of game lines clear while making one backyard space work harder.

Plan the base, drainage, and playing surface

You can start designing a combined basketball and pickleball court for your yard today. It starts with a good plan for what goes under the top layer first. A strong base keeps the court flat and safe for many years of play. Whether you use stone, asphalt, or tiles, the base must hold up the weight of the players. Gappsi helps you choose the right base for your yard.

Choosing the right base type

Most people choose a concrete slab or an asphalt base for their Sports Games Courts. Concrete gives you a very firm floor that does not move. It is a great choice for a court that needs a true ball bounce. Asphalt is a bit more flexible and can cost less at first. But it may need more care as the years go by.

Some yards work better with a thick stone base. This can be a good pick if you want a court that is easy to fix later. Gappsi looks at your land to see which base will work best. They take care of all the hard work to make sure your base is ready for the game.

Site prep and drainage ways

Long Island has many types of soil. Some areas have sand, while others have more clay. This changes how you build a court. Sand drains well, but it can shift if it is not packed down. Clay holds water, which can be a problem in the winter. Expert site work includes moving the topsoil to reach the firm ground below. This keeps the court from sinking or tilting. Gappsi uses the best tools to test the soil on your property. They make sure the ground is stable before they pour any concrete.

Water is the biggest enemy of a new court. Heavy rain and snow can make deep pools or ice if the court does not drain well. This stops water from sitting under the base. Water under the base can cause the floor to crack or sink. Good water flow involves the land around the court too. You want the water to move away from the playing space. Gappsi looks at the slope of your yard to find the best way to move water. Proper site prep is a key step because it keeps your cost low in the long run. Using the right materials helps the court stay strong for everyone.

Surface grip and player comfort

The top layer of the court changes how it feels to play. A combined court must handle the fast bounce of a basketball and the soft hit of a pickleball. Many players like special layers because they offer better grip. This helps you move fast without a slip, which is vital for quick games.

Comfort is also a major point for your body. Hard floors can be tough on your knees and feet over time. Tile floors or special paints can add a bit of flex to the court. This makes it easier to play long games with less pain. Pros will make sure the floor meets the rules for both sports while keeping the game fun.

Game court surface and drainage edge for basketball and pickleball
Surface and drainage decisions affect play, comfort, and long-term upkeep.

Coordinate lines, hoops, nets, fencing, and lighting

High-contrast line systems

Designing a basketball and pickleball court combined starts with the layout of the surface. To make the space easy to use, we apply a clear system of lines. Each sport needs its own set of bounds. Using other colors helps players stay in the game. We often use a high-contrast color like white for the main sport lines. For the second sport, we pick a shade that stands out but does not clash. This visual order keeps the court from looking messy. It also ensures that players can see their lines even during quick moves.

The choice of paint for these lines is also vital. We use expert-grade paints that grip the surface to prevent slips. These paints are made to last through sun and rain without fading. On Long Island, weather can be tough on outdoor surfaces. By using proper construction practices, we make sure your court stays bright and useful for a long time. Clear lines make it simple to switch from a basketball game to a pickleball match in seconds.

Adjustable basketball hoops and net options

The gear you choose defines how you use your court. For the basketball part, we suggest hoops with heights you can change. These allow players of all ages and skill levels to enjoy the game. You can lower the rim for children or set it at the standard ten-foot height for adults. We often place the hoop at the center of one end. This spot works best for both foul shots and three-point play. It also keeps the main hoop out of the way of the pickleball zone.

For pickleball, the net setup is a major choice. Some homeowners prefer a fixed net system with poles set into the ground. These are very strong and always ready for play. Others like portable nets that have wheels. You can move a portable net to the side when you want the full court for basketball. Removable net systems offer a good middle ground. They provide the strength of fixed poles but let you clear the court when needed. According to the standard sizes, a pickleball court measures 20 feet by 44 feet. We plan your space to fit these bounds fully.

Enclosures and lighting for night play

Fencing and gates are needed for ball control and safety. A tall fence keeps basketballs and pickleballs from rolling into your yard or pool. We offer many types of fencing that blend with your home’s look. Chain-link is a common choice, but we also have other options. We can add gates at useful spots so you can enter and exit the court easily. These gates also provide a path for moving large gear or upkeep tools. A well-placed fence turns a simple slab into a true pro arena.

To get the most use out of your court, you should think about lighting. LED lights are the best choice for outdoor Sports Games Courts. They give off a bright, clear light that acts like the sun. This allows you to play late into the evening during the summer months. Modern LED systems also save power and do not create much glare. We mount these lights on tall poles to cover the entire area with even light. This setup prevents shadows that could trip up players or hide the ball.

Finally, consider adding storage for your gear. We can build benches with hidden bins to hold balls, nets, and rackets. This keeps your outdoor space neat and keeps your gear safe from the weather. Gappsi provides a full answer for Sports Games Courts on Long Island. We handle every step from the first 3D design to the final coat of paint. Our team makes sure every part of your court works well together.

How to plan a combined court on Long Island

Building a new court at your home is a big choice. A combined basketball and pickleball court is a smart way to add value to your house. On Long Island, we often deal with small lots and close neighbors. You need a team that knows how to fit a big court in a small space. Gappsi Group has worked in towns like Smithtown and Huntington for years. We know how to plan every part of your new space.

Set your court goals

Start by thinking about how you will play. Do you want a full court or a half court? A combined basketball and pickleball court works well for families. You can play hoops in the morning and have a match later that day. Using high quality surfaces makes the court safe for everyone. A careful site plan and quality materials help create a space that lasts for many years. You should also think about the colors you want for your yard.

Review local town rules

Before you dig, you must check the laws. Some places in Nassau County have strict rules on water runoff. In Suffolk County, you might need a soil test before you build. Our team handles the technical plan and the permits. We make sure your court does not cause floods or issues for your neighbors. We also check on noise rules for your area. This keeps your project on track and out of trouble. A site-specific layout helps balance court dimensions, setbacks, drainage, and neighboring properties.

Pick the right court surface

The surface you choose affects how the ball bounces. A combined basketball and pickleball court needs a base that works for both sports. Matflex tiles are a top choice because they stay cool in the sun. They also drain fast after a Long Island rain storm. Asphalt and concrete are other options that offer a firm feel. Choosing the right base keeps your court from cracking as the years go by. We help you pick the best one for your yard and your budget. This choice is key to how much you will enjoy your games.

Gappsi Group provides a full plan for your home. We follow these steps to make sure your project is a success.

  1. Pick the best spot in your yard. You want a flat area that is away from trees and power lines.
  2. Choose your court surface. We offer Sports Games Courts with Matflex tiles, asphalt, or concrete to fit your budget.
  3. View your 3D design. We create a map of your yard to show you how the court fits with your pool or patio.
  4. Submit for permits. Our experts fill out all the forms and meet with town boards to get your project moving.
  5. Prepare the site. We use heavy machines to move dirt, level the ground, and set up a solid base for the court.
  6. Build the court. We pour the base and install the top layer. Then we paint the lines for both sports.
  7. Final walkthrough. You join us to look at the court and make sure every hoop and net is just right.

Gappsi Group is the only provider you need to hire. From the first sketch to the last coat of paint, we are there. We can add custom lights for night play and strong fences to keep the balls in your yard. Our goal is to give you a space you love. You will have a professional court that looks great and works well for all your favorite games.

Design the court around how your family will play

When you start to plan, think about who will use the space most. A combined basketball and pickleball court is a great choice for your home. Kids often want a place to shoot hoops. Adults might prefer the fast pace of pickleball or a space for low-impact exercise. By looking at how you play now, you can pick the best parts for your yard.

Layout choices for multiple players

The best way to start is to map out the main games you want to play. For a full game of basketball, you might need a large area. A standard NBA court is 94 feet long and 50 feet wide, but most home courts are much smaller. If your main goal is designing a combined basketball and pickleball court, you can overlap the lines to save space.

Pickleball is very common because it fits well in smaller yards. A standard court for both singles and doubles play is 20 feet by 44 feet. Putting these two games in one area is a smart way to use your land. This setup lets you switch from one sport to the next without needing extra builds. This is a big help for people on Long Island where yard sizes can vary.

Future growth and simple upkeep

You should also think about how your family might change in a few years. Younger kids will grow into teens who need a tough surface for fast play. Choosing a high-grade surface from the start ensures your Sports Games Courts stay in good shape. Parts like Matflex tiles or hard concrete are strong and handle the weather well.

A long life is key when you spend money on your home. Research shows that good build steps and often doing upkeep are vital for the life of your court. You want a surface that stays flat and safe as the seasons change. Gappsi acts as a single provider to help with the first build and long-term care. This makes it easy to keep the space in top shape without calling many workers.

Matching your court with home style

A court should not just be a flat slab in your yard. It should look like a part of your whole landscape. You can add low walls, custom fencing, and green plants to make the area feel private. Gappsi can handle all these steps, from the first 3D design to the final stone work. This “one-provider” model means every part of the project fits together.

Good lights are also a big part of the design. They let you play late into the evening after the sun goes down. You can also add high-grade fencing to keep balls in the court area. This keeps the rest of your garden safe and makes the game more fun. By thinking about these extra details, you create a space that adds real value to your home. If you are ready to plan your build, you can call Gappsi at 631-543-1177 for an expert talk.

What affects the scope of a combined court project?

Planning a basketball and pickleball court combined takes careful thought. Many factors change how big or small the project will be. The work starts with your land and ends with the final parts you pick. Gappsi handles the whole process to make sure your new space fits your needs and your yard. They offer a one-provider value for homeowners on Long Island.

Checking the land and making the site ready

The state of your yard is the first big factor. A flat yard is easier to work on than one with steep hills. Proper site work is a vital step in any court project. This work includes grading the soil and setting up the right drainage plans to keep the area dry. If the ground is not level, the team must move dirt to create a flat base.

Building a court also requires checking local rules. Most towns in Nassau and Suffolk counties need permits for these types of projects. As a full-service team, Gappsi handles the 3D design and the permit process for you. Getting these papers in order before the work starts helps avoid delays. It ensures that your Sports Games Courts project follows all local codes.

Picking the right surface parts

The parts you choose for the base and the top layer change the scope. Different surface parts work well for multi-sport use. You may pick modular Matflex tiles, asphalt, or concrete. Concrete is very strong and provides a smooth surface for many years. Asphalt is a common choice but may need more care over time. Each choice affects how you use the space and how long it lasts.

Picking the top layer is also a key part of planning a combined basketball and pickleball court. Set pickleball courts use a standard size of 20 feet by 44 feet for games. These dimensions provide a practical starting point for the site plan. Using quality parts helps make sure your Sports Games Courts stay safe for all types of play. High-quality building ways are vital for the long life of any playing surface. You can learn more about court standards from the National Institutes of Health.

Adding custom features and tools

The final scope depends on the added items you pick. A simple court might just have lines and a hoop. But many homeowners want to add more to make the space better. Proper lighting and fencing are great ways to finish the area. Lights let you play after the sun goes down. Fences keep the ball from leaving the yard and hitting other things.

The type of hoop and net system you pick also matters. You can choose a hoop that adjusts in height for younger players. For pickleball, you will need a net that is easy to move or set up. Adding these items to your Sports Games Courts plan makes the space more useful for everyone. These choices help turn a basic court into a full center for your home. Gappsi handles every step from the first plan to the final build.

Frequently Asked Questions

Can you combine pickleball and basketball on one court?

Yes, you can simply combine these two sports into one layout to save space. A Sports Games Courts design uses clear line colors to mark both areas on the same surface. This plan works well for Long Island homes where land is often scarce. By sharing the space, you get more value and fun out of your backyard. As Gappsi says, combining sports is the best way to use your yard to save space.

What is the best size for a combined basketball and pickleball court?

A full basketball court is 94 feet by 50 feet, while a pickleball court only needs 20 feet by 44 feet. Most homeowners choose a half-court layout that fits a full pickleball court inside it. This mostly needs a space of about 30 feet by 60 feet. A standard pickleball court is 20 feet wide and 44 feet long for both singles and doubles play.

What surface types are best for a Sports Games Court?

The best surface depends on your goals for speed and safety. Many Long Island owners choose tiles like Matflex because they provide good grip and drain water fast. Asphalt and concrete are also strong choices for a Sports Games Courts project. These types last a long time even with heavy use and changing weather. High-grade tiles and proper installation help the court remain safe and durable through years of use.

Can I convert a current backyard court into a pickleball and basketball combo?

Yes, you can often update an old court to include more sports. A pro can clean the surface, fix any cracks, and add new lines for pickleball. If the old surface is worn out, adding tiles is a great way to fix the space without a full teardown. Good care is key for these surfaces. Proper construction and routine care help the playing area last longer.

Set up your custom Sports Games Courts today

Home court projects take time to plan and build the right way if you want them to last. If you wait too long to start, you might miss out on a full year of fun with your family. Starting your project now lets you skip the rush and secure your spot on our build list for next year. You will be able to enjoy your new court as soon as the warm weather returns to Long Island. Our team handles each step from the first 3D design to the final paint lines on the court. Do not let one more year go by without the backyard space you have always wanted for your home. You can learn more about designing a combined basketball and pickleball court to see what is possible.

Ready to build? Contact our team to request a consultation or visit the Smithtown showroom.

Share this page:
A modern paver driveway design with interlocking stones and a contrasting border.

15 Paver Driveway Design Ideas for Major Curb Appeal

When you think about home design, you probably focus on the kitchen, the living room, or the backyard patio. But the driveway often gets overlooked, treated as a purely practical necessity. It’s time to rethink that approach. Your driveway is a massive piece of your home’s visual real estate and a powerful design tool. It connects the street to your front door, setting the stage for your entire property. Instead of a boring slab, you can create a surface with texture, color, and pattern that complements your home’s architecture and landscaping. This guide is filled with paver driveway design ideas to help you see this space not as a utility, but as a canvas for creating a beautiful and cohesive first impression.

Key Takeaways

  • Select the Right Foundation with Material and Pattern: Your driveway’s longevity and style depend on the material and laying pattern you choose; consider durable options like porcelain or natural stone and structural patterns like herringbone for a lasting, beautiful result.
  • Define Your Style with Custom Details: Use color, texture, and borders to create a unique look. Select paver colors that complement your home’s exterior and add a contrasting border for a sharp, professionally designed appearance.
  • Protect Your Investment with Proper Prep and Care: A lasting driveway requires a solid, well-drained base from the start. Plan for long-term maintenance, like sealing your pavers every few years, to keep them looking new and prevent damage.

Is Your Driveway Living Up to Its Potential?

Your driveway is more than just a place to park your car; it’s the welcome mat to your home. It’s the first feature guests interact with and the last one they see when they leave. It sets the entire tone for your property. So, take a look outside. Is your cracked asphalt or plain concrete driveway making the best first impression? If it feels more like an afterthought than a feature, you’re missing a huge opportunity to enhance your home’s curb appeal. A paver driveway can completely transform your entrance, turning a purely functional space into a stunning design statement.

Imagine pulling up to a home with a clean, upscale entrance that feels intentional and polished. That’s the effect a modern paver driveway can have. The real magic, however, is in the endless customization. You’re no longer limited to a single slab of gray concrete. With a wide range of design choices, you can select from countless colors, textures, and patterns to create a look that is uniquely yours. You can use natural stone or porcelain pavers to achieve a highly customized artistic effect that complements your home’s architecture and landscape. Whether you prefer a classic herringbone pattern or a bold, geometric layout, the right design can make your driveway a true focal point. Plus, today’s paver options are not just beautiful; they are also durable and designed for easier maintenance, making them a smart and stylish investment for any Long Island home.

Choose the Right Paver for Your Driveway

Selecting the right material for your driveway is one of the most important decisions you’ll make. It’s about more than just looks; it’s about finding a material that can withstand daily traffic, resist Long Island’s weather, and complement your home’s architecture for years to come. The paver you choose sets the entire tone for your home’s entrance, acting as the foundation for your curb appeal. From the classic charm of brick to the modern sleekness of porcelain, each option offers a unique set of benefits.

Your choice will influence everything from the installation process to long-term maintenance. Some materials offer incredible design flexibility, while others are prized for their natural, timeless beauty. As you explore your options, think about your personal style, your budget, and how much upkeep you’re willing to perform. Our masonry experts can help you weigh the pros and cons of each material, ensuring your new driveway is both beautiful and built to last. Let’s look at four of the most popular paver choices for driveways.

Concrete Pavers

If you love having options, concrete pavers are a fantastic choice. They are engineered for strength and come in an almost endless variety of shapes, sizes, and colors. This versatility means you can achieve nearly any look you want, from a simple, uniform surface to a complex pattern that mimics natural stone or classic brick. Because they are manufactured, concrete pavers have consistent dimensions, which allows for a smooth, even installation. They are also incredibly durable and designed to handle the weight of vehicles without cracking, making them a practical and long-lasting solution for any driveway.

Brick Pavers

For a warm, traditional, and timeless look, nothing beats classic brick. Brick pavers bring a sense of history and character to a home’s exterior, instantly creating a welcoming and established feel. Unlike surface-dyed materials, the color in a brick paver runs all the way through, so any chips or scratches are far less noticeable. They are also exceptionally strong, often having a higher compressive strength than poured concrete. This durability ensures your driveway will maintain its rich color and classic charm for decades, making it a beautiful investment that truly enhances your home’s curb appeal.

Natural Stone Pavers

Natural stone offers an elegance and organic beauty that simply can’t be replicated. Each paver is completely unique, with its own distinct colors, textures, and variations that create a one-of-a-kind surface. Materials like granite, bluestone, and travertine provide a luxurious feel and are known for aging gracefully, developing a richer patina over time. While it’s a premium option, natural stone is also incredibly durable and requires very little maintenance. Choosing natural stone means you’re not just installing a driveway; you’re adding a timeless, high-end feature to your property.

Porcelain Pavers

For a clean, modern aesthetic combined with incredible performance, porcelain pavers are an excellent choice. These pavers are manufactured at high temperatures, resulting in a dense, non-porous material that is exceptionally resistant to stains, scratches, and fading. They won’t absorb water, so you don’t have to worry about frost damage or mold growth. Porcelain pavers can realistically mimic the look of natural stone, wood, or concrete, giving you a sophisticated appearance with minimal upkeep. They are perfect for homeowners who want a sleek, contemporary driveway that will look brand new for years.

Paver Driveway Ideas for Every Home

Your driveway is more than just a place to park your car; it’s the first impression your home makes. The right design can completely transform your home’s curb appeal, creating a welcoming and polished entrance. Whether your style is classic, modern, or something in between, there’s a paver design that will fit your vision and your budget. From simple, elegant layouts to grand, circular patterns, the possibilities are endless. Let’s explore some popular paver driveway ideas to get you inspired for your own home.

Simple Designs for Maximum Impact

You don’t need an overly complex design to make a statement. A modern paver driveway with clean lines and a simple pattern can give your entrance an incredibly upscale look. If you’re working with a specific budget, you can still achieve a high-end feel by installing pavers just at the driveway’s entrance, creating a stylish apron. This approach adds a touch of sophistication where it counts most. Using high-quality porcelain and natural stone pavers in a straightforward layout ensures durability and timeless appeal, proving that sometimes, less really is more.

Focus on the Entrance with a Paver Apron

A paver apron is a fantastic way to define your driveway’s entrance and add a decorative touch without committing to a full paver installation. This design feature involves paving the first several feet of the driveway where it meets the street. It creates a beautiful transition and can be customized with contrasting colors or patterns. For an even more cohesive look, you can extend a matching paver walkway from the driveway to your front door. This not only improves functionality but also ties your home’s landscape design together beautifully, creating a welcoming path for you and your guests.

Mix Permeable Pavers with Gravel

For a contemporary design that is both stylish and functional, consider blending permeable pavers with gravel. This combination creates a visually interesting texture while offering excellent drainage, which is a huge plus for Long Island properties. You can use pavers to create a solid track for your tires while filling the surrounding space with decorative gravel. This approach is durable, reliable, and adds a unique, modern touch to your home’s exterior. It’s a creative way to manage stormwater runoff while using Gappsi’s expertise in both paver and gravel driveway installations.

Go for a Modern, Elaborate Look

If you want your driveway to be a true work of art, an elaborate, modern design is the way to go. Interlocking pavers allow for incredible creativity, letting you combine multiple colors, shapes, and patterns for a completely custom effect. Think bold geometric layouts, intricate inlays, or a dynamic mix of paver sizes to create movement and visual interest. This is your chance to design a surface that is truly one of a kind. Our masonry design experts can help you craft a unique artistic statement that reflects your personal style and makes your driveway stand out.

Create a Grand Entrance with a Circular Design

A circular or semi-circular driveway creates an immediate sense of grandeur and elegance. This classic design not only provides a stunning focal point but also offers practical benefits, like easier entry and exit. You can enhance the look by using pavers of different colors, such as light and dark gray, to create a sophisticated pattern. Using larger format pavers can also contribute to a modern aesthetic and allow for a faster installation. Whether you envision a full circle or a graceful arc, this design choice is sure to make your home feel like a distinguished estate.

Combine Tones and Materials

One of the best things about driveway pavers is the ability to fully customize the design. Don’t be afraid to mix and match different colors, textures, and even materials to create a look that is uniquely yours. You could frame a textured paver field with a smooth, dark border or blend two or three complementary paver colors to create a custom palette. This approach allows you to perfectly match your driveway to your home’s exterior and landscaping. You can explore a wide range of options at the Gappsi Store to find the perfect combination for your project.

Create a Seamless Flow to Patios and Walkways

Your driveway shouldn’t feel like a separate entity from the rest of your property. To create a truly cohesive and professionally designed look, ensure your driveway flows seamlessly into your front walkway, patio, and other hardscaped areas. Using similar paver styles, colors, or patterns across these different spaces will make your entire front yard feel connected and thoughtfully planned. This unified approach enhances your home’s overall aesthetic and curb appeal. A well-executed masonry construction plan will ensure every element works together in harmony.

Find the Perfect Paver Pattern

Once you’ve selected your material, the next step is choosing a laying pattern. This is where you can really infuse your personality into the design. The pattern you choose does more than just create a pretty picture; it affects the structural strength of your driveway and the overall feeling of your home’s entrance. A simple pattern can feel clean and modern, while a more intricate one can lend a sense of classic elegance. The right pattern can even make a small driveway feel more expansive or a long one feel more welcoming.

Think of the pattern as the foundation of your driveway’s style. It’s a decision that works hand in hand with your choice of paver color and texture. At Gappsi, our masonry design experts can walk you through the options, showing you how different patterns will look with your home’s architecture and surrounding landscape. We’ll help you find the perfect layout that is not only beautiful but also built to handle daily traffic for years to come. From timeless classics to bold, modern statements, there’s a pattern for every style.

Herringbone

The herringbone pattern is a timeless choice for a reason. Pavers are laid in a V-shape, creating a distinctive zigzag that interlocks tightly. This interlocking feature is what makes it so popular for driveways, as it distributes weight evenly and prevents the pavers from shifting under the pressure of vehicles. It’s an incredibly durable and stable design that offers a sophisticated, classic look. Whether your home is a traditional colonial or a modern build, the herringbone pattern adds a touch of texture and movement that always feels upscale and intentional.

Basketweave

If you’re looking for a pattern with a bit of old-world charm, the basketweave is a fantastic option. This design arranges pavers in pairs, alternating them horizontally and vertically to create a square grid that looks like a woven basket. It’s a visually interesting pattern that breaks up the surface and can be customized by using two different paver colors to enhance the woven effect. The basketweave pattern works beautifully for driveways leading to cottage, farmhouse, or traditional-style homes, adding a layer of texture and quaint character to your entrance.

Running Bond

The running bond is perhaps the most straightforward and widely used paver pattern. It consists of pavers laid in simple, linear rows, with each row offset by half a paver from the one below it, similar to a classic brick wall. This clean, simple layout creates a sense of order and flow, making it incredibly versatile for any home style. Depending on the direction you lay the pavers, a running bond can make your driveway appear longer or wider. It’s a great choice if you want a subtle, uncluttered look that lets the paver material itself be the star.

Circular and Fan Patterns

For a driveway that makes a grand statement, consider a circular or fan pattern. These intricate designs create a powerful focal point and are perfect for defining a large entrance, a motor court, or the area directly in front of your garage. A circular pattern radiates from a central point, while a fan pattern creates elegant, sweeping arcs. Both add a sense of movement and luxury to your property. With a wide range of porcelain and natural stone pavers available, you can create a truly stunning and dynamic design that immediately captures attention.

Geometric and Bold Layouts

If your style leans more contemporary, a geometric or bold layout can turn your driveway into a piece of modern art. This approach often involves using large-format pavers, mixing different shapes, or creating blocks of contrasting colors to form a unique, eye-catching design. Think oversized squares, sleek planks, or abstract arrangements that play with lines and negative space. This is your chance to get creative and design a driveway that is anything but ordinary. A bold layout makes a strong statement and signals a modern aesthetic from the moment someone arrives at your home.

Mixed Patterns and Contrasting Borders

Why settle for one pattern when you can combine them? Using mixed patterns with contrasting borders is a professional design technique that adds a polished, custom finish to your driveway. A border acts like a picture frame, neatly containing the main pattern and giving it a crisp, defined edge. You can use a darker paver for the border, a different material, or even a simpler pattern like a running bond to frame a more intricate one like herringbone. This approach allows you to tie your driveway into your broader landscape design for a cohesive look.

Use Color and Texture to Define Your Style

Your driveway’s color and texture are more than just finishing touches; they are the key ingredients that define its personality. This is where you can move beyond a purely functional space and create something that truly reflects your home’s character. By thoughtfully selecting colors that either blend or contrast with your home and choosing textures that add depth and dimension, you can craft a driveway that feels intentional and custom-made. Let’s explore how to use these elements to create a stunning first impression.

Match Your Home’s Exterior

The most harmonious driveway designs feel like a natural extension of the house itself. Take a moment to look at your home’s exterior. What colors do you see in the siding, roof, trim, and front door? Are there existing brick or stone accents? Choosing a paver color that picks up on one of these elements creates a cohesive and polished look. For example, a warm gray paver can beautifully complement a home with cool blue siding and white trim. Our extensive selection of porcelain and natural stone pavers offers a wide palette, making it easy to find the perfect match for your Long Island home’s unique style.

Create Contrast for Visual Interest

While matching is a safe and classic approach, using contrast can create a dynamic and high-end look. A simple way to do this is with a decorative border. Framing your driveway with pavers in a darker, contrasting color adds definition and makes the entire design pop. You can also use contrasting colors to create intricate inlays or patterns that draw the eye toward your entrance. This technique turns your driveway from a simple path into a work of art. Our masonry design experts can help you visualize how different color combinations can add character and depth to your project.

Choose Your Texture: Smooth, Tumbled, or Brushed

The texture of your pavers plays a huge role in the overall feel of your driveway. Smooth pavers offer a clean, sleek look that’s perfect for modern and contemporary homes. Tumbled pavers, on the other hand, have a slightly weathered, rough-hewn appearance that lends itself to rustic, traditional, or old-world aesthetics. Beyond looks, texture also has a practical function. A more textured or brushed surface can provide better traction for both feet and tires, which is a great safety feature during wet or icy weather. Thinking about both the style and the function will help you select the perfect finish.

Mix Colors for a Custom Palette

Why settle for one color when you can have a custom blend? Mixing two or three complementary paver colors is a fantastic way to create a variegated, natural look that mimics the subtle color shifts found in natural stone. This approach adds incredible visual depth and has a practical benefit: the varied colors are excellent at camouflaging minor stains or dirt, keeping your driveway looking fresh. You can work with our team to select a pre-blended mix or create your own unique palette from the options available at the Gappsi Store. This is your opportunity to design a driveway that is truly one-of-a-kind.

Modern Features for Your Paver Driveway

A driveway is so much more than just a path to your garage. It’s the first impression your home makes, a key part of your daily routine, and a major player in your home’s overall curb appeal. While classic paver designs are timeless, modern advancements can make your driveway safer, more convenient, and even better for the environment. Thinking beyond the surface and incorporating smart features can completely change how you experience your home’s entrance.

Imagine pulling up to a beautifully lit driveway on a dark night, or never having to shovel snow again after a Long Island winter storm. These aren’t futuristic fantasies; they are practical upgrades that add real value and function. From integrated lighting that guides your way to heated systems that melt ice and eco-friendly pavers that manage rainwater, today’s driveways work harder for you. By exploring these modern options, you can create a driveway that is not only stunning but also perfectly suited to your lifestyle. Our expert masonry design team can help you integrate these features seamlessly into your project.

Add Integrated Lighting

Adding lighting directly into your driveway design is one of the most effective ways to blend beauty with practicality. Subtle lights installed along the edges or even within the pavers themselves create a warm, welcoming glow. This feature makes your home safer by illuminating the path for guests and family, reducing the risk of trips and falls after dark. It also adds a high-end, polished look to your property, highlighting your home’s architecture and landscaping. With a professional installation, the wiring is completely hidden, leaving you with a clean, sophisticated finish that enhances your home’s curb appeal around the clock.

Install a Heated System for Winter

For anyone who has spent a winter on Long Island, the idea of a snow-free driveway is a dream. A heated system installed beneath your pavers makes that dream a reality. These systems automatically melt snow and ice, saving you from hours of back-breaking shoveling and the need for corrosive de-icing salts that can damage your pavers and surrounding plants. A heated driveway also protects your investment from potential damage caused by snowplows. It’s a smart, long-term solution that adds incredible convenience and safety, ensuring you always have a clear and accessible entrance, no matter the weather.

Choose Eco-Friendly Materials

If you’re looking for a sustainable option, consider permeable pavers. These innovative pavers are designed with small gaps between them, which are filled with a fine gravel. This allows rainwater and snowmelt to drain directly through the surface and into the ground below. This natural filtration process helps reduce stormwater runoff, which can otherwise carry pollutants into local waterways. By preventing puddles and standing water, permeable pavers also create a safer, drier surface. Choosing these materials is a responsible way to manage water on your property while still achieving a beautiful, durable driveway.

Are Permeable Pavers Right for Long Island?

Yes, permeable pavers are an excellent choice for Long Island homeowners. Our area often deals with heavy rainfall and stormwater management challenges. Installing a permeable surface helps prevent flooding and soil erosion by allowing water to soak naturally into the ground, replenishing the local aquifer instead of overwhelming storm drains. This can be especially beneficial for properties near the coast. Beyond the environmental perks, a permeable system can reduce the formation of ice patches in the winter, making your driveway safer. It’s a forward-thinking solution that aligns perfectly with Long Island’s unique environmental needs.

Common Paver Driveway Mistakes to Avoid

A beautiful paver driveway is a significant investment in your home’s curb appeal, so you want to make sure it’s done right. While picking the perfect pattern and color is exciting, avoiding a few common installation pitfalls is just as important for a lasting, professional result. Getting these details right from the start ensures your driveway will look fantastic for years, not just for a season. From the ground up, every step matters. Here are the key mistakes to watch out for when planning your project.

Skipping Proper Ground Preparation

Think of the ground beneath your driveway as its foundation. If you skip the proper prep work, you’re setting yourself up for trouble like sinking pavers, an uneven surface, and drainage problems. A solid base is non-negotiable for a driveway that can handle vehicle weight and weather changes. It’s important to plan for the time and cost to prepare the ground correctly, which includes proper excavation and compaction. This foundational work is what gives your driveway its strength and longevity, so working with an expert in masonry construction is key.

Forgetting Edge Restraints and Drainage

Edge restraints are the unsung heroes of a paver driveway. These hidden borders are installed along the perimeter to lock the pavers in place and prevent them from shifting or separating over time. Without them, the edges of your driveway can begin to spread apart under the pressure of cars driving on them. Equally important is planning for drainage. Water needs a place to go, otherwise it can pool on the surface, seep into the joints, and cause damage, especially during freeze-thaw cycles in the winter. Proper grading and drainage solutions are essential for a stable, long-lasting installation.

Choosing the Wrong Paver for Your Home

With so many beautiful options available, it can be tempting to choose a paver based on a picture alone. However, the best choice is one that complements your home’s architectural style and color palette. Take a moment to consider your home’s existing materials, like its siding, roofing, and trim. You should choose pavers that go well with your home’s current look. Whether you prefer classic brick or modern porcelain pavers, selecting a material that creates a cohesive look will make your entire property feel more harmonious and thoughtfully designed.

Overlooking Long-Term Maintenance

Your paver driveway will need a little care to stay in top condition. Many homeowners forget that pavers are an investment that requires protection. One of the most effective ways to preserve your driveway is to have it sealed. Sealing your driveway every three to five years helps protect it from stains, weed growth, and salt damage, keeping it looking great for much longer. Gappsi offers professional driveway cleaning and sealing to protect your pavers and maintain their original beauty, ensuring your investment stands the test of time.

Keep Your Paver Driveway Looking Brand New

Your new paver driveway is a major investment in your home’s curb appeal, so you’ll want to keep it looking its best. A little routine maintenance goes a long way in preserving the color, stability, and overall beauty of your pavers for decades. By staying on top of cleaning, sealing, and minor repairs, you protect your driveway from the elements and daily wear and tear. Think of it as simple upkeep that ensures your home’s entrance always looks polished and welcoming. If you ever need a hand, professional restoration and sealing services can bring your pavers back to their original glory. Following a straightforward maintenance plan will keep your driveway in pristine condition and prevent small issues from turning into larger problems down the road.

Clean and Power Wash Regularly

Regular cleaning is the easiest way to maintain your paver driveway’s fresh appearance. Start by sweeping away leaves, dirt, and other debris with a stiff-bristled broom to prevent stains from setting in. For a deeper clean, a power washer on a low-pressure setting can effectively remove grime and mildew. Be careful to use a wide-angle nozzle and keep it moving to avoid dislodging the joint sand or etching the paver surface. Never use a wire brush, as it can scratch and damage the pavers. Consistent cleaning not only keeps your driveway looking great but also helps you spot any potential issues, like weeds or shifting pavers, before they get worse.

Seal Your Pavers Every 3 to 5 Years

Applying a quality sealant is one of the most important steps in protecting your paver driveway. Sealing creates a protective barrier that repels oil, dirt, and other substances that can cause stains. It also helps prevent color fading from UV exposure and inhibits the growth of moss and algae. We recommend you seal your pavers every three to five years, depending on the amount of traffic and sun exposure your driveway gets. A good sealant also helps lock the sand in the joints, which stabilizes the pavers and reduces weed growth, keeping your driveway strong and beautiful for longer.

Avoid Damaging De-Icing Salts

Winter on Long Island can be tough on driveways. While it’s tempting to reach for rock salt (sodium chloride) to melt ice, these products can be corrosive and cause long-term damage to your pavers. The salt can eat away at the surface, leading to spalling and discoloration over time. Instead, opt for safer de-icing alternatives like calcium magnesium acetate or simply use sand for added traction. Another great solution is a permeable paver system, which allows water to drain through the surface, naturally reducing ice formation. Choosing the right paver materials from the start can also make a difference in winter durability.

Repair Cracks and Shifts Immediately

One of the best things about a paver driveway is how simple it is to repair. Unlike a solid concrete slab that requires a complete overhaul for a single crack, you can replace individual pavers if they get damaged or stained. If you notice a paver starting to sink or shift, it’s best to address it right away to prevent the issue from affecting the surrounding area. Our masonry experts can easily lift the affected pavers, re-level the base material underneath, and set the pavers back in place. This quick fix ensures your driveway remains a smooth, stable, and attractive surface for years to come.

Ready to Transform Your Home’s Entrance?

A new paver driveway does more than just give you a place to park; it completely redefines your home’s first impression. Think of it as the red carpet to your front door. With so many design possibilities, you can create an entrance that truly reflects your personal style and improves your home’s curb appeal. Whether you prefer a clean, modern layout or an intricate pattern with multiple colors, the versatility of pavers allows you to craft a look that perfectly complements your home’s architecture.

One of the best things about working with pavers is the flexibility they offer. You can achieve a high-end look even on a budget by focusing on a stylish paver apron at the entrance while keeping the rest of the driveway simple. For a more cohesive feel, consider extending the design with a matching walkway that guides guests from their car to your front door, creating a seamless and welcoming path. These thoughtful driveway landscaping ideas connect your home to its surroundings.

Choosing the right materials is key to a successful project. With a huge selection of porcelain and natural stone pavers, you can select the exact color, texture, and size to bring your vision to life. This isn’t just about looks; it’s about investing in a durable, attractive surface that will stand the test of time. When you’re ready to move from ideas to action, our design experts at Gappsi can help you explore the options and create a stunning entrance for your Long Island home.

Related Articles

Frequently Asked Questions

How long will a paver driveway last compared to a traditional concrete one? A professionally installed paver driveway can easily outlast a poured concrete one. While concrete is prone to cracking over time, especially with Long Island’s freeze and thaw cycles, pavers are designed to be flexible. The joints between them allow for slight movement, which prevents cracking. If a single paver ever does get damaged, it can be replaced individually, a simple fix that is impossible with a large concrete slab. With proper installation and a little maintenance, your paver driveway can look great for decades.

Are paver driveways difficult to maintain, especially with weeds? They are surprisingly low maintenance. The key is in the installation and follow-up care. We use a special polymeric sand in the joints that hardens to lock the pavers together and resist weed growth. Regular sweeping and occasional rinsing will keep the surface clean. For long-term protection, we recommend sealing the driveway every few years. This protects against stains, enhances the color, and further prevents weeds, making upkeep much simpler than you might think.

I love the idea of a heated driveway system, but is it complicated and expensive to operate? A heated system is a fantastic feature that adds a lot of convenience, and it’s less complicated than it sounds. The system is installed beneath the pavers and can be automated with sensors that turn it on when temperature and moisture levels are right for snow or ice. While there is an initial investment and it does use electricity, the cost to run it is often less than paying for seasonal snow removal services. Plus, you save yourself from shoveling and avoid using harsh de-icing salts that can damage your pavers and landscape.

My driveway is on a slope. Are pavers still a good option? Absolutely, in fact, pavers can be an excellent solution for a sloped driveway when installed correctly. The key is expert ground preparation and choosing the right laying pattern. A pattern like herringbone provides a strong interlock that is very stable and resists the downward forces on a slope. Proper base compaction and secure edge restraints are also critical to prevent any shifting. A professional installation will ensure your sloped driveway is not only beautiful but also secure and durable.

Can I combine different paver types, like using porcelain for the main area and natural stone for a border? Yes, and this is a wonderful way to create a truly custom look. Mixing materials is a great design strategy to add visual interest and define different areas. For example, you could use sleek, large-format porcelain pavers for the main field of the driveway and frame it with a classic cobblestone or natural stone border. This contrast in texture and color creates a high-end, polished appearance. Our design team can help you choose combinations that work well together and complement your home’s style.

Share this page: