Hiring backyard designers Long Island homeowners can trust is about more than choosing attractive features. The right team studies how your family lives, how water moves across the property, and how patios, pools, planting, lighting, and outdoor structures should work together. Gappsi brings a design-build-supply approach shaped by Long Island projects since 1987, three generations of Italian craftsmanship, and hands-on material selection at its Smithtown showroom.
Schedule a backyard design consultation with Gappsi to turn your ideas into one coordinated plan.
Backyard designers Long Island homeowners hire should offer a full design-build-supply model to keep the project on track. This method gives you one point of contact for the whole job. It covers 3D drawings, stone choice, and the final build. Expert designers help you avoid common errors by focusing on site water flow, local rules, and family needs. You should look for a firm with a local showroom to see stone in person. According to experts at Mississippi State University Extension, knowing the design process helps you ask the right questions during your first meeting. This knowledge ensures your new yard provides the privacy and fun your family needs for many years.
Finding the right expert for your home needs a clear plan. You must know what to check before you sign a contract. Knowing what backyard designers Long Island homeowners should do first is the best way to start. The path begins with
What backyard designers Long Island homeowners should do first
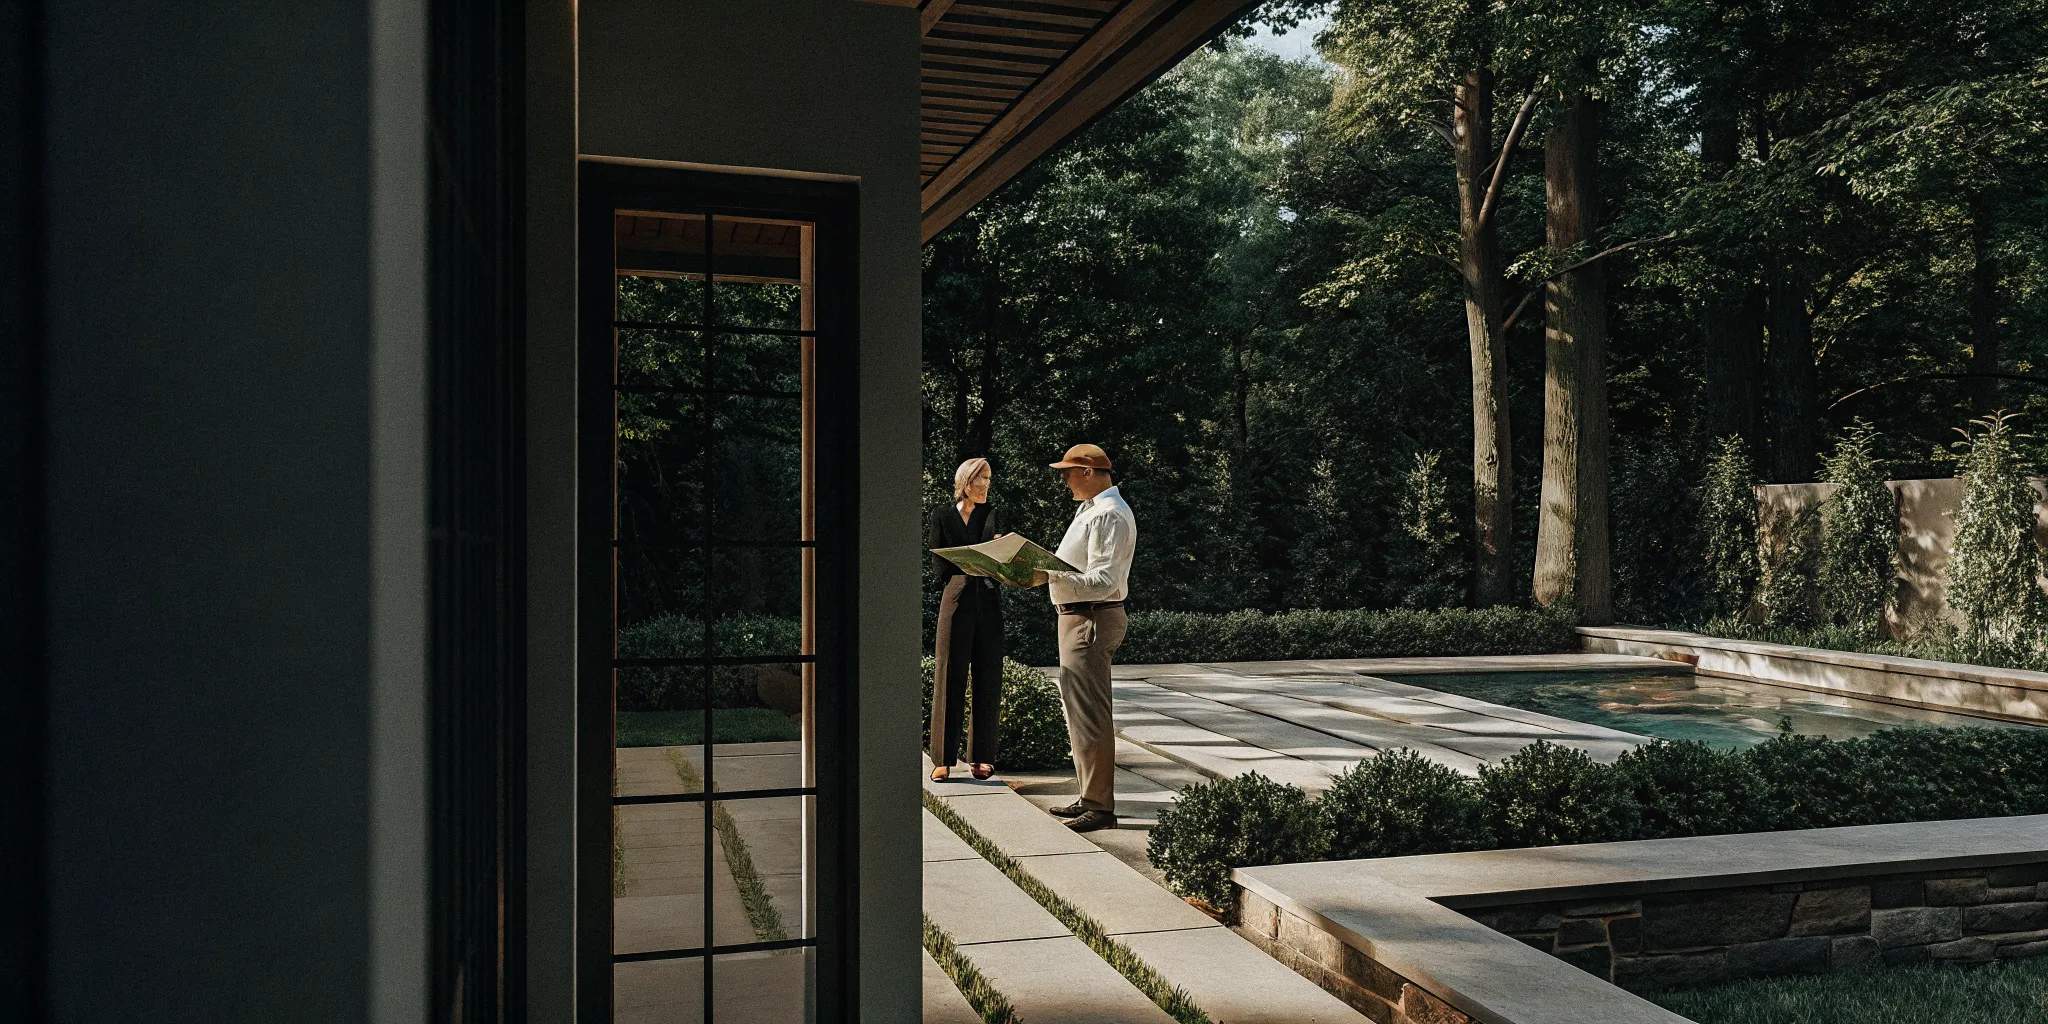
Planning your dream yard starts long before you dig. Most expert backyard designers Long Island owners trust say you should start with a clear list of goals. Knowing how the landscape design process works helps you ask the right questions when you meet with a pro. This early work helps to stop big mistakes and makes sure the final plan fits your life. You should think about how your family will use the space to play, rest, and host friends.
Find your lifestyle needs
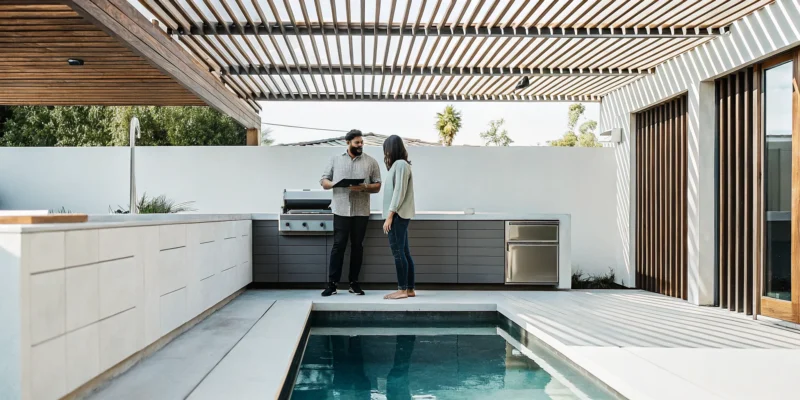
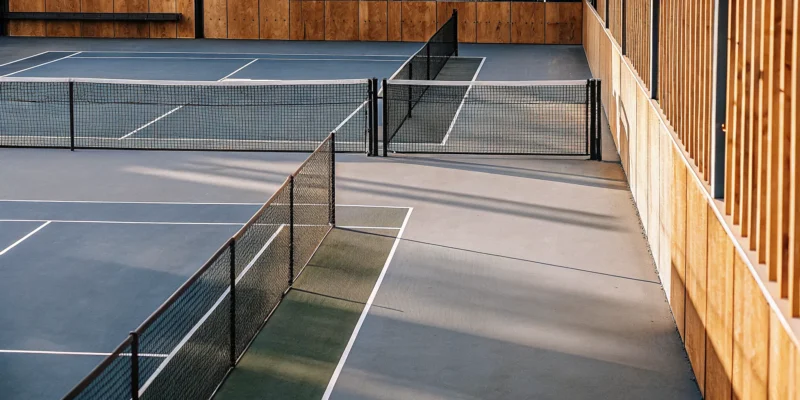
Your yard should work for your needs while looking great. A well-planned landscape gives your family a place for fun and privacy. Think about who will use the space each day. If you have young kids, you might want open grass or unique Sports Games Courts. If you love to cook outside, a high-end kitchen might be your top goal. Matching your yard to how you live is the best way to get long-term value from your project.
You should also think about how much time you want to spend on yard care. Some plants and features need lots of work, while others are easy to keep up. Being honest about your goals helps your expert pick the right parts and plants. You can see many of these choices in person at the Gappsi showroom in Smithtown. Seeing the stones and plants up close makes it easier to pick what you love.
Set your budget and scope
Before you call an expert, you should have a rough idea of your budget. Top-grade design is a big cost that can increase your home’s value by making the space look better. Knowing your price range helps the pro pick the best options for your space. It also keeps the project from growing too large. A clear budget allows you to pick must-have features over things that are just nice to have.
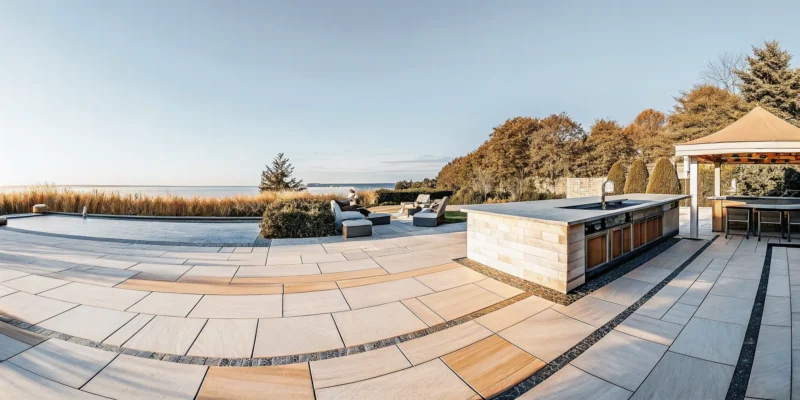
A full project scope includes more than just a patio or pool. It covers lights, water flow, and how areas link up. Working with a team that does everything from design to build makes the work simple. This model offers more trust and ease for the owner. You can start this journey by booking a design meeting to share your ideas and get expert feedback.
- Define how you plan to use your space for daily life and hosting.
- List your must-have features versus nice-to-have add-ons.
- Decide how much time and money you can spend on yard care.
- Set a clear budget range for the whole project.
- Collect photos of styles and features that you like.
- Visit a local showroom to see stones and plants in person.
What happens during a backyard site evaluation?
A backyard site evaluation documents grading, drainage, access, utilities, sunlight, privacy, and the relationship between existing structures. On Long Island, this early review also helps the design team account for local property conditions and identify practical constraints before concepts become construction plans.
A site evaluation is a key step in any outdoor project. It helps you find out what is possible for your land and your budget. During this visit, professional backyard designers on Long Island look at the layout of your yard to plan the best use of space. They check the soil, land shape, and sun paths to make sure your new design will last for years.
Checking your yard for technical needs
Experts start by looking at how water flows through your yard. Proper drainage keeps your basement dry and stops pools of water from forming on your patio. Designers also check the grade of the land. If your yard slopes, you may need retaining walls or custom steps to create flat areas for play or dining. These choices help prevent costly mistakes during the build phase of your project.
Privacy and sun are also big parts of the review. A good designer looks at where the sun hits at different times of the day. This helps them decide where to put a pool or a seating area. They also see which spots need screening from neighbors. This consultative design process ensures your yard offers both beauty and a place for your family to relax in private.
Planning for utilities and local rules
A major part of the site visit is finding where gas, water, and power lines run. Knowing these spots is a must before any digging starts. It keeps your home safe and helps the team plan where to put outdoor kitchens or fire pits. Designers also look for existing trees or structures that might stay or need to go. This step helps you ask the right questions before the work begins.
Your designer also checks for local permit rules and property lines. Long Island towns have specific laws about how close a pool or shed can be to a fence. Understanding these rules early saves time and keeps your project on track with the town. A team with deep local knowledge can help guide you through these permit steps so you do not face fines or delays later.
How concepts and materials become a buildable plan
A buildable backyard plan connects the design vision to accurate material choices, site conditions, and construction sequencing. With Gappsi’s integrated team, homeowners can review concepts, compare materials at the Smithtown showroom, and refine details before crews begin work.
The step from a simple idea to a real build starts with a solid plan. A good plan turns your vision into a map for your yard. It looks at how you use your space and what items work best for the local land. When you work with expert backyard designers on Long Island, they help you see the big picture. This plan keeps the project on track and helps you avoid high costs later.
A smart plan also looks at how a yard adds value to a home. Research shows that design sophistication is the top factor that can boost how much people think a home is worth. By planning for beauty and use, you create a space that serves your family now and helps you later if you sell. This way makes sure your yard is both useful and pretty.
Viewing your project with 3D views
It can be hard to see how a new pool or patio will look just from a drawing. That is why pros use 3D tools to show you the end result. This step lets you walk through your new yard in a virtual way. You can see how the sun hits your patio or where to put your Sports Games Courts for the best play.
Using 3D design views helps find any issues with the flow of the space. It makes sure the build plans match your vision before any work starts. This clear view makes the whole process easier for you. It gives you peace of mind that the final build will be what you want.
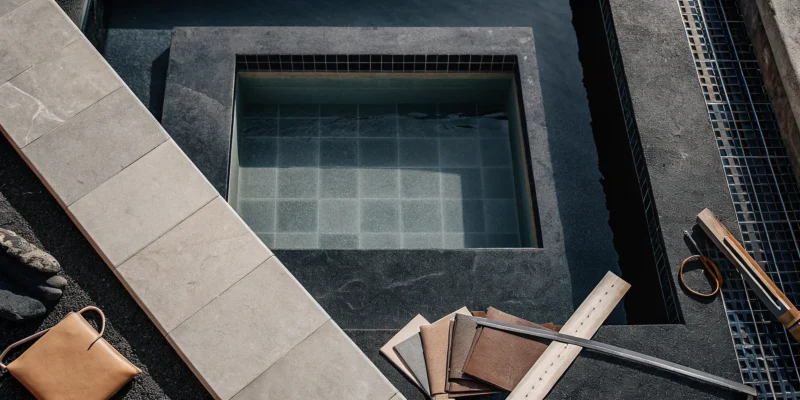
Picking stone and tile in a physical showroom
The items you pick define the look and feel of your yard. You should not have to guess what a stone or tile looks like from a small photo. A physical showroom lets you touch and see the items in person. You can check the colors and see how different stones work together.
This hands-on step is a big part of making a buildable plan. It helps you pick stones that are both pretty and strong enough for the local weather. At the Gappsi showroom in Smithtown, you can view many high-quality options. Seeing these items in person helps you make the best choice for your home.
Handling permits and local rules
A plan is only buildable if it follows the law. Every town has rules for how you can change your land. You need a team that knows the permit process for Nassau and Suffolk Counties. This local knowledge helps you get the right papers and avoid fines. Experts who know the local land can also help with drainage and soil issues. They make sure your new yard is safe and legal. This part of the plan is vital for a smooth build. It ensures that your project is done right the first time.
| Decision Phase | Focus Area | Plan Result | Key Benefit |
|---|---|---|---|
| Initial Design | Layout and flow | 3D models | See the yard first |
| Picking Items | Style and strength | Choice of items | Find the best look |
| Building Plan | Rules and safety | Permit papers | Avoid local fines |
How design-build coordination changes the experience
Design-build coordination gives homeowners one accountable team from the first concept through construction. Designers, material specialists, and builders can resolve details together, reducing handoff gaps and helping pools, patios, masonry, planting, lighting, and other features come together as one usable outdoor environment.
Choosing a design-build model for your home project makes the whole process easy. Instead of hiring many firms, you work with one team from start to finish. This method brings designers, builders, and suppliers together under one roof. For homeowners looking for backyard designers long island, this means less stress and better results. You will not have to act as a middleman between a designer and a builder.
One point of contact for the full build
When you hire different teams, wires often get crossed. A designer might plan a feature that a builder cannot make. Or, a builder may change a detail without telling the design team. In a design-build setup, every person works for the same company. This creates a smooth flow of facts from the first sketch to the last stone laid. It also makes things more clear. You always know who to call when you have a question.
This single point of contact saves you a lot of time. You do not have to repeat your goals to new people at each stage. Your team knows your vision from day one. They keep that vision in mind as they pick out tiles or plants. This is helpful when you plan complex parts like masonry design for a patio or pool deck. Having one team handle the masonry design and build keeps the look and quality the same throughout.
Bridging the gap between 3D design and construction
Modern tools like 3D models let you see your yard before any work starts. But those models only help if the build team follows them to the letter. In a design-build firm, the people who drew the plan are in close touch with the crew on the ground. They make sure the real yard looks just like the online one. This close link helps find and fix errors before they cost too much.
Learning about the landscape design process helps you ask the right questions during your first talk. When the same firm handles the plan and the build, they can give you a real price early on. They know what the parts cost and how long the work will take. This keeps your project on track and helps you stay within your budget.
Managing changes with ease
Most large outdoor projects face a few changes along the way. You might find a rock under the soil that blocks a pipe. Or, you might see a new plant at the showroom that you love. In a split system, these small changes can cause big delays. The builder has to wait for the designer to sign off on a new plan. In a design-build model, these shifts happen much faster.
The team can adjust the plan and the budget in one step. This keeps the work moving without a long pause. This speed is vital for backyard designers long island who work with tight local timelines. A well-planned yard does more than just look good. High-quality landscape design style can even raise how much people think your home is worth. By keeping the design and build teams close, you get the best value for your home.
How Long Island conditions shape backyard design
Long Island backyard design must respond to the individual property’s soil, drainage, exposure, access, and municipal requirements. A locally experienced team can plan around those conditions while selecting durable materials and creating comfortable spaces that work through changing seasons in Nassau and Suffolk Counties.
Planning a yard in Nassau or Suffolk County needs a deep look at the local land. The weather and soil here can change how you use your outdoor space. Long Island experts must plan for sea winds and changing seasons to keep your yard looking great all year. By choosing professional backyard designers on Long Island, you make sure your plan works with the local land and permit rules.
Adapting to soil and drainage
The ground in our area can vary from sandy shores to heavy clay inland. Good drainage is key to keep water from pooling near your home or patio. A smart plan uses the natural slope of your land to move water away from busy zones. This step helps keep your stone work and plants healthy through heavy rain. Proper grading also makes sure your luxury patio and backyard designers can set a strong base for masonry.
Managing salt and wind air
Homes near the water face extra tests from salt spray and strong gusts. These things can hurt common plants and wear down some building goods. Designers often use hardy, local plants that can handle the harsh air without constant care. A well-planned yard gives your family space for fun and privacy while helping the environment, according to Mississippi State University Extension. Strong walls or fences can also act as breaks to keep your seats calm.
Planning for four seasons
Long Island yards should be useful from the first warm days of spring through the cool fall. This means picking goods that can handle freezing and thawing without cracking. Good lights and heat, like fire pits, stretch the time you can spend outside. A top-tier plan with large plants and many types can also increase the perceived value of a home. Balancing beauty with use ensures your yard stays a favorite spot for the family for many years.
How should you compare backyard designers?
Compare backyard designers by reviewing relevant completed work, local experience, planning process, material access, construction responsibility, and communication. The strongest choice should explain how each feature fits the whole property, who manages each phase, and how decisions are documented before construction begins.
Picking from the many expert backyard designers on Long Island takes a clear plan. You want a team that can take your ideas and turn them into a real, useful space. Checking other firms helps you find the right fit for your home and budget.
Check for local skill and past work
A great designer must know the local area well. Long Island has unique soil, weather, and rules. Ask if the team knows the permit steps in Nassau or Suffolk County. They should have a deep history of working with local towns to avoid delays. Gappsi Group has served the area since 1987, which gives them a lot of local insight.
You also want to see a portfolio that fits your style. Look for projects that match what you want for your own yard. If you want a pool and a patio, find a designer who has done both. A team that knows the local land will make better choices for your yard. They can pick plants that grow well here and stone that stays strong through cold winters.
Look at the design and build process
The best way to compare teams is to look at how they work. Some firms only draw a plan. Others handle everything from the first sketch to the last brick. This is called a design-build model. It gives you one point of contact and keeps the project on track. Per the Mississippi State University Extension, knowing the process helps you ask better questions when you meet a pro.
Ask if they use 3D tools to show you the plan. Seeing your yard in 3D before work starts helps you find mistakes early. It also ensures the final result matches what you have in mind. A firm that uses modern tools shows they care about your time. This stage is vital for setting a clear budget and timeline for your home project.
Verify items and clear updates
A designer should be open about where they get their items. It is helpful if they have a showroom where you can see the stones, tiles, and plants. Being able to touch and see the items in person helps you make better choices. This prevents shocks once the work begins. It also shows the firm has strong ties with its sources.
Clear updates are also key. You need a team that listens to your ideas and gives plain reports. Ask how they handle changes or problems during the build. A team that values your input will create a space that fits your lifestyle. They should focus on your vision while using their skills to keep the project safe and strong. They should also explain the steps in the build so you know what to expect each week.
What should you expect after approving the design?
After design approval, the team finalizes selections, confirms project details, coordinates scheduling, and prepares the site for construction. Homeowners should expect clear communication about upcoming phases, access, material decisions, and questions that need answers as the approved backyard plan moves from drawings into the built environment.
Once you give the green light to your 3D design, the real work starts. This is an exciting time for your home. You have already seen the digital version of your dream yard. Now, the team will turn those images into a real space.
The next steps focus on picking items and getting the site ready. Knowing this landscape design process helps you know what comes next. It also lets you ask the right questions as the work moves forward.
Choosing your material picks
The next task is to pick the exact items for your project. You will need to choose the stones, pavers, and plants. Many professional backyard designers on Long Island have a local showroom. You can visit these places to see the goods in person.
This helps you check the colors and feel of the stones. You can also see the size of the plants that will go in your yard. Picking these items now prevents delays later.
It ensures that the team has everything they need when they start the build. It also gives you a chance to see how different stones look next to each other. This step is vital for making sure the yard matches your style.
It also helps the project stay within your goals for both beauty and use. A good plan keeps the work on track from the start. This allows you to relax while the team builds your new space.
Site prep and local permits
Before the heavy machines arrive, the team must prep the site. This involves clearing the area and marking where everything will go. They might need to move dirt or take out old shrubs.
This part can be loud and messy, but it is needed for a strong base. A firm base ensures that your new patio or pool lasts for many years. It is the first step in the real build of your new yard.
Your team will also handle the forms. Local towns have strict rules for backyard projects. Expert backyard designers on Long Island know how to get the right permits.
They work with Nassau and Suffolk County offices to make sure your build is legal. This keeps the project on track and helps you avoid fines. Having a team that knows the local laws is a big plus for any homeowner.
Building steps and talking points
As the build starts, you will see your yard change fast. You should expect regular updates from your project lead. This person is your main link to the crew.
They can answer questions about the schedule or the work being done. Good talk keeps everyone on the same page. It also helps the team find and fix any small issues before they become big problems.
Sometimes you might want to make a small change. You should talk about these ideas as soon as possible. Your designer can tell you how a change might affect the build or the plan.
Once the project is done, you will do a final walkthrough. This is your time to check every detail. The team will also show you how to care for your new plants and hardscape. This last step ensures that you are happy with the results for a long time.
Frequently Asked Questions
These quick answers cover the questions Long Island homeowners most often ask before choosing a backyard design partner.
What is the typical process for hiring a backyard designer on Long Island?
Hiring a professional begins with a meeting to discuss your goals and property needs. According to Gappsi, a talk-first way helps avoid costly mistakes by knowing your vision before work starts. After looking at your site, the designer makes a plan, often using 3D images. Once you approve the design, the project moves to the build phase. This step-by-step path makes sure the final result fits your life and budget.
What factors should I consider when selecting a backyard designer on Long Island?
You should check a designer’s local name and what they know about Long Island building rules. It is also smart to see if they offer a full design-build-supply model so you have one group to hold to their word. According to Mississippi State University, a good yard plan should give you privacy and fun while showing your style. Last, look for a firm with a local shop where you can see and pick materials before work begins.
Should I hire a landscape designer or a landscape contractor for my backyard?
A landscape designer focuses on the art and planning, while a builder handles the hard work. Picking a firm that does both gives you one point of contact and more trust. For example, Gappsi uses an all-in-one model to handle every step from 3D art to the final build. This way removes the need to talk to many different workers and helps keep the project on track and on time.
How much does professional backyard design cost on Long Island?
Price for backyard work changes based on how big the project is and the parts you pick. While first meetings might have a fee, the total cost often grows with the size of your yard and the quality of stones or plants. A study from Virginia Tech says that good designs and large plants are top ways to help your home sell for more. Spending on a pro plan helps you pick the best parts.
Ready to set up your backyard design consultation?
Putting off your backyard plans can lead to more than just a late start on building. It often means paying more for supplies and facing a long wait for the best crews. If you act now, you can work through each part of your plan without any rush or stress. This early start gives you the time to pick the right items and find the best look for your home. Working with professional backyard designers on Long Island helps you avoid the stress of trying to fix errors after the work has started. Our team will help you find the best path for your project so you can enjoy your new yard as soon as you can.
Ready to get started? Call 631-543-1177 to schedule a backyard design consultation or visit the Smithtown showroom today.