You want that gorgeous, high-end look for your patio, but the thought of maintaining natural stone or a wood deck gives you pause. That’s where porcelain pavers come in. They offer the stunning appearance of materials like slate, travertine, or even reclaimed wood, but without the constant work. Porcelain is incredibly strong, stain-resistant, and won’t fade in the sun, meaning you get a beautiful outdoor space you can actually relax in. This guide covers why so many homeowners are making the switch. To truly achieve that flawless, long-lasting finish, the quality of the work matters just as much as the material. We’ll show you what goes into the best installation of porcelain pavers on Long Island ny.
Key Takeaways
- Choose porcelain for its durability and low maintenance: Porcelain pavers are a smart investment for Long Island homes because their dense, non-porous nature resists cracking from freeze-thaw cycles and prevents stains, saving you time and money on upkeep.
- A professional installation is critical for longevity: The total project cost reflects materials, labor, and site preparation; hiring an expert is essential for managing technical challenges like proper drainage and precise cutting to ensure a beautiful, lasting result.
- Protect your investment by vetting your contractor: Always confirm your installer is licensed and insured, review their portfolio of past work, and insist on a detailed written contract to ensure everyone is aligned and you avoid common red flags.
Why Choose Porcelain Pavers for Your Long Island Home?
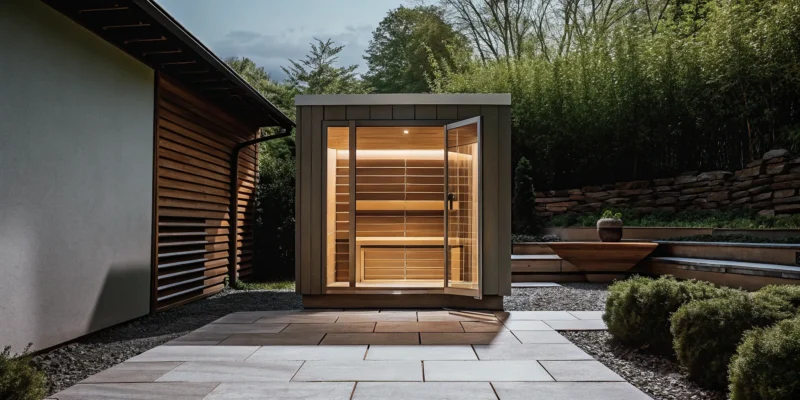
If you’re dreaming of a beautiful, long-lasting patio, walkway, or pool deck, porcelain pavers are an incredible option. They combine sophisticated style with practical strength, making them a smart investment for any Long Island property. Unlike some traditional materials that require a lot of upkeep, porcelain gives you a stunning outdoor space you can actually relax in, not constantly work on. Let’s look at a few reasons why so many homeowners are making the switch.
Durability for the Long Island Climate
Here on Long Island, our weather can be tough on outdoor materials. Porcelain pavers are built to handle it all. Because they are incredibly dense and non-porous, they absorb very little water. This quality is crucial for surviving our freeze-thaw cycles without cracking. You won’t have to worry about them fading from the summer sun or suffering damage from harsh winter storms. This resilience means your investment stays beautiful for years, making it a perfect material for everything from a new patio to a durable gravel driveway border.
Low Maintenance, High Reward
One of the biggest perks of choosing porcelain is how little maintenance it requires. Forget about annual sealing or special cleaners. Porcelain pavers resist stains, mold, and mildew, so a simple sweep or rinse with a hose is usually all it takes to keep them looking pristine. This saves you both time and money on upkeep. Because they are so hard and durable, they also hold up exceptionally well against scratches and everyday wear. This gives you a high-end look without the high-effort maintenance, freeing you up to simply enjoy your beautiful outdoor living space.
Endless Style Options for Your Outdoor Space
Your home has a unique style, and your outdoor space should reflect that. Porcelain pavers offer incredible design flexibility to match any aesthetic. They can convincingly mimic the appearance of natural materials like wood, slate, or stone, but without the associated maintenance. Gappsi offers a huge variety of Italian-made porcelain and natural stone in countless colors, patterns, and sizes. Whether you want a sleek, modern patio, a rustic walkway, or a classic pool surround, there’s a porcelain paver that will bring your vision to life perfectly.
The Best Porcelain Paver Brands to Consider
Once you’ve decided on porcelain for your outdoor project, the next step is choosing a brand. This decision is more than just picking a color; it’s about investing in the long-term beauty and durability of your space. The right brand will deliver a product that not only looks stunning on day one but also holds up beautifully through years of family barbecues, sunny afternoons, and Long Island winters.
The number of options can feel like a lot, but the process gets much simpler when you know what to look for. Quality brands stand out for their superior manufacturing processes, consistent quality, and stunning designs. At Gappsi, we have worked with a wide range of materials for decades, so we have a clear understanding of which brands consistently deliver the best results for our clients. We focus on sourcing pavers that offer the perfect combination of strength, style, and low-maintenance living, ensuring your new patio, pool deck, or walkway is built to last.
What Defines a Quality Brand?
A quality porcelain paver brand is defined by three key things: durability, aesthetic variety, and ease of maintenance. Because porcelain is man-made, manufacturers have incredible control over its strength and appearance. Top-tier brands produce pavers that are exceptionally dense and non-porous. This means they won’t absorb water, which prevents cracking during our harsh freeze-thaw cycles on Long Island. They are also highly resistant to stains, scratches, and fading from UV rays, so your patio will look just as good in five years as it does today.
Beyond strength, the best brands offer an extensive selection of porcelain and natural stone styles. You can find pavers that convincingly mimic the look of natural wood, slate, or travertine without any of the associated upkeep. A quality brand provides consistency in color and size from batch to batch, which is critical for a professional and seamless installation.
Top Brands Available on Long Island
On Long Island, you have access to several excellent brands and suppliers known for their high-quality products. Gappsi is a premier source for top-tier materials, offering a curated selection of pavers directly to homeowners and contractors through the Gappsi Store. We have spent years identifying the best products that meet our high standards for performance and design.
Other reputable names you may come across include NT Pavers, known for their beautiful natural stone and porcelain options, and Powerhouse Mason Supply, which provides a wide range of materials for residential projects. Astro Masonry is another established supplier in the area. Working with an experienced installer who has strong relationships with these suppliers ensures you get authentic, high-quality materials for your project. An expert can guide you to the perfect brand and style to match your home’s aesthetic and your family’s lifestyle.
What Does Porcelain Paver Installation Cost on Long Island?
Understanding the budget for your new patio or walkway is one of the most important steps in planning your project. When you start getting quotes for a porcelain paver installation, you’ll notice that the final price is more than just the cost of the pavers themselves. The total investment is a blend of three key elements: the materials you choose, the labor required for a professional installation, and the specific preparation your property needs.
Think of it like baking a cake from a recipe. The cost of the flour and sugar is just one part. You also have the baker’s time and skill, plus the work of getting the kitchen ready. Similarly, your total project cost will reflect the quality of the pavers, the expertise of the installation team, and the unique conditions of your outdoor space. Breaking down these costs helps you see exactly where your money is going and why investing in quality from the start pays off for years to come. We can help you explore a wide range of beautiful and durable porcelain and natural stone options to find the perfect fit for your budget and style.
Breaking Down Material Costs
The pavers are the star of the show, and their cost is a major part of your budget. On Long Island, porcelain pavers typically cost between $7 and $9 per square foot. This price can vary based on several factors, including the brand, the intricacy of the finish, the size of the paver, and the overall style. For example, a premium Italian porcelain with a realistic wood grain texture might be at the higher end of the price range, while a more standard stone-look paver could be more budget-friendly. Visiting the Gappsi Store can give you a hands-on feel for the different textures, colors, and sizes available, helping you visualize how they will look in your space.
What Influences Labor Costs?
Labor for a professional porcelain paver installation generally runs from $5 to $10 per square foot. This cost covers the installer’s skill, time, and specialized equipment needed to do the job correctly. Porcelain is a tough material that requires specific diamond-tipped blades and techniques for precise cutting and laying. The complexity of your design also plays a role. A simple square patio will have a lower labor cost than a project with intricate patterns, curved edges, or numerous cuts around features like a swimming pool or fire pit. Investing in experienced professionals ensures your patio is not only beautiful but also built to last.
Factoring in Site Prep and Other Expenses
Before any pavers can be laid, your site needs to be properly prepared. This is a critical step that can significantly influence the total cost. Site preparation includes tasks like excavating the area, removing an old patio or deck, grading the land for proper water drainage, and installing a stable base of aggregate. A sloped or uneven yard will require more extensive prep work than a flat, clear area. Other potential costs to consider include material delivery fees, debris removal, and any necessary permits for your project. A thorough landscape design plan will account for these factors from the very beginning, preventing surprises down the road.
How to Choose the Right Porcelain Paver Installer
Selecting the right installer is just as important as choosing the perfect porcelain paver. This is the team that will bring your vision to life, so you want a partner you can trust to handle the job with skill and professionalism. A great installation ensures your patio, walkway, or pool deck not only looks beautiful but also stands strong for years to come. The difference between a good and a great installation often comes down to the details: the precision of the cuts, the stability of the base, and the overall finish. Finding the right fit means looking beyond the price tag and focusing on experience, credibility, and craftsmanship. When you vet your options carefully, you’re not just hiring a contractor; you’re investing in peace of mind and a final result you’ll love. The best installers offer a combination of technical expertise and a deep understanding of how to work with high-quality porcelain and natural stone to create stunning, durable outdoor spaces. They can guide you through the process, answer your questions clearly, and anticipate challenges before they become problems. Think of them as your project partner, dedicated to making sure every detail aligns with your expectations.
Look for Local Experience and Specialization
Long Island’s climate has its own set of rules, especially with our freeze-thaw cycles. An installer with deep local experience understands these specific challenges. They know how to prepare a base that won’t shift or heave during the winter, ensuring your pavers remain level and stable. Ask potential contractors about their experience working in your specific area of Nassau or Suffolk County. A team that specializes in outdoor masonry and paver installation will have a proven process for creating foundations built to last in our unique environment. This local knowledge is invaluable and can save you from costly repairs down the road.
Verify Licenses, Insurance, and Certifications
This step is non-negotiable. Before you hire anyone, confirm they are fully licensed to work in your town and carry both general liability insurance and worker’s compensation. This protects you from any liability in case of an accident on your property. A professional company will readily provide you with their documentation. Don’t just take their word for it; ask for copies of their certificates. This simple check is a clear indicator of a contractor’s professionalism and commitment to operating a legitimate business. It’s a fundamental part of ensuring your project is in safe and capable hands from start to finish.
Review Their Portfolio and References
A picture is worth a thousand words, and a portfolio of completed projects is your best window into a contractor’s quality of work. Ask to see photos and videos of their past porcelain paver installations, paying close attention to the details. Look for clean, straight grout lines, even spacing between pavers, and perfectly level surfaces. A great place to see work in action is on a company’s YouTube channel, where you can often view projects from start to finish. Don’t hesitate to ask for references from recent clients, especially those with projects similar to yours. A confident installer will be proud to share their work and connect you with happy customers.
Ask About Warranties and Support
A reputable installer stands behind their work. Always ask about the warranties they offer, which should cover their labor and craftsmanship. This is separate from the manufacturer’s warranty that comes with the pavers themselves. A strong labor warranty shows that the contractor is confident in their installation methods and the durability of their projects. Get all warranty details in writing within your contract so you know exactly what is covered and for how long. It’s also wise to ask about long-term support, like their availability for future restoration and sealing services, to keep your investment looking its best.
Red Flags to Spot When Hiring a Contractor
Choosing the right contractor is just as important as selecting the perfect porcelain pavers for your patio or walkway. A great installer ensures your project not only looks beautiful but also stands the test of time. While most professionals are honest and skilled, knowing how to spot a few red flags can protect you from headaches and costly mistakes down the road. The success of your project truly depends on who you hire.
An unusually low price, a missing contract, or a pushy sales pitch can all be signs of trouble. A reputable contractor will be transparent, patient, and proud to show you their credentials and past work. Think of this process as building a partnership. You want to find someone who communicates clearly and respects your investment in your home. By keeping an eye out for these warning signs, you can confidently choose a masonry professional who will bring your vision to life the right way.
Bids That Seem Too Good to Be True
We all love a good deal, but when it comes to home improvement, an extremely low bid should give you pause. If one contractor’s estimate is significantly lower than all the others, it’s wise to ask why. Often, a rock-bottom price means they are cutting corners somewhere. This could involve using subpar base materials, hiring inexperienced labor, or skipping crucial steps in the installation process.
Remember, the success of your project depends heavily on who you hire, not just the pavers themselves. A cheap installation can lead to shifting pavers, poor drainage, and other issues that will cost you more to fix in the long run. It’s better to invest in quality craftsmanship from the start to ensure your beautiful new porcelain paver patio lasts for decades.
Vague Contracts or No Contract at All
A detailed, written contract is your single most important tool for a successful project. Never, ever proceed with a contractor who is hesitant to provide one or offers only a vague, one-page agreement. A professional contract protects both you and the contractor by clearly outlining expectations. It should specify the full scope of work, a breakdown of costs, the exact materials being used, a payment schedule, and a projected timeline.
Most importantly, the contract should confirm that the company is properly licensed and carries both general liability and worker’s compensation insurance. This is non-negotiable, as it protects you from liability in case of accidents on your property. A contractor who avoids putting things in writing is a contractor who is trying to avoid accountability.
High-Pressure Sales Tactics
A home improvement project is a big decision, and you should never feel rushed into it. Be wary of contractors who use high-pressure sales tactics to get you to sign on the spot. This might sound like a “special price” that’s only good for today or making you feel like you’ll miss out if you don’t commit immediately. A confident, reputable professional will understand that you need time to review bids, check references, and feel comfortable with your choice.
A good installer will also offer warranties on their work, in addition to any product warranties from the paver manufacturer. They will be happy to provide these details in writing because they stand behind the quality of their craftsmanship. True professionals build their business on trust and results, not on forcing a quick sale.
No Proof of Credentials or Local Work
When you ask a contractor for their license, insurance information, and examples of their work, their response should be enthusiastic, not hesitant. A professional with a solid reputation will be proud to show you their credentials and a portfolio of completed projects. If a contractor can’t or won’t provide proof of their qualifications, consider it a major red flag.
Ask to see photos or even visit past projects, especially ones similar to yours. This is the best way to assess the quality of their work firsthand. Checking their past projects on YouTube or other platforms can give you a feel for their style and capabilities. A contractor who is established in your local area should have a long list of happy customers and a portfolio that speaks for itself.
What to Expect During the Installation Process
Bringing a new patio, walkway, or pool deck to life is an exciting process. Knowing what happens at each stage can help you feel confident and prepared from start to finish. A professional installation is a well-orchestrated project with clear steps, ensuring your vision is executed perfectly and built to last. Here’s a breakdown of what you can expect when working with an experienced team.
The Initial Consultation and Design Plan
This is where your ideas begin to take shape. The first step is a collaborative meeting with our design team to discuss your vision, goals, and how you plan to use the space. We’ll listen to your preferences for style and color and offer expert recommendations on the best materials for your project. During this phase, we create a detailed design plan that maps out every aspect of the installation. This ensures that the final result not only meets but exceeds your expectations, creating a beautiful and functional outdoor area using our stunning selection of porcelain and natural stone pavers.
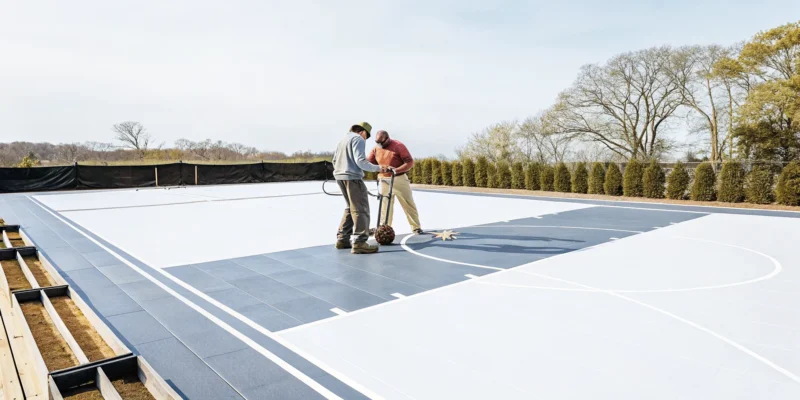
Preparing the Site and Building the Foundation
A beautiful paver surface is only as good as the foundation beneath it. Once the design is approved, our crew gets to work preparing the site. This involves carefully excavating the area, grading the ground for proper drainage, and building a solid, level base. Depending on your project’s specific needs, we use high-quality materials like crushed stone aggregate and sand to create a foundation that can withstand Long Island’s weather and prevent shifting or settling over time. This expert masonry work is the unseen hero of a durable, long-lasting paver installation.
Laying, Cutting, and Grouting the Pavers
With a solid foundation in place, the transformation truly begins. Our skilled installers will start carefully laying the porcelain pavers according to the design plan, ensuring tight, even spacing and a perfectly level surface. Porcelain is an incredibly hard material, so making precise cuts for edges, curves, or obstacles requires specialized tools and expertise. Once all the pavers are set, we fill the joints with a high-quality grout or polymeric sand. This final step locks the pavers into place, adds stability, and gives the entire surface a clean, polished look that will stand the test of time.
The Final Walkthrough and Sealing
Once the installation is complete, we aren’t finished until you are completely satisfied. We’ll conduct a final walkthrough with you and the project manager to inspect the work and ensure every detail is perfect. This is your opportunity to ask any questions and confirm that the project aligns with the plan we created together. We may also recommend sealing the pavers. While porcelain is highly resistant to stains and moisture, sealing can offer an extra layer of protection and make cleanup even easier. It’s a great way to safeguard your investment and keep your new space looking pristine for years with our restoration and sealing services.
Common Installation Hurdles and How a Pro Solves Them
Installing porcelain pavers isn’t just about laying tiles on the ground. It’s a technical process where precision makes all the difference between a patio that lasts for decades and one that fails after a few seasons. Even the highest quality porcelain and natural stone can look subpar if the installation is flawed. A professional installer anticipates challenges specific to Long Island and has the skills to manage them from the start. Let’s look at a few common hurdles and how an expert gets the job done right.
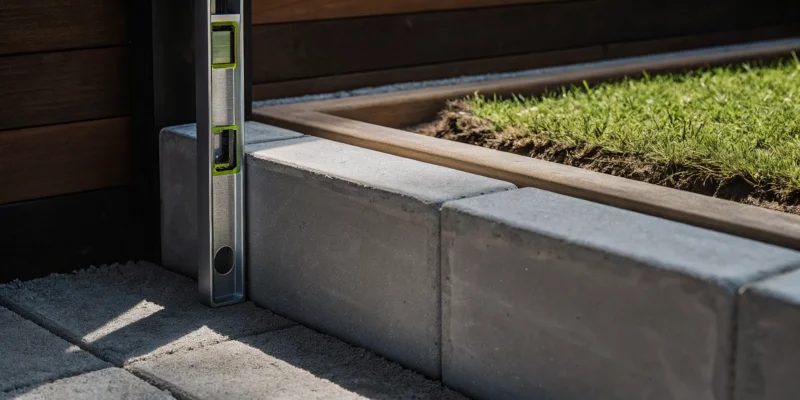
Creating a Perfectly Level Surface
One of the best things about porcelain pavers is their clean, uniform appearance. But those perfect lines also mean that any mistake, like an uneven surface or inconsistent spacing, will be immediately obvious. A professional installer uses specialized tools and leveling systems to guarantee a smooth, even finish. This isn’t just for looks; a perfectly graded surface is essential for proper drainage, preventing water from pooling on your patio. It all starts with meticulous site preparation, something a seasoned masonry expert never overlooks.
Managing Proper Drainage and Runoff
On Long Island, we get our fair share of rain and snow. If water doesn’t have a place to go, it can wreak havoc on your patio. Without a strong, well-drained base, pavers can shift, settle unevenly, or even crack over time. A professional team builds a multi-layered foundation of compacted materials specifically suited for our local soil conditions. This creates a stable base that allows water to drain away from the surface and foundation, protecting the integrity of your entire outdoor living space, especially around sensitive areas like swimming pools.
Handling Long Island’s Freeze-Thaw Cycle
Porcelain is an excellent choice for our climate because it’s incredibly dense and non-porous, making it highly resistant to water absorption. This is key for surviving the freeze-thaw cycle, where absorbed water freezes, expands, and causes other materials to crack. A professional installation maximizes this benefit. By ensuring the base is solid, the joints are properly filled, and the surface is graded correctly, an expert installer minimizes the chance of water getting underneath the pavers. This keeps your patio stable and beautiful through countless winters, reducing the need for future restoration and sealing.
Using the Correct Tools for Porcelain
You can’t install porcelain pavers with the same tools you’d use for concrete. Porcelain is extremely hard, so it requires special diamond-tipped blades to make clean, precise cuts without chipping the edges. Beyond cutting, an experienced installer knows which installation method is best for your specific project. They will choose the right approach, whether it’s a dry-laid method on a gravel base, a mortar-set application on a concrete slab, or a pedestal system for a rooftop or balcony. This expertise ensures your pavers are secure, functional, and perfectly suited to their environment.
Key Tips Before You Sign a Contract
You’ve reviewed portfolios, checked references, and found an installer you trust. Before you sign on the dotted line, it’s time to iron out the final details. A clear and comprehensive contract is your best friend for a stress-free project, and it should cover everything from the timeline and payment schedule to the exact materials used. Getting these key points in writing protects both you and your contractor, ensuring everyone is on the same page from day one. Think of this as the final checklist before your backyard transformation begins. It’s your chance to ask clarifying questions and confirm that every aspect of the project meets your expectations. A good contract leaves no room for ambiguity, detailing the scope of work, site preparation, and cleanup procedures. It should also outline the process for handling any unexpected issues or changes to the plan. This document is more than a formality; it’s the blueprint for a successful partnership and a beautiful, long-lasting result. Let’s walk through the most important items to discuss with your installer before you commit.
When Is the Best Time to Schedule Installation?
Timing is everything, especially with Long Island’s fluctuating weather. While you might be eager to start, scheduling your installation during the right season is crucial for a lasting result. Extreme heat, freezing temperatures, or heavy rain can all impact the integrity of the installation. A professional crew knows how to work around the weather, but it’s wise to plan for a time with milder conditions, typically in the spring or fall. Your contractor will help you find the best window for the job. They understand how temperature affects the setting materials and will schedule the work to ensure your new patio or walkway is built correctly and stands the test of time.
How to Pick the Right Color, Texture, and Finish
This is one of the most exciting parts of the process. Porcelain pavers offer an incredible range of styles, so you can find the perfect match for your home. As you make your final choice, think about your property’s overall aesthetic. Do you want a modern look with large, smooth tiles, or a rustic feel with pavers that mimic natural stone or wood? Porcelain can look like slate, travertine, or even reclaimed lumber, giving you endless possibilities. We always recommend getting physical samples to see how they look next to your home’s exterior in different lighting conditions. You can explore a wide variety of porcelain and natural stone options to find a design that truly complements your style.
What to Know About Local Permits
Navigating local regulations can feel overwhelming, but a professional installer will handle it for you. Depending on the size and scope of your project, a permit from your town or village may be required. Your contractor should know the specific requirements in your area. More importantly, this is the time to confirm your contractor’s credentials. Always make sure the company is properly licensed and carries both general liability insurance and worker’s compensation. This is non-negotiable, as it protects you from any liability in case of accidents on your property. A reputable home improvement company will gladly provide proof of their credentials.
Planning for Future Maintenance
One of the biggest advantages of porcelain pavers is how easy they are to care for. Before you finalize your decision, it’s great to have a clear understanding of the long-term upkeep. The good news is, there isn’t much to do. Porcelain is non-porous, so it naturally resists stains, mold, and mildew. Unlike many other materials, it doesn’t require annual sealing, which saves you significant time and money over the years. A simple sweep or a quick rinse with a garden hose is usually all it takes to keep your pavers looking brand new. While porcelain is low-maintenance, it’s good to know your contractor also offers restoration and sealing services for other parts of your property.
Why Gappsi Is the Trusted Choice for Porcelain Pavers
Choosing the right team for your paver project is about more than just installation skills. It’s about finding a partner who truly understands the local environment and can bring your vision to life from start to finish. With so many options, it’s important to select a company with a proven track record of quality, reliability, and comprehensive service. At Gappsi, we combine decades of local experience with an all-in-one approach to deliver exceptional results for Long Island homeowners. Our process is designed to be seamless, giving you peace of mind and a beautiful outdoor space that lasts.
Decades of Outdoor Living Expertise on Long Island
Since 1987, Gappsi has been transforming outdoor spaces across Long Island. This deep-rooted experience means we know how to build patios, walkways, and pool surrounds that stand up to our specific climate, from hot summers to freezing winters. We don’t just see a paver project; we see how it fits into your entire backyard vision. As a full-service company, we integrate every element, from landscaping to pools, ensuring a beautiful and cohesive result. Our long history on Long Island is your assurance that we build things the right way, creating outdoor living areas meant to be enjoyed for years to come.
Complete Service from Design to Installation
Juggling different contractors for design, material sourcing, and installation can be a major headache. We simplify the entire process by offering a complete, in-house service that covers everything from the initial design to the final paver being set. This all-in-one approach means you have a single, dedicated team managing your project, ensuring a cohesive plan and clear communication. Our expertise in both masonry and design allows us to create a space that is not only stunning but also structurally sound. We handle all the details so you can focus on the excitement of seeing your new outdoor area take shape.
Explore Our Porcelain and Natural Stone Selections
The perfect outdoor space starts with the right materials. We offer an extensive selection of high-quality porcelain and natural stone pavers to suit any style. Our collection includes premium Italian-made porcelain, known for its incredible durability, low maintenance, and sophisticated appearance. Whether you envision a sleek, modern patio, a classic stone walkway, or a slip-resistant pool deck, we have the materials to make it happen. You can explore our options to find the perfect color, texture, and finish to complement your home’s architecture and your personal taste, ensuring your new space is uniquely yours.
Related Articles
- 5 Largest Porcelain Pavers Suppliers on Long Island NY
- Stones & Porcelain Archives – Gappsi Group
- Outdoor Living News: Pools, Fire Pits & Renovations | Gappsi Inc
Frequently Asked Questions
Are porcelain pavers slippery when they get wet? This is a great question, especially for families with pools or kids who love to run around. The answer is that it depends on the finish you choose. Many porcelain pavers are specifically made for outdoor use and come with a textured, slip-resistant surface. When you’re selecting pavers for a pool deck or walkway, we can guide you to options that provide excellent grip without sacrificing style, so you can have peace of mind in wet conditions.
Why is the installation cost sometimes as much as the pavers themselves? The labor cost reflects the skill and precision required for a job that lasts. Porcelain is an extremely hard material that requires special diamond-tipped tools for clean cuts. More importantly, a huge part of the job is building a proper foundation. This involves excavating, grading for drainage, and compacting several layers of aggregate. This expert site prep is what prevents your patio from shifting, cracking, or developing low spots over time, making professional installation a crucial investment in your home.
How long does a typical porcelain paver installation take? The timeline really depends on the size and complexity of your project, as well as the weather. For a straightforward, medium-sized patio on a flat surface, the process from site prep to final cleanup might take about a week. If the project is larger, involves intricate patterns, or requires significant grading work, it could take longer. A professional installer will give you a realistic timeline in your contract before any work begins.
Do I really need to seal my porcelain pavers? One of the best things about porcelain is that it does not require sealing. Because the material is non-porous, it naturally resists stains, water, mold, and fading all on its own. This is a huge advantage over natural stone or concrete pavers, which need regular sealing to stay protected. You get to spend your time enjoying your patio, not maintaining it.
Can you install porcelain pavers directly over my old concrete patio? While this can sometimes be an option, it depends entirely on the condition of your existing concrete slab. If the concrete is cracked, uneven, or doesn’t have proper drainage, laying pavers over it will only lead to problems down the road. A professional will need to inspect the slab first. In many cases, removing the old concrete and starting with a proper, well-drained base is the best way to guarantee a beautiful and long-lasting result.